(ENG/ESP) ❤️ Crafts for children during the holidays 💚 Manualidades para niños en vacaciones
@kdelvaeg
· 2025-08-18 16:21
· DIYHub
Hello my dear readers, I hope you are having or have had an excellent day. As in many places in the world, right now we are in school vacations and now most of the children entertain themselves watching TV or playing video games. Few of them do any sports or entertainment activities outside of the technological life. I have an 8 year old daughter, she is a girl who loves video games, but I do not like her to spend all day glued to a technological device, so I look for ways to entertain her doing some different activity, such as painting, drawing, besides putting her to do homework, reinforcing what she learned in the school year. The truth is that this time, I told her to do a craft, because she loves to cut, paint and get dirty with paint and make a little mess. So without further ado, I show you the step by step of what she chose to do, it is a decoration to place on the wall, or anywhere.
STEP BY STEP
The task at hand is called line art, which involves creating any design using only lines, which can be straight or curved. It is usually monochromatic art, with black typically used for the lines, although you can customize it however you like. In this case, my daughter wanted to do it in red.
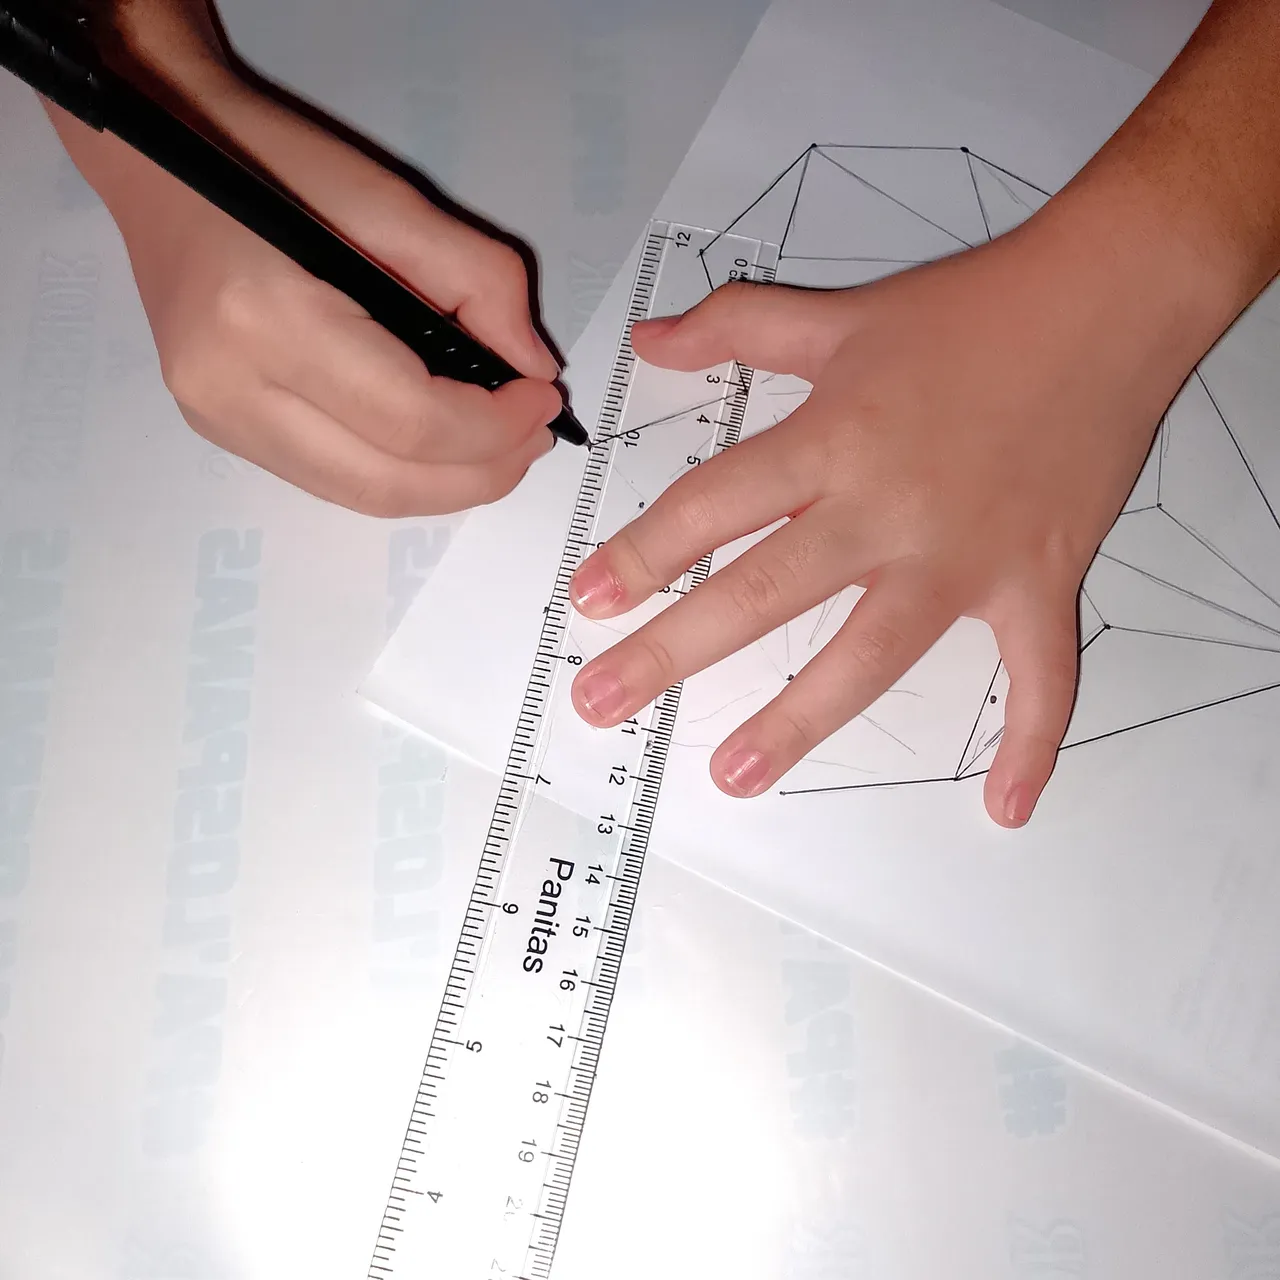
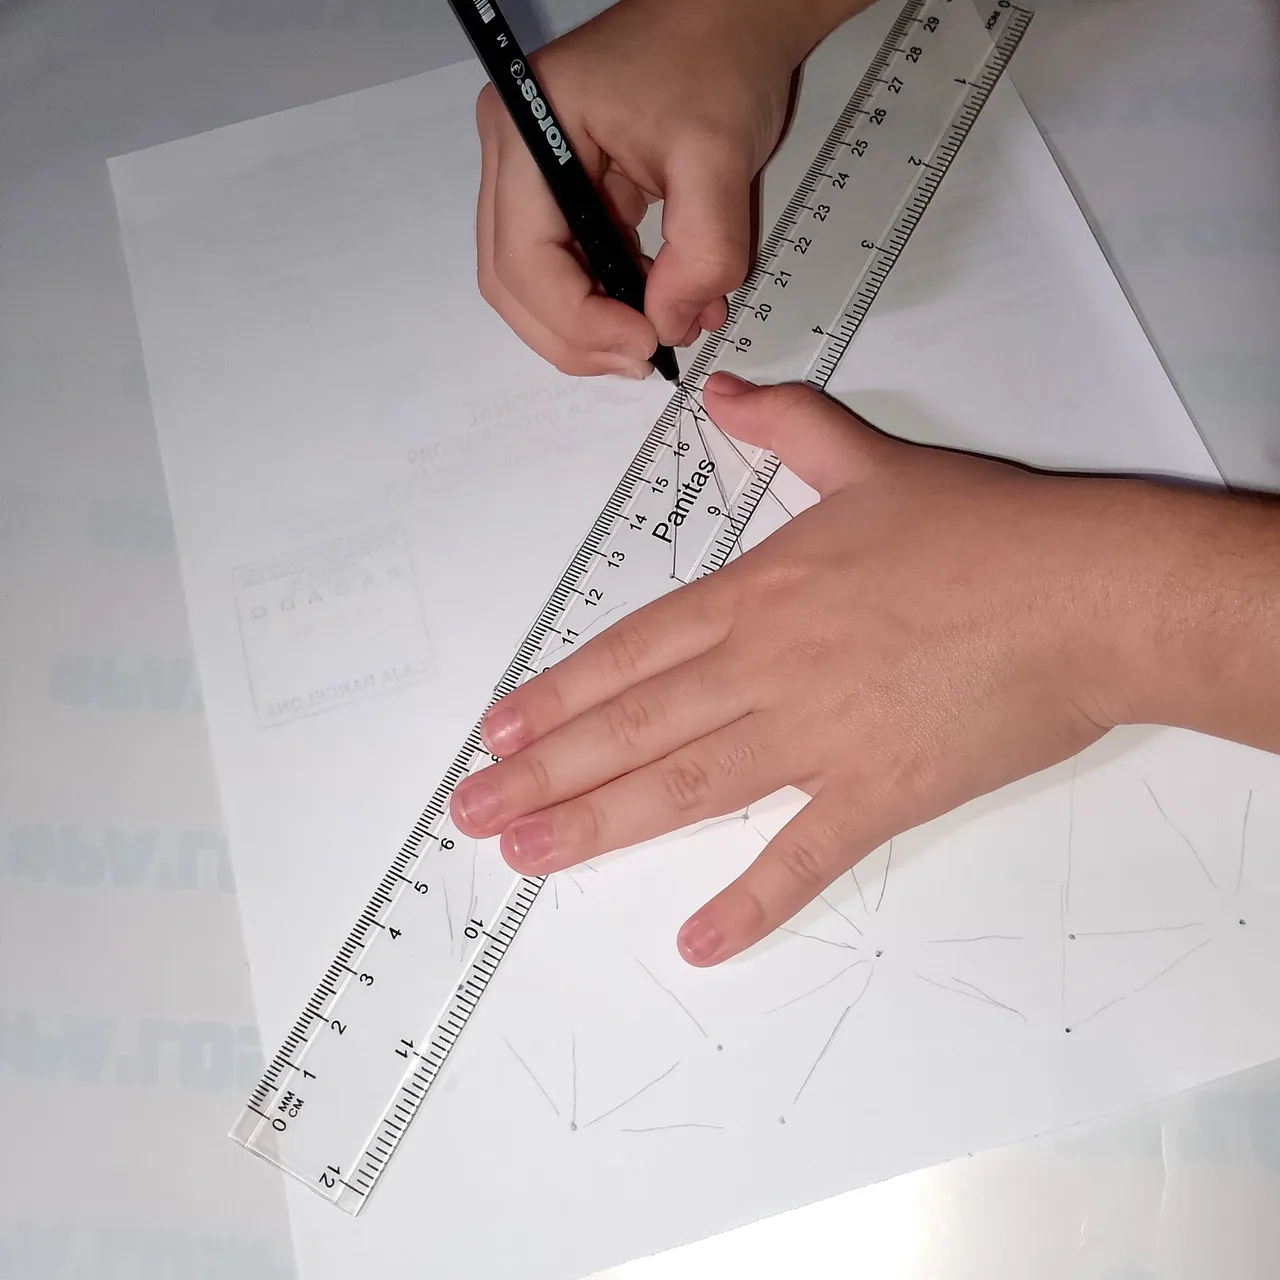
A heart was drawn on a sheet of paper. I helped my daughter a little by making some dots and lines to guide her.
Using a ruler and pencil, lines were drawn until the entire desired design was complete.
Now, with another sheet of paper, folded vertically into four parts, four strips were cut from each sheet to make the sticks used to form the heart.
Take a strip of paper and roll it diagonally around the stick to form tubes, as shown in the image.
Note: When you have finished rolling up all the paper, put a little glue on the end so that it does not unroll.
Once all the sticks were ready, we formed the heart frame, following the pattern. To join the sticks and make a longer one, we put a little glue on the tip and inserted it into another stick. We did the same to close the heart frame.
And now the frame is ready.
Now, to make the lines in the center, we cut the sticks to the necessary size and, with the help of glue, stick them down to form the design we want. I don't know if you notice, but the final design is not the same as the one made on paper.
Since my daughter was doing this project, she told me she wasn't going to put so many lines on it, that she liked it better that way. I told her that was fine, it's her project and she can adapt it to her liking. So that's the shape she liked.
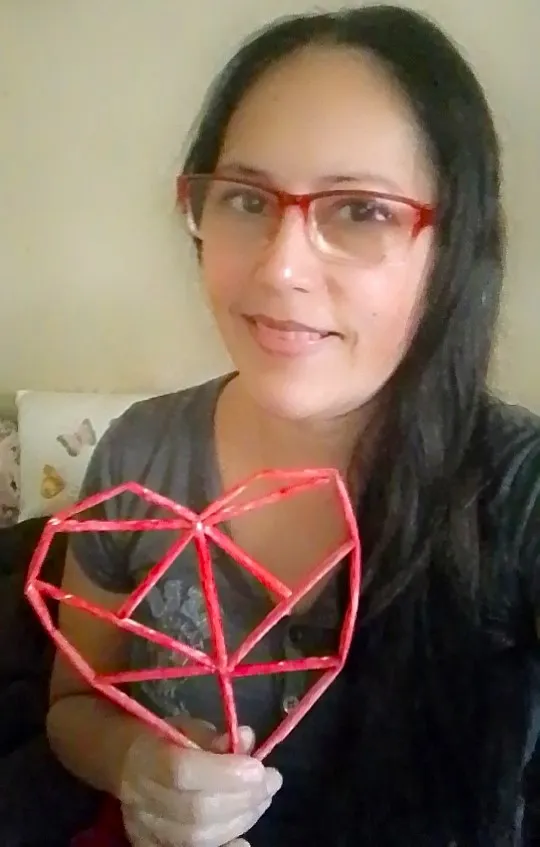
Once the heart was completely assembled, it was painted with a brush and red paint.
And so the work was ready. An easy craft for children, they learn to be more creative, to have more imagination and to have more motor skills.
This type of art is normally used to decorate walls, of course you can use it anywhere else you want and as I told you before, this work was done by my daughter, so she came up with a strategic place to put it. She told me that for us to see it every day, we could put it on the fridge like all the other little things she has placed there. So I thought it was an excellent idea and I put a magnet on the back and that's how it turned out.
I hope you liked this tutorial that I gladly prepared for you. I say goodbye as always, but not before thanking you for taking a little of your valuable time to visit my blog and support me. And as the saying goes: "Do good, without looking at whom".
Original creation content:
💛 All photos are mine, taken and edited with my Infinix SMART 8 phone.
💜 Cover image and materials were made with Canva app and edited by me.
♥️ The English translation was made with the help of deepl.com/translator
💚 The letters indicating the languages were made on es.textstudio.com and edited by me.
Hola mis queridos lectores, espero que tengan o hayan tenido un excelente día. Como en muchos lugares del mundo, justo ahora estamos en vacaciones escolares y ahora la mayoría de los niños se entretienen mucho viendo TV o jugando videos juegos. Son pocos los que hacen una alguna actividad deportiva o de entretenimiento, fuera de la vida tecnológica. Tengo una hija de 8 años de edad, es una niña que le encantan los videos juegos, pero no me gusta que pase todo el día pegado a un aparato tecnológico, así que busco manera de entretenerla haciendo alguna actividad diferente, como pintar, dibujar, aparte de colocarla hacer tareas, reforzando lo que aprendió en el año escolar. Lo cierto es que en esta ocasión, le dije que hiciera una manualidad, pues a ella le fascina eso de recortar, pintar y ensuciarse con pintura y hacer un poco de desastre. Así que sin más preámbulos, les muestro el paso a pase de lo que ella escogió realizar, es una decoración para colocar en la pared, o en cualquier sitio.
PASO A PASO
El trabajo a realizar se llama, arte lineal, es decir, es realizar cualquier diseño, pero con solo líneas, que pueden ser rectas o curvas. Normalmente, es un arte monocromático, generalmente se usa el color negro para las líneas, aunque igual lo pueden personalizar como se guste. En este caso, mi hija quiso hacerlo de color rojo.
En una hoja de papel, se dibujó un corazón. Ayude un poco a mi hija, haciéndole unos puntos y unas líneas por donde se iba a guiar.
Con la regla y el lapicero, se realizaron las líneas, hasta completar todo el diseño deseado.
Ahora, con otra hoja de papel, en vertical, se dobló en 4 partes. Se sacaron 4 tiras de cada hoja para poder realizar los palitos con los que se hizo el corazón.
Se agarra una tira de papel y se enrolla en el palito de altura, en forma diagonal y se van a formar unos tubos, tal como se muestra en la imagen.
Nota: Al finalizar de enrollar todo el papel, se coloca un poquito de pega en la punta, para que no se vaya a desenrollar.
Una vez que ya se tengan hechos todos los palitos, se formó el marco del corazón, guiándonos por el patrón. Para unir los palitos y hacer uno más largo, se colocó un poco de pega en la punta y se introdujo en otro palito. Se hace de la misma manera para cerrar el marco del corazón.
Y así nos queda ya el marco listo.
Ahora, para hacer las líneas del centro, recortamos los palitos del tamaño necesario y con la ayuda de la pega, se van pegando, formando el diseño que queremos. No sé si dan cuenta, pero el diseño final no es igual al que se realizó en el papel.
Como este trabajo lo estaba haciendo mi hija, ella me dijo que no le iba a colocar tantas líneas, que le gustaba más así, yo le dije que estaba bien, es su trabajo y ella lo puede adaptar a su gusto. Así que esa forma fue la que le gusto.
Ya una vez finalizado todo el armado del corazón, se procedió a pintarlo, con el pincel y usando la pintura roja.
Y así quedo listo el trabajo. Un arte fácil de hacer para los niños, aprenden a ser más creativos, a tener más imaginación y tener más habilidades motrices.
Este tipo de arte se usa normalmente para decorar paredes, por supuesto que se puede usar en cualquier otro lado que se desea y como le dije anteriormente, este trabajo fue realizado por mi hija, así que a ella se le ocurrió un lugar estratégico para colocarlo. Me dijo que para que lo viéramos todos los días, lo podríamos colocar en la nevera como todas las demás cositas que ha colocado allí. Así que me pareció excelente idea y le coloque un imán por la parte de atrás y así quedo.
Espero que les haya gustado este tutorial que con mucho gusto prepare para ustedes. Me despido como siempre, no sin antes agradecerles por tomarse un poco de su valioso tiempo, para visitar mi blog y apoyarme. Y como dice el dicho: “Hagan bien, sin mirar a quién”.
Contenido de creación original:
💛 Todas las fotos son mías, tomadas y editadas con mi teléfono Infinix SMART 8.
💜 La imagen de portada y los materiales fueron hechos con la aplicación Canva y editados por mí.
❤️ La traducción al inglés se hizo con la ayuda de deepl.com/translator
💛 Las imágenes de los separadores fueron tomadas de: glitter-graphics.com
💚 Las letras que indican los idiomas fueron hechas en es.textstudio.com y editadas por mí.