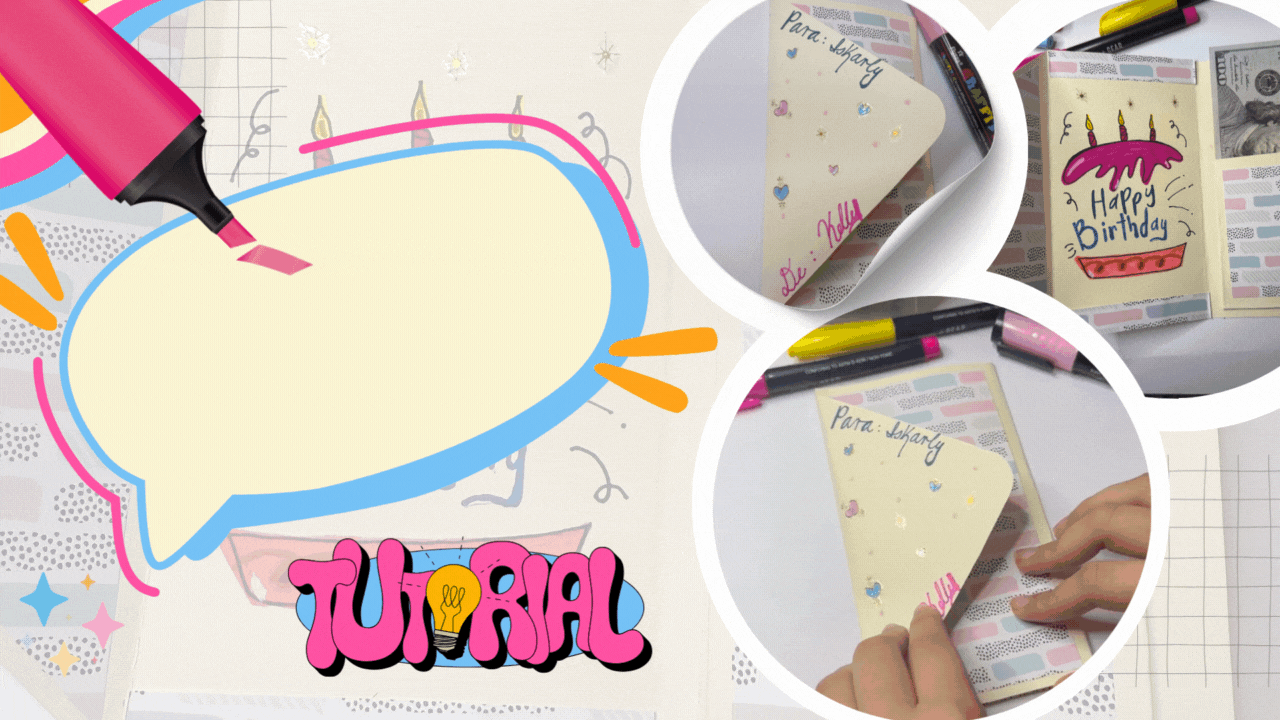
Hola amigos creativos! una vez más aquí para compartir con ustedes el proceso de una tarjeta o sobre de cumpleaños. Es muy común regalar dinero como regalo de cumpleaños, ya sea porque es lo que la cumpleañera quiere o porque no tuvimos tiempo de ir por un regalo, así que esta es una buena opción de sobre para guardar el dinero que vamos a regalar.
Hello creative friends! Once again here to share with you the process of a birthday card or envelope. It is very common to give money as a birthday gift, either because it is what the birthday girl wants or because we didn't have time to go for a gift, so this is a good envelope option to keep the money we are going to give as a gift.
* Cartulina (color a elegir)
- Cartulina impresa (estampado a elegir)
- Rotuladores
- Pegamento
- Regla
- Tijeras
* Cardboard (color of your choice)
- Printed cardboard (print of your choice)
- Felt-tip pens
- Glue
- Ruler
- Scissors

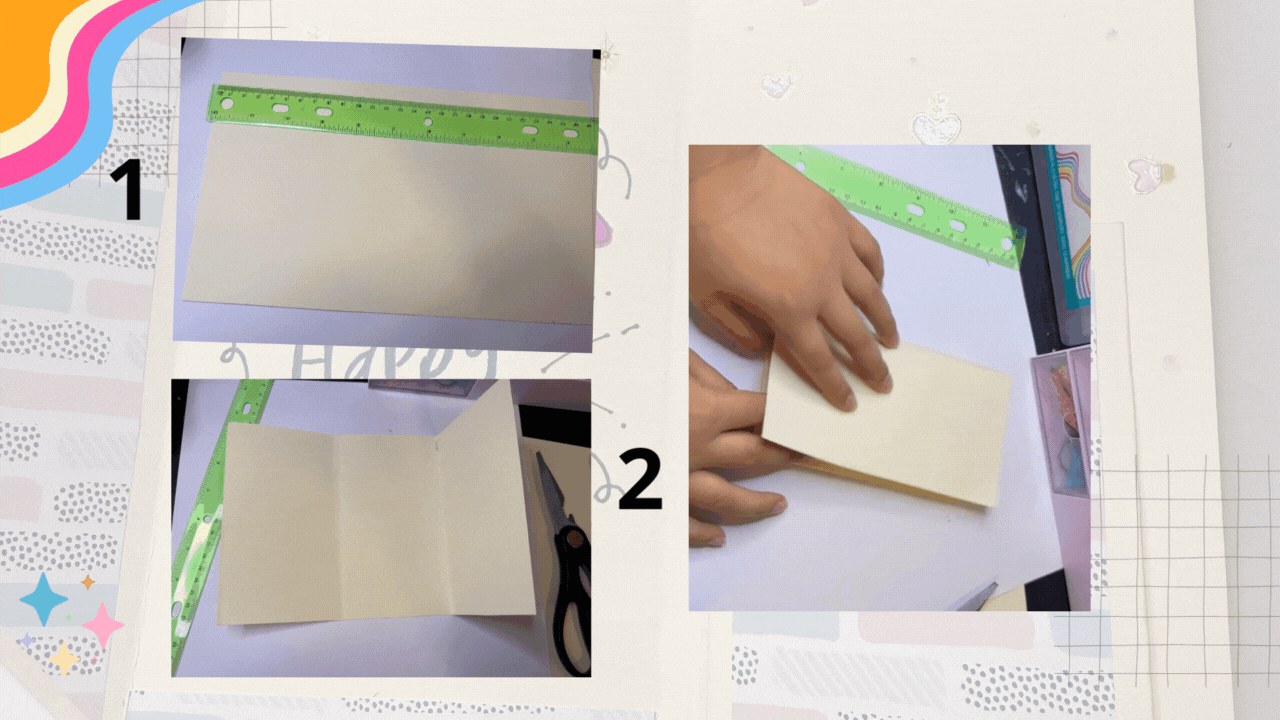
- Utilicé una cartulina de 27 cm de ancho por 16 cm de alto. Con la regla hice una marca a 9 cm y otra a 18 cm, y doblé por dentro las marcas hechas. El cartón se dividirá en tres partes.
- I used a piece of cardboard 27 cm wide by 16 cm high. With the ruler I made a mark at 9 cm and another at 18 cm, and folded inside the marks made. The cardboard will be divided into three parts.
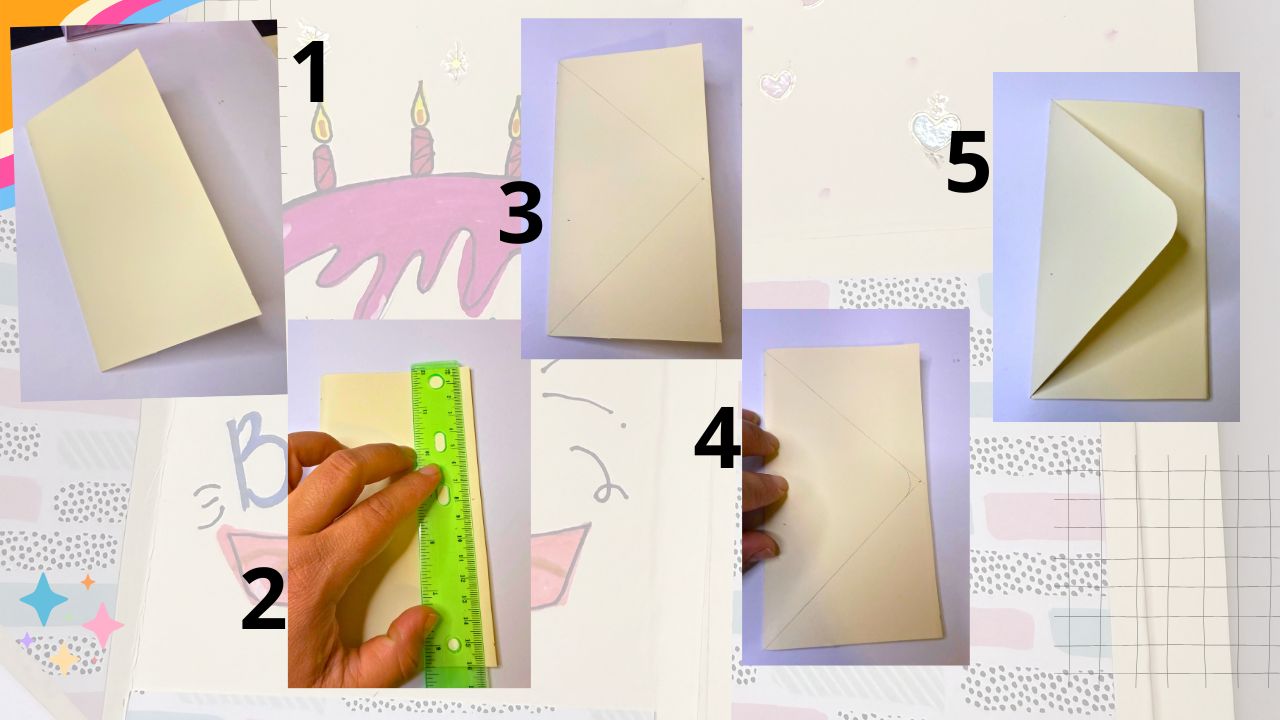
- En la primera cuadrícula, que será la portada de la tarjeta, en el extremo derecho con la regla hago una marca a 8 cm, tracé líneas diagonales formando un triángulo. Para que no quede puntiagudo a mano alzada lo hice ovalado y luego corté.
- In the first grid, which will be the cover of the card, on the right end with the ruler I make a mark at 8 cm, I drew diagonal lines forming a triangle. I made it oval so that it would not be sharp freehand and then cut it.
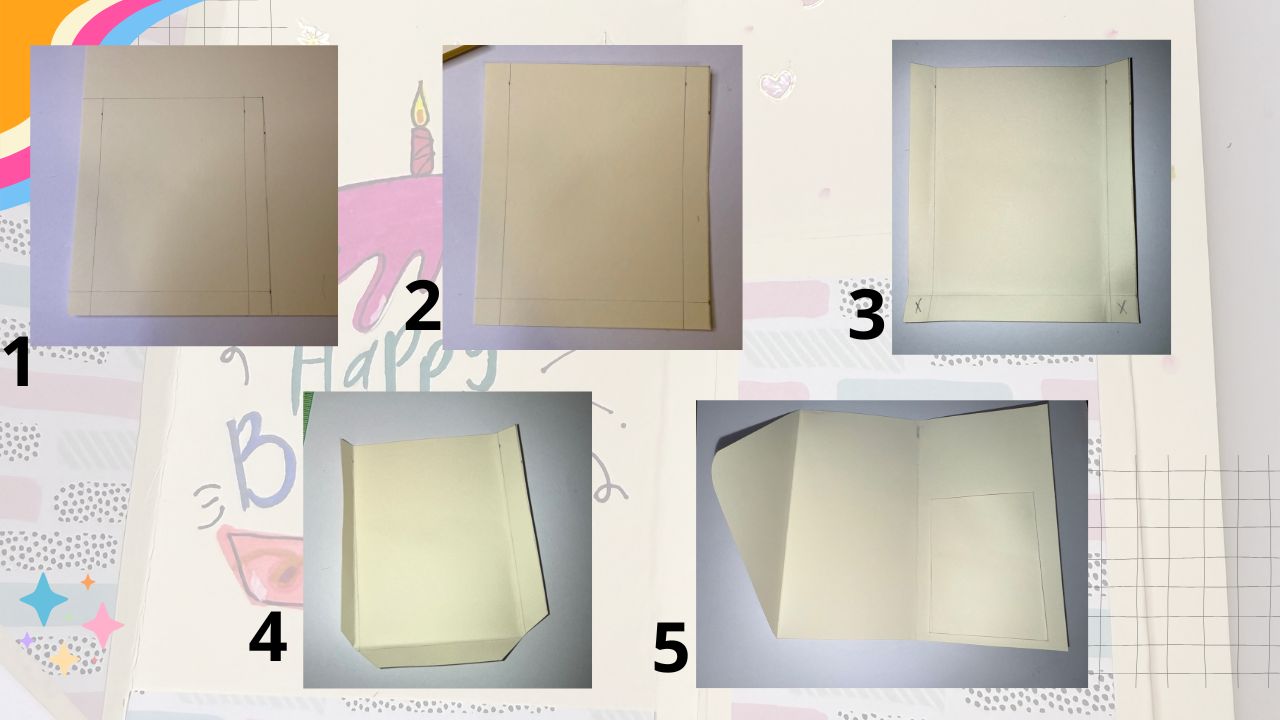
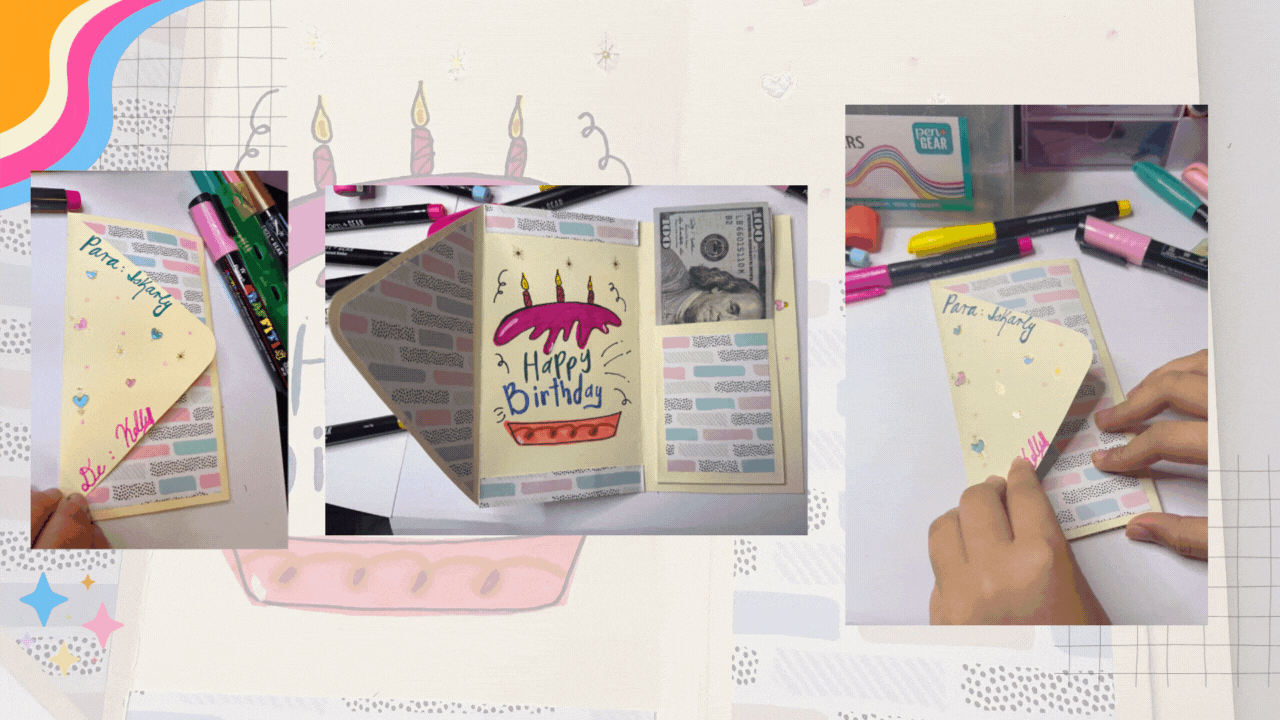
- Sobre una cartulina de 10 cm por 11 cm hice un margen de 1 cm en los laterales y en la parte inferior, corté los las puntas en diagonal, luego doblamos por las marcas de los márgenes que hice. Pegue en el interior del sobre, en la tercera casilla. Este bolsillo sirve para guardar el dinero.
- On a 10 cm by 11 cm cardboard I made a margin of 1 cm on the sides and at the bottom, cut the ends diagonally, then fold along the marks of the margins I made. Glue on the inside of the envelope, in the third box. This pocket is used to keep the money.
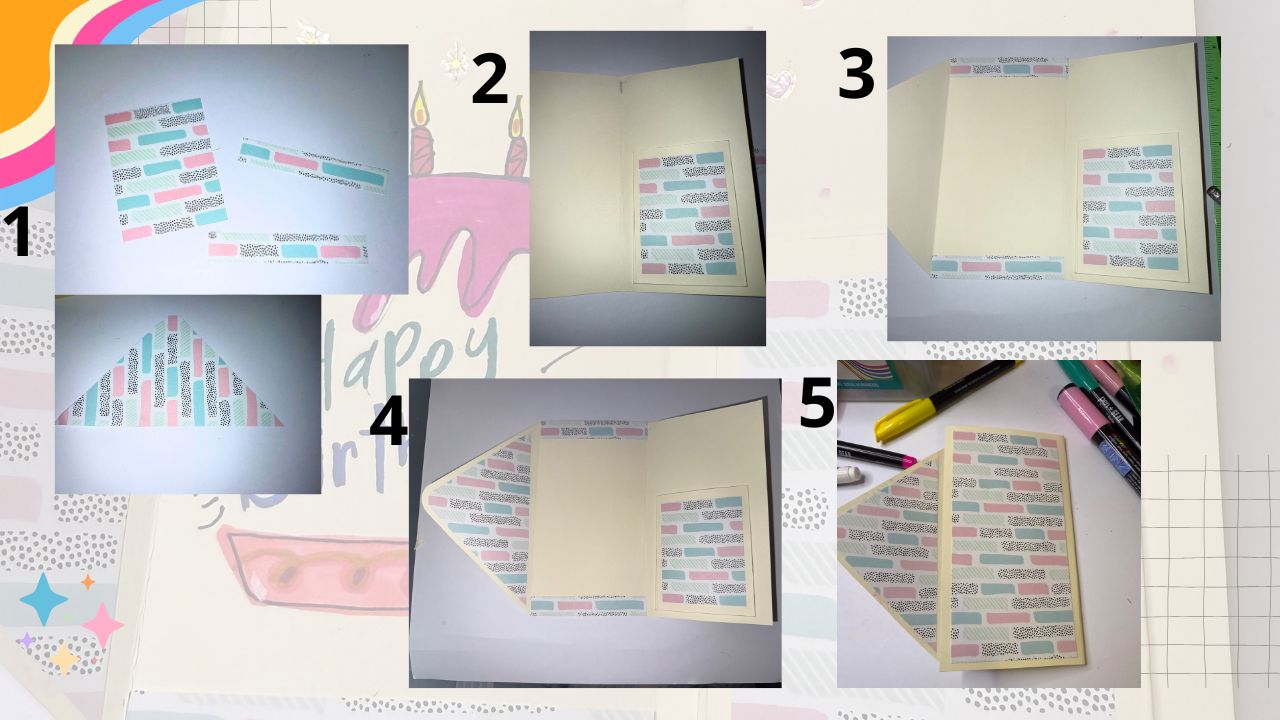
- La cartulina estampada la utilice para decorar la parte del bolsillo , dos rectángulos para pegar arriba y abajo de la cuadrilla del medio, un triangulo para la parte interior de la portada
- The stamped cardboard was used to decorate the pocket part, two rectangles to glue on the top and bottom of the middle square, a triangle for the inside of the cover, and a triangle for the inside of the front cover.
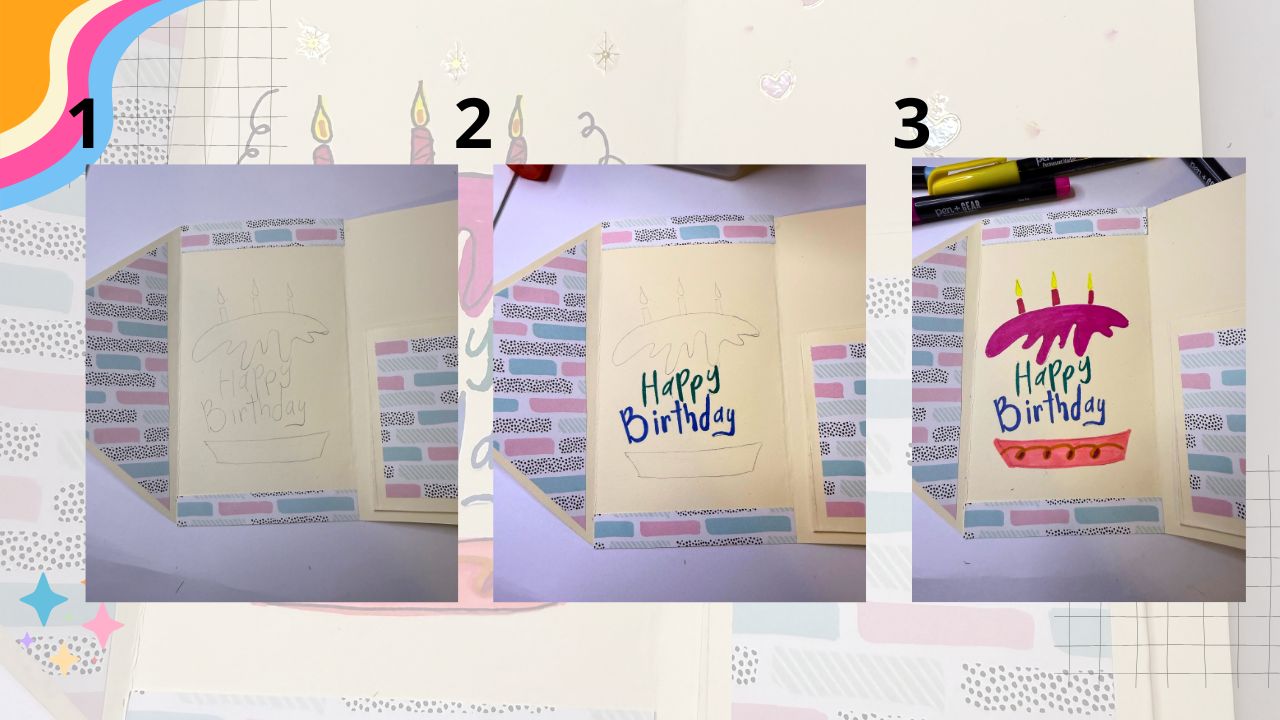
- Hice un dibujo alusivo al motivo que es para un cumpleaños, así que dibujé un pastel con la palabra "Happy Birthday".
- I made a drawing alluding to the motif that is for a birthday, so I drew a cake with the word “Happy Birthday”.
- Tenía unas pegatinas que son realmente para uñas, pero los colores que tenía combinaban con la tarjeta así que intenté pegarlas repartidas por la tarjeta, finalmente en la portada puse el nombre del cumpleañero y el remitente.
- I had some stickers that are actually for nails, but the colors I had matched the card so I tried to stick them scattered around the card, finally on the cover I put the name of the birthday boy and the sender.
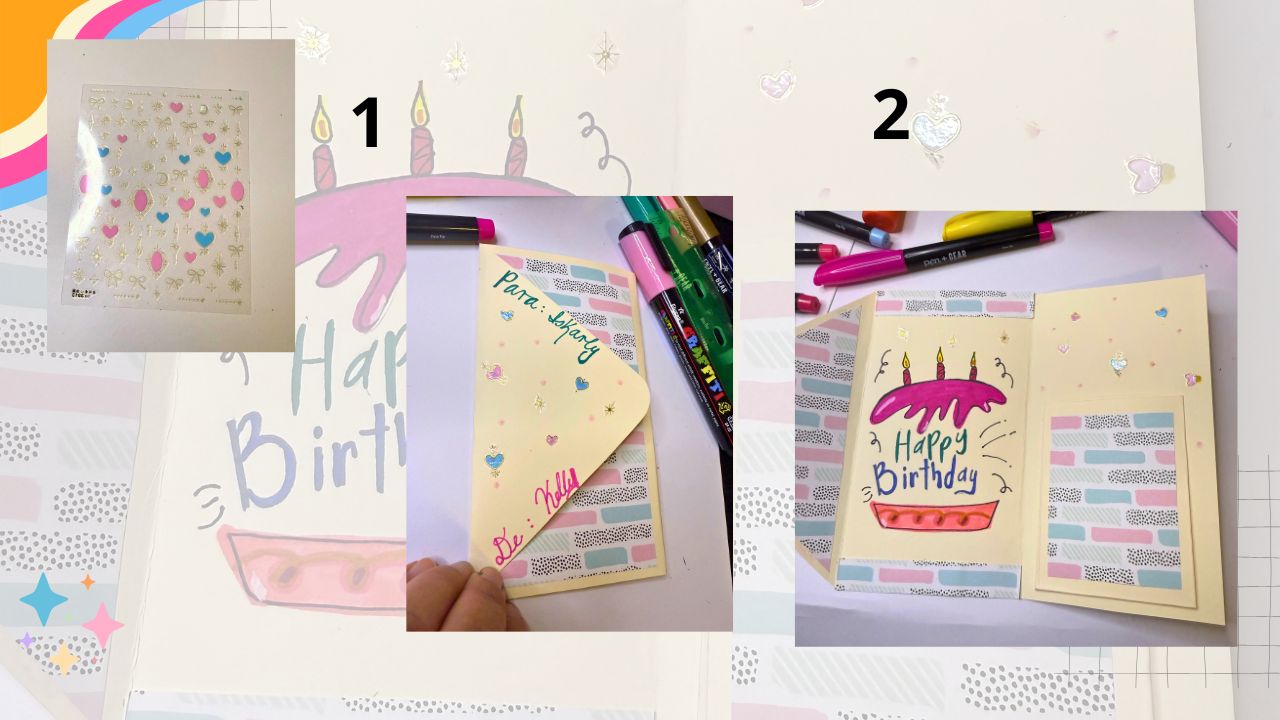
- Asi de sencillo tenemos un bonito sobre personalizado.
- Just like that we have a nice personalized envelope.
Estaré encantada de leer y responder a sus comentarios. Gracias totales a todos los que aprecian mi contenido, y que se toman el tiempo de leer y dejar un comentario, gracias, muchas gracias. Les deseo lo mejor.
Hasta pronto.
I will be happy to read and respond to your comments. Total thanks to all of you who appreciate my content, and who take the time to read and leave a comment, thank you, thank you very much. I wish you all the best.
See you soon.
Otros trabajos similares :
| DIY - Creative card for mom ENG/SPA | DIY - Surprise gift box ENG/ESP | DIY "A card dedicated to my favorite hiver " ENG/ESP | Creative wedding anniversary card ENG/SPA | DIY- Tarjeta creativa de cumpleaños 🧁 |
|---|---|---|---|---|
| https://images.hive.blog/0x0/https://files.peakd.com/file/peakd-hive/kellyrsa/EowKvD1pvgxCaws64x1xgU2RJRMFWAZAzvXWEv9JfUkc91dFxBa5XYP6gTg4Zk1qY1j.gif | https://images.hive.blog/0x0/https://files.peakd.com/file/peakd-hive/kellyrsa/23zGq37p2bHoU7rsqQmGP1wH4nx92hkBYkzzRjcgU7gbXLPgfrorSDbxubFmGPLrCReZZ.gif | https://images.hive.blog/0x0/https://files.peakd.com/file/peakd-hive/kellyrsa/Ep1Zm1NajzYUtrAtYh6iMwmmYkpAFVgbegRRjp9WdmbovrV3B6R1PyvahRQsMyVL4Ua.gif | https://images.hive.blog/0x0/https://files.peakd.com/file/peakd-hive/kellyrsa/48PwLvzUMNNRJ4mmZknvHrzxZx58RRifC2VvpgDB36zjF8SUUXpMdbd7DqWSUyYHgc.gif |  |
Fotografías de mi propiedad tomadas con el celular iPhone 📲 16 pro max, editadas en [canva](https://www.canva.com/)
Traducción realizada con la versión gratuita del [
traductor DeepL](https://www.deepl.com/)
Todos los diseños fueron creados en [canva](https://www.canva.com/)