# Hola gente!
Estos días de frío, mucho frío y encierro porque las calles se han congelado, he aprovechado para hacer unas tarjetitas, así que hoy vengo a enseñarles el proceso de una de ellas, es una tarjetita diferente a las que suelo hacer, diferente con respecto al color, normalmente mis tarjetitas son muy coloridas, juego con muchos colores, pero esta es algo más neutra.
# Hello people!
These days of cold, very cold and confinement because the streets have been frozen, I took the opportunity to make some little cards, so today I come to show you the process of one of them, it is a different card to those I usually do, different with respect to color, usually my cards are very colorful, I play with many colors, but this is something more neutral.


- 🖤 Cartulina negra
- 🖤 Cartulina blanca
- 🖤 Cartulina estampada
- 🖤 Pega
- 🖤 Tijera
- 🖤 Regla
- 🖤 Marcadores
- 🖤 Black cardboard
- 🖤 White cardboard
- 🖤 Stamped cardboard
- 🖤 Glue
- 🖤 Scissors
- 🖤 Ruler
- 🖤 Markers

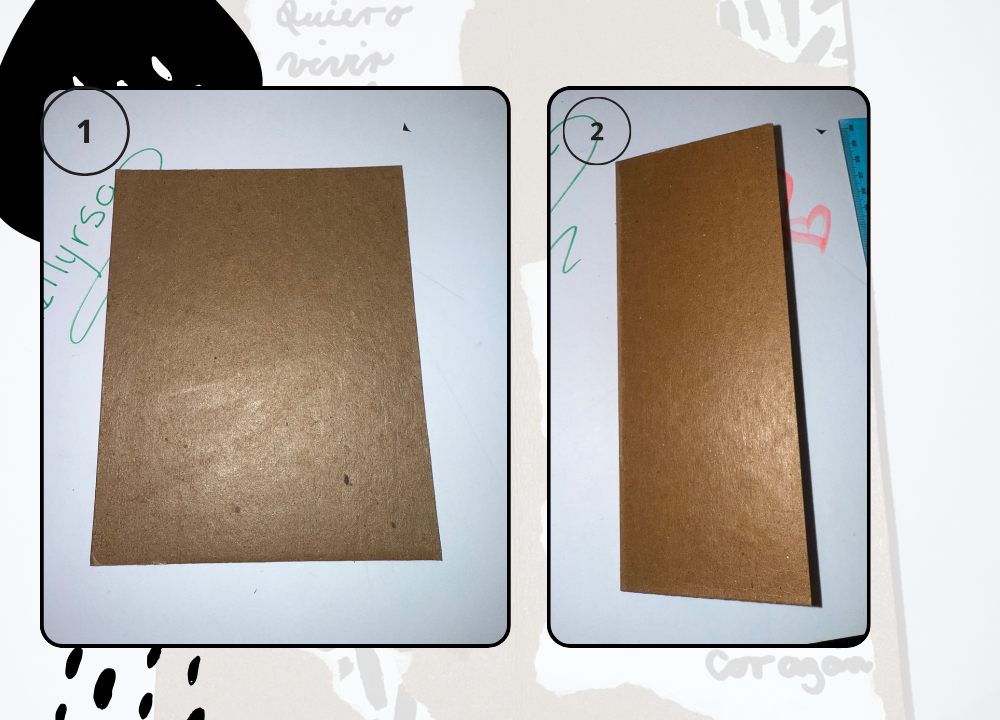
## **Paso 1 🖤**
- Para empezar, he doblado la cartulina por la mitad.
> El tamaño de la cartulina es de 15 cm x 22 cm.
## **step 1 🖤**
- To start, I folded the cardstock in half.
> The size of the cardboard is 15 cm x 22 cm.
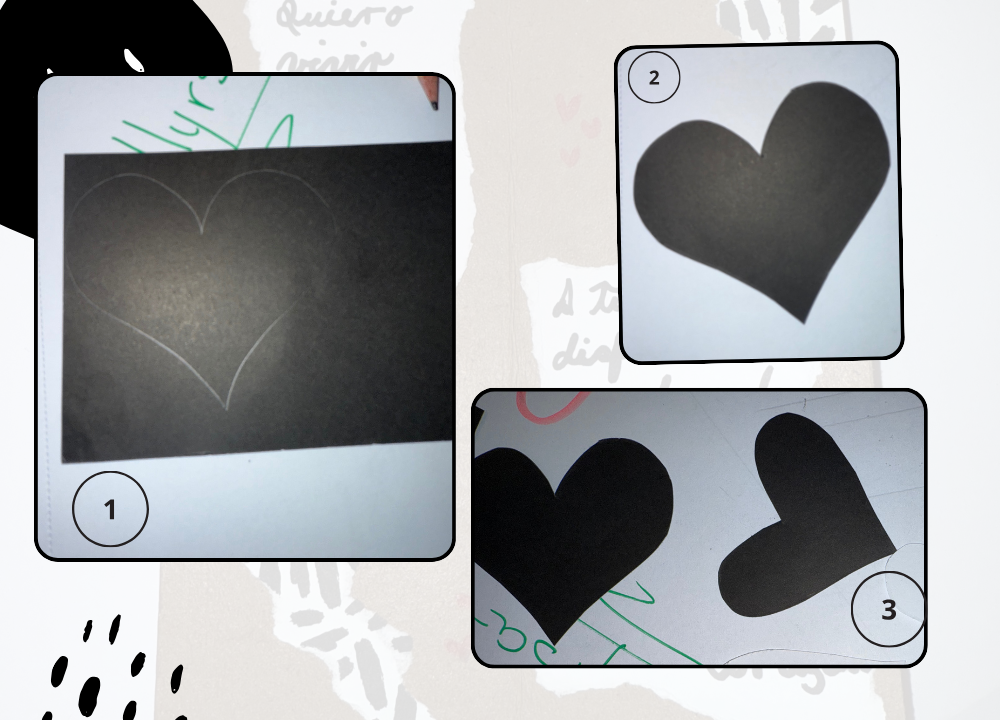
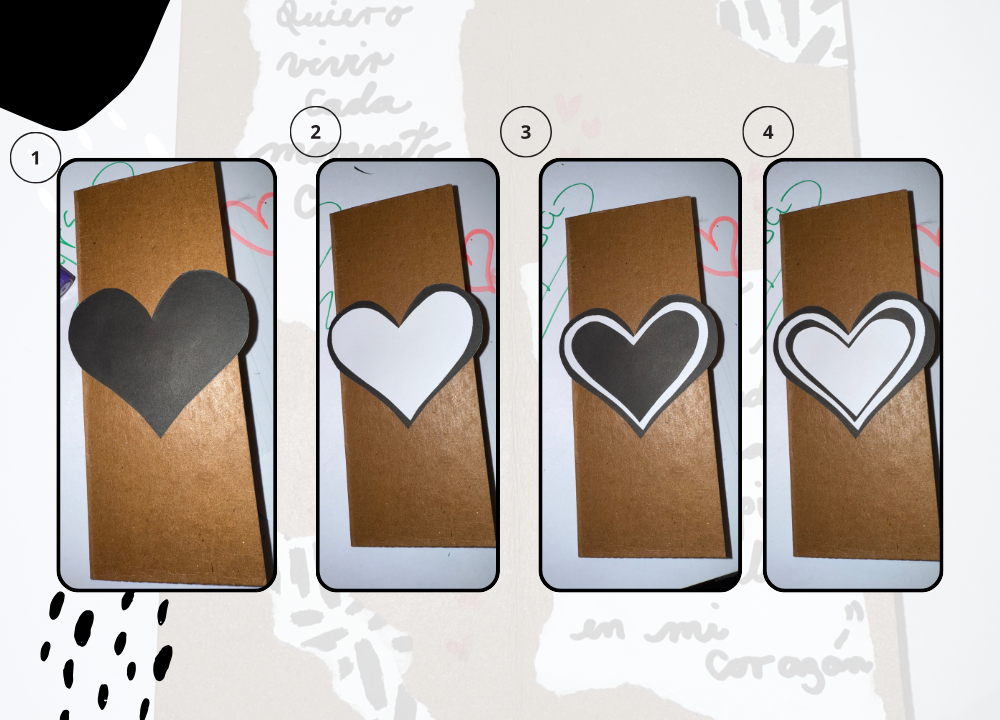
## **Paso 2 🖤**
- Dibujé un corazón en cartulina negra, luego lo utilicé como guía para hacer otro corazón blanco, pero a éste le quitaré medio centímetro aproximadamente y repetiré el procedimiento para hacer otros dos corazones blancos y negros.
## **step 2 🖤**
- I drew a heart on black cardboard, then used it as a guide to make another white heart, but I will remove about half a centimeter from this one and repeat the procedure to make two more black and white hearts.
## **Paso 3 🖤**
- Con los corazones listos, los pegué en el centro de la cubierta de la tarjeta. Colocándolos del más grande al más pequeño, de forma que el blanco y el negro quedaran intercalados.
## **step 3 🖤**
- With the hearts ready, I glued them in the center of the card cover. Placing them from the largest to the smallest, so that the black and white were interspersed.
## **Paso 4 🖤**
- En una tira de cartulina blanca escribí con rotulador negro la palabra ¨Love¨ . Recorté todo el borde de la palabra y luego la pegué en el centro del corazón. Por toda la portada hice corazoncitos en negro.
## **step 4 🖤**
- On a strip of white cardstock, I wrote with black marker the word ¨Love¨. I cut out the entire edge of the word and then glued it in the center of the heart. All over the cover I made little hearts in black.
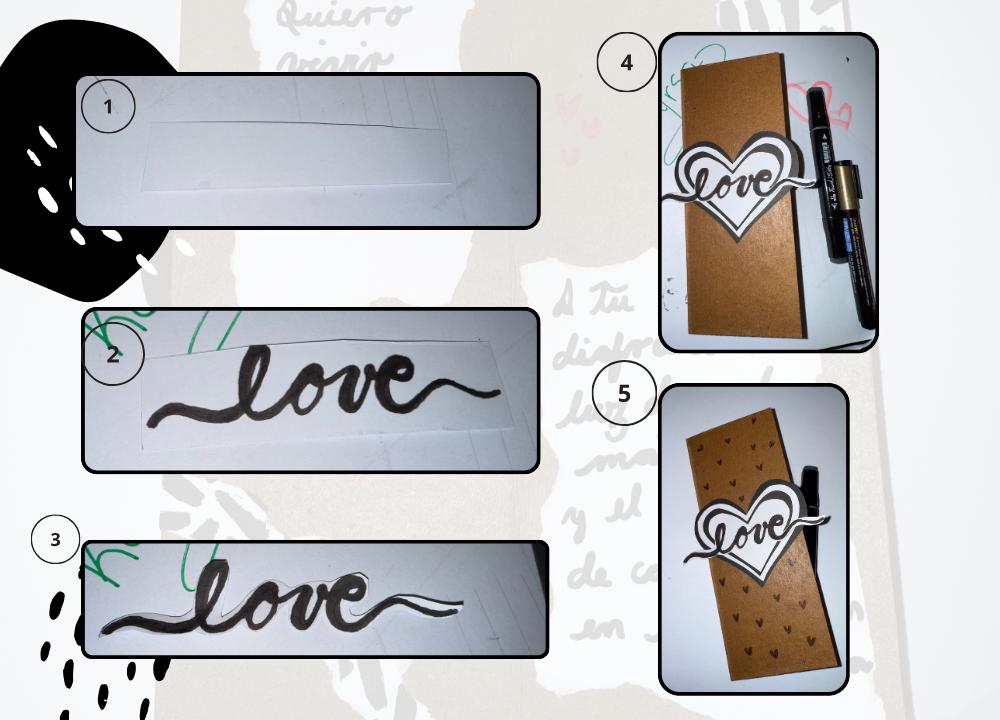
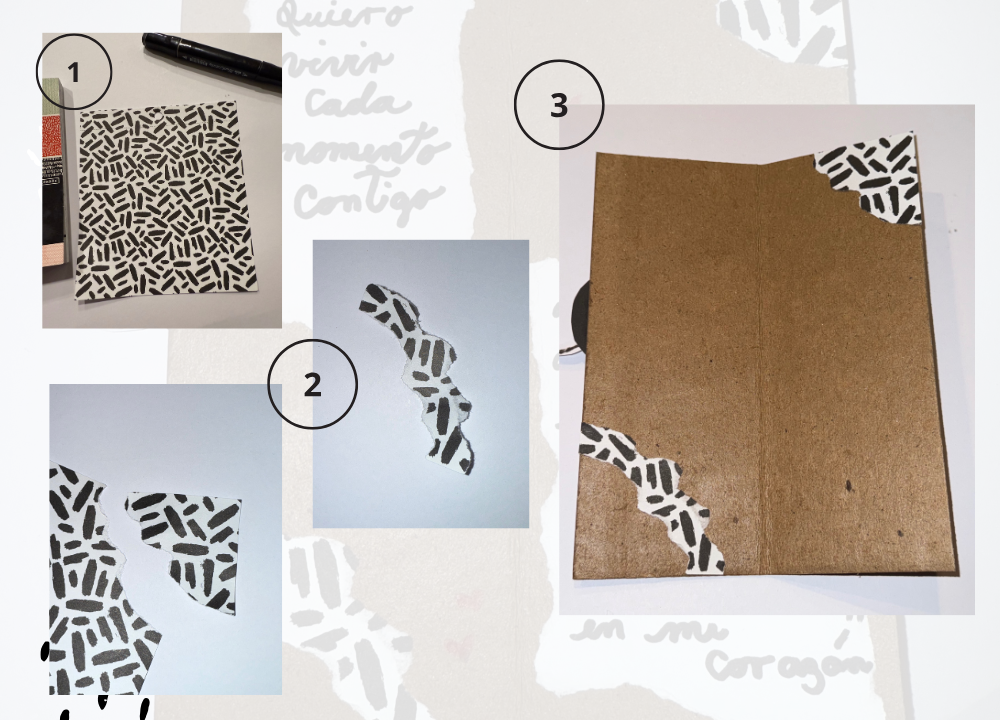
## **Paso 5 🖤**
- Con una cartulina estampada en blanco y negro, rasgué dos trozos para pegarlos en una esquina superior e inferior.
## **step 5 🖤**
- Using a black and white patterned cardstock, tear two pieces to glue in a top and bottom corner.
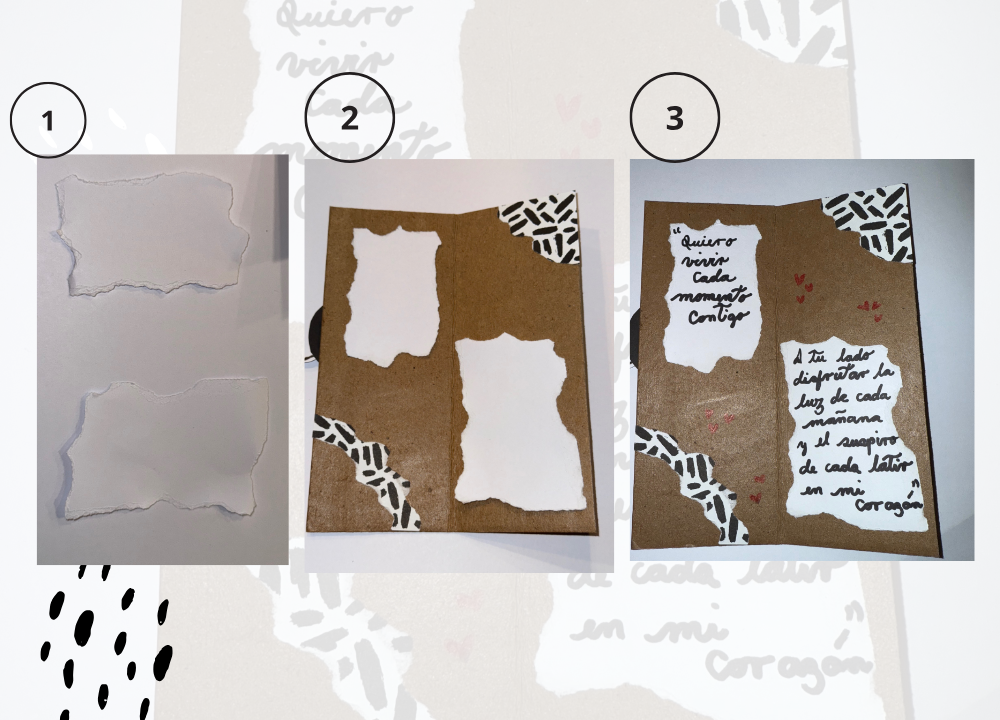
## **Paso 6 🖤**
- En cartulina blanca hice dos cuadrados y los rasgué por todo el borde,los pegue de un lado arriba y del otro abajo y en ellos escribi un texto: «Quiero vivir cada momento contigo» y en el otro lado “A tu lado disfrutar de la luz de cada mañana y del suspiro de cada latido de mi corazón”.
## **step 6 🖤**
- On white cardboard I made two squares and ripped them all around the edge, glued them on one side up and on the other side down and on them I wrote a text: “I want to live every moment with you” and on the other side “By your side enjoy the light of every morning and the sigh of every beat of my heart”.
- Resultado 🖤
- Result 🖤
Estaré encantada de leer y responder a sus comentarios. Gracias totales a todos los que aprecian mi contenido, y que se toman el tiempo de leer y dejar un comentario, gracias, muchas gracias. Les deseo lo mejor.
Hasta pronto.
I will be happy to read and respond to your comments. Total thanks to all of you who appreciate my content, and who take the time to read and leave a comment, thank you, thank you very much. I wish you all the best.
See you soon.
Otros trabajos similares :
| DIY - Creative card for mom ENG/SPA | DIY - Surprise gift box ENG/ESP | DIY "A card dedicated to my favorite hiver " ENG/ESP | Creative wedding anniversary card ENG/SPA | DIY- Tarjeta creativa de cumpleaños 🧁 |
|---|---|---|---|---|
| https://images.hive.blog/0x0/https://files.peakd.com/file/peakd-hive/kellyrsa/EowKvD1pvgxCaws64x1xgU2RJRMFWAZAzvXWEv9JfUkc91dFxBa5XYP6gTg4Zk1qY1j.gif | https://images.hive.blog/0x0/https://files.peakd.com/file/peakd-hive/kellyrsa/23zGq37p2bHoU7rsqQmGP1wH4nx92hkBYkzzRjcgU7gbXLPgfrorSDbxubFmGPLrCReZZ.gif | https://images.hive.blog/0x0/https://files.peakd.com/file/peakd-hive/kellyrsa/Ep1Zm1NajzYUtrAtYh6iMwmmYkpAFVgbegRRjp9WdmbovrV3B6R1PyvahRQsMyVL4Ua.gif | https://images.hive.blog/0x0/https://files.peakd.com/file/peakd-hive/kellyrsa/48PwLvzUMNNRJ4mmZknvHrzxZx58RRifC2VvpgDB36zjF8SUUXpMdbd7DqWSUyYHgc.gif |  |

Fotografías de mi propiedad tomadas con el celular iPhone 📲 16 pro max, editadas en [canva](https://www.canva.com/)
Traducción realizada con la versión gratuita del [
traductor DeepL](https://www.deepl.com/)
Todos los diseños fueron creados en [canva](https://www.canva.com/)