🪡🧵 Acompáñame a Confeccionar un Corset (por primera vez) ✨🎉 || 🪡🧵 Join me in Making a Corset (for the first time) ✨🎉

@kiutvariedades · 2025-09-23 01:47 · NeedleWorkMonday
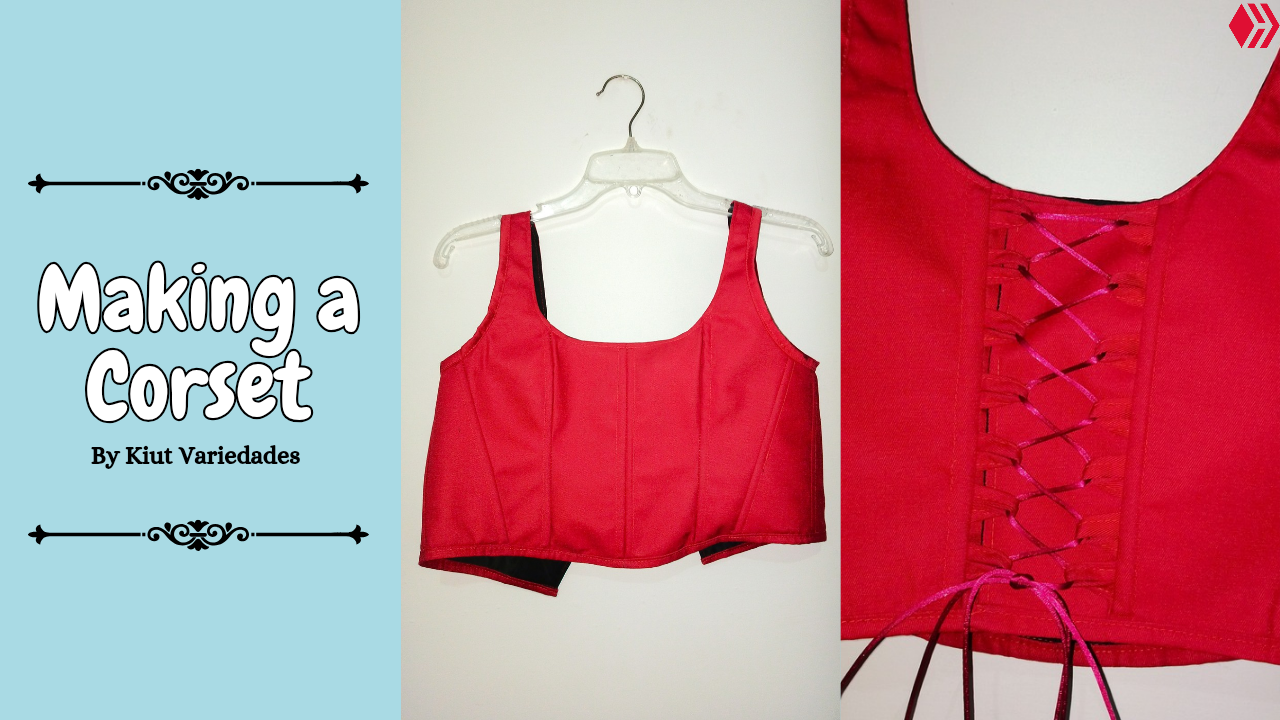
¡Hola queridos usuarios de Hive ✨💕!
Hi dear Hive users ✨💕!

¡Hola Hola Comunidad! ✨, a partir de éste momento comienza otra serie de post en ésta cuenta, y es que nuevamente regreso con los tutoriales de costura de ropa, porque todos ustedes me acompañaran a confeccionar los outfits para mi graduación 🎉; obviamente no les diré para qué día será cada uno porque de eso se enteraran cuando llegue su momento, pero de una vez les adelanto que el último post de costura que haré será el de mi vestido para el acto de grado, y ese saldrá después de que ocurra ese evento, más que nada porque quiero guardar el secreto 🤭, así que no me extiendo más y vamos a ver cómo realicé éste hermoso corset 💖.

Hello Hello Community! ✨, From this moment on, another series of posts will begin on this account, as I am returning with sewing tutorials for clothing, because you will all be joining me in making outfits for my graduation 🎉; obviously, I won't tell you which day each one will be for because you'll find out when the time comes, but I'll tell you right now that the last sewing post I'll do will be about my dress for the graduation ceremony, and that will come out after the event, mainly because I want to keep it a secret 🤭. So, without further ado, let's see how I made this beautiful corset 💖.

![Image of my property created in Canva](https://files.peakd.com/file/peakd-hive/kiutvariedades/243zp35vTS8mVhqAuQquromQFikDCP5WS8WUGUfp5iiqHR313TroduCaoYSQvLMorQK4K.png) ![separador nuevo.png](https://files.peakd.com/file/peakd-hive/kiutvariedades/EoibzJBuKooMnVdgJahuM46NCrLqCQuNqYyj1hFhu6eT7e3G3jft7A7Tu33wLKDwTCF.png)

🧵 MATERIALES || MATERIALS 🪡
- ½ m de tela externa no elástica (en mi caso estoy usando Drill). - ½ m de tela para forro, preferiblemente del mismo color que la anterior 🤣 (en mi caso estoy usando microfibra). - Entretela termo adhesiva. - Varillas de plástico. - Hilo del color de la tela. - Cinta métrica. - Tijeras. - Máquina de coser.

- ½ metre of non-stretch outer fabric (in my case, I am using drill). - ½ metre of lining fabric, preferably the same colour as the previous one 🤣 (in my case, I am using microfibre). - Iron-on interfacing. - Plastic rods. - Thread in the same colour as the fabric. - Measuring tape. - Scissors. - Sewing machine.

![IMG_20250909_144243_477.jpg](https://files.peakd.com/file/peakd-hive/kiutvariedades/EoH2LJnVSMvBsJdTSNthPtyUDioiRujR63p9j91FJzBoJMjBBoZSKifUZmxTwNGZz3q.jpg) - - -

🧵 CONFECCIÓN || MAKING 🪡
En ésta ocasión como era mi primera vez haciendo un corset, y ya había escuchado que el patronaje era complicado, preferí irme por un vieja confiable que son los patrones de Marlene Mukai que [aquí](https://marlenemukai.com.br/corpete-cropped-corset-decote-quadrado/) les dejo. Obviamente, hice algunos ajustes conforme a mi medidas reales, pero en general fueron mi guía absoluta de patronaje. Así que pasando directamente con el corte en tela, es importante identificar las piezas y en algunos sitios señalar unas pequeñas marcas que nos ayuden al momento de coser, sobre todo en las curvas del busto, además hay que tener siempre presente donde irán las varillas, pues allí hay que añadir un margen de costura de 2cm, tanto en forro como en tela externa, lo único que no llevará margen son las piezas cortadas en entretela.

This time, as it was my first time making a corset, and I had heard that pattern making was complicated, I preferred to go with a reliable old favourite: Marlene Mukai's patterns, which I am sharing [here](https://marlenemukai.com.br/corpete-cropped-corset-decote-quadrado/). Obviously, I made some adjustments according to my actual measurements, but in general, they were my absolute guide for pattern making. So, moving straight on to cutting the fabric, it is important to identify the pieces and, in some places, mark small dots to help us when sewing, especially on the curves of the bust. You also need to keep in mind where the boning will go, as you need to add a 2 cm seam allowance there, both on the lining and the outer fabric. The only pieces that will not have a seam allowance are those cut from interfacing.

![IMG_20250909_150520_707.jpg](https://files.peakd.com/file/peakd-hive/kiutvariedades/EpCEHSUpD47ggXpiVaw31J9uMGG1fZ9WZNbYqFop2gvkAwR26mCEoBHem23sa2SozRV.jpg) ![IMG_20250909_152105_170.jpg](https://files.peakd.com/file/peakd-hive/kiutvariedades/23viAKNJDdTXZKFoqxmU3Qj1QzNfeZSFj3Lotqm6udYY8EtT5giBPdPmnzWnh2D8PpvrK.jpg)

Yo arranque cosiendo primero el forro, uniendo las piezas por todas las costuras que eran rectas y dejando para el final las piezas que formaban la curva del busto, pues allí debía ir con mayor cuidado para poder formar bien ésta parte. Una vez que todas las piezas estuvieron cosidas me pasé a planchar, aquí la plancha será nuestra mejor amiga de principio a fin, y con ella me ayude para abrir **todas** las costuras, excepto la del hombro la cual planche tirando hacía atrás.

I started by sewing the lining first, joining the pieces along all the straight seams and leaving the pieces that formed the curve of the bust until last, as I had to be more careful there to get this part right. Once all the pieces were sewn together, I moved on to ironing. Here, the iron will be our best friend from start to finish, and I used it to open up **all** the seams, except for the shoulder seam, which I ironed by pulling it backwards.

![IMG_20250912_114311_942.jpg](https://files.peakd.com/file/peakd-hive/kiutvariedades/23ywu6yw86RtxUDKgN8tVgcBk6hCSHkyeLCGRhtgHWwNyuaTUWg4C9ZSeUkb9hGeh4Hi3.jpg) ![IMG_20250912_122306_399.jpg](https://files.peakd.com/file/peakd-hive/kiutvariedades/241tZ7bgn5baw9TYnZwqyA5iSrc9E9PTyDK7Am1iJn5riM1GjxsqrftfnX49krS6pUHmd.jpg) ![IMG_20250912_124815_839.jpg](https://files.peakd.com/file/peakd-hive/kiutvariedades/EqDjcrxJYQNPHDHNnaSz73yDZX7SeDJX58sjabsdKNfZA7BZE3H4HVEnuwqrTsLYPpm.jpg)

Para comenzar a trabajar con la tela externa, lo primero que hay que hacer es pegar la entretela, la cual al ser termo adhesiva facilita mucho el trabajo, y de una vez nos indica el margen de costura. Además de ésto, se debe cortar una tira de 3cm de ancho por aproximadamente 85cm de largo, la cual coseremos como un sesgo para formar una tira larga de la cual cortaremos trozos de 6cm y coseremos a la pieza de espalda central por la misma línea donde se unirá a la pieza de espalda lateral, con ésto luego lograremos trenzar y cerrar el corset cuando se esté usando.

To begin working with the outer fabric, the first thing to do is to glue the interfacing, which, being heat-adhesive, makes the job much easier and immediately shows us the seam allowance. In addition to this, you must cut a strip 3 cm wide by approximately 85 cm long, which we will sew as a bias to form a long strip from which we will cut 6 cm pieces and sew to the centre back piece along the same line where it will join the side back piece. This will allow us to braid and close the corset when it is being worn.

![IMG_20250912_124749_583.jpg](https://files.peakd.com/file/peakd-hive/kiutvariedades/23vi8AbGwUCWxaewmYWxQRWkNDGbf57QYfQEvsQEMfKE37BFHetZM6jfykwbxwrUEPGXW.jpg) |![IMG_20250912_142838_577.jpg](https://files.peakd.com/file/peakd-hive/kiutvariedades/Eo6NkbuEDd7Sw779fRnV8qPHCeDEtJMXaGawMhhdPRGgU8JwXjkFtLTT8Mx3YFTavfD.jpg)|![IMG_20250912_143735_669.jpg](https://files.peakd.com/file/peakd-hive/kiutvariedades/23w36B6vaDeGBgdCQFwXjWM8WBw5fk9Giu5zBat96LLWxcQFd9CZhMM86STkv4fpFPHB5.jpg)| |-|-| |![IMG_20250912_143413_178.jpg](https://files.peakd.com/file/peakd-hive/kiutvariedades/23viLirEU5xMywQAyrHjEYQaVB3FMhKC2UTZ29UoBPhTzCPSeoA22DR8ff9aQfv6hZtFj.jpg)|![IMG_20250912_144834_246.jpg](https://files.peakd.com/file/peakd-hive/kiutvariedades/23uR5AJtoYJCm4VeK3cS8PxXCy7R3vcWmBxKJt9i5WseNYrGPg4DT4aZ82BB8FCo97pCg.jpg)| |-|-|

Con ésto listo, entonces coseremos todas las piezas de la tela externa y luego al igual que hicimos por el forro, plancharemos todas las uniones, sin embargo aquí la única que abriremos será la costura central delantera del corset, todas las demás se deben planchar tirando hacía la espalda. Para hacer los canales donde irán las varillas de plástico, primero debemos medir el grosor de estás y dar 2mm más a ésta medida, marcar con línea recta éste grosor y coser siguiendo éstas líneas, todos éstos cabales deben quedar en dirección a la espalda, excepto la central pues allí será el único lugar donde se harán dos canales, uno a cada lado de la costura.

With this ready, we will sew all the pieces of the outer fabric and then, as we did for the lining, we will iron all the seams. However, here the only one we will open will be the central front seam of the corset; all the others should be ironed towards the back. To make the channels where the plastic boning will go, first measure the thickness of the boning and add 2mm to this measurement. Mark this thickness with a straight line and sew along these lines. All of these seams should face the back, except for the centre seam, as this will be the only place where two channels will be made, one on each side of the seam.

![IMG_20250912_152952_770.jpg](https://files.peakd.com/file/peakd-hive/kiutvariedades/EoAd7RbuNgYWqnmoj95TAnFeJXSmbnQiFQG75m82AQev6mez3G2jG1bWTfshDDAVjg6.jpg) ![IMG_20250912_160010_611.jpg](https://files.peakd.com/file/peakd-hive/kiutvariedades/23wXBnhCPiXiCCotTgRUZs67L3RLkPTZc3Loh7VuheAikG2PjdgHrLZd5kJ4XynbWmSiw.jpg)

Enfrentamos derechos de tela y unimos la pieza externa con el forro y cosemos por toda la parte superior, luego volteamos, planchamos y damos costura de asentamiento para obtener un mejor acabado. Cortamos dos tiras de 4cm de ancho por el largo que indiquen nuestras sisas, y cosemos tipo sesgo a la pieza del corset, dejando así listo y cerrado toda la parte superior del corset.

We place the fabric rights sides together and join the outer piece with the lining, sewing along the entire top edge. Then we turn it inside out, iron it, and sew a topstitch for a better finish. We cut two strips 4 cm wide by the length indicated by our armholes and sew them on the bias to the corset piece, leaving the entire top of the corset ready and closed.

![IMG_20250915_113241_987.jpg](https://files.peakd.com/file/peakd-hive/kiutvariedades/242DLMWw2vVSpasGaYcW6AJbZrL7if796ThRZP5cz18UVMaE2EKvMym5qiX1QKTf8rjTG.jpg) ![IMG_20250915_122609_252.jpg](https://files.peakd.com/file/peakd-hive/kiutvariedades/23y96pddH79TdZib2p48ybutko6hZvgGKCyAkqmGbHq3L5rWKQQaNSnX7jRoWvEBLMuW4.jpg) |![IMG_20250915_131122_697.jpg](https://files.peakd.com/file/peakd-hive/kiutvariedades/23xVbxPQMyqnMbozWk497iXfGJvurmscVgDxJWFGuJGv6zdF7MFdQ77dg8EkshCxujpCn.jpg)|![IMG_20250915_133125_710.jpg](https://files.peakd.com/file/peakd-hive/kiutvariedades/23yx1RjMCFDE2f5MPNrEMsYRKFGb3xLas3hmiMNv1hrW4yNf3aHVssxact9LVA7Nc8NNK.jpg)| |-|-|

Y ahora sí vamos con las varillas, para ésto es importante medir en cada canal del corset el largo que requerimos de varilla, teniendo en cuenta que en la parte inferior hay que dejar un espacio de 1cm aproximadamente para luego cerrar con sesgo. Al momento de cortar las varillas se recomienda quemar o limar las puntas, ésto para evitar que la varilla rompa la tela y nos lastime. Una vez cortadas las varillas, se pasa a introducirlas por los respectivos canales y al final se cierra toda la parte inferior del corset con sesgo, nuevamente cortando una tira de 4cm de ancho. ***Durante todo el proceso es importante ayudarnos de la plancha, incluso al final.***

Now we move on to the boning. For this, it is important to measure the length of boning required for each channel of the corset, bearing in mind that there should be a space of approximately 1 cm at the bottom to then close with bias binding. When cutting the boning, it is recommended to burn or file the ends to prevent the boning from tearing the fabric and causing injury. Once the boning has been cut, insert it into the respective channels and finally close the entire bottom of the corset with bias binding, again cutting a 4 cm wide strip. ***Throughout the process, it is important to use an iron, even at the end.***

|![IMG_20250915_153730_348.jpg](https://files.peakd.com/file/peakd-hive/kiutvariedades/EoEuLNrjxRk7ZvhpCBGjcKwMdMvV6qSytNHCNnPkWaomteqTZ5WGxfvVNoHxc3zuDFf.jpg)|![IMG_20250915_154541_044.jpg](https://files.peakd.com/file/peakd-hive/kiutvariedades/23tcJMFMqnEgpFEqUnnBw68NDForGxk3Xtrgt5U8kPpxPNuZF6Ex6TxLQSgjXpEq6FLR7.jpg)| |-|-| ![IMG_20250915_161939_775.jpg](https://files.peakd.com/file/peakd-hive/kiutvariedades/23vsjdEmudSXdJS6urFxGtTRhFxi7sfeibNLmgFk9uaeJgd1cugHdh4iUmAefDCkKnjy6.jpg) ![separador nuevo.png](https://files.peakd.com/file/peakd-hive/kiutvariedades/EoibzJBuKooMnVdgJahuM46NCrLqCQuNqYyj1hFhu6eT7e3G3jft7A7Tu33wLKDwTCF.png)

No les voy a negar, entiendo porqué dicen que hacer corsets es un trabajo pesado, lo que más agota es la constante cuidado al detalle, cada paso tiene un orden por una razón específica y hay que respetarlo, las medidas y por ende los margenes de costura son importantísimos, no obstante fuera de todo eso, la corseteria es un trabajo maravilloso y yo quedé sumamente satisfecha con el resultado 💖.

I won't deny it, I understand why they say that making corsets is hard work. The most exhausting part is the constant attention to detail. Each step has a specific order for a specific reason, and you have to respect that. Measurements and, therefore, seam allowances are extremely important. However, despite all that, corset-making is a wonderful job, and I was extremely satisfied with the result 💖.

![IMG_20250922_154218_177.jpg](https://files.peakd.com/file/peakd-hive/kiutvariedades/242s9uq6xXd41schVWZtvaYdcGm1aX4CRj2svXwqFPSrpHd8dBnHRYVTzQErqNQ26Da7Z.jpg) ![IMG_20250922_153523_554.jpg](https://files.peakd.com/file/peakd-hive/kiutvariedades/23z7QJBG1Yfrt7efz8YDv6KYPLhDg5XsfL1wjET4yAgEbJJjK4eyhW32zoXrwJ41wm1JB.jpg) ![IMG_20250922_153529_390.jpg](https://files.peakd.com/file/peakd-hive/kiutvariedades/23xyXadLR4YGSQKAG16FZkr67MEH42mB4UaUcSeMguGeSewzZXjZyJ4ftcUnFYg59chg5.jpg) |![IMG_20250922_154205_521.jpg](https://files.peakd.com/file/peakd-hive/kiutvariedades/242YJpfUmyiWFzS3BLL1r9oLaFHgEboHFrjhFUcBdhGDACtpX3xbBShTGXSRhv8JhwWQP.jpg)|![IMG_20250922_154141_135.jpg](https://files.peakd.com/file/peakd-hive/kiutvariedades/241tjcs1HNWo4Huw2CRHDsPSB7LtV9ysapUSNeX2Q6y5VxkBGz9QRkbEp3E2fvxNB2W68.jpg)| |-|-| - - - ![Banner_20250718_175732_0001.gif](https://files.peakd.com/file/peakd-hive/kiutvariedades/48Vjprgf7L64hn2E1pd3Px4kDfvdqTJTphafvcf7mh8hY4Dn4JZTf8nr8Y3UVKMnBV.gif)

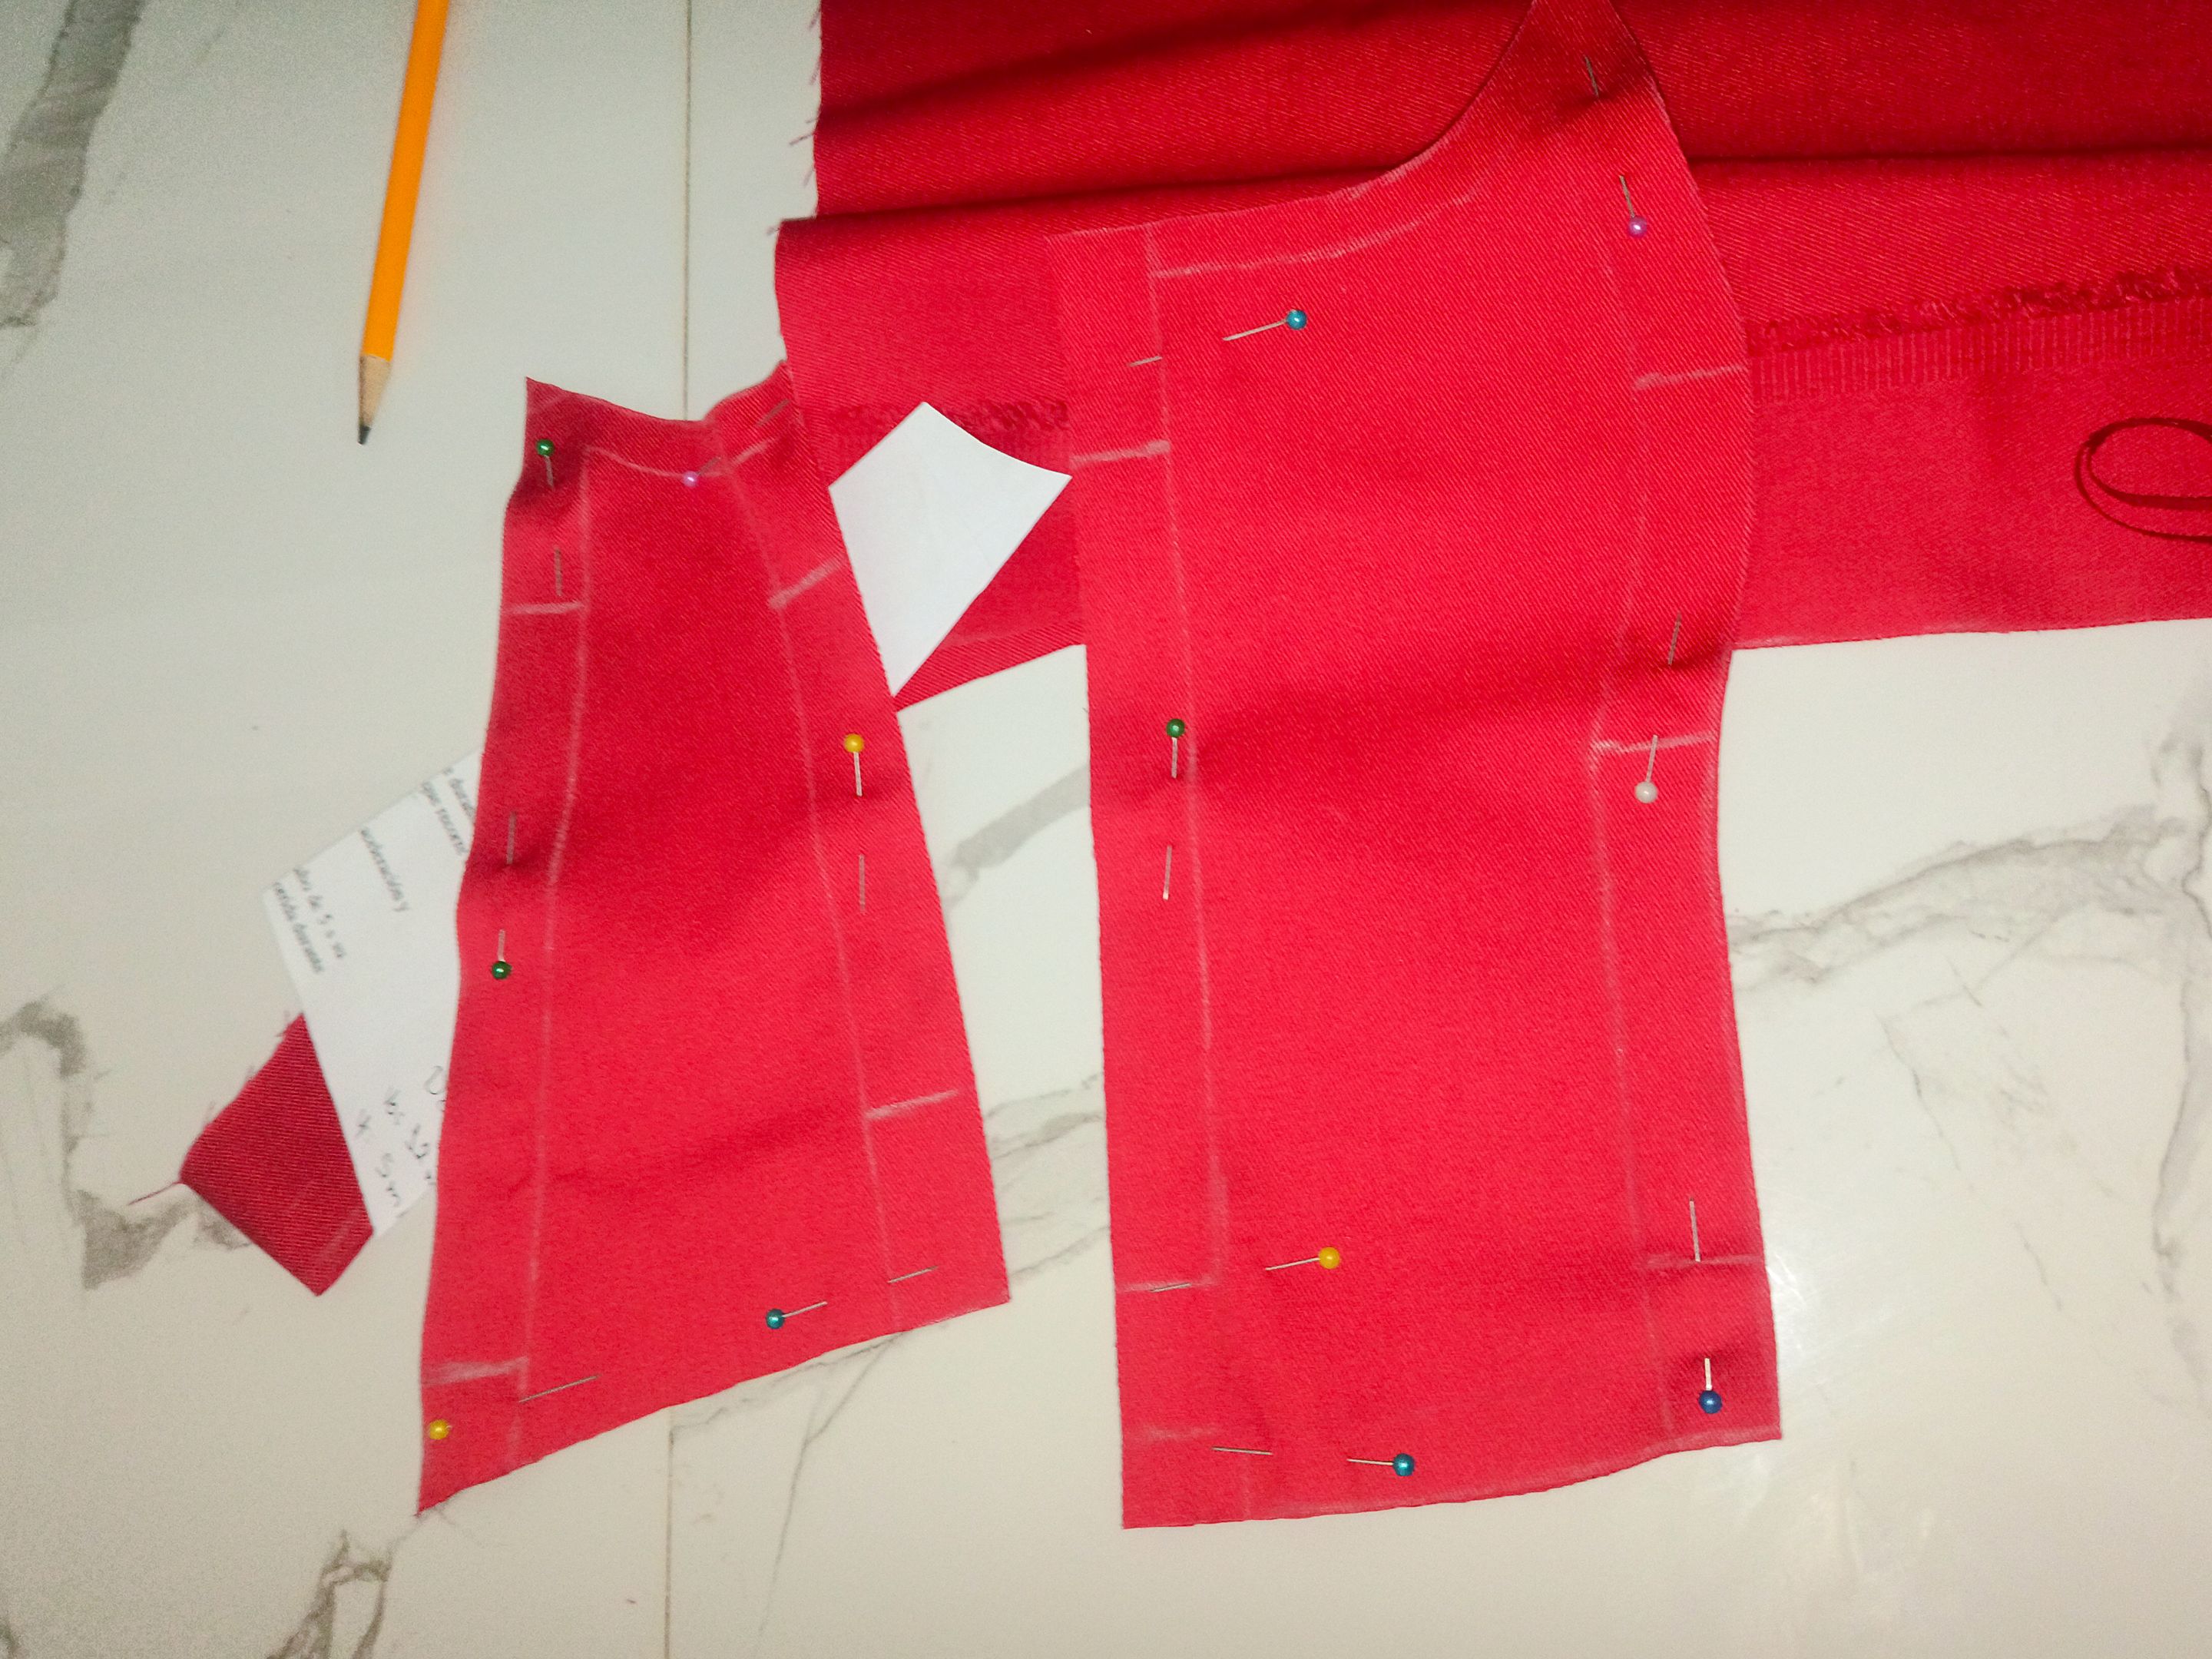
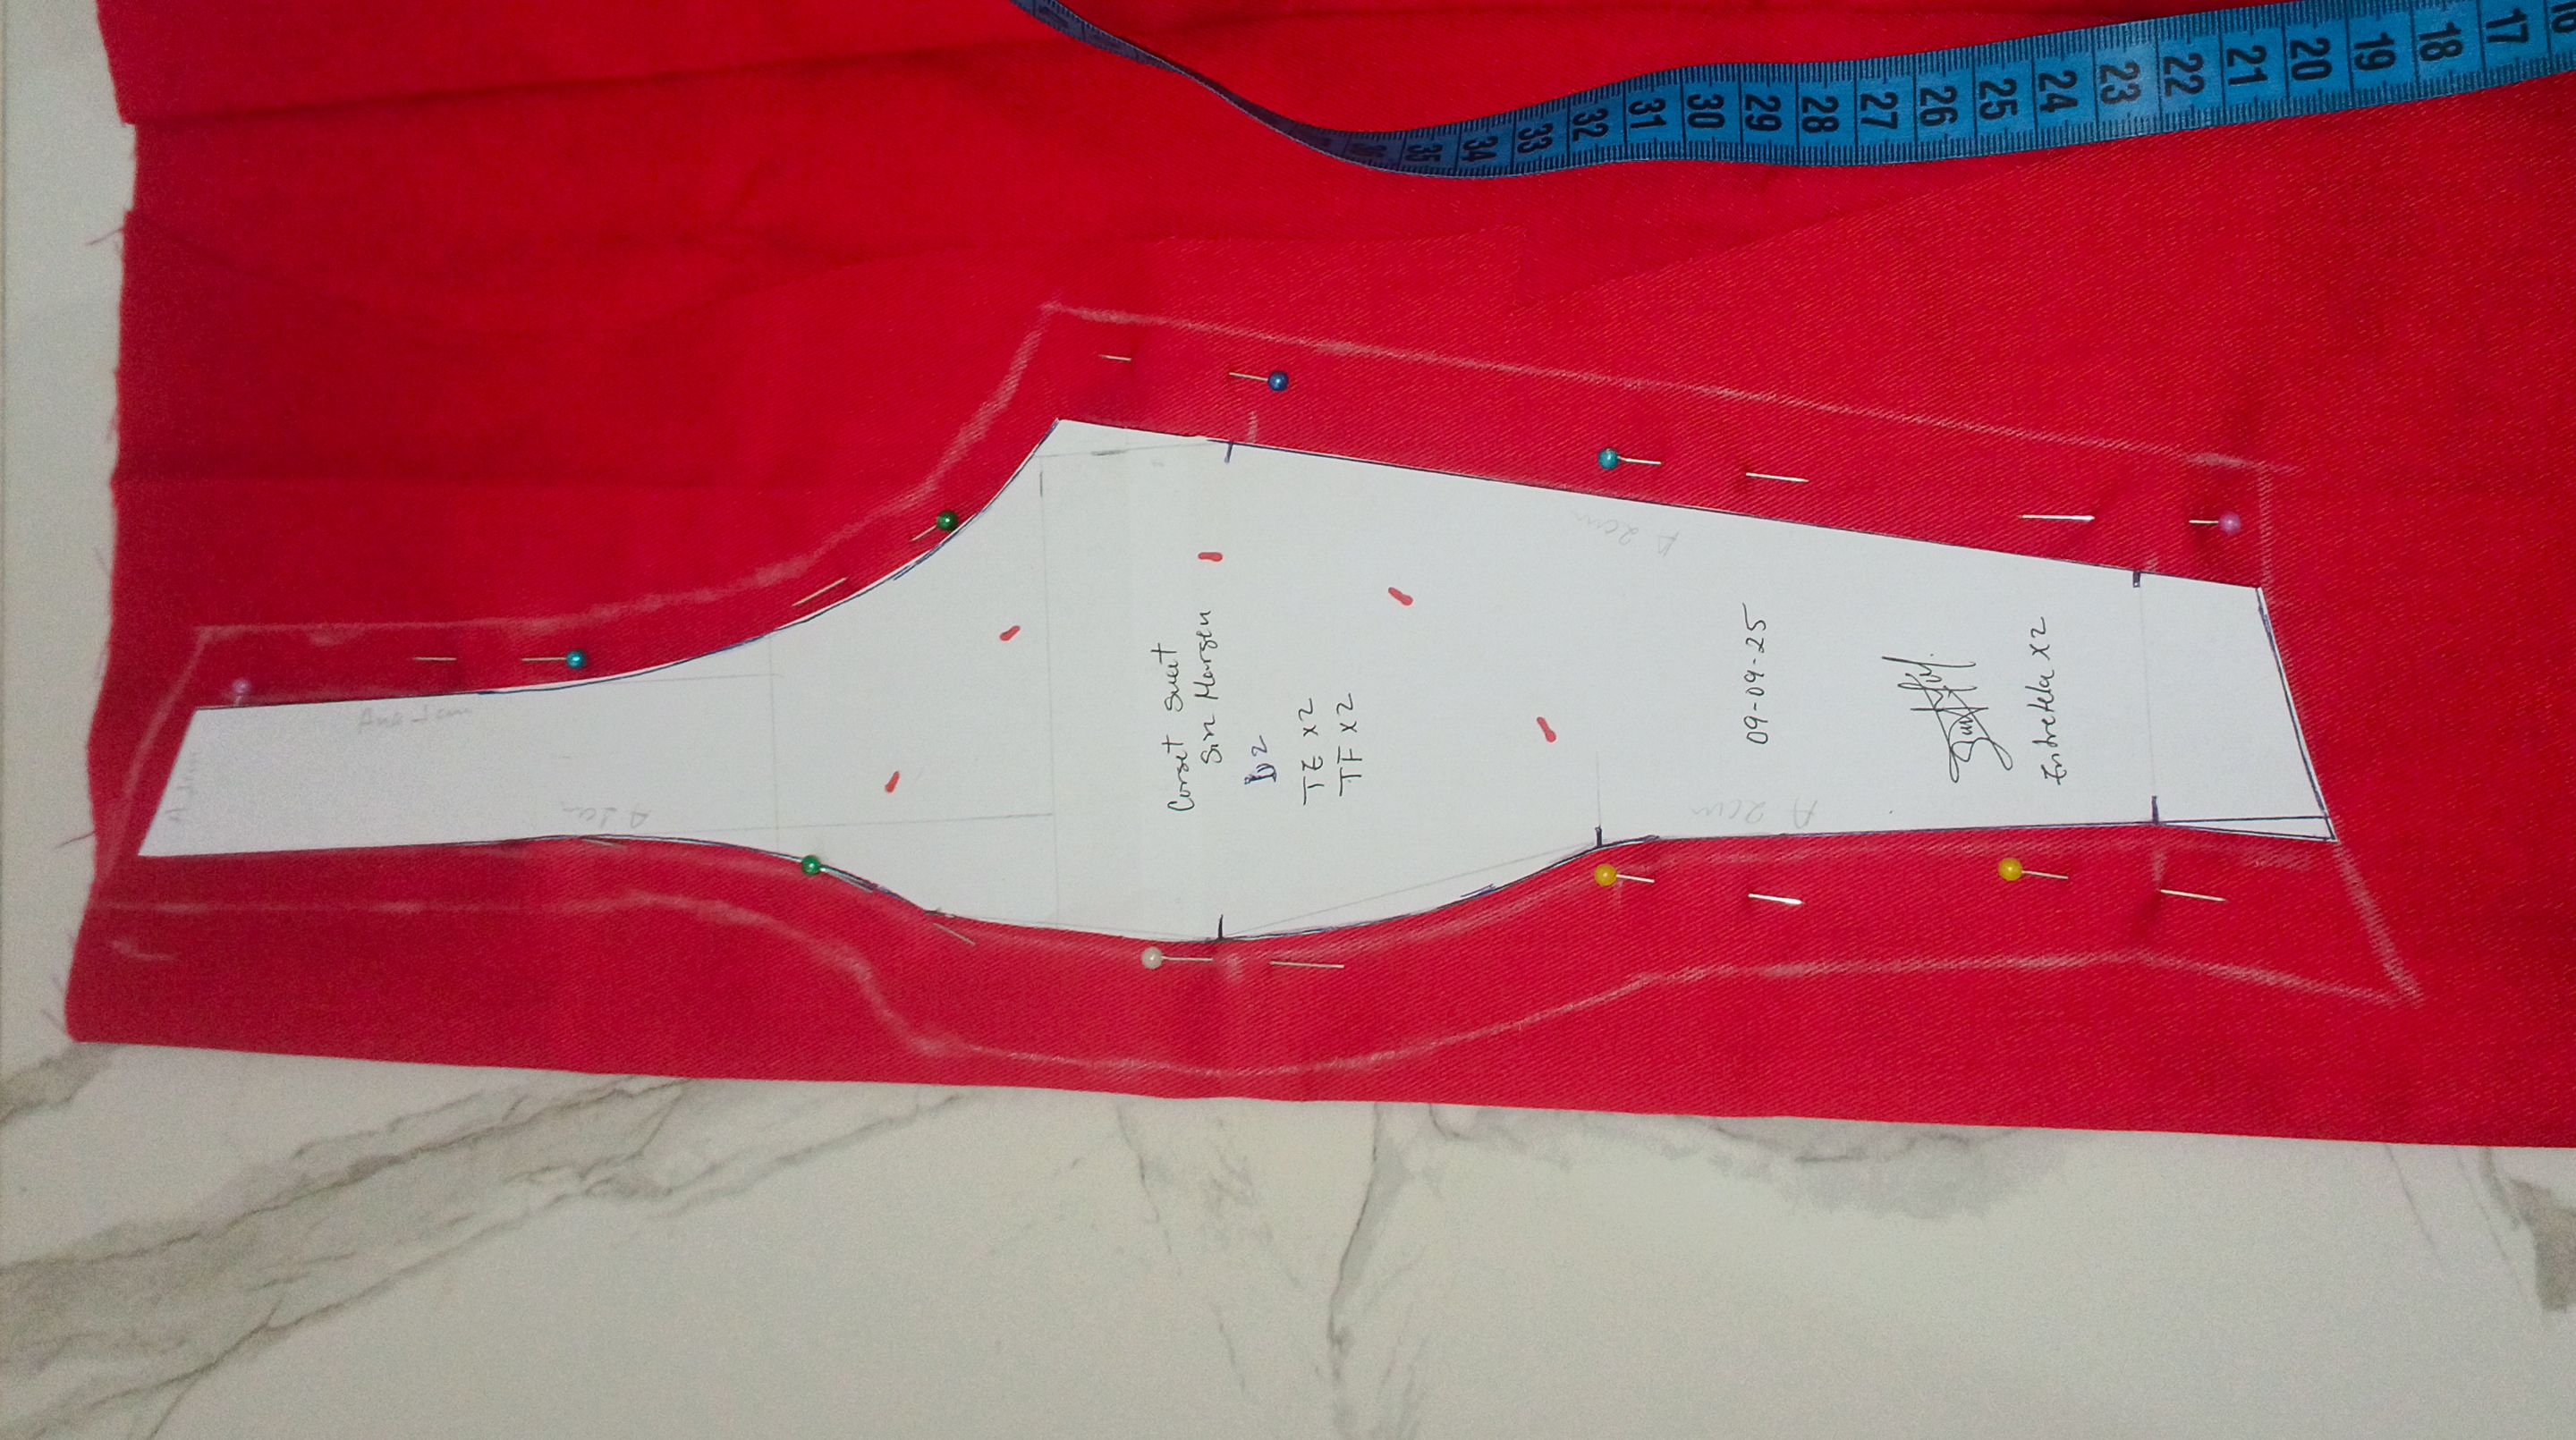
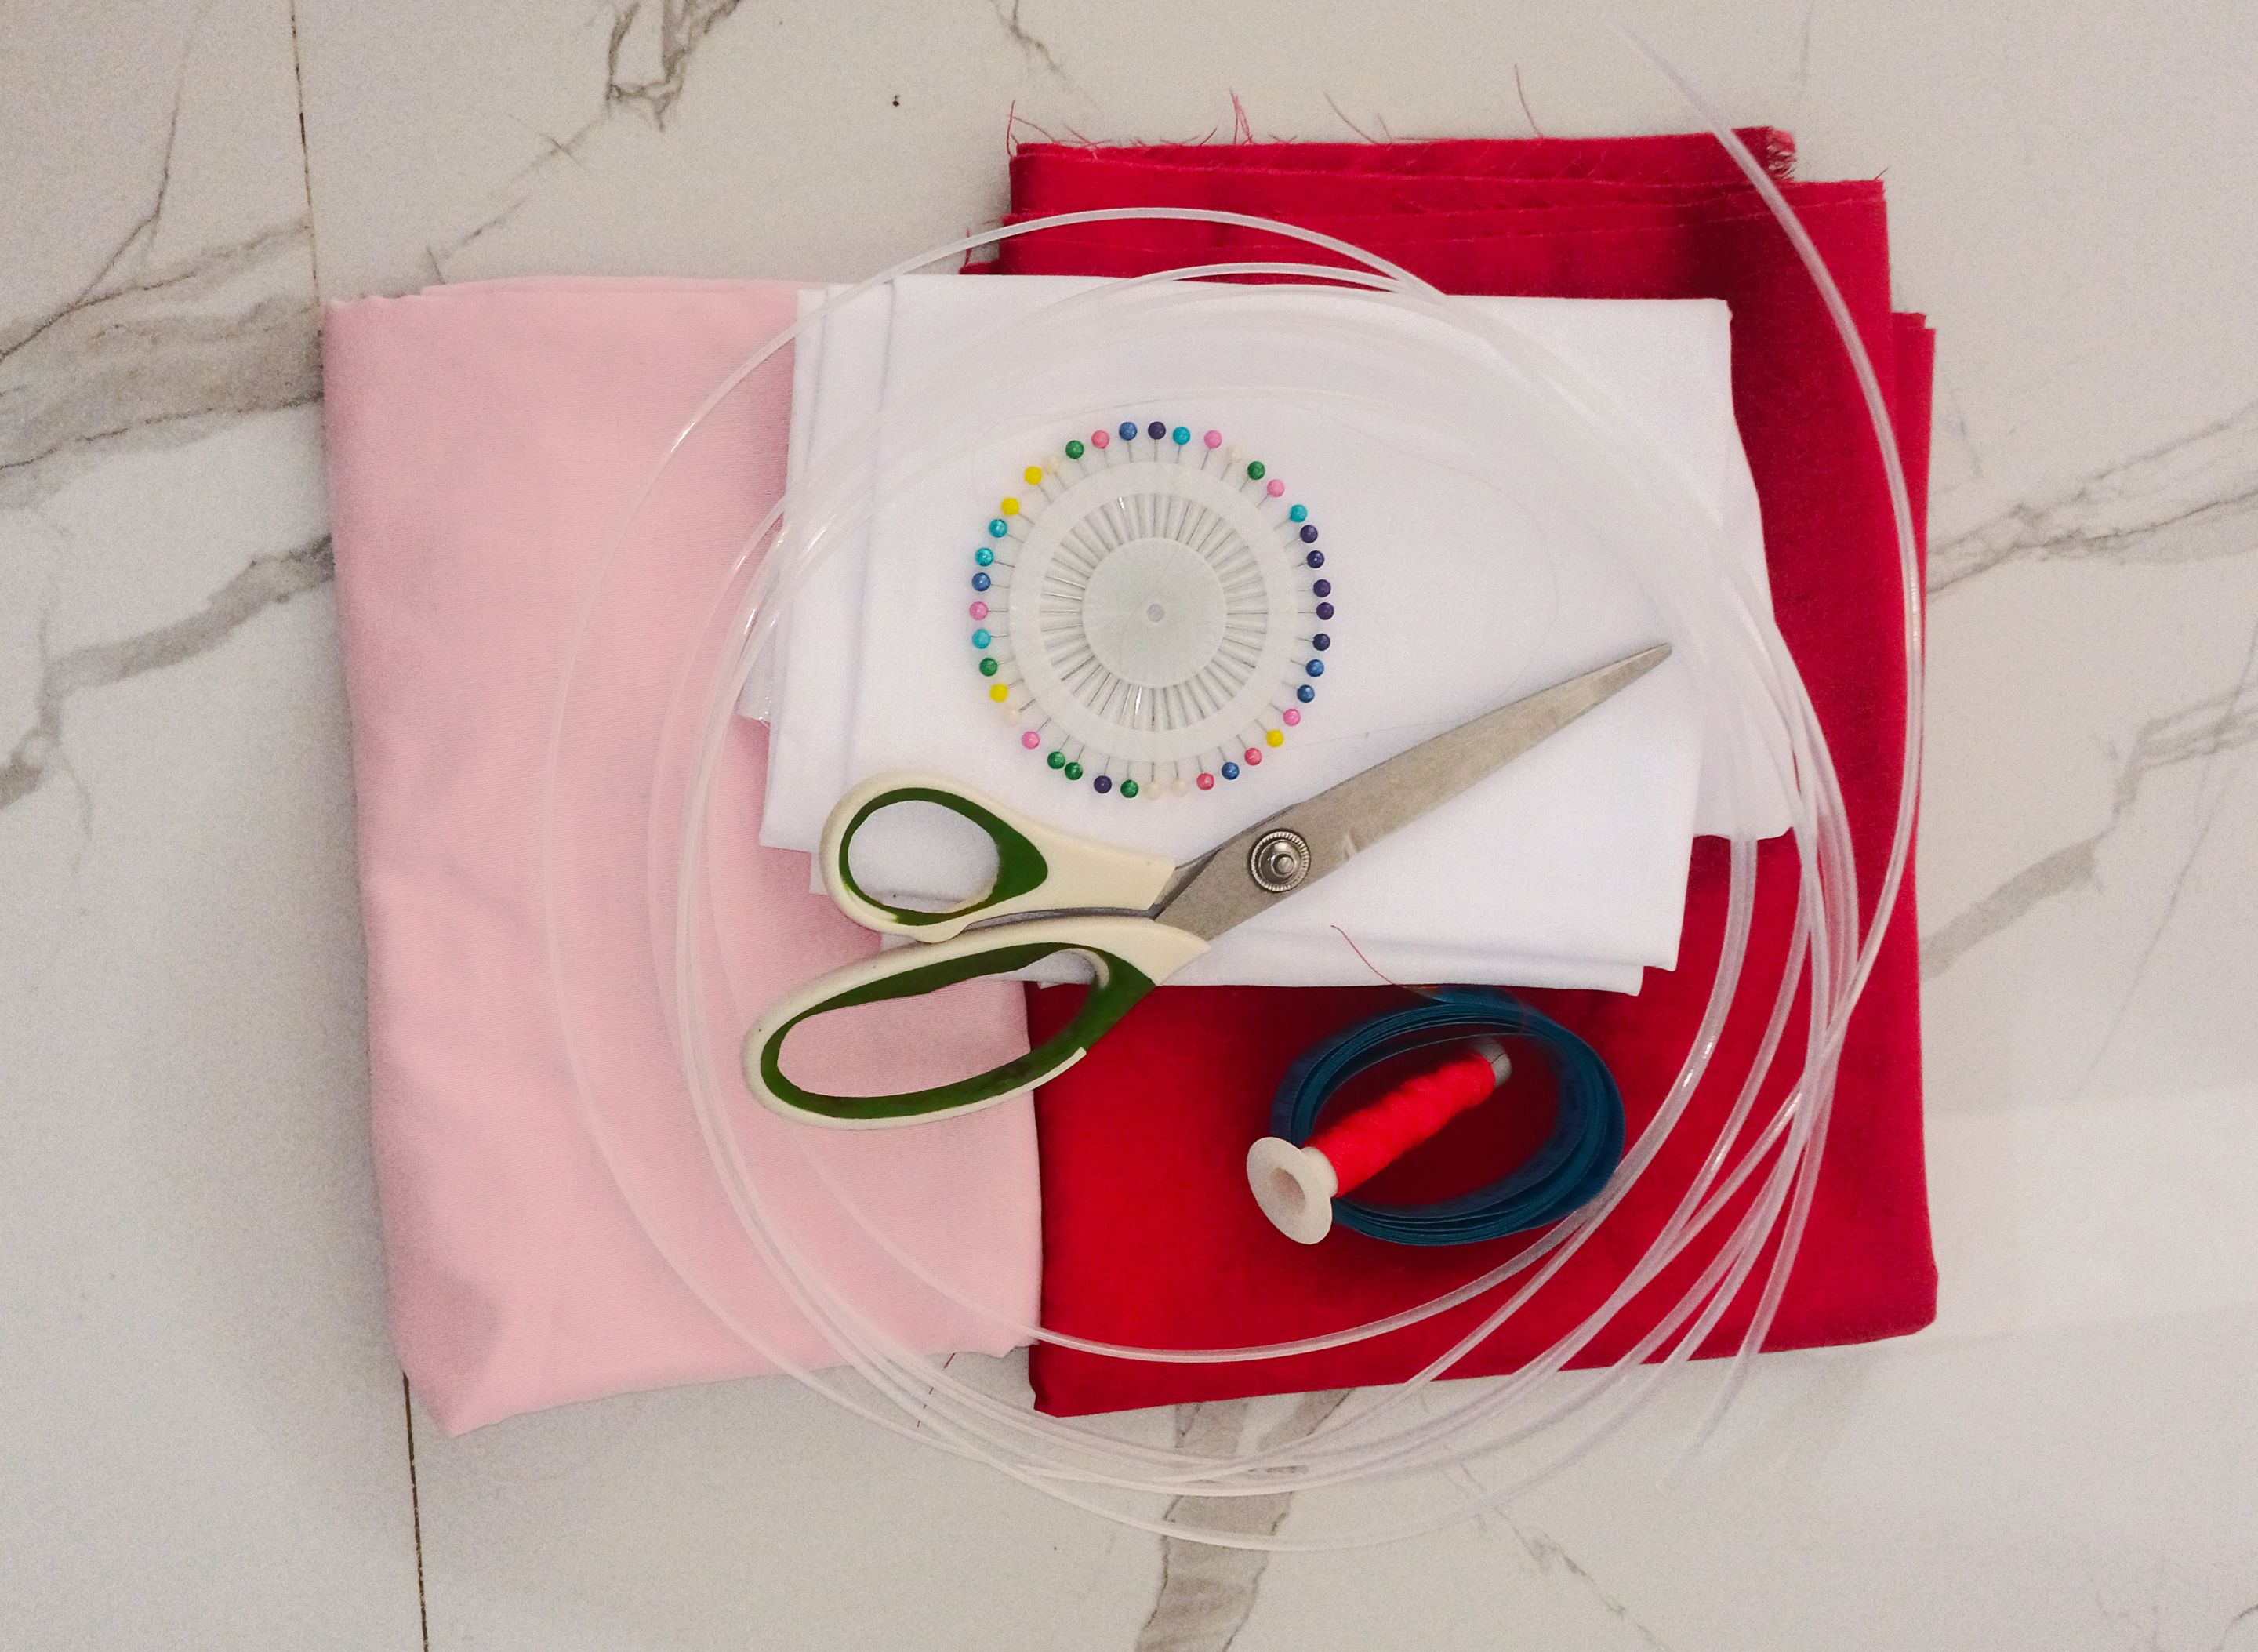
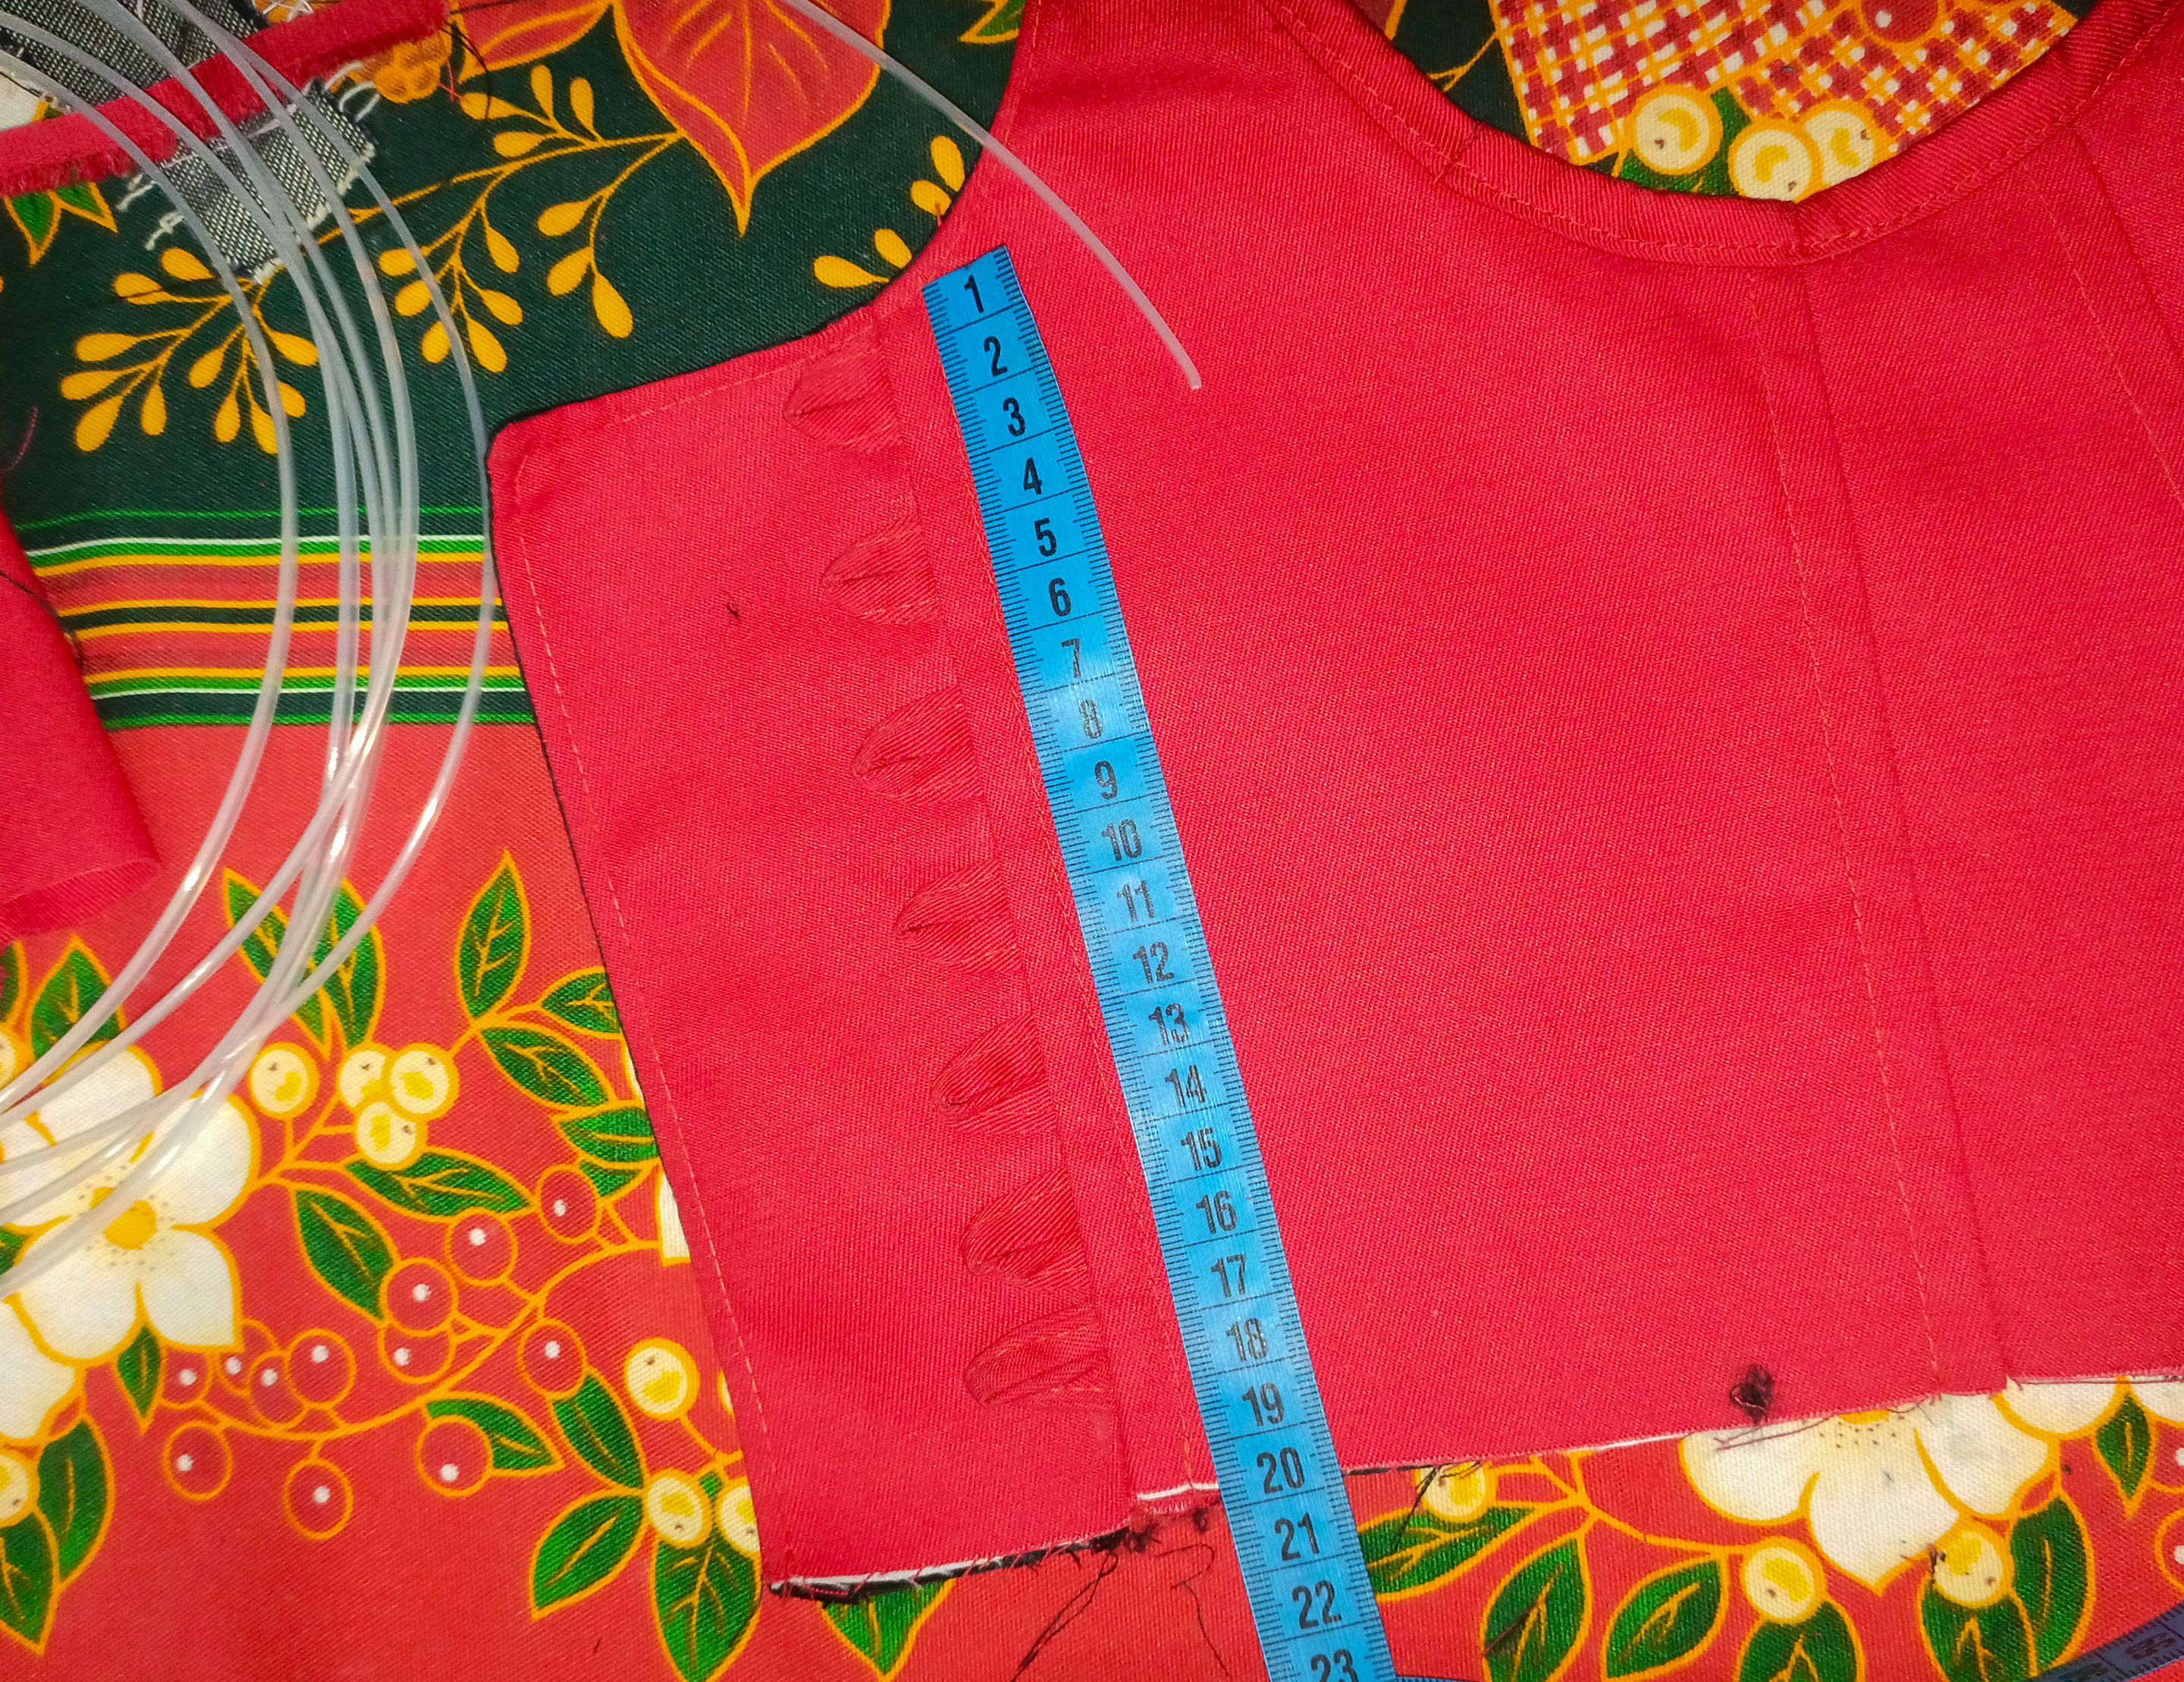
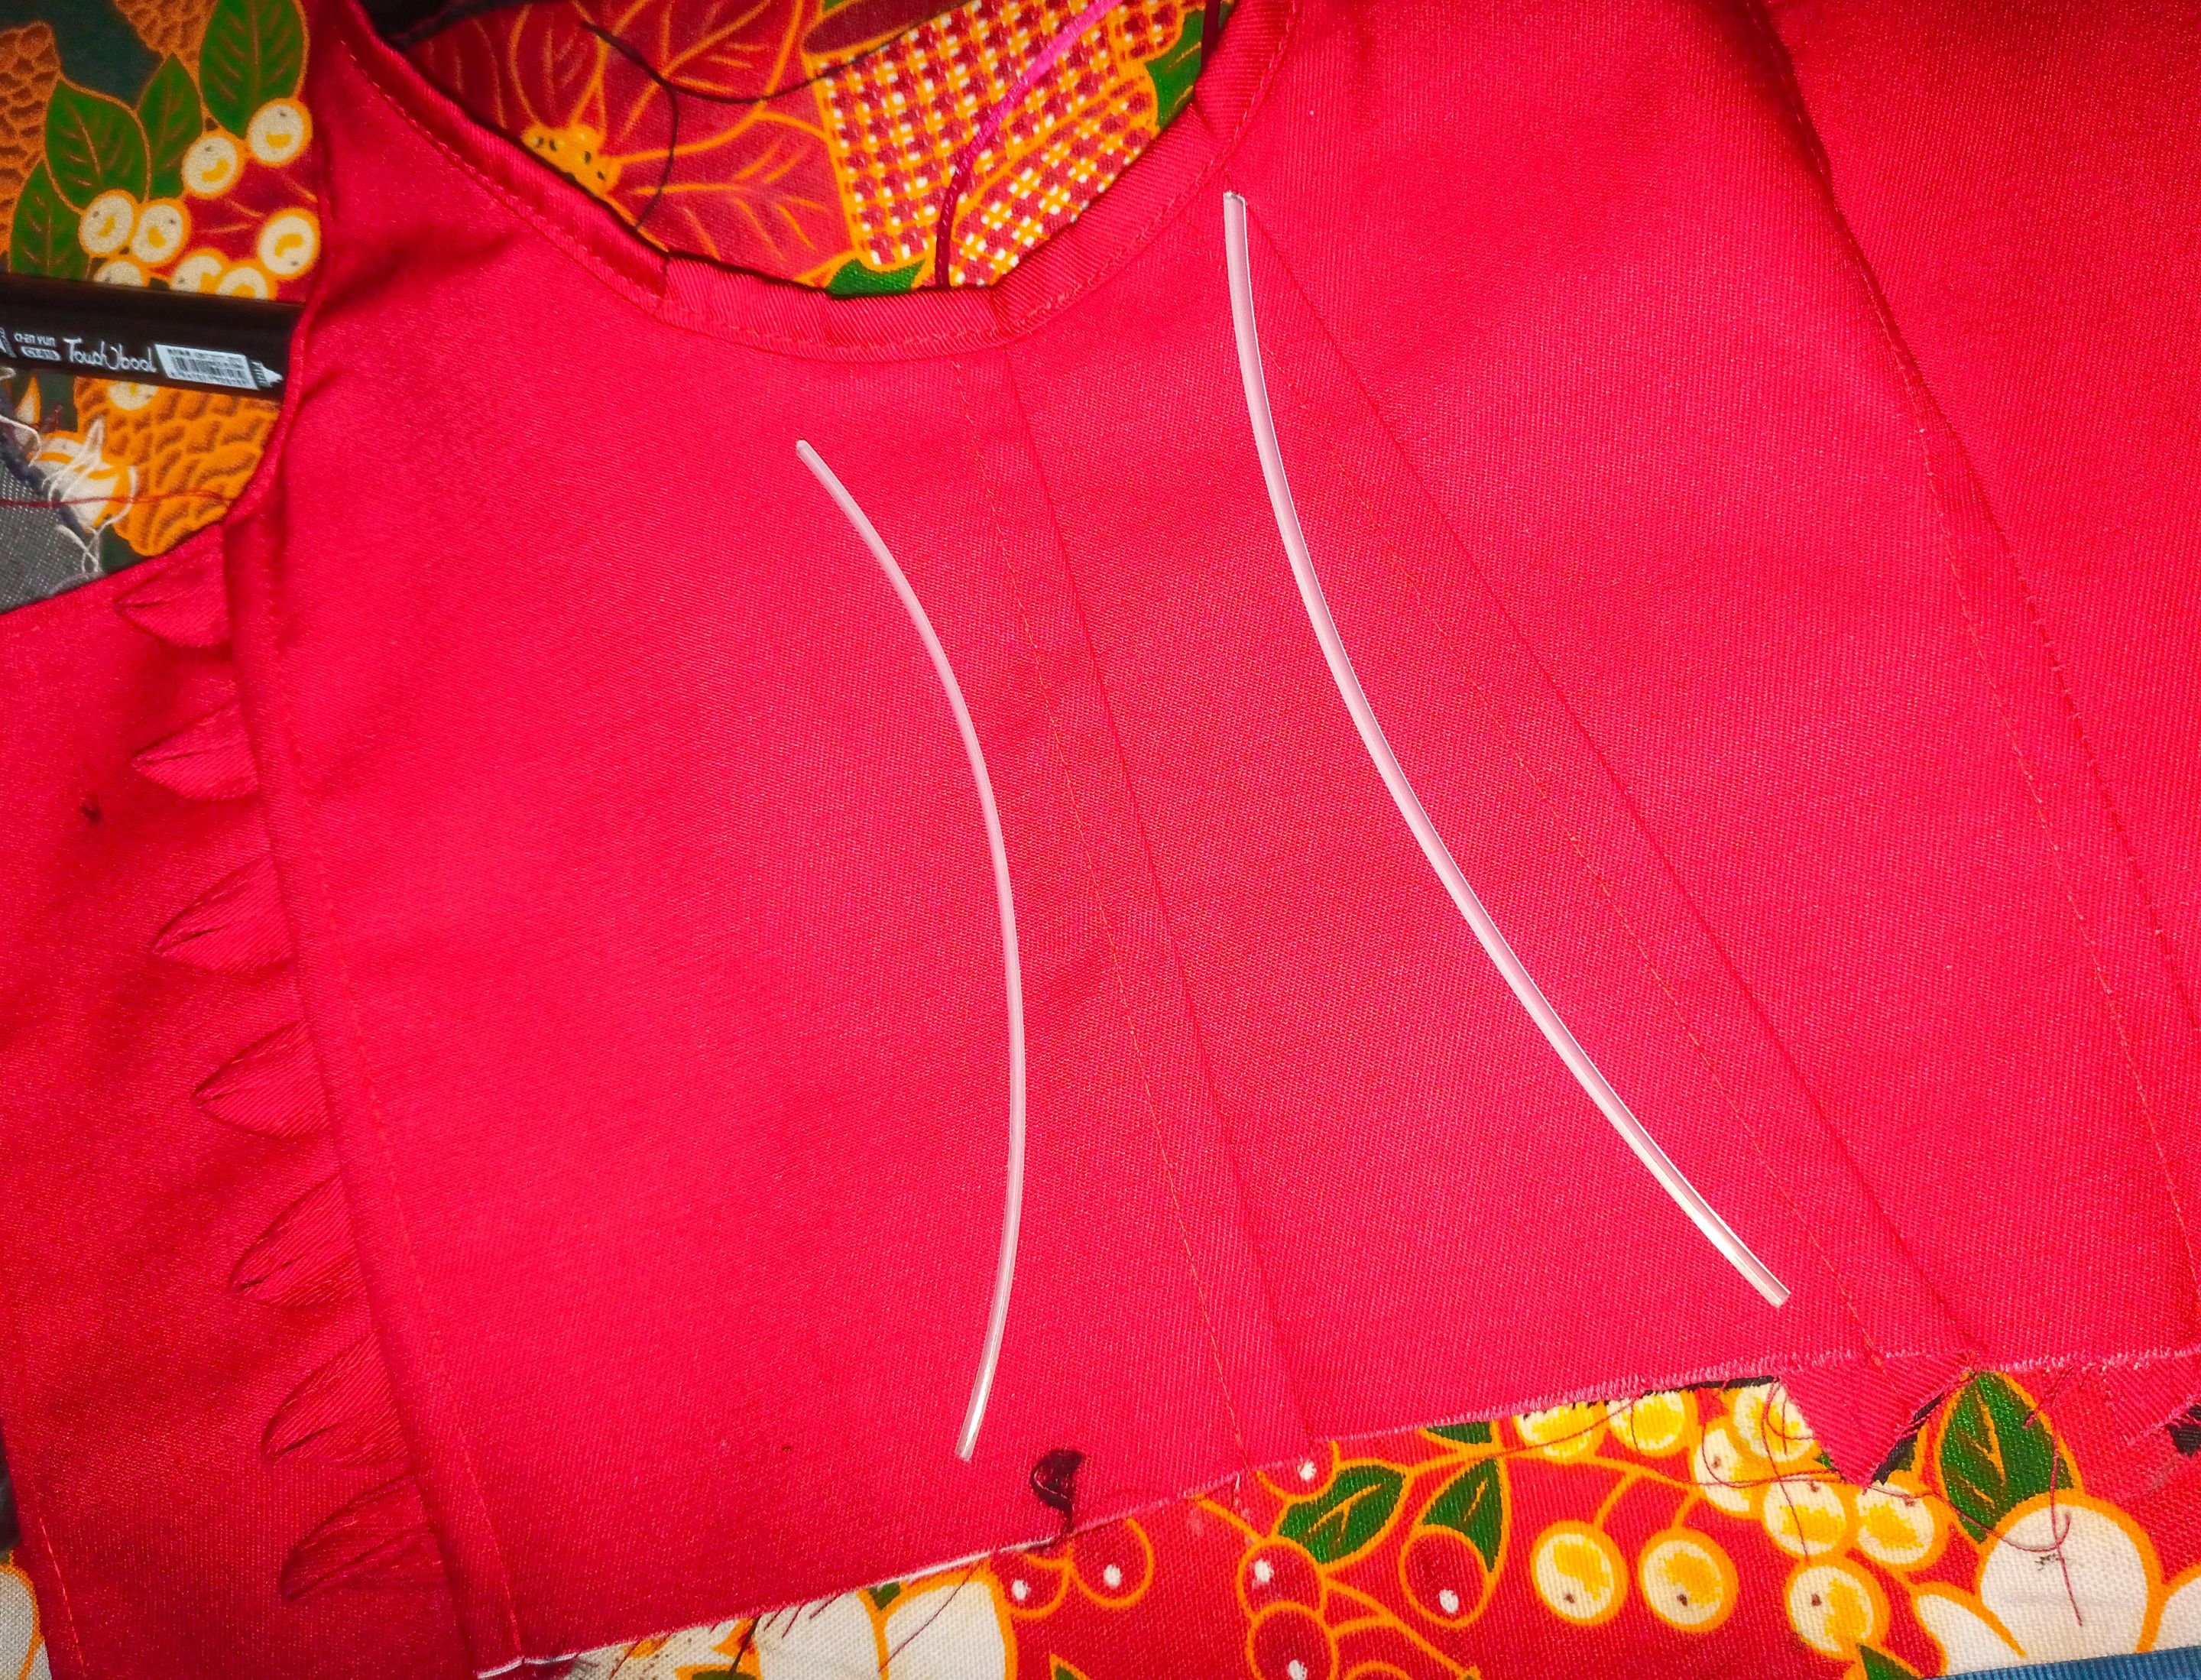
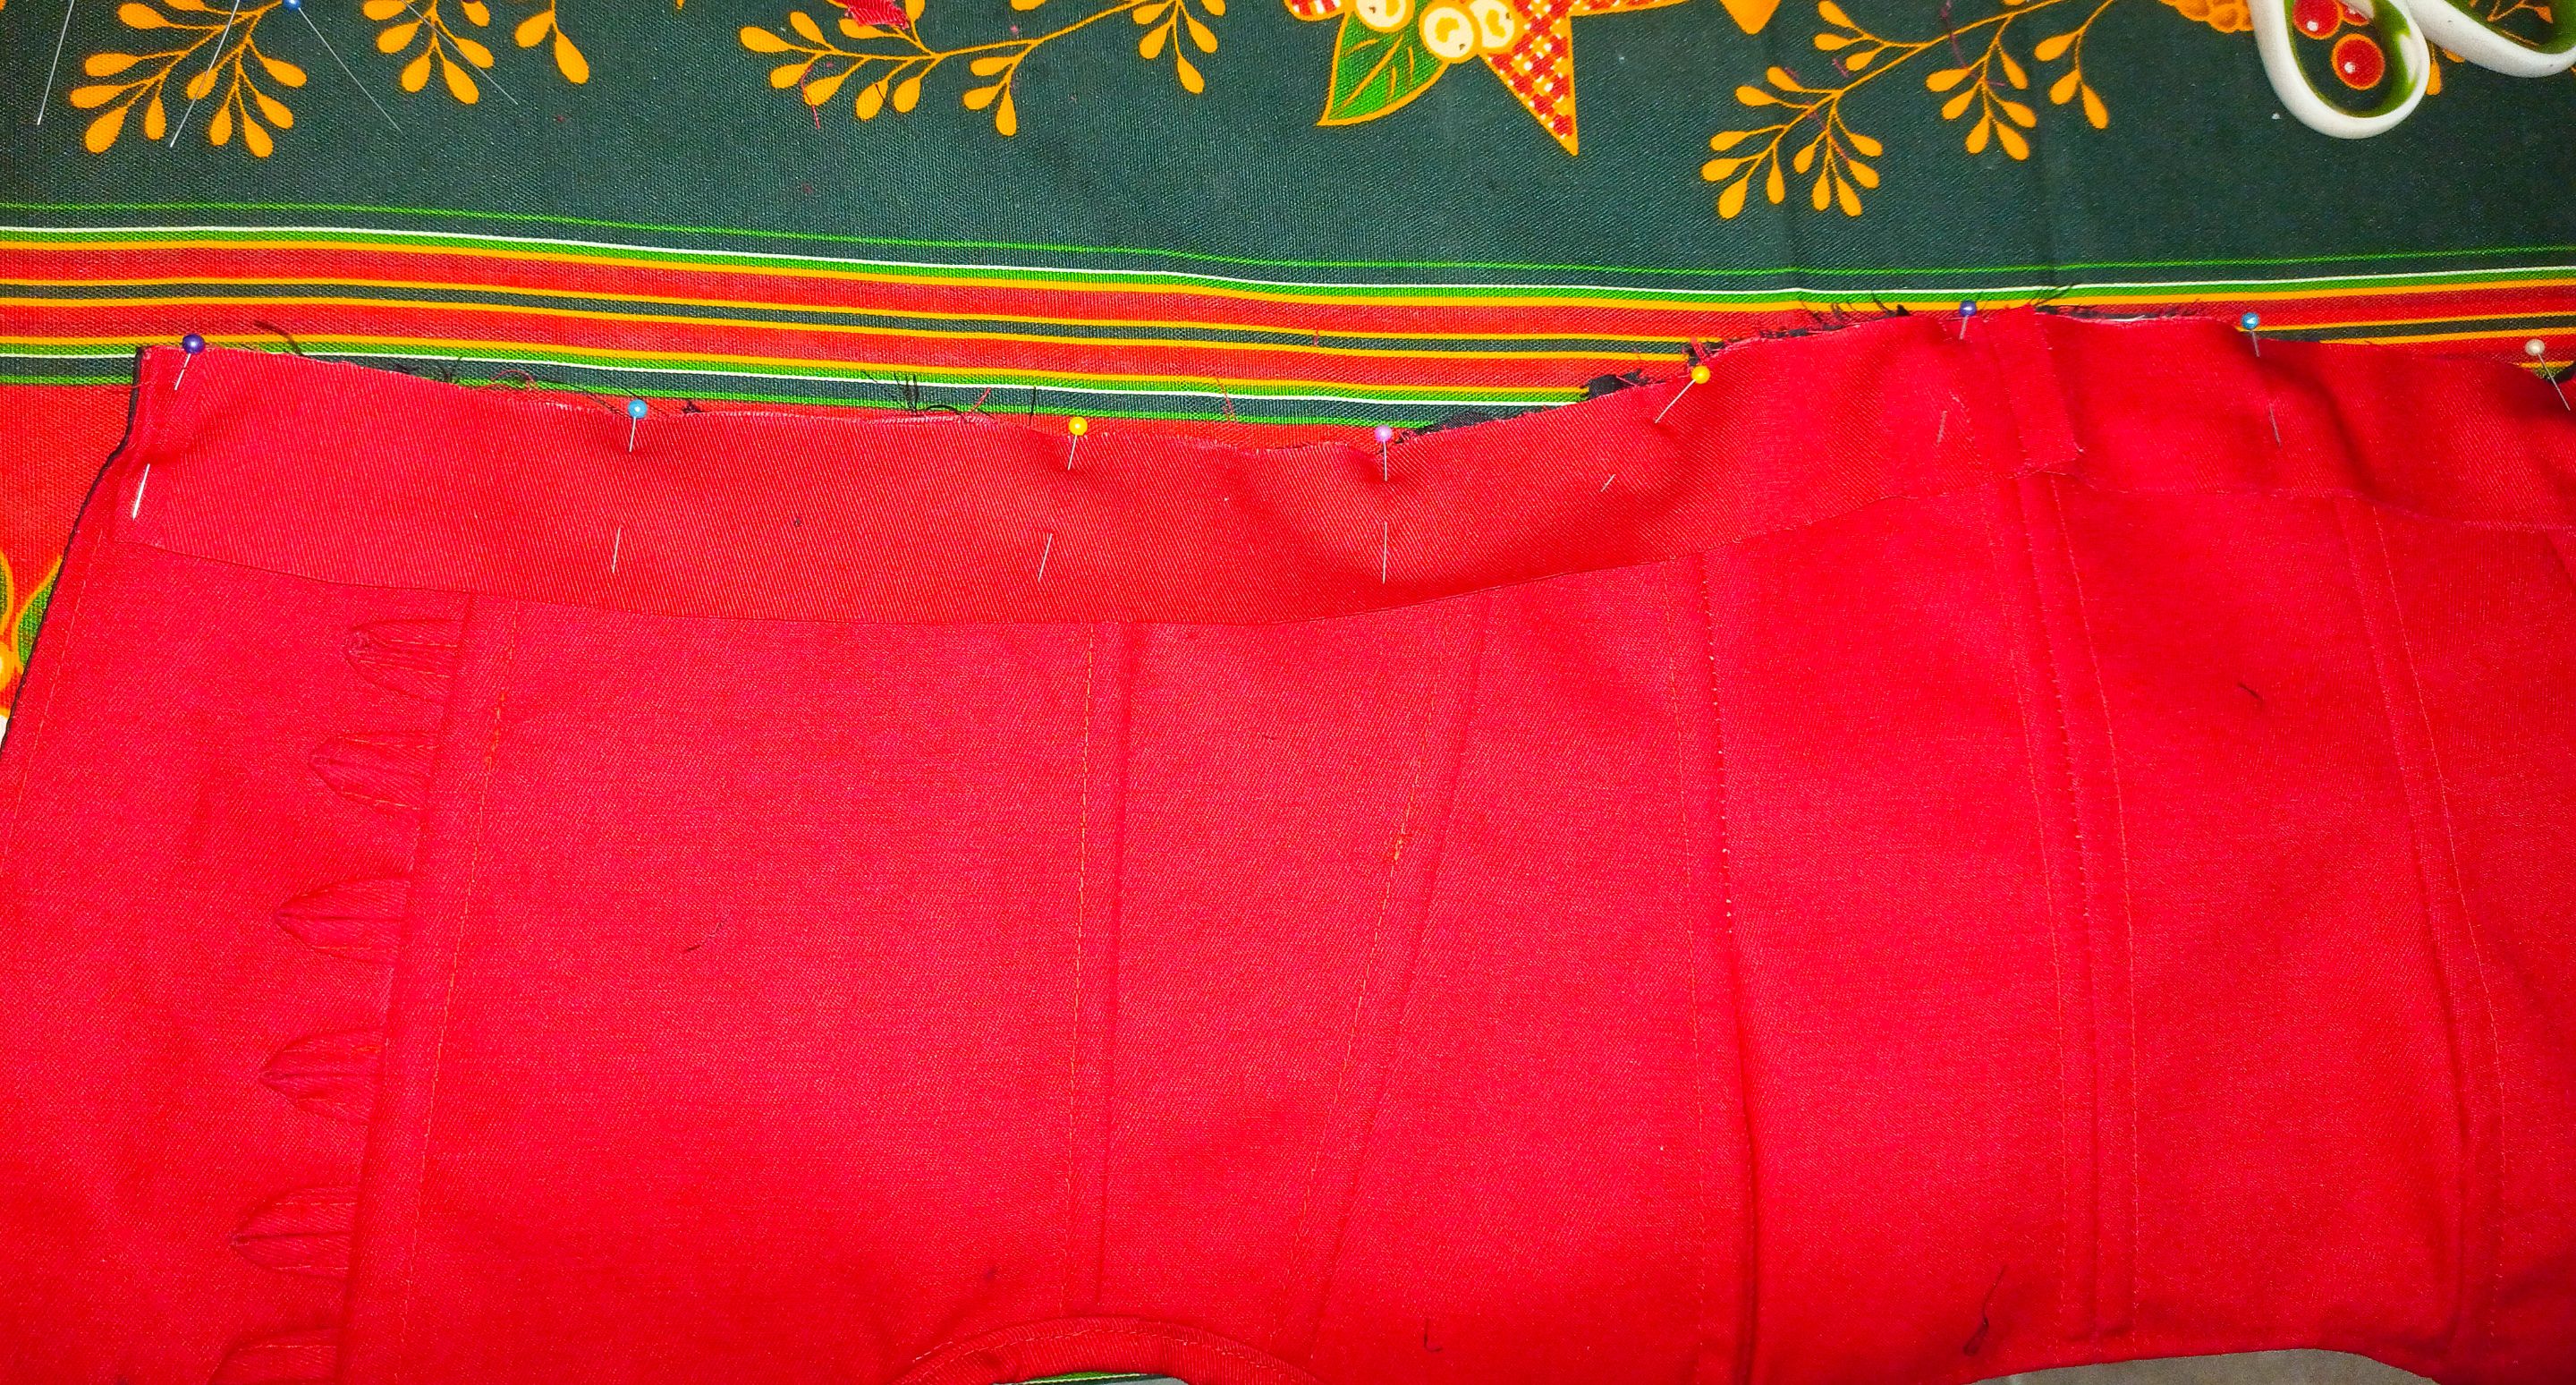
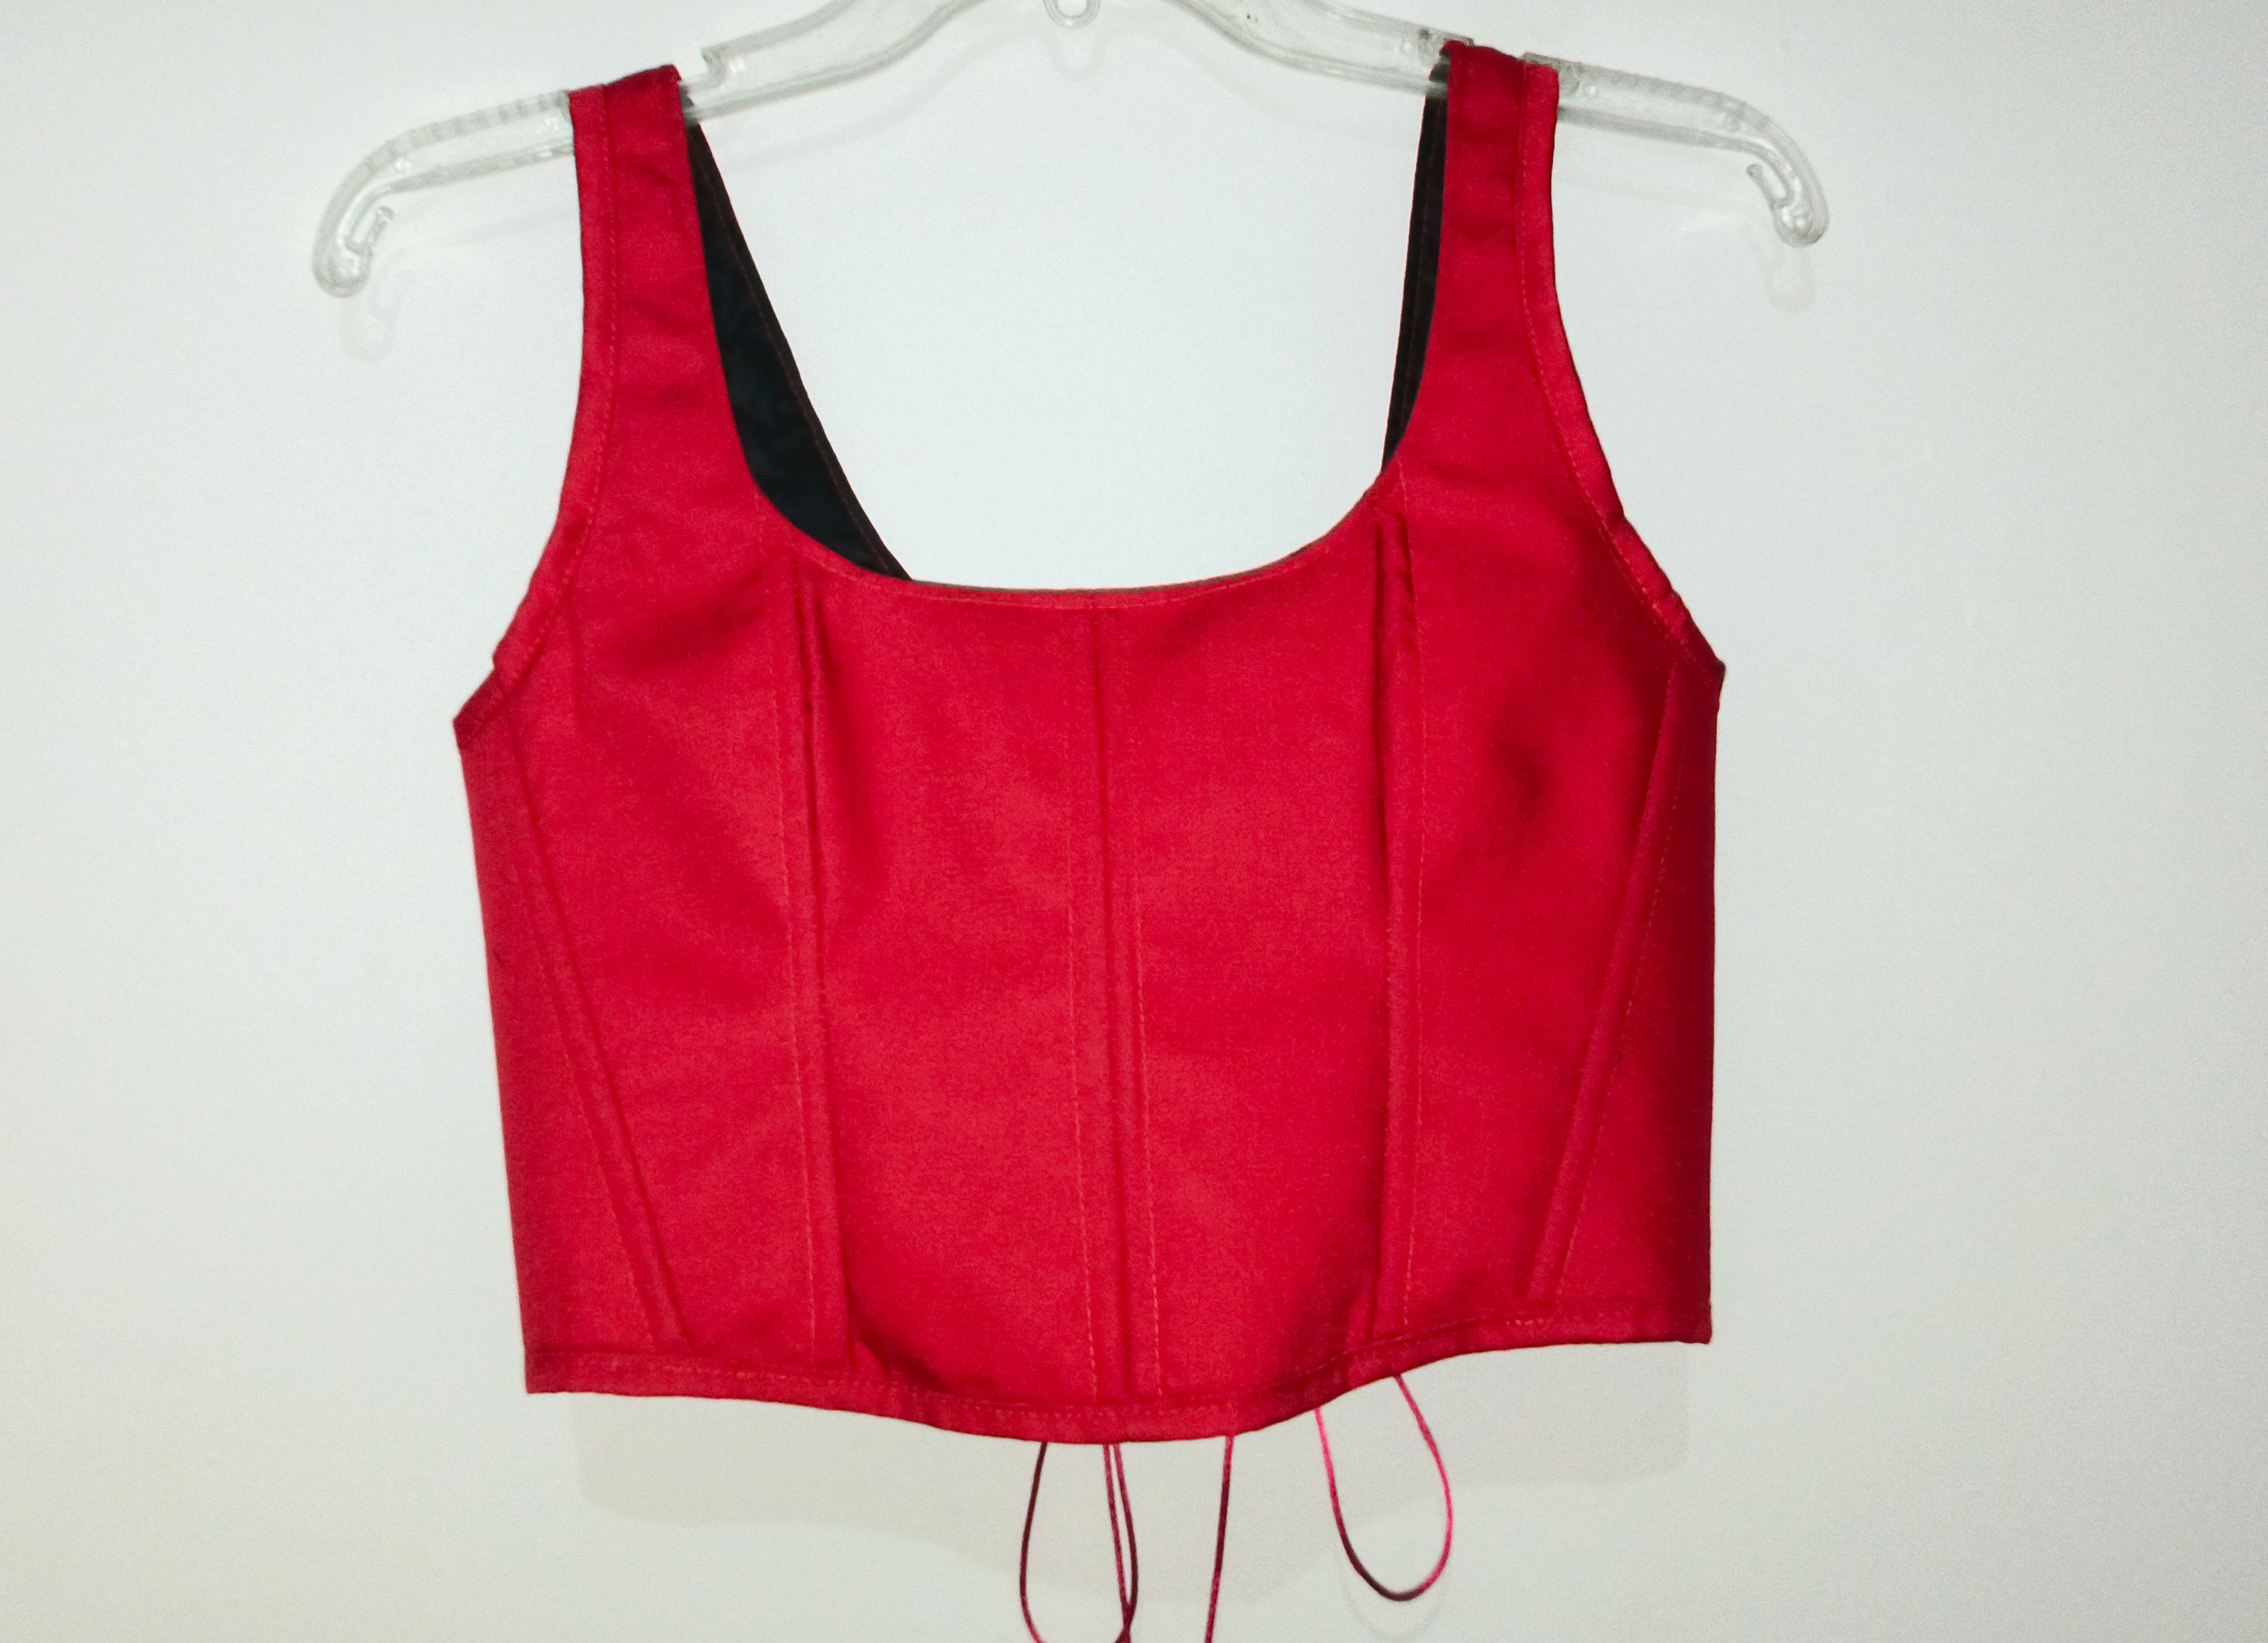
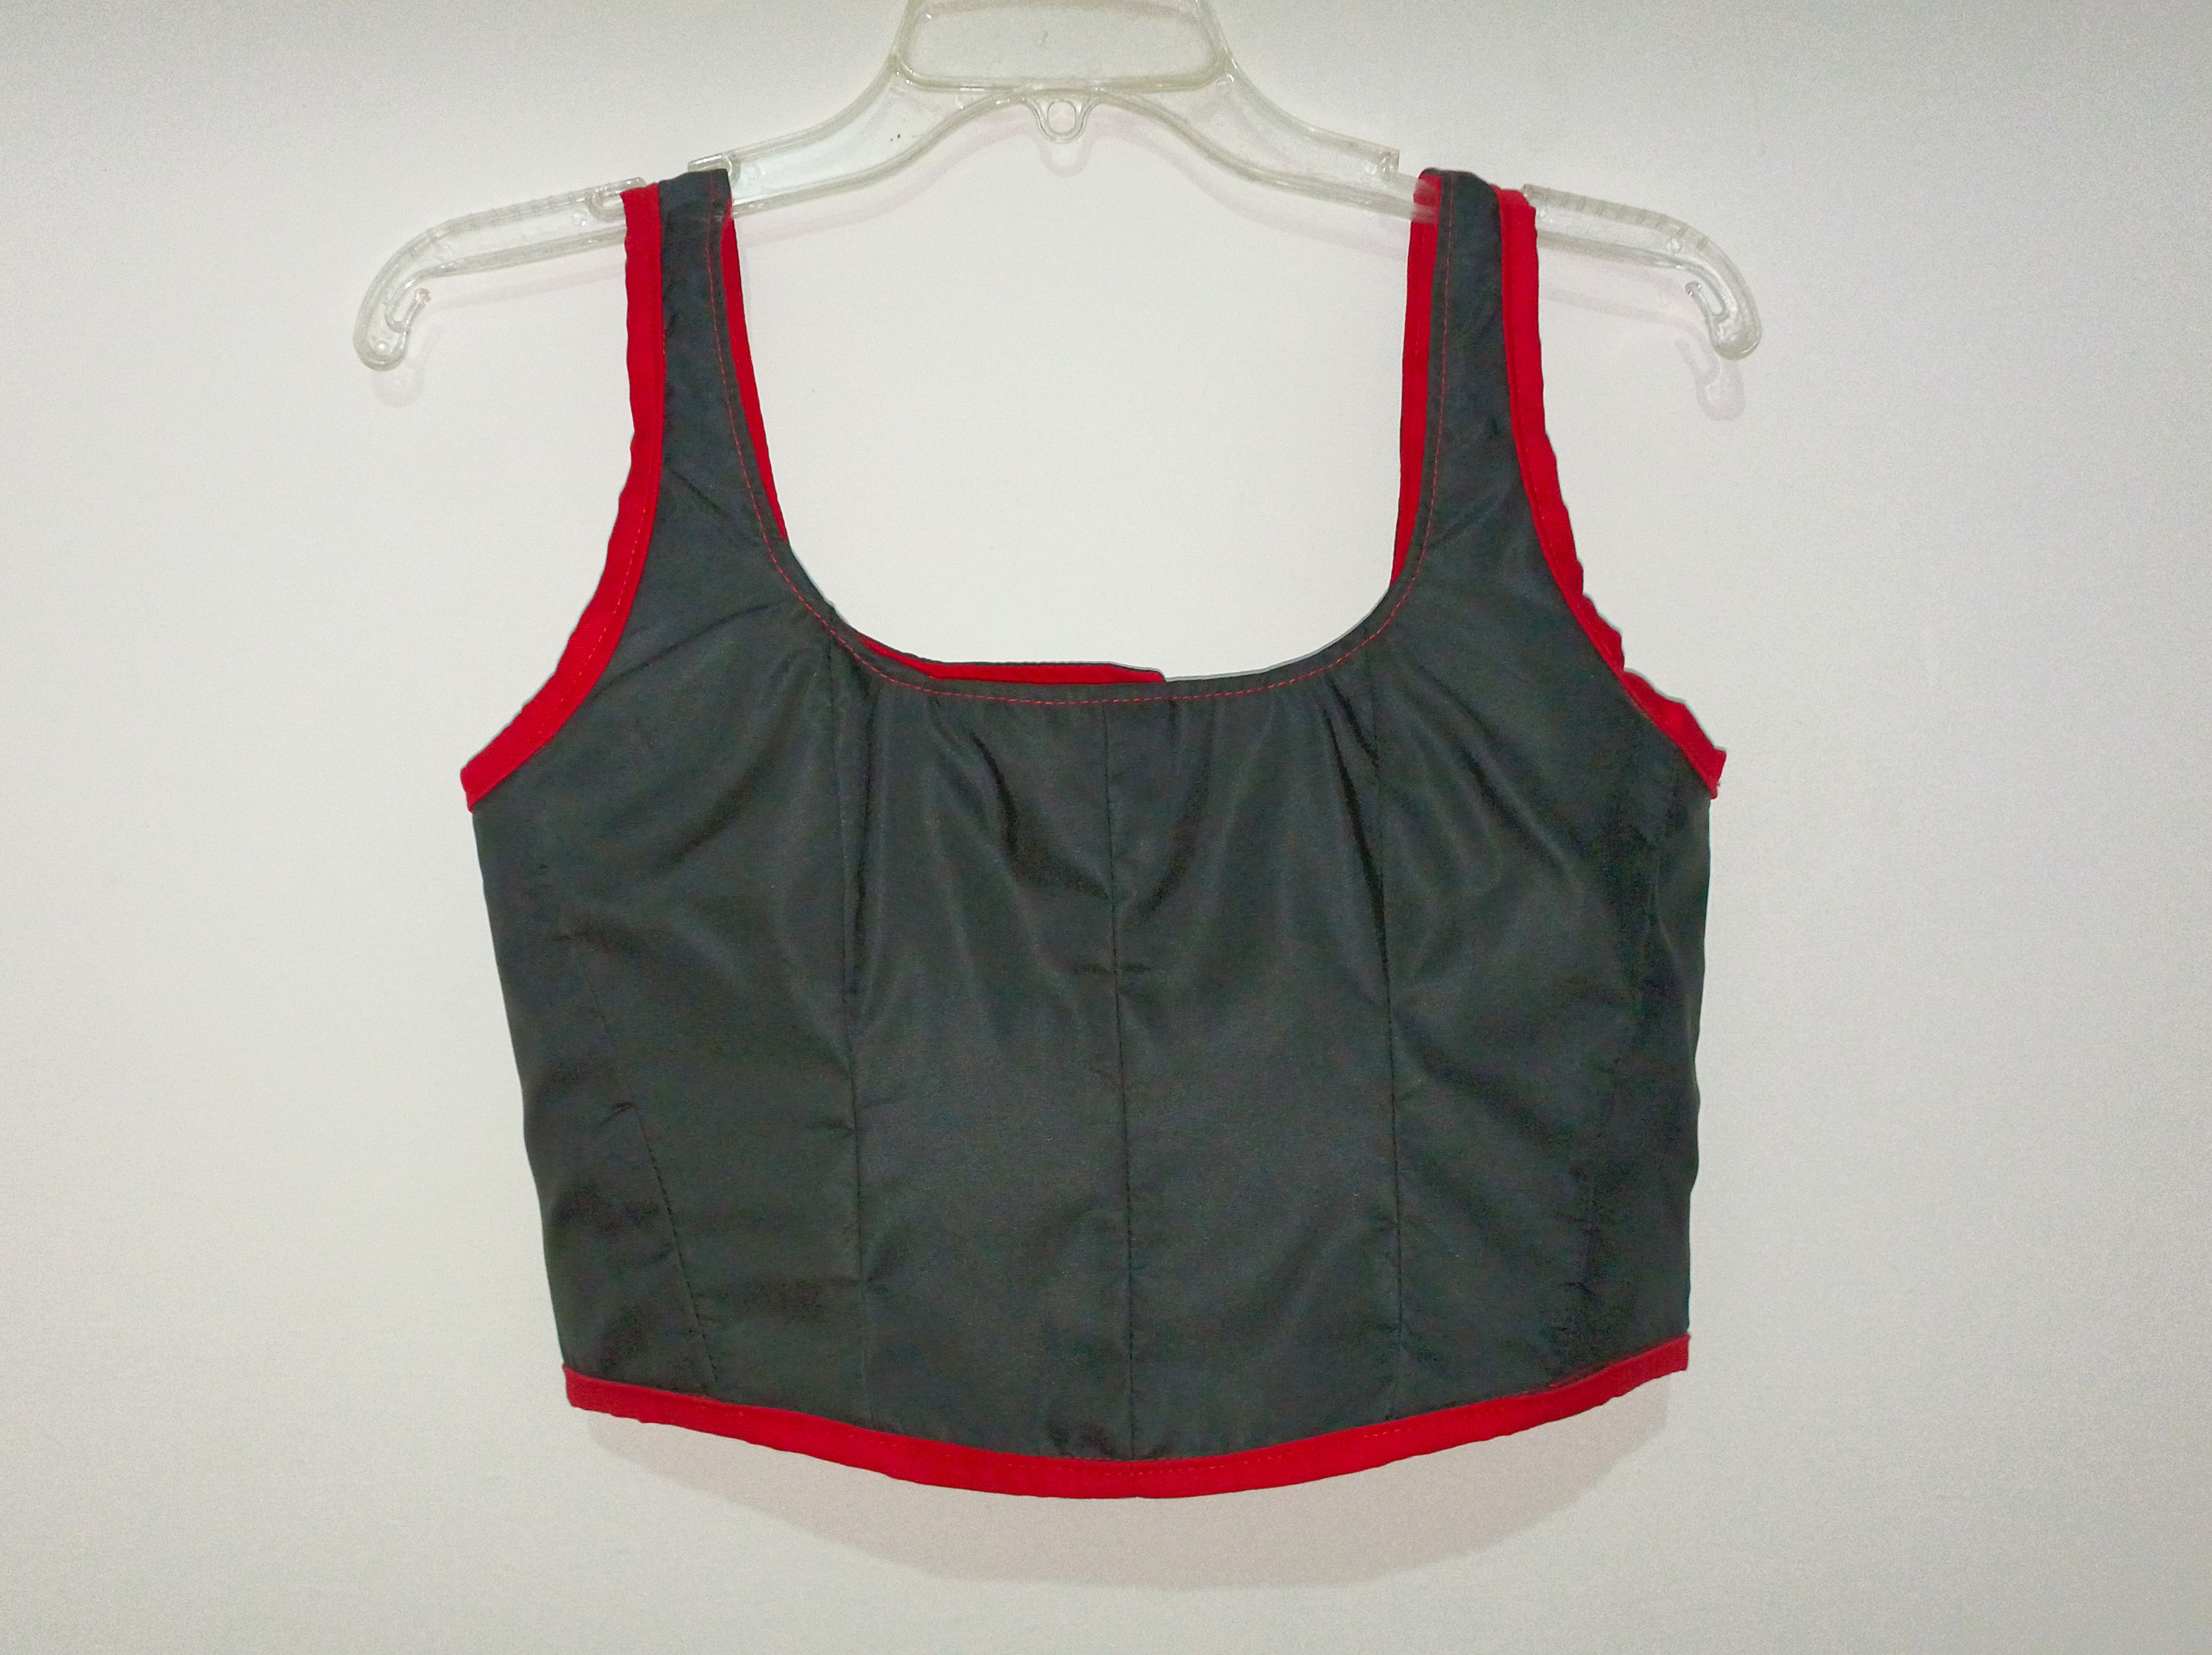
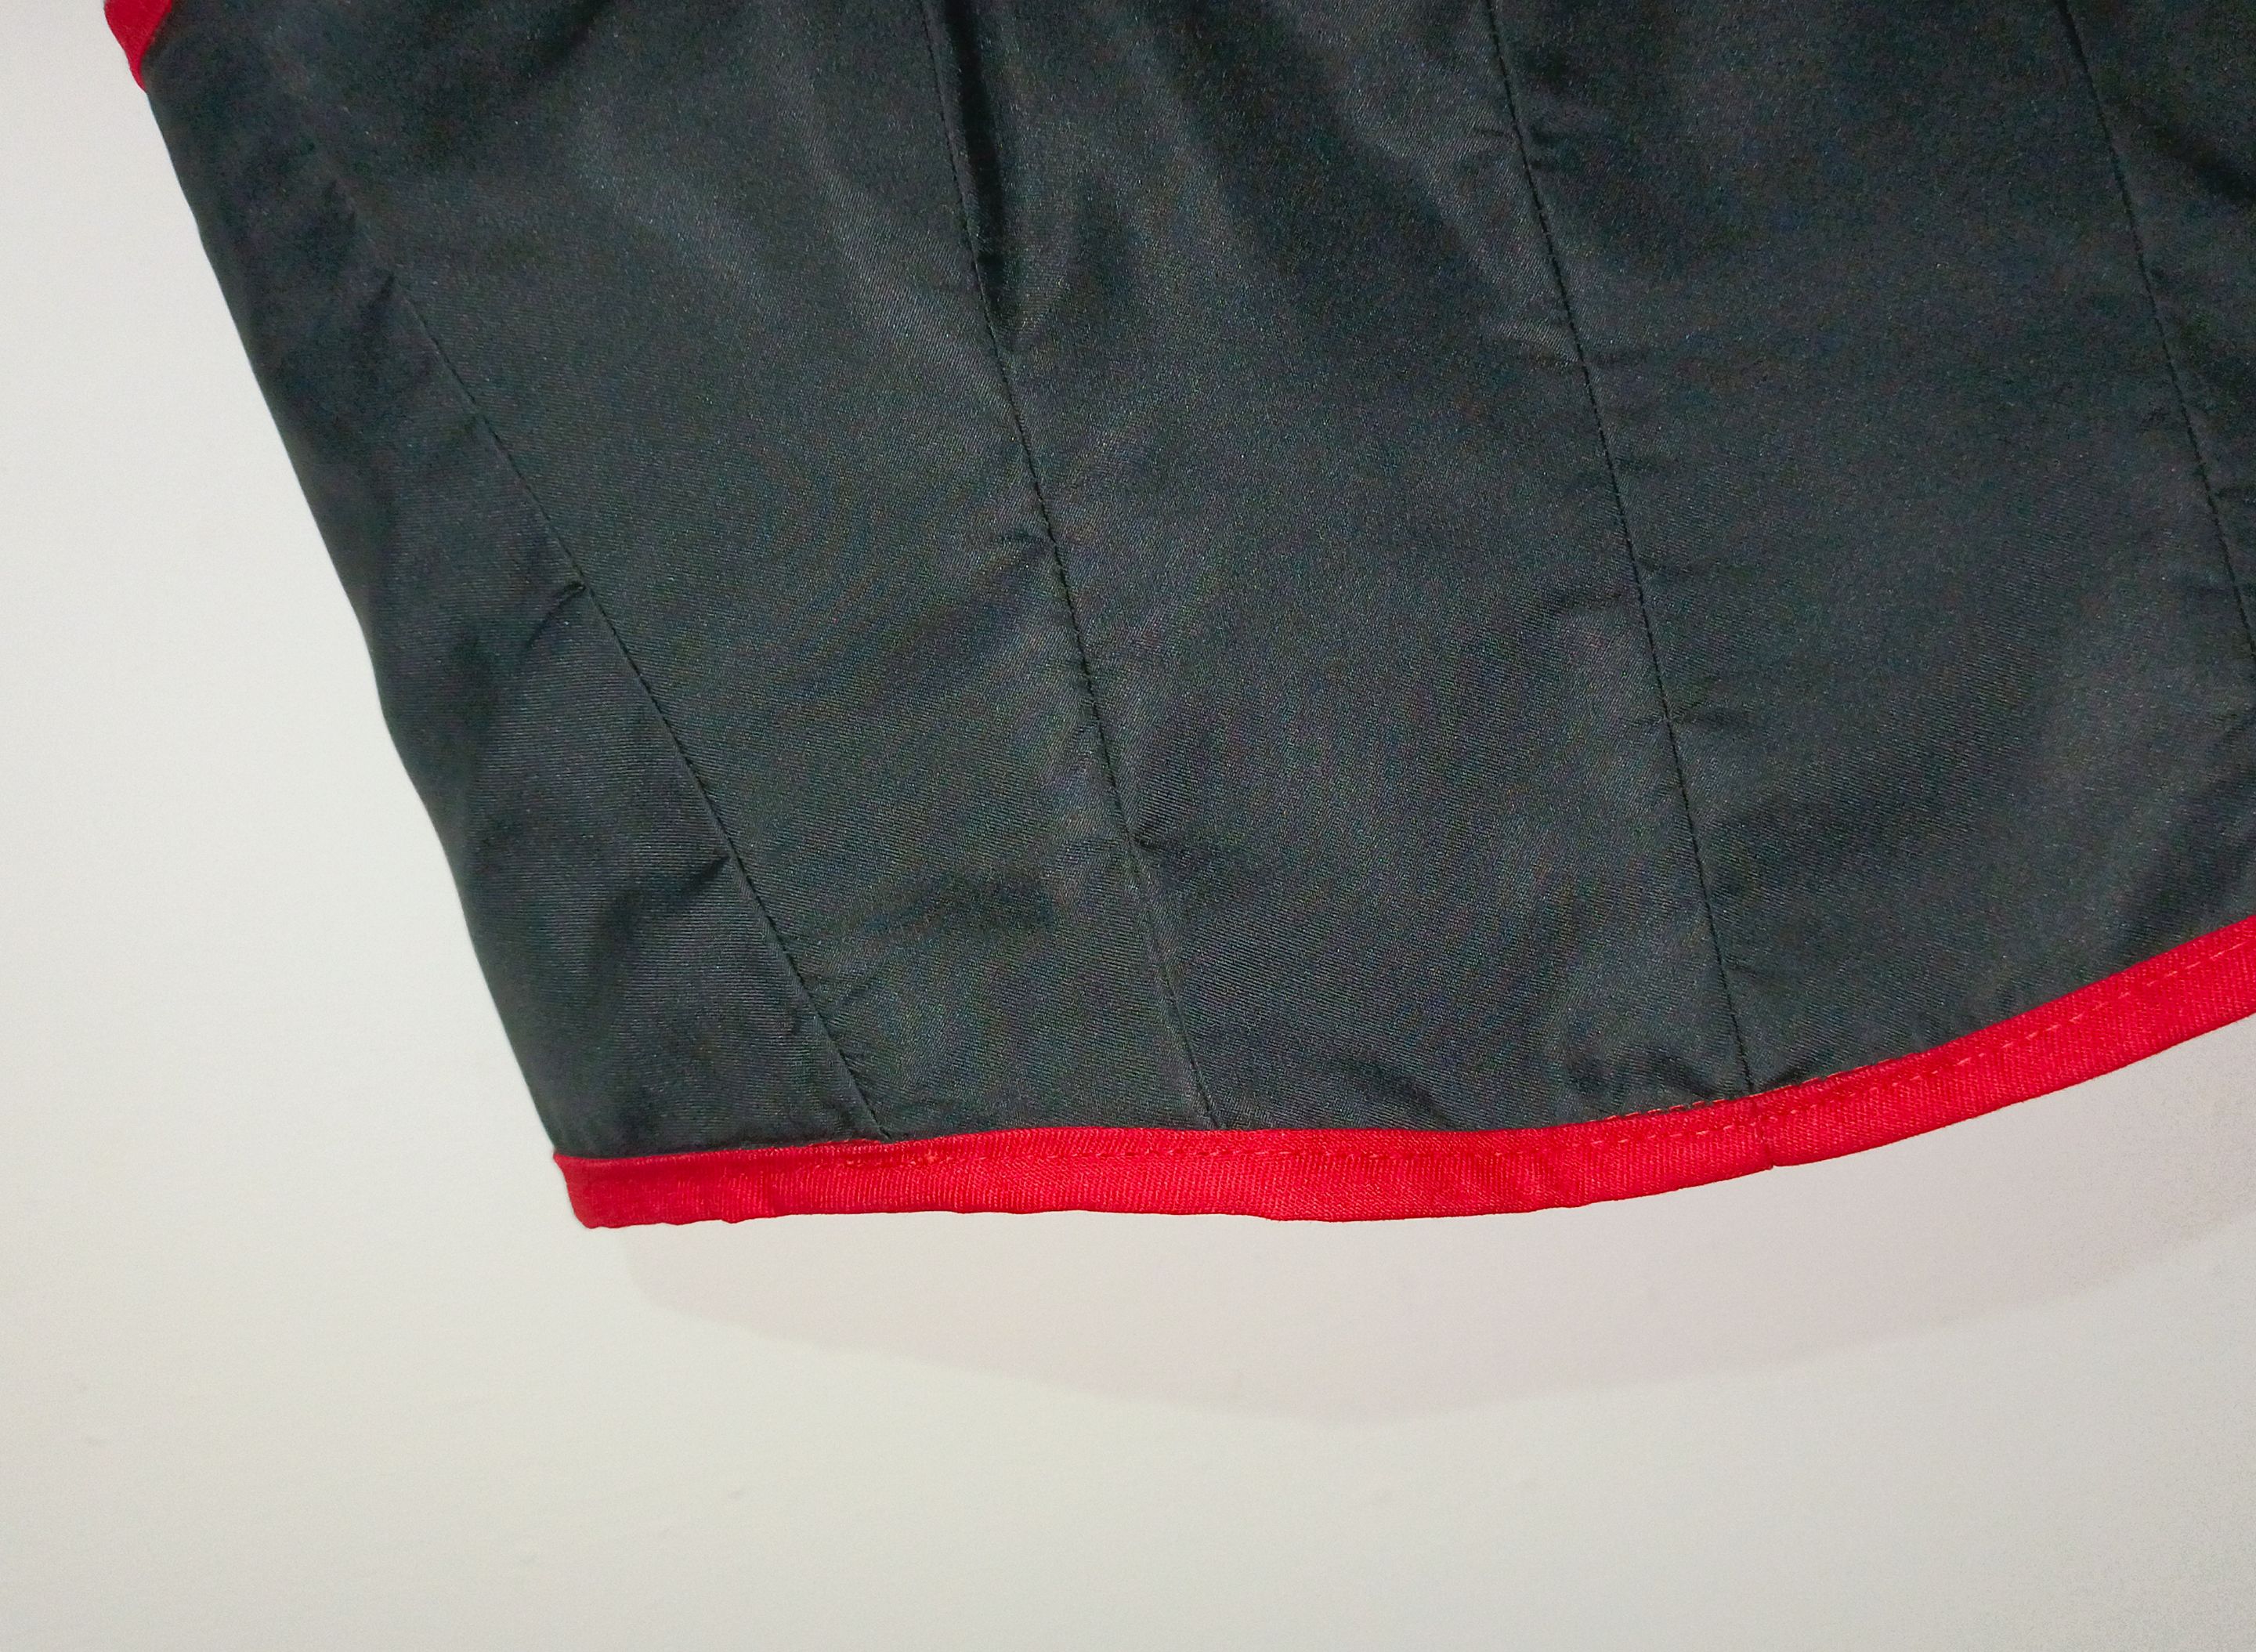
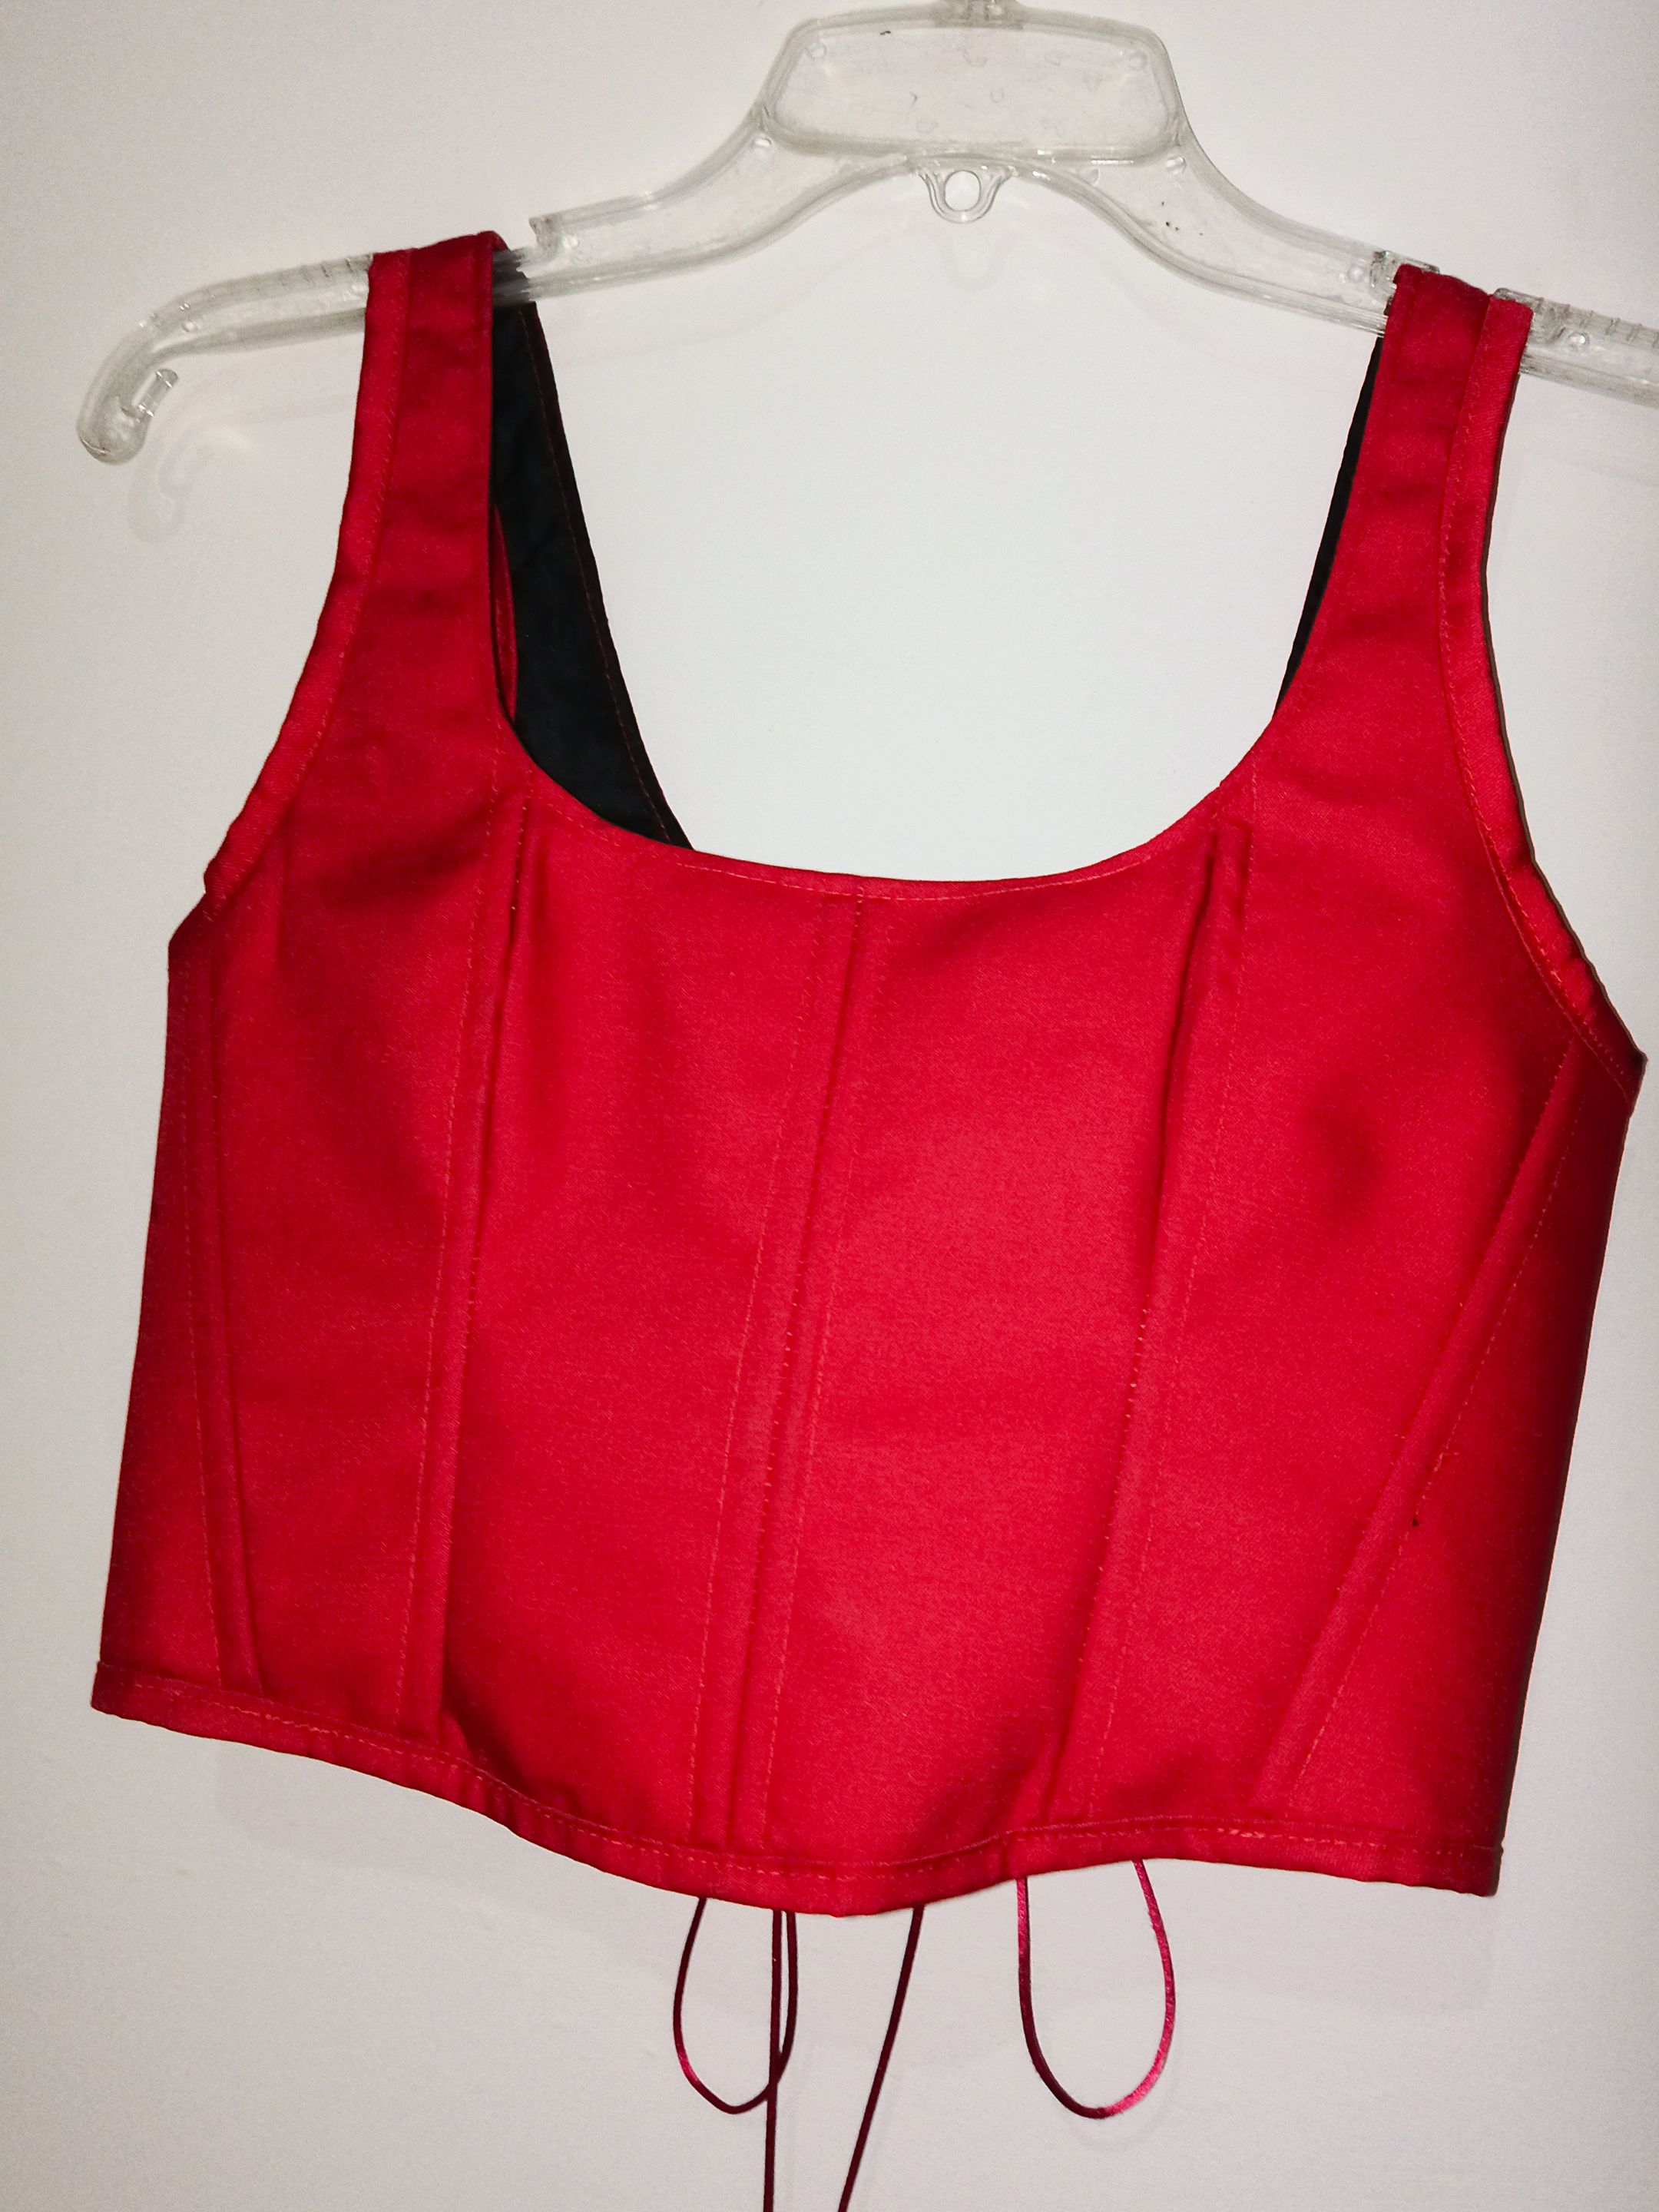
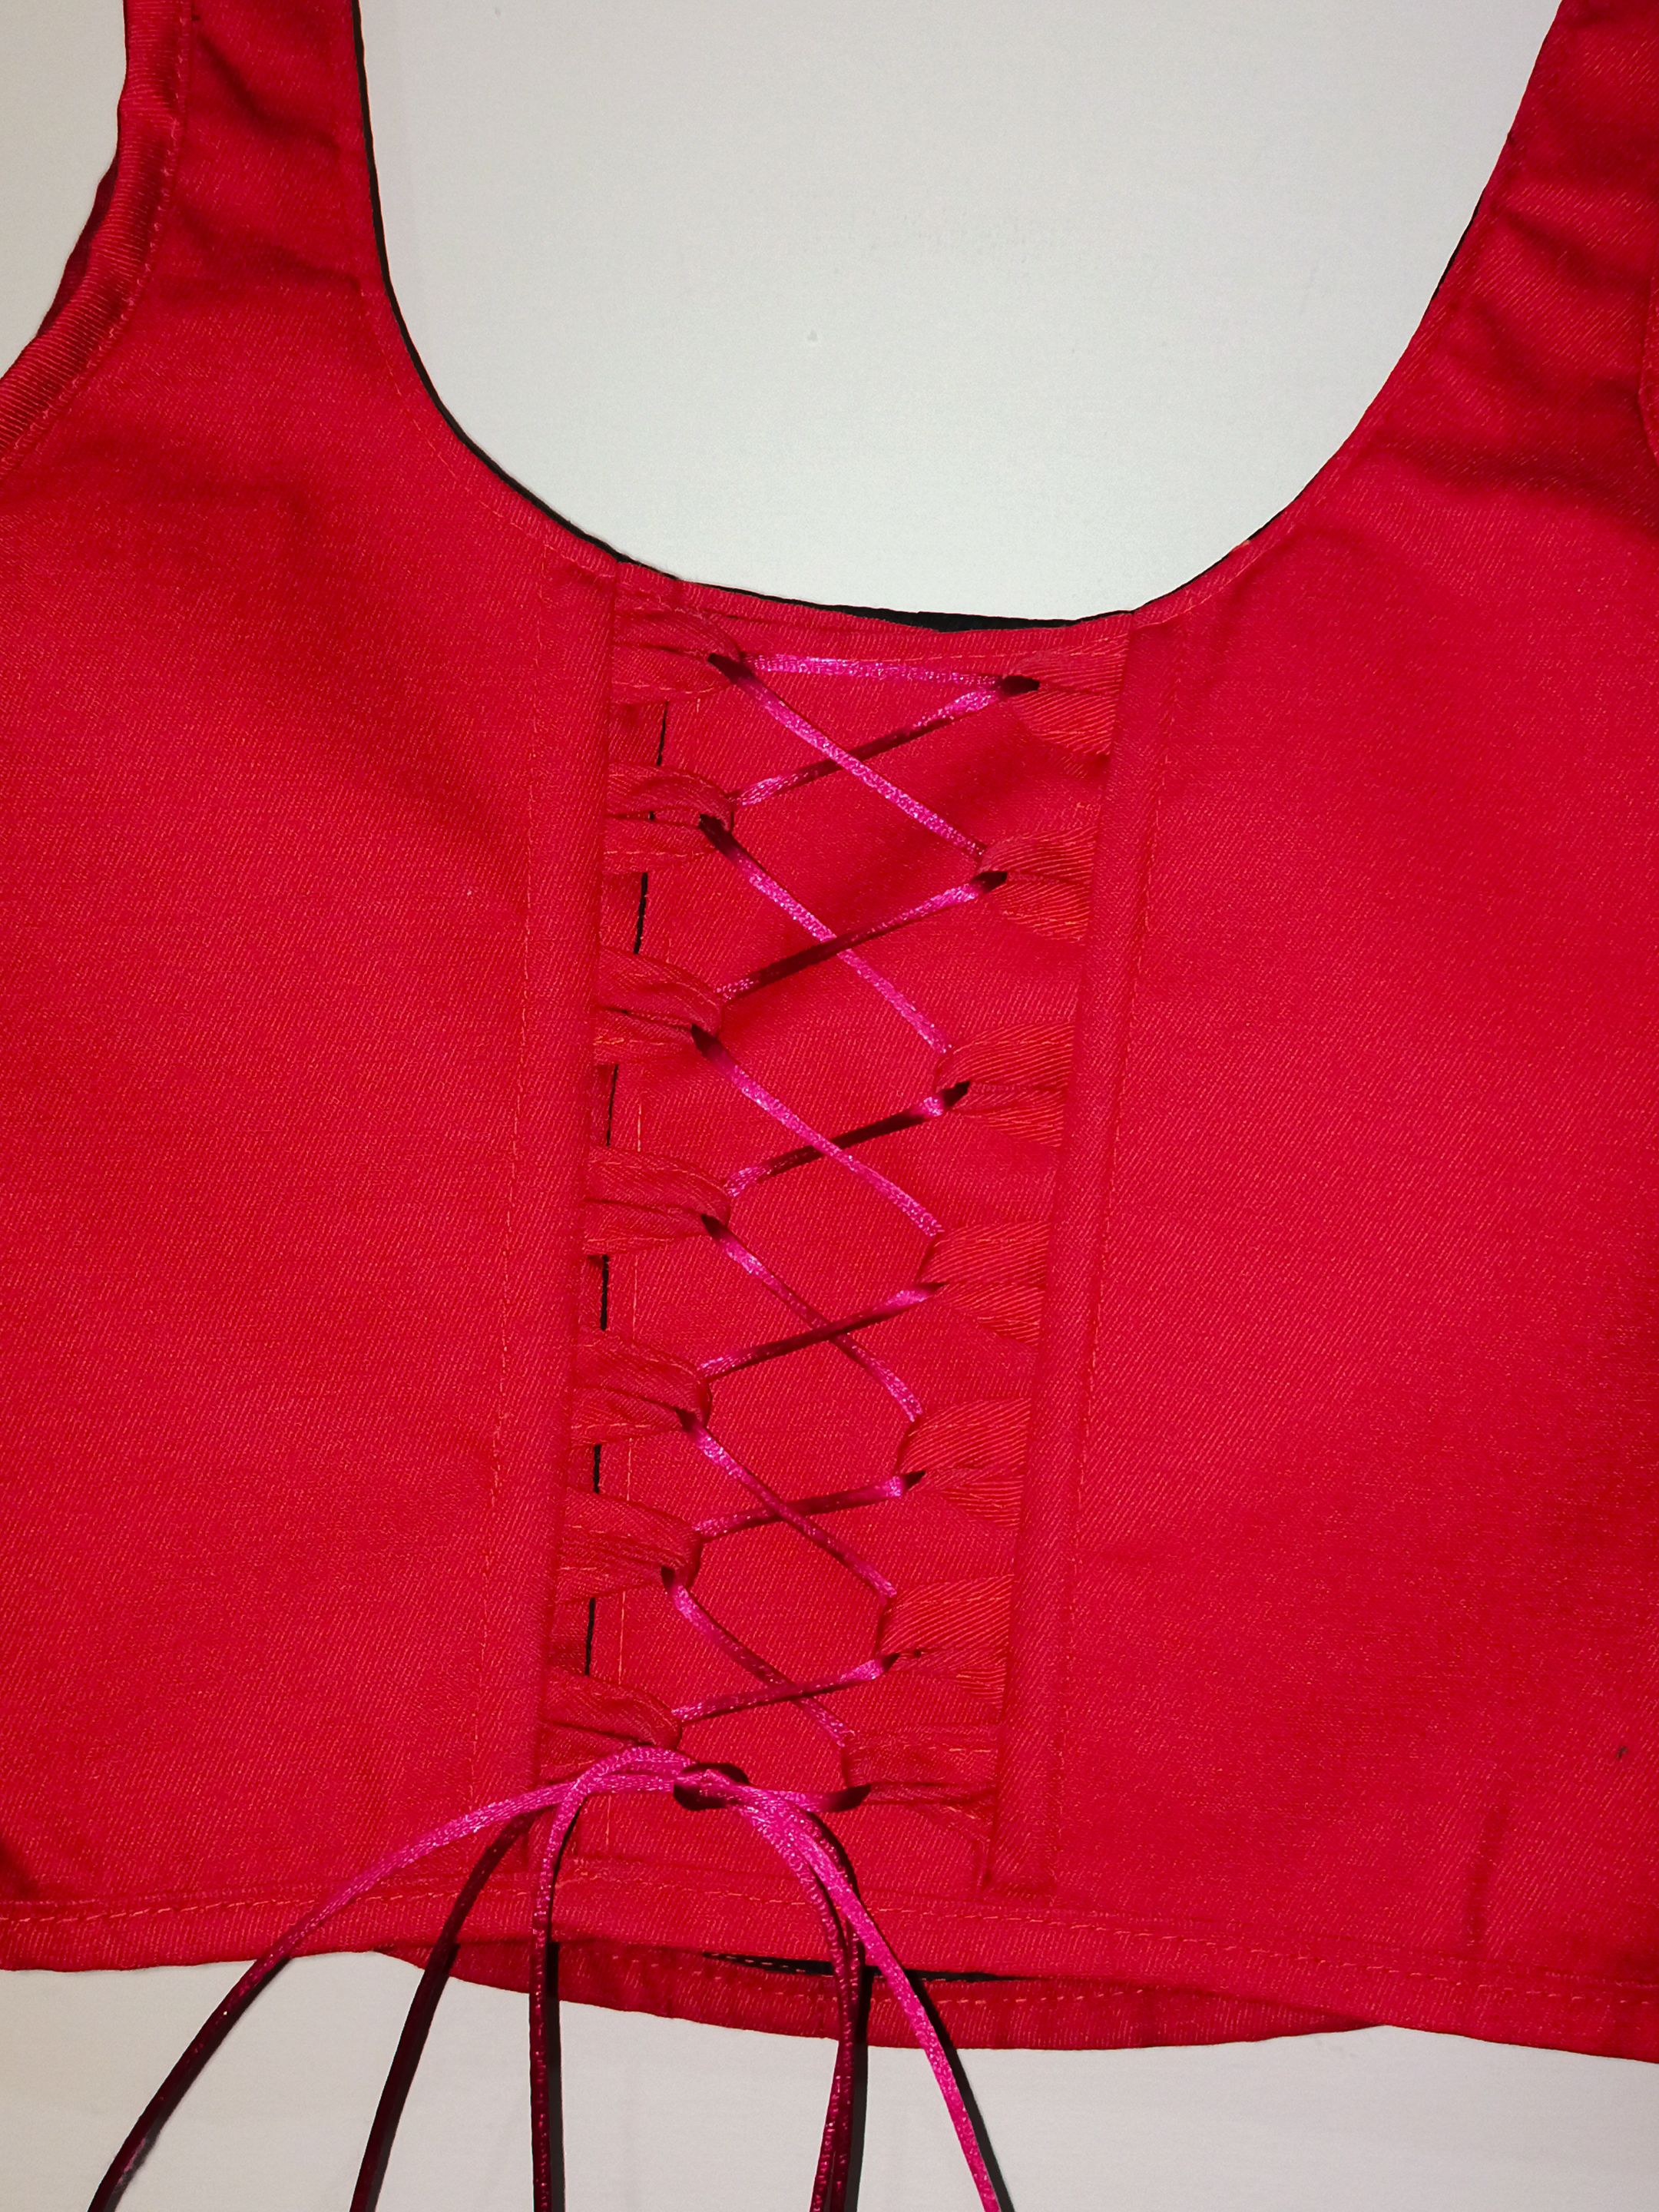
_**Sígueme en mis redes sociales… || Follow me on my social networks…**_ **Instagram Personal:**[@susijackeline](https://instagram.com/susijackeline?igshid=OGQ2MjdiOTE=) **Instagram de Maquillaje:**[@makeup_sm22](https://www.instagram.com/makeup_sm22/) **Twitter:**[@kiut_variedades](https://twitter.com/kiut_variedades?lang=es) --- Original Content All Images are my Property [Translator DeepL]( https://www.deepl.com/es/translator)

#needleworkmonday #sewing #tutorial #corset #spanish #handmade #making #neoxian #graduation
Payout: 0.000 HBD
Votes: 247
More interactions (upvote, reblog, reply) coming soon.