Hola mi gente hermosa ✨💕!
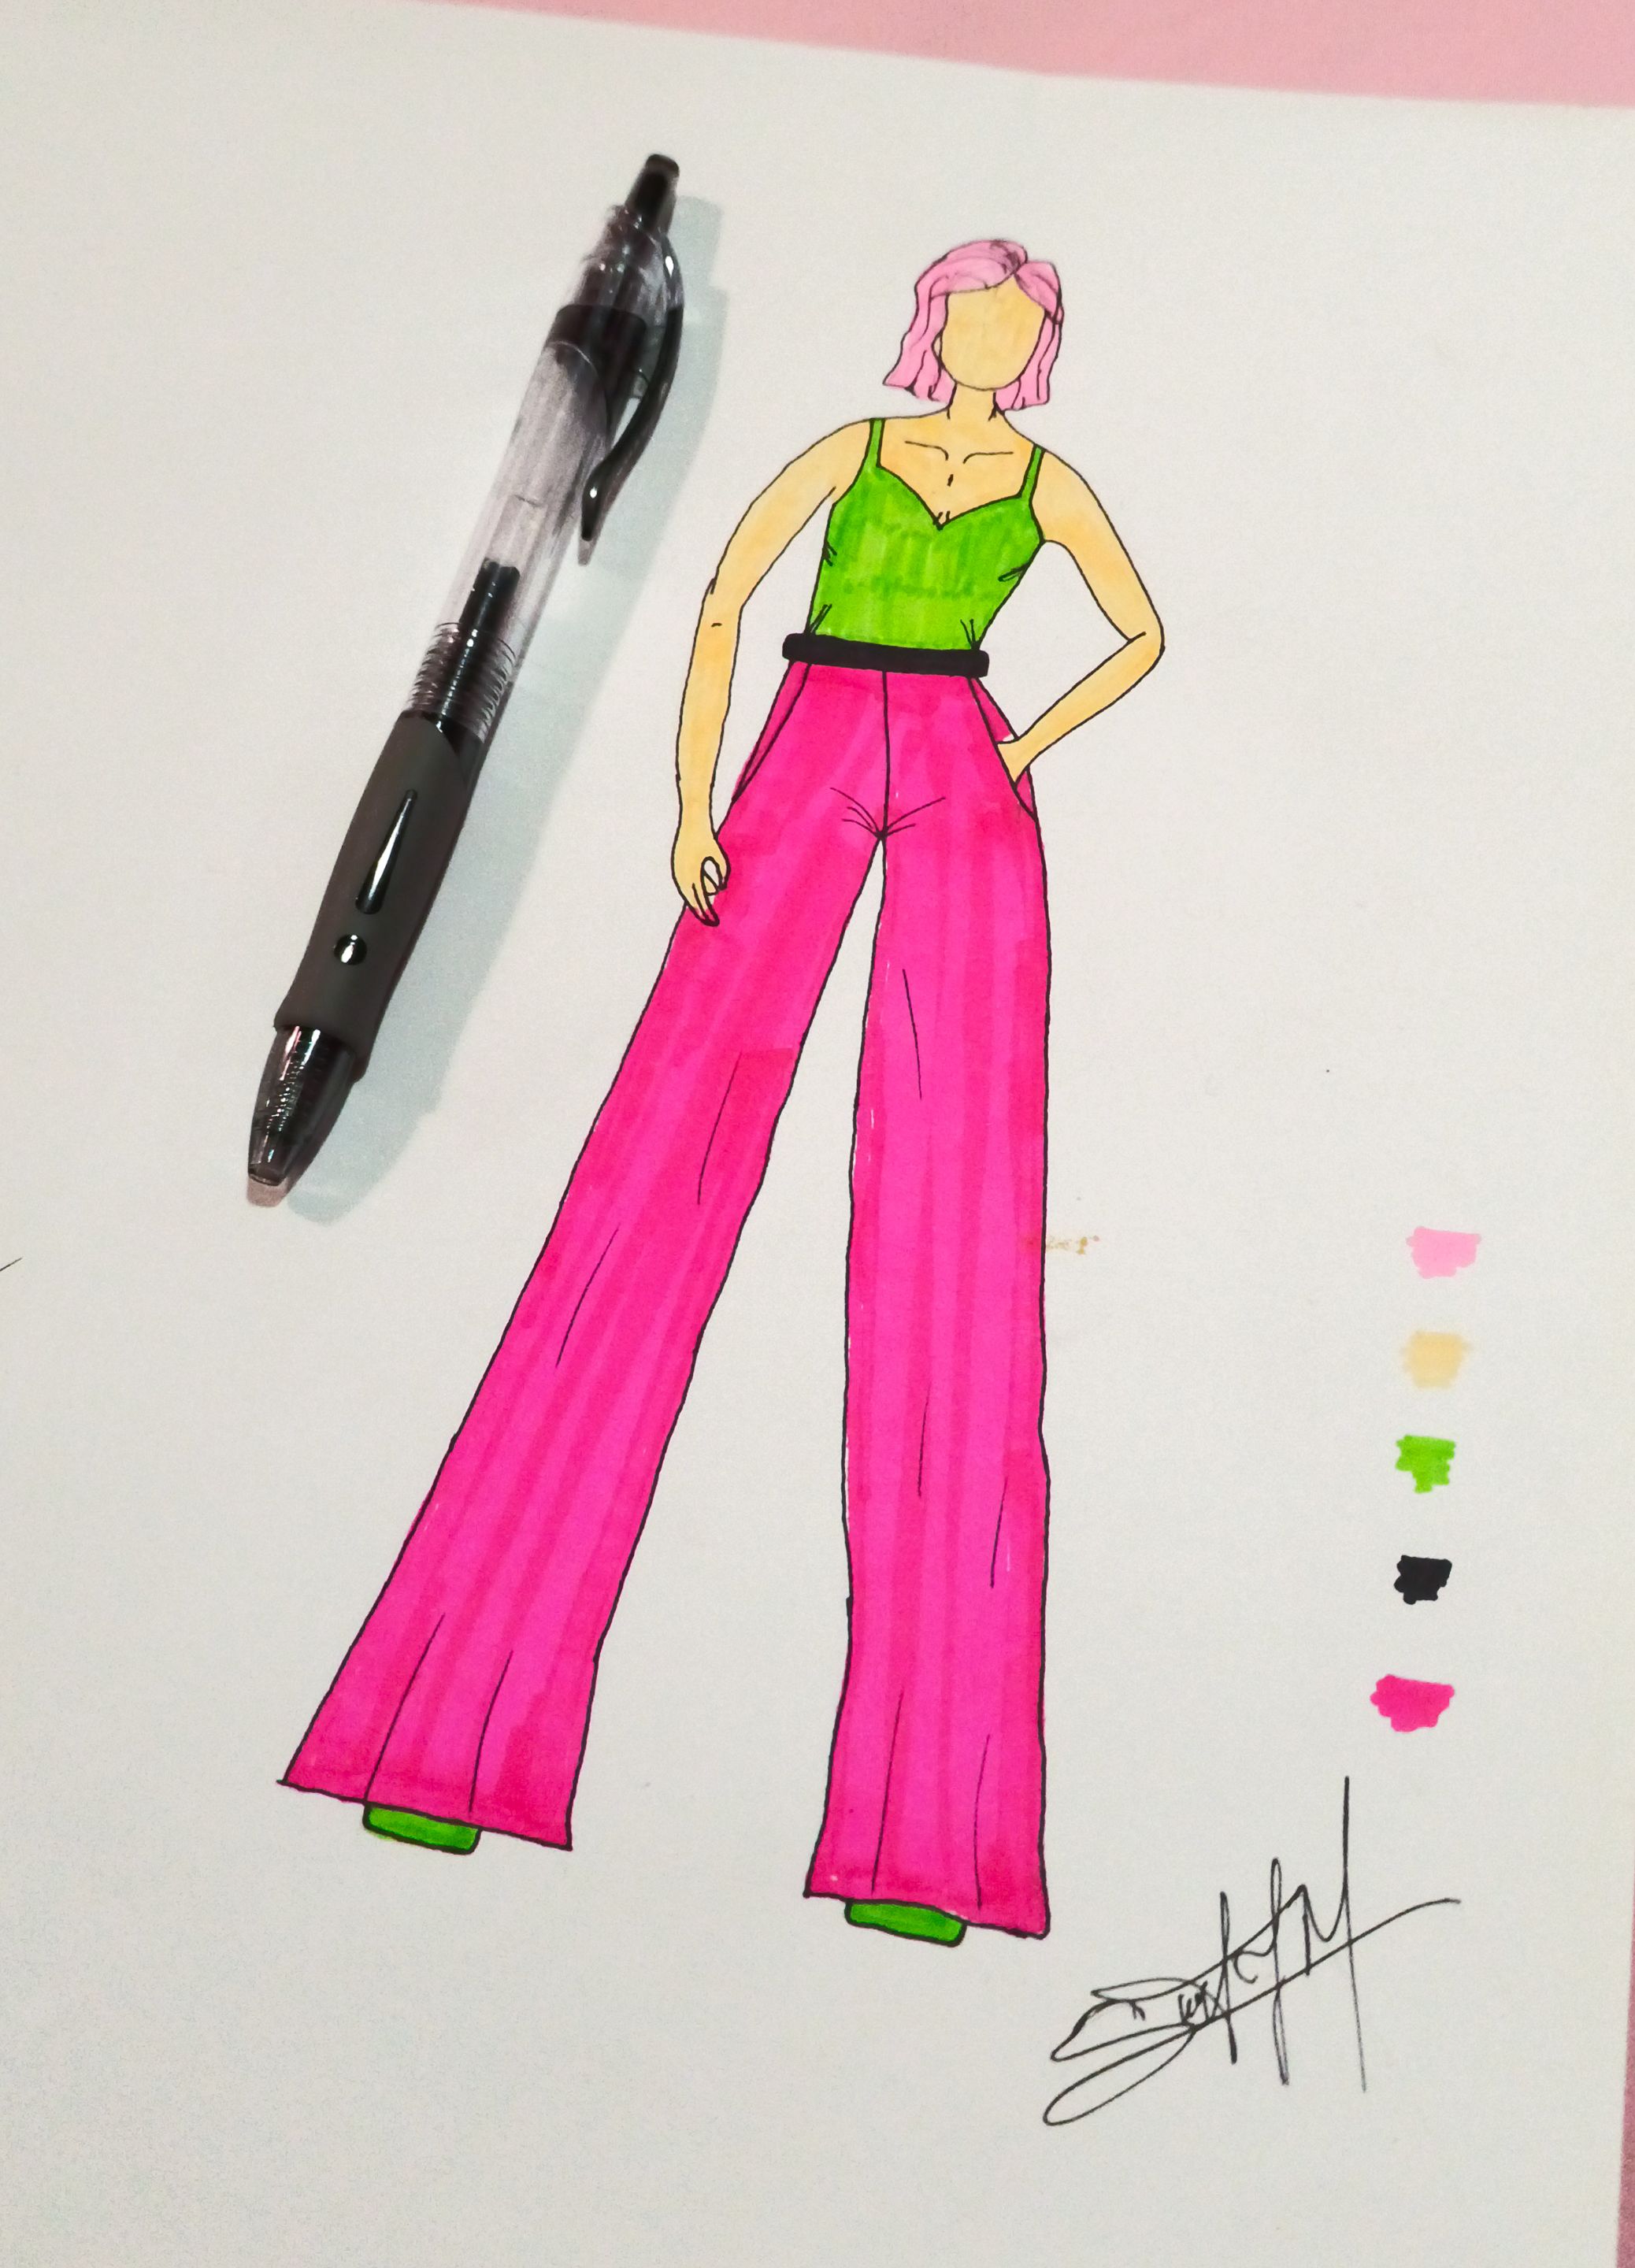
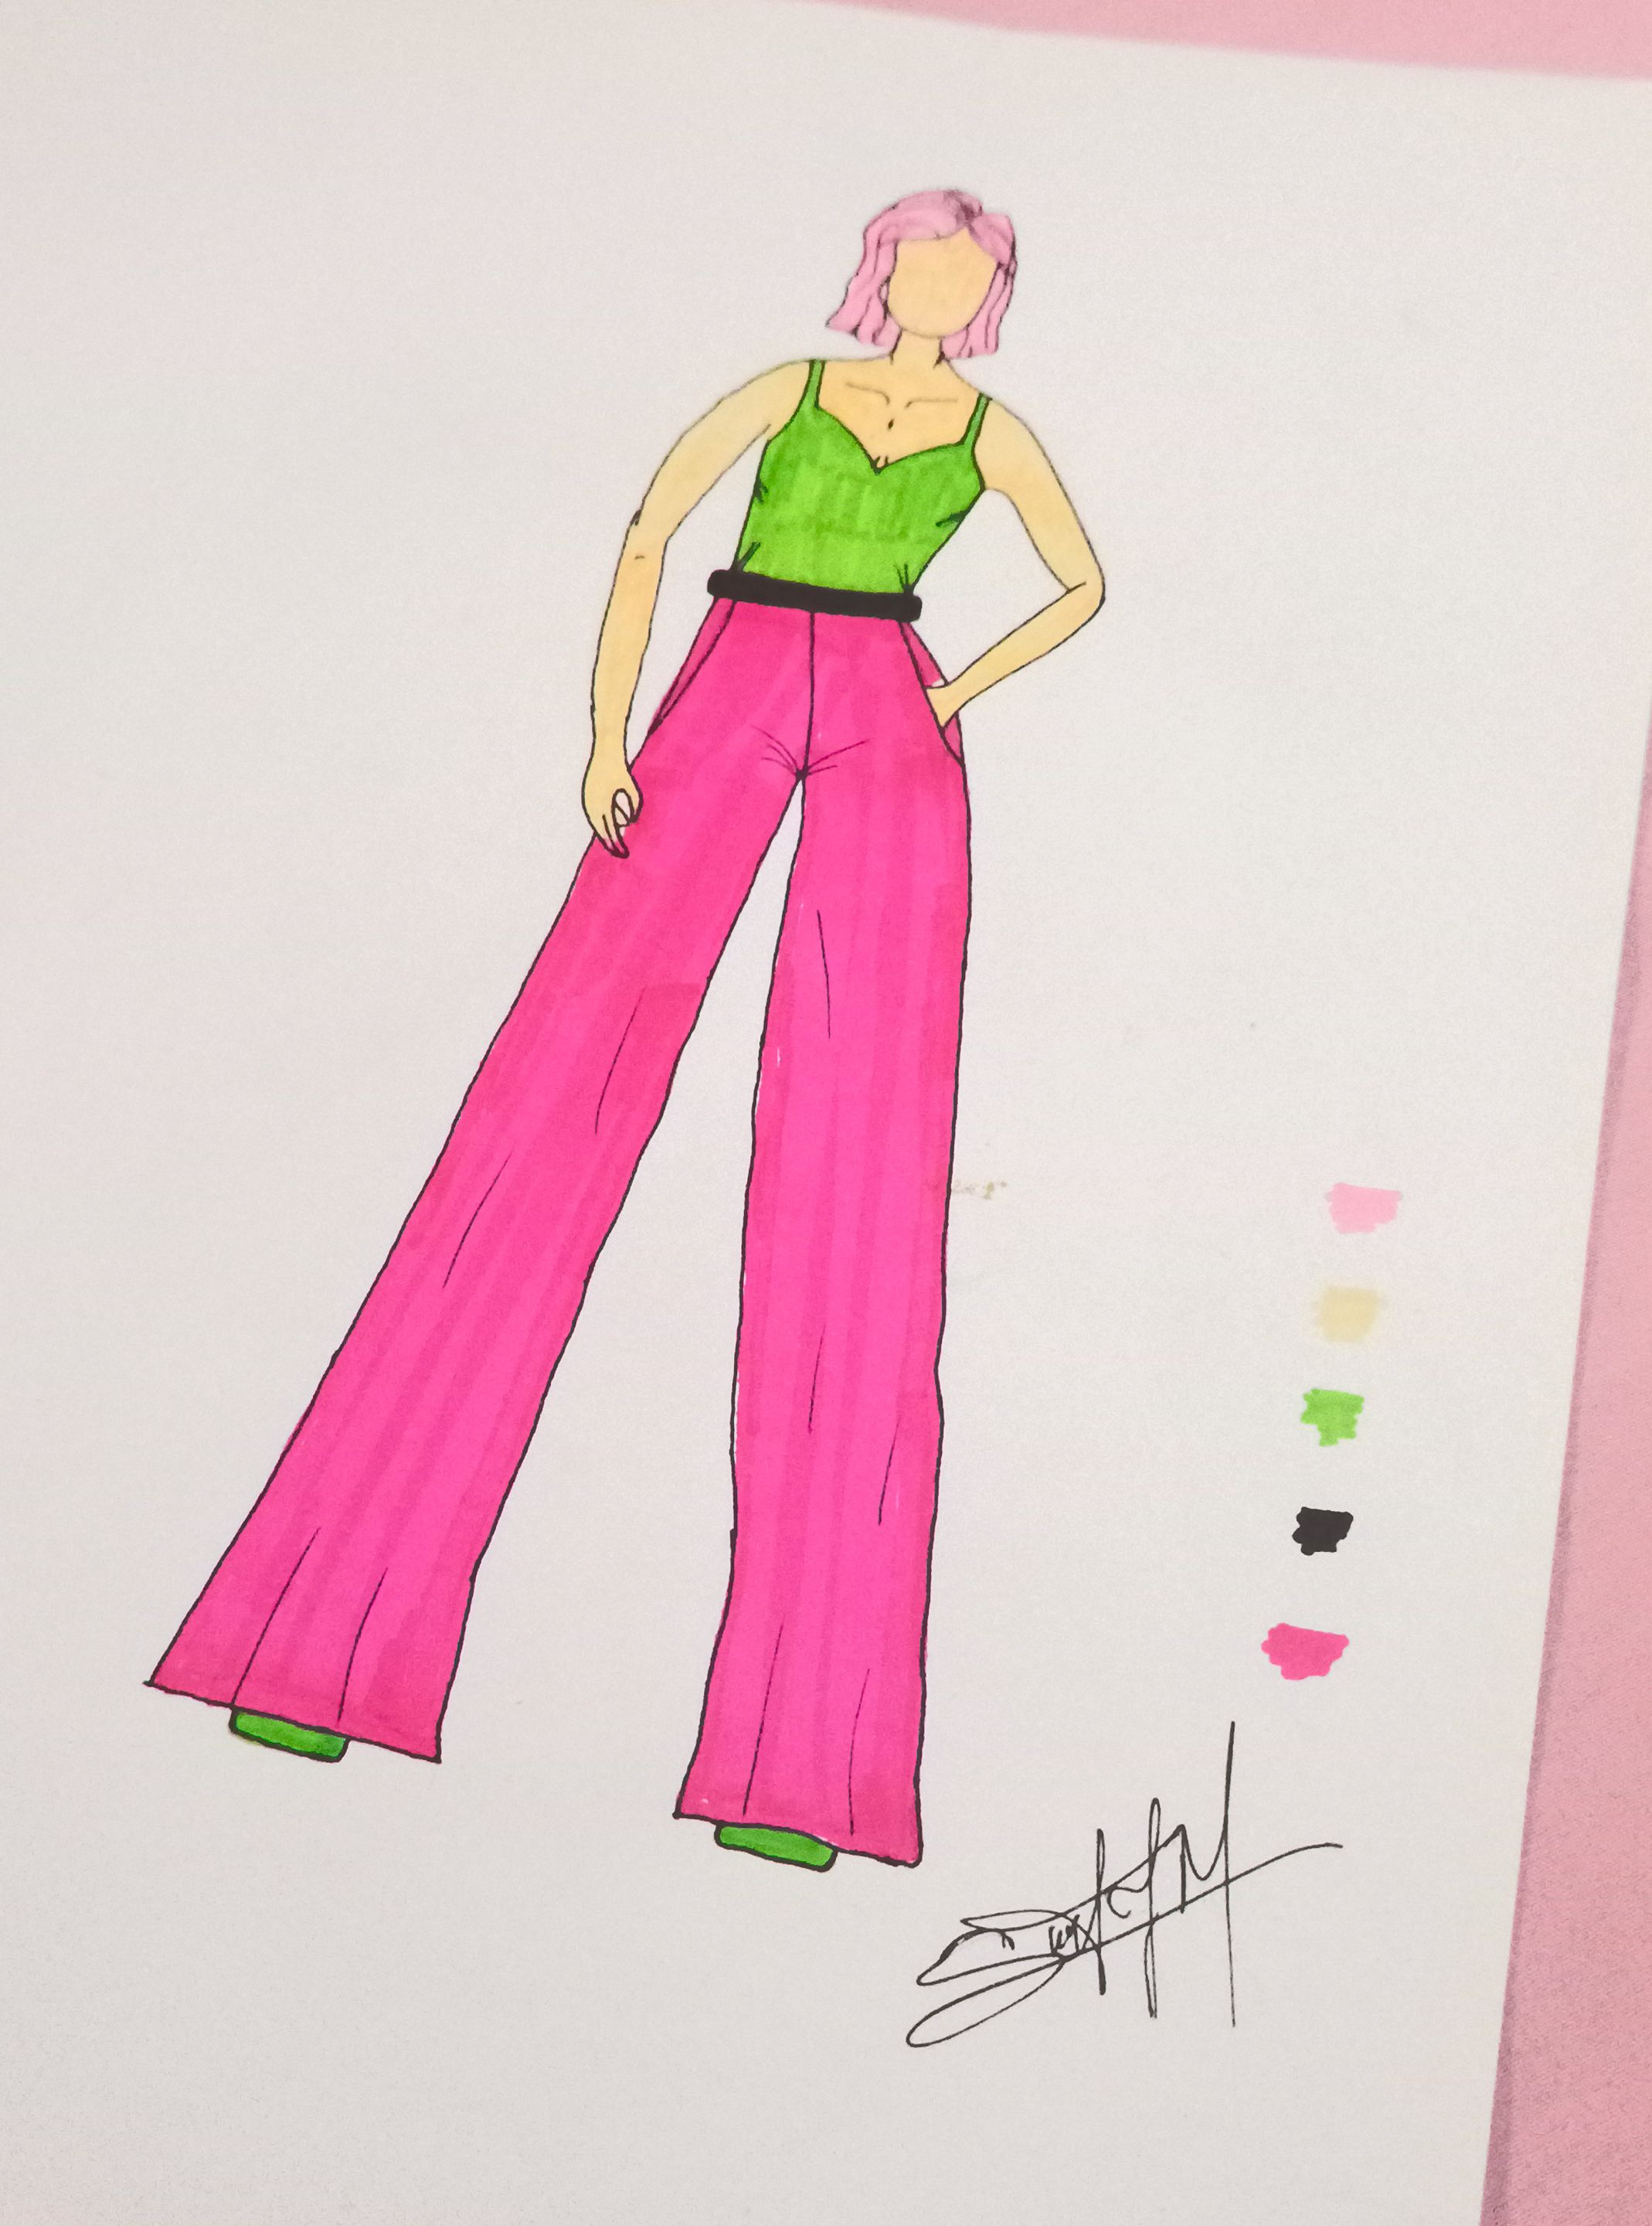
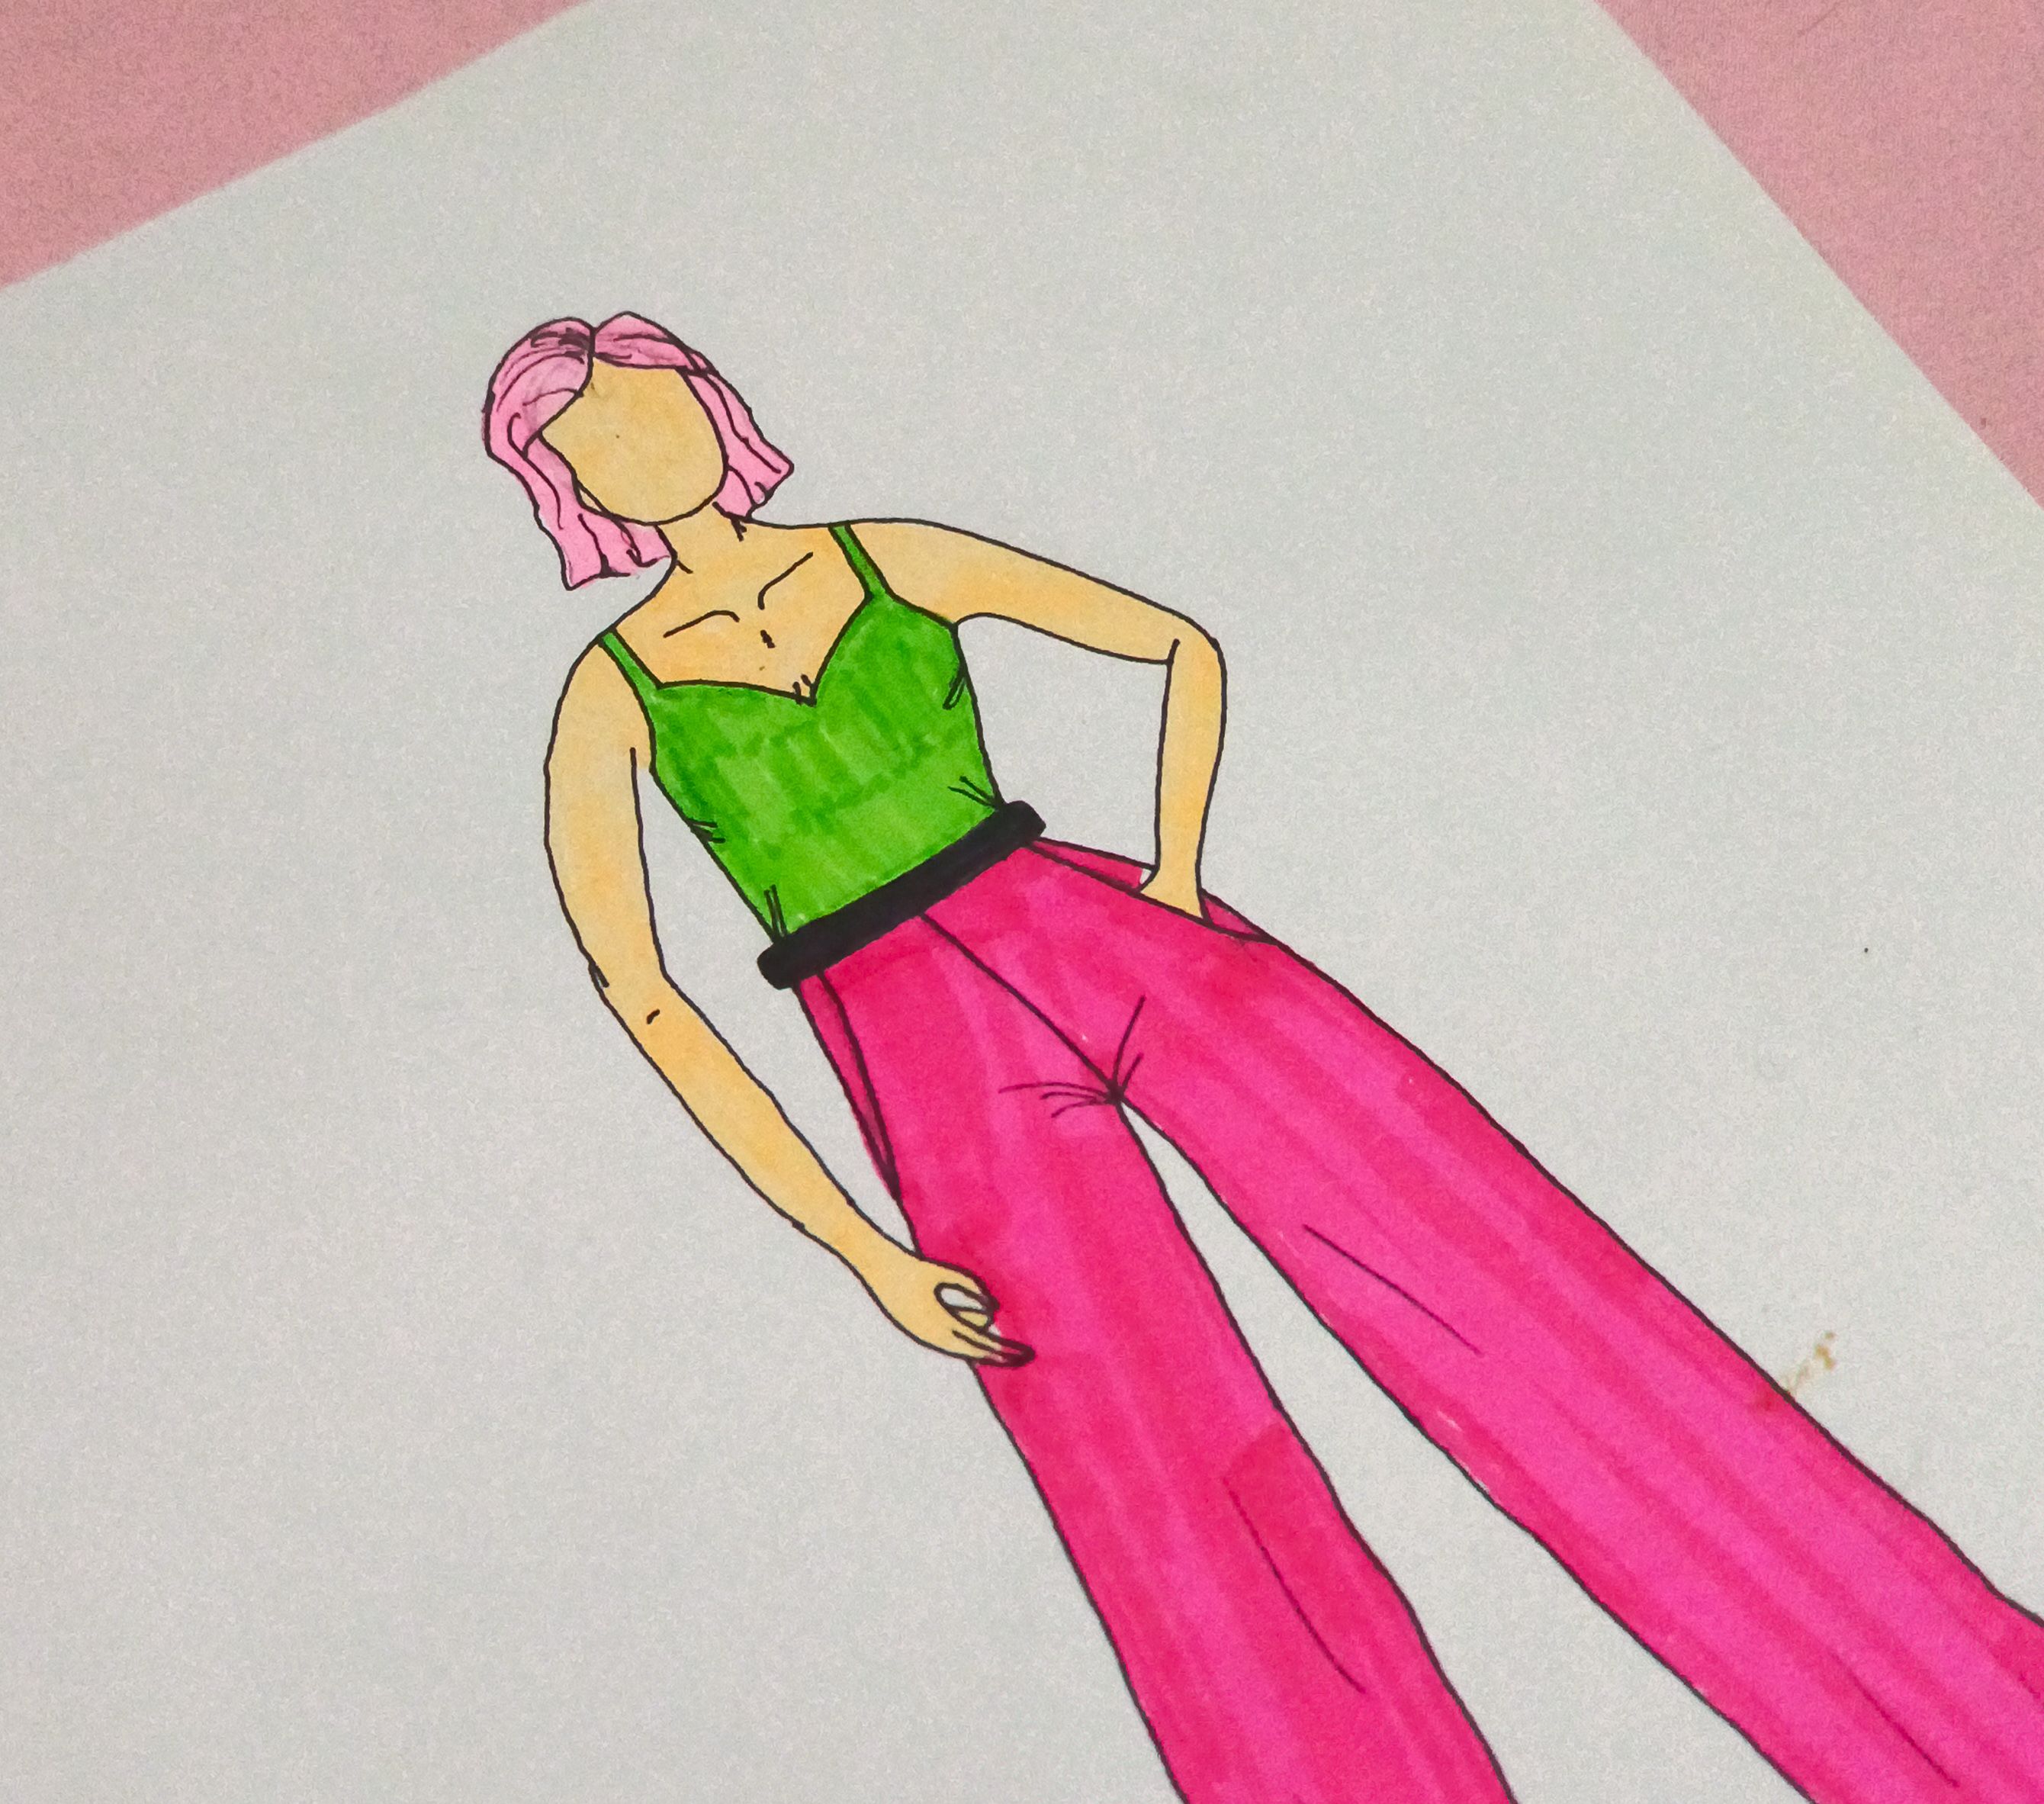
Hello hello community 💕, As you may already know since a few weeks ago I have started to practice making fashion figurines, not only I have found that it is an activity that relaxes me and therefore clears me mentally, but being something that I have wanted to do for a long time, every time I try something new I get very excited. For that reason today I wanted to practice a new position of the figurine, previously I had already shown how to do it from the front without movement, and today I will share with you a new position with more movement.
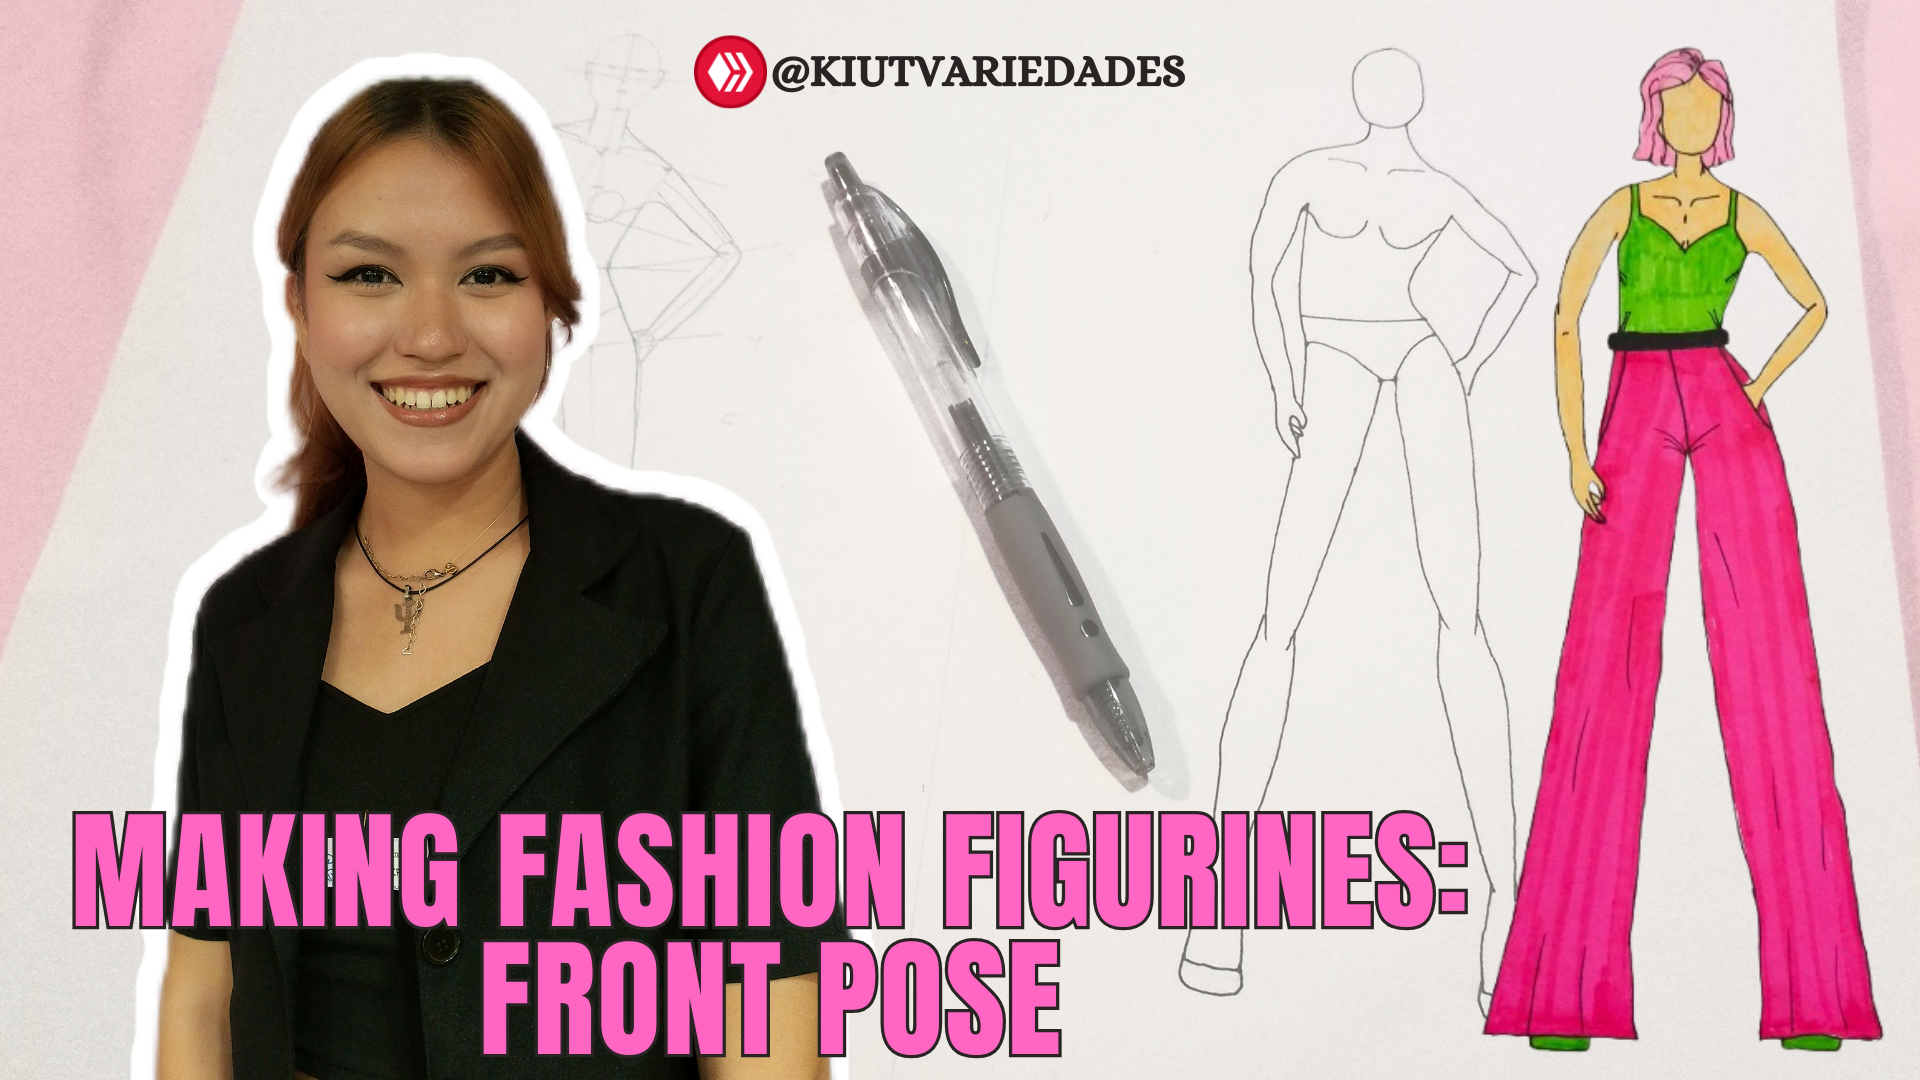 ---
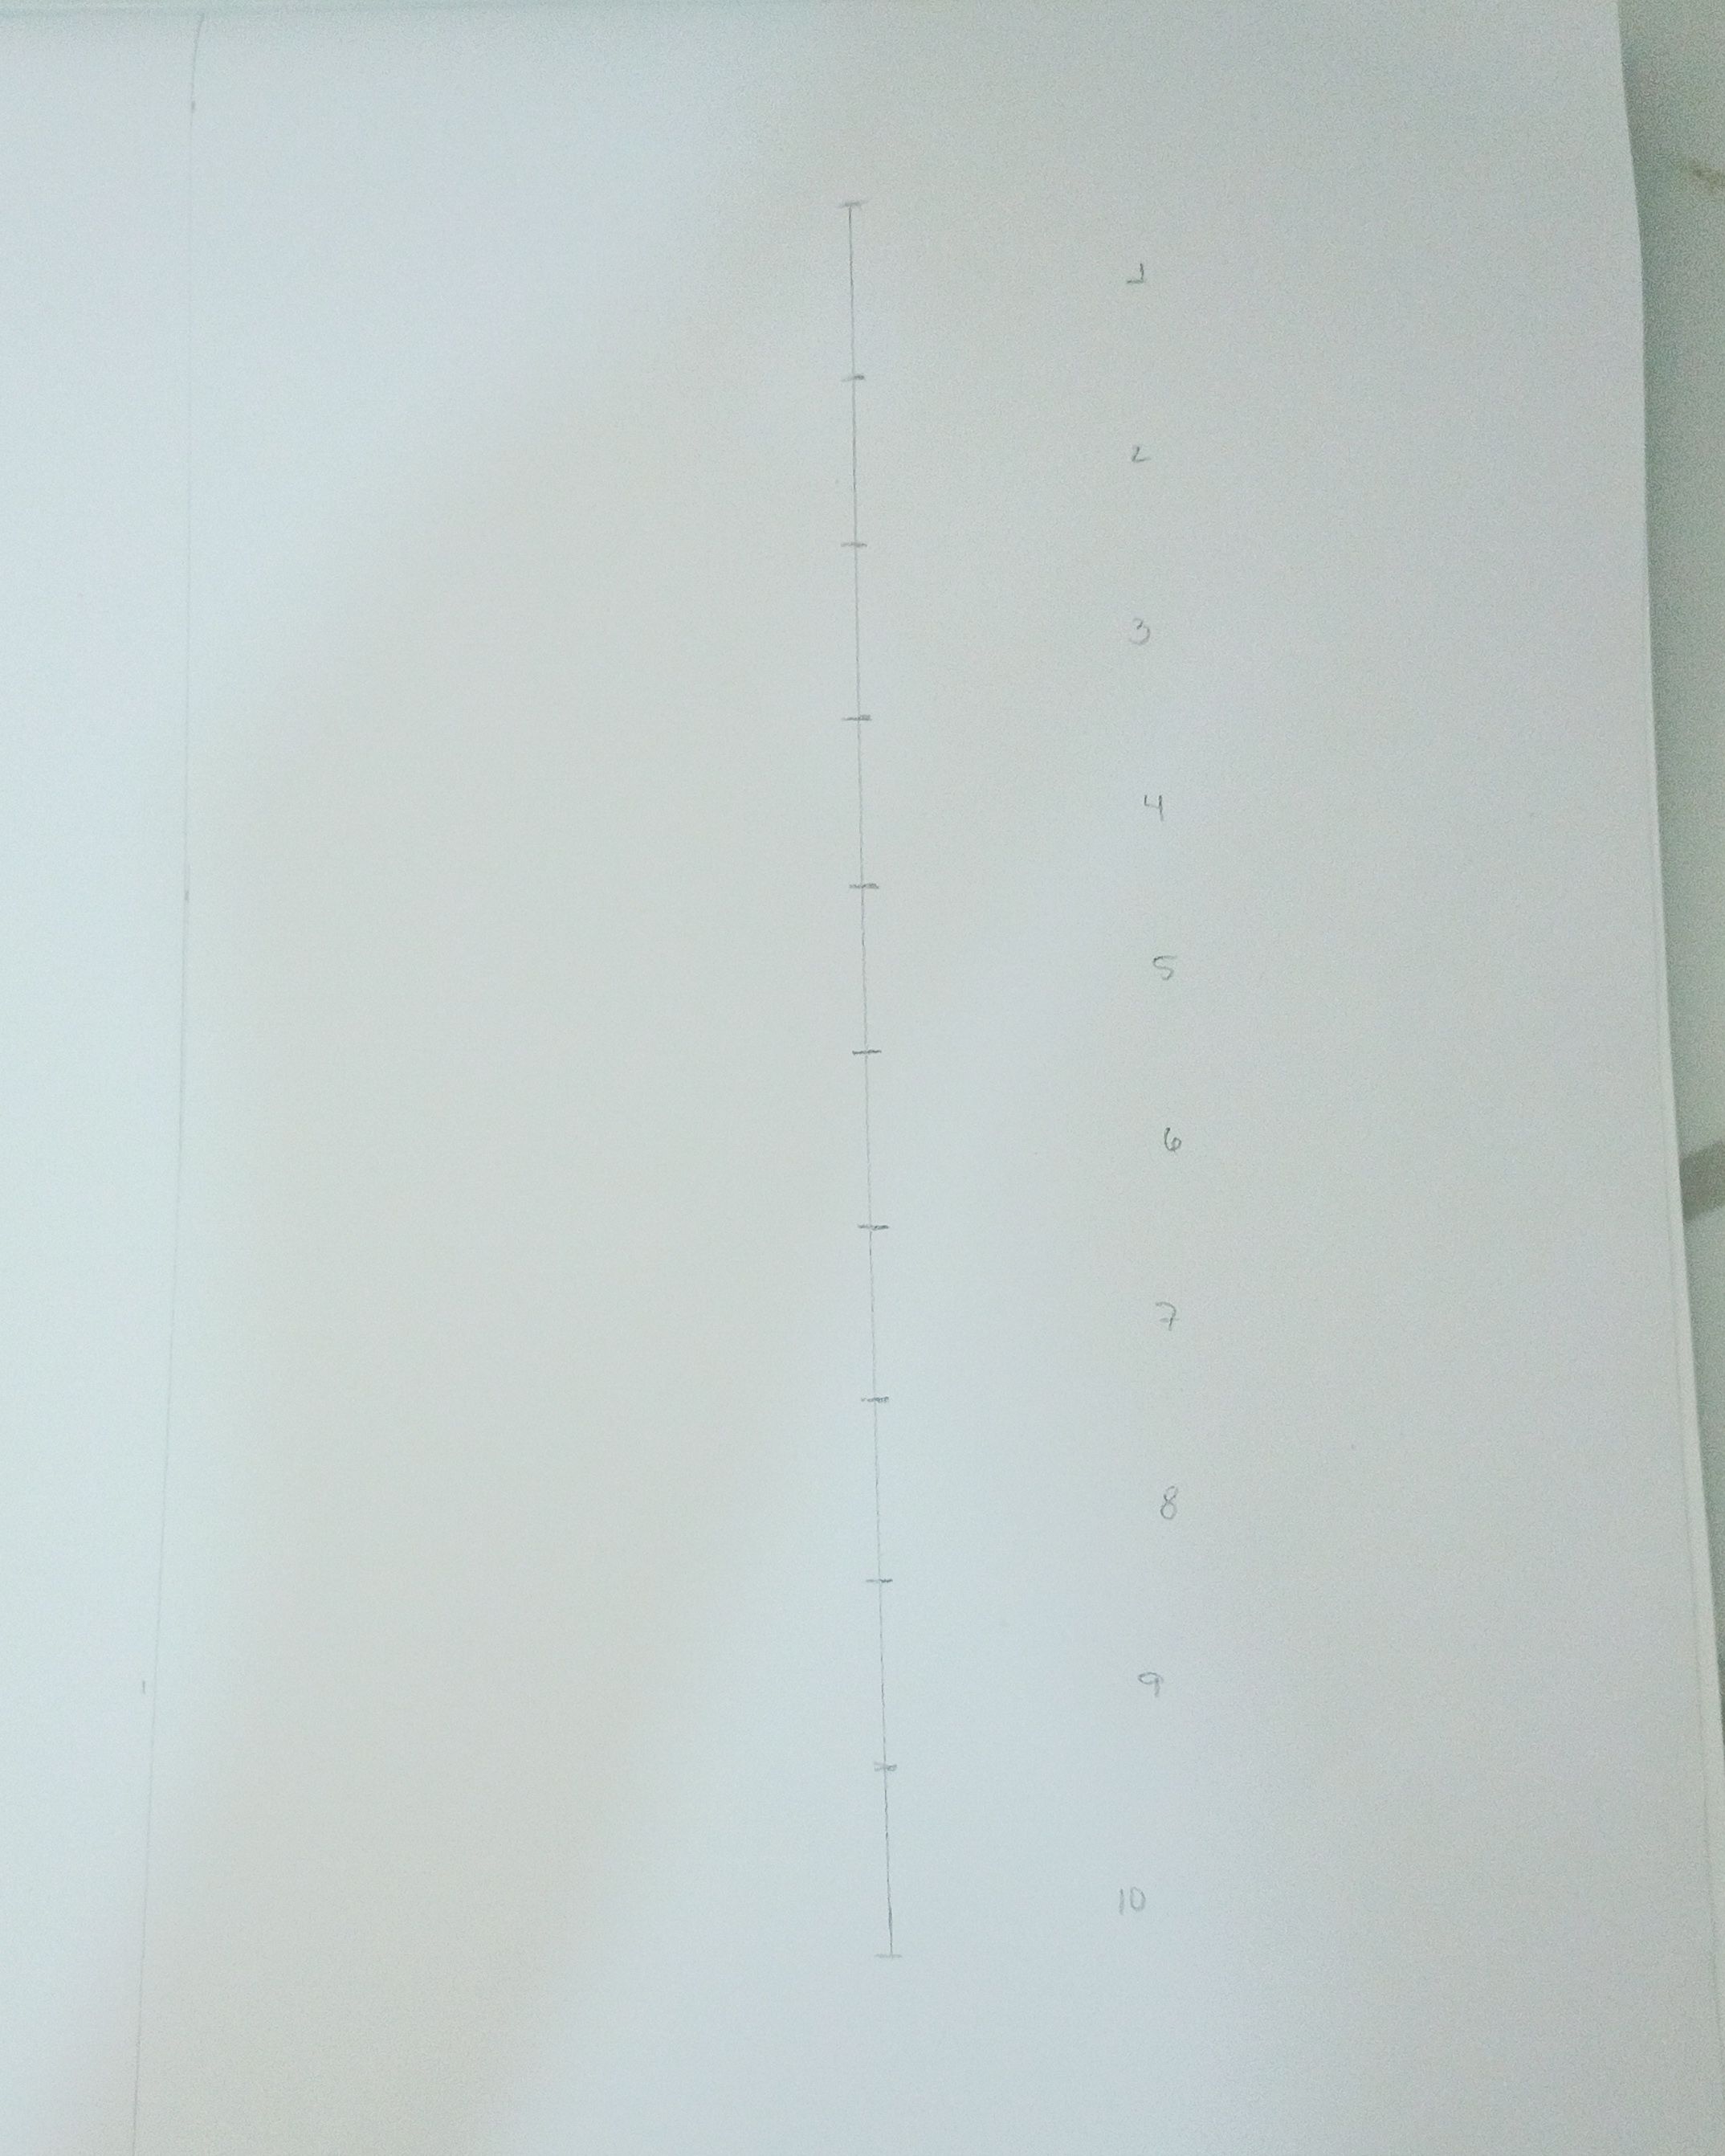
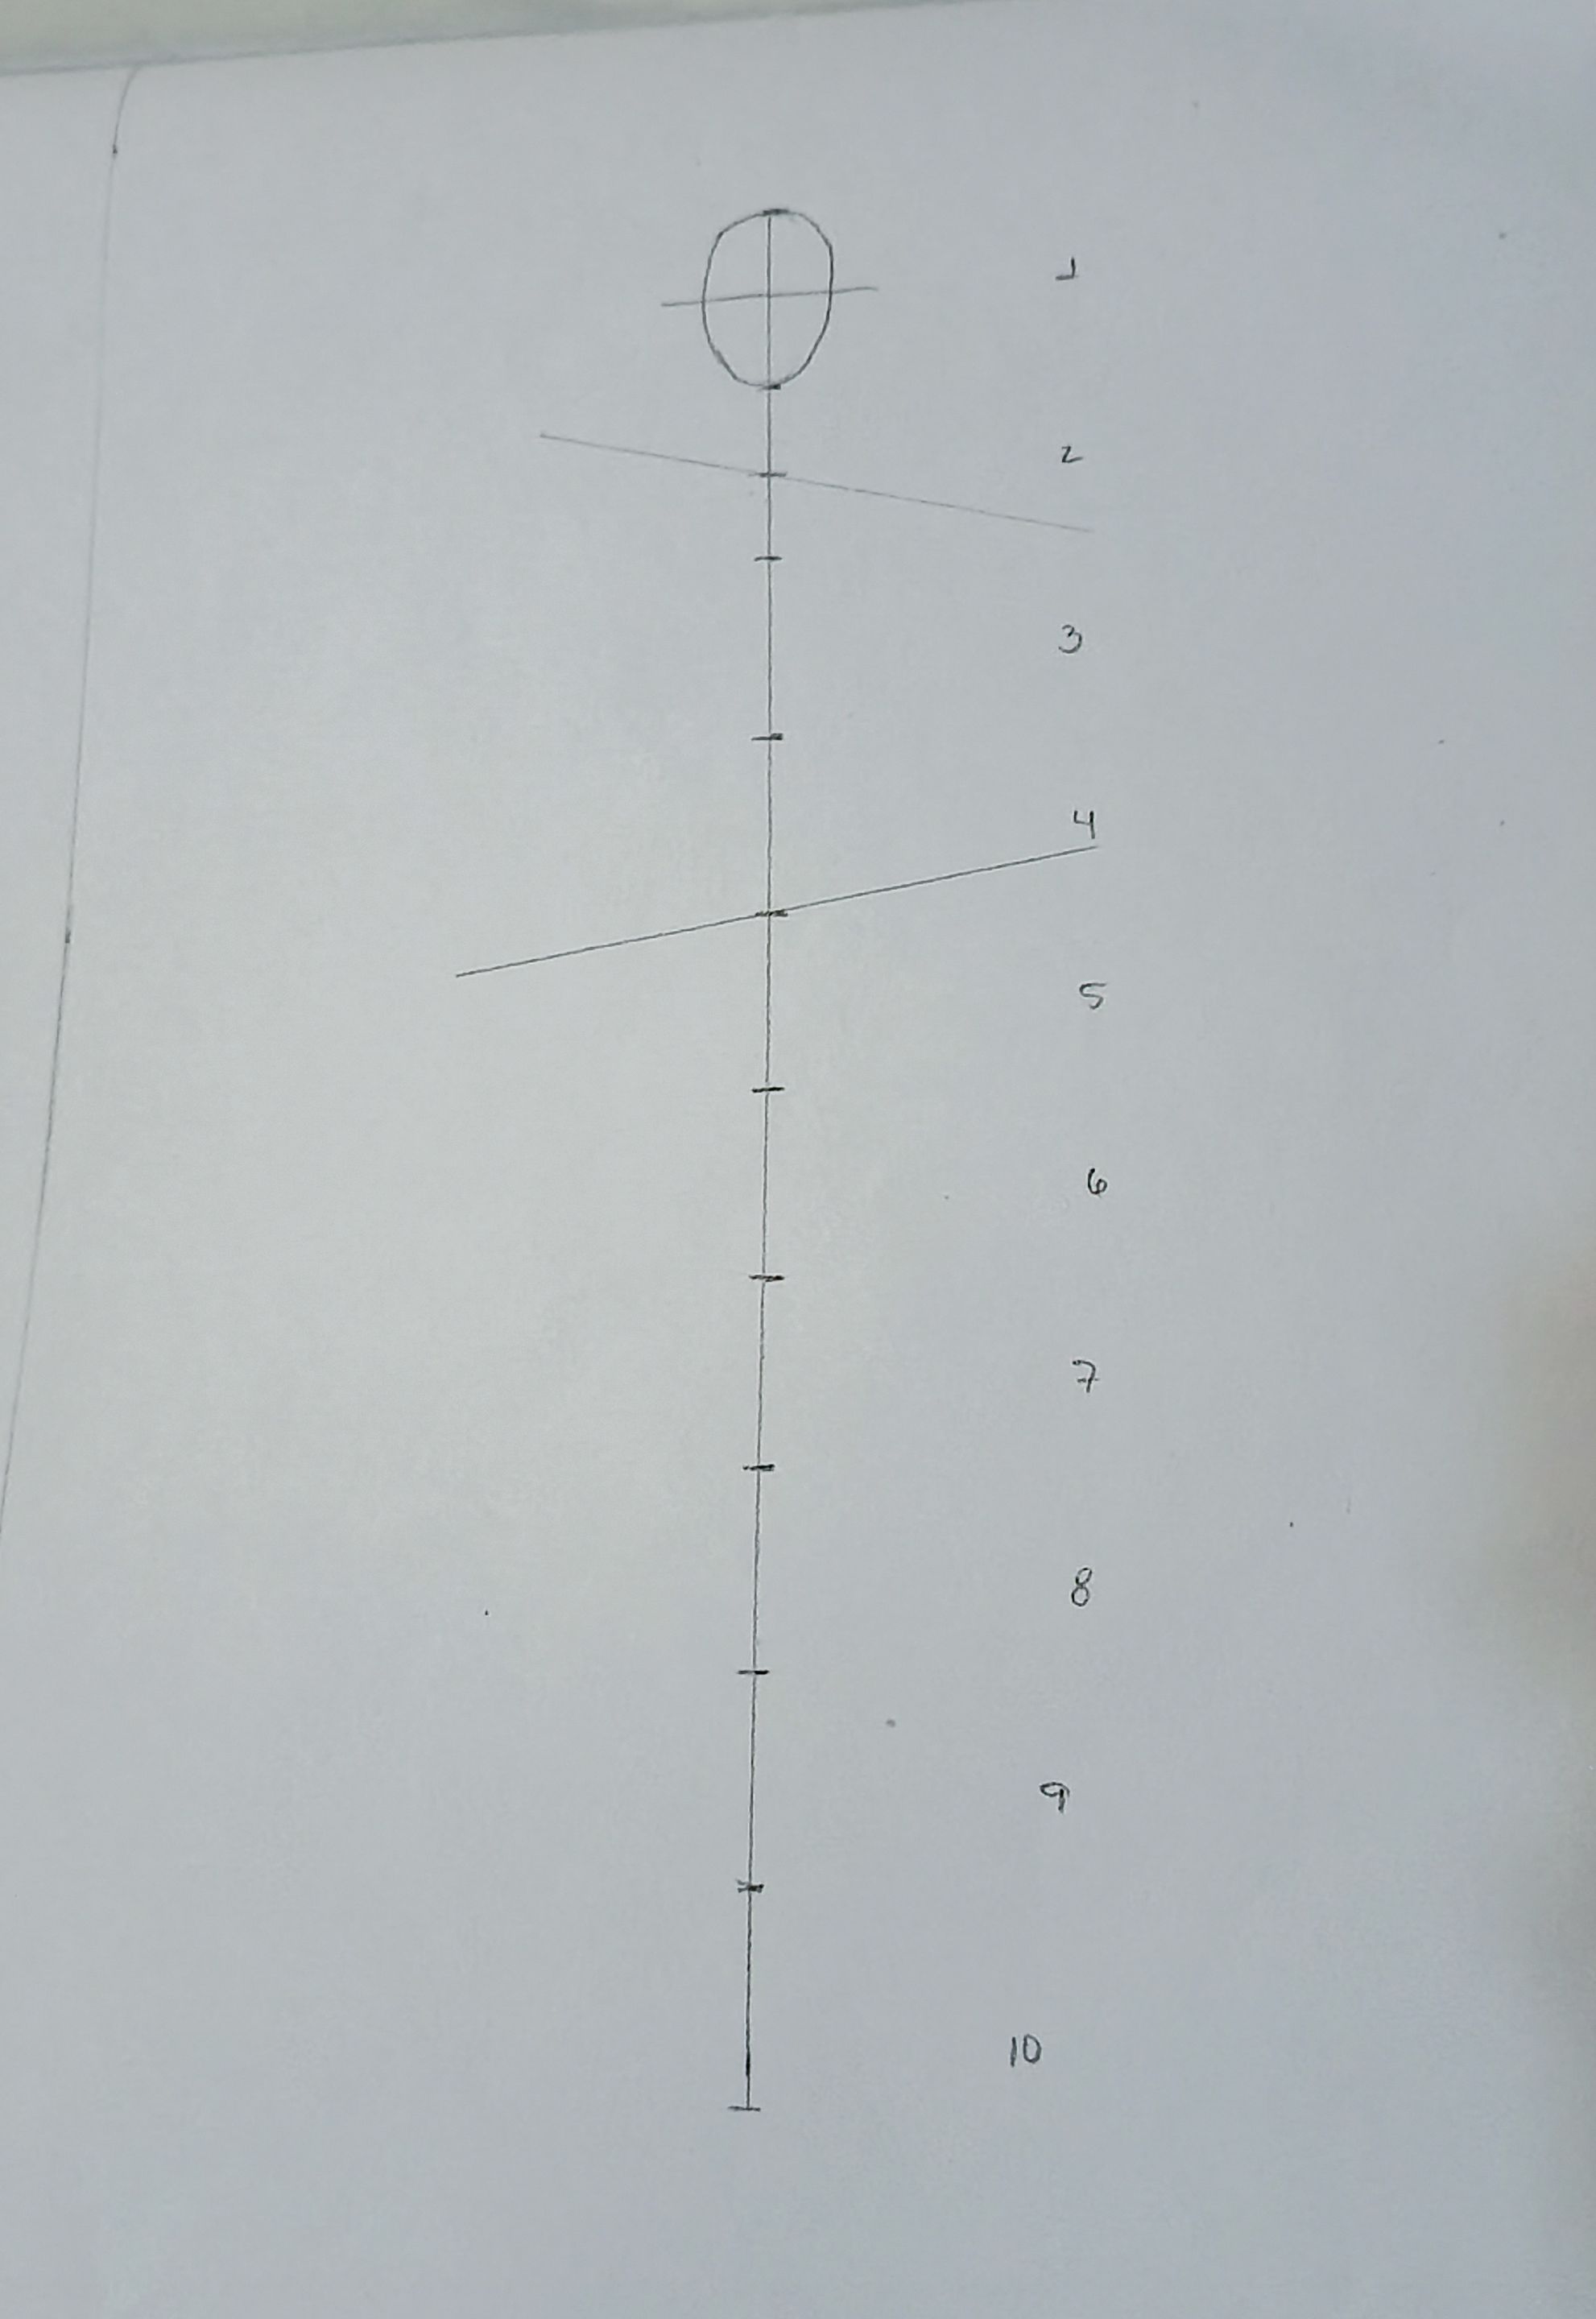
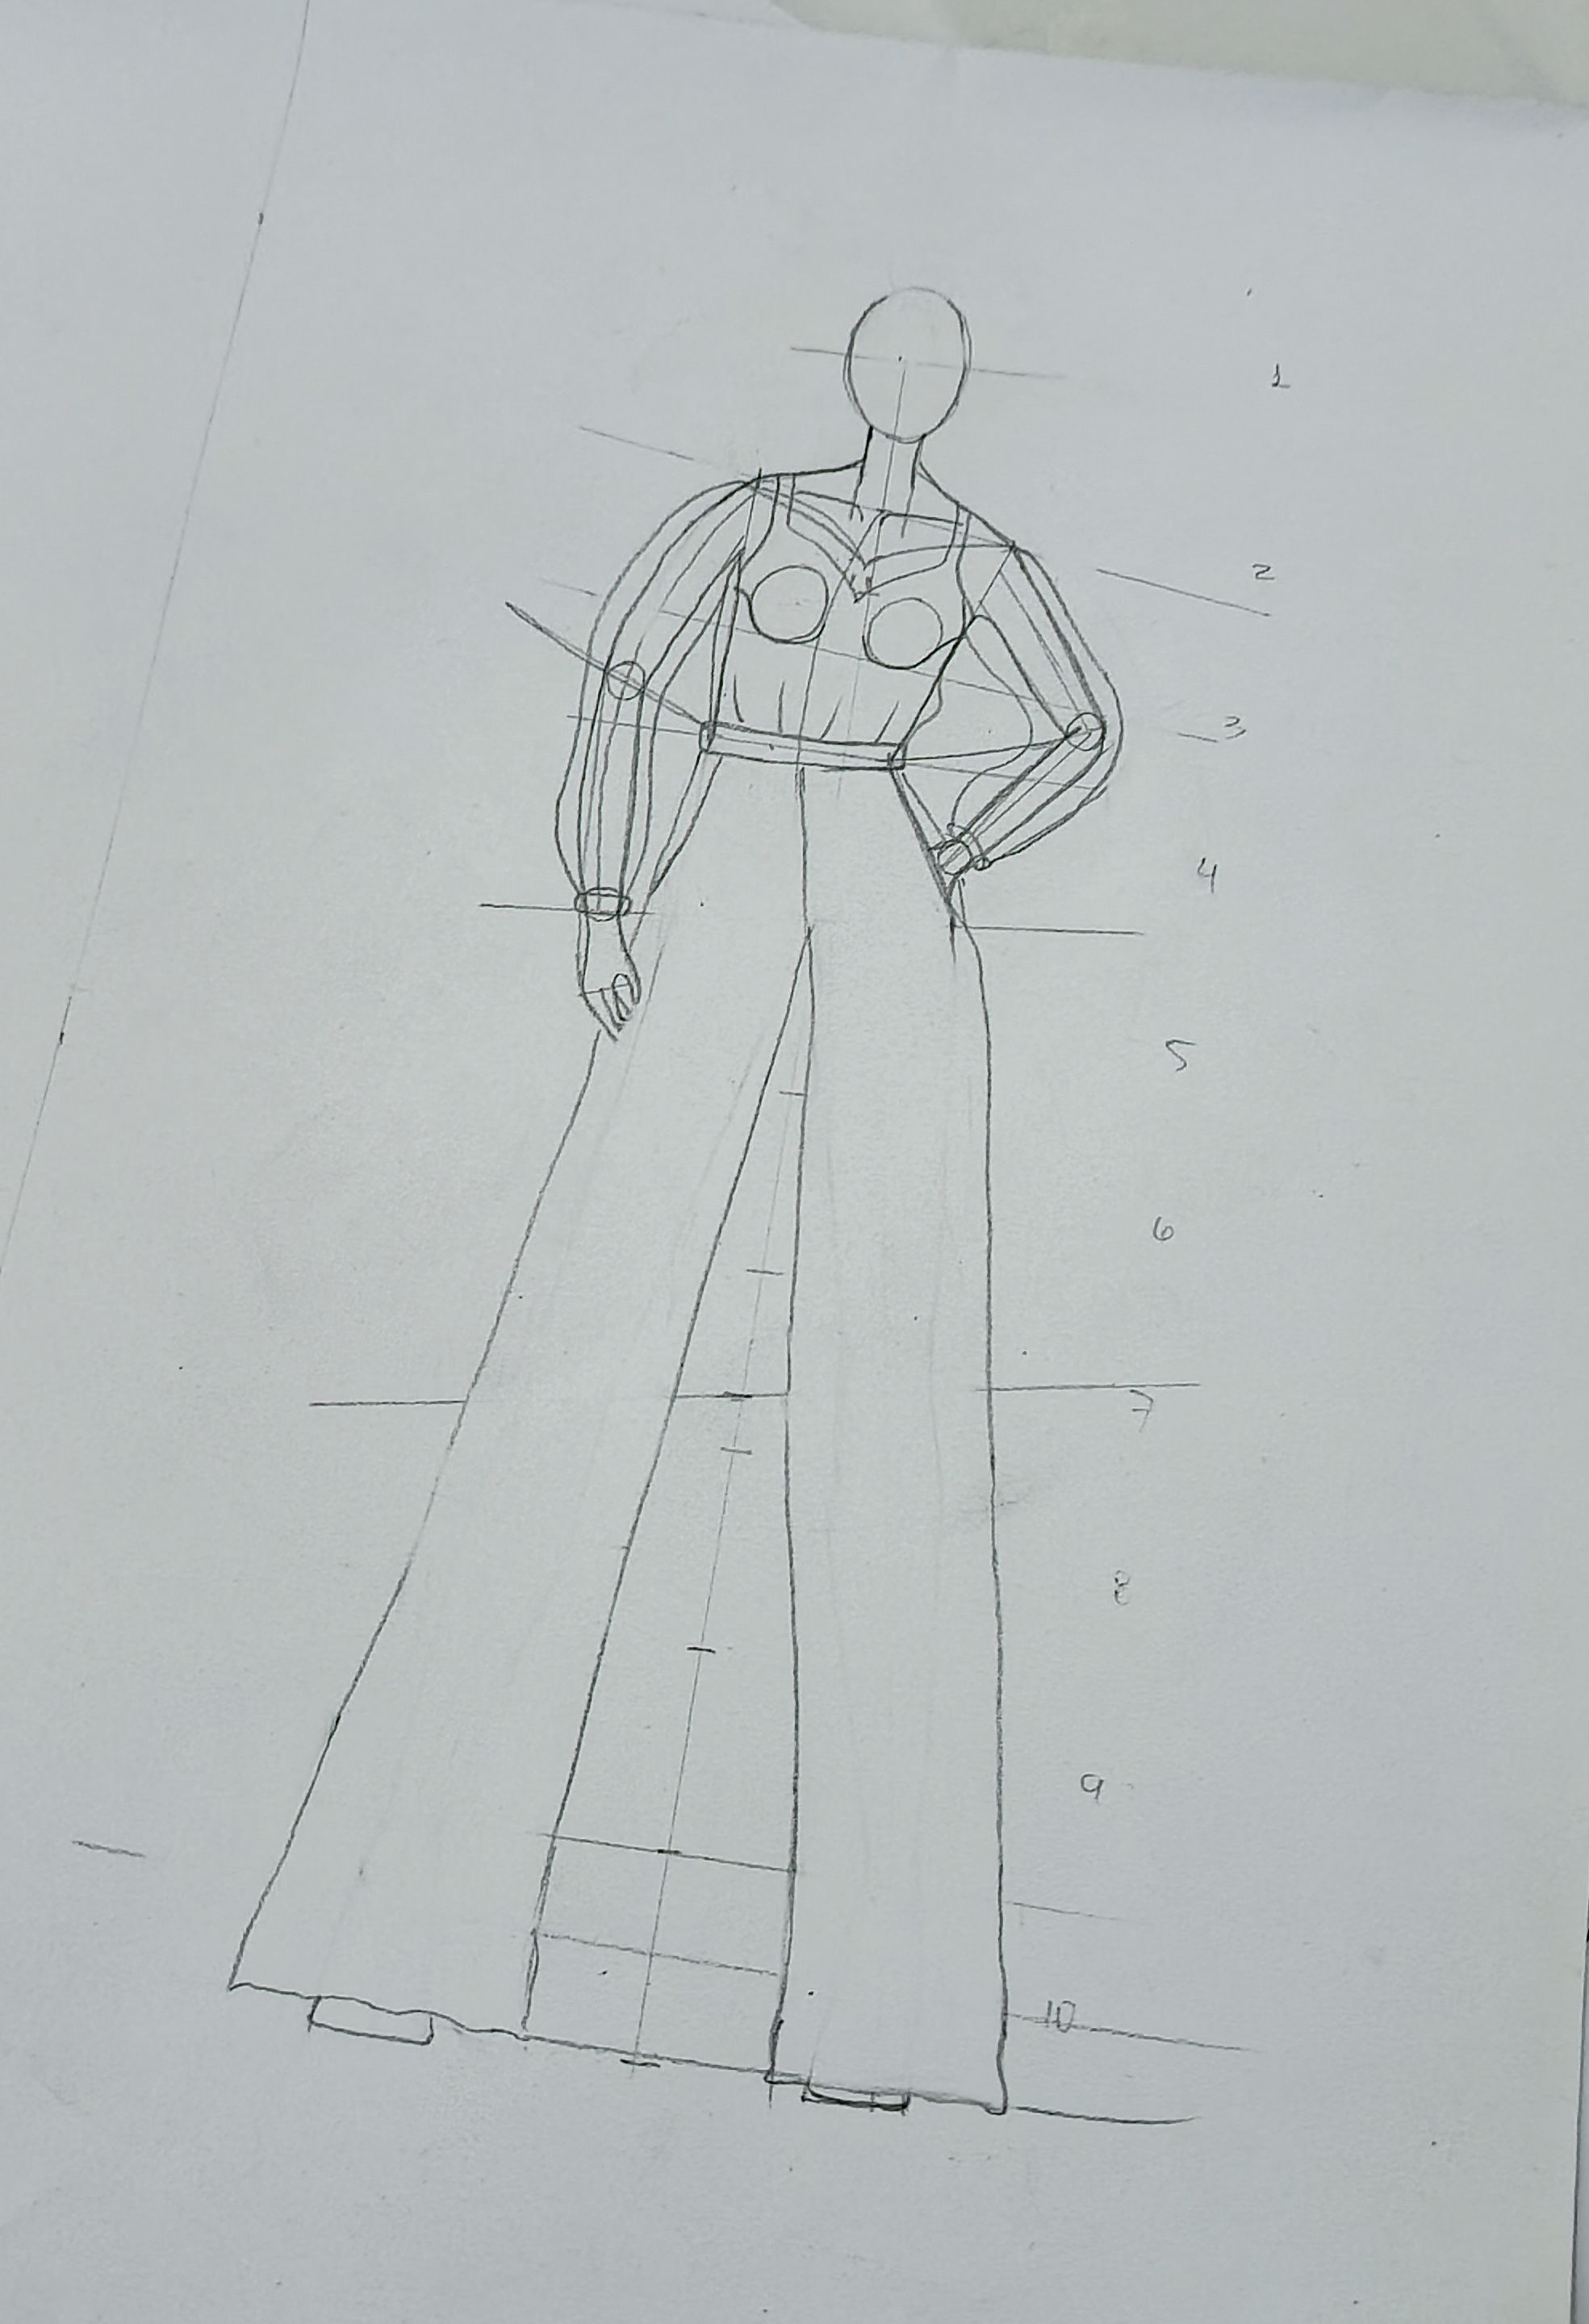
Here we are going to continue with the technique of the 10 heads, so I started by making a vertical line of 20 cm and made marks every 2 cm, thus obtaining the 10 spaces. In the first space I made the oval of the head and in the middle of the second space I made a diagonal line that will represent the shoulders. Between spaces 4 and 5, another diagonal line is drawn opposite to the previous one, thus marking the hip line. And the waist line will go in spaces 3 and 4 slightly straight, a slight curve is made (not as pronounced as I made it) that joins the shoulders and the hip in the middle.
|||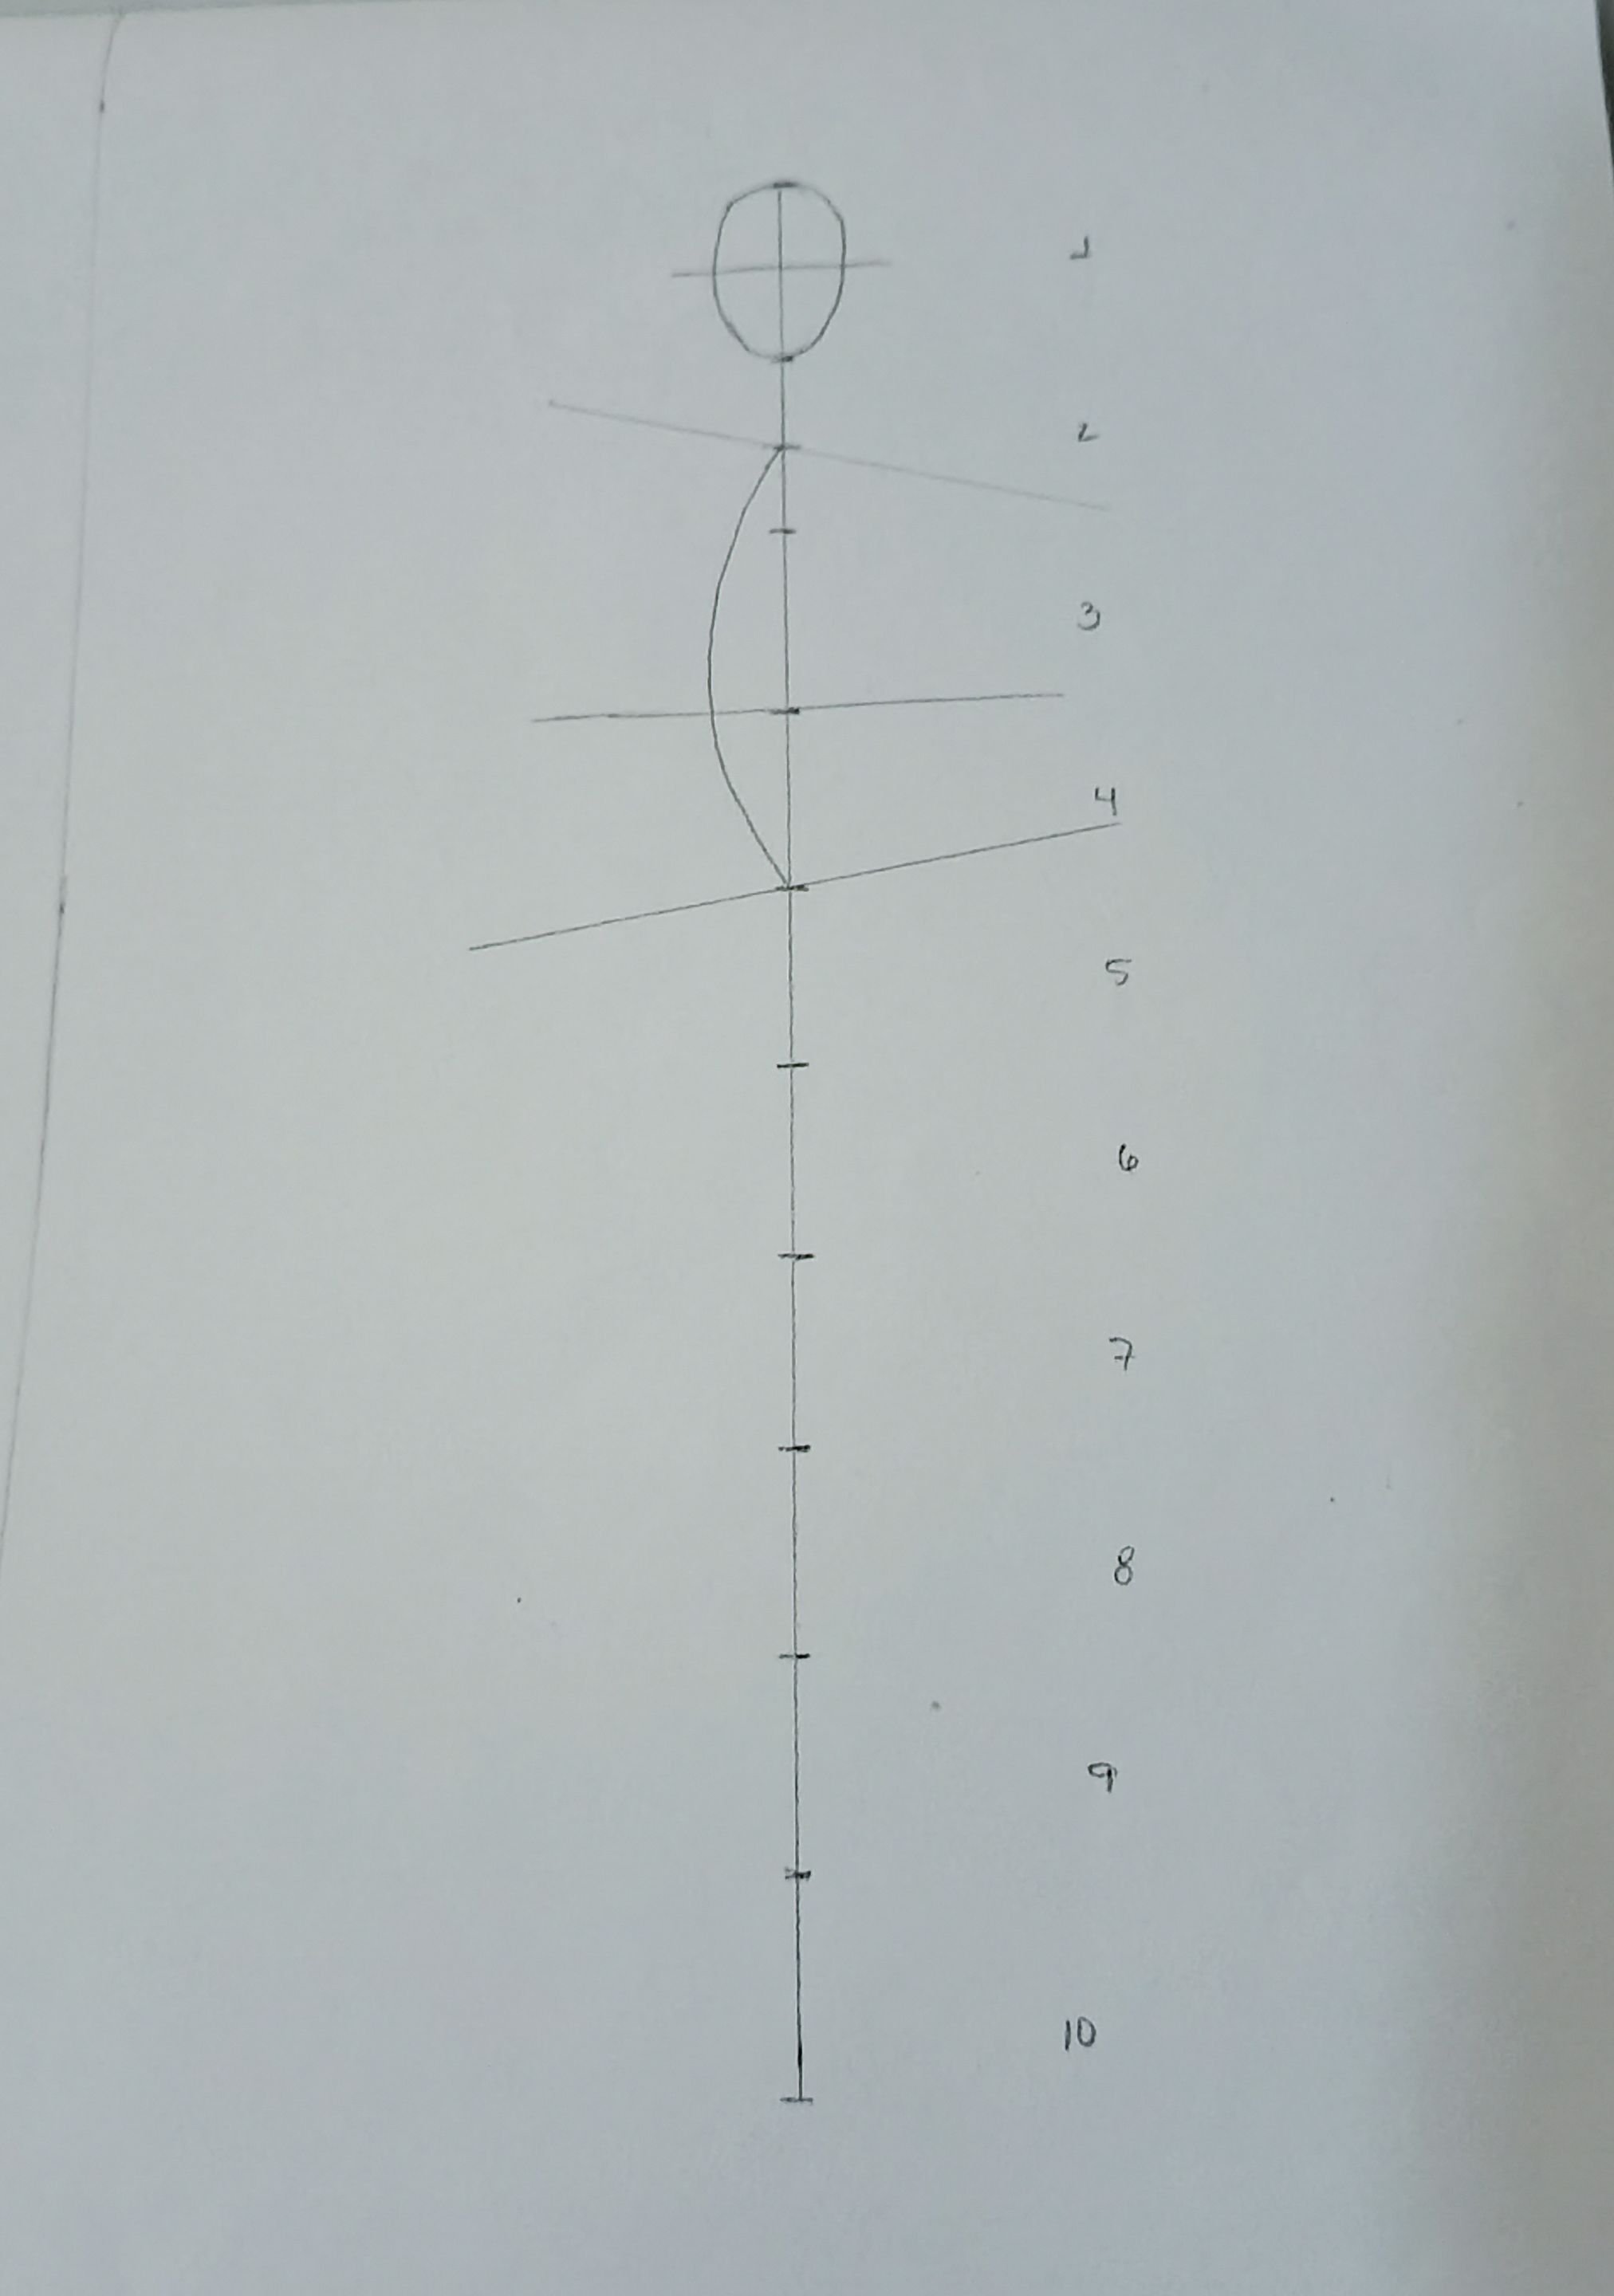| |-|-|-|
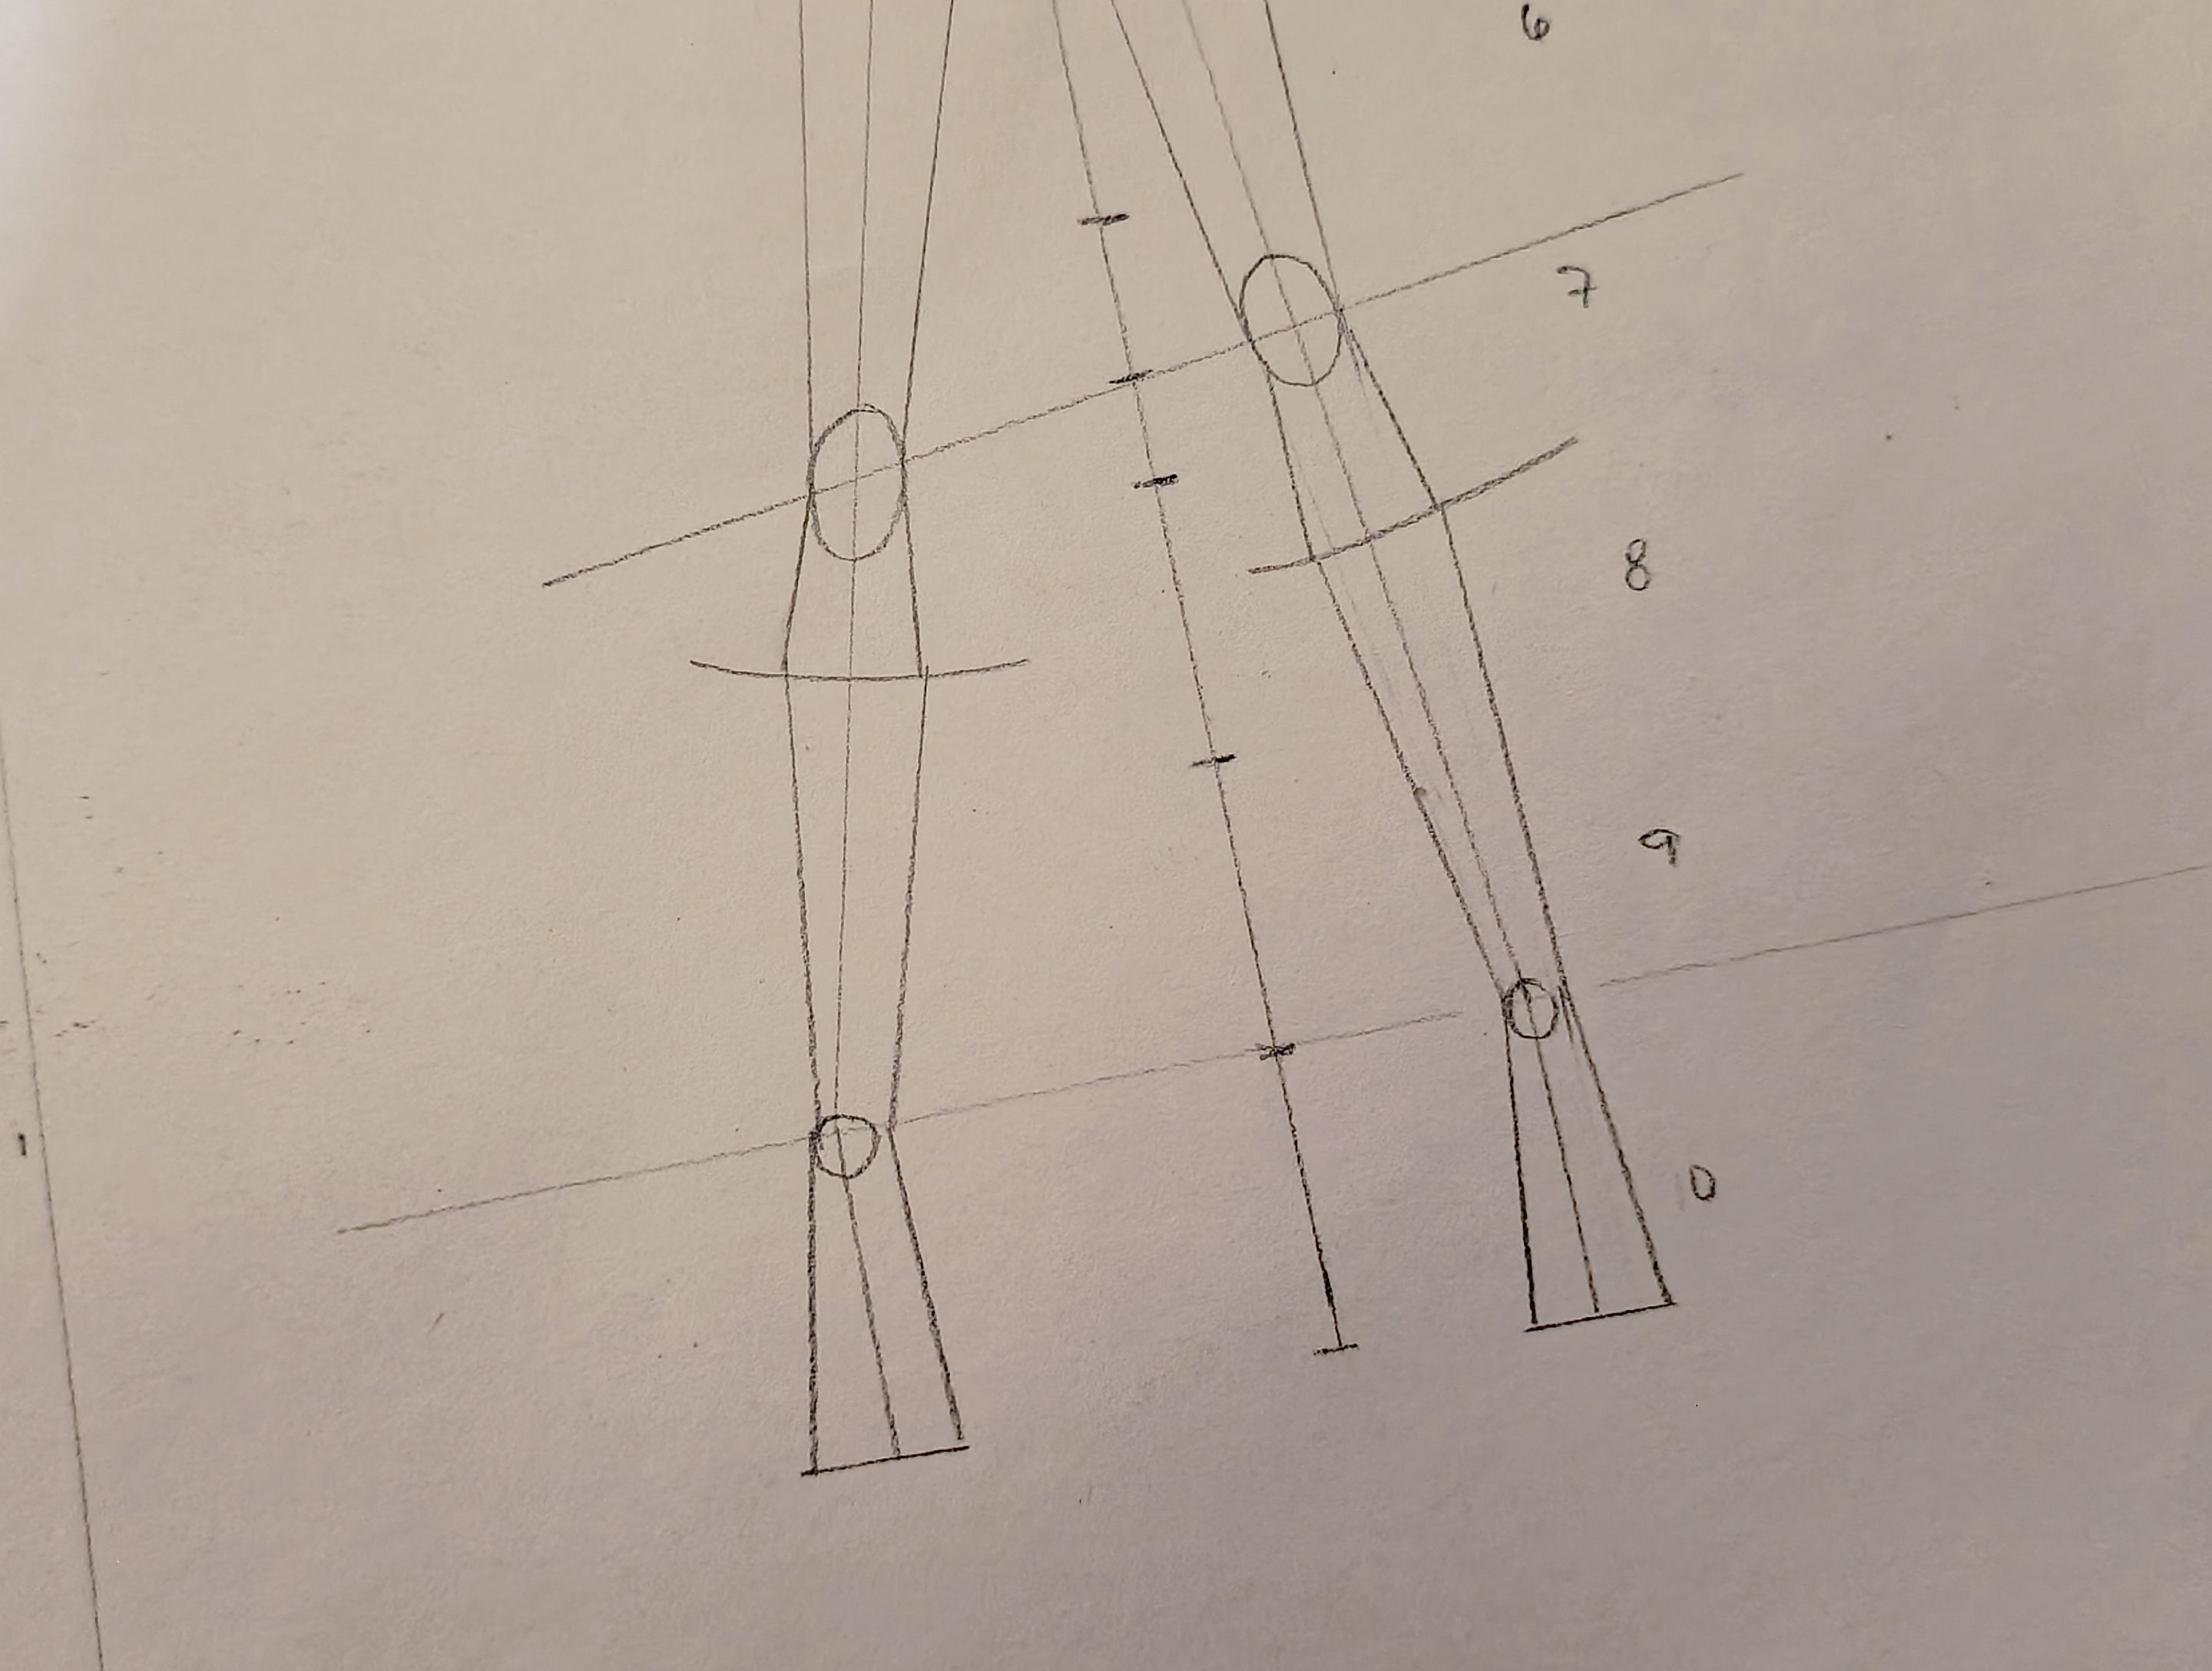
Delimit the width of the waist, shoulders and hips (these two should have the same width) and join the points with straight lines. From the hip line two diagonal lines (opposite each other) will be the legs, in the middle of space 7 we will make a line parallel to the hip line and there we will make an oval on each side that will represent the knees. Between spaces 9 and 10 will be the ankles, so we will also make some small circles, a little below the knee we will make some curved lines to mark the calf muscle, and we will join all these points with straight lines.
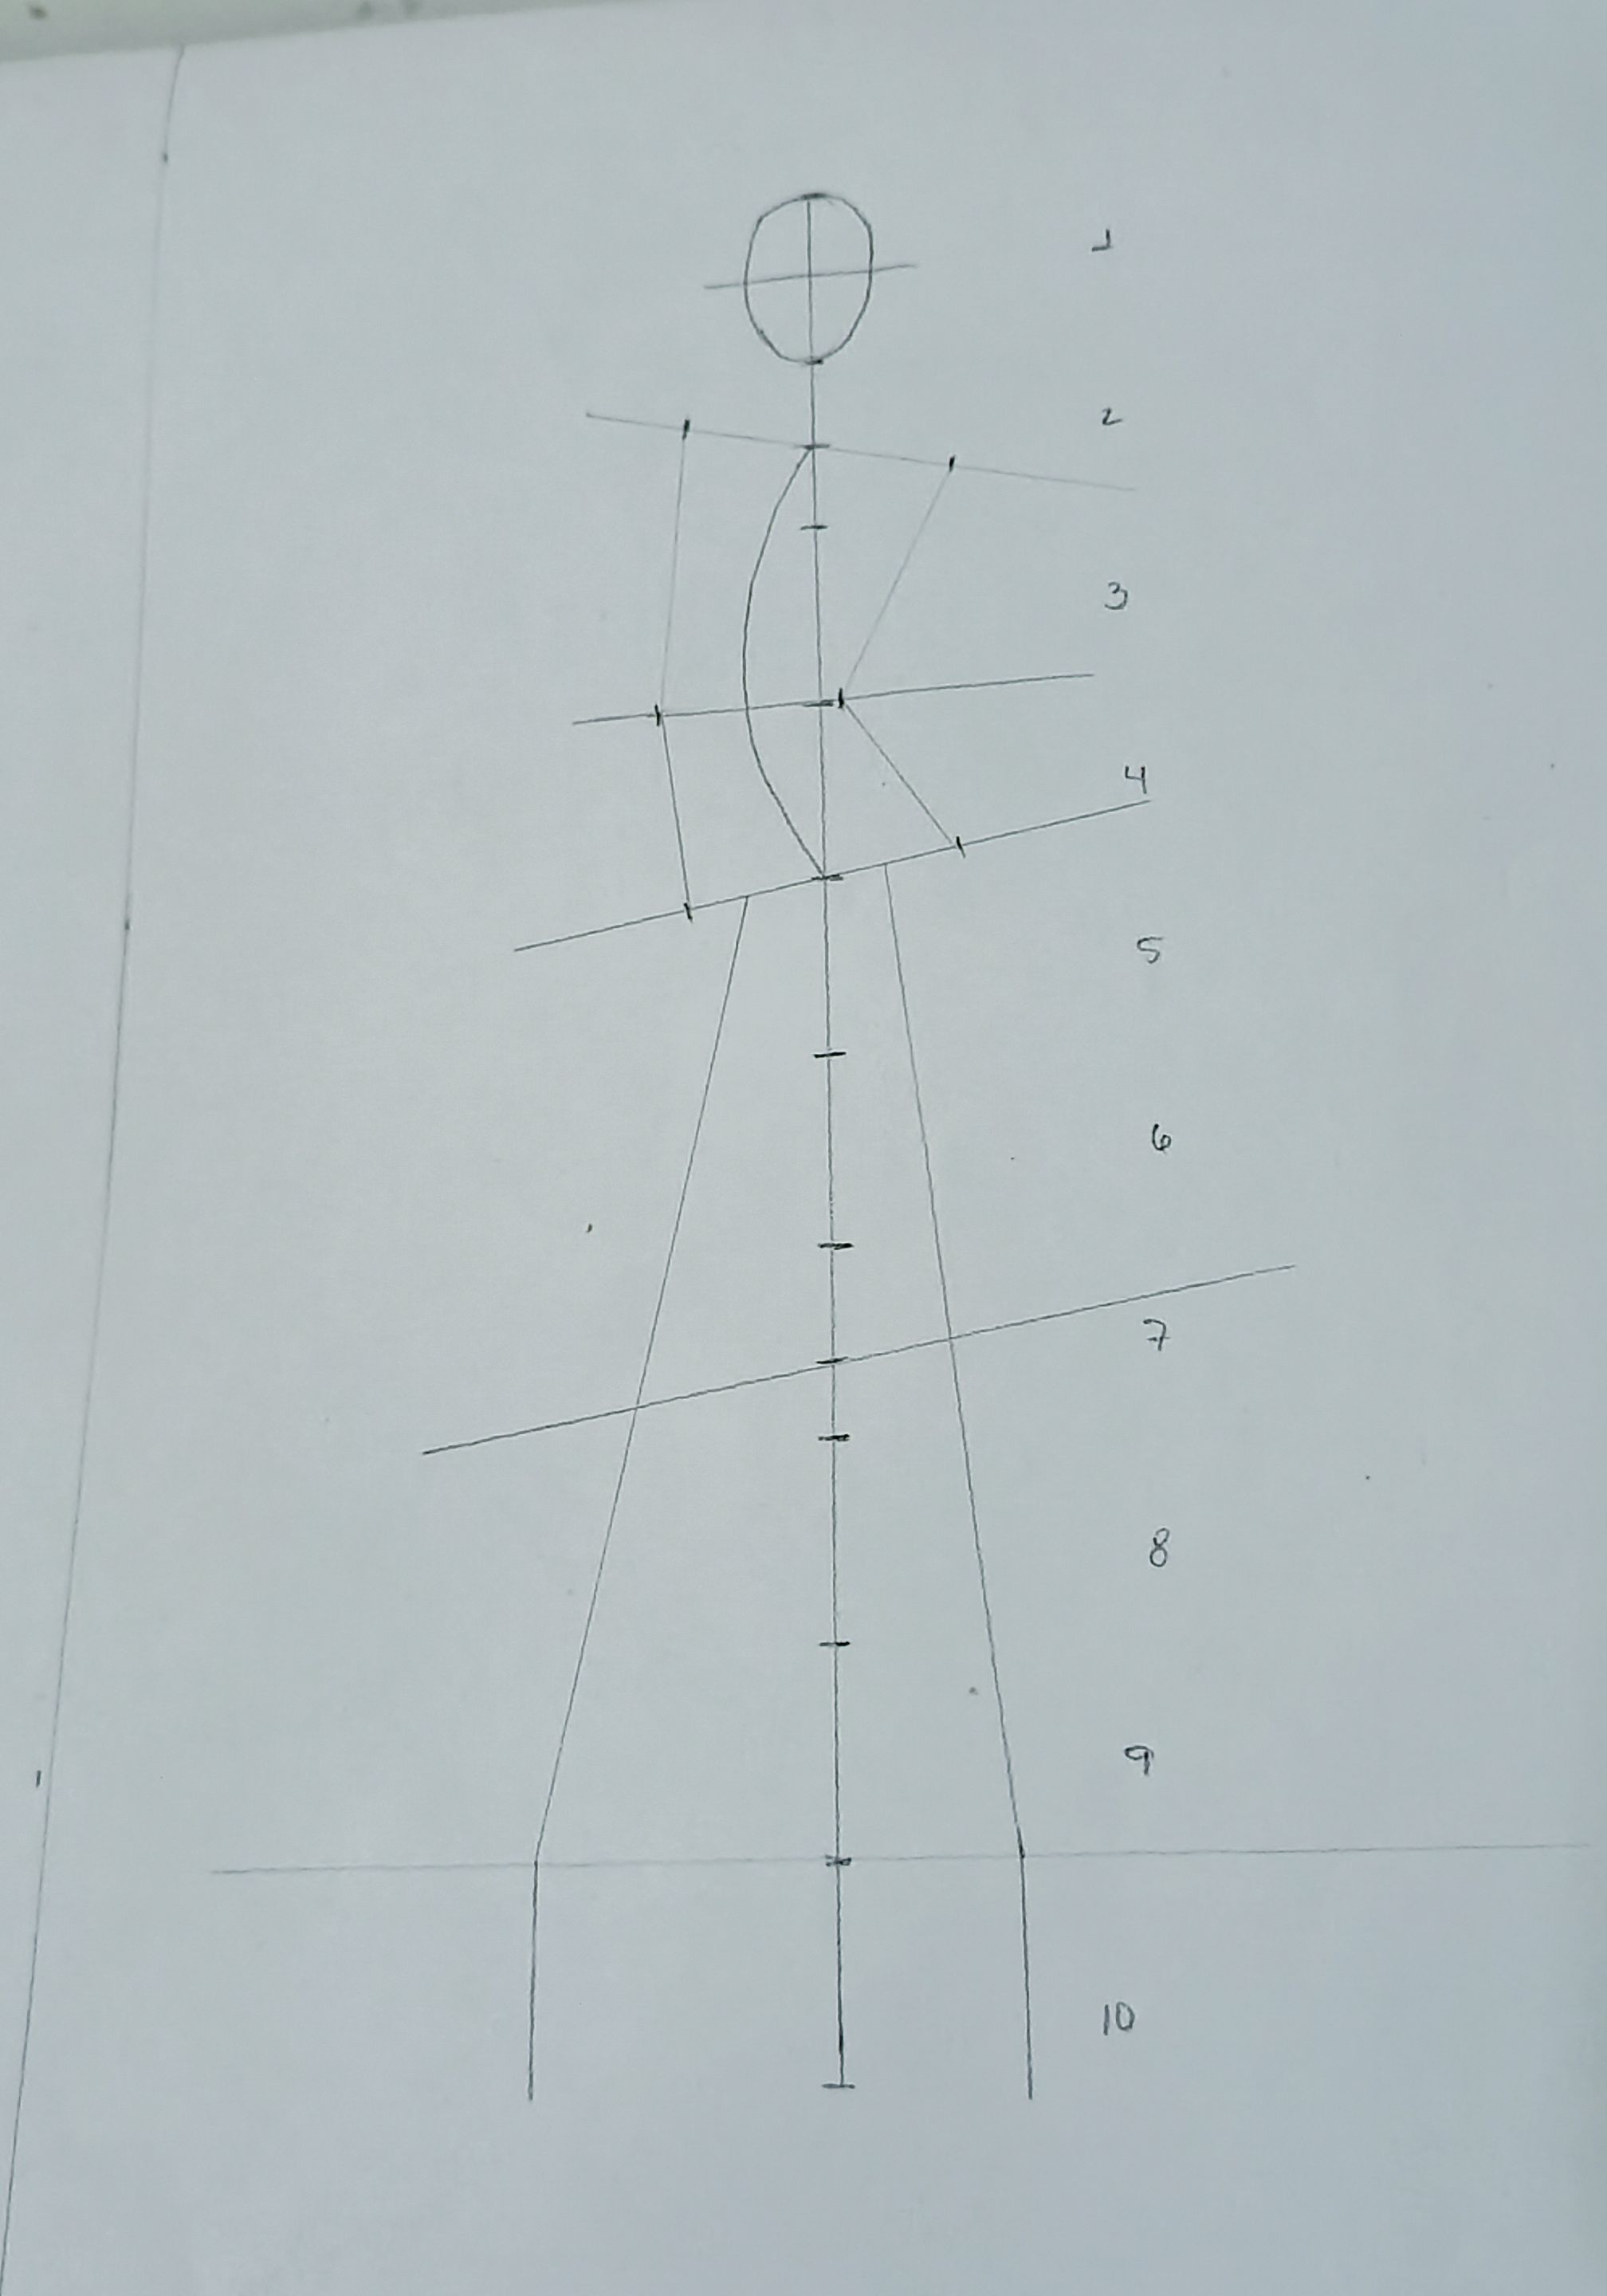 
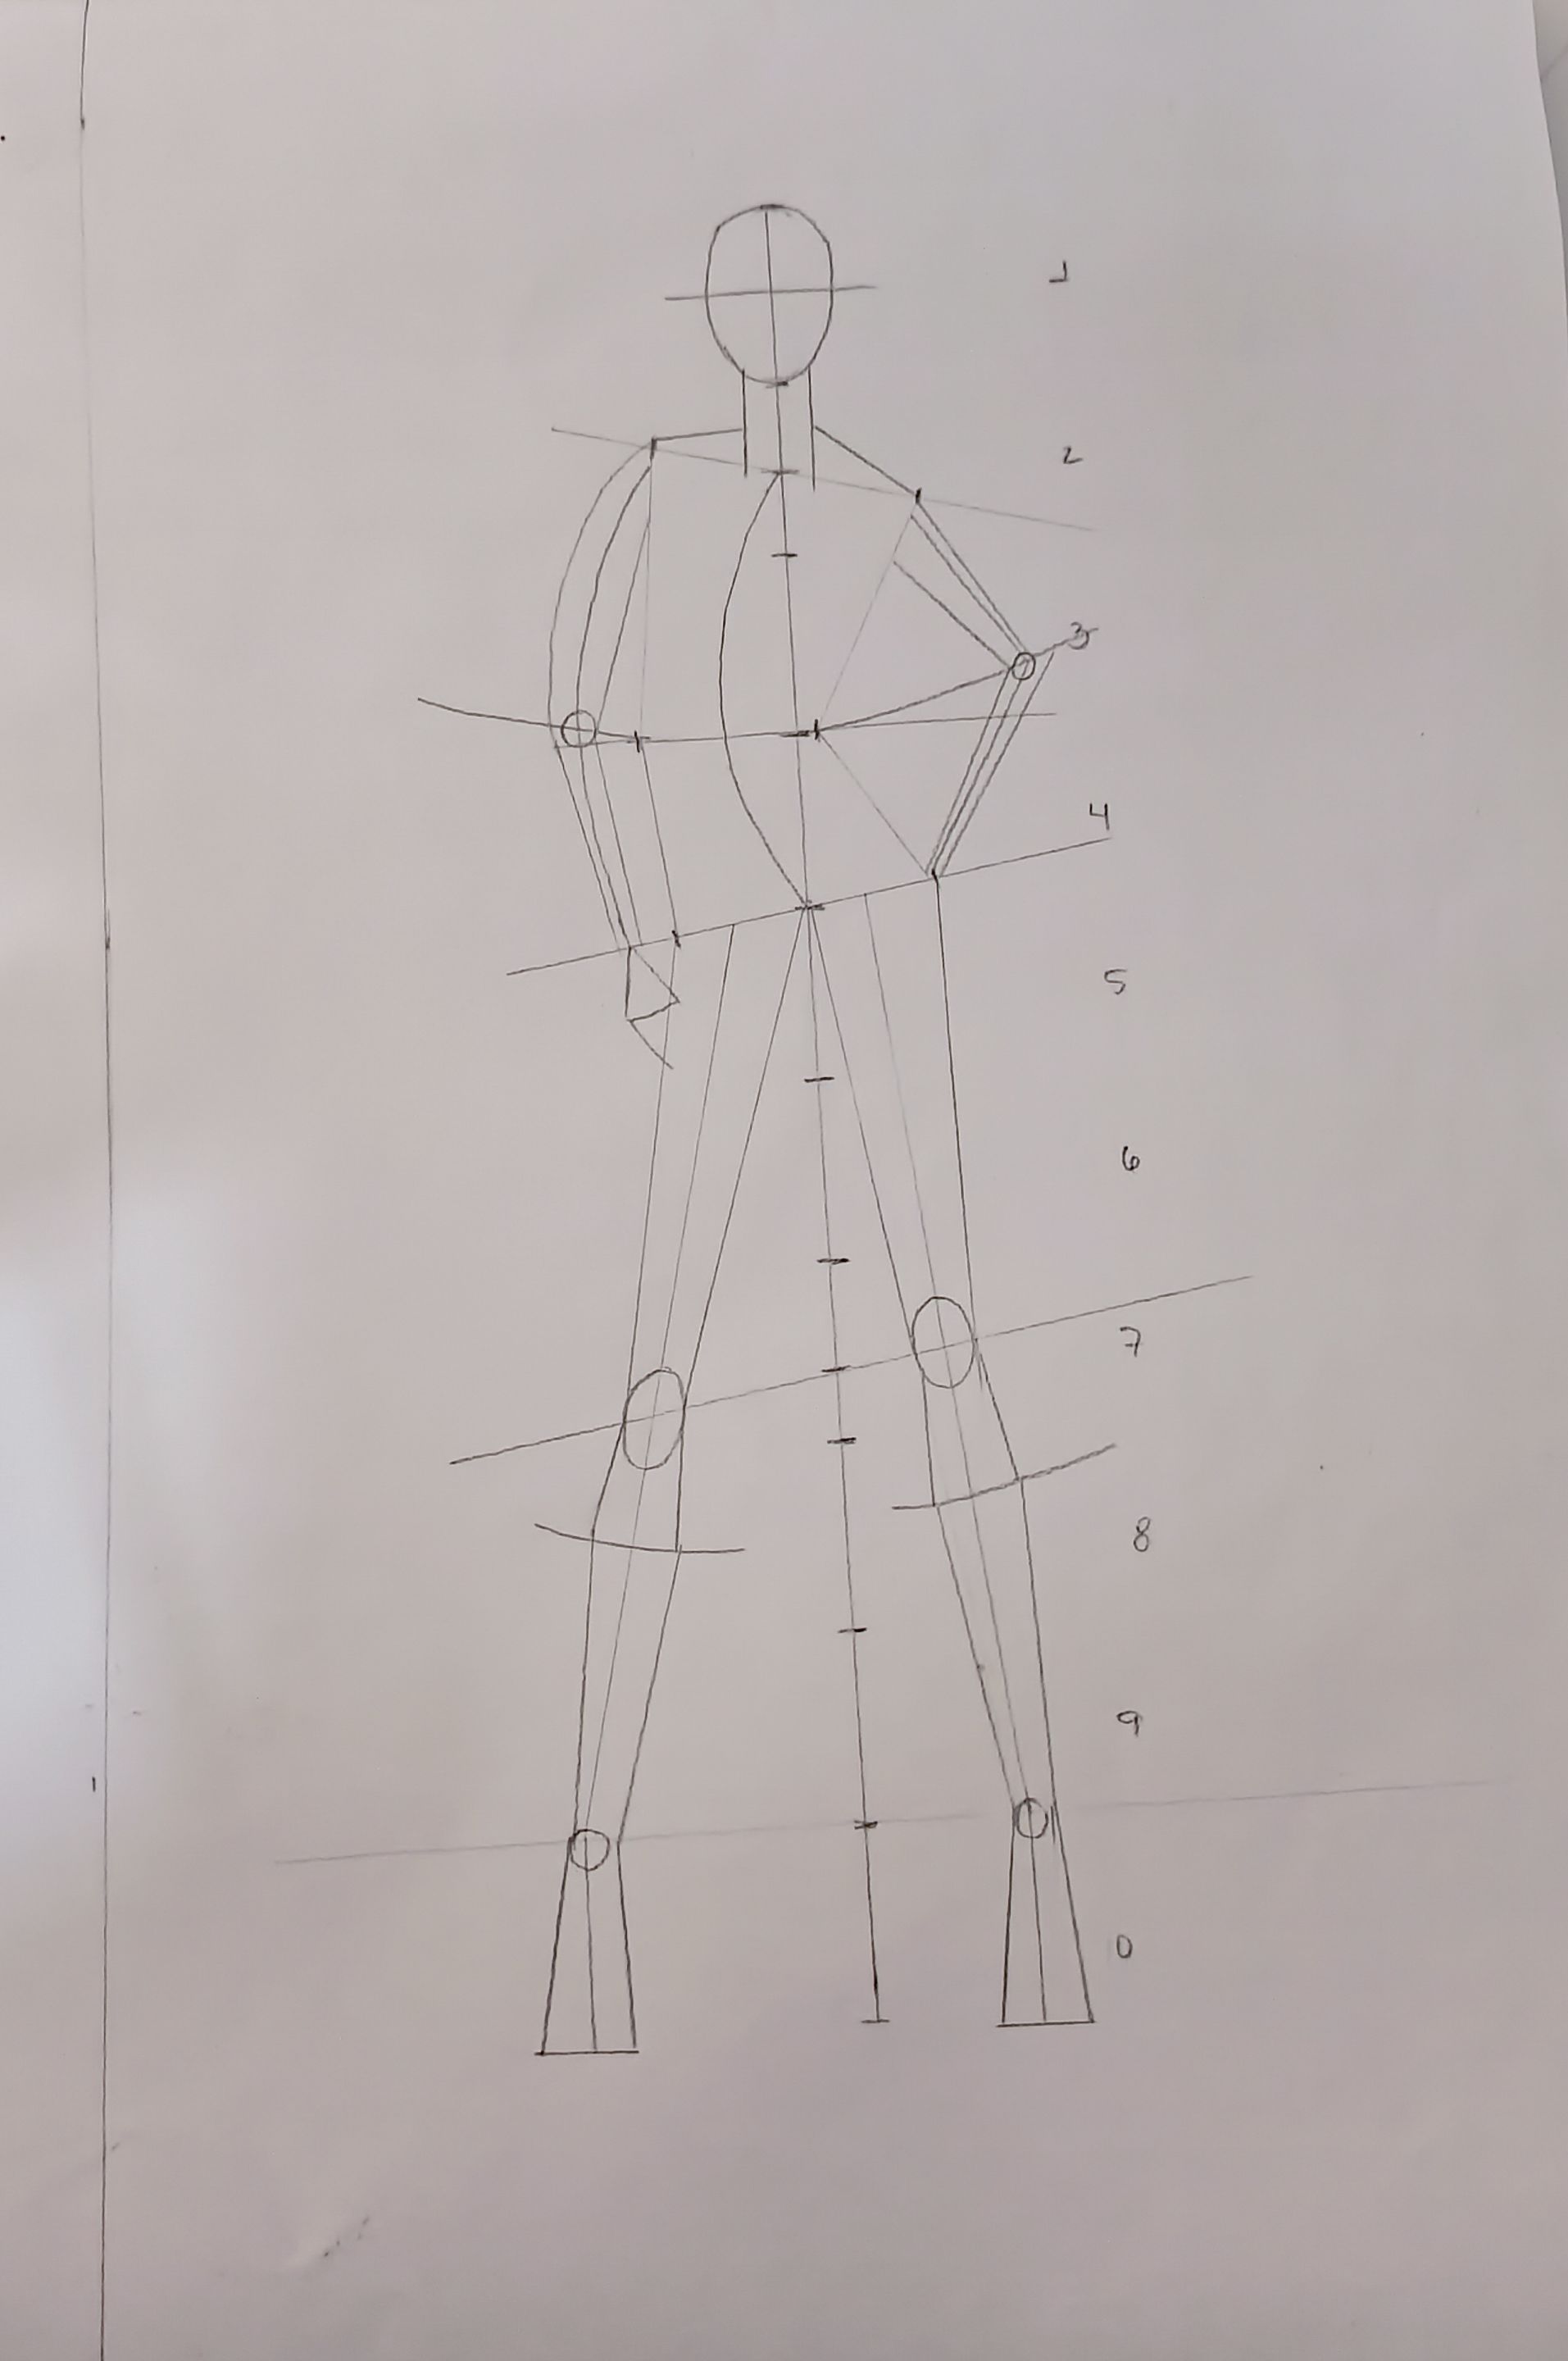
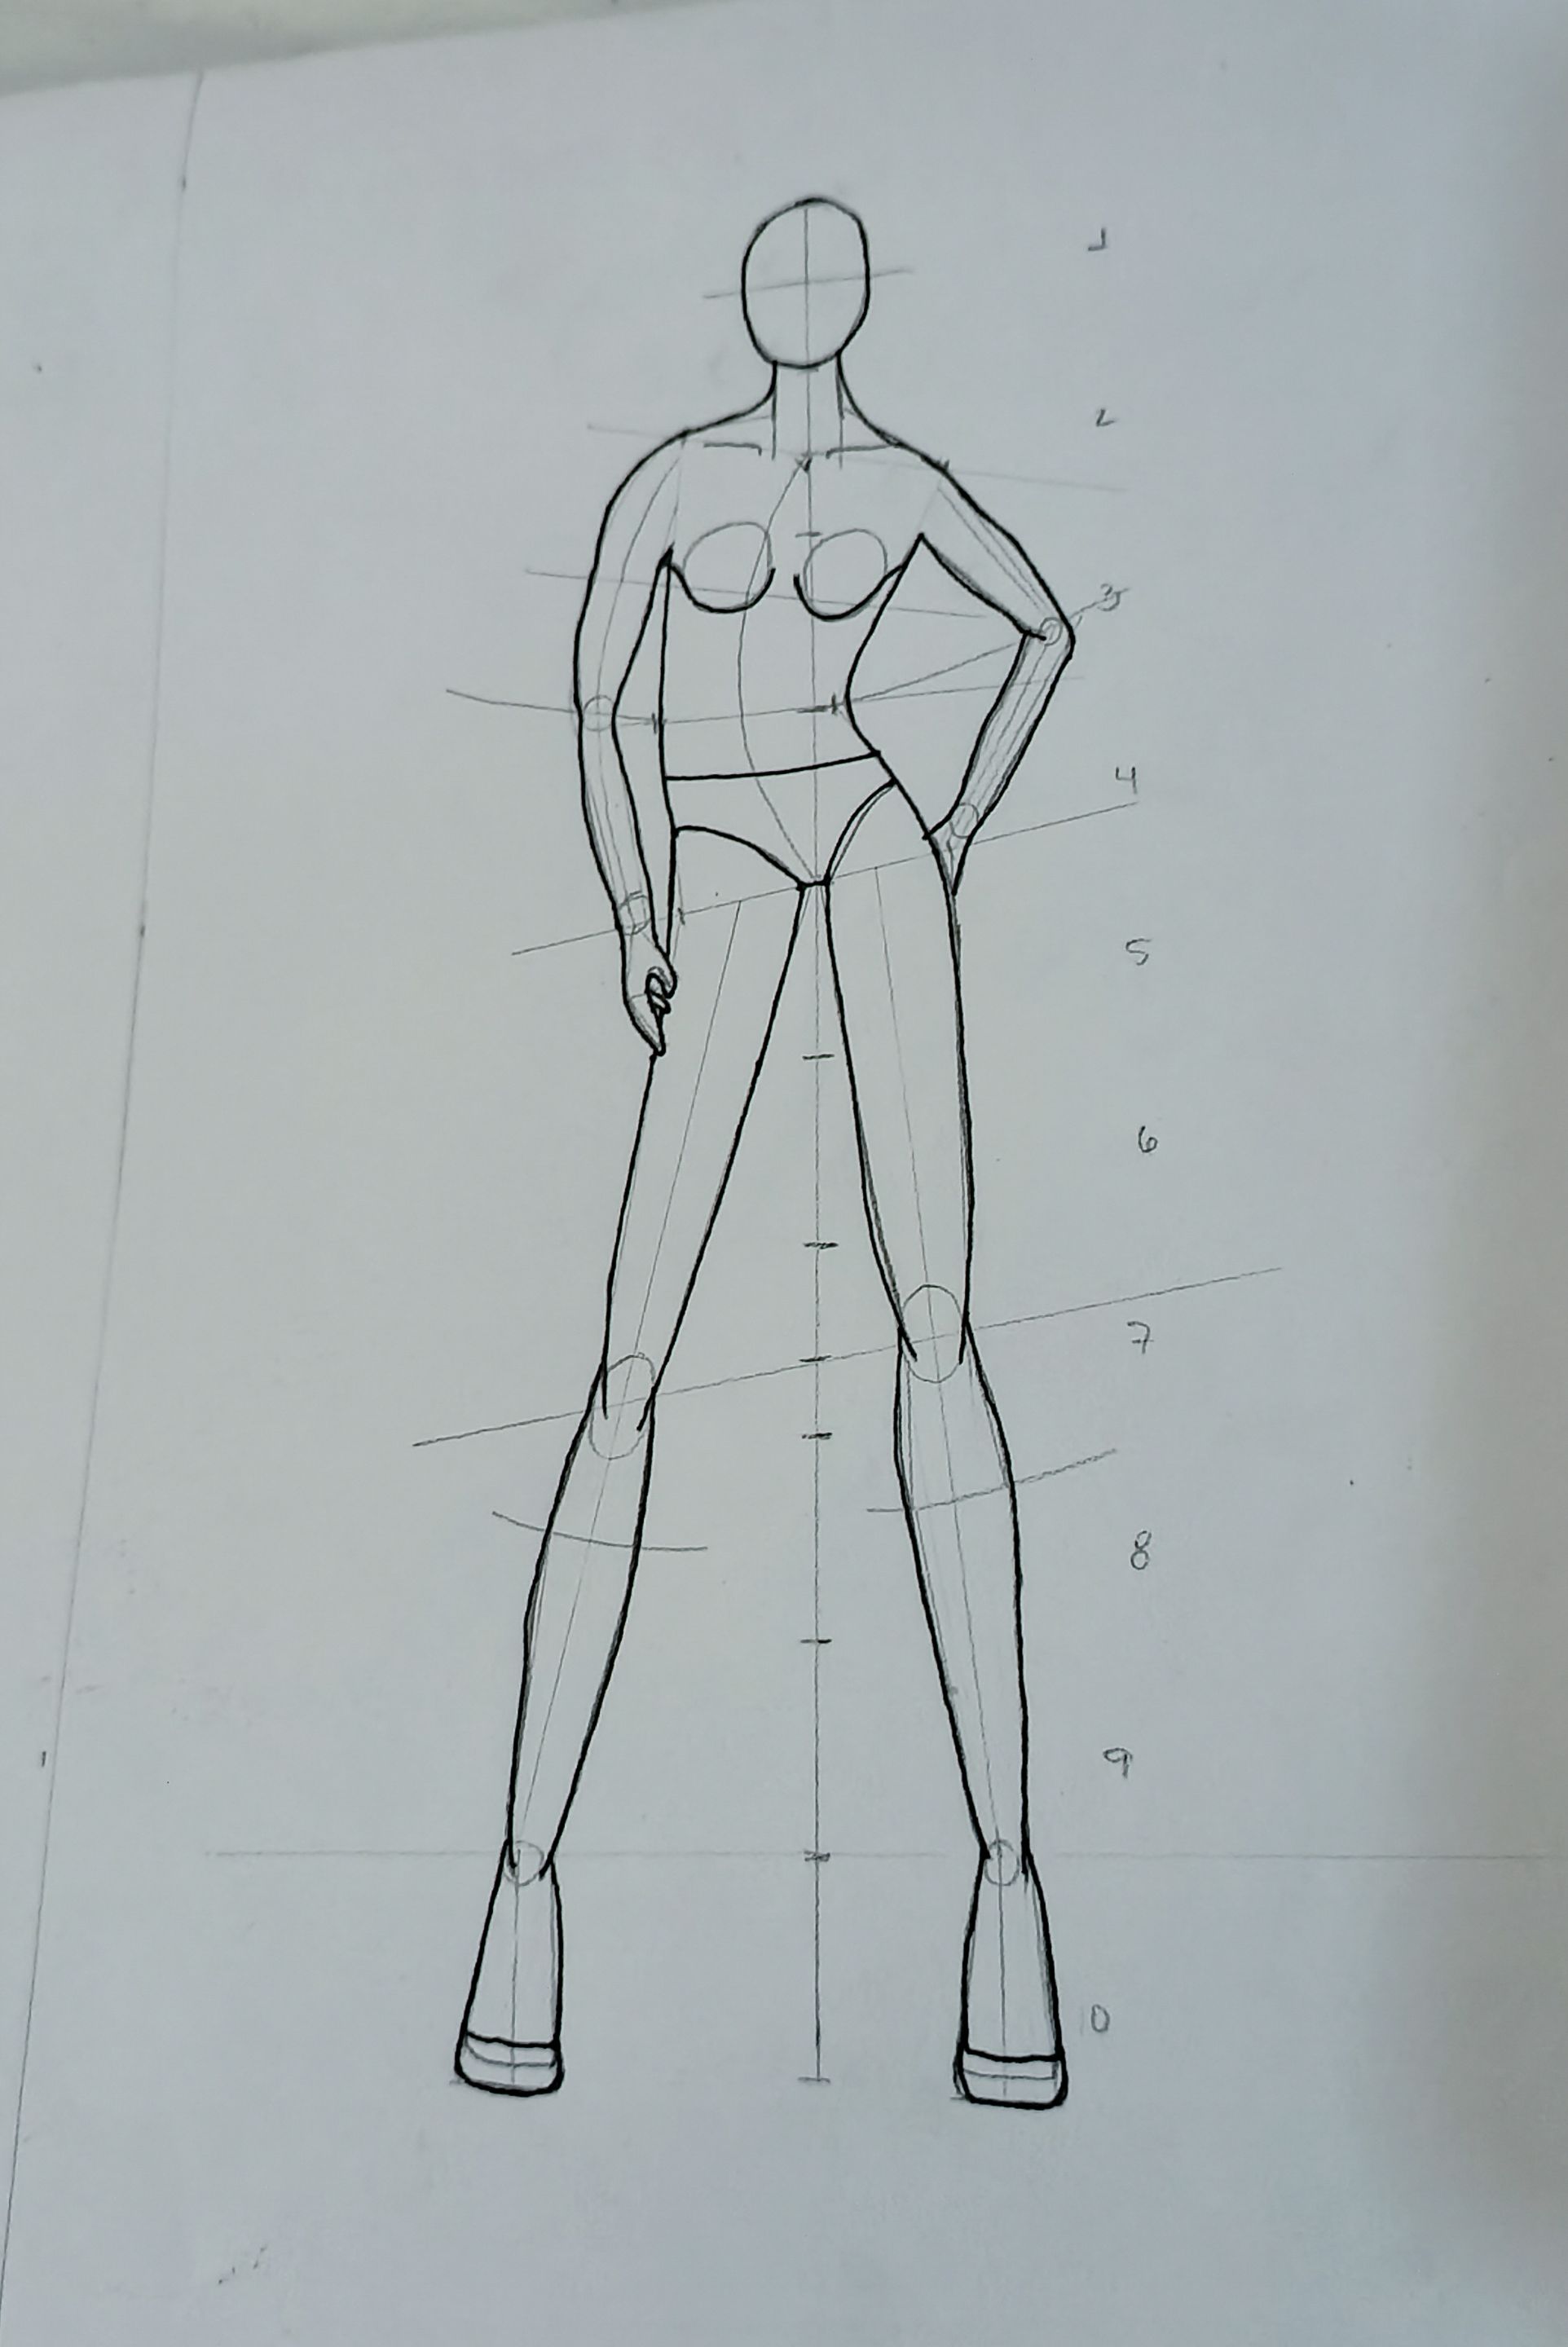
To mark the arms we will draw a curved line from the hip and on it we will make a small circle to indicate the elbow, and on one side we will draw lines with angles to simulate an arm that is attached to the hip. The other arm will be marked with a slight curve as it will be extended. The neck will be two parallel vertical lines and the shoulders two diagonal lines. If you see so far we only have the structure made in straight lines that we can even make with a ruler, now directly with the pencil we will give the necessary curves to the figurine. Once I had made 3 more practice figures, I then ventured into a simple design with quite vibrant colours 🤭.
 |||| |-|-|-| - - - No lo voy a negar, éste nuevo diseño me costó más que el básico 🤣, lo cual tiene toda la lógica del mundo porque ya es una pose más arriesgada, todavía siento que la puedo mejorar más (porque siempre se puede) pero de momento estoy conforme con lo que voy obteniendo, espero hayan podido entender el paso a paso, porque si me cuesta un poco explicarlo y si tienen dudas puede preguntar con confianza 💖.
I'm not going to deny it, this new design cost me more than the basic one 🤣, which has all the logic of the world because it is a more risky pose, I still feel that I can improve it more (because you always can) but for the moment I'm happy with what I'm getting, I hope you could understand the step by step, because if it costs me a little to explain it and if you have doubts you can ask with confidence 💖.
||| |-|-|  - - - 
_**Sígueme en mis redes sociales… || Follow me on my social networks…**_ **Instagram:**[@susijackeline](https://instagram.com/susijackeline?igshid=OGQ2MjdiOTE=) **Instagram de Maquillaje:**[@makeup_sm22](https://www.instagram.com/makeup_sm22/) **Twitter:**[@kiut_variedades](https://twitter.com/kiut_variedades?lang=es) --- All images are my property [Translator DeepL]( https://www.deepl.com/es/translator)