
Outside Mudroom DIY Reforming
This spring, summer, and autumn, we’ve been doing DIY renovations outside the house, such as building a wood deck, fixing the garden, making a septic tank cover, railing, and more. Now, we are renovating the small outside mudroom area. It was very useful, but it felt dark and a bit uncomfortable.

How uncomfortable? Well, the mini mudroom was right outside the front door, which was great for blocking winter snow, summer bugs, and more. The space was very convenient for us. We could hang laundry, yard clothes, jackets, boots, dried flowers, and other items there. We could also place some herb pots inside, and they get nice morning sunshine. I think the original owner who built it was a smoker. The atmosphere felt like a hidden man-cave. Since we don’t smoke, we wanted to make the space brighter and a little wider.
It’s also a perfect spot to get ready for dog walks, especially in the cold winter. We can leave winter boots here temporarily, and we also store the snow shovel there.

In Japan, in my hometown, houses usually have more stable front doors for winter snow, plus a space inside the entrance where you take off your shoes before stepping into the house. But in Canada, the front door style is very different from Japan’s, which makes this mudroom spot especially useful.
The materials, however, weren’t very permanent. I guess the original builder used recycled materials. The chi felt stuck in this spot. I know that’s related to feng shui thinking, so I can’t “prove” it, but still, the dark, box-like structure in front of the door felt dominating and blocking. We wanted to improve the flow.

After removing the outside cover and mesh screen, we got more sunshine and breeze. I felt relieved to have a wider view, and my dog was happy to see outside clearly.

We also didn’t like the bottom part of the old design, because it was hard to clean. Dust, dirt, and dog hair collected there easily, and I had to spend a lot of time cleaning it.
We also disliked the lattice-style railing, which was the same as the outside railing we had already replaced.

Now, this is the new version of the outside mudroom. My husband did a great job! We couldn’t change the whole frame, but he replaced some old wood, reinforced the frame, and made repairs.
The roof had already been fixed earlier with new panels, since rain used to leak through. When we fixed the shed roof, we installed panels here too. Since then, the mudroom feels much drier.
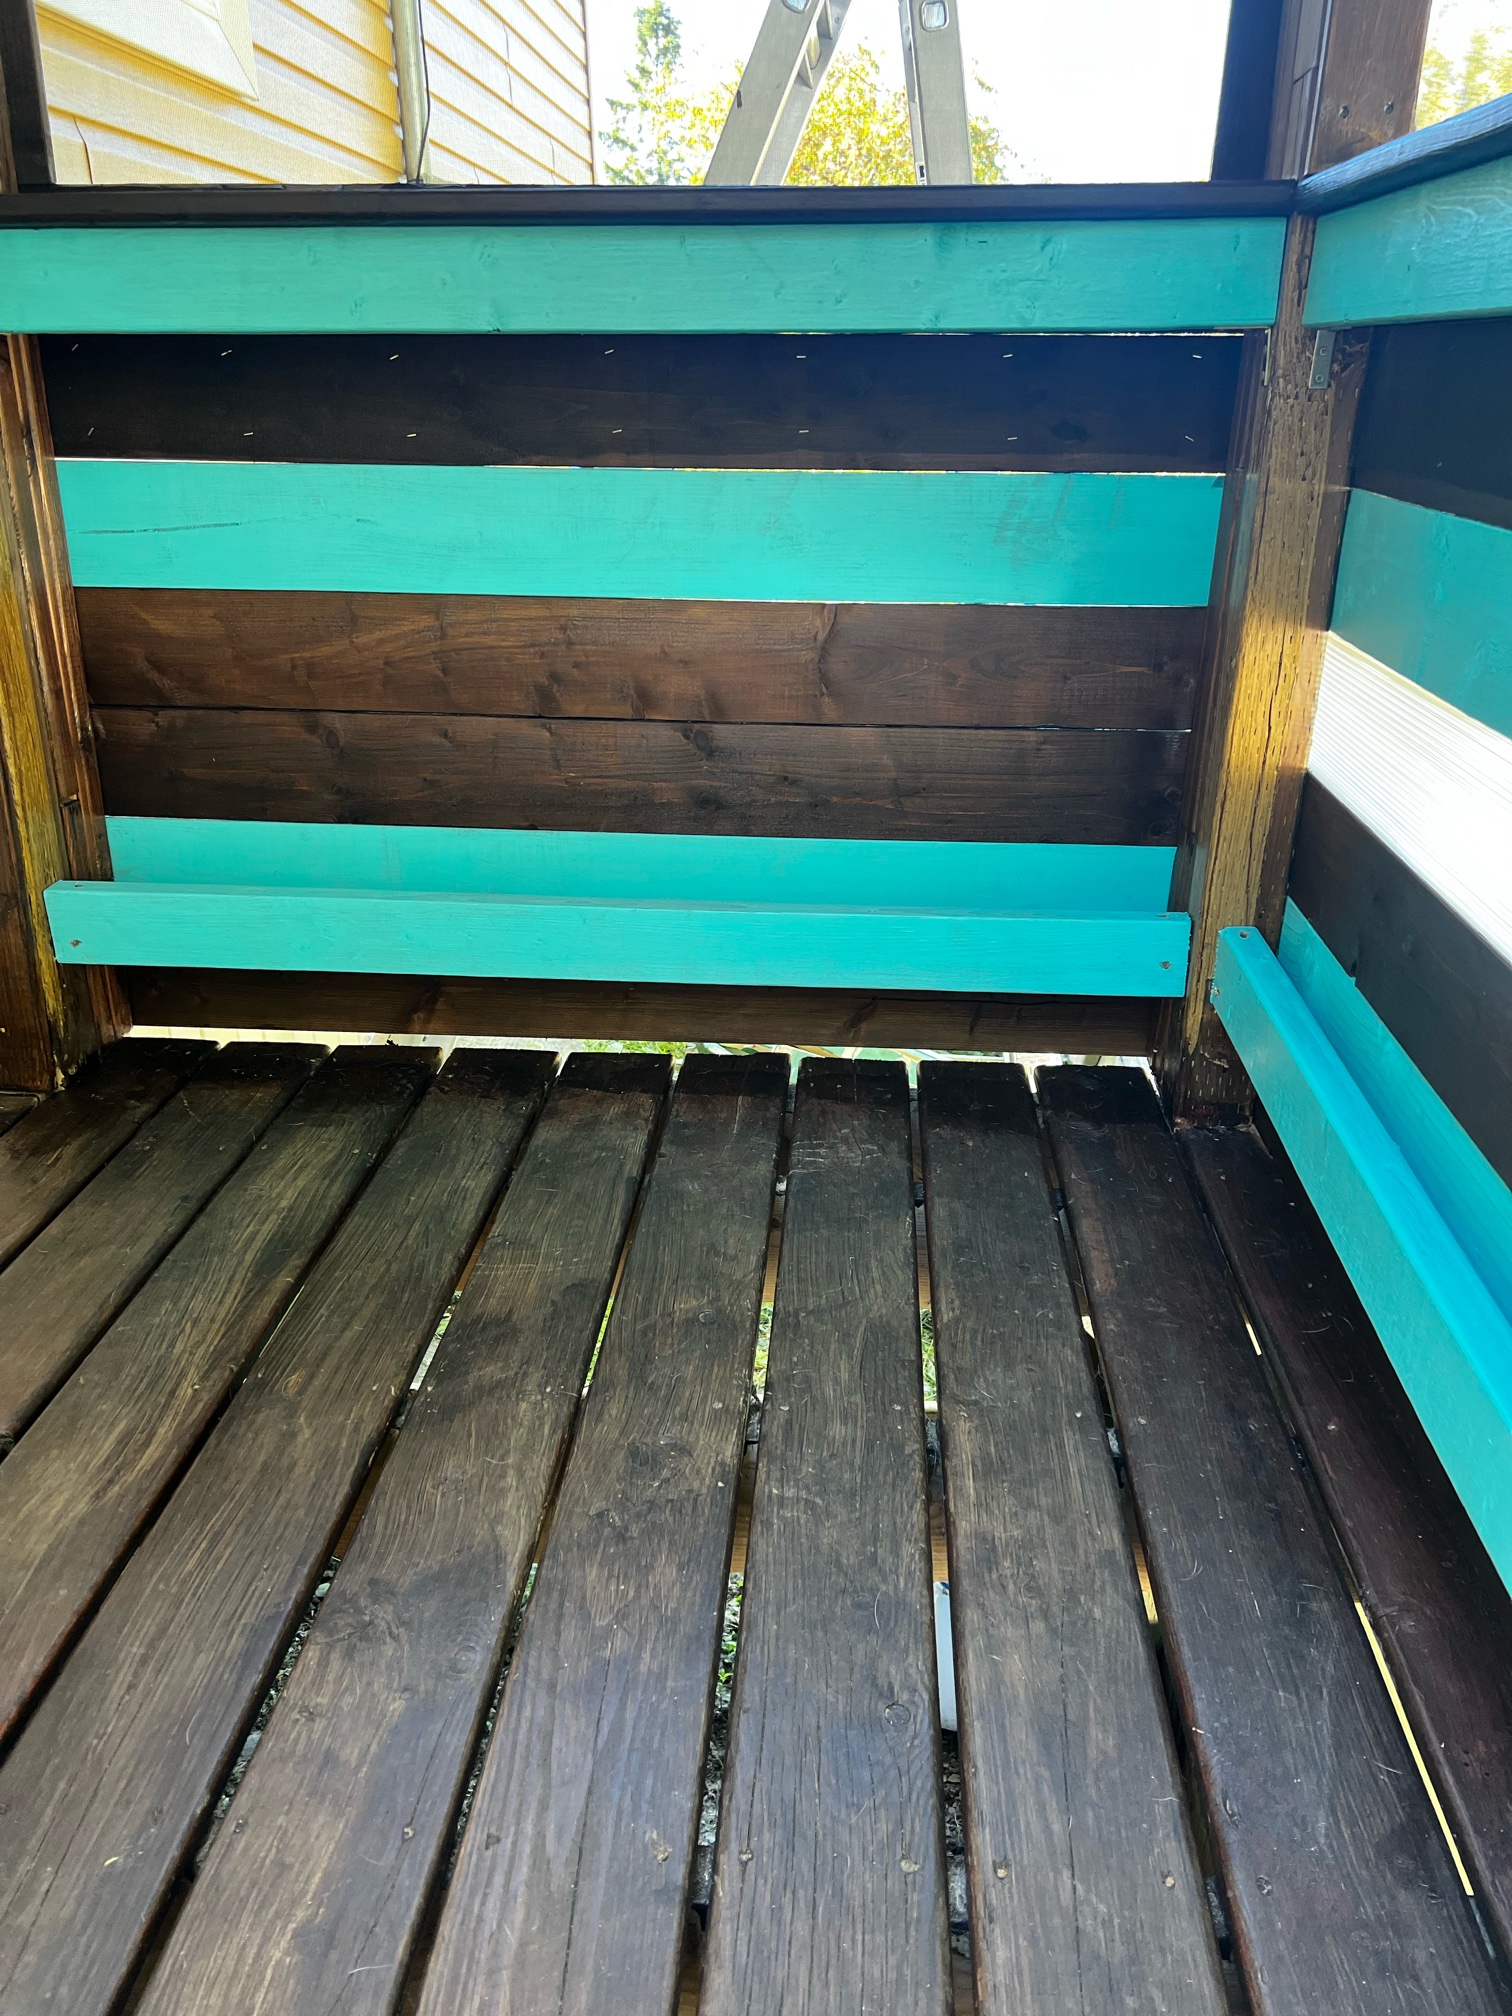
Here’s the new inside of the mudroom. The bottom part now has a small gap, so I can sweep easily. Somehow, it feels wider than before.
We installed a new mesh screen, and it looks so clear compared to before. I almost don’t feel like there’s a screen at all!

Now there’s more space to put planters, and we can hang flowers to collect seeds again. The dark wall is gone, so it’s no longer blocking the view. We can see our yard clearly.
We also used the same clear materials as our shed greenhouse. There’s a thin, clear window on the side for our dog to look outside, and he’s already using it to peek out.
We haven’t installed the door yet. It also needs to be rebuilt. The original door was badly damaged, and our dog scratched the mesh screen a lot when trying to come inside. We’ll need to make a new door.
On the left side of the door, we already replaced the panels with clear ones, but we still need to repaint the base colours in a darker shade, like the new parts. That will be done in a few days.

This project is ongoing. The colour of the new mudroom and wood deck area reminds me of a mint-chocolate café. I also like the mocha colour of the nails we used.
Hopefully, we can finish our outside renovation project before the snow season arrives. I’m very thankful to my husband for putting so much effort and energy into it!
Japanese 日本語
外玄関の土間のDIYリフォーム、パート1
今年の春、夏と秋は家の外回りのDIYリフォームをしています。ウッドデッキ部分、庭の改善、セプティックタンクのカバーの交換、手すりのリフォームなどなど…。そして、現在は玄関の外の小さな土間の部分をリノベーション中です。この土間部分は便利なのですが、暗くてあまりいい感じがしなかったのです。
どのように快適に感じられなかったかというと…。この小さな土間は玄関の外にくっついて建てられていますので、冬の雪から守ってくれ、夏の虫よけにもなる場所です。とても便利な場所であることには間違いないです。ちょっとした洗濯物を干しておくこともできますし、庭仕事の服やジャケットをかけたり、ブーツを置いておいたり、ドライフラワーなどを作ることもできます。朝日がふんだんに入ってくる場所ですので、ハーブのプランターを設置もしています。前の大家さんはおそらくタバコを吸う場所にしていたようです。この場所はマンケーブ的な隠れ場所のようなイメージでした。わたしたちはタバコを吸わないので、この場所をもう少し明るいイメージにしたいと思っていました。
さらに、冬は特に犬の散歩前の準備をする場所としても有効活用できます。冬のブーツを一時的に放置しておくこともできますし、雪かき用のショベル置き場としても活用できます。
日本の故郷では、冬の雪対策がしっかりされた玄関使用になっていますので、こことは全然違う作りです。玄関内の作りもかなり違います。カナダは日本の玄関の作りと違うので、この土間スペースはかなり便利な場所ではあるのです。
元々の材料にはかなり適当な素材のものを使用されていました。おそらく、再利用した材料で建てられたのではないでしょうか。なんとなく、この場所には気が溜まるような感覚がしていました。風水的な考え方になってしまうのかもしれません。具体的な証拠はないのですが、暗いボックスのような囲われた場所が玄関の気の流れをストップしているような感じです。この滞った流れを変えたいと思っていました。
土間を覆っていたカバーとメッシュスクリーンを取り除くと、太陽の光が差し込んで、風の通りがよくなりました。視界の狭さがなくなり、愛犬も外がはっきり見えて嬉しそうです。
それから、足元の下の部分も掃除がしづらくてあまり好きなデザインではありませんでした。埃、土や犬の毛がたまってしまい、掃除がしづらく、きれいにするまでに手間がかかりました。
そして、別の部分のデザインと同様にこの格子風の手すりのデザインも好きではなかったです。
これがリフォーム後の土間のデザインです。主人が頑張って作ってくれました。すべての枠を取り去ることはできなかったので、古い木の部分をとって、新しい木材を入れて枠を強化しました。
屋根は、以前雨漏りがした時、新しい屋根を上に取り付けて強化済みです。物置の屋根を強化した時に同時に作業しました。それからというもの、土間の雨漏りがなくなりすっかりドライになりました。
これが新しい土間の内部です。下部には少しの隙間があるので、掃き掃除が簡単にできそうです。なぜか、前よりも広く感じます。
新しいメッシュのスクリーンをつけたので、以前よりもクリアな眺めです。まったくスクリーンがあるように感じません。
前よりもプランターを置く場所が増えました。種をとるために以前と同様に花を干すことができます。暗い壁がなくなったことで、眺めがスッキリしました。庭が見渡せるようになりました。
物置のグリーンハウスに使用したクリアな素材と同じものを使用しました。透明な窓が下の部分にも少しだけあります。これは犬が外の様子を覗くことができるようにつけたらしいです。すでに愛犬はここから外の様子を見ています。
土間用のドアはまだつけていません。ドアも作り変える必要があります。元々のドアにはかなりダメージがありました。さらに愛犬が中に入る時にメッシュのスクリーン部分をひっかいてしまい、ボロボロになってしまいました。新しいものを付け替えて作り直します。
ドアの左側はすでにクリアな壁に変えてあるのですが、枠の色を塗り替えるために取り外してやり直しです。ドア部分は数日かかる予定です。
このプロジェクトはまだ続きそうです。新しい土間の色とウッドデッキはミントチョコレートのカフェのようなイメージの色合いです。モカ色の釘もいい感じだと思います。
この家の外回りの改修プロジェクトは雪が降る前に終了すればいいなと思います。主人の労力と努力に感謝です!
Thank you for reading! お読みいただきありがとうございます。
 https://koto-art.wixsite.com/mysite-1