Hola amiguitos de #hive como están, espero que su fin de semana hayan disfrutado al máximo, el mío estuvo cargado de mucha unión familiar y descanso, pero hoy regreso a traerles un lindo y práctico corazón para guardar los hilos.
Los materiales son fáciles, y estaremos creando un lindo estuche para guardar nuestros materiales de costura, hilos, agujas, entre otros, y esa es la idea crear trabajos que tengan una función, aquí les dejo los materiales y el paso a paso.
♥️ Materiales ♥️
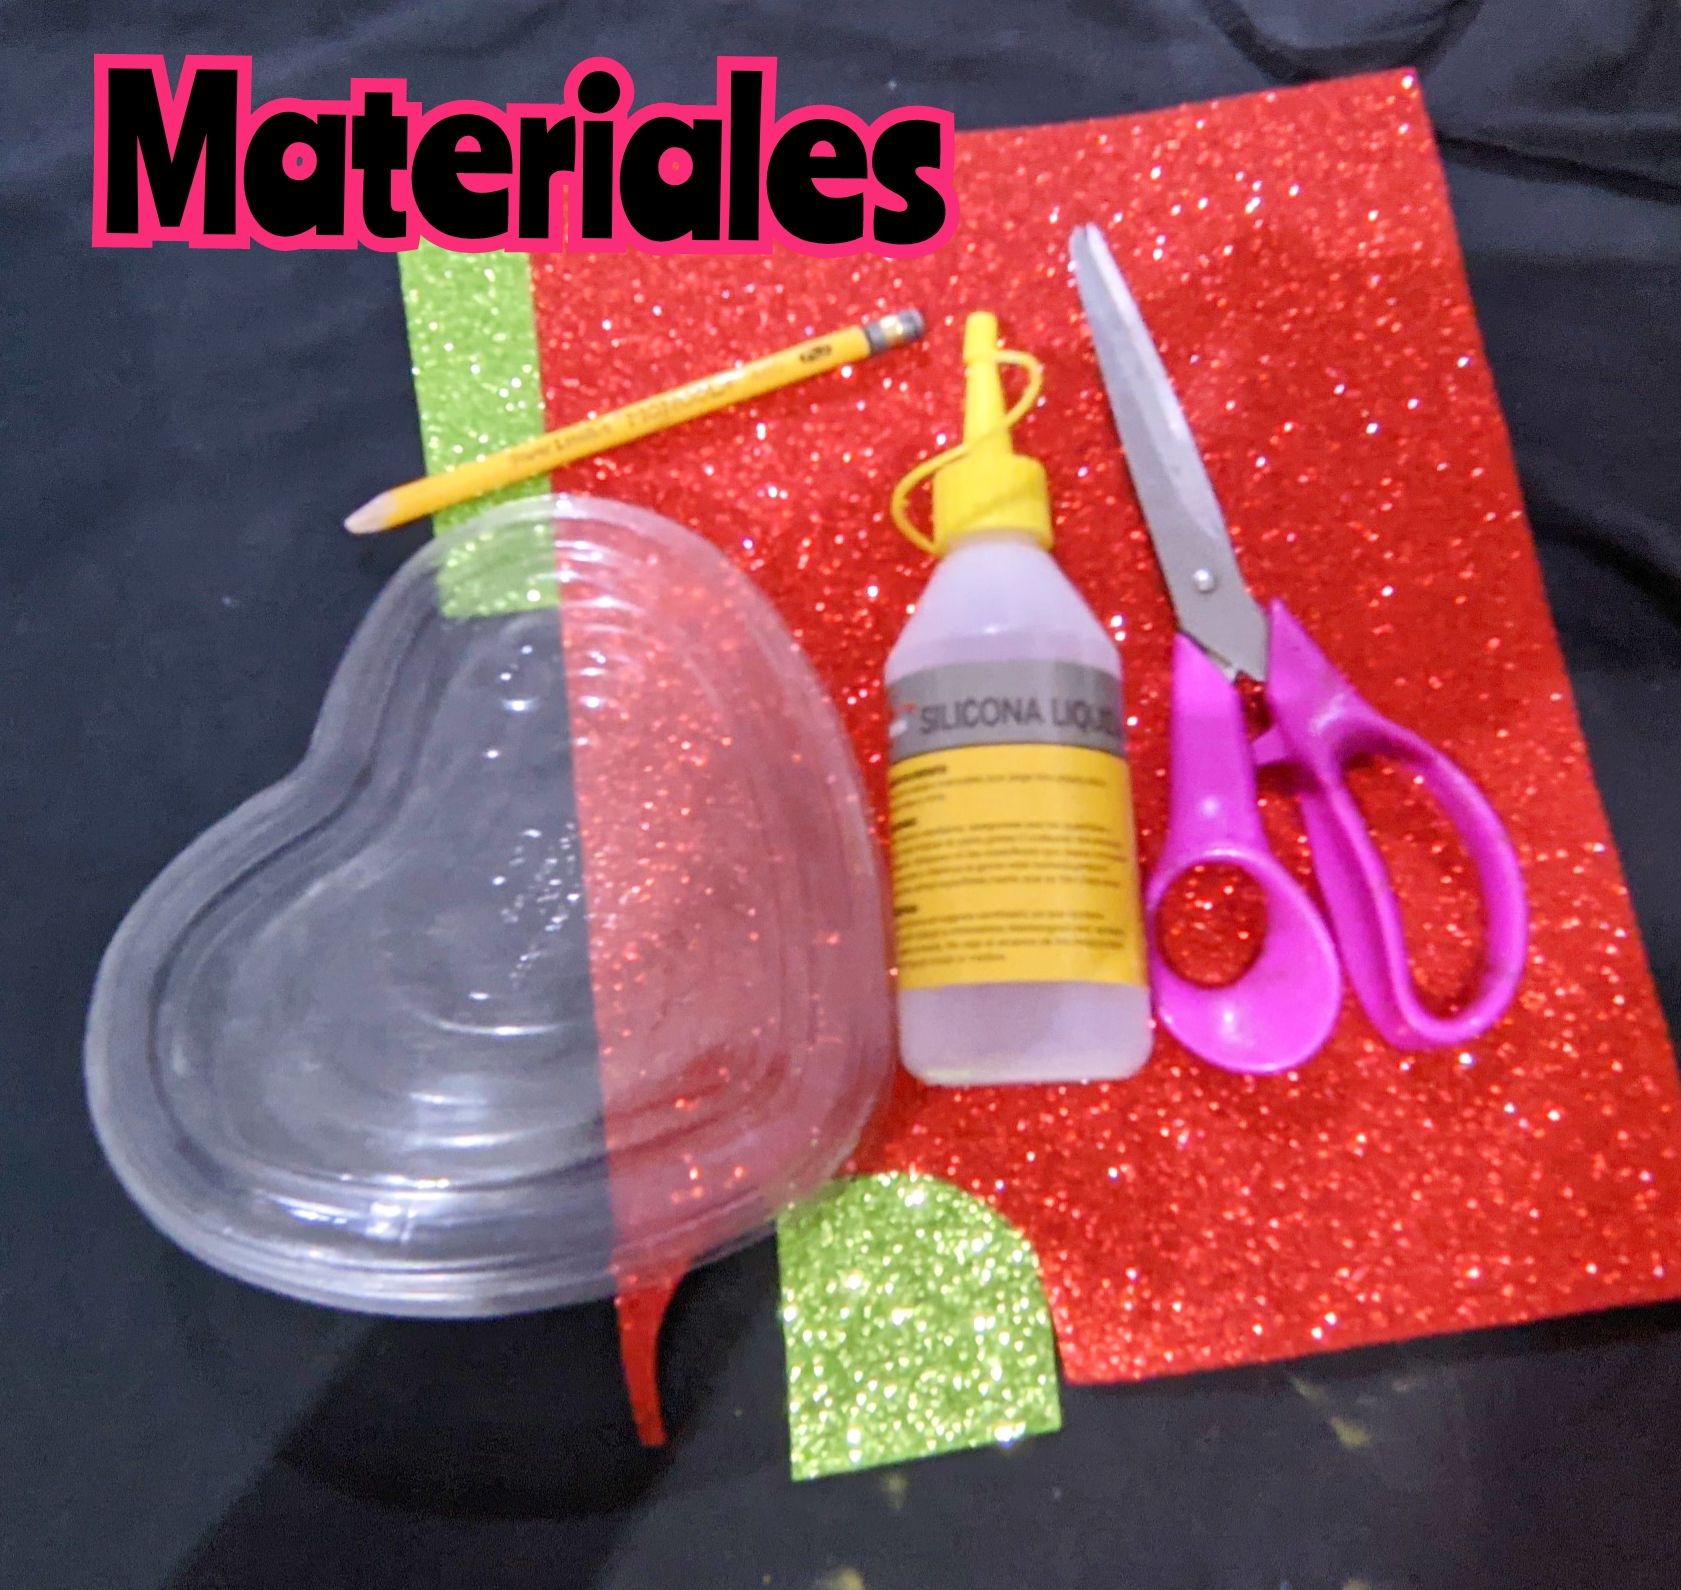
♥️ Foami rojo escarchado.
♥️ Foami rosado.
♥️ Foami amarillo.
♥️ Foami verde.
♥️ Silicón líquido.
♥️ Envase en forma de corazón.
♥️ Tijera.
♥️ Lápiz.
♥️ paso a paso ♥️
♥️Paso 1:
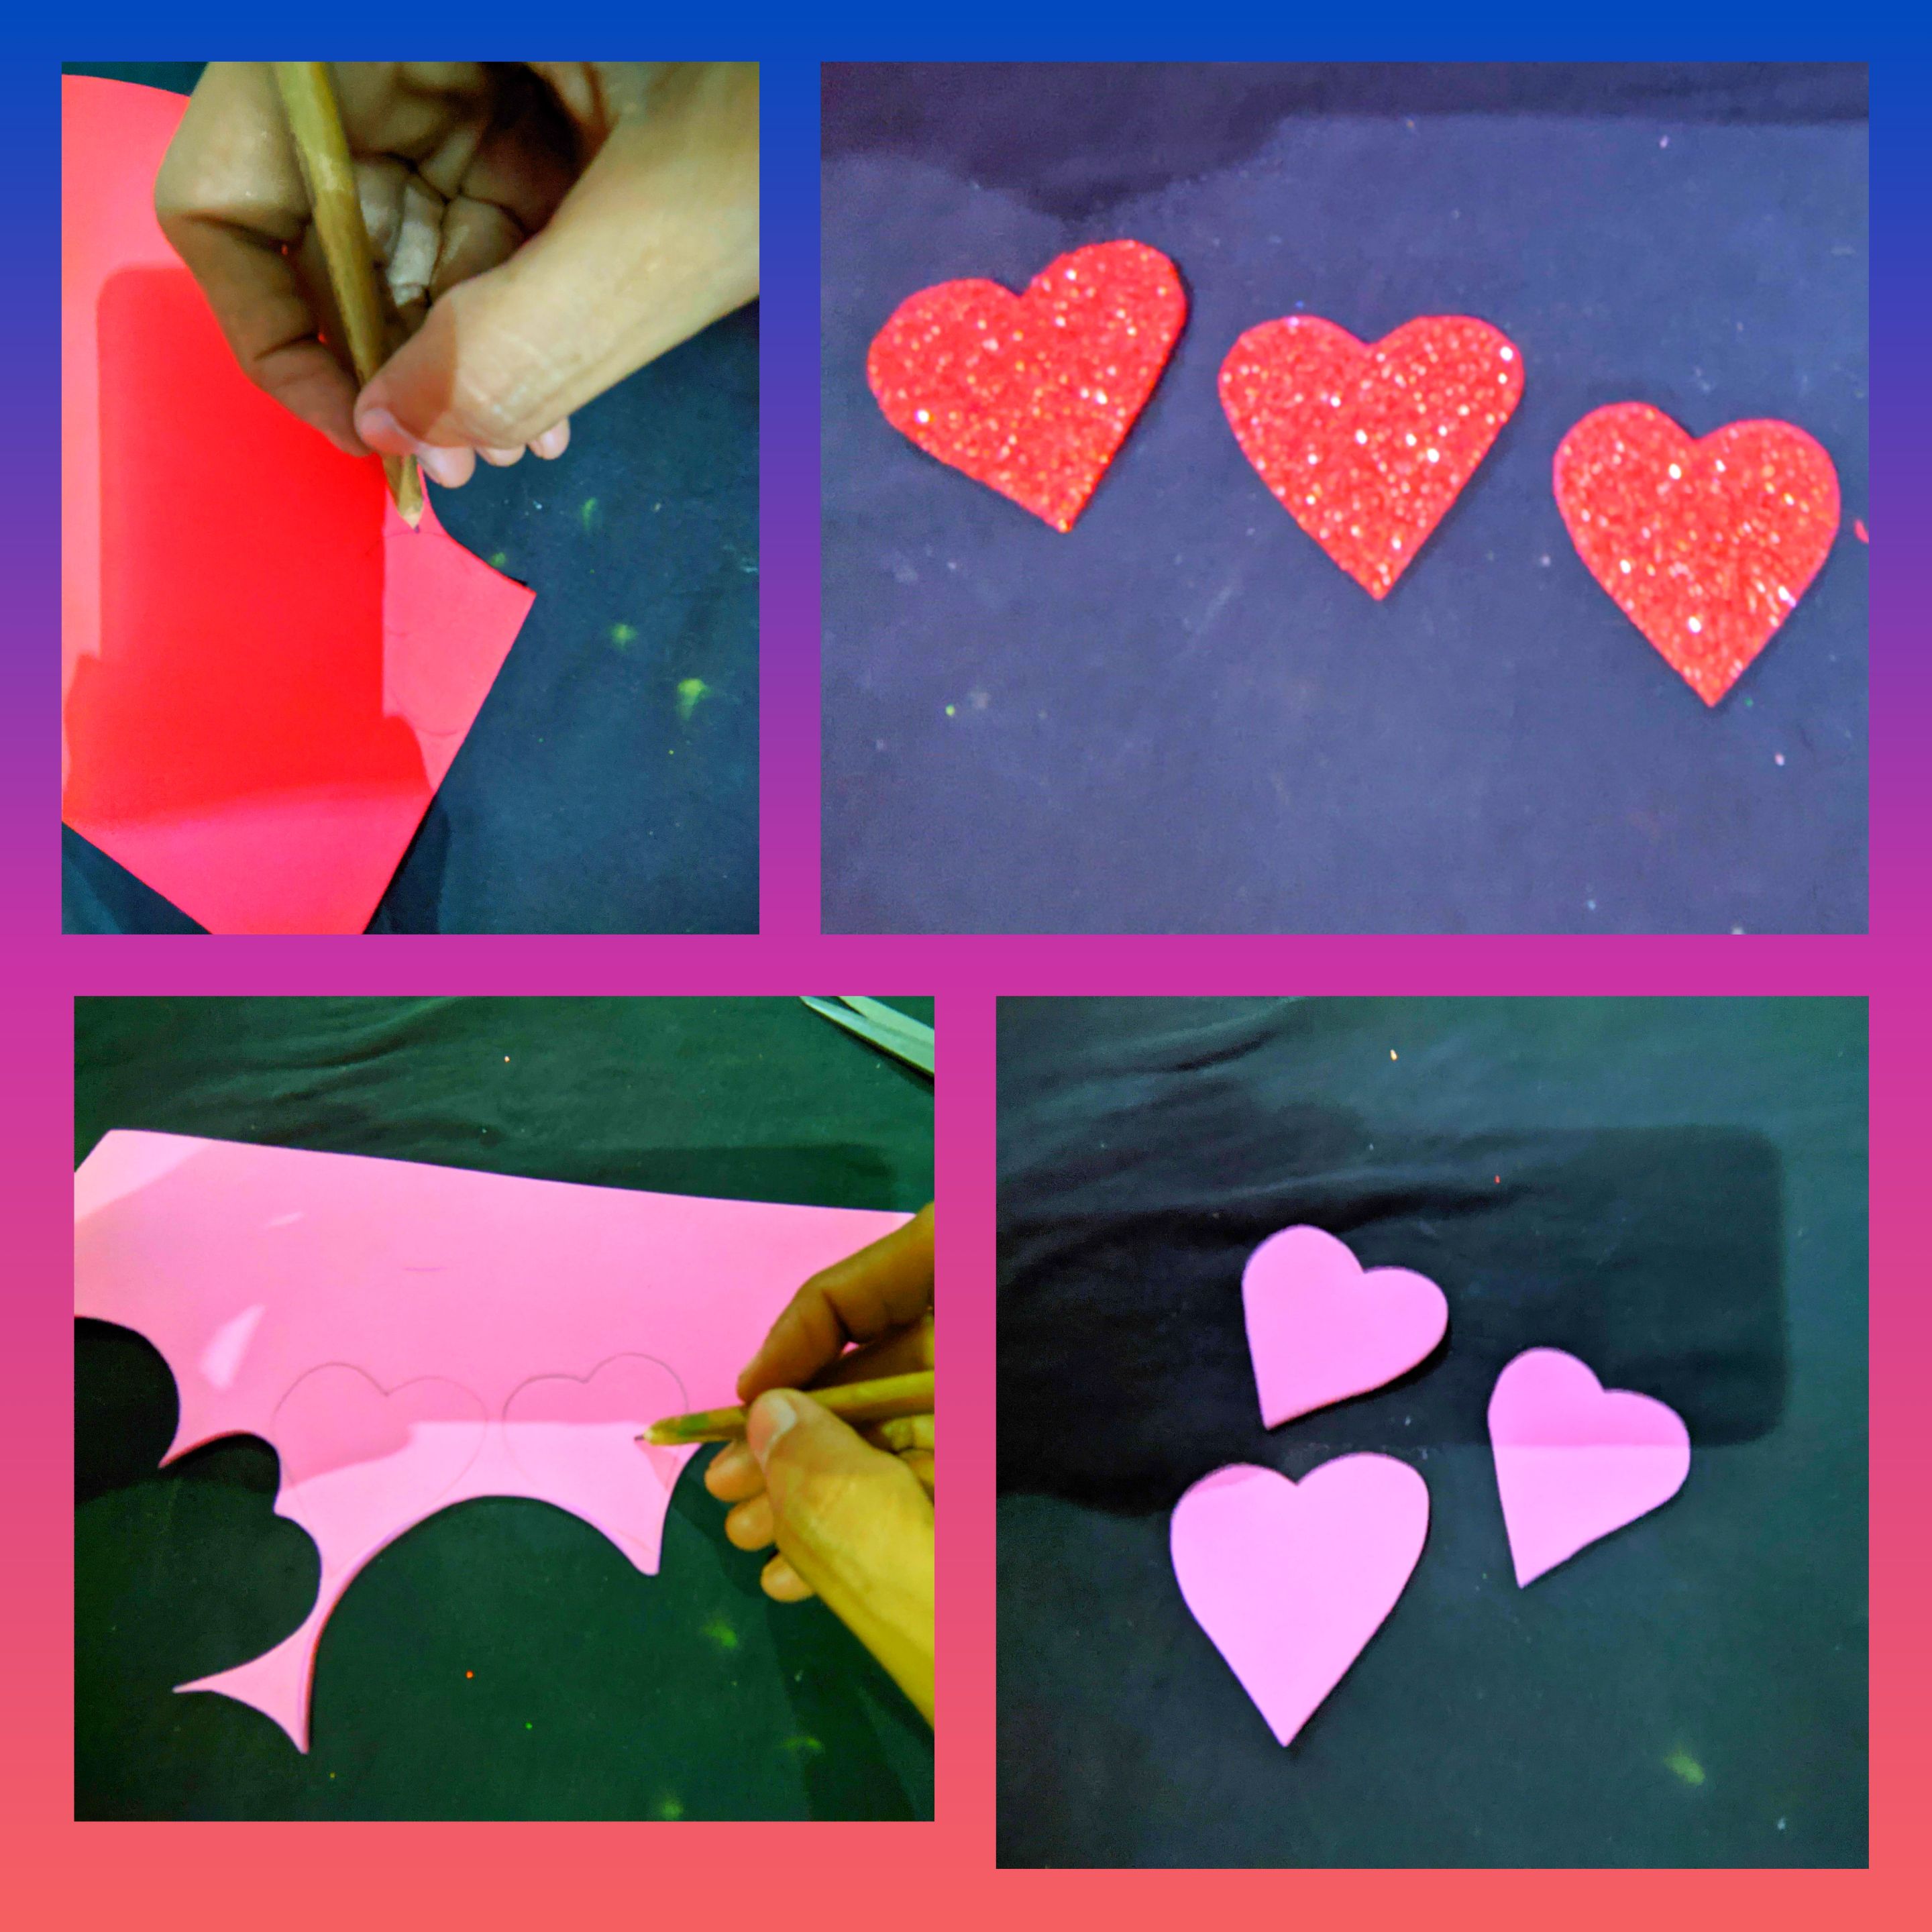
Primero tome el foami rojo escarchado y en el dibuje tres corazones, uno más pequeño que el anterior, y lo recorté,después tomé el foami rosado y dibuje tres corazones, pero estos deben ser más grandes que los de foami de color rojo.
♥️Paso 2:
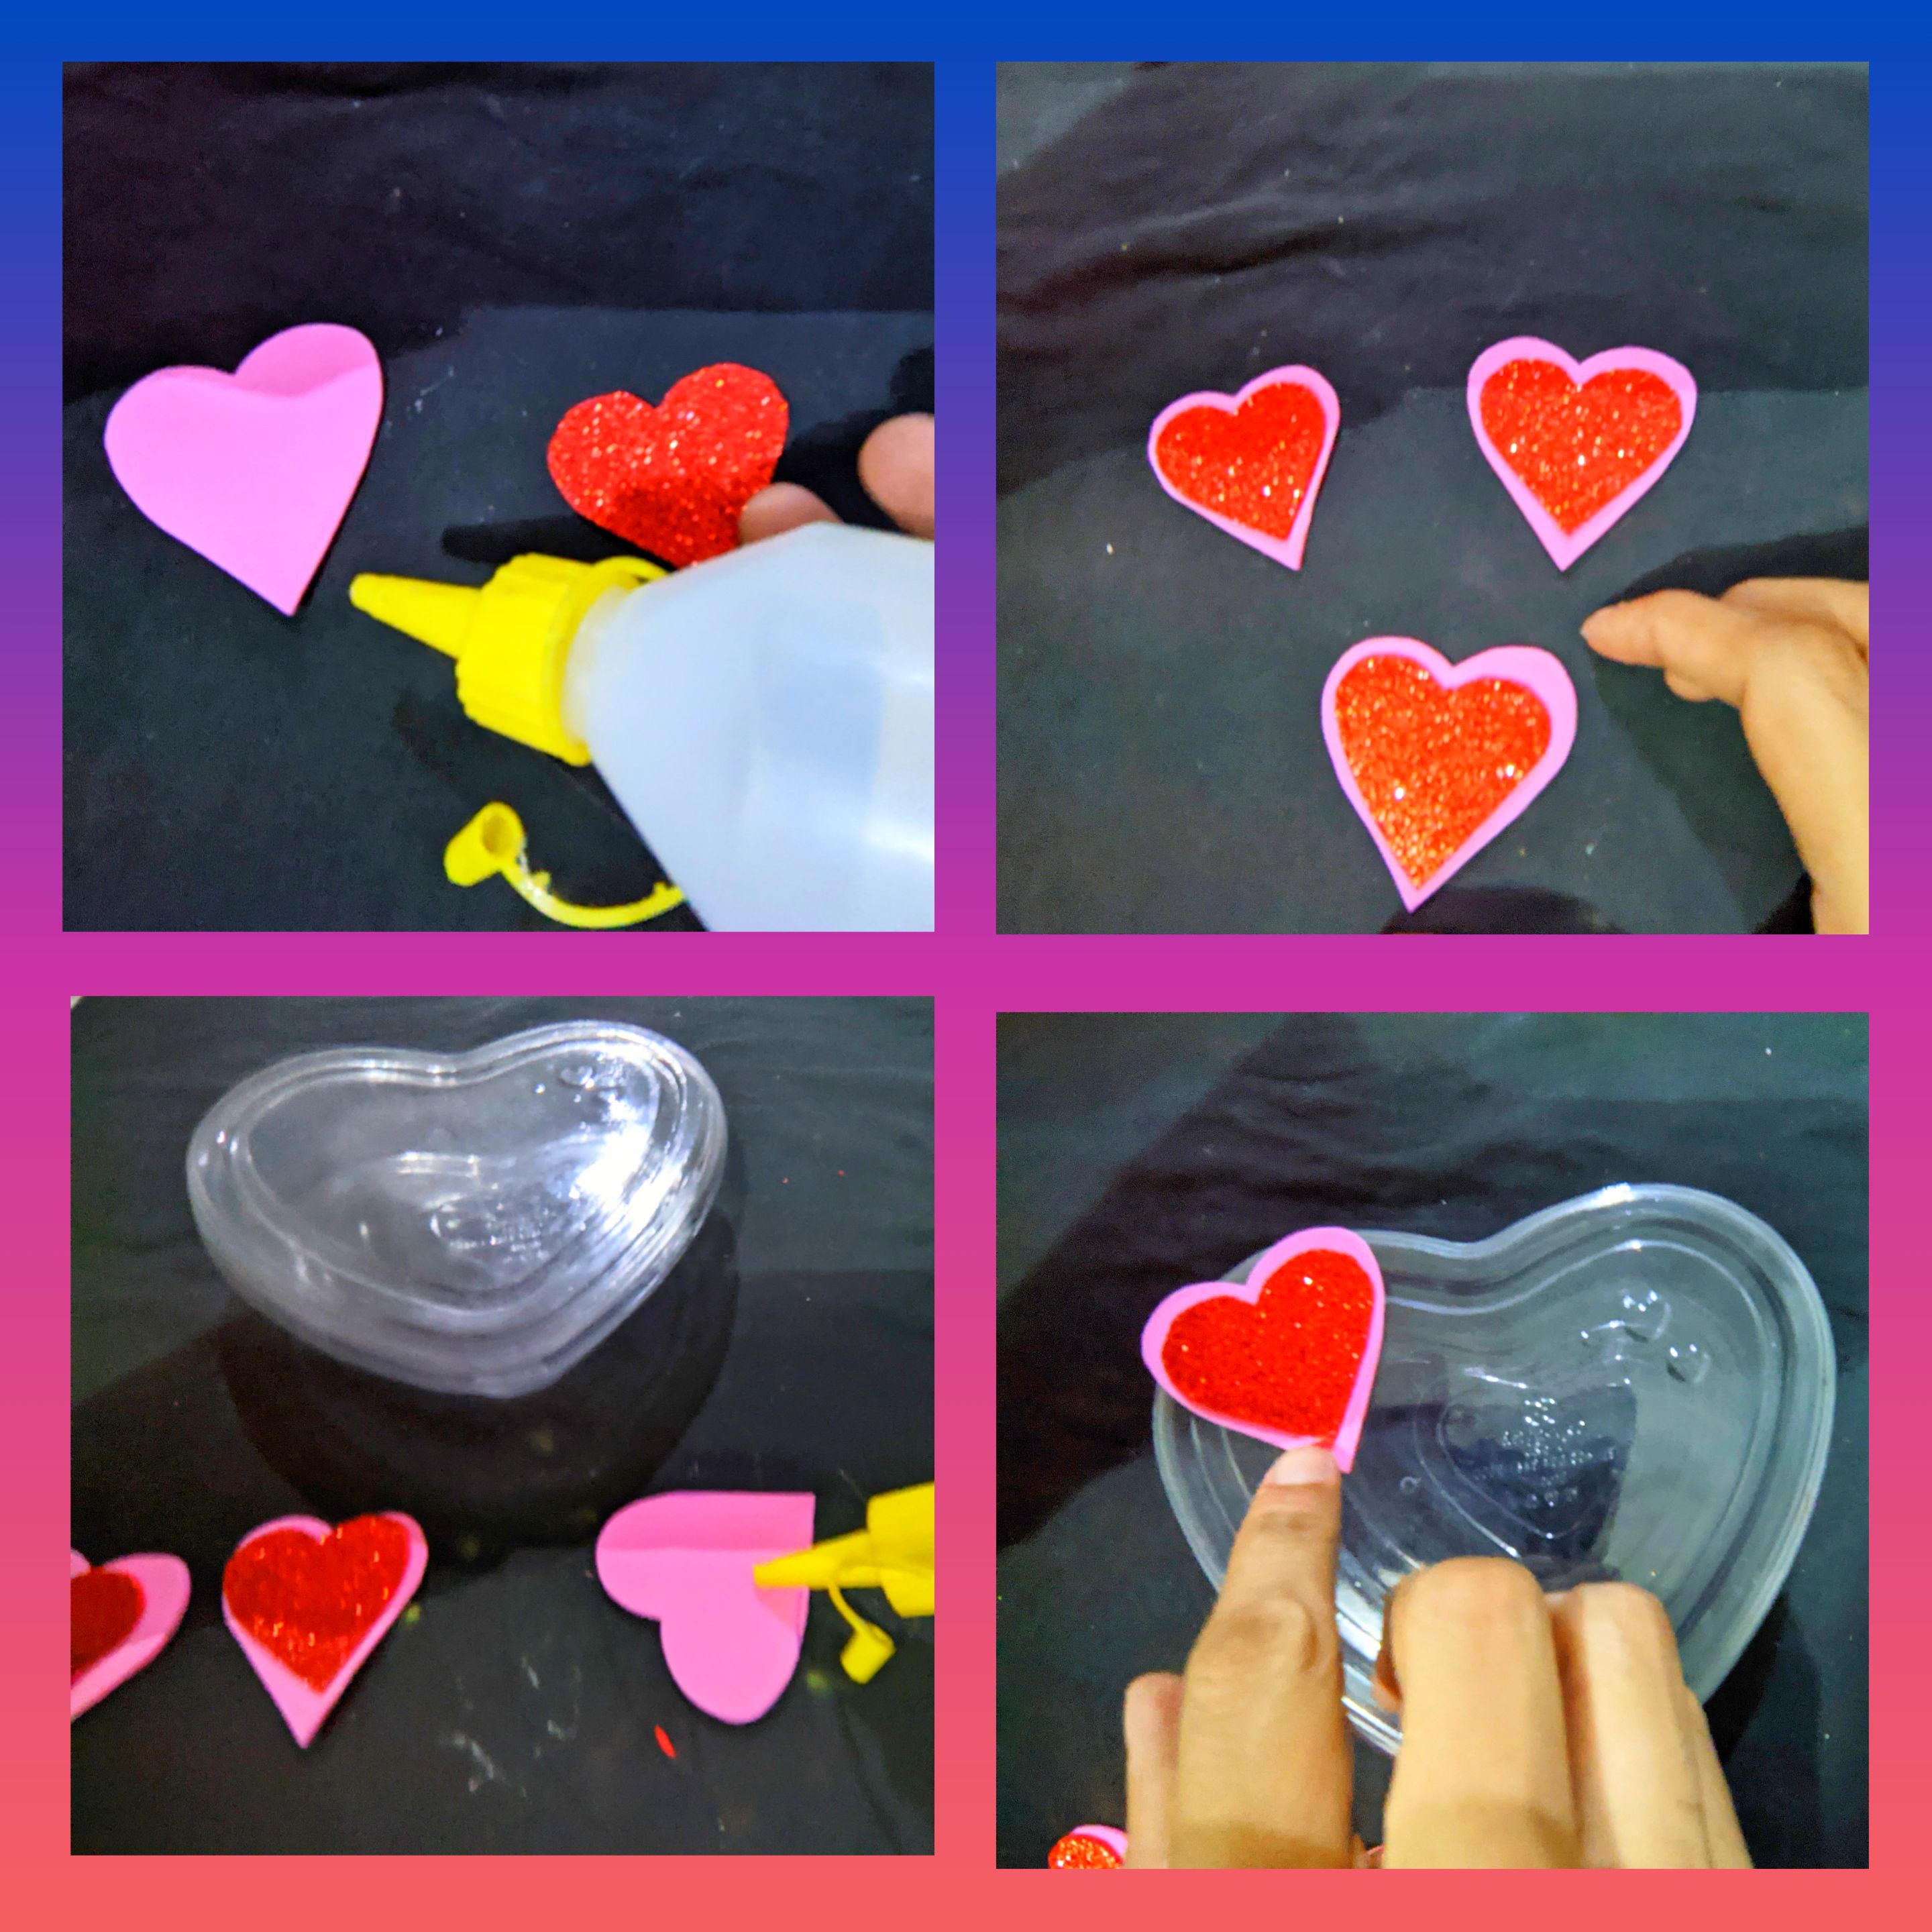
Ahora el silicón líquido lo aplicamos en el corazón de foami rojo y lo pegamos encima del corazón rosado, esto lo repetí con los tres corazones y dejamos secar.
Cuando ya están bien pegados le aplicó silicón líquido y procedo a pegar encima de la tapa del envase.
♥️ Paso 3:
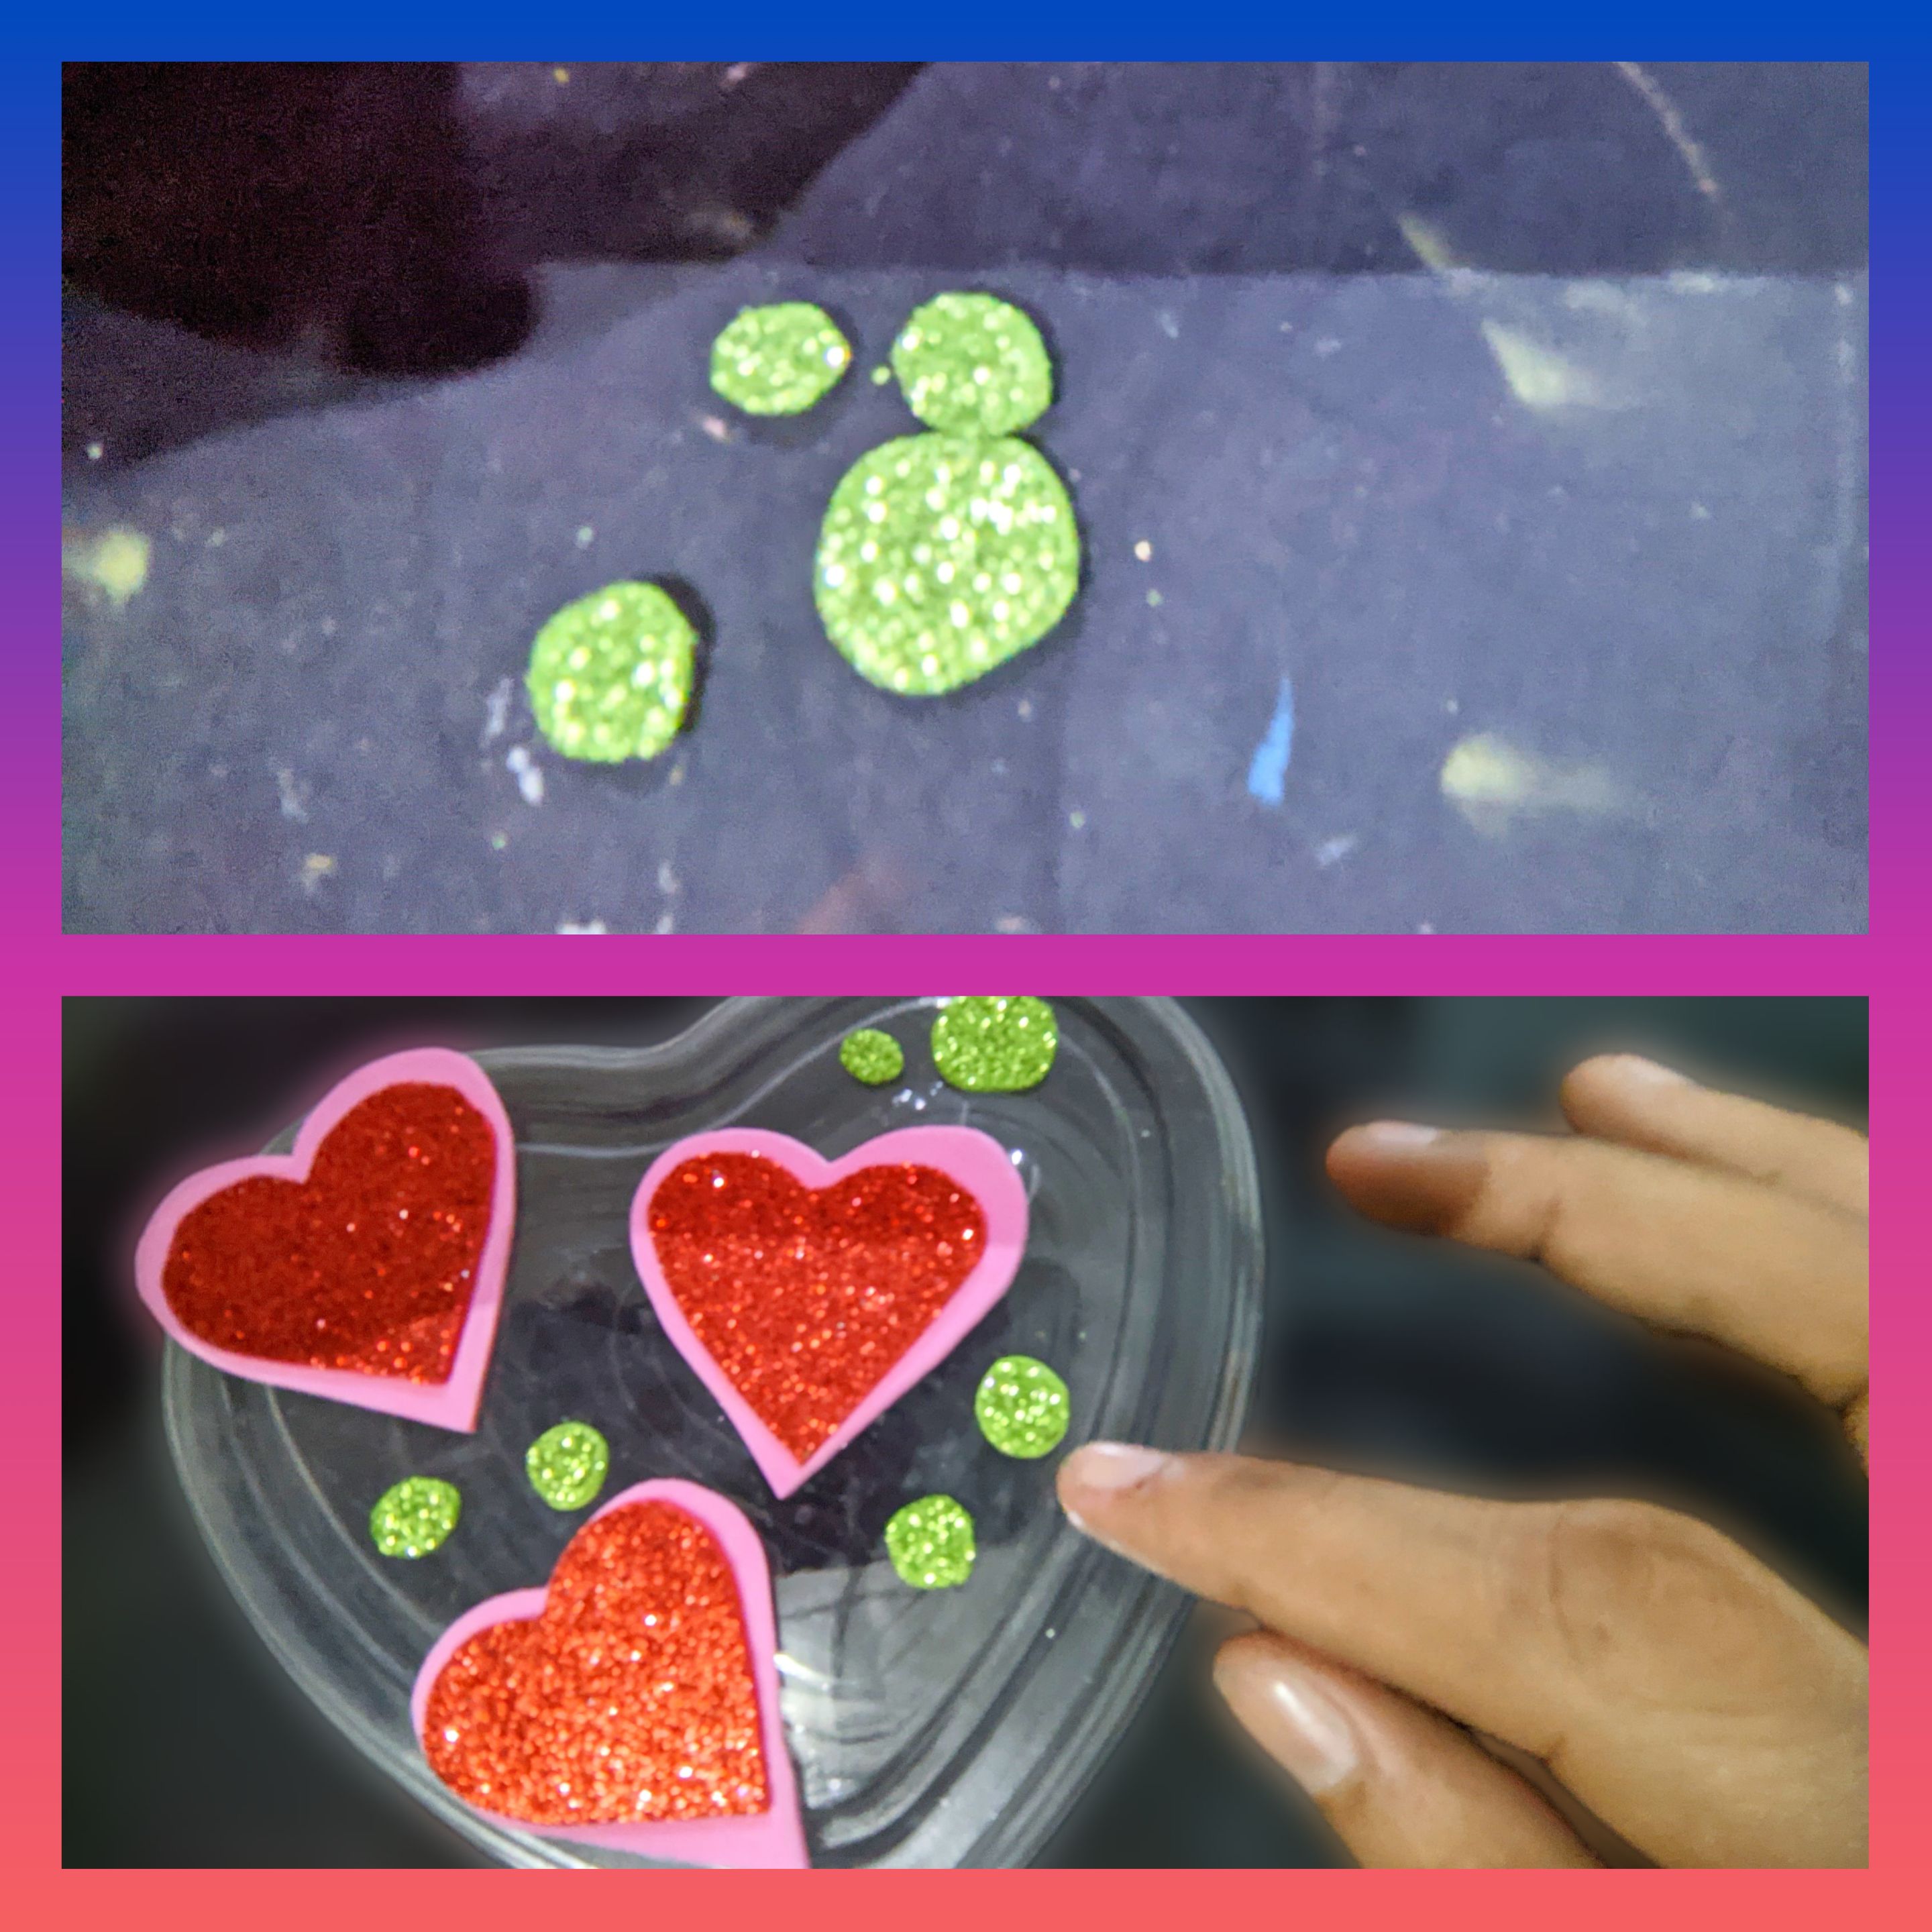
Ahora con de los recortes de foami escarchado verde dibuje y recorte unos pequeños círculos de diferentes tamaños, después con el silicón líquido lo aplicamos y pegamos en diferentes partes de la tapa, al rededor de los corazones.
♥️ paso 4:
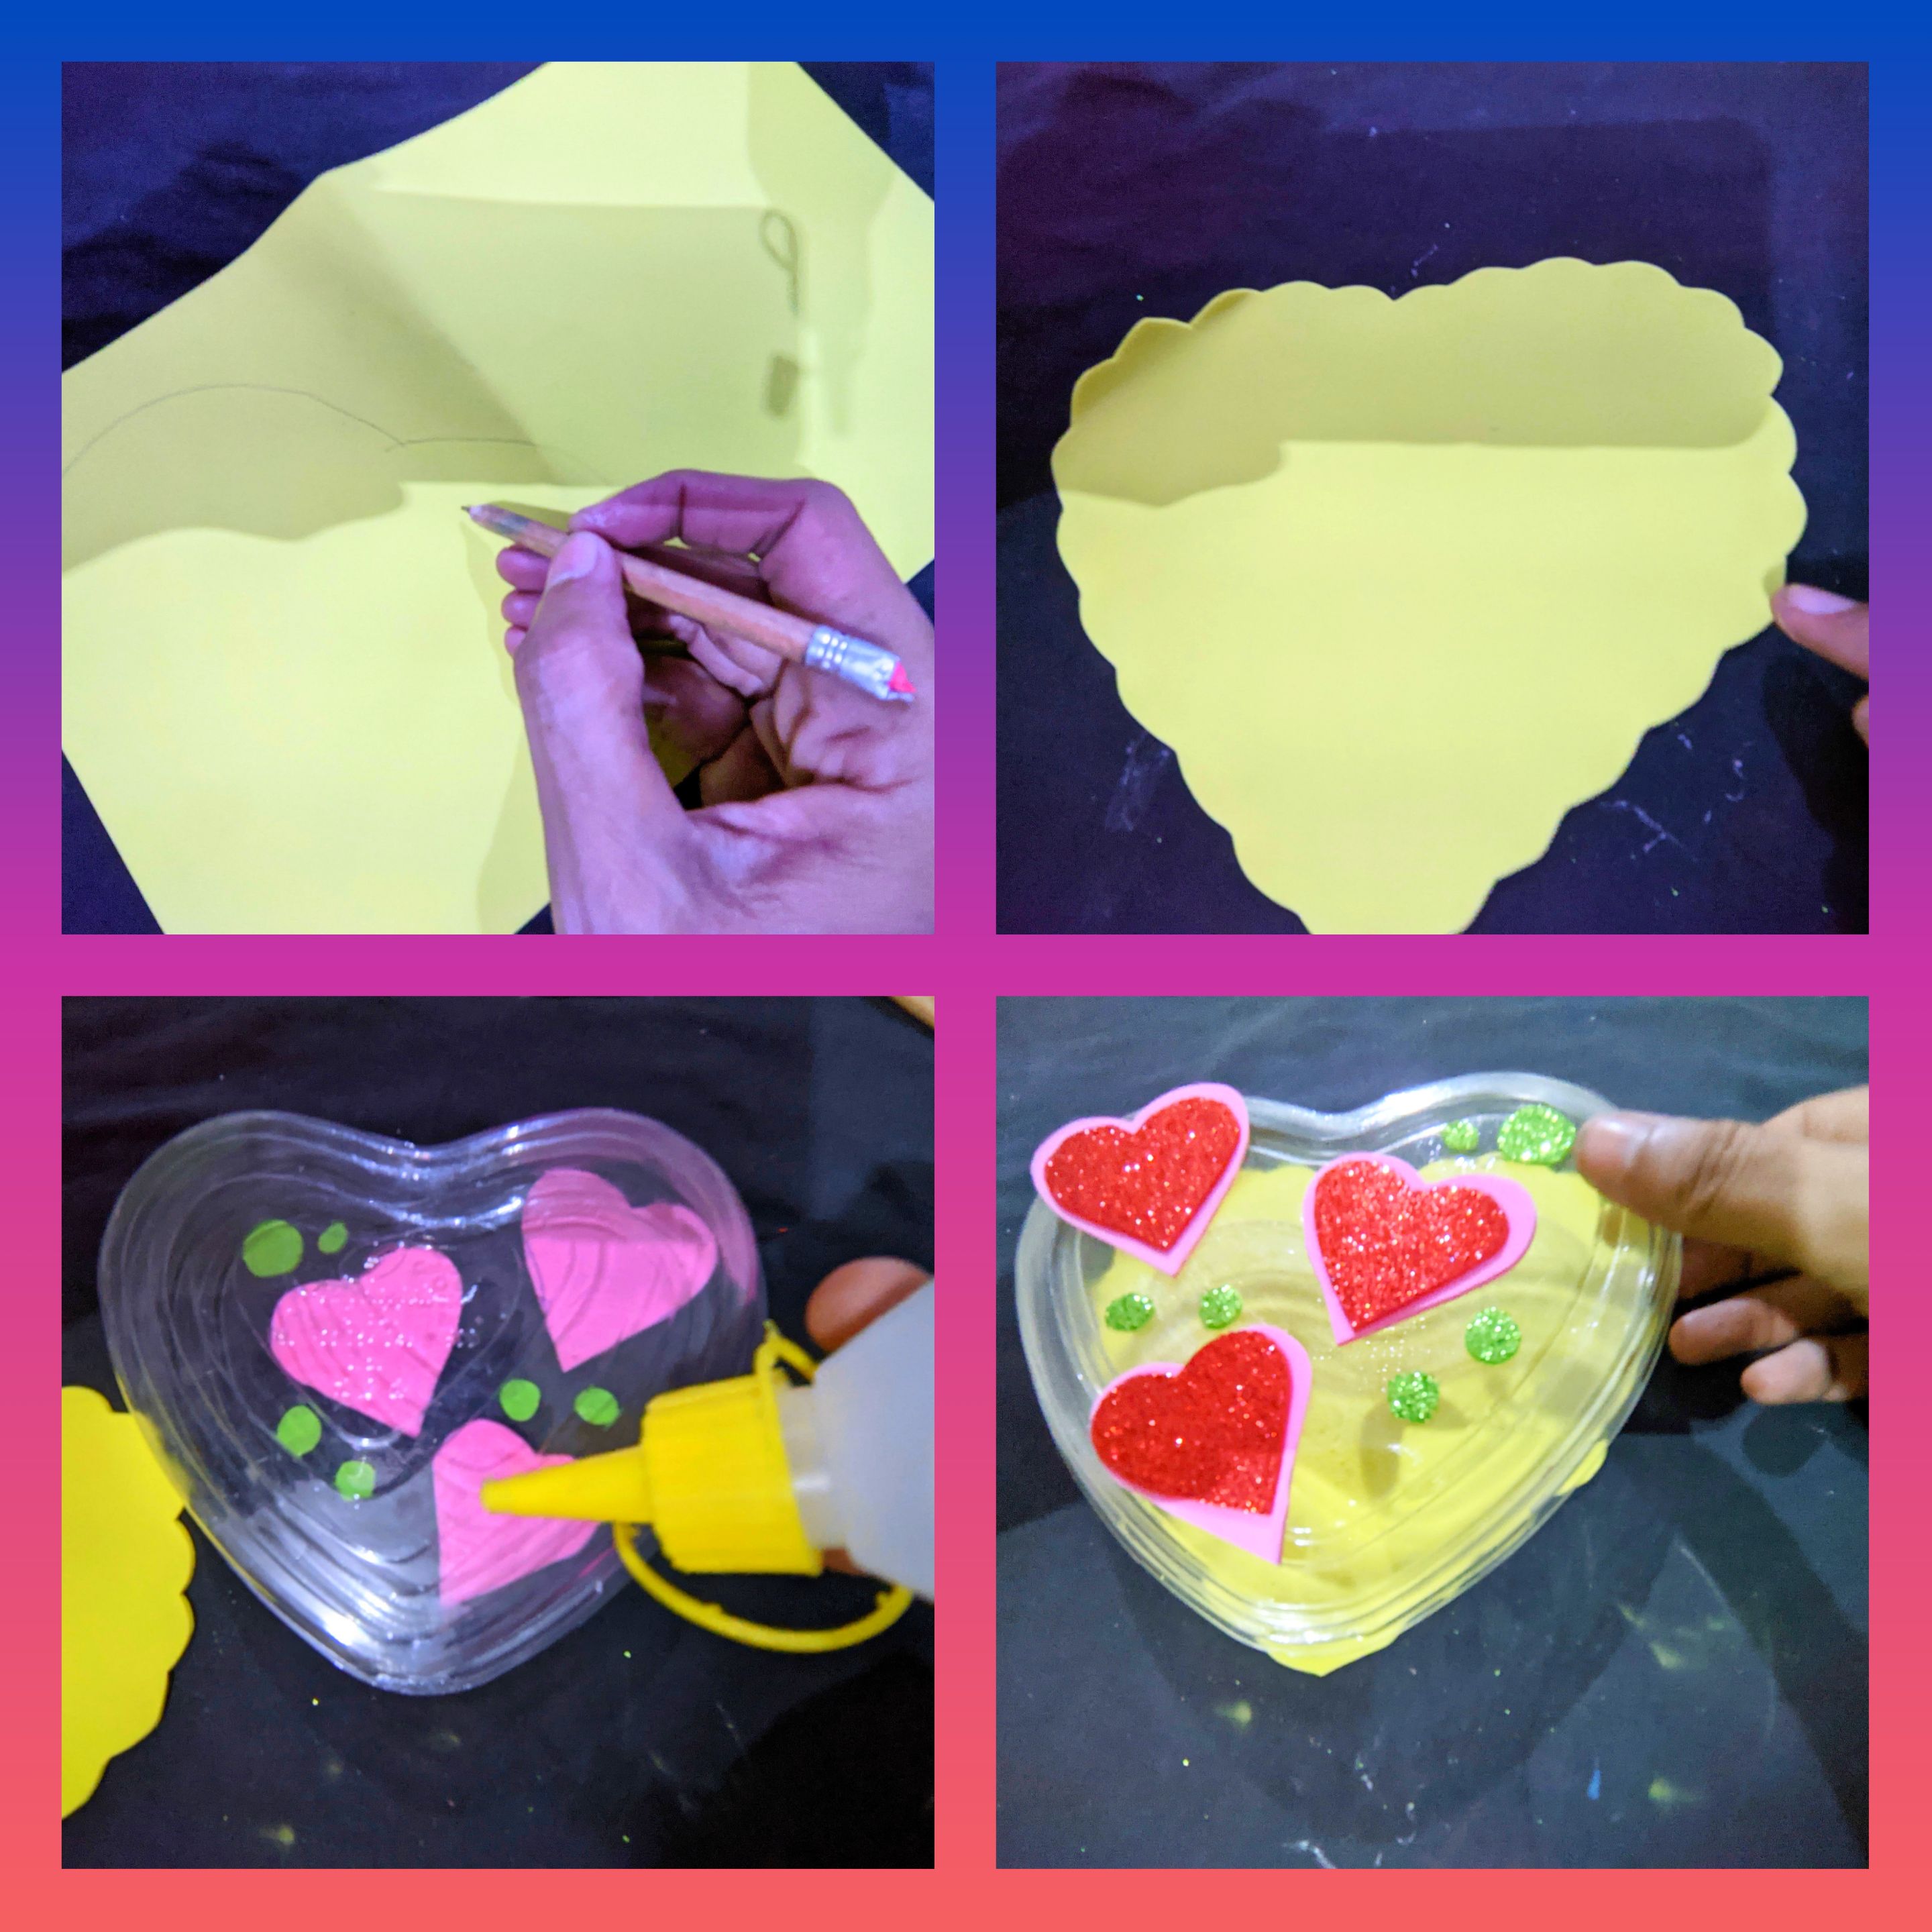
Después tomé el foami amarillo y dibuje un corazón bien grande, y o que sobresalga del envase, y después lo recortamos, luego aplicamos silicón líquido, lo pegamos y listo.
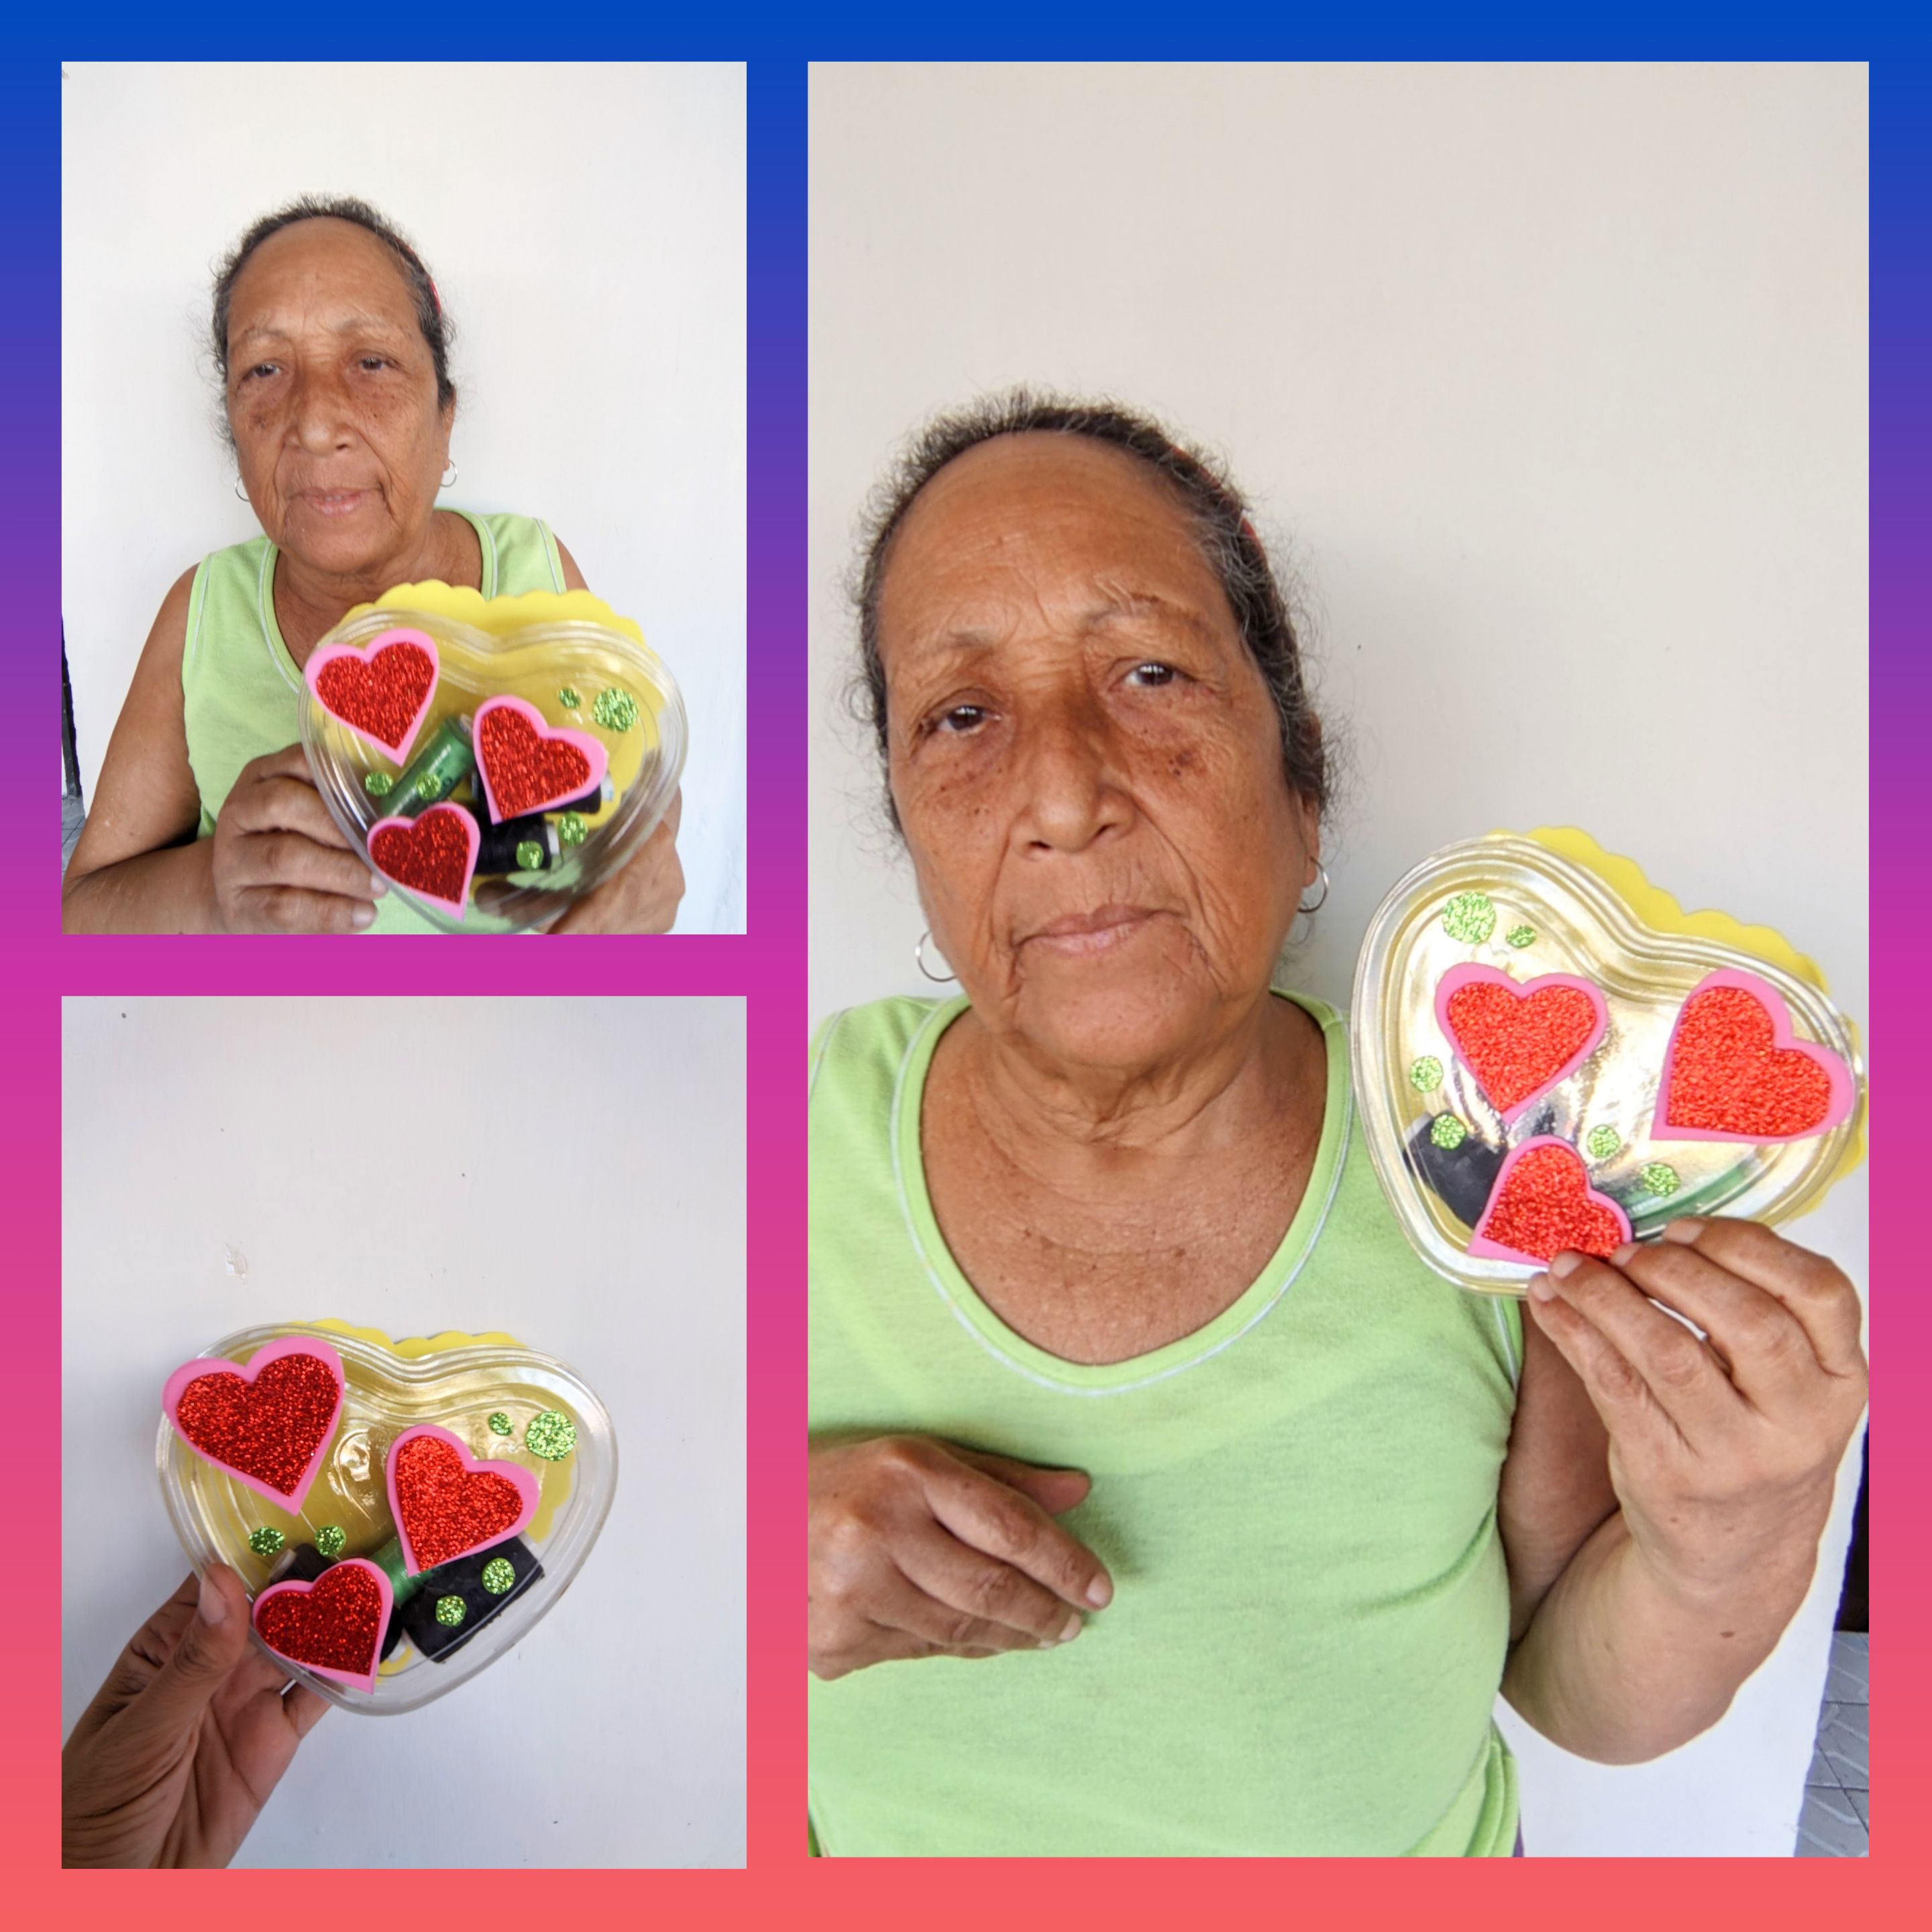
♥️ FOTOS FINALES ♥️
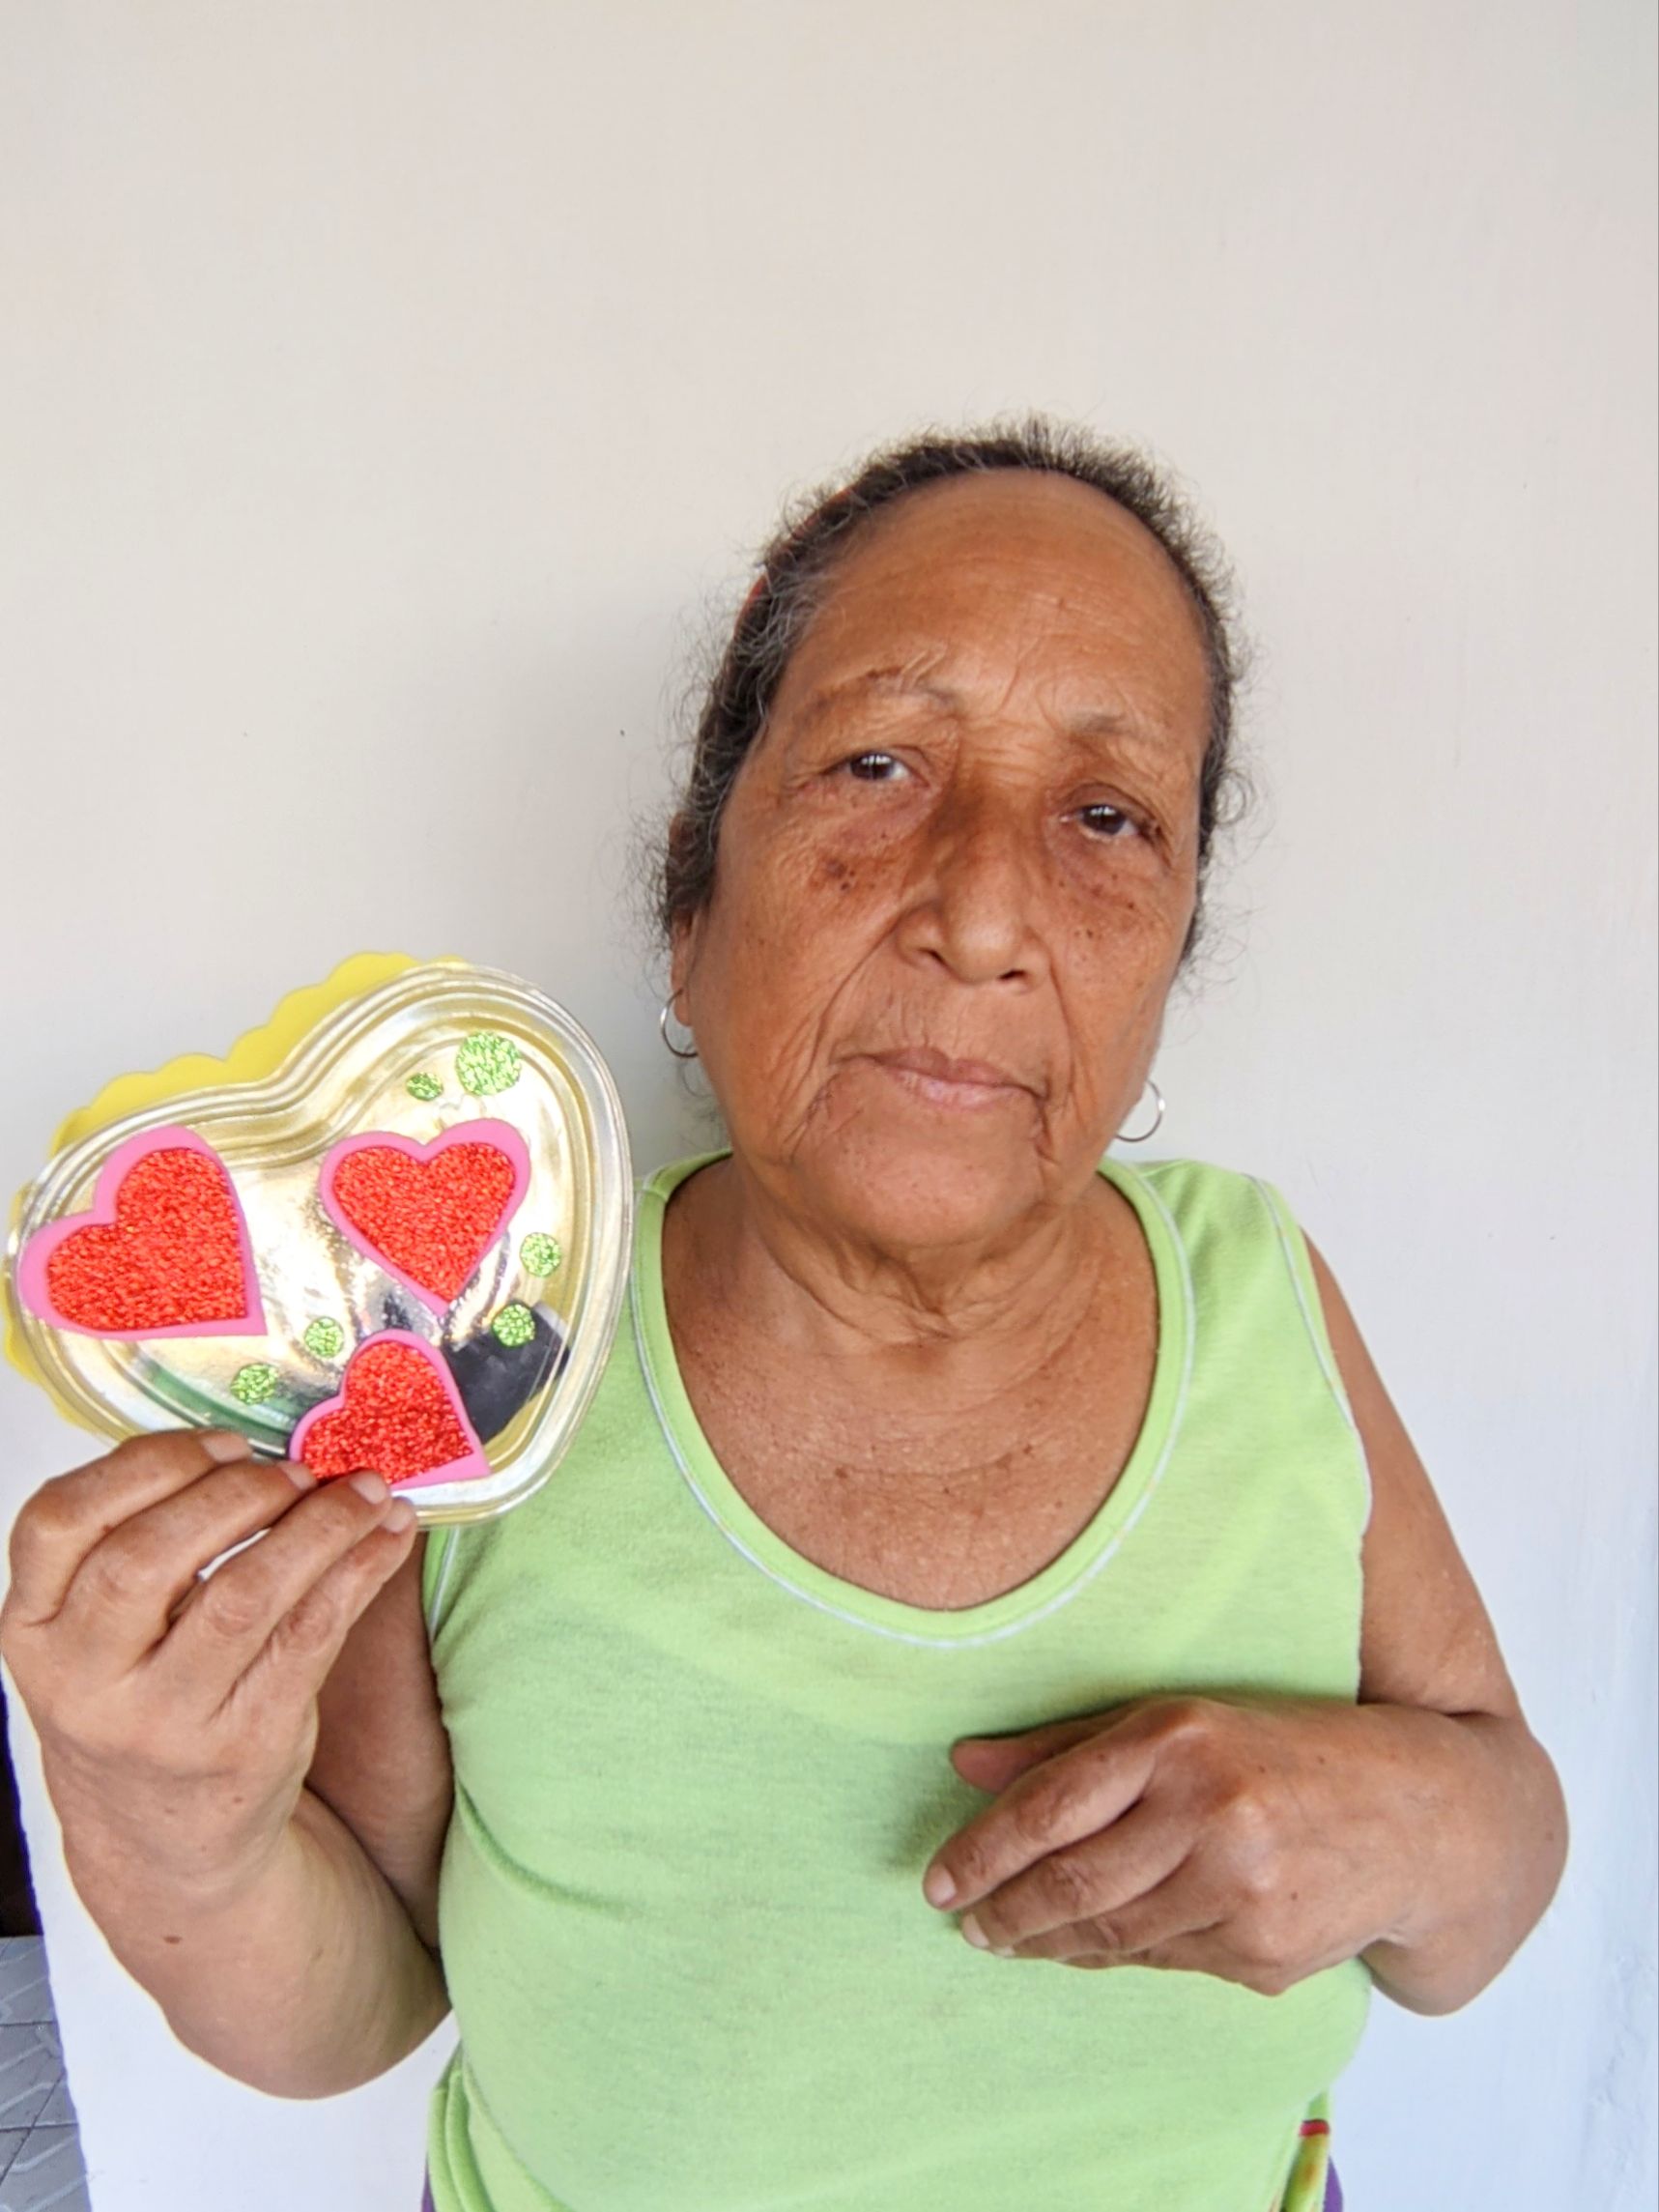
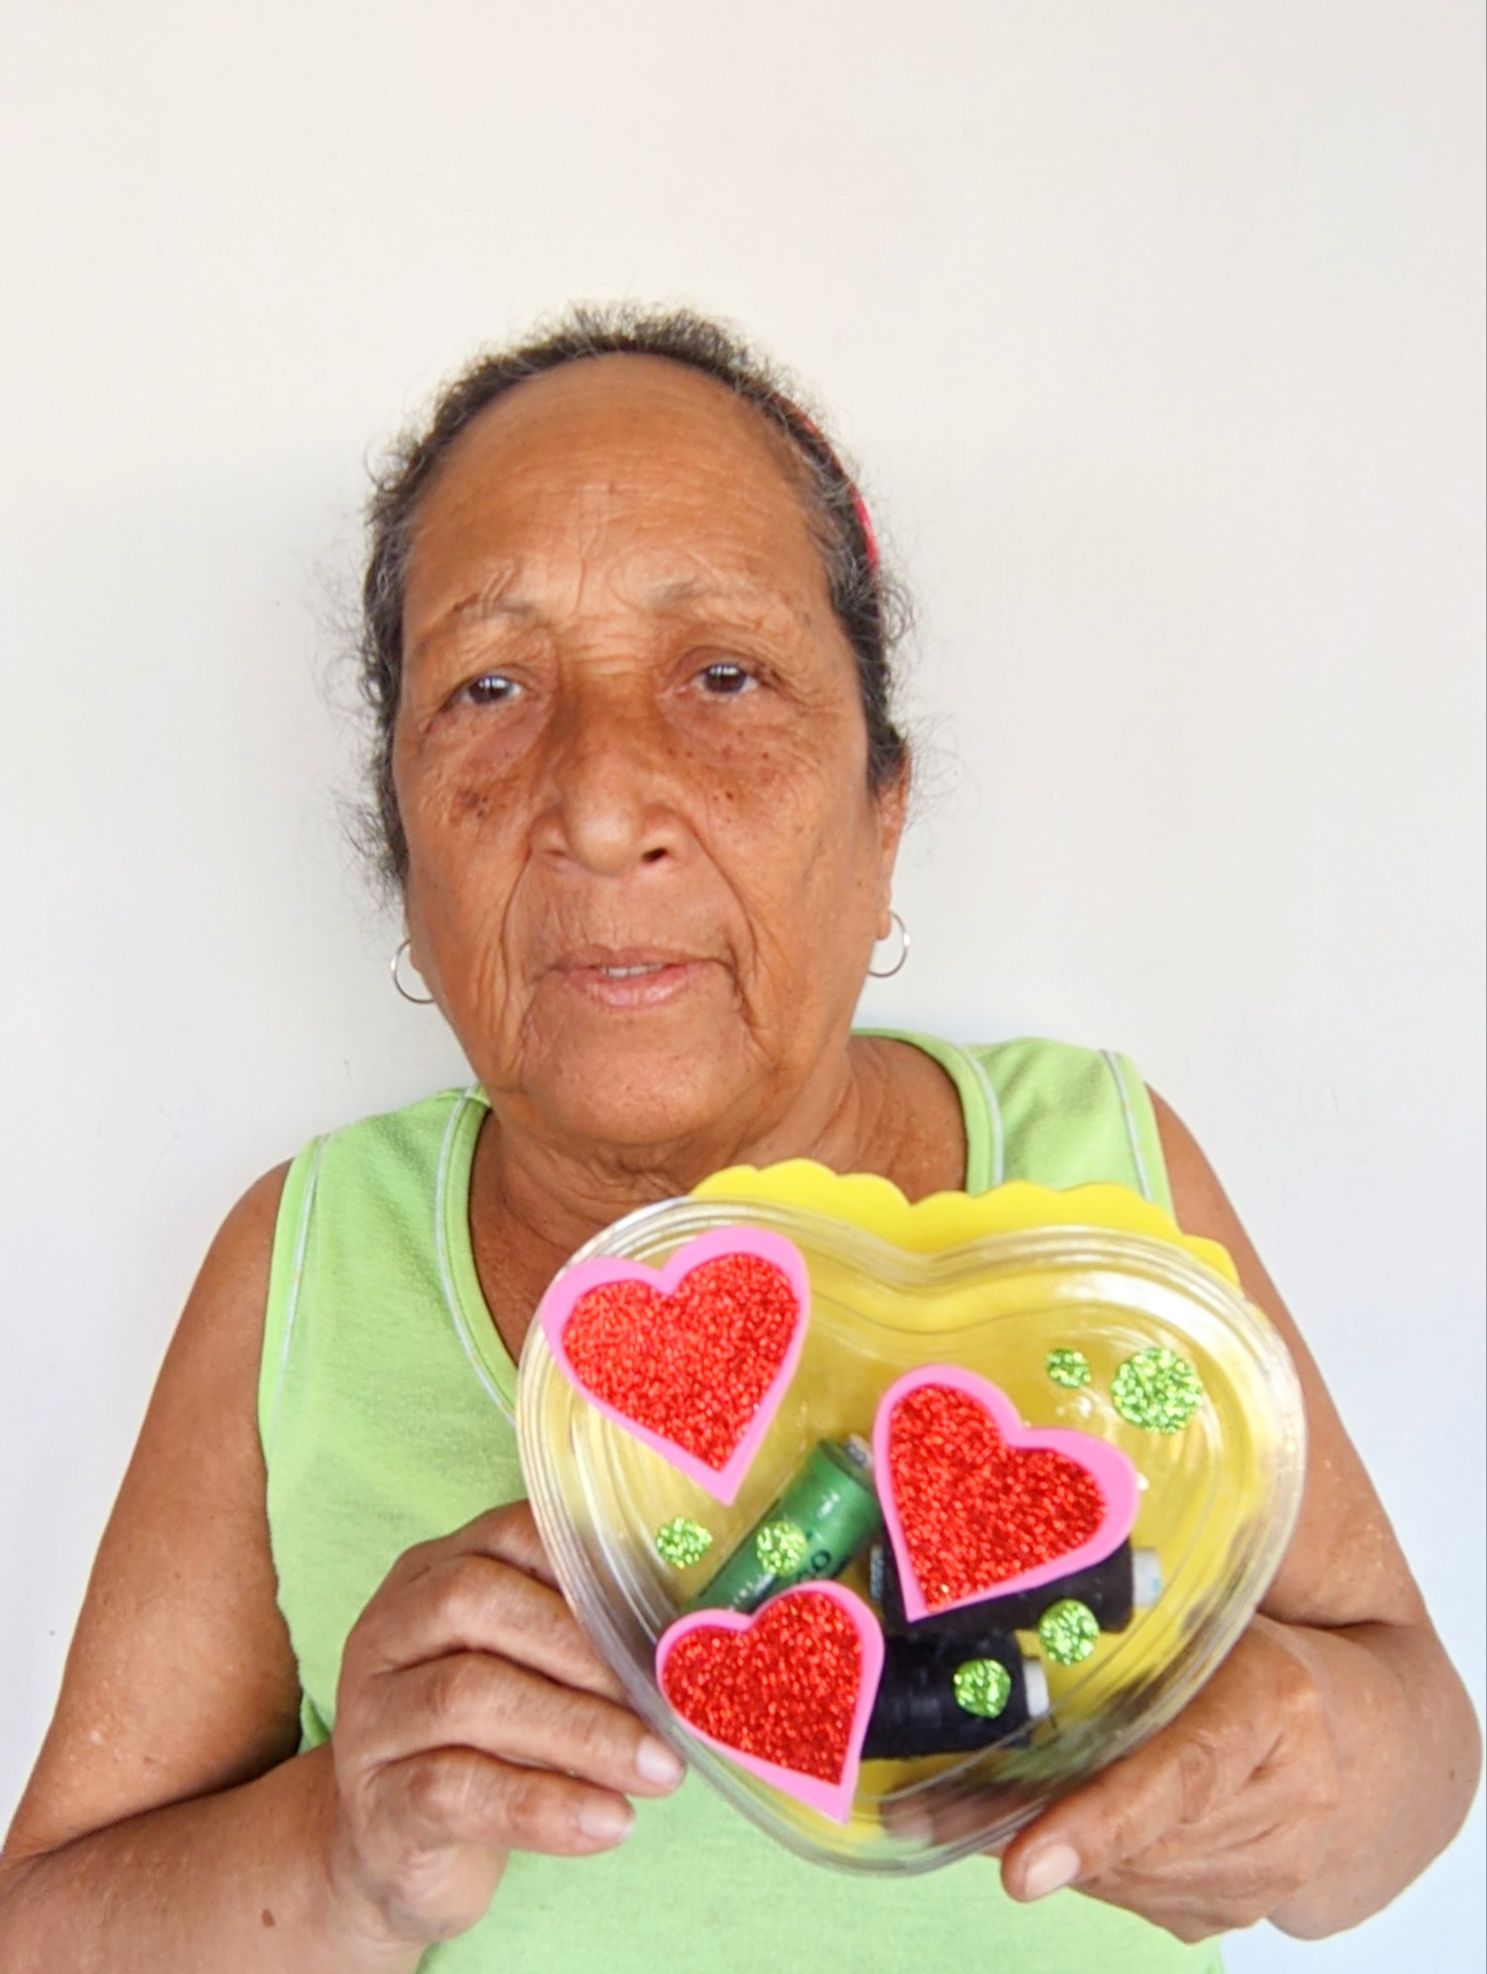
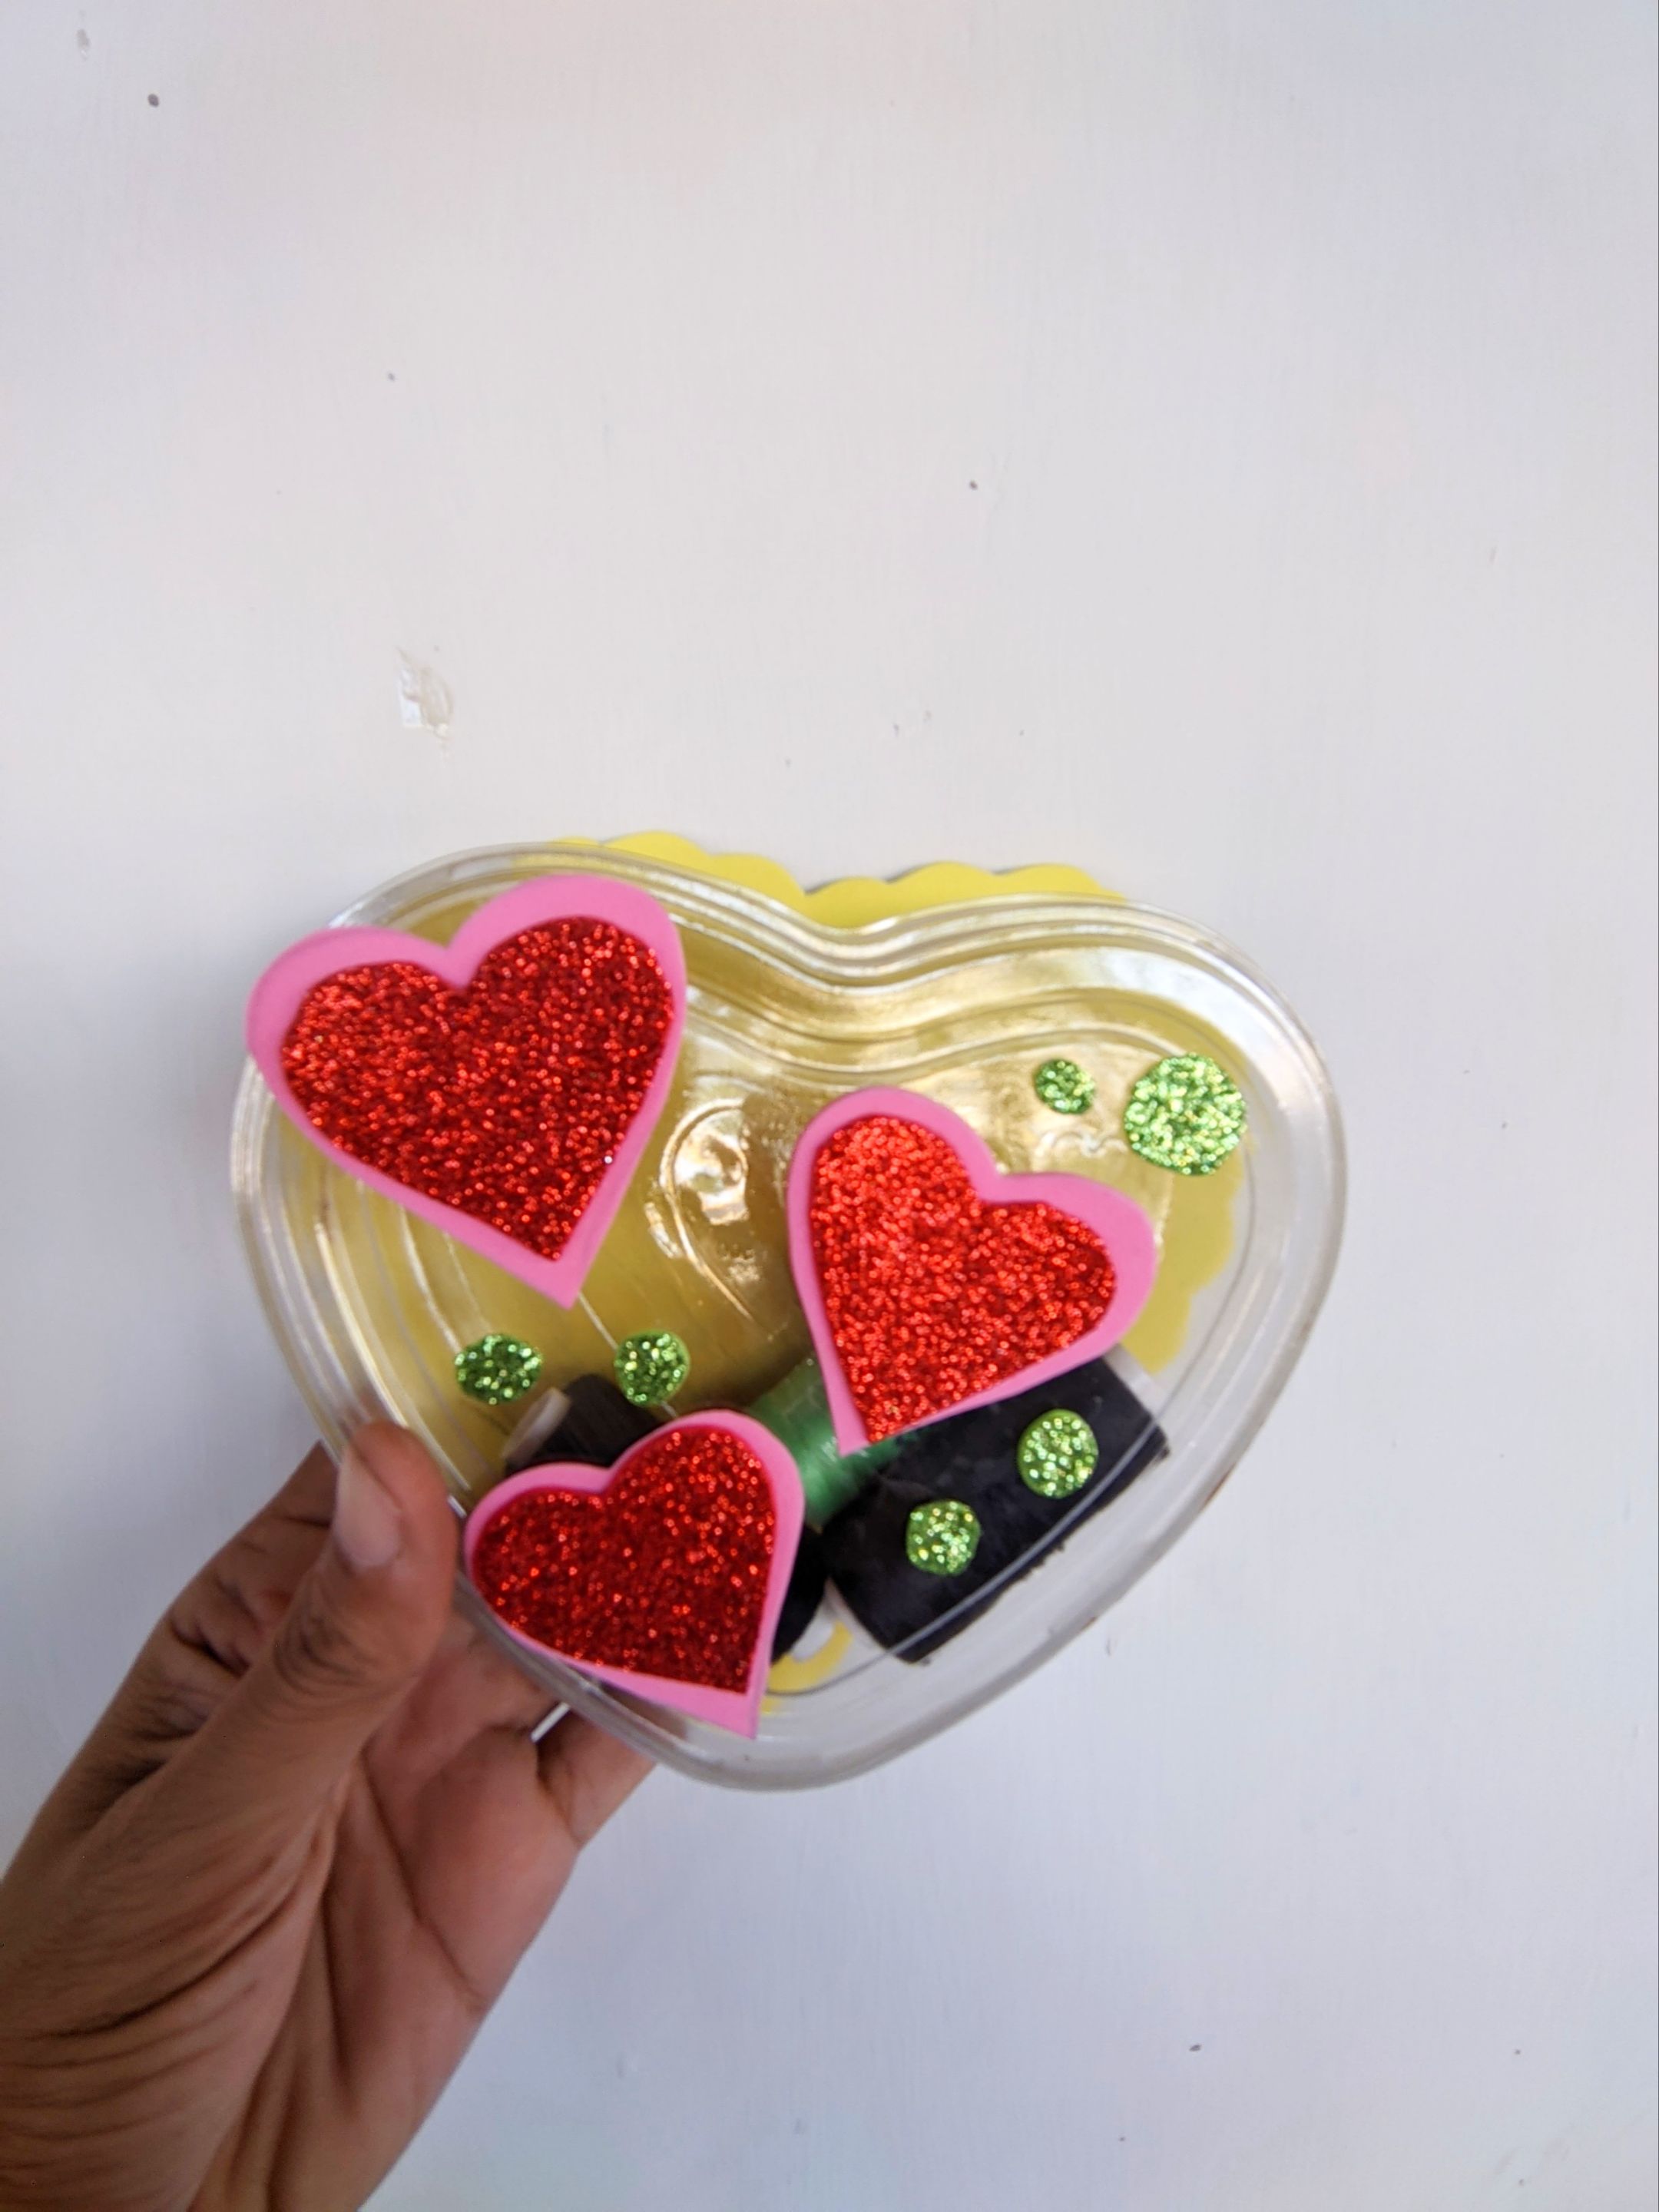
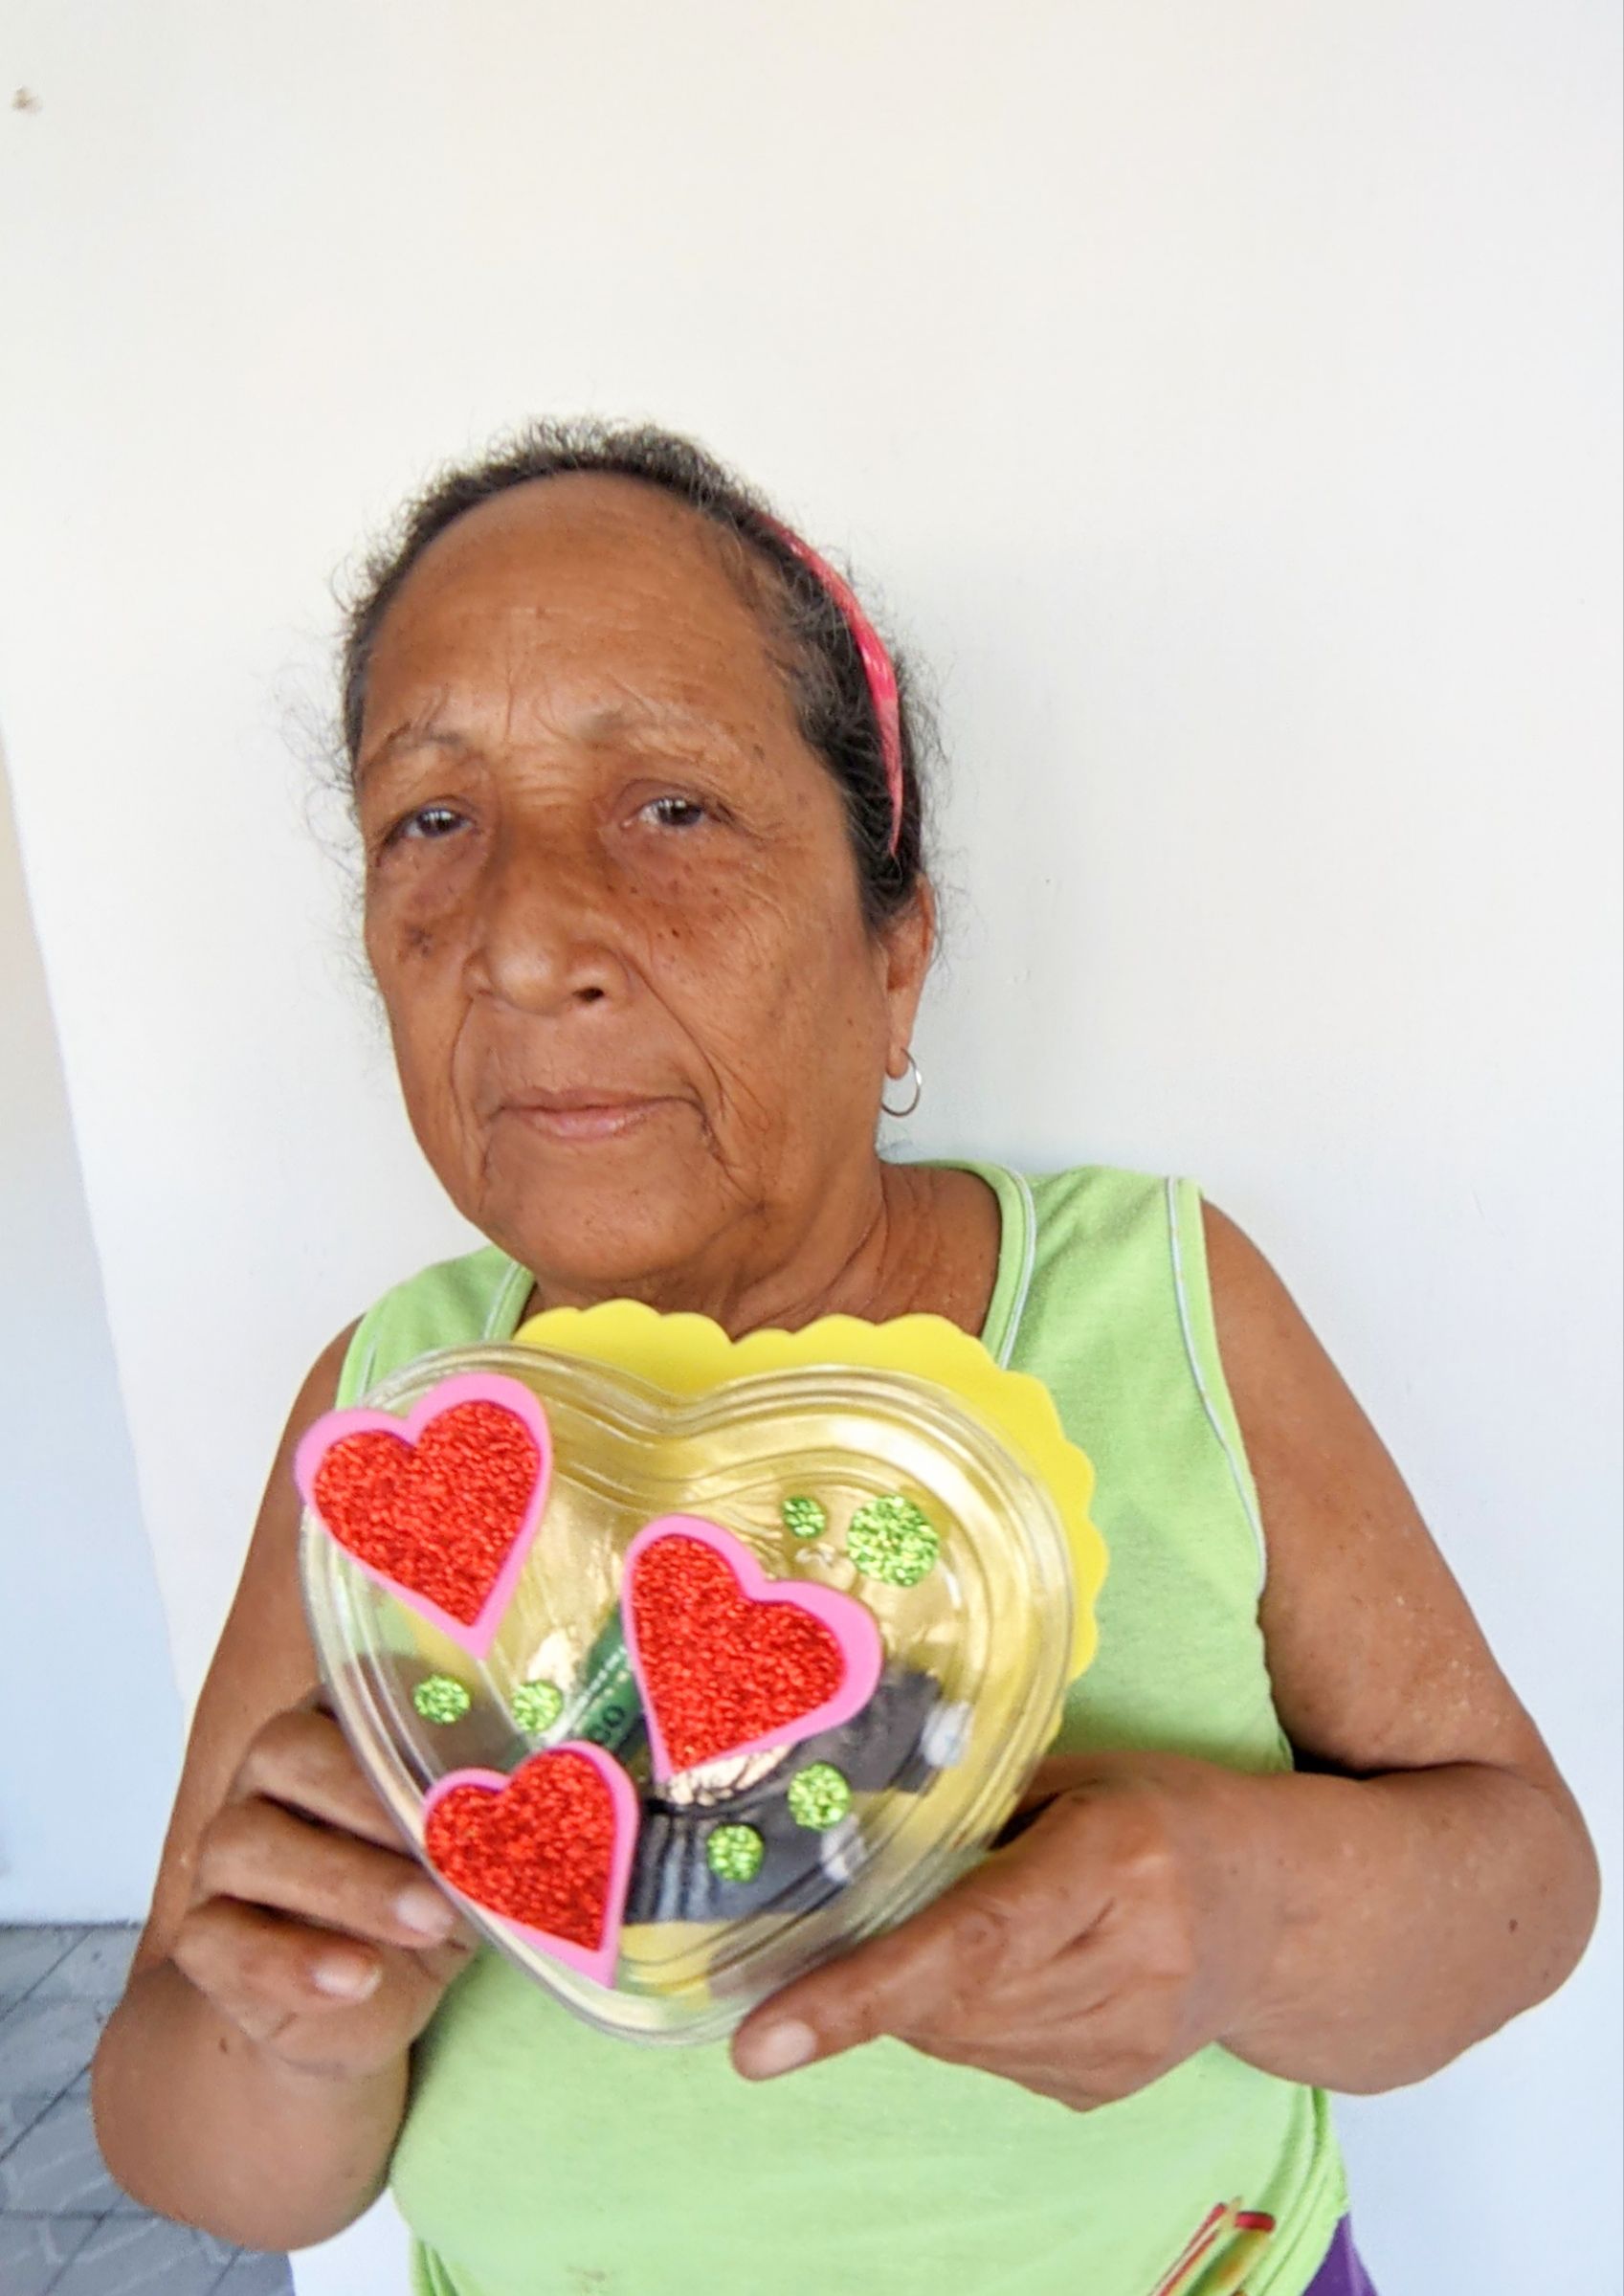
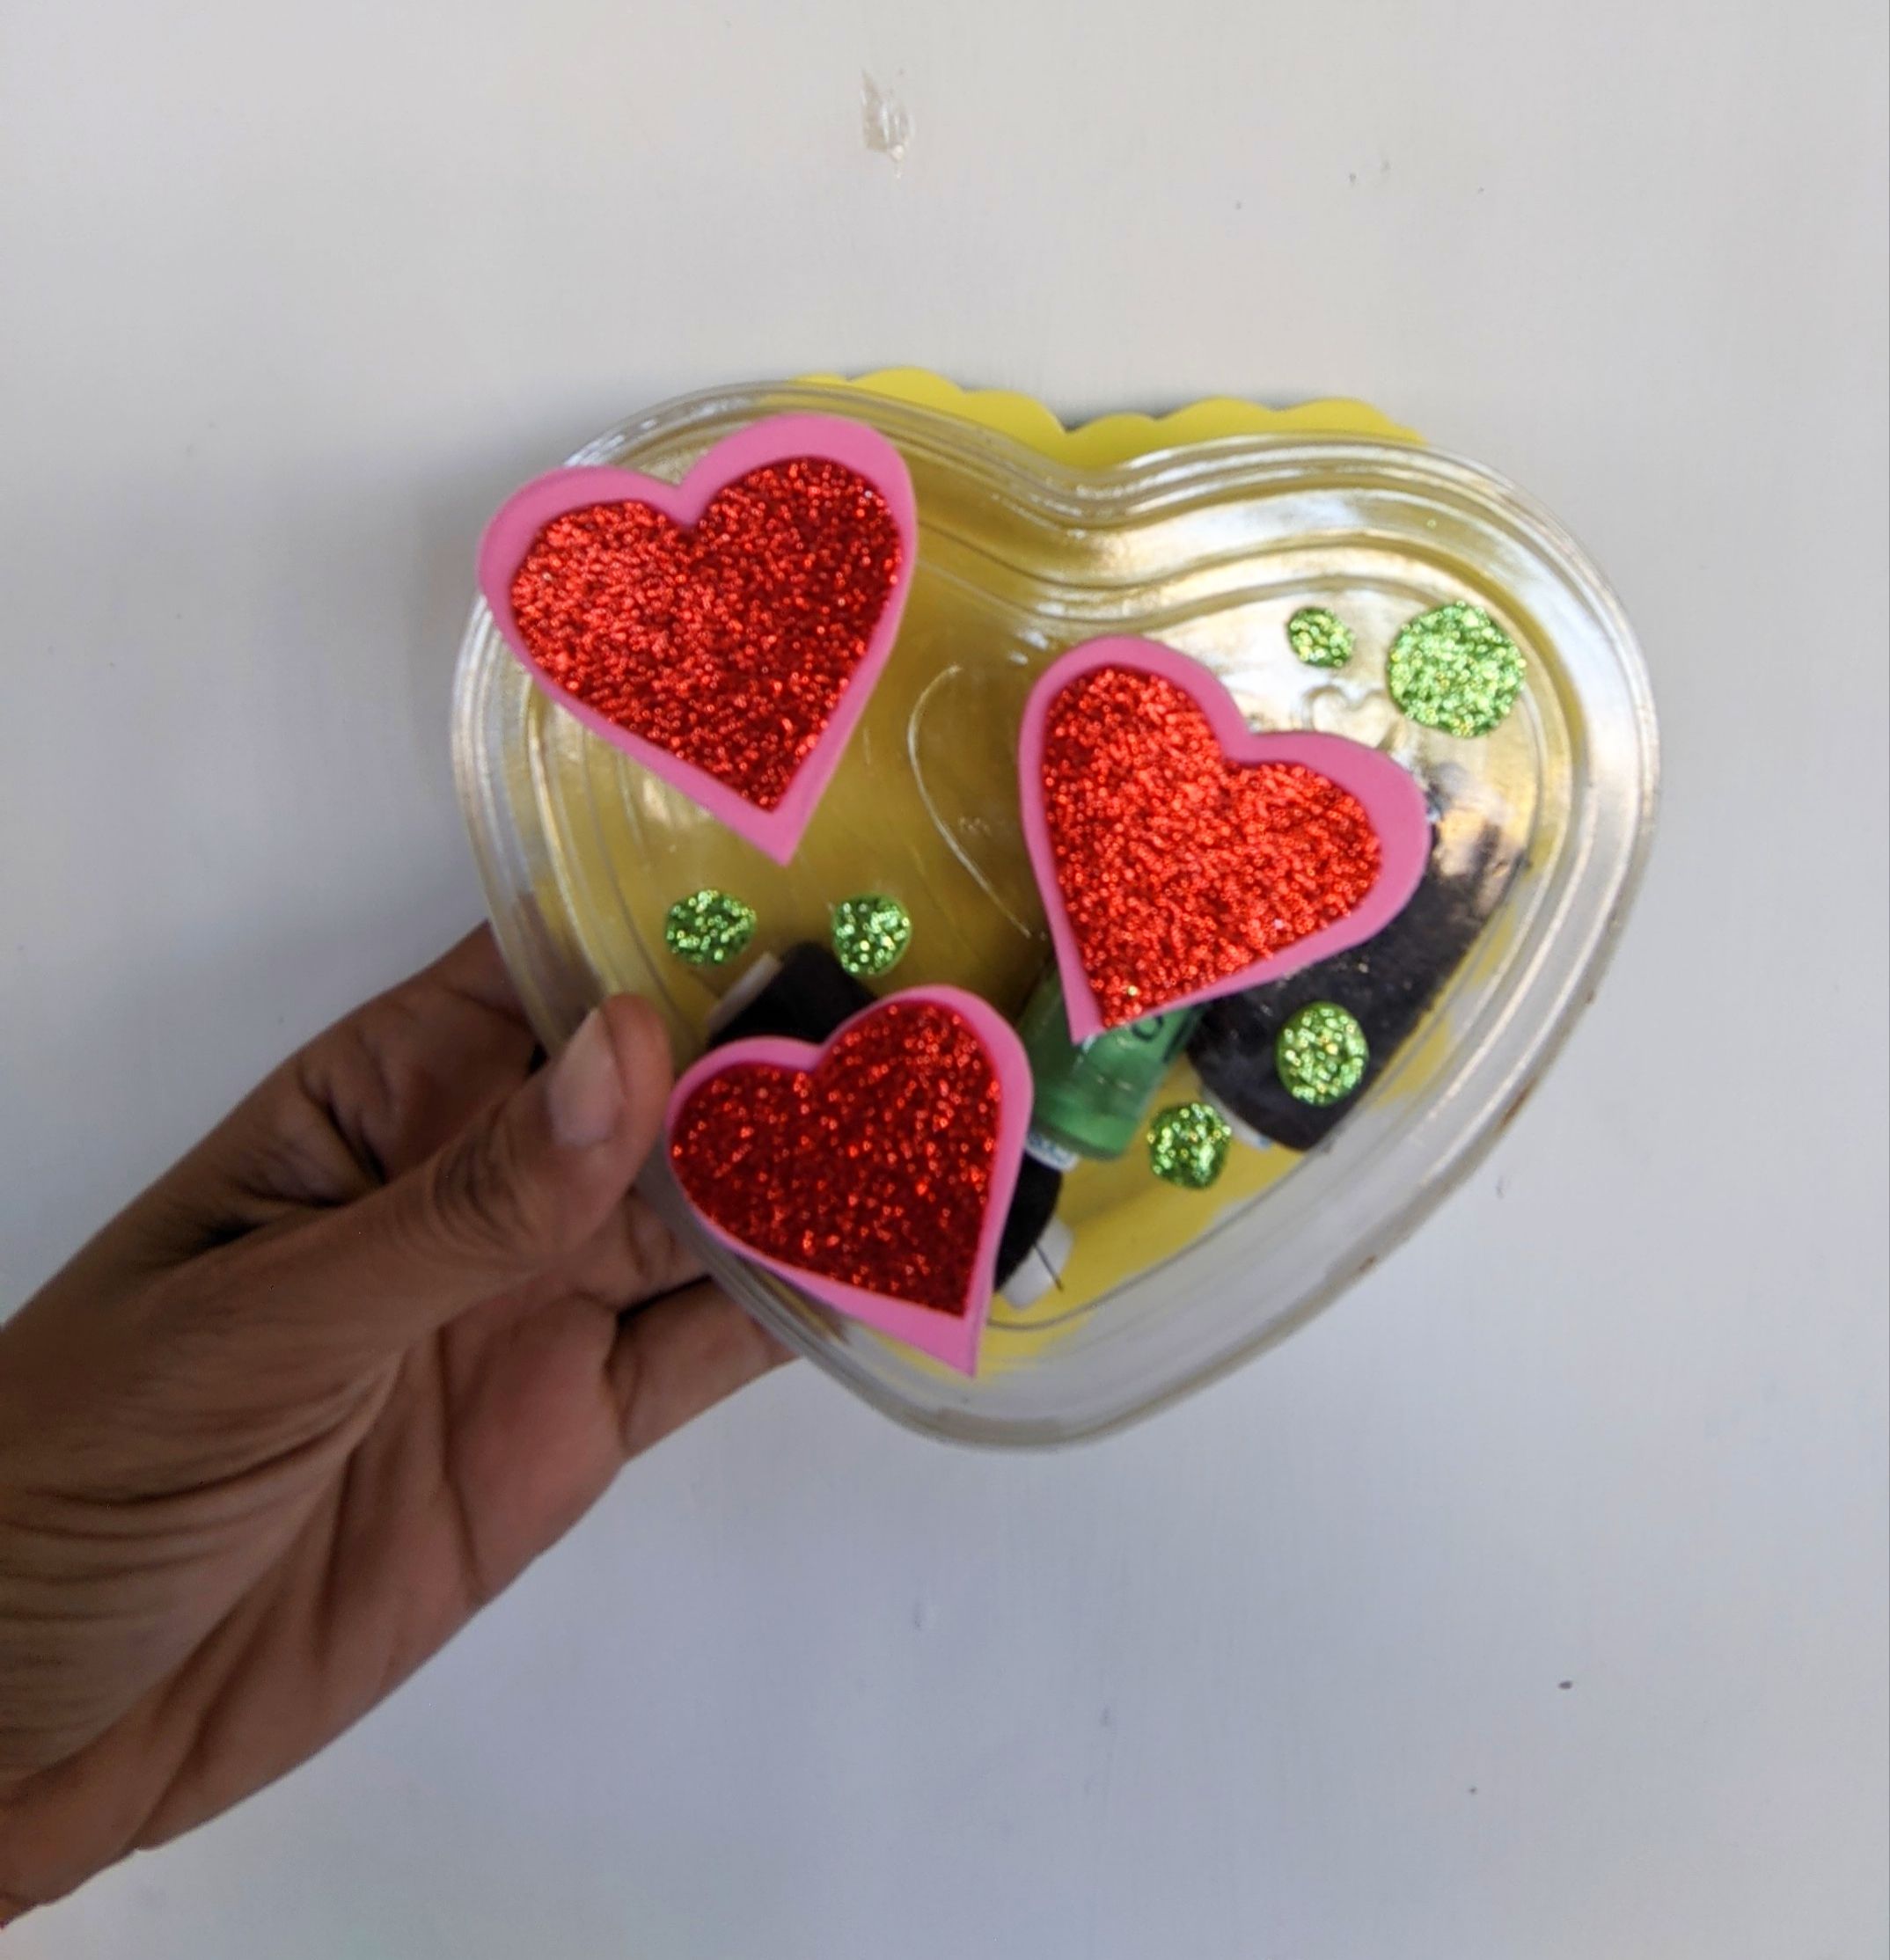
Díganme qué no quedó muy bonito,a mí me gustó mucho, y lo mejor de todo, es que es fácil de elaborar y con materiales sencillos, para trabajar este post utilice el programa polish que trajo mi teléfono Xiaomi redmi con el que tome las fotos y el traductor deepl versión gratis.

ENGLISH
Hello #hive friends how are you, I hope you enjoyed your weekend to the fullest, mine was filled with lots of family togetherness and rest, but today I'm back to bring you a nice and practical heart to keep the threads.
The materials are easy, and we will be creating a nice case to store our sewing materials, threads, needles, among others, and that is the idea to create works that have a function, here are the materials and the step by step.
♥️ Materials ♥️
♥️ Red frosted foami.
♥️ Pink foami.
♥️ Yellow foami.
♥️ Green foami.
♥️ Liquid silicone.
♥️ Heart-shaped container.
♥️ Scissors.
♥️ Pencil.
♥️ step by step ♥️
♥️Paso 1:
First I took the frosted red foami and on it I drew three hearts, one smaller than the previous one, and cut it out,then I took the pink foami and drew three hearts, but these should be larger than the red foami.
♥️Paso 2:
Now apply the liquid silicone on the red foami heart and glue it on top of the pink heart, I repeated this with the three hearts and let it dry.
When they are well glued I apply liquid silicone and proceed to glue on top of the lid of the container.
♥️ Step 3:
Now with the green frosted foami cutouts I drew and cut out some small circles of different sizes, then with the liquid silicone I applied it and glued it in different parts of the lid, around the hearts.
♥️ step 4:
Then I took the yellow foami and drew a very large heart, and or that protrudes from the container, and then we cut it out, then apply liquid silicone, glue it and that's it.
♥️ FINAL PHOTOS ♥️
Tell me what was not very nice, I really liked it, and best of all, is that it is easy to make and with simple materials, to work this post I used the polish program that brought my Xiaomi redmi phone with which I took the photos and the free version deepl translator.