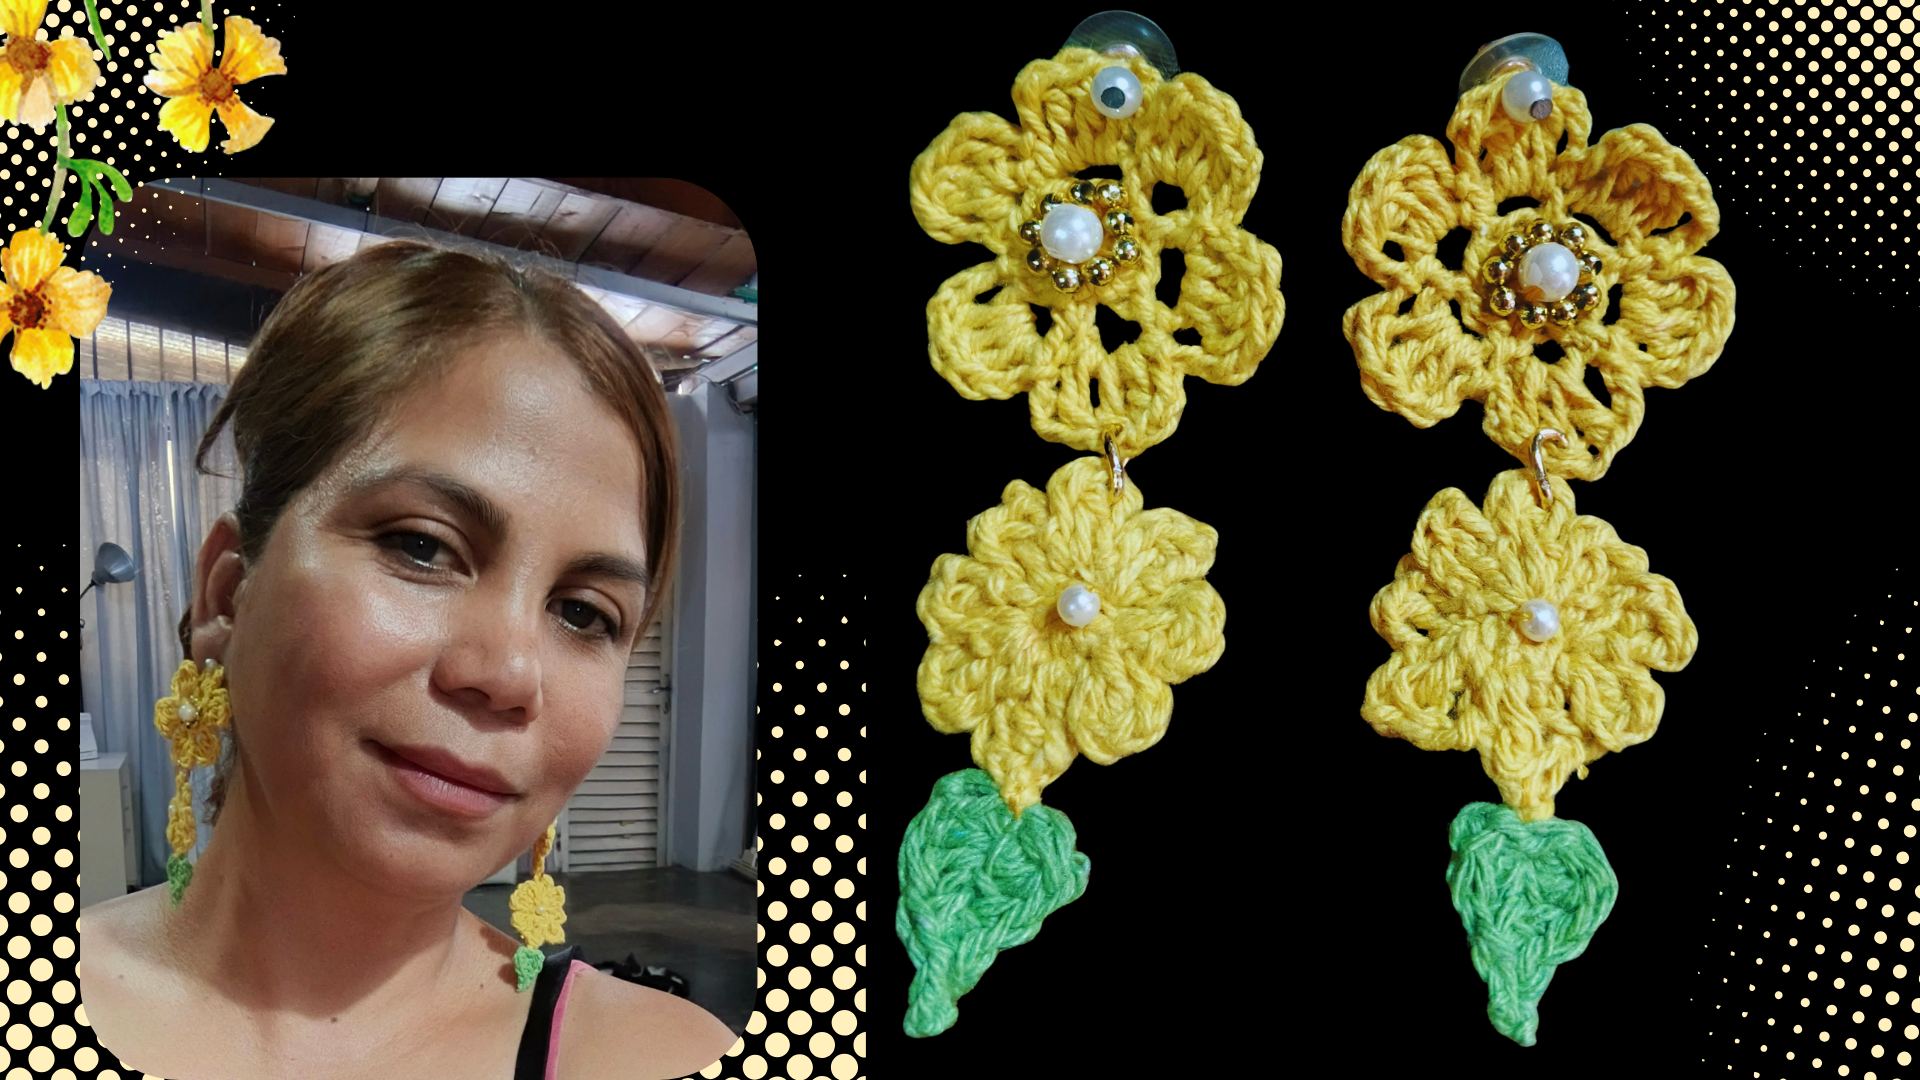
Greetings, dear needleworkers, happy and blessed Needlework Monday! Once again, we meet in this beautiful space to share the initiatives we come up with for each Monday. I am pleased to share my initiative today, in honor of yesterday's celebration, September 21st, the special day of yellow flowers. These flowers represent joy, love, optimism, the arrival of spring, renewal, and prosperity.
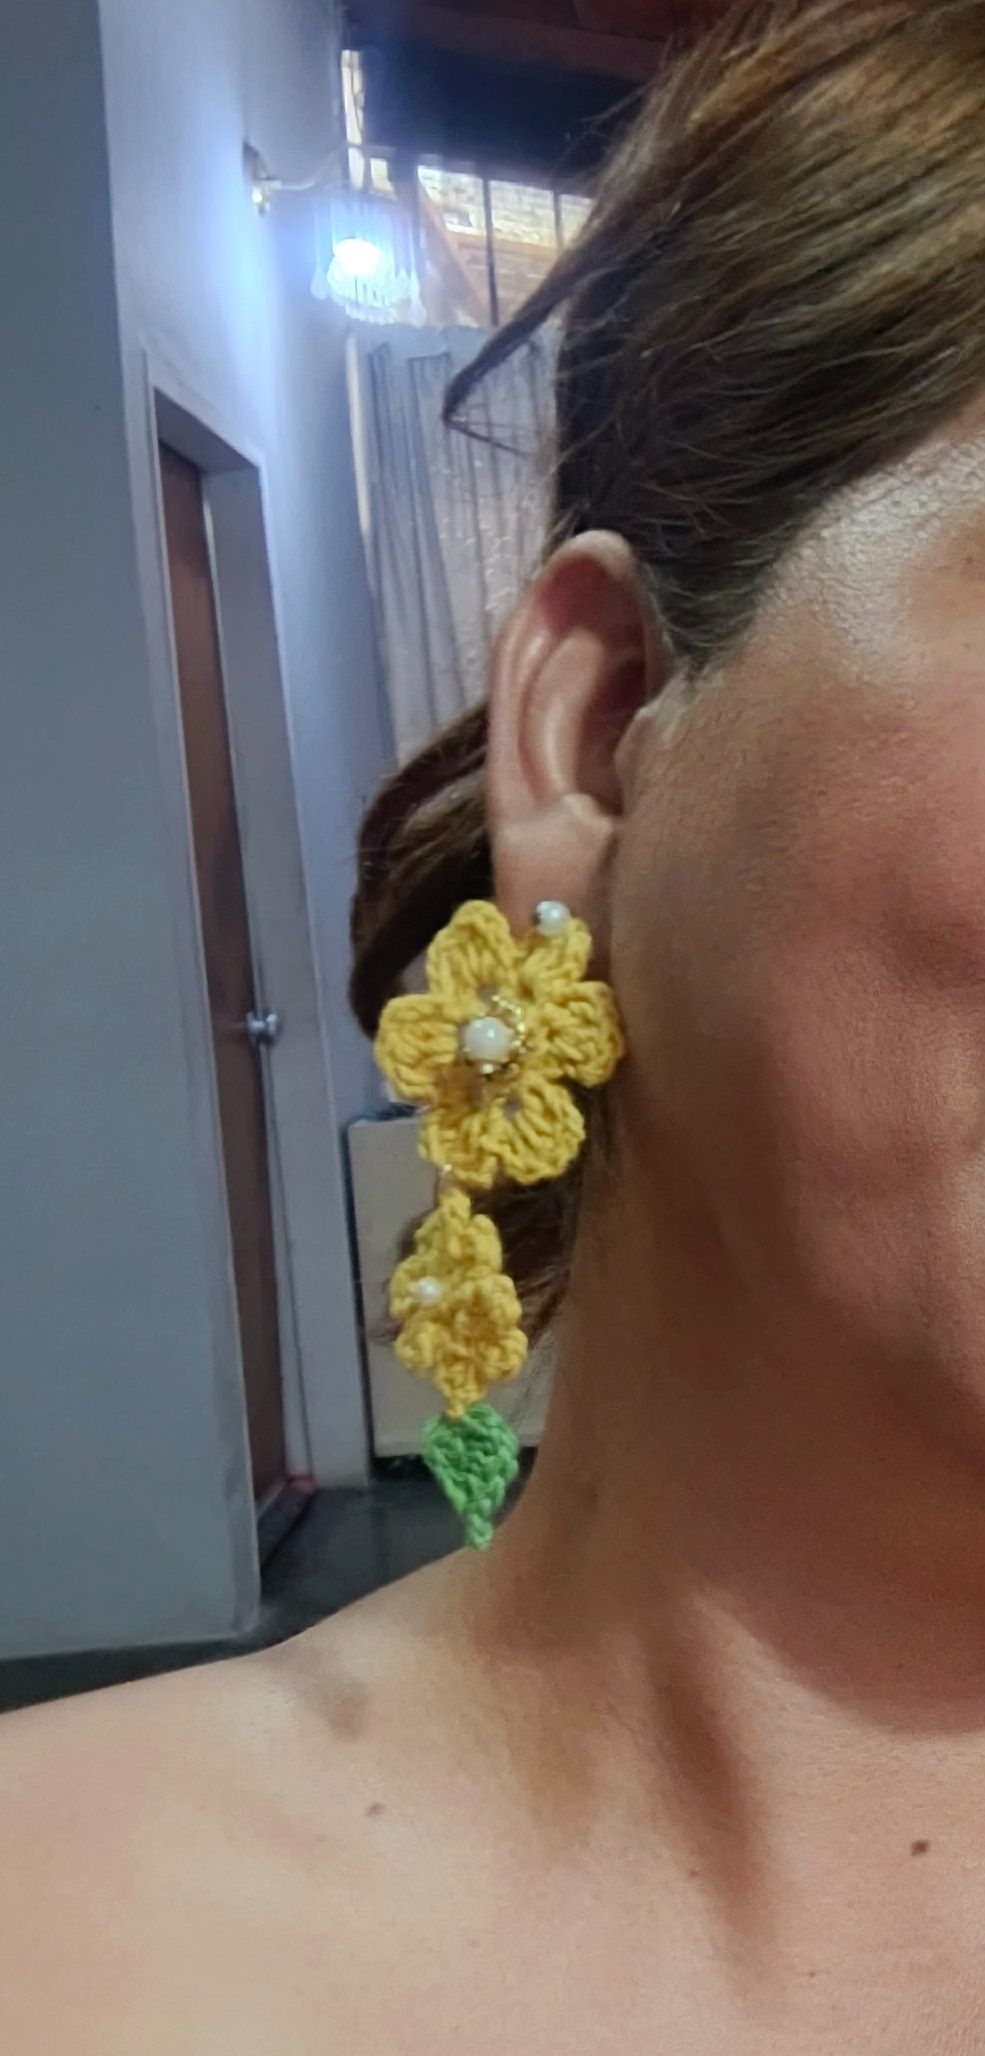
I was inspired by yellow flowers to weave a pair of earrings consisting of two yellow flowers each, with a beautiful leaf hanging from the end of the flowers, decorated with gold and white pearls.
I've wanted to wear these yellow earrings for a long time, so using this date, I wove them as part of my motivation for crocheting, which I've been practicing for some time now. I love using crochet hooks more and more every day for my yarn projects.
The photographs you will see below were taken with my TECNO SPARK GO 2024 model phone.
> Saludos, queridos Needleworkers, ¡feliz y bendecido Lunes de Costura! Una vez más, nos reunimos en este hermoso espacio para compartir las iniciativas que ideamos cada lunes. Me complace compartir mi iniciativa de hoy, en honor a la celebración de ayer, 21 de septiembre, el día especial de las flores amarillas. Estas flores representan la alegría, el amor, el optimismo, la llegada de la primavera, la renovación y la prosperidad.
> Me inspiré en las flores amarillas, para tejer unos zarcillos de dos flores amarillas cada uno, con una hermosa hoja colgando del extremo, decorada con perlas doradas y blancas.
> Llevo mucho tiempo queriendo usar estos zarcillos amarillos, así que aprovechando esta fecha, los tejí como parte de mi motivación para tejer a crochet, algo que llevo practicando un tiempo. Y que Cada día me encanta practicar y usar las agujas de crochet para mis proyectos.
Las fotos que verán a continuación fueron tomadas con mi teléfono TECNO SPARK GO modelo 2024.

 |
| |
| |-|-|-
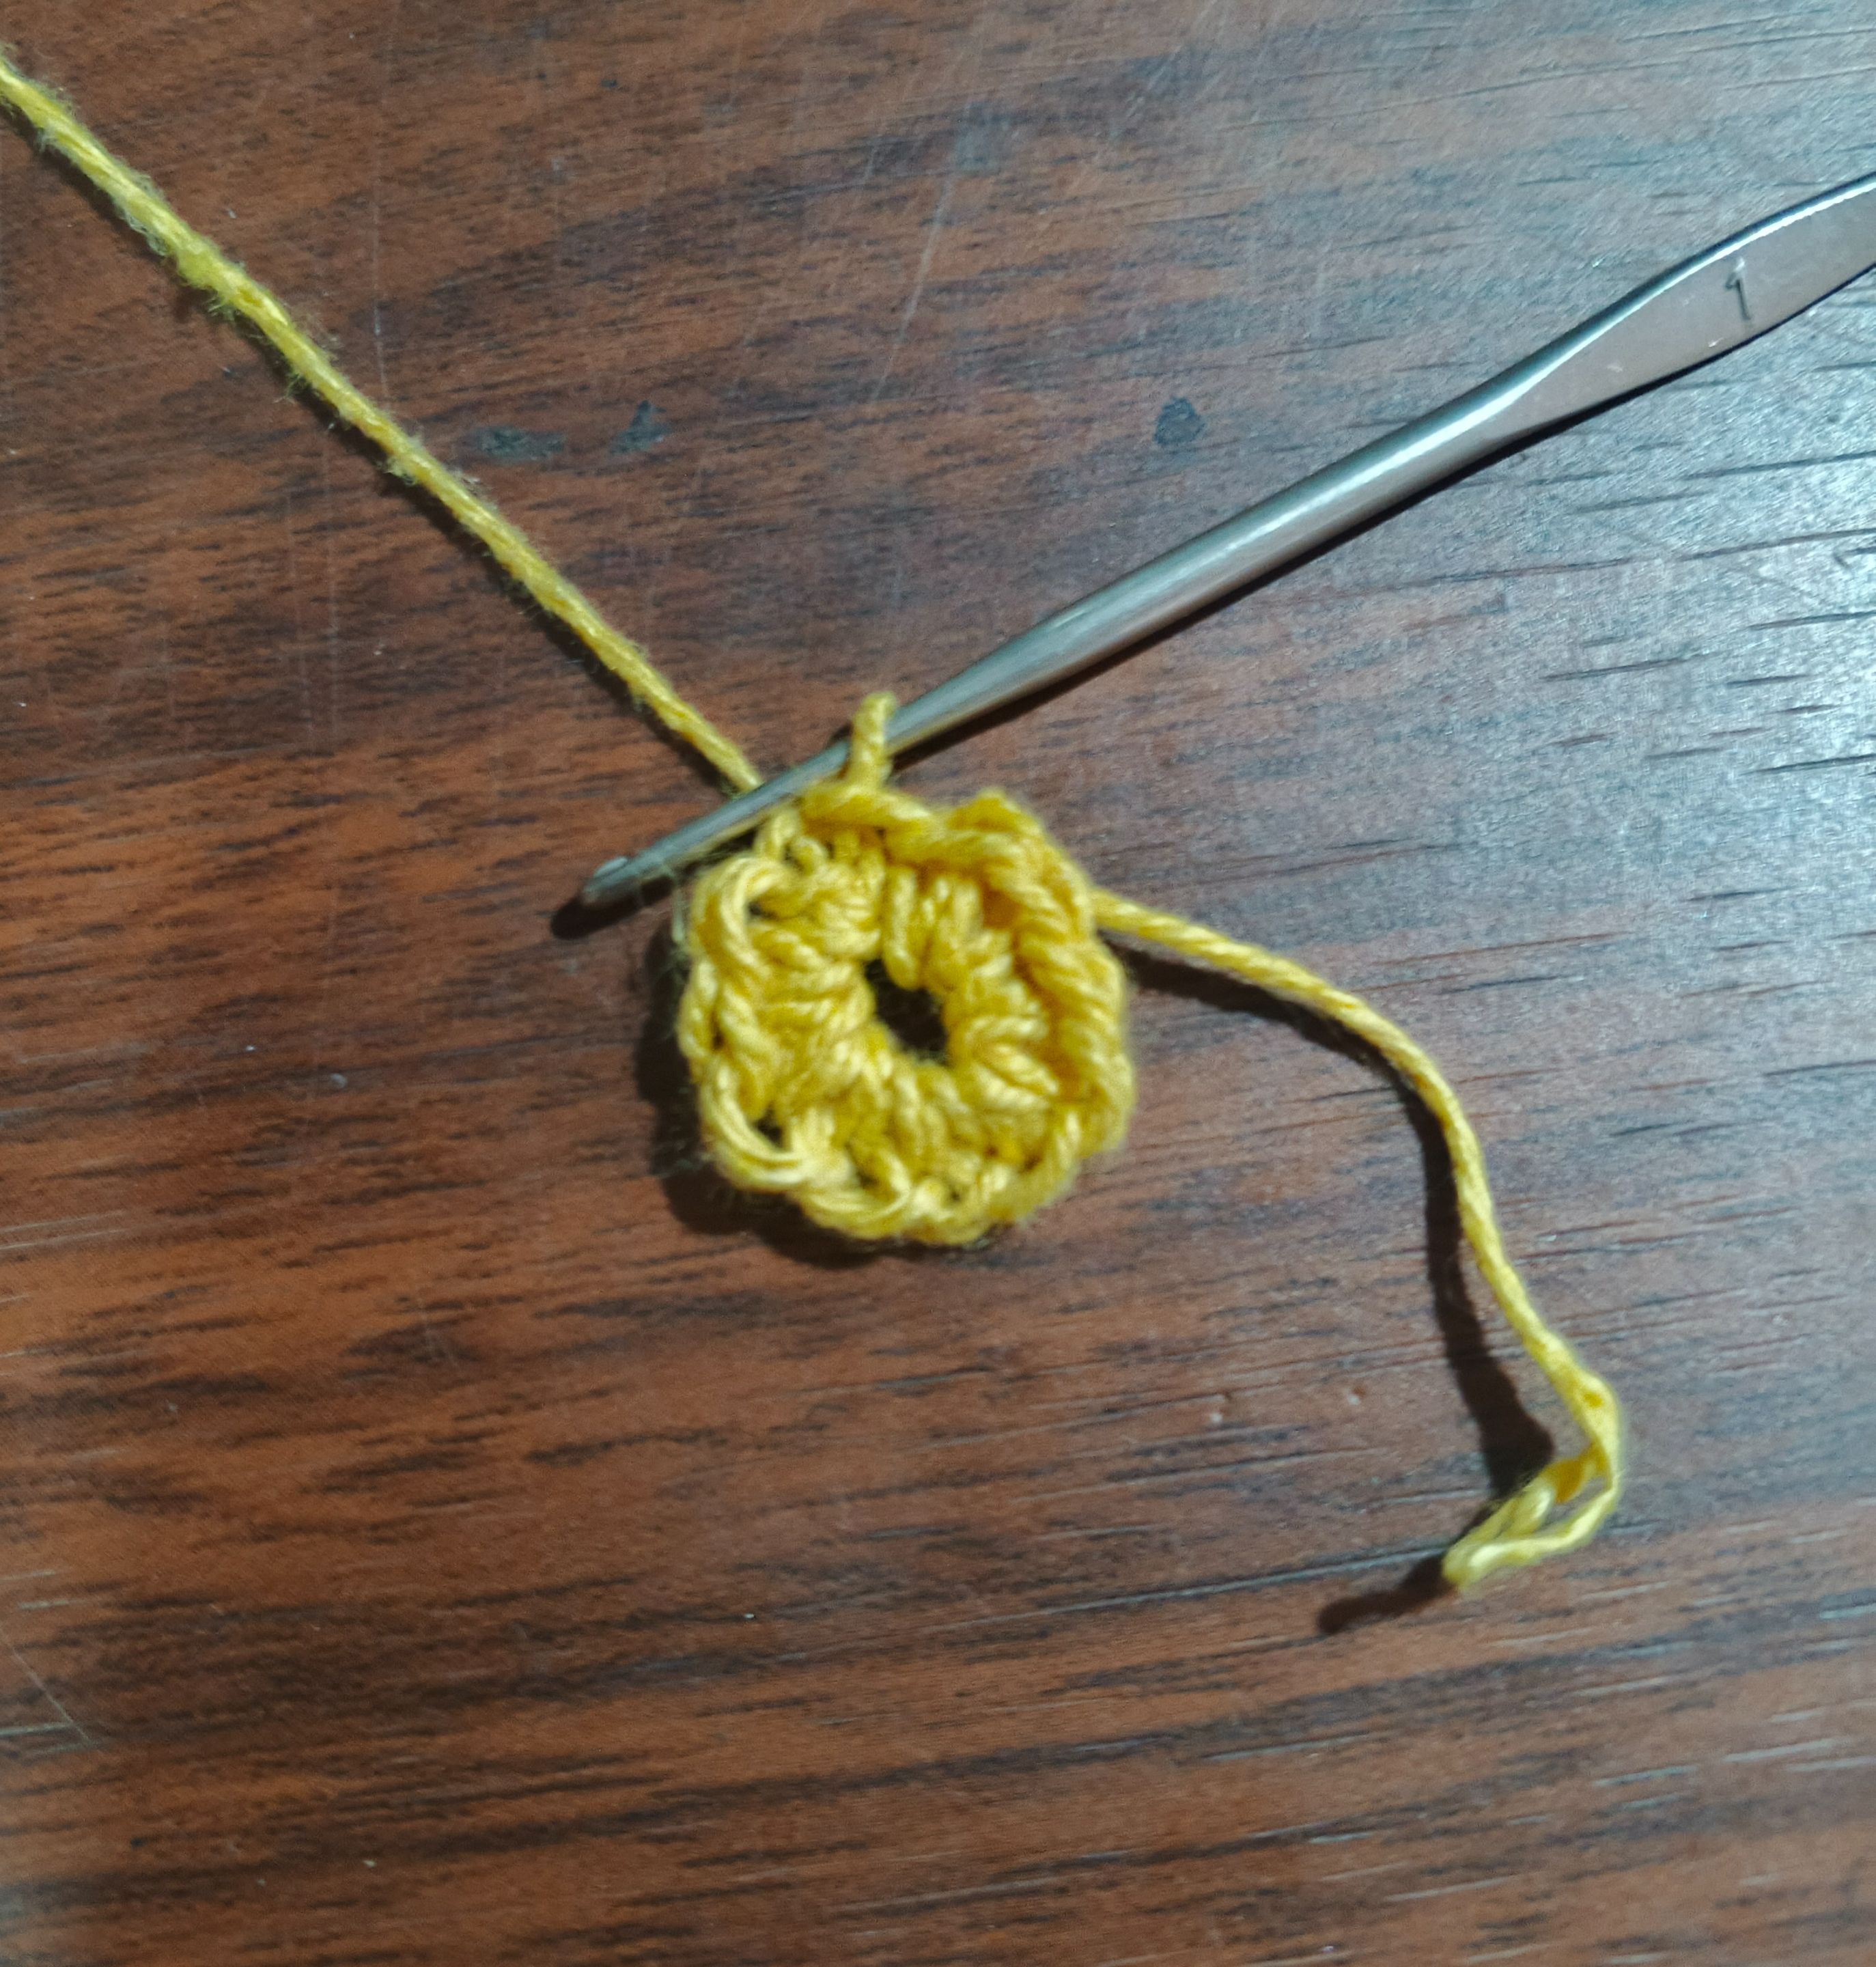
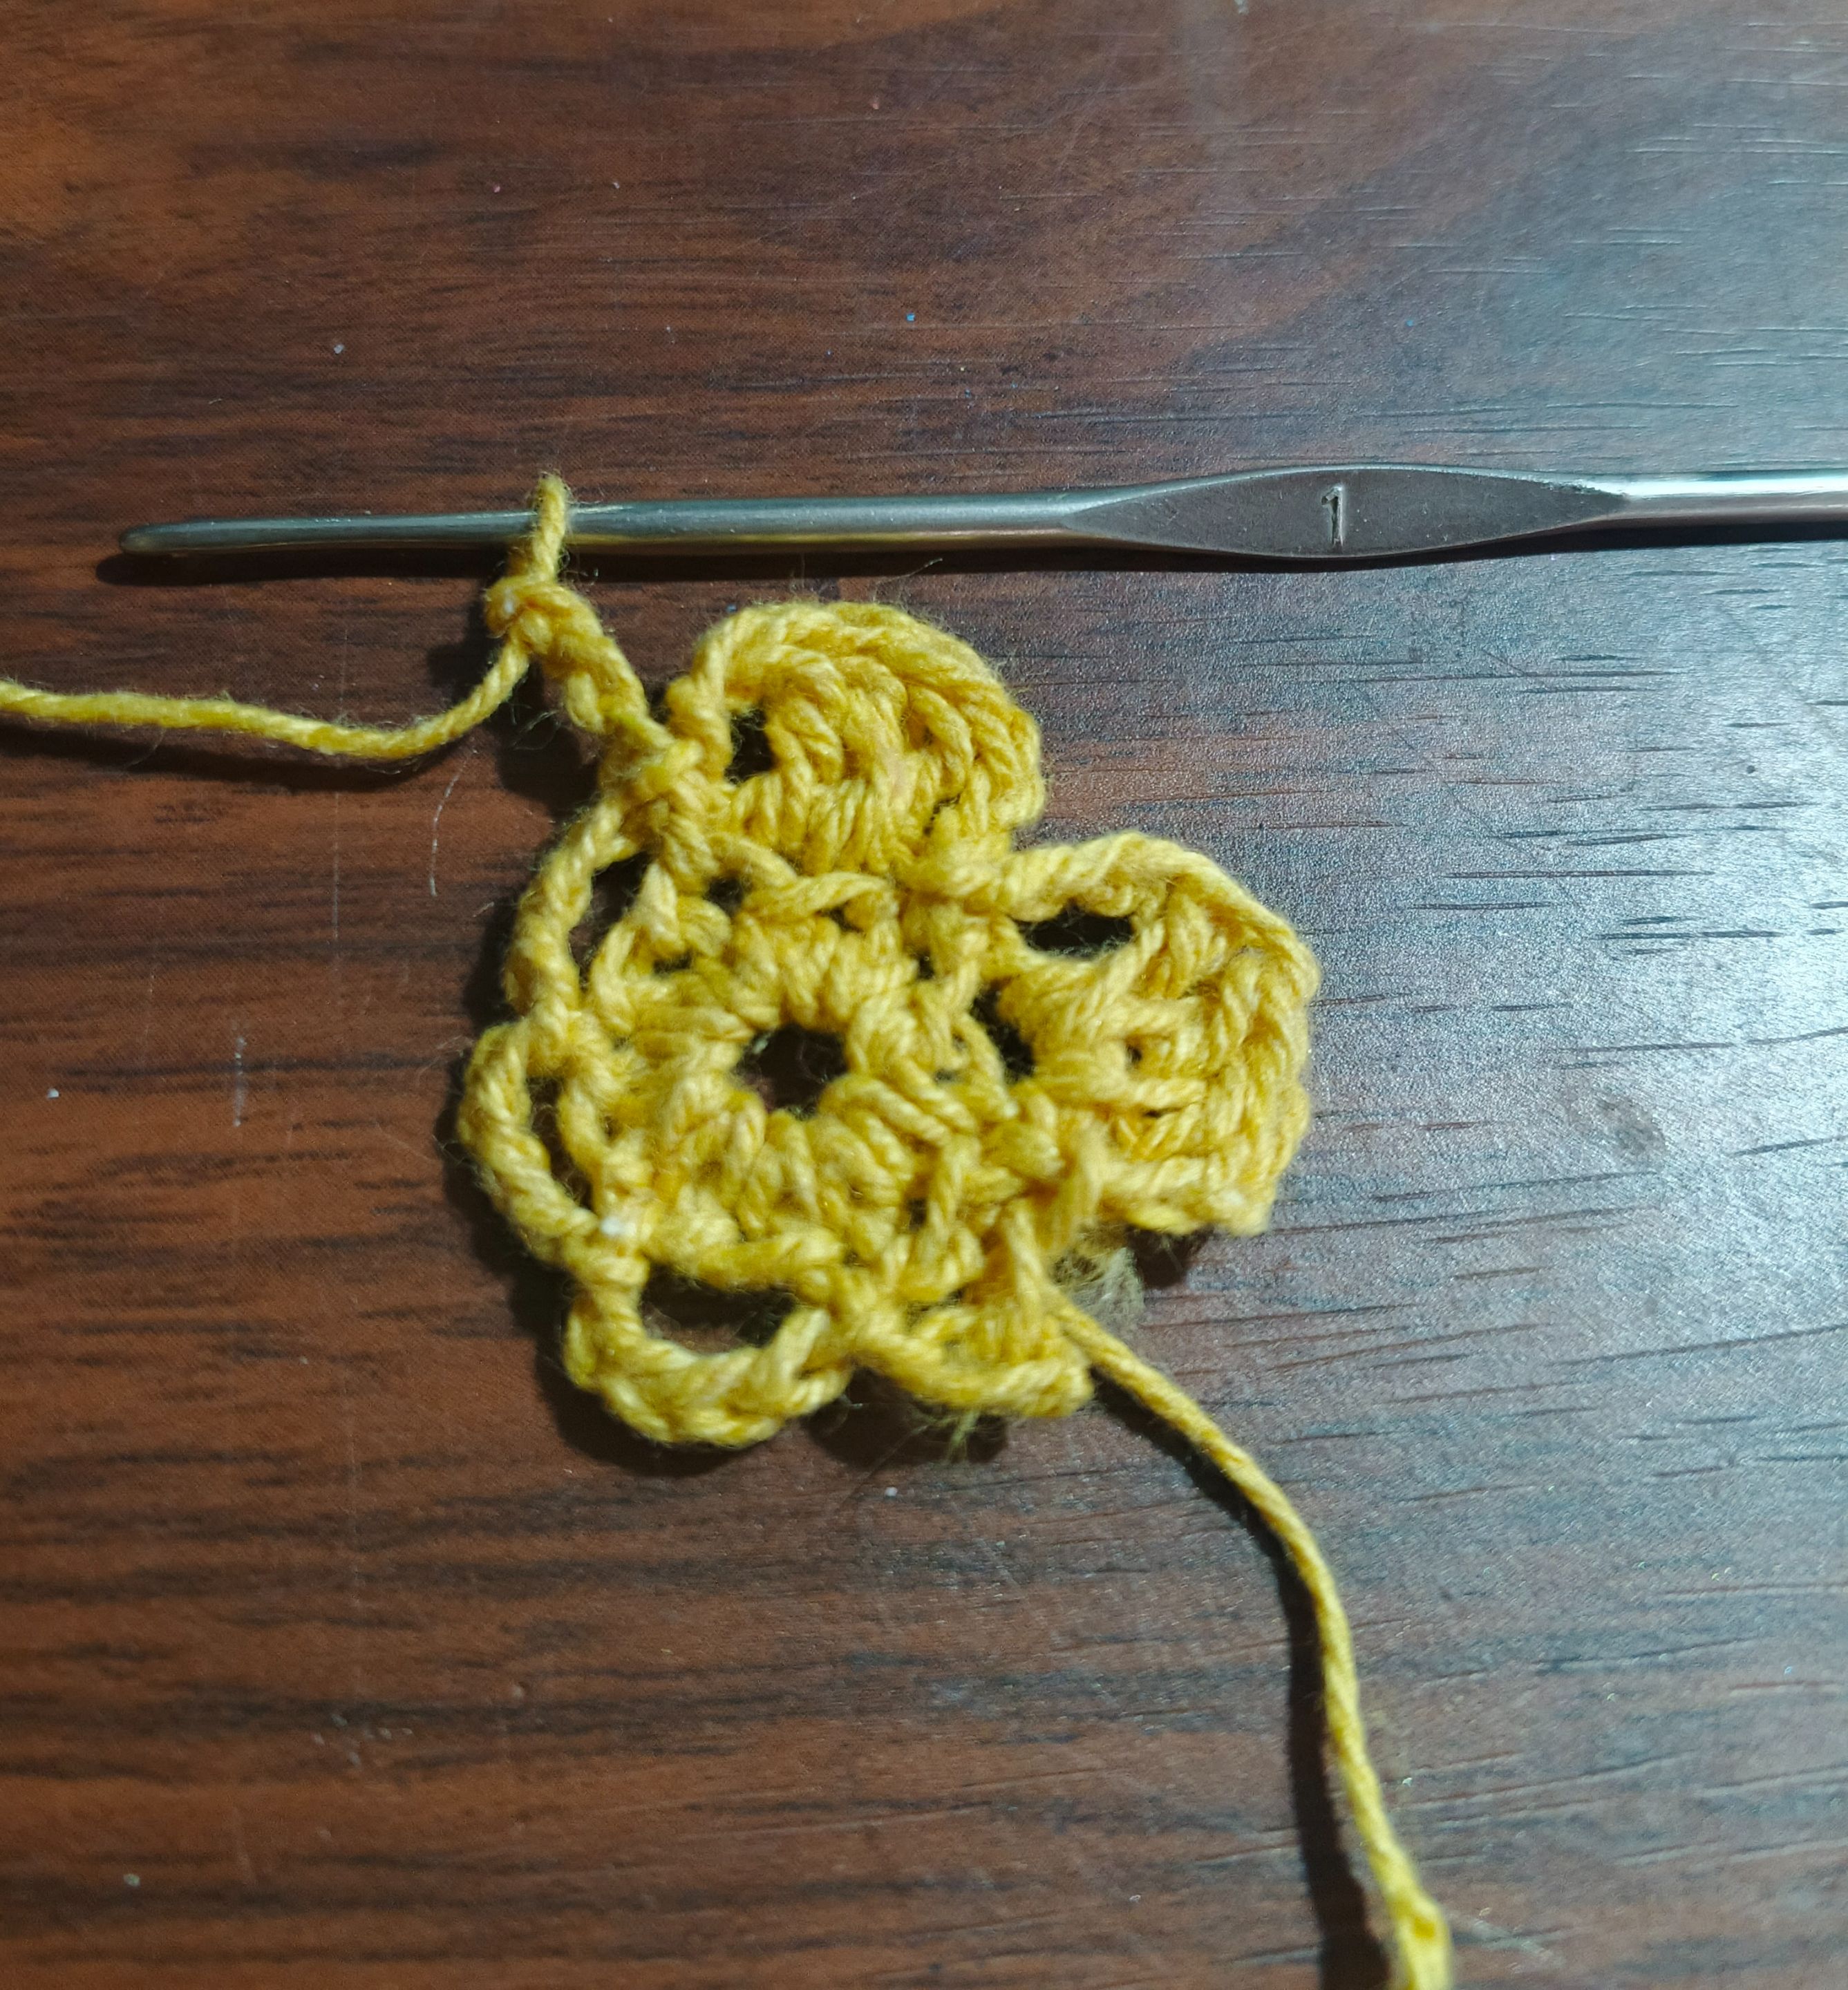
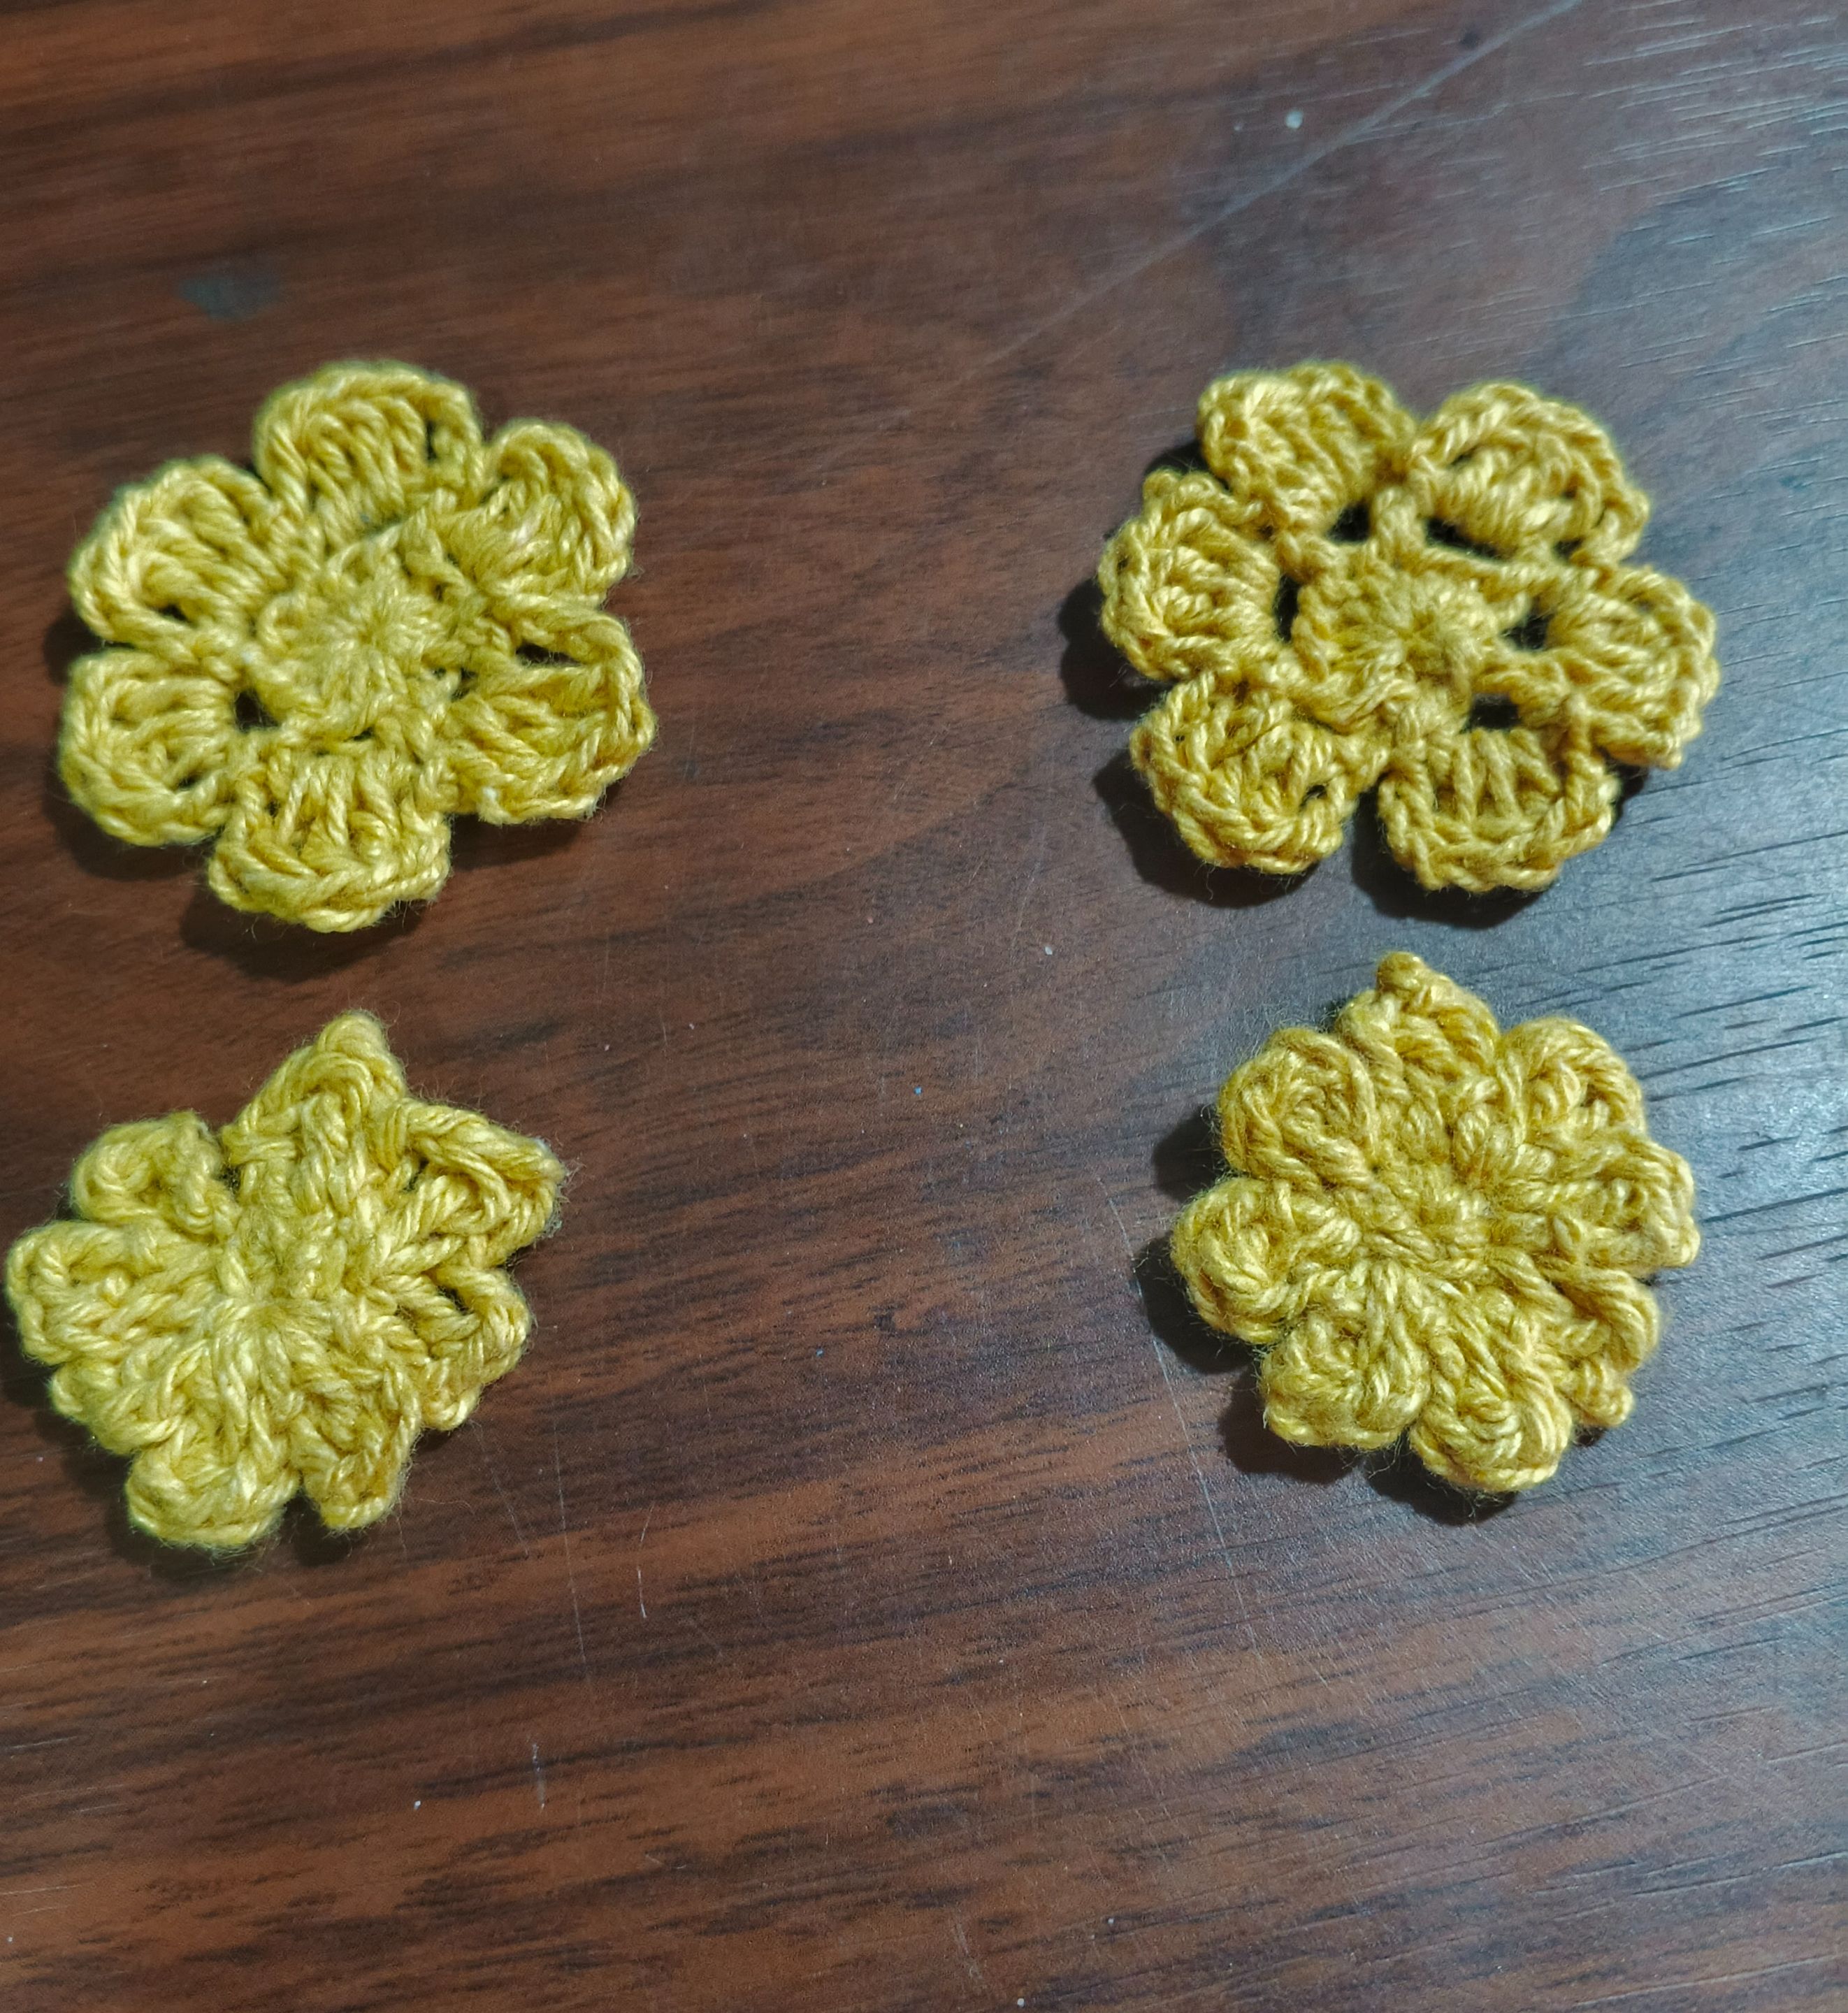
The flower design is simple to make. You start with a ring of 11 single crochet stitches, then continue forming the first petal, where you lift a chain of 3 stitches, followed by 3 double crochet stitches ending with a chain of 2 stitches. In this order, you make each petal that forms these first yellow flowers, which consist of 6 petals.
The second flower, I crocheted smaller, to create an asymmetrical shape. The initial loops are made in the same order as the 6-petal flowers I crocheted, but in this case, I formed the flowers with a greater number of smaller petals.
> El diseño de la flor es sencillo de hacer. Se empieza con un anillo de 11 puntos bajos, luego se continúa formando el primer pétalo, donde se levanta una cadeneta de 3 puntos, seguida de 3 puntos altos y se termina con una cadeneta de 2 puntos. En este orden, se teje cada pétalo que forma estas primeras flores amarillas, que constan de 6 pétalos.
> La segunda flor la tejí más pequeña para crear una forma asimétrica. Las lazadas iniciales se tejen en el mismo orden que las flores de 6 pétalos que tejí, pero en este caso, las formé con un mayor número de pétalos más pequeños.
 |
| |
| |-|-|-
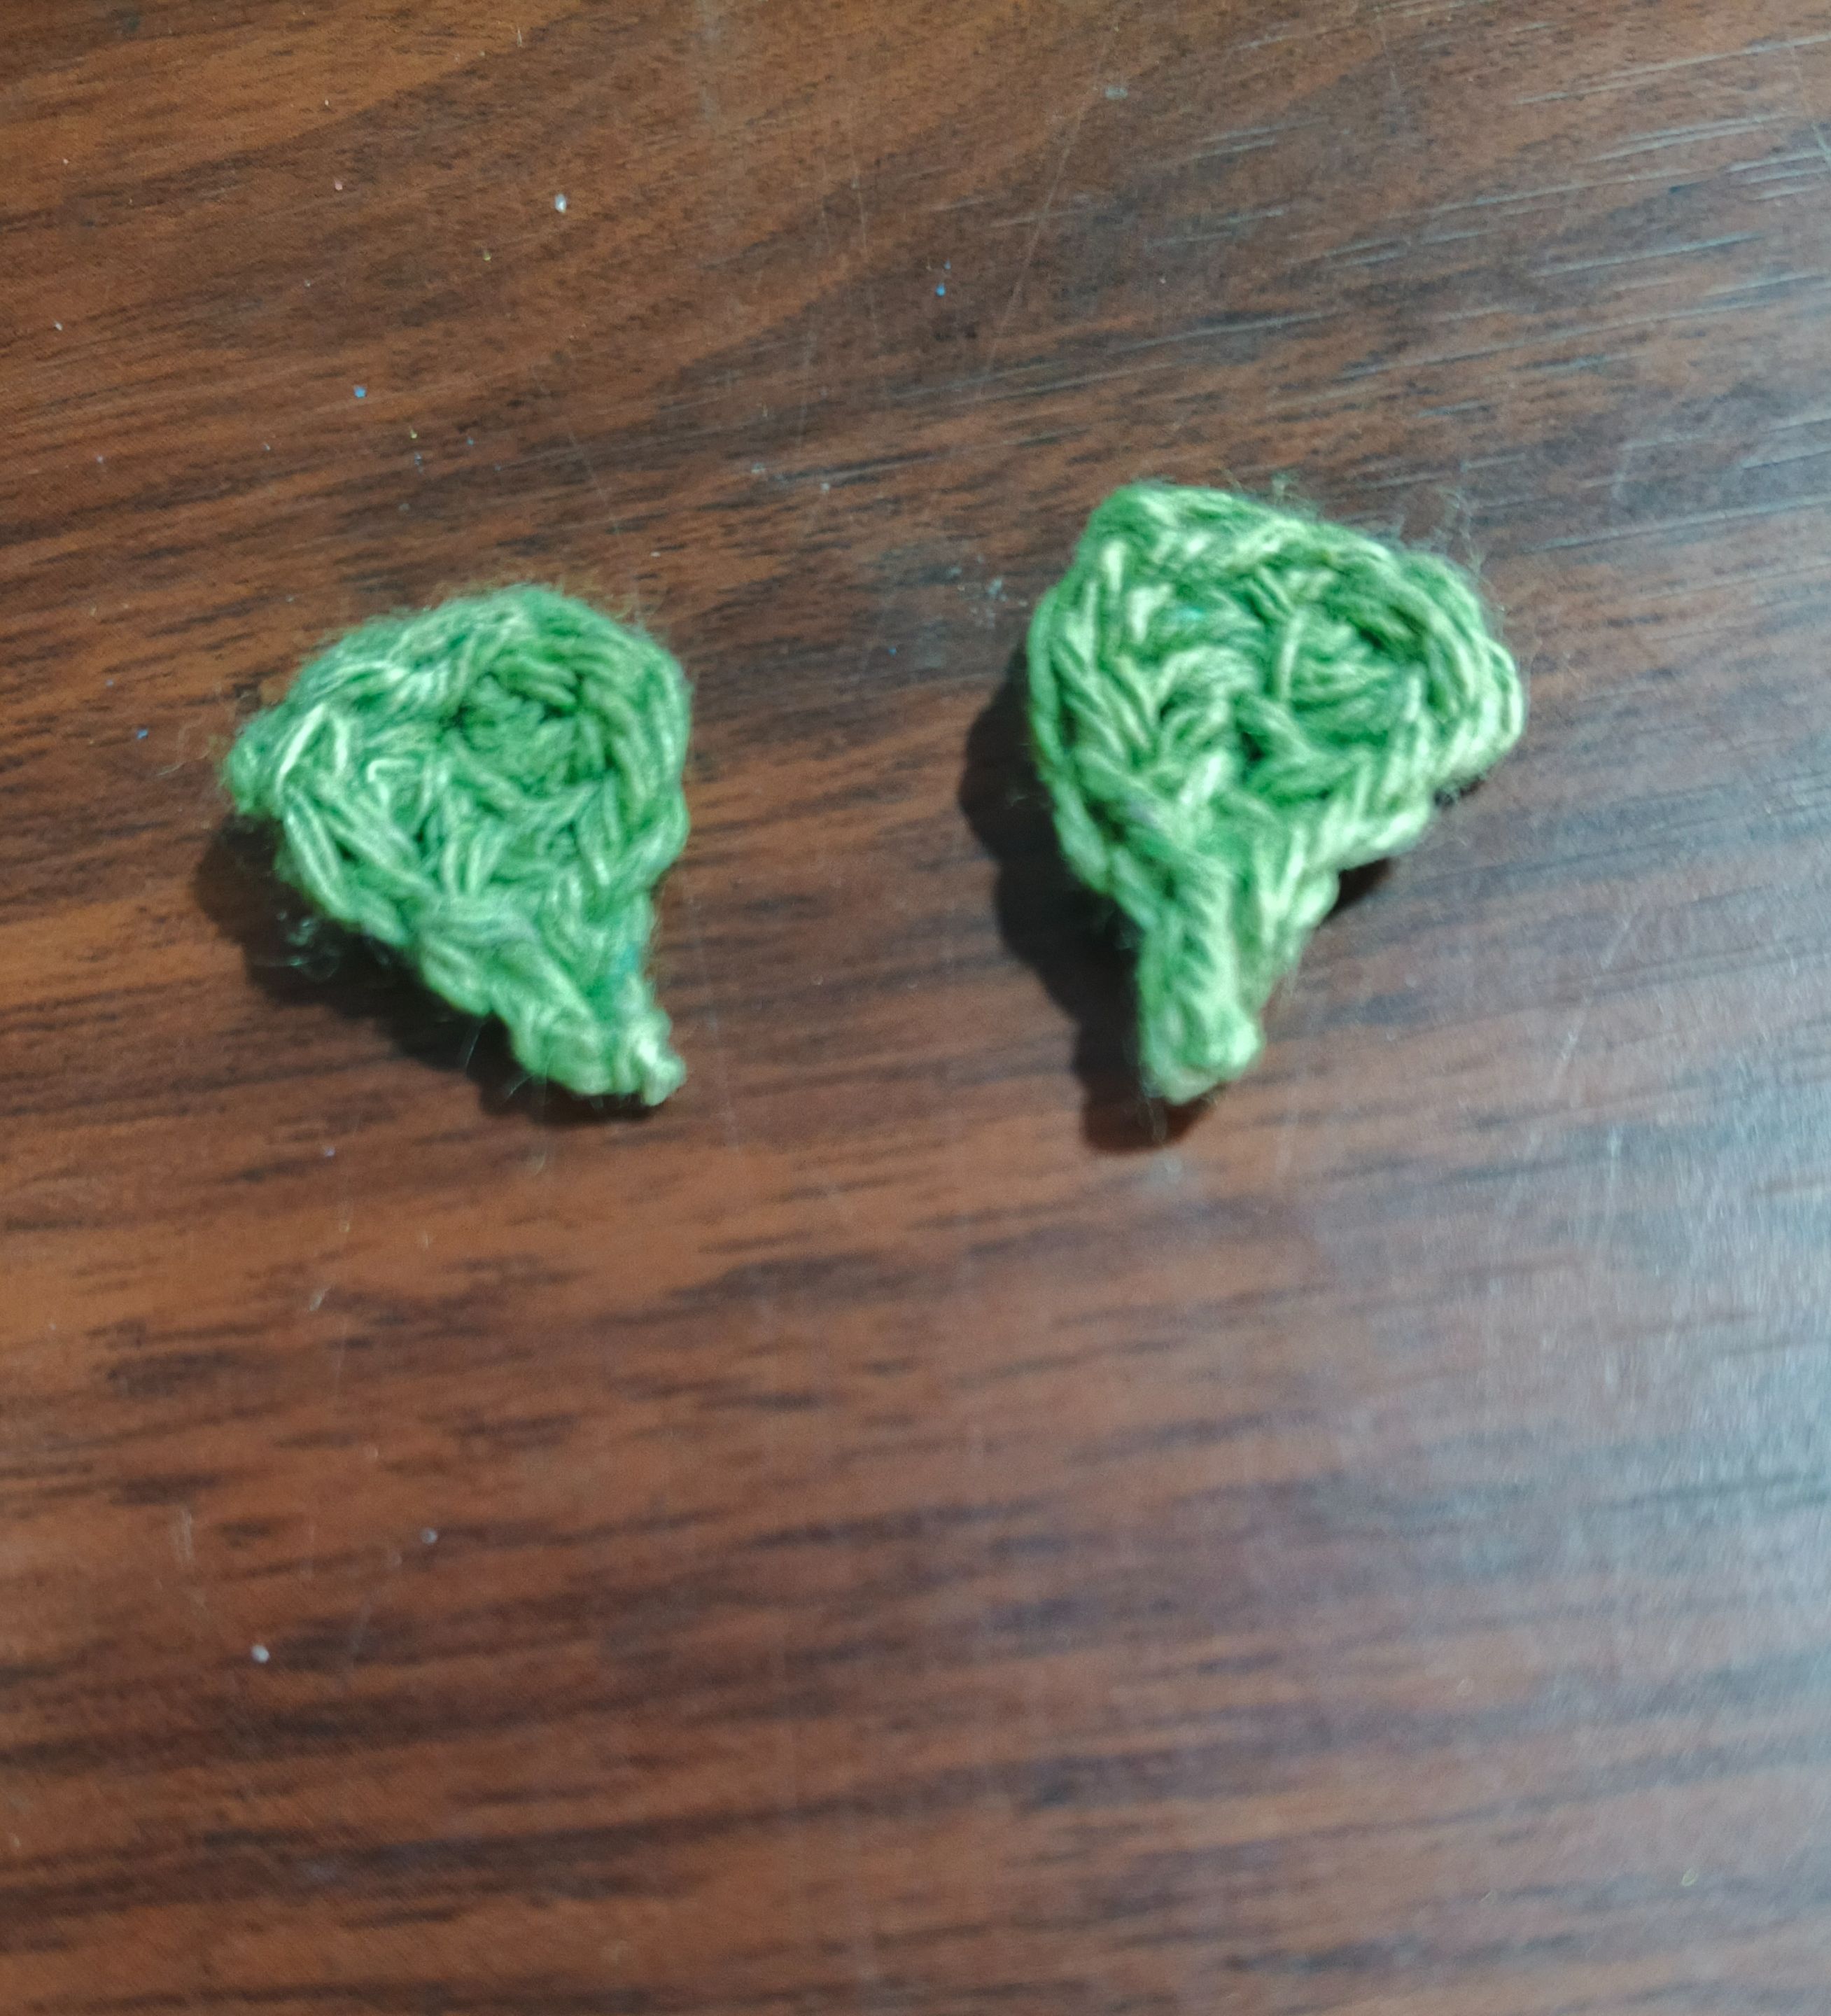
Finally, I finished weaving the flowers and began weaving the leaves. For this design, I started with a chain of 6 stitches. Then, on one side, I knitted 6 more stitches to make what will be the stem of the leaves. To make the stitches that form the leaf more resistant, I made them by making 1 slip stitch, followed by 1 single crochet, plus 2 double crochets in the same anchor stitch, finishing with 1 single crochet, plus 1 slip stitch, using the same anchor stitch. This step is repeated on the other side of the leaf.
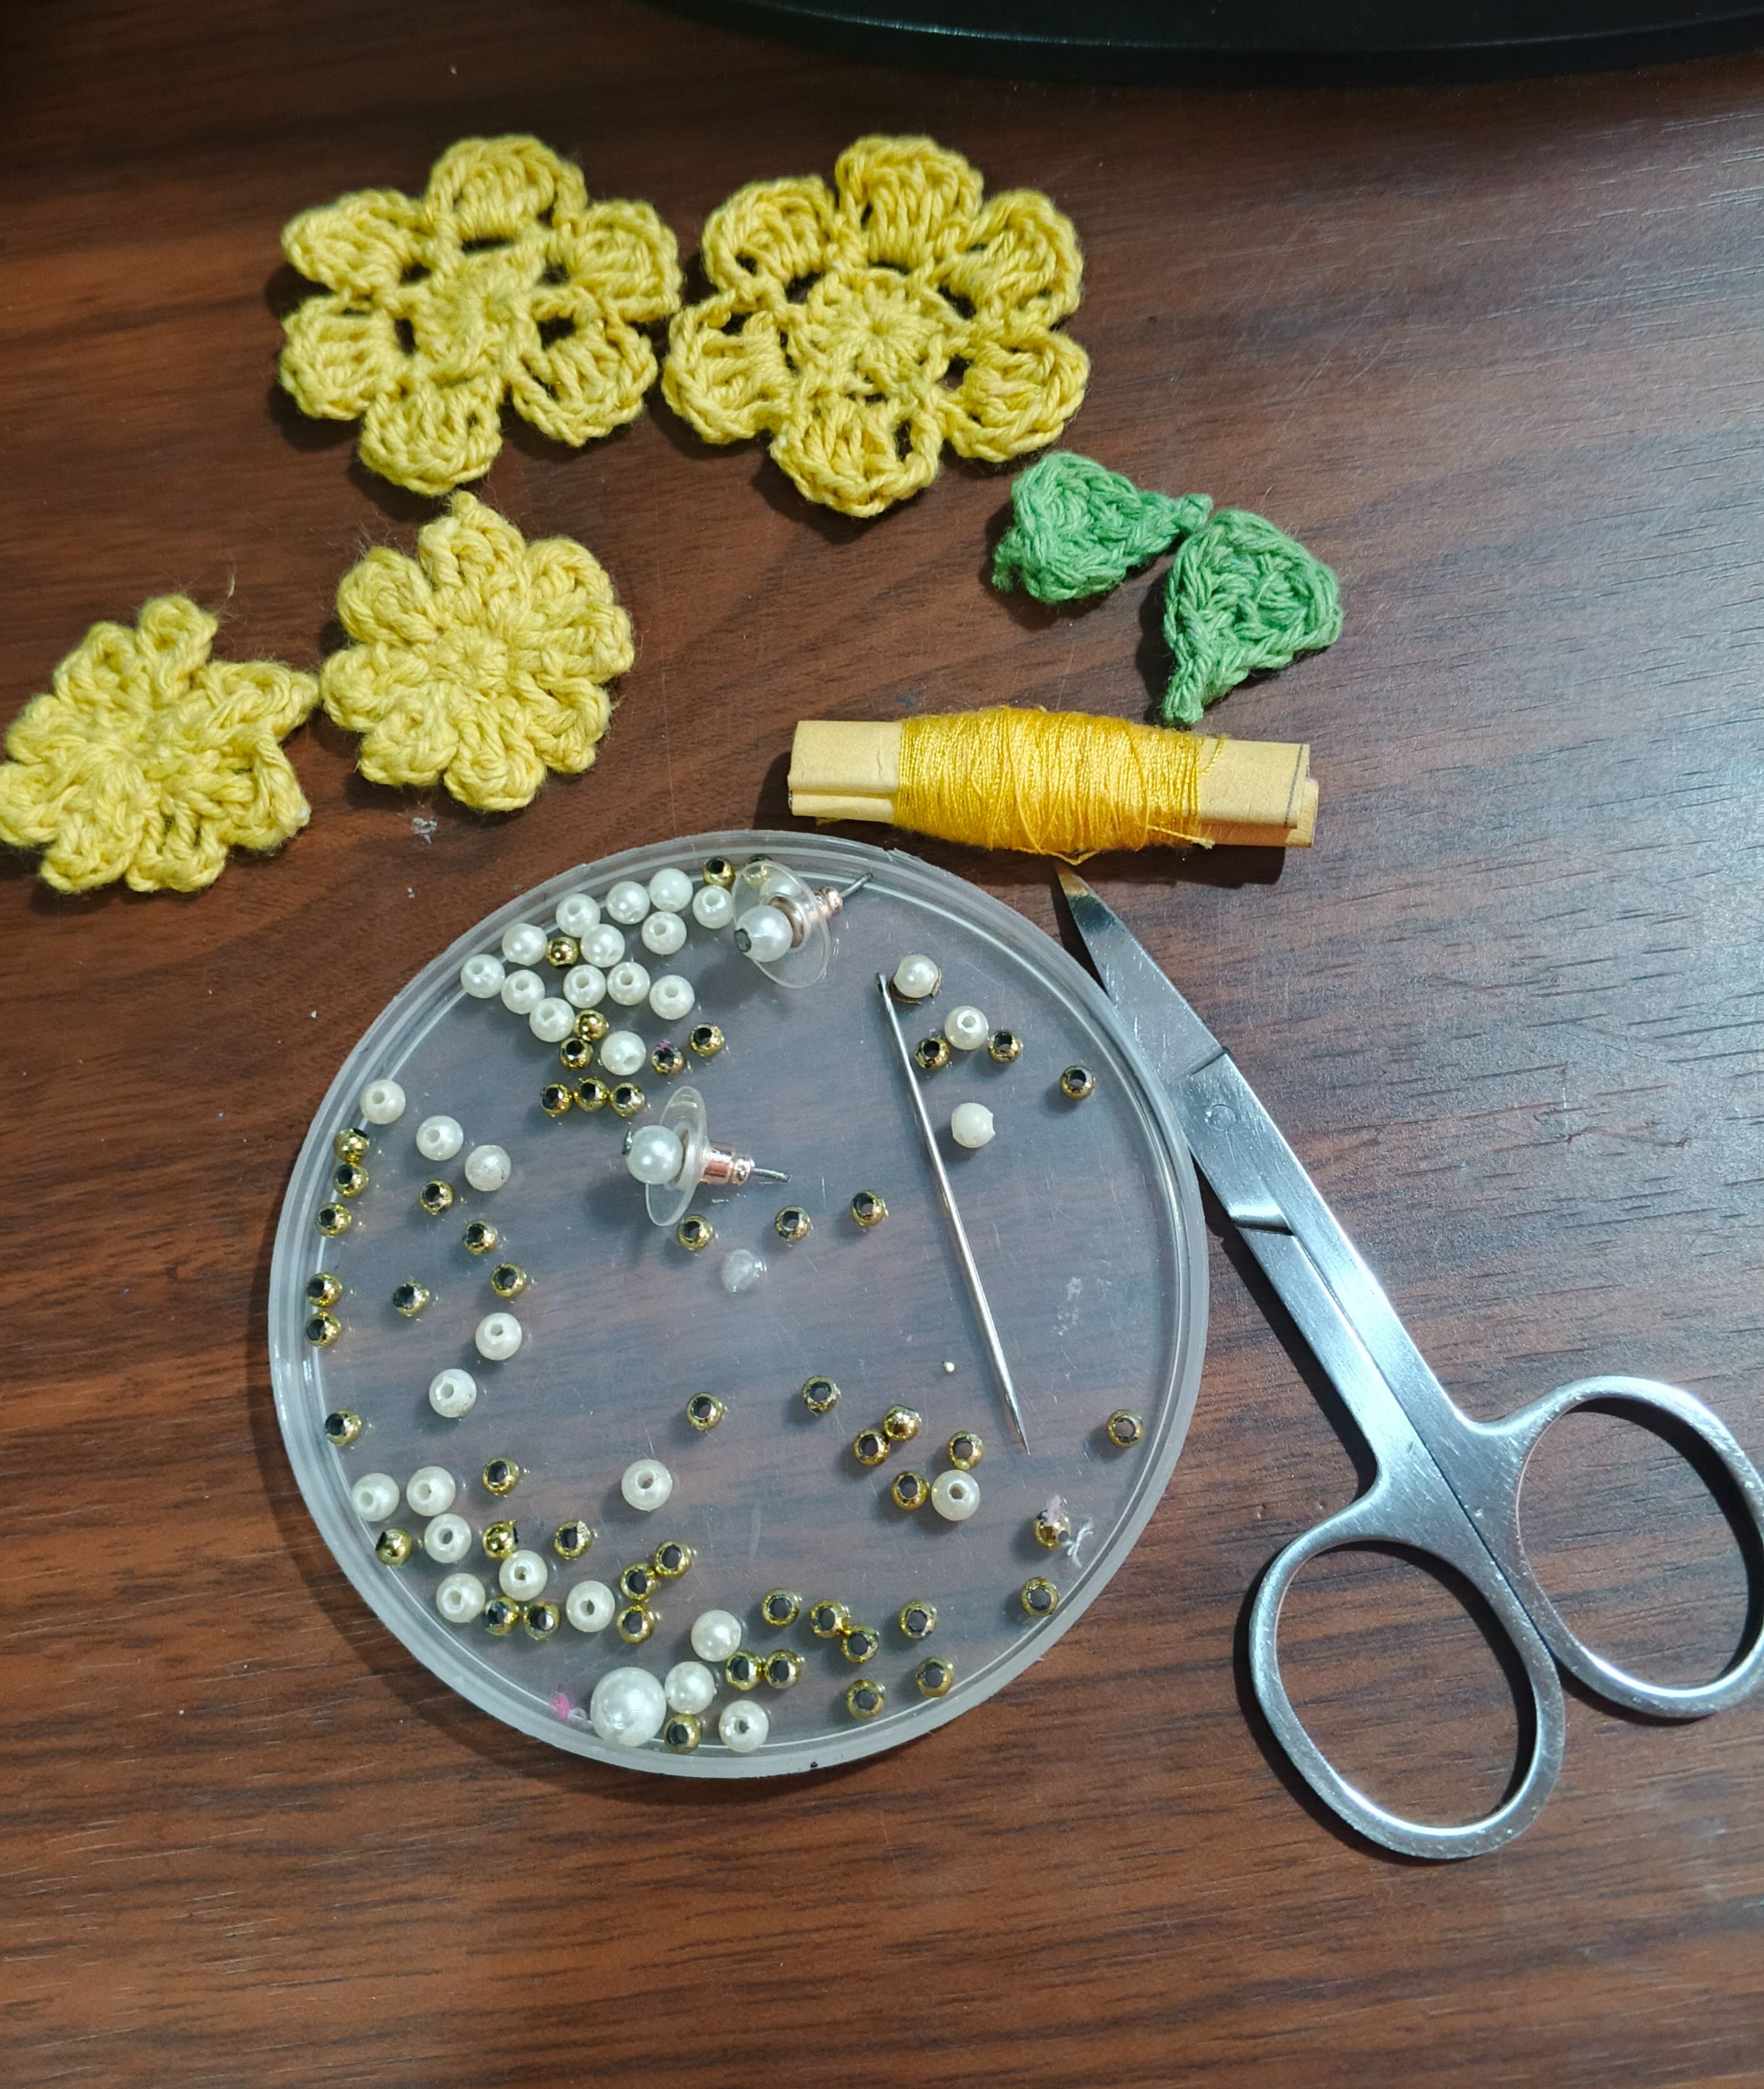
Then, I gathered all the pieces together to begin joining them.
> Finalmente, terminé de tejer las flores y comencé a tejer las hojas. Para este diseño, comencé con una cadeneta de 6 puntos. Luego, en un lado, tejí 6 puntos más para formar lo que será el tallo de las hojas. Para que los puntos que forman la hoja fueran más resistentes, los tejí con un punto raso, seguido de un punto bajo y dos puntos altos en el mismo punto de anclaje, terminando con un punto bajo y un punto raso, usando el mismo punto de anclaje. Este paso se repite en el otro lado de la hoja.
Luego, junté todas las piezas para comenzar a unirlas.
 |
| |-|-
|-|-
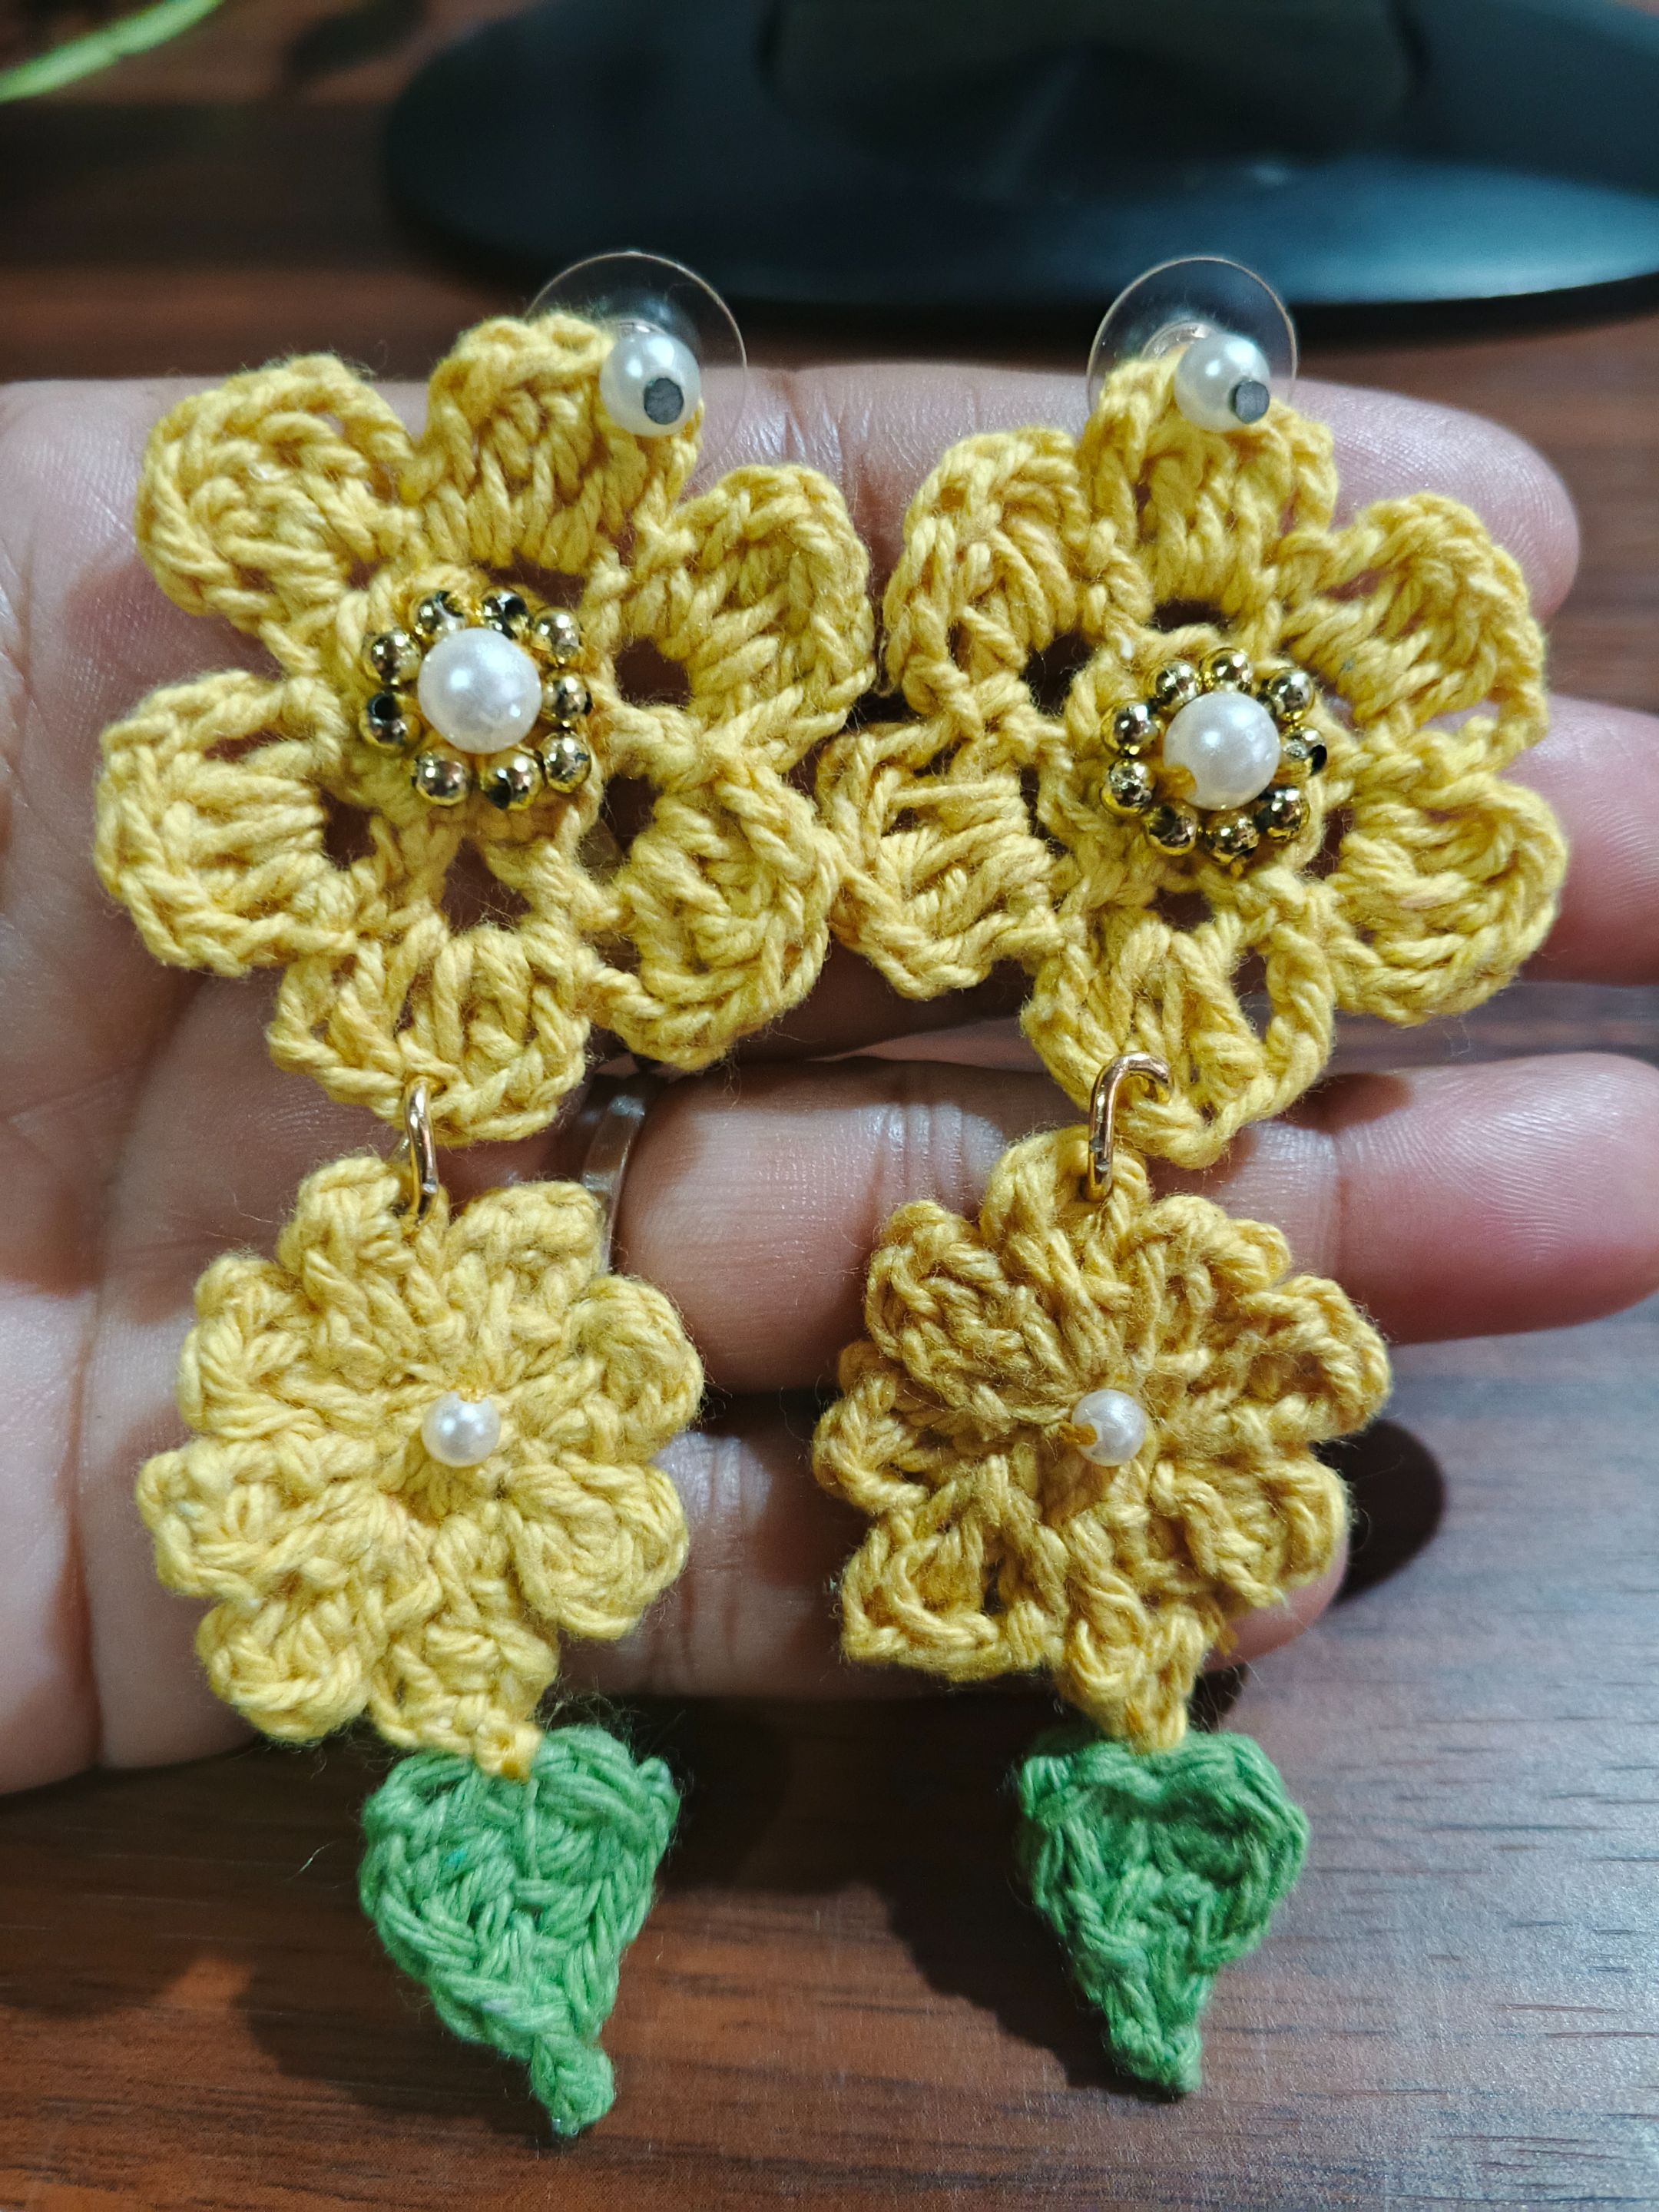
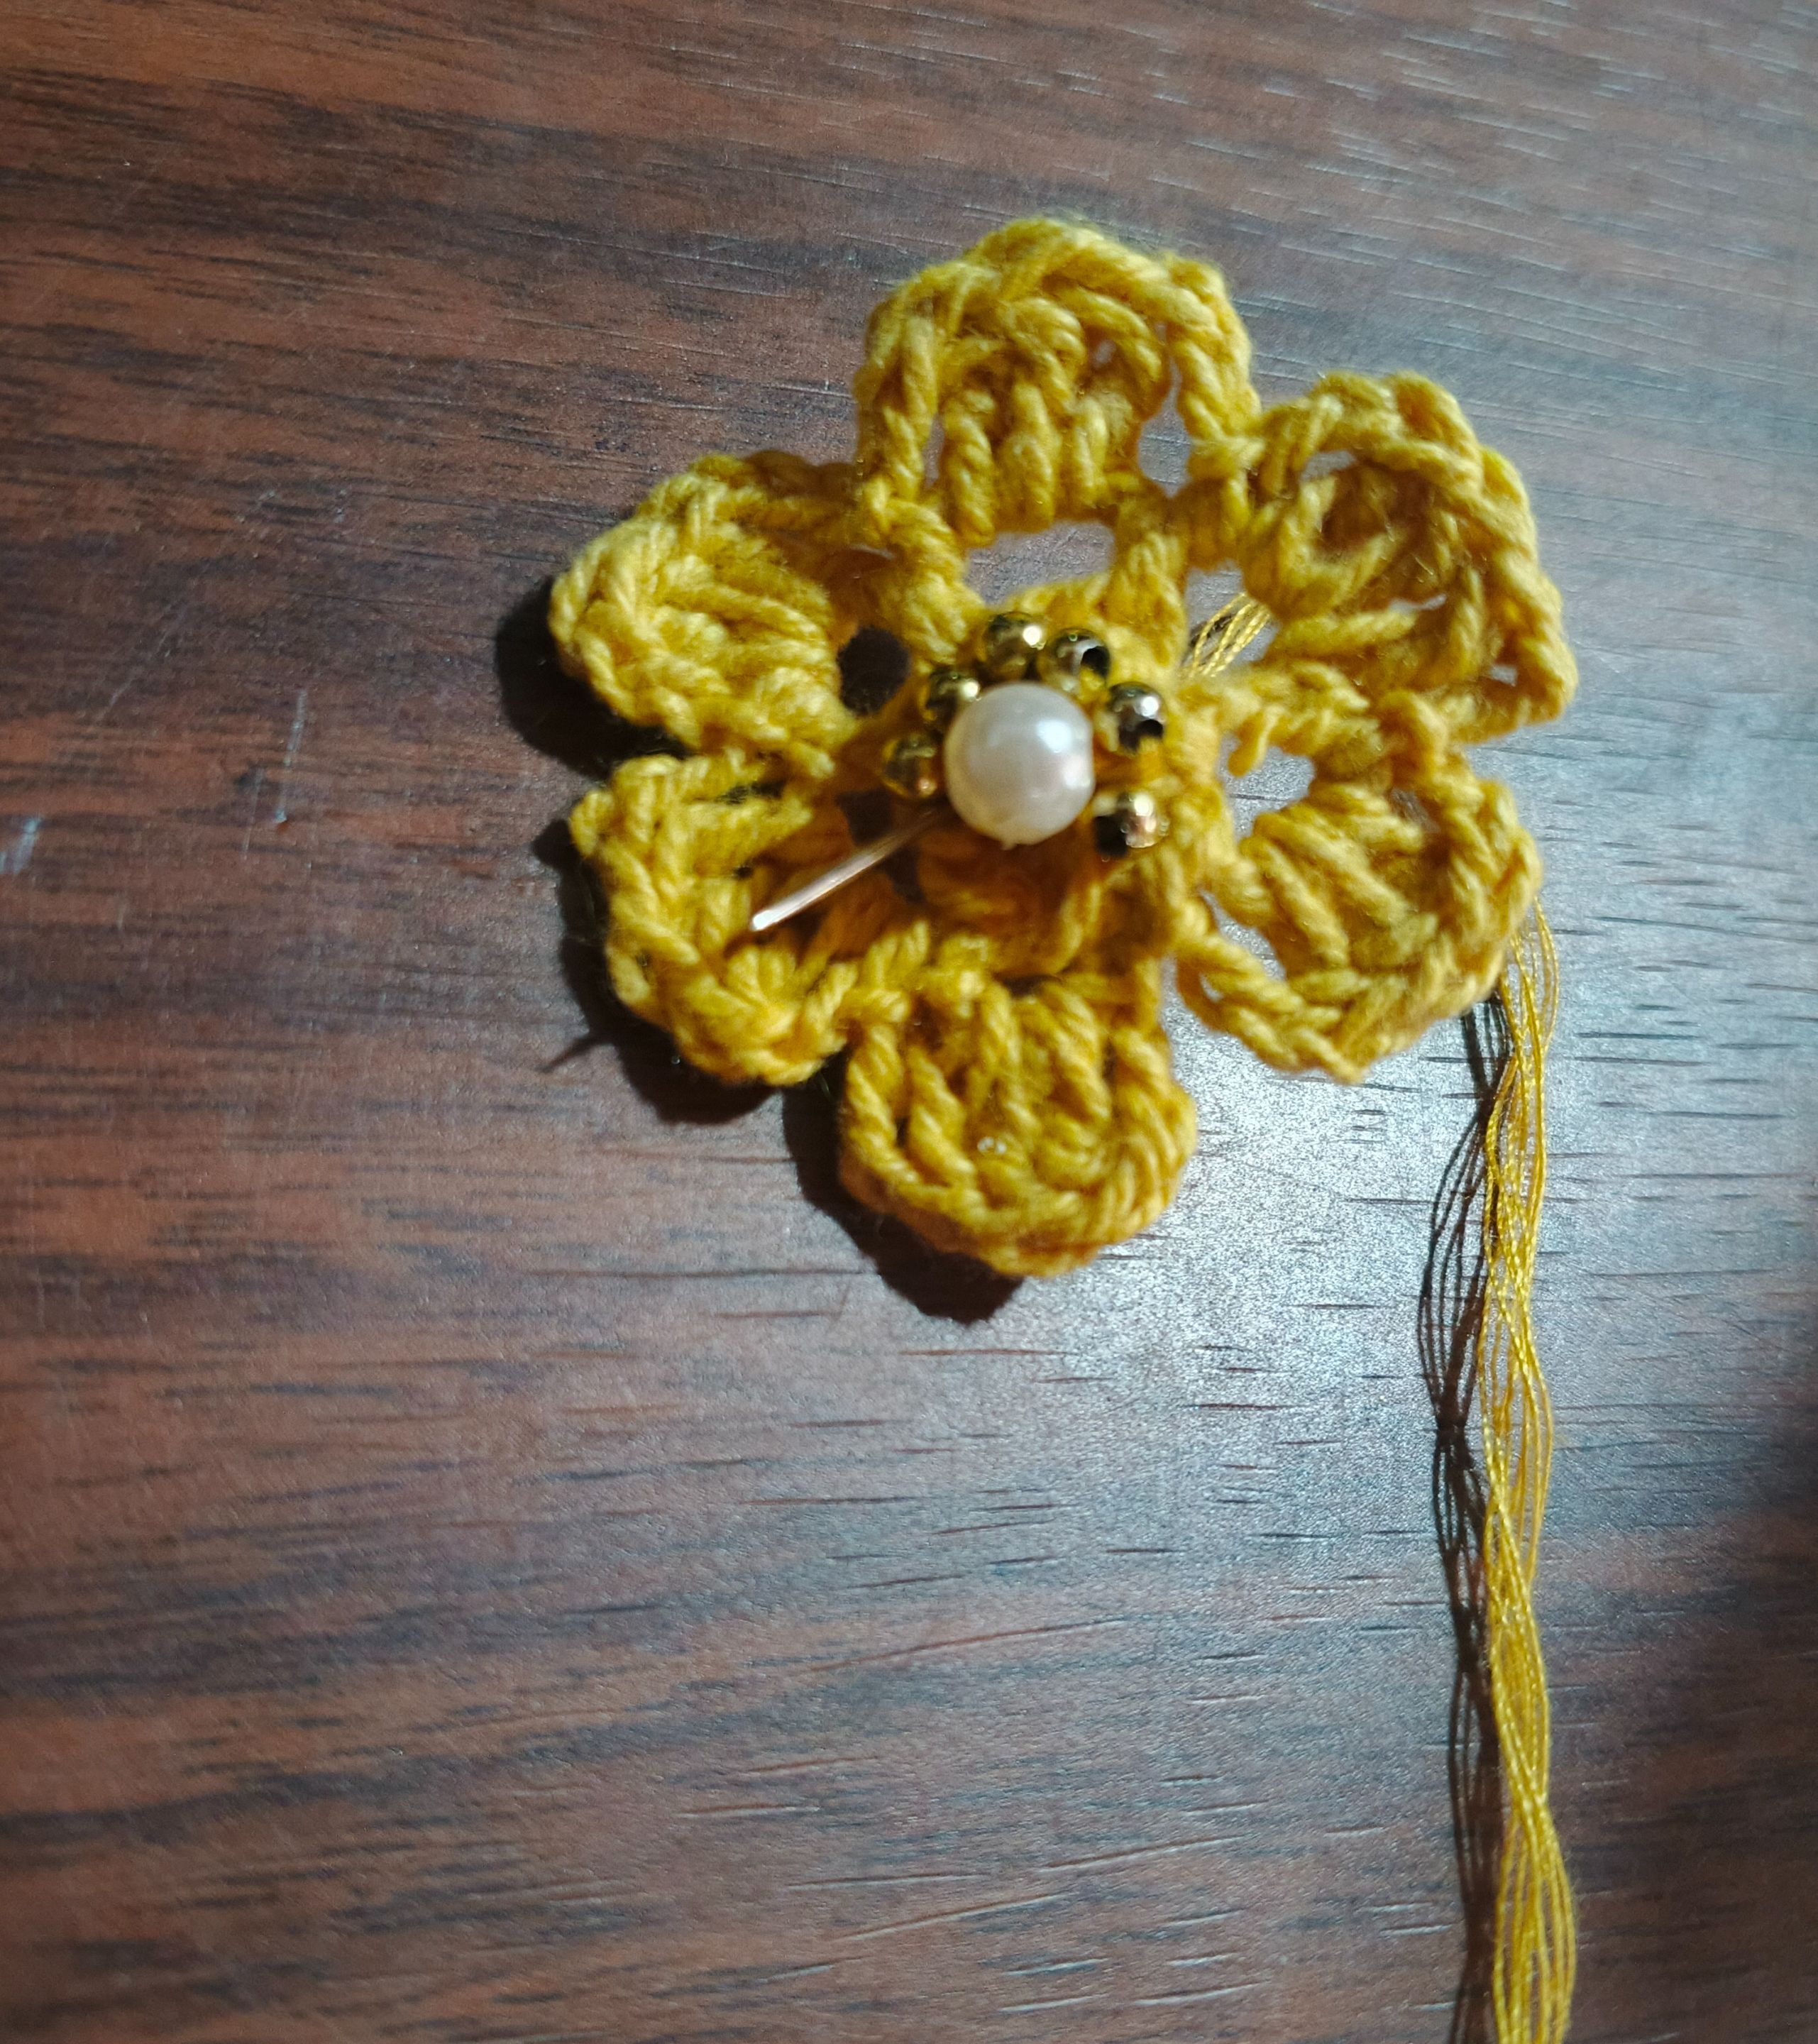
Next up is the flower center decoration. Using a needle and yellow thread, I sewed a white pearl in the center of the flower, bordered by gold pearls. I then sewed a smaller white pearl in the center of the smaller flower.
I continued by joining the pieces and placing the toothpicks to finish.
> Lo que sigue es hacer la decoracion del centro de la flor. Con una aguja e hilo amarillo, cosí una perla blanca en el centro de la flor, bordeada con perlas doradas. Luego, cosí una perla blanca más pequeña en el centro de la flor más pequeña.
Continué uniendo las piezas y colocando los palillos para terminar.
 |
| |-|-
|-|-
I hope you enjoyed my work today. From afar, I send my best wishes to everyone.
> Espero que hayan disfrutado de mi trabajo de hoy. Desde la distancia, les envío mis mejores deseos a todos.
social networks / redes sociales
Traductor Deepl
Translated Deepl
Ediciones Canva
Editions Canva