Hello dear creatives, happy day! I hope you're all doing well. I'm presenting a craft for my second participation in this month's contest. I'm so happy and excited to be here again, sharing my crafty skills, made with love and always recycling to contribute a little something to the planet by using recycling as art.
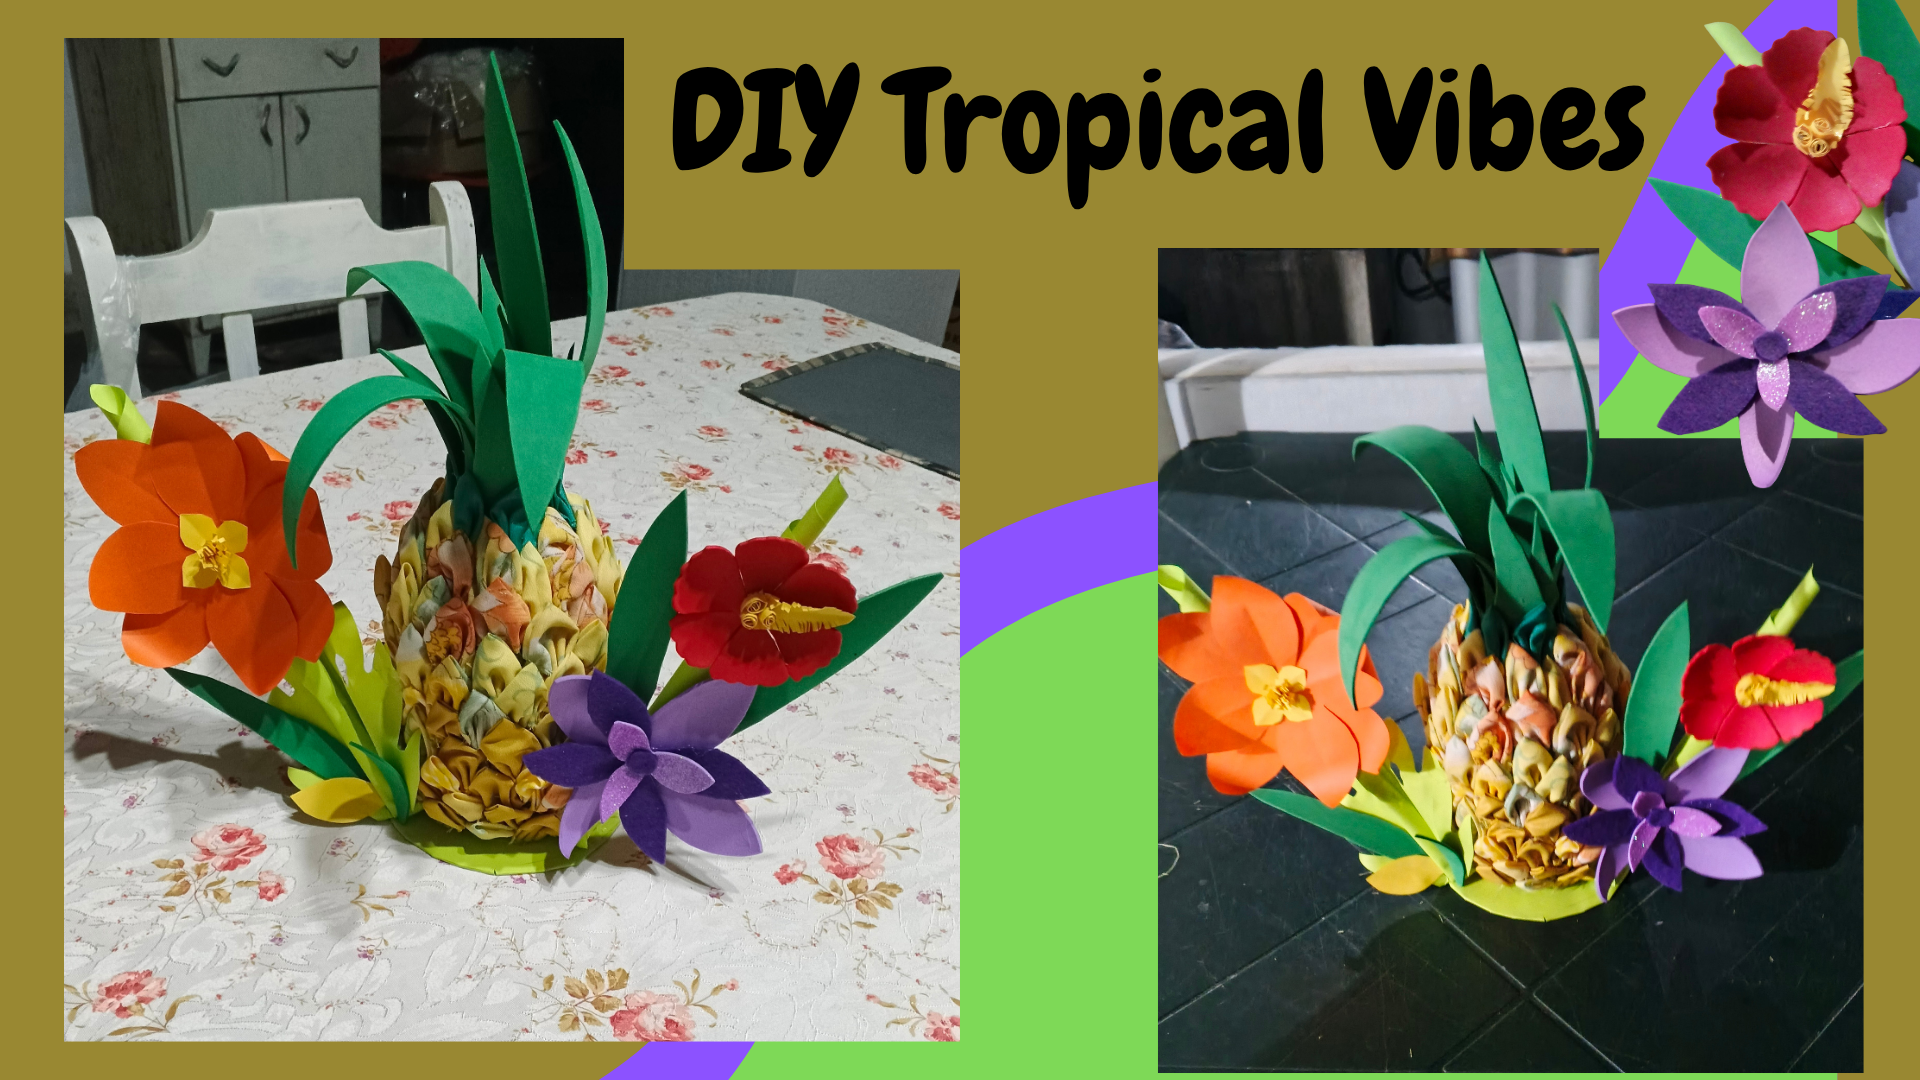
This project took me almost all day yesterday. I even had some outings that I canceled because I was so motivated to see my finished work. I wanted to see the result. I didn't want to leave anything for today because I was so inspired. I didn't want to let this moment pass me by. I left it to go out today, knowing that I shared my initiative for this colorful and motivating contest, with This Month's theme: DIY Tropical Vibes 🍁🍁🍁🍁🍁🍁🍂🌻🌴
The photographs you'll see below were taken with my TECNO SPARK GO 2024 model phone.
> Hola queridos creativos, feliz día, espero estén muy bien, les presento una manualidad para participar por segunda vez en el concurso del mes con la alegría y felicidad de estar aquí nuevamente para compartirles mis habilidades manuales, hechas con amor y reciclando siempre para aportar un granito de arena al planeta utilizando el reciclaje en arte.
> Este trabajo me tomo casi todo el día de ayer, incluso tenía unas salidas que cancele, ya que estaba tan motivada en ver mi trabajo culminado, quería ver el resultado, no quería dejar nada para hoy porque la inspiración que tenía eran enormes, no quería dejar pasar este momento, deje para salir hoy, sabiendo que les compartí mi iniciativa para este concurso colorido y motivador, con la temática de This Month: DIY Tropical Vibes 🍁🍁🍁🍁🍁🍁🍂🌻🌴
> Las fotografías que verán a continuación, fueron tomadas con mi teléfono modelo TECNO SPARK GO 2024.
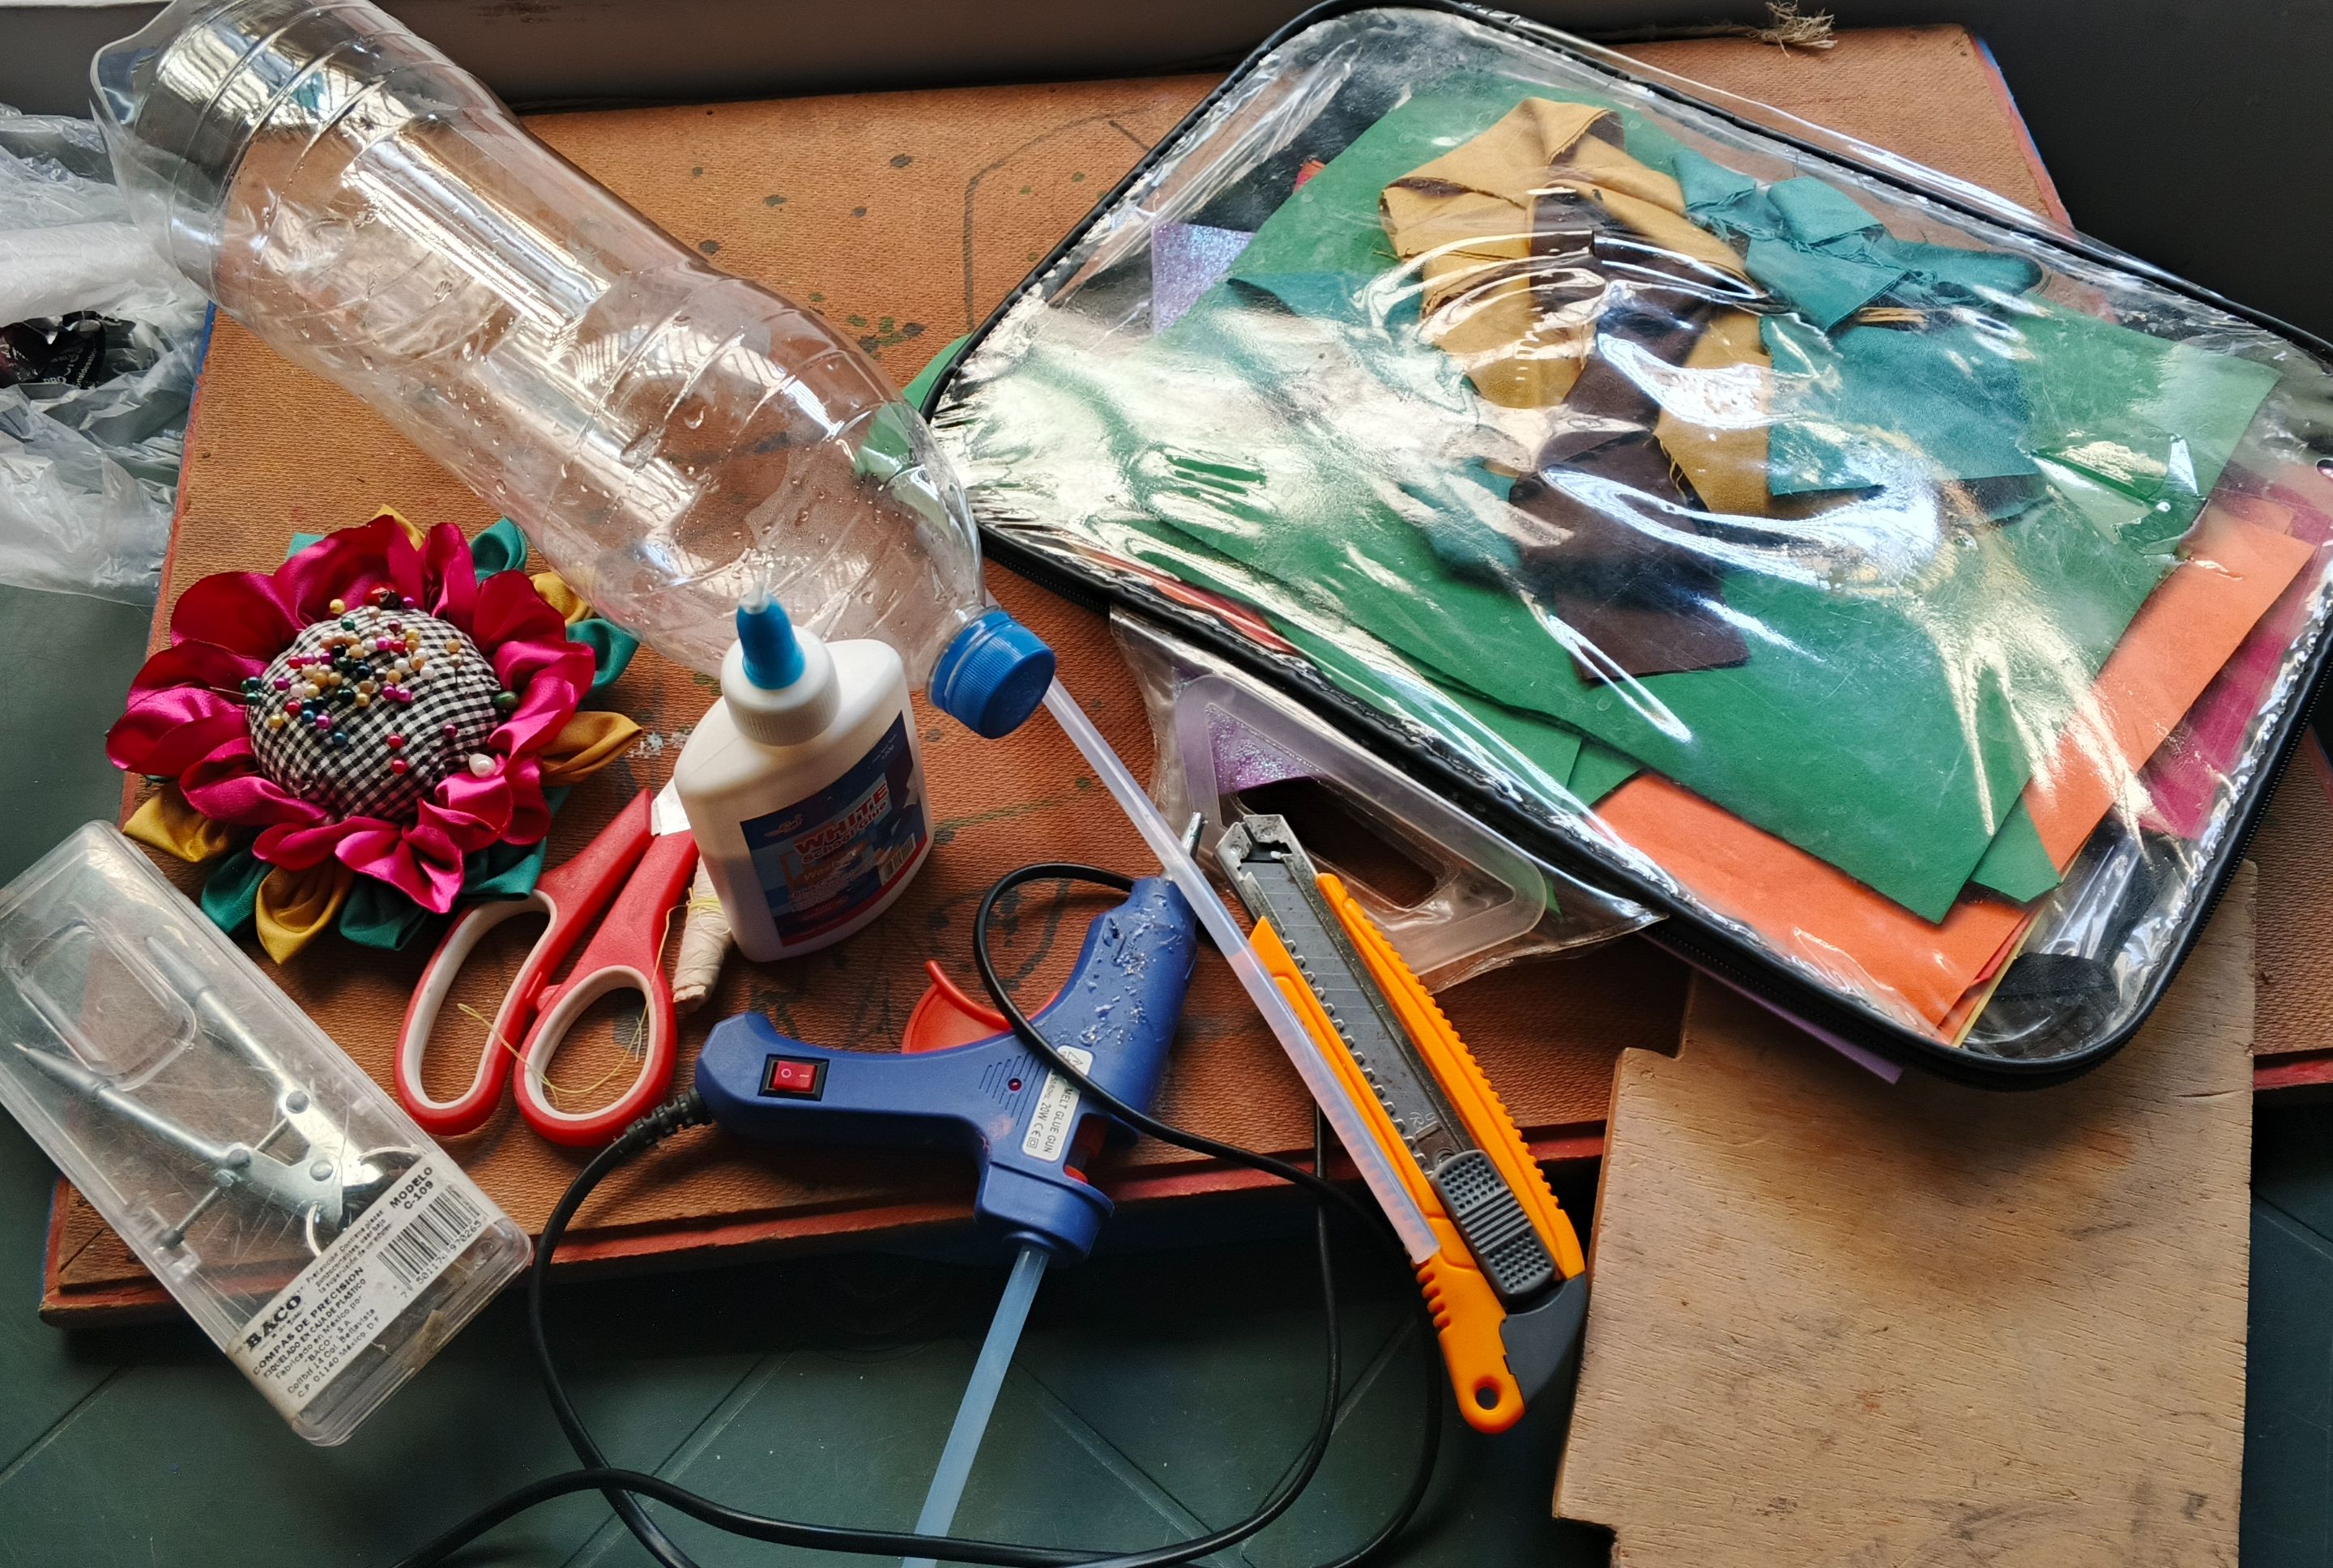
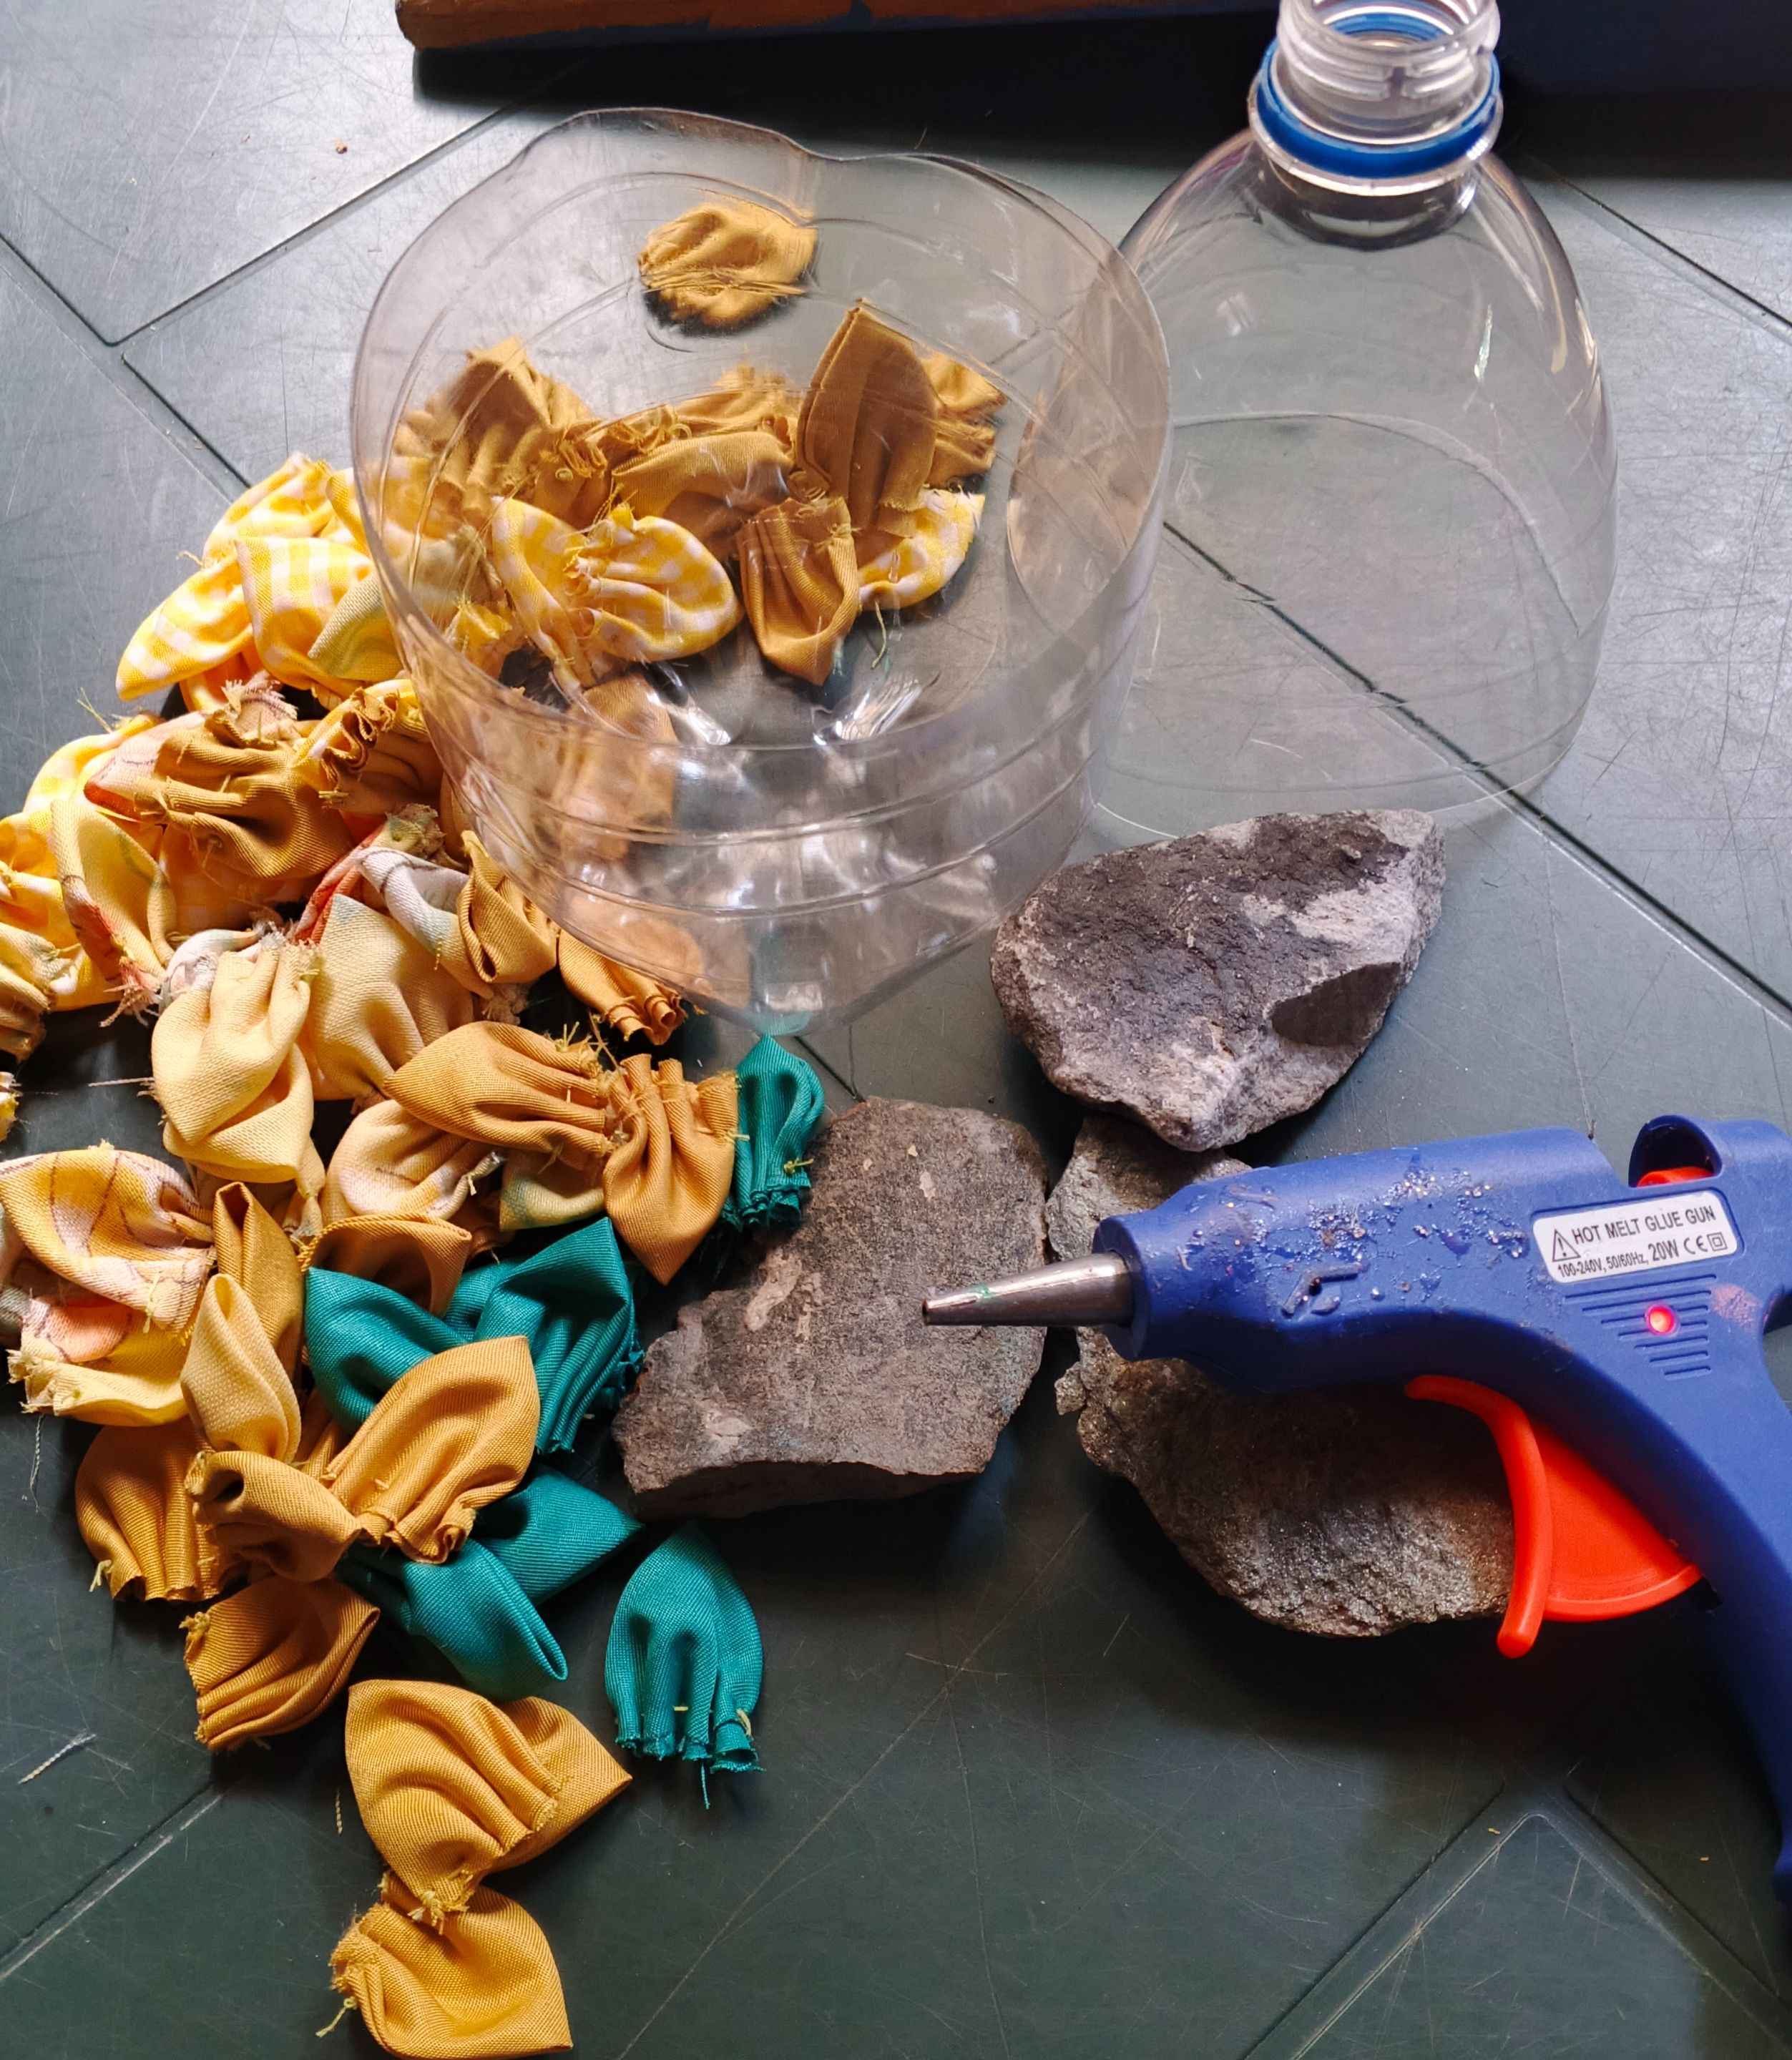
Collect various recycled materials to reuse and begin transforming them into tropical art.
Materials used:
🌺- 1 plastic bottle
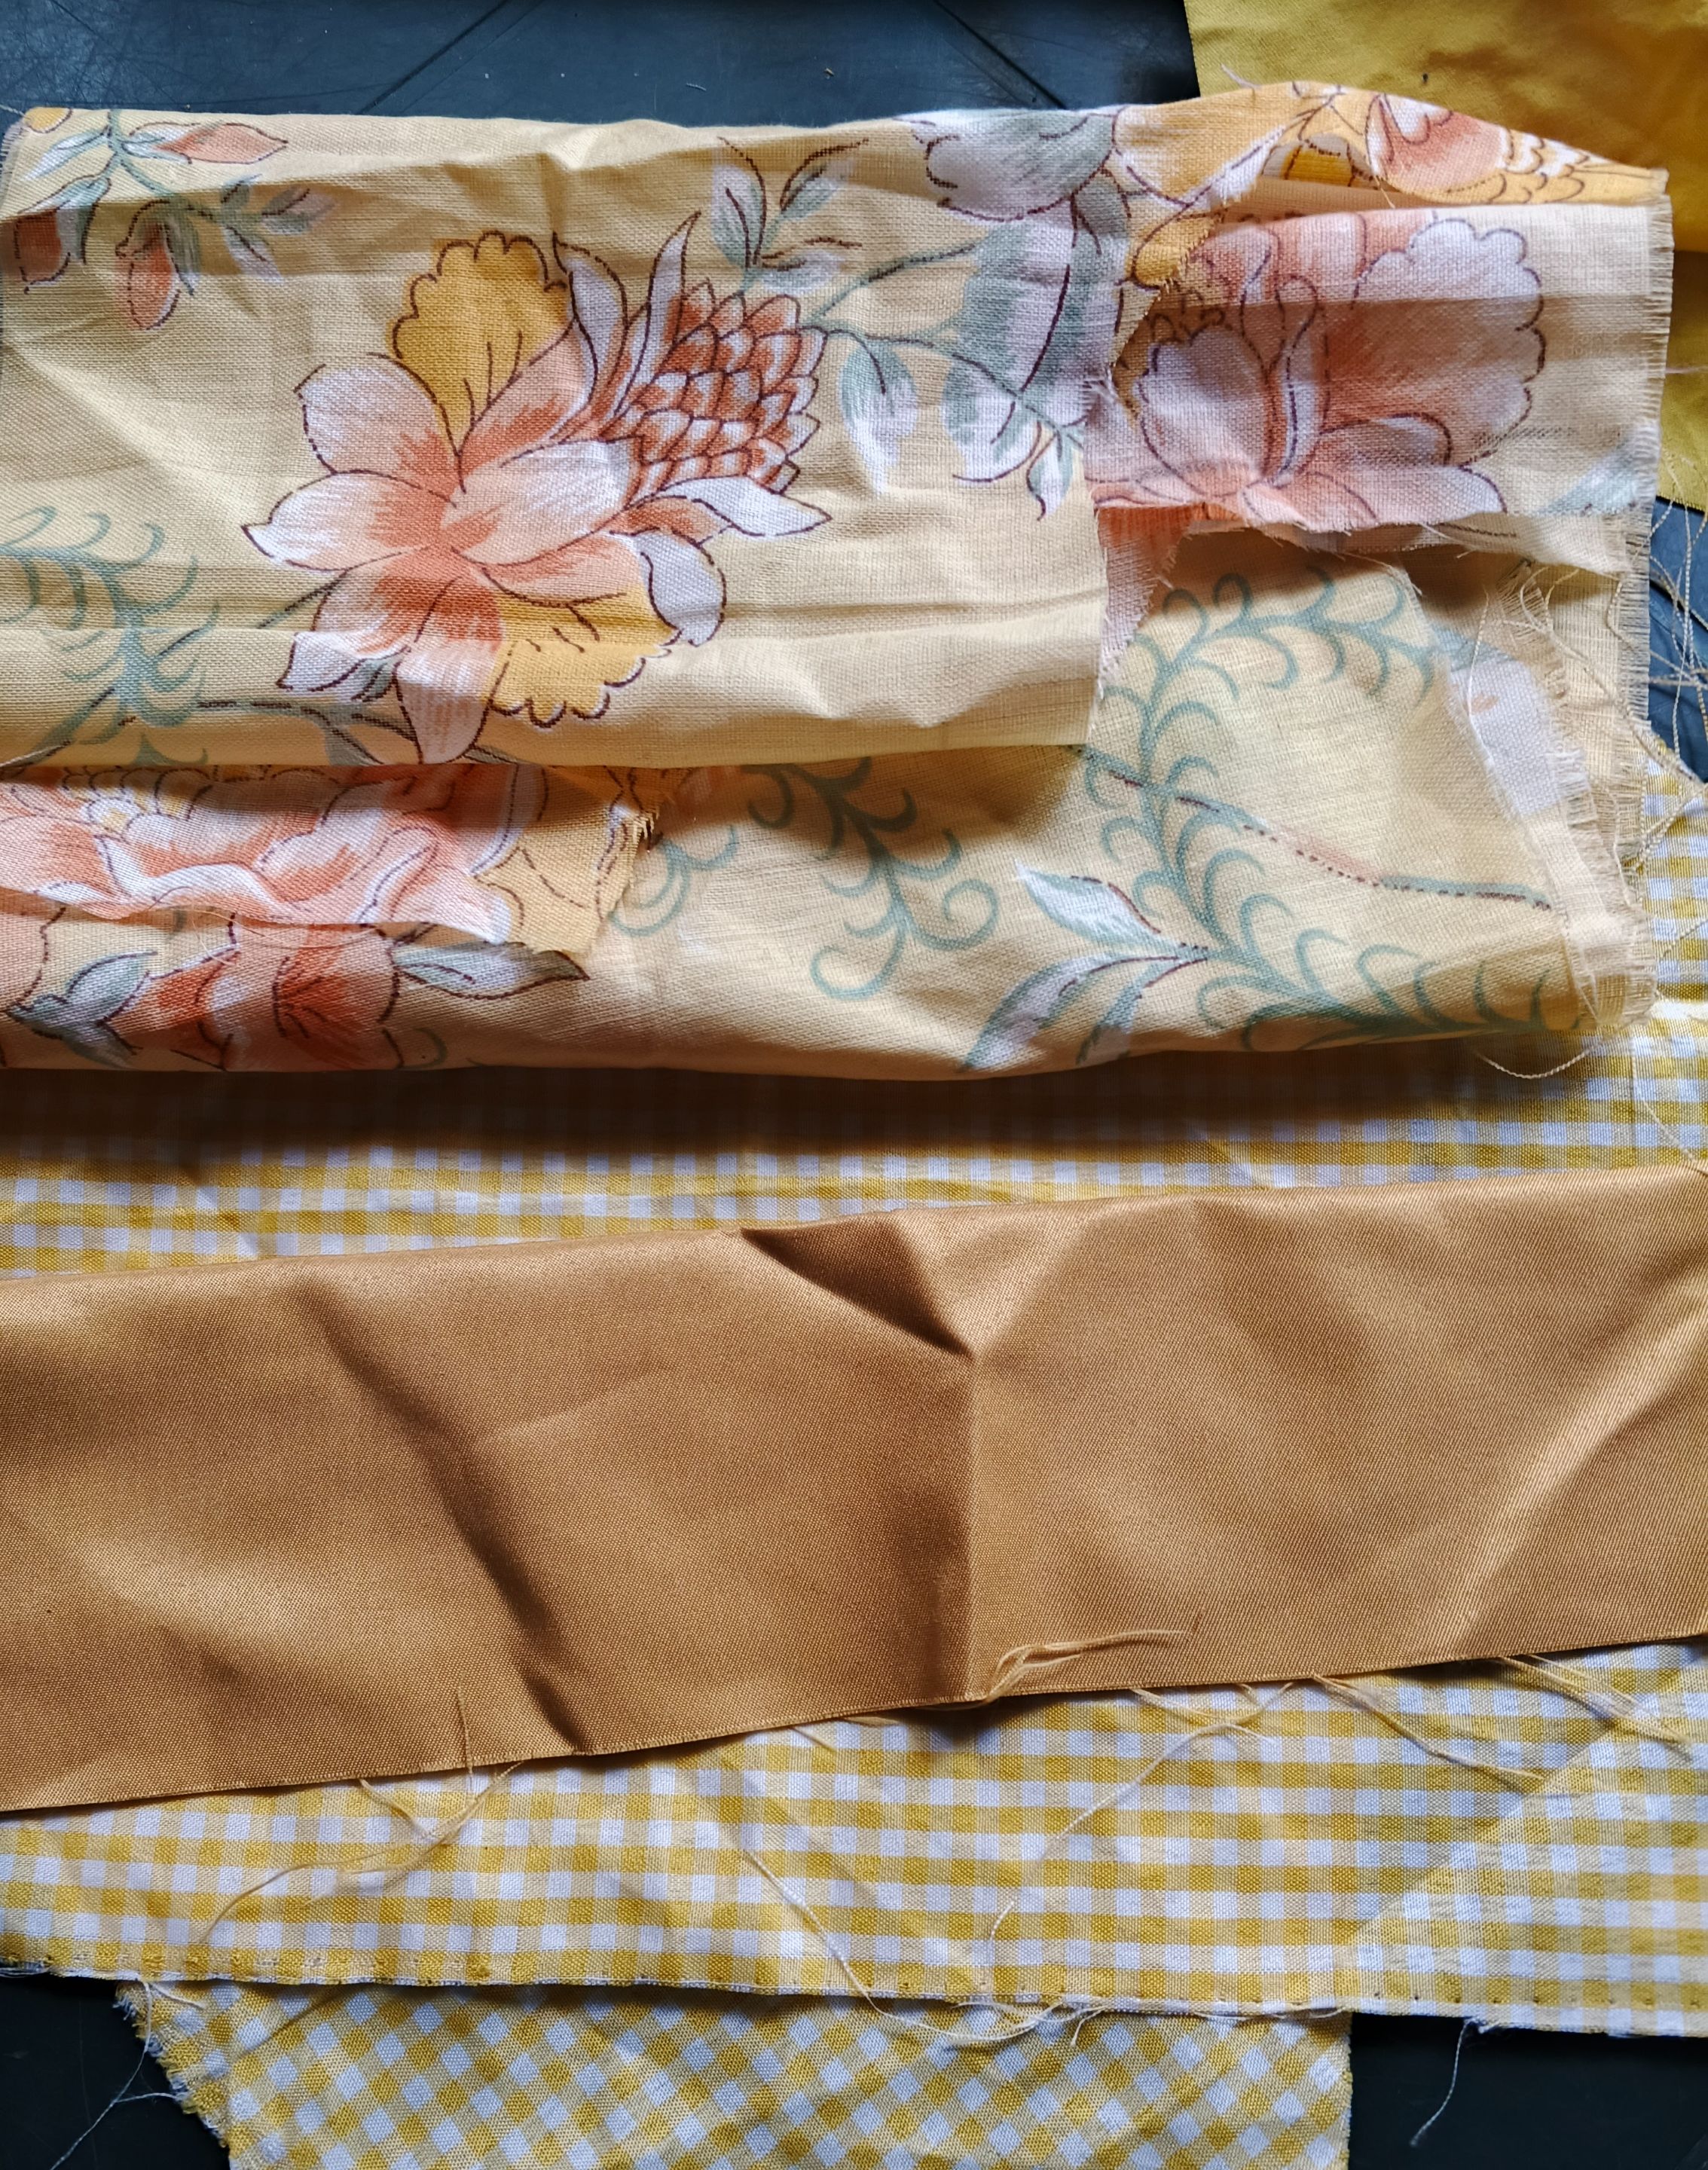
🌺- Assorted yellow and patterned scrap fabrics
🌺- Purple felt
🌺- Green, lilac, and red foam
🌺- Green fabric
🌺- Colored paper (orange, lime green, and yellow)
🌺- White glue
🌺- 3 sticks of thin silicone
🌺- Needle and yellow thread
🌺- Scissors
🌺- Lid for making the circles
🌺- Pencil
🌺- Cutter
🌺- Board for support
🌺- Hot glue gun
🌺- Stones
🌺- CDI
🌺- Skewer
> Recolecte varios materiales reciclados para hacer uso y comenzar a transformarlos en arte tropical.
>Materiales utilizados.
>🌺- 1 botella de plástico
🌺- Telas de retazos color amarillo variado y estampadas
🌺- fieltro morado
🌺- foami verde, lila y rojo
🌺- tela verde
🌺- Papel de colores, anaranjado, verde limón y amarillo
🌺- Pega blanca
🌺- 3 barras de silicona delgada
🌺- Aguja e hilo amarillo
🌺- tijeras
🌺- tapa para hacer los círculos
🌺- Lápiz
🌺- cúter
🌺- tabla para apoyo
🌺- Pistola para silicona caliente
🌺- piedras
🌺- CDI
🌺- Palo de brocheta

 |
| |-|-
|-|-
 |
|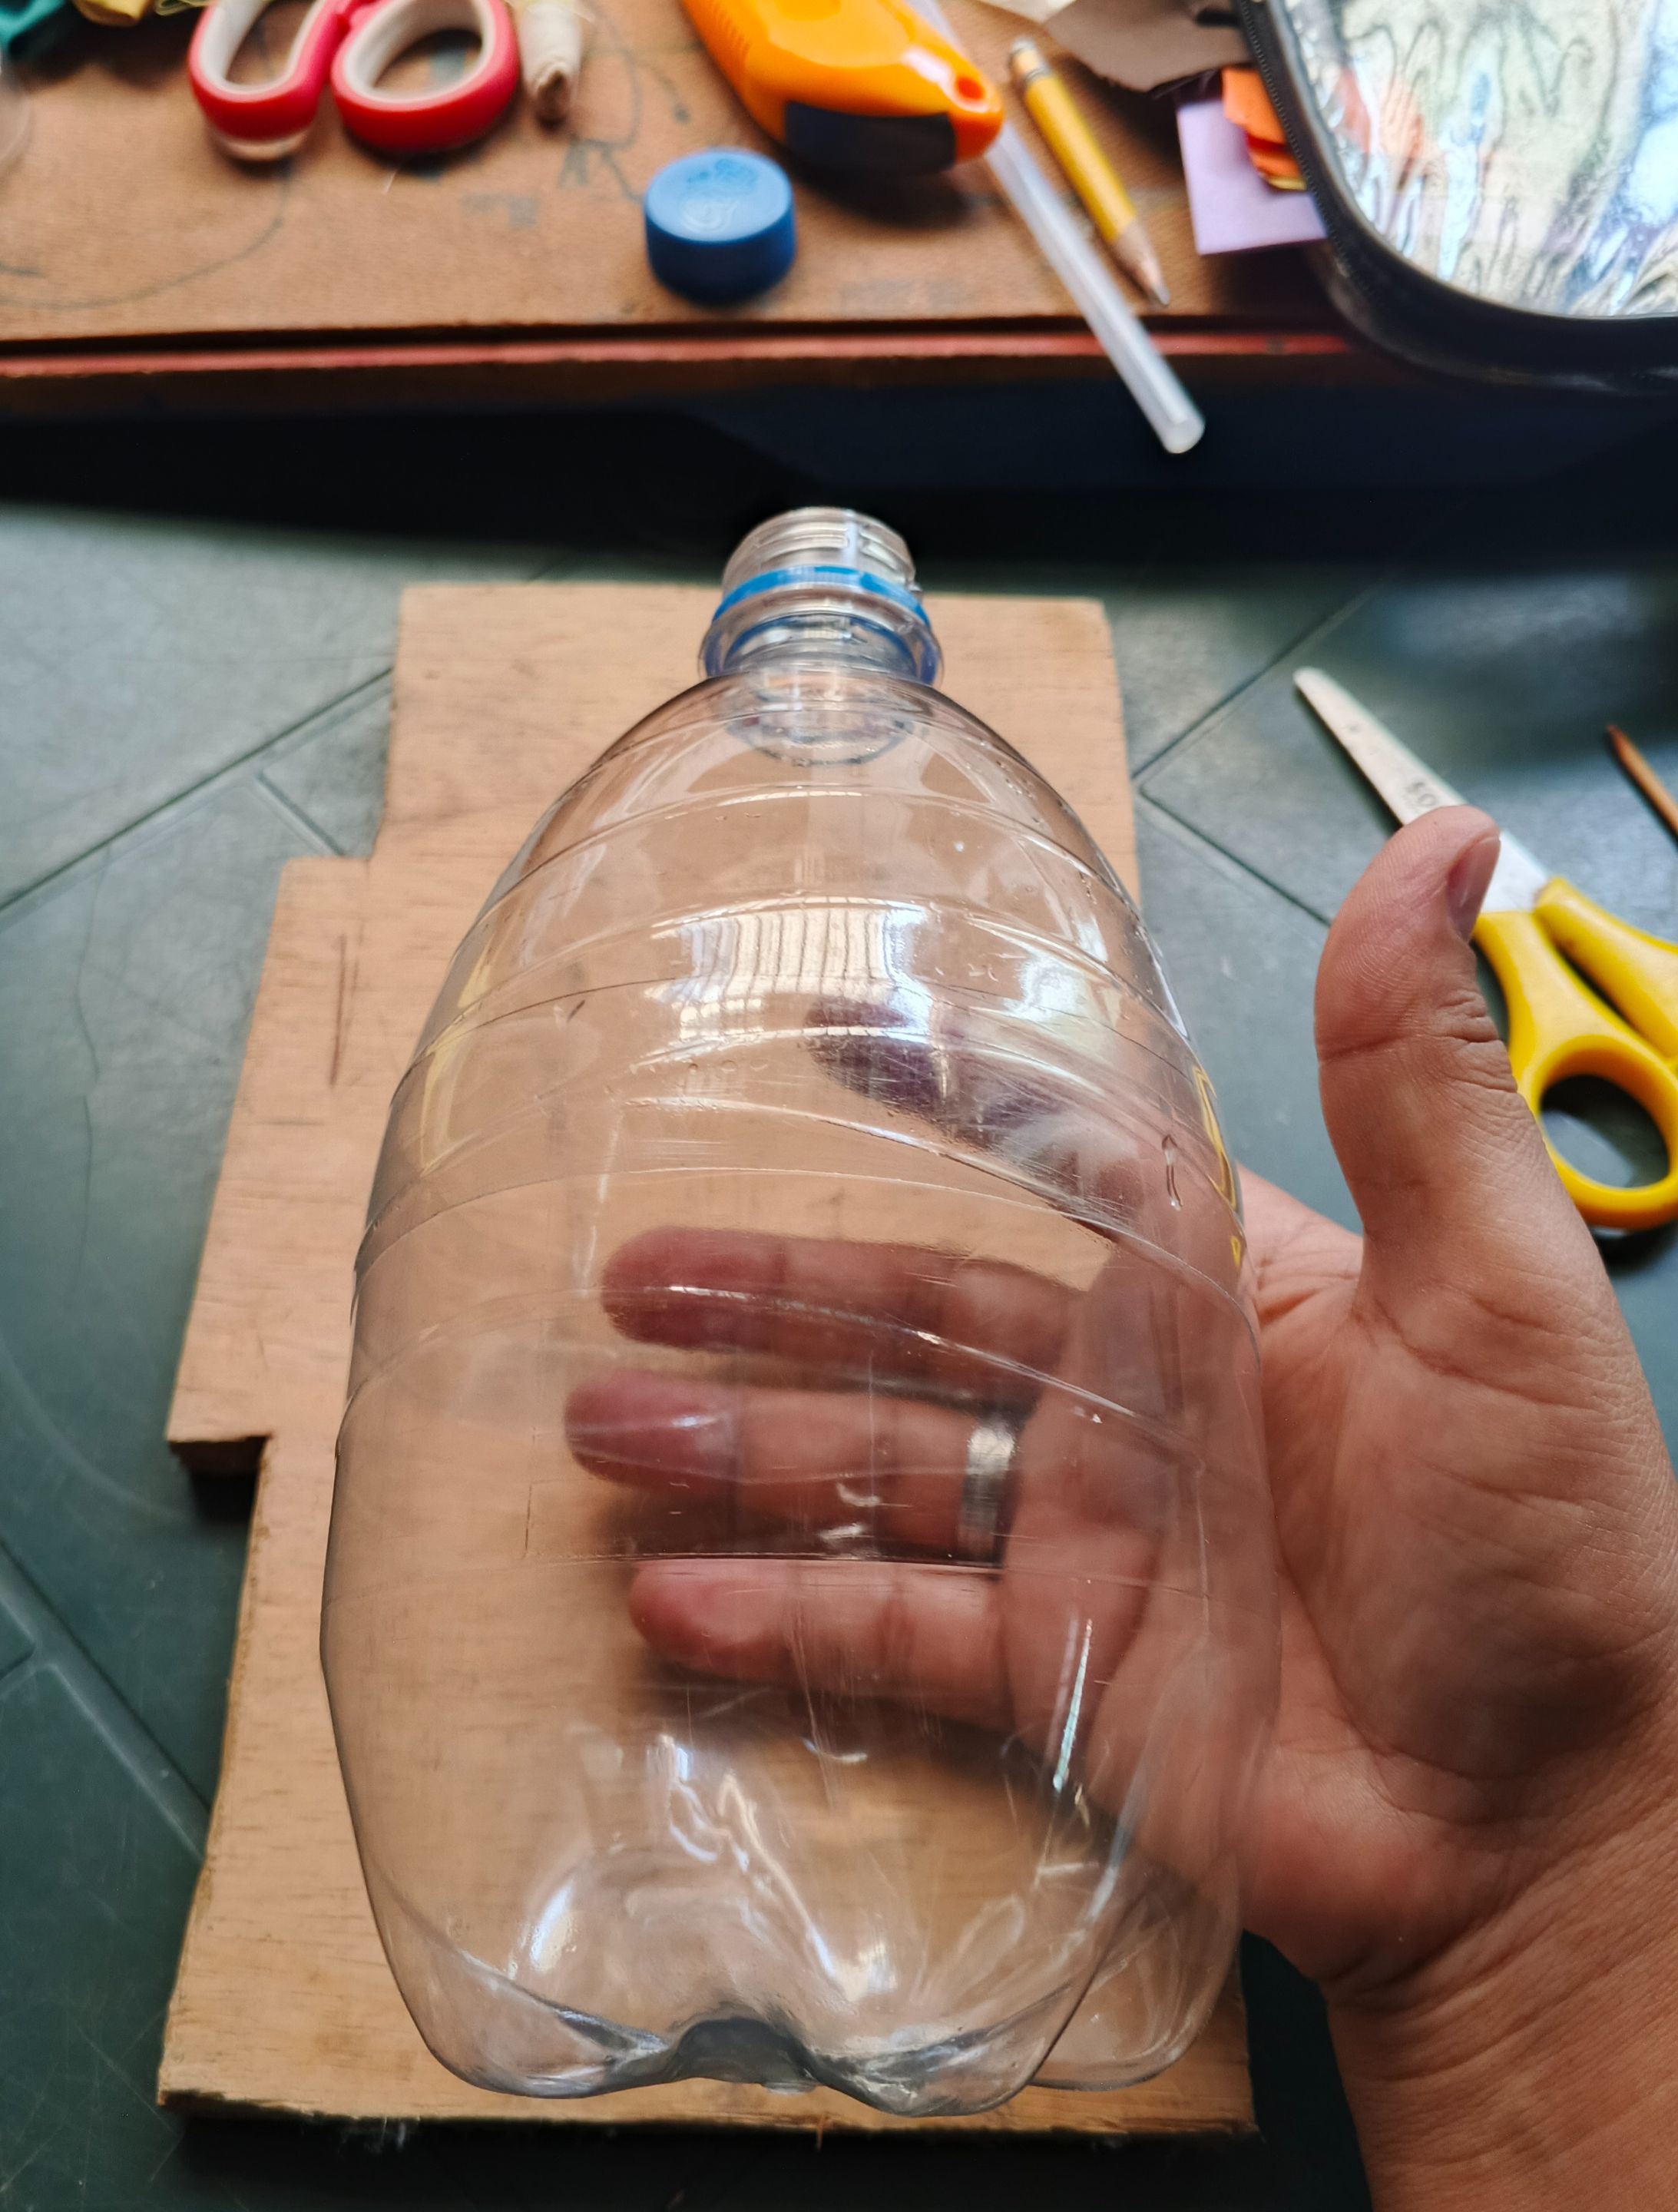
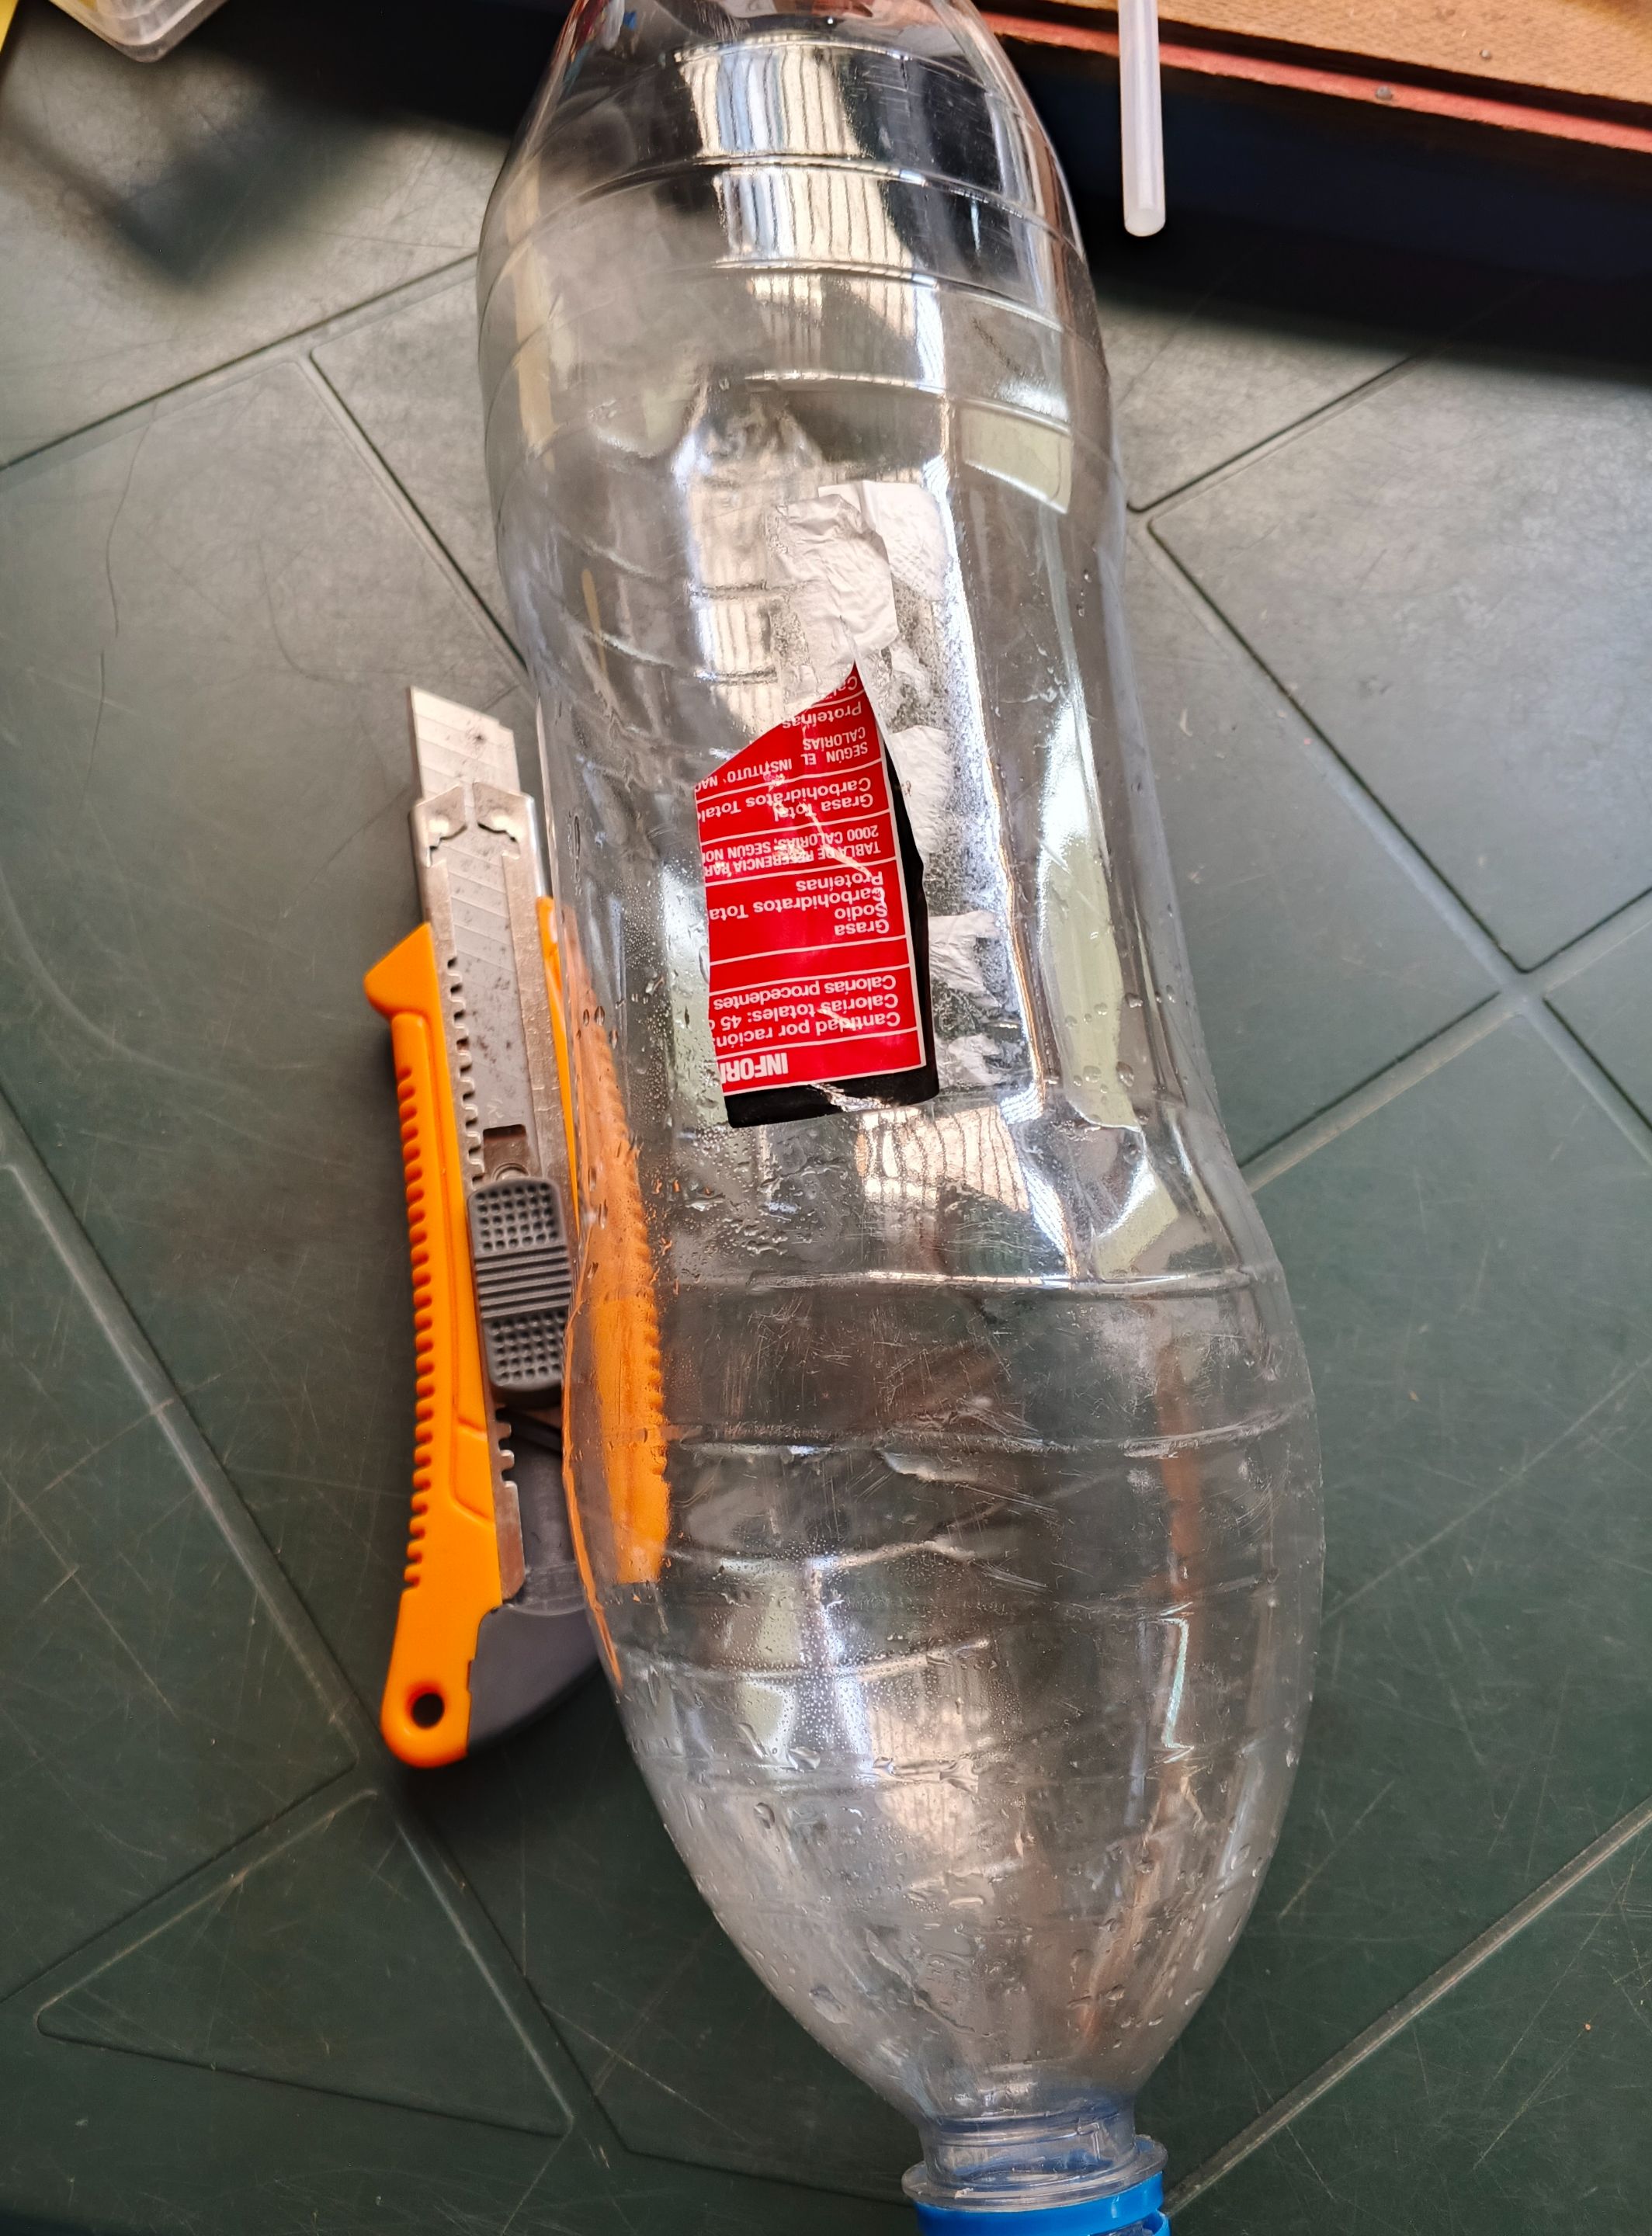
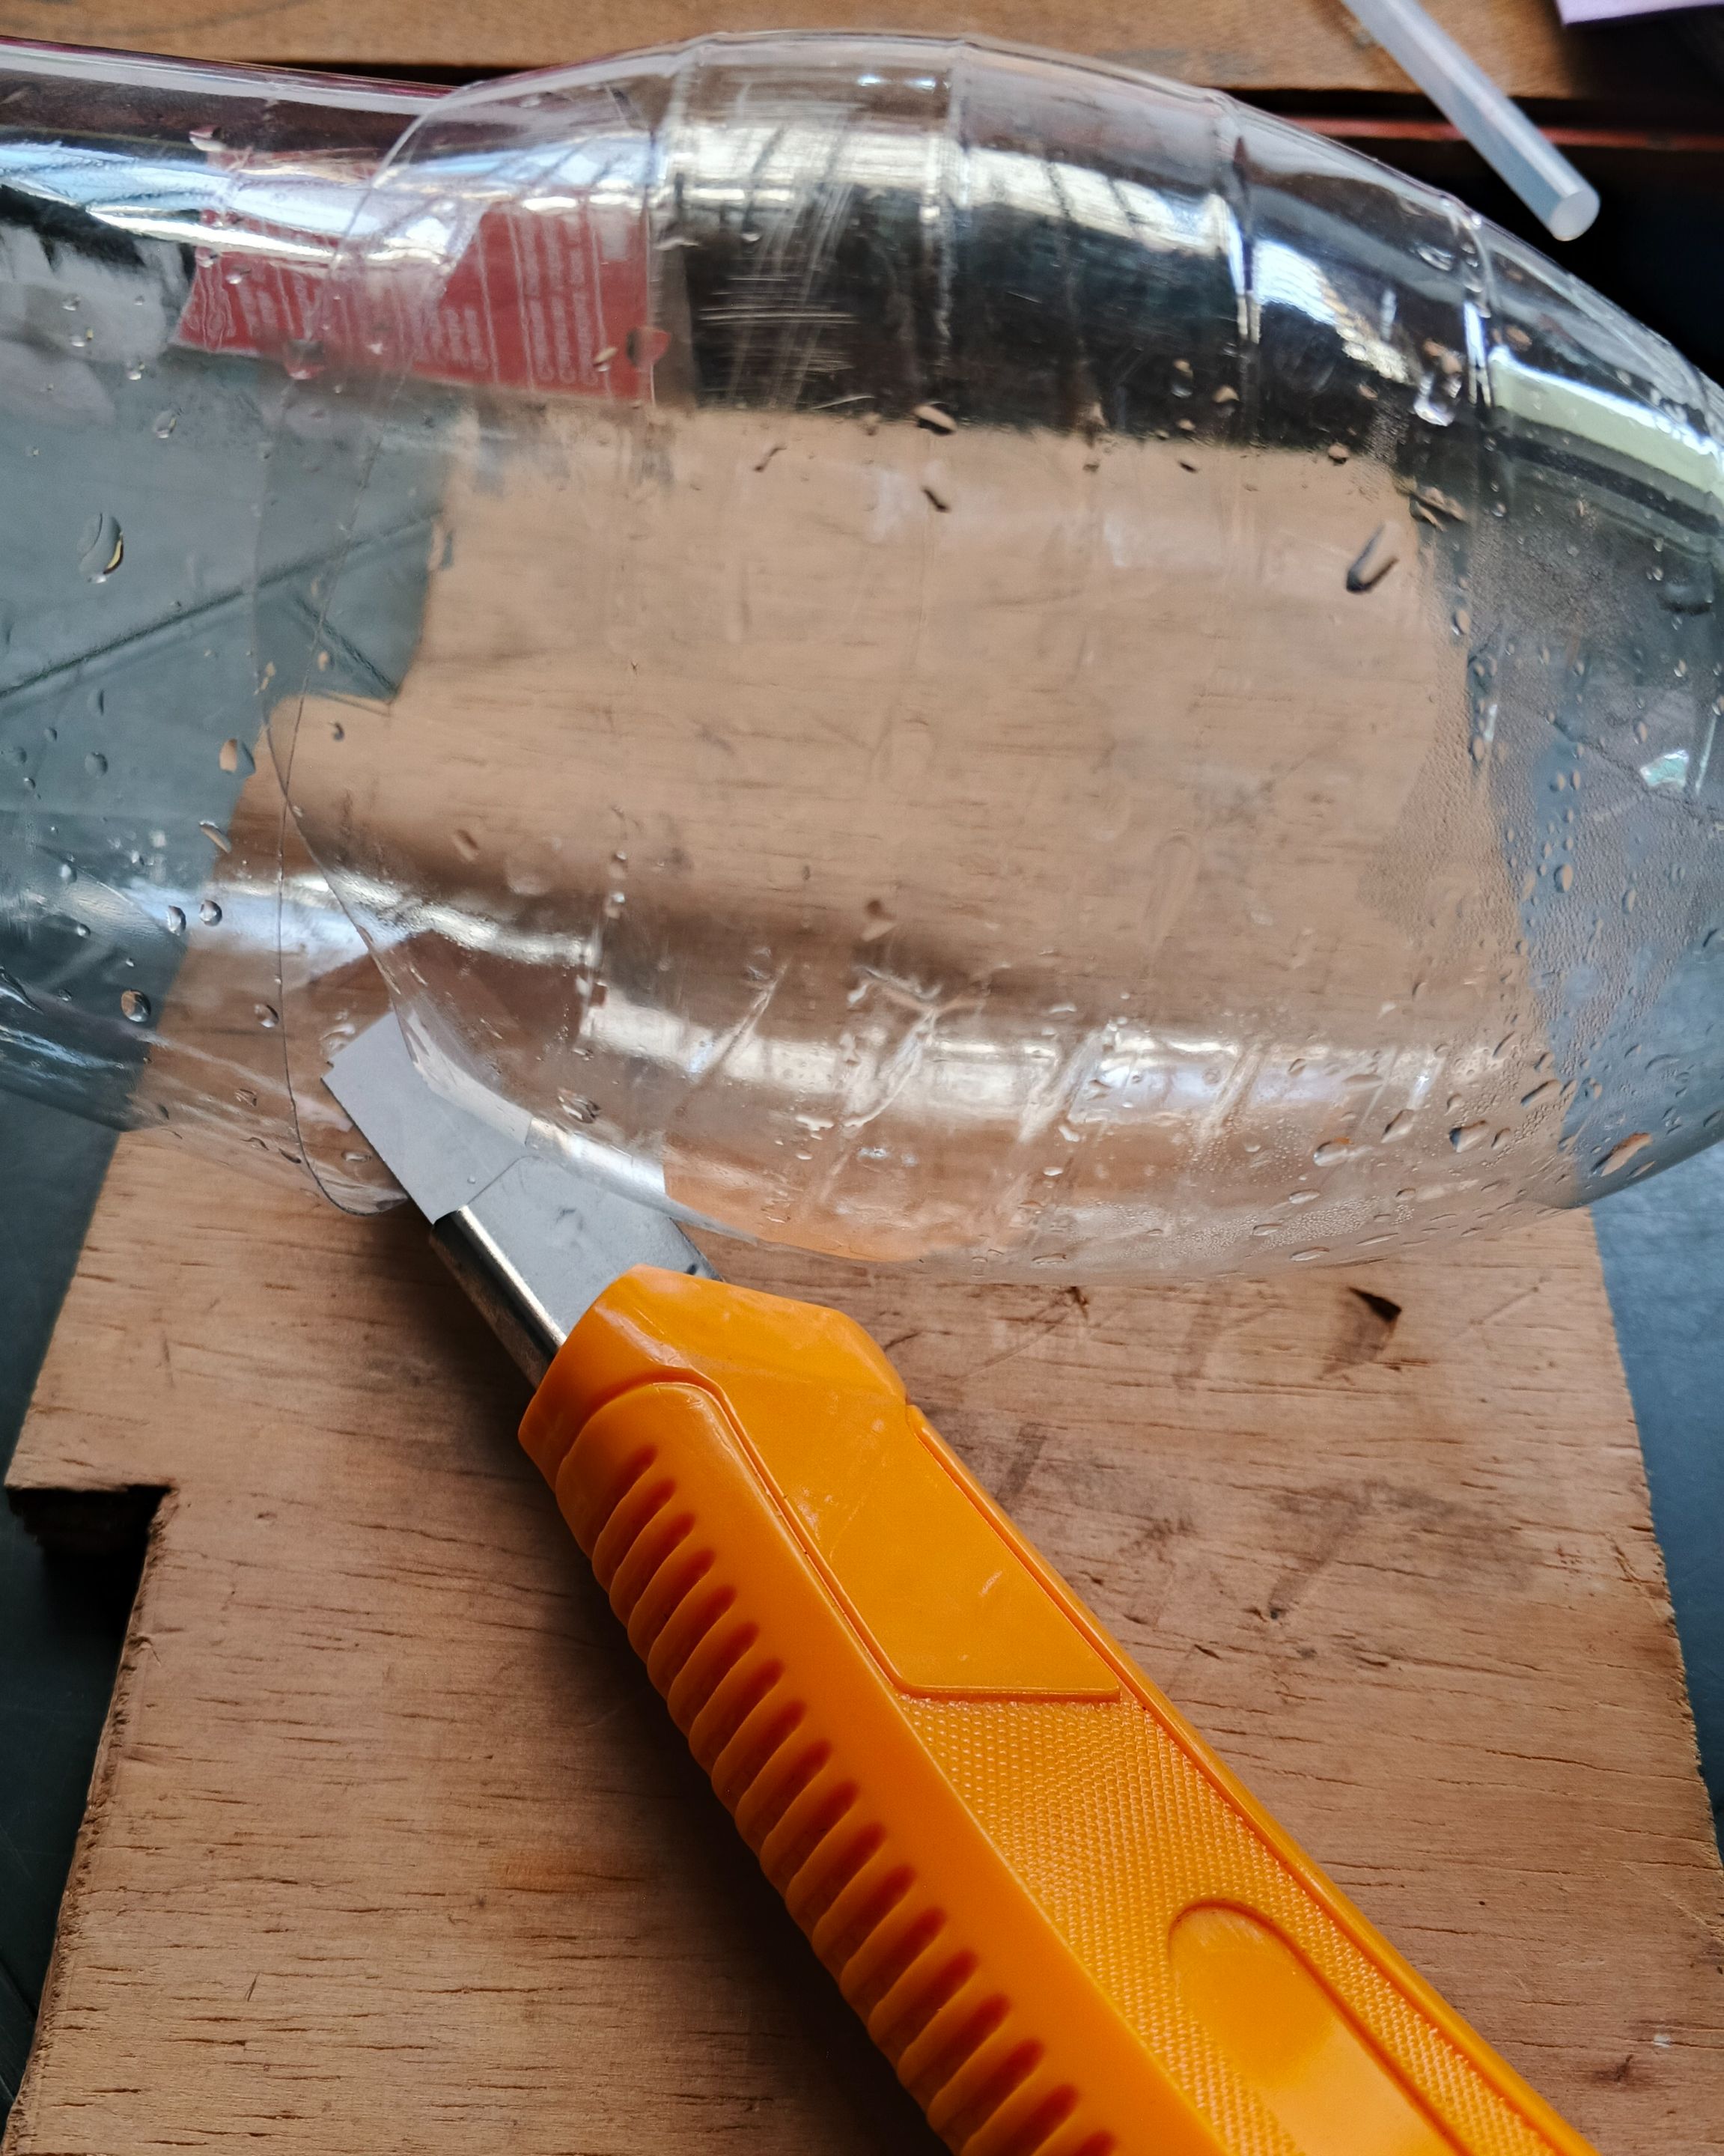
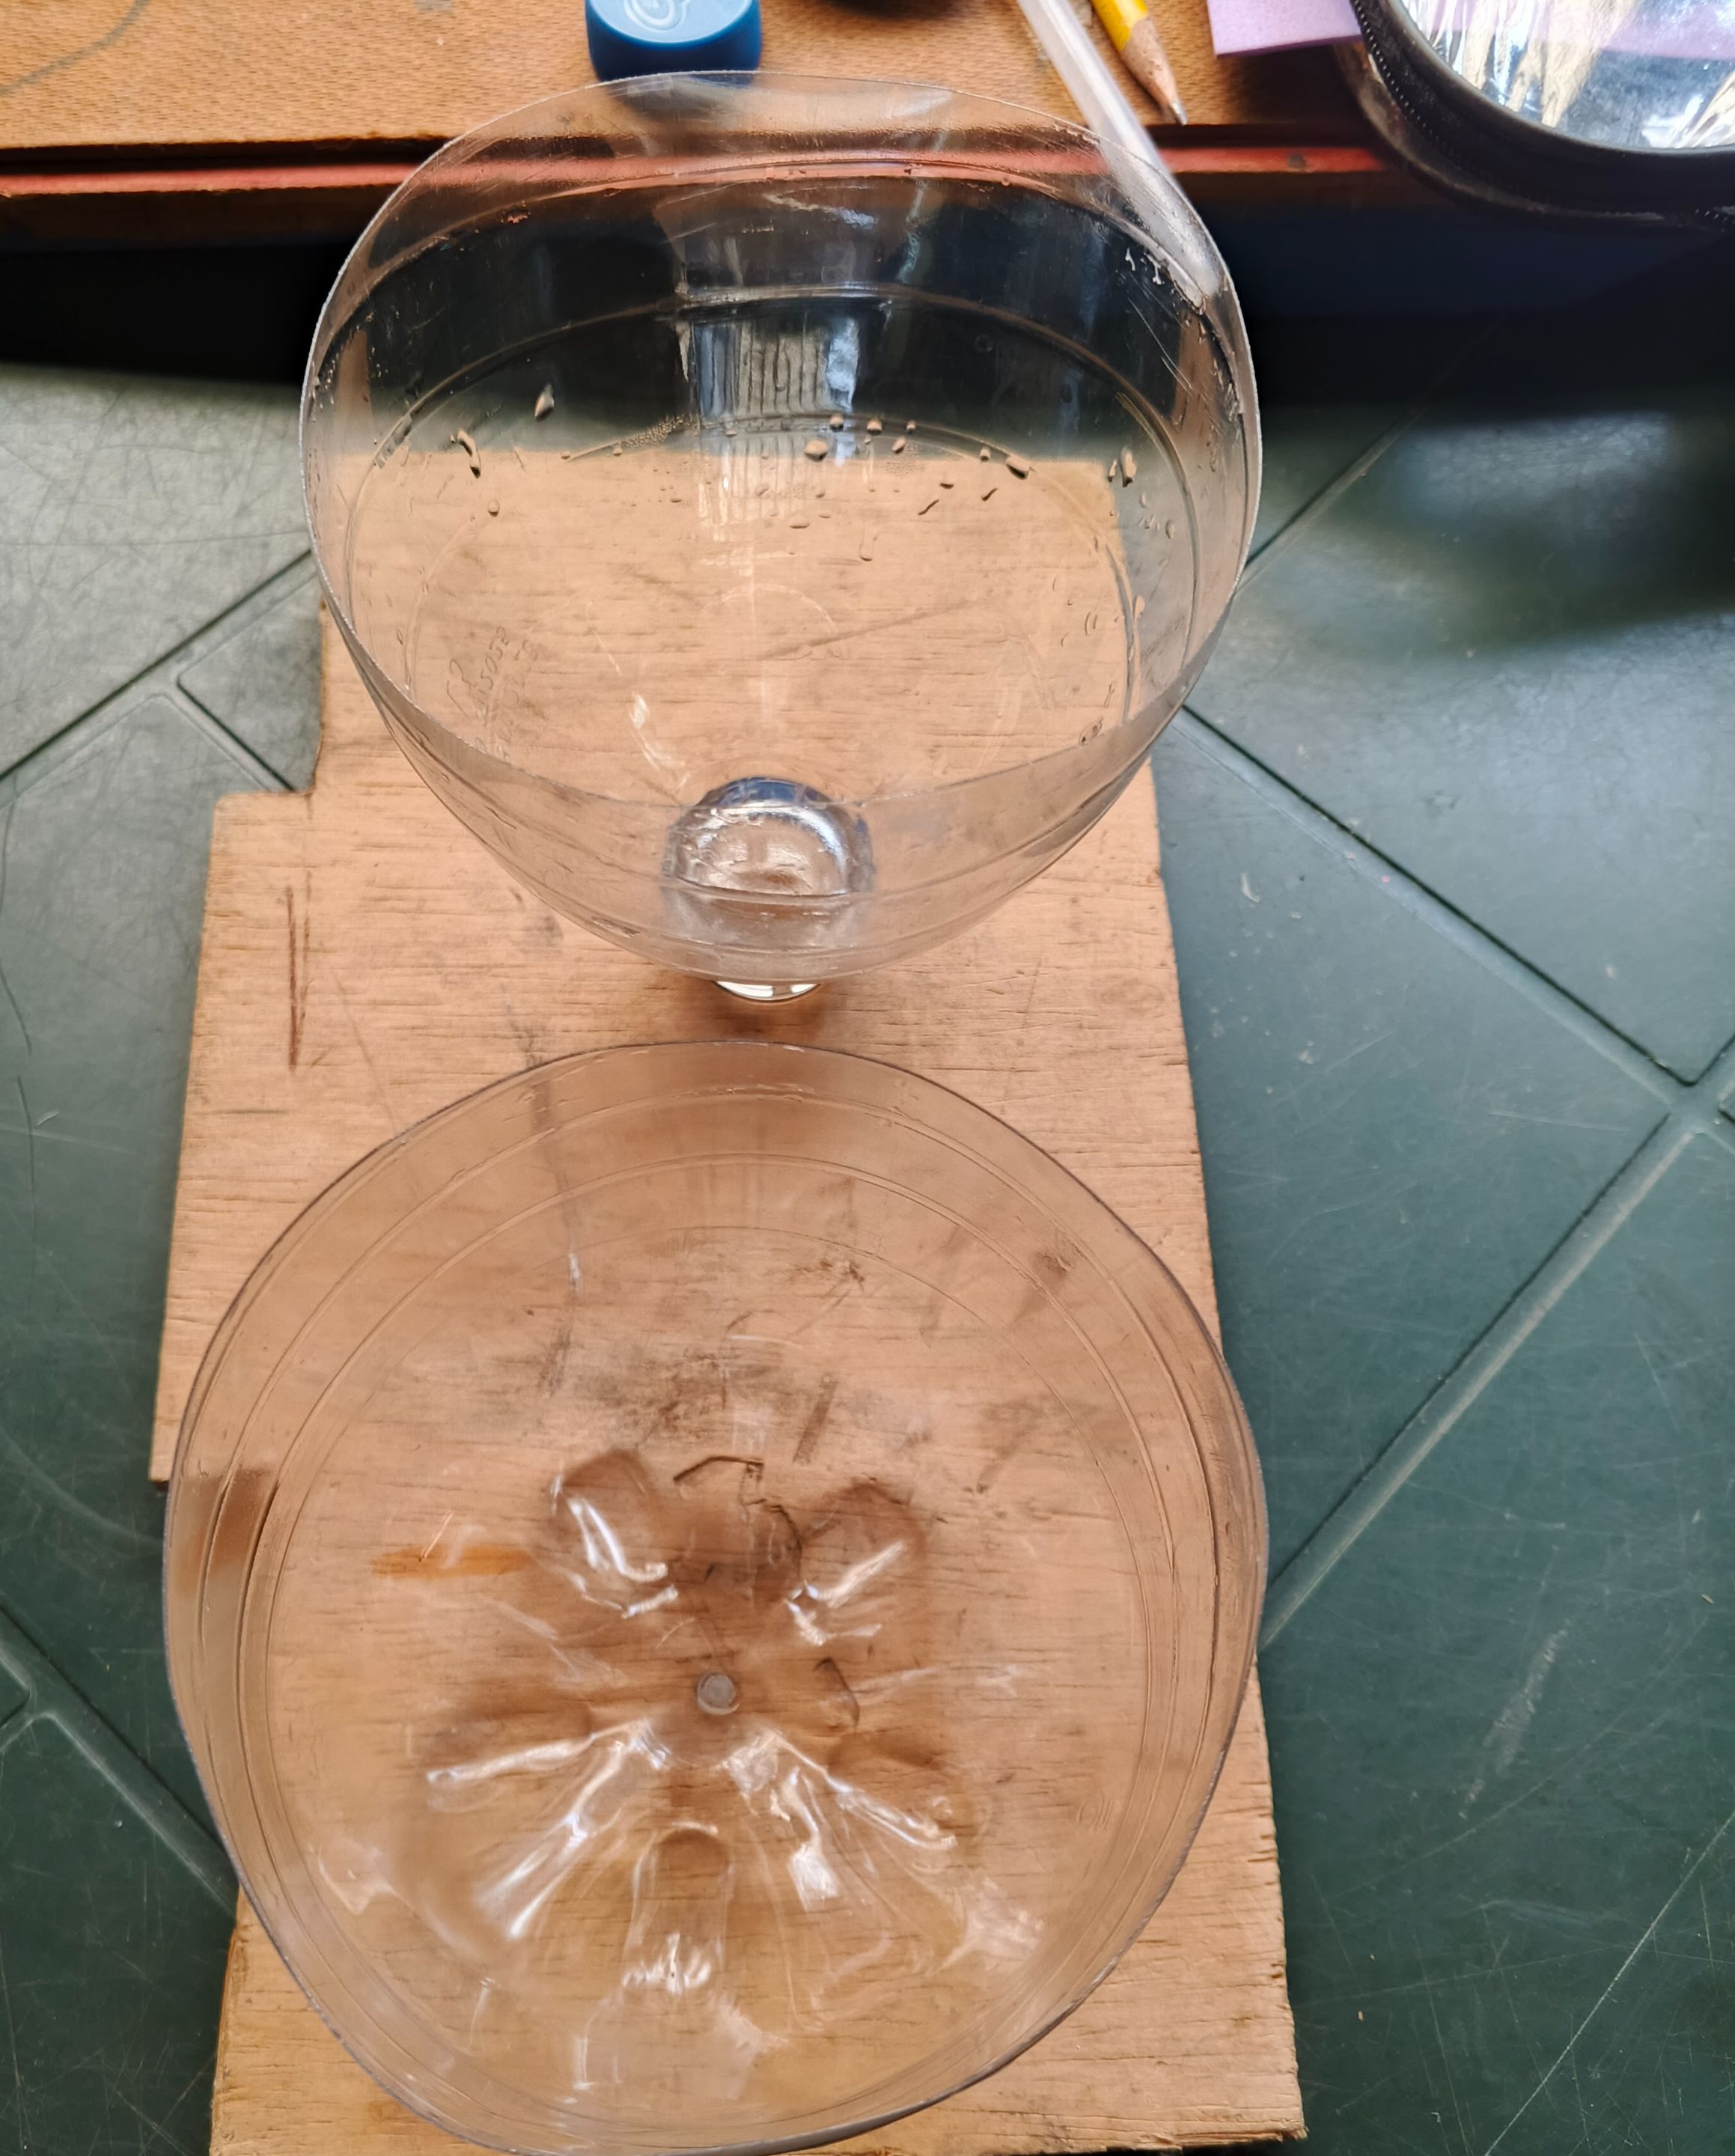
I held the plastic bottle firmly in my hands to avoid cutting myself, then using a box cutter and scissors, I cut the bottle to use the top and bottom parts and joined them together to make a smaller bottle to use as the pineapple mold.
> Tome la botella de plástico en mis manos con firmeza, para evitar cortarme, luego con el uso de un cúter, y una tijera corte la botella, para utilizar la parte superior, e inferior, y unirlas para hacer una botella más pequeña, para utilizarla como molde de la piña.
 |
| |-|-
|-|-
 |
|
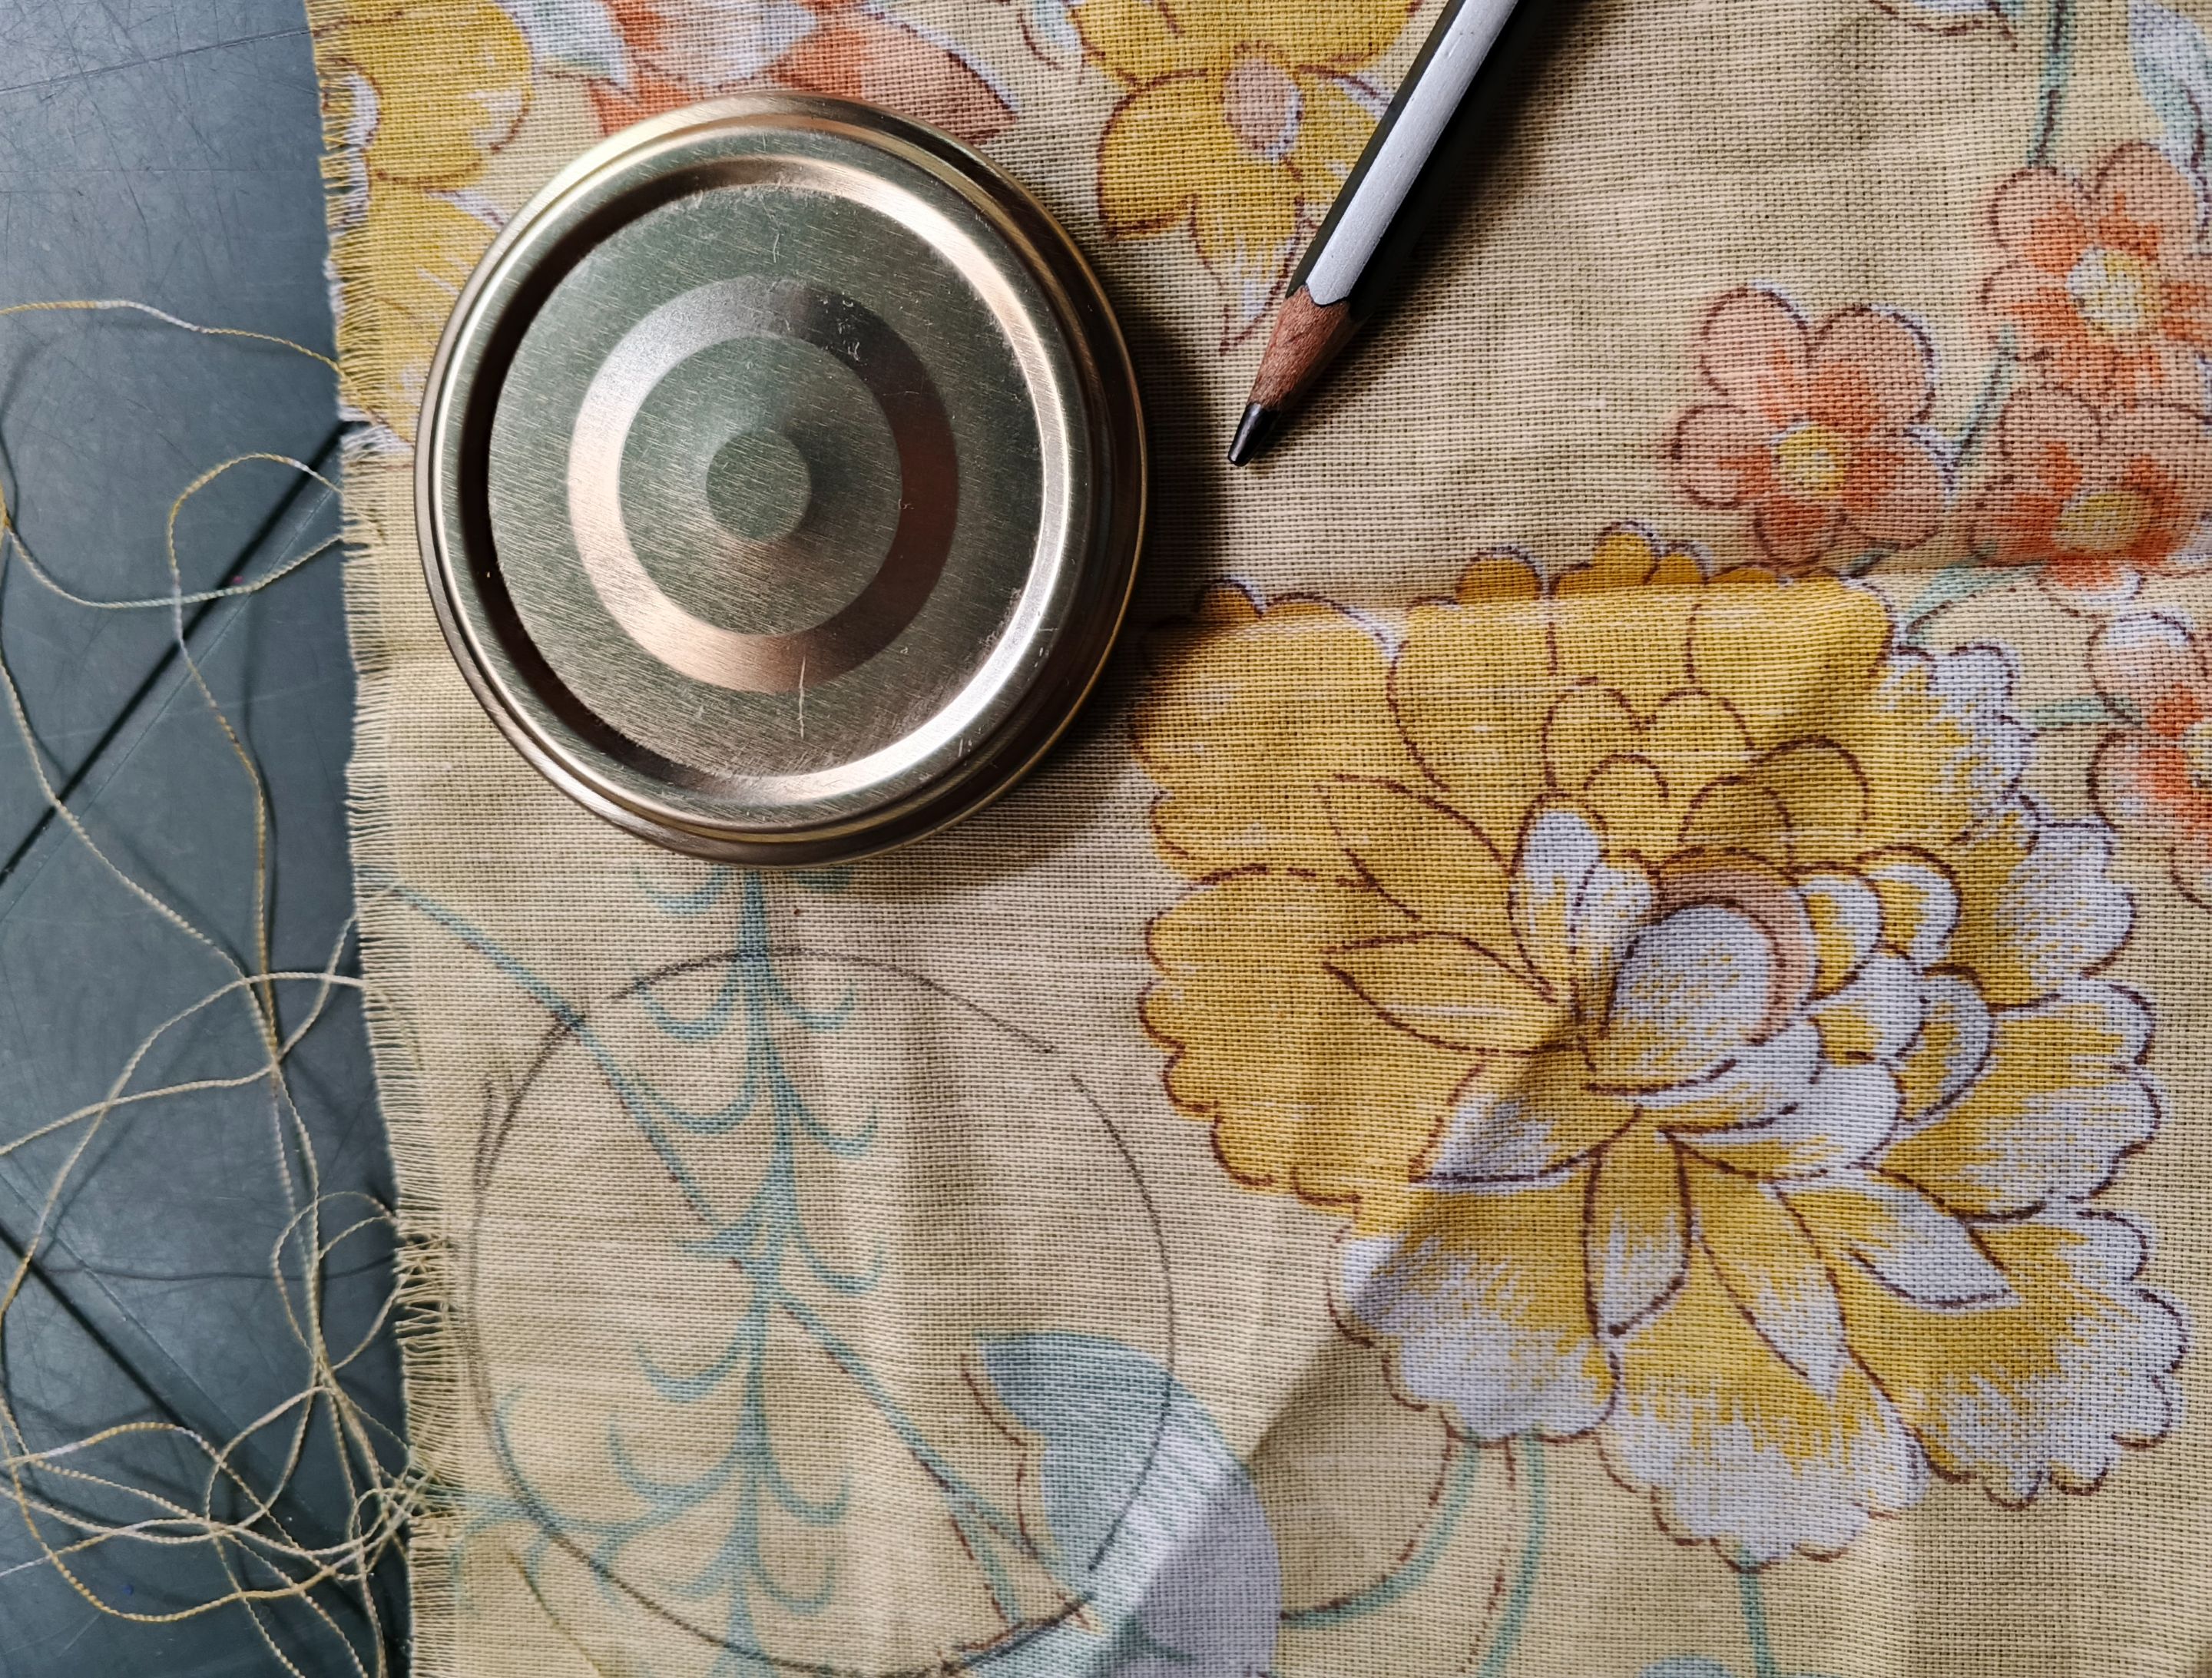
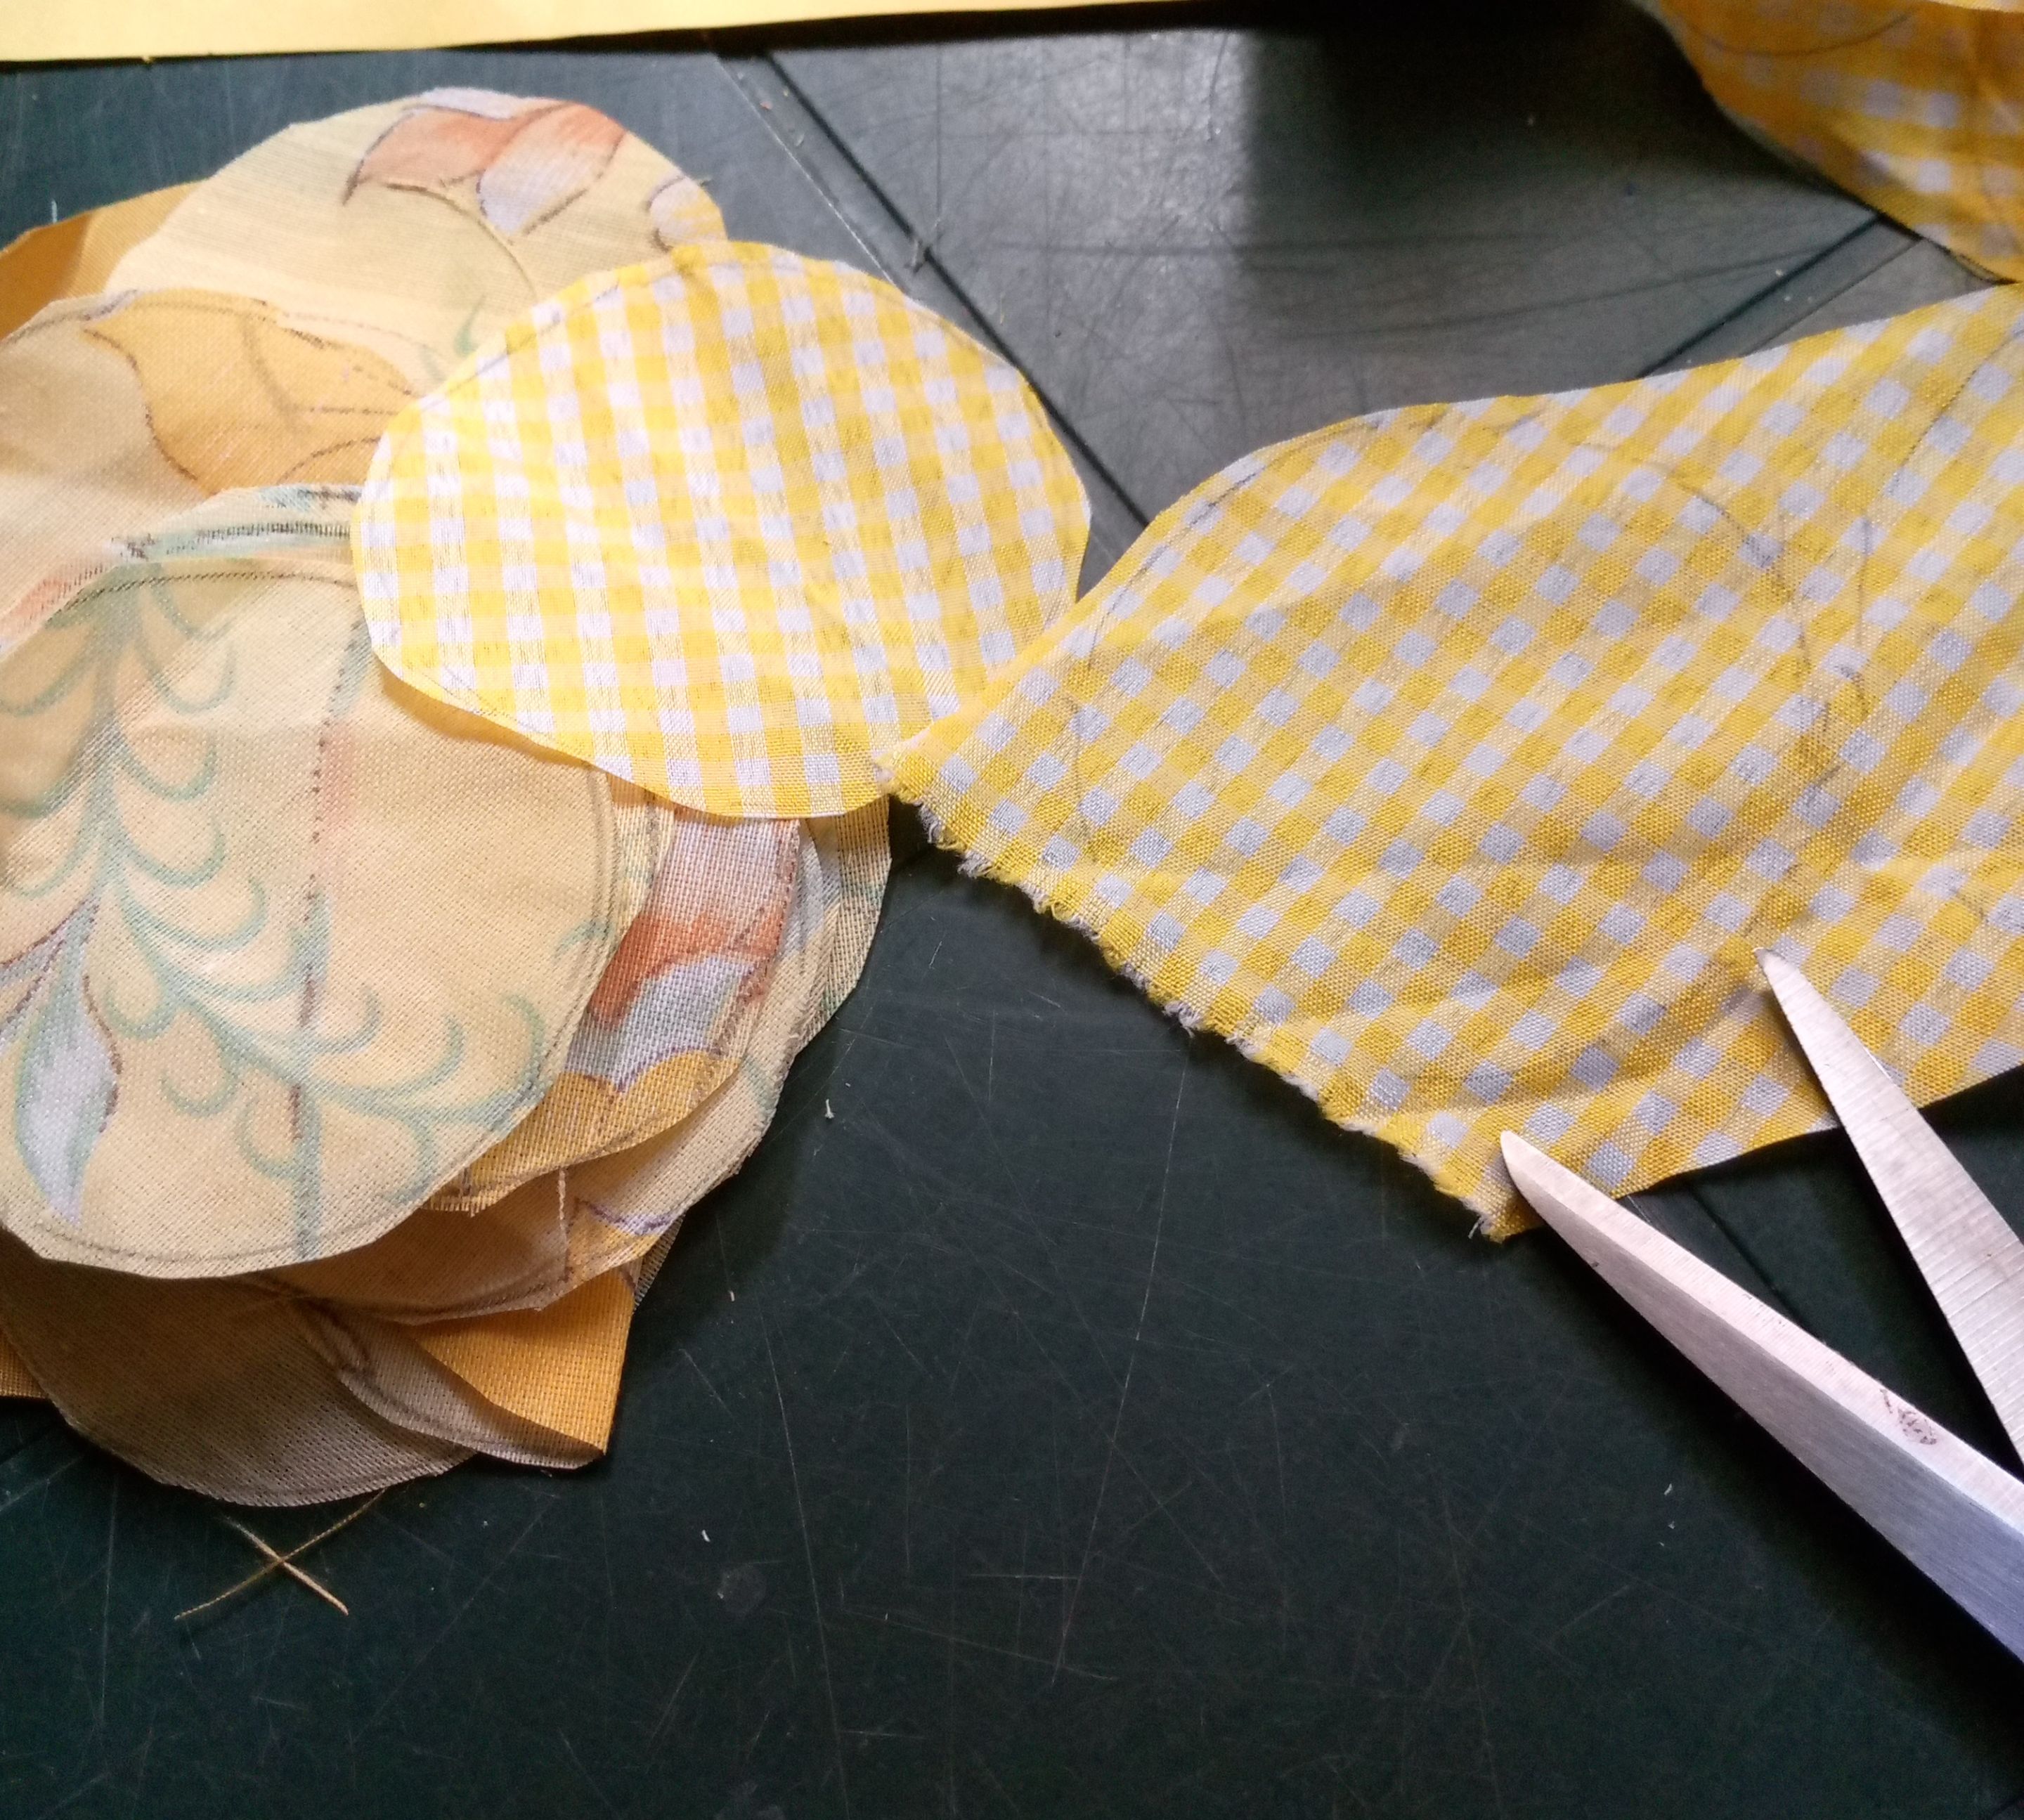
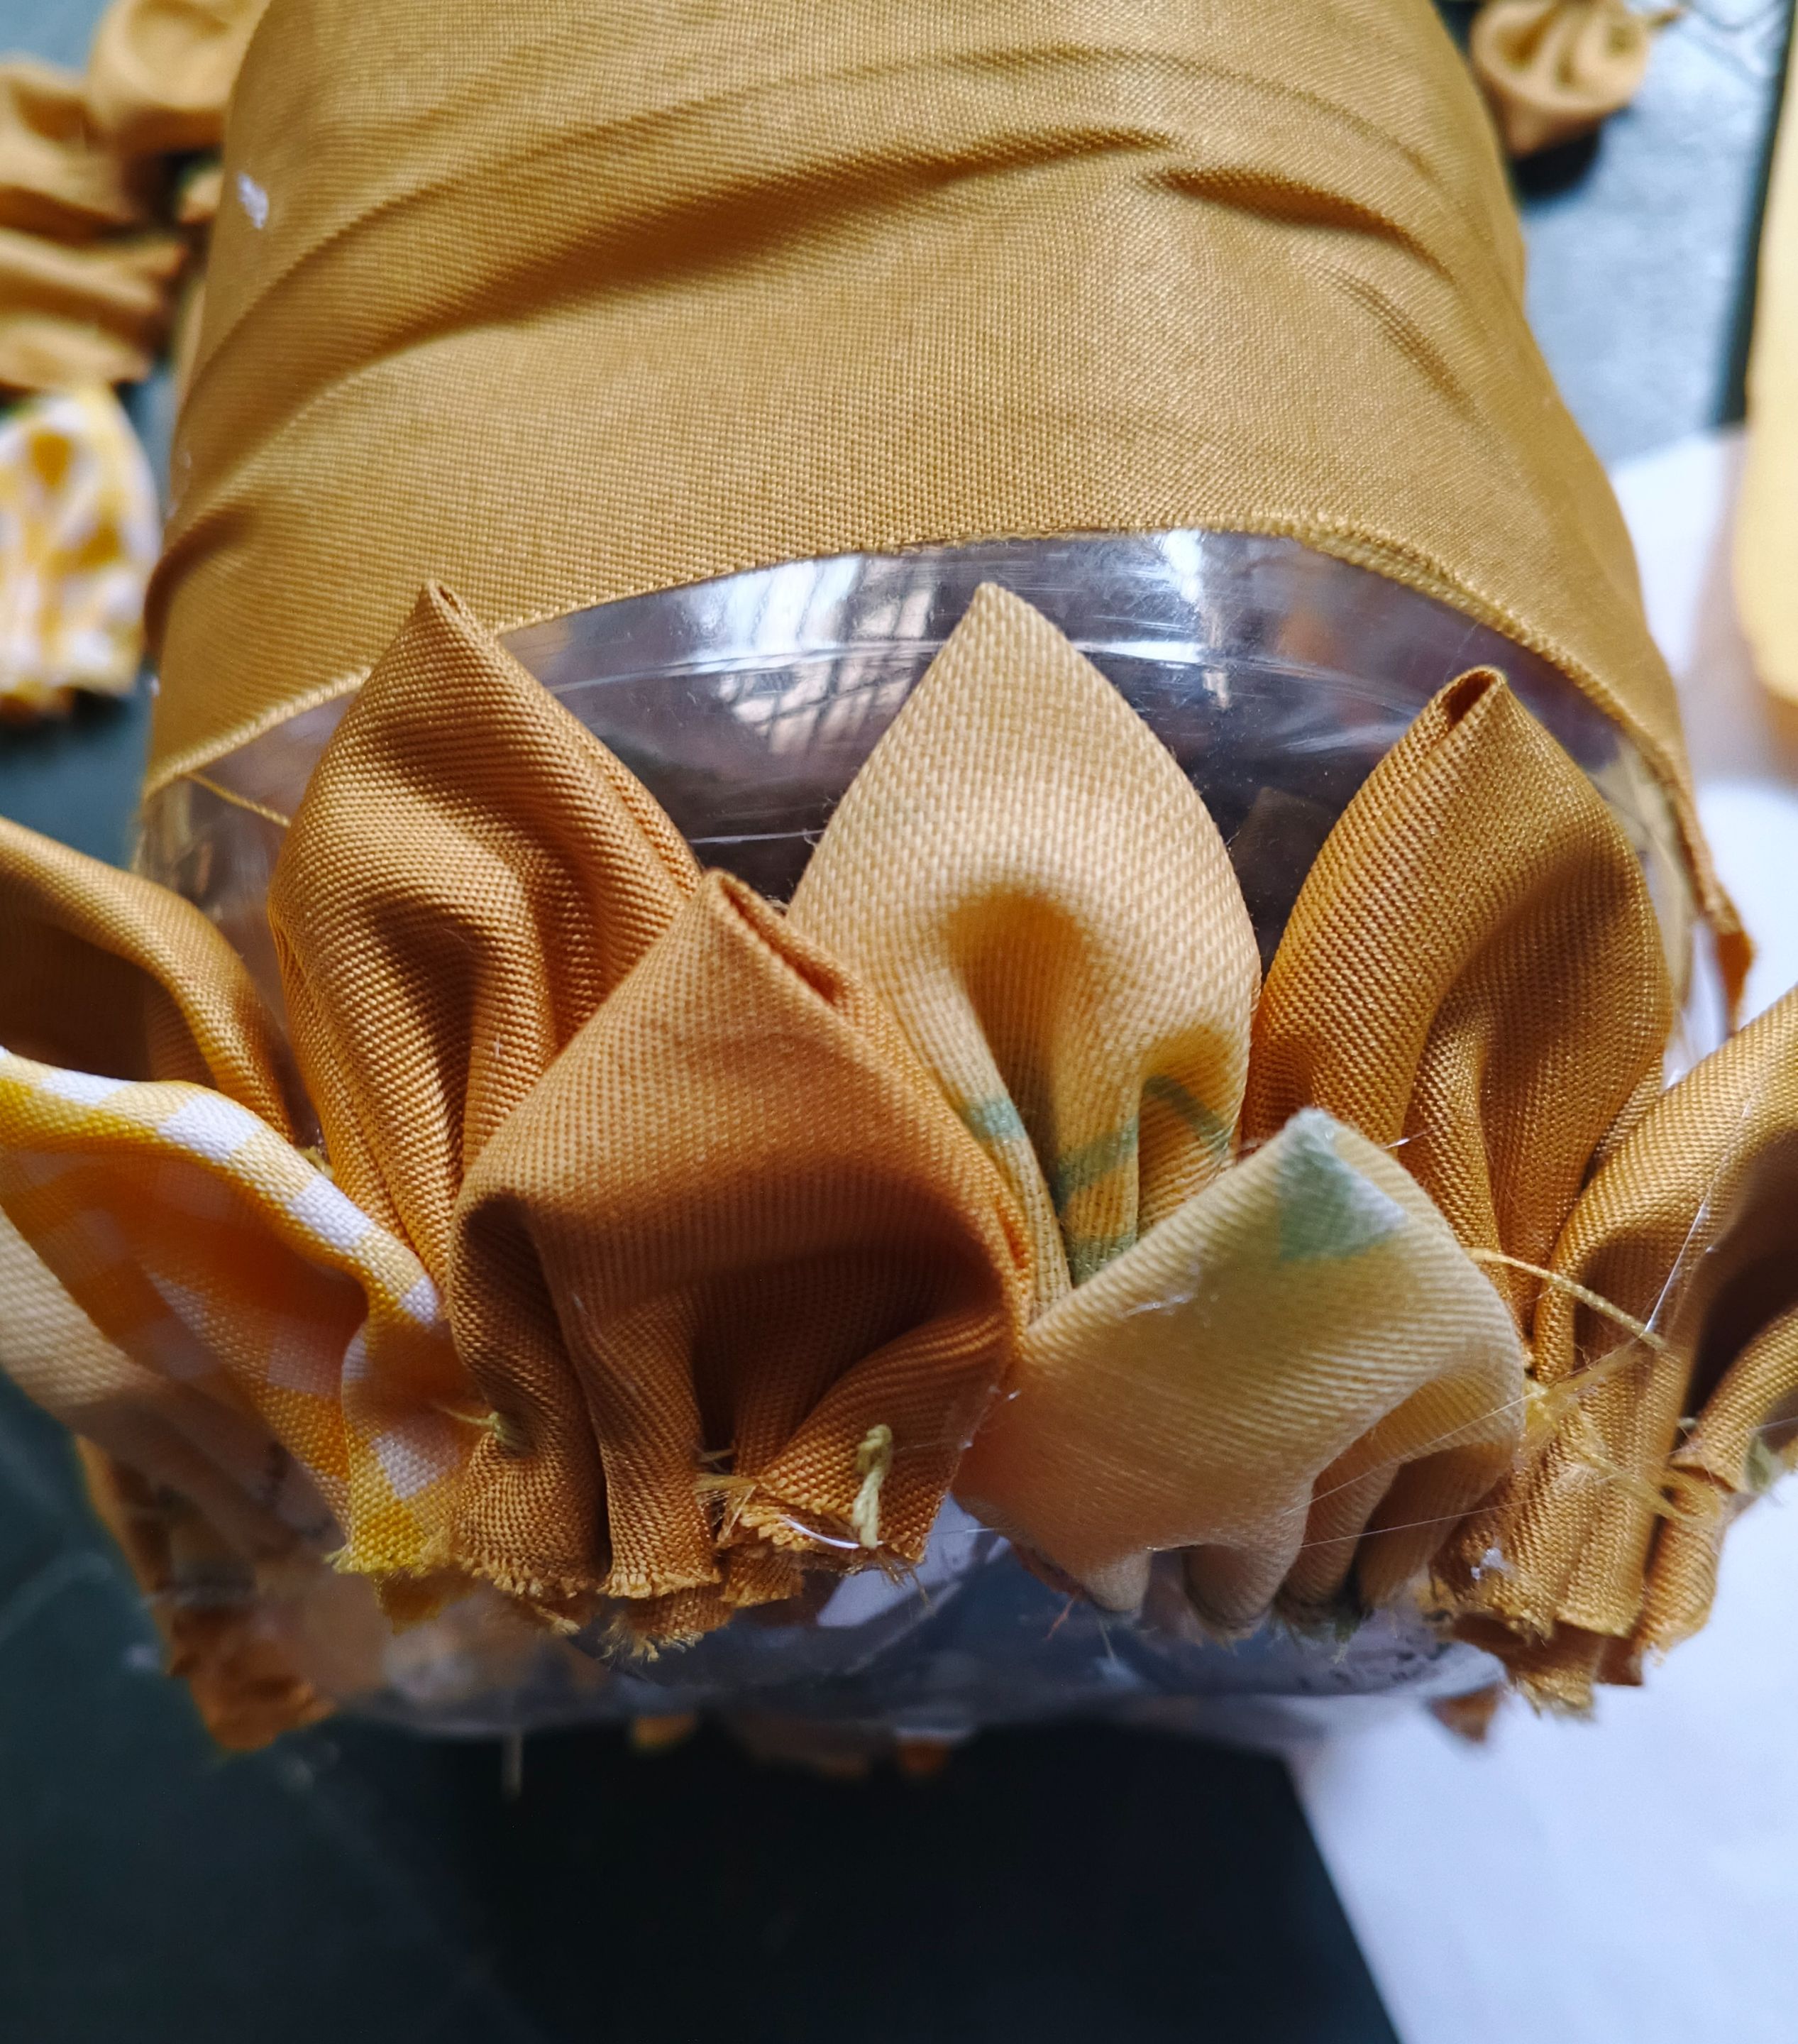
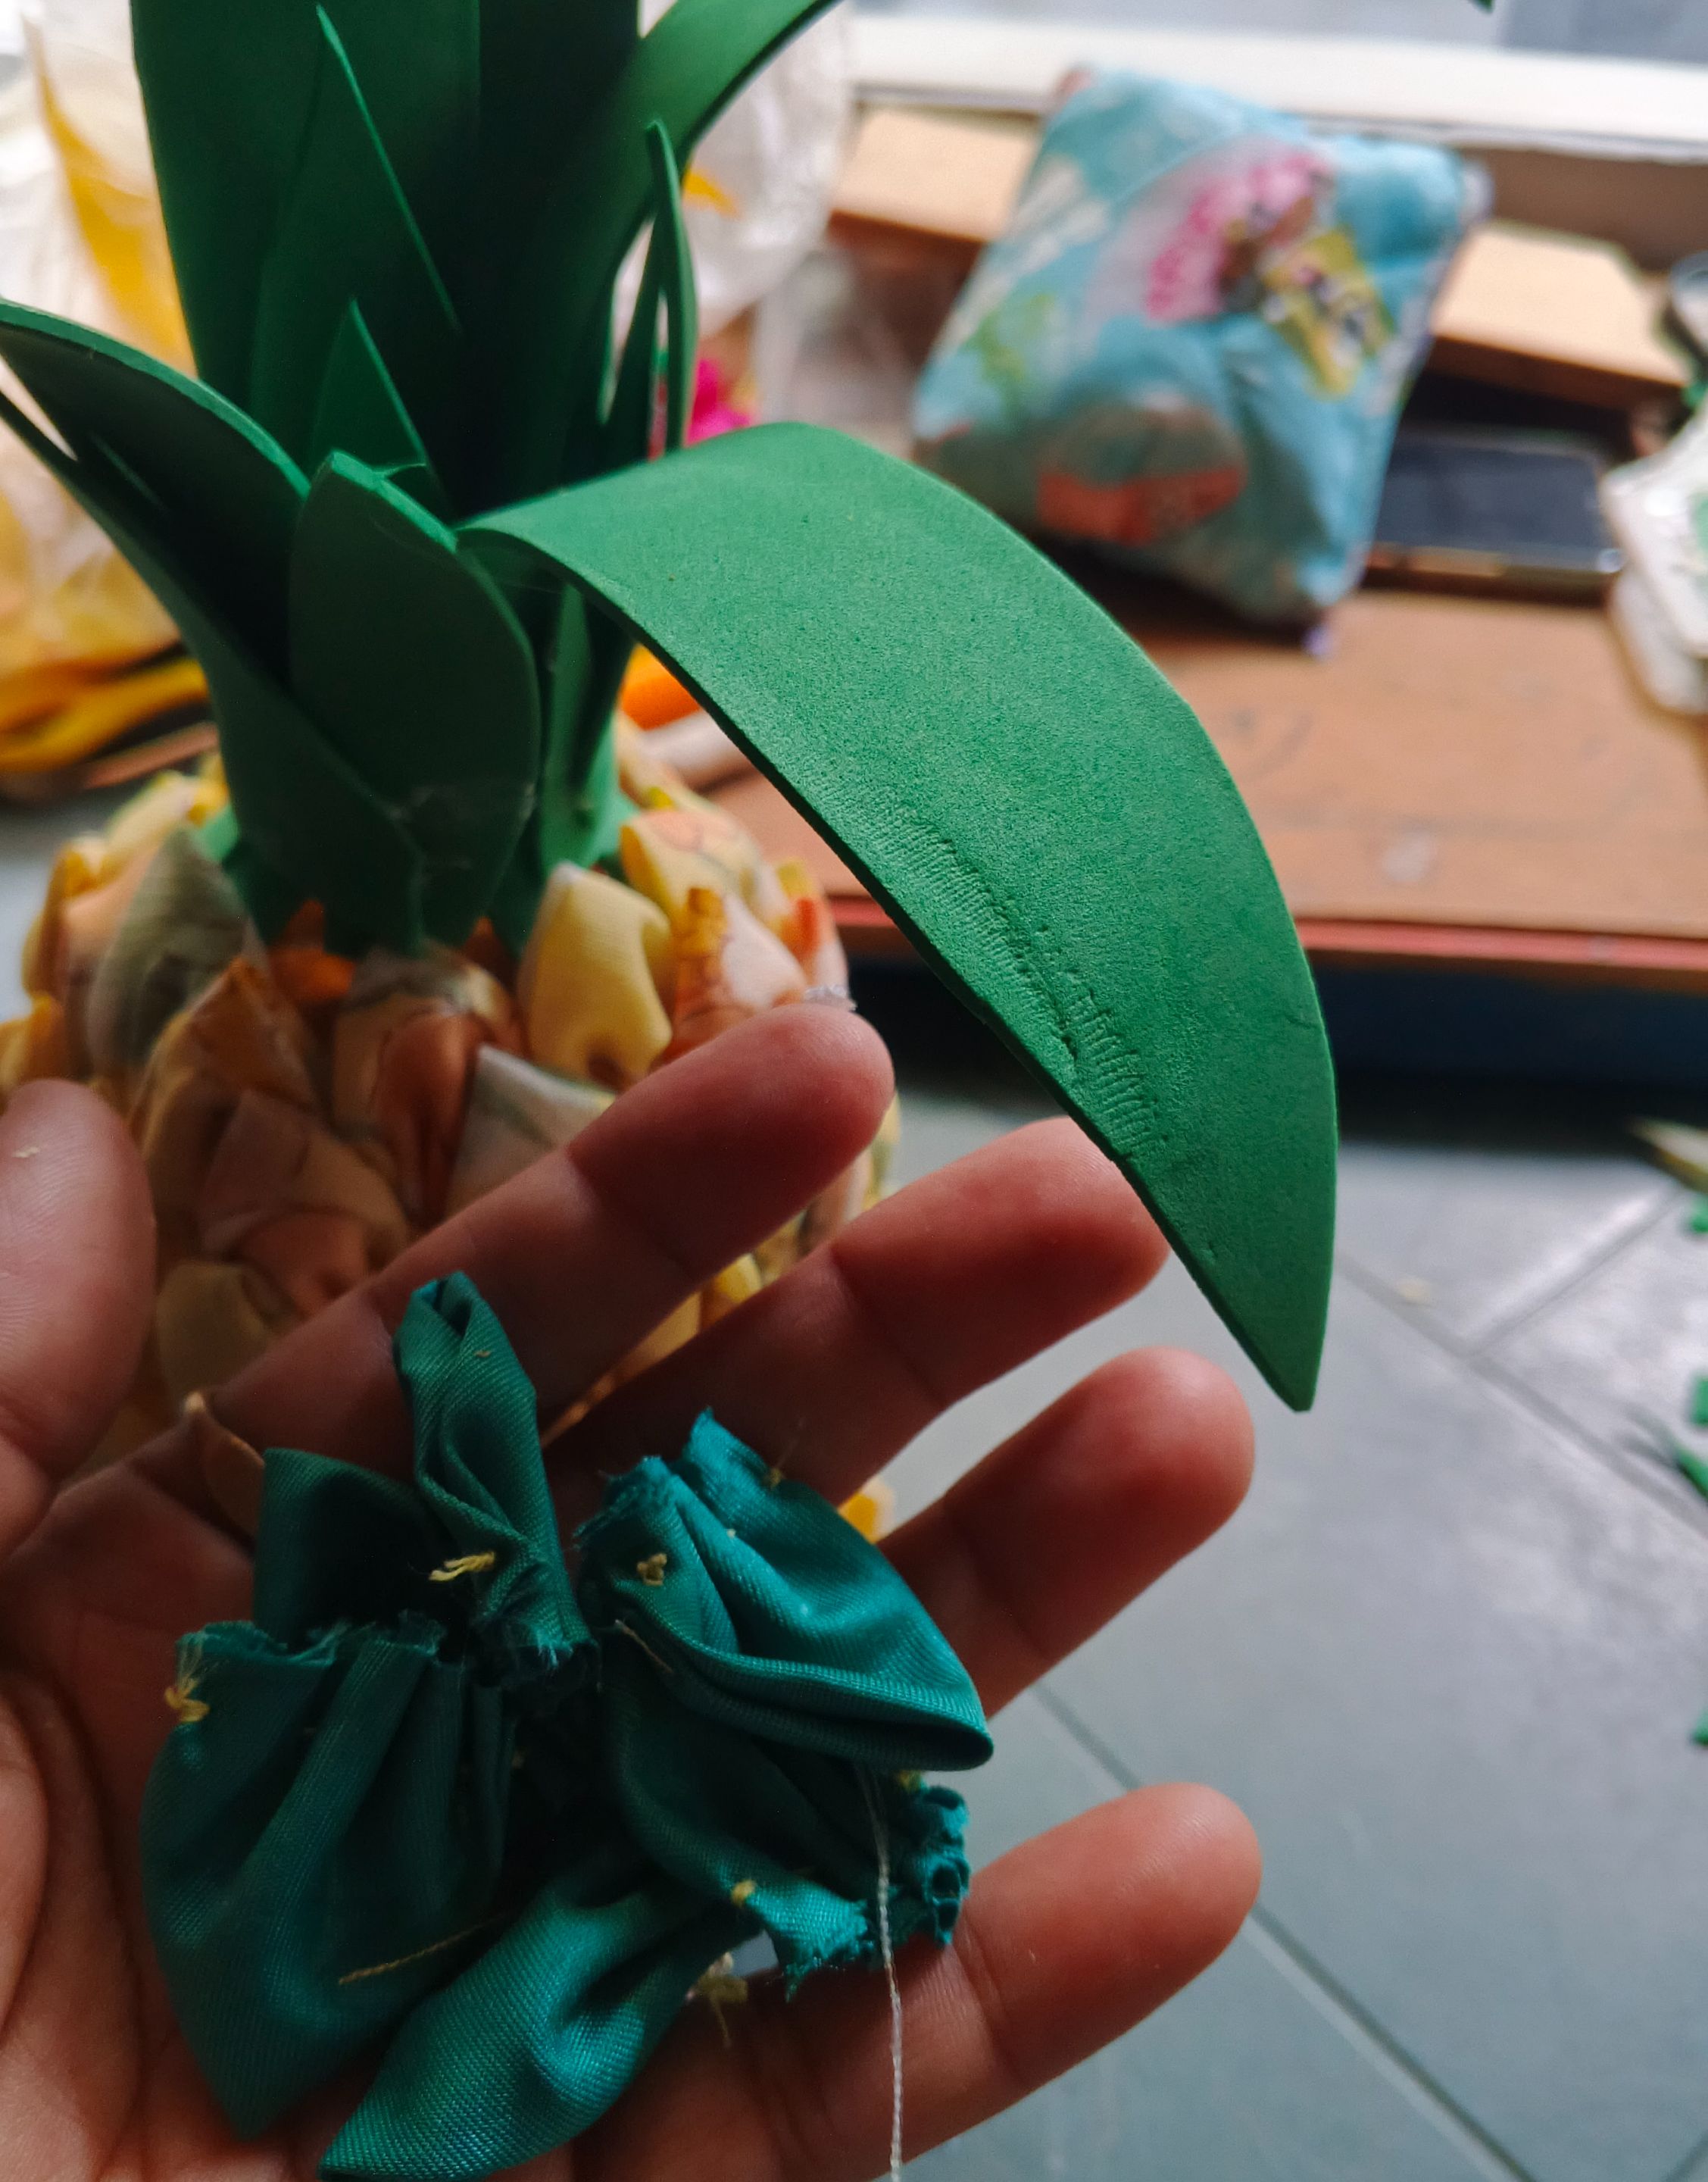
The next step was to mark some circles on the fabrics with the lid and a pencil. When I finished marking, I cut out all the circles, then folded them, and made some triangular shapes. These are very easy to do. Just fold the fabric circle in half. Then, fold that half in half again, resulting in a triangle. I then gathered it with a needle threaded with yellow thread to give it shape. I also cut green circles, the same shape, to glue them on when I placed the pineapple leaves.
Next, I made the bottle and attached some stones to the fabric petals, to begin the transformation from bottle to pineapple.
> Lo siguiente fue marcar sobre las telas, unos círculos con la tapa, y un lápiz, cuando termine de marcar, corte todos los círculos, para después doblarlos, y hacer unas formas triangulares, que se hacen muy fácil, solo de dobla la tela del círculo por la mitad, luego esa mitad se vuelve a doblar, por la mitad, quedando como resultado un triángulo, que luego fruncí, con la aguja enhebrada con hilo amarillo, para darle forma, también corte círculos verdes, los mismos con igual forma, para pegarlos, al momento de colocar las hojas de la piña.
> Enseguida hacer que la botella, y unas piedras a los pétalos de tela, para comenzar con la transformación, de la botella a piña.
 |
| |-|-
|-|-
 |
|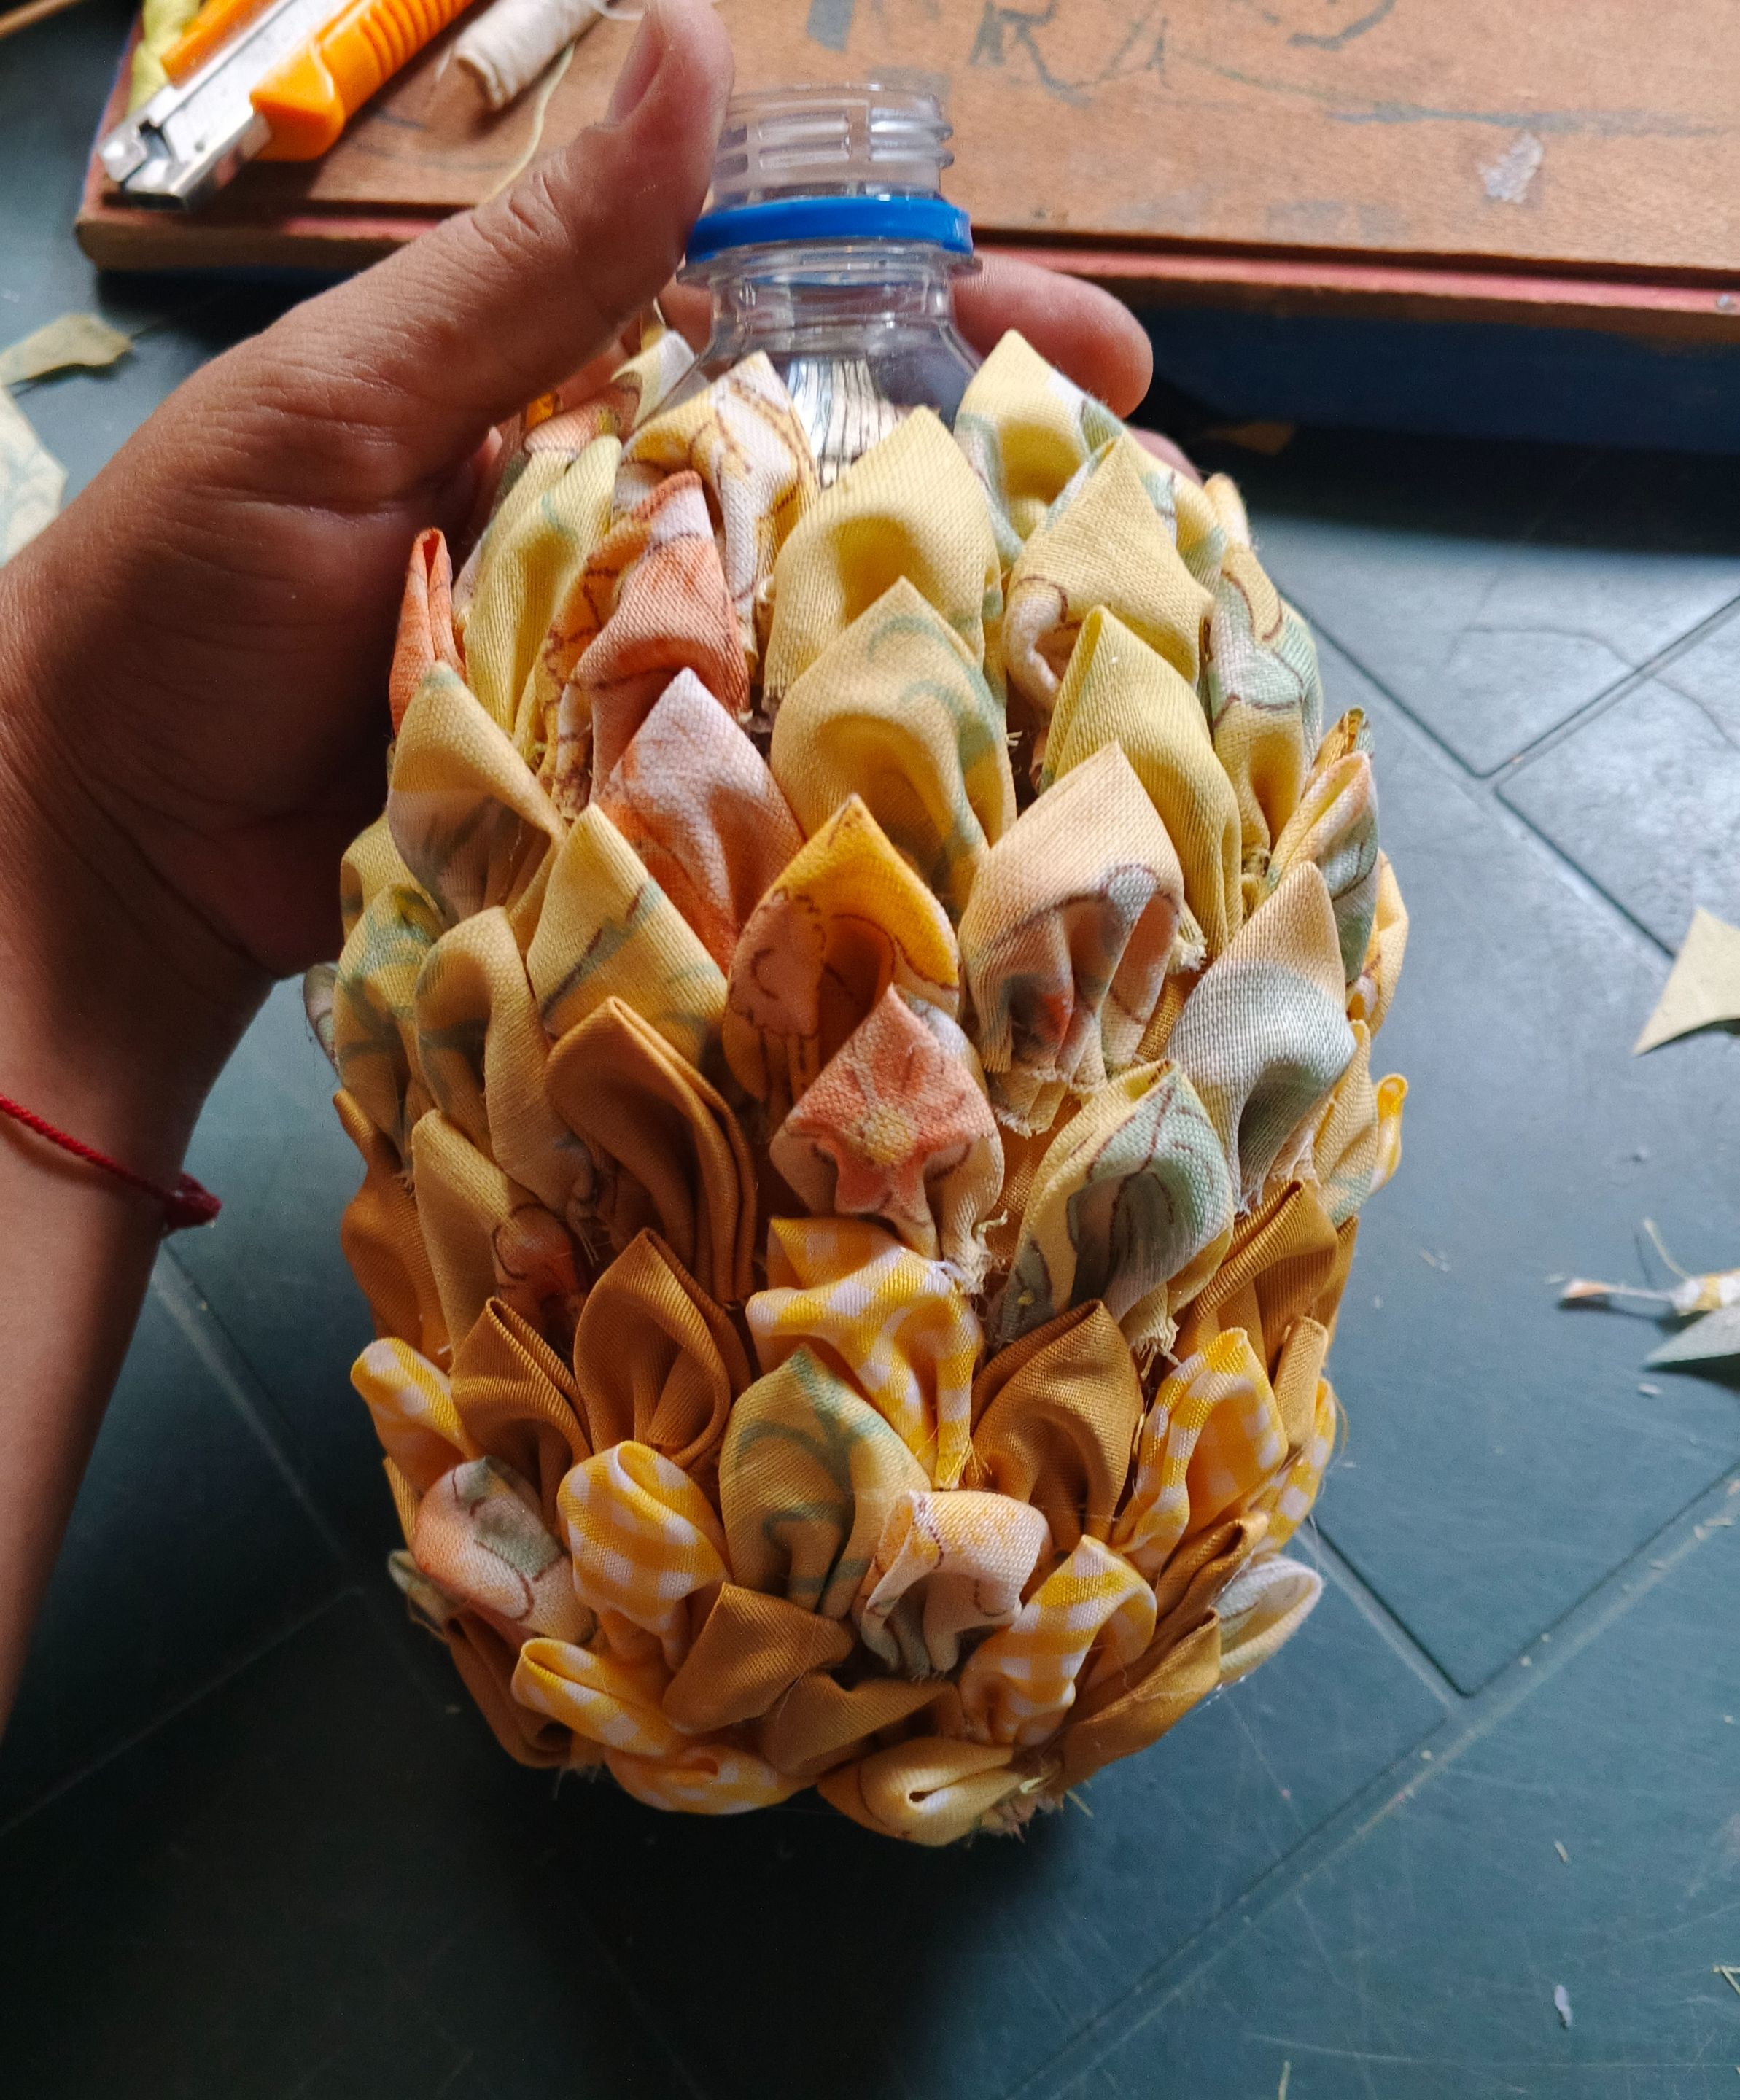
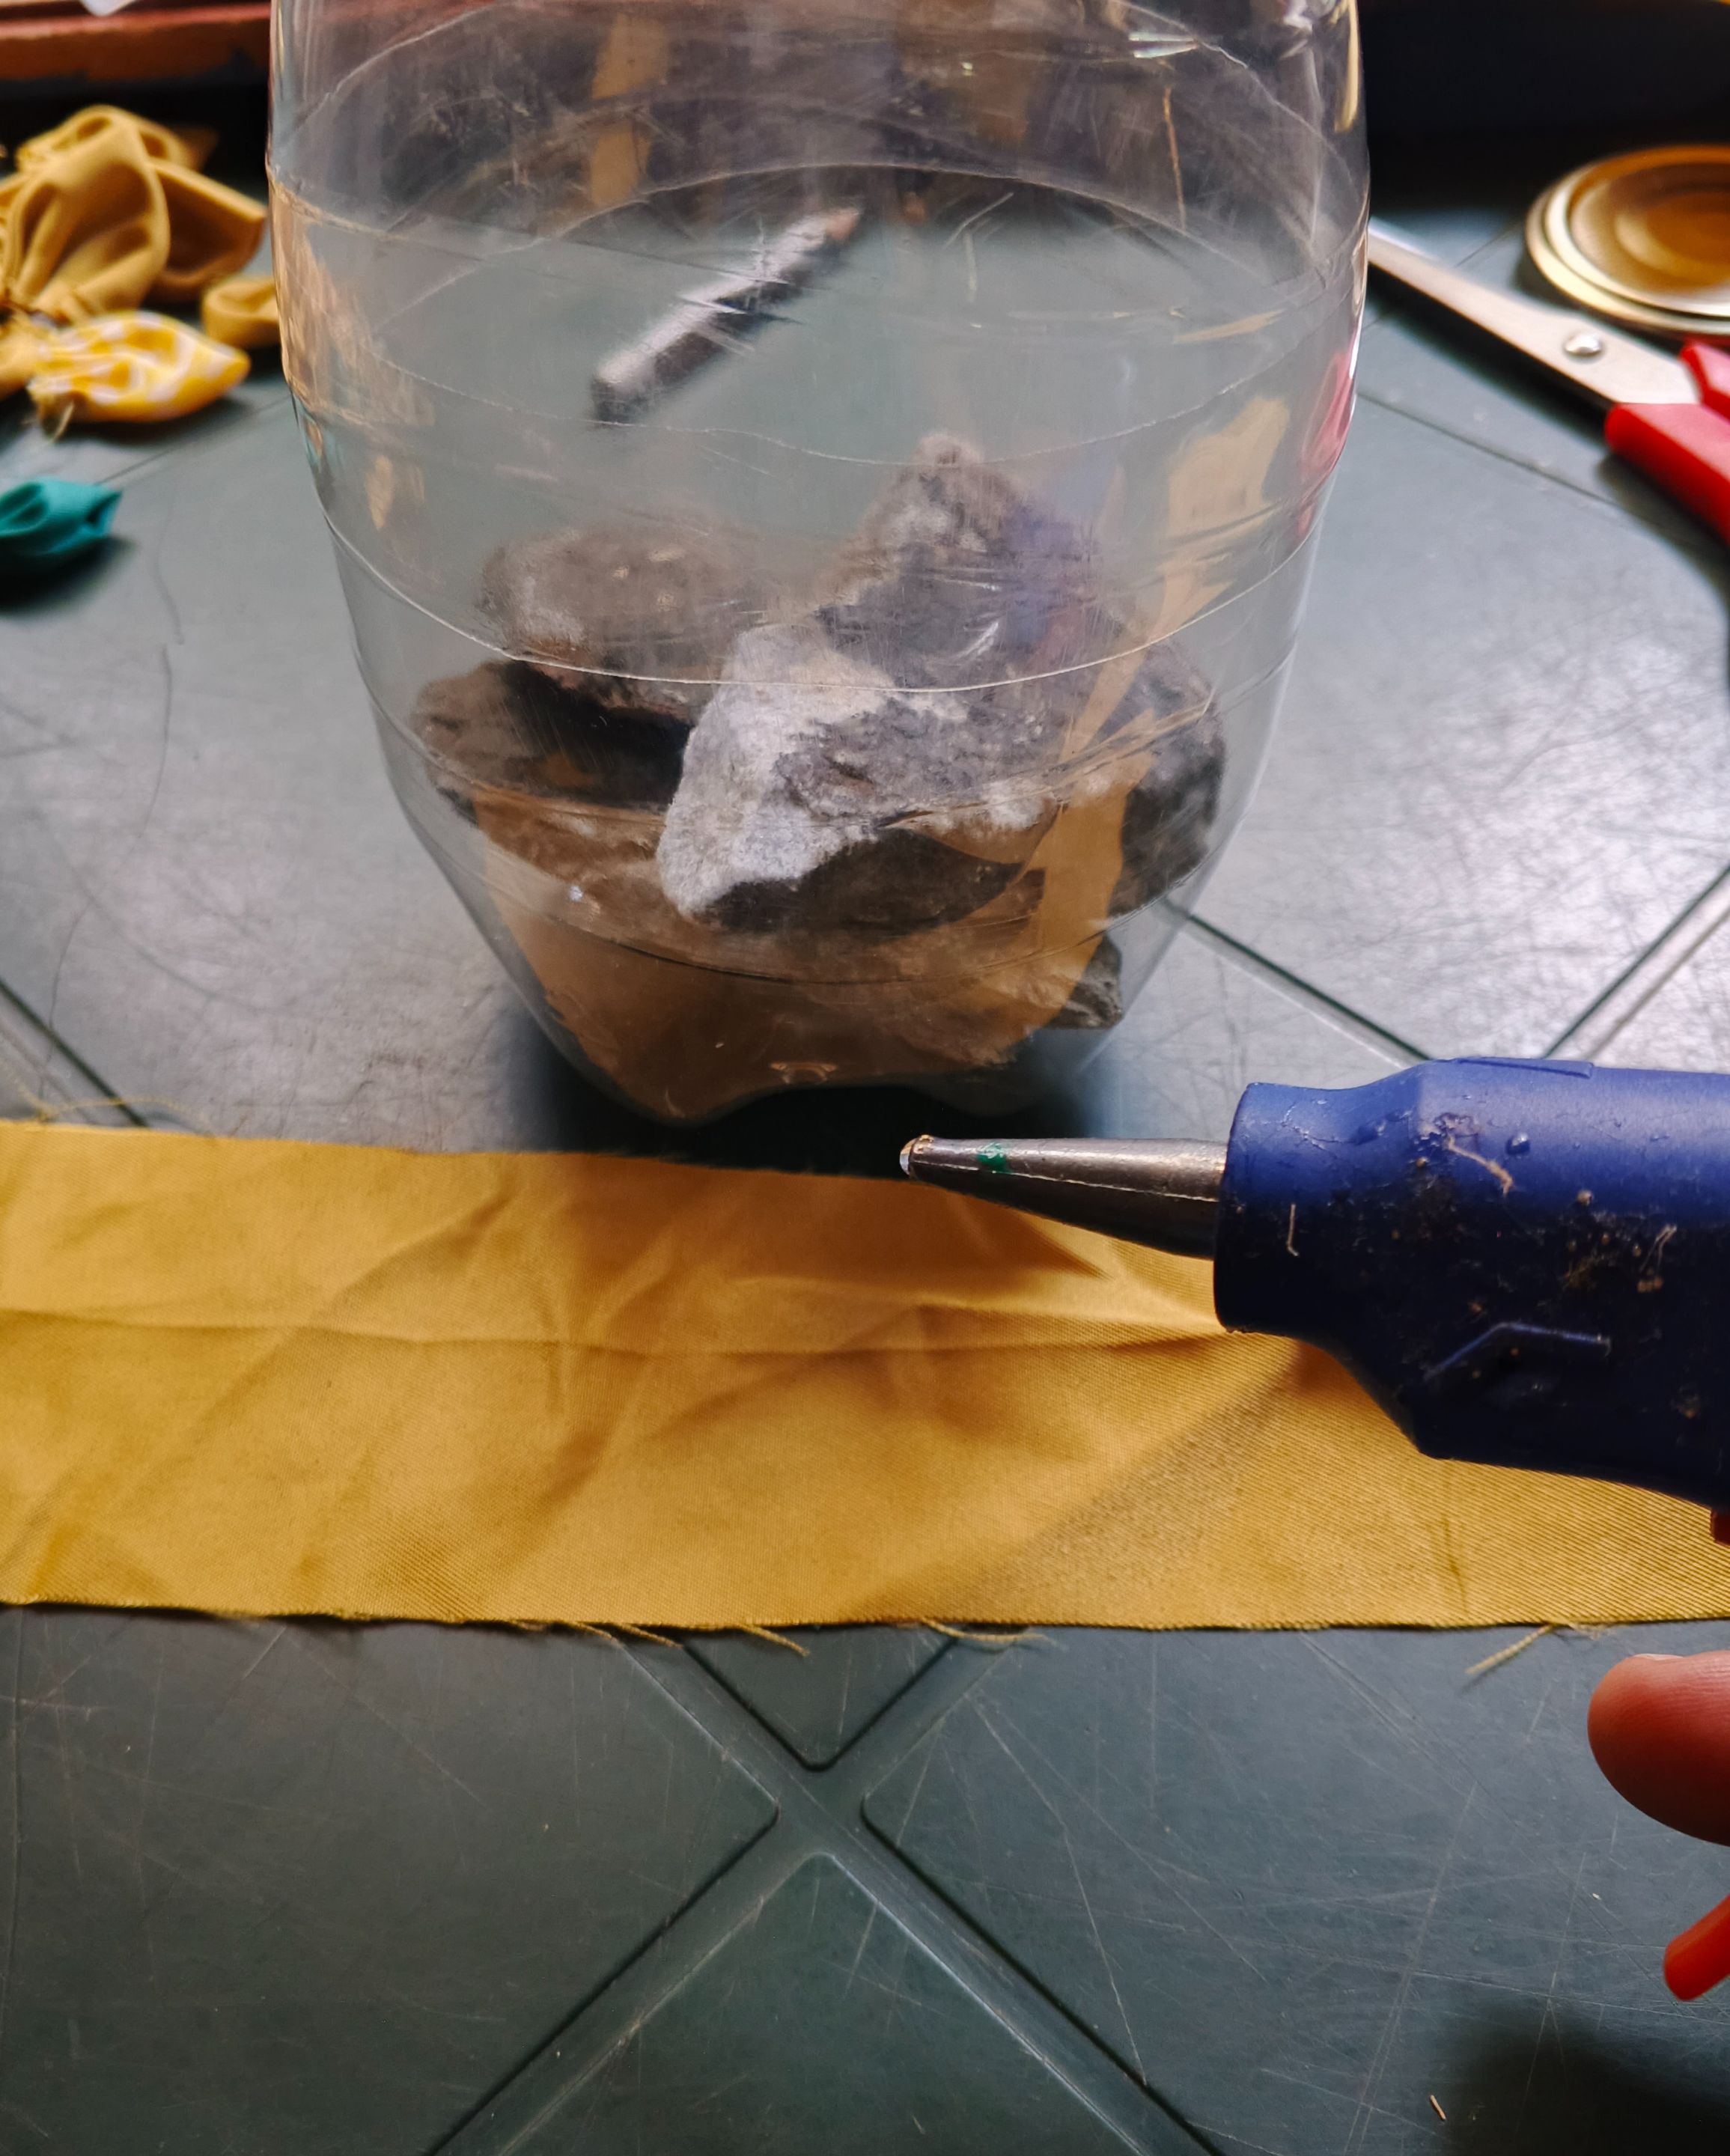
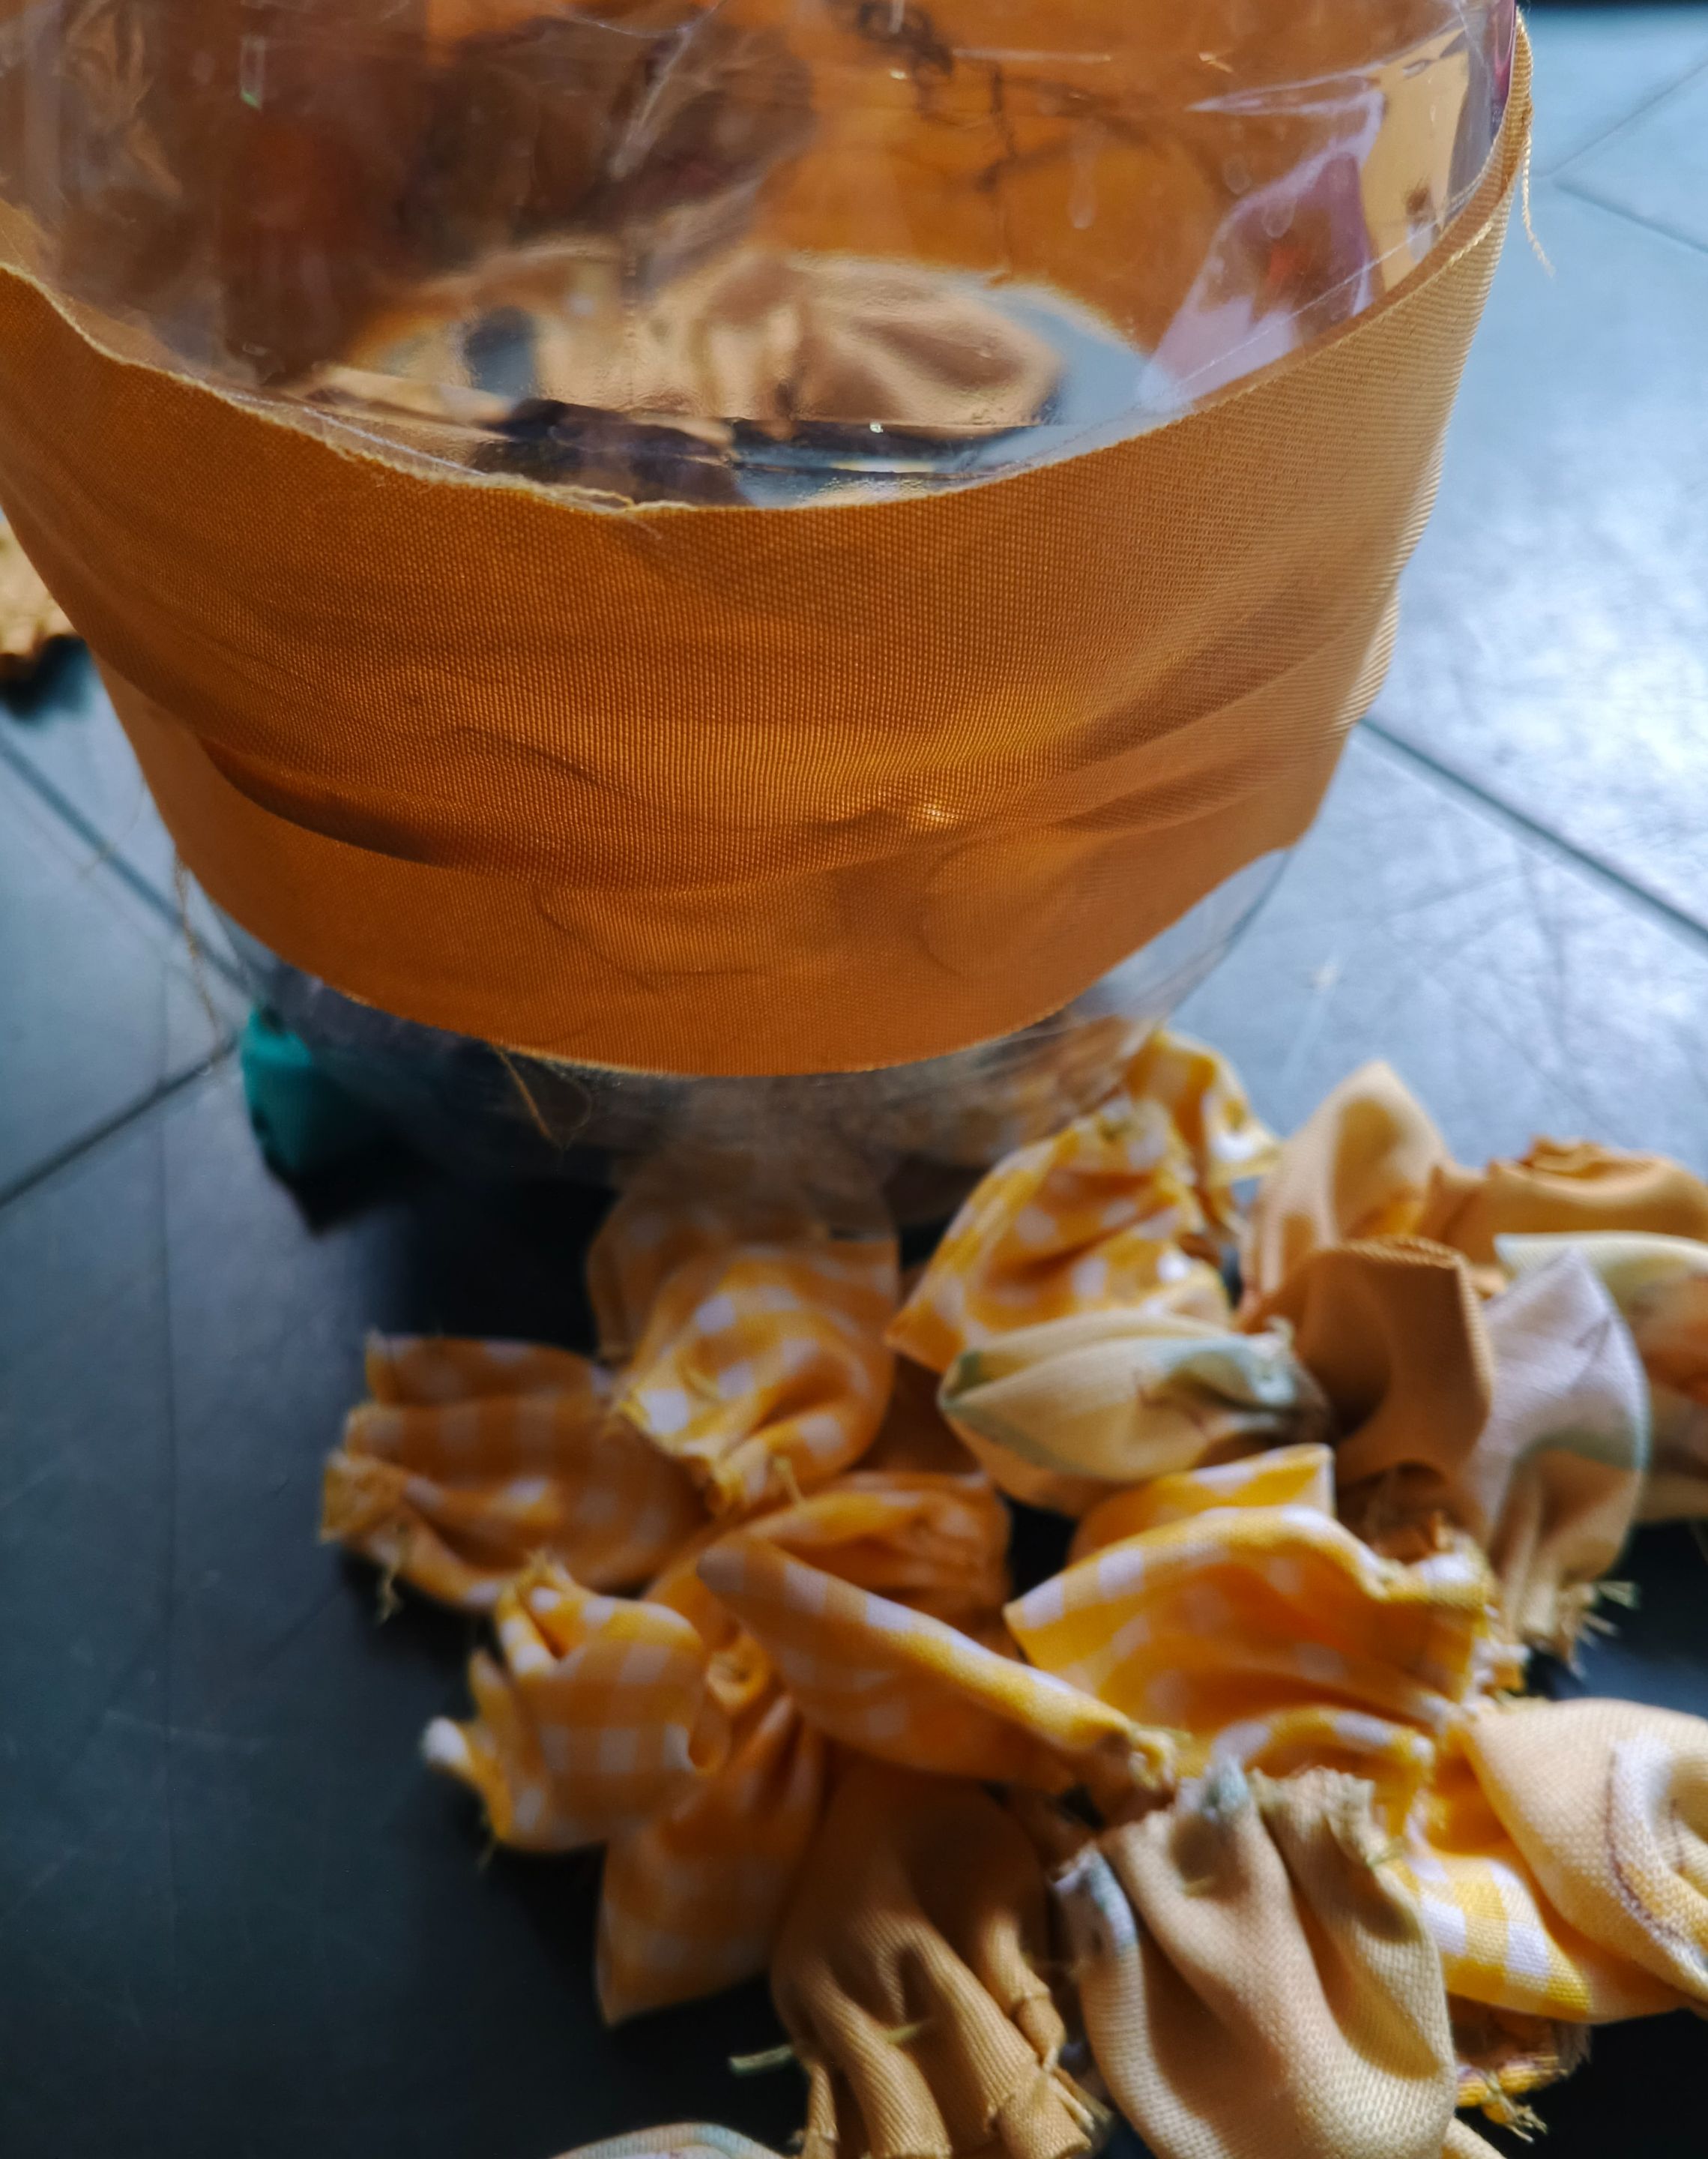
I placed the stones at the bottom of the bottle to give it stability. Then, to make sure the bottle wouldn't tip over easily, I cut a strip of yellow fabric and glued it around the entire perimeter of the bottle where the top and bottom pieces were joined.
Then I began gluing each petal onto the bottle with hot glue, applying gentle pressure so they would stick well. I continued gluing until the entire bottle was covered, which, from that moment on, transformed into a beautiful pine cone.
> Introduje las piedras en el fondo de la botella, para darle estabilidad, después para asegurarme que esta botella no se fuera habría con facilidad, corte una cinta de tela amarilla y se la pegue por todo el contorno de la botella por donde estaban unidas las piezas, superior e inferior de la botella.
> Luego empecé a pegar cada pétalo sobre la botella, con silicona caliente, haciendo presión suave para que se pegaran bien, así fui pegando hasta cubrir toda la botella, que desde ese momento, se transformó en una hermosa piña.
 |
| |-|-
|-|-
 |
|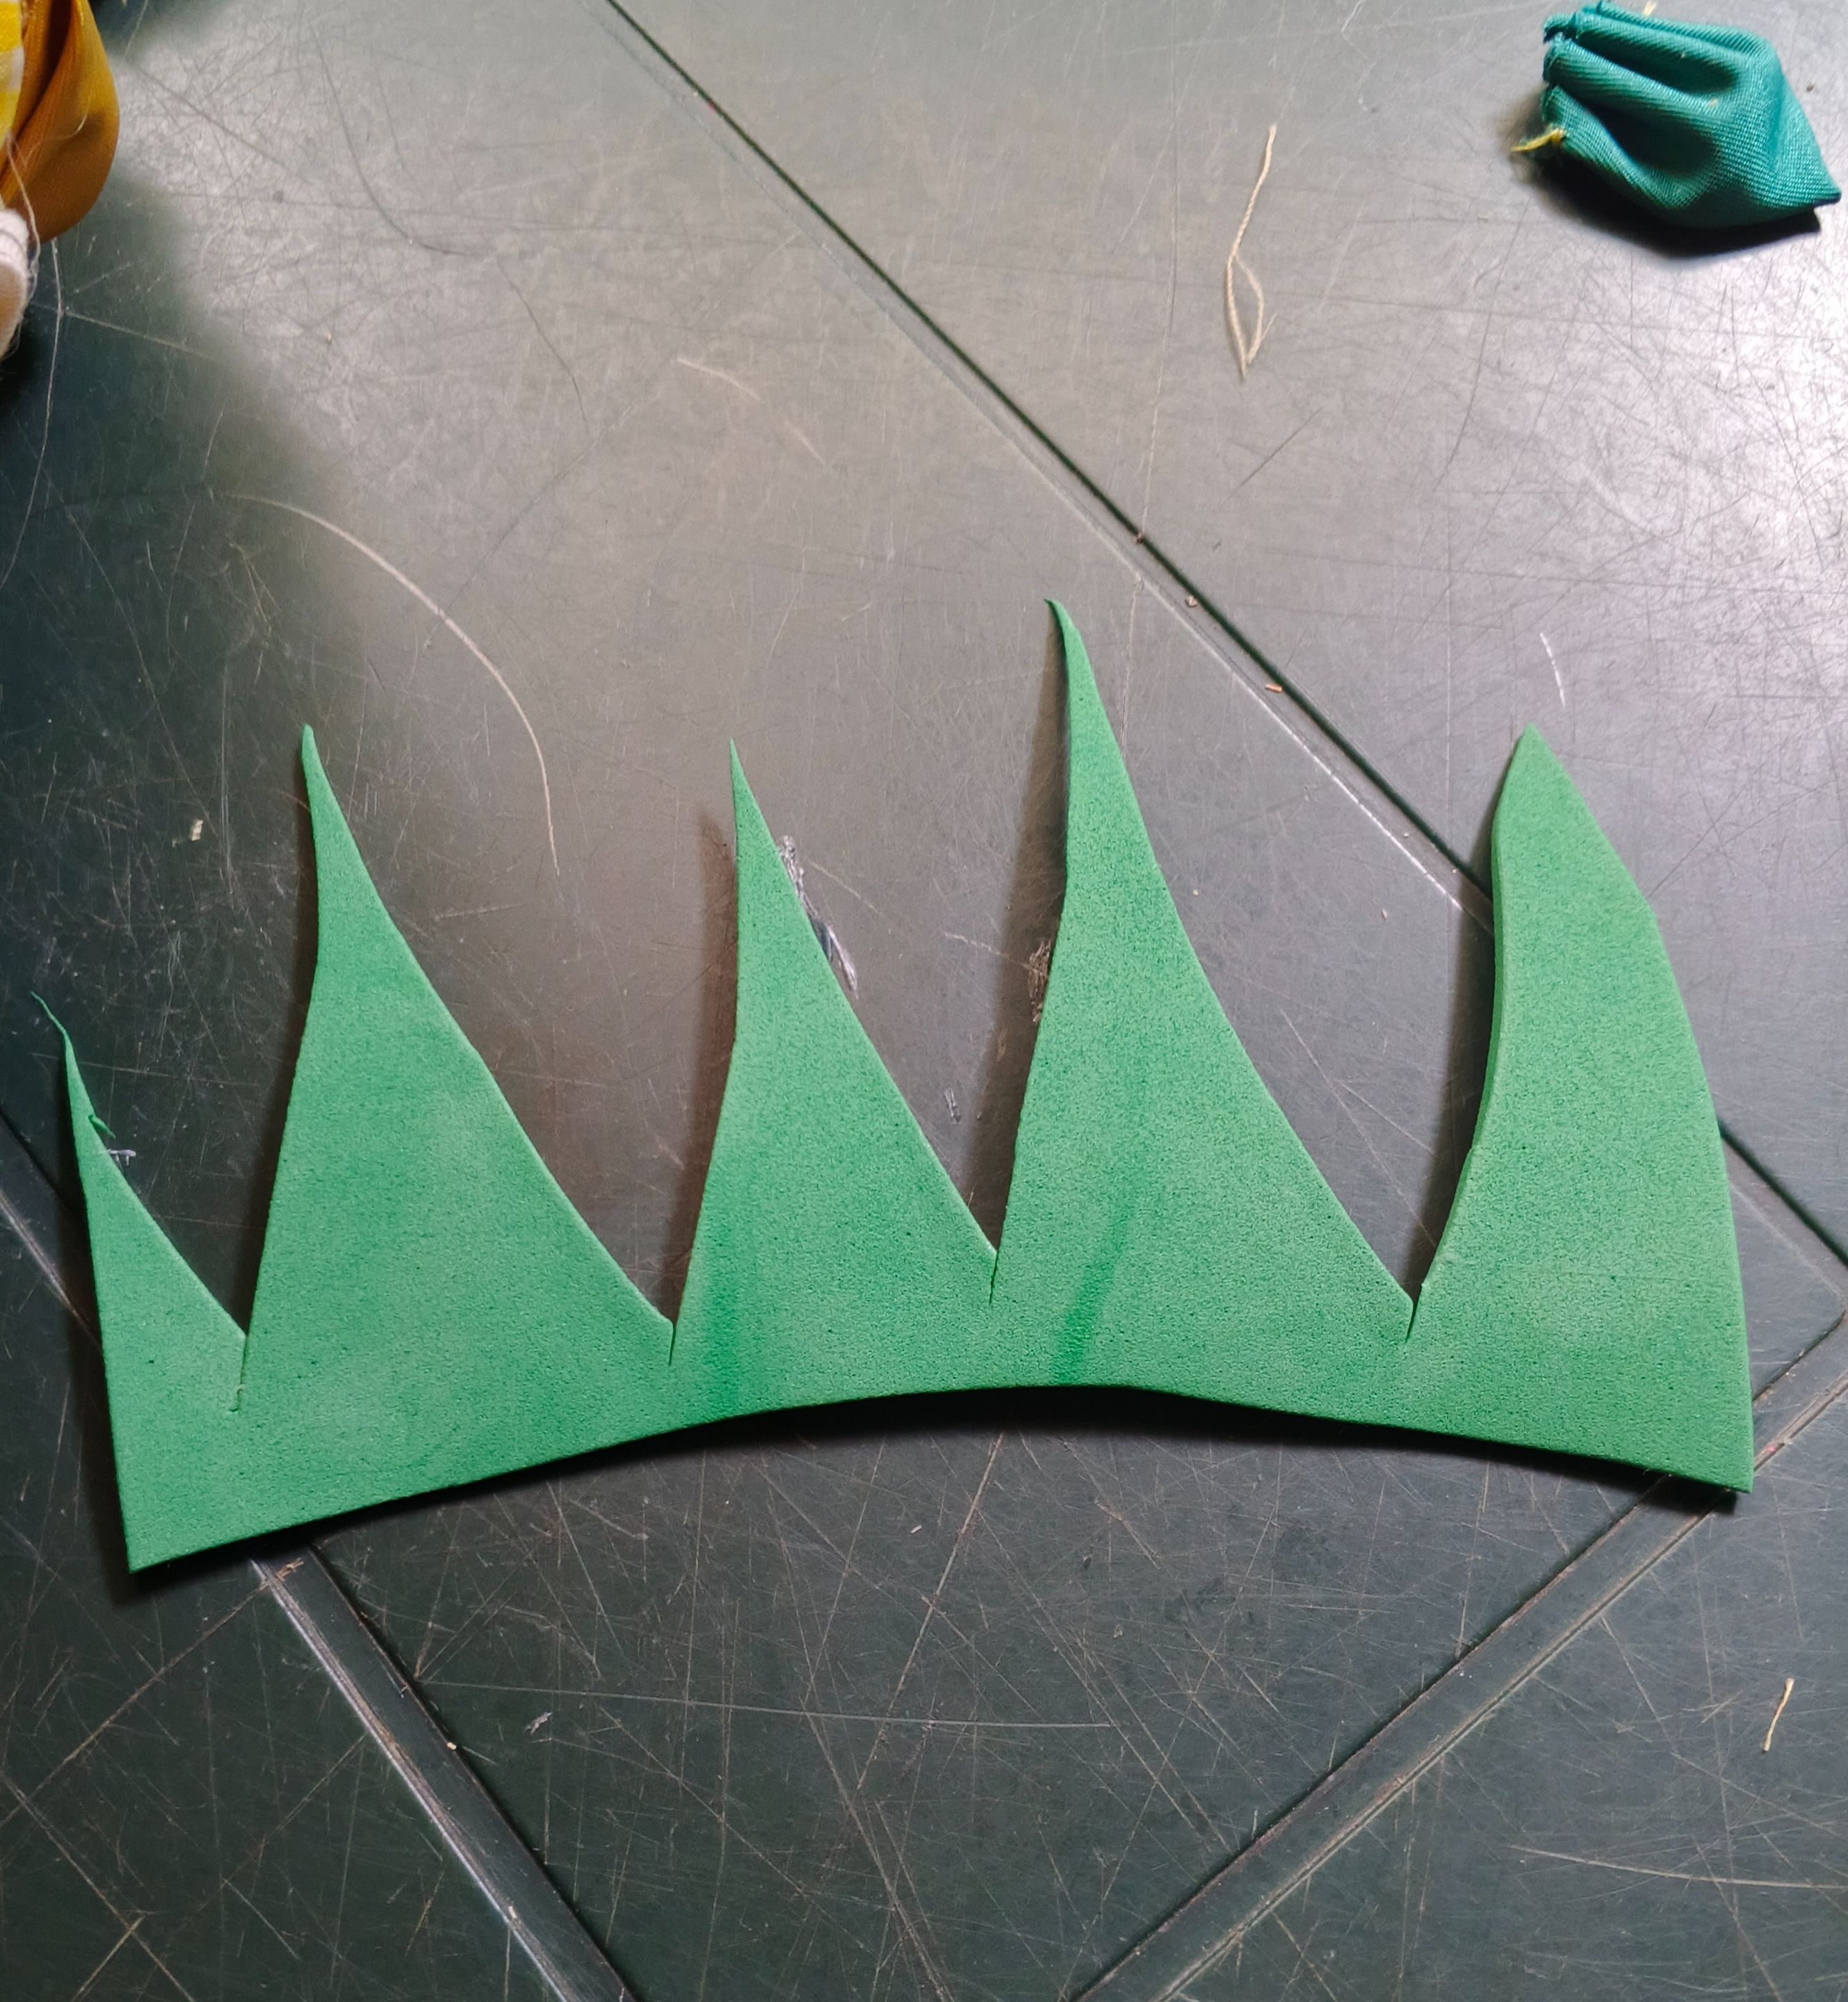
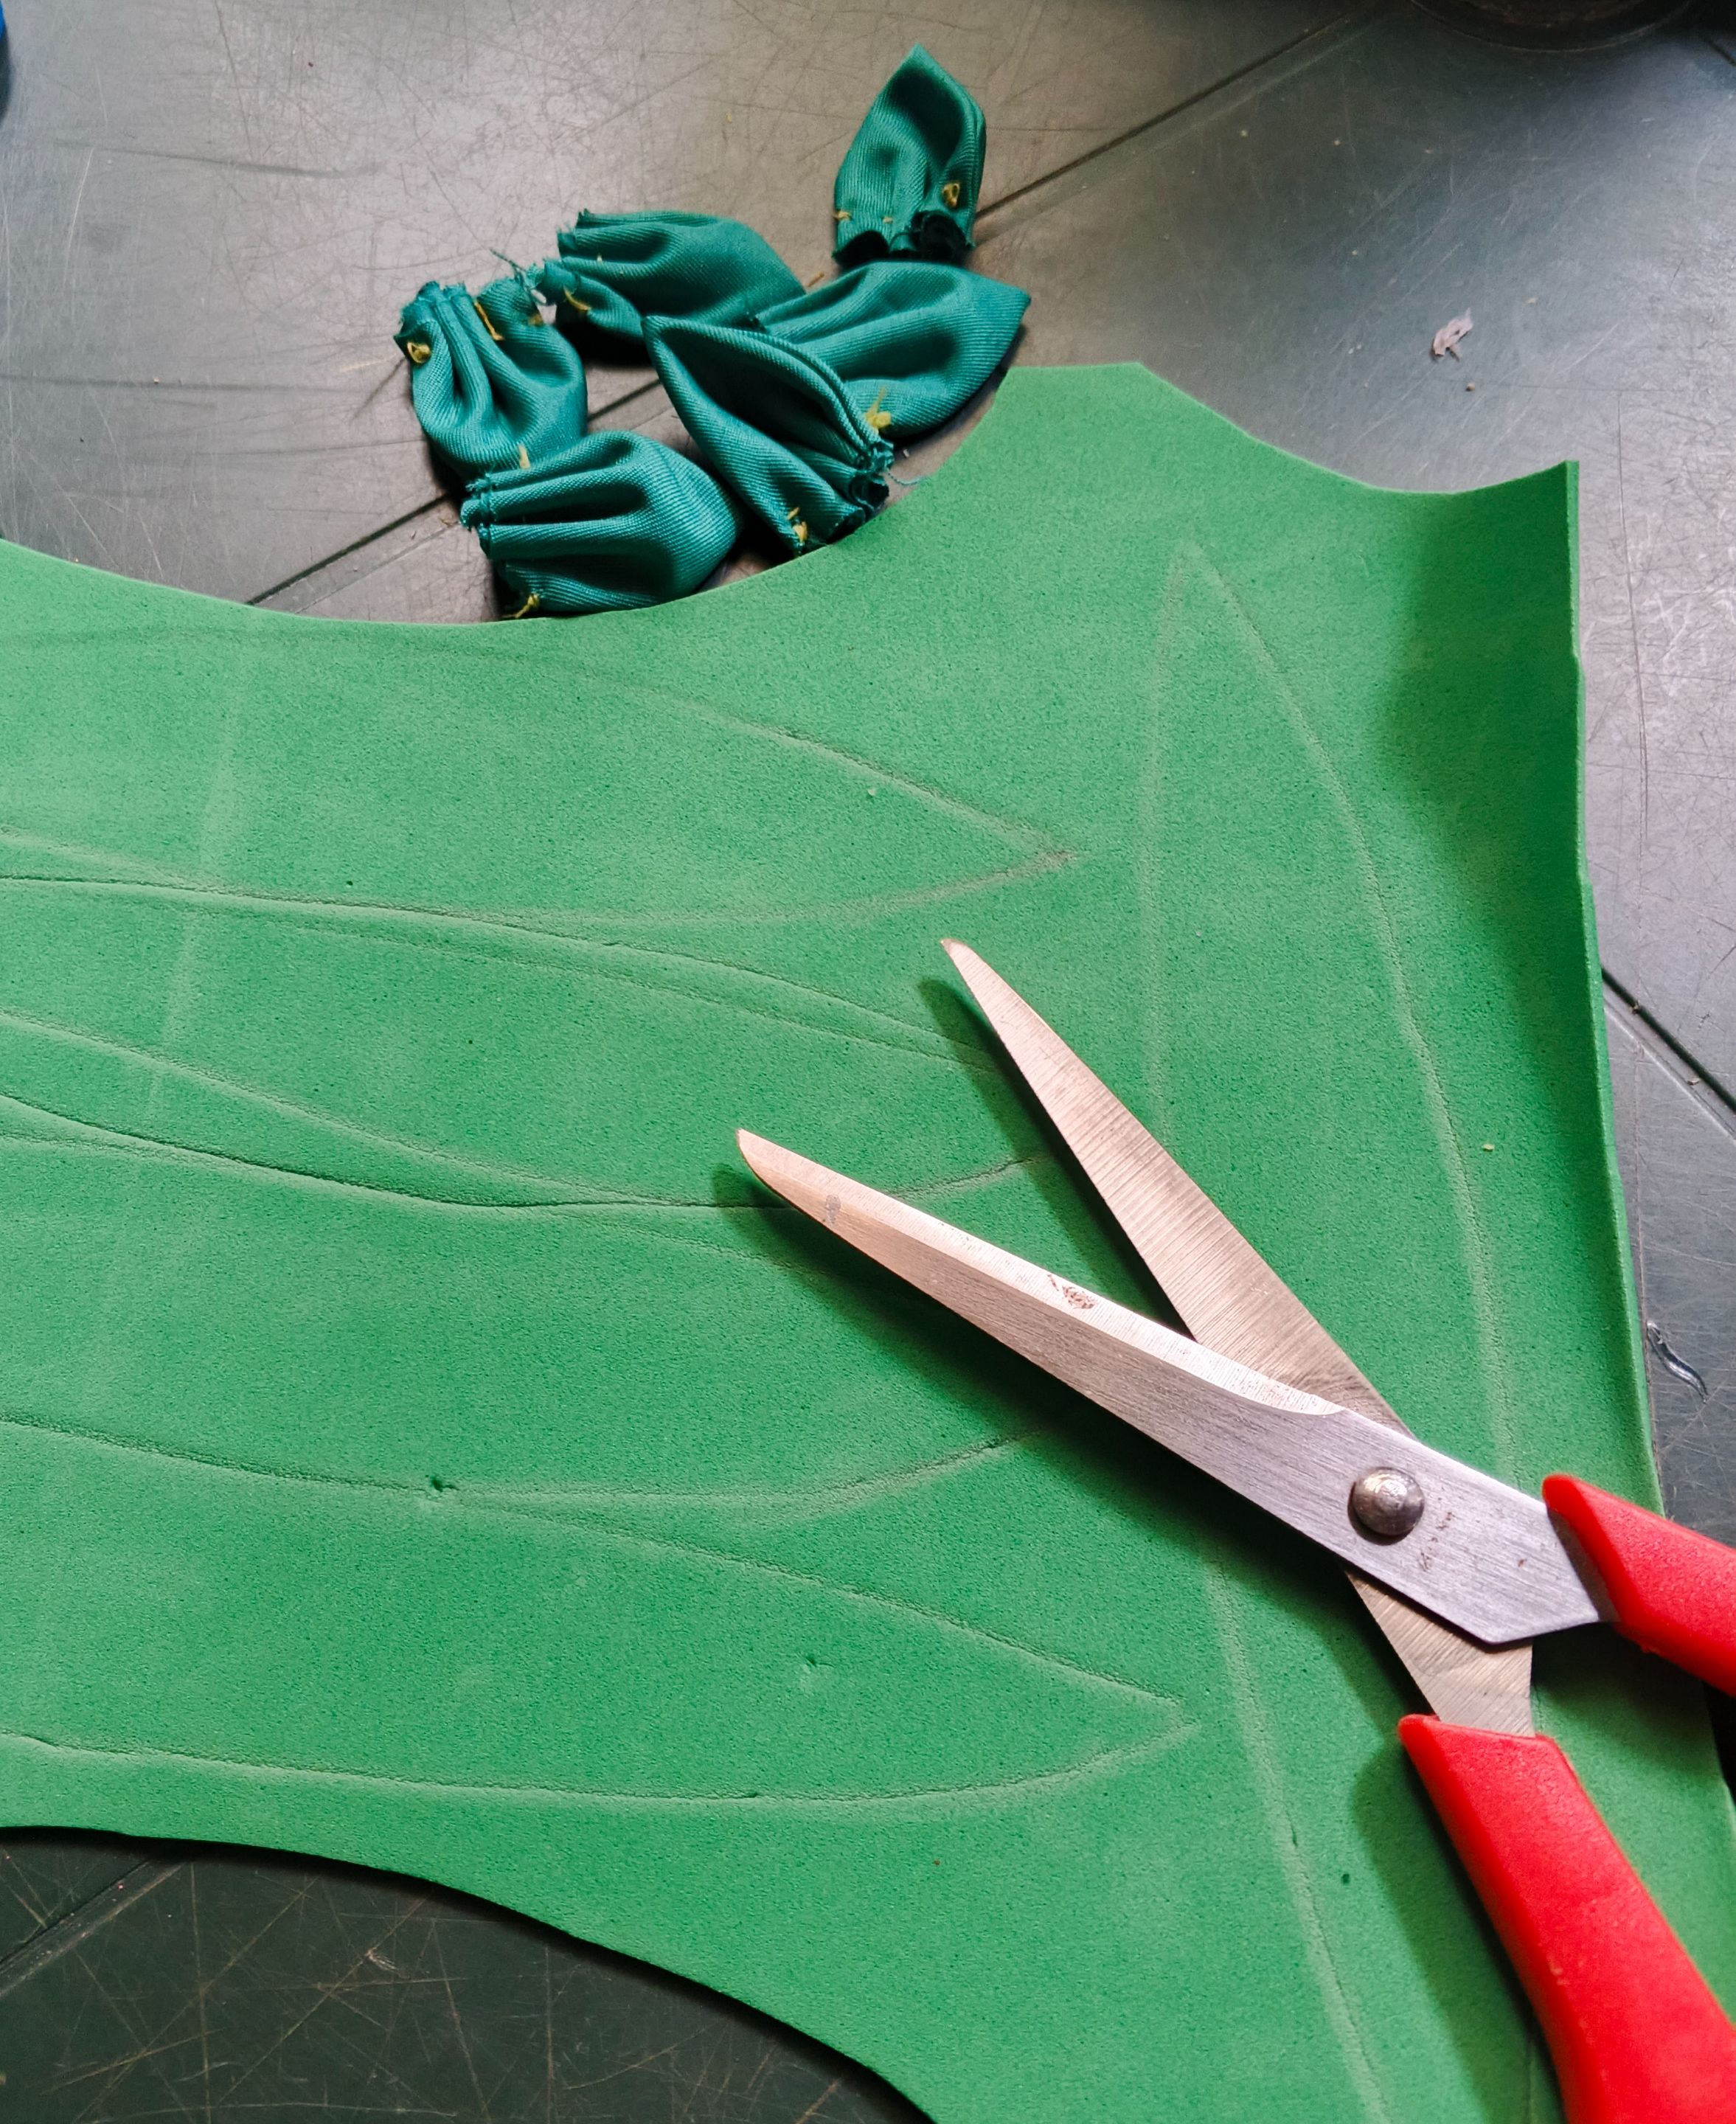
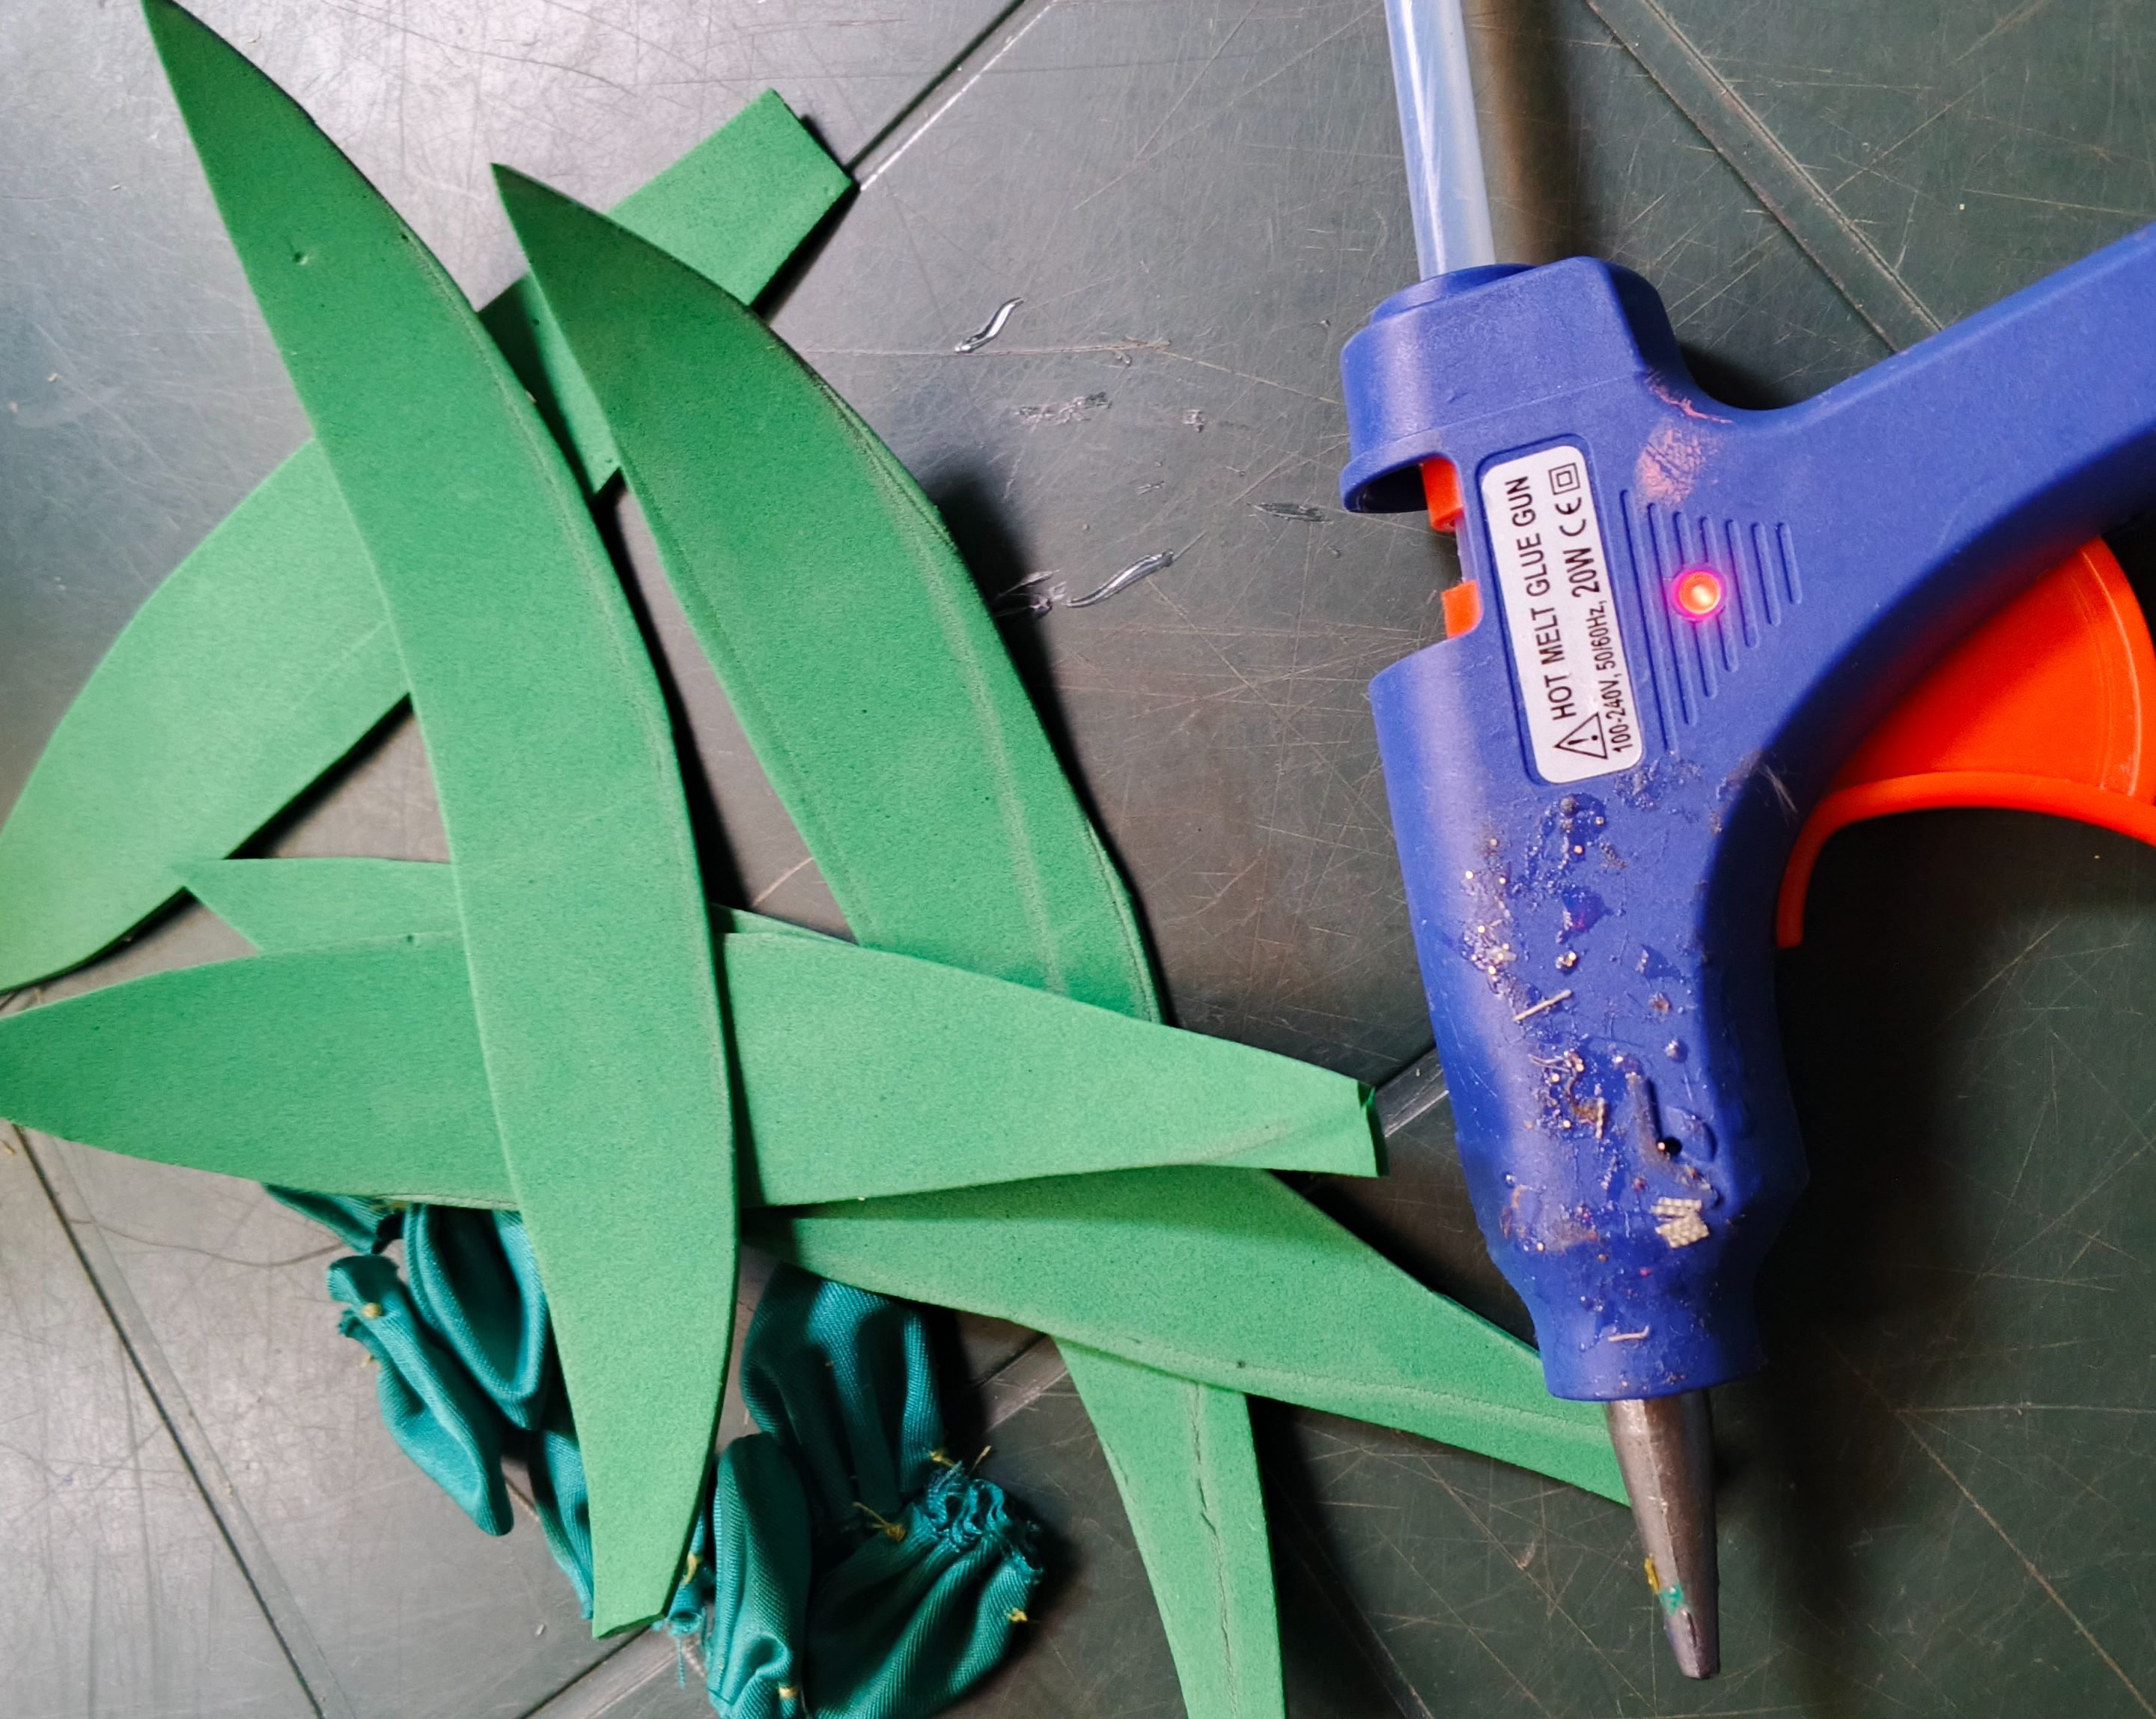
What followed was making the leaves, it was very quick and easy because I drew some elongated leaf shapes, cut them out and used almost all of the green foam for the leaves, even the shape that was left after cutting the leaves was in good shape and I enjoyed using it too.
> Lo que siguió fue hacer las hojas, fue muy rápido y sencillo porque dibuje unas formas de hojas alargadas, recorte y aproveche casi todo el foani verde para las hojas, incluso la forma que quedo después de cortar las hojas quedo con buena forma y me gusto usarla también.
 |
| |-|-
|-|-
 |
|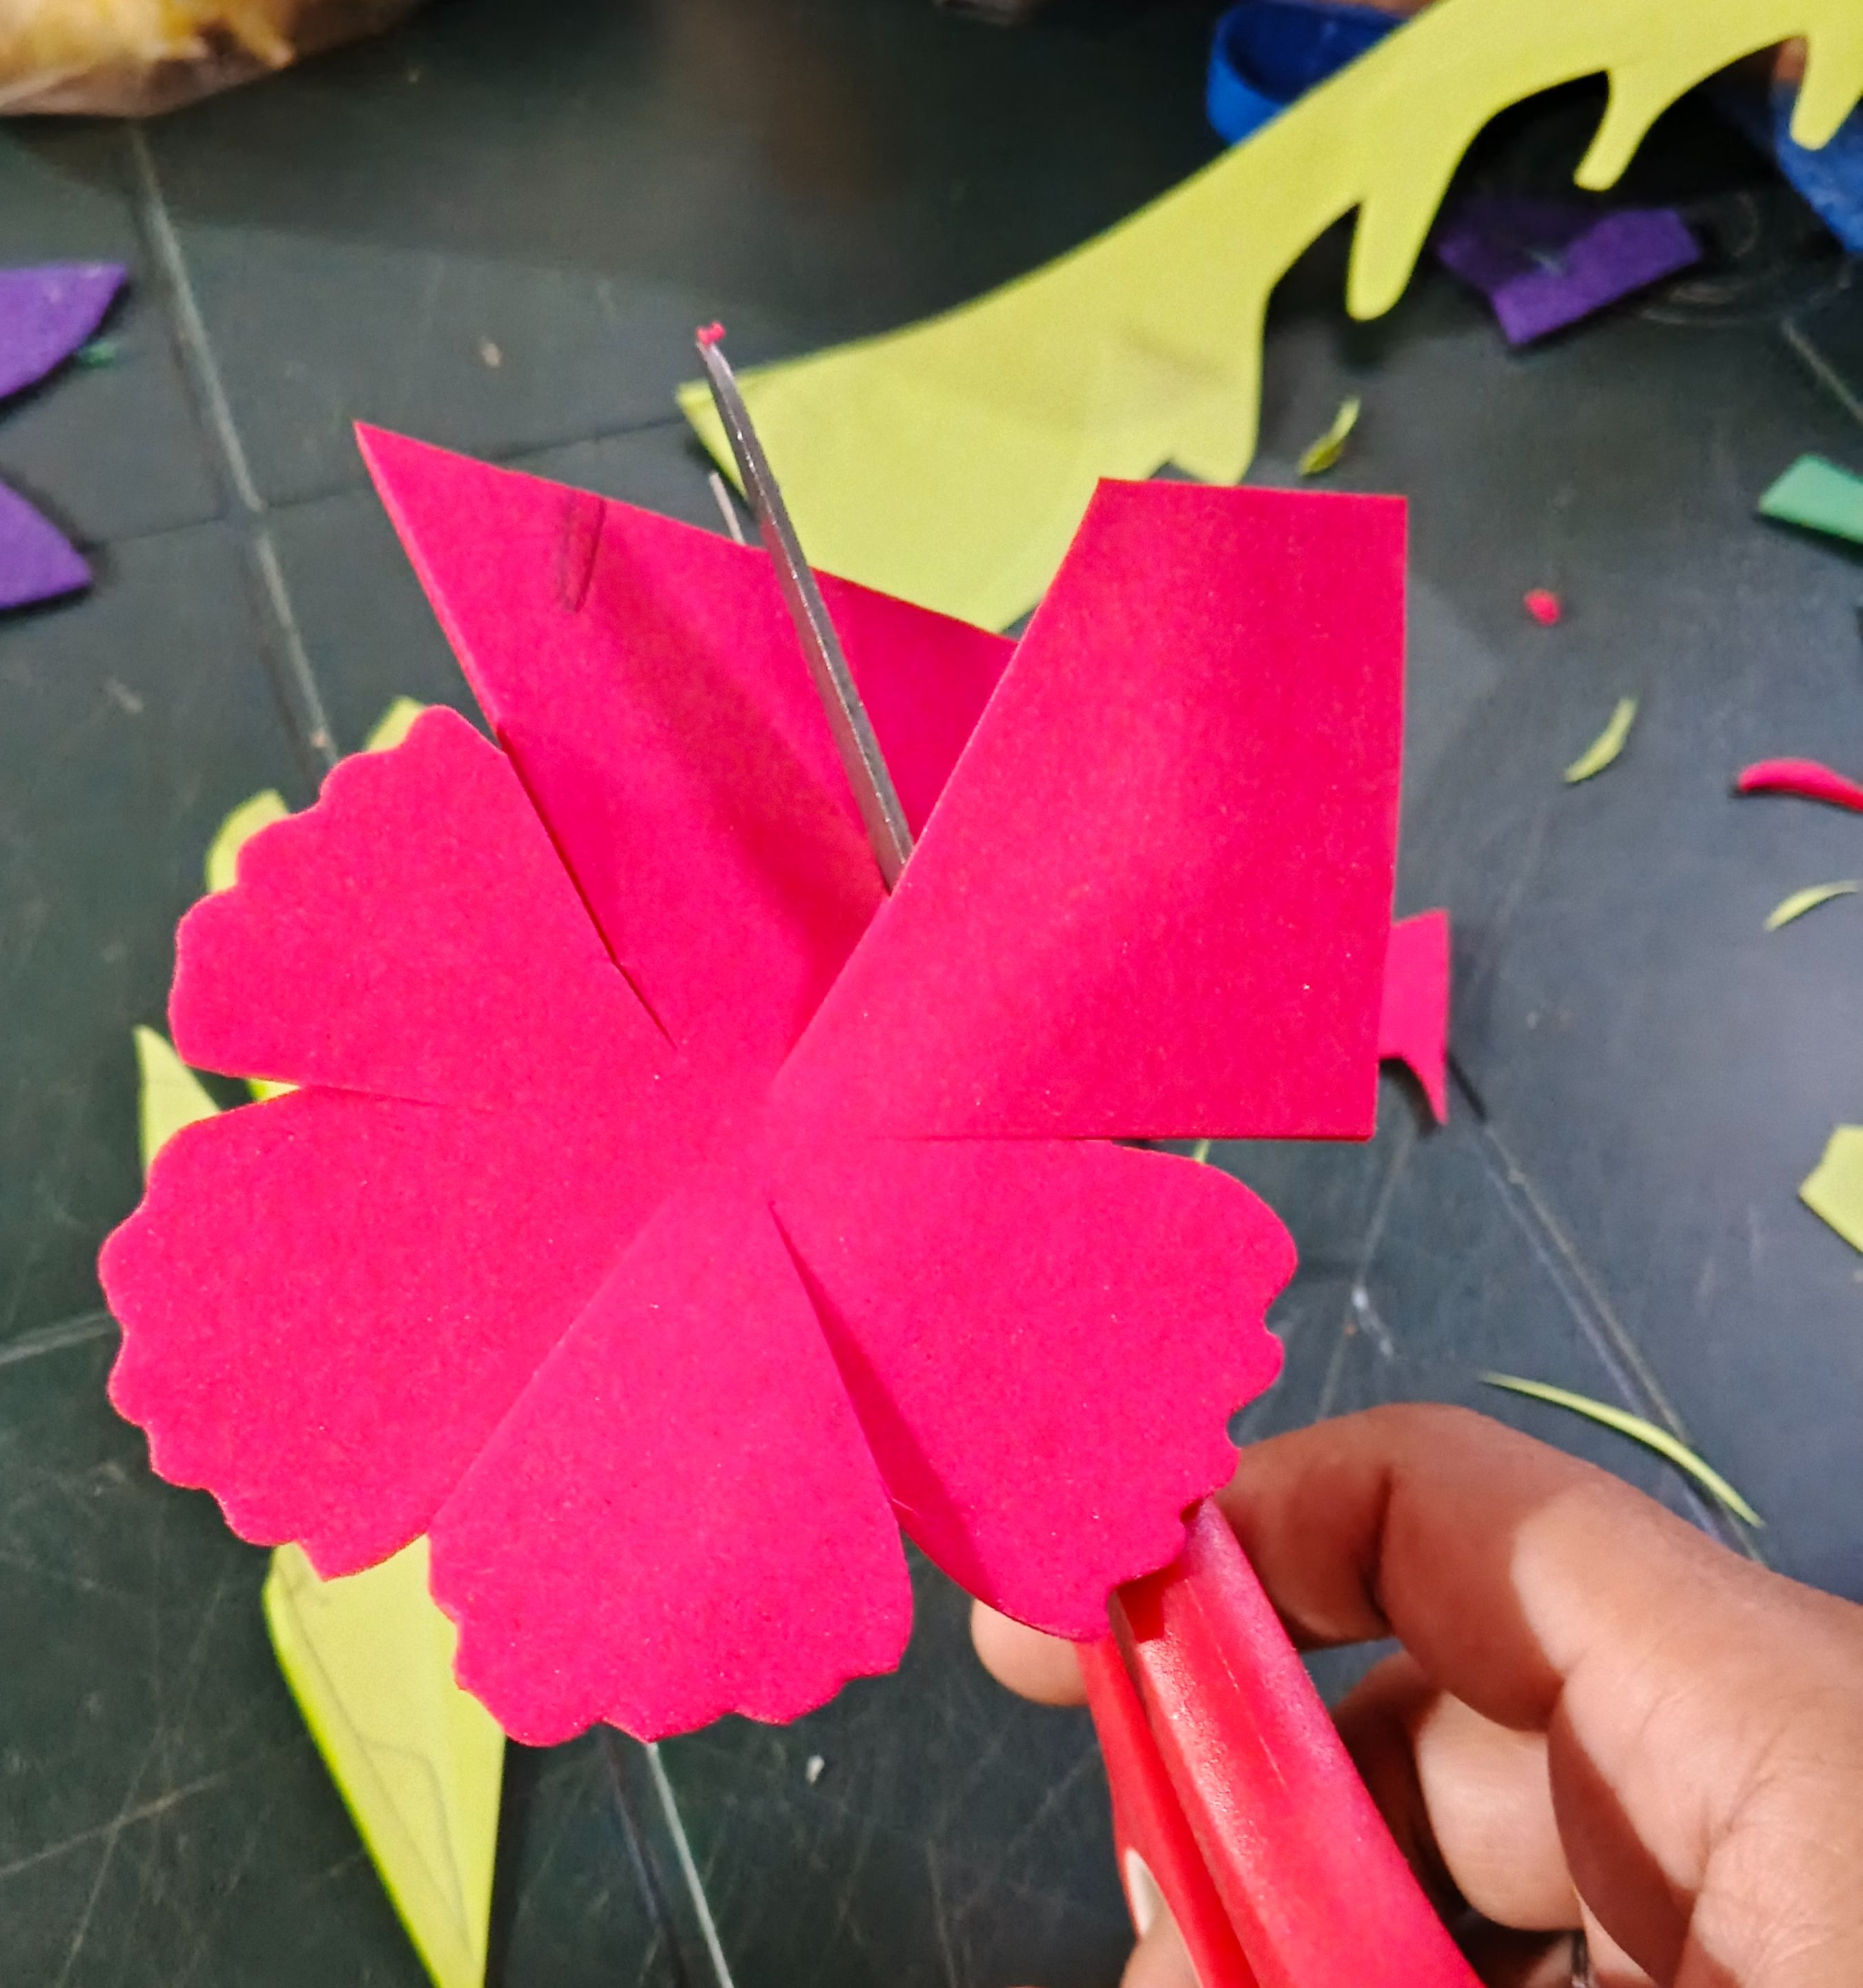
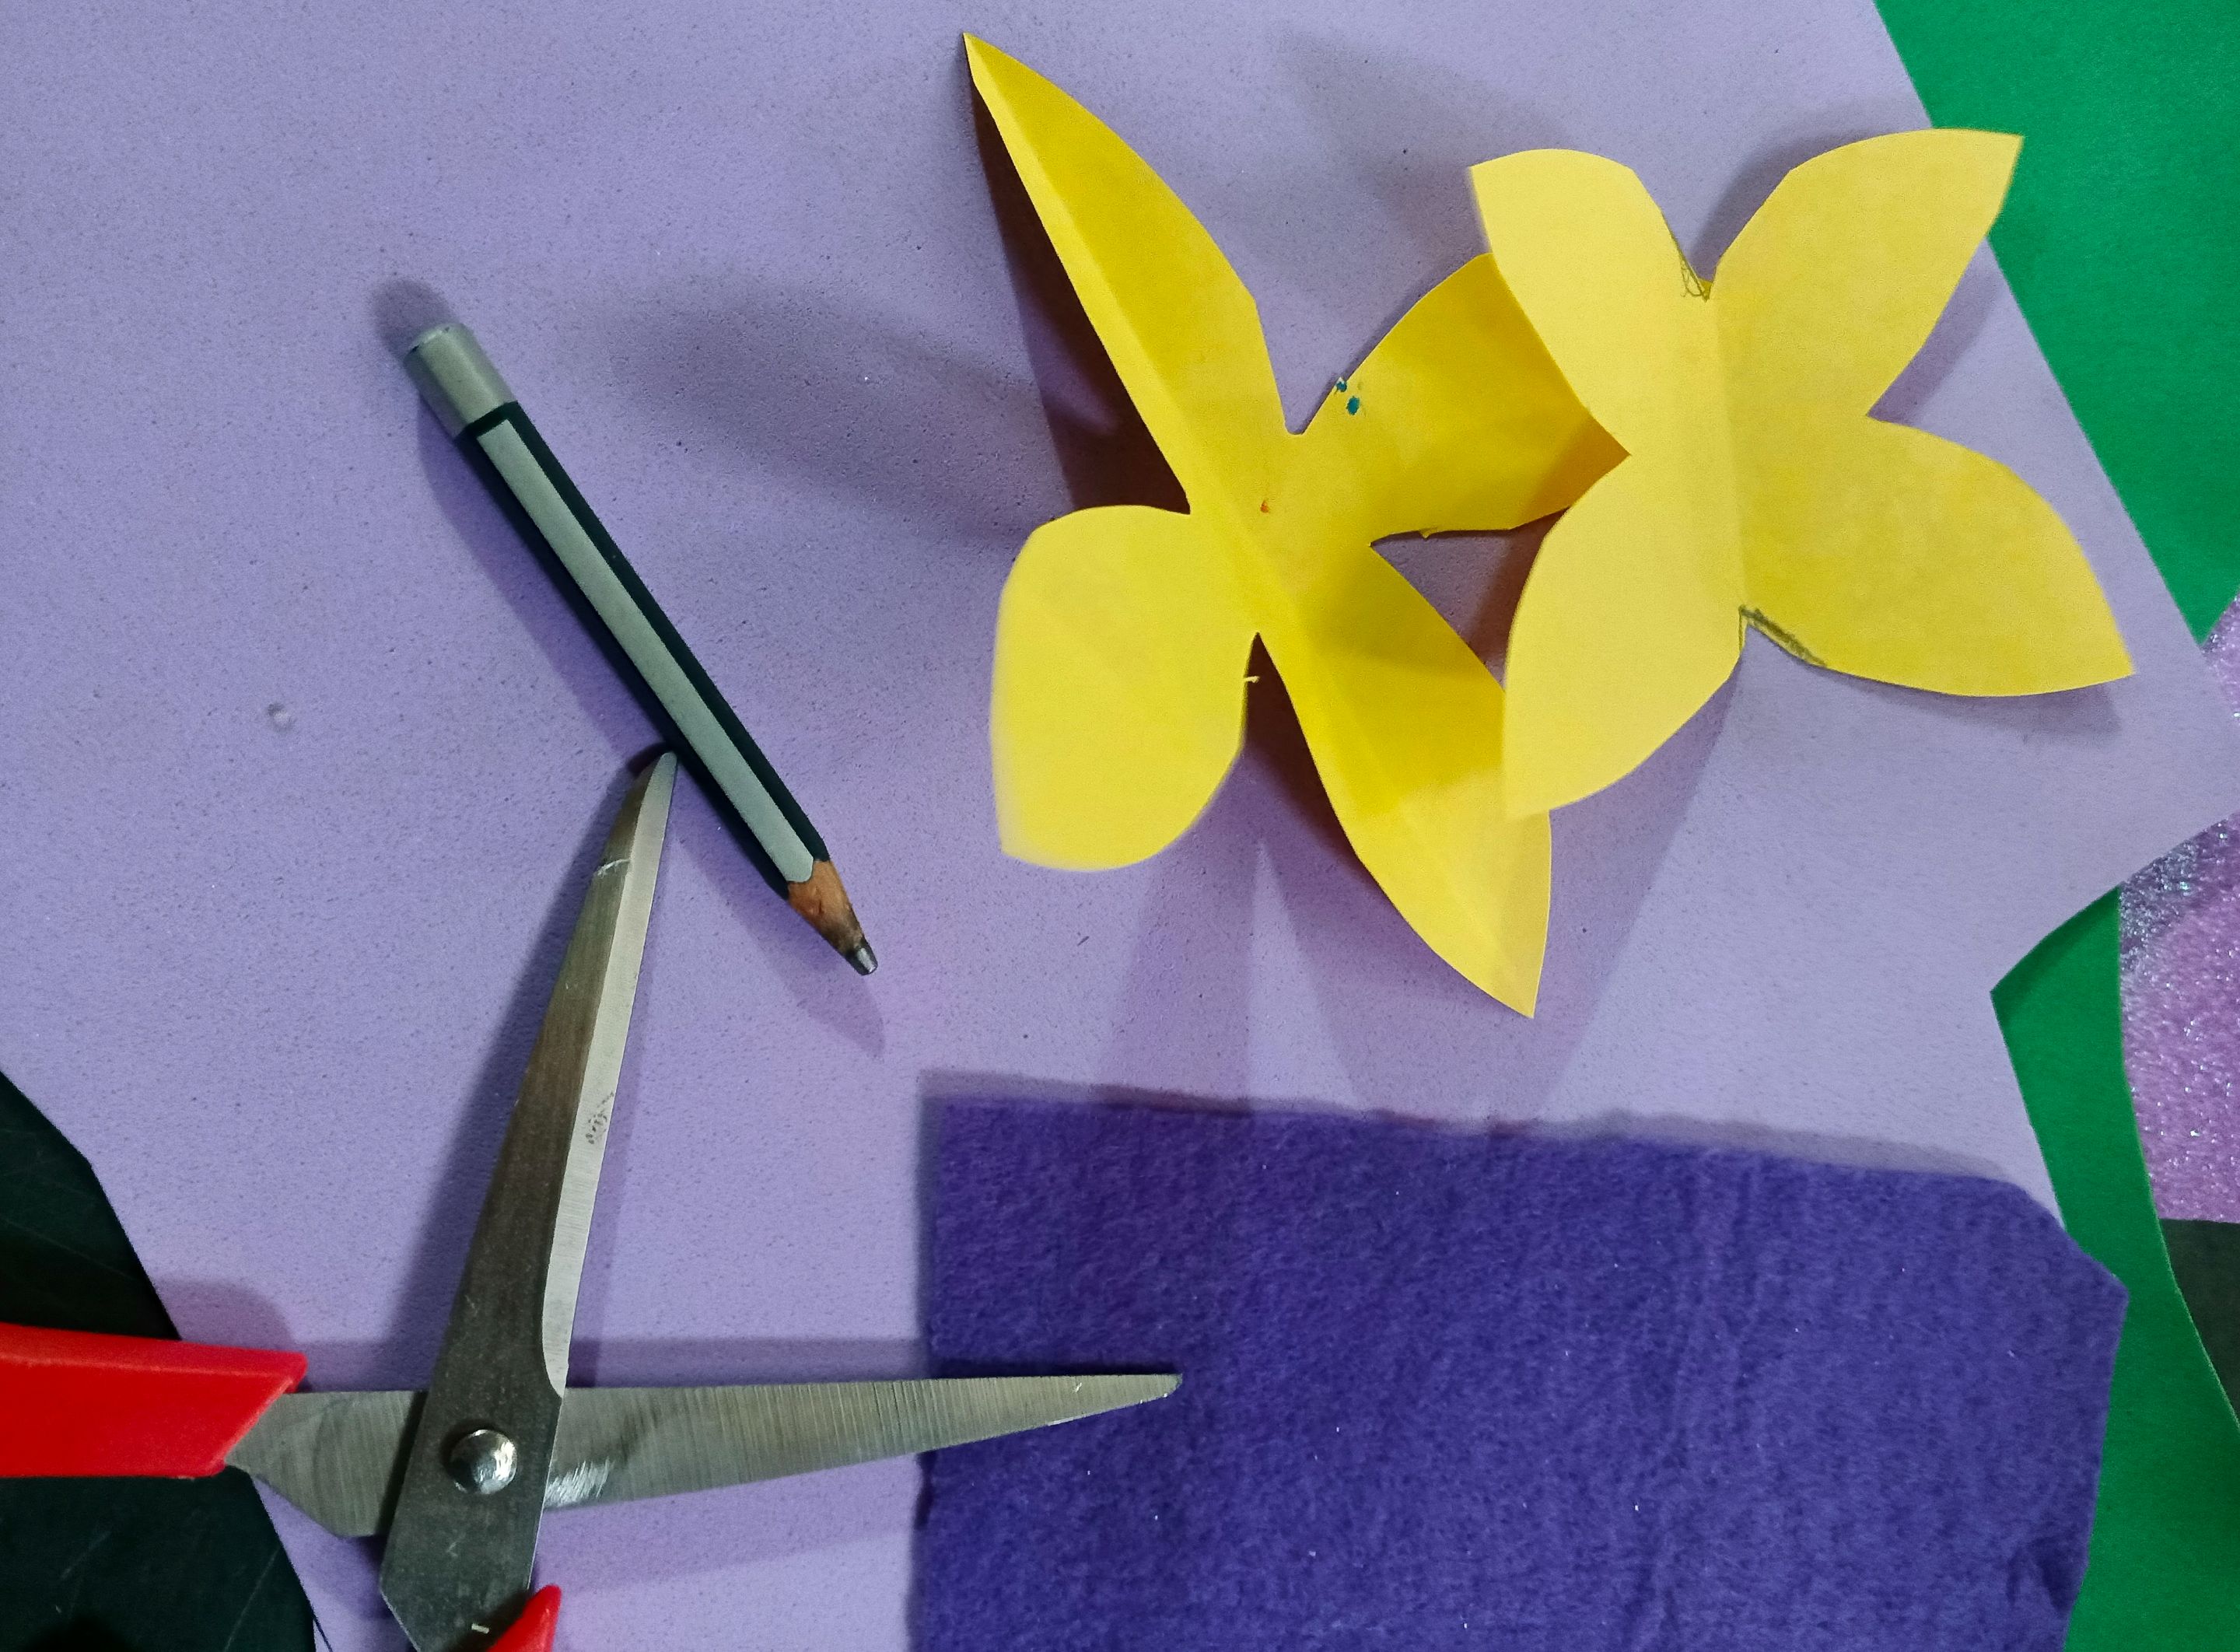
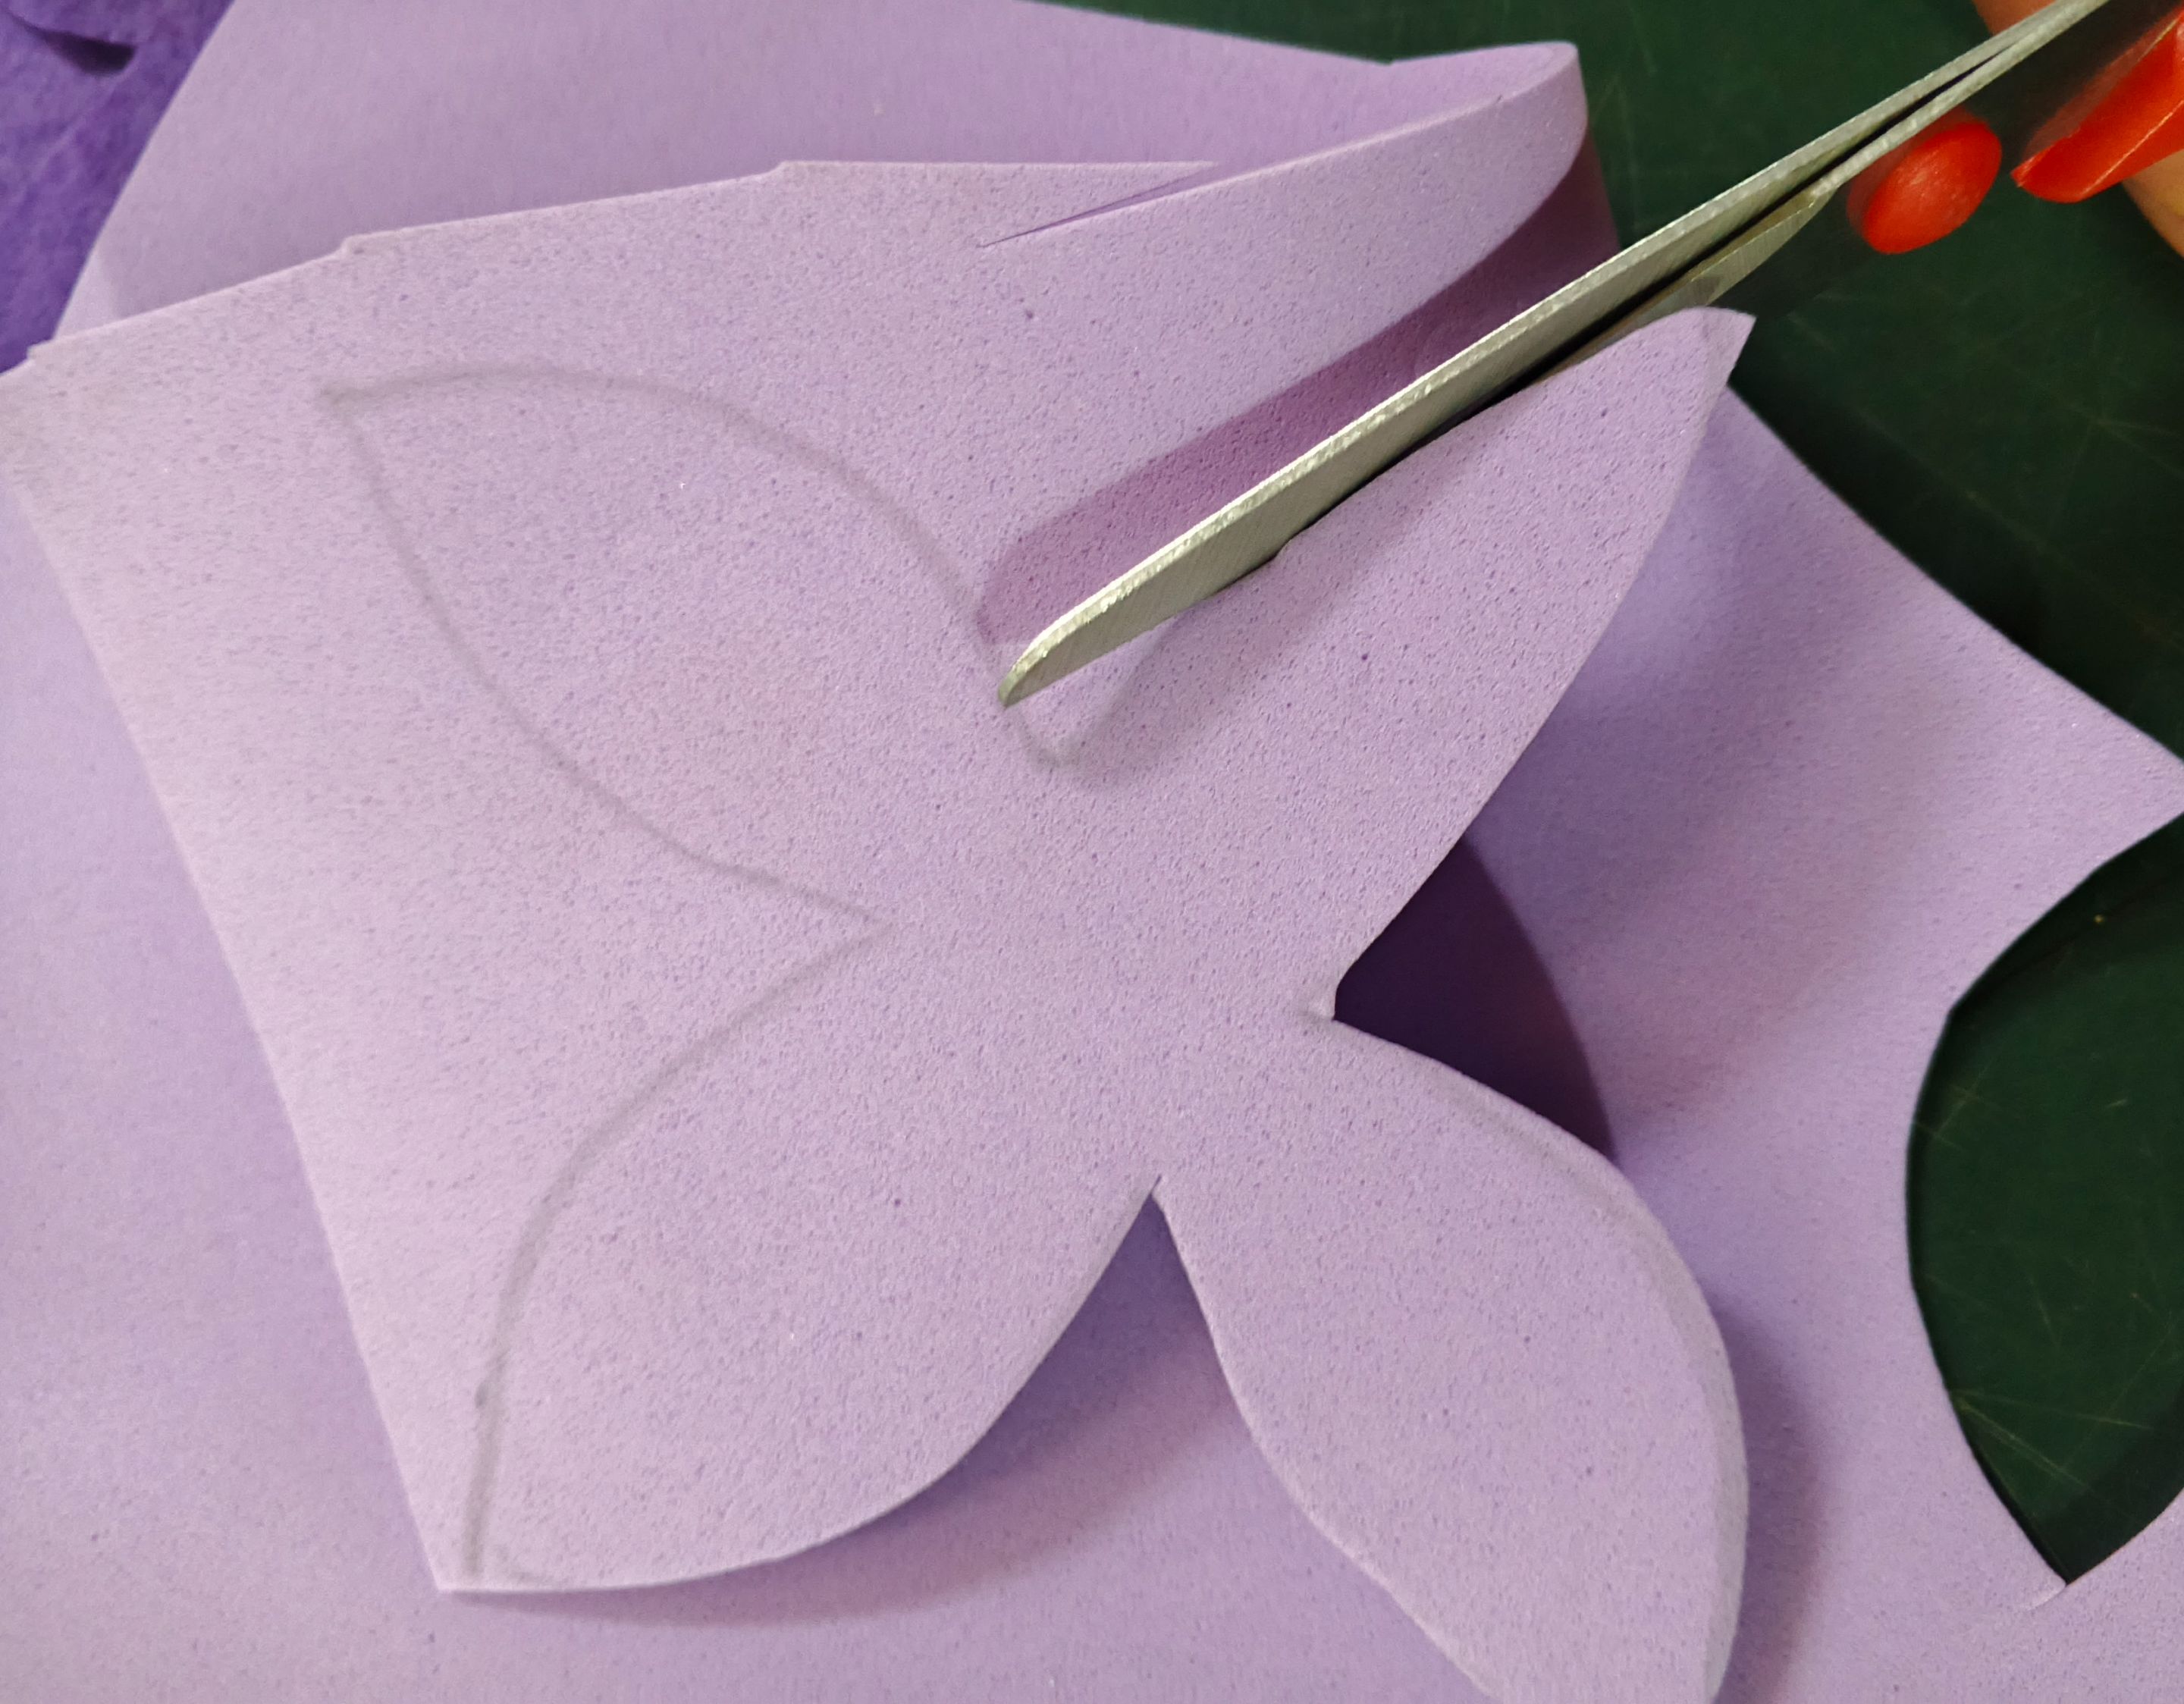
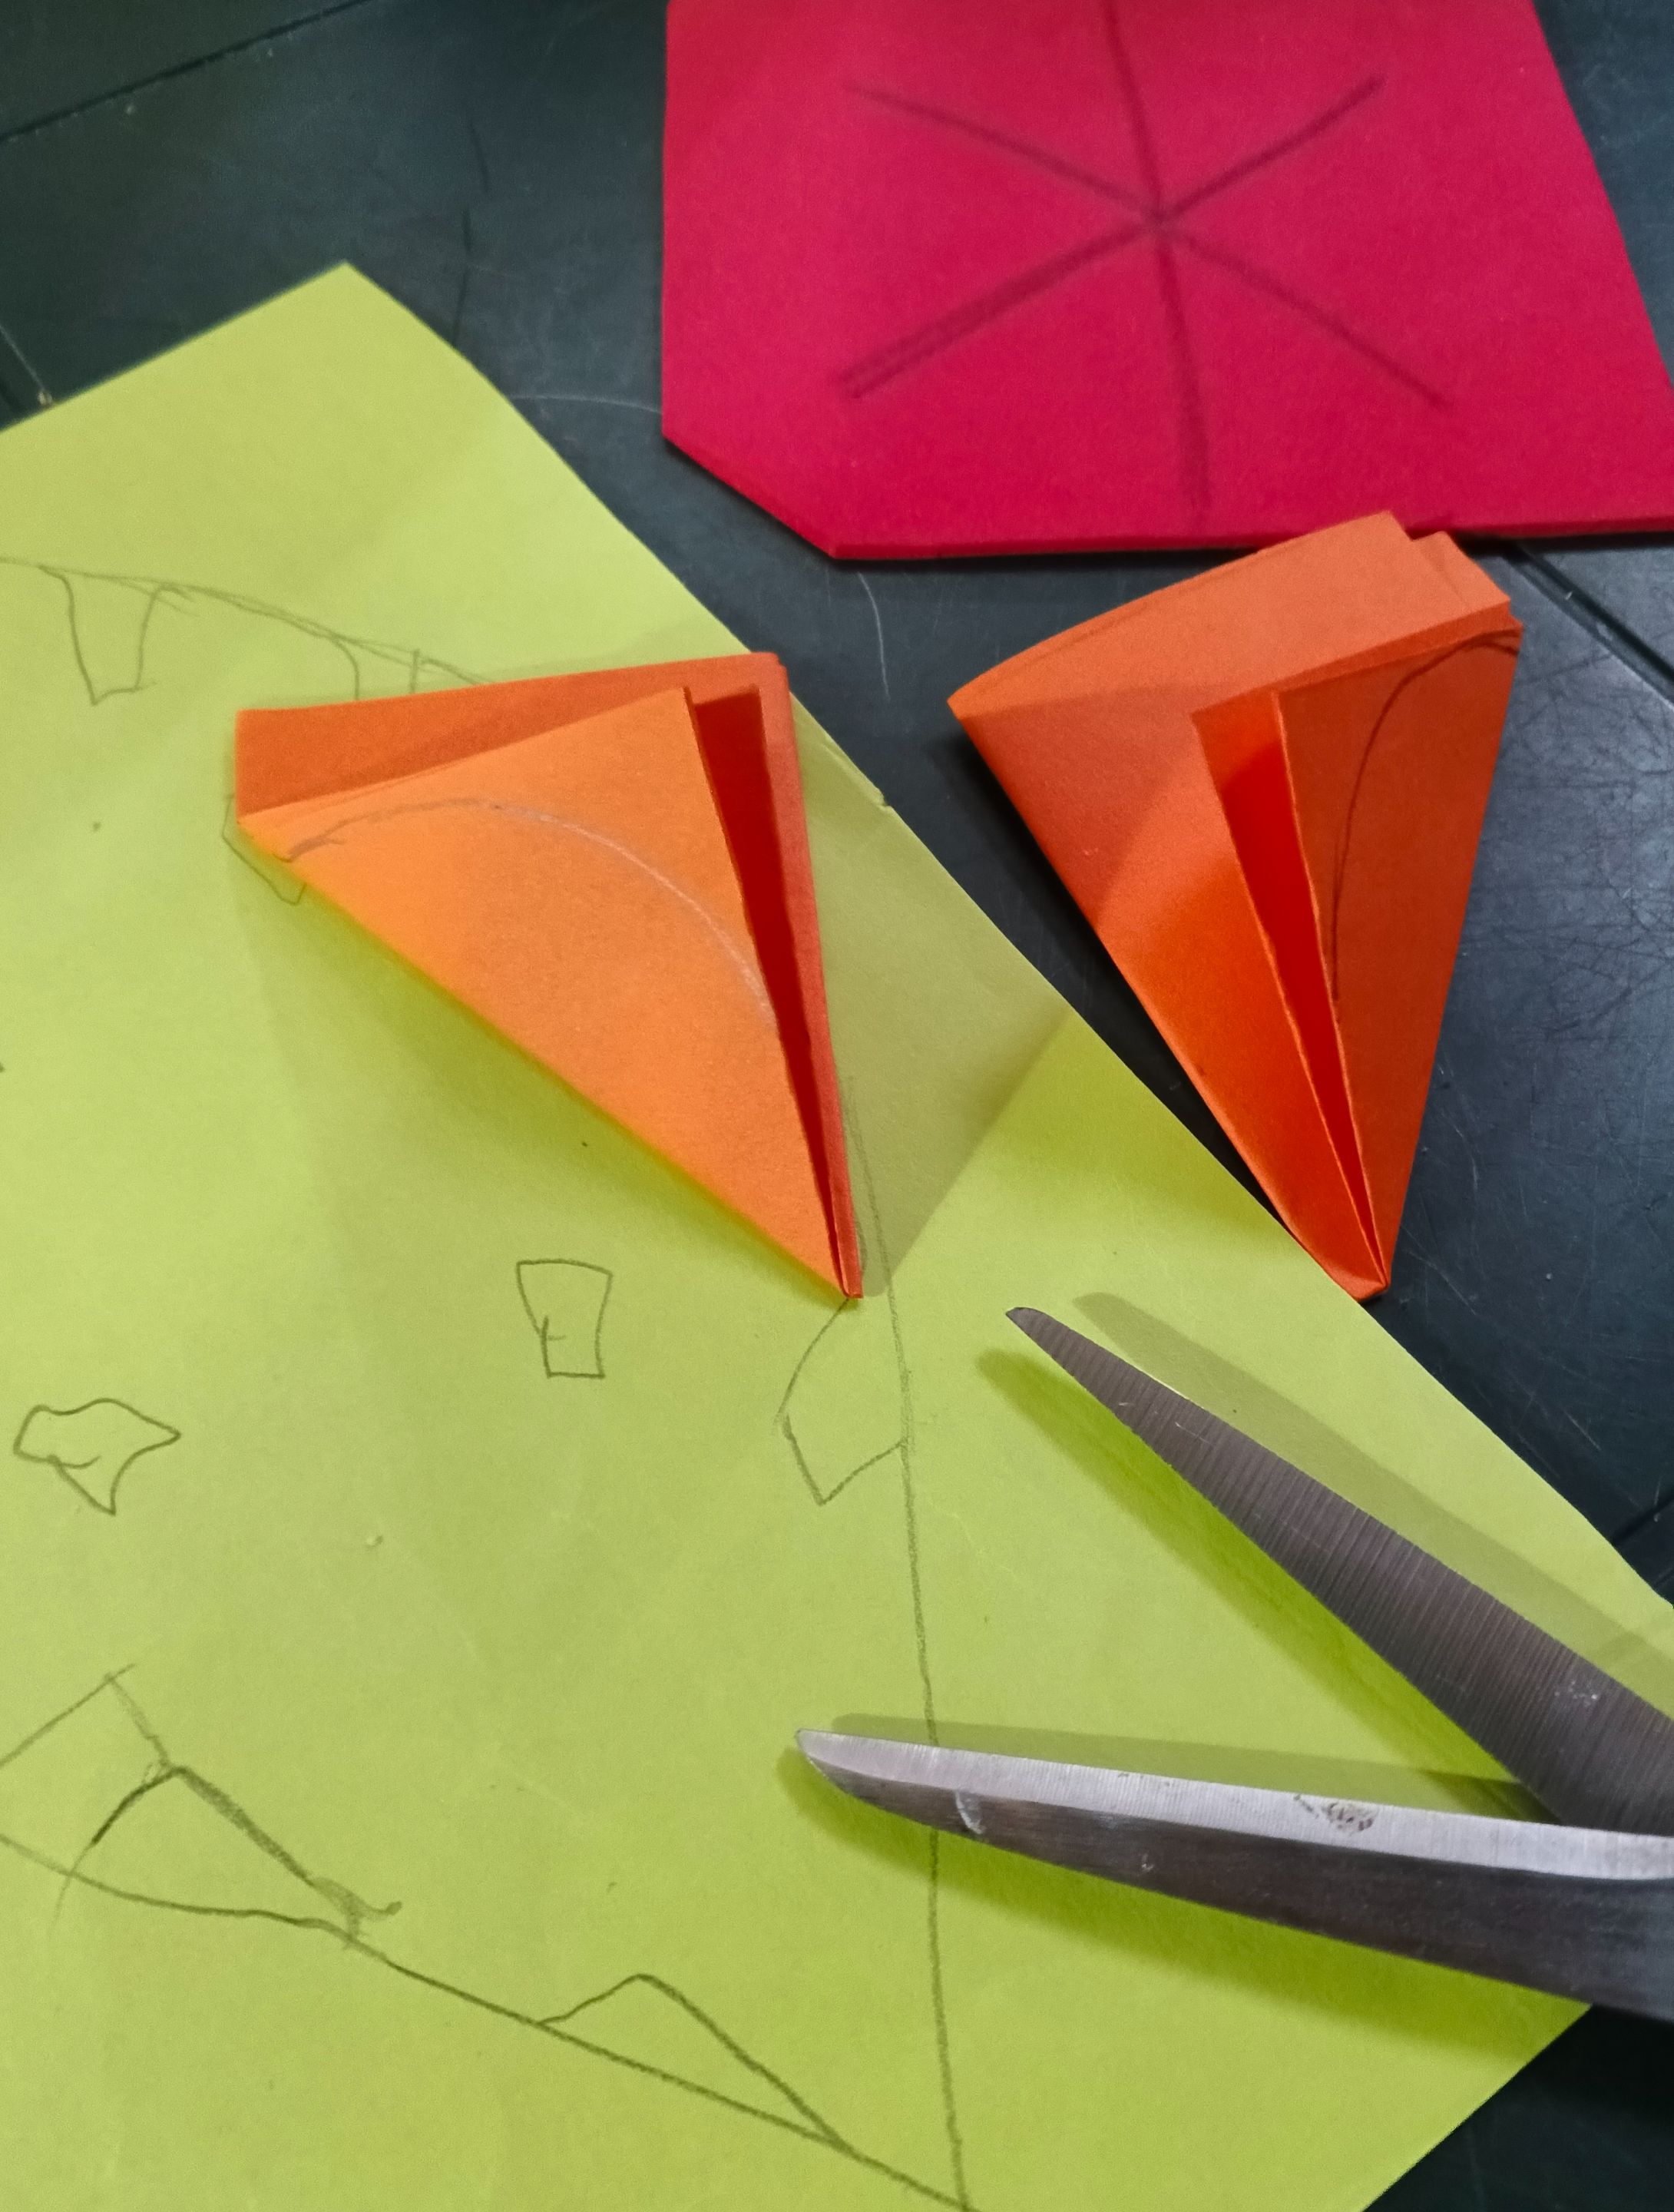
After making the flowers, I went to get the colored paper and foam to make the flowers. I already had a template for a purple orchid, so what I did was mark and cut. Then, to make the rest of the flowers, I used some line techniques. For the orange flowers, I used a technique of folding leaves into parts, creating a simple 4-petal flower. By joining two petals, I created an 8-petal orange flower.
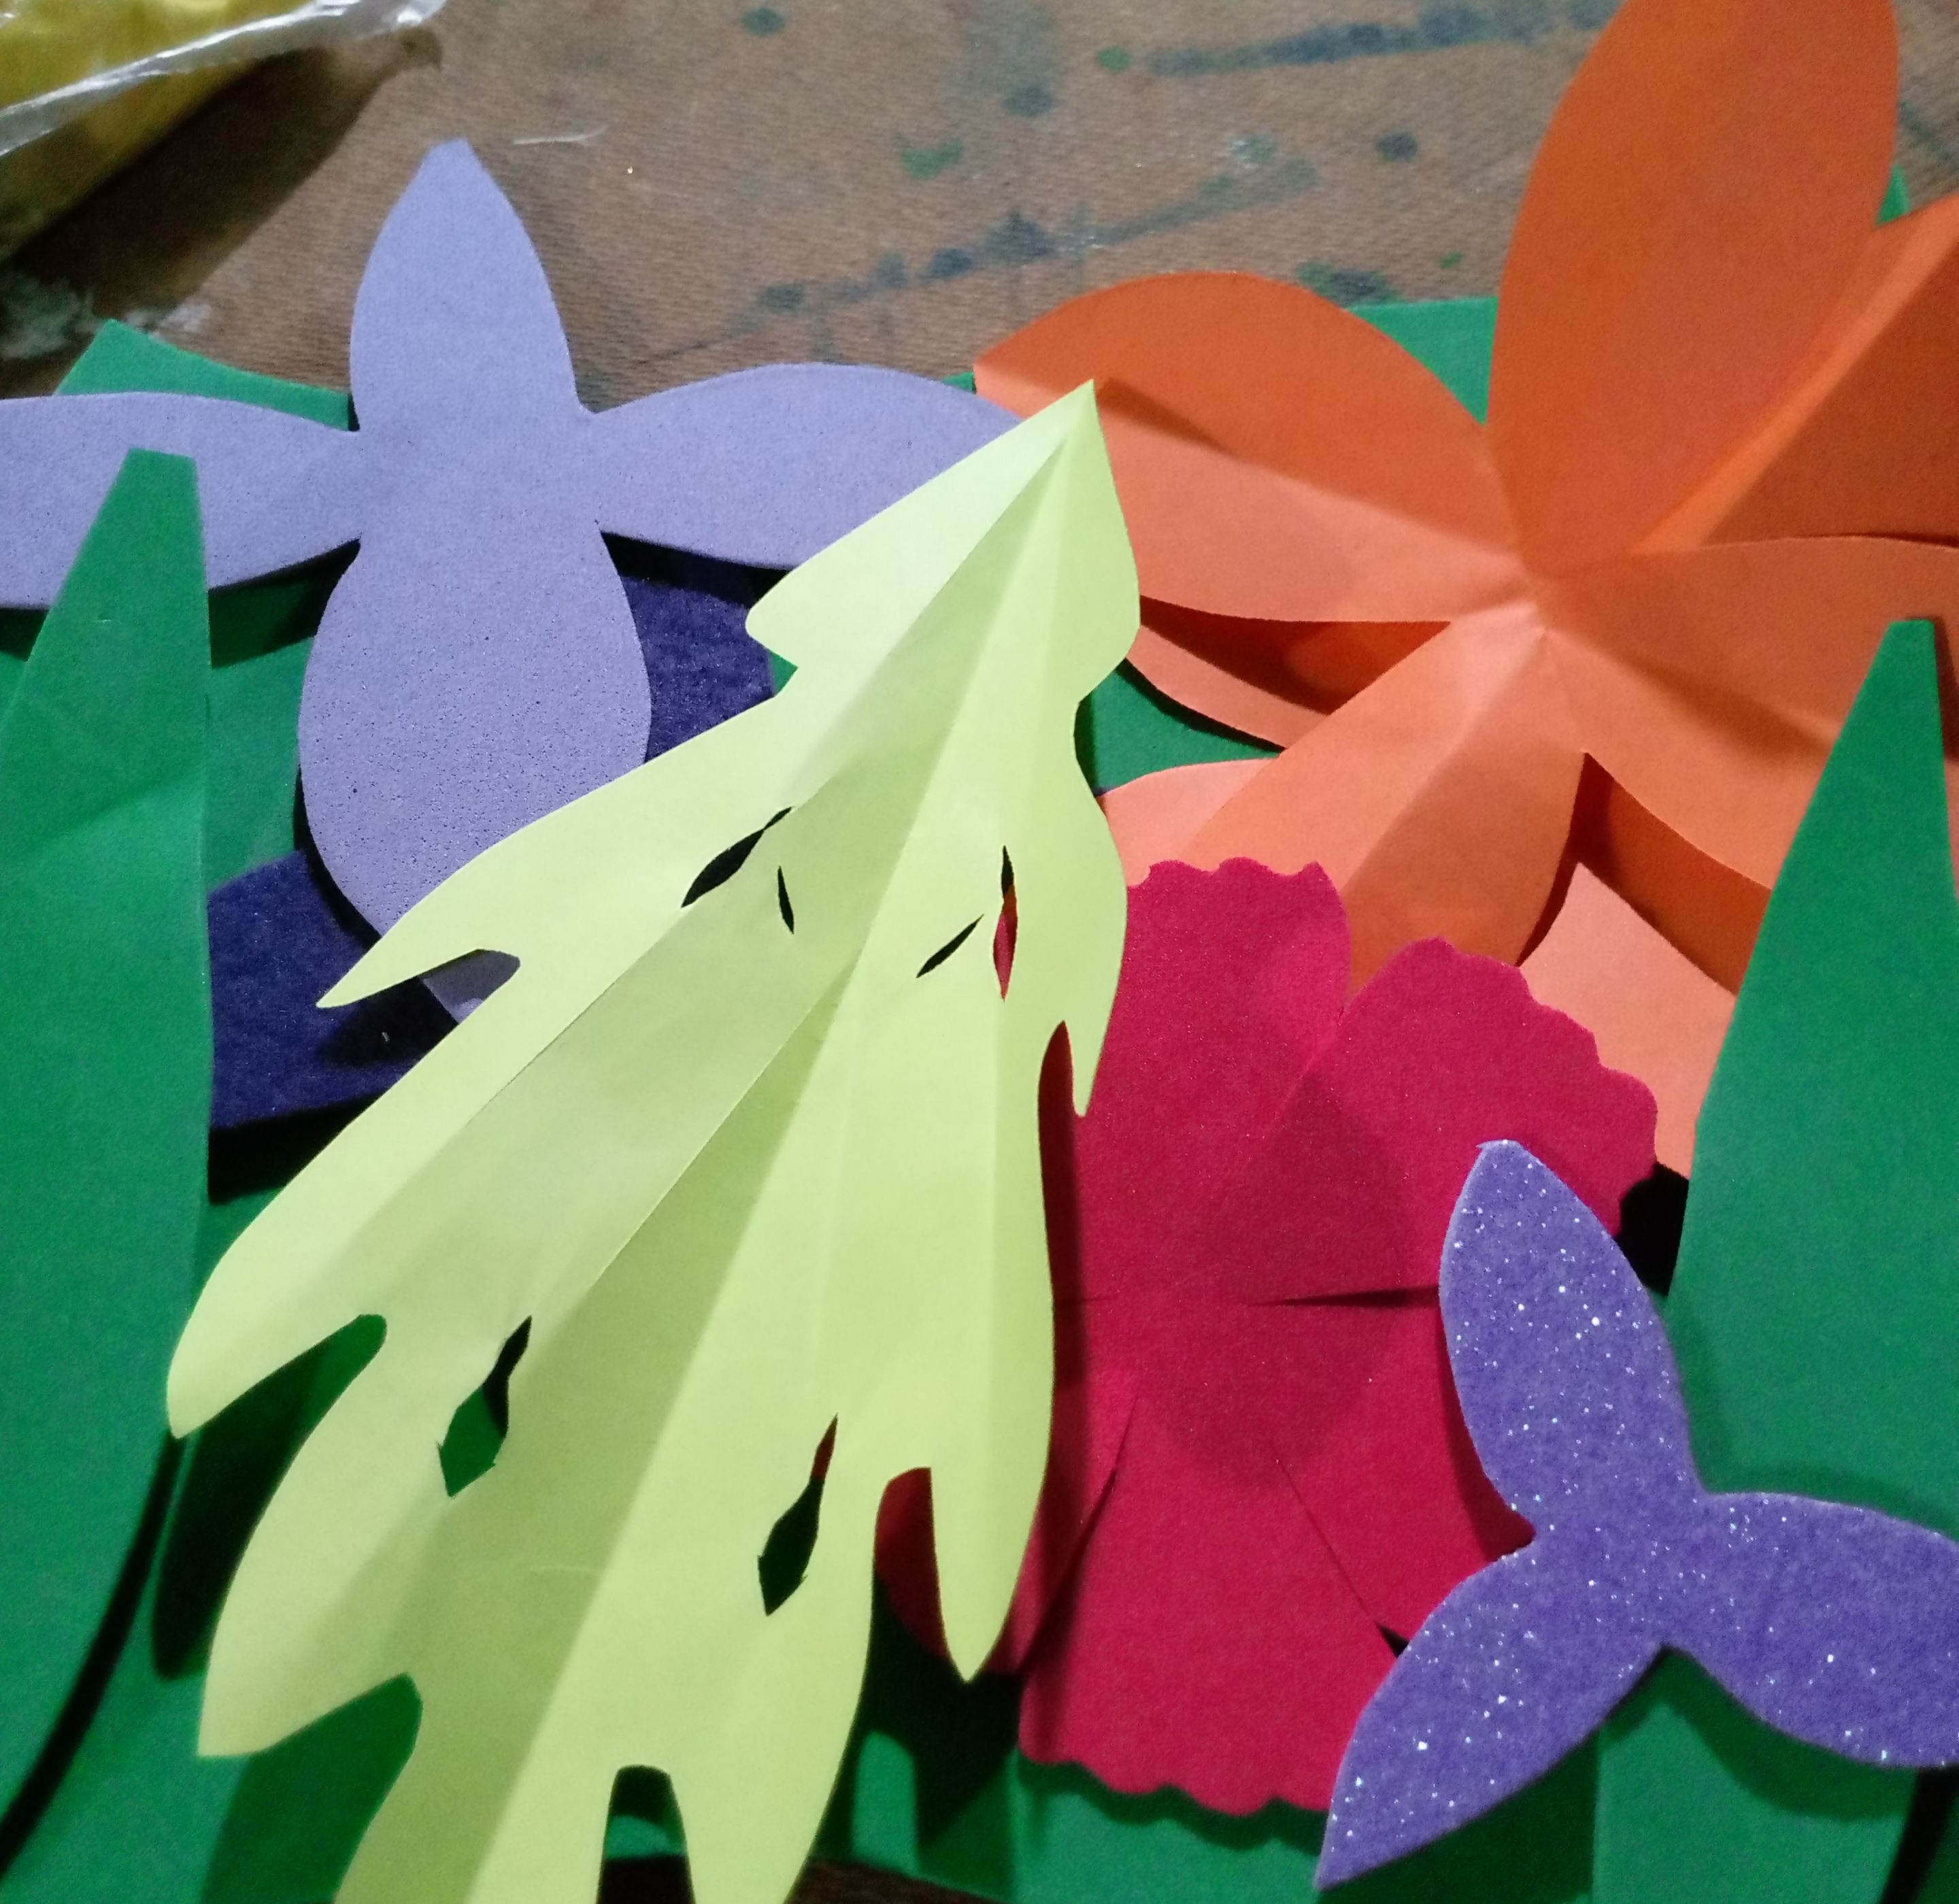
I continued cutting the foam flowers, some paper leaves, and others from green foam.
> Luego de hacer las flores me fui a tomar el papel de colores y el foami para hacer las flores, ya tenía un molde para hacer una orquídea morada y lo que hice fue marcar y cortar, luego para hacer el resto de las flores utilice unas técnicas de líneas, y las flores naranja la técnica de doblar en partes uno cuando de hojas para que me resultara una flor sencilla de 4 pétalos que uniendo 2 salió una flor de 8 pétalos de color anaranjado.
Continúe cortando las flores de foami, y algunas hojas de papel y otras de foami verde.
 |
| |-|-
|-|-
 |
|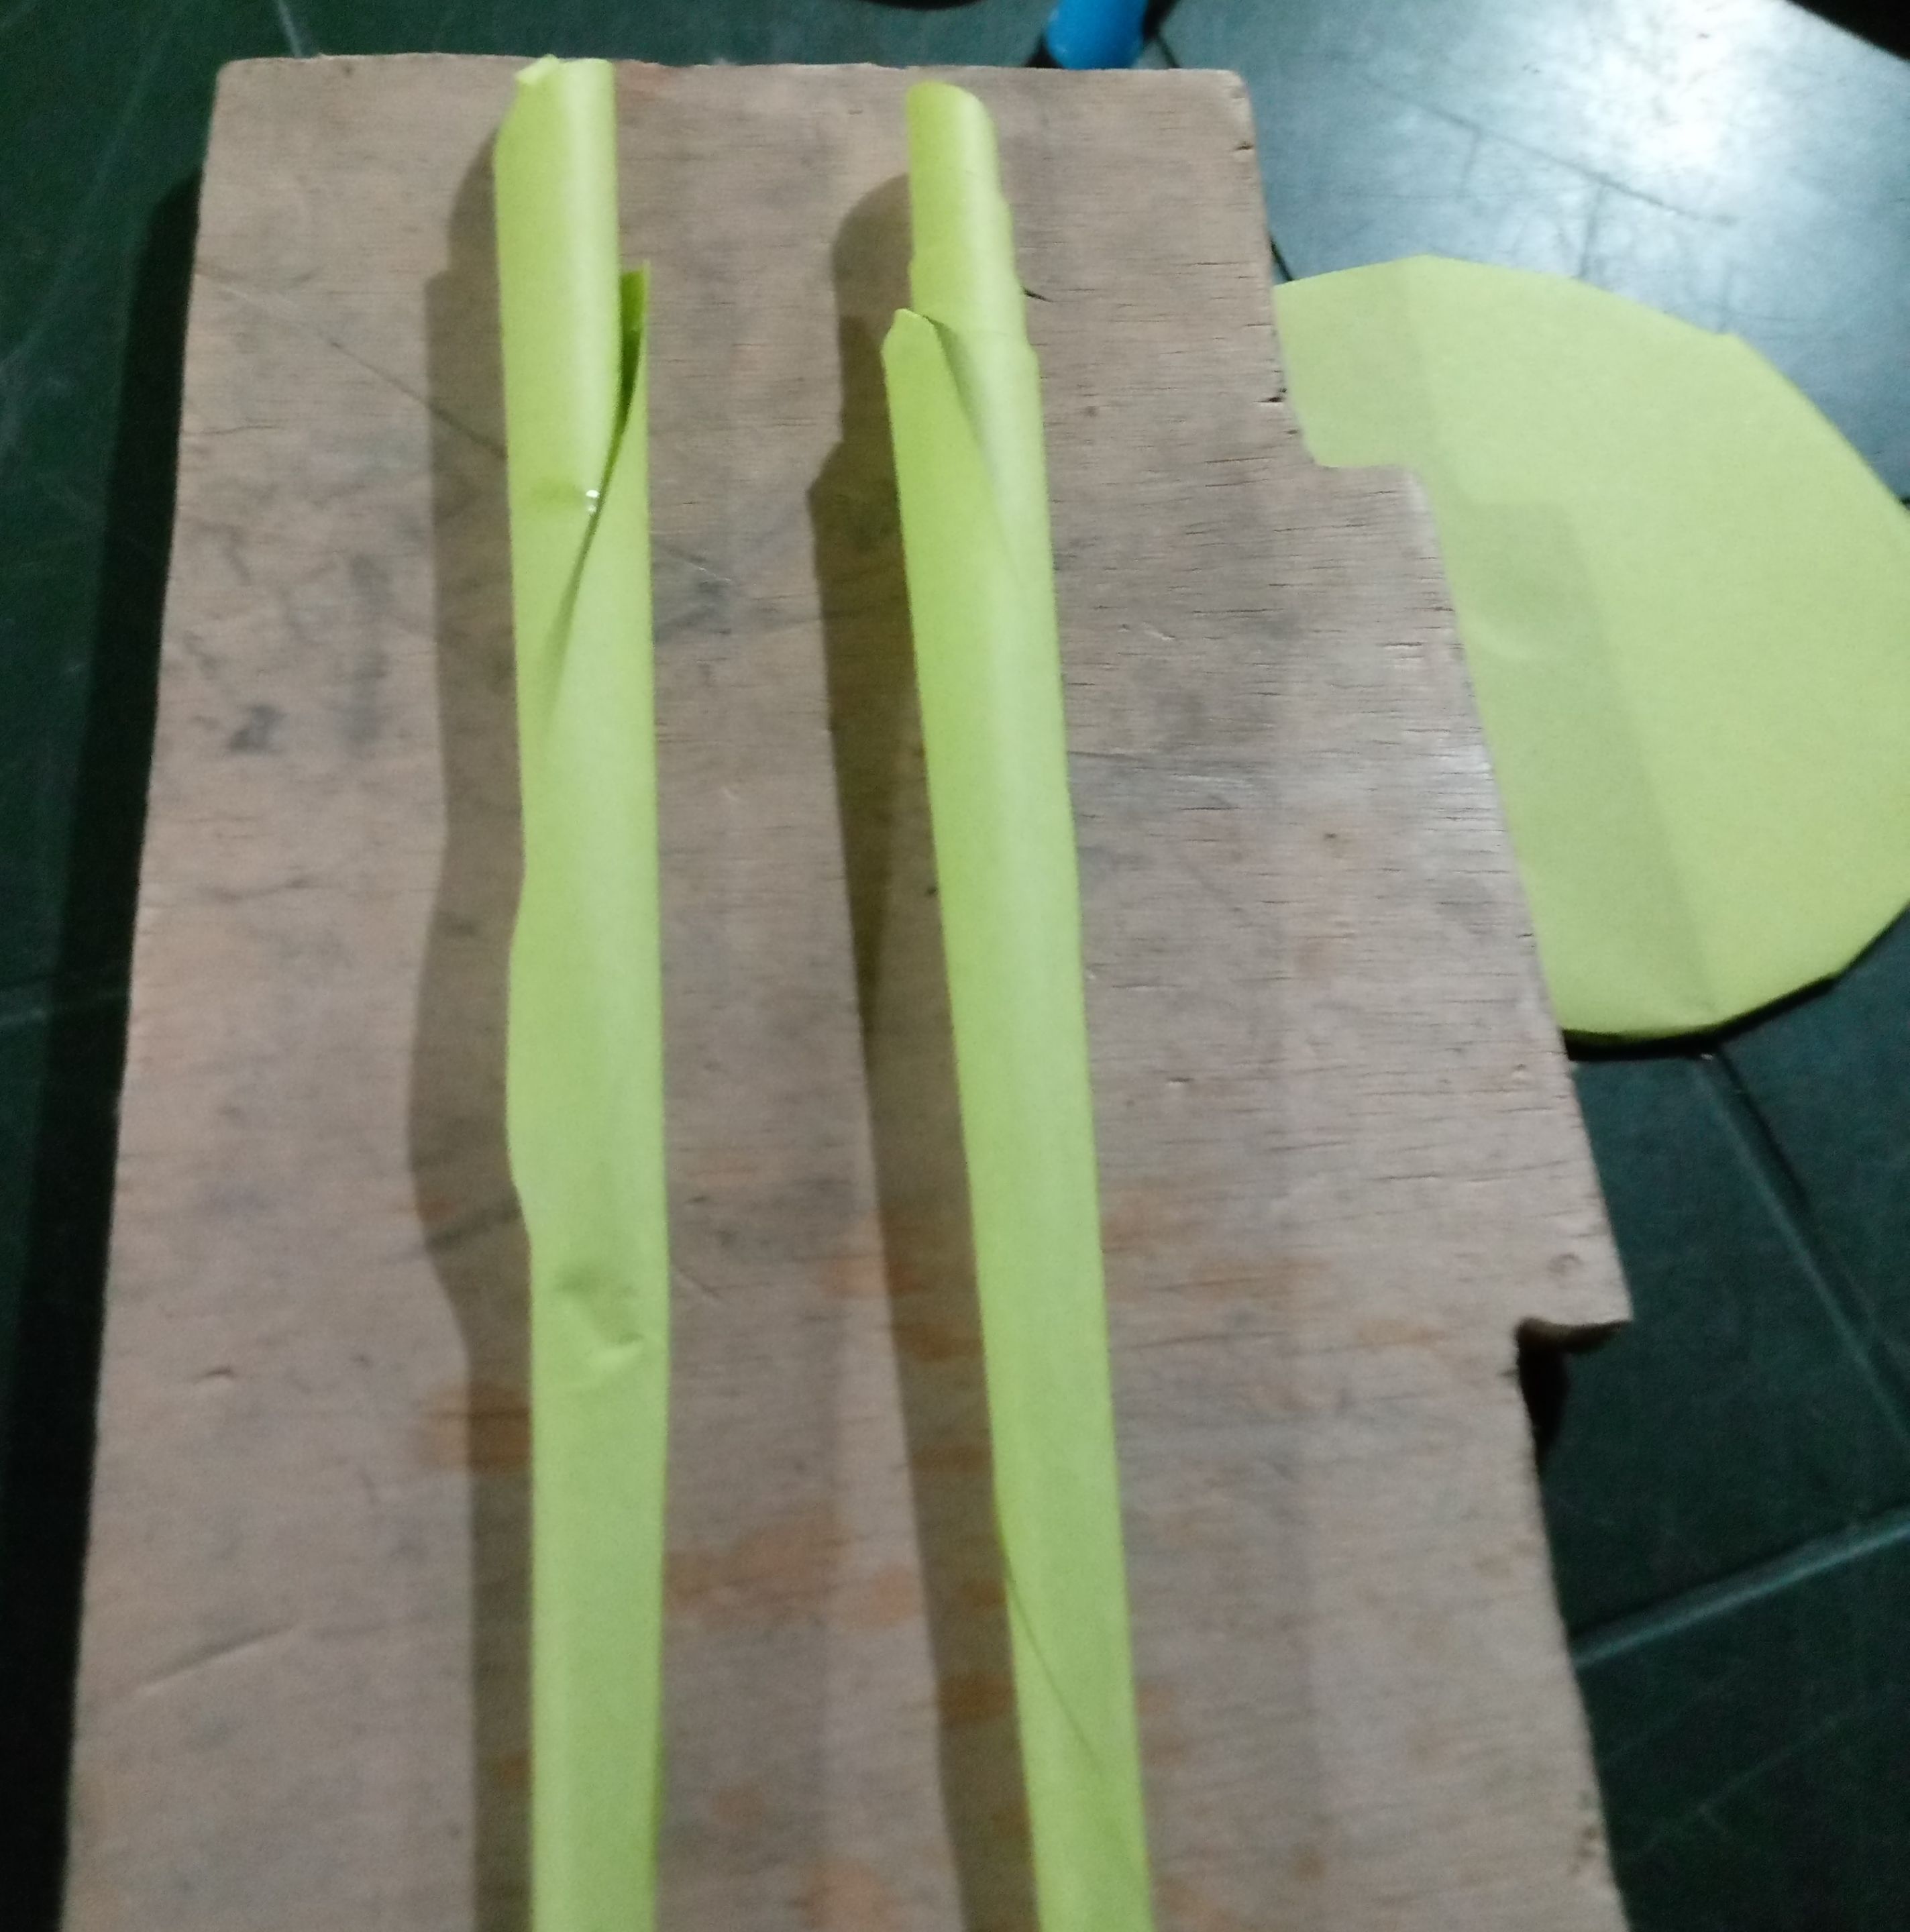
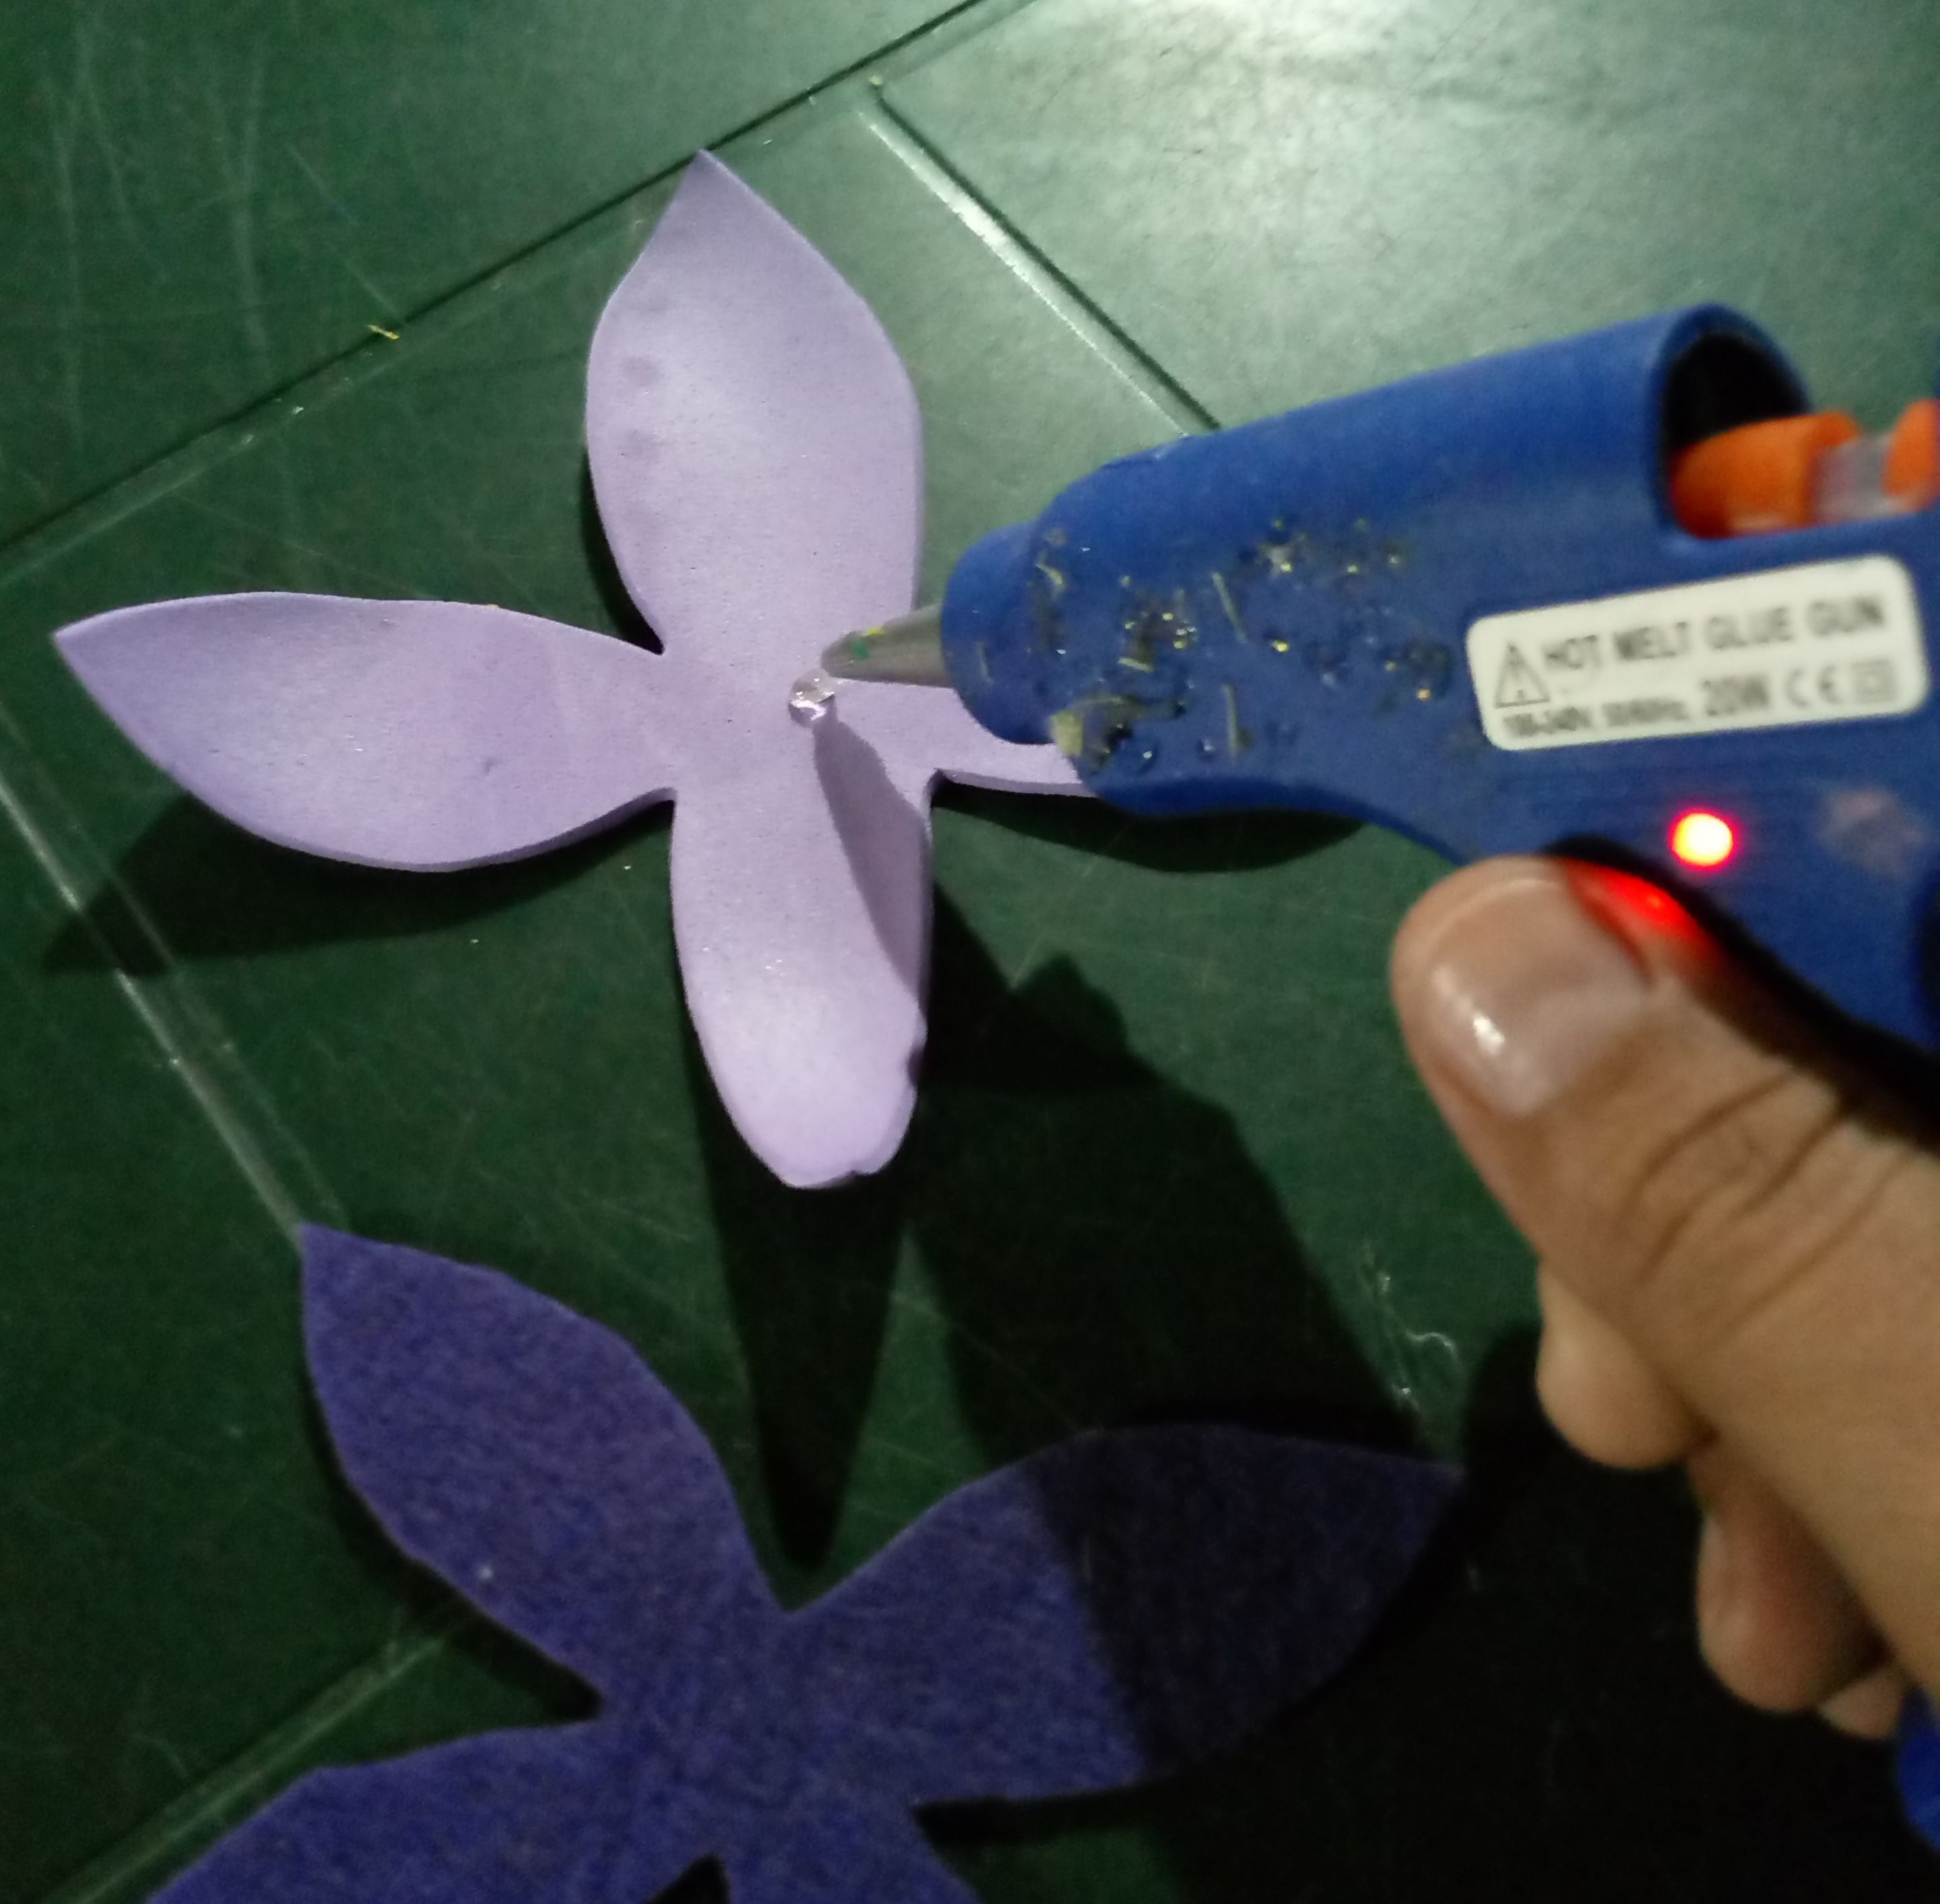
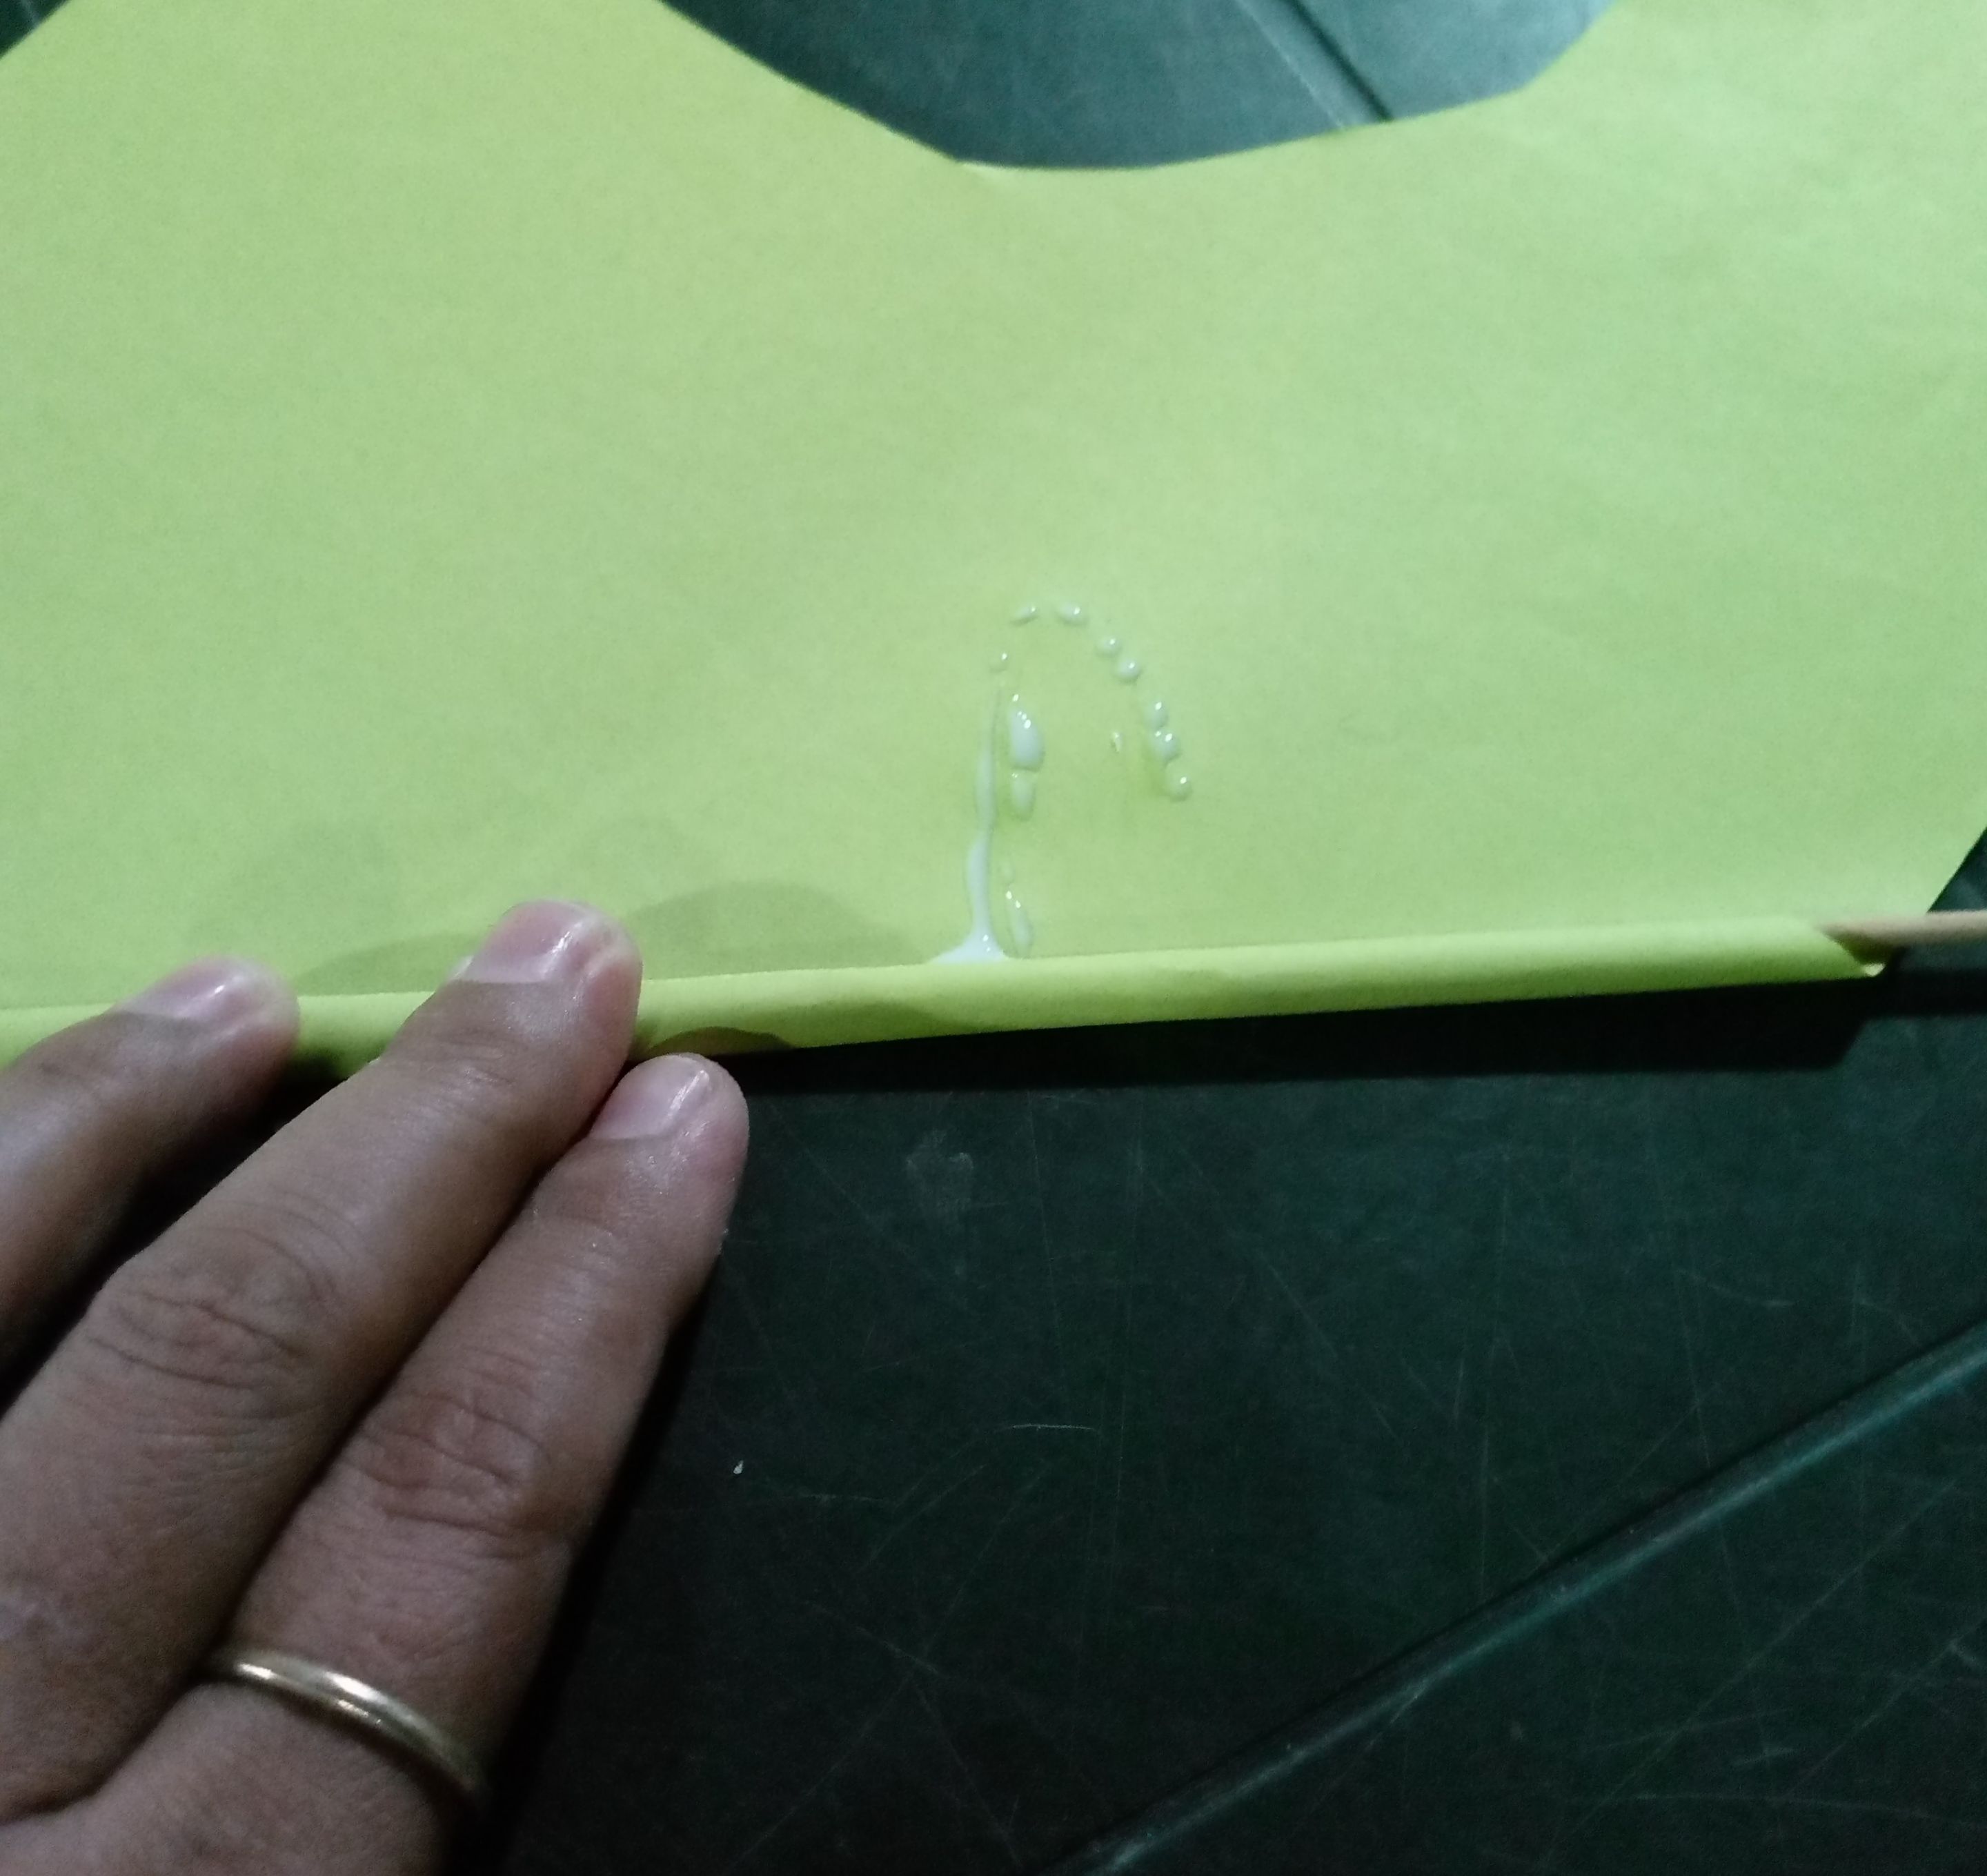
Glue the flower petals with silicone, shaping each one. Then, with the skewer, make some green sticks where you will place the flowers and leaves. In addition, cover the CDI with green paper, as this would be the base of this beautiful tropical pineapple ornament.
> Pegue los pétalos de las flores con silicona dándole forma a cada una, luego con el palo de brochetas realice unos palitos verdes donde coloque las flores y las hojas, además de esto forre el CDI con papel de color verde, ya que este sería la base de este bello adorno de piña tropical.
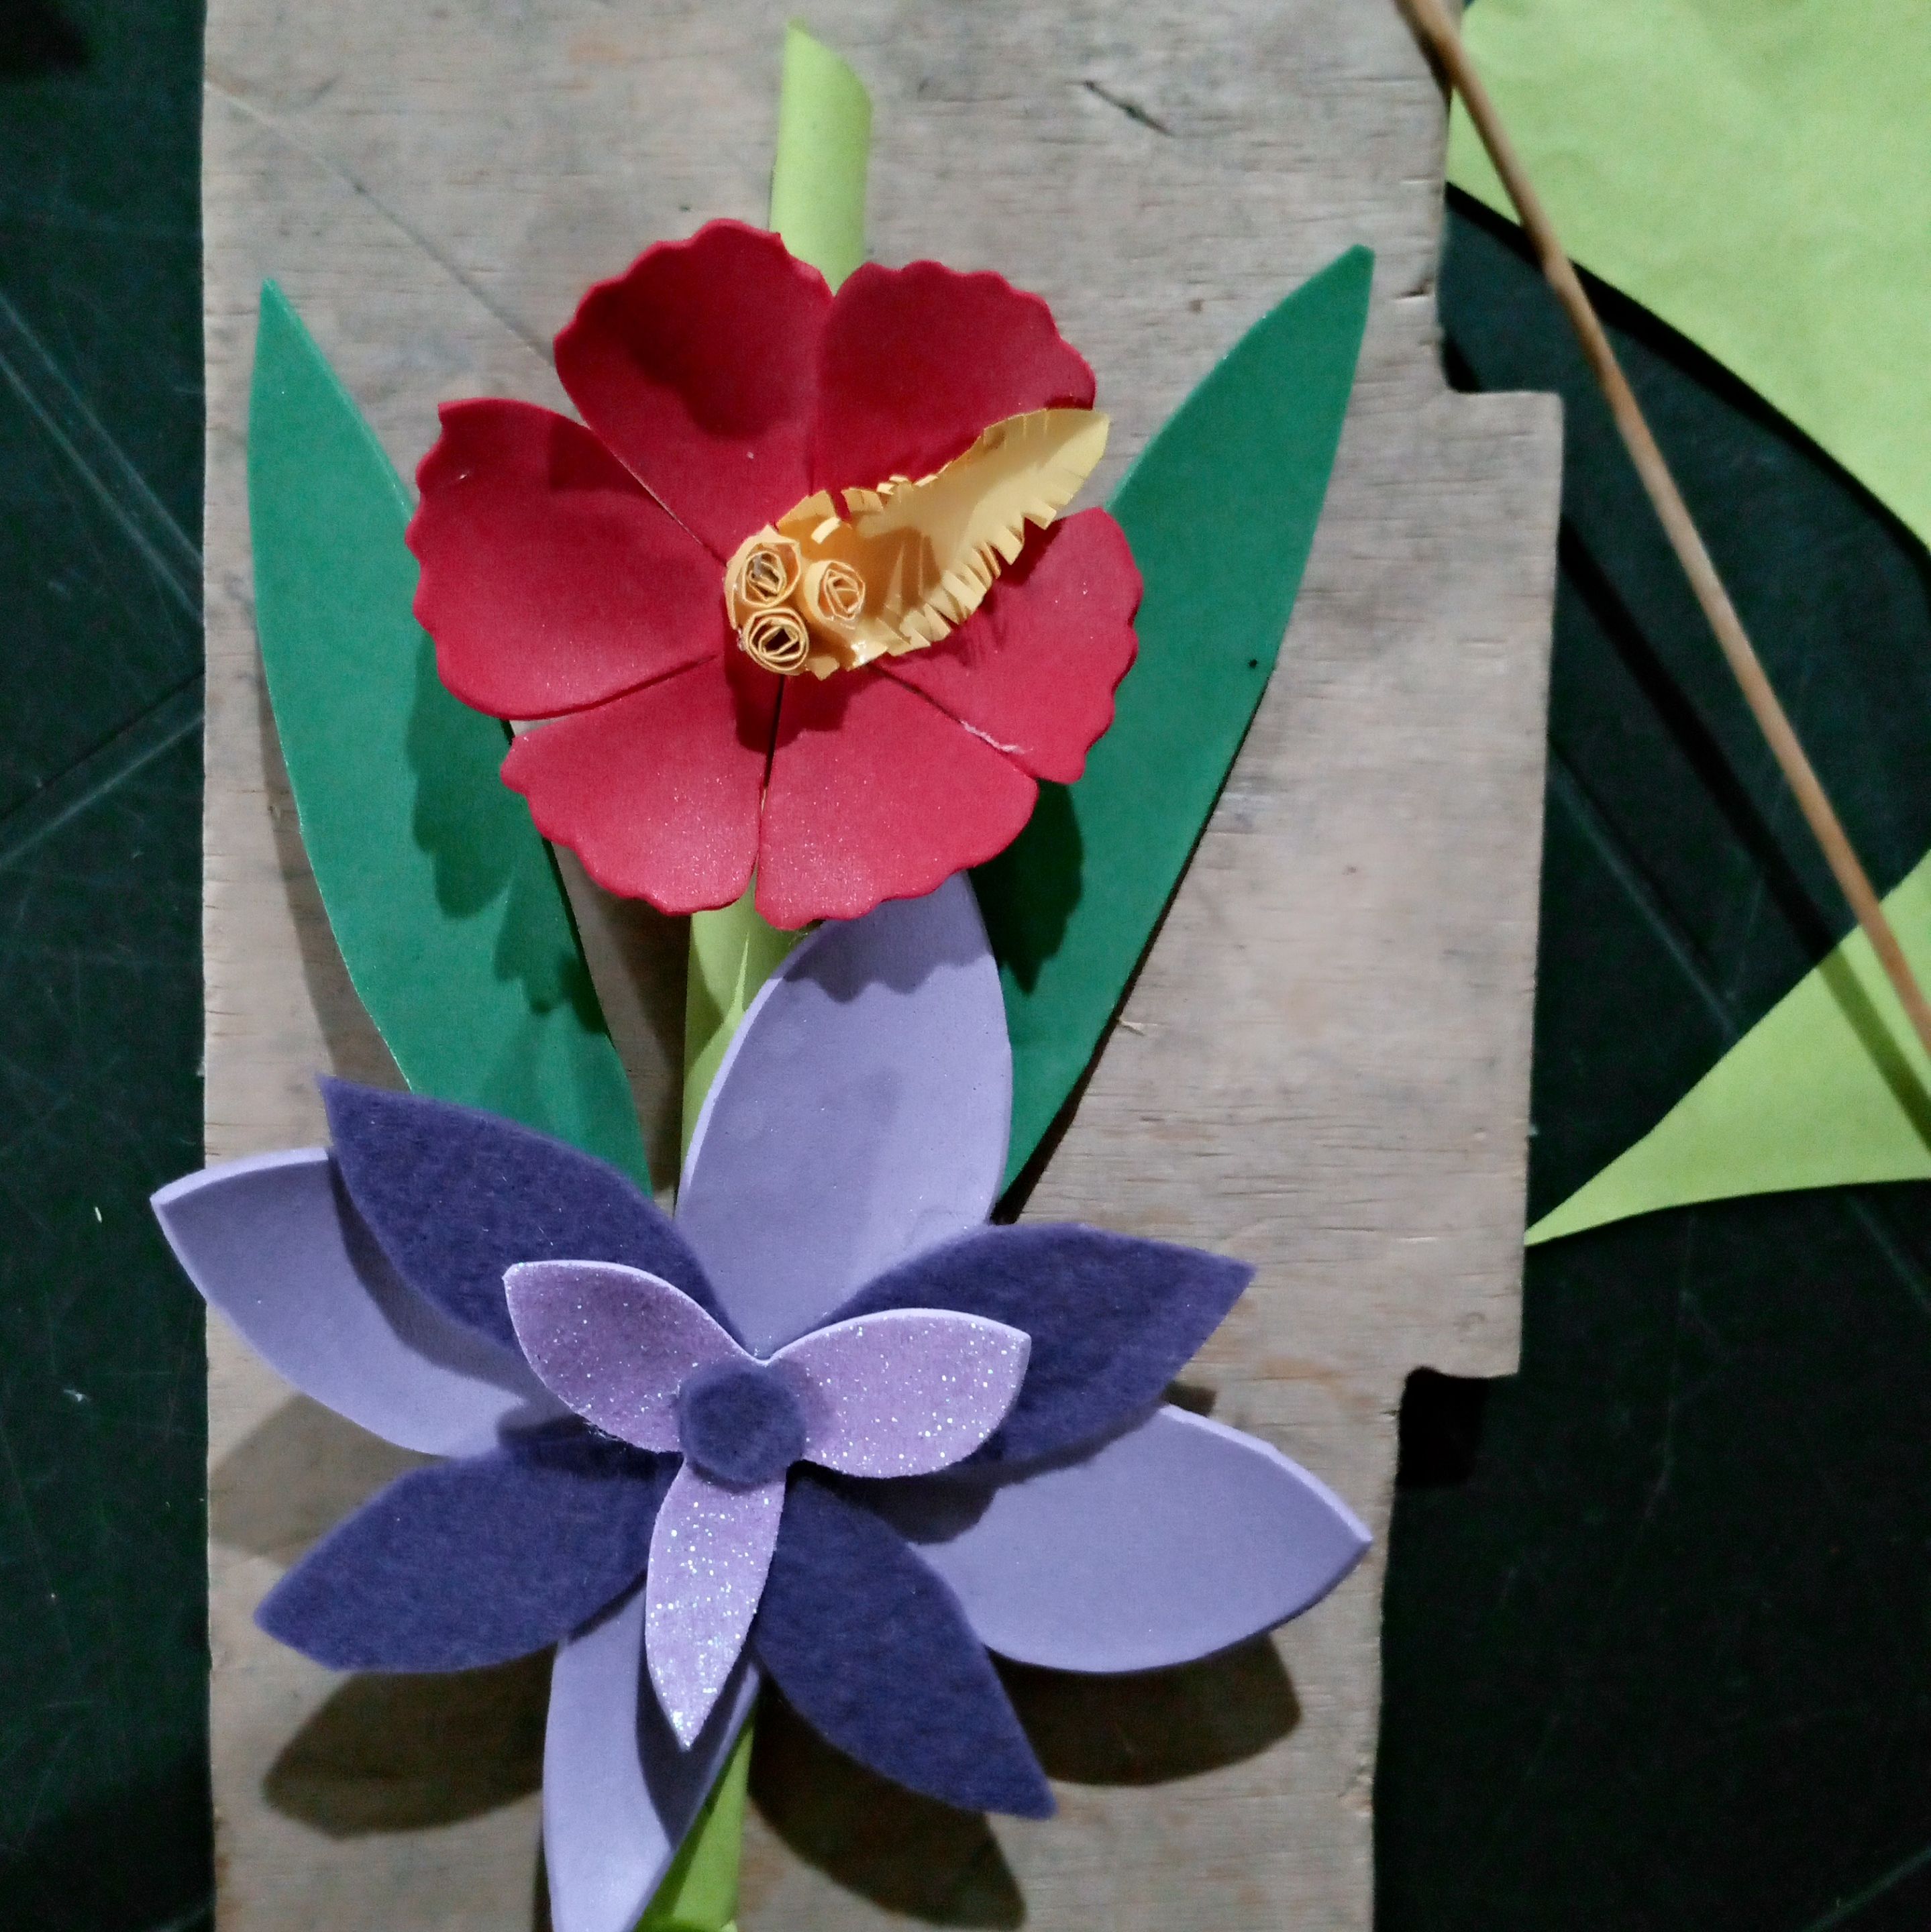
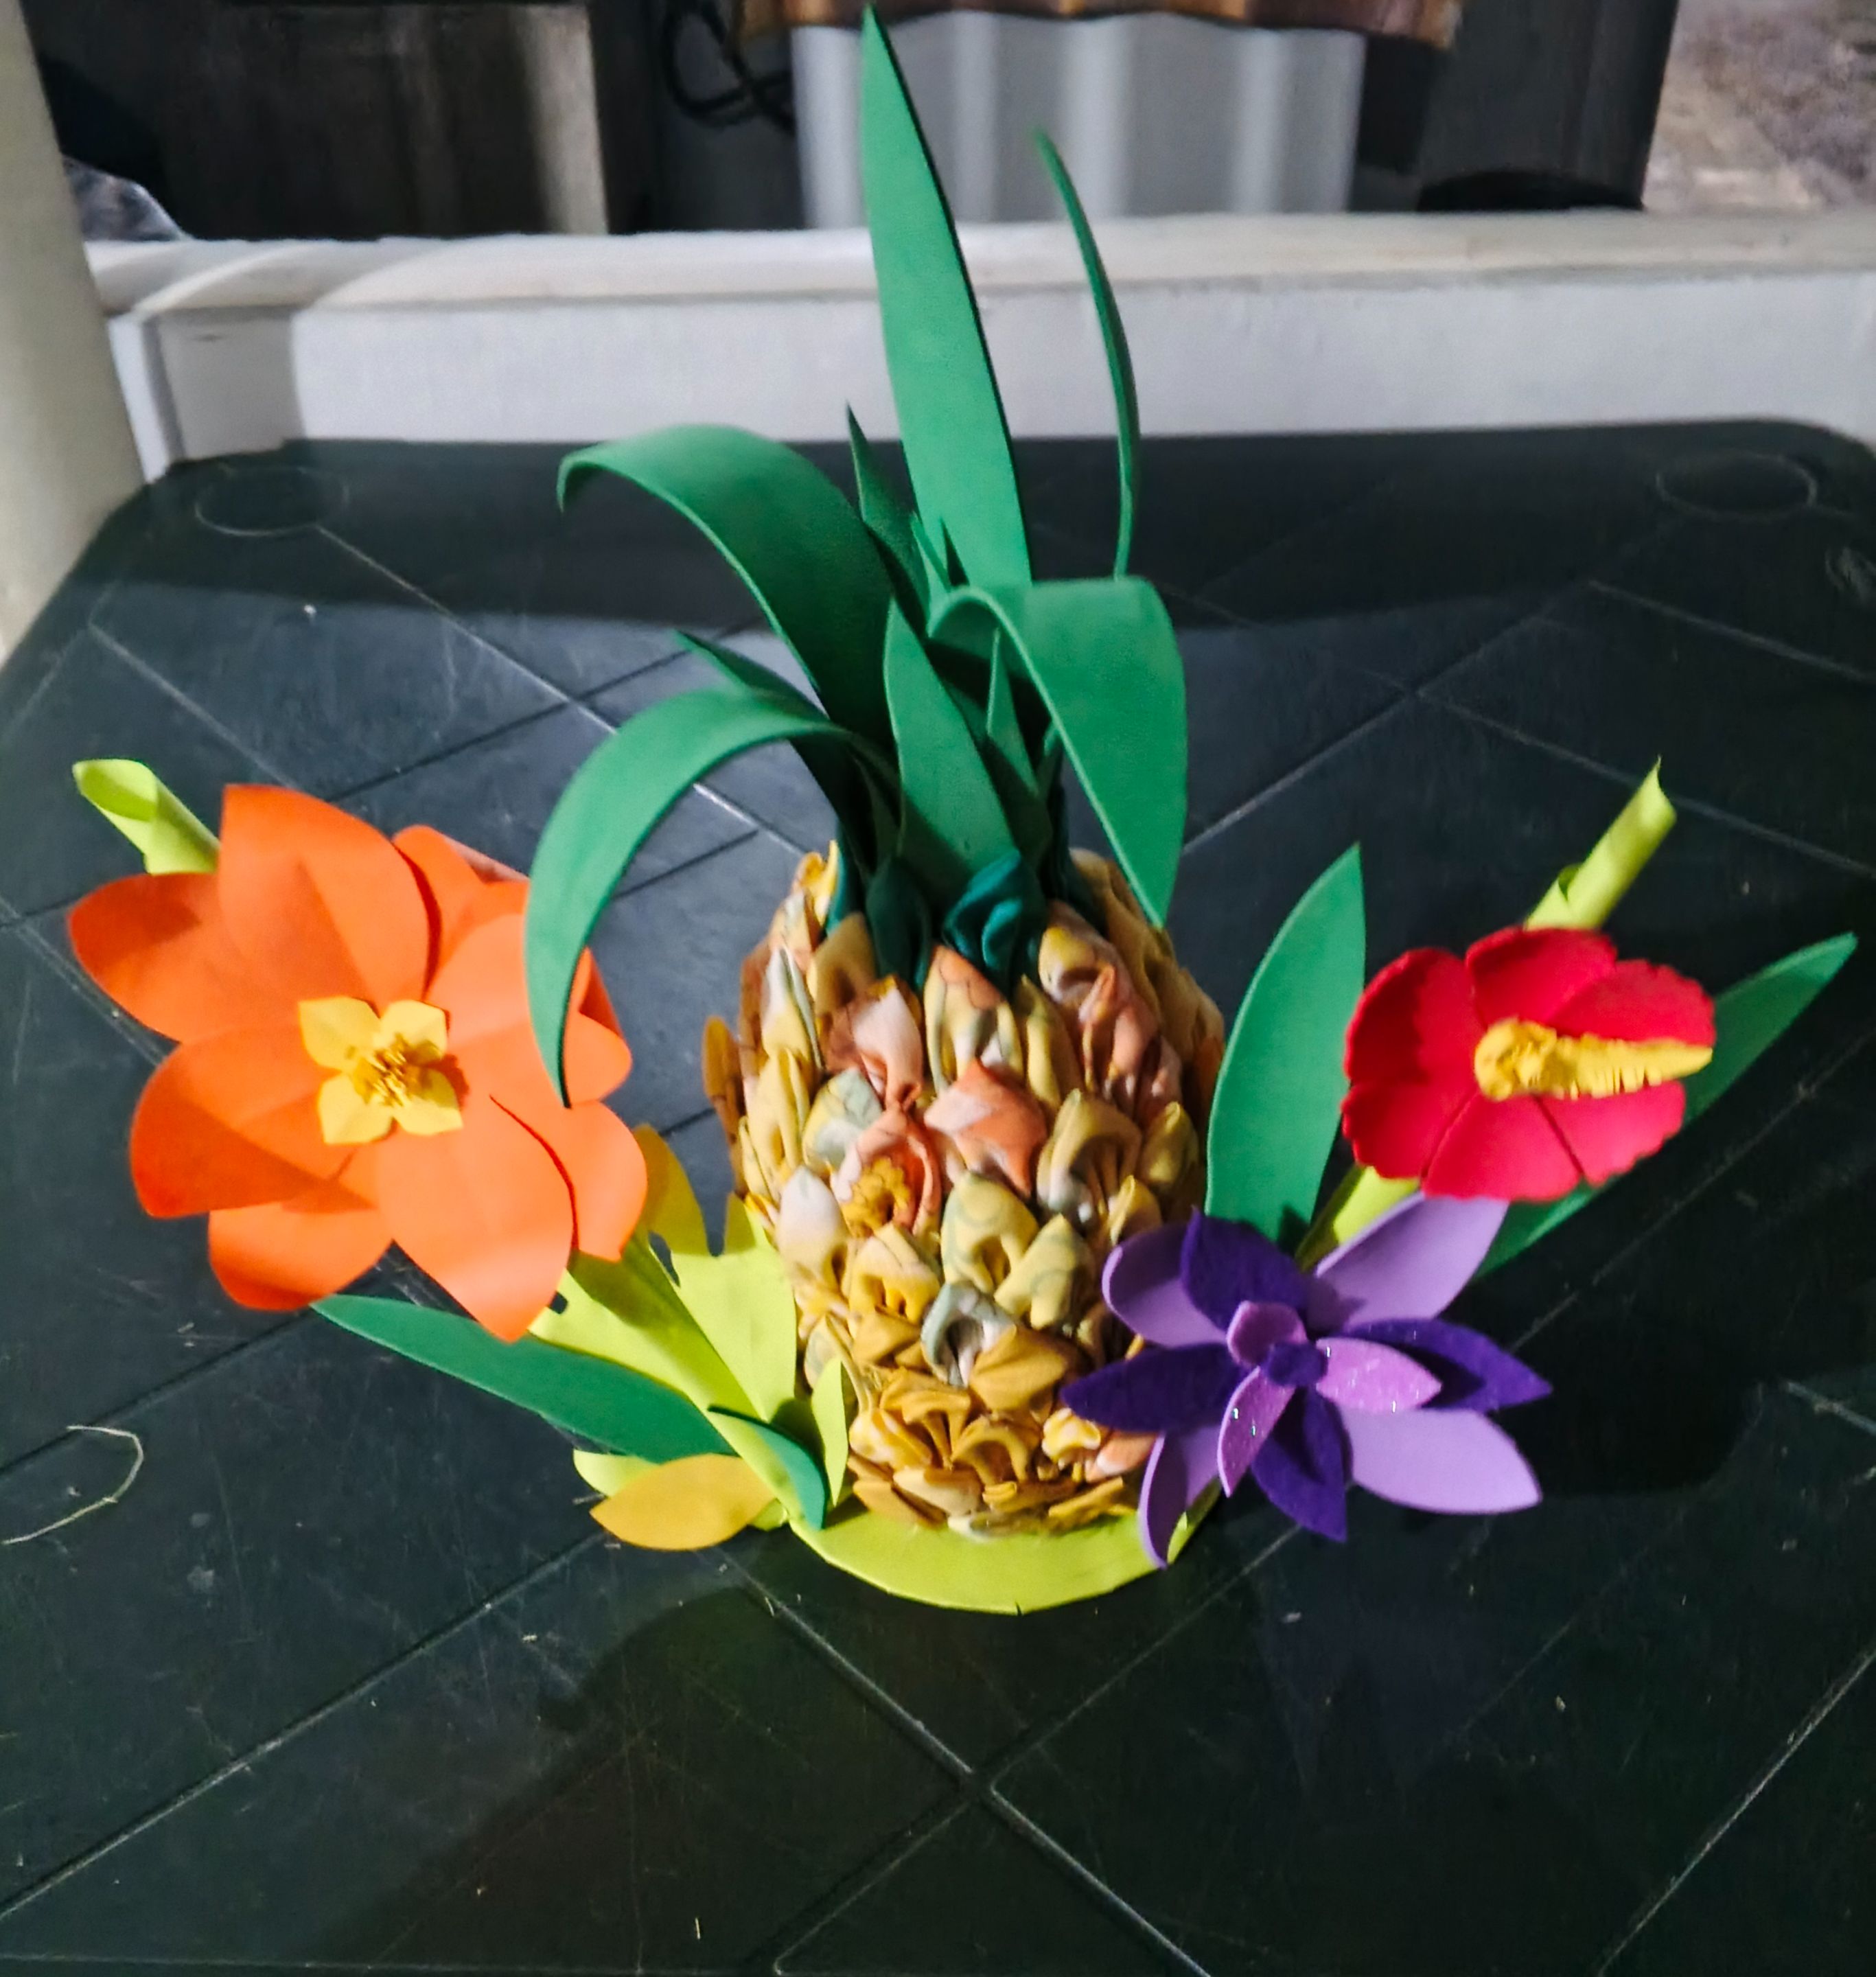
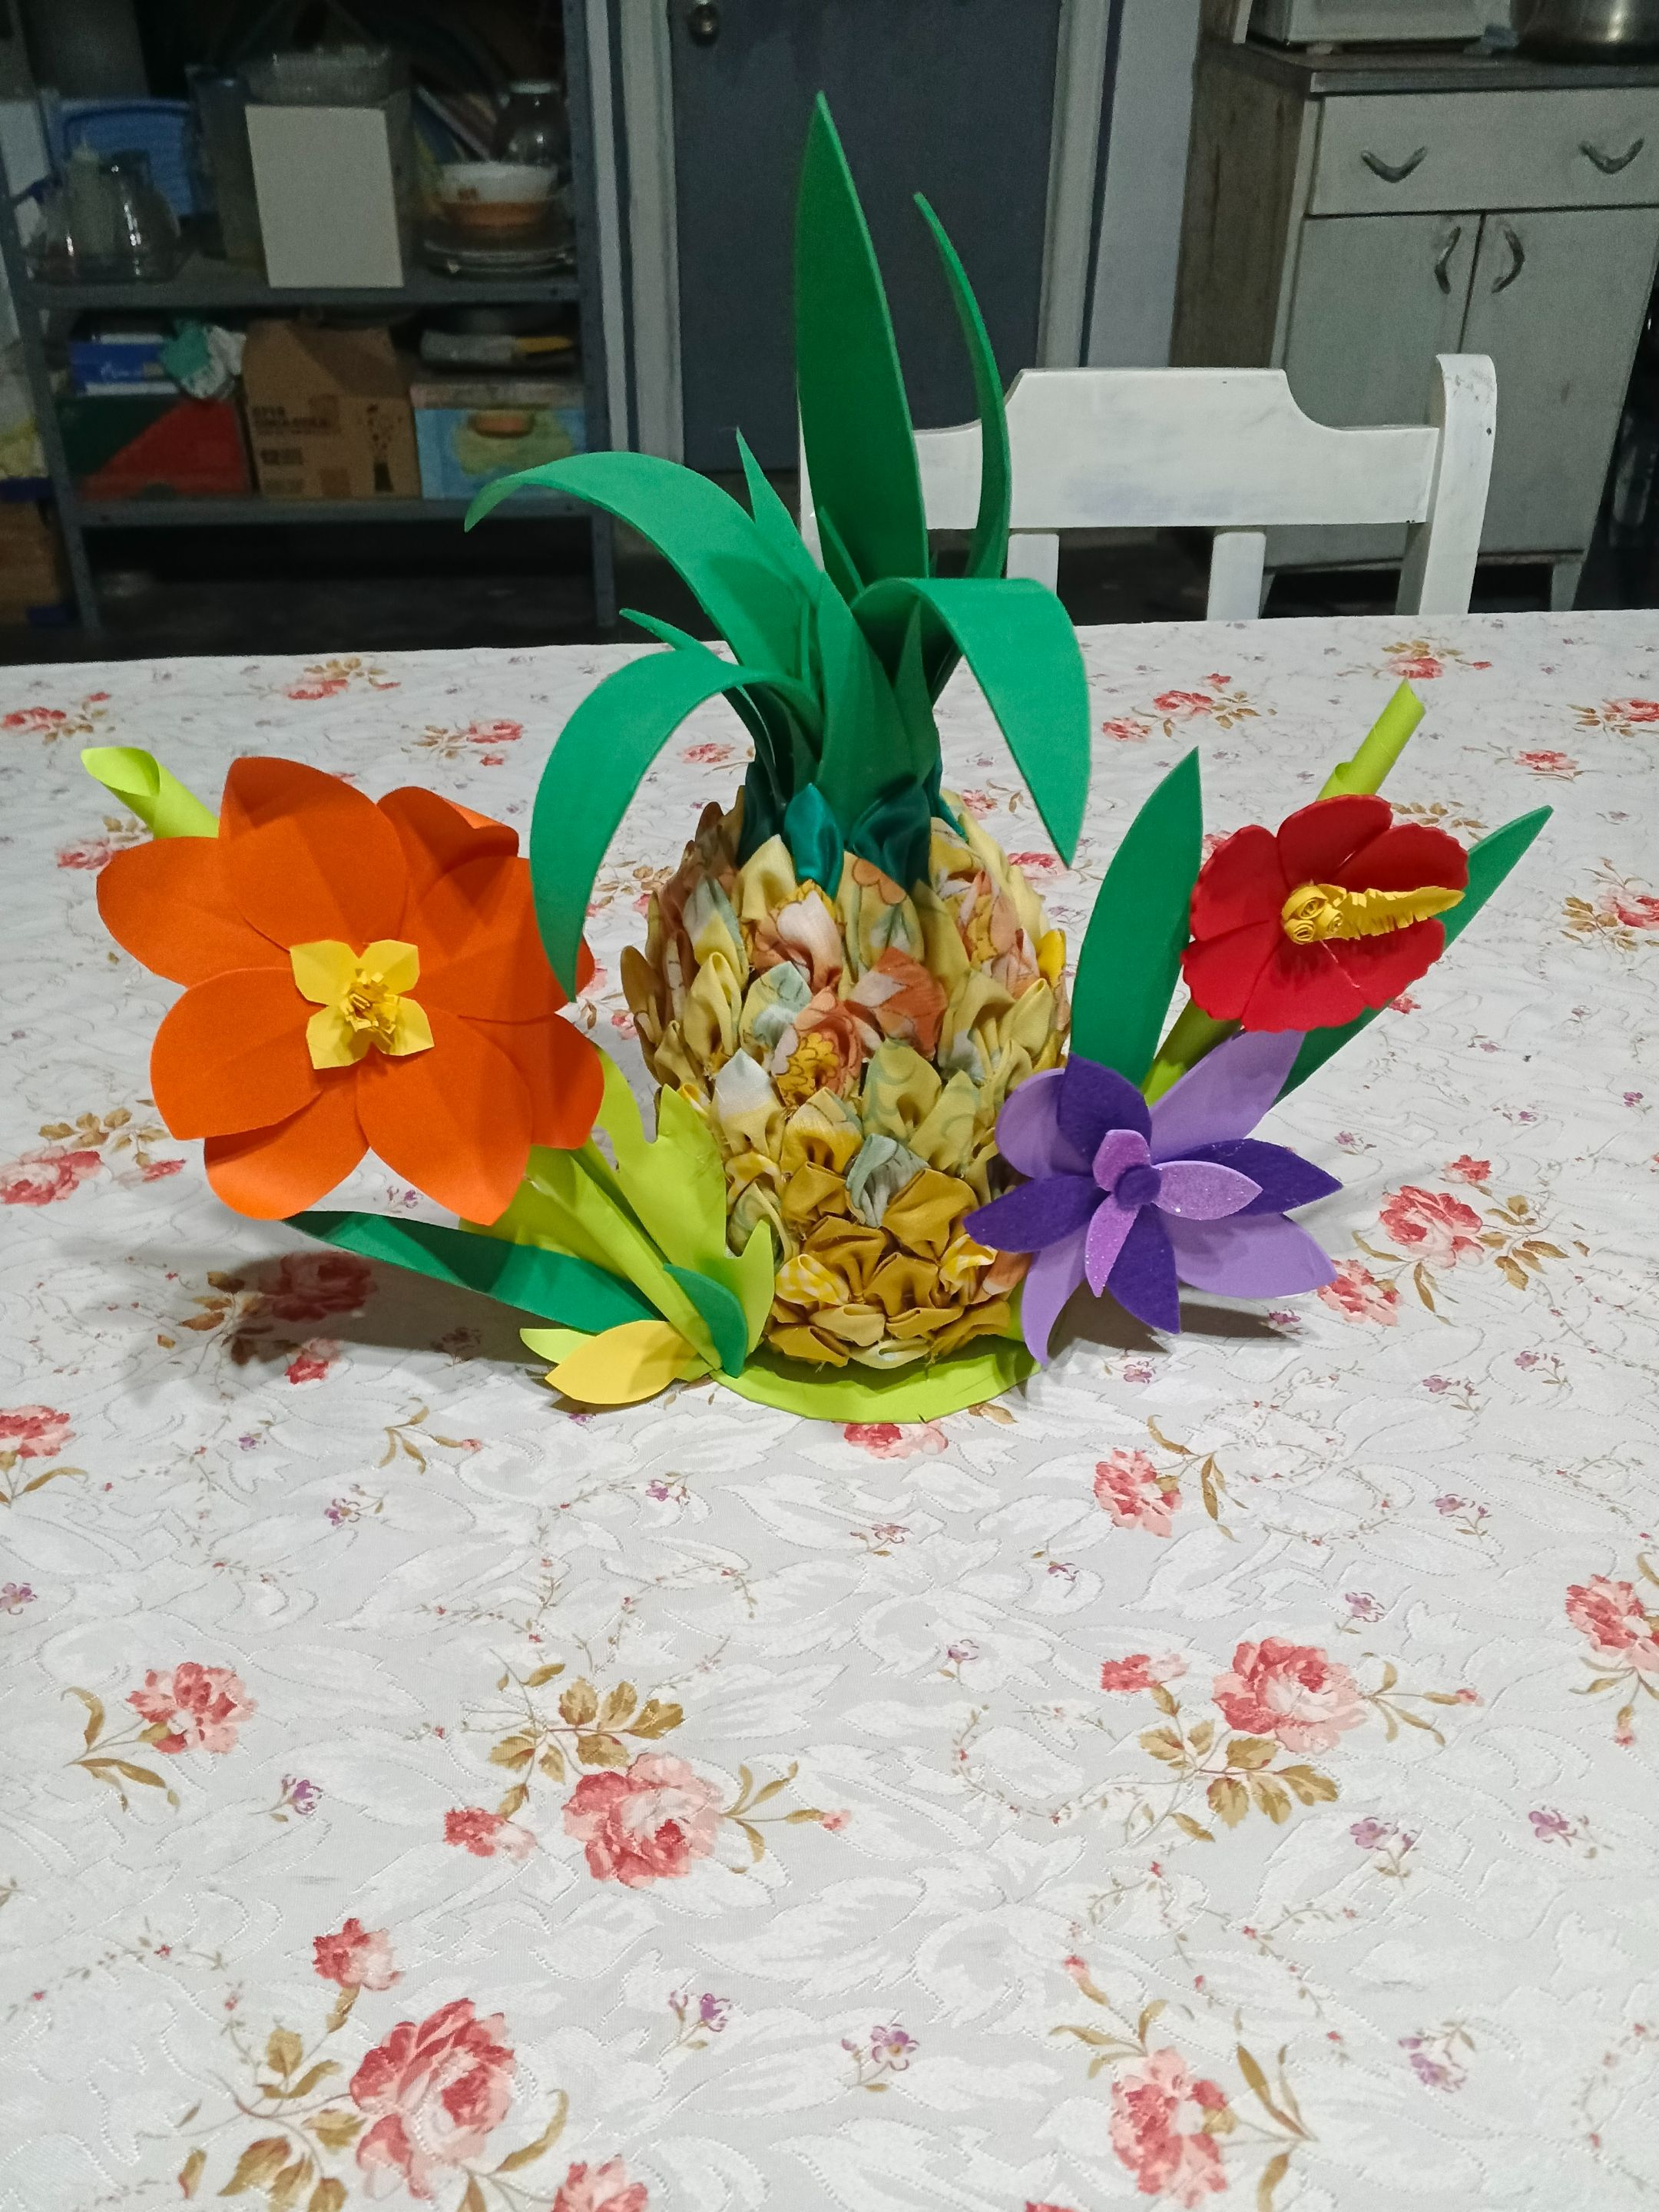
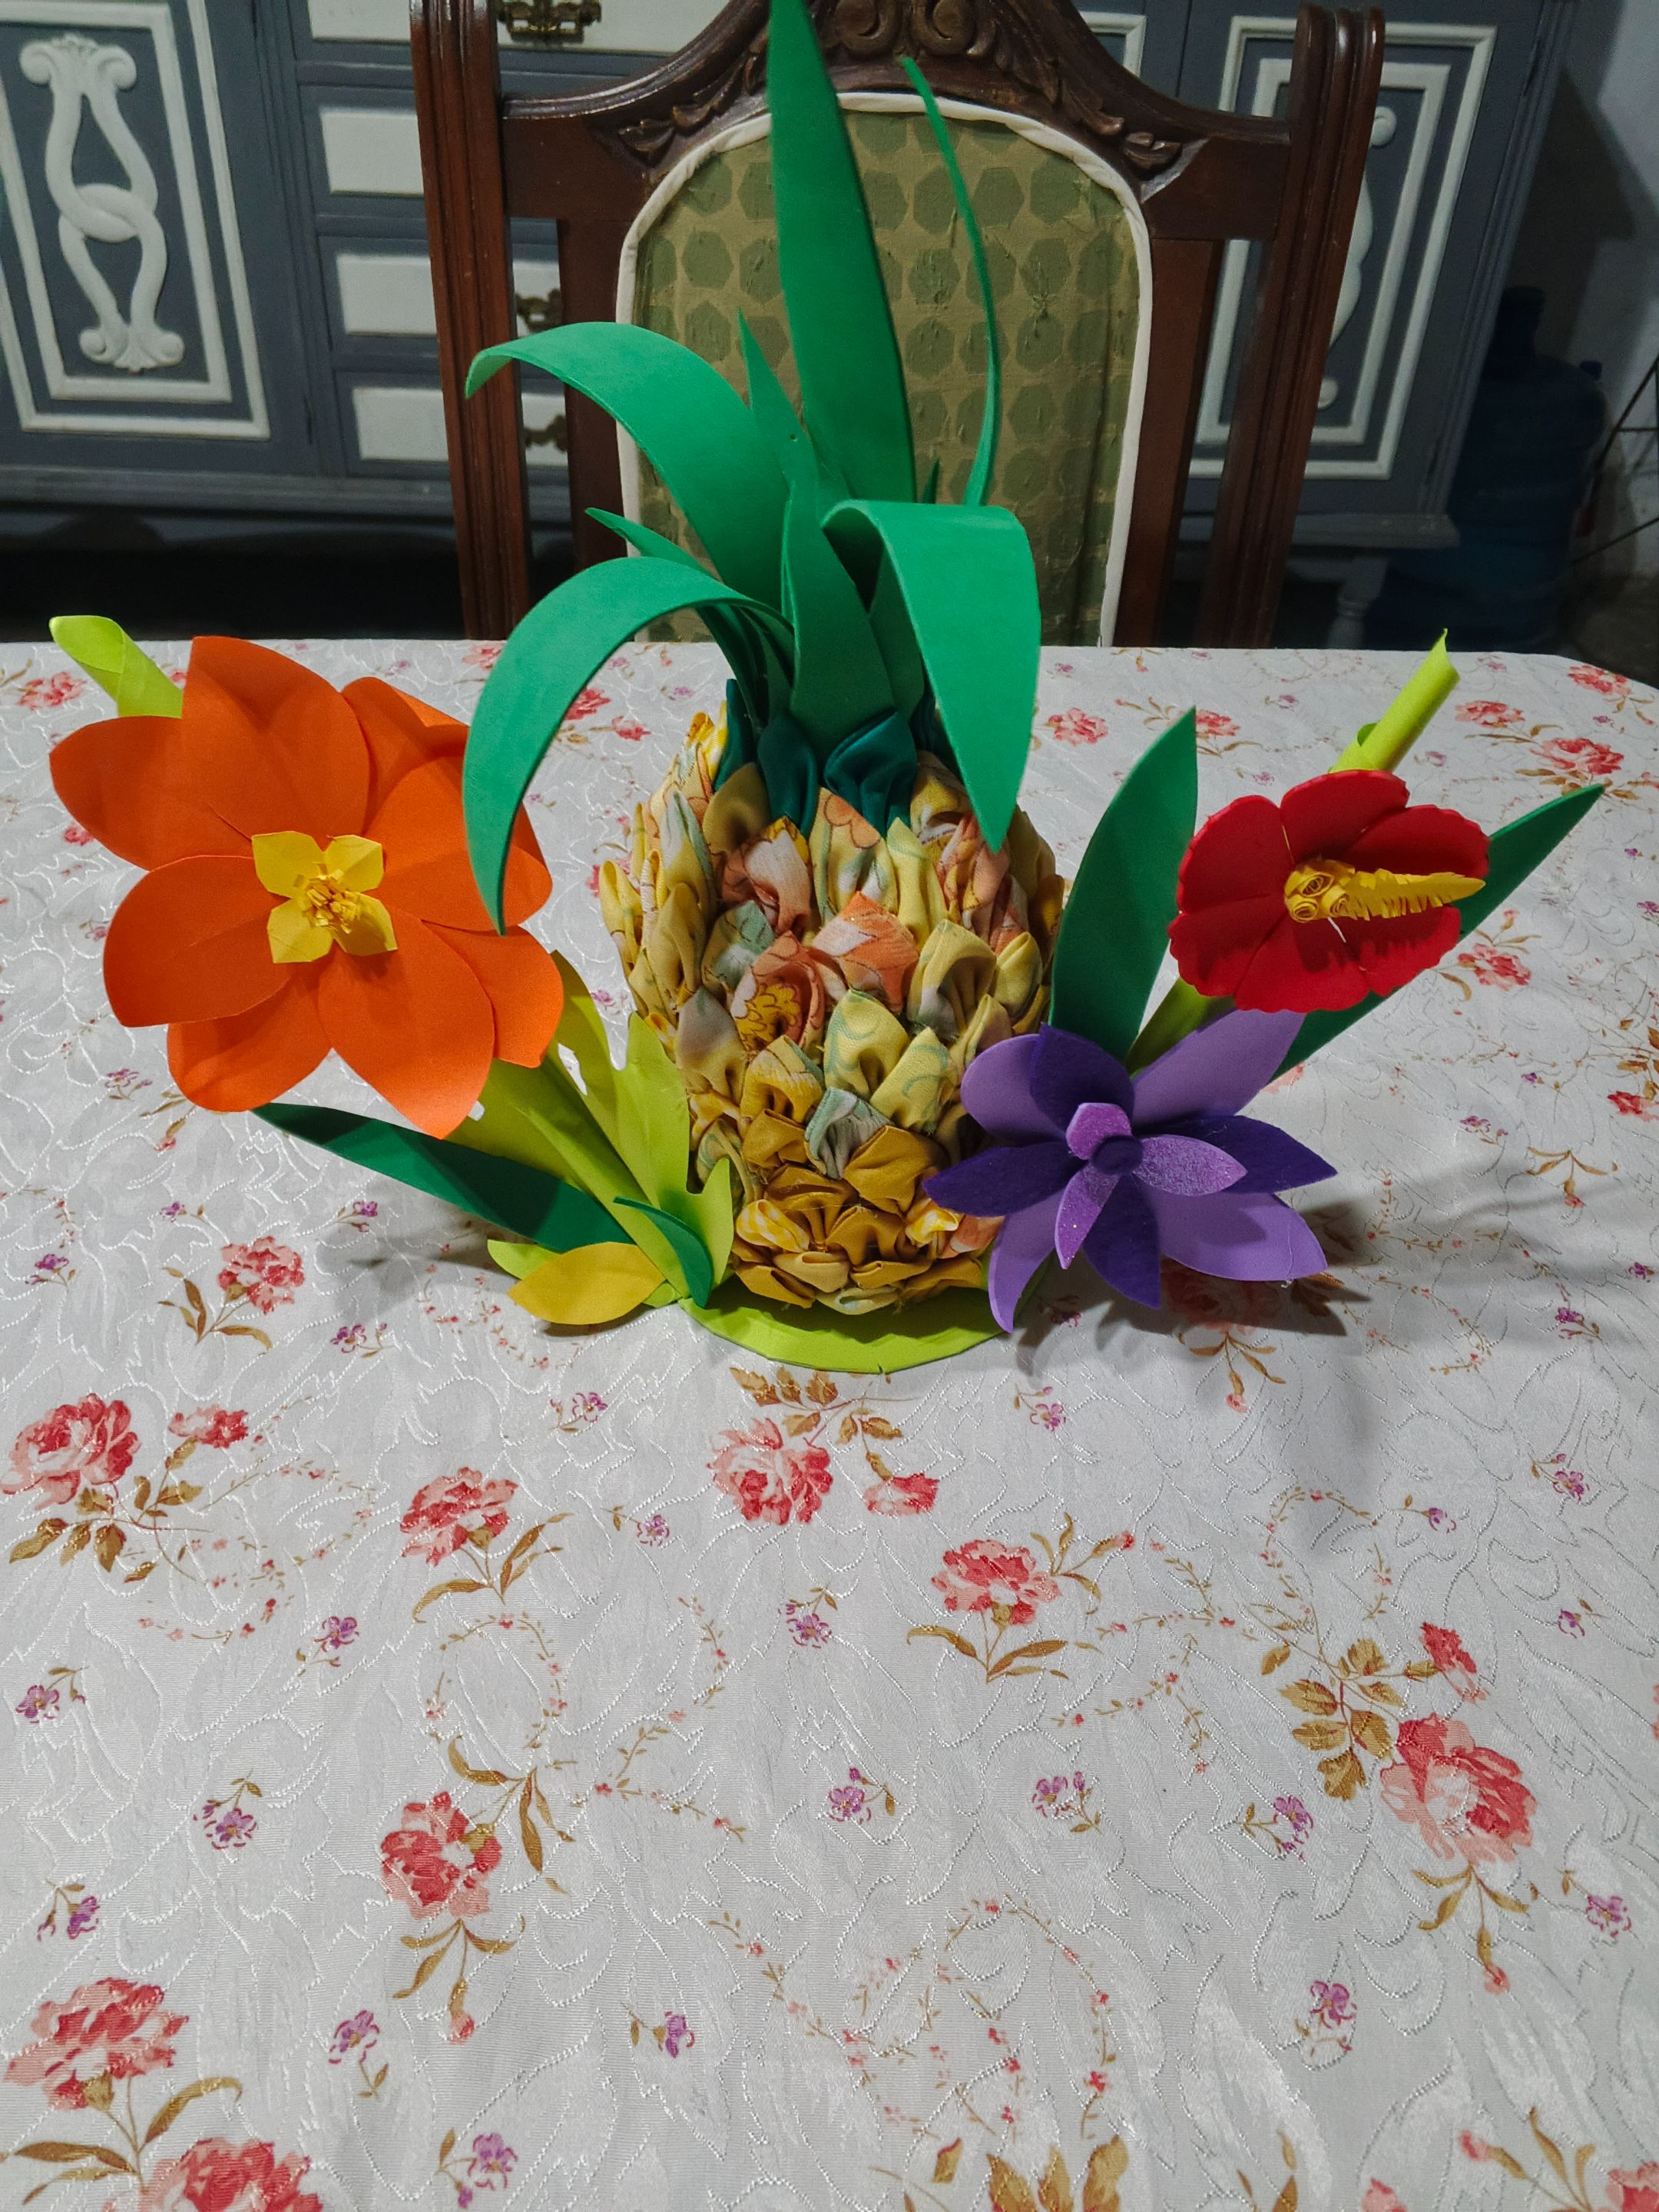
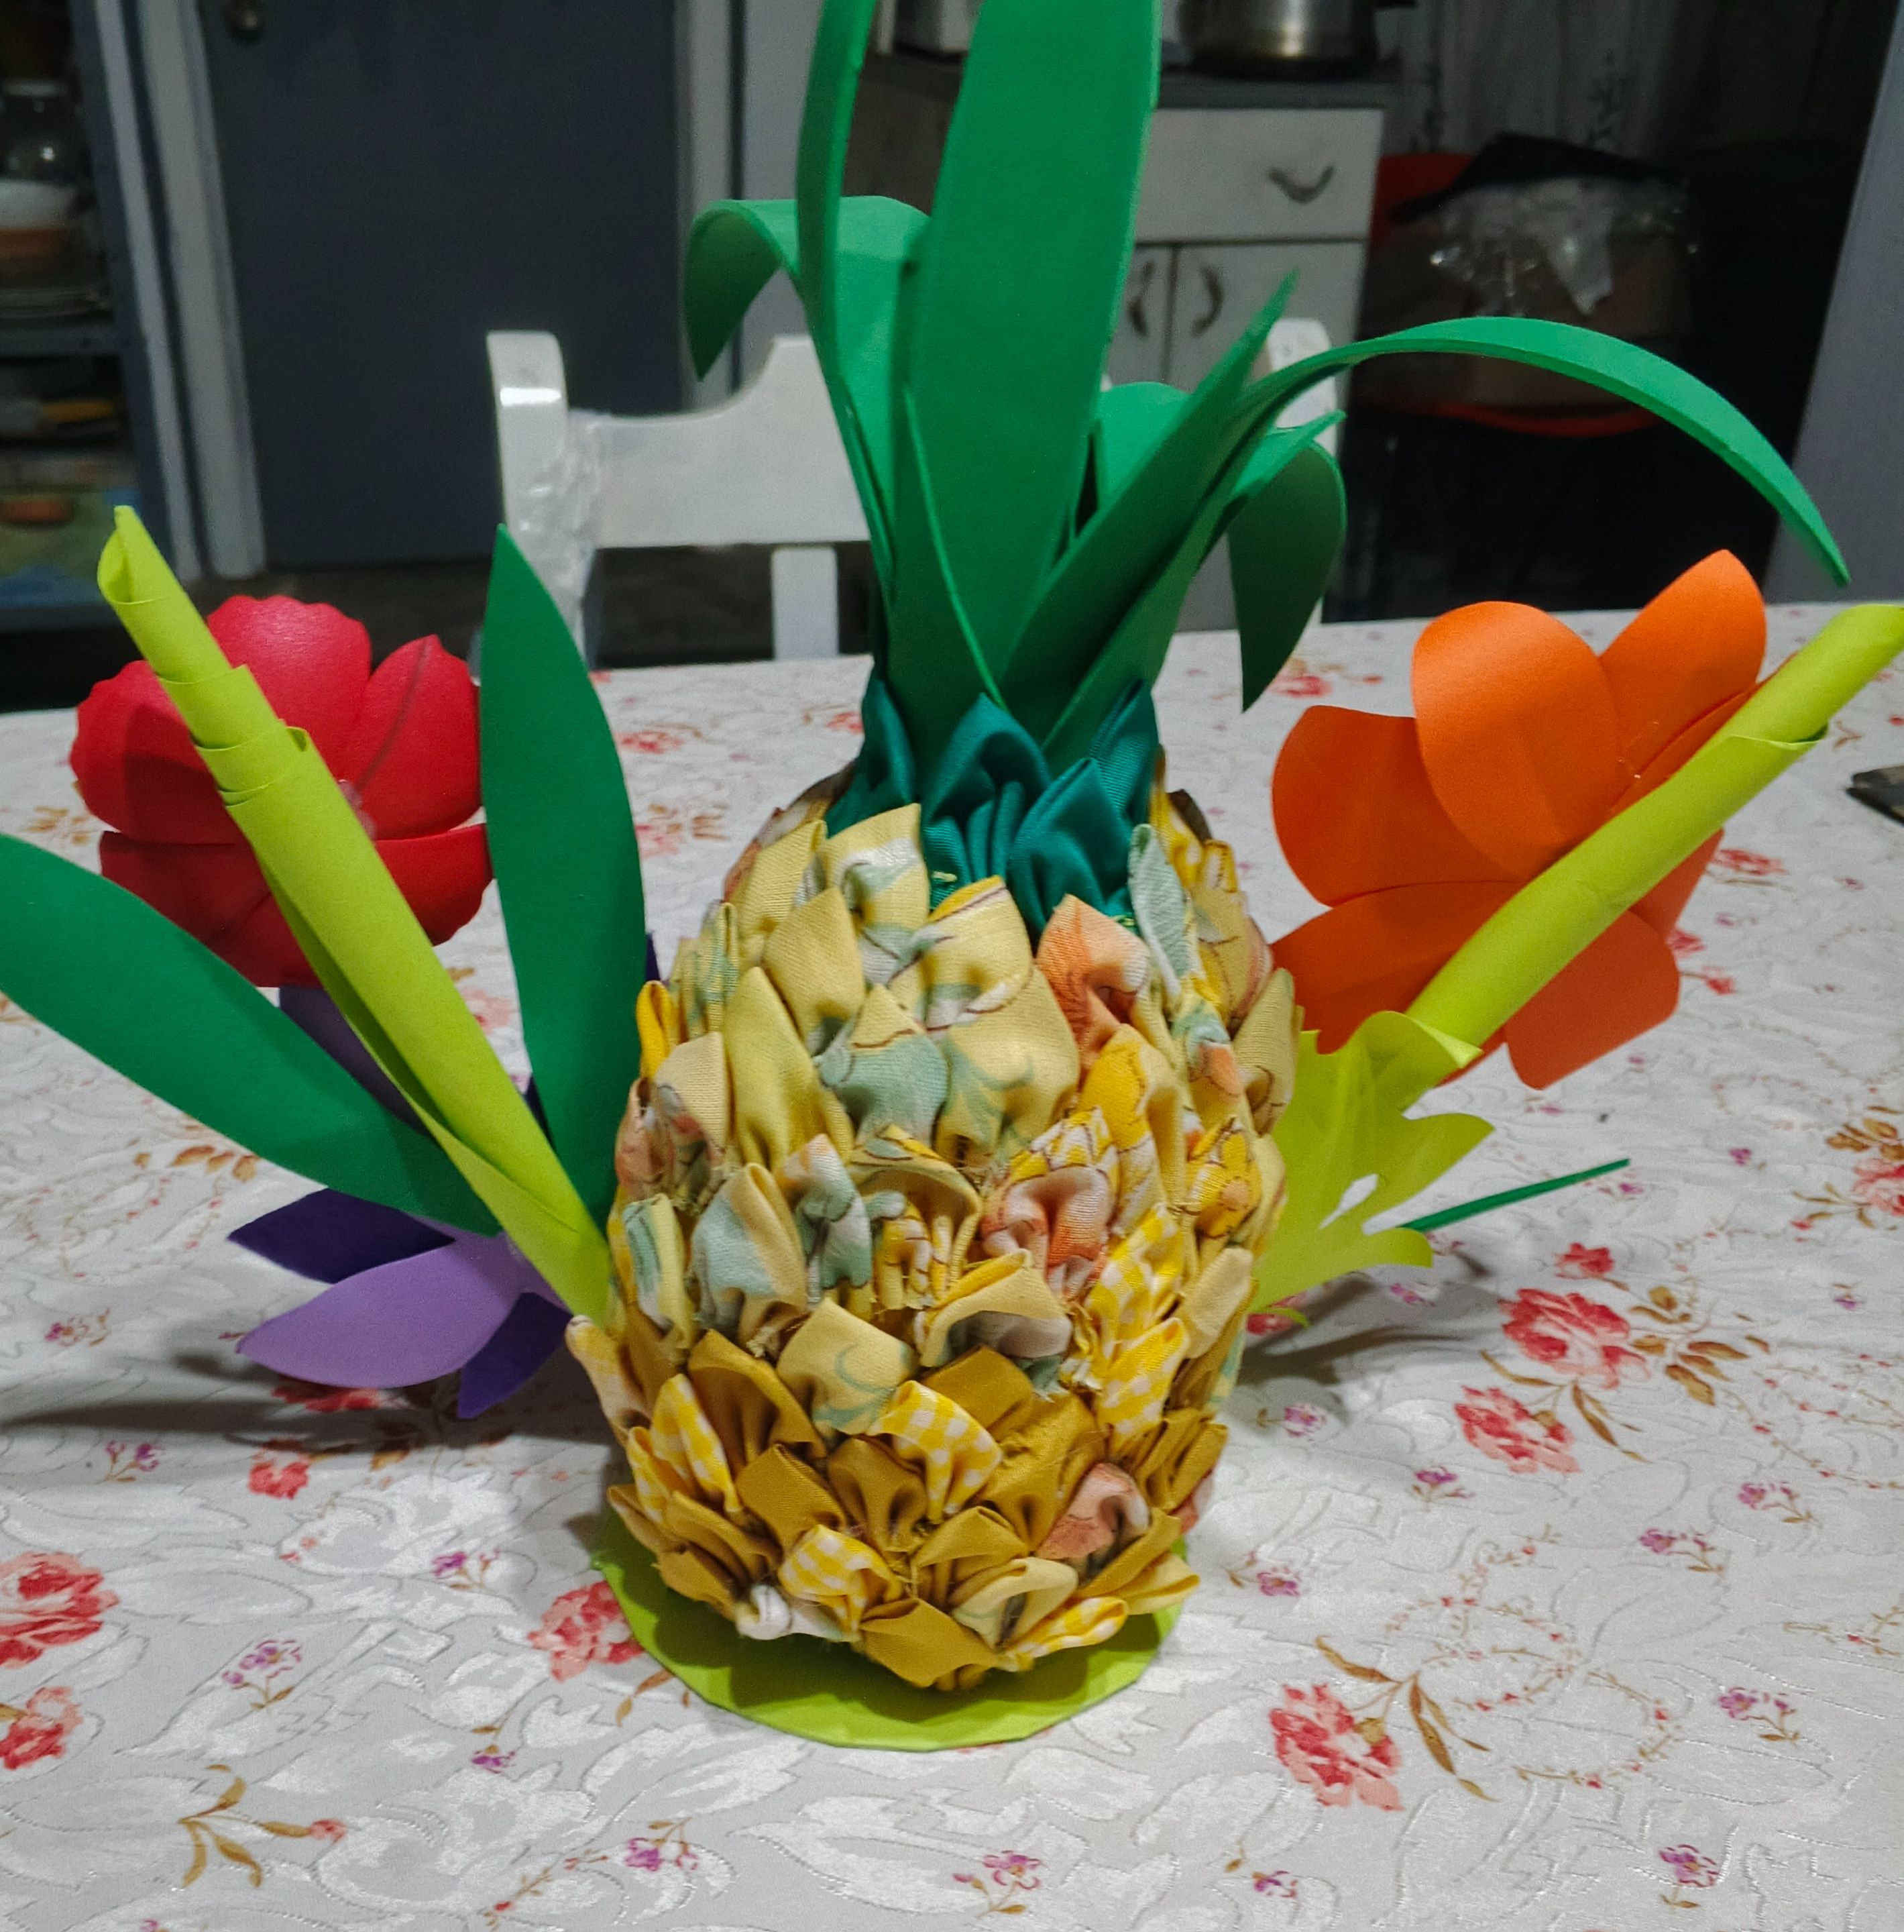
And after gluing the flowers to their respective branches, I positioned the pine cone centered on the lined CDI, securing it with hot silicone. I decorated the sides of the pine cone with the flower branches. I molded these flowers with a hot iron so they would take a better shape and give them more shine.
At that moment, I went to the kitchen with the flowers and placed them on the table. Everyone in the house looked so pretty! They liked it. I hope you liked it too, and let me know with your motivational messages.
Thank you for visiting my post. See you soon in another of my posts. Many blessings to all. May God always take care of you. 🌺🌺🌺🌺🌺🌺🌺🌺🌺🌺🌺🌺🌺🌺🌺💚💙❤️
> Y pegando las flores en sus respectivas ramas, posicione la piña centrada sobre el CDI forrado, fijándola con silicona caliente, y decore los lados de la piña con las ramas de flores, estas flores las moldee con la plancha caliente para que tomaran mejor forma y más brillo.
> Y en ese momento me fui a la cocina con las flores y las coloqué en la mesa, y qué lindas se vieron a todos en la casa, les gusto, espero que a ustedes también les haya gustado, y me lo hagan saber con sus mensajes motivadores.
> Gracias por visitar mi post, nos vemos pronto, en otra de mis publicaciones, muchas Bendiciones para todos, que Dios los cuide siempre.🌺🌺🌺🌺🌺🌺🌺🌺🌺🌺🌺🌺🌺🌺🌺🌺💚💙❤️