
*This post is both in English and Spanish, you can go directly to english by clicking [HERE](#english)* Saludos y bendiciones, mi gente bella de @needleworkmonday. Nuevamente por aquí, deseo que todos podamos pasar una semana espectacular. Por aquí, a días de comenzar las clases para mis princesas. Estos días he estado haciendo unas camisas para ellas y esta que les muestro hoy, es para mí, un lindo crop top, una camisa corta. Este modelo, desde que lo vi en Pinteres me gustó mucho, aunque no me salió en tutorial, igual es sencillo de hacer. 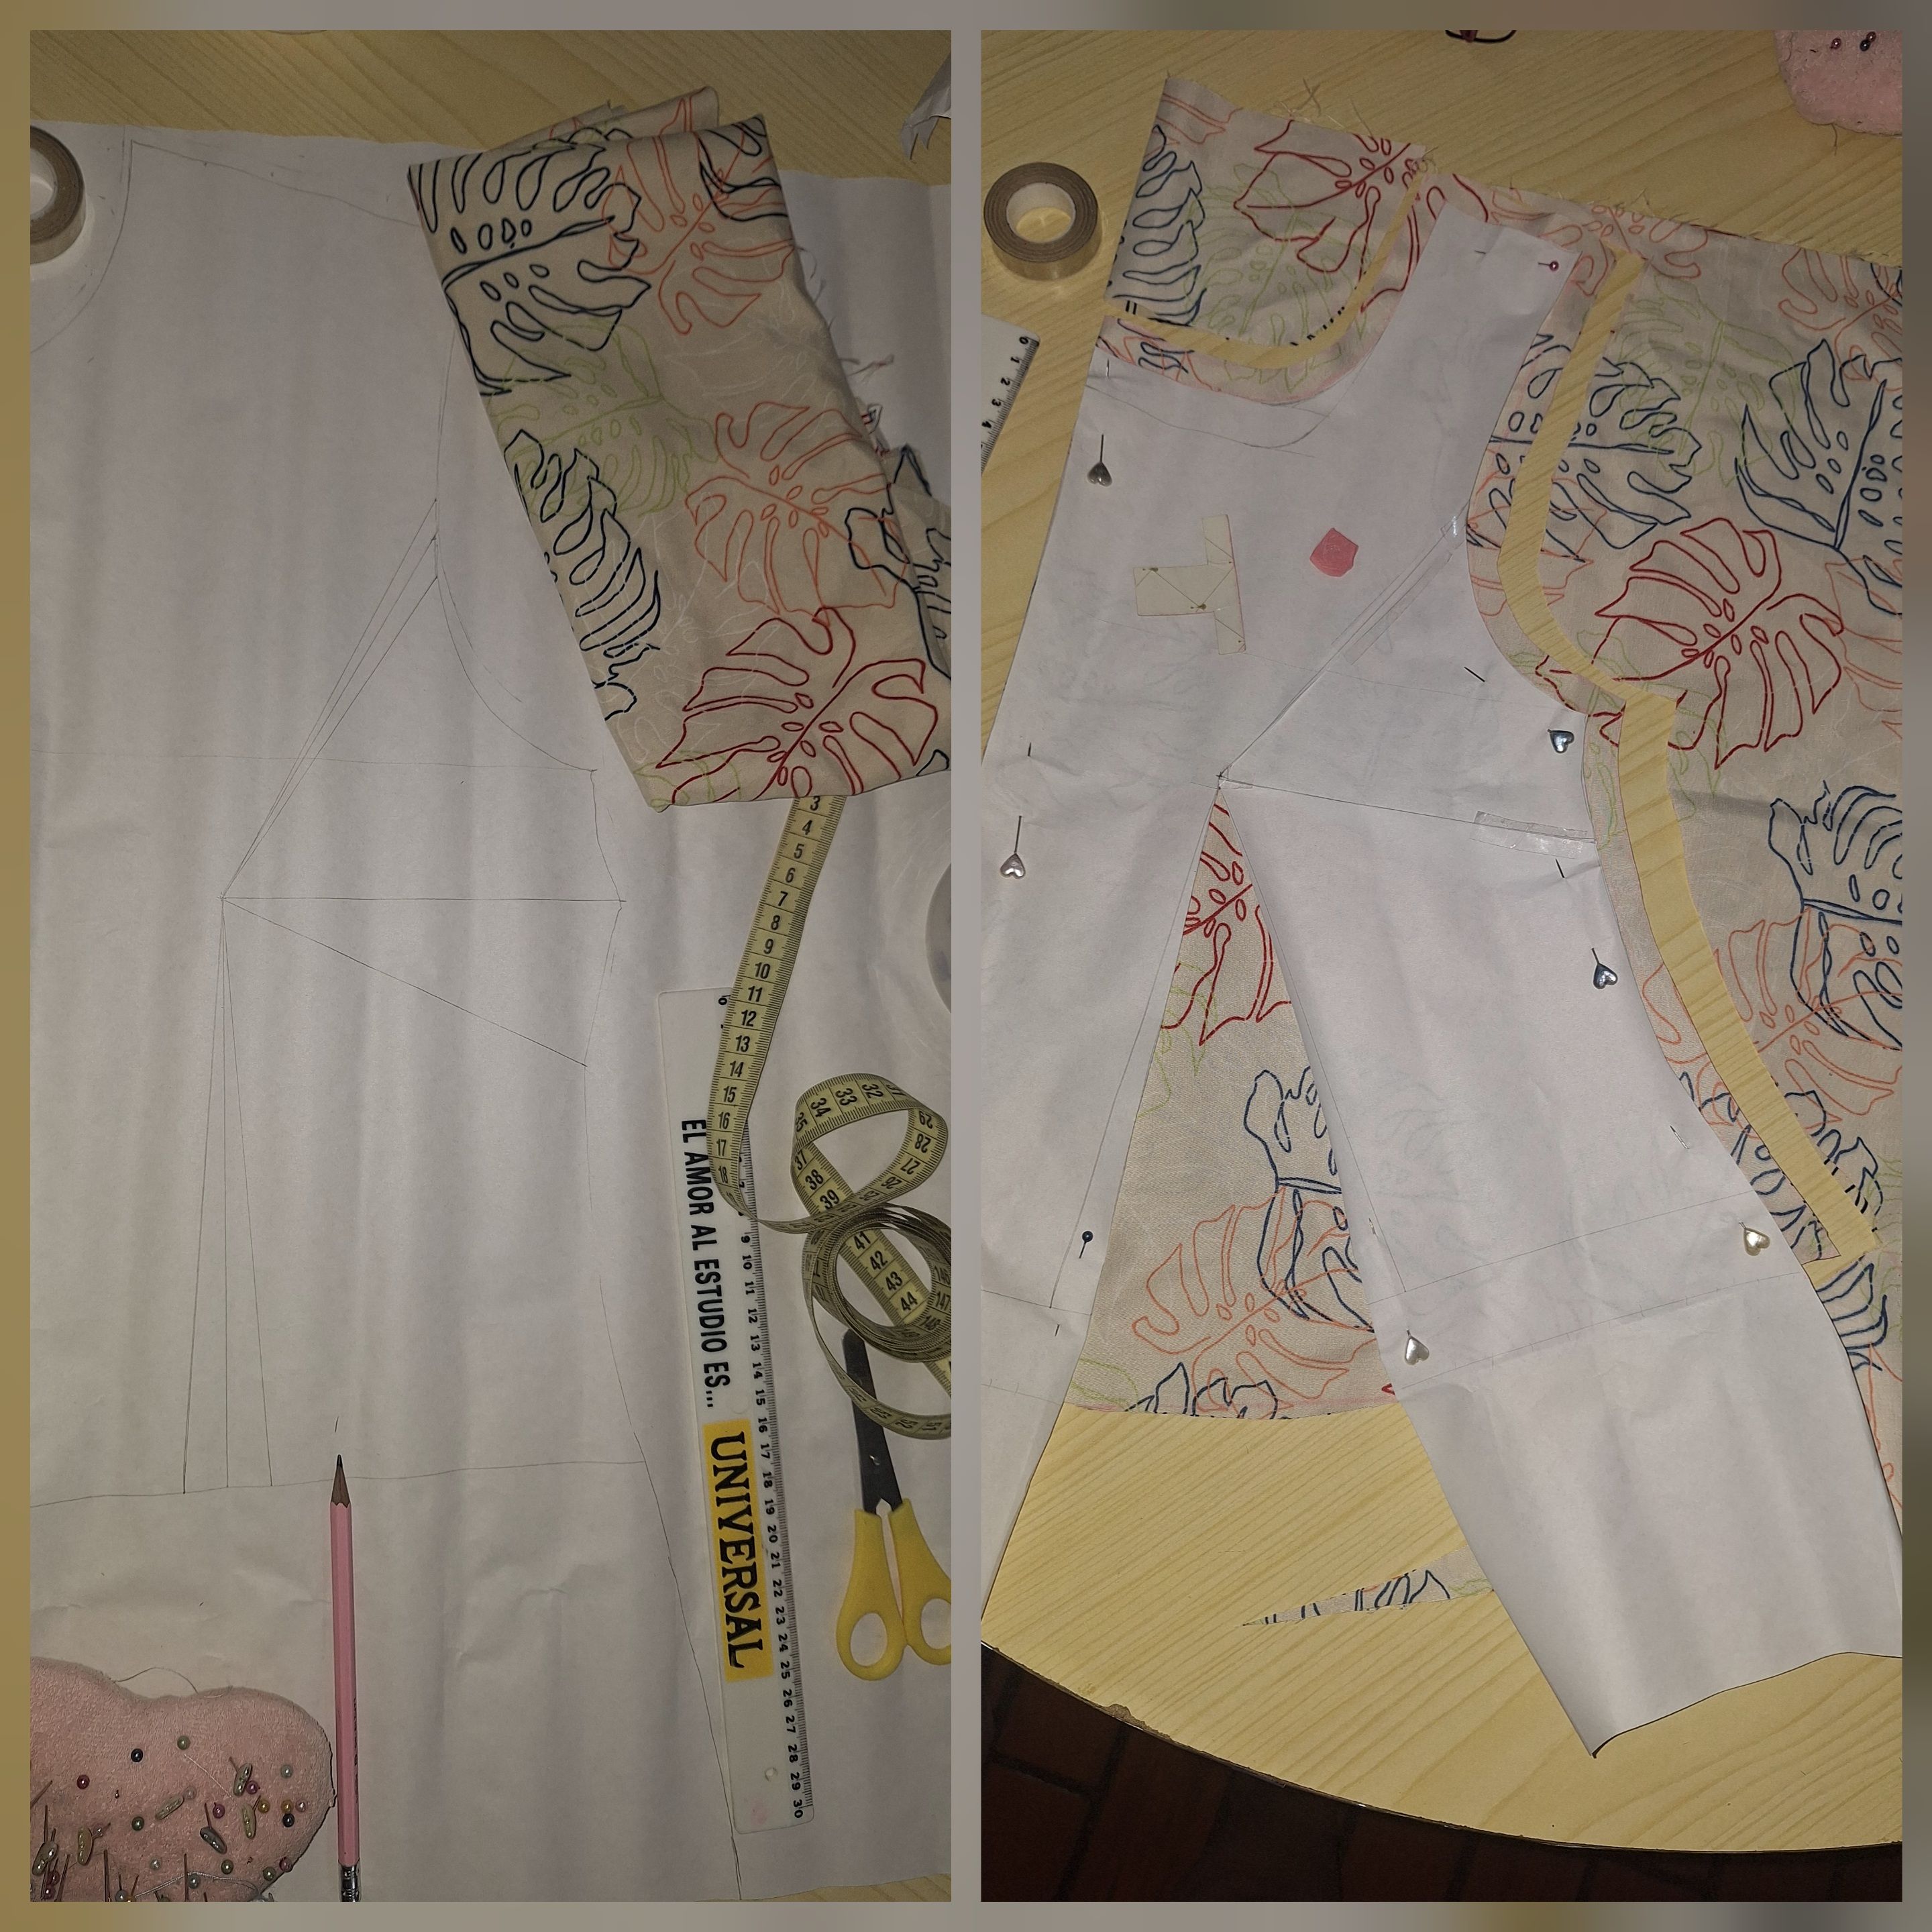
Para este proyecto usé medio metro de tela estampado. En un principio la había comprado para un short, pero no me alcanzó. Como era un talle alto, necesité 75 cm. Ya tenía un patrón básico hecho, pero en esta oportunidad estuve realizando otro y así poder modificarlo y correr las pinzas de costado y de siza hacia la de cintura y así darle más amplitud, que era como la quería, que tuviera un ligero vuelo. Una vez con el patrón modificado, lo fijo a la tela con alfileres, marque y corte. 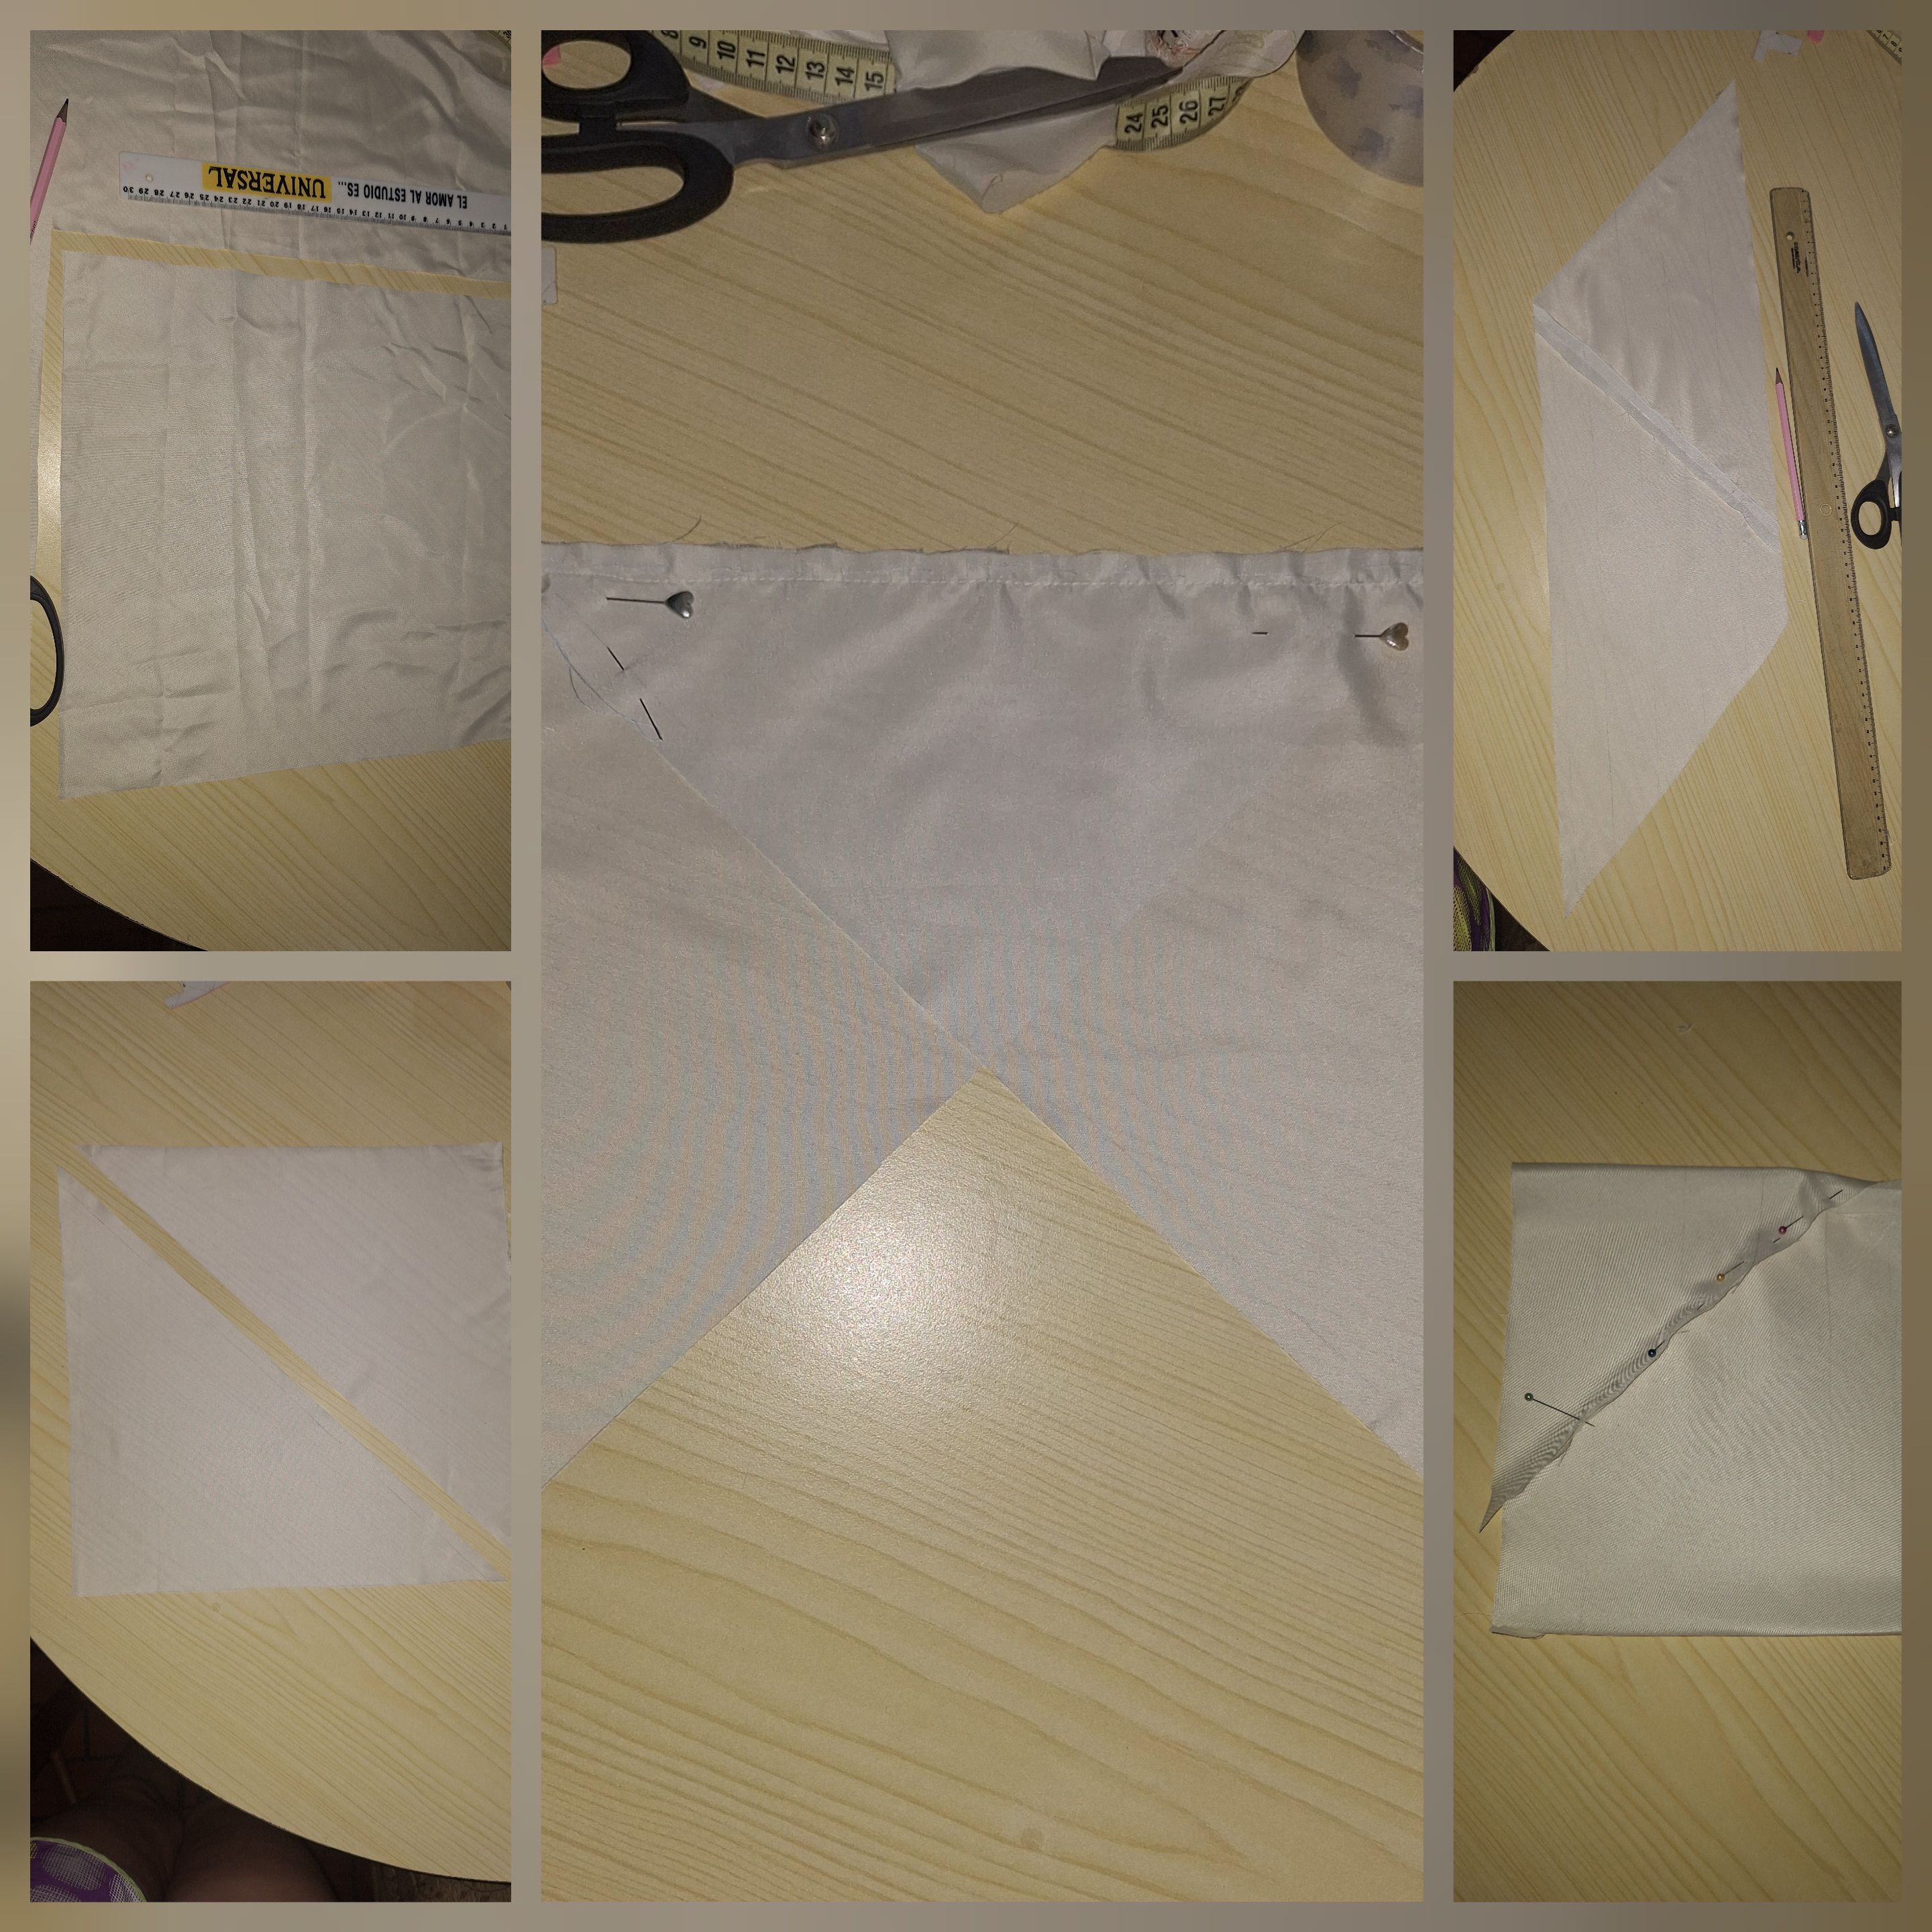 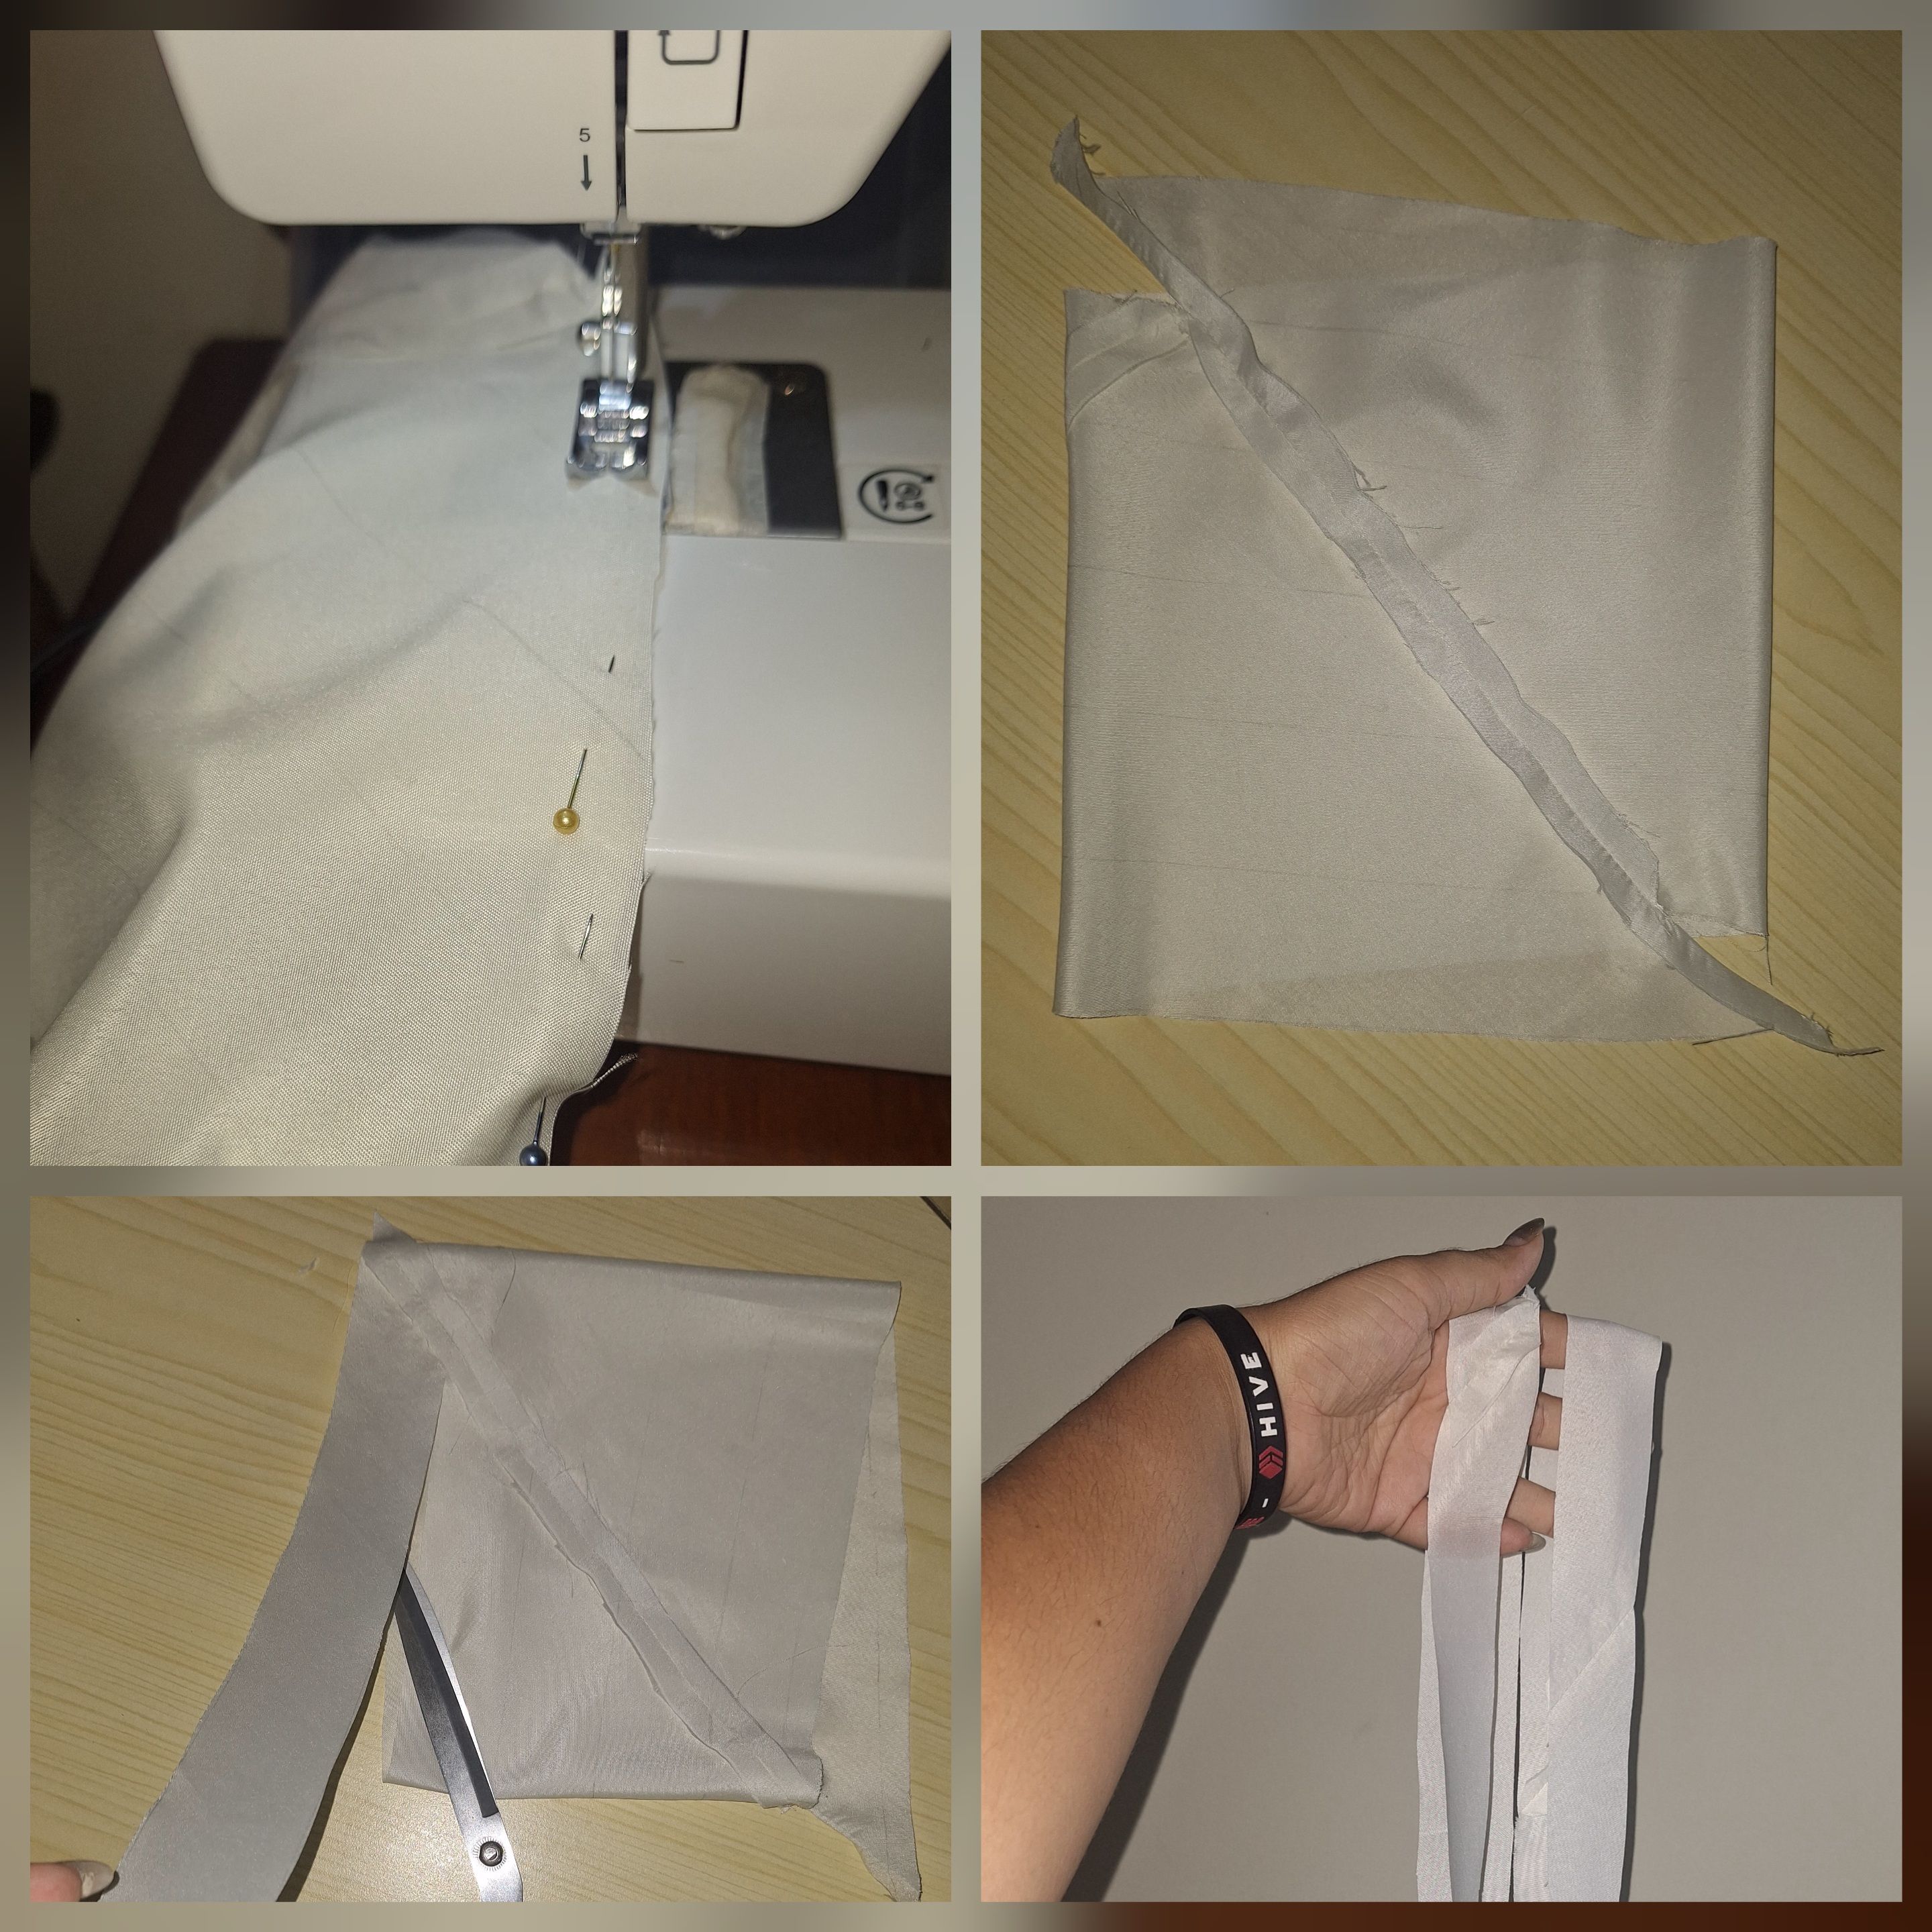
Como la tela no era suficiente para hacer las vistas, de la parte las hice con otra tela que le combinaba y con esta tela también me atreví por primera vez a hacer el bies. Estos lo quise hacer para darle un mejor acabado al ruedo de la blusa sin afectar mucho su largo, ya que de por qué quedaba corta. Estuve viendo unos tutoriales y así lo hice. Con un cuadrado de 35 cm por cada lado, la corte a la mitad y luego uní los triángulos que quedaron de la forma que se muestra en la figura, le pasé costura y luego la planché. Hice unas franjas de 4 cm, aunque debieron ser de 5 cm. Después lo hice como especie de un tubo, dejando por cada lado una franja por fuera y volví a coser. Luego corte las tiras, empezando por uno de los extremos. Y de ese pequeño cuadrado saqué 250 cm de bies, me quedé sorprendida de lo mucho que rinde. Se los recomiendo. 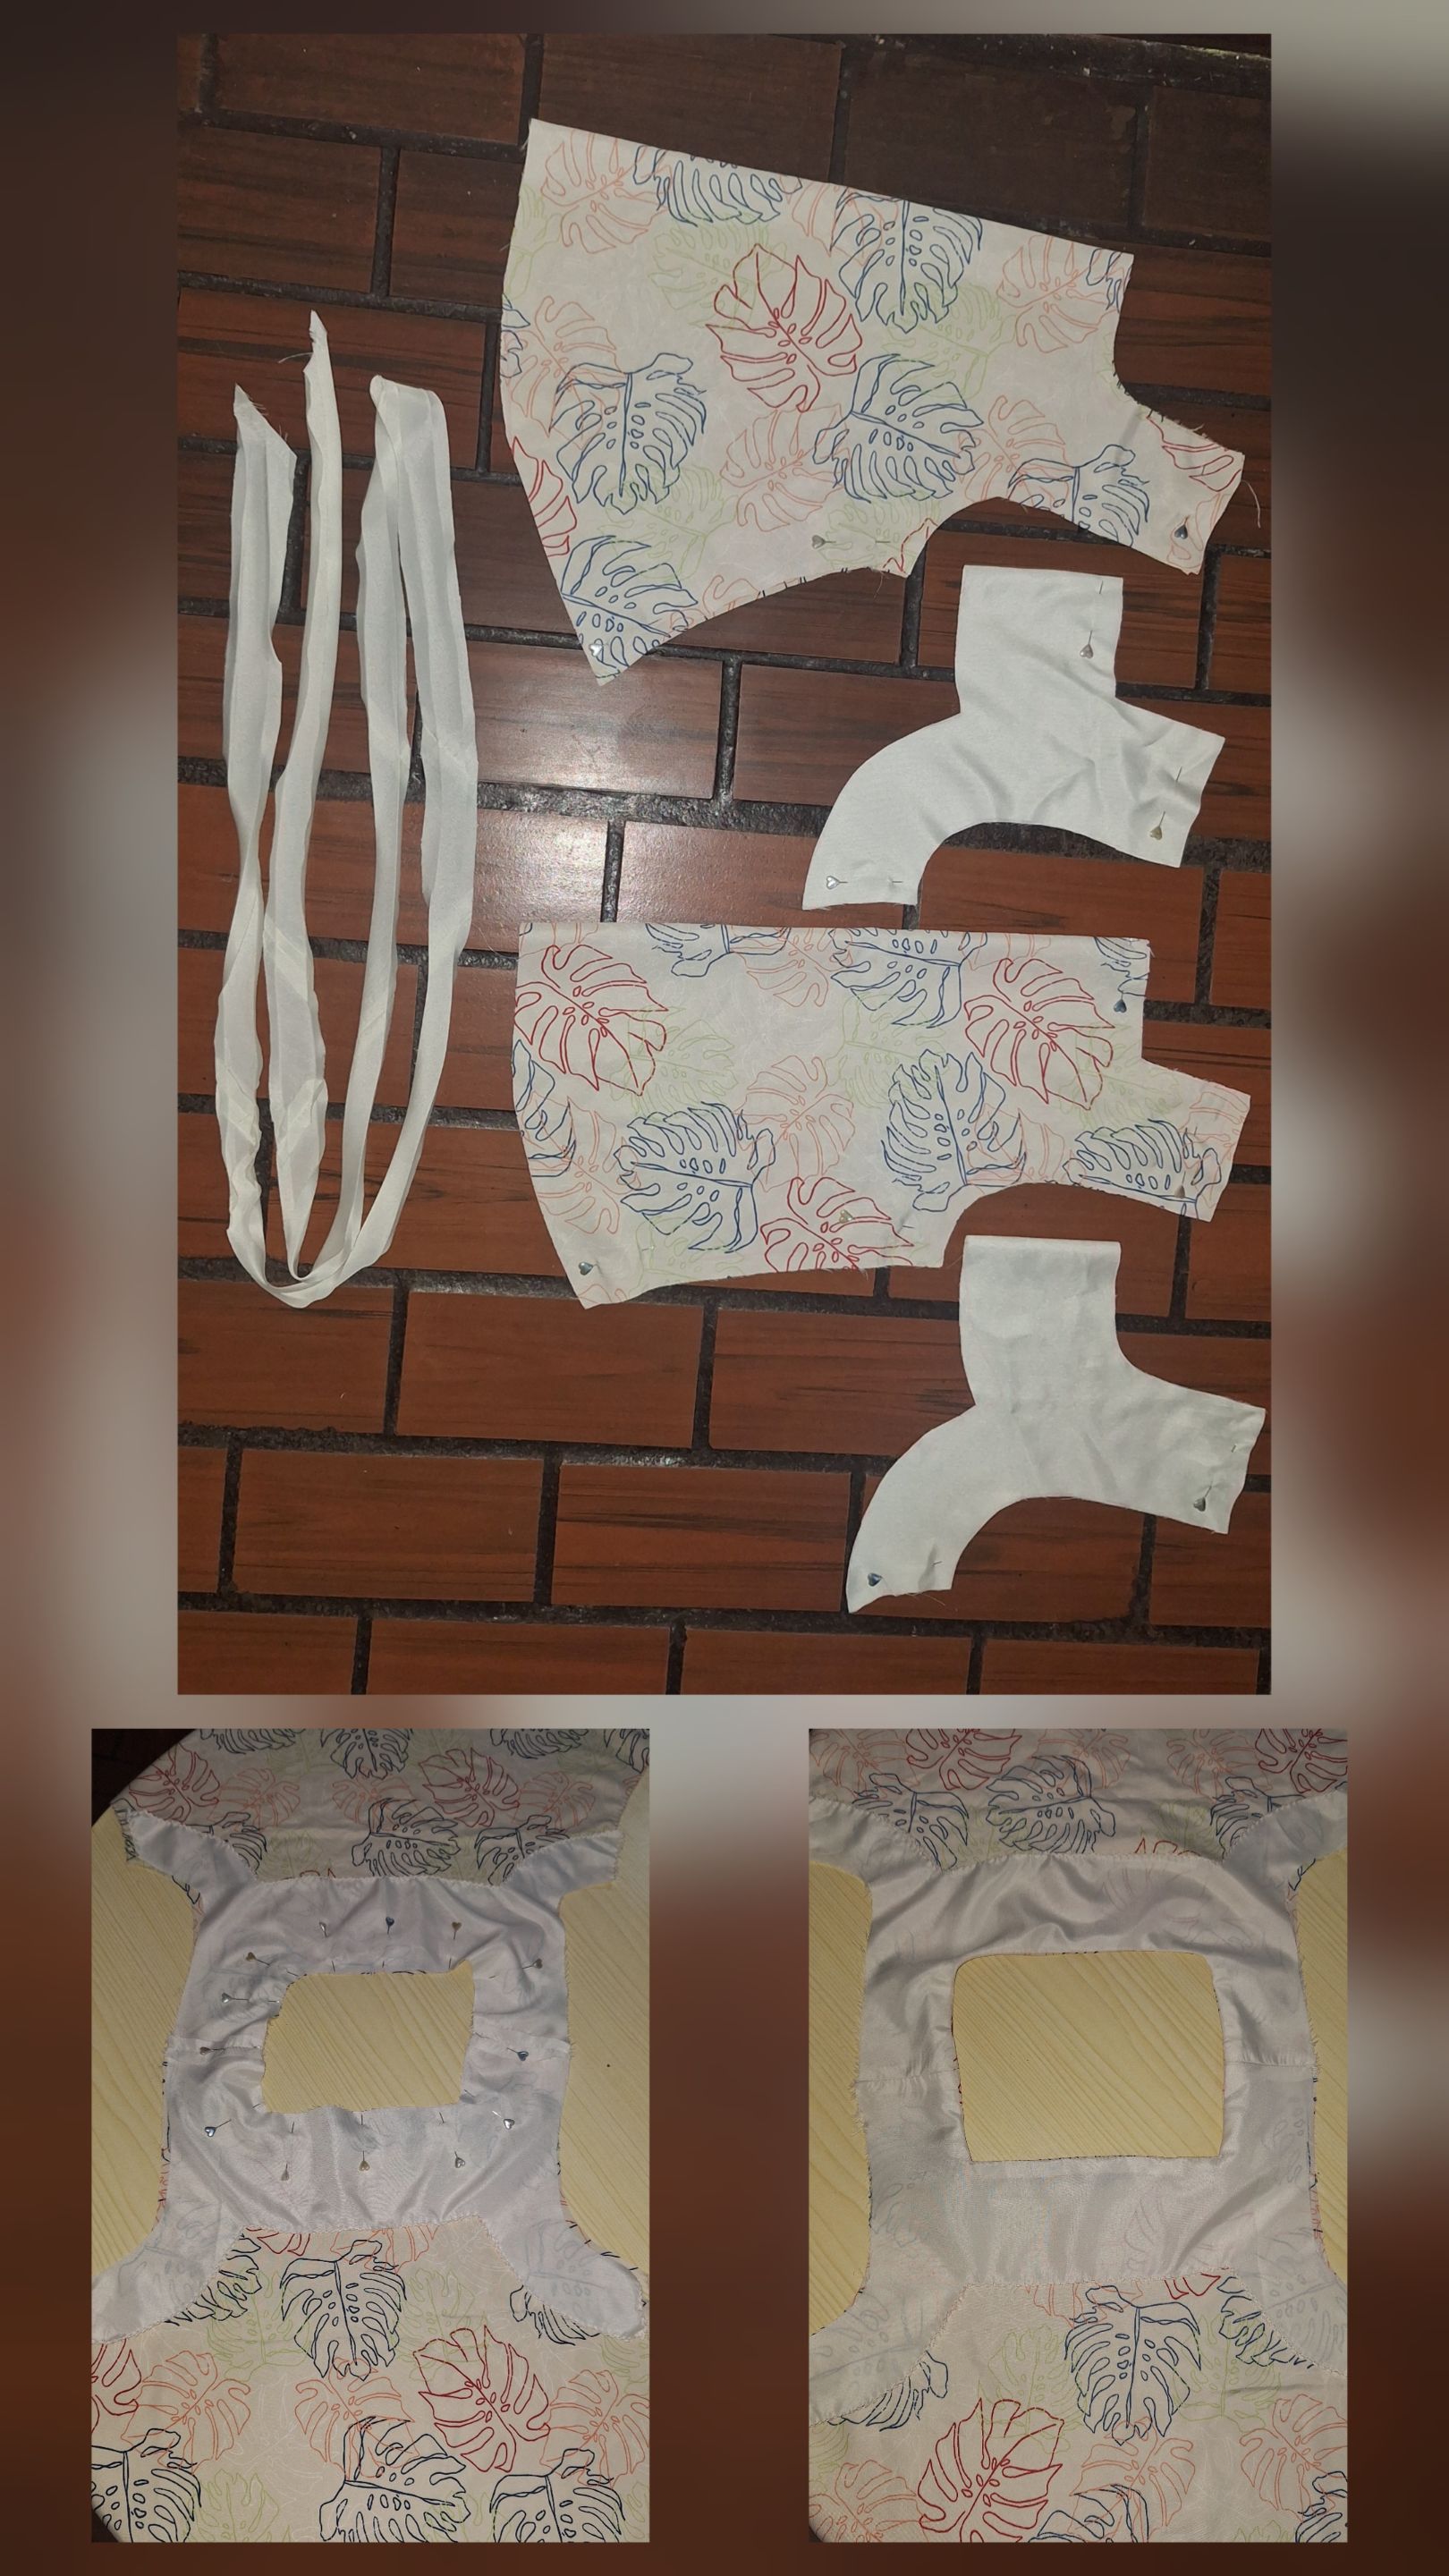 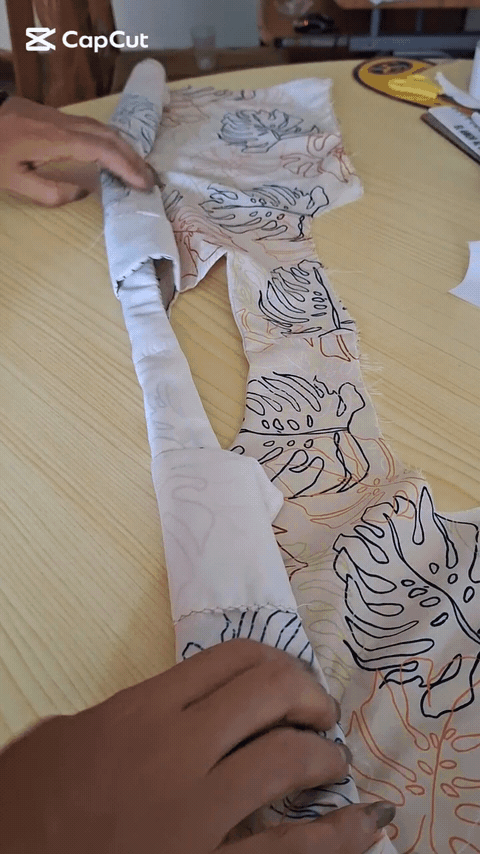 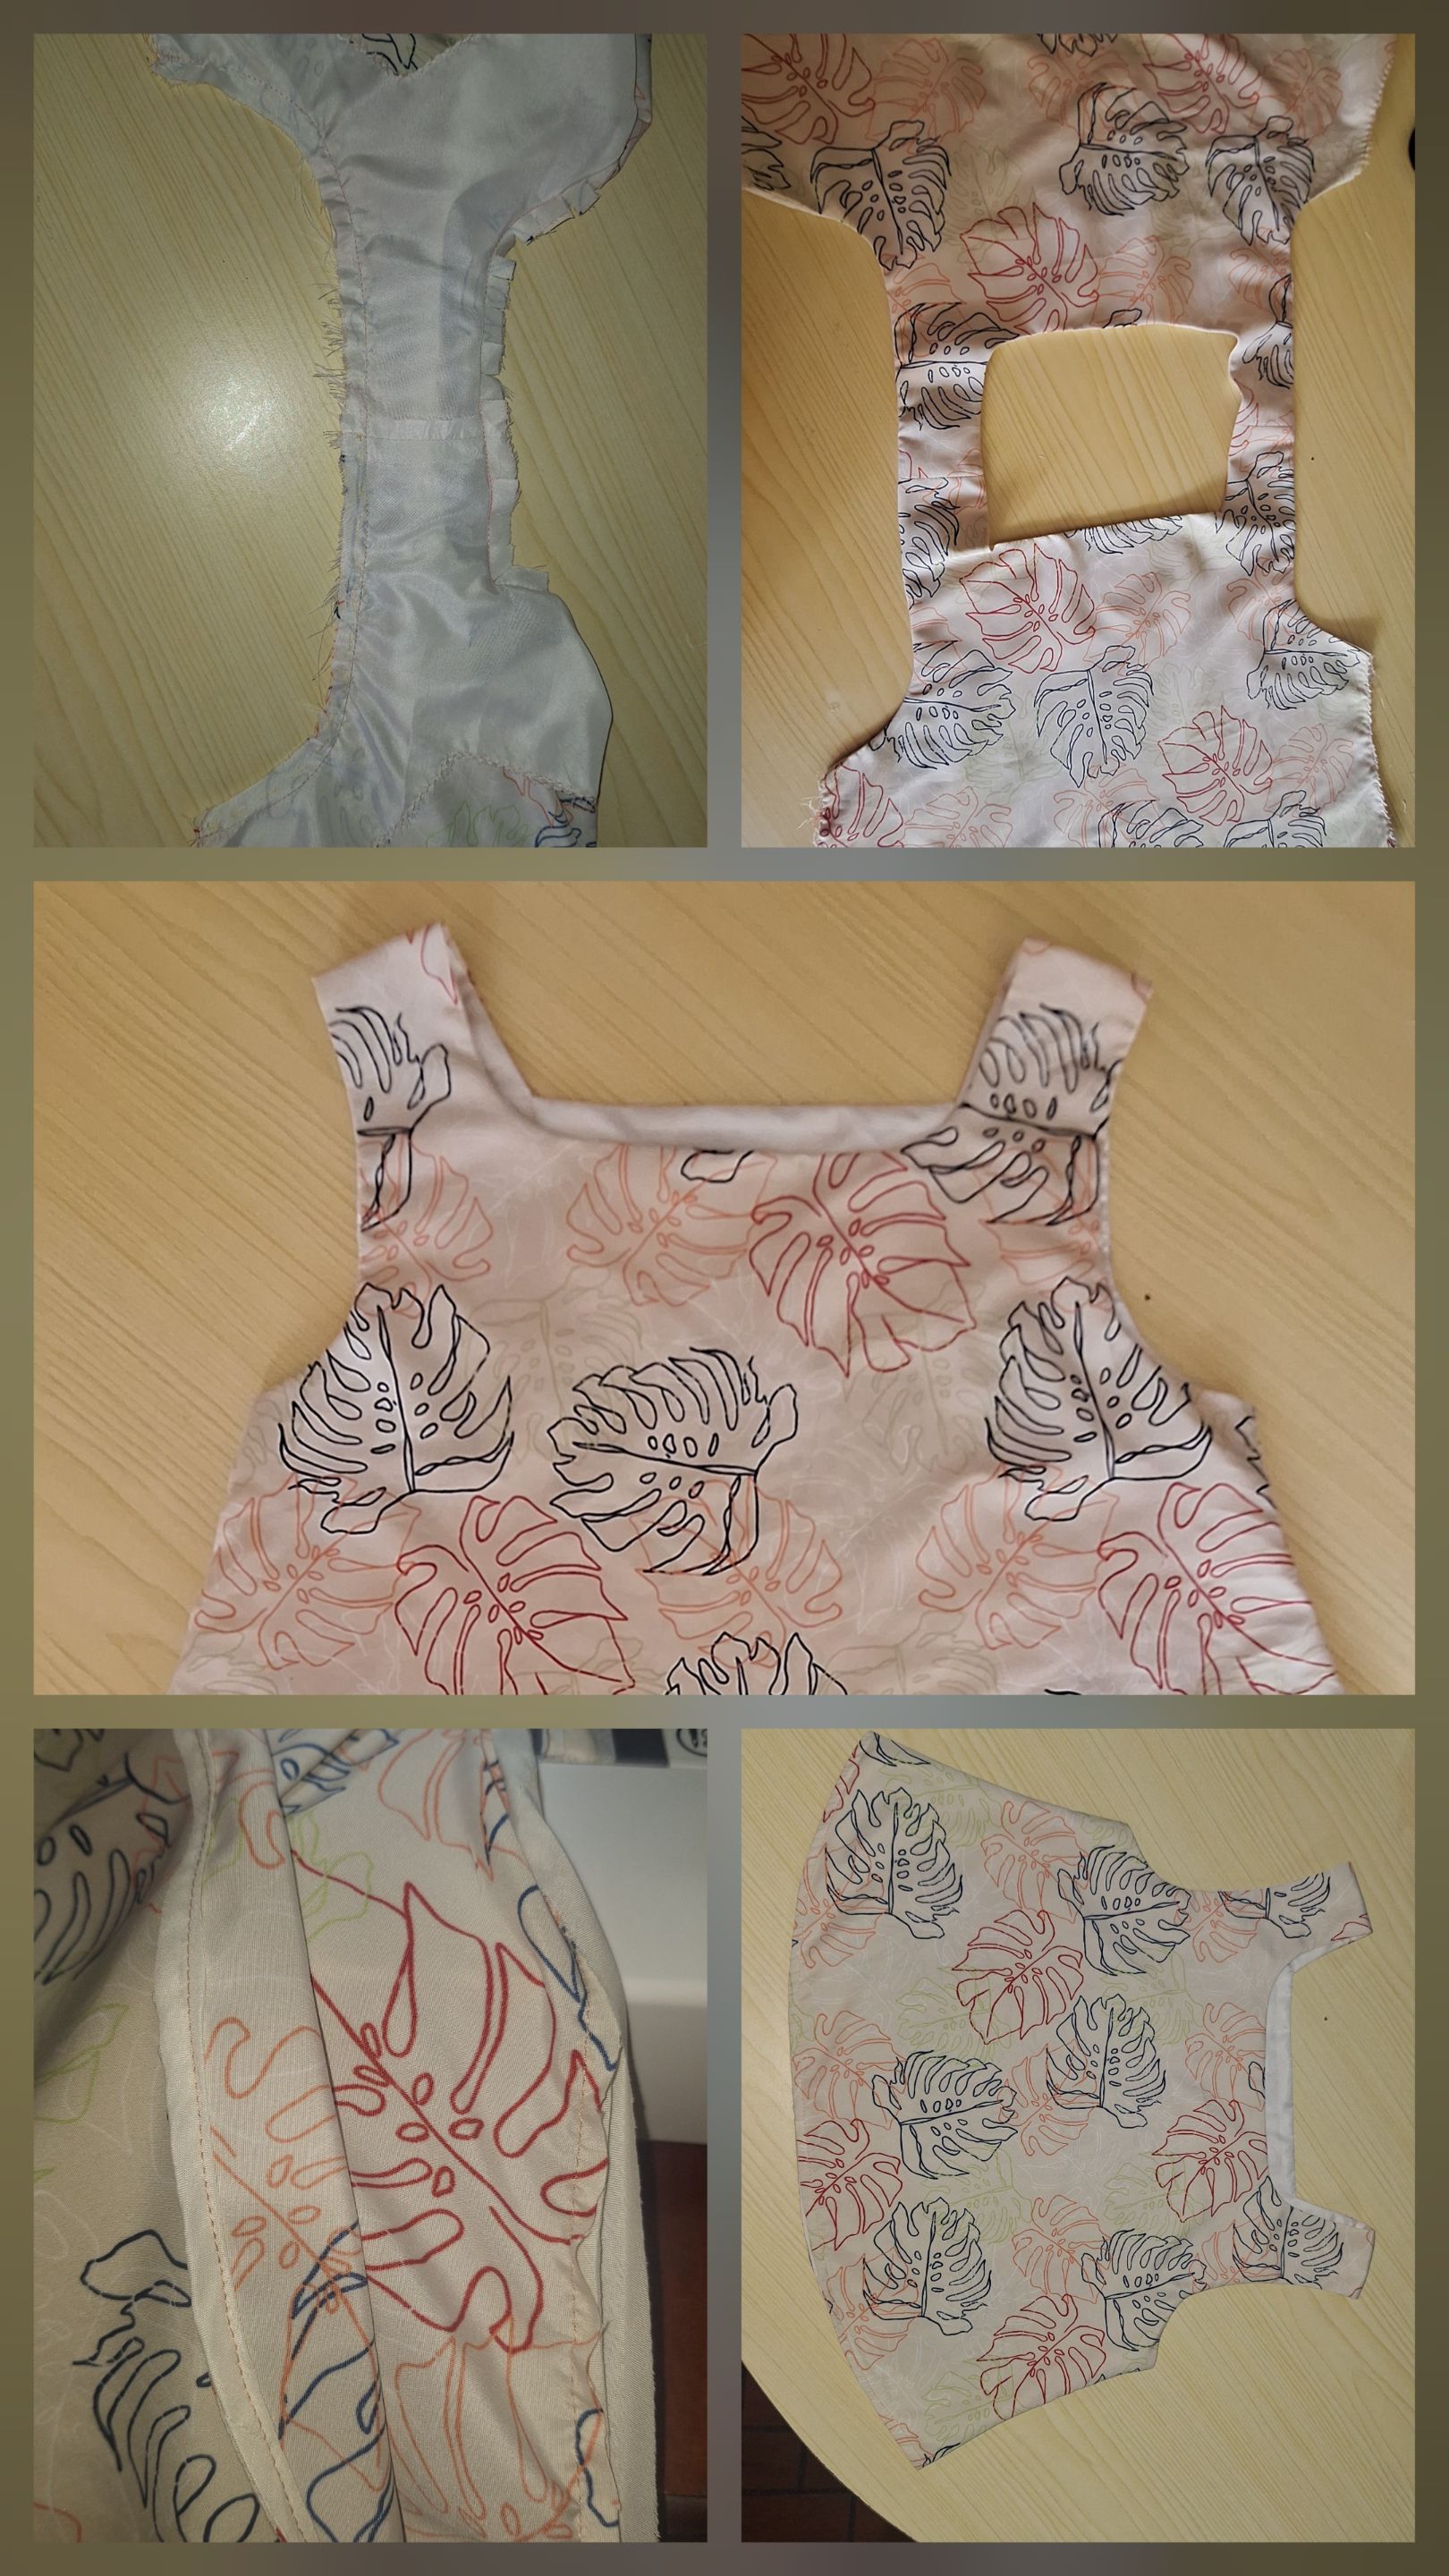 
Teniendo el bies y todas las piezas cortadas, era el momento de empezar a armar la camisa con costuras. Primero cosí los hombros de la tela principal y de las vistas. Después enfrenté los derechos de las telas por la parte del cuello, pasé costuras e hice cortes para darle vuelta y tener un mejor acabado. Luego, para embonar los hombros, enrolle uno de los hombros para enfrentar los derechos del otro hombro, como ven el GIF. La verdad es que de esta forma se logra un bonito acabado. Después cosí los costados y terminé de hacer los acabados con el bies, que viéndolo bien, lleva más trabajo, pero da mejores resultados. Y así de bonita se ve mi crop top, que por cierto me lo puse ayer para ir a misa y se los estuve mostrando aquí en mi publicación de ayer y se los dejo por aquí, por si no lo vieron. Esto ha sido todo por hoy, amigos, nos vemos en una nueva publicación pronto. ****** 
English  # ***A cute crop top for me***
Greetings and blessings, my beautiful people at @needleworkmonday. Back here again, I hope we all have a spectacular week. Around here, my princesses are about to start school. I've been making some shirts for them, and the one I'm showing you today is for me, a cute crop top, a short shirt. I really liked this style when I saw it on Pinterest, and even though I didn't find a tutorial for it, it's still easy to make. 
For this project, I used half a meter of patterned fabric. I had originally bought it to make shorts, but I didn't have enough. Since it was a high waist, I needed 75 cm. I already had a basic pattern made, but this time I made another one so I could modify it and move the side and waist darts to the waist, giving it more width, which was how I wanted it, with a slight flare. Once I had modified the pattern, I pinned it to the fabric, marked it, and cut it out.  
As I didn't have enough fabric to make the facings, I made them from another fabric that matched, and with this fabric I also dared to make bias binding for the first time. I wanted to do this to give a better finish to the hem of the blouse without affecting its length too much, as it was already quite short. I watched some tutorials and did it that way. With a 35 cm square on each side, I cut it in half and then joined the triangles that were left in the shape shown in the figure, sewed them, and then ironed them. I made 4 cm strips, although they should have been 5 cm. Then I made it into a kind of tube, leaving a strip on each side on the outside, and sewed it again. Then I cut the strips, starting at one end. And from that small square, I got 250 cm of bias tape. I was surprised at how much it yielded. I recommend it.    
With the bias tape and all the pieces cut, it was time to start putting the shirt together with seams. First, I sewed the shoulders of the main fabric and the facings. Then I matched the right sides of the fabrics at the neck, sewed the seams, and made cuts to turn it inside out and get a better finish. Then, to fit the shoulders, I rolled one of the shoulders to match the right side of the other shoulder, as you can see in the GIF. The truth is that this way you get a nice finish. Then I sewed the sides and finished the edges with the bias tape, which, looking at it closely, takes more work but gives better results. And this is how pretty my crop top looks. By the way, I wore it yesterday to go to church and showed it to you here in my post yesterday. I'll leave it here in case you didn't see it. That's all for today, friends. See you soon in a new post. ********** 
*** Mi blog es familiar, de mi día a día, en donde puedo subir fotos de niños u otras personas de mi entorno, NO autorizo a usar mis fotografías sin mi autorización. > My blog is a family blog, of my daily life, where I can upload photos of children or other people around me, I do NOT authorize you to use my photos without my authorization. Dispositivo | Device | Samsung Galaxy A54 *** Fotos editadas en: |Photos edited in | CC Express for Picsart / Canva *** Separadores hechos en | Separators made in | CC Express for Samsung *** Traducción con | Translation with| [DeepL](www.DeepL.com/Translator (free version))