
---
En Venezuela, cada vez que desechamos una prenda de vestir, ésta se suele transformar para diferentes usos, según el tipo de tela; y hoy es momento de decirle adiós a un par de pantalones de blue jean y darle la bienvenida a un pequeño bolso de primavera.
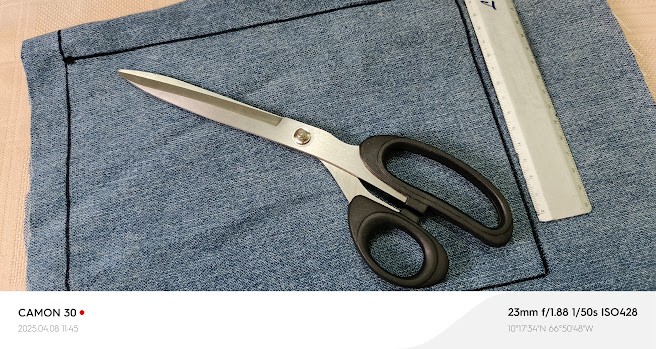
Los materiales, son muy sencillos:
- un cuadrado (o rectángulo) de jean (o una tela gruesa),
- máquina de coser,
- agujas de tejer (acorde al hilo de crochet)
- hilo plástico de crochet,
- tijeras,
- encendedor.
Lamento no poder contar con una foto, es que perdí las fotos, por lo que pido disculpas.
In Venezuela, every time we discard an item of clothing, it is usually transformed for different uses, depending on the type of fabric; and today it is time to say goodbye to a pair of blue jean trousers and welcome a small spring bag.
The materials are very simple:
- a jean square (or rectangle) (or a thick fabric),
- sewing machine,
- knitting needles (according to the crochet thread)
- plastic crochet thread,
- scissors,
- lighter.
I'm sorry I don't have a photo, but I've lost the photos, so I apologise.
---
Lo primero que haremos es marcar el tamaño de nuestro bolso base; recorta, con ayuda de la máquina de coser, realiza el dobladillo superior y une todos los tres lados restantes.
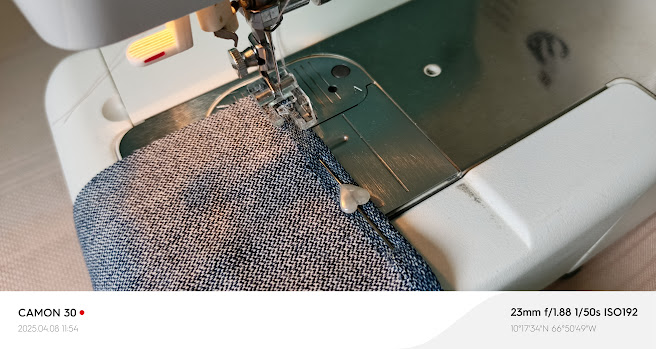
The first thing we will do is to mark the size of our base bag; cut out, with the help of the sewing machine, make the top hem and join all the three remaining sides.
---
Realiza una pequeña costura en forma de triangulo de aproximadamente tres centímetros y recorta ese excedente, así nuestro bolso tomara una forma bonita.

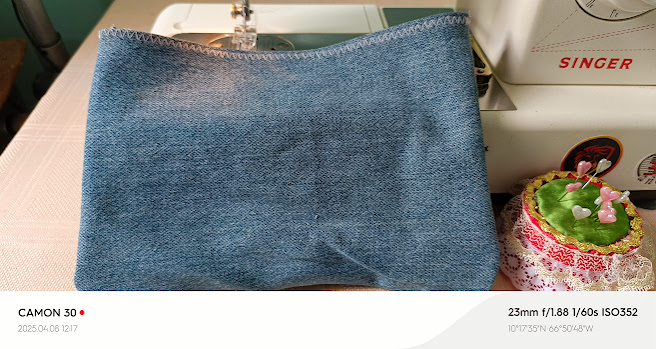
Make a small triangle-shaped seam of approximately three centimetres and cut off the excess, so our bag will take a nice shape.
---
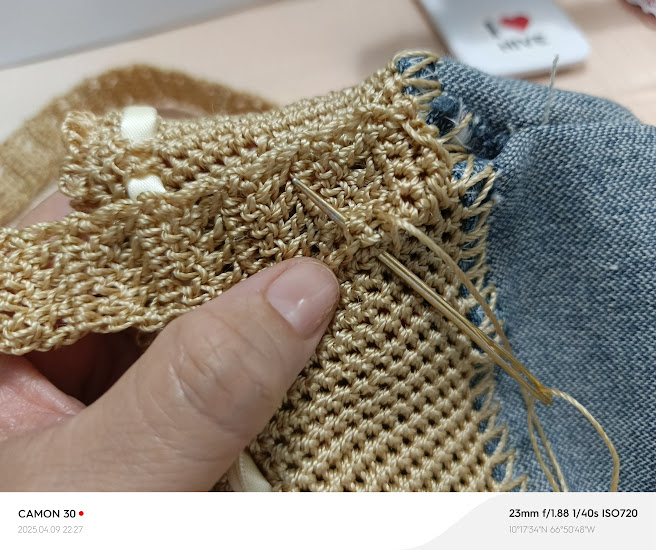
Opcionalmente puedes realizar bordes decorativos alrededor de la base del bolso de tela, también puedes bordar un lateral o colocar algún motivo adicional. Una vez que haya quedado lista nuestra base, con ayuda de una aguja delgada o una aguja punta roma, vamos abriendo pequeños orificios para ir tejiendo con nuestro hilo plástico de crochet, todo el borde superior de la base, justamente, donde hicimos el dobladillo.
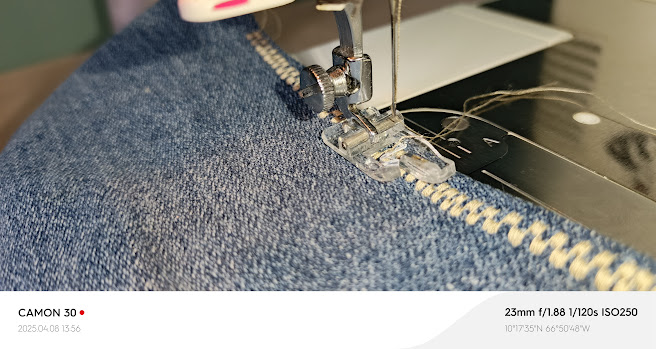
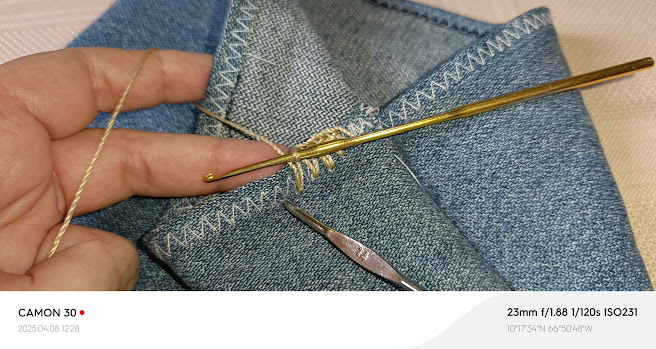
Optionally you can make decorative borders around the base of the bag, you can also embroider a side or place an additional motif. Once our base is ready, with the help of a thin needle or a blunt needle, we open small holes to weave with our plastic crochet thread, all around the upper edge of the base, just where we made the hem.
---
Iniciaremos nuestra primera vuelta con puntos bajos en cada uno de los puntos base que realizamos; de allí en adelante, continúa con puntos bajos de manera circular, hasta alcanzar el tamaño deseado.
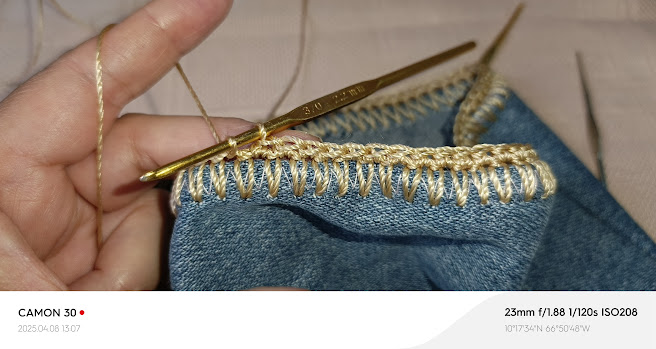
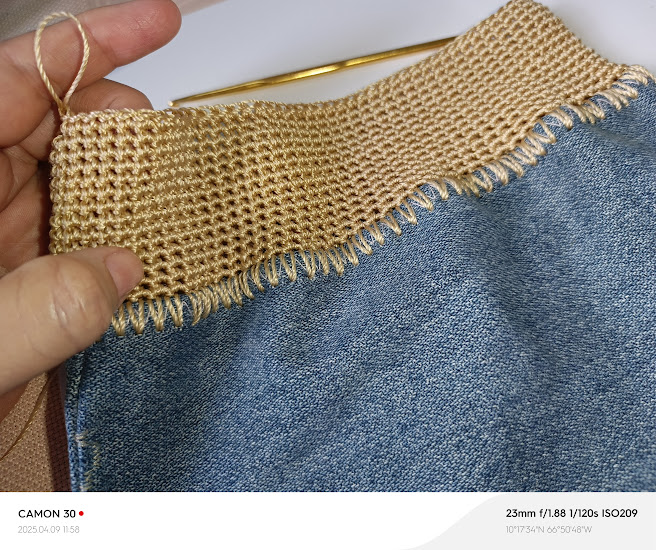
We will start our first round with single crochet in each of the base stitches we knit; from then on, continue with single crochet in a circular fashion, until we reach the desired size.
------
Una vez que hayas alcanzado el tamaño deseado, sólo faltarán tres hileras: una vuelta con puntos altos, una con puntos bajos (para dar firmeza y luego repite: un punto bajo clavado en la base + dos cadenetas (repetir), hasta lograr una ligera decoración.
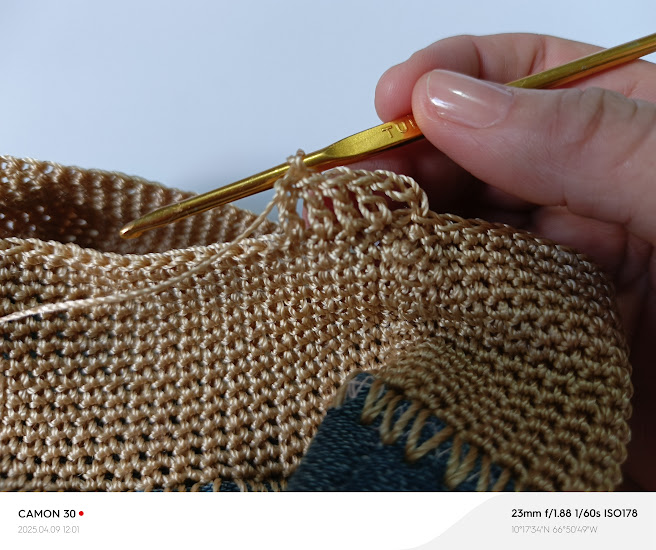
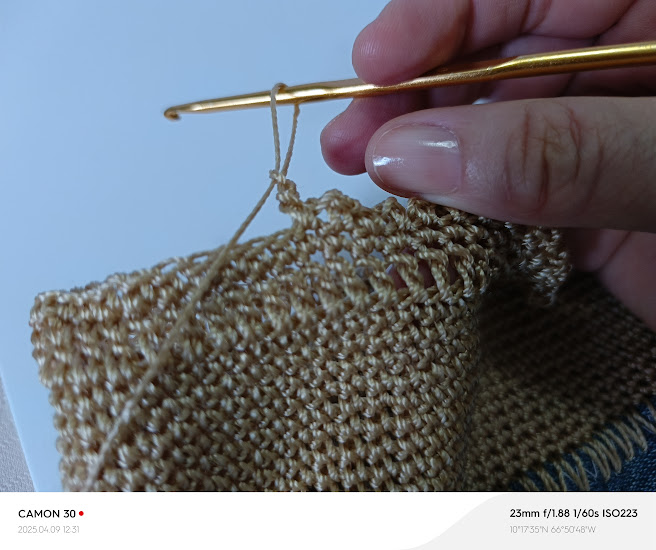
Once you have reached the desired size, you only need three rows: one row with double crochet, one row with single crochet (to give firmness and then repeat: a single crochet tacked to the base + two chain stitches (repeat), until you achieve a slight decoration.
----
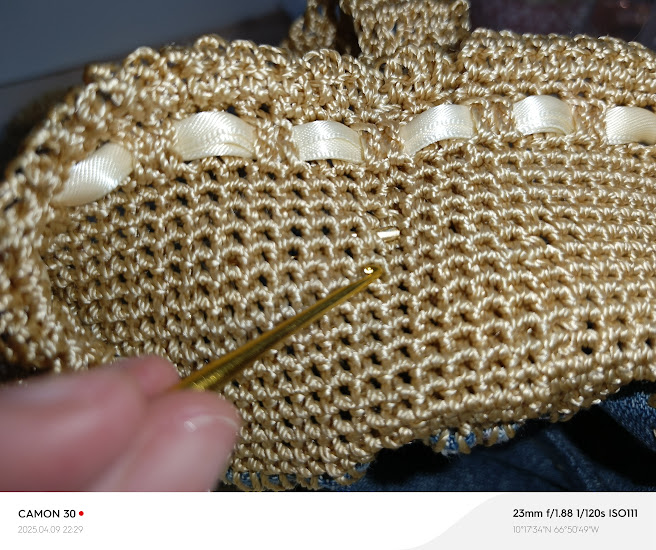
Cierra nuestra vuelta con un nudo, corta y quema el hilo plástico, para sellar y finalizar el bolso; introduce una cinta de raso como se muestra en la imagen, por todo el contorno de la hilera de puntos altos.
Puedes dejar de éste tamaño y usar como bolso auxiliar o puedes realizar una cinta a crochet, que nos sirva de asa de nuestro bolso.
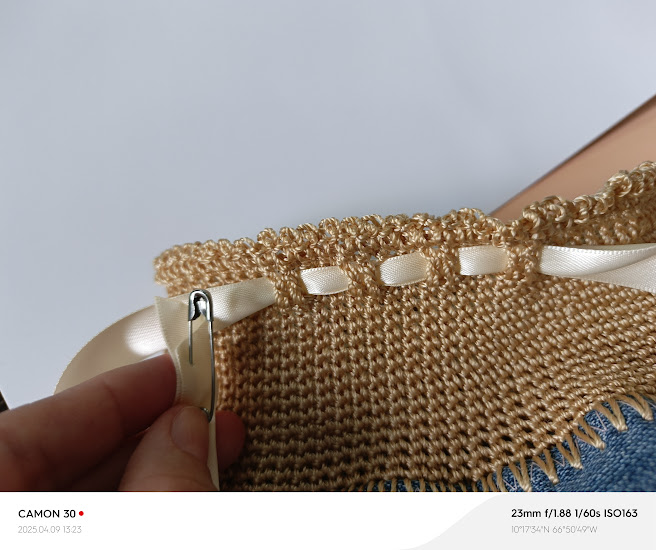
Close our round with a knot, cut and burn the plastic thread, to seal and finish the bag; insert a satin ribbon as shown in the picture, all around the row of high stitches.
You can leave this size and use it as an auxiliary bag or you can crochet a ribbon to use as a handle for your bag.
---
La unión de la cinta en nuestro bolso, debe ser fuerte y asegurada; con ayuda de una aguja punta roma une punto a punto todo los bordes.
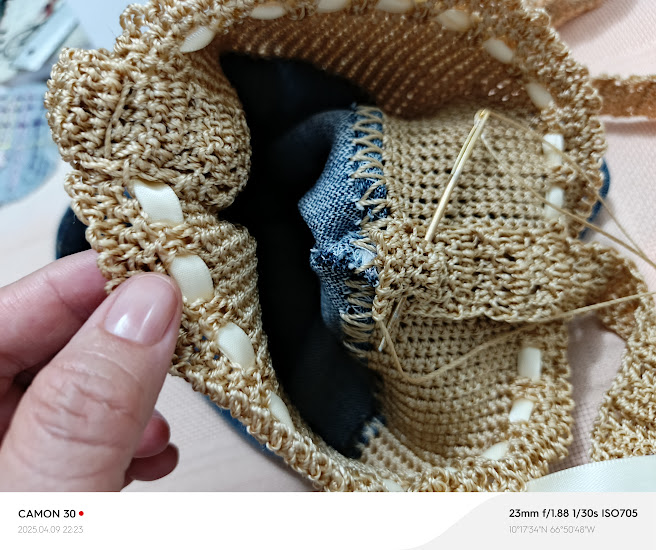
The ribbon must be tightly and securely attached to the bag; with the help of a blunt-pointed needle, join the edges of the ribbon stitch by stitch.
---
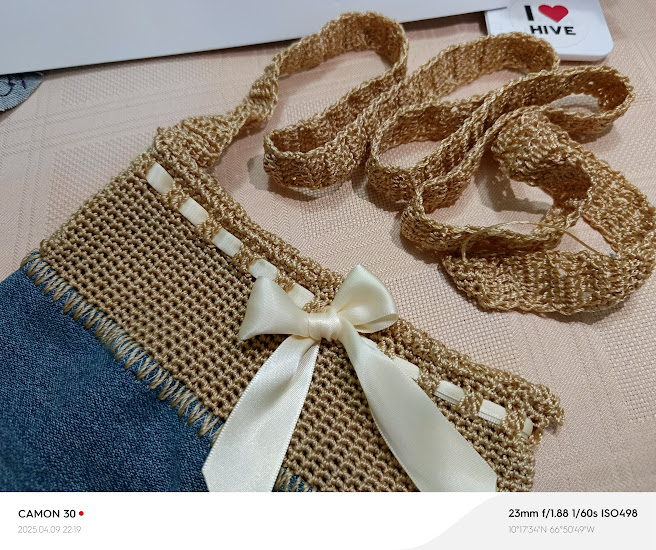
No te preocupes por la terminación, porque no se notará todas las posibles imperfecciones que puedan quedar del paso anterior.
De ésta manera, quedará nuestro ¡hermoso bolso primavera!.
Espero que sea de tu agrado y que puedas realizarlo de manera sencilla.
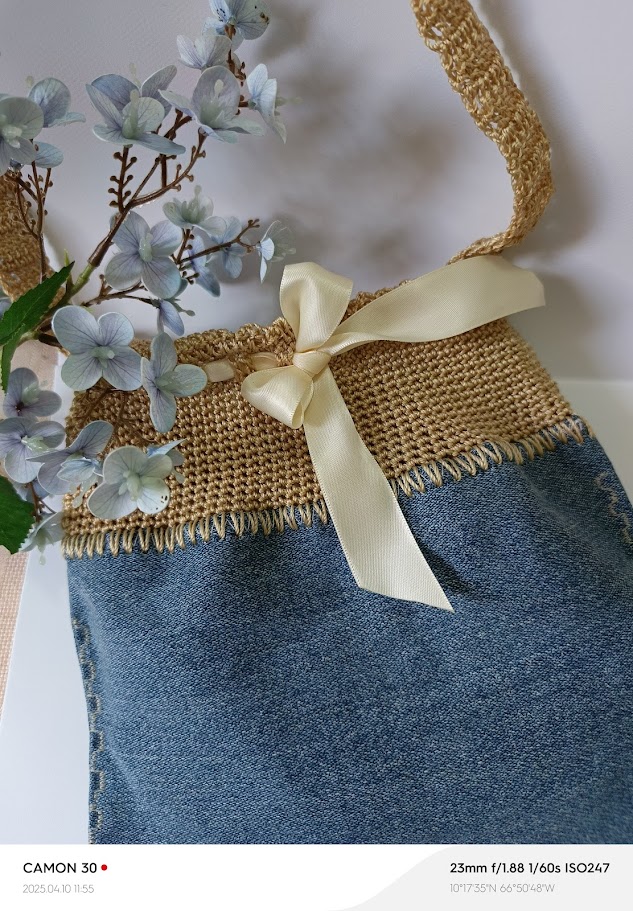
Don't worry about the finish, because you won't notice any imperfections that may remain from the previous step.
This way, our beautiful spring bag will be ready.
I hope you like it and that you can make it in a simple way.
---
Amigos, muchas gracias por acompañarme en este nuevo tutorial; espero que les haya gustado y sobre todo deseo que pueda de ser de gran ayuda para ti que estas iniciando en la elaboración de elementos artesanales.
Recuerda que el trabajo artesanal es único; la elaboración de piezas artesanales, aparte de ser una acción liberadora, es también un acto de amor e ilusión.
¡Nos vemos pronto!
Letty
Friends, thank you very much for joining me in this new tutorial; I hope you liked it and above all I hope it can be of great help to you who are starting to make handmade elements.
Remember that handmade work is unique; the elaboration of handmade pieces, apart from being a liberating action, is also an act of love and illusion.
See you soon!
Letty
----

✒️Autor: @leticiapereira 📸 Huawei Y9 /2019 - Sony H400 Acknowledgements: Canva & Deepl Translator 🚨 Please don´t edit or use my images, videos or text on other networks without my approval. 🚨 ©️ 2017 - 2024, @leticiapereira - Original Content
Plagiarism free and AI-free