Buenas tardes, amigos de #DiyHub en esta oportunidad hice un tutorial de un impermeable y una pequeña bolsa para colocar el impermeable.
>Good afternoon, #DiyHub friends this time I made a tutorial of a raincoat and a small bag to put the raincoat in.
---
## Materiales | Materials
- 2 Metros de tela impermeable
- 5 Metros de sesgo
- Hilo blanco
>- 2 Meters of waterproof fabric
>- 5 Meters of bias
>- White thread

## Pasos | Steps
### Paso 1 | Step 1
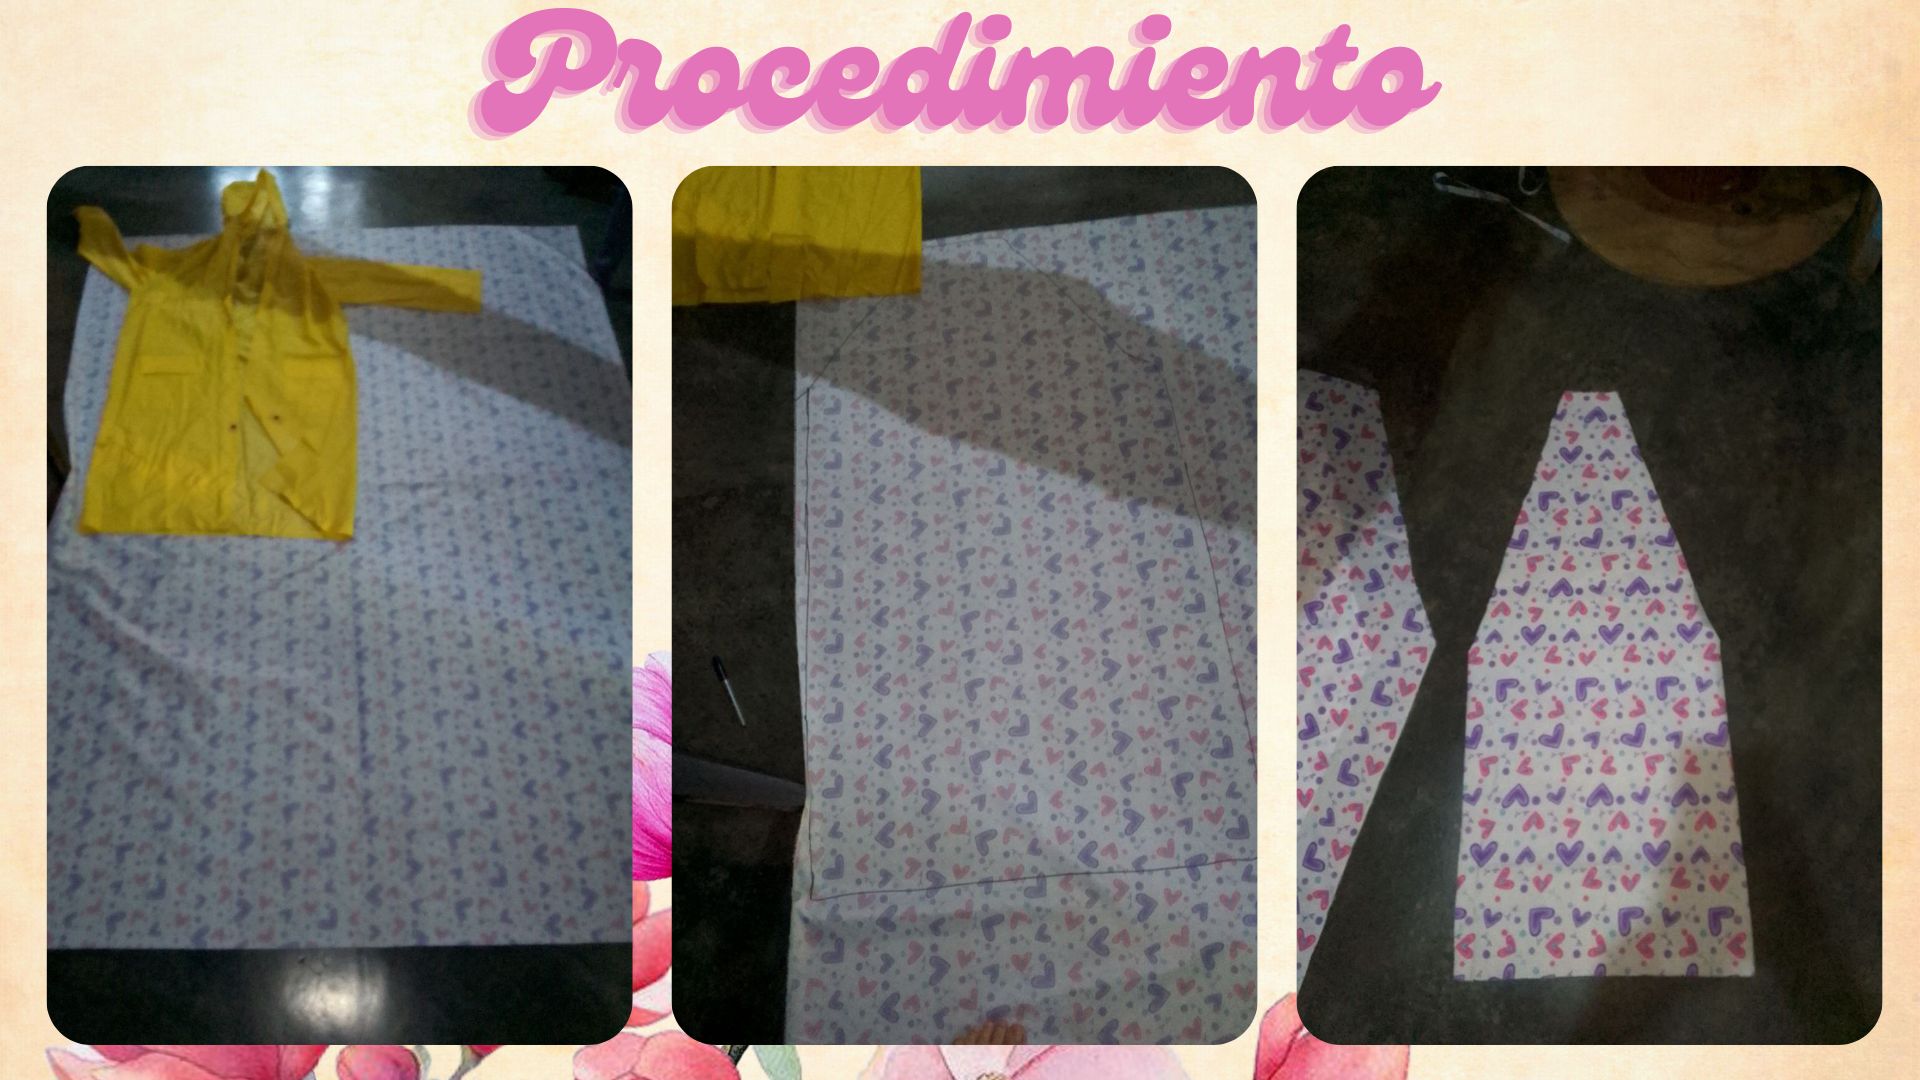
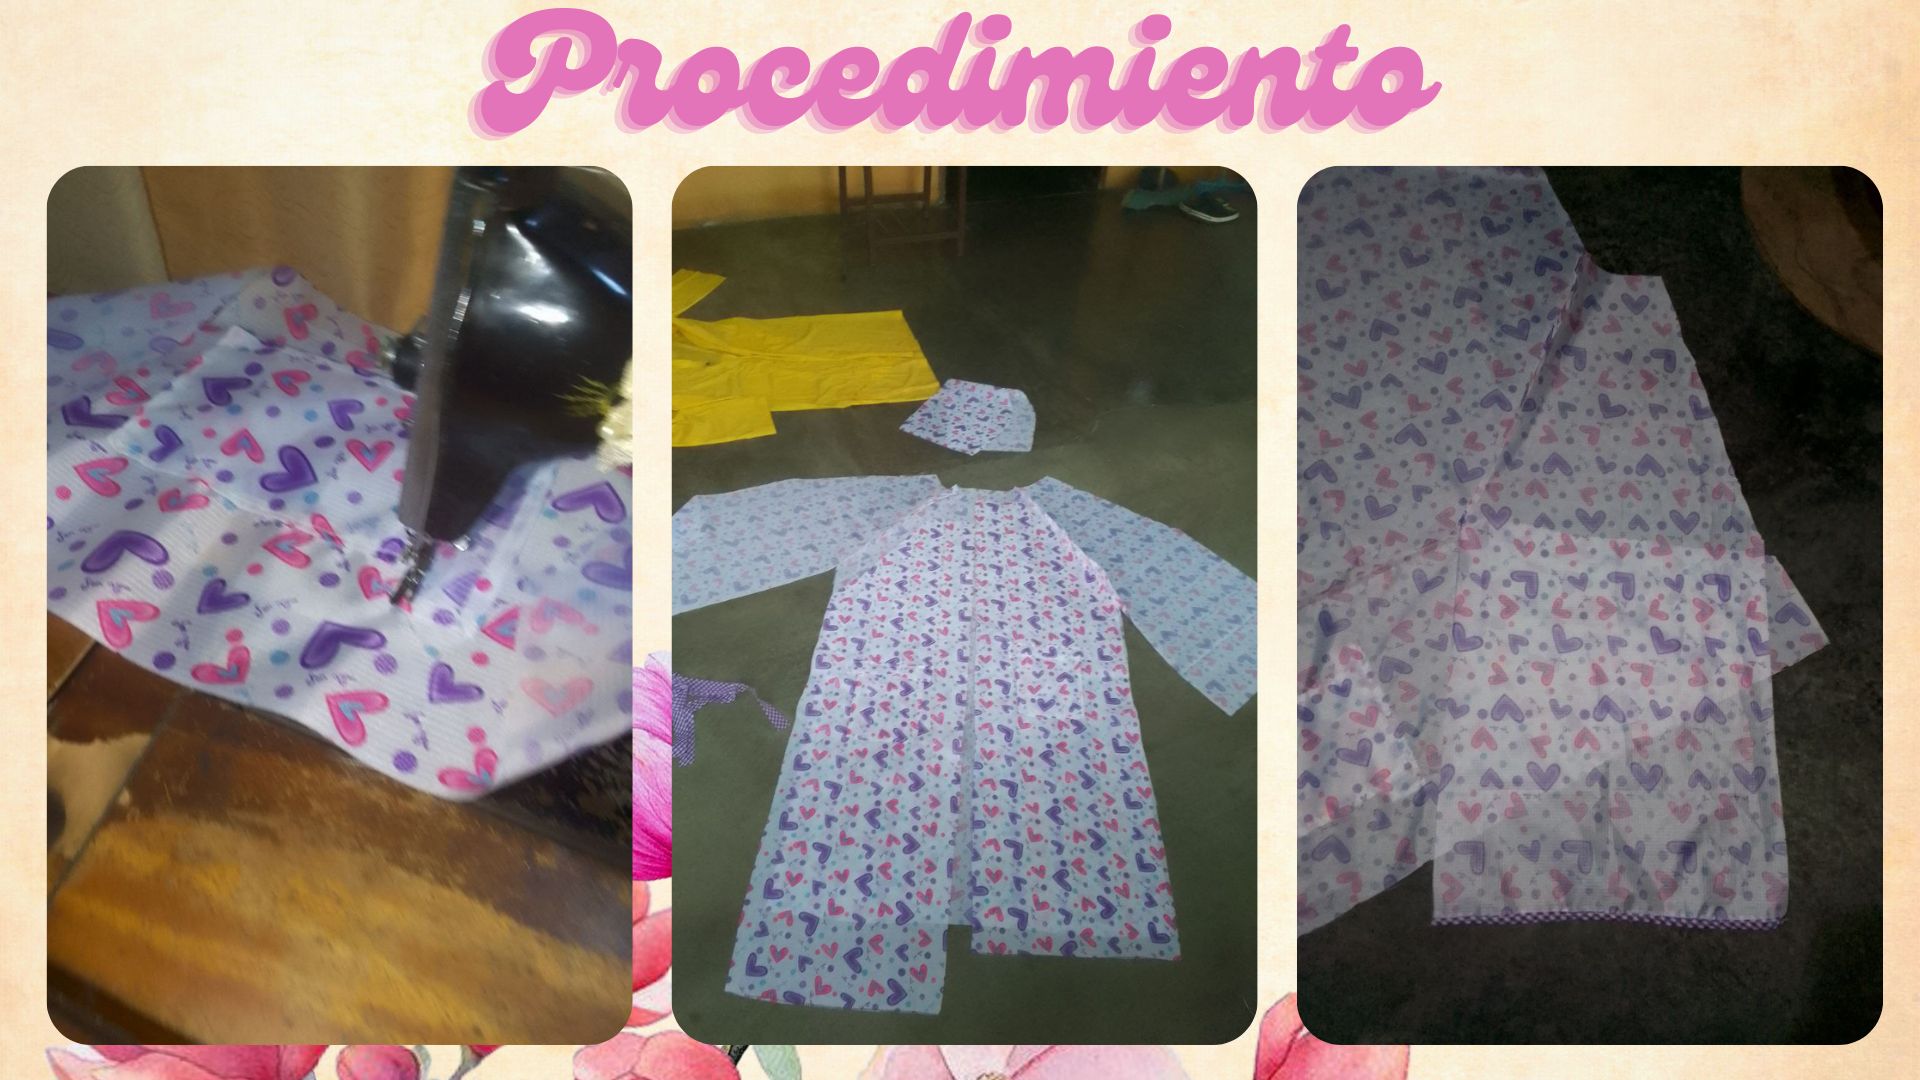
Coloque un impermeable para sacar los patrones, de la parte de atrás. Luego el patron de los brazos.
>Place a raincoat to pull out the patterns, from the back. Then the pattern of the arms.
### Paso 2 | Step 2
Coloque un impermeable para sacar los patrones, de la parte de atrás. Luego el patron de los brazos.
>Place a raincoat to pull out the patterns, from the back. Then the pattern of the arms.
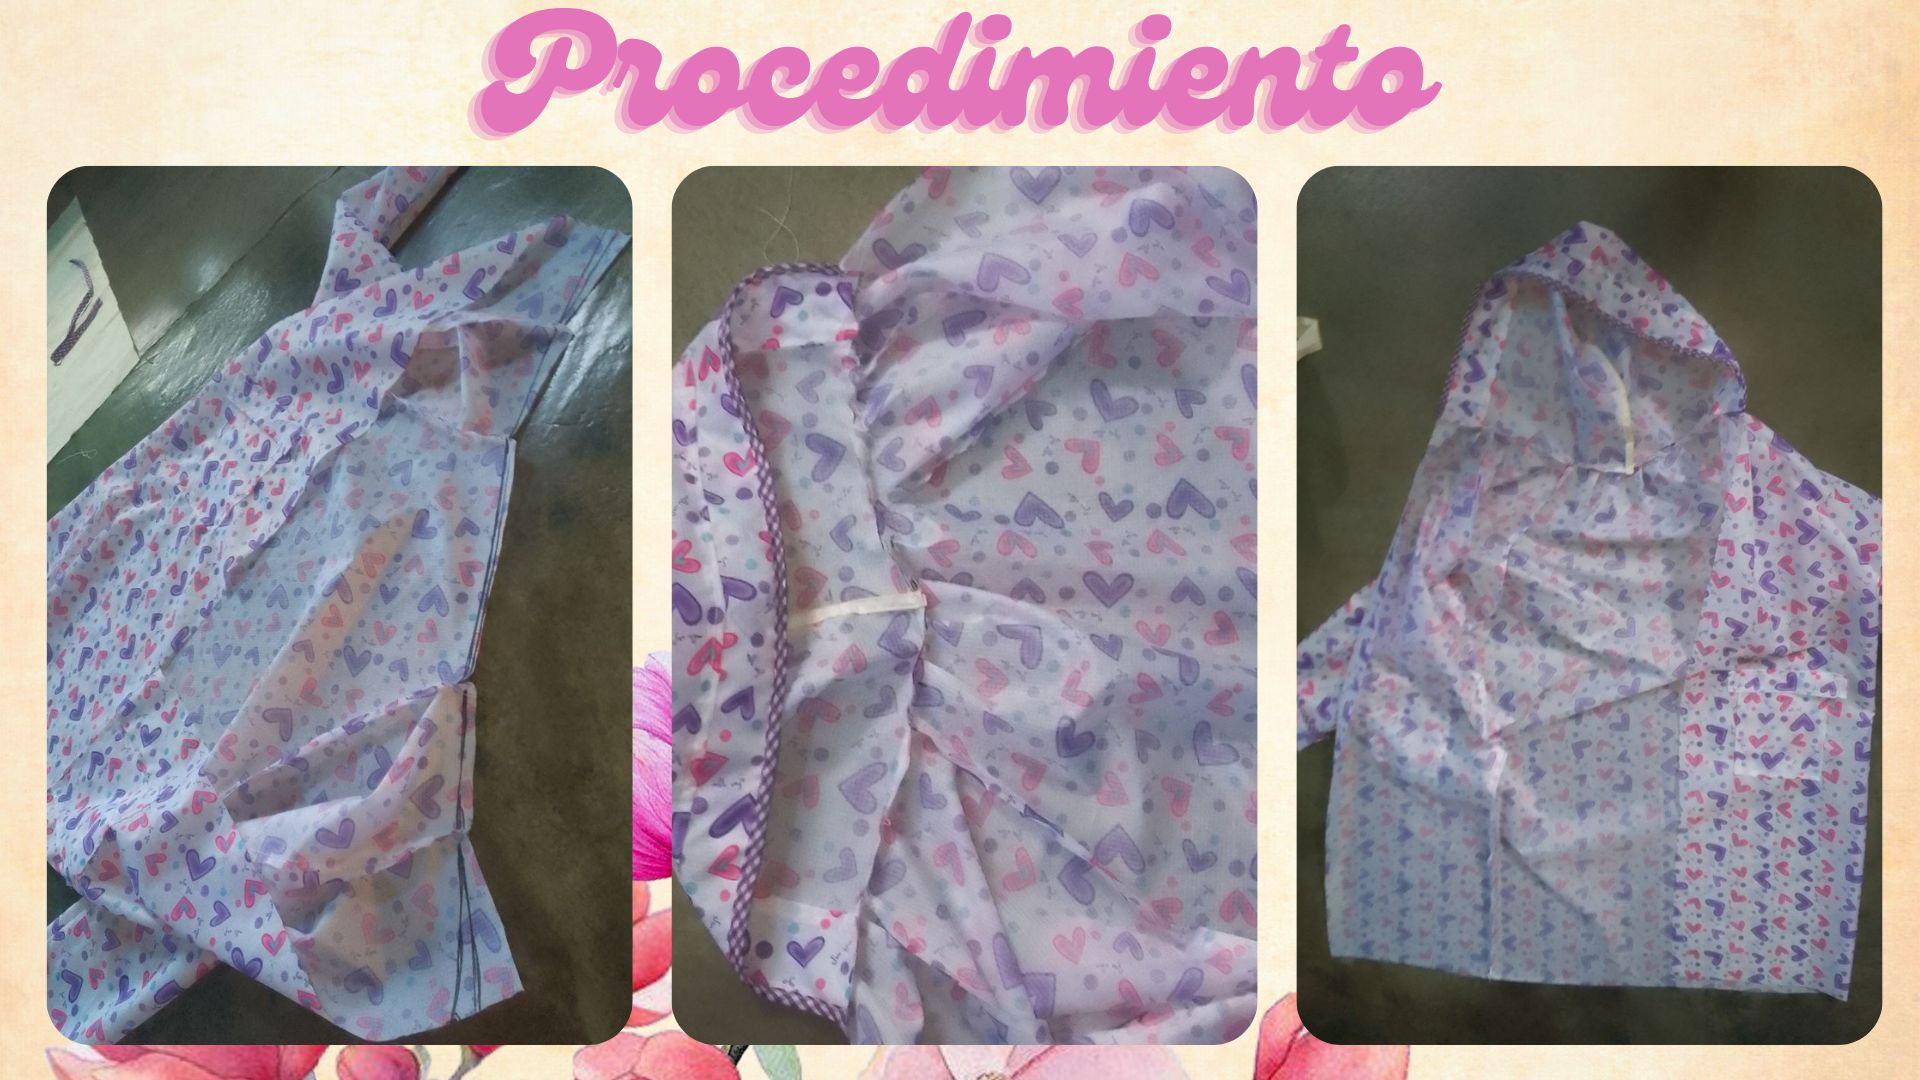
### Paso 3 | Step 3
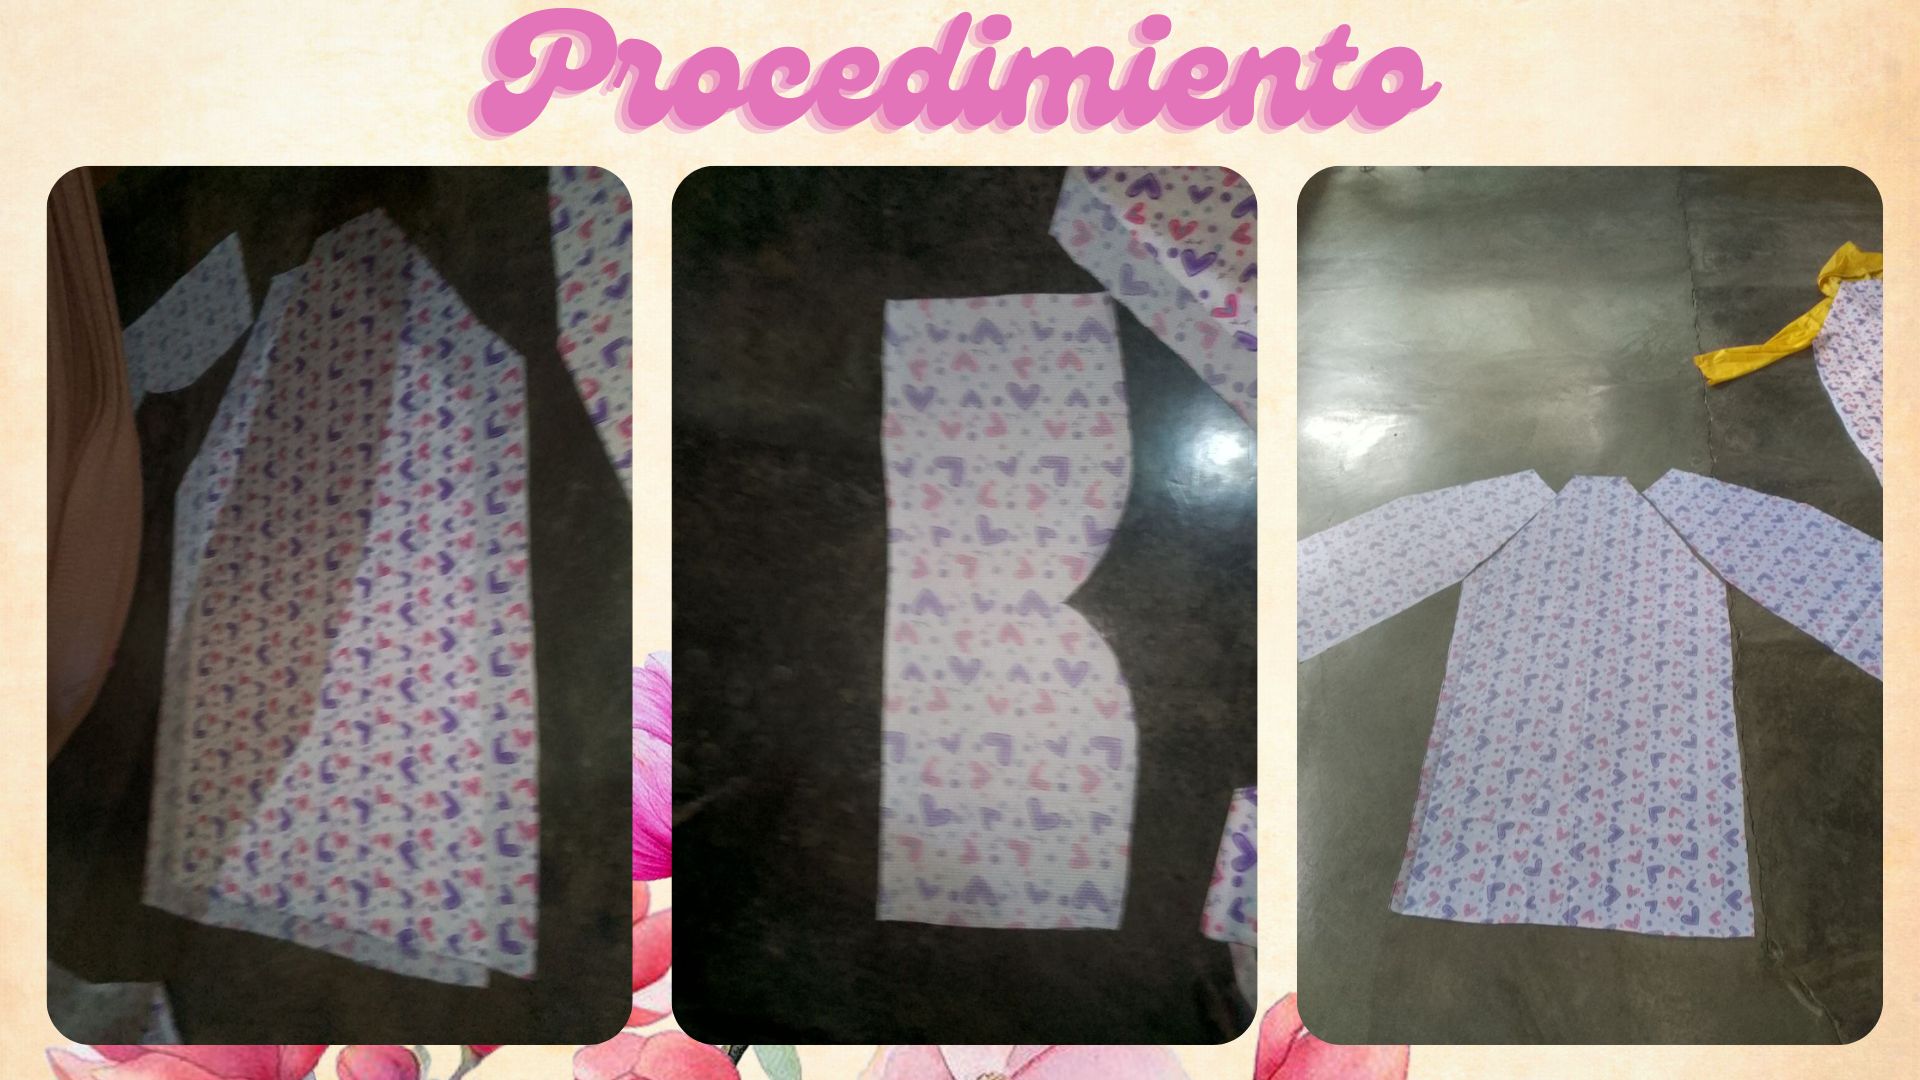
El espacio mas grande, lo dividi a la mistad para pasarle el sesgo.
>The larger space, I divided it to the mistad to pass the bias.
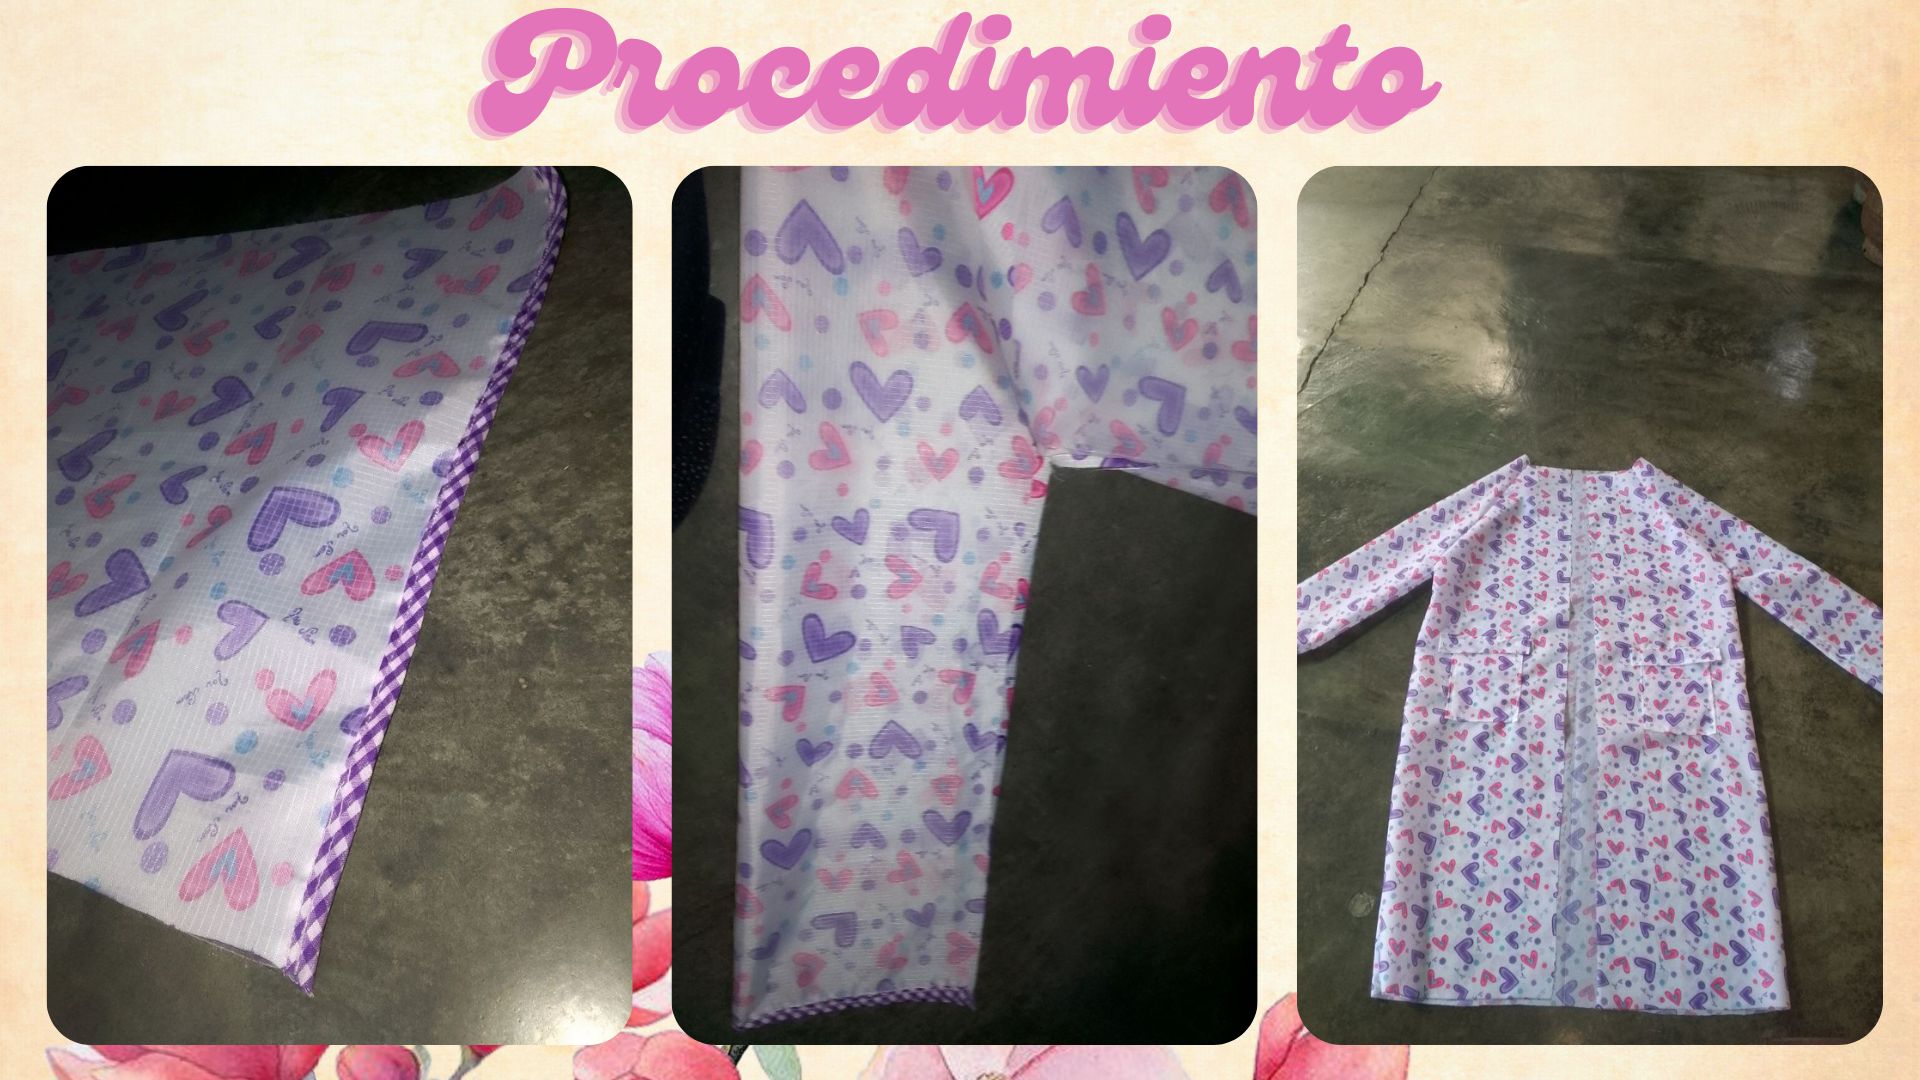
### Paso 4 | Step 4
Luego colocamos las caras contrarias de cada lado del impermeable.
>Then we place the opposite sides of each side of the raincoat.
### Paso 5 | Step 5
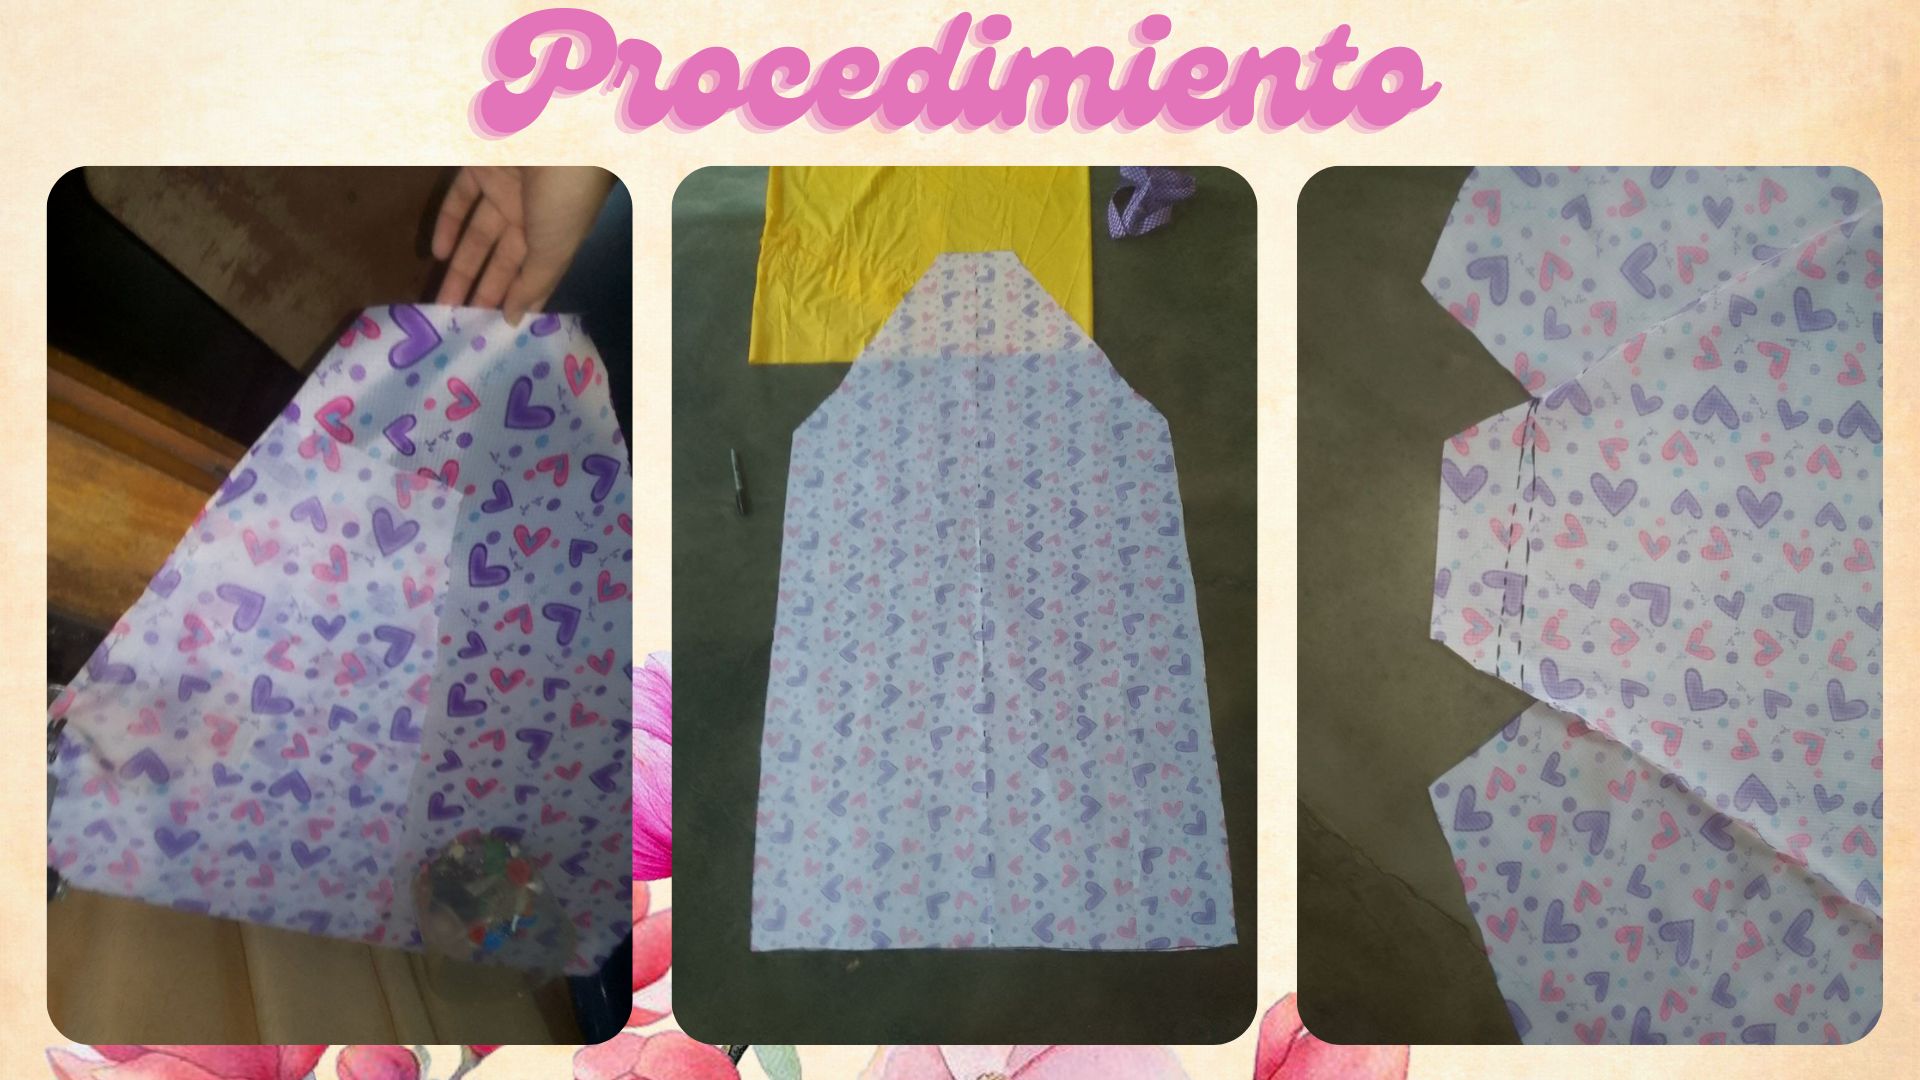
Luego hice un bolsillo en cada lado, Luego empece a coser la parte interior de los brazos.
>Then I made a pocket on each side, then started sewing the inside of the arms.
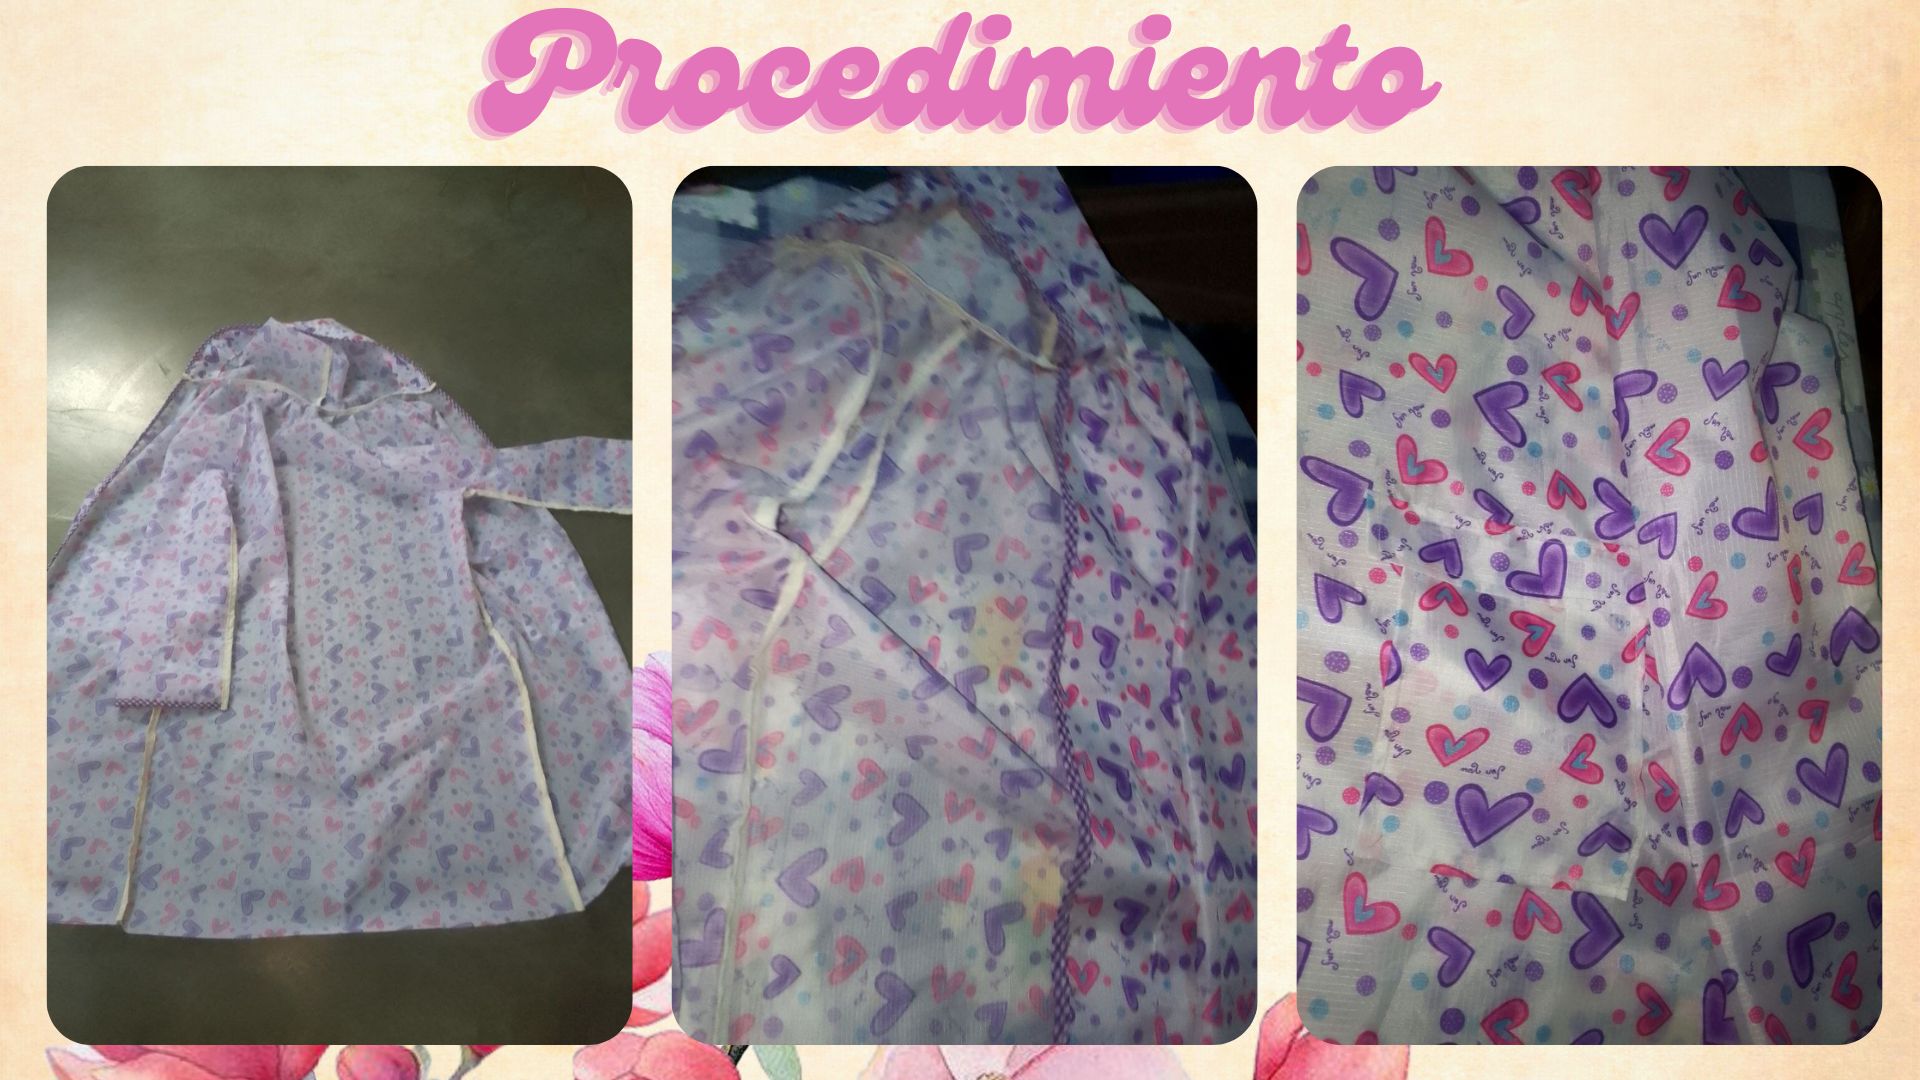
### Paso 6 | Step 6
Luego que ya tuve la parte de abajo del impermeable, sigue la capucha que es mucho mas facil de hacer. Y tambien coloque el sesgo en la parte de abajo y en las mangas.
>After I had the bottom part of the raincoat, the hood follows, which is much easier to make. And I also put the bias on the bottom and sleeves.
### Paso 7 | Step 7
Para la capucha, tome el patron del impermeable y tome dos tiras cosi todo a contra cara.
>For the hood, take the pattern of the raincoat and take two strips and sew the whole thing back to back.
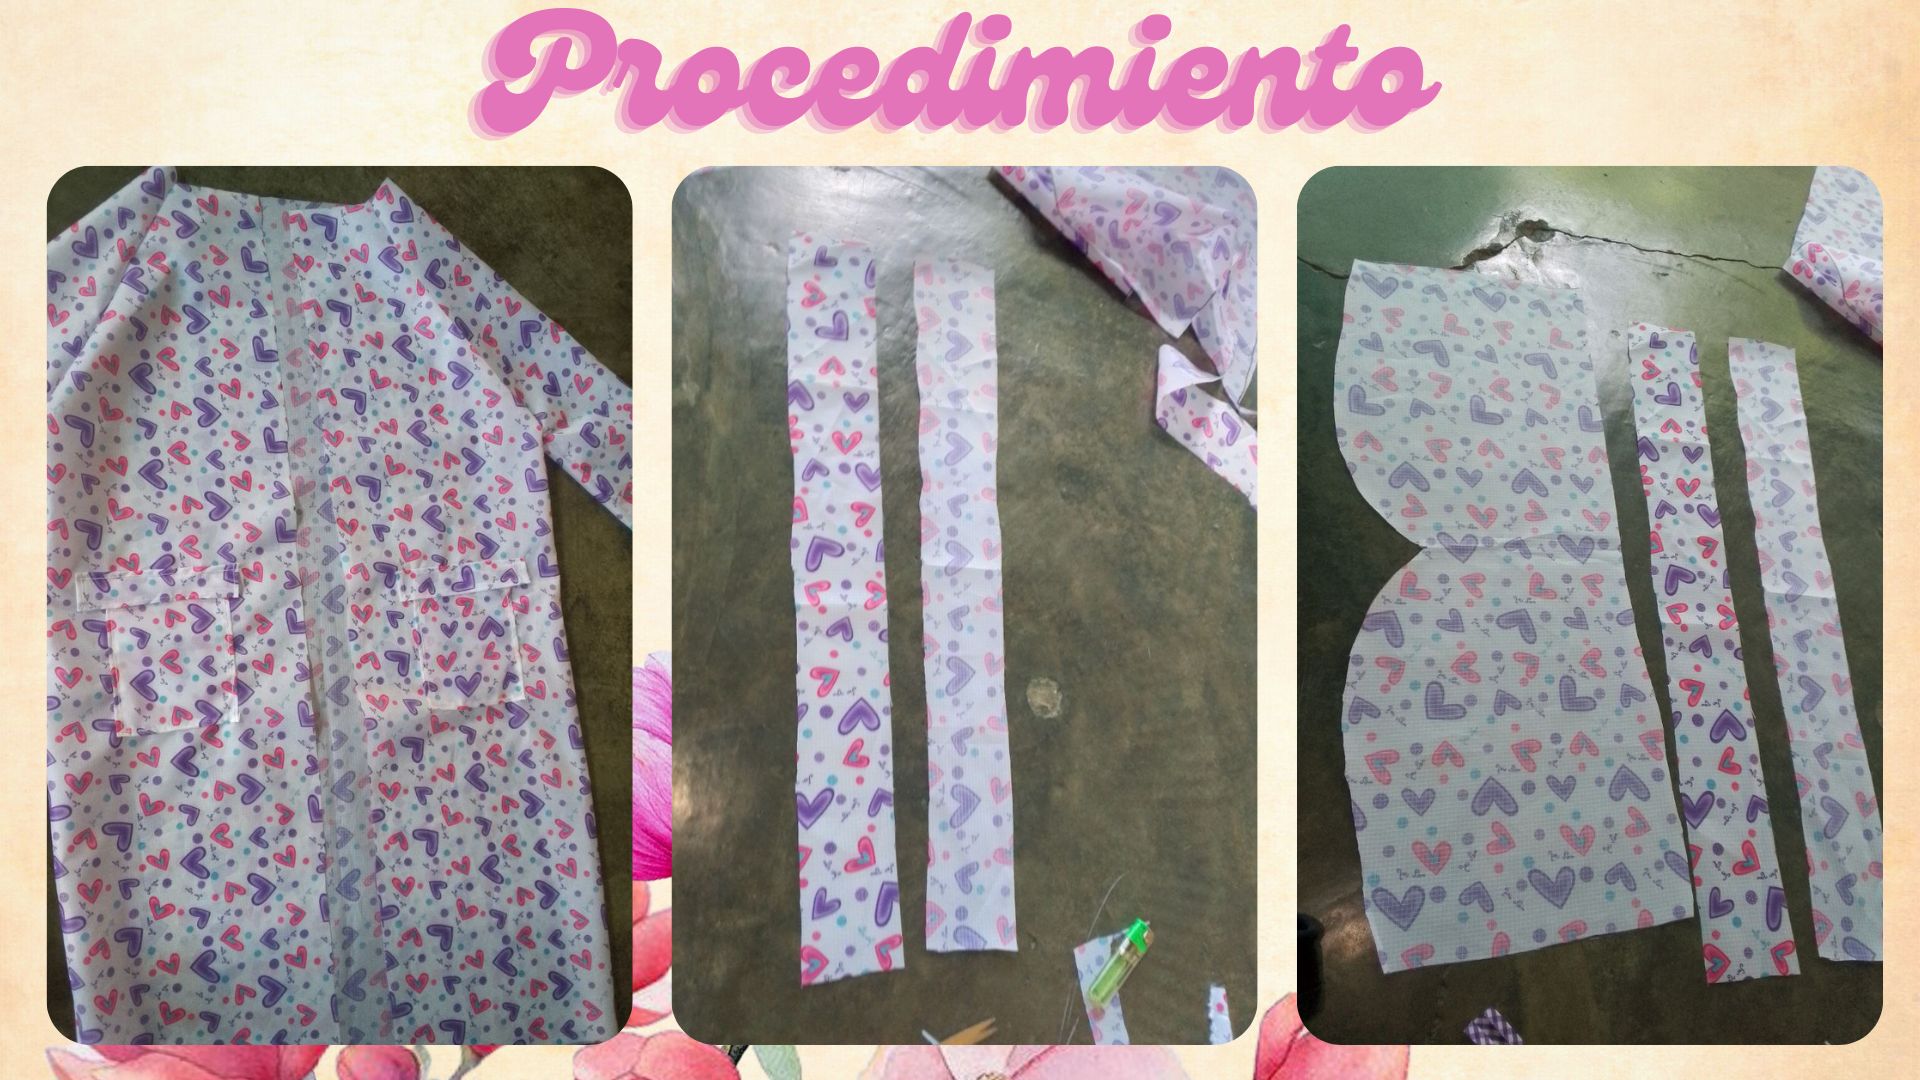
### Paso 8 | Step 8
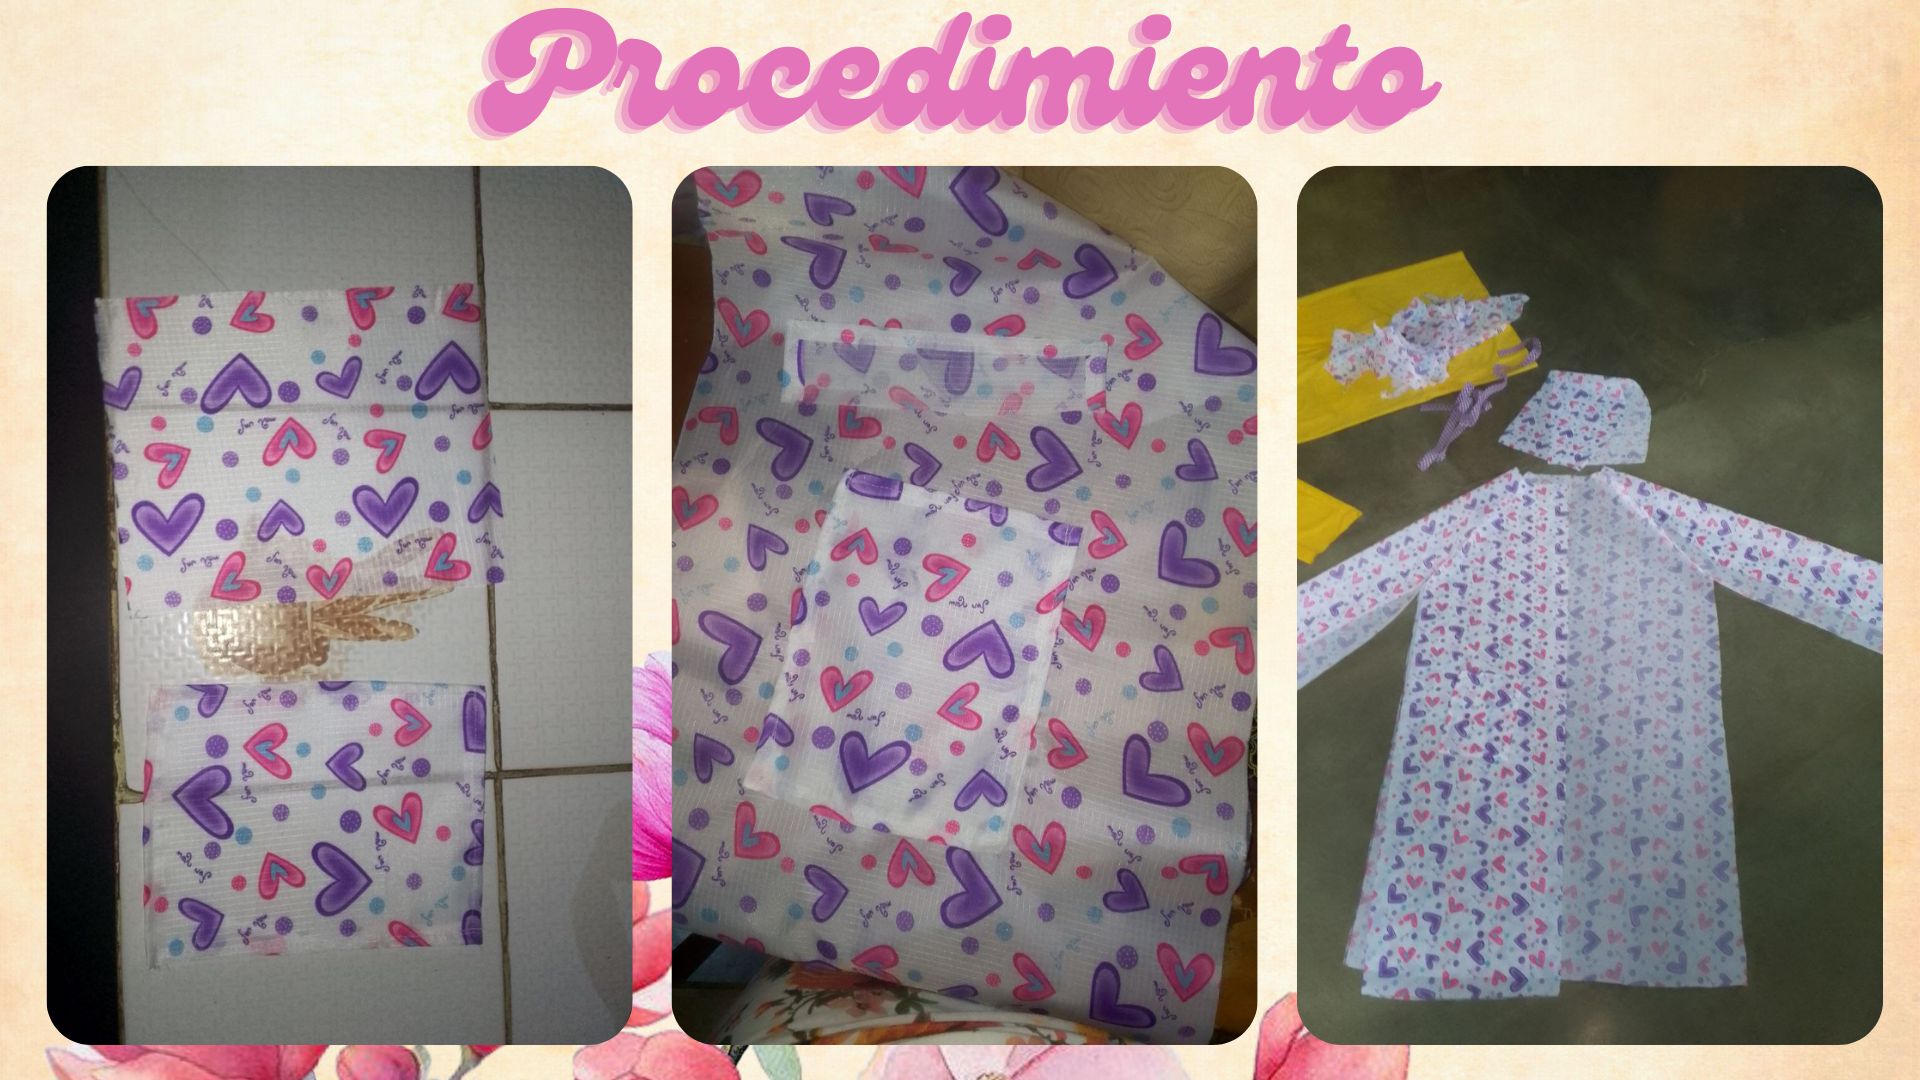
Luego, en la parte interior le colocamos sesgo blanco para que el impermeable no se deshilache.
>Then, on the inside, we put white bias binding so that the raincoat does not fray.
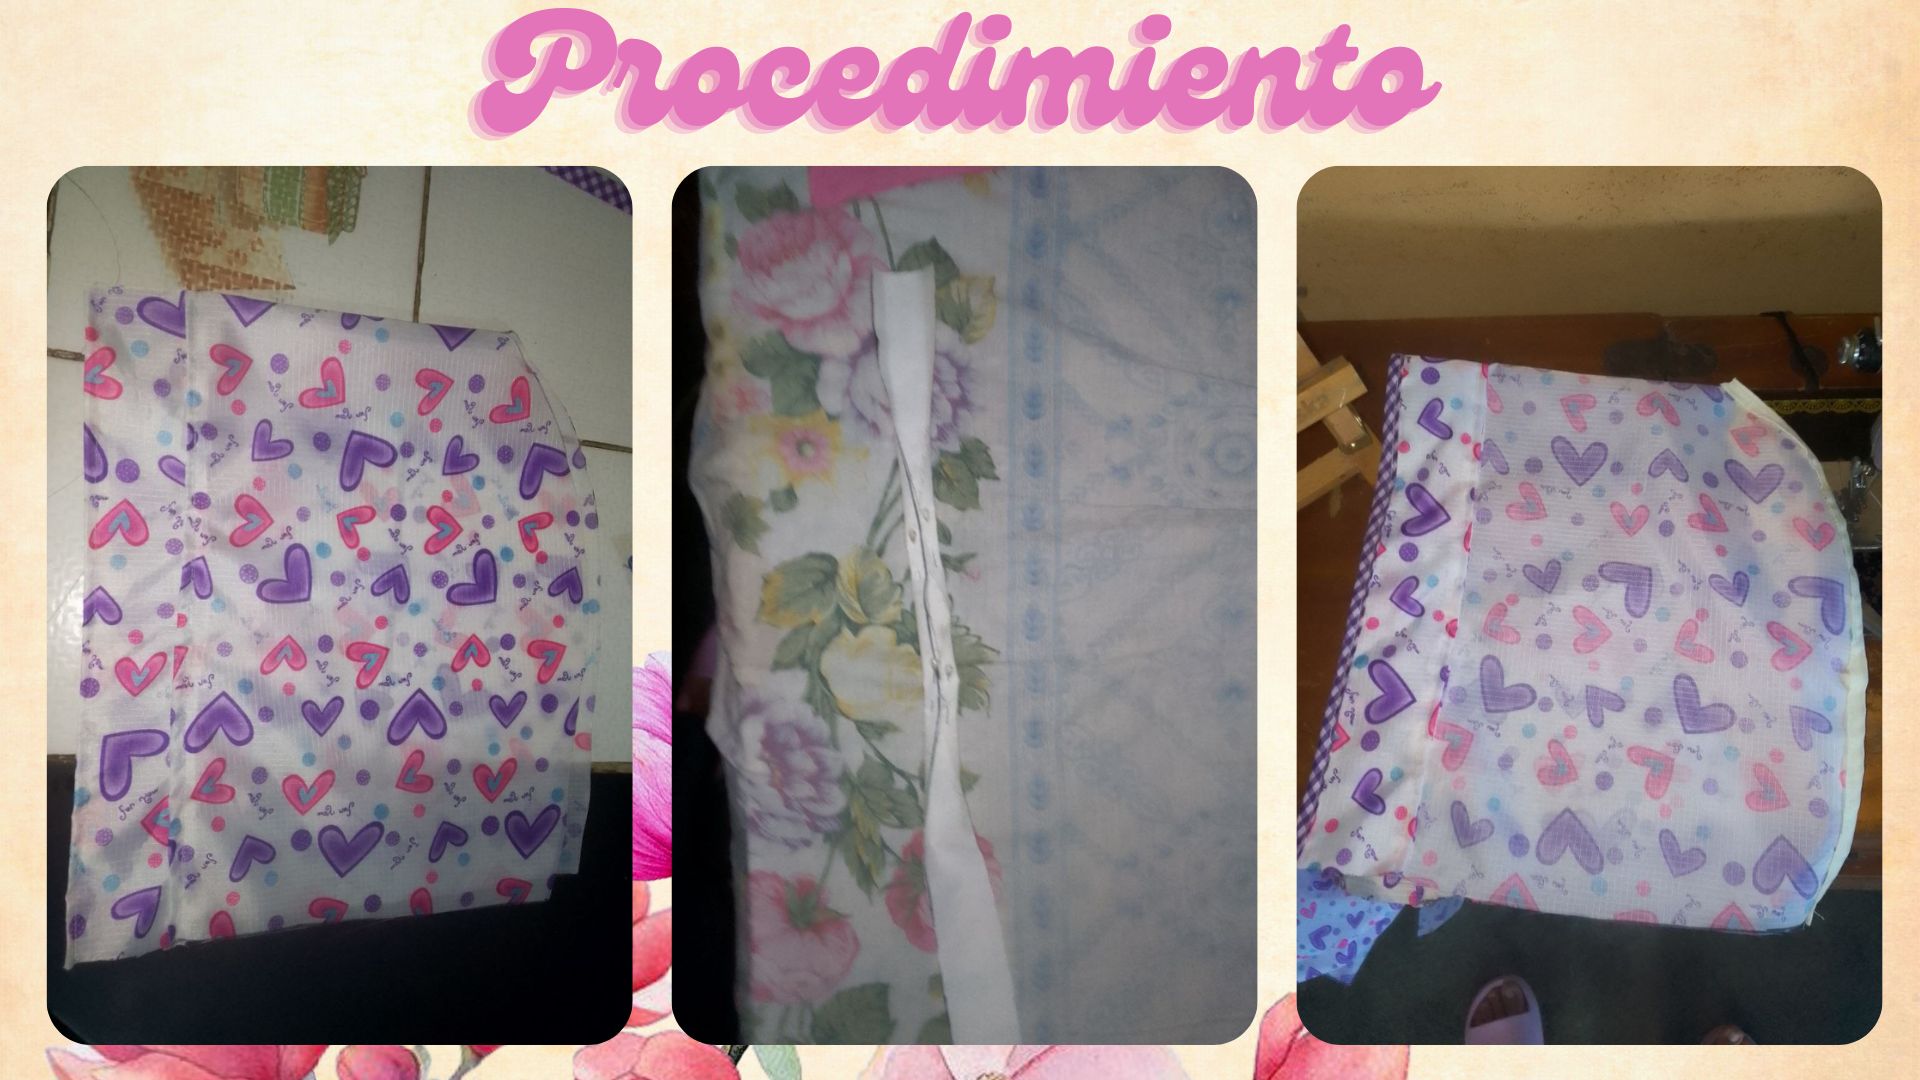
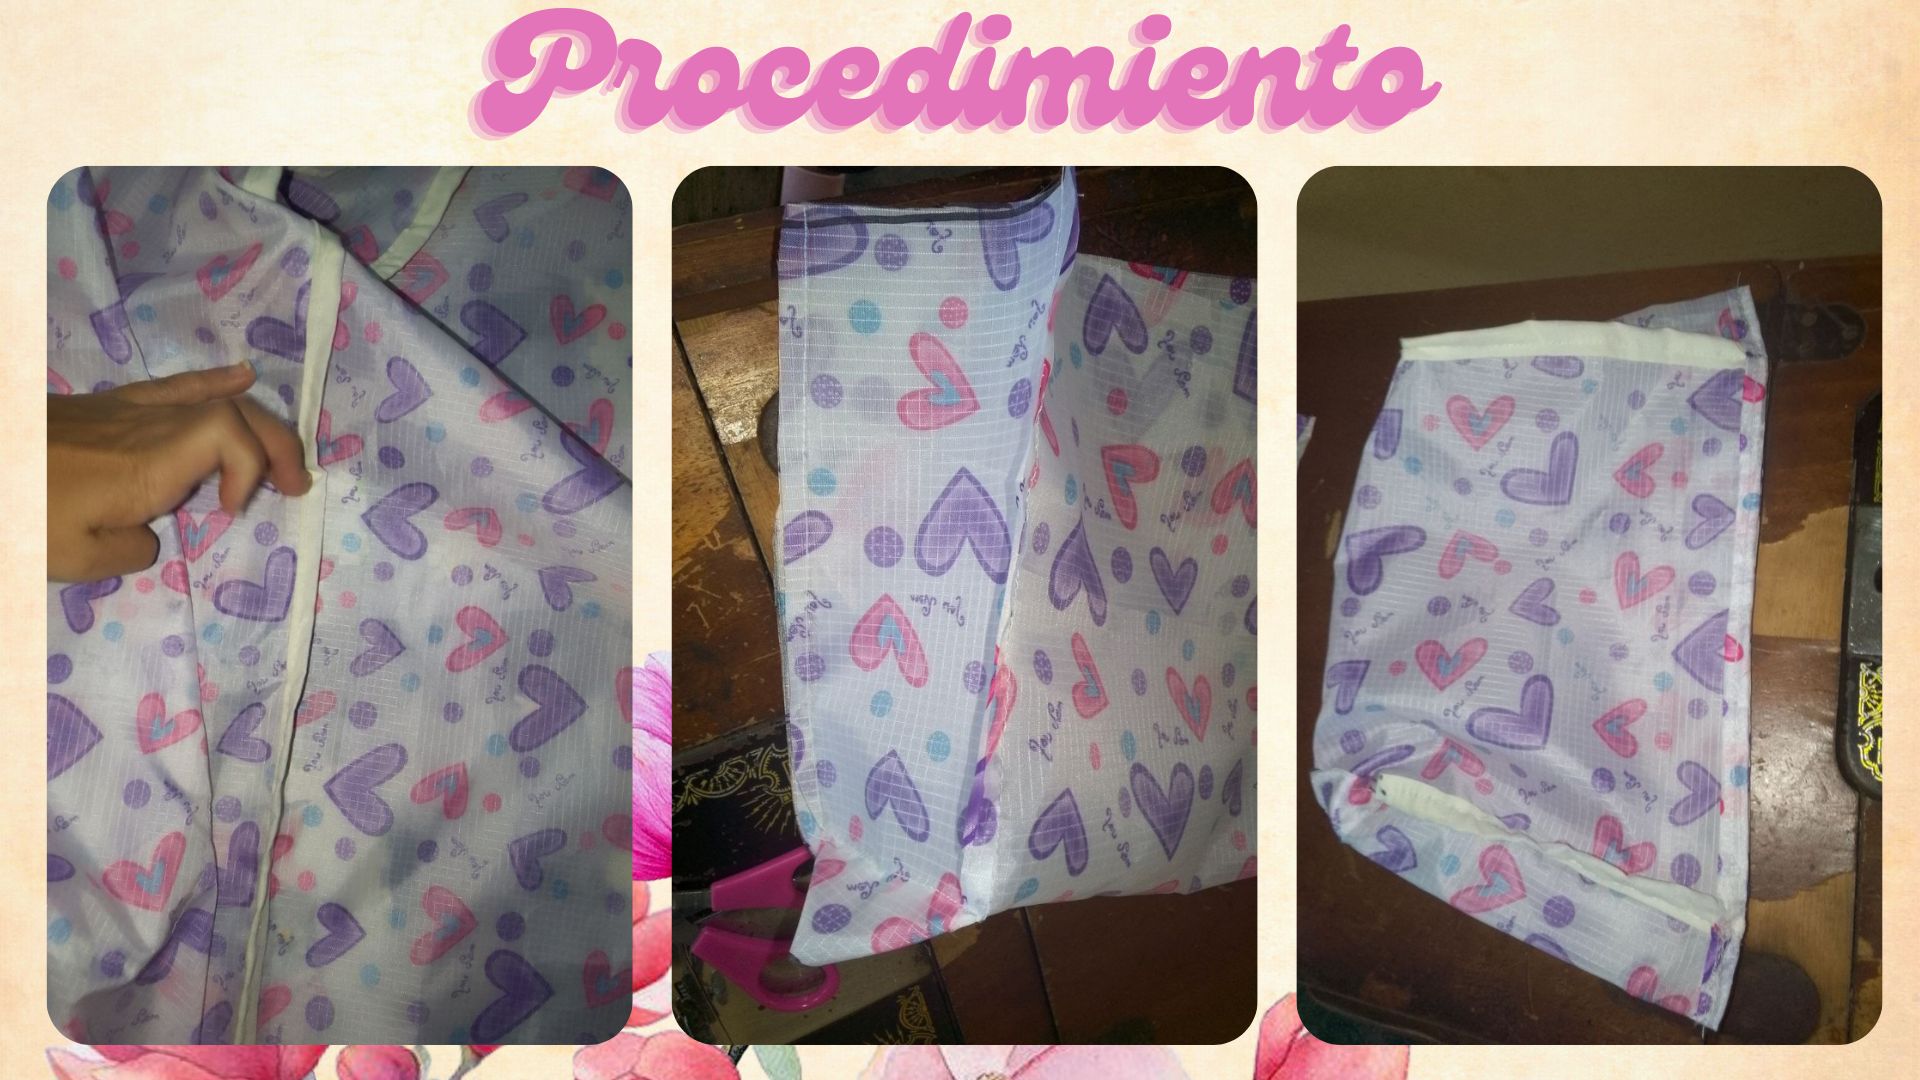
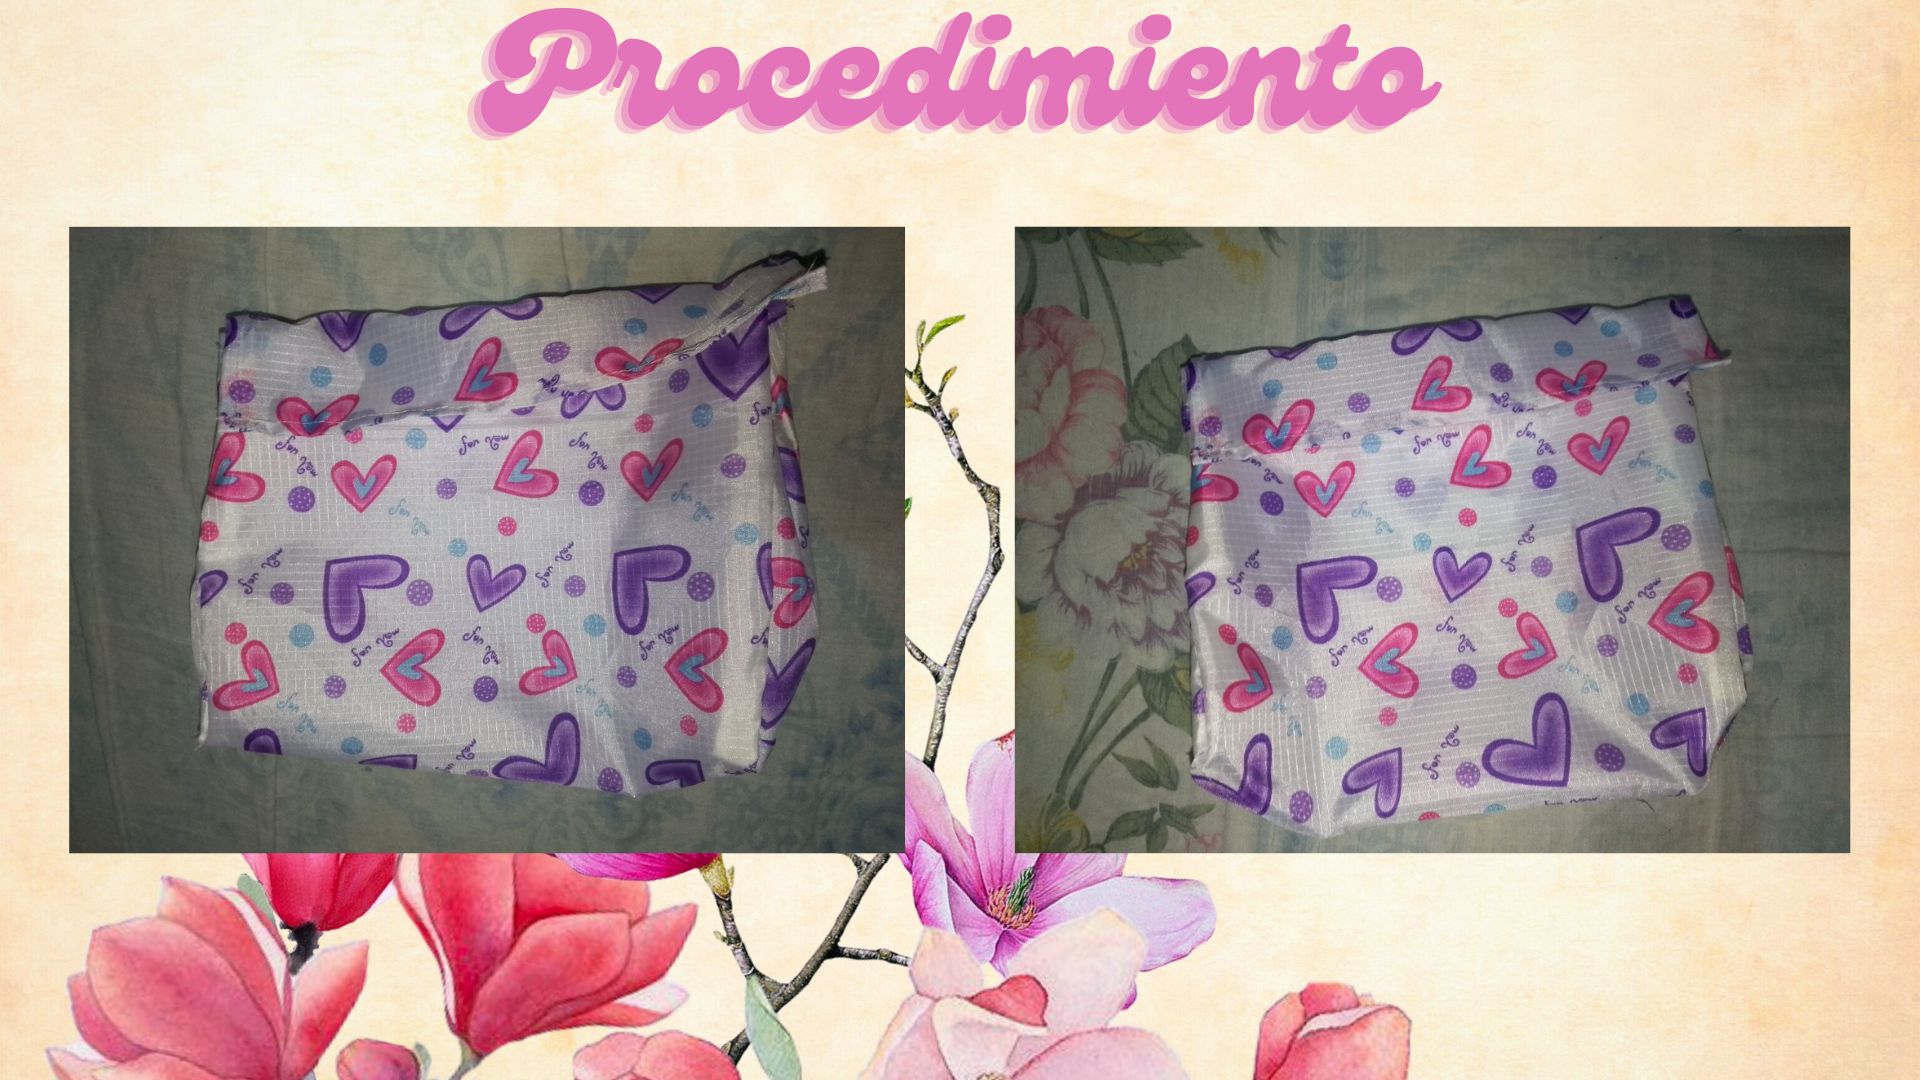
### Paso 9 | Step 9
Luego hice el pequeño bolso, con un rectangulo grueso, y con dos rectangulos mas delgados.
>Then I made the small bag, with a thick rectangle, and with two thinner rectangles.

>Gracias por visitar mi blog.
>Thanks for visiting my blog.
---
## No te detengas, no dejes de creer en ti y de buscar ideas y opciones para salir adelante.
## Don't stop, don't stop believing in yourself and looking for ideas and options to get ahead.
## Creditos | Credits
Use [https://www.deepl.com/es](https://www.deepl.com/es/translator) para la traducción.
>I used [https://www.deepl.com/es](https://www.deepl.com/es/translator) to traduction.
Las imagenes son propias y sujetas a derechos de autor.
>The images are our own and subject to copyright.