**
ESPAÑOL
**
Hola amigos... quiero mostrarles algo que hice y cómo lo hice..
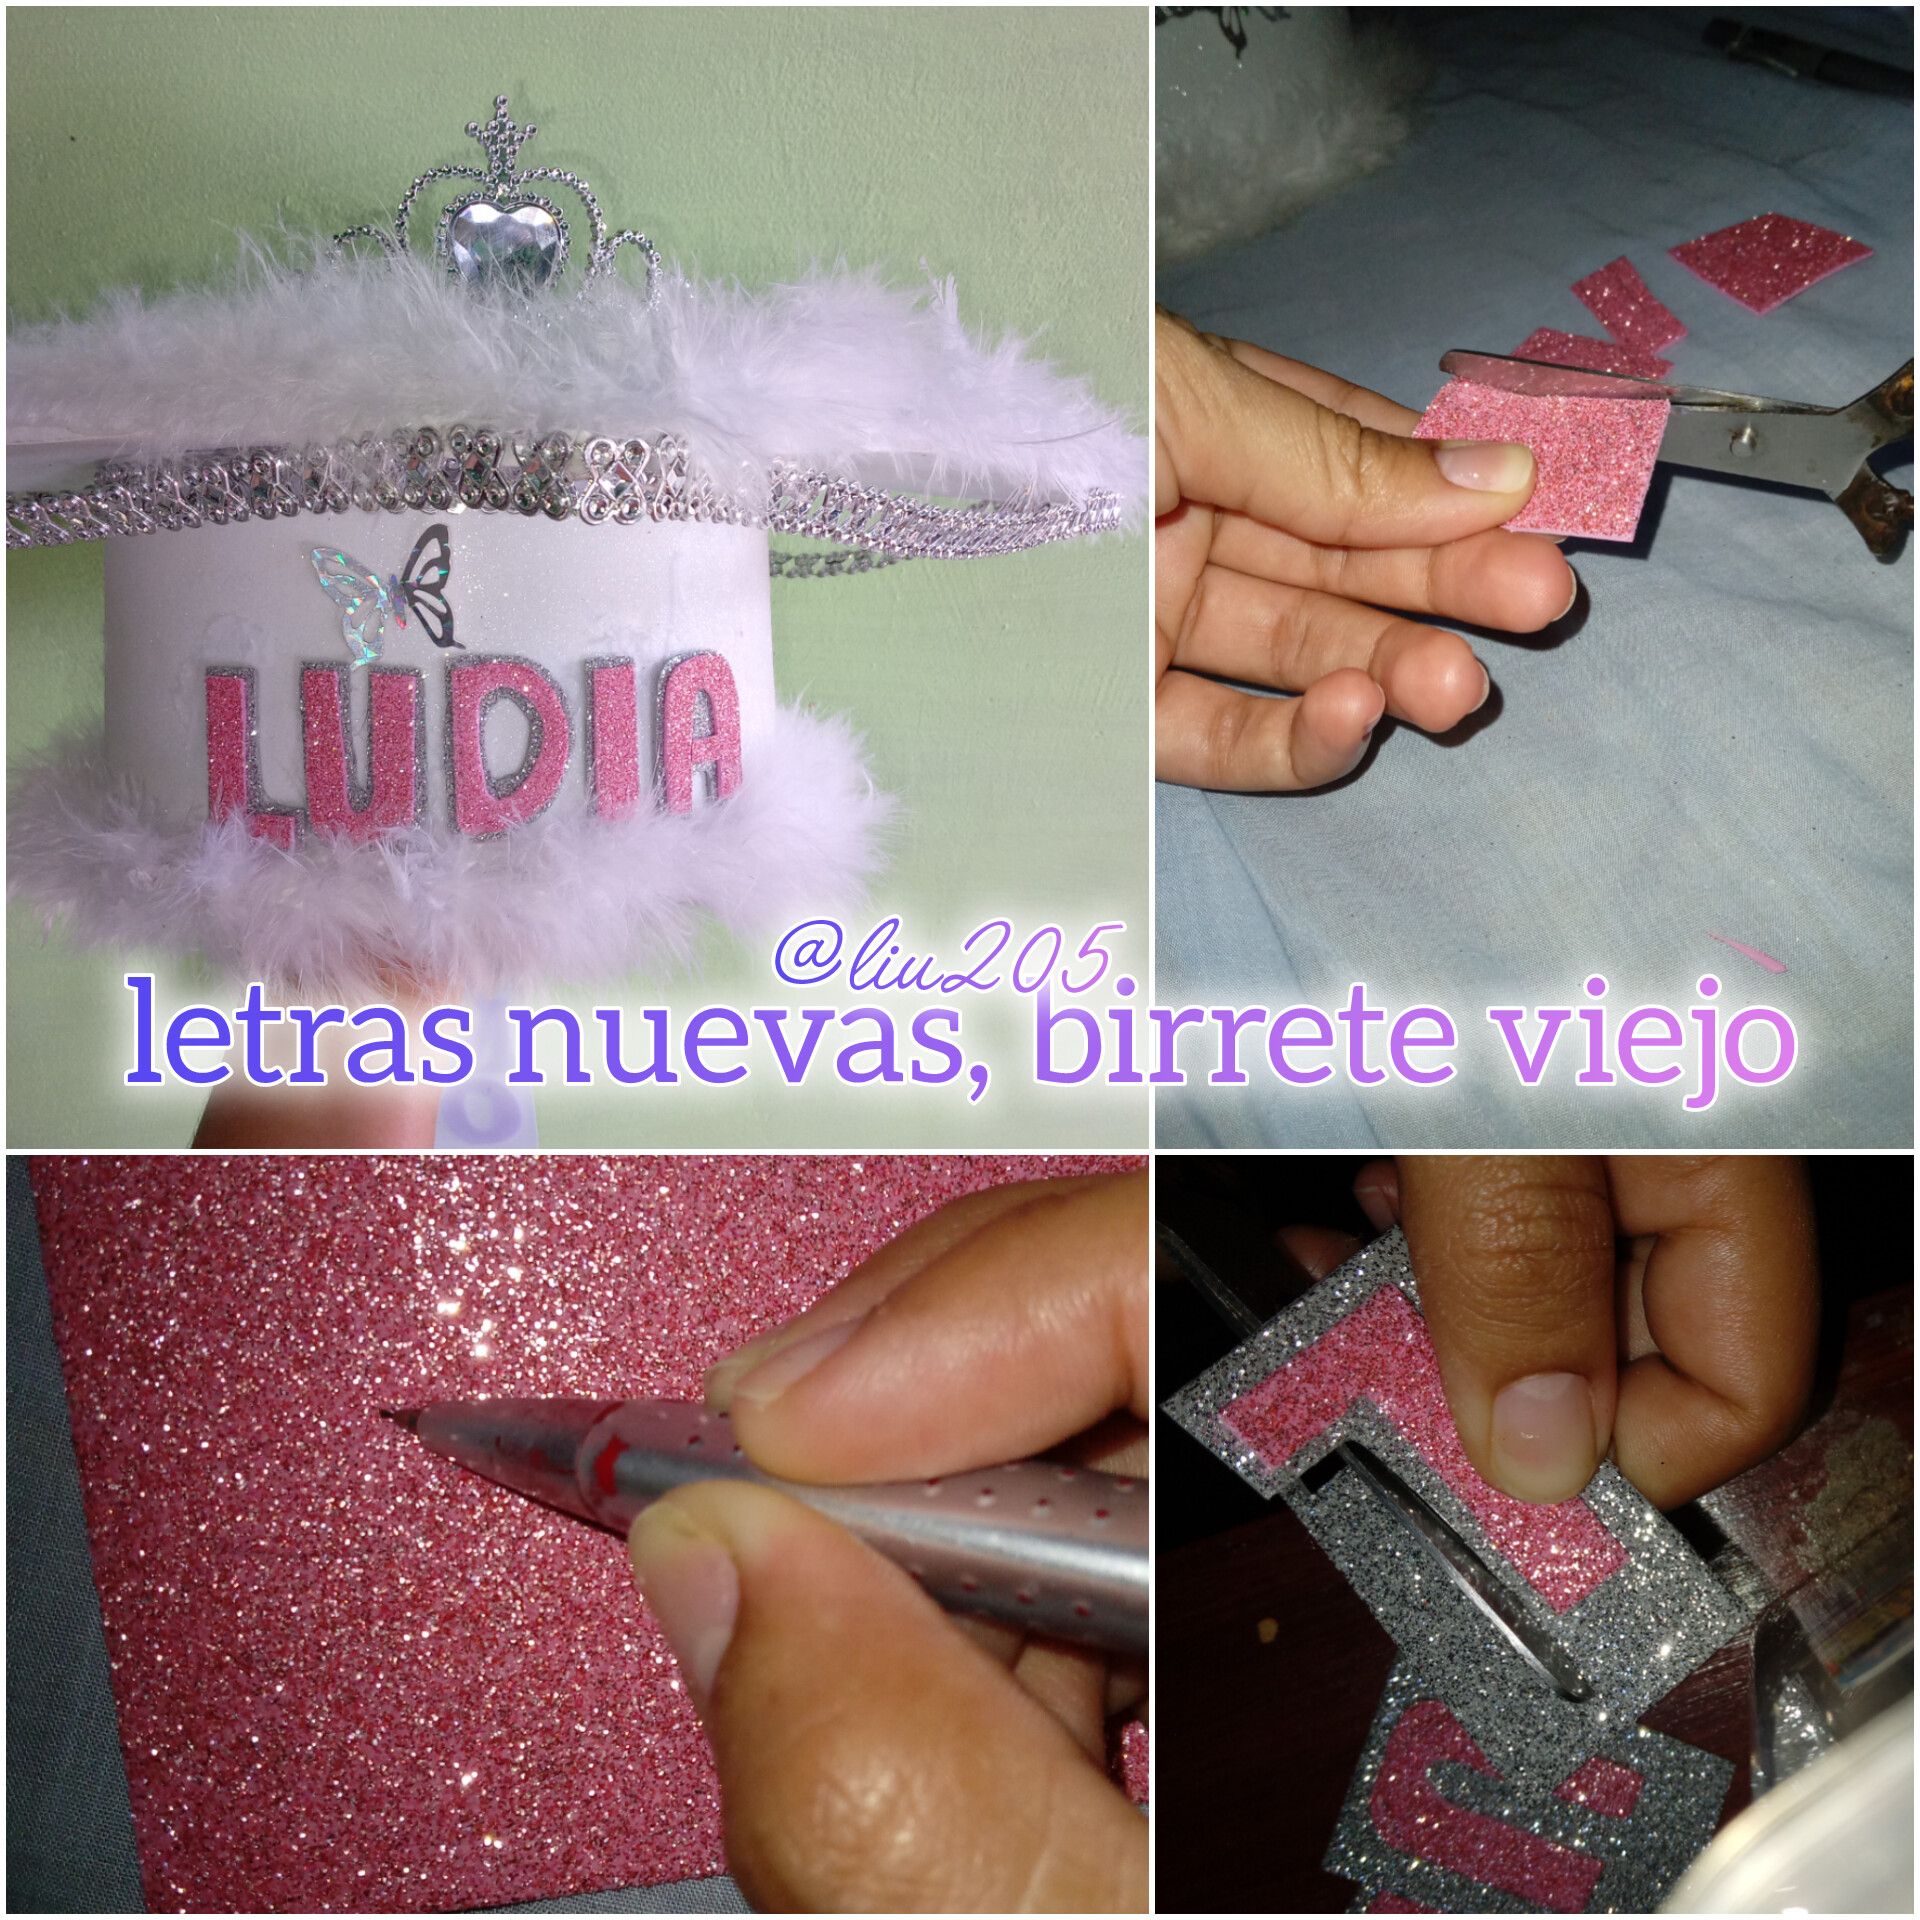
Mi hermana se gradúa de quinto año para salir a la universidad y con esa emoción le gustó la idea de llevar un birrete personalizado, pero, hacer esas cosas es costoso y como realmente solo se usa esa vez una vecina le prestó el de ella y lo único que había que hacer era cambiar el nombre y ahí es donde entro yo...!!!
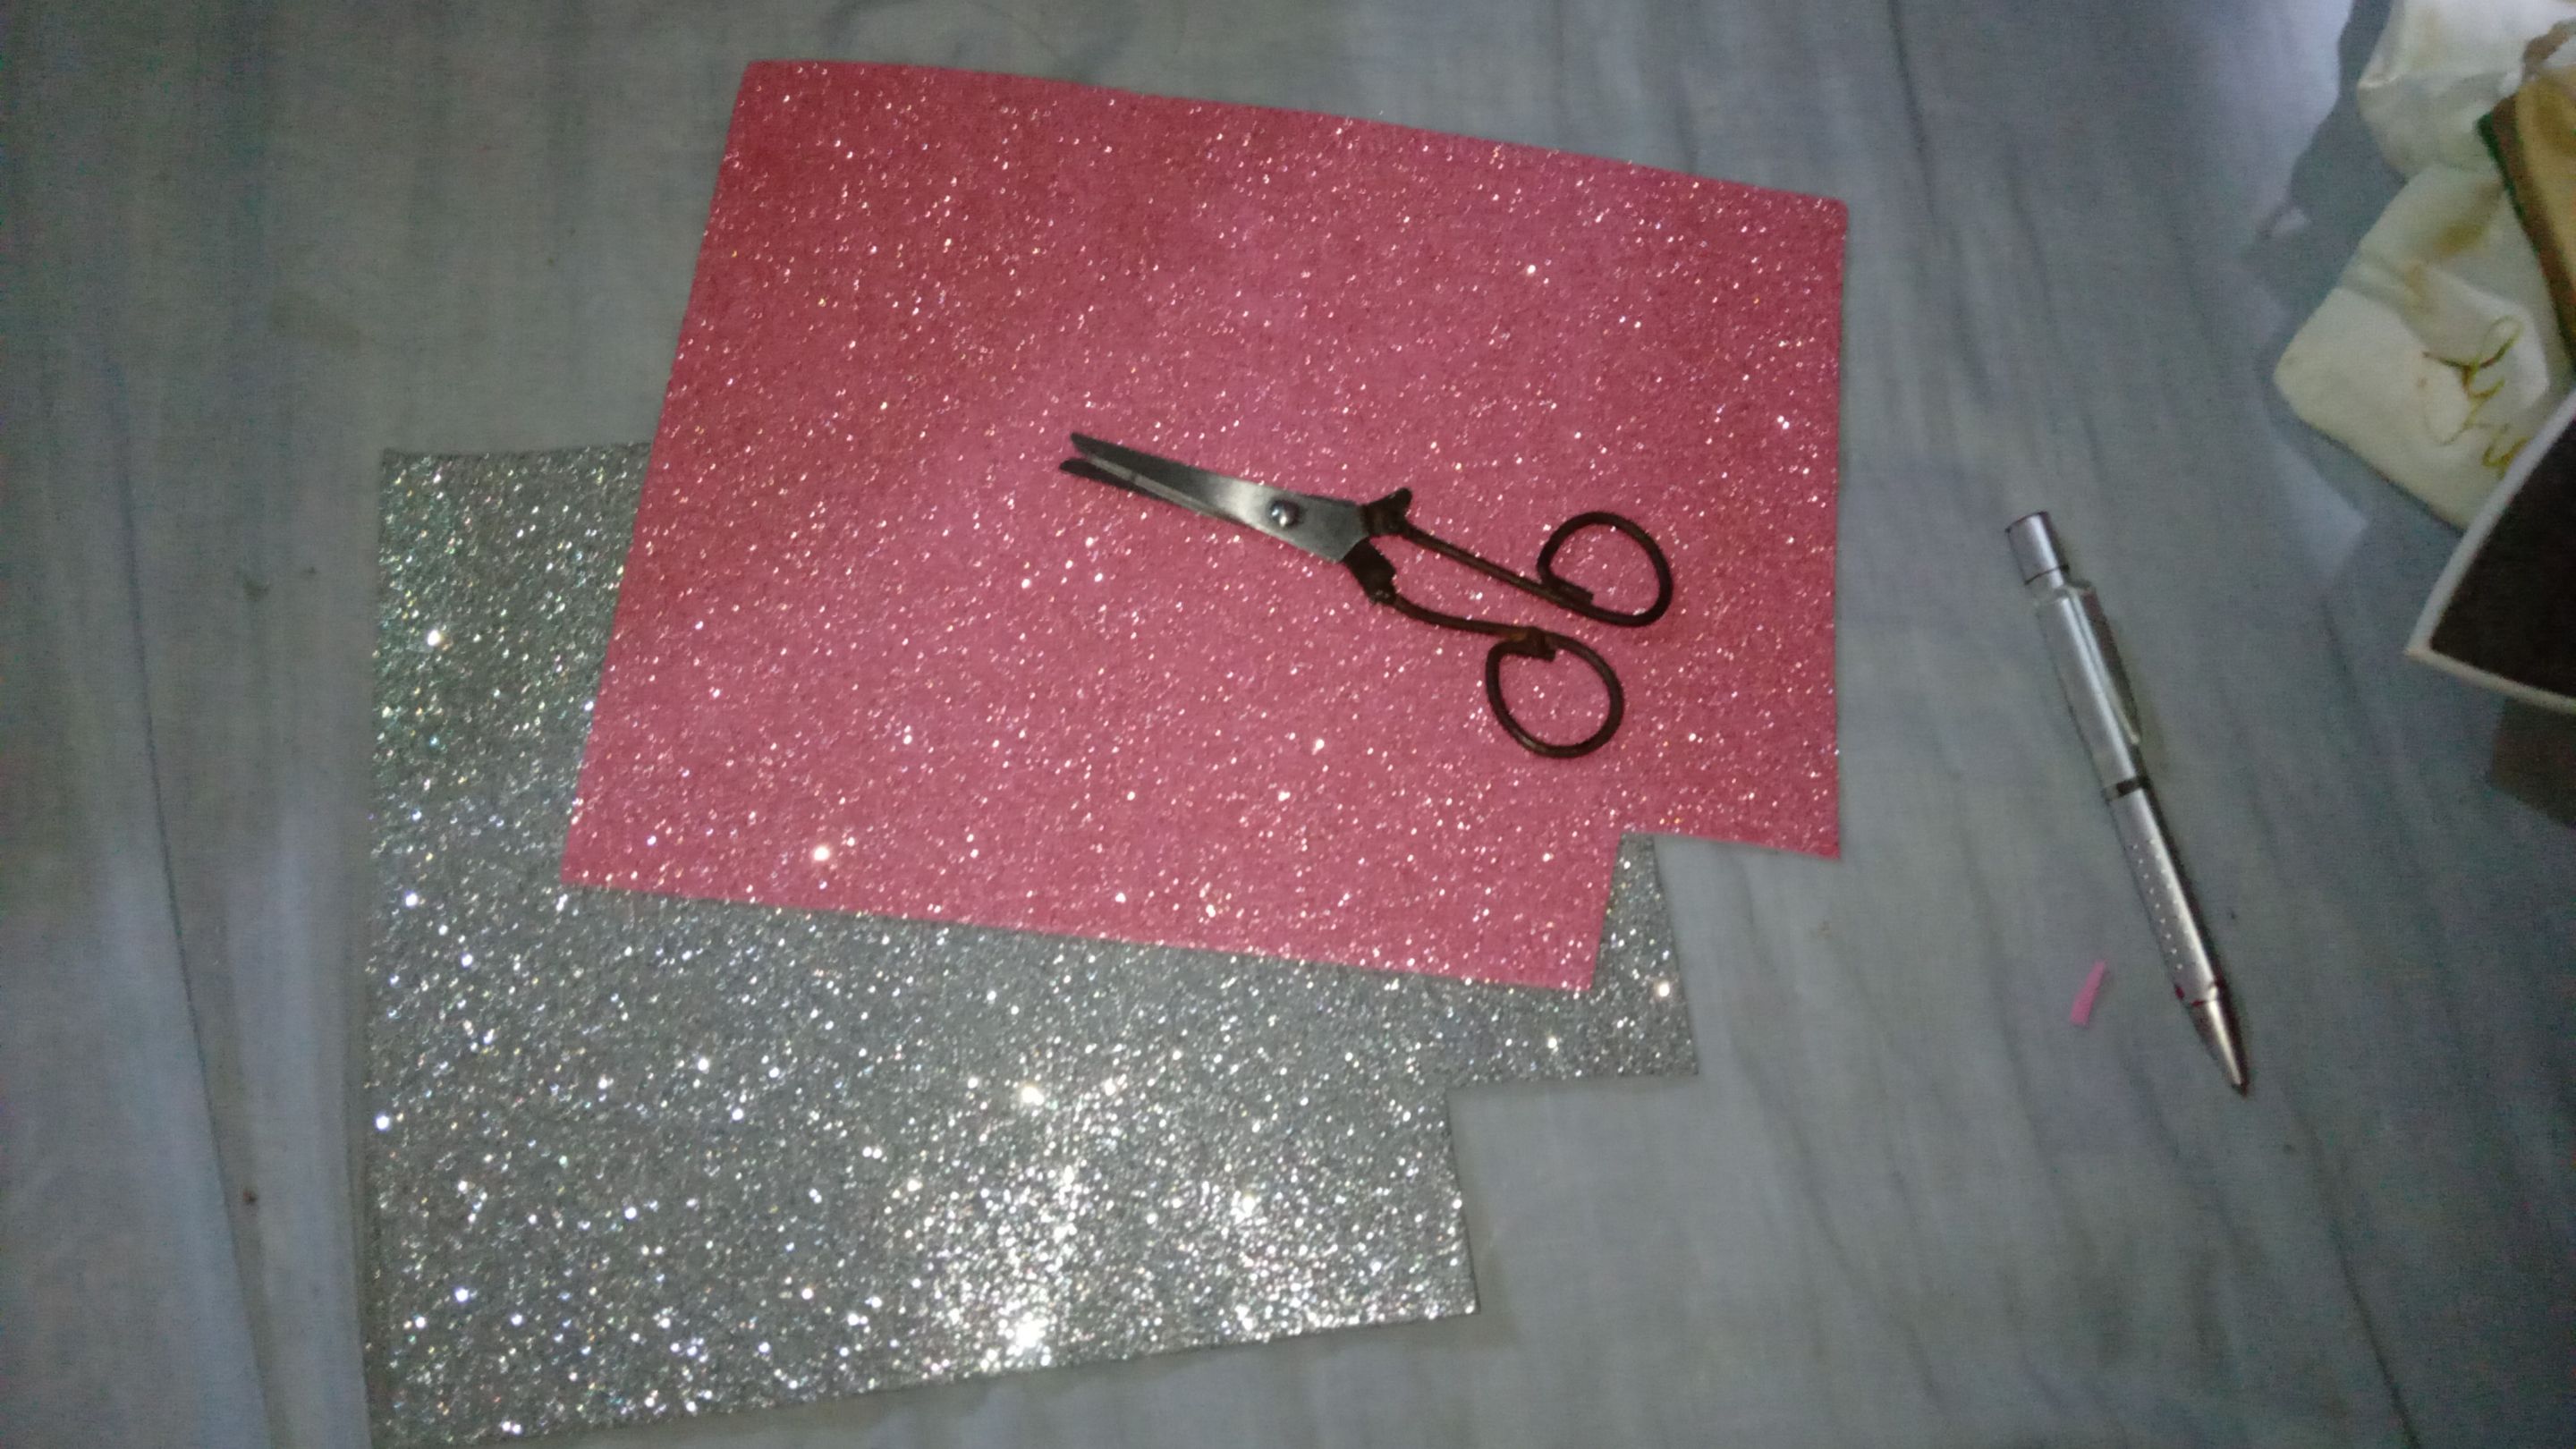
Solo necesité comprar dos formas escarchados en rosado y plateado, ya que, el color de él es blanco (muy lindo, por cierto).
Materiales:
Pistola de silicón
Tijeras
Lápiz
Foami
**
ENGLISH
**
Hi friends... I want to show you something I made and how I made it.
My sister is graduating from fifth grade to go off to college, and with that excitement, she liked the idea of wearing a personalized cap, but making those things is expensive, and since it's really only used that one time, a neighbor lent her hers, and all she had to do was change the name, and that's where I come in...!!!
I only needed to buy two frosted shapes in pink and silver, since his color is white (very pretty, by the way).
Materials:
Hot glue gun
Scissors
Pencil
Foam
---
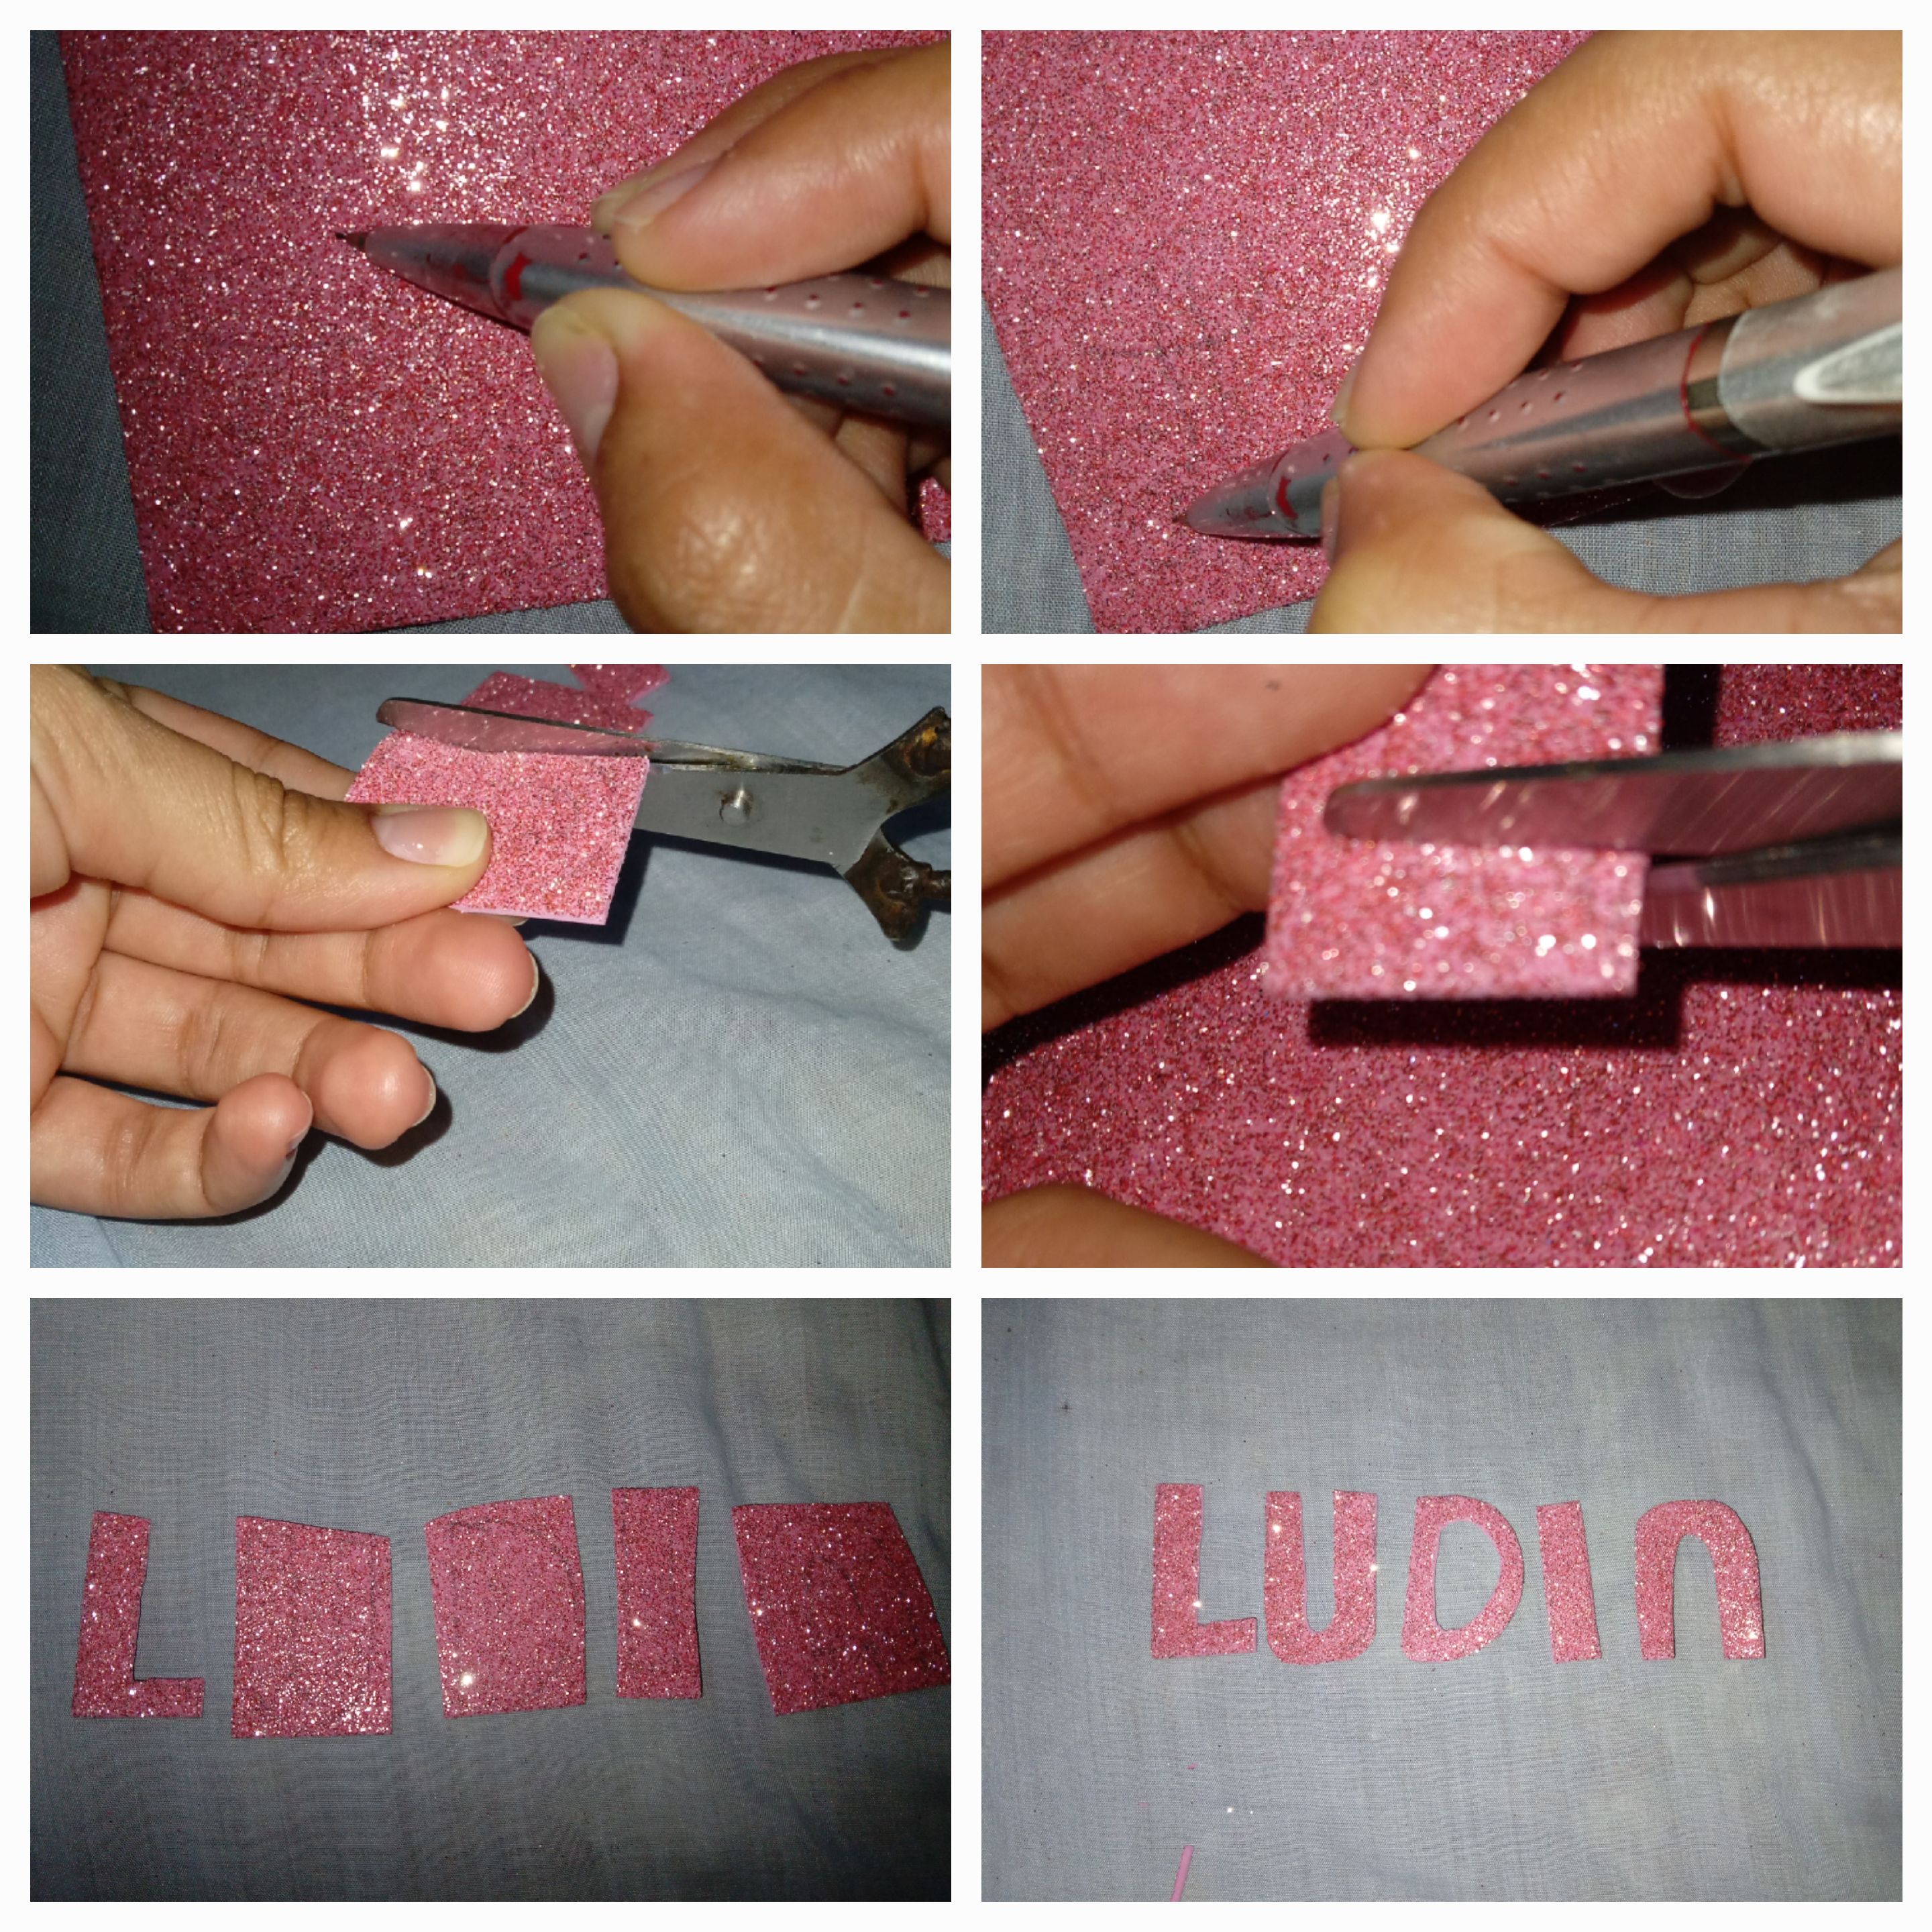
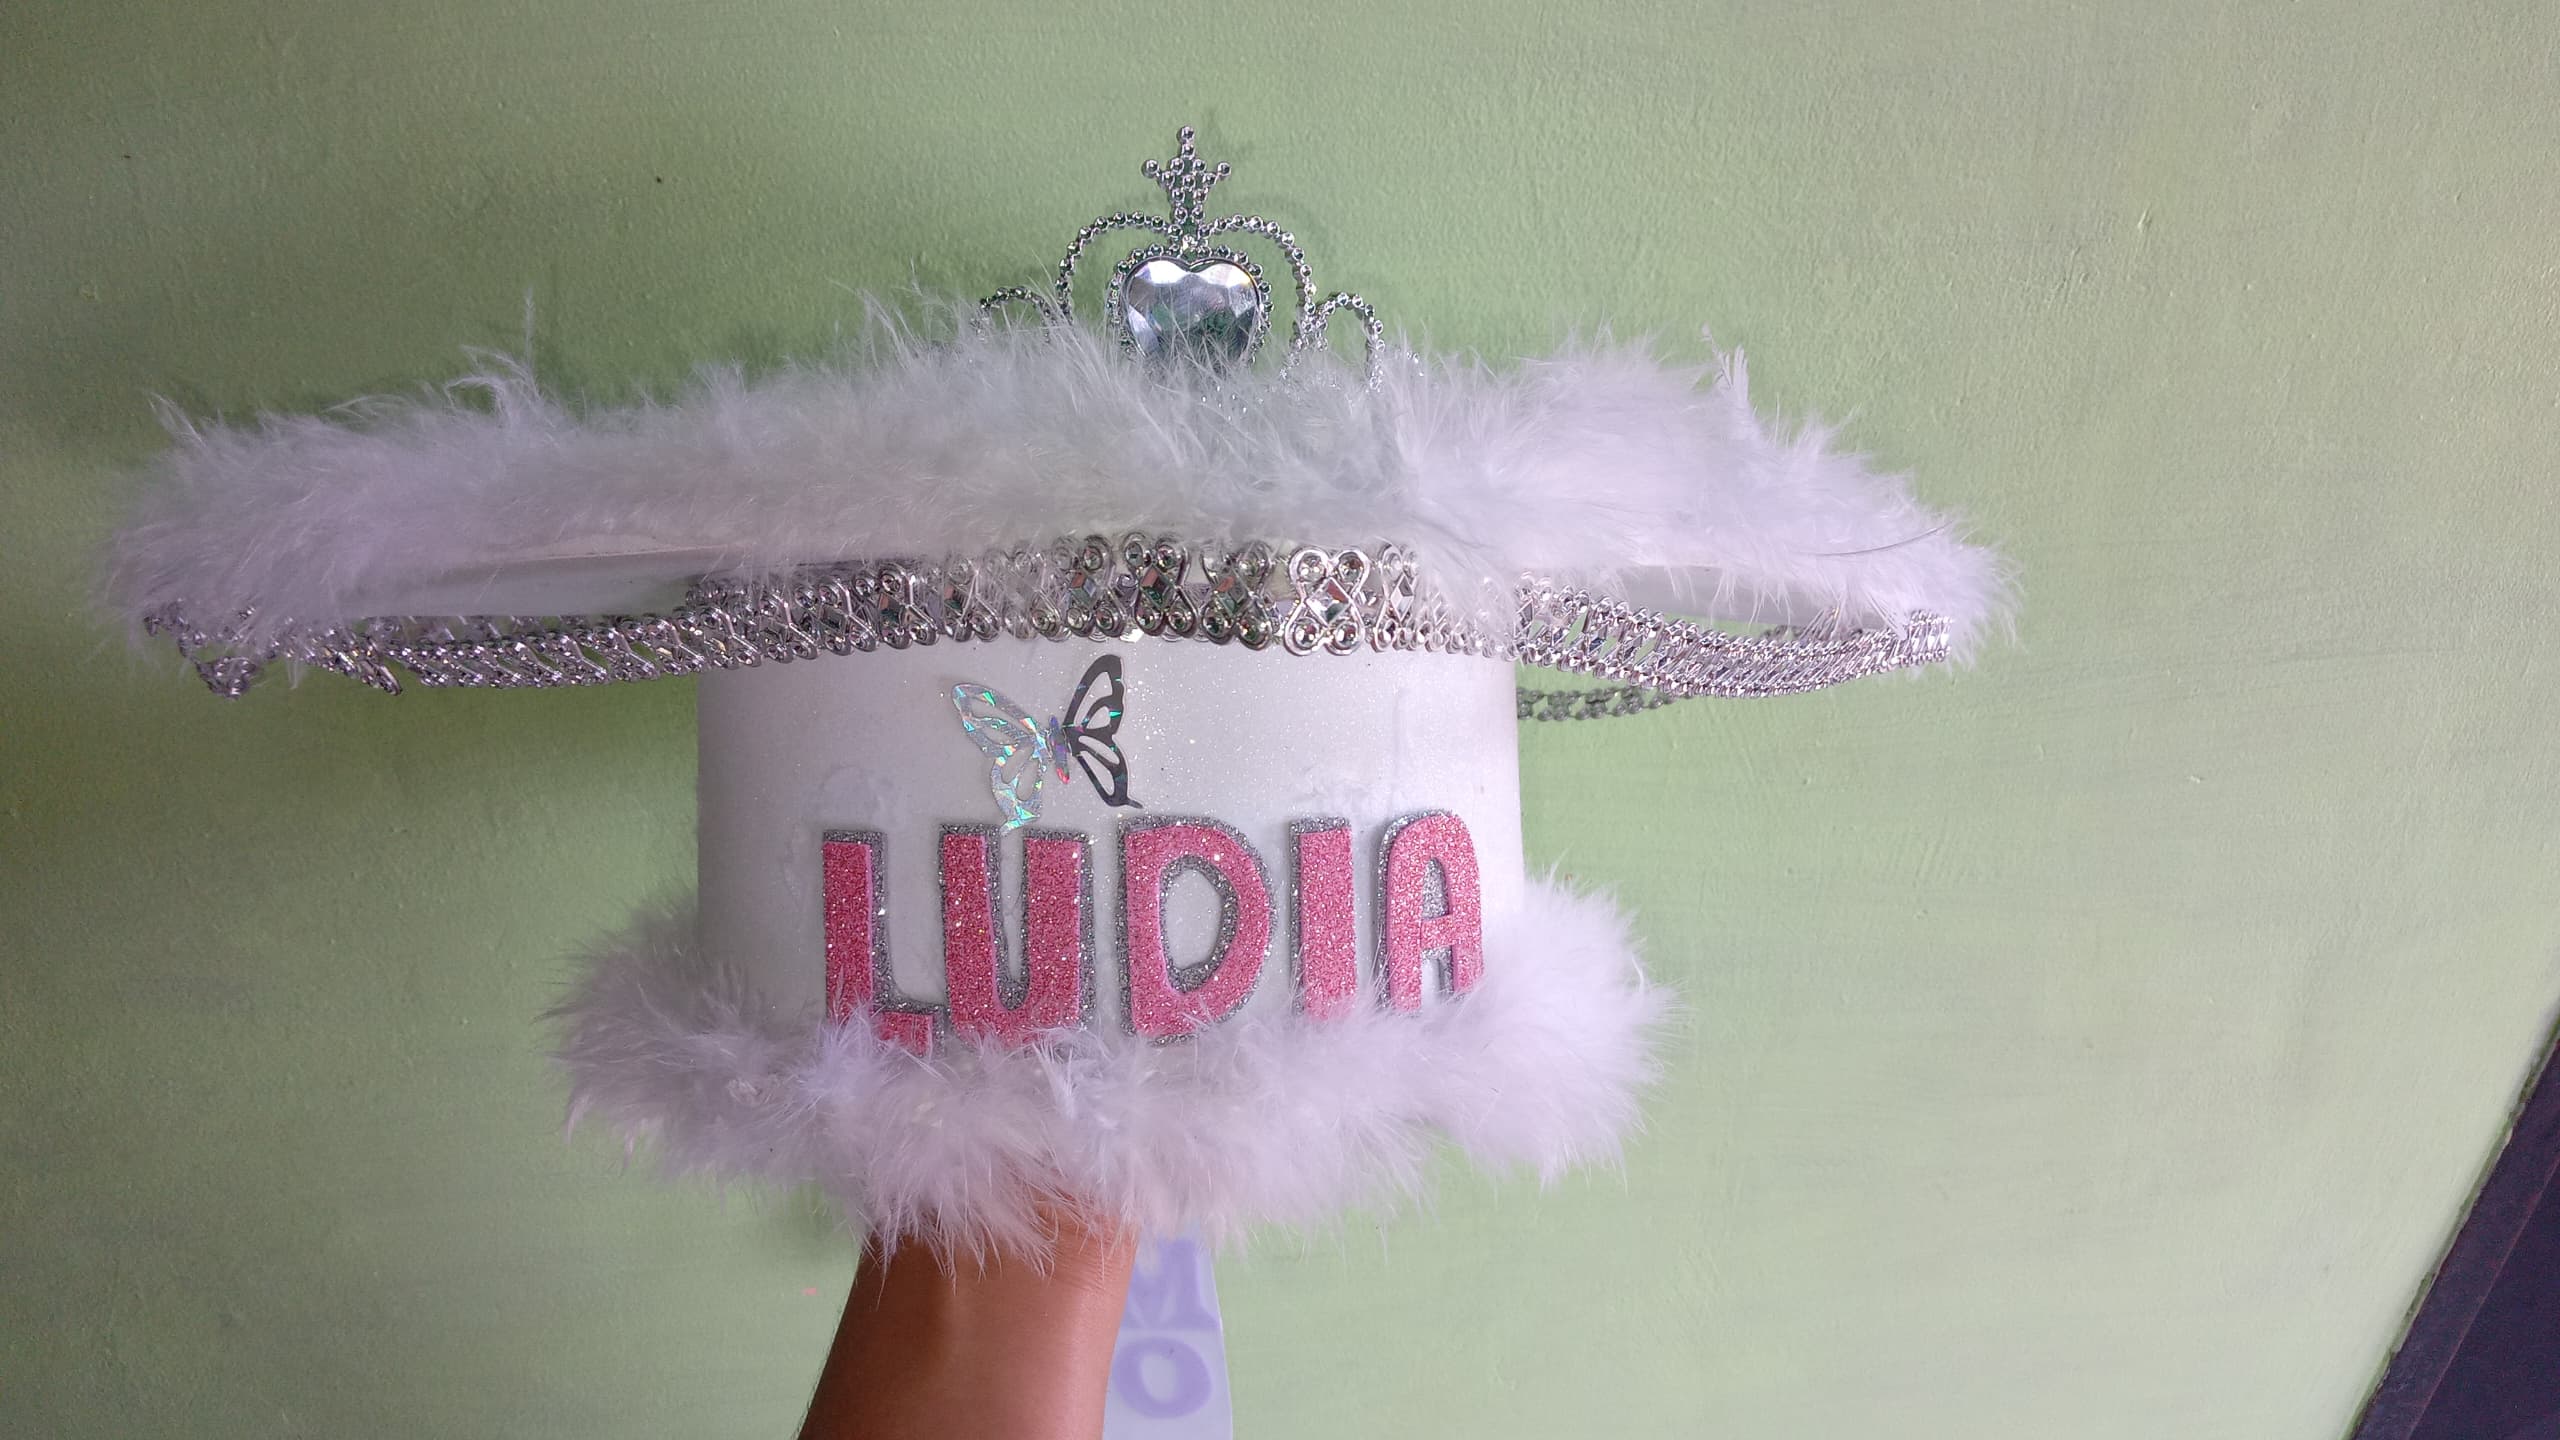
Bueno, realmente todo este procedimiento es algo sencillo de realizar y se empieza por marcar las letras de preferencia, en este caso, es el nombre de mi hermana. Ella se llama LUDIA, sí, no es un nombre común, pero eso es lo que lo hace bonito.
Después de marcar, y cortar, empezamos a darle la forma de la letra marcada. Así vamos poco a poco para lograr nuestro objetivo!
Well, this whole process is actually quite simple to do, and you start by marking the letters you prefer. In this case, it's my sister's name. Her name is LUDIA. Yes, it's not a common name, but that's what makes it beautiful.
After marking and cutting, we begin to shape the marked letter. So, we'll gradually achieve our goal!
---
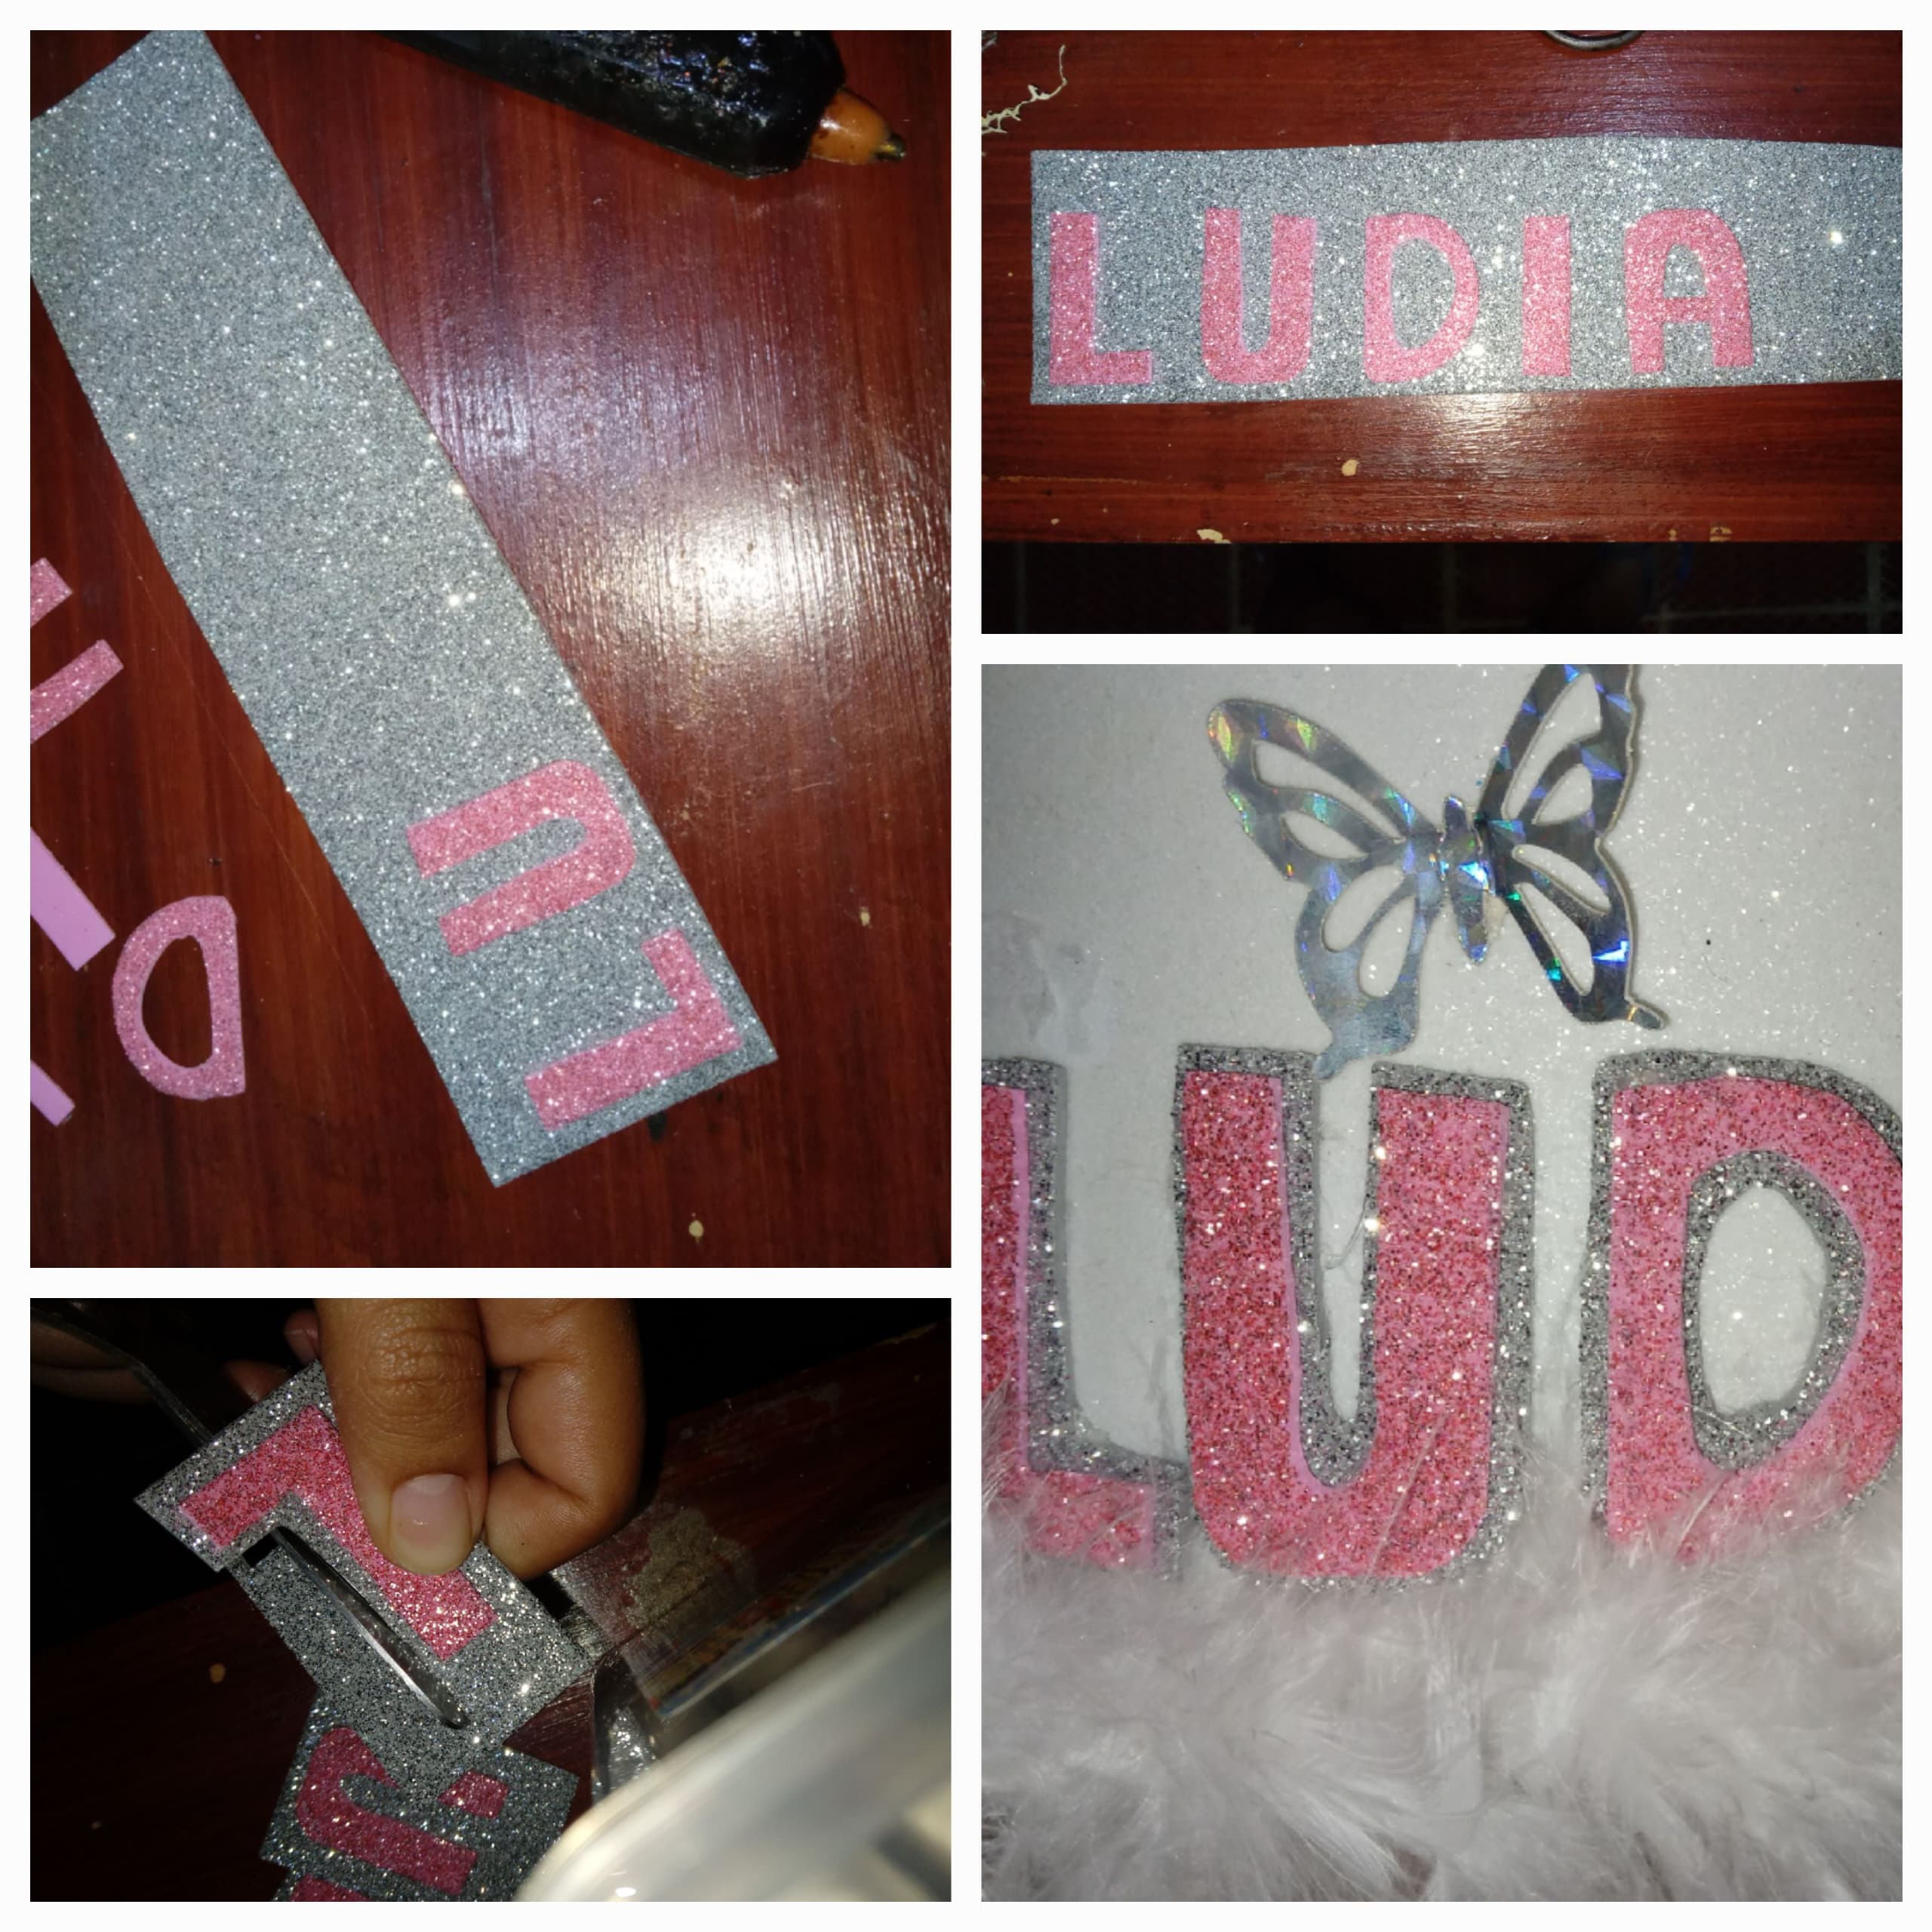
Me gustó la idea de que fuera de dos colores, hoy en día está de moda eso de un color de fondo y uno diferente para la parte de arriba, por supuesto, que sean tonos muy diferentes para que resalten. Escogí el color plateado para el fondo. Empecé a pegar las letras a ese color plateado para luego recortar las orillas un poco más gruesas que las rosadas...
Ya para finalizar pegué las letras al birrete... y así pueden ver el resultado... el crédito mio solo son las letras, no el birrete, tampoco sé quién se lo hizo a mi vecina.!
I liked the idea of it being two-colored. These days, it's fashionable to have one background color and a different one for the top. Of course, they should be very different shades so they stand out. I chose silver for the background. I started gluing the letters to that silver color and then cut the edges a little thicker than the pink ones...
Finally, I glued the letters to the cap... and so you can see the result... I'm only credited with the letters, not the cap. I don't know who made it for my neighbor either!
---
---
Translated with https://www.deepl.com/translator
#diyhub
#tutorial
#crafting
#home
#upcycling
#ocd
#creativecoin
#manualidades
#neoxian
#spanish
Payout: 0.000 HBD
Votes: 18
More interactions (upvote, reblog, reply) coming soon.