**
ESPAÑOL
**
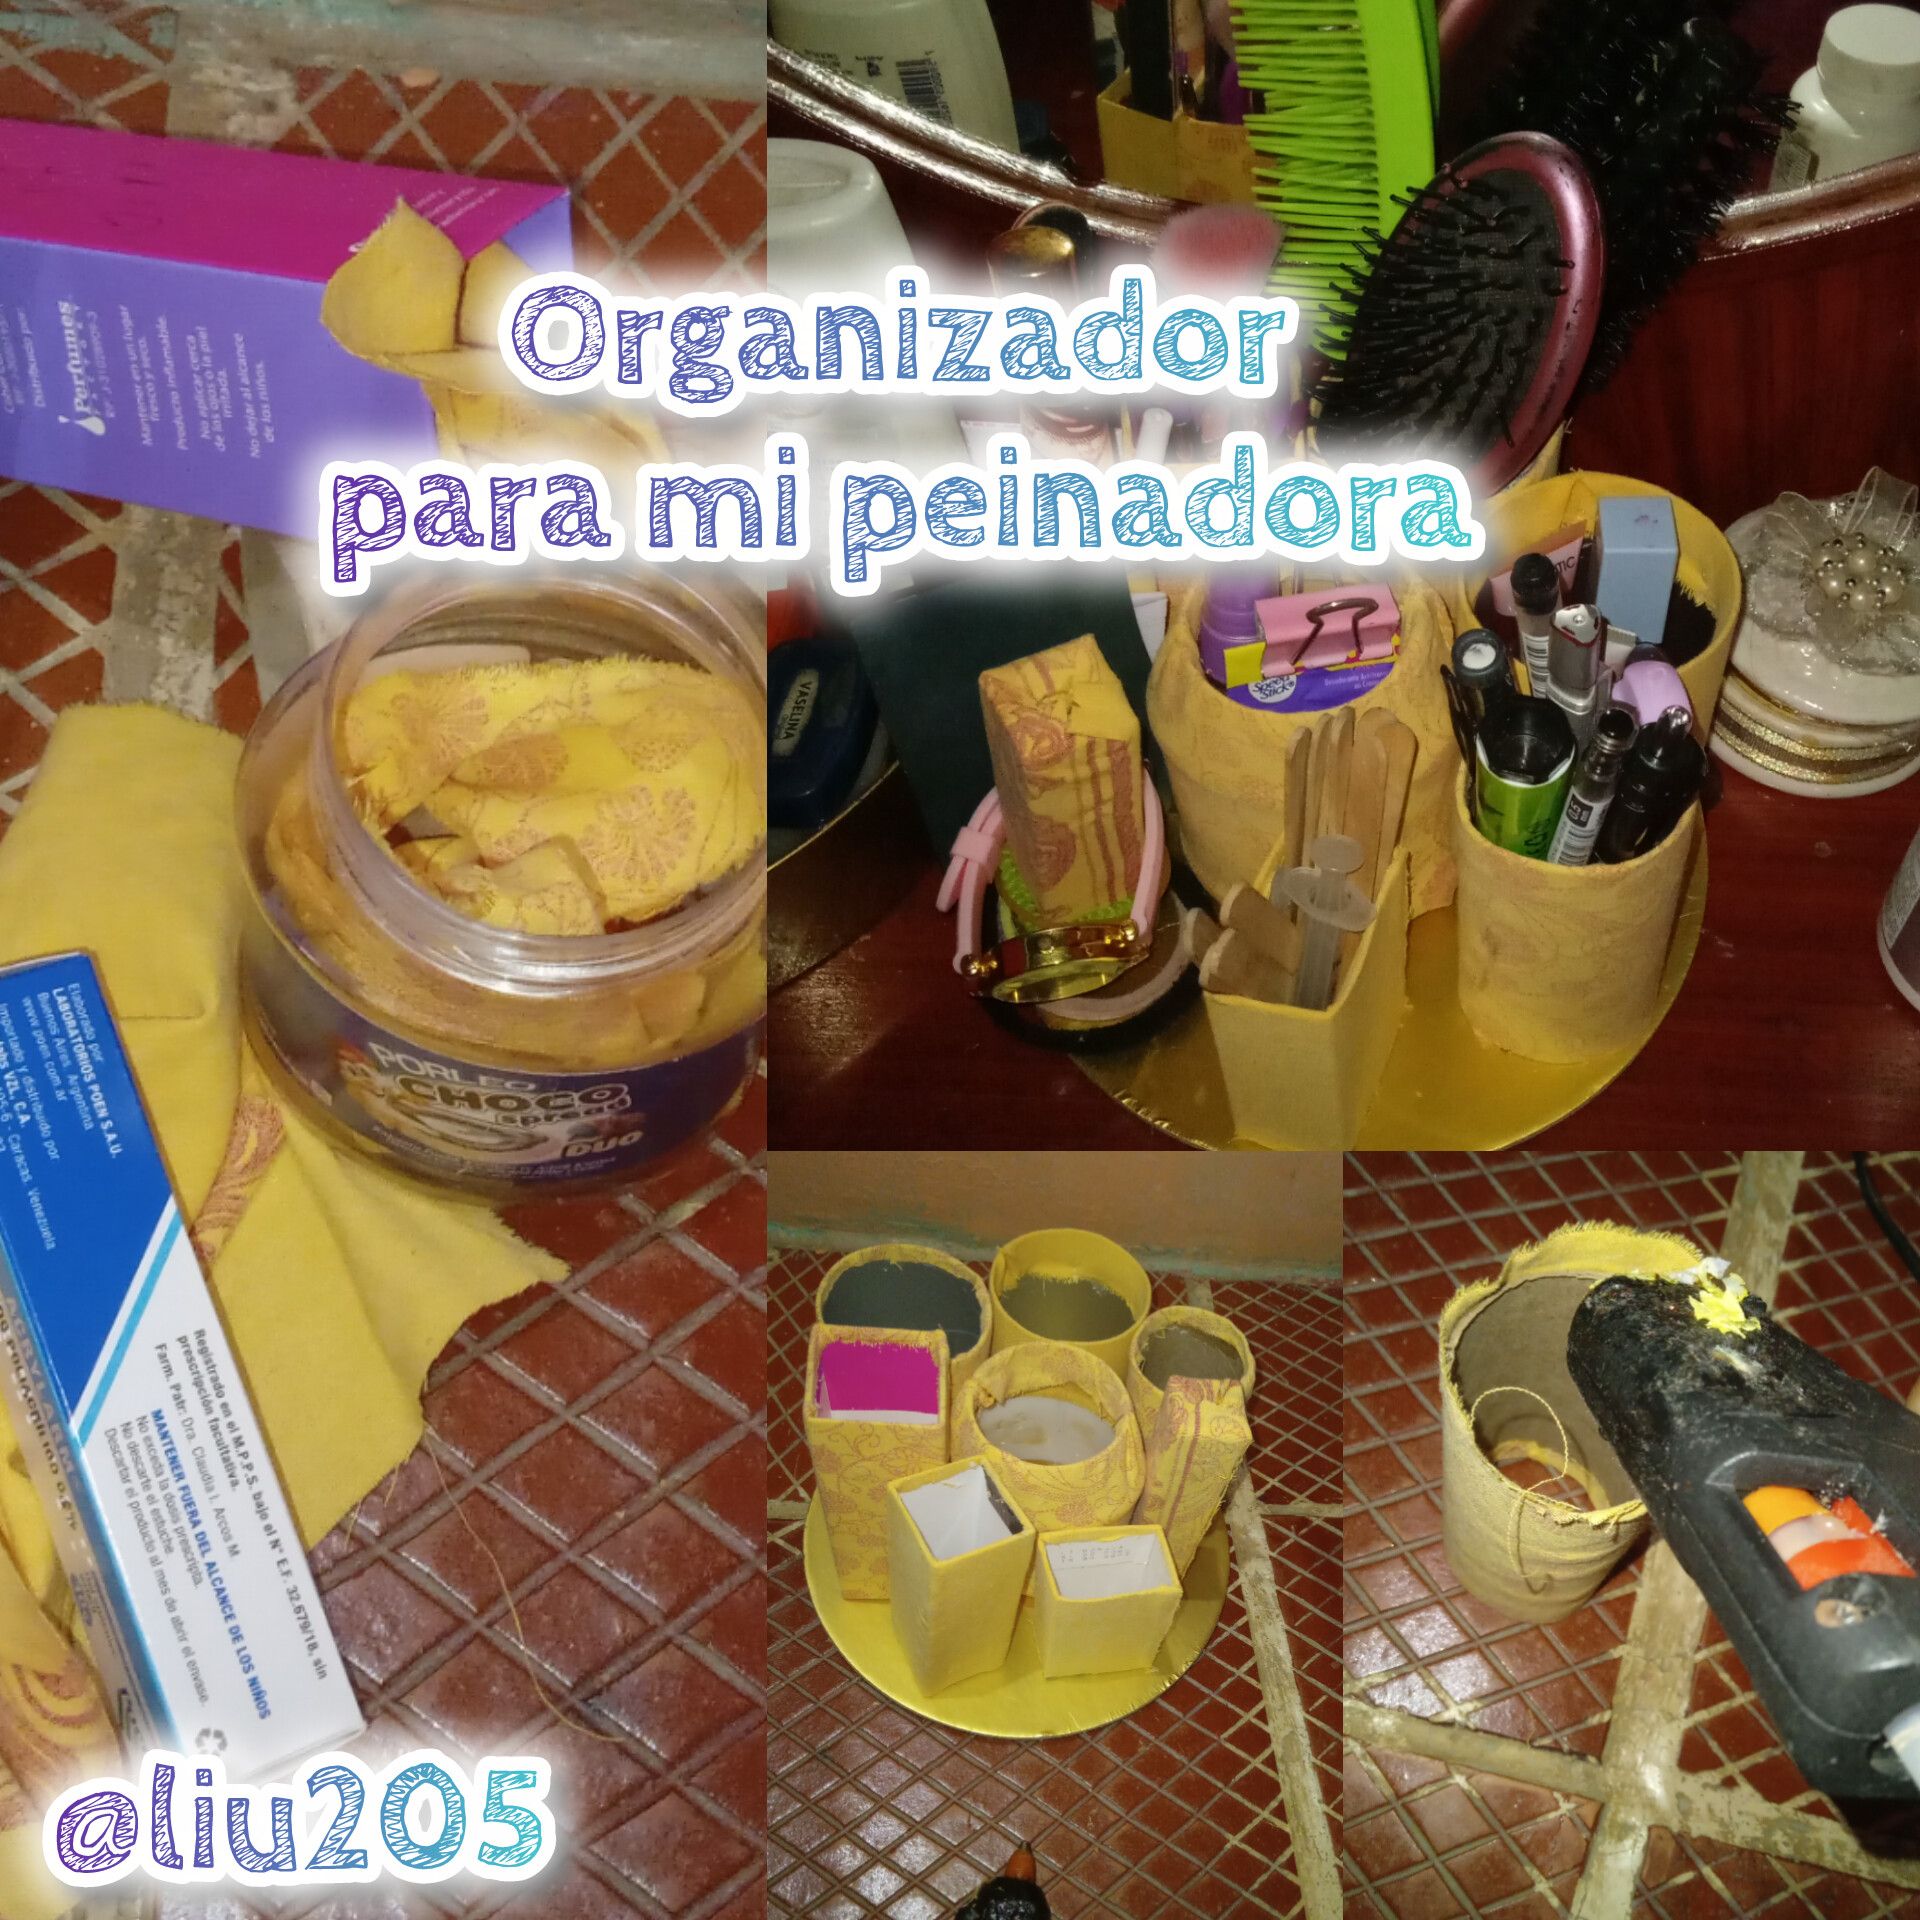
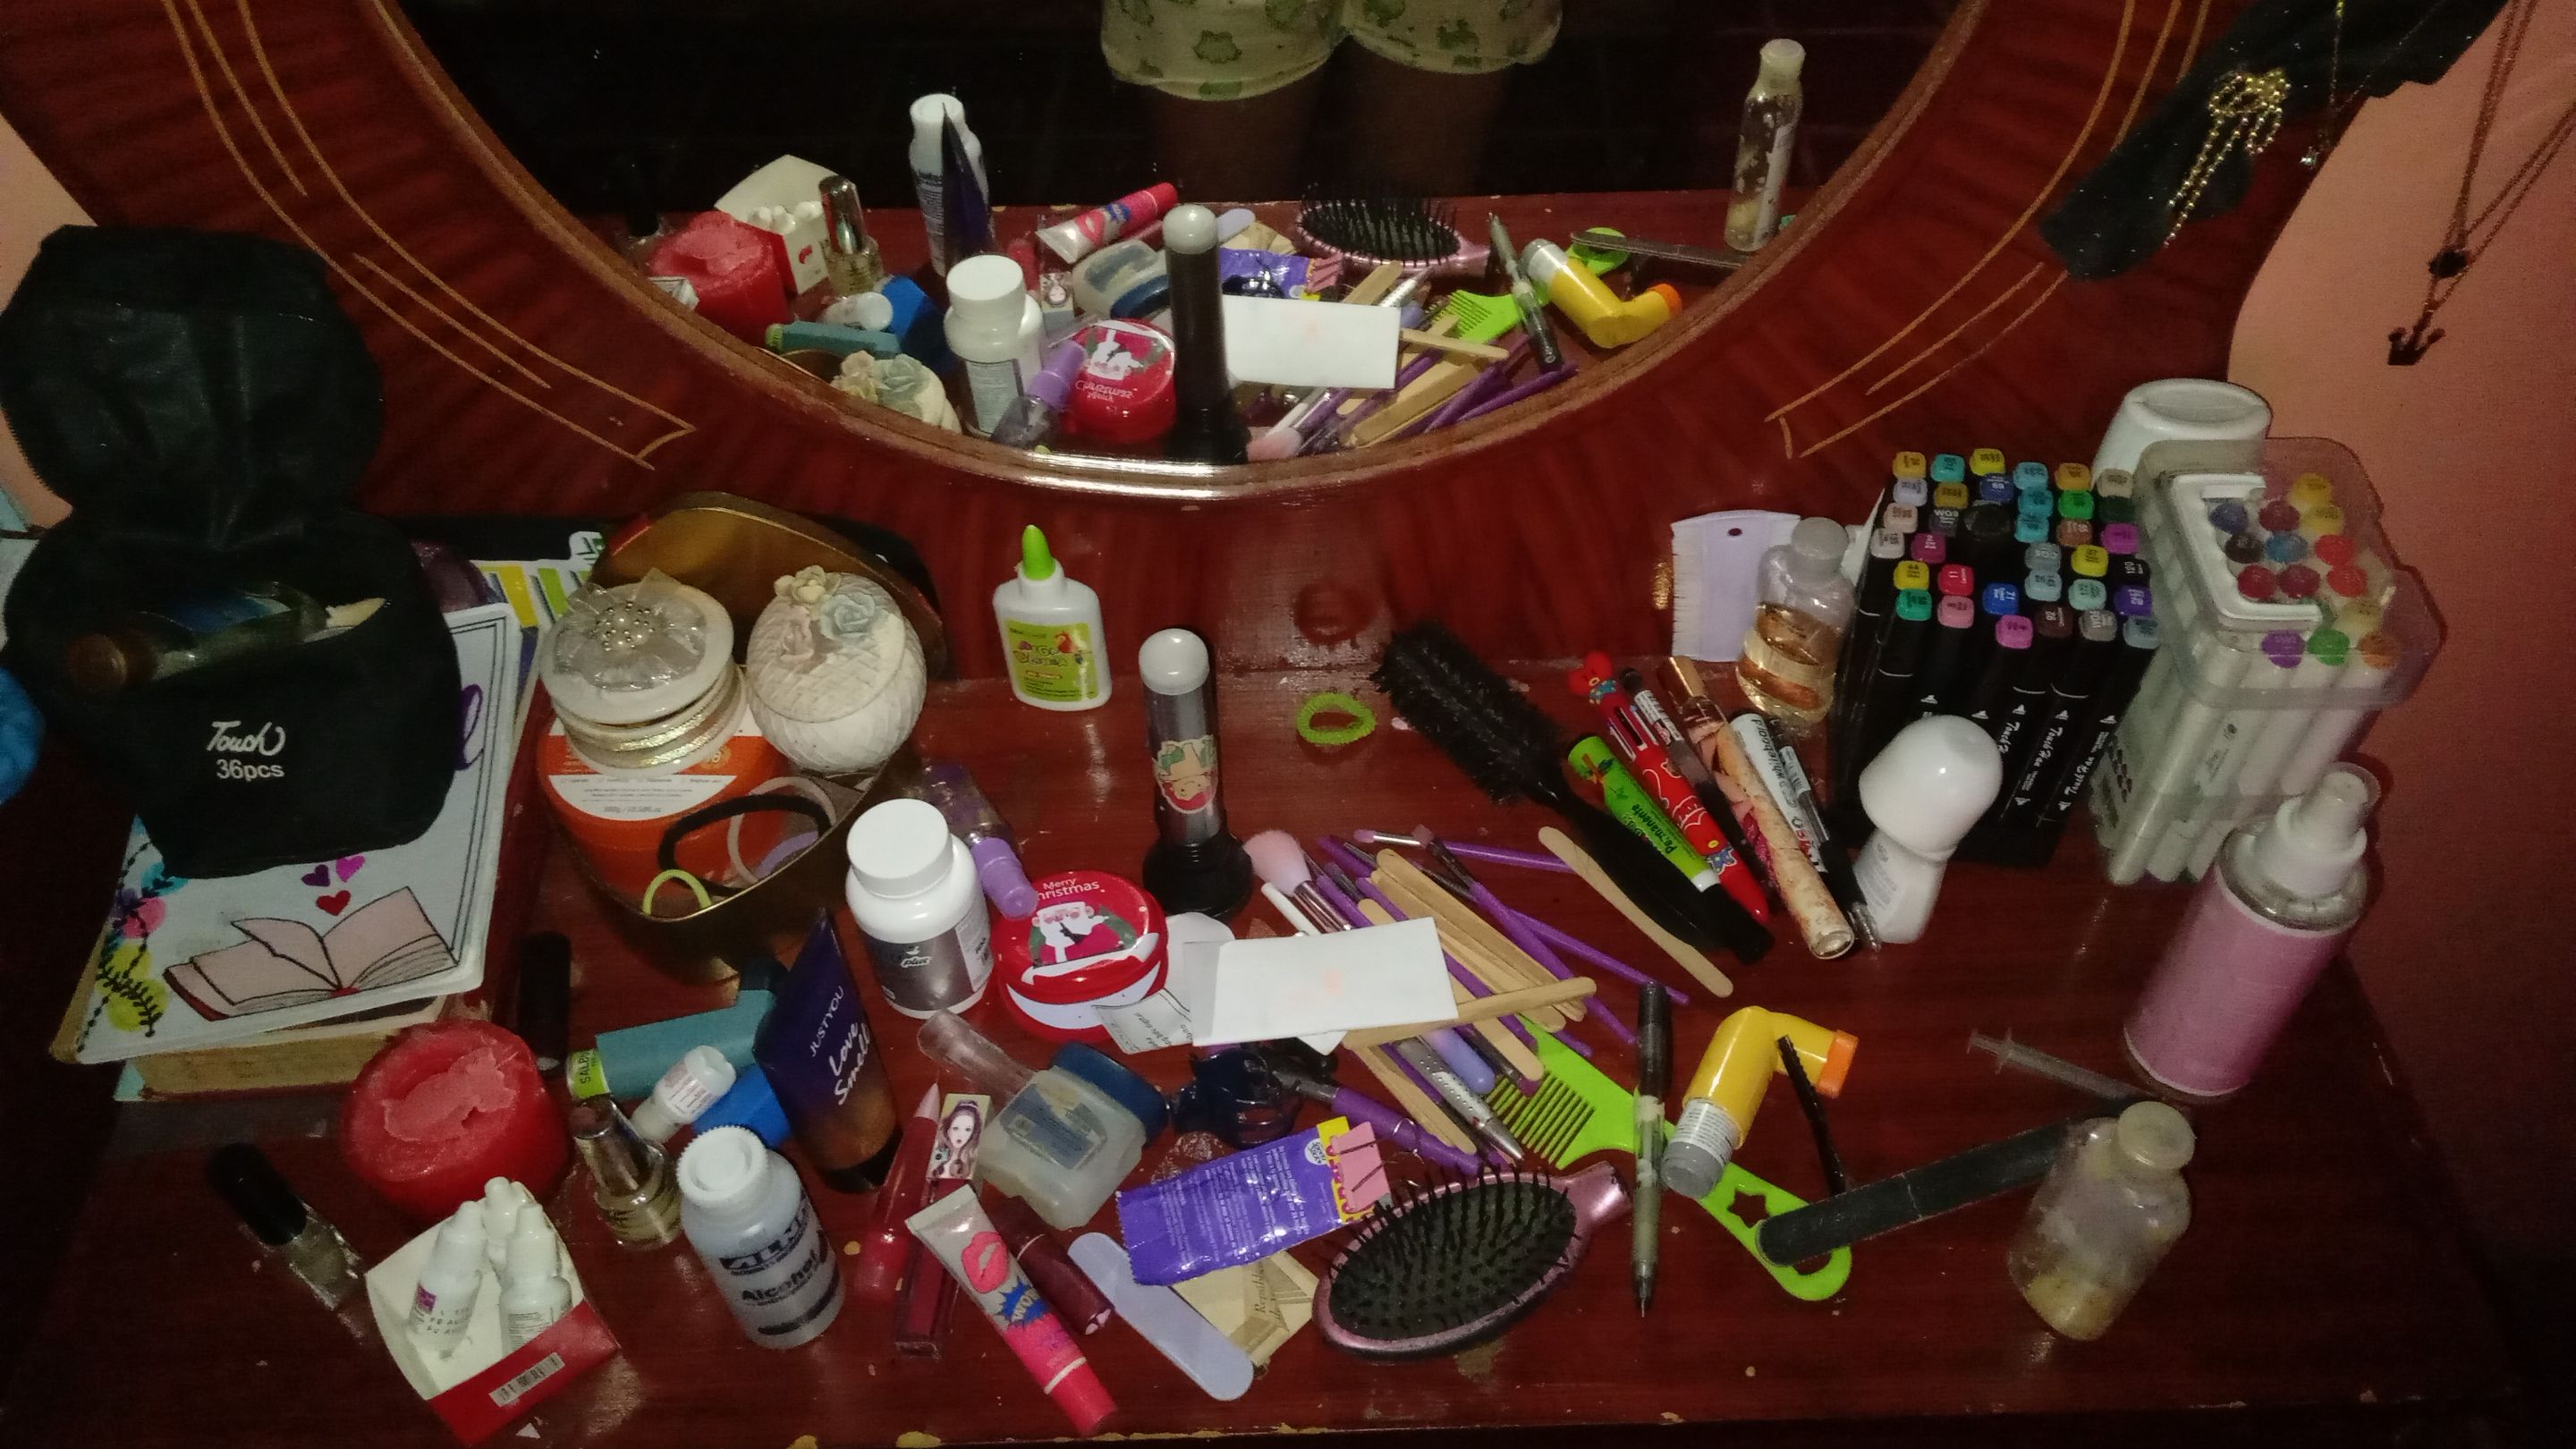
Hola a todos queridos amigos de Diyhub, Hoy quiero mostrarles cómo realicé un organizador para mi peinadora, ya que esta estaba desordenada todo el tiempo; No como la foto que les voy a mostrar porque aquí ya había sacado todo de los antiguos "organizadores" y los voy a hacer de nuevo.
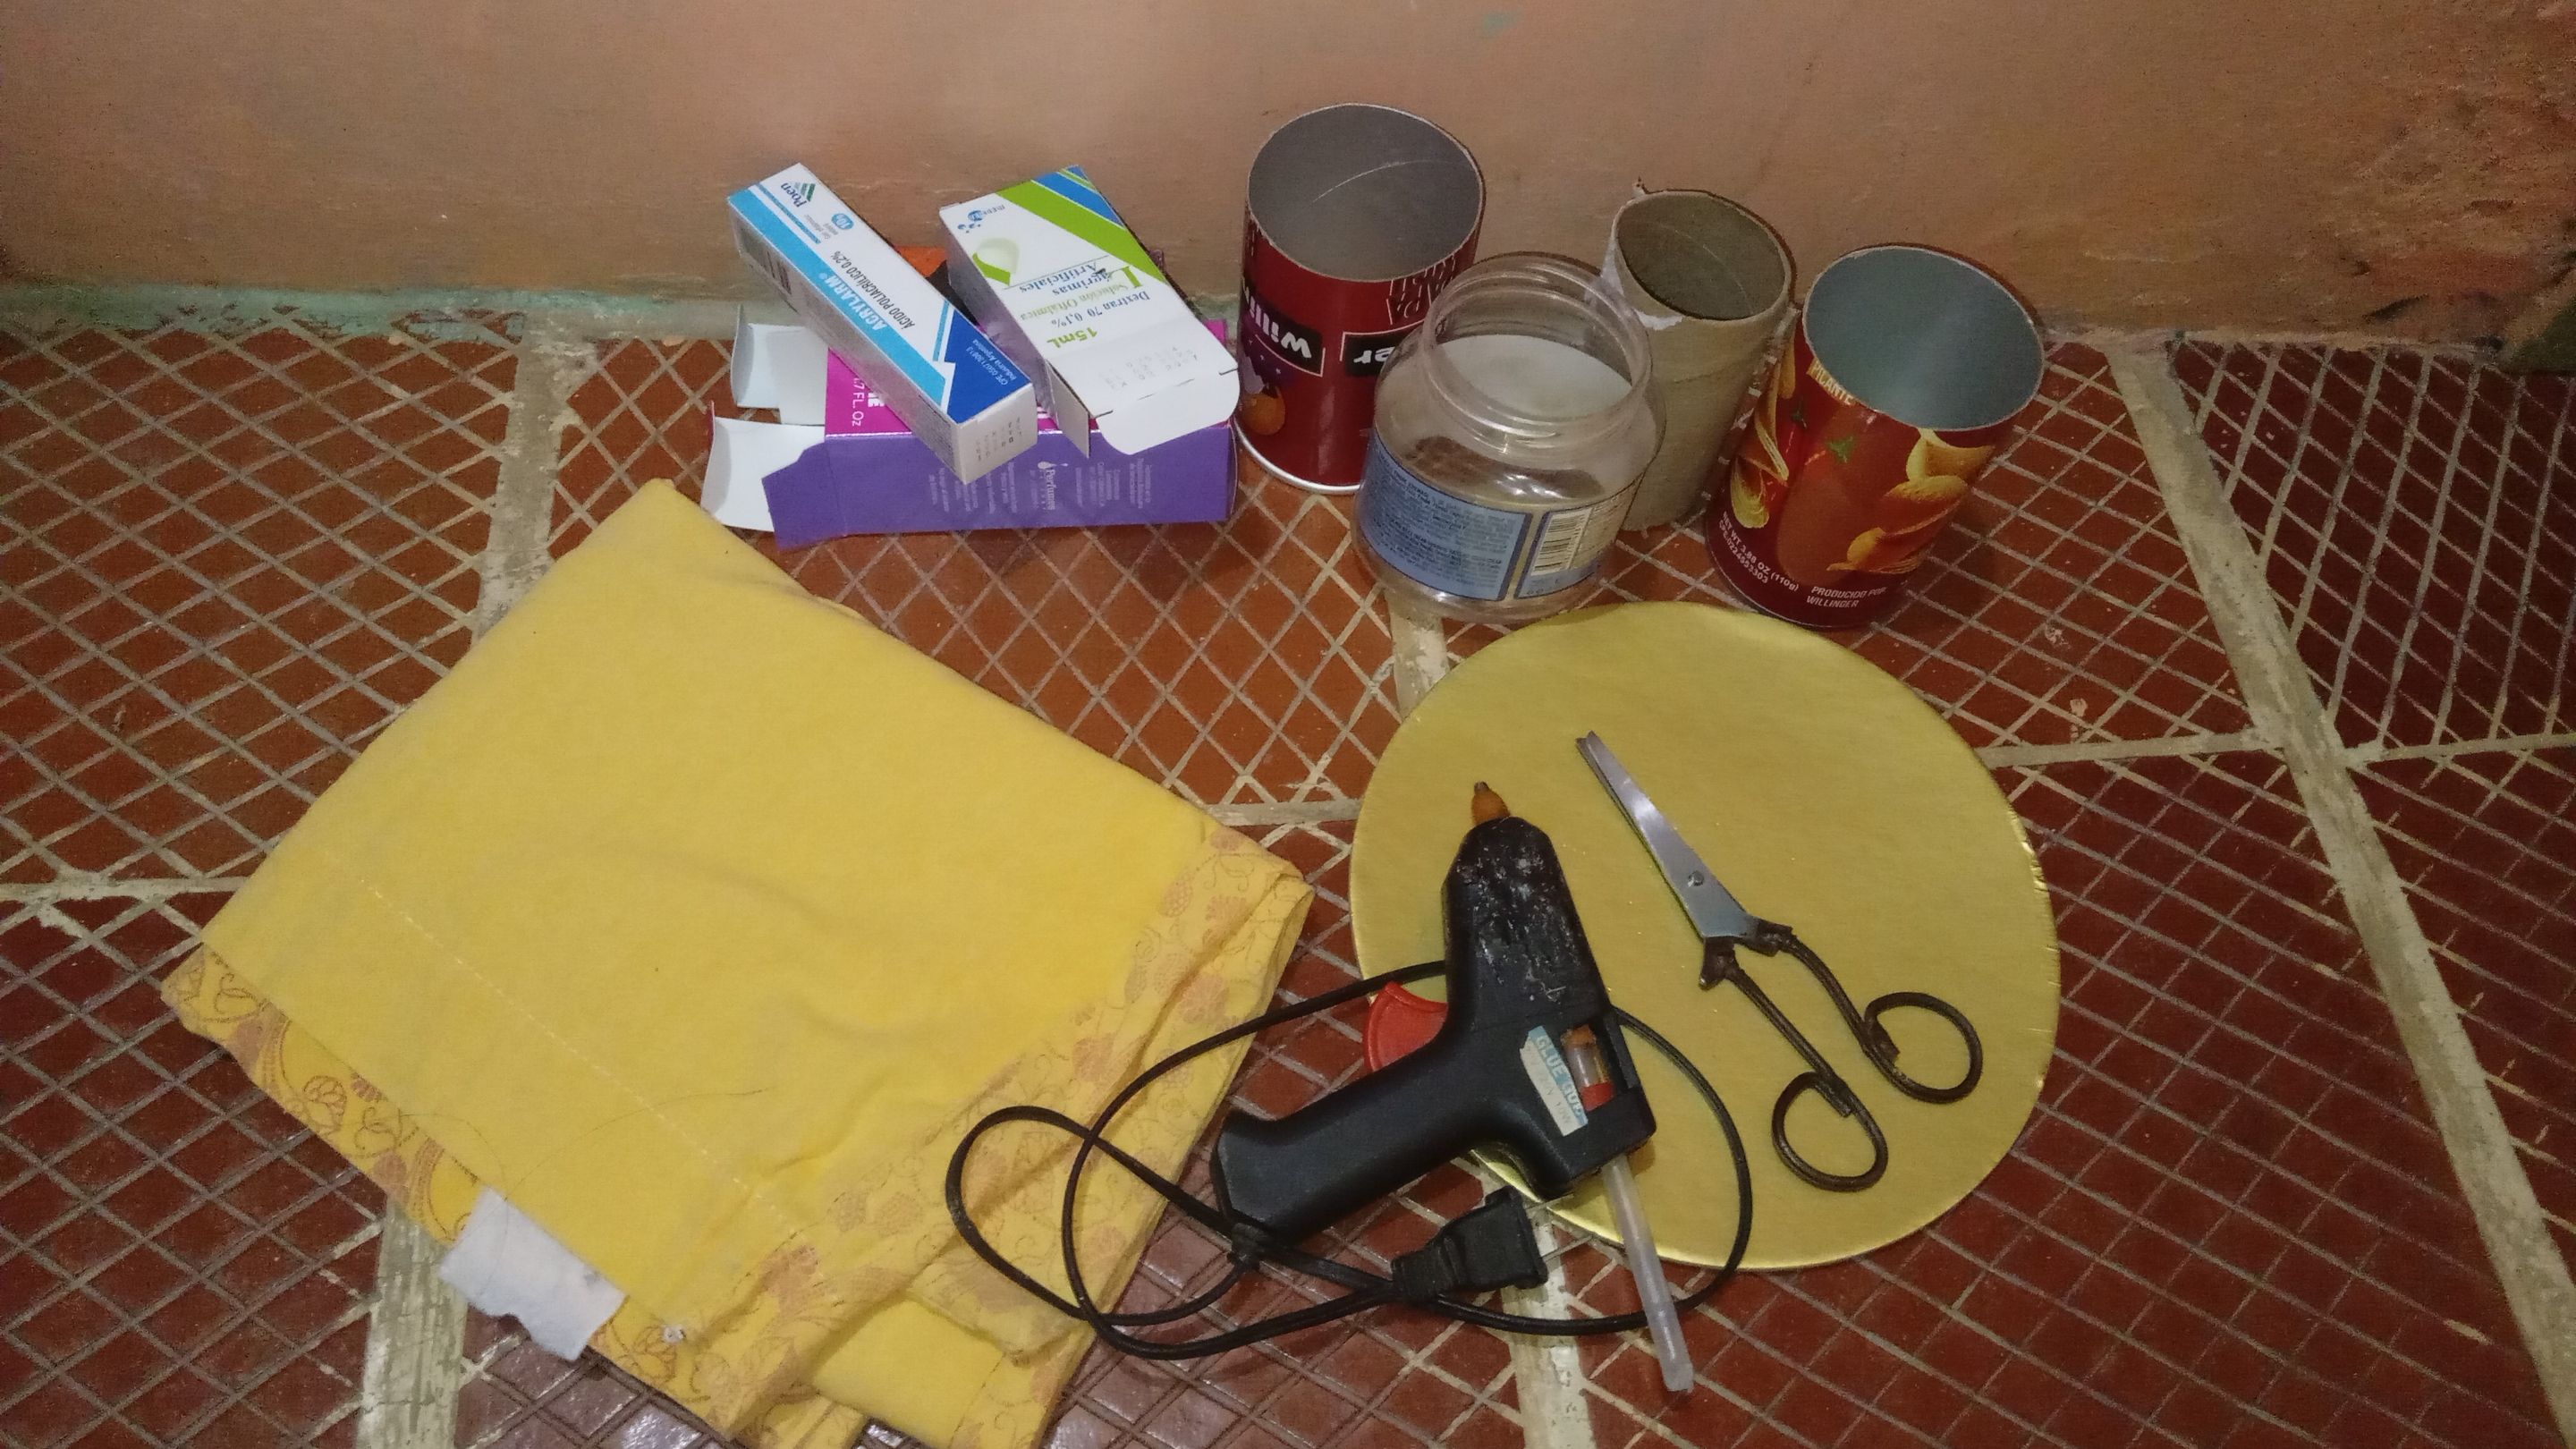
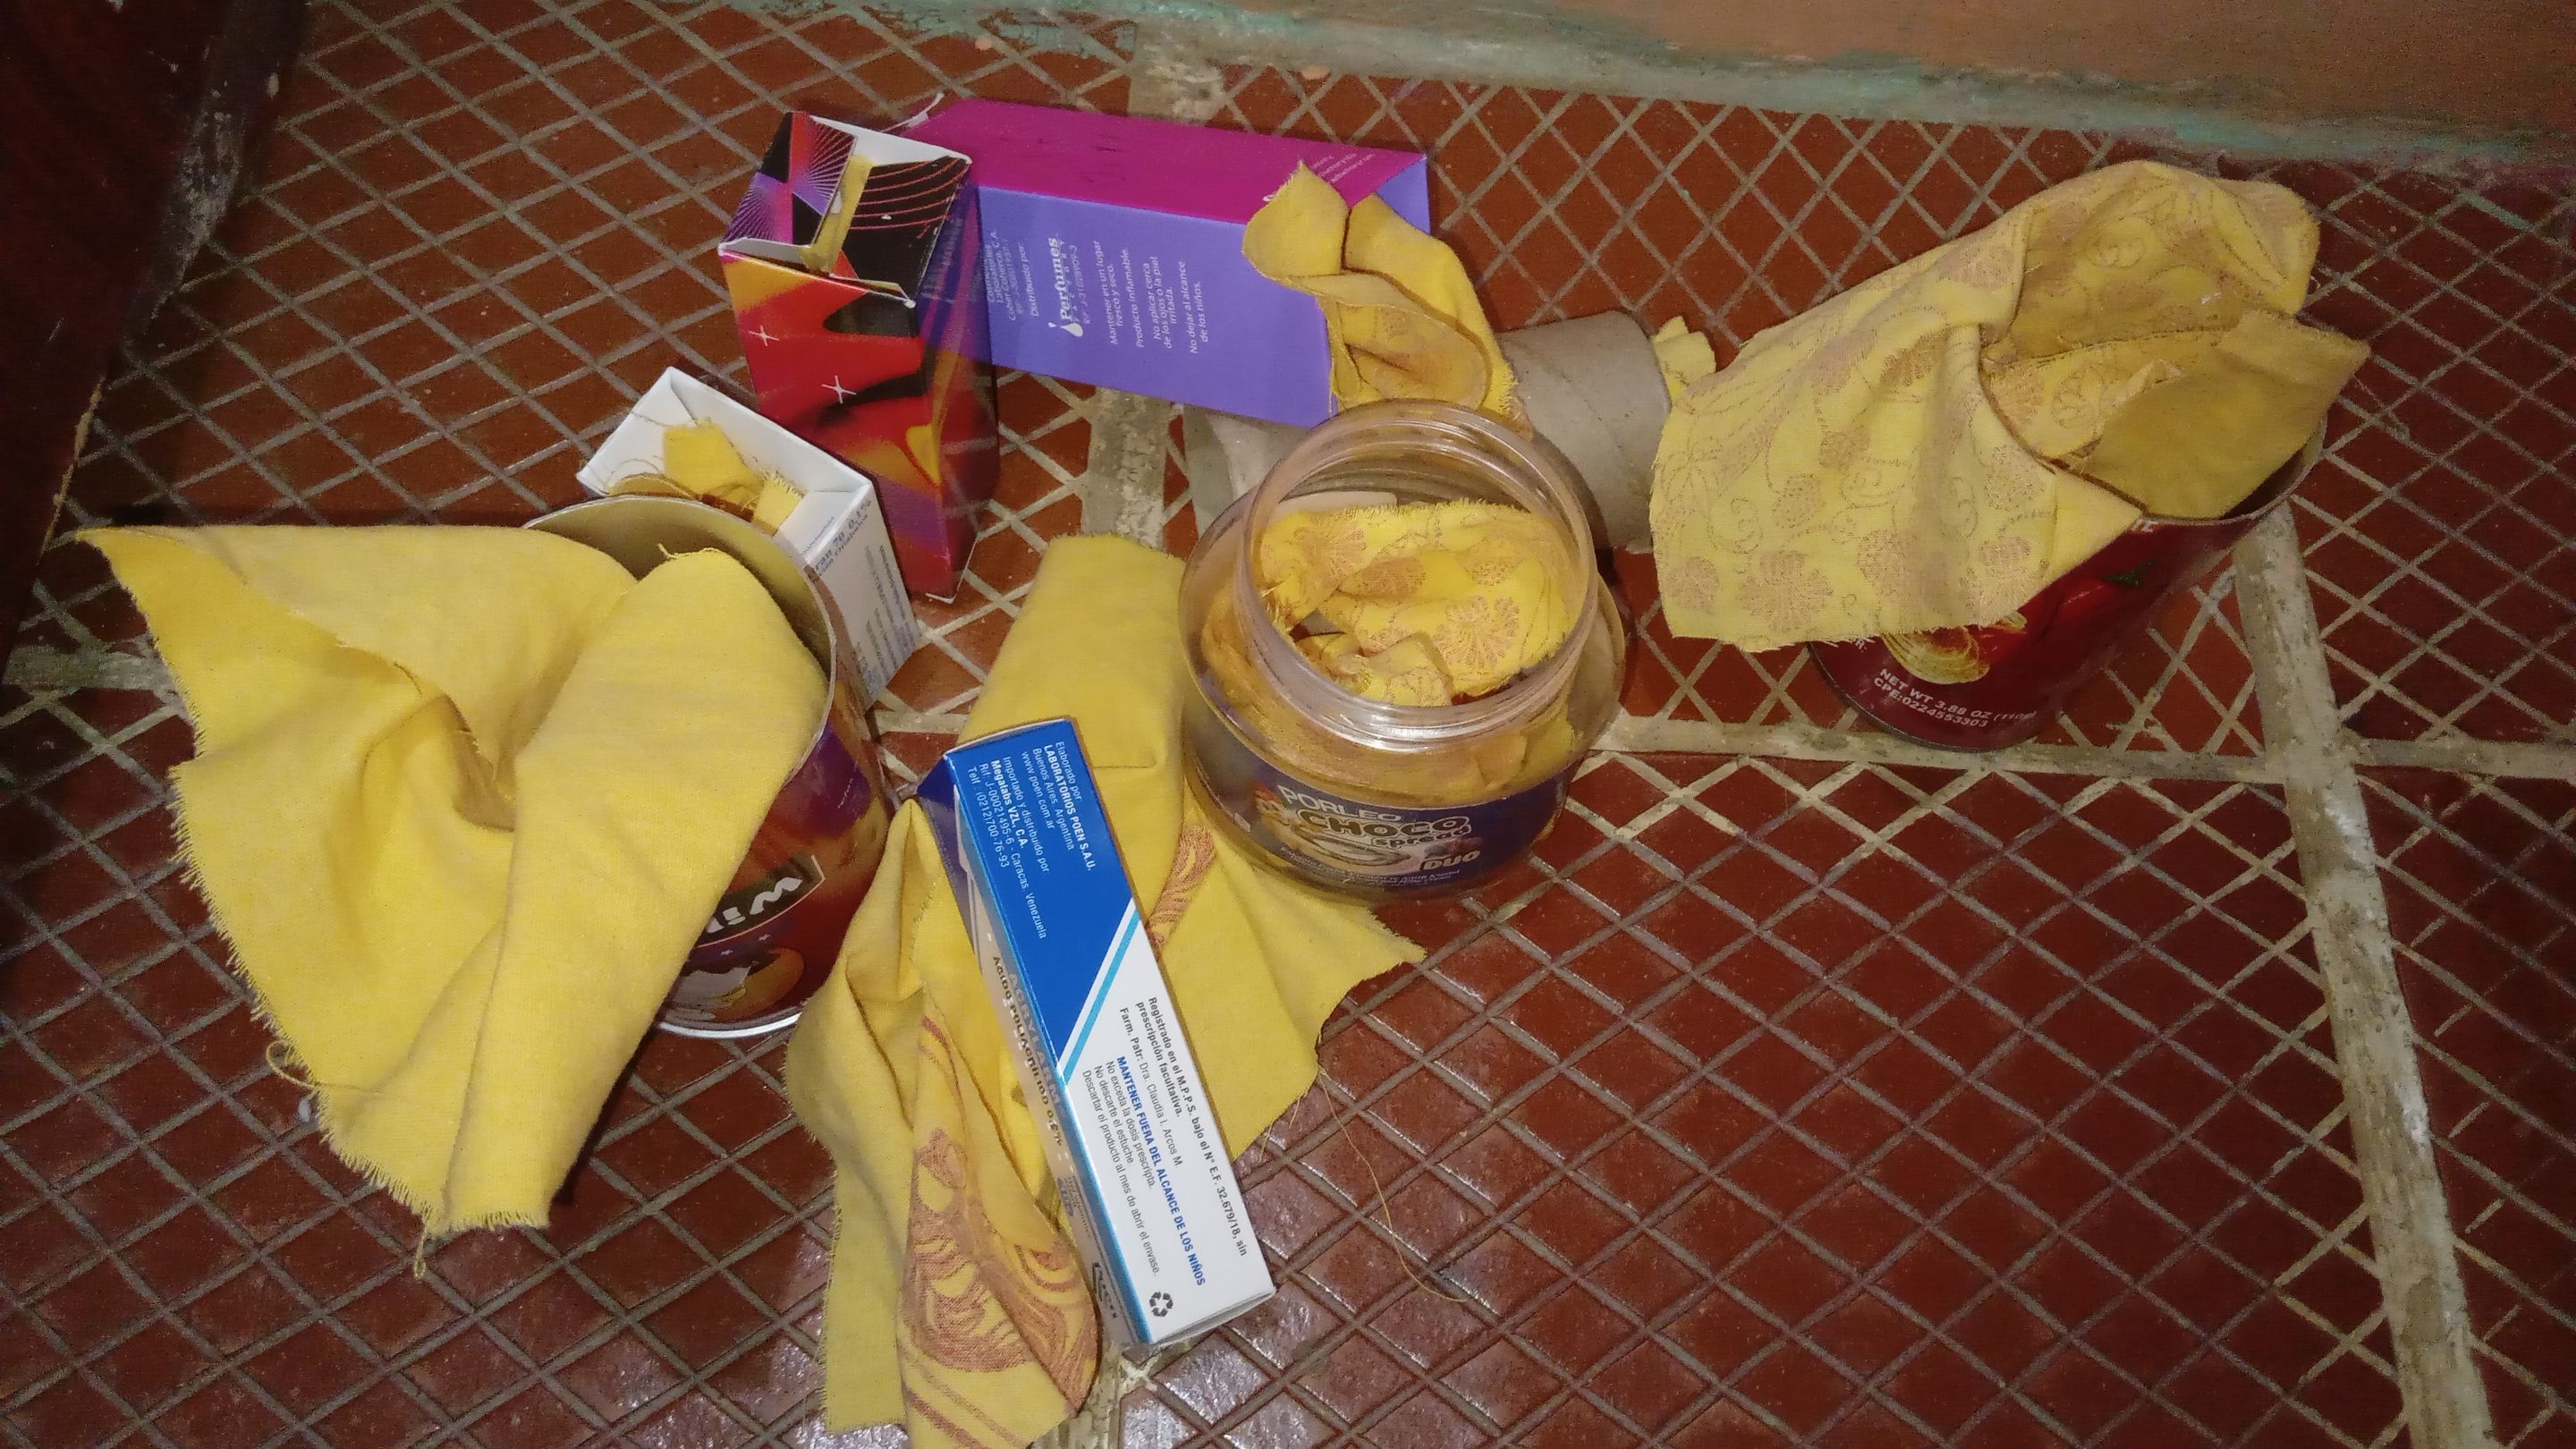
Los materiales que voy a utilizar o mejor dicho que utilicé para realizar mi organizador fueron:
Una tijera
Envases redondos como potes de plástico, rollo de papel higiénico o el envase de las papas crunch.
También utilicé cajas cuadradas de medicamentos y de colonias que compré.
De igual forma, utilicé un pedazo de tela vieja
Silicón caliente
Una tijera
Y un cartón redondo de los que se utilizan para poner las tortas.
**
ENGLISH
**
Hello all, dear friends of Diyhub, Today I want to show you how I made an organizer for my hairdresser, since it was always in disarray. Not like the photo I'm about to show you, because here I had already removed everything from the old "organizers" and I'm going to make them again.
The materials I'm going to use, or rather, what I used to make my organizer were:
Scissors
Round containers such as plastic tubs, toilet paper rolls, or potato chip containers.
I also used square medicine and perfume boxes that I bought.
I also used a piece of old fabric
Hot glue
Scissors
And a round cardboard box, like the ones used to store cakes.
---
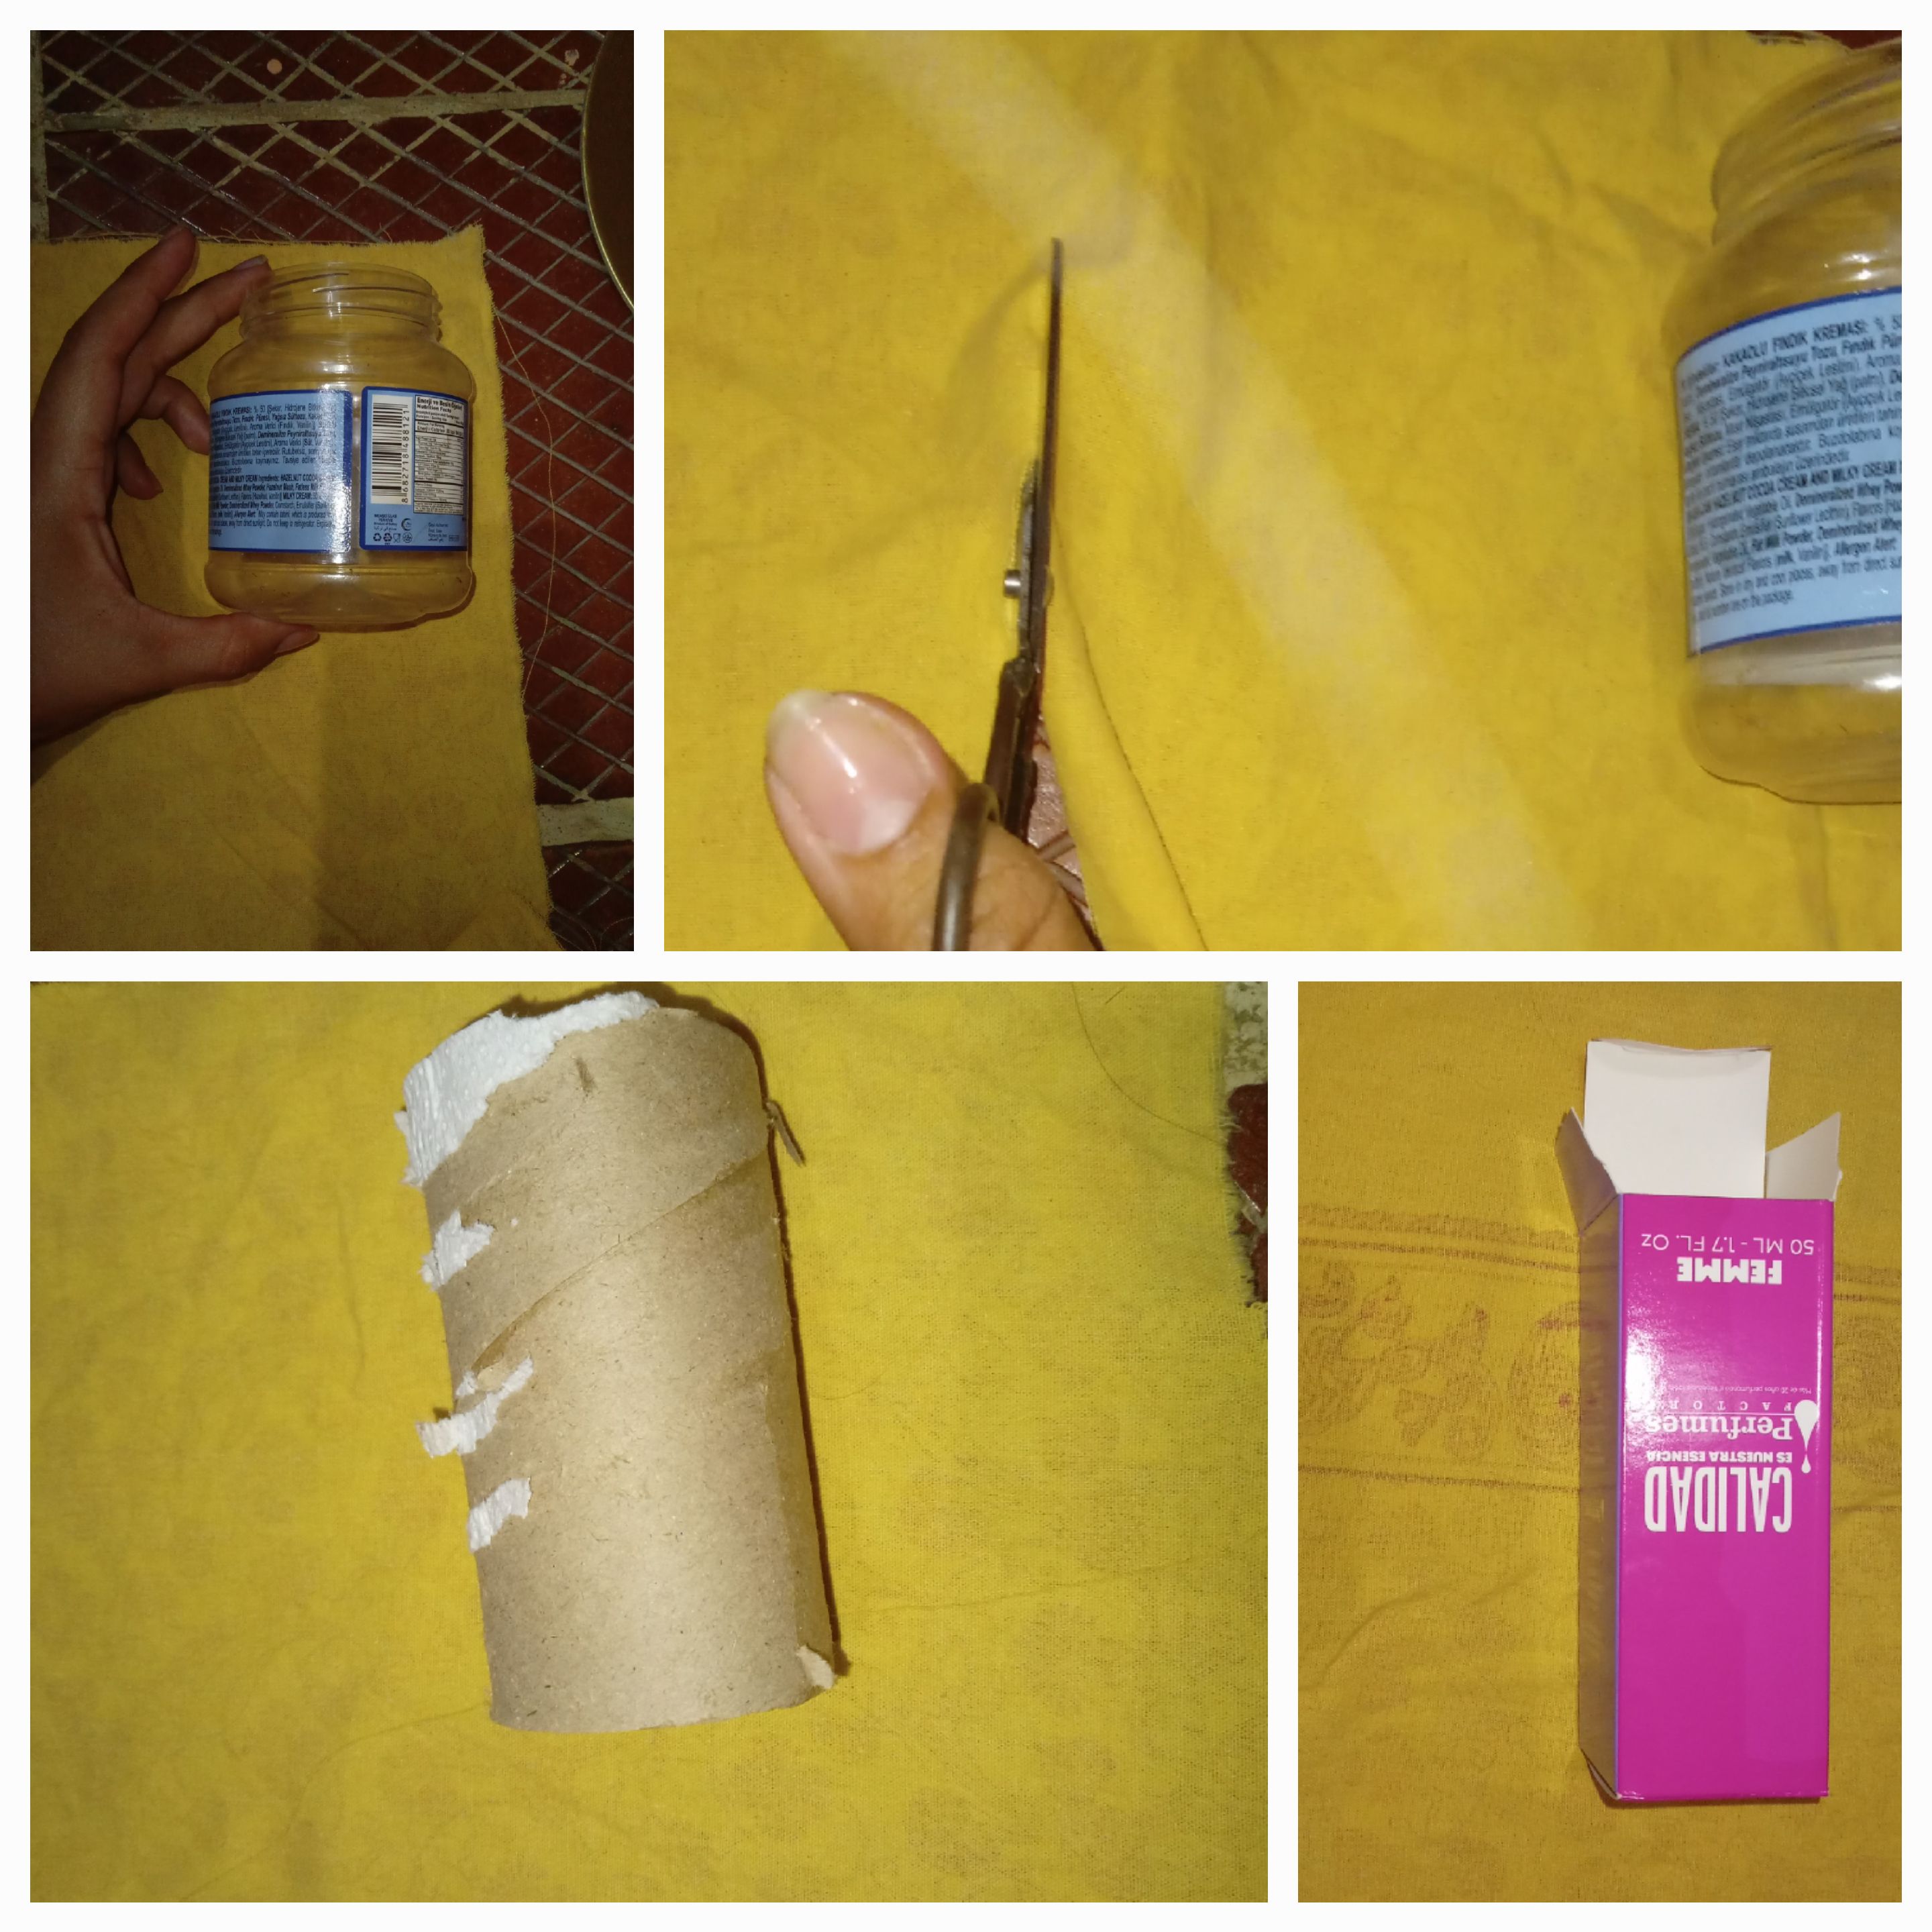
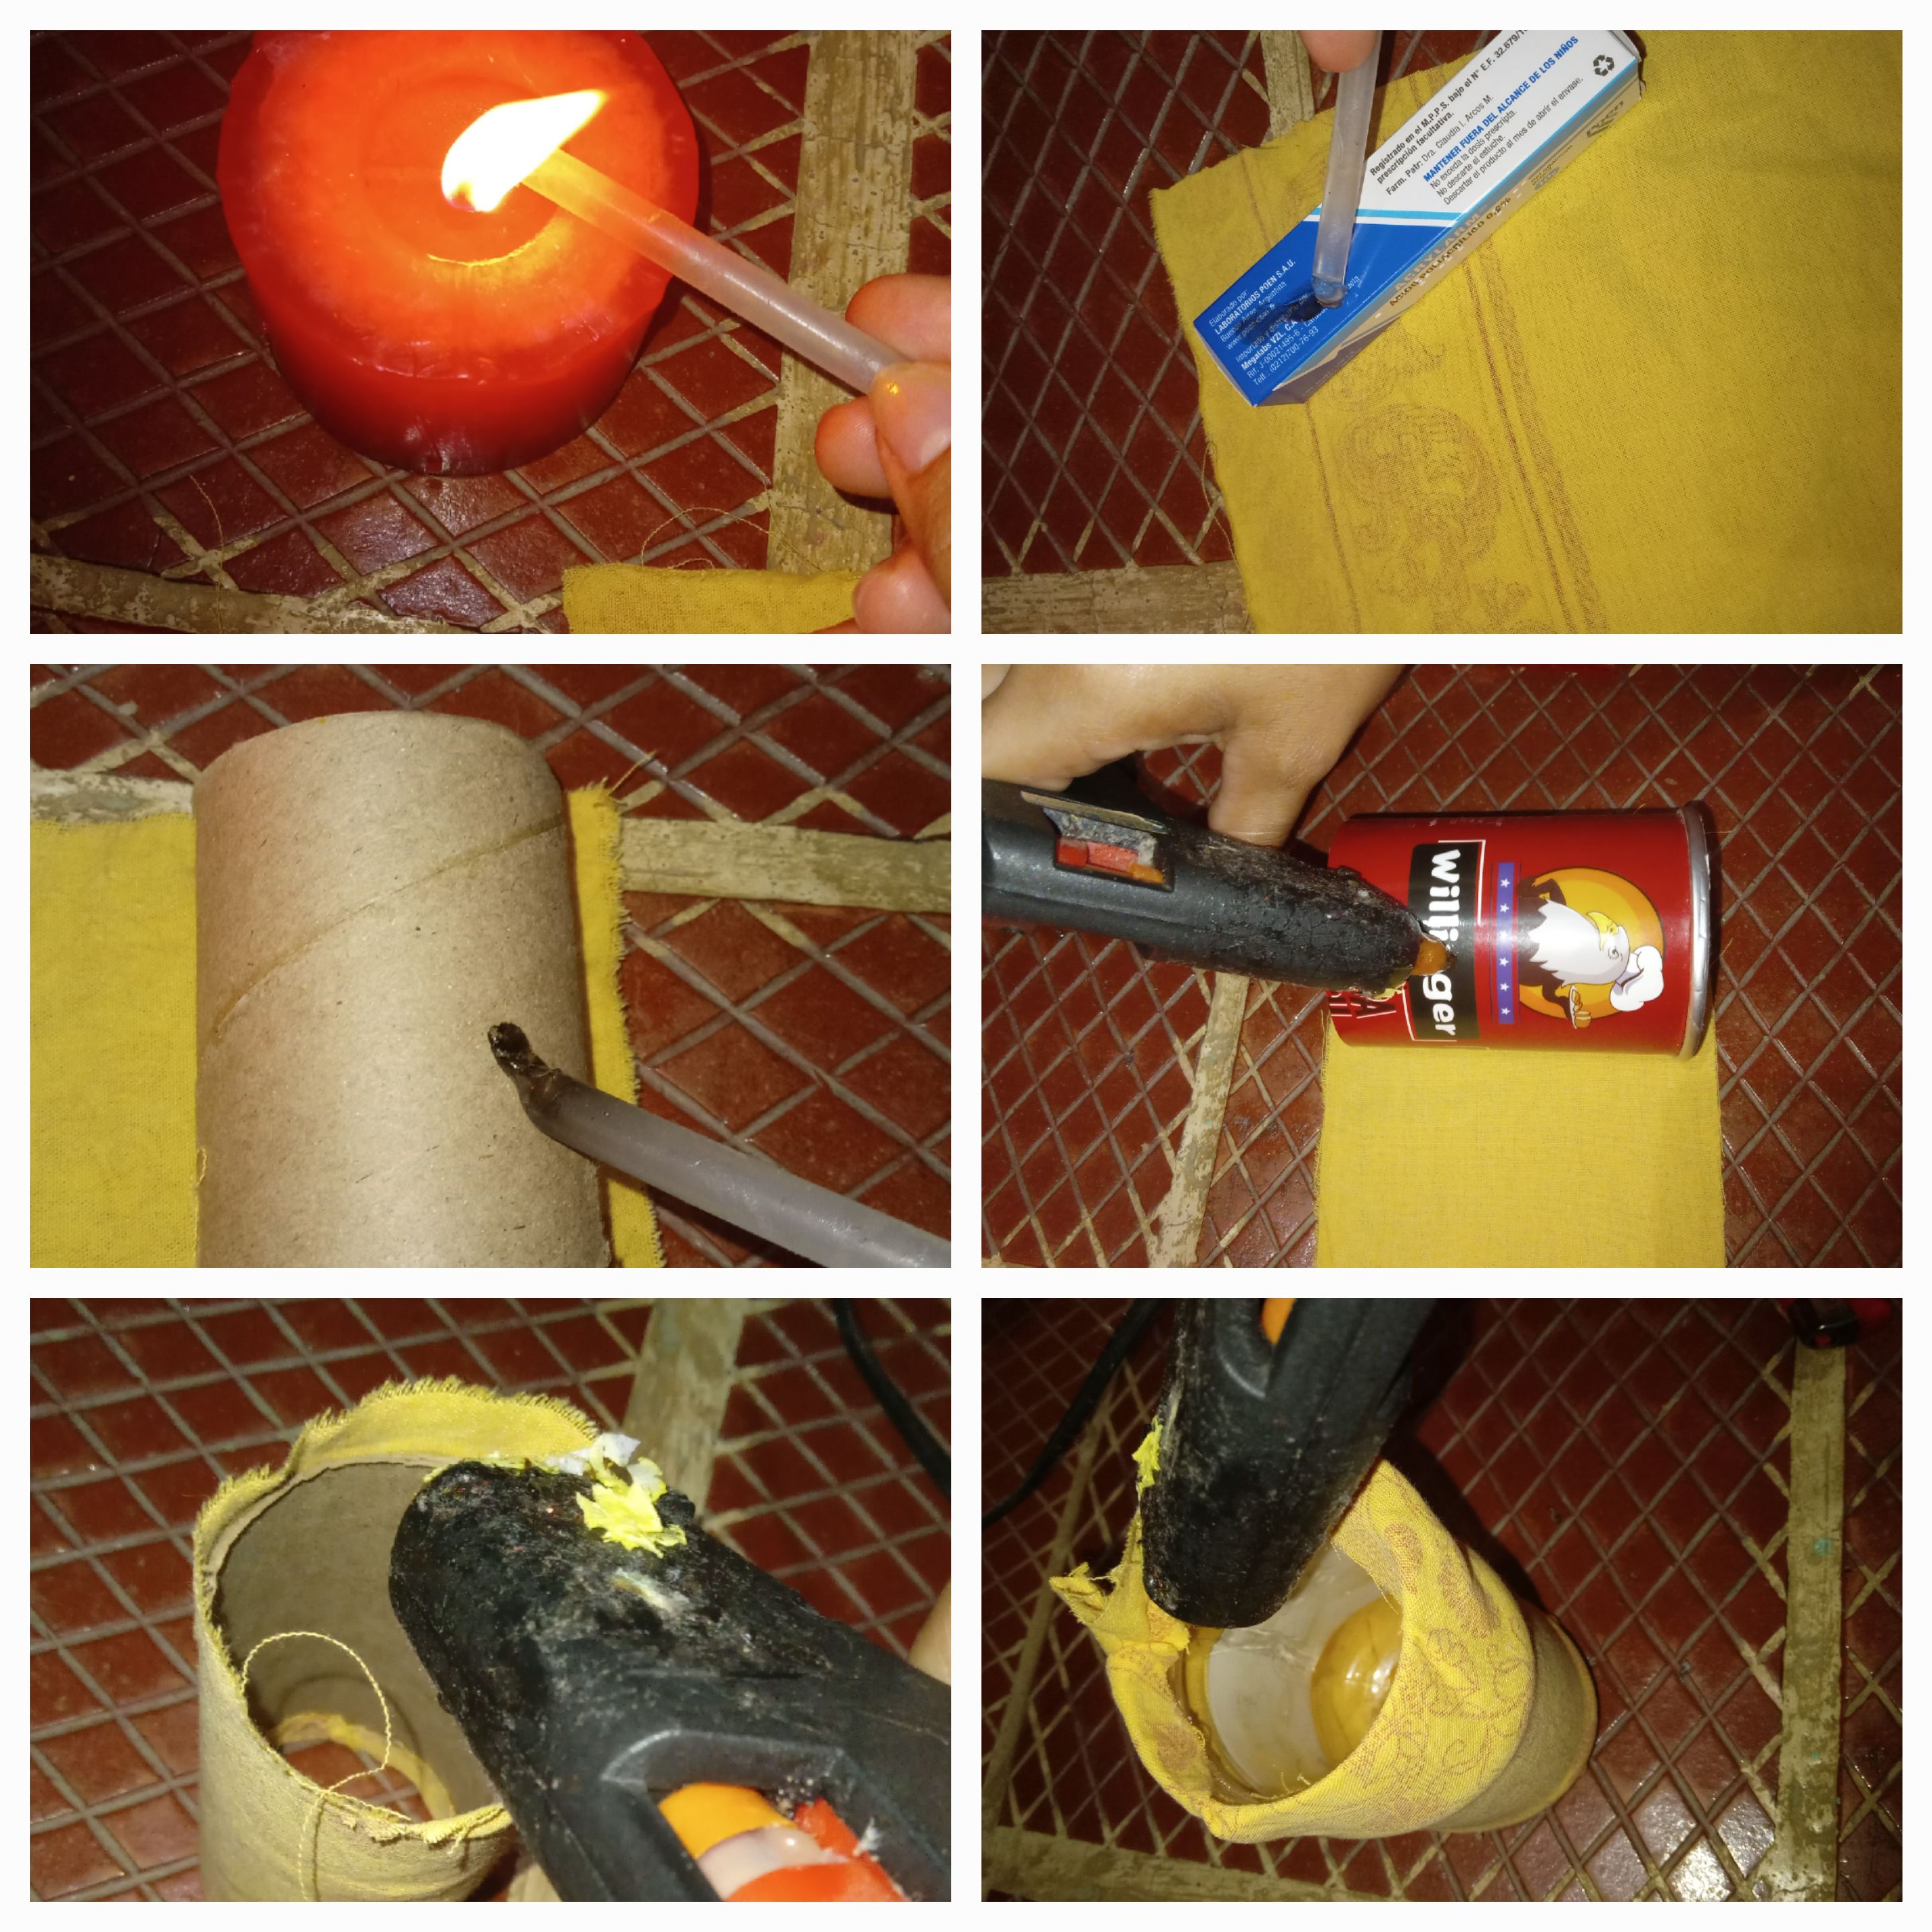
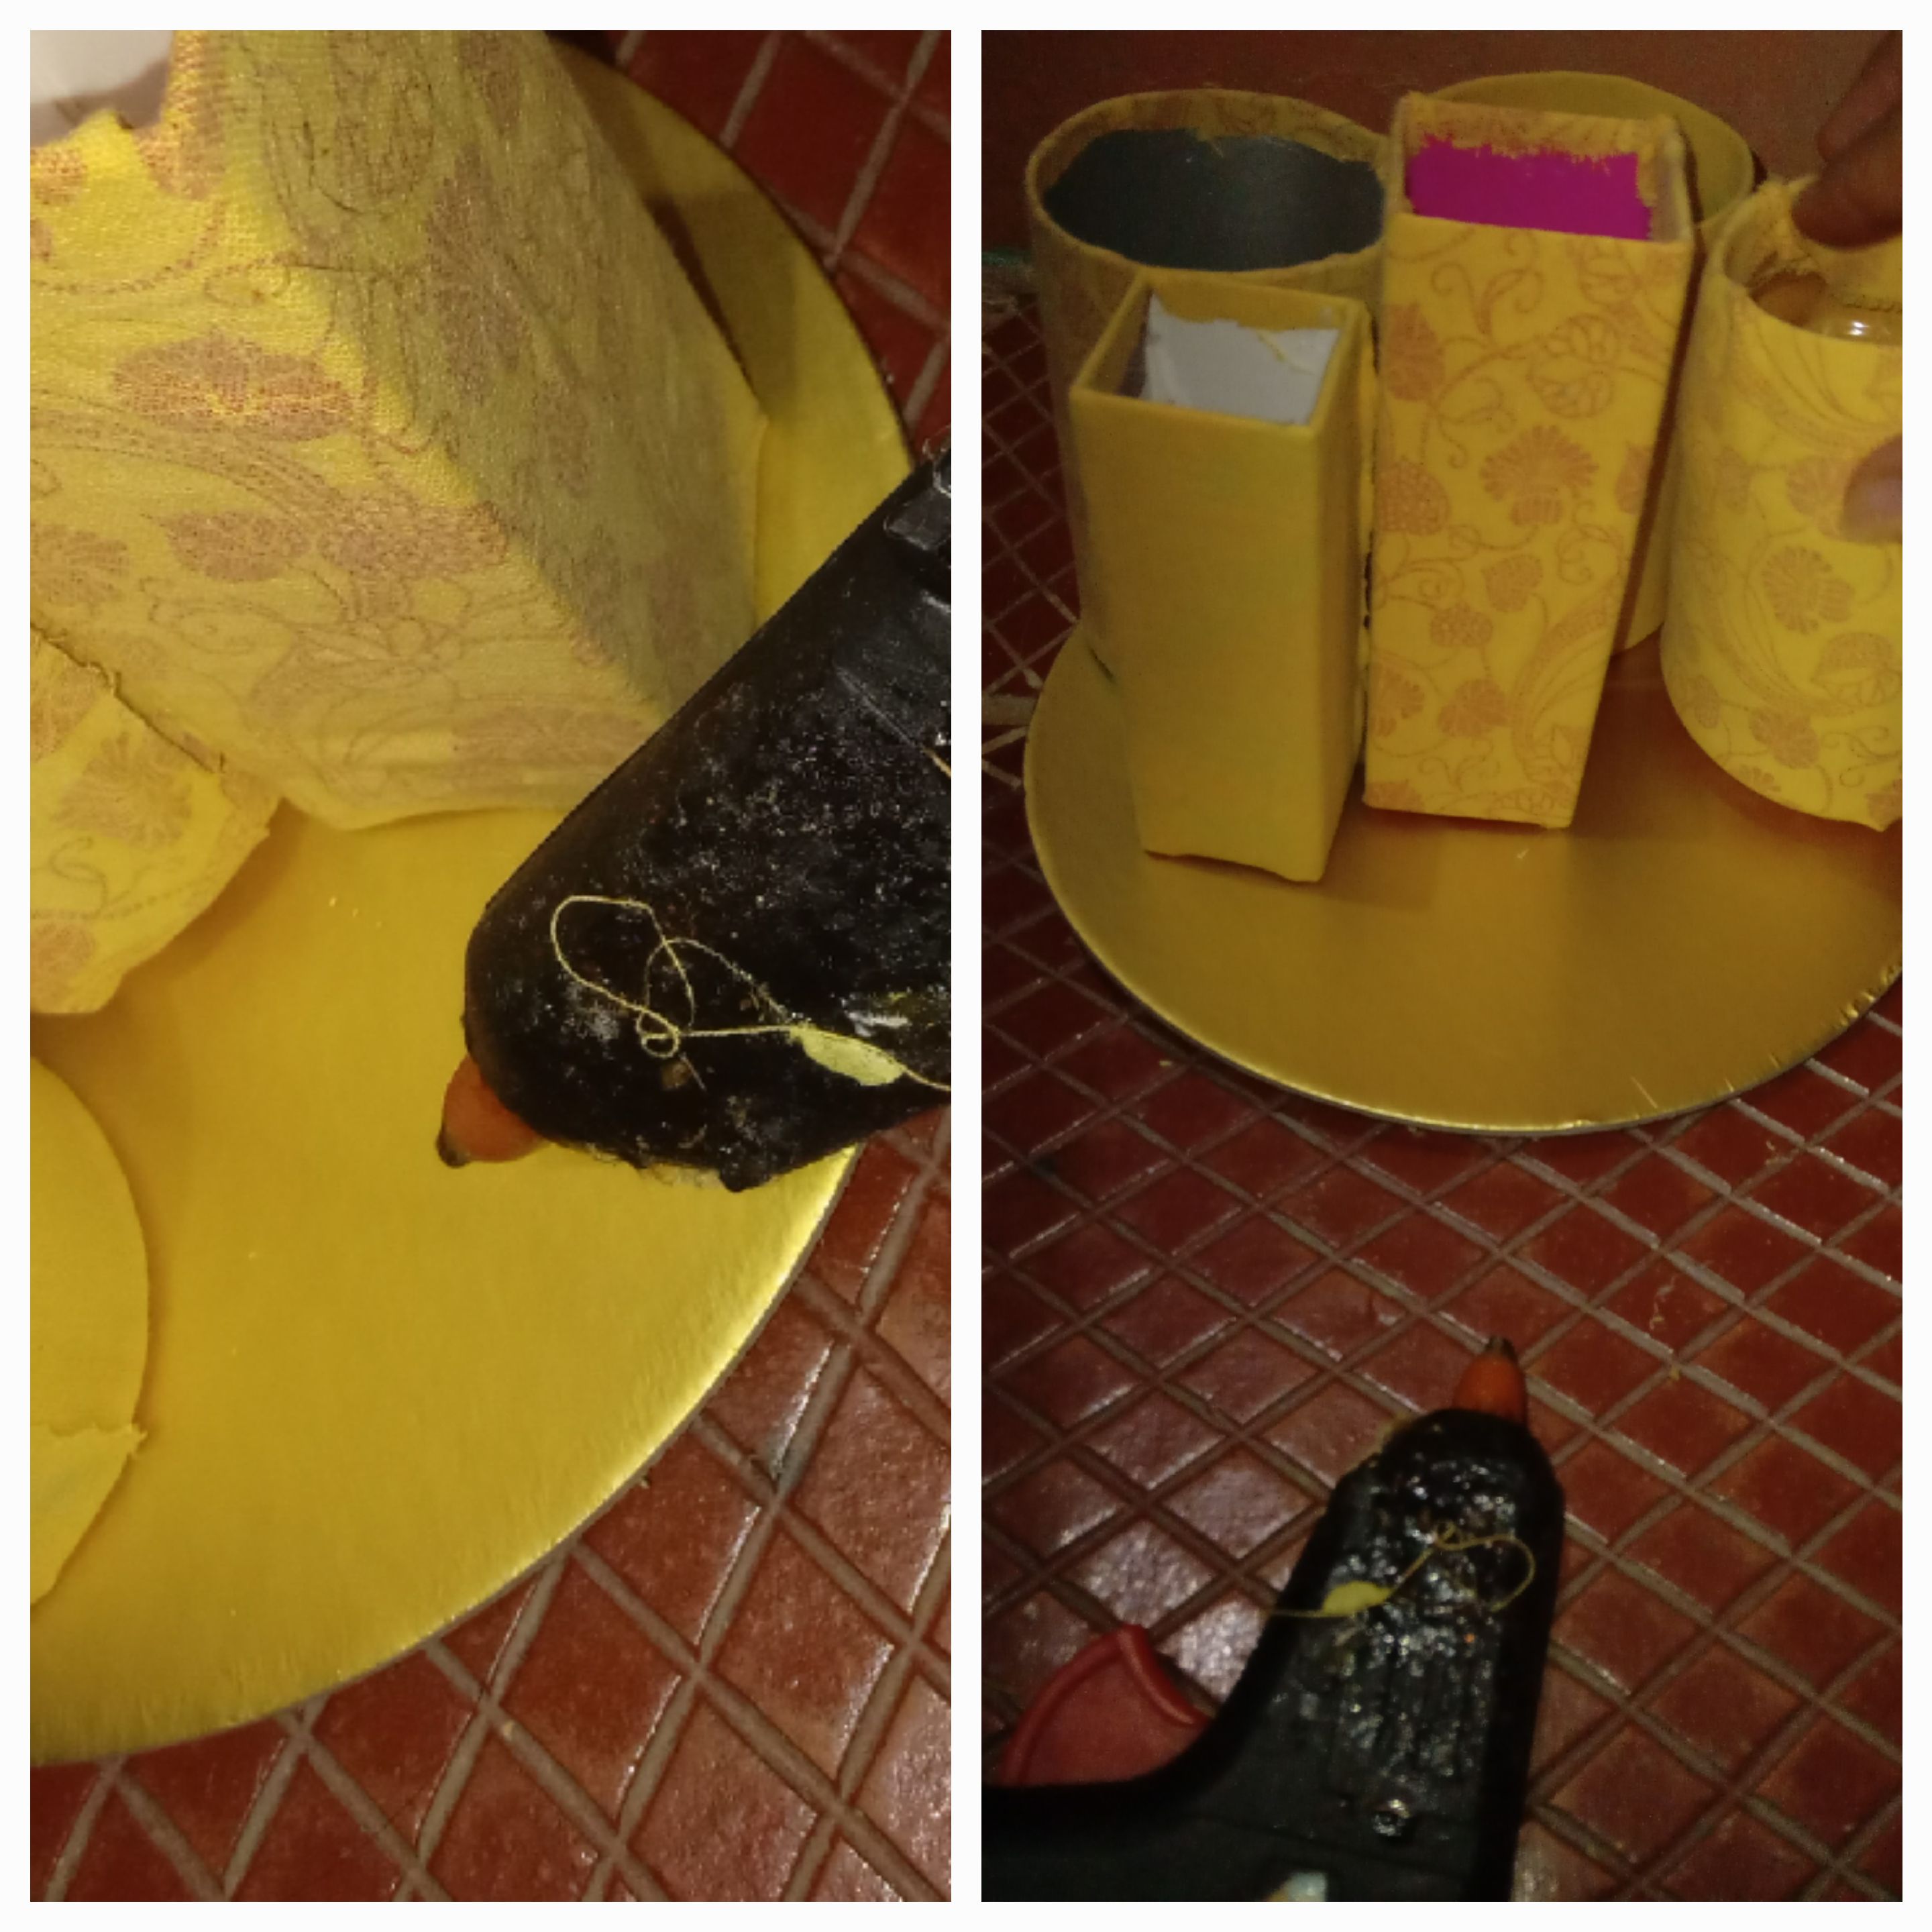
Ahora bien, empecé midiendo pedazos de tela a lo largo y a lo ancho sobre cada envase Y cortando para luego enrollarlos alrededor y forrarlo con esta tela
Now, I started by measuring pieces of fabric lengthwise and widthwise on each container and cutting them to then roll them around and cover it with this fabric.
---
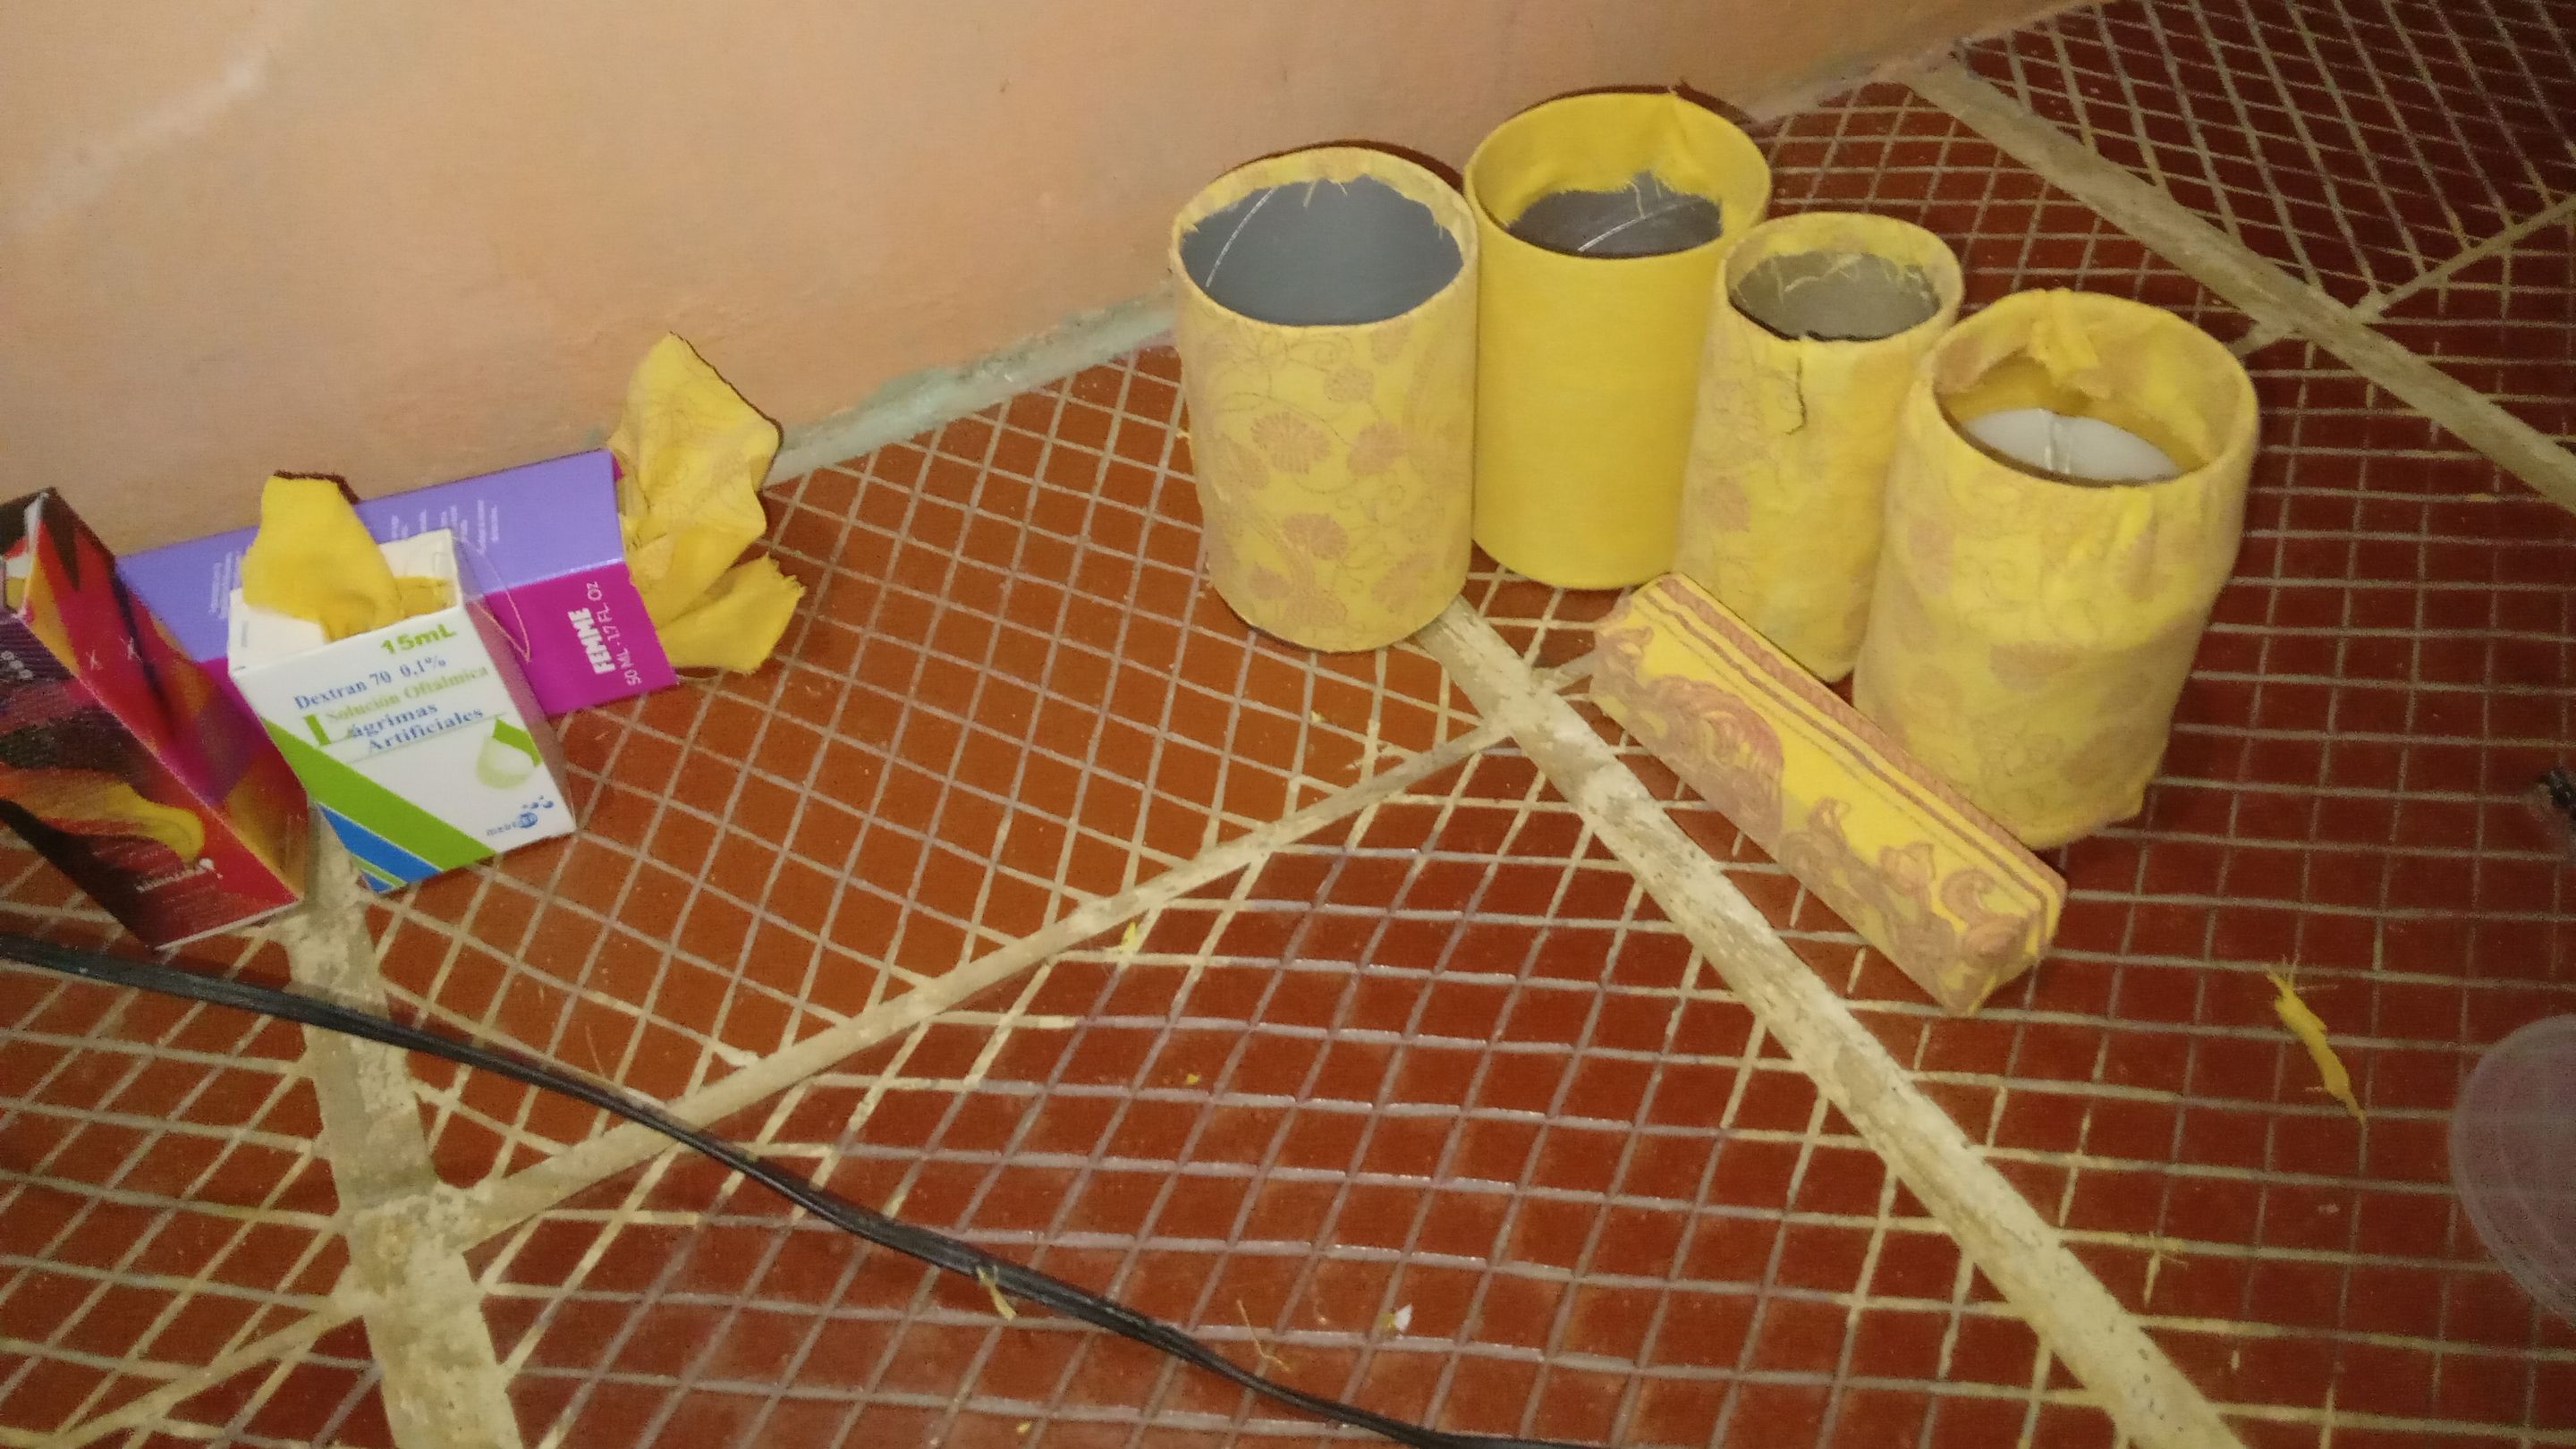
Después de haber hecho eso con cada uno de los envases que tenía empecé a pegarle la tela a ellos
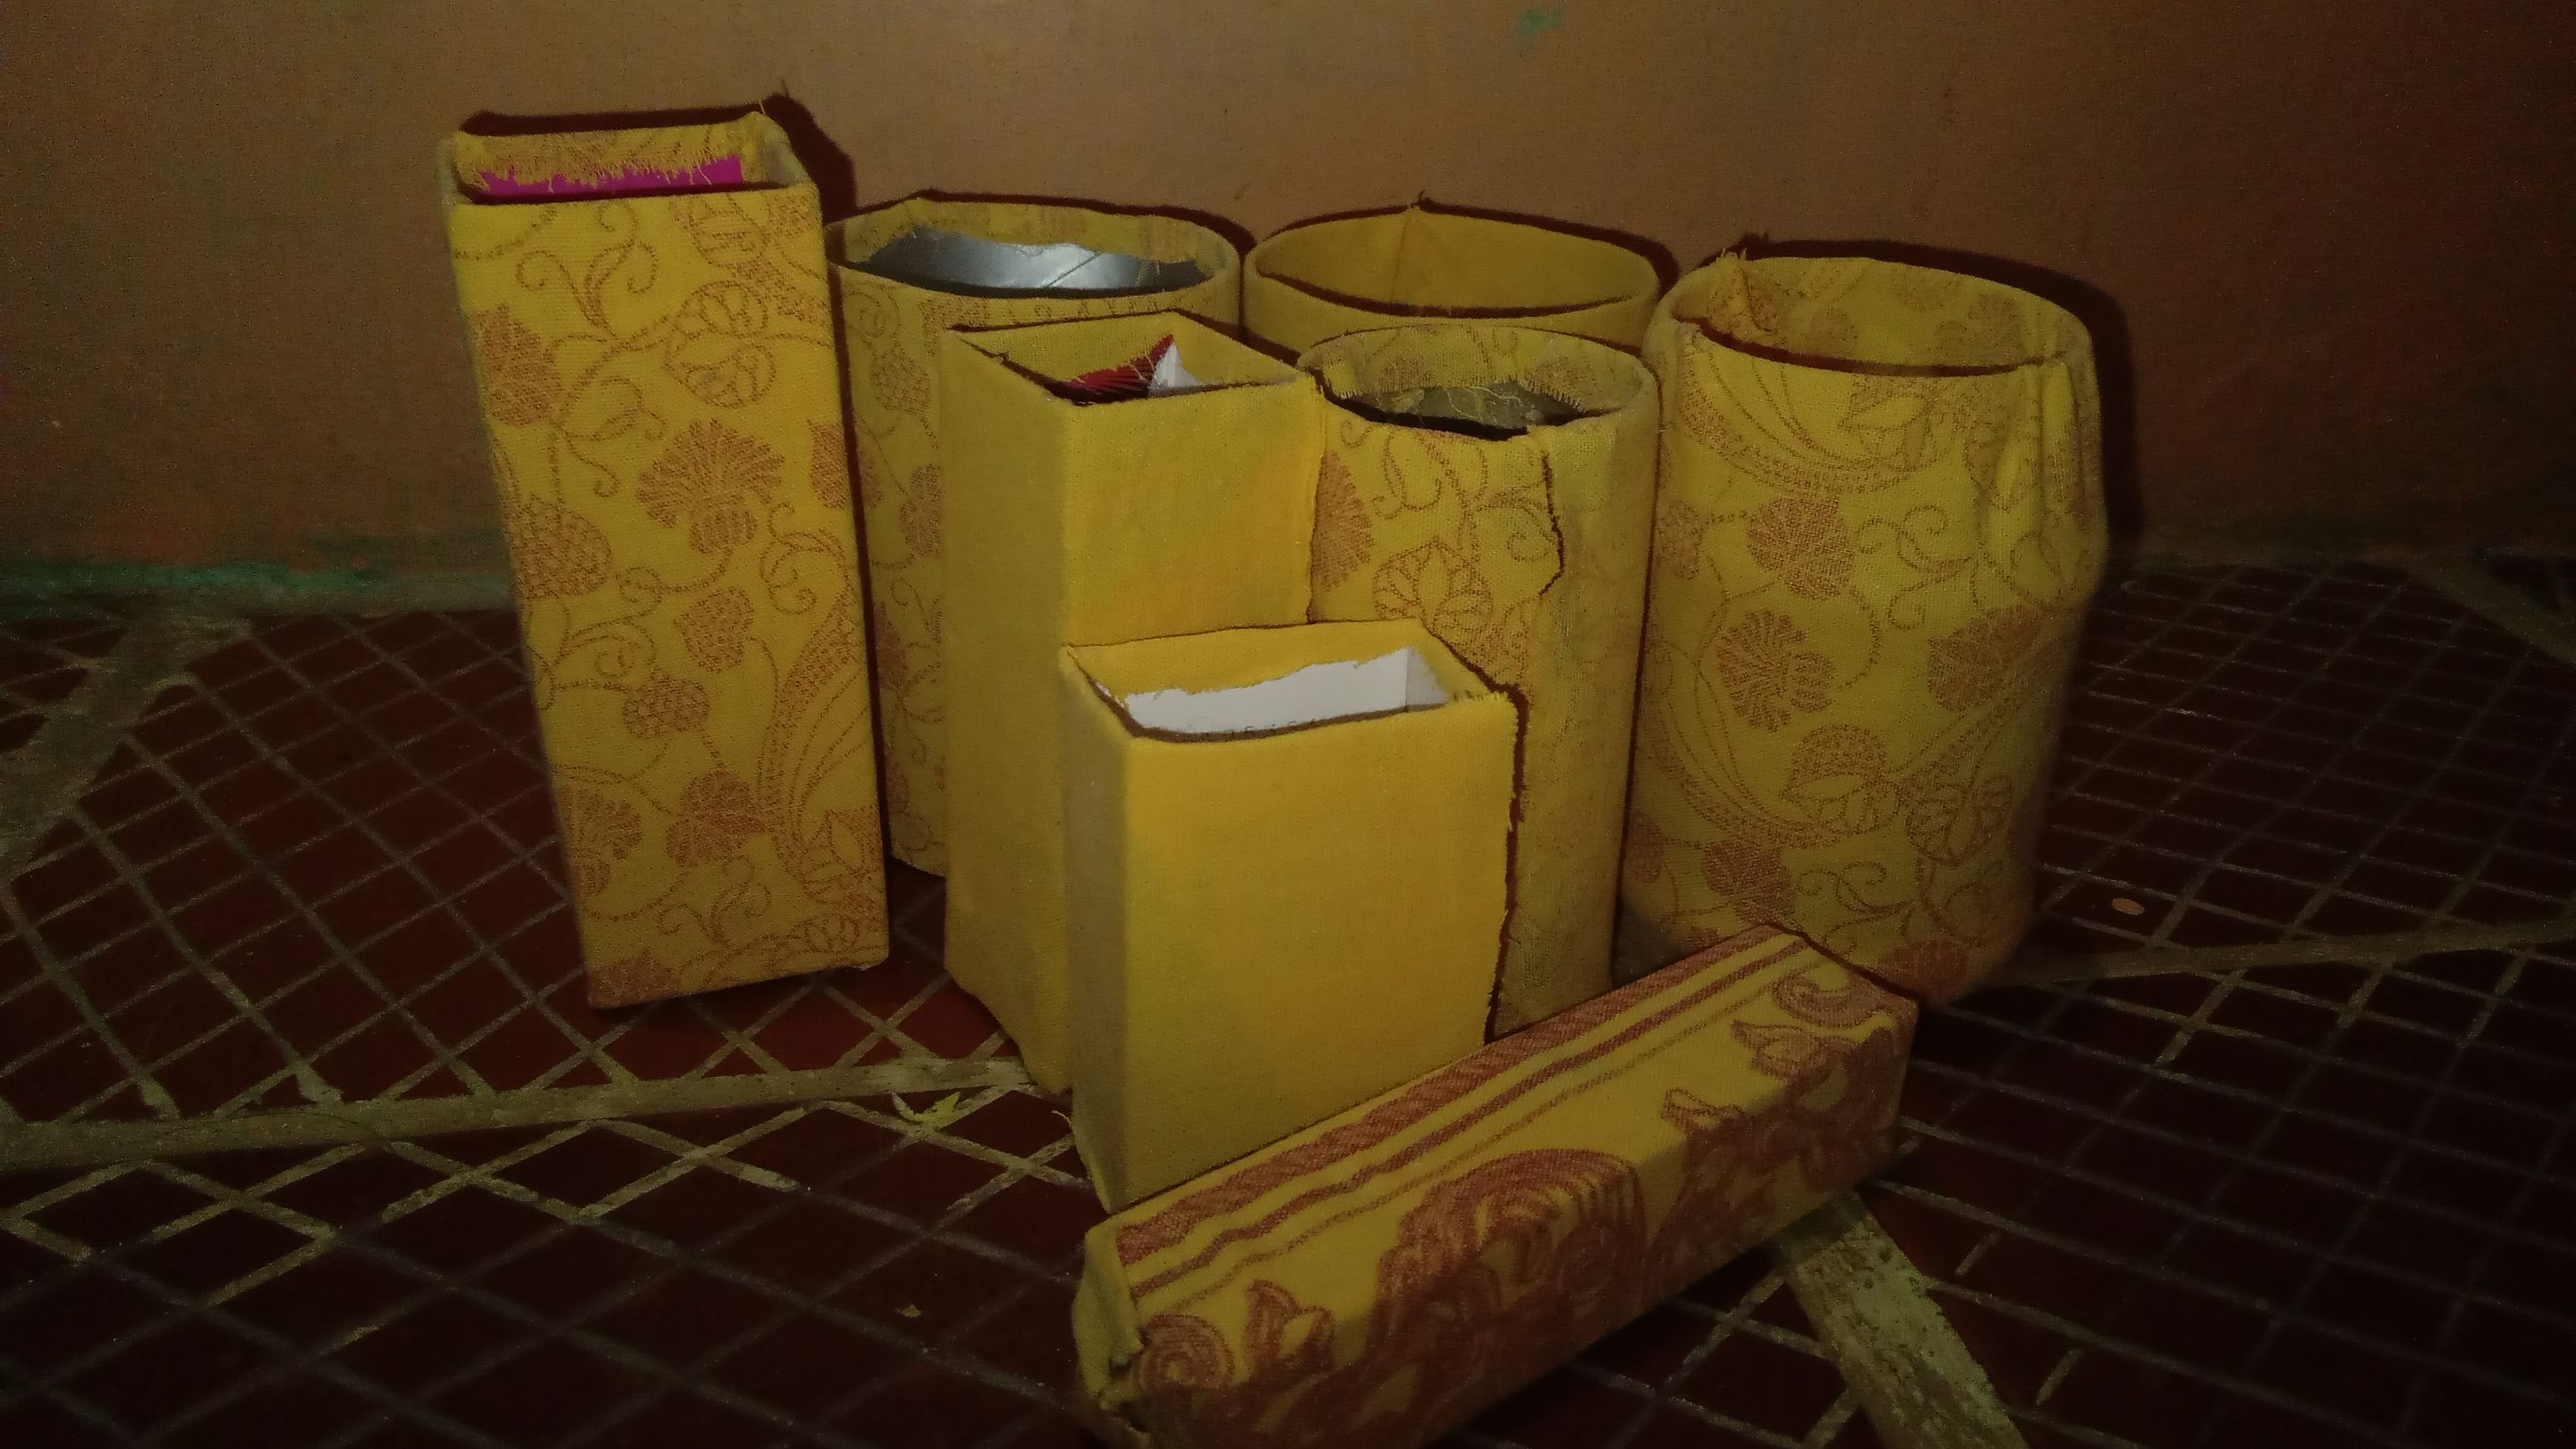
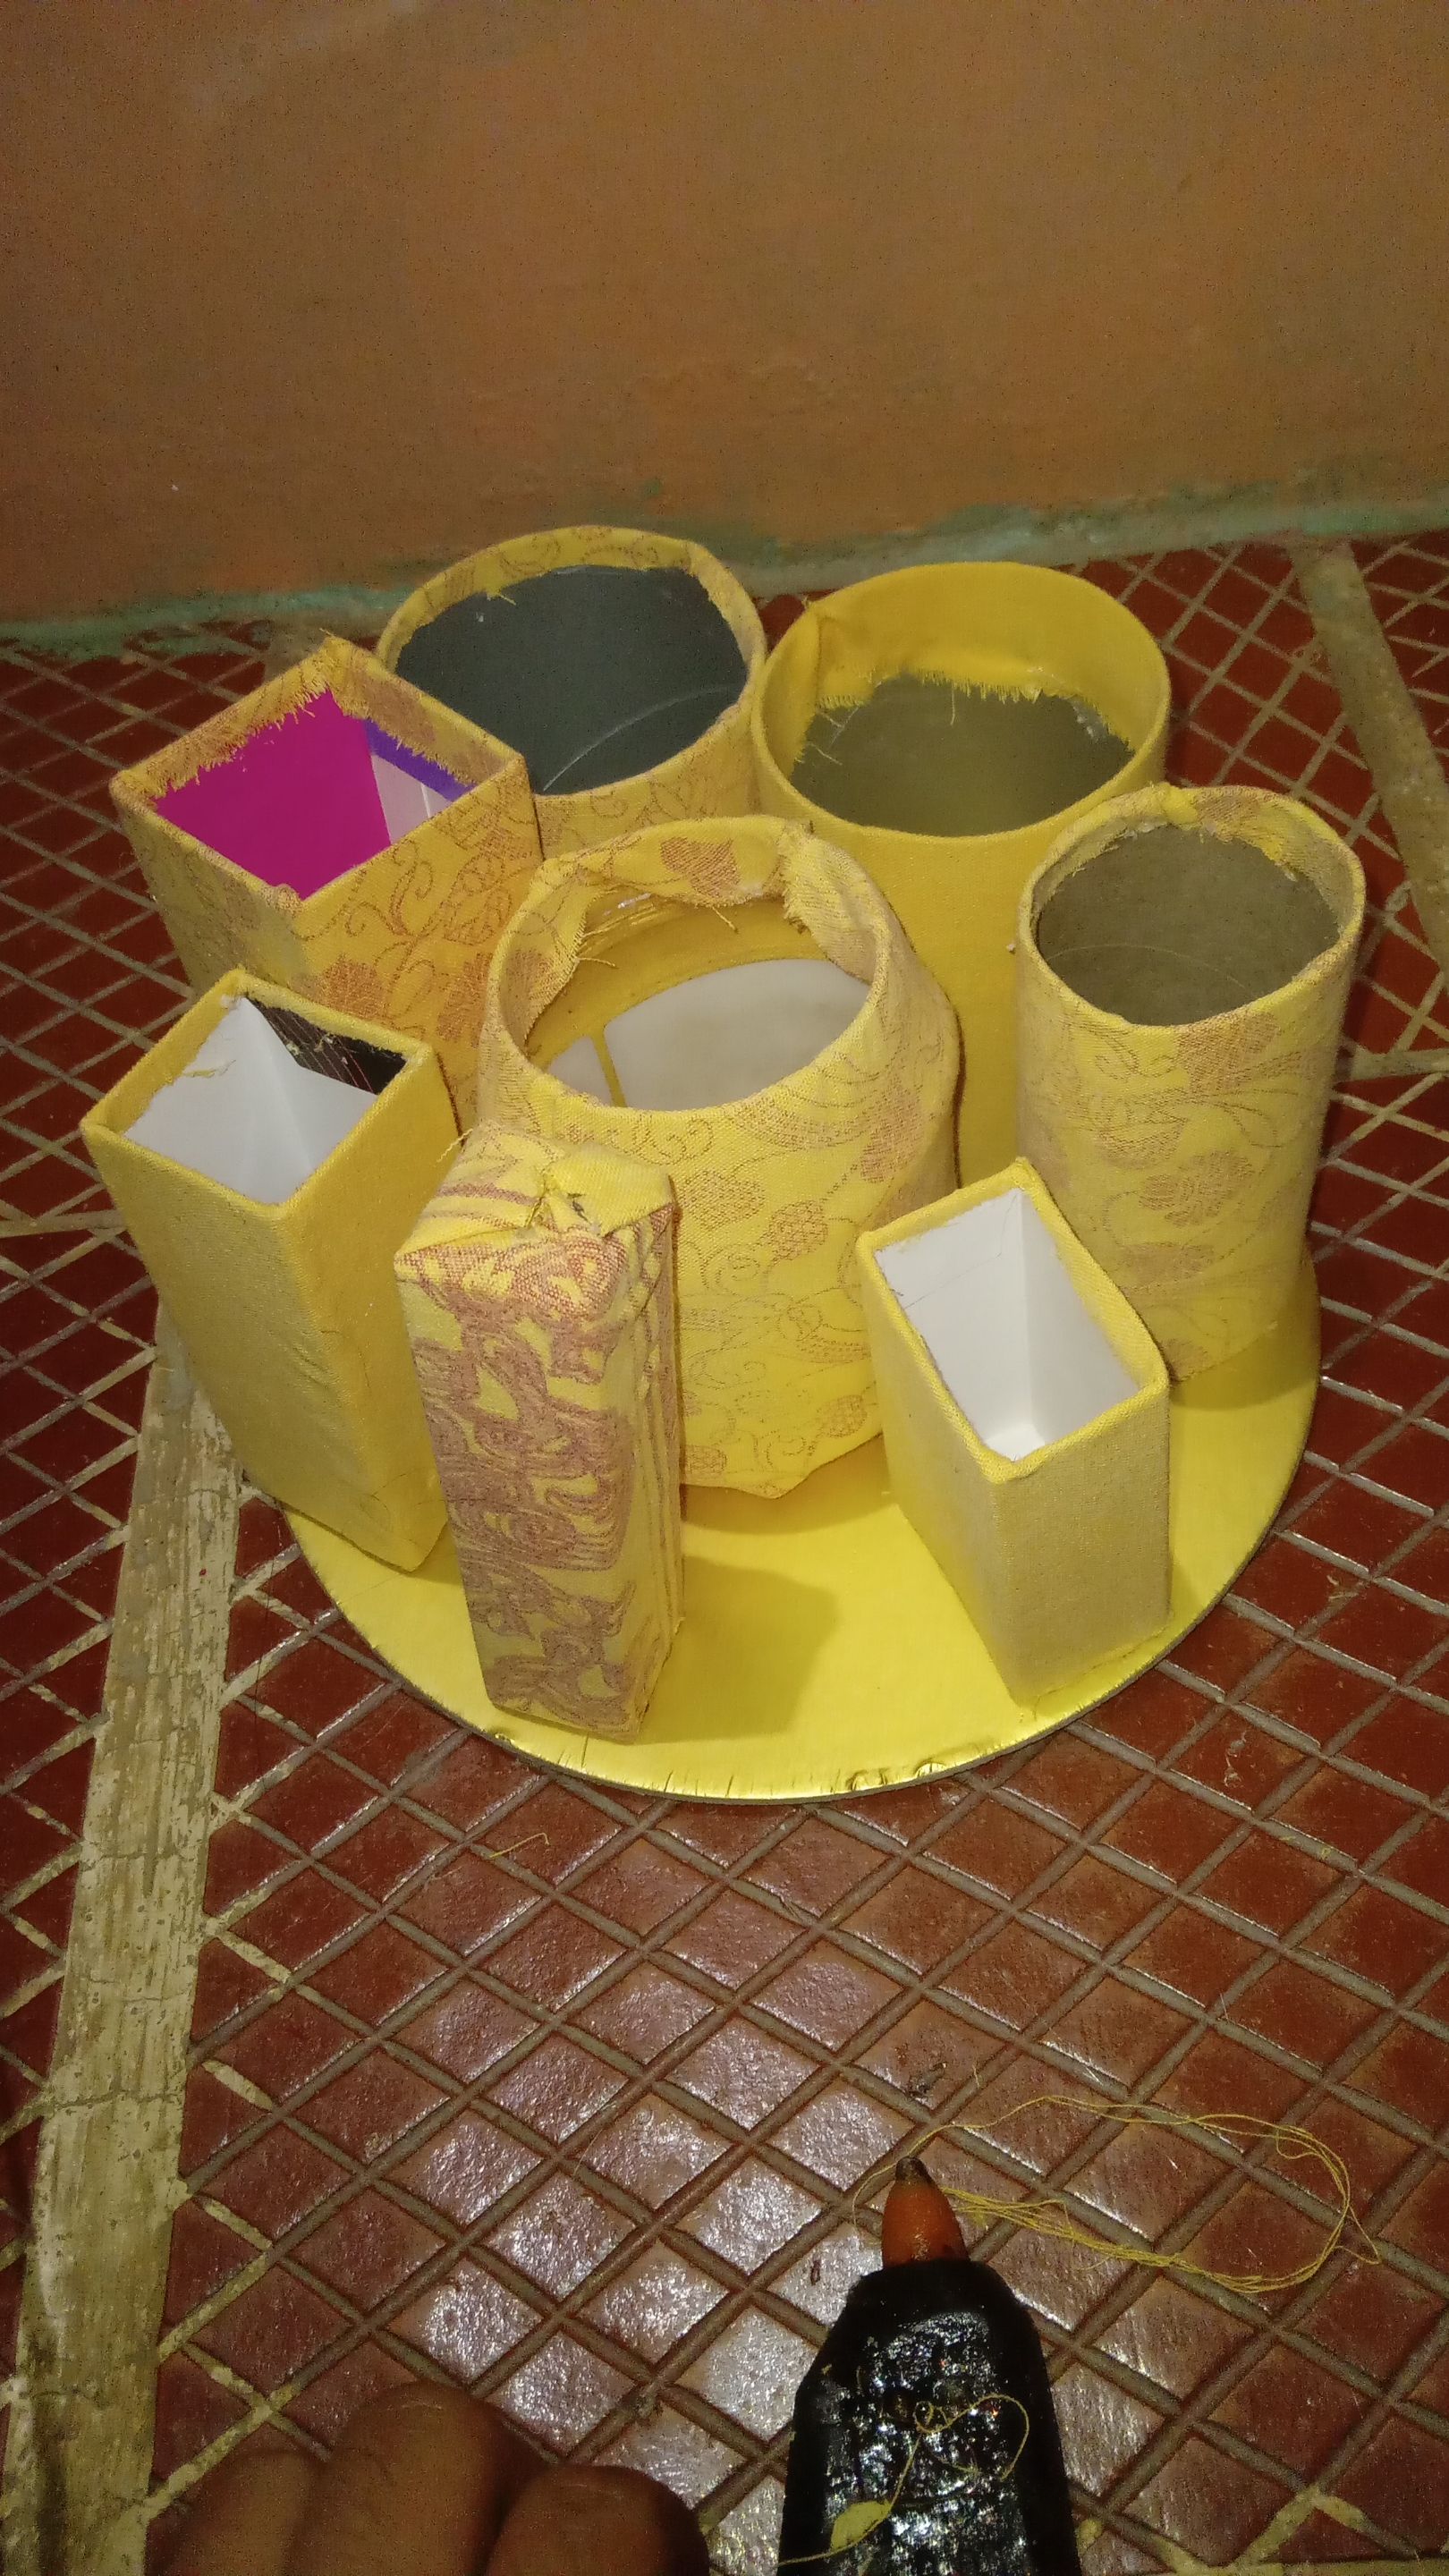
Primero utilicé silicón en barra derretido en fuego porque habían muchos bajones de luz y entonces no quería que se me dañara la pistola, pero ya después de un rato los bajones se acabaron por completo y pude utilizar mi pistola de silicón con confianza. Luego de pegar a cada envase la tela, los pueden ver aquí como iba en el procedimiento y aquí cuando terminé todos. Y después de finalizar esa parte los pegué de una manera uniforme y preferida, es decir, a mi gusto, los pegué sobre el cartón redondo.
After doing this with each of the containers I had, I started gluing the fabric to them.
First, I used a silicone stick melted over a flame because there were a lot of power outages, and I didn't want to damage the gun. But after a while, the power outages stopped completely, and I could use my glue gun with confidence. After gluing the fabric to each container, you can see the procedure here and here when I finished them all. After finishing that part, I glued them in a uniform, preferred way—that is, to my liking—to the round cardboard.
---
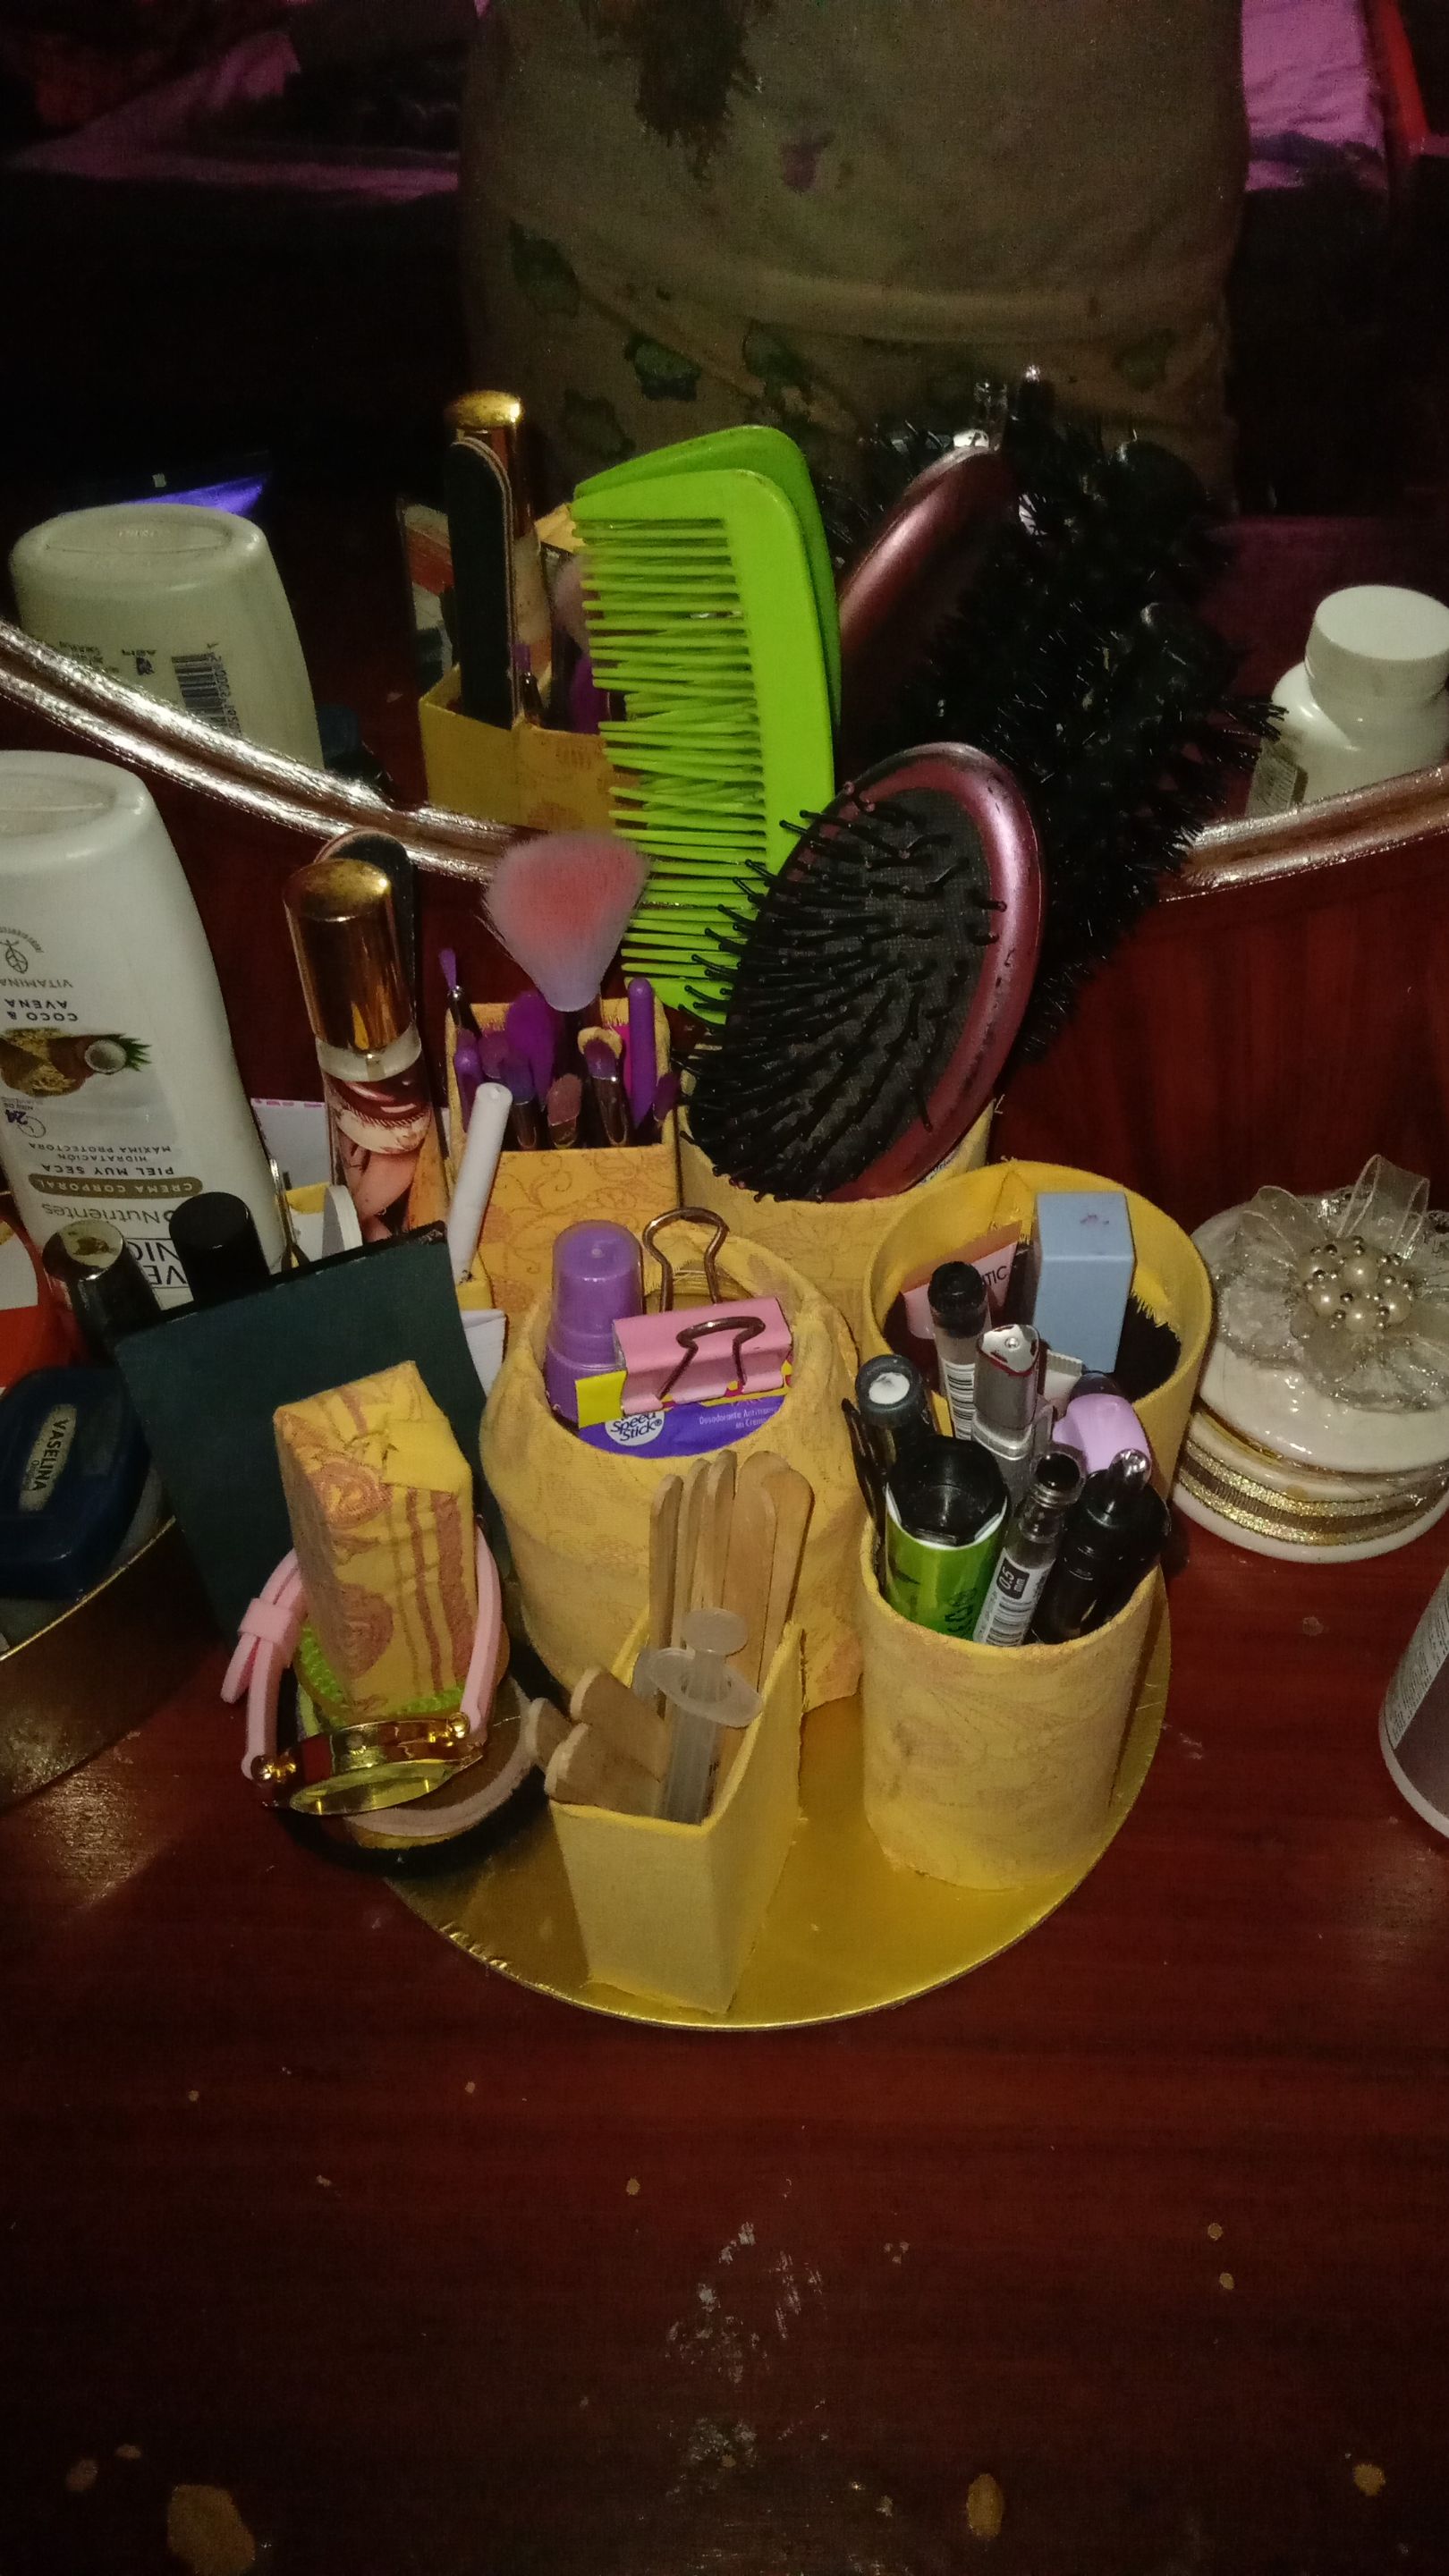
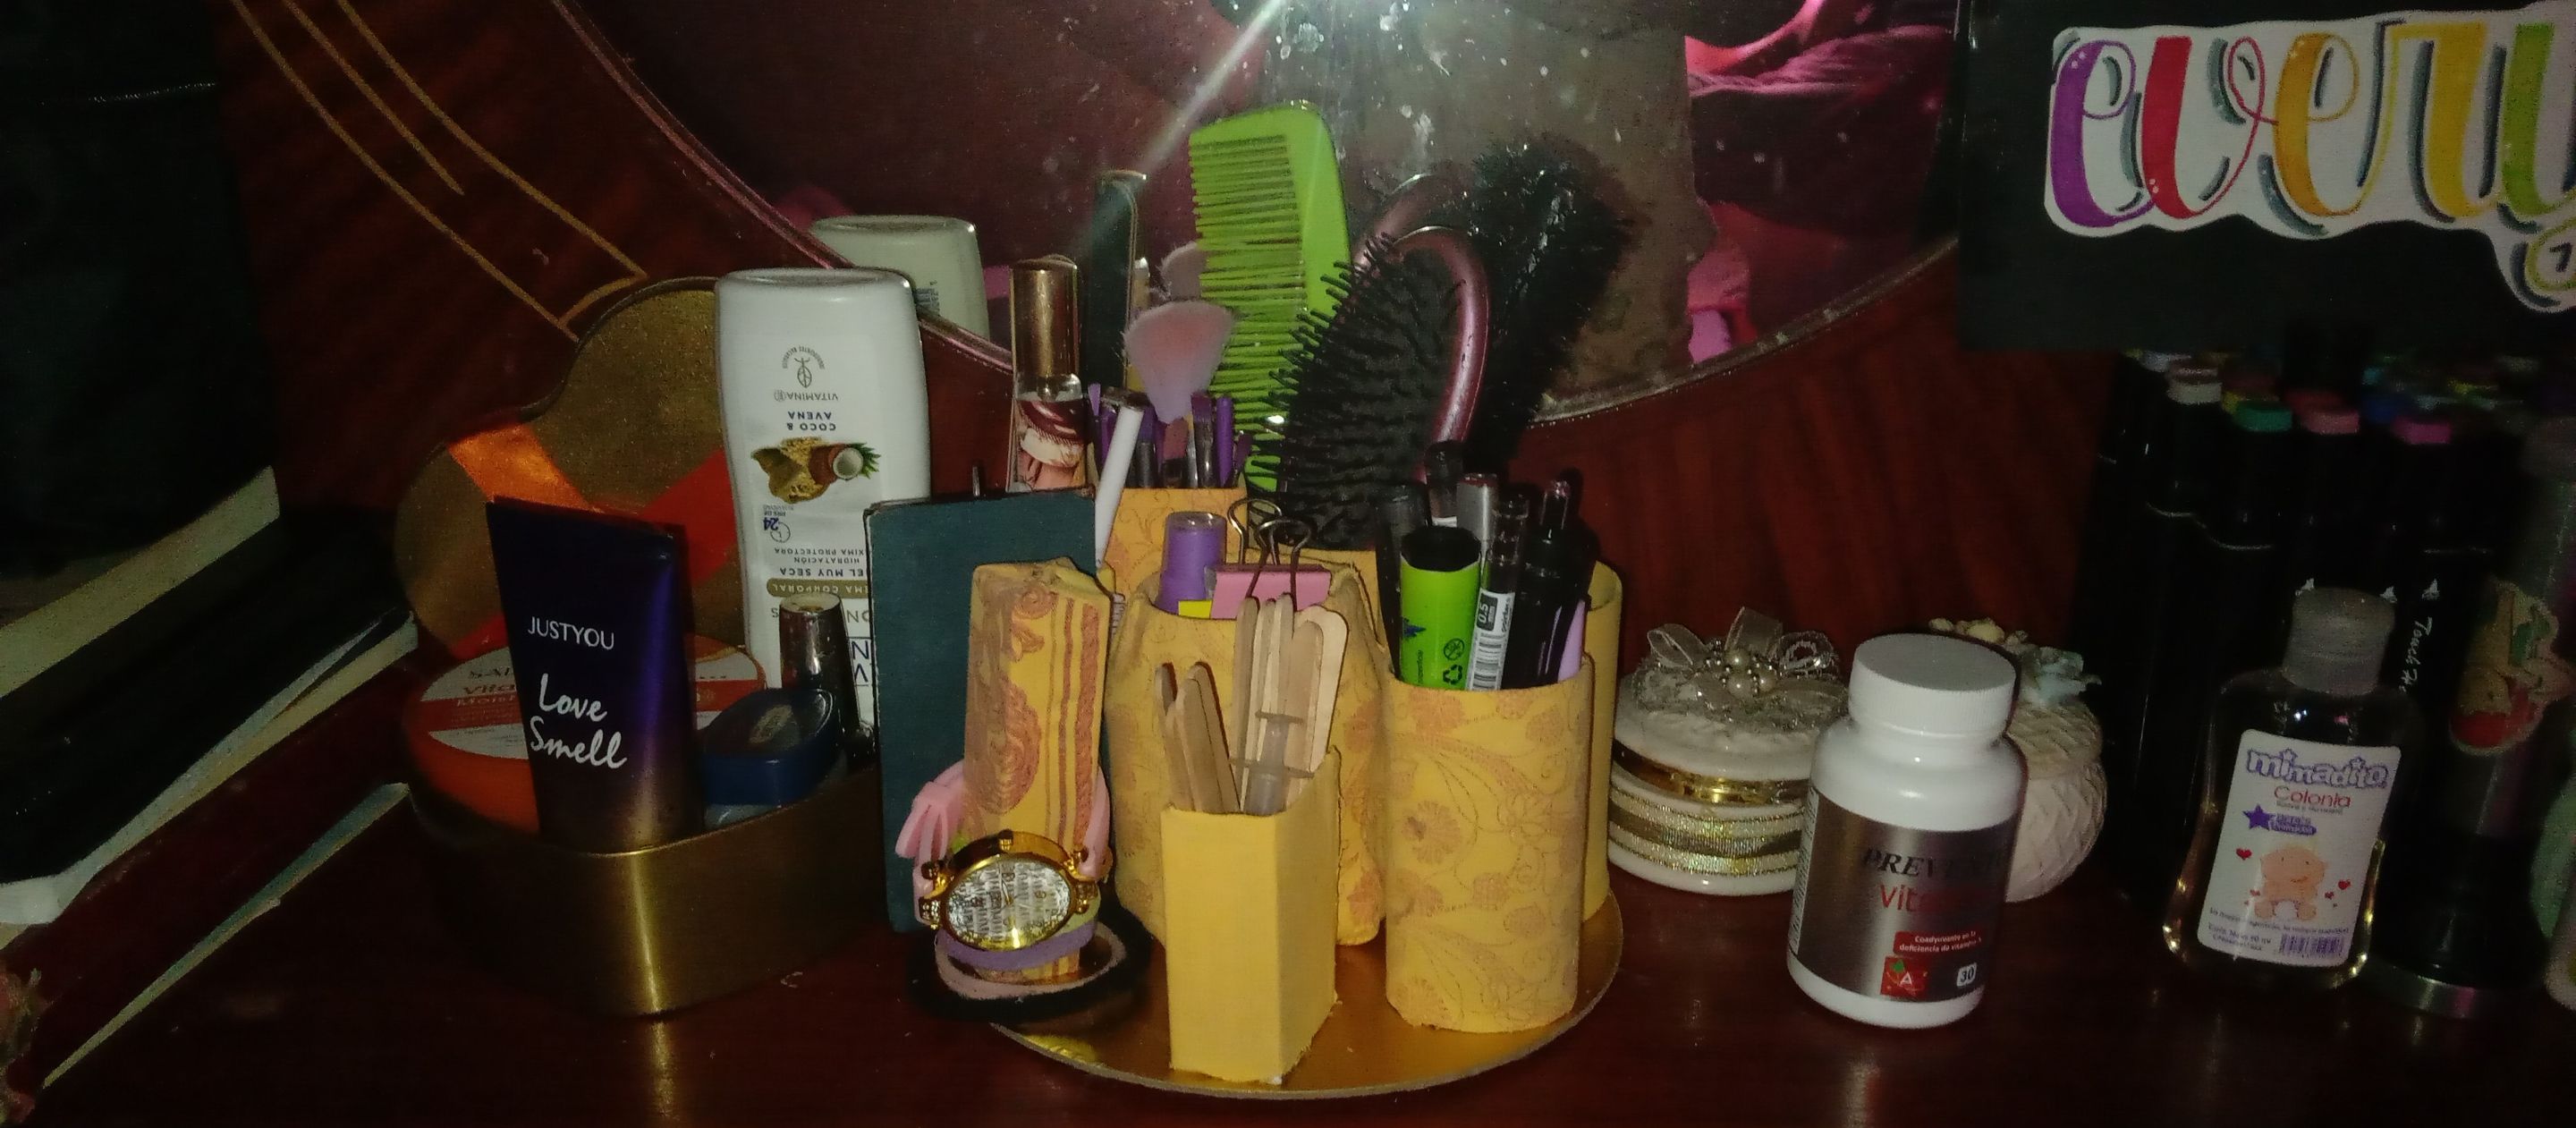
Pueden notar que en las orillas arriba se ve desordenado y feo, sí, es cierto pero no quise hacerle más detalles ya que cuando yo voy a meter los objetos a ese organizador él va a tapar cada detalle que se vea mal, es decir, que todo lo que haya quedado "feo" entonces no se va a ver con los objetos que tiene adentro.
Ahí pueden ver que pude meter mis colitas en un tubito pude meter las paletitas de madera, los bolígrafos, los cepillos, las brochas y muchas cosas que entraron allí con mucha comodidad.
You can notice that the top edges look messy and ugly. Yes, that's true, but I didn't want to go into more detail because when I put the items in that organizer, it'll cover up every detail that looks bad. That is, anything that looks "ugly" won't be visible with the items inside.
There you can see that I was able to fit my tails into a little tube. I was able to fit the wooden palette knives, pens, brushes, and many other things that fit in there very comfortably.
---
---
Translated with https://www.deepl.com/translator
#diy
#spanish
#neoxian
#appreciator
#curangel
#ocd
#creativecoin
#qurator
#honeyswap
#tutorial
Payout: 0.000 HBD
Votes: 323
More interactions (upvote, reblog, reply) coming soon.