**
ESPAÑOL
**
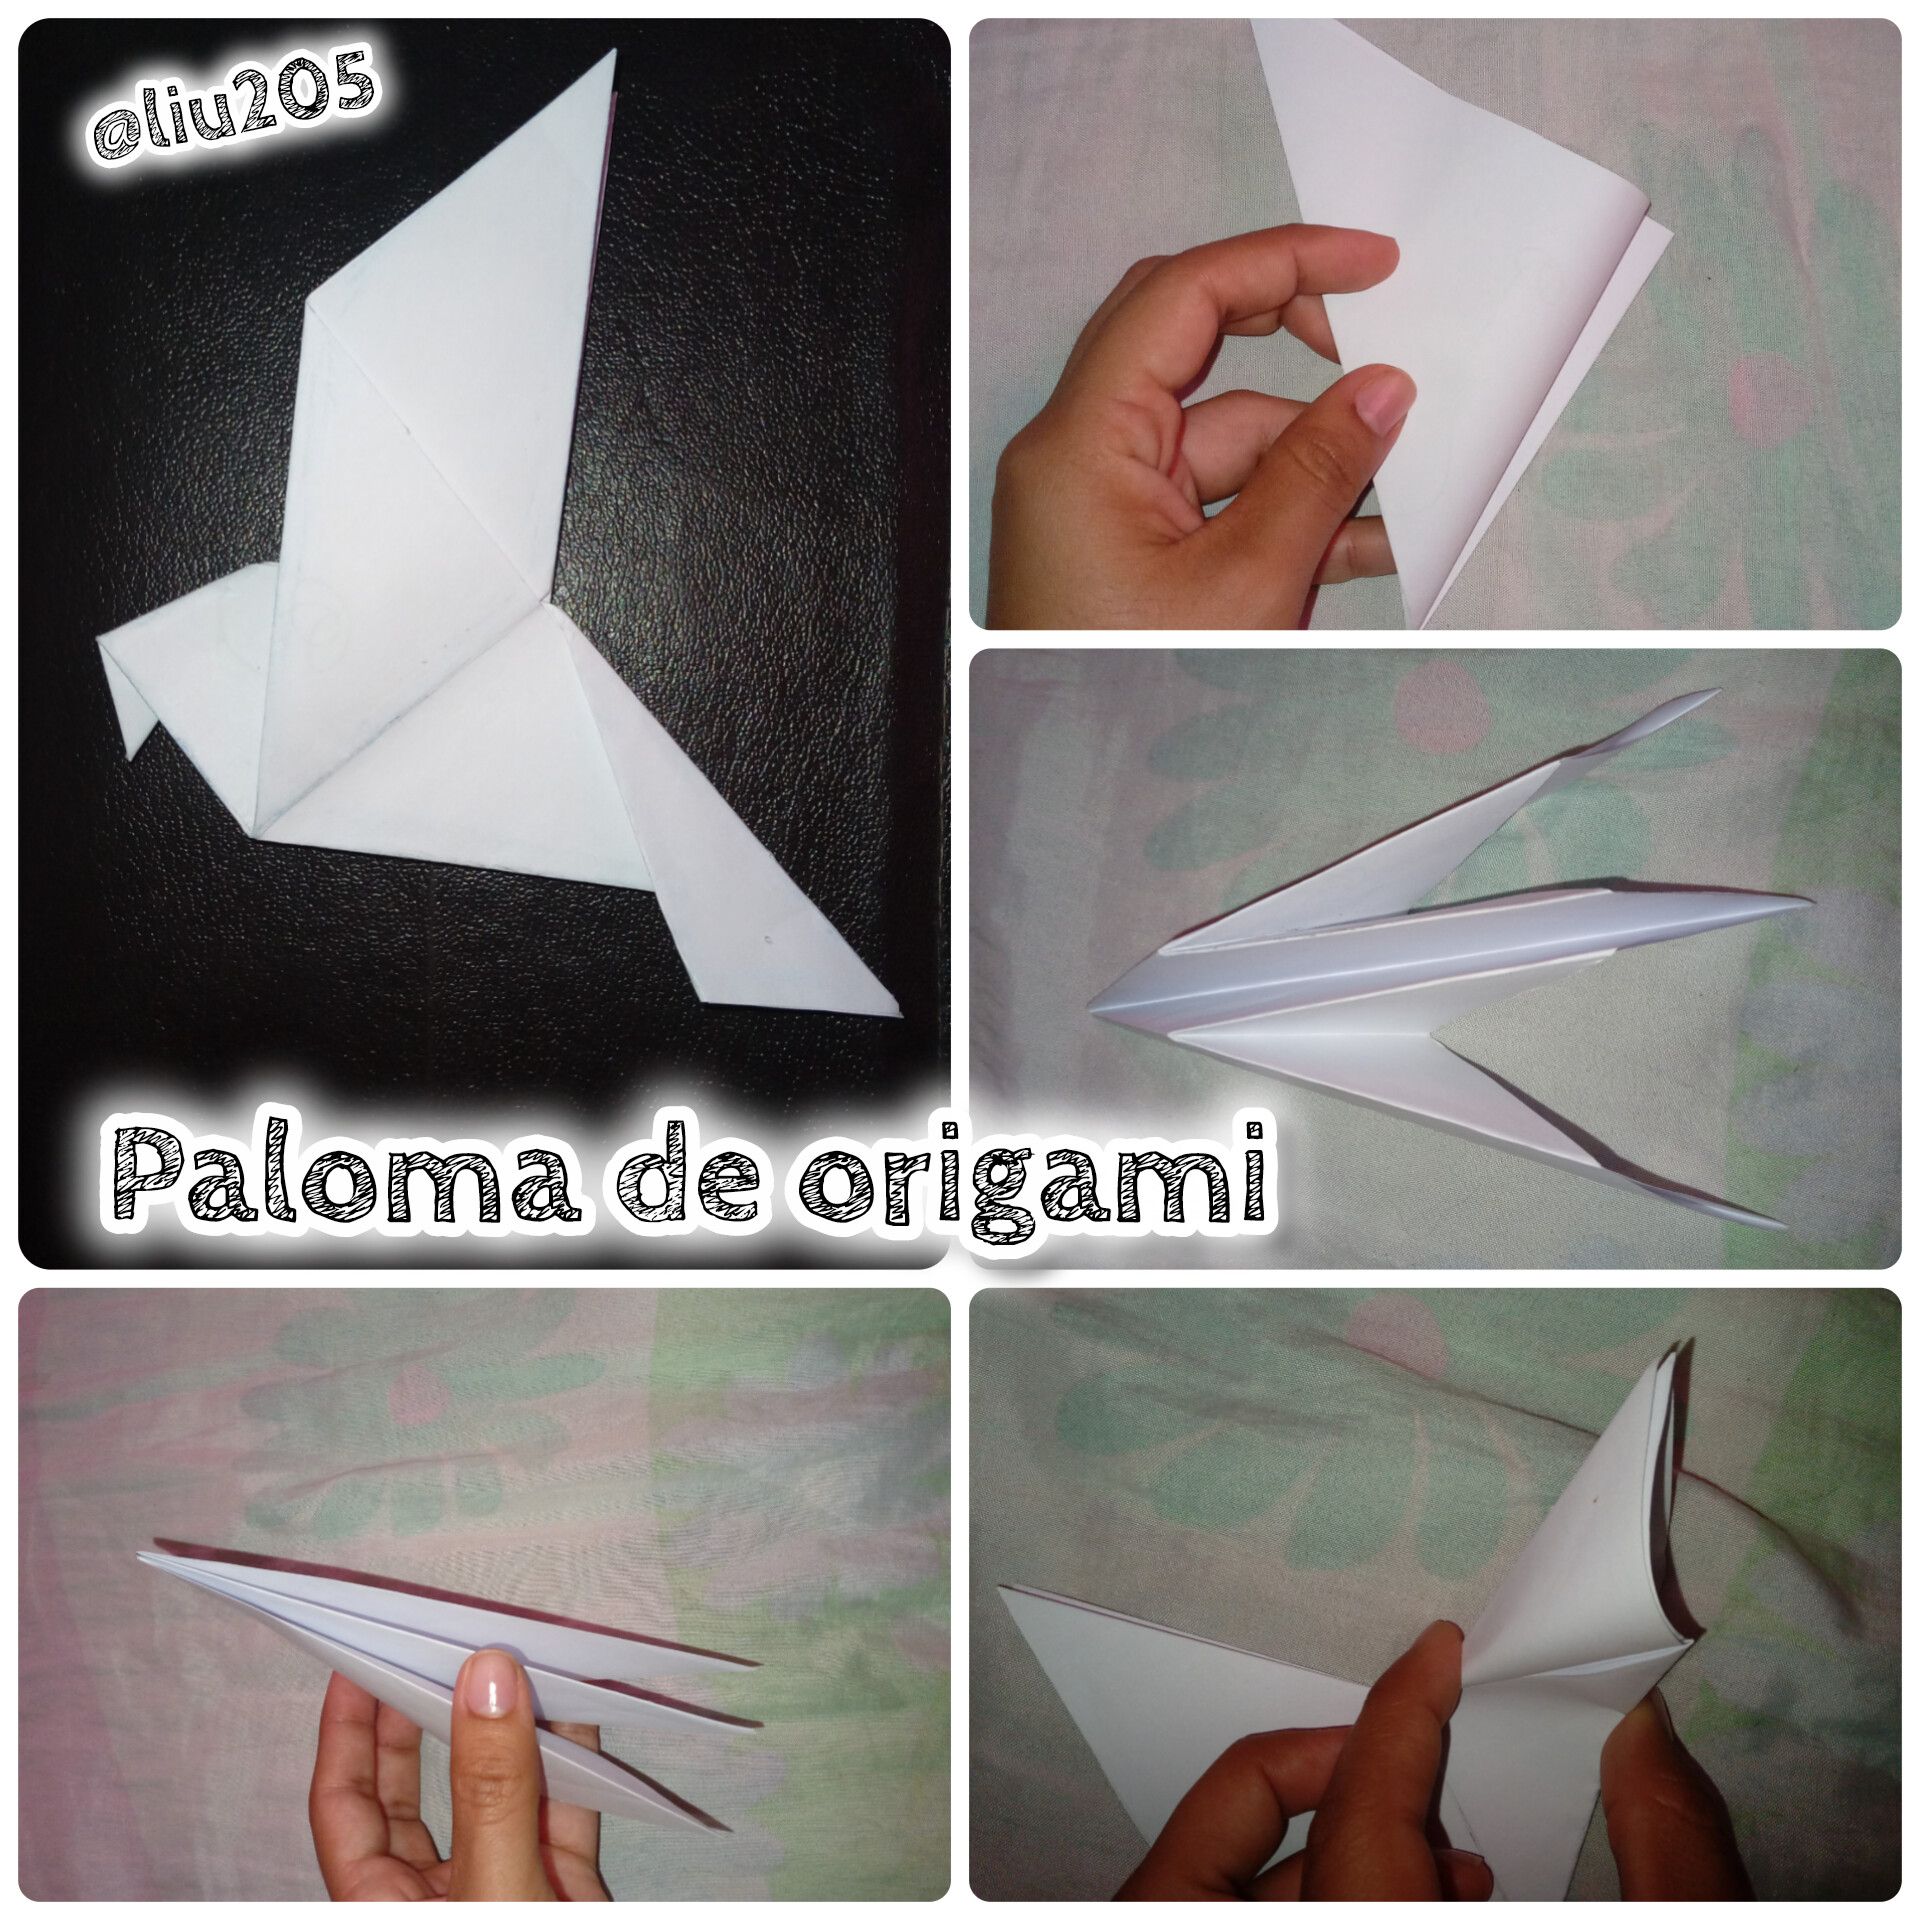
Hola a todos mis amigo de diyhub, hoy me quiero unir al concurso por el día de la paz realizando una paloma de origami, ya que esta es el símbolo de la paz.
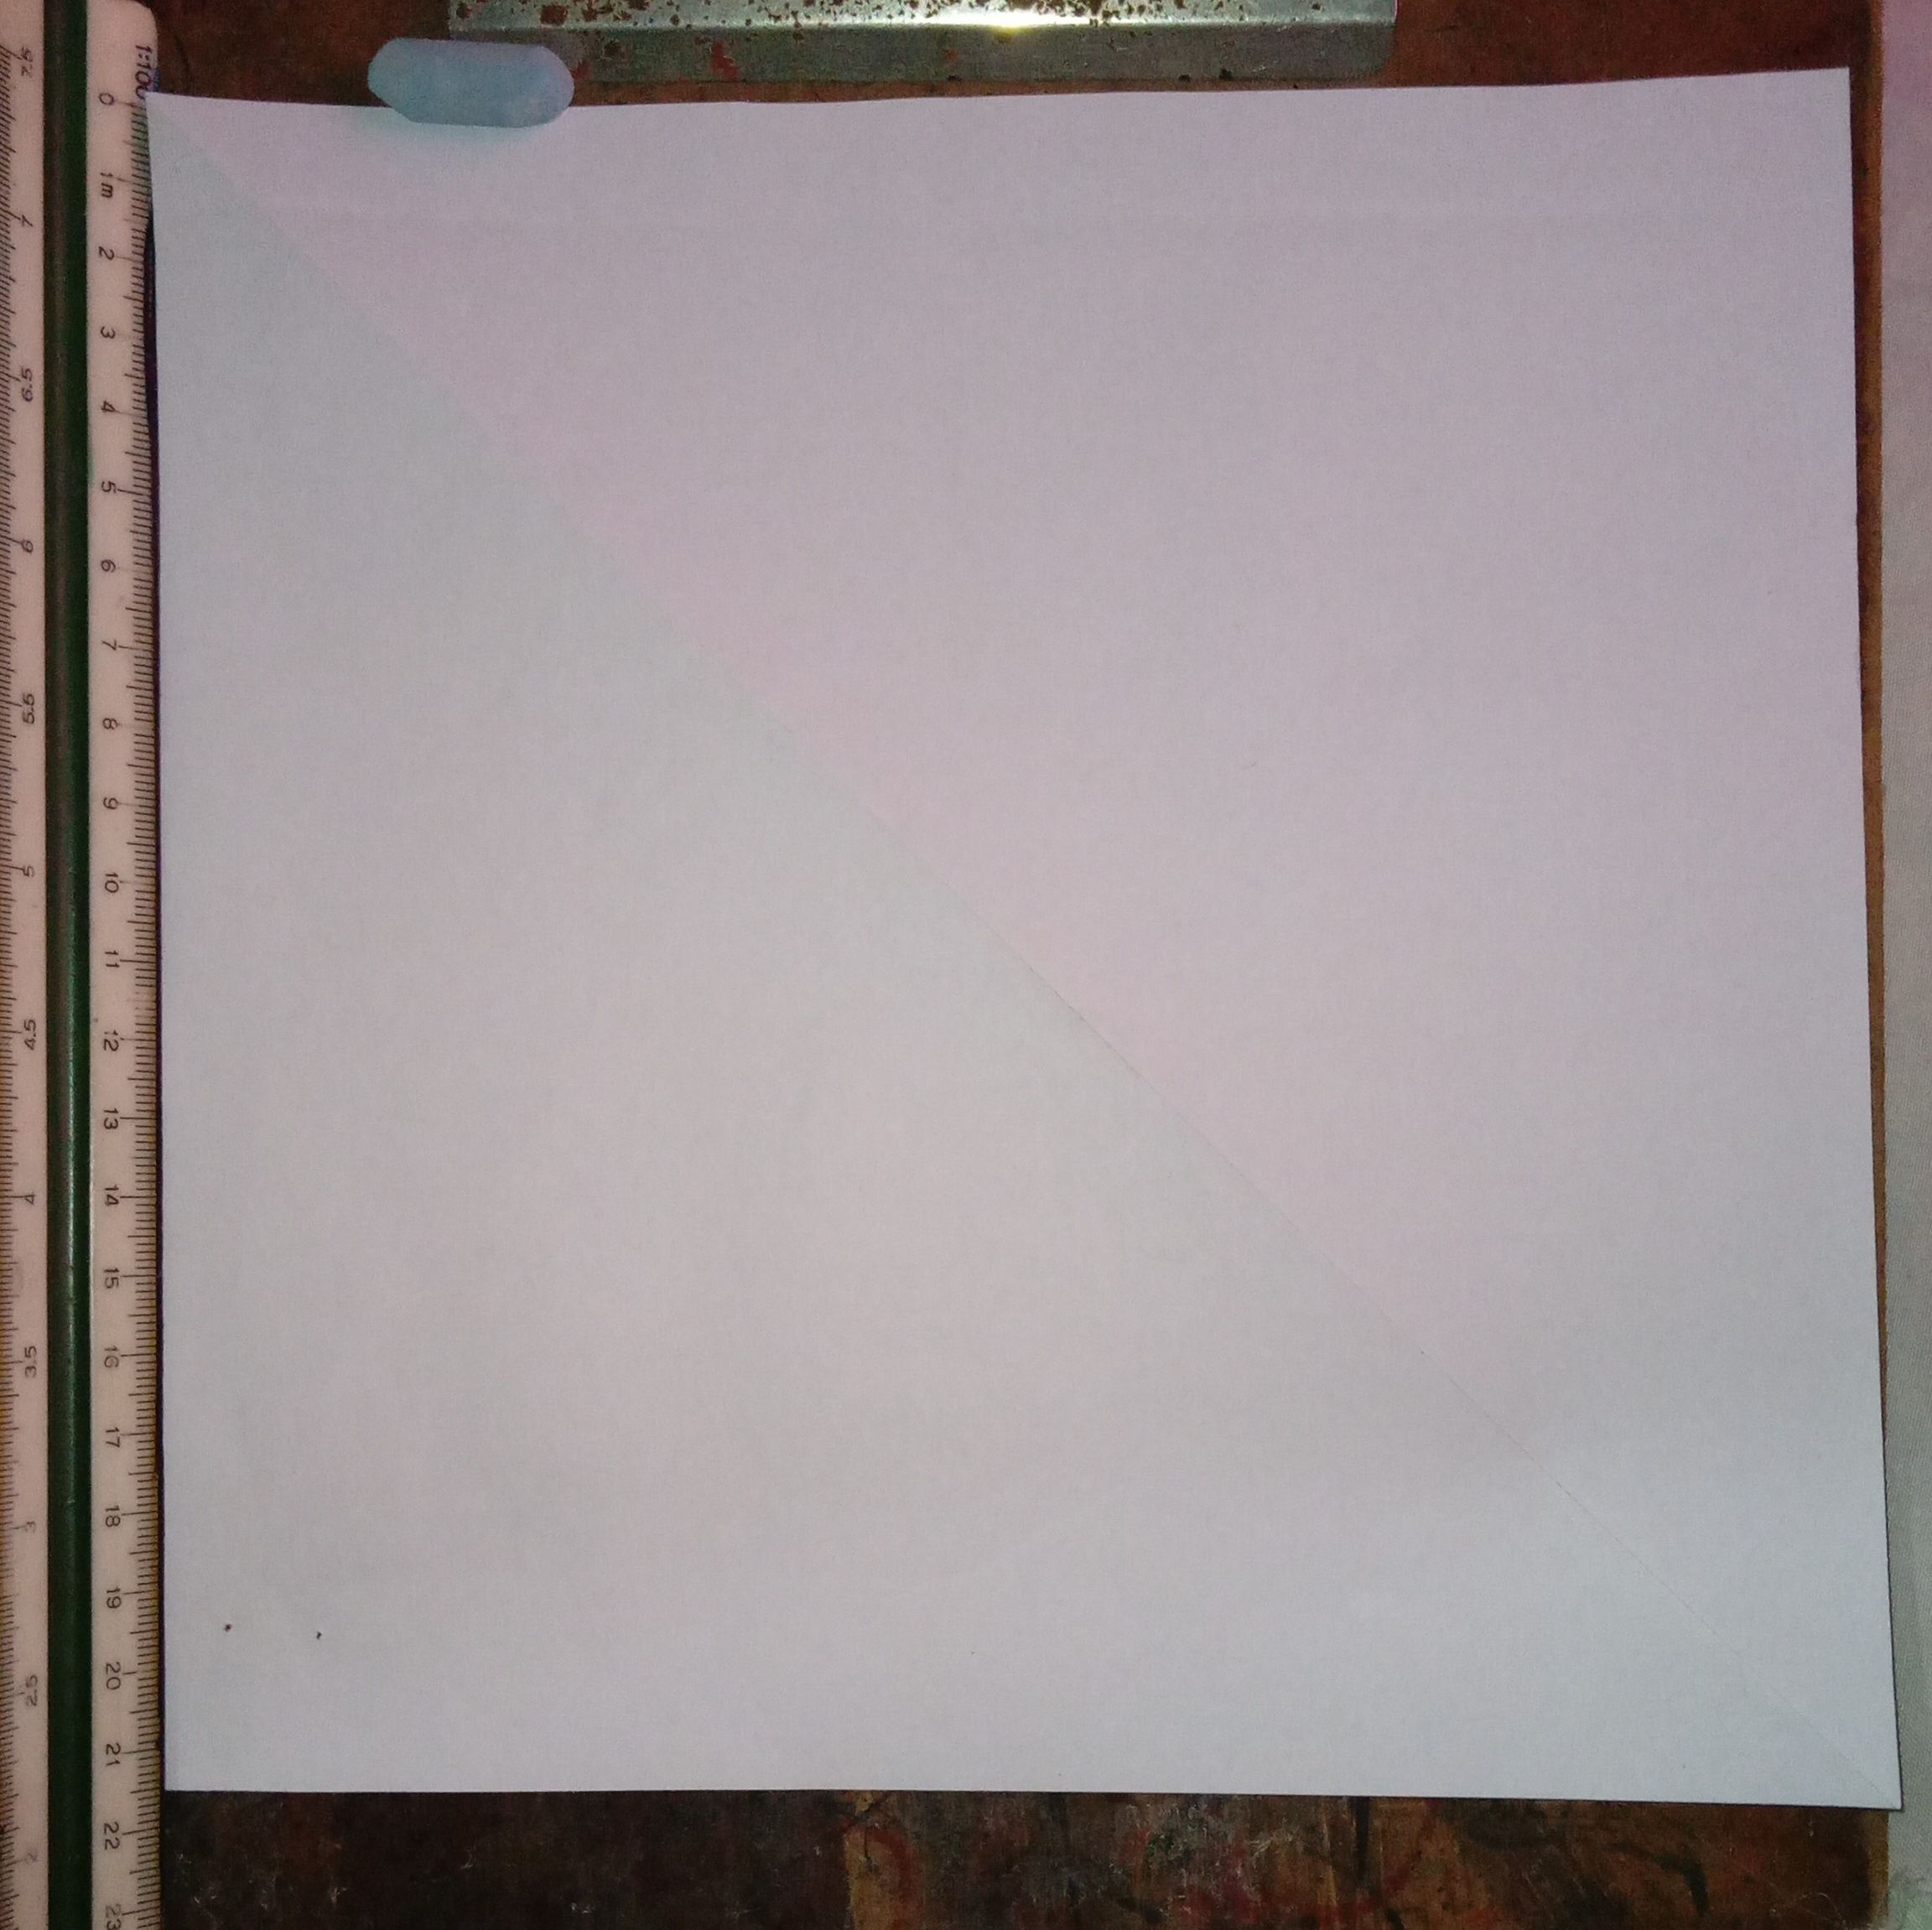
Solo vamos a necesitar un papel totalmente cuadrado, en este caso solo de 21.5 cm y una tiza color azul, aunque puedes escoger a tu gusto. Ahora vamos a empezar y les invito que tengan mucha paciencia para sumergirse en este tutorial ya que es con imágenes. Mientras tanto tenemos paciencia para hacer nuestra paloma, también tengamos paz. 🕊 ☮️
**
ENGLISH
**
Hello all my friends at diyhub, today I want to join the Peace Day contest by making an origami dove, as this is the symbol of peace.
We'll just need a completely square piece of paper, in this case only 21.5 cm, and some blue chalk, although you can choose any color you like. Now we're going to begin, and I invite you to be very patient as you dive into this tutorial, as it's all with images. In the meantime, we'll be patient while we make our dove. Let's also have peace. 🕊 ☮️
---
Voy a separar el tutorial con número para que se identifiquen con las imágenes.
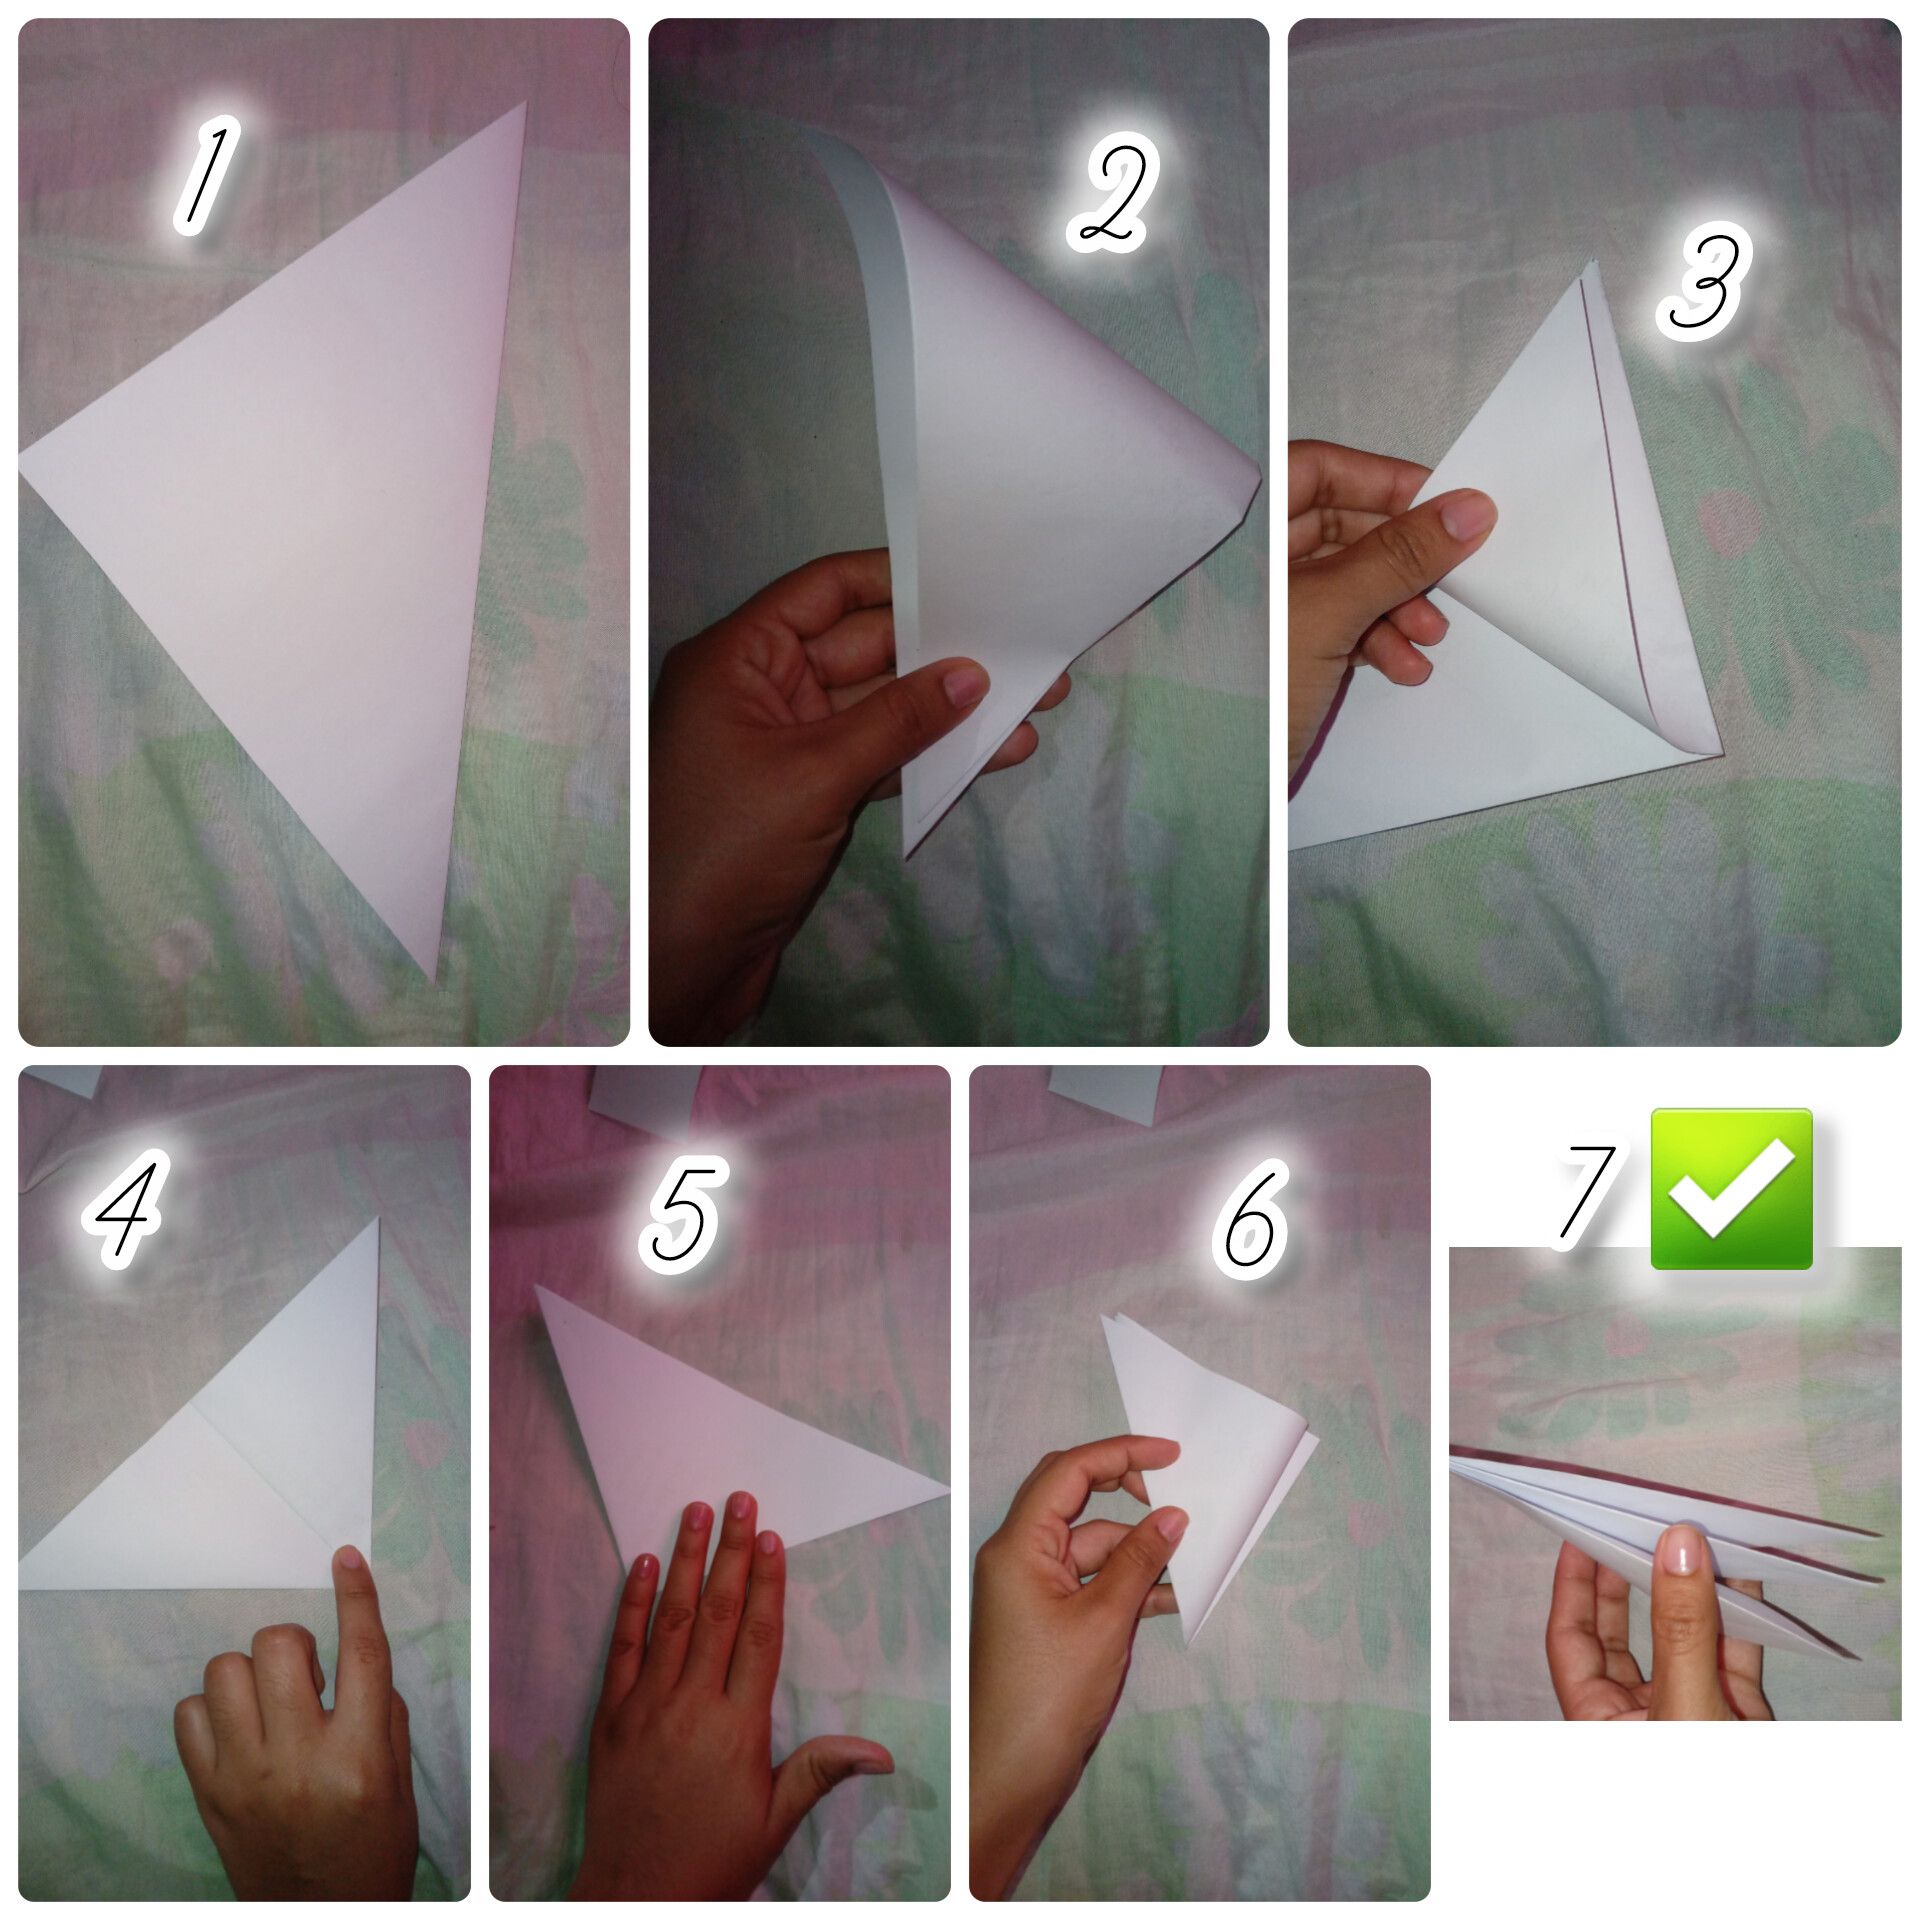
1 Ok, lo primero que vamos a hacer es doblar el cuadrado de una esquina a otra como pueden ver en la imagen.
2 Como pueden ver quedó como un triángulo 🔺️, ahora vamos a doblar de nuevo esa esquina.
3 Queda un triángulo más pequeño y vamos a doblar la punta que tenemos, hacia atrás.
4 Tenemos un lado listo
5 La volteamos
6 Volvemos a doblar la punta hacia atrás.
7 Así debe quedar viéndose desde arriba.
Ya tenemos la primera parte.
I'm going to separate the tutorial with a number so you can identify with the images.
1 Okay, the first thing we're going to do is fold the square from one corner to the other, as you can see in the image.
2 As you can see, it looks like a triangle 🔺️, now we're going to fold that corner again.
3 We have a smaller triangle, and we're going to fold the tip back.
4 We have one side ready.
5 We flip it over.
6 We fold the tip back again.
7 This is how it should look when viewed from above.
Now we have the first part.
---
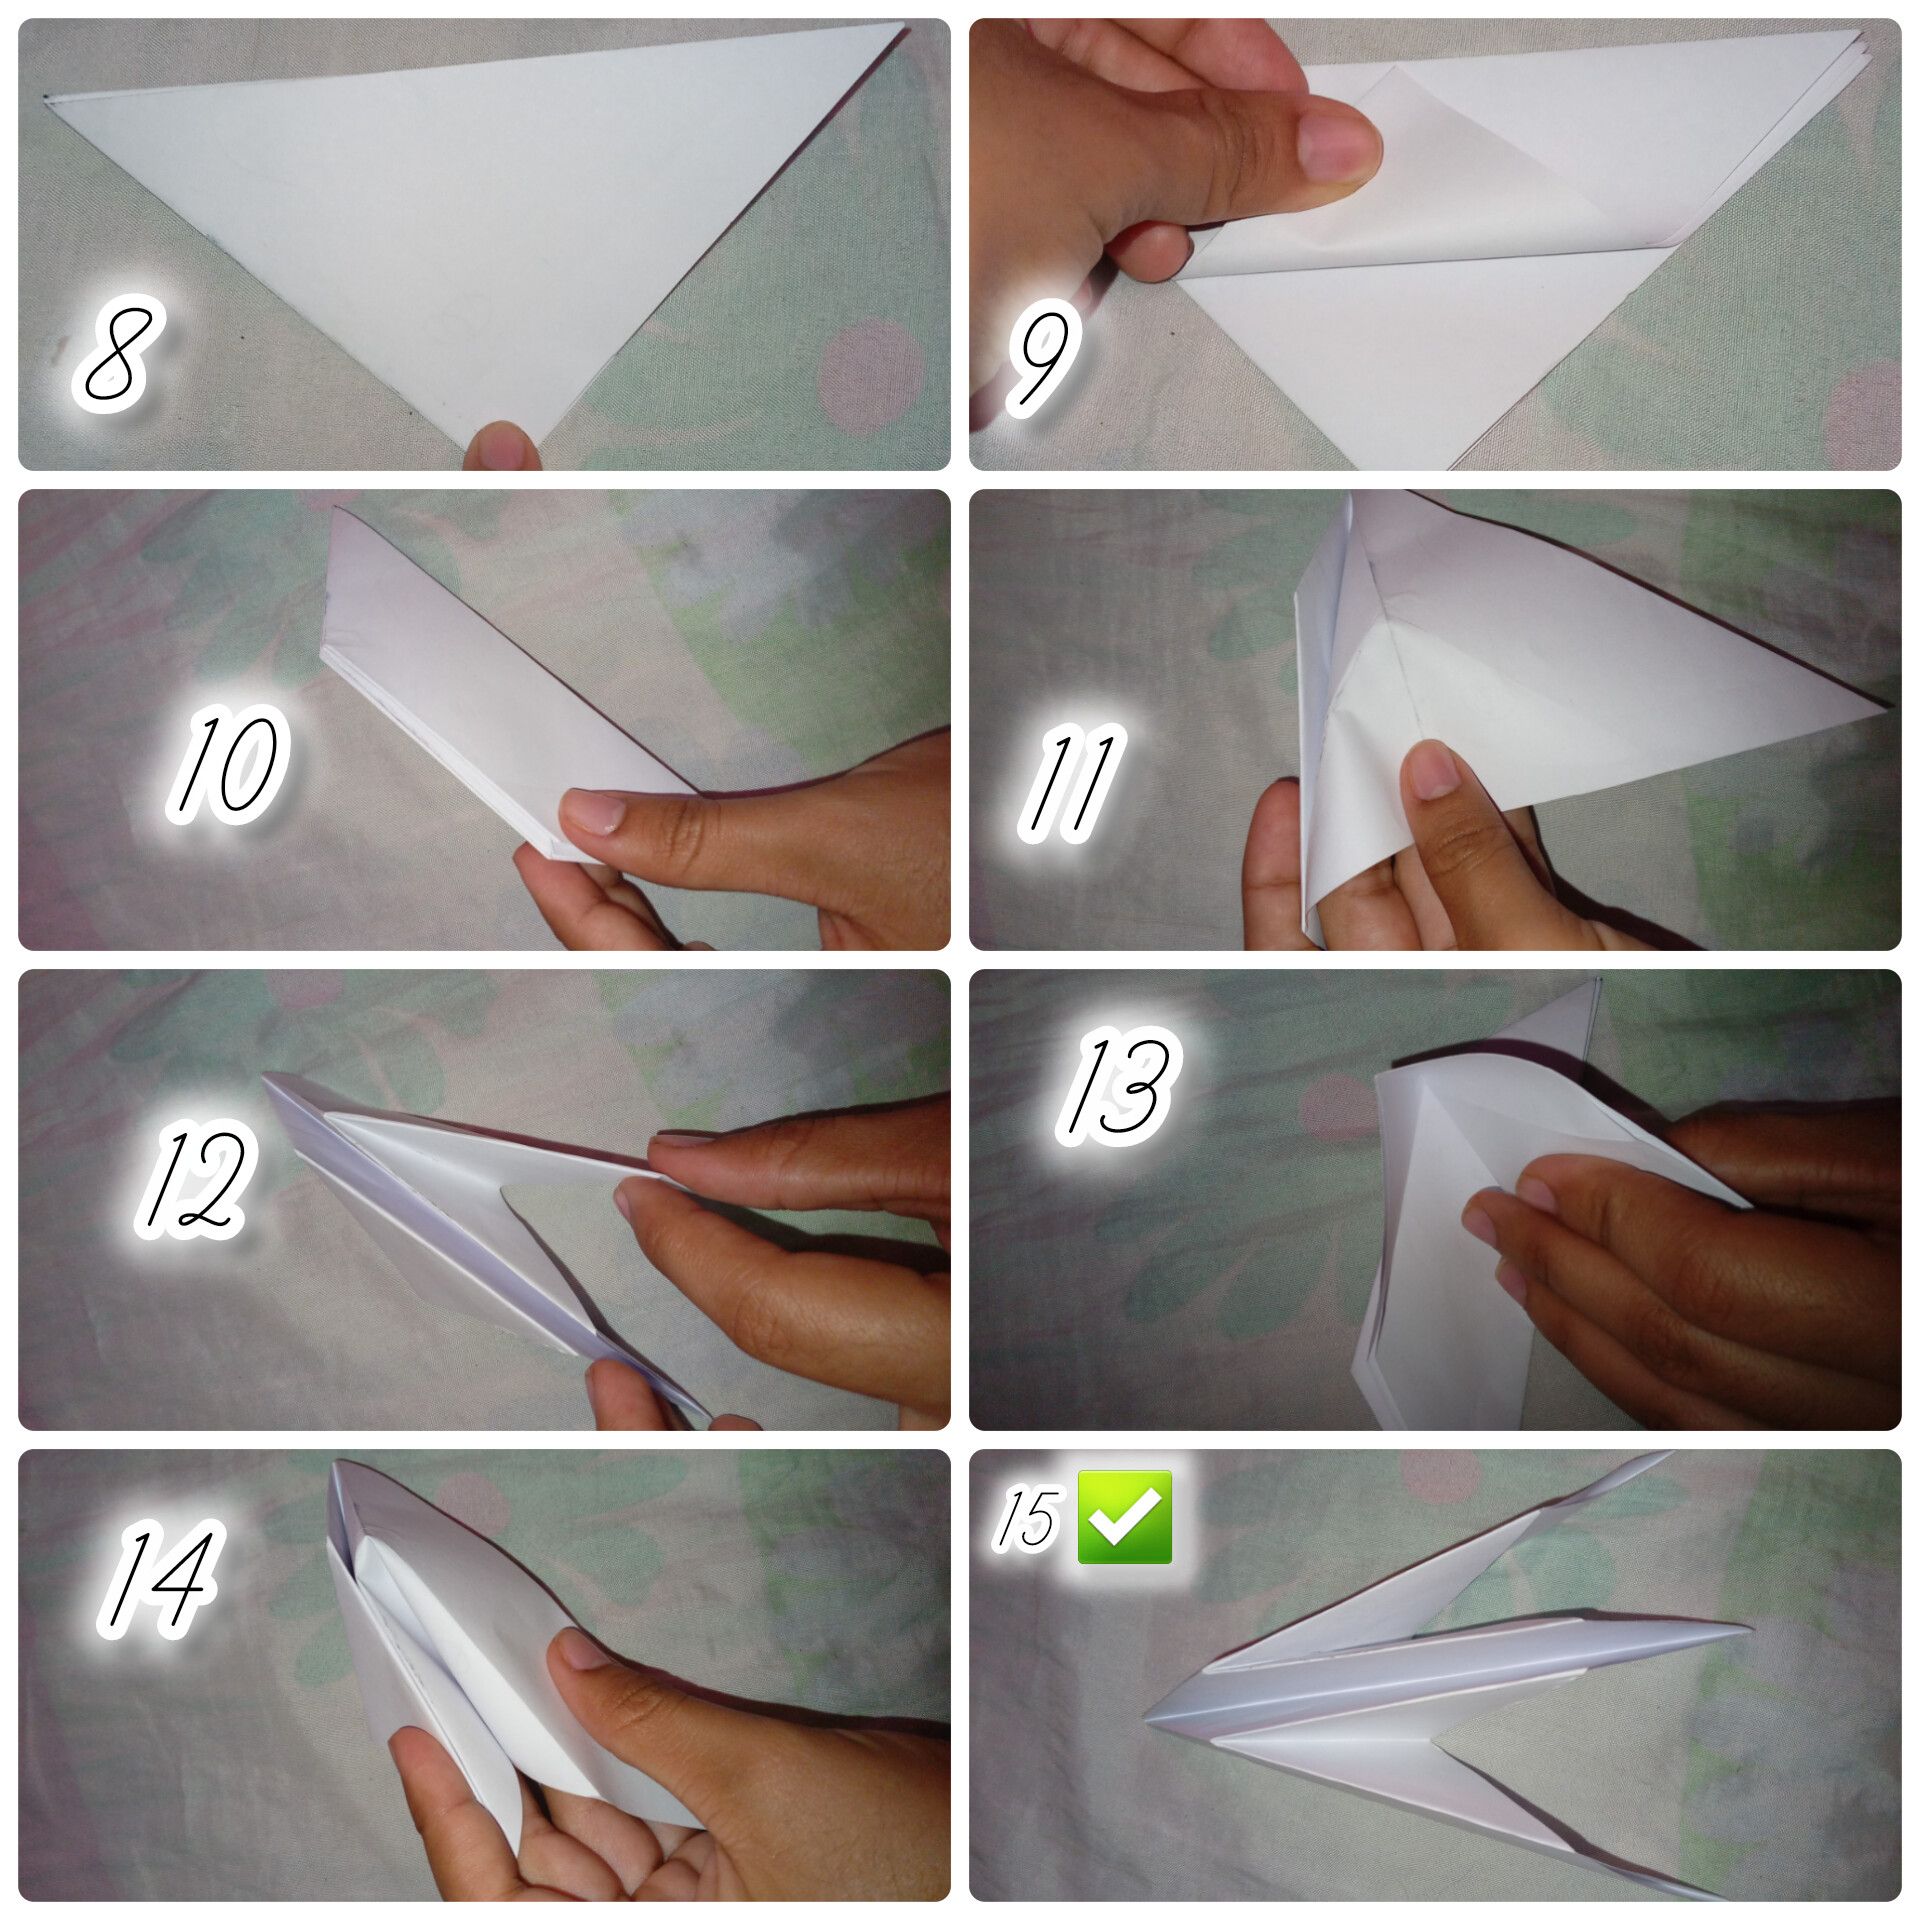
8 Cuando enderezado la hoja podemos ver que queda como un triángulo, pues la punta de este la vamos a poner hacia abajo de la manera que se ve en la imagen número 8.
9 Esa punta tiene dos partes, la de adelante que es la que vemos y la de atrás, la que no se ve. Esa punta de a delante se dobla hacia arriba como en la imagen 9.
Esta parte no está en las fotos porque vamos a voltear y a hacer es mismo por la parte de atrás.
10 Así debe quedar después de tener las dos partes dobladas.
11 Vamos a abrir esos dobleces que acabamos de hacer para undirlos y que queden por dentro.
12 Así debe quedar. Este es un solo lado.
13 Hacemos lo mismo del otro lado para que también quede por dentro
14 Nos debe quedar como puede verse en la imagen 14
15 Así se ve desde arriba el resultado de la segunda parte.
Ya tenemos la 2da parte hecha.
8 When the sheet is straightened, we can see that it looks like a triangle. We're going to point the point downwards, as shown in image 8.
9 This point has two parts: the front one, which we see, and the back one, which we can't see. The front point is folded upwards, as shown in image 9.
This part isn't shown in the photos because we're going to flip it over and do the same thing on the back.
10 This is how it should look after folding both parts.
11 We're going to open those folds we just made to merge them so they're on the inside.
12 This is how it should look. This is only one side.
13 We do the same on the other side so it's also on the inside.
14 It should look like the one shown in image 14.
15 This is how the result of the second part looks from above.
We already have the 2nd part done.
---
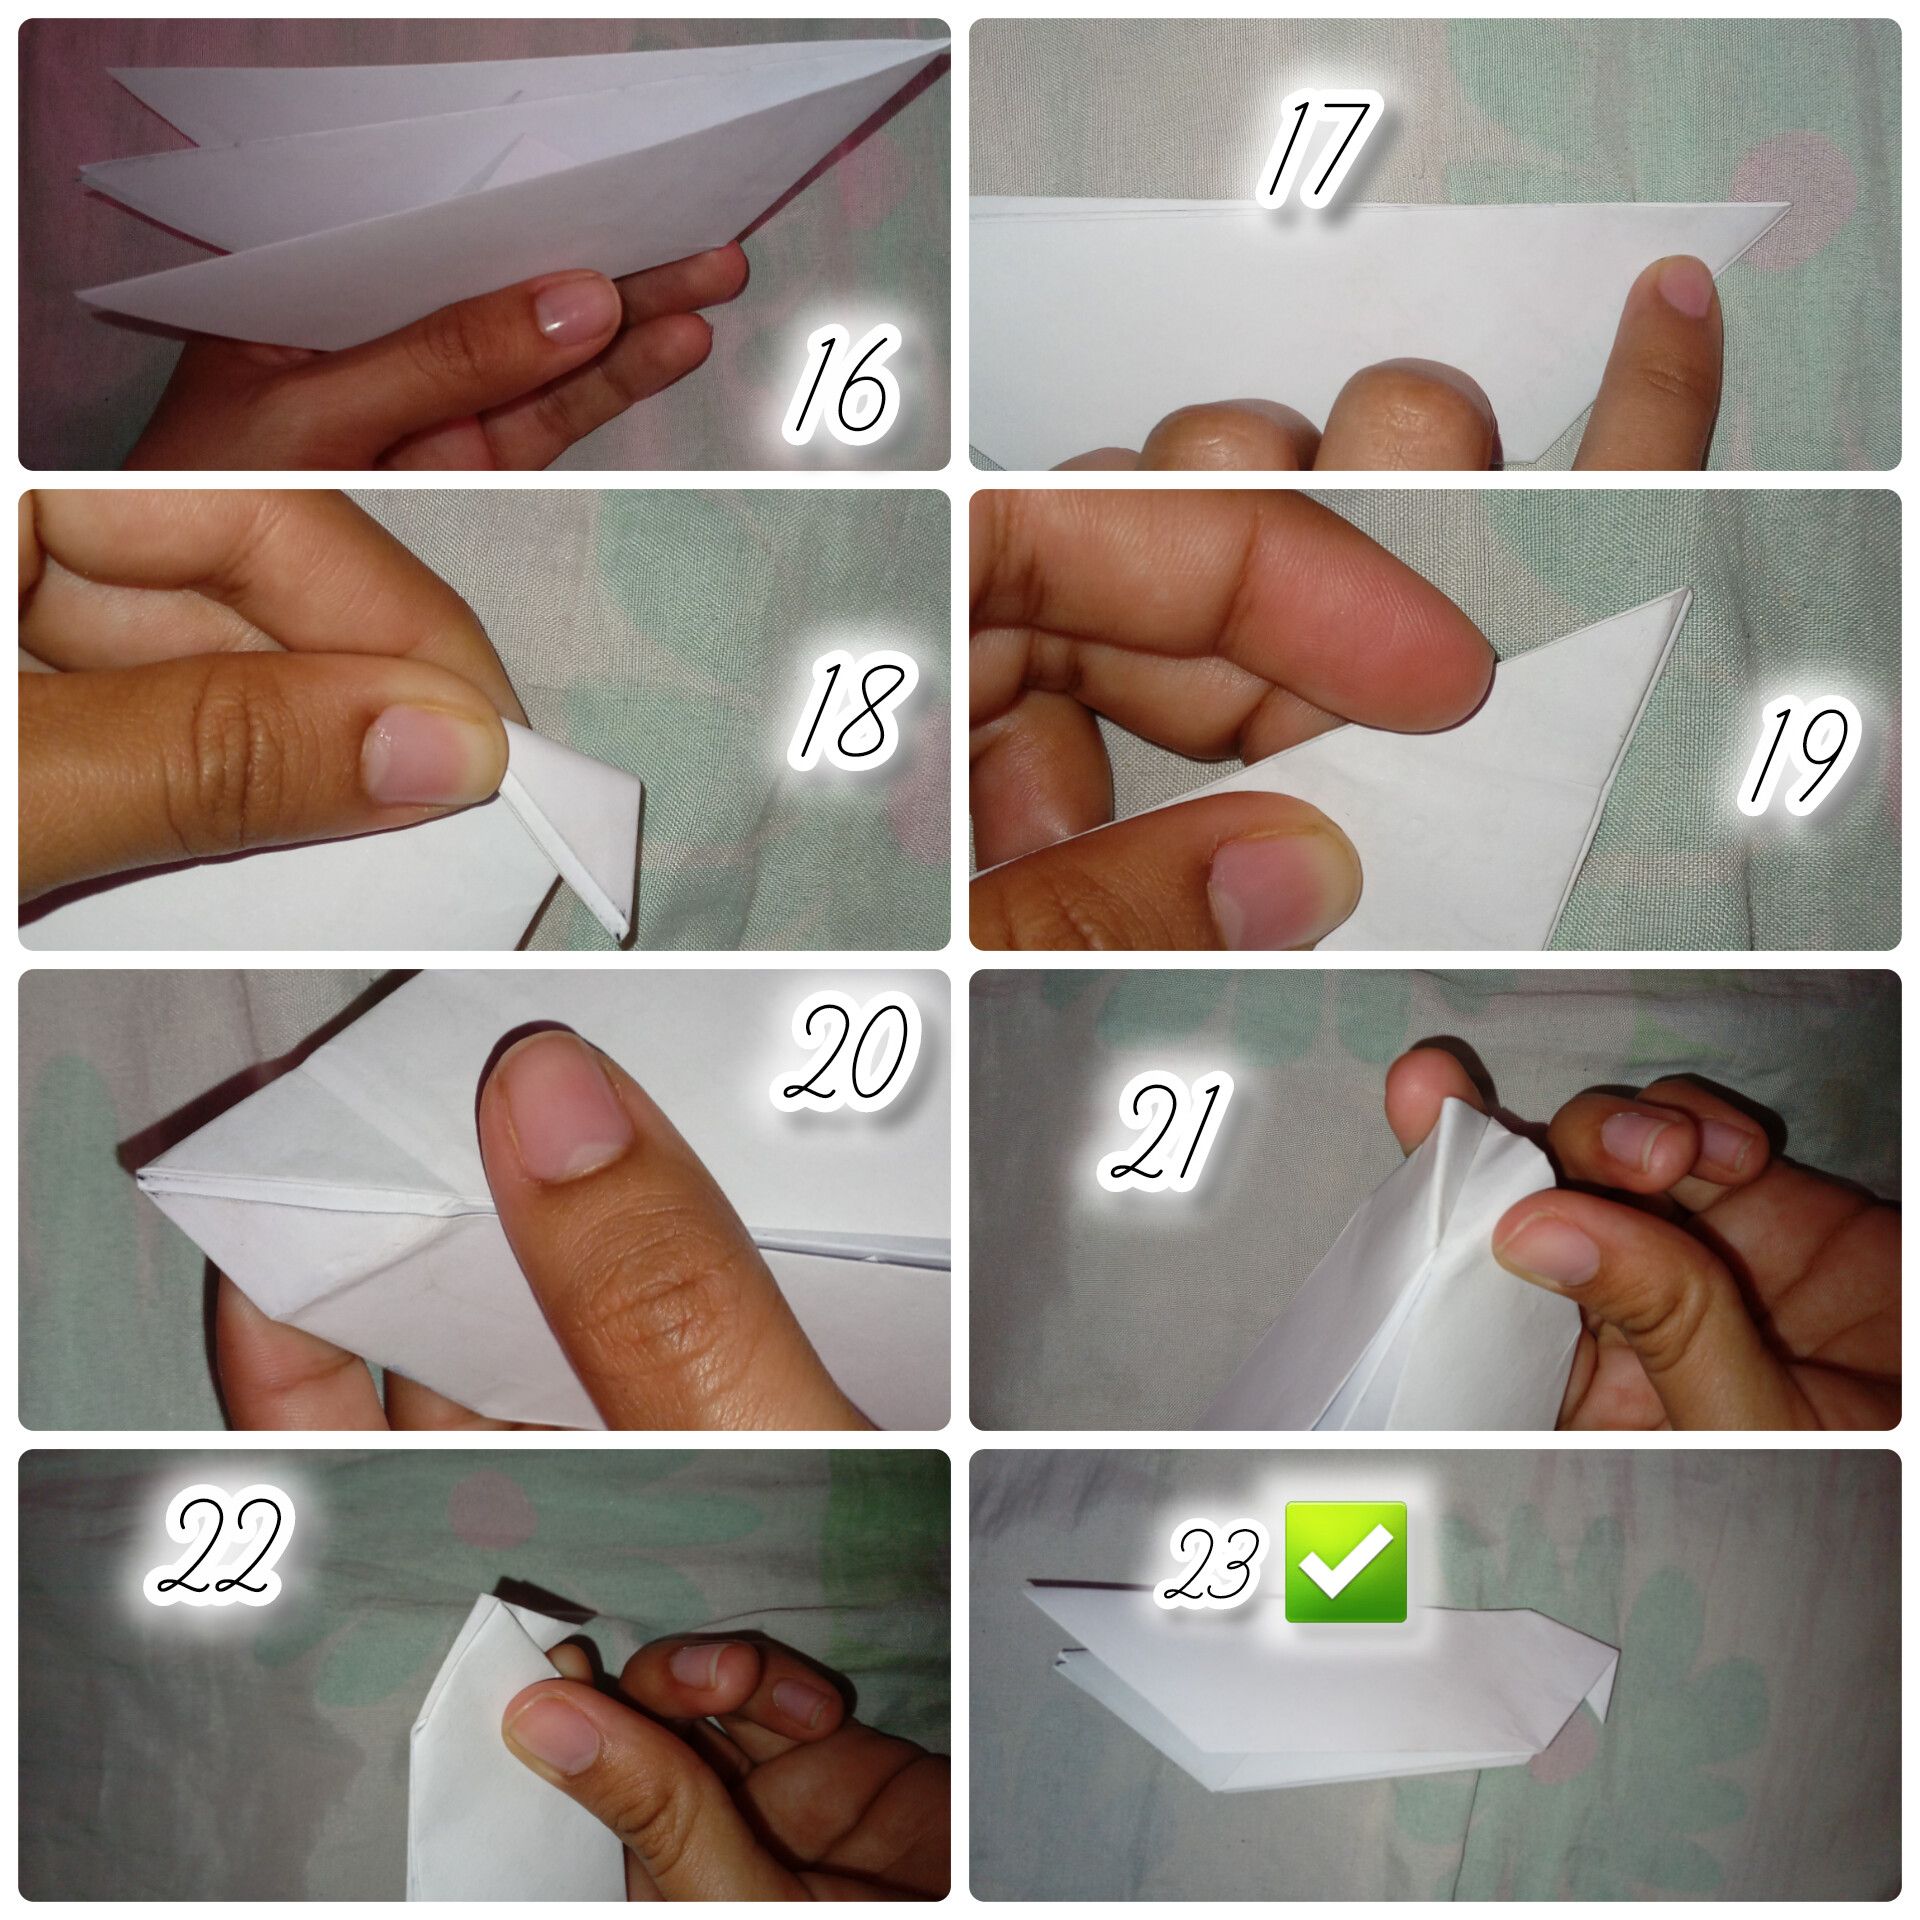
16 Vamos a tomar lo que doblamos y la vamos a poner con la esquina hacia arriba como ven en la foto.
17 Esa esquina que señala mi dedo la van a doblar hacia abajo.
18 Aquí se ve lo que les quiero decir
19 La vuelven a doblar hacia arriba.
20 Y la desarman como hicimos hace rato con un doblés
21 La doblan hacia adentro
22 Así debe quedar
23 Y así debe quedar el pico de nuestra paloma.
Lista la parte 3
16 Let's take what we folded and place it with the corner facing up, as you can see in the photo.
17 That corner my finger is pointing at, you're going to fold down.
18 Here's what I'm trying to say.
19 Fold it up again.
20 And unfold it like we did a little while ago with a fold.
21 Fold it inward.
22 This is how it should look.
23 And this is how our dove's beak should look.
Part 3 is ready.
---
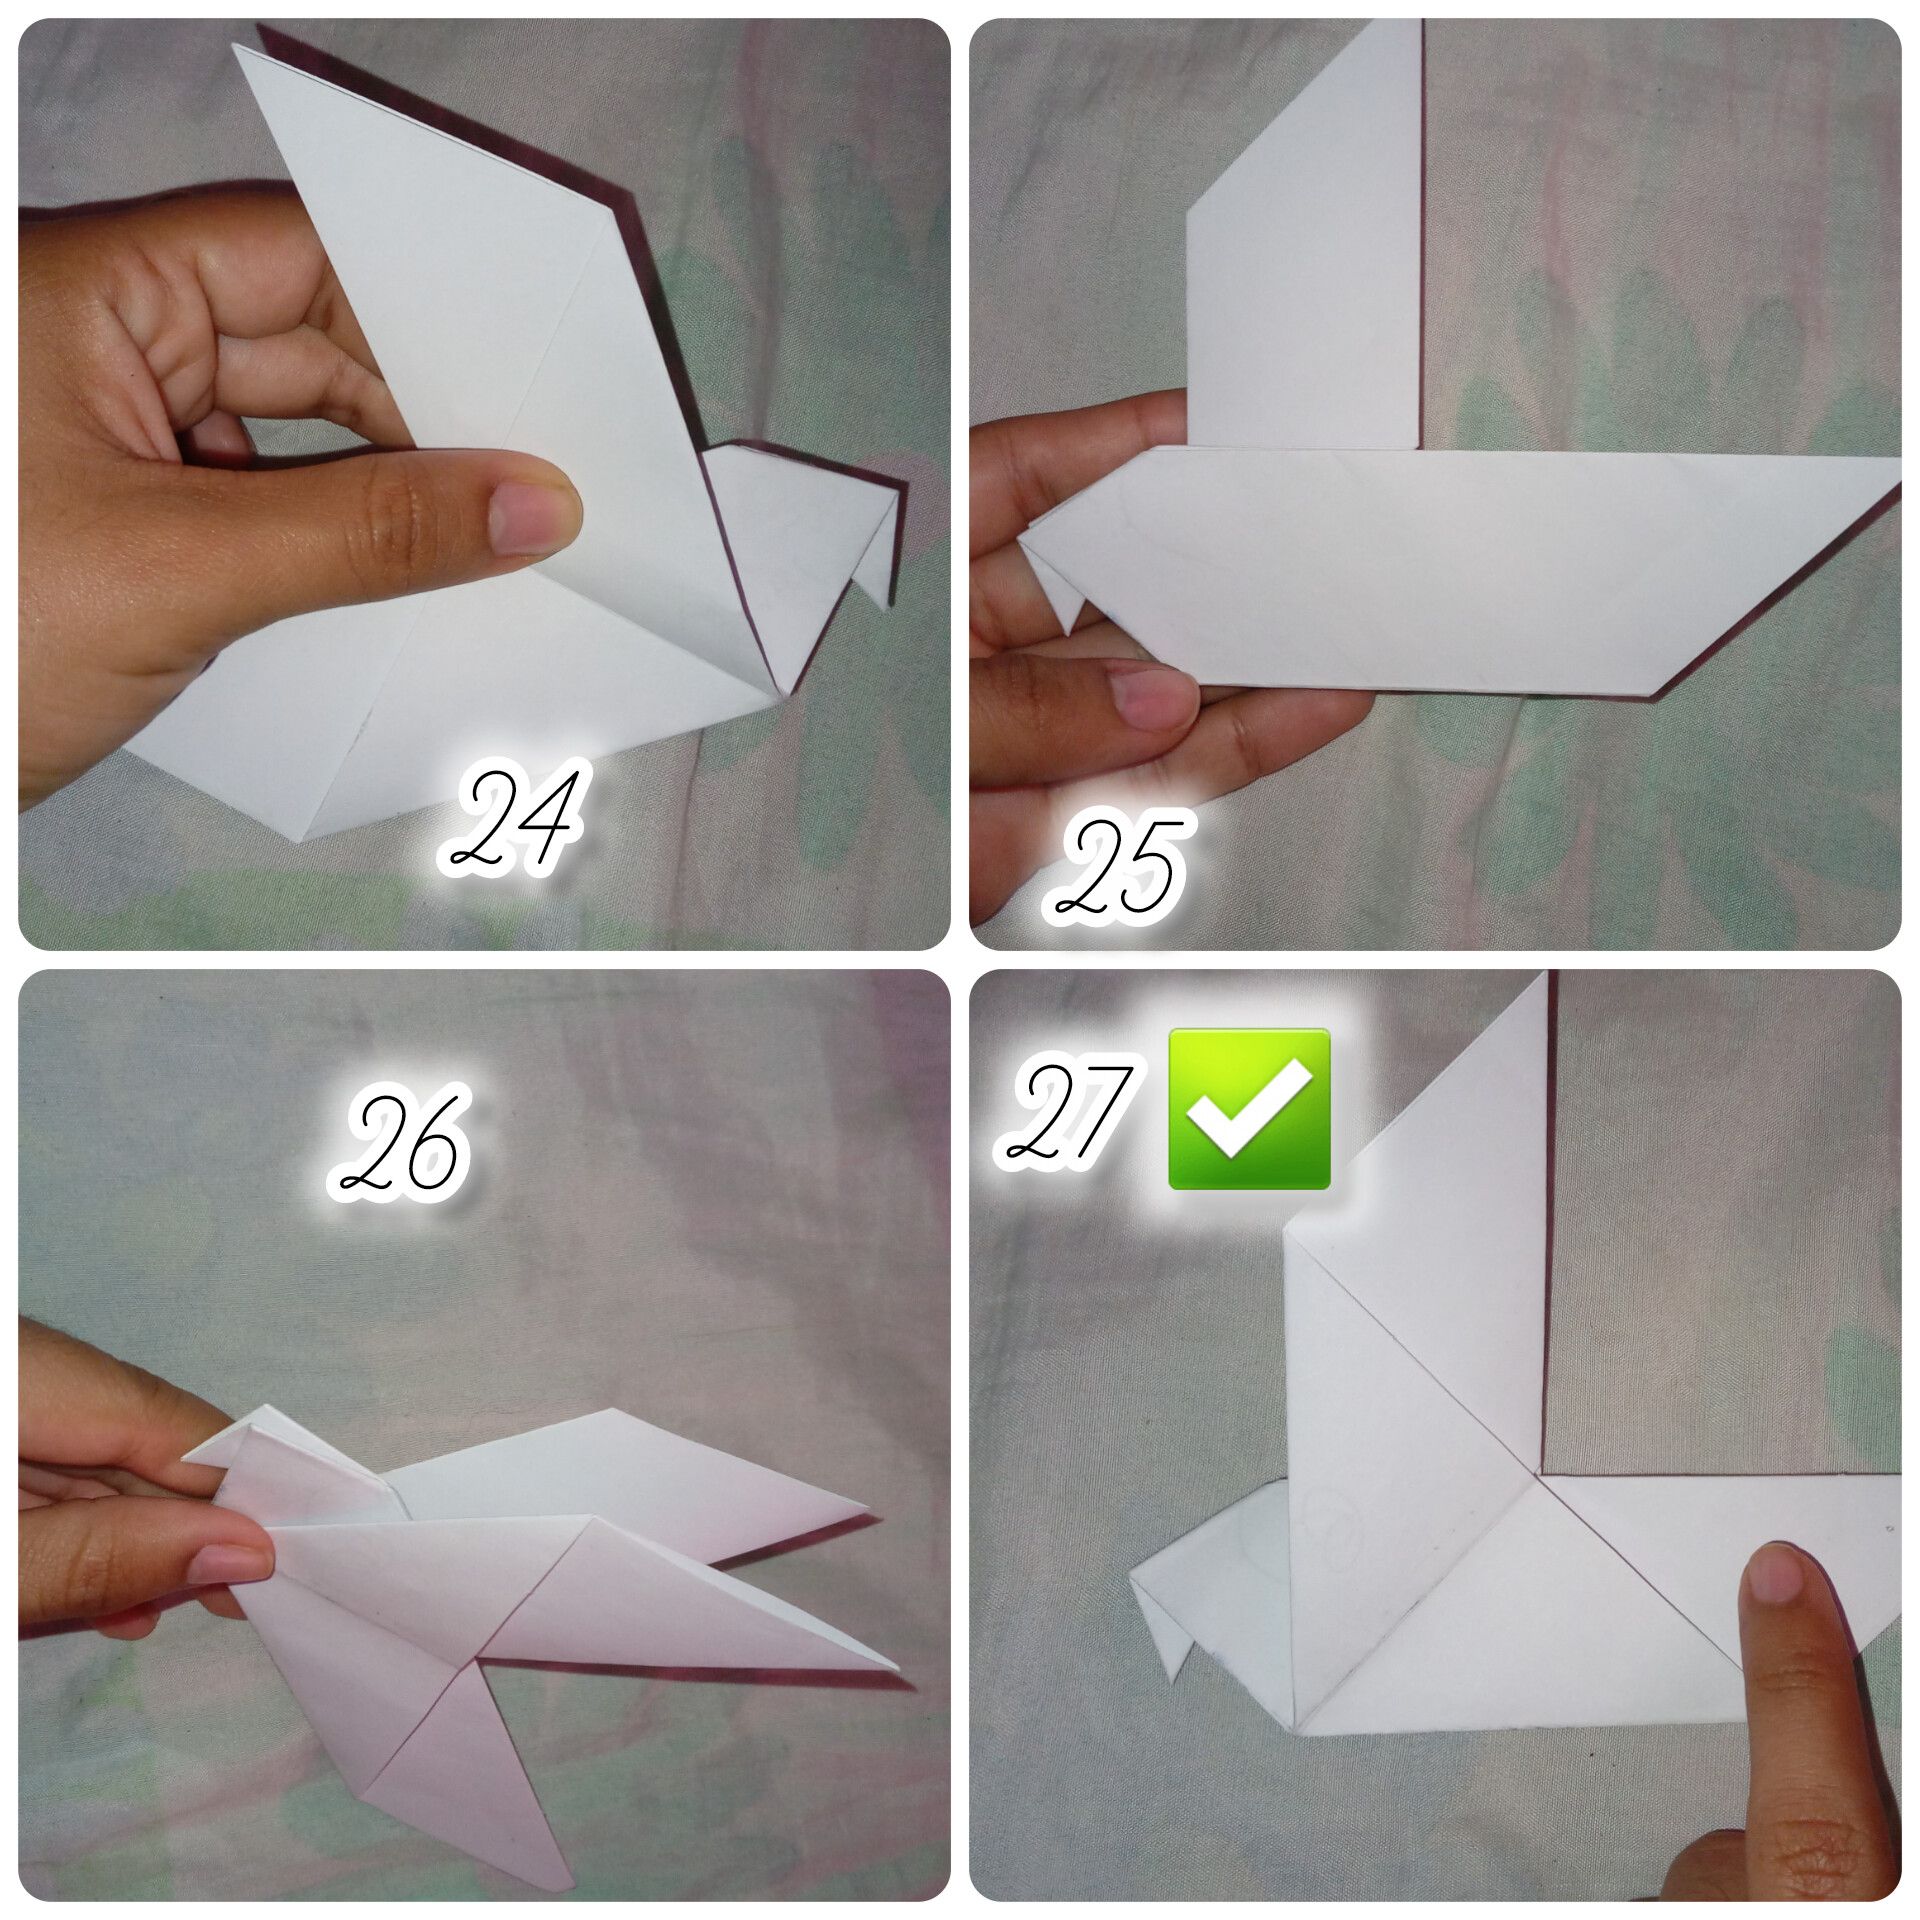
La parte 4 es muy fácil
24 Doblamos el papel hacia arriba, justo por donde se ve marcada una línea que van a ver si lo están haciendo.
25 Volteamos la palomita y vemos que se puede hacer por el otro lado. Lo hacemos.
26 Así se ve desde arriba
27 Así se ve de frente.
Lista la parte 4
Part 4 is very easy.
24 Fold the paper upwards, right where you see a line marked on it. You'll see if you're doing it right.
25 Turn the dove over and see if it can be done on the other side. Do it.
26 This is how it looks from above.
27 This is how it looks from the front.
Part 4 is ready.
---
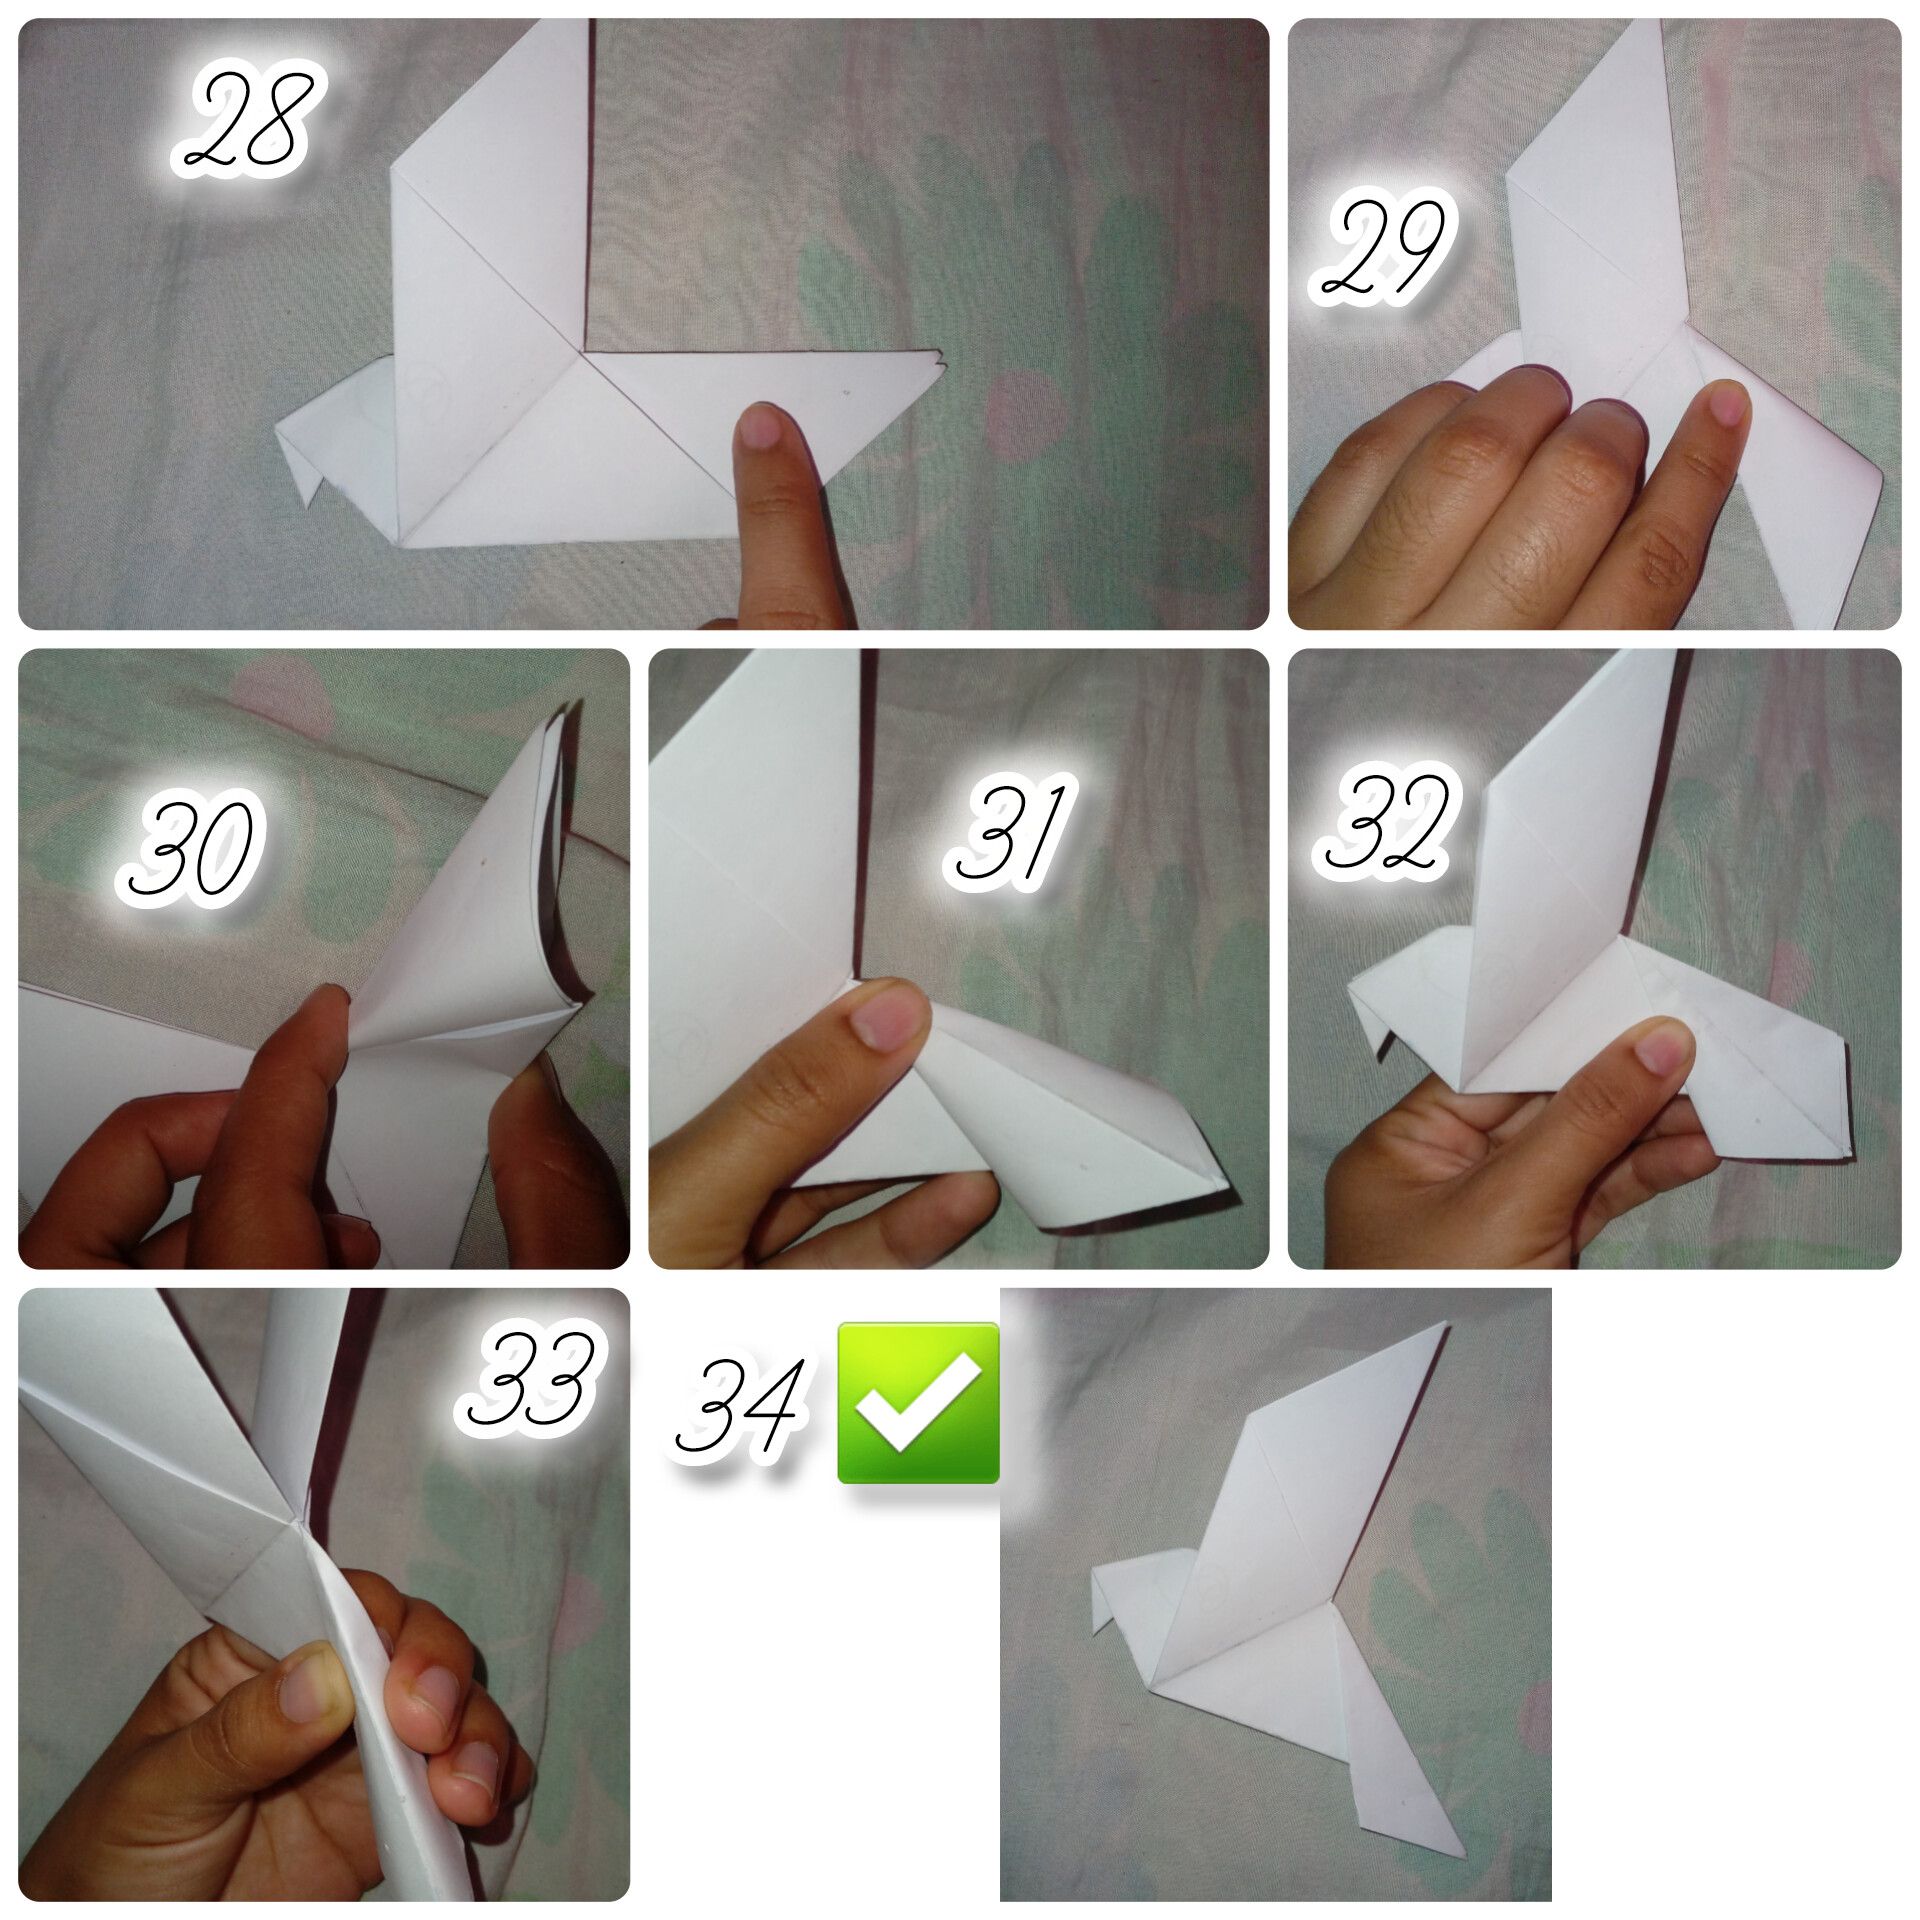
La parte 5 es doblar y desarmar.
28 La cola de la paloma que señala mi dedo la vamos a doblar hacia abajo.
29 Justo como se ve en la foto 29.
30 Ya doblada la abrimos para desarmarla
31 Y la línea que se ve ahí va a servir para dividir la cola para que quede igual por delante y por detrás.
32 Así como en la imagen 32
34 Asi se ve de frente
Pero solo terminamos la parte 5, viene la 6
Part 5 is folding and disassembling.
28 We're going to fold the tail of the dove my finger is pointing at downward.
29 Just like you can see in photo 29.
30 Once folded, we open it up to disassemble it.
31 And the line you see there will be used to divide the tail so it's the same size front and back.
32 Just like in image 32.
34 This is how it looks from the front.
But we're only done with part 5; next comes part 6.
---
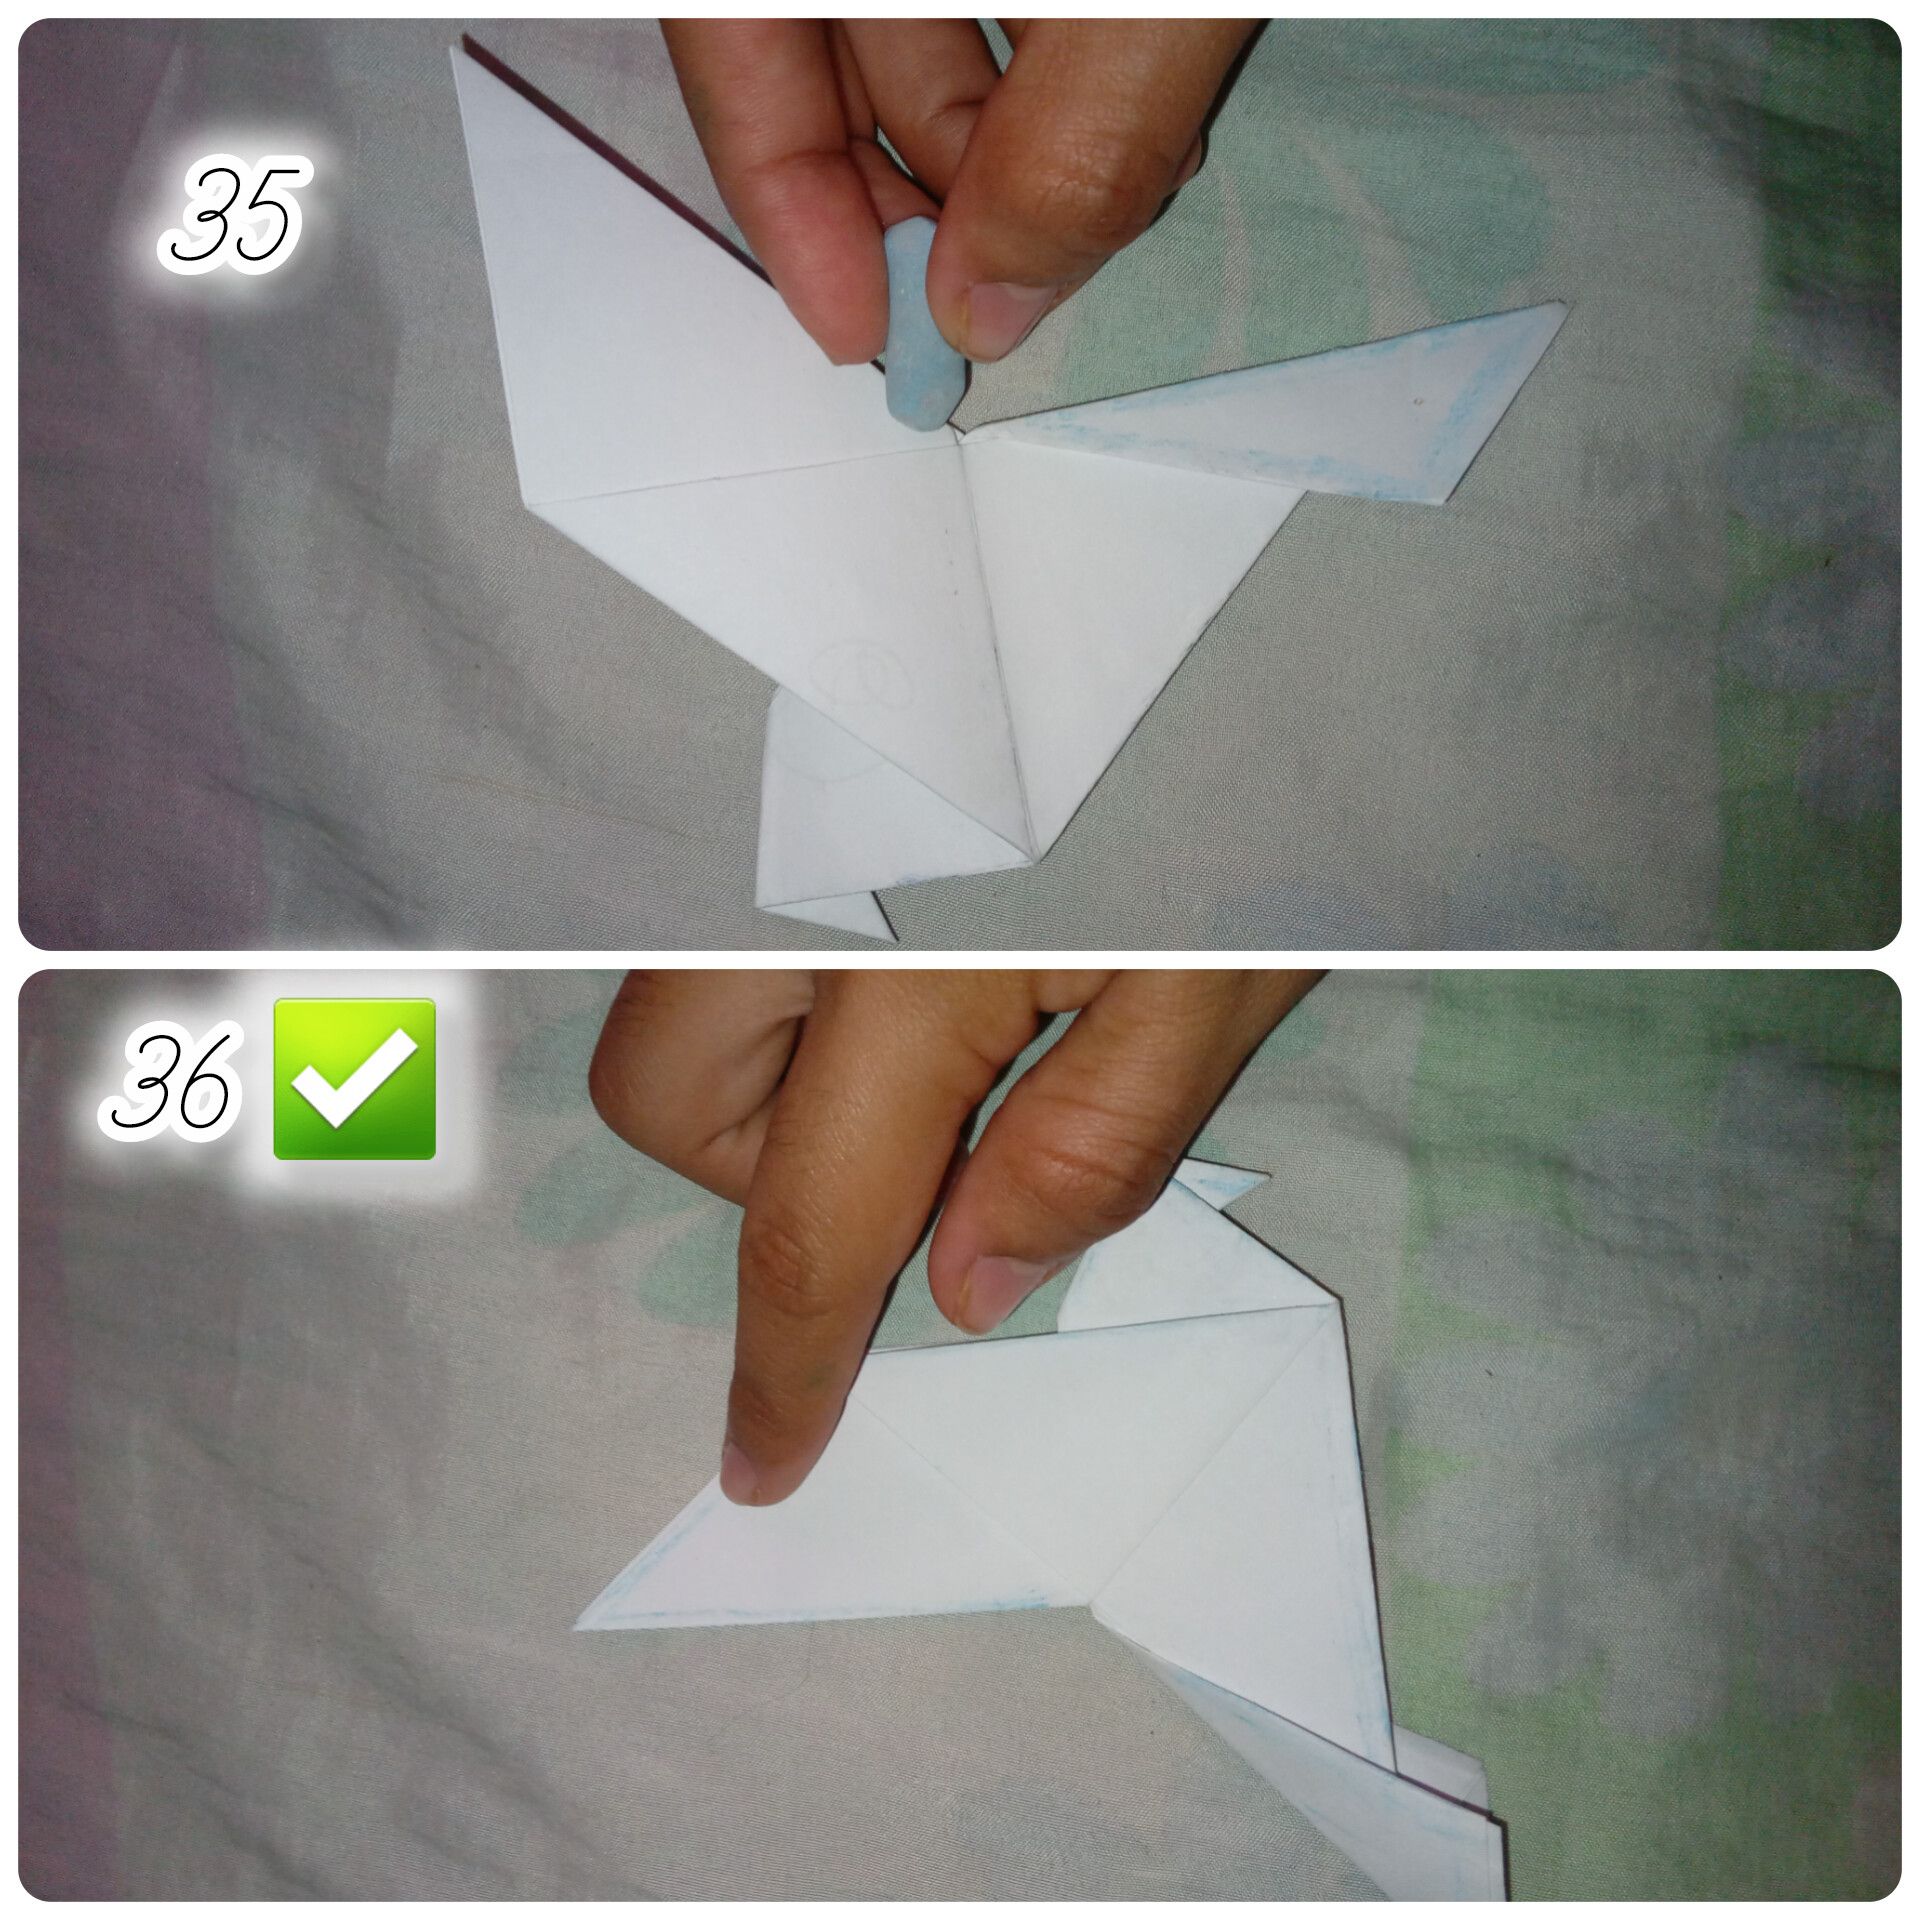
35 Se le echa tiza del color de tu preferencia
36 Se difunima con los dedos.
Lista parte final.
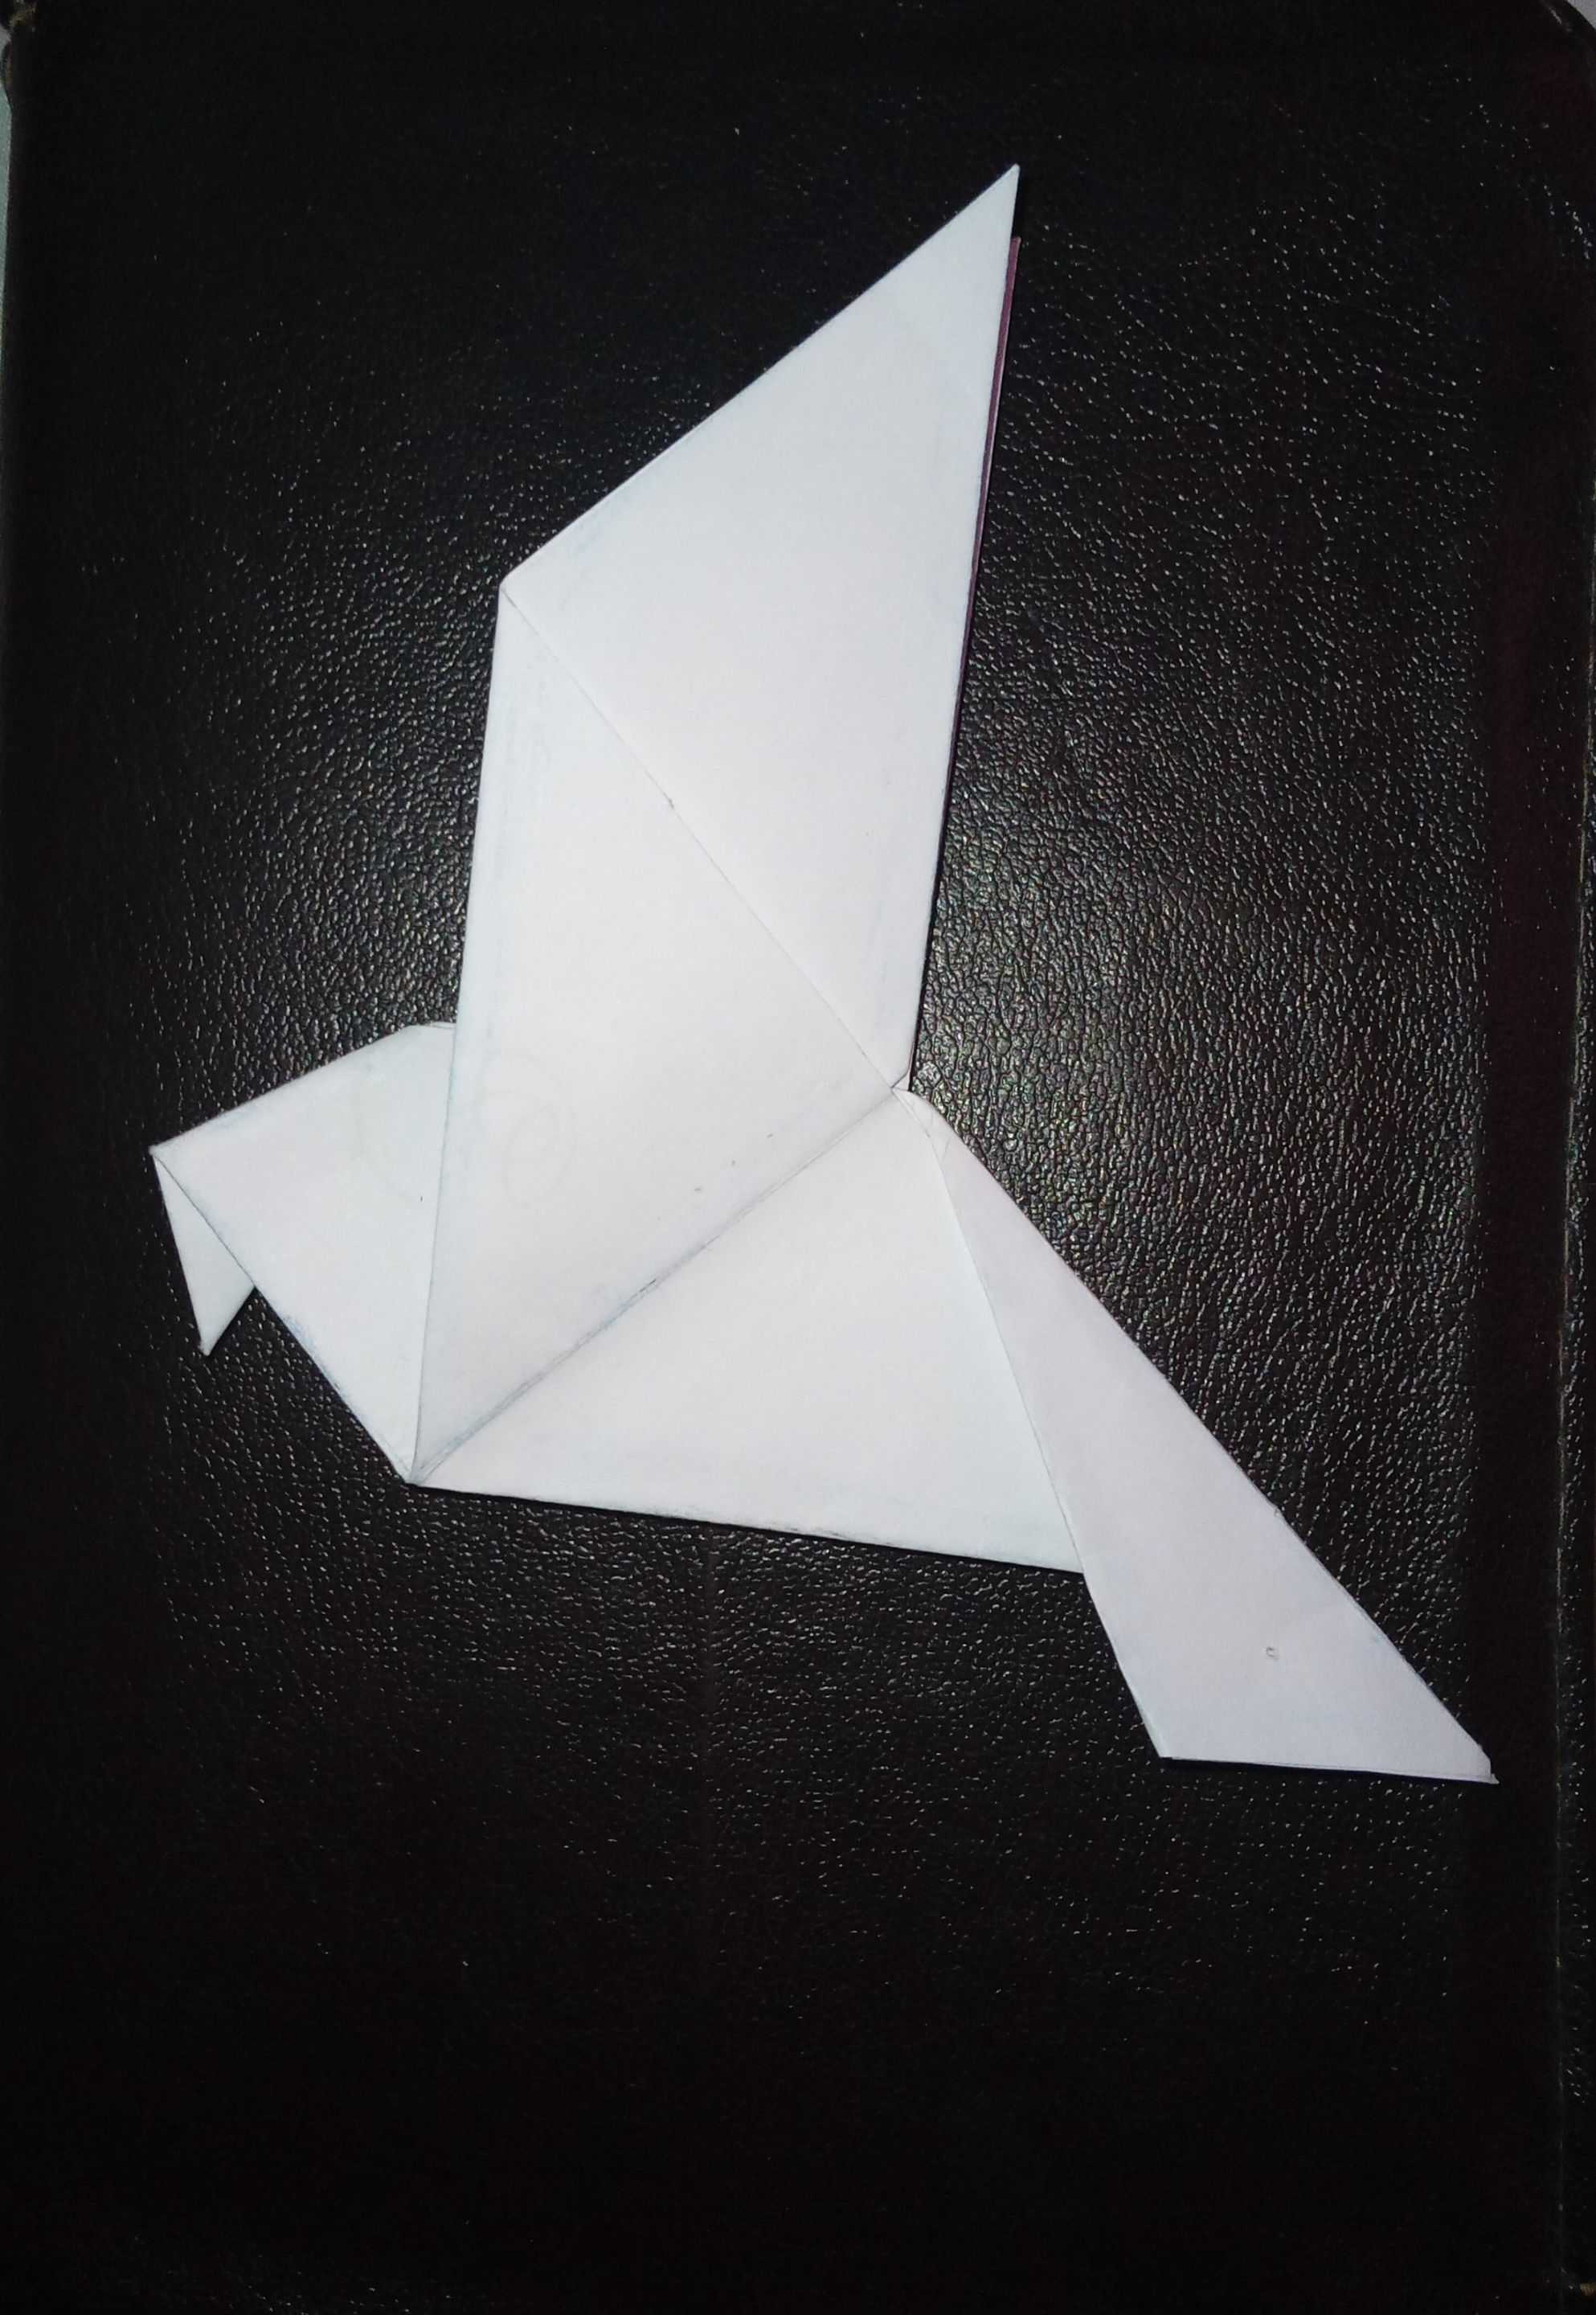
Aquí está nuestra paloma de origami
35 Add chalk in the color of your choice.
36 Blend with your fingers.
Final part ready.
Here's our origami dove.
---
#diyforpeace
#diyhub
#appreciator
#neoxian
#curangel
#ocd
#qurator
#honeyswap
#spanish
Payout: 0.000 HBD
Votes: 216
More interactions (upvote, reblog, reply) coming soon.