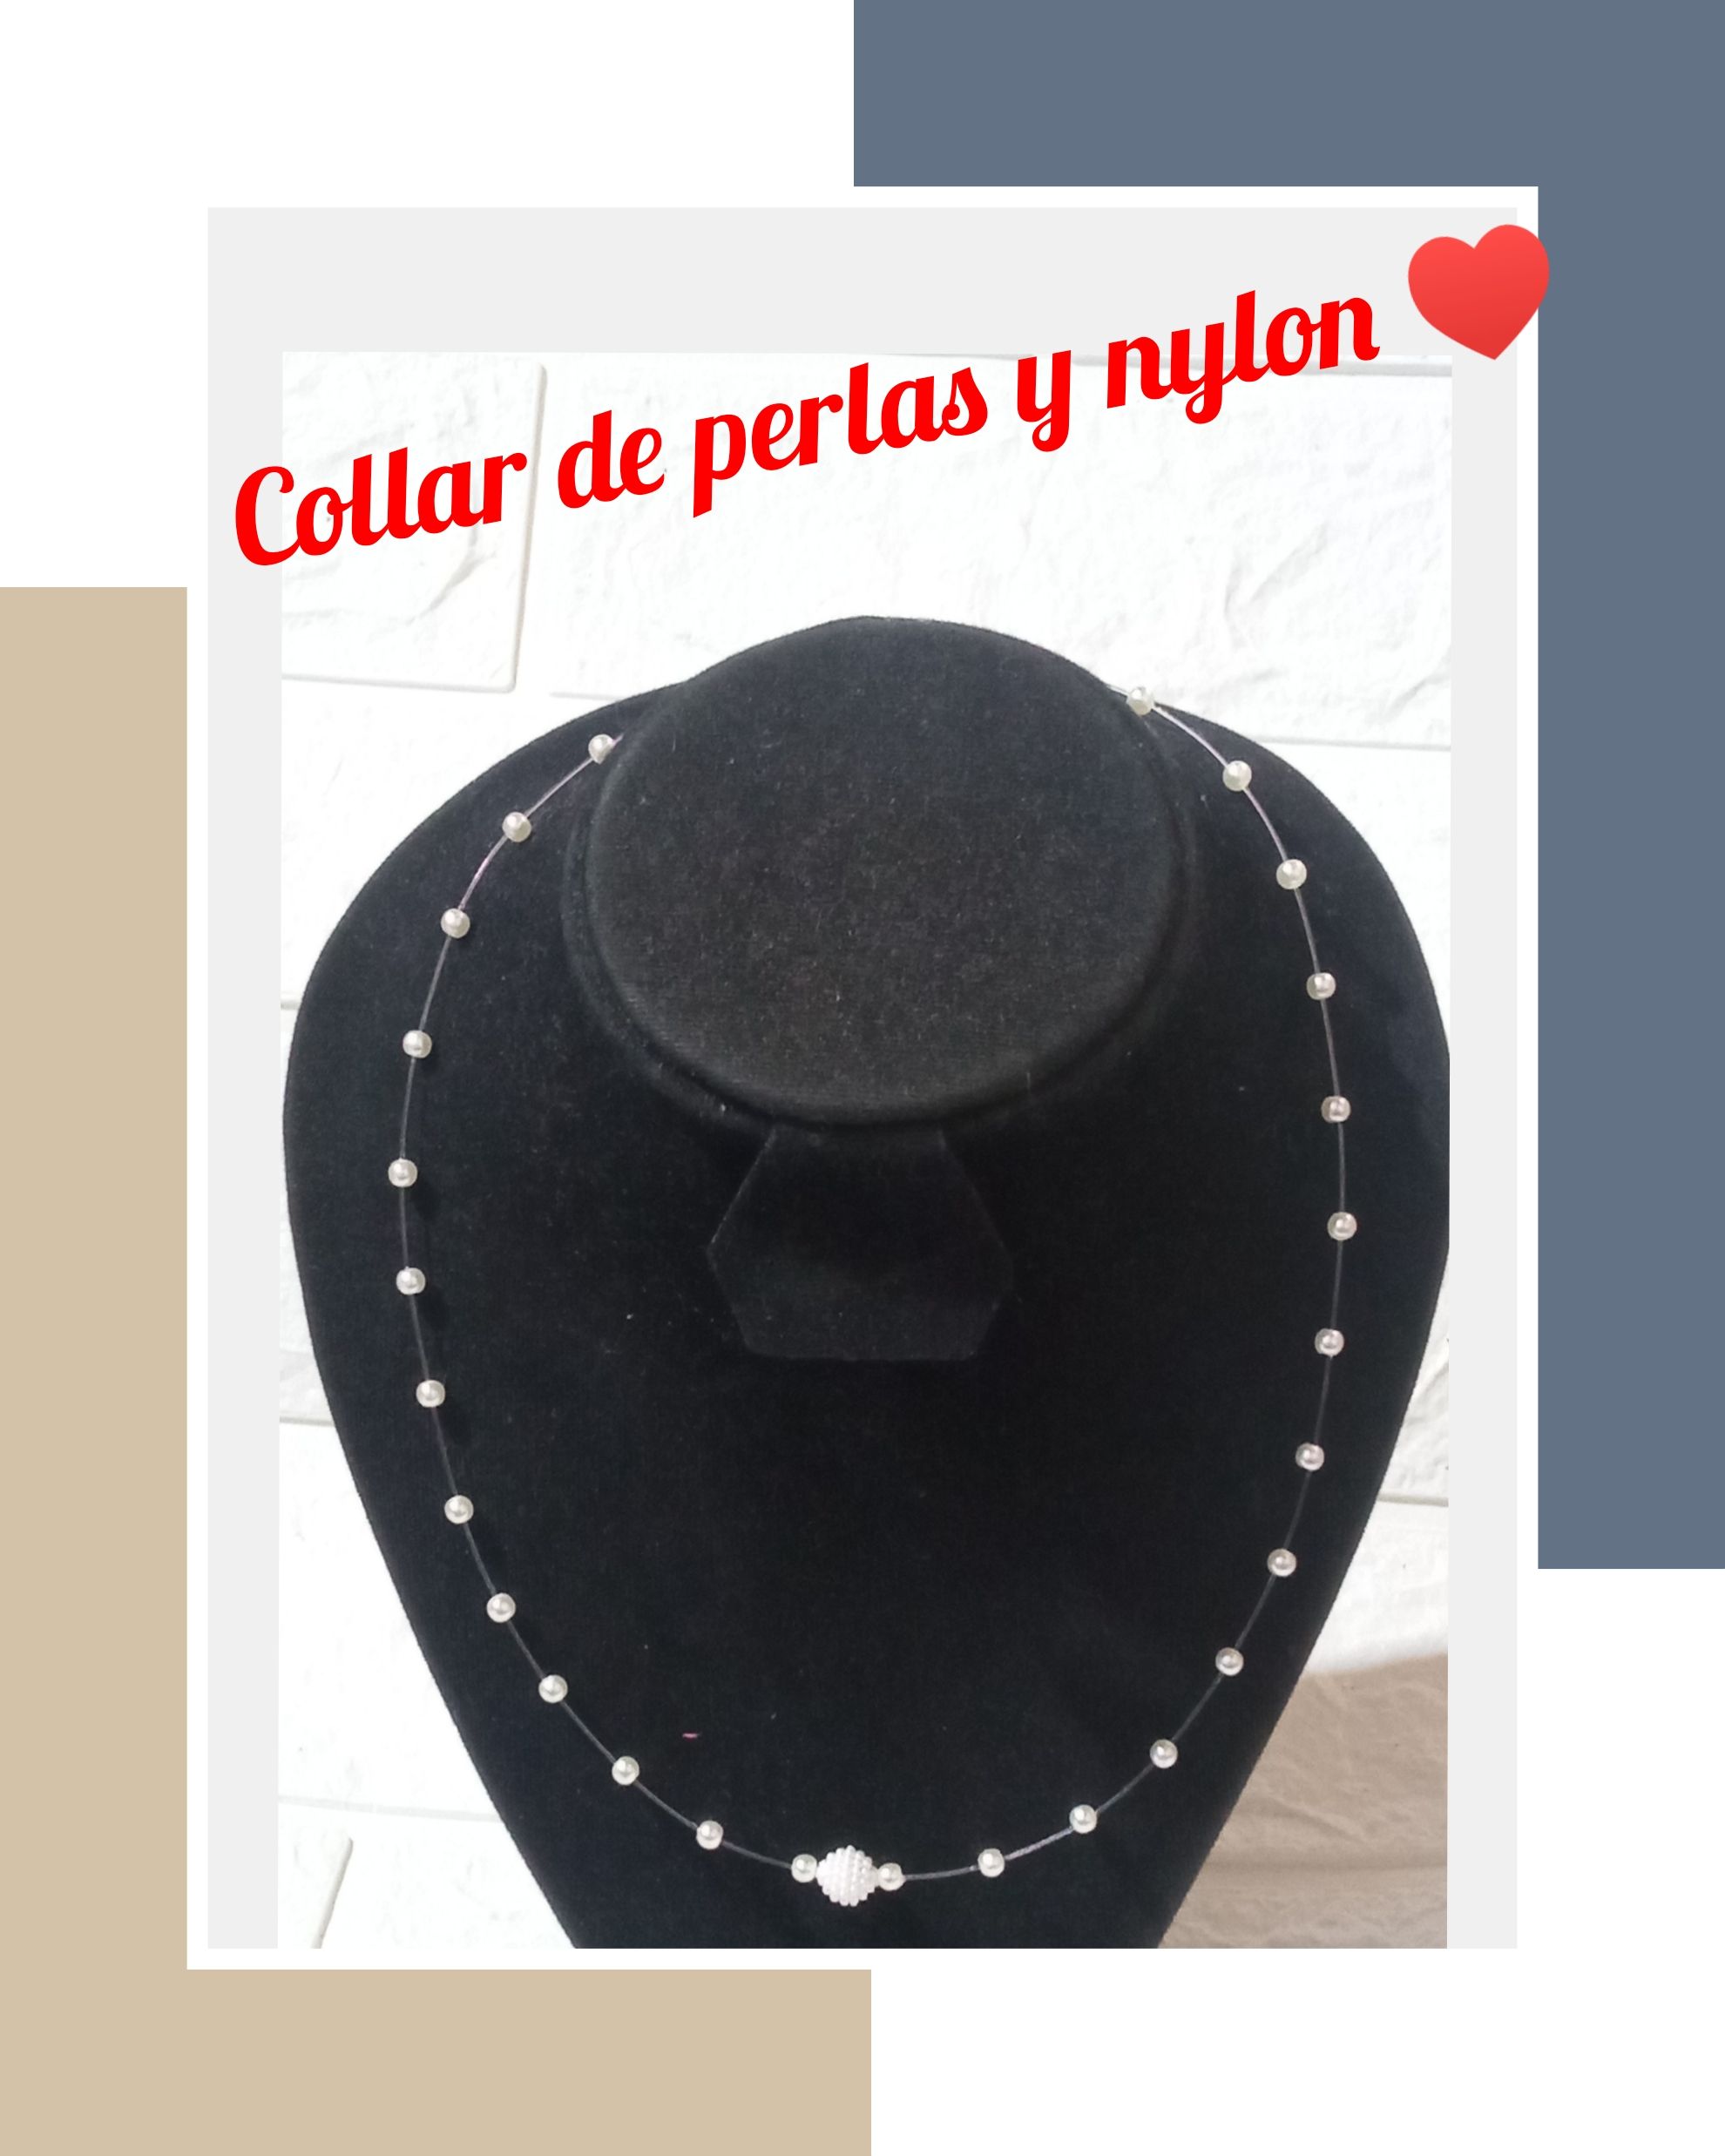
*** BIENVENIDOS TODOS A MI BLOG***
Saludos querida comunidad de #Hive y #Jewelry deseo estén todos bien en salud, abundancia y creatividad , por acá con ustedes nuevamente compartiendo como siempre mis creaciones de accesorios , hoy les traigo el tutorial o paso a paso de como elaboré un hermoso collar o gargantilla con perlas acrílicas e hilo nylon , está pieza la realicé para mi es lo que puedo usar ya que mi ph es muy alto y los accesorios en dorado las daño muy rápido es por ello que opto por hacerme estos modelos, les digo que es una gargantilla muy bonita y delicada, Espero sea de su agrado, el proceso se hace un poco lento ya que se debe esperar que la perla se adhiera al pegamento y al nylon , pero vale la pena.
*** WELCOME EVERYONE TO MY BLOG***
Greetings dear #Hive and #Jewelry community, I hope you are all well in health, abundance, and creativity. Here I am with you again, sharing my accessory creations as always. Today I bring you a tutorial or step-by-step guide on how I made a beautiful necklace or choker with acrylic pearls and nylon thread. I made this piece for myself because I can wear it since my pH is very high and gold accessories damage it very quickly. That's why I choose to make these models for myself. I must say that it is a very pretty and delicate choker. I hope you like it. The process is a little slow because you have to wait for the pearl to adhere to the glue and nylon, but it's worth it.
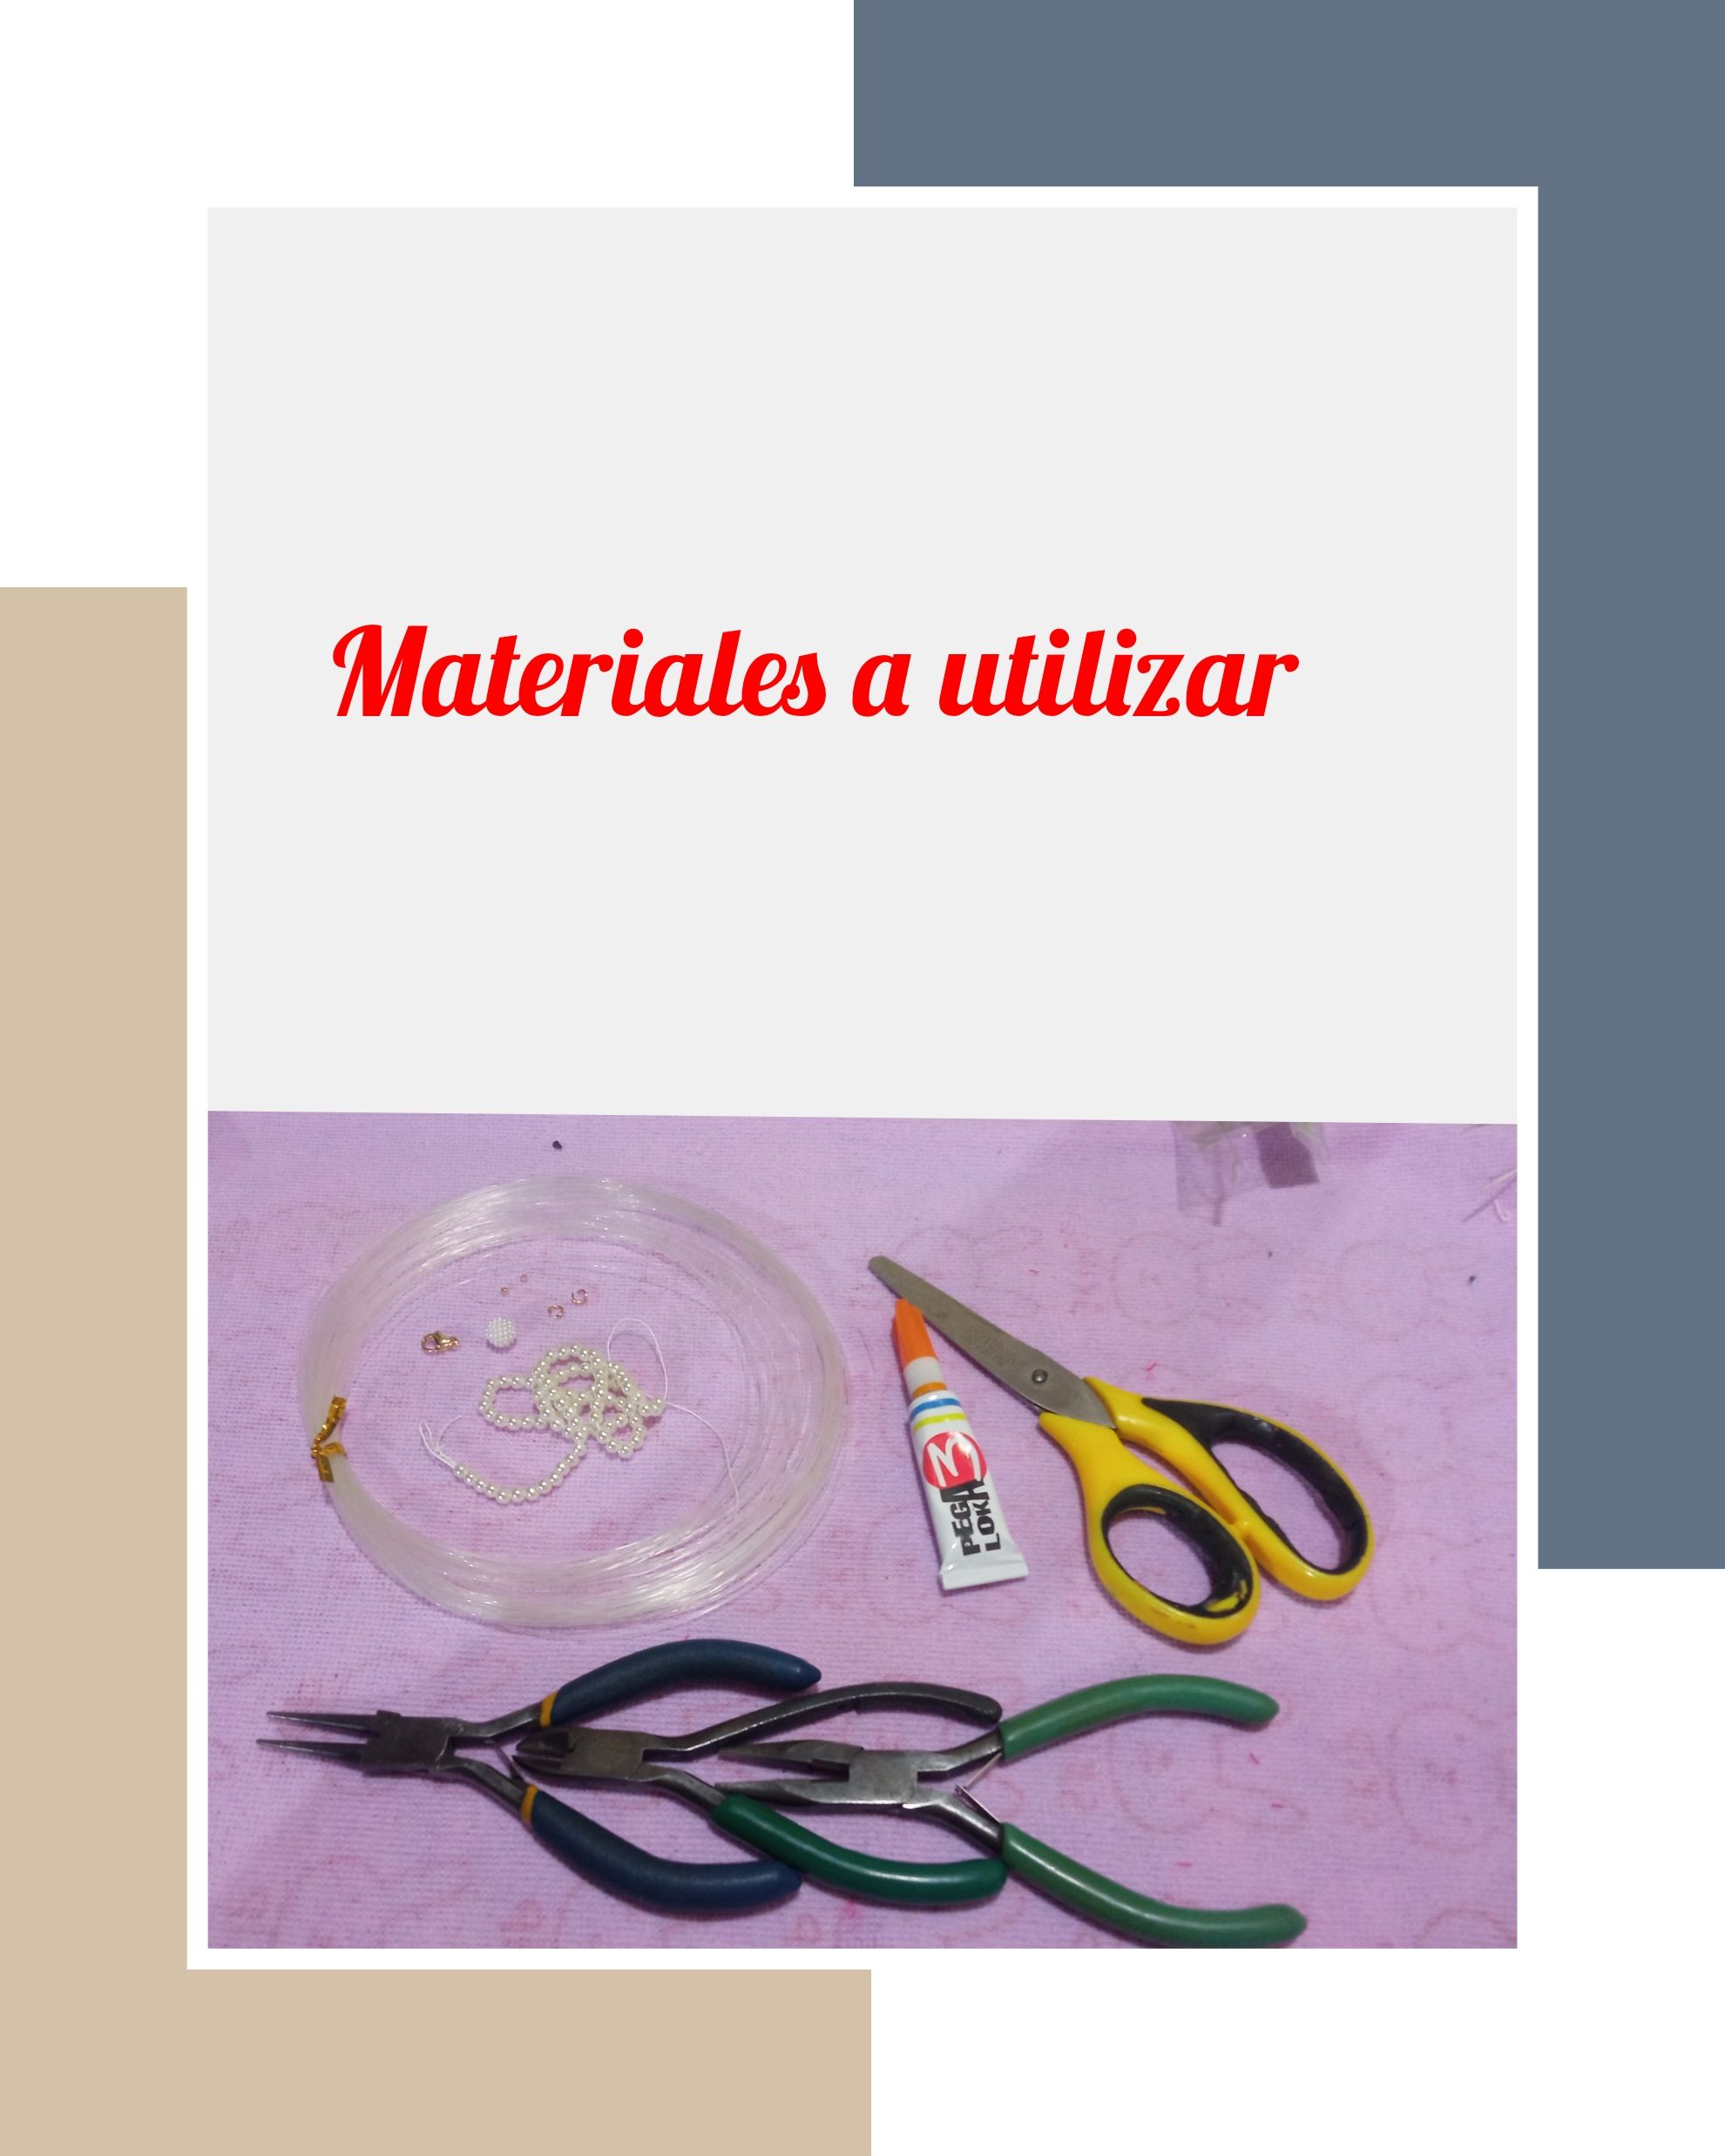
Materiales a utilizar.
☑️ 50 cm de hilo nylon. ☑️ Perlas acrílicas No 4. ☑️ Una cuenta blanca No 8. ☑️ 2 grapas o escarlachin. ☑️ 2 Argollas medianas. ☑️ 1 trancadero pico de loro. ☑️ Cinta metrica. ☑️ Pinzas piqueta, punta plana y punta redonda. ☑️ Pegamento líquido. ☑️ Un alfiler o aguja.
Materials to use.
☑️ 50 cm of nylon thread. ☑️ No. 4 acrylic beads. ☑️ One No. 8 white bead. ☑️ 2 staples or paper clips. ☑️ 2 medium rings. ☑️ 1 parrot beak clasp. ☑️ Tape measure. ☑️ Pliers, flat tip and round tip. ☑️ Liquid glue. ☑️ A pin or needle.
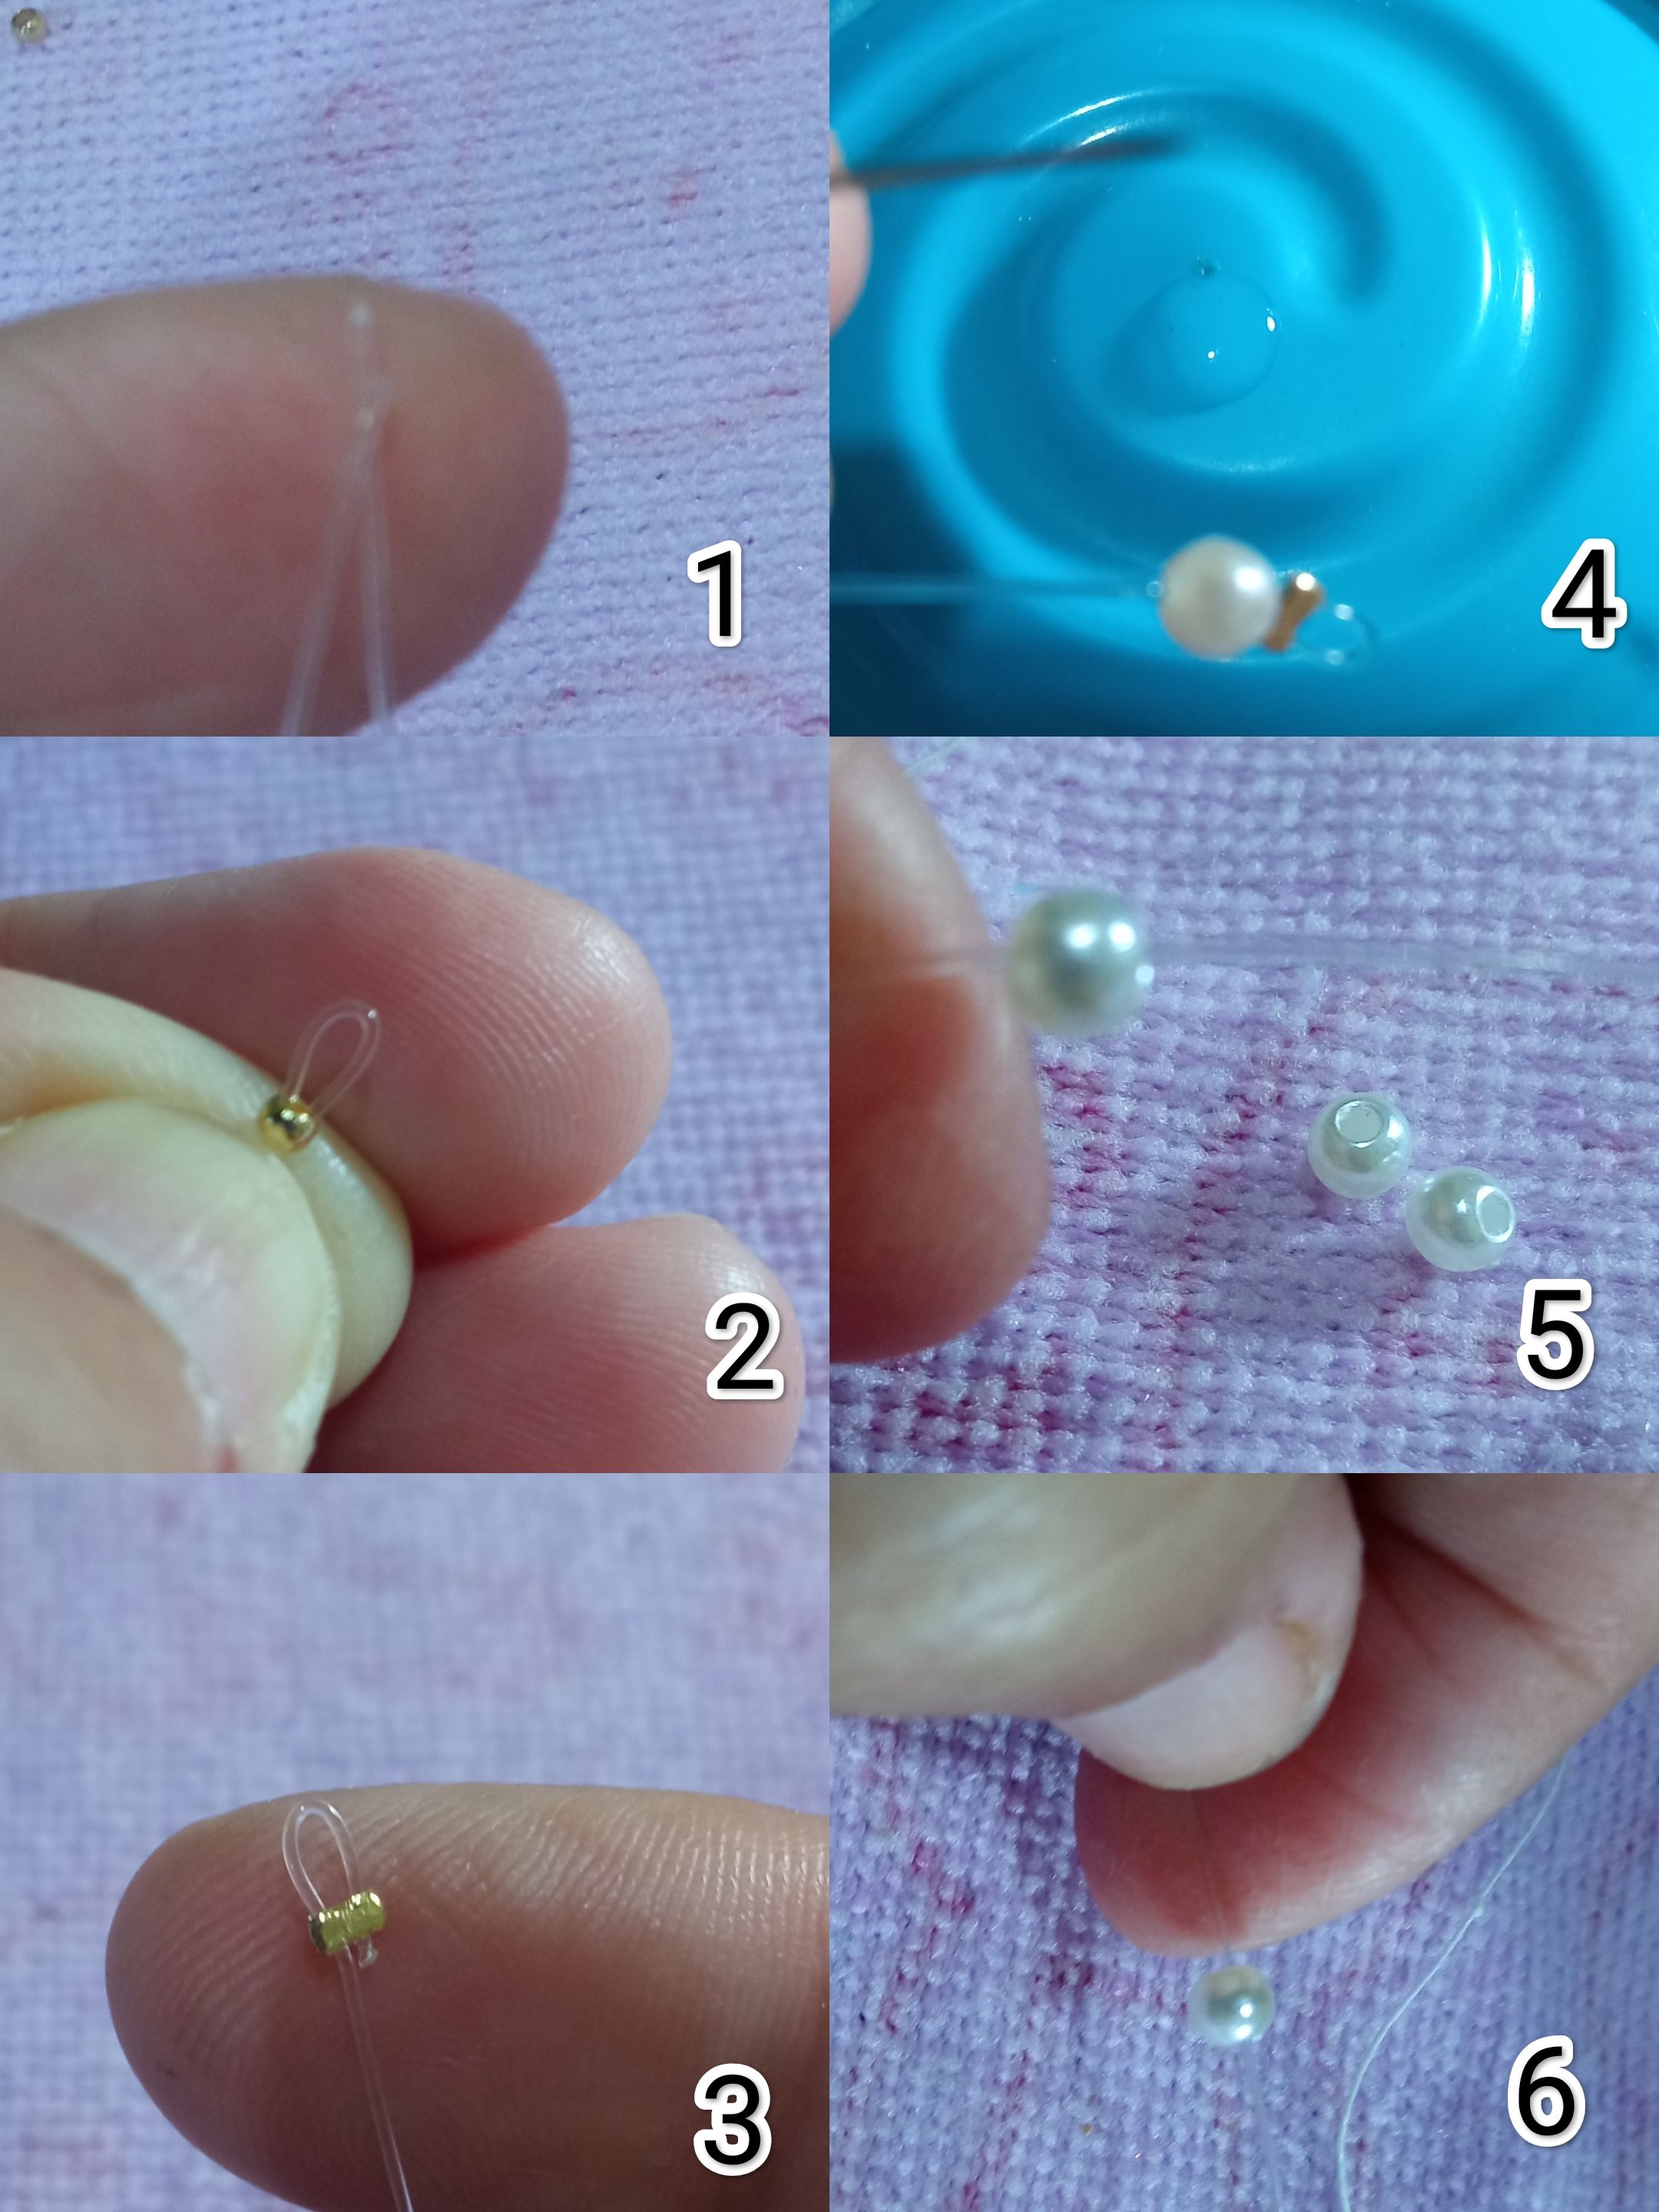
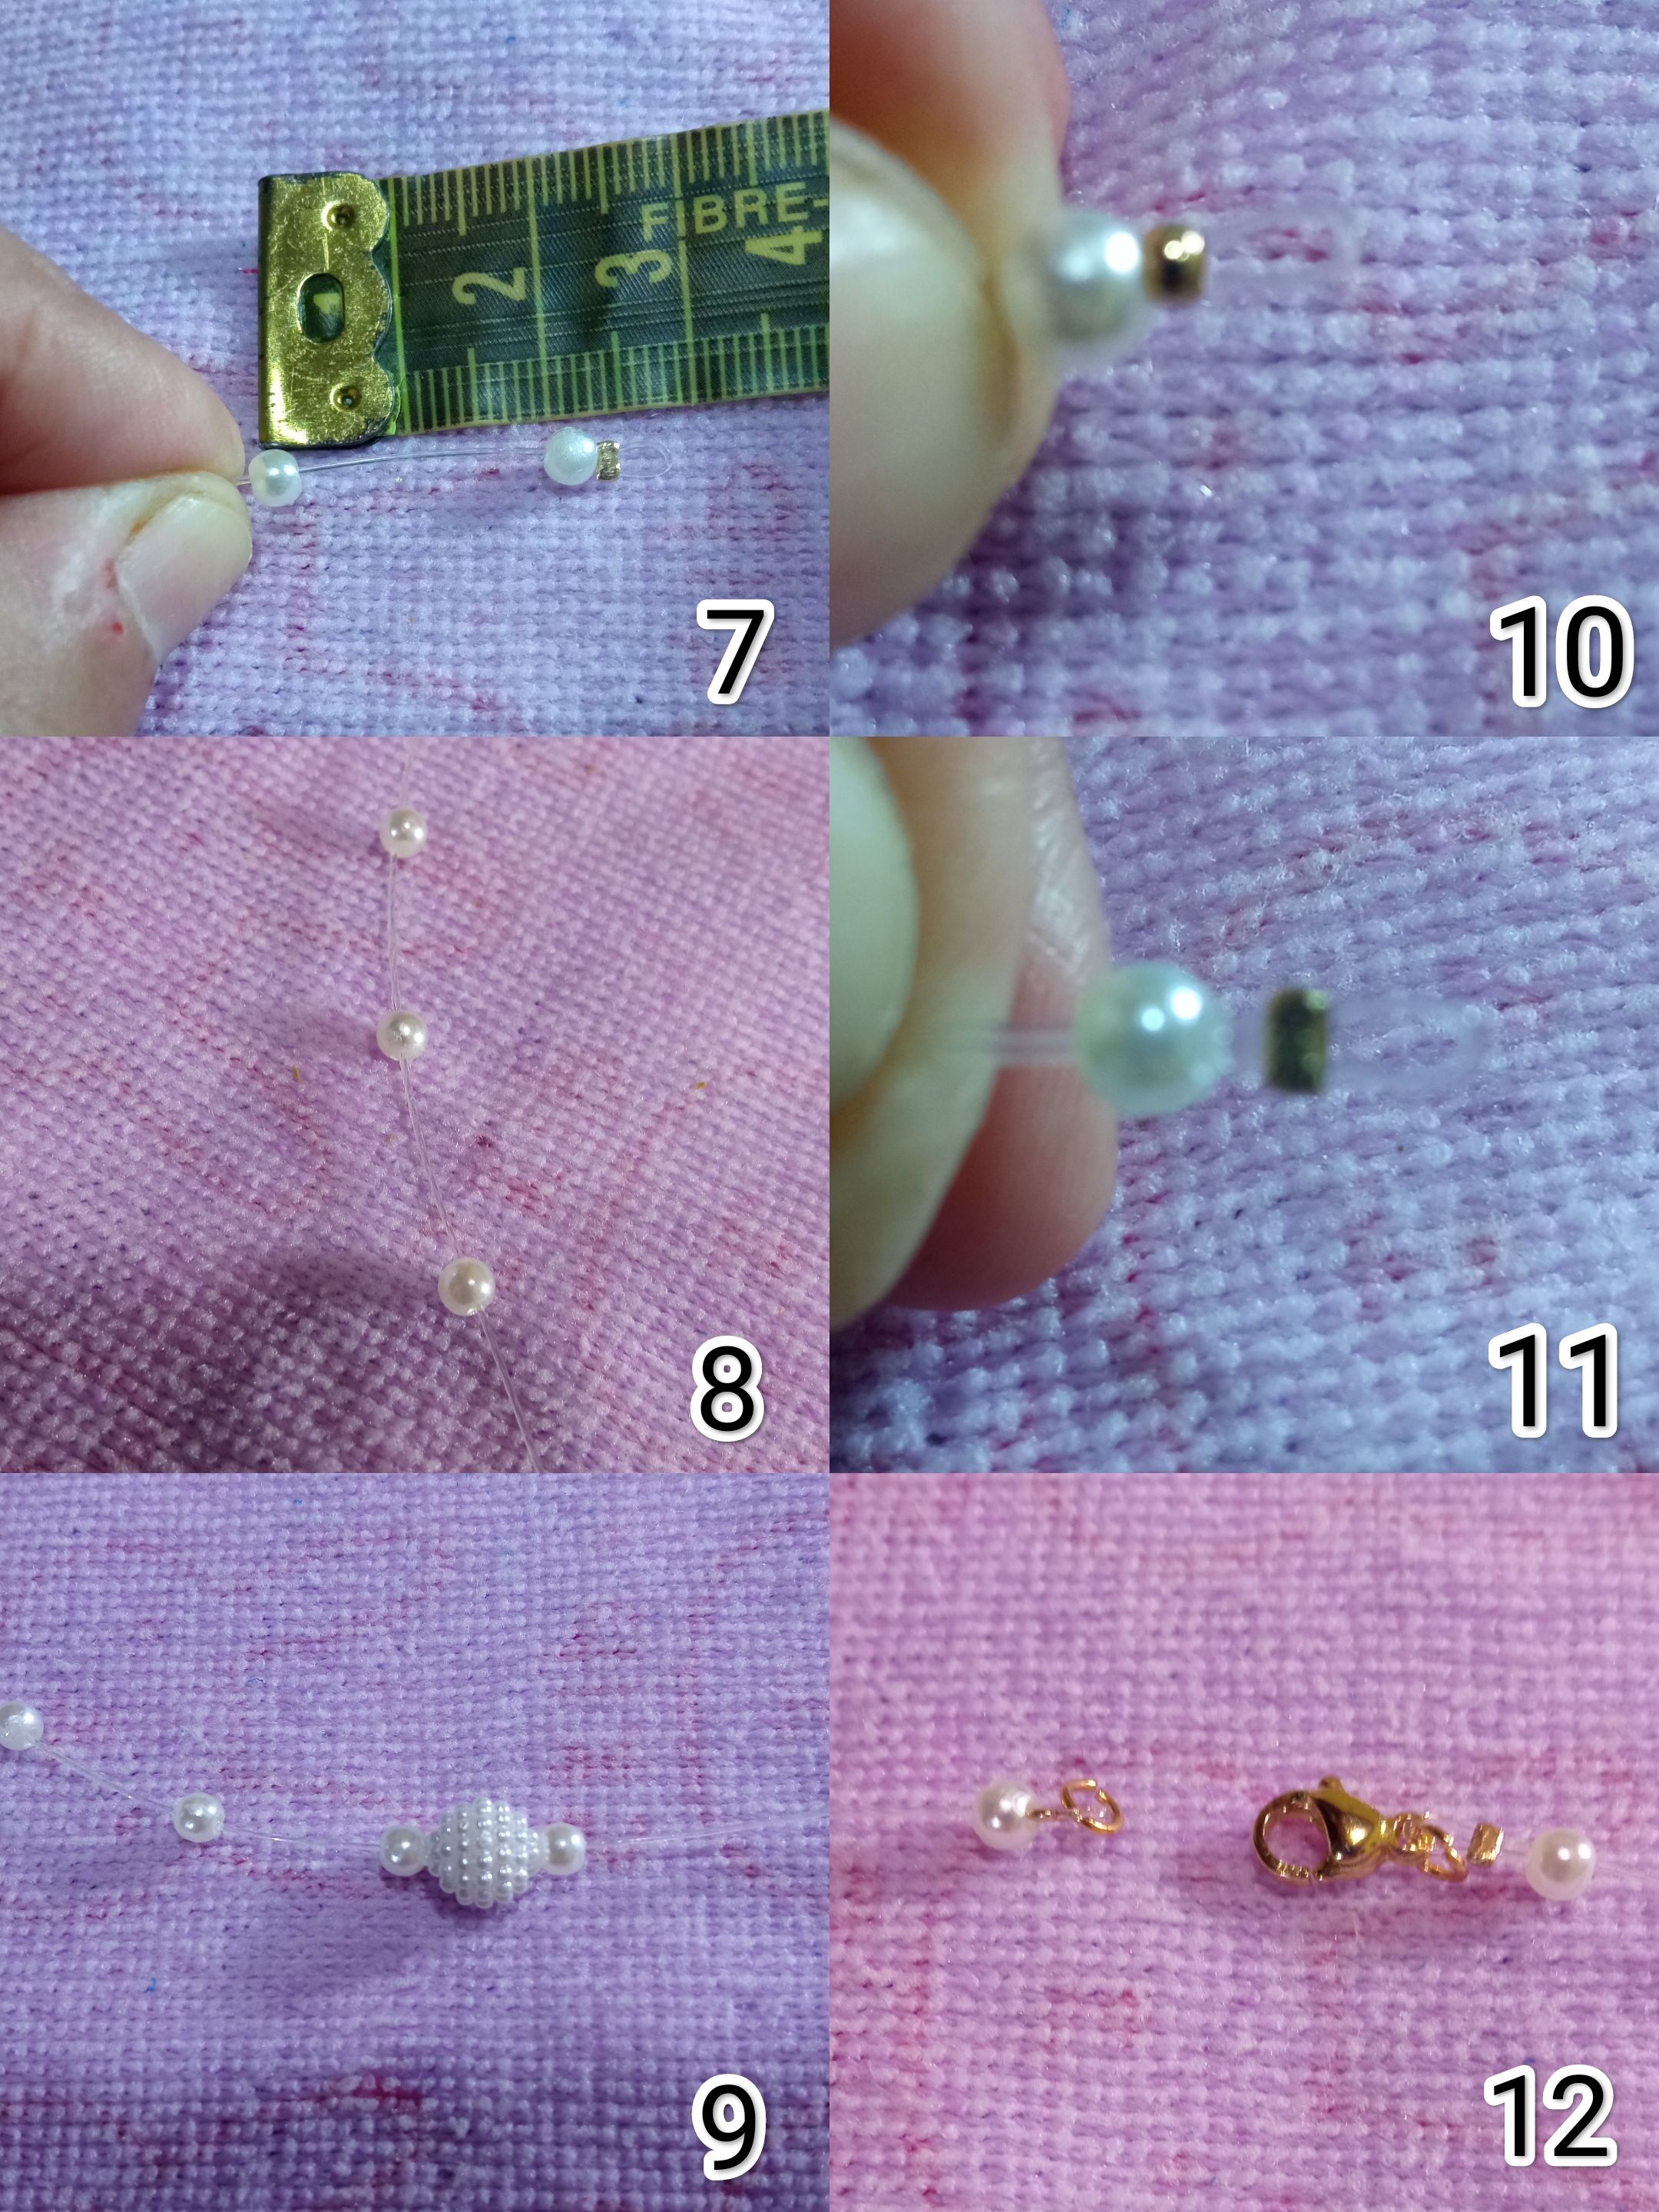
Tutorial o paso a paso.
Corto un tramo de hilo nylon de 50 cm y en uno de los extremos coloco una grapa o escarlachin y aprieto dejando un lub y empiezo a colocar la primera perla cerca de la grapa, con el alfiler o aguja agarro un poquito de pegamento el cual coloco en la parte superior de un envase y lo coloco en el hilo nylon con mucho cuidado para evitar que se corra el pegamento y dejo la perla ahí por un rato sin moverla hasta que se pegue por completo , esto lo hago con la finalidad de que la perla no se mueva, se debe trabajar con mucho cuidado para evitar que el pegamento caiga en el espacio que debe quedar libre ( 1 al 6).
Tutorial or step-by-step guide.
I cut a 50 cm piece of nylon thread and attach a staple or scarlet pin to one end, tightening it to leave a loop. I then start to attach the first bead near the staple. Using the pin or needle, I pick up a little glue, which I place on top of a container, and carefully place it on the nylon thread to prevent the glue from running. I leave the bead there for a while without moving it until it is completely stuck. I do this so that the bead does not move. You must work very carefully to prevent the glue from falling into the space that must remain free (1 to 6).
Luego de colocar la primera perla mido con la cinta métrica una distancia de 2 cm y repito el proceso de colocar el punto de pegamento y colocar la siguiente perla , ese procedimiento lo repito hasta llegar al centro de la gargantilla y coloco 1 perla pequeña seguido de la cuenta o perla grande y luego otra perla pequeña, sigo colocando las perlas hasta completar el largo deseado , coloco la otra grapa aprieto y corto el hilo nylon restante , luego en uno de los extremo de la gargantilla coloco una argolla y el trancadero pico de loro y en el otro extremo coloco una argolla y doy por terminado este hermoso trabajo ( 7 al 12).
After placing the first bead, I measure a distance of 2 cm with the tape measure and repeat the process of placing the dot of glue and placing the next bead. I repeat this procedure until I reach the center of the necklace and place one small bead followed by the large bead or pearl and then another small bead. I continue placing the beads until I reach the desired length, place the other clasp, tighten it, and cut the remaining nylon thread. Then, at one end of the necklace, I place a ring and the parrot's beak clasp, and at the other end, I place a ring, and I finish this beautiful work (7 to 12).
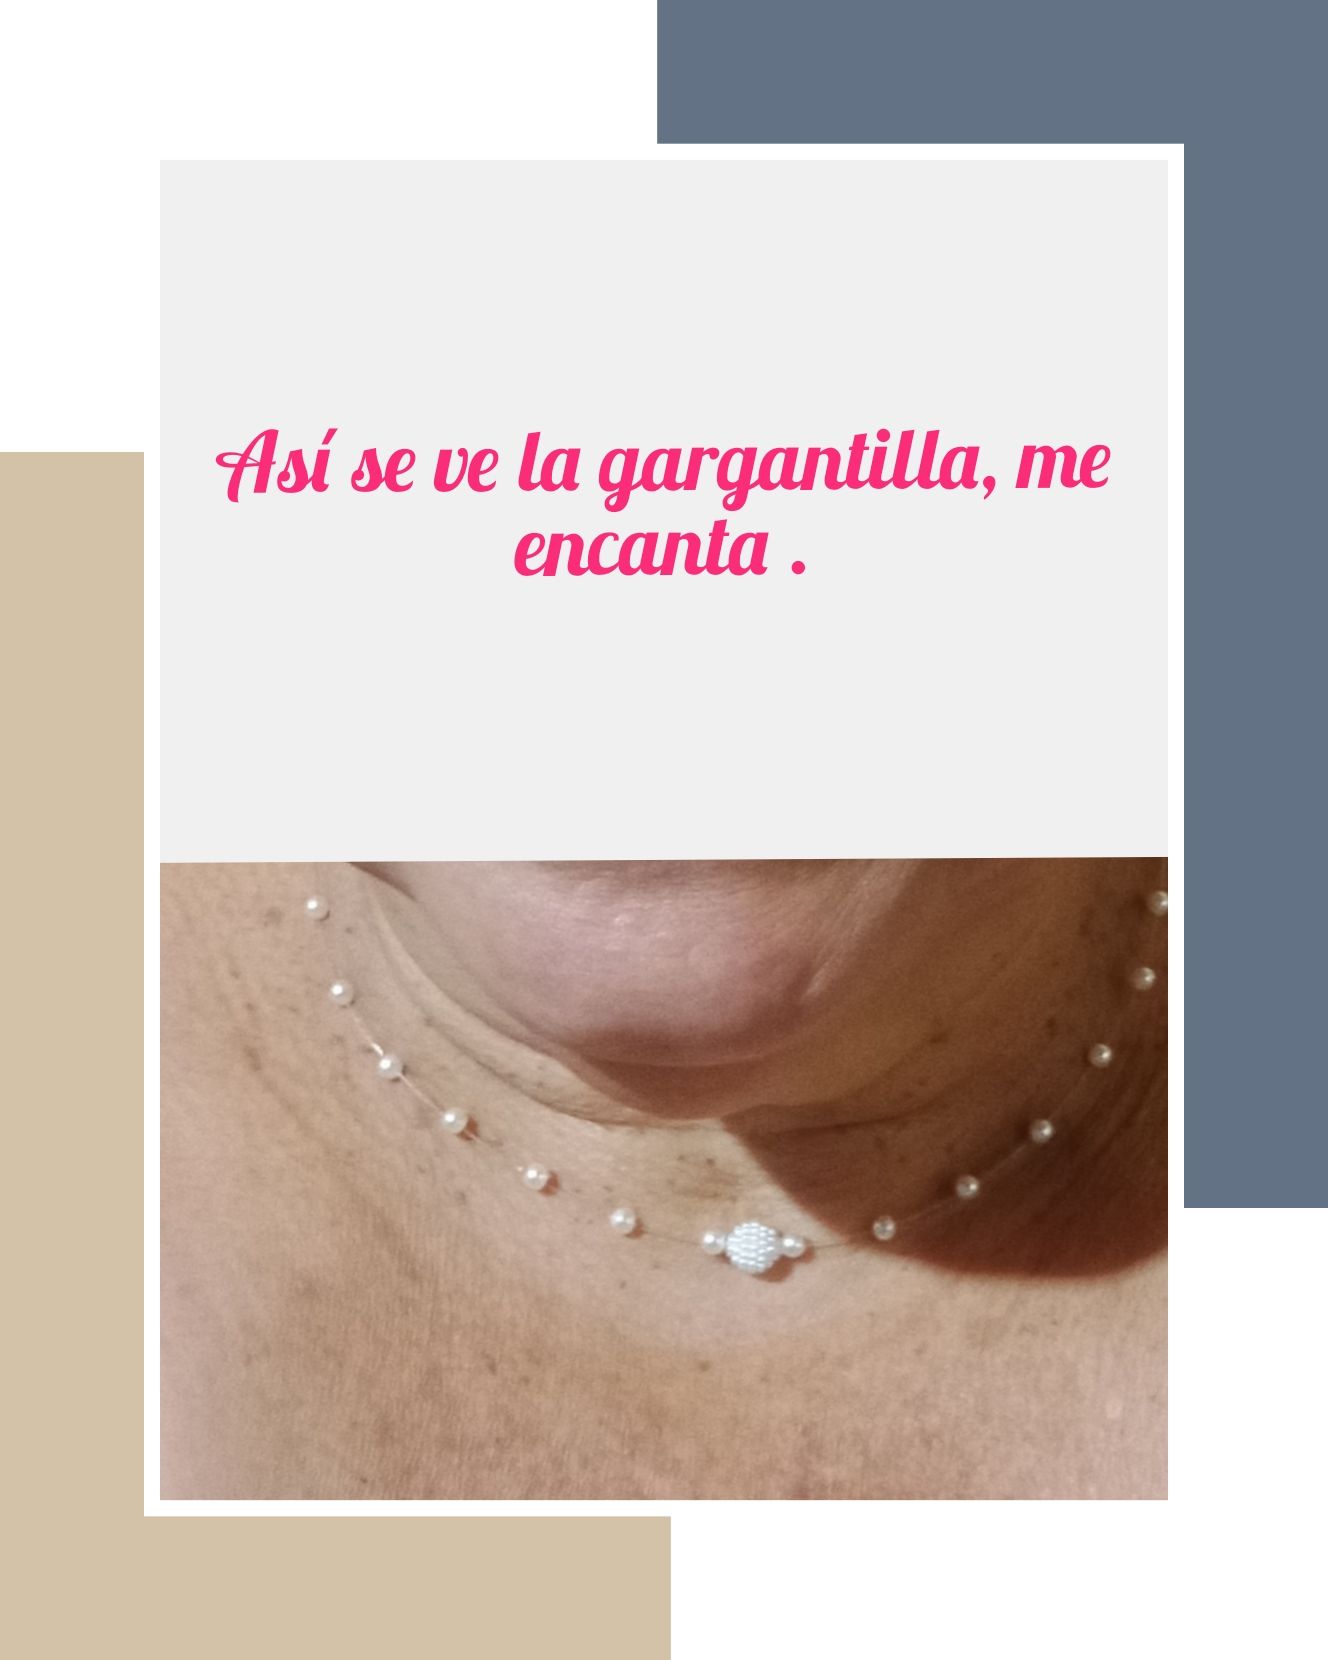
Espero les haya gustado el proyecto y el paso a paso descrito , será hasta una próxima oportunidad, tengan todos un excelente fin de semana, un abrazo.
I hope you liked the project and the step-by-step instructions. Until next time, have a great weekend, everyone. Best wishes.
Todas las fotos son de mi autoría @Lupasbra21 fueron tomadas con mi teléfono inteligente Redmi 9 . Usé la aplicación polish para la edición de fotos. Usé el traductor Deepl translate.
All photos are my own @Lupasbra21 and were taken with my Redmi 9 smartphone. I used the Polish app for photo editing. I used the Deepl translate translator.