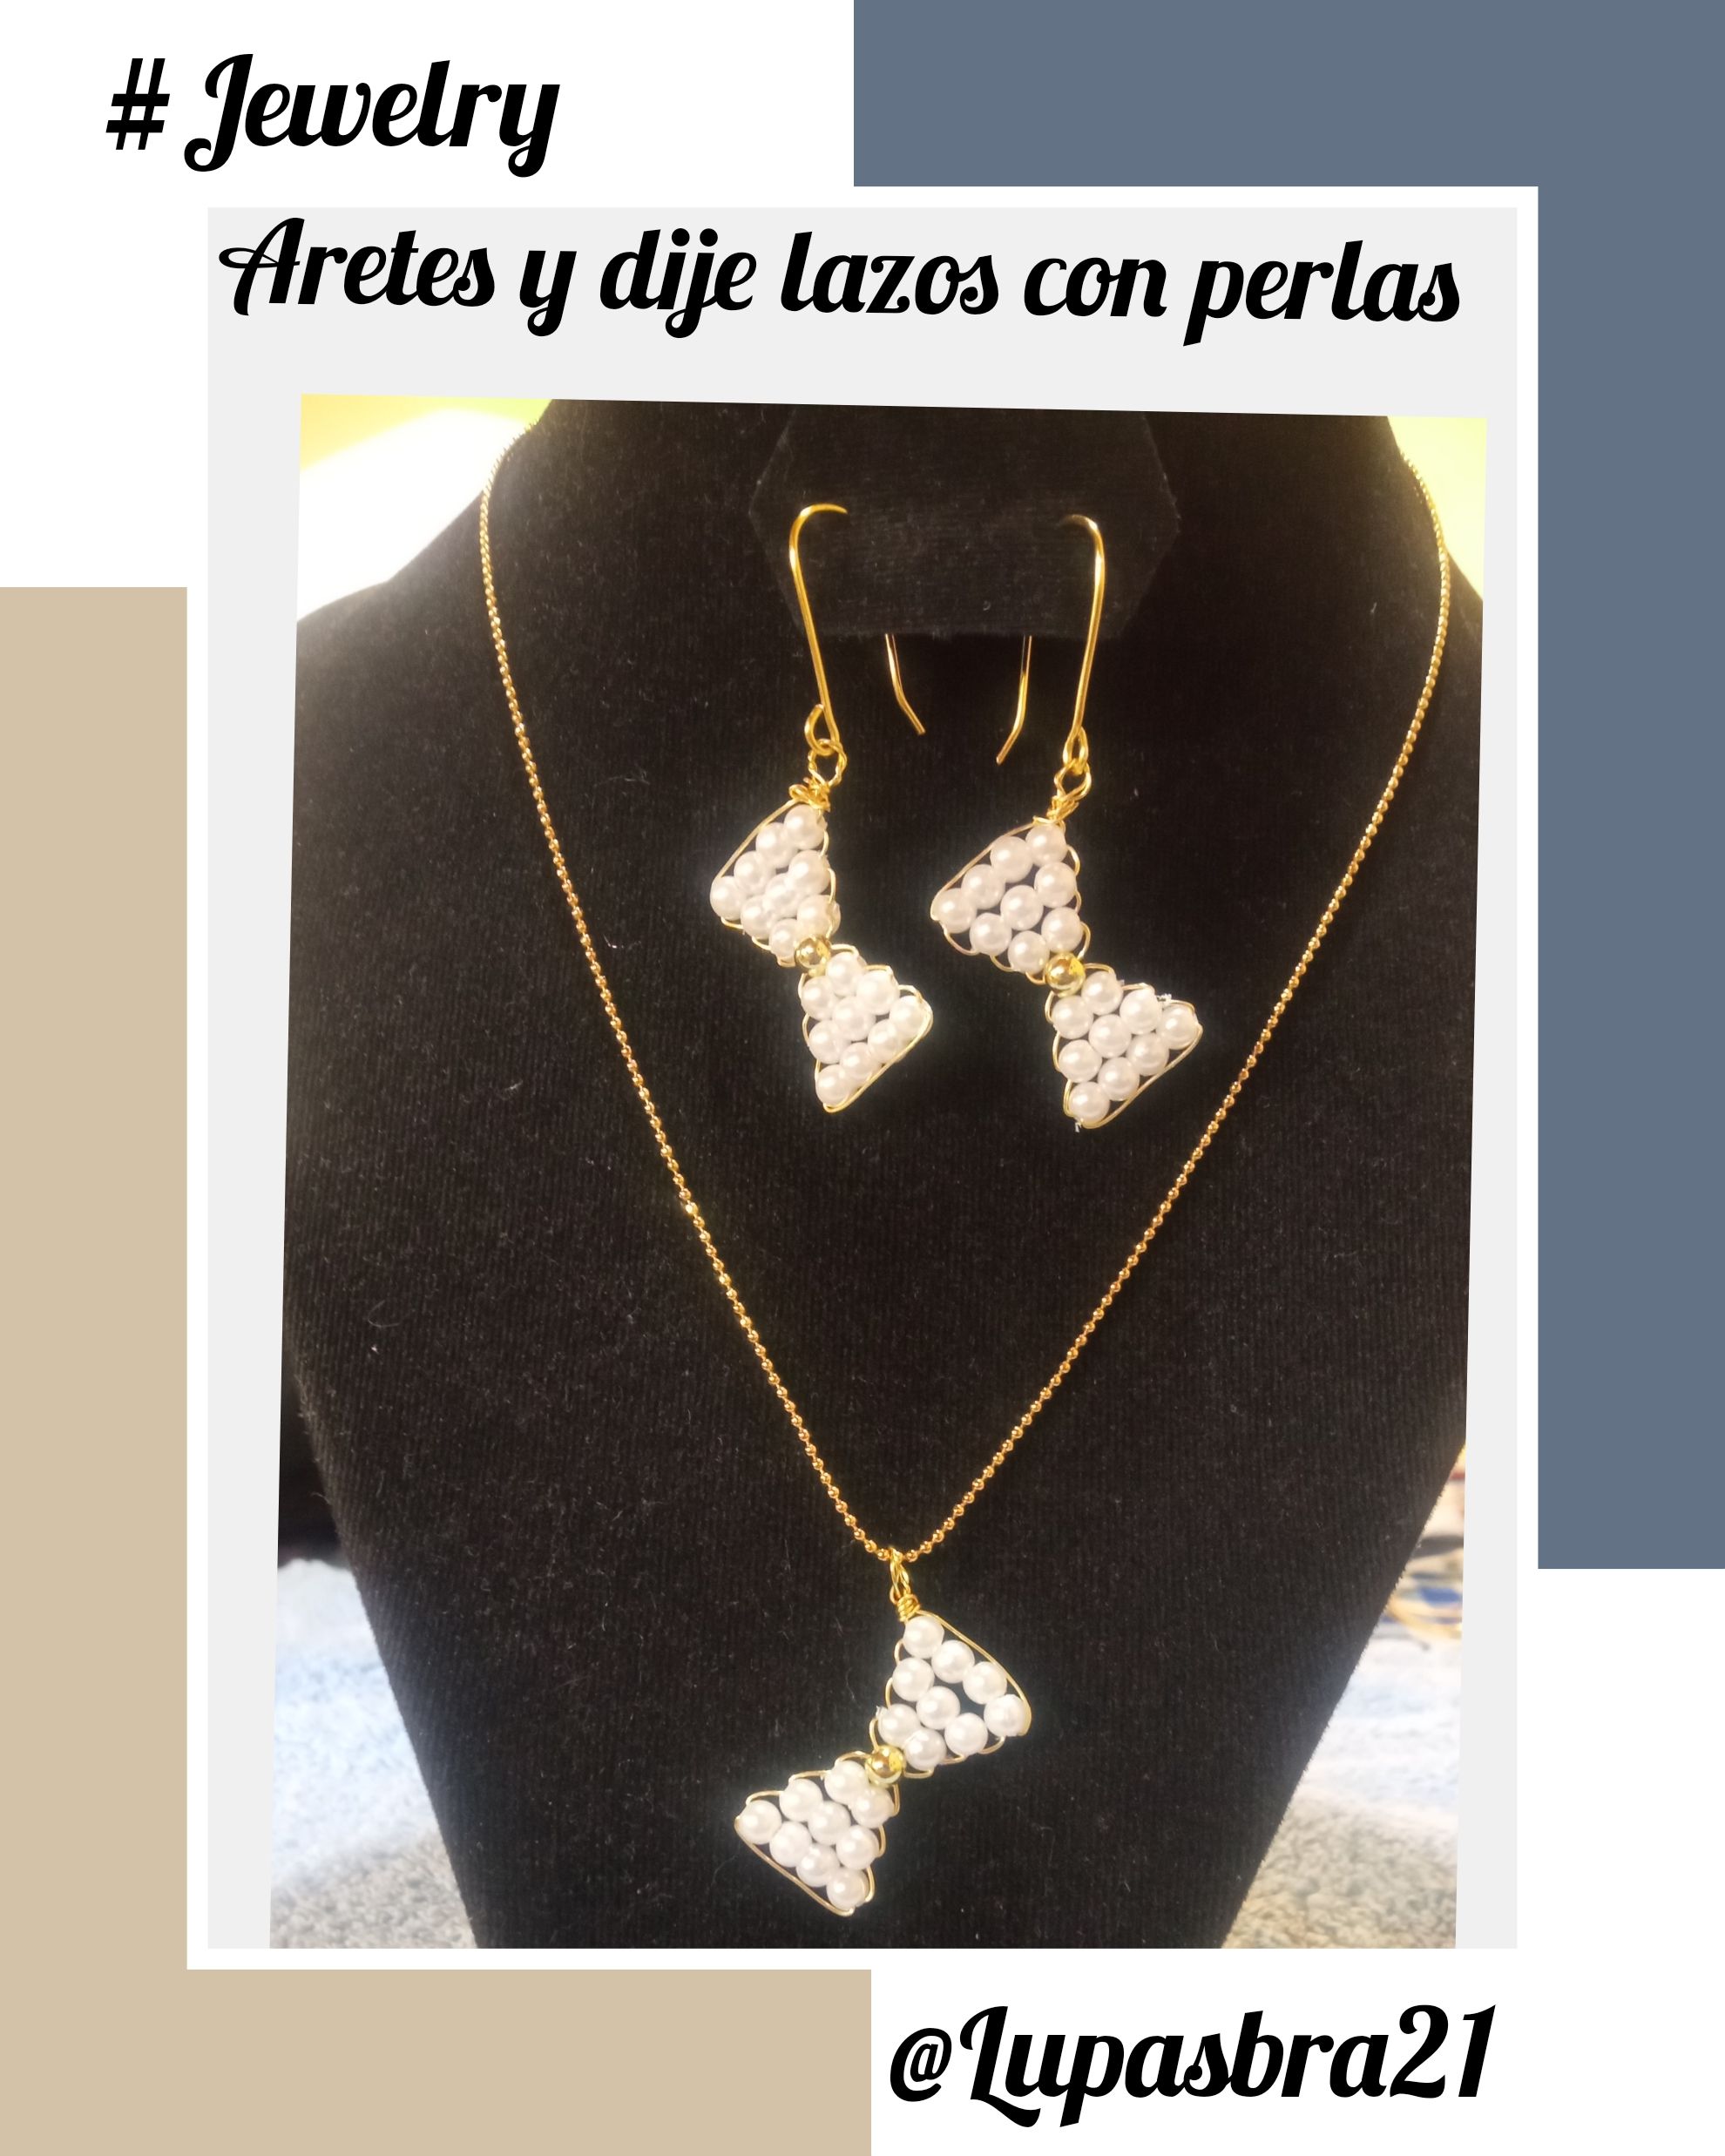
*** BIENVENIDOS TODOS A MI BLOG***
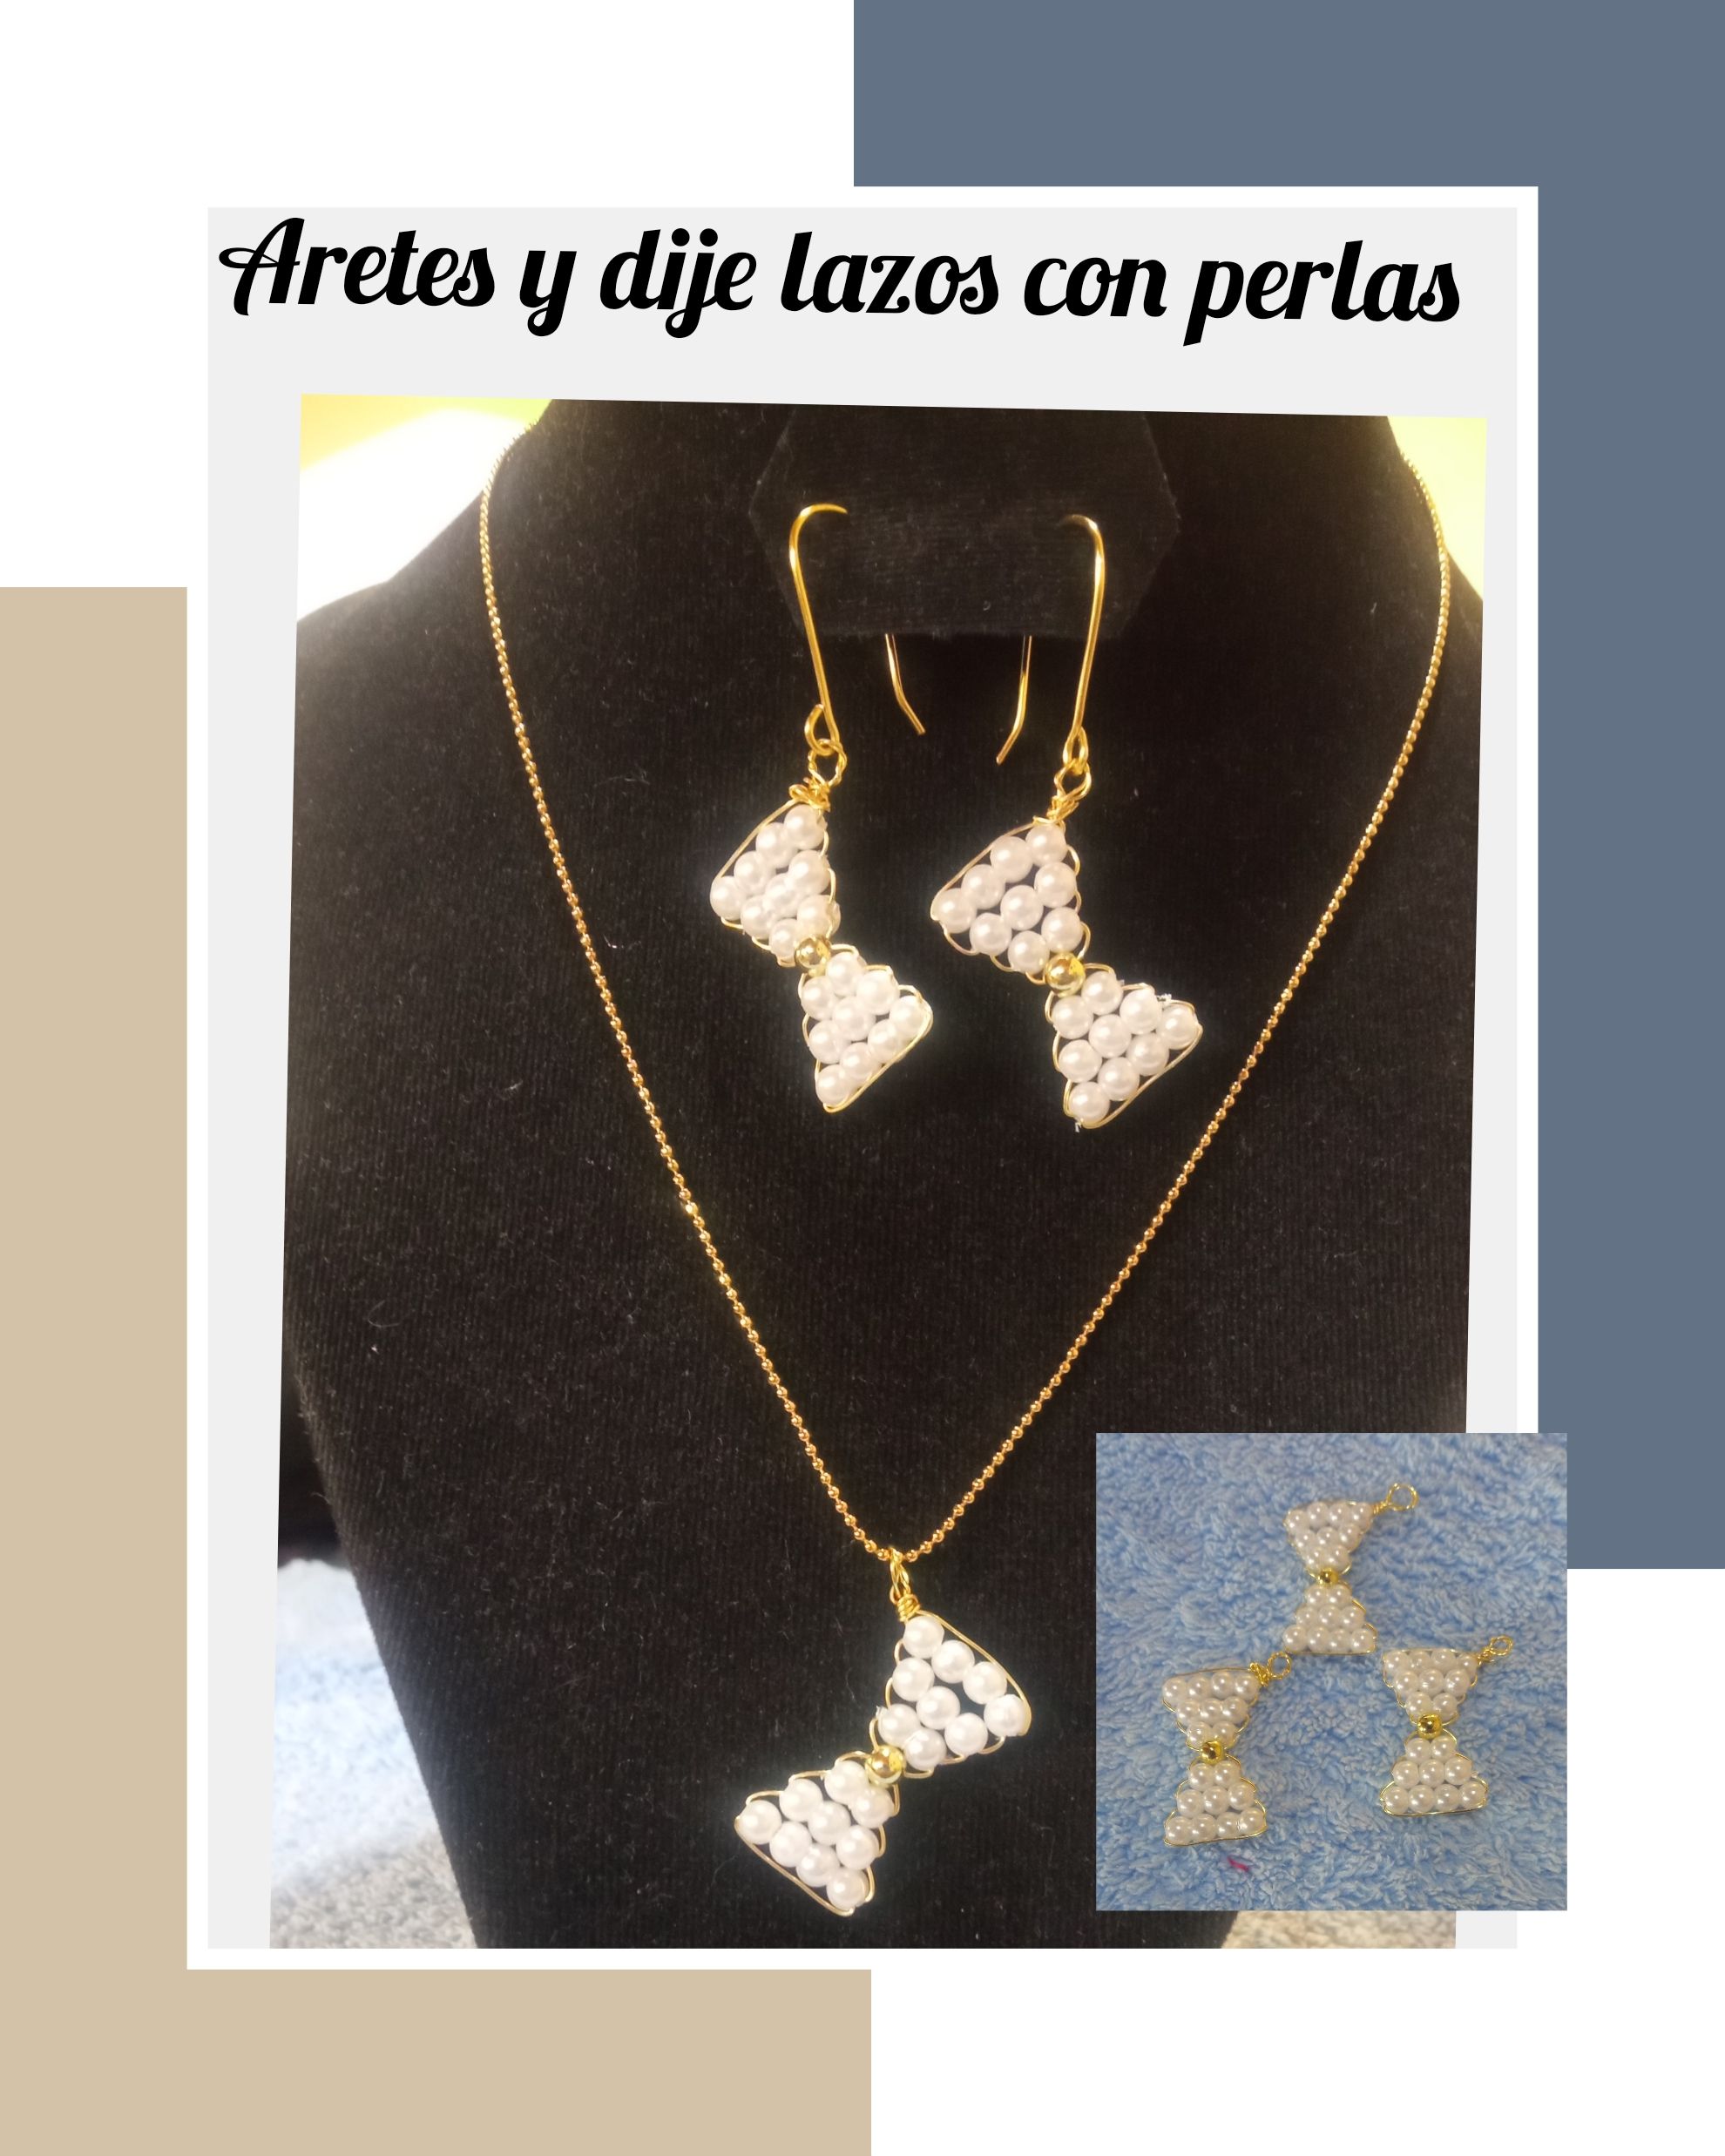
Saludos comunidad de #Hive y hermosa comunidad de #Jewelry deseo se encuentren todos bien , que tengan una buena y bendecida semana, que el éxito y la abundancia los acompañen siempre , hoy les vengo a compartir con mucho cariño el tutorial o paso a paso como realicé un hermoso juego de aretes y dije para cadena en forma de lazo con perlas acrílicas y alambre tpc un diseño sencillo pero hermoso y delicado ideal para lucirlo en cualquier ocasión y puede ser combinado con un oufith casual o un poco mas formal, así que los invito a quedarse y ver el paso a paso .
*** WELCOME EVERYONE TO MY BLOG***
Greetings #Hive community and beautiful community of #Jewelry I wish you all well, have a good and blessed week, may success and abundance accompany you always , today I come to share with much affection the tutorial or step by step how I made a beautiful set of earrings and pendant for chain in the form of loop with acrylic pearls and wire tpc a simple but beautiful and delicate design ideal to wear on any occasion and can be combined with a casual oufith or a little more formal, so I invite you to stay and see the step by step .
Materiales a utilizar.
☑️ Perlas acrílicas No 2. ☑️ Alambre tpc No 20 y 26. ☑️ Una cadena en Goldfield. ☑️ 3 balines en acero No 4. ☑️ Pinza piqueta. ☑️ Pinza punta redonda. ☑️ Pinza punta plana. ☑️ Lima de uñas.
Materials to be used.
☑️ No 2 acrylic beads. ☑️ Tpc wire No 20 and 26. ☑️ One Goldfield chain. ☑️ 3 No 4 steel pellets. ☑️ Pickaxe pliers. ☑️ Round nose pliers. ☑️ Flat nose pliers. ☑️ Nail file.
Tutorial o paso a paso
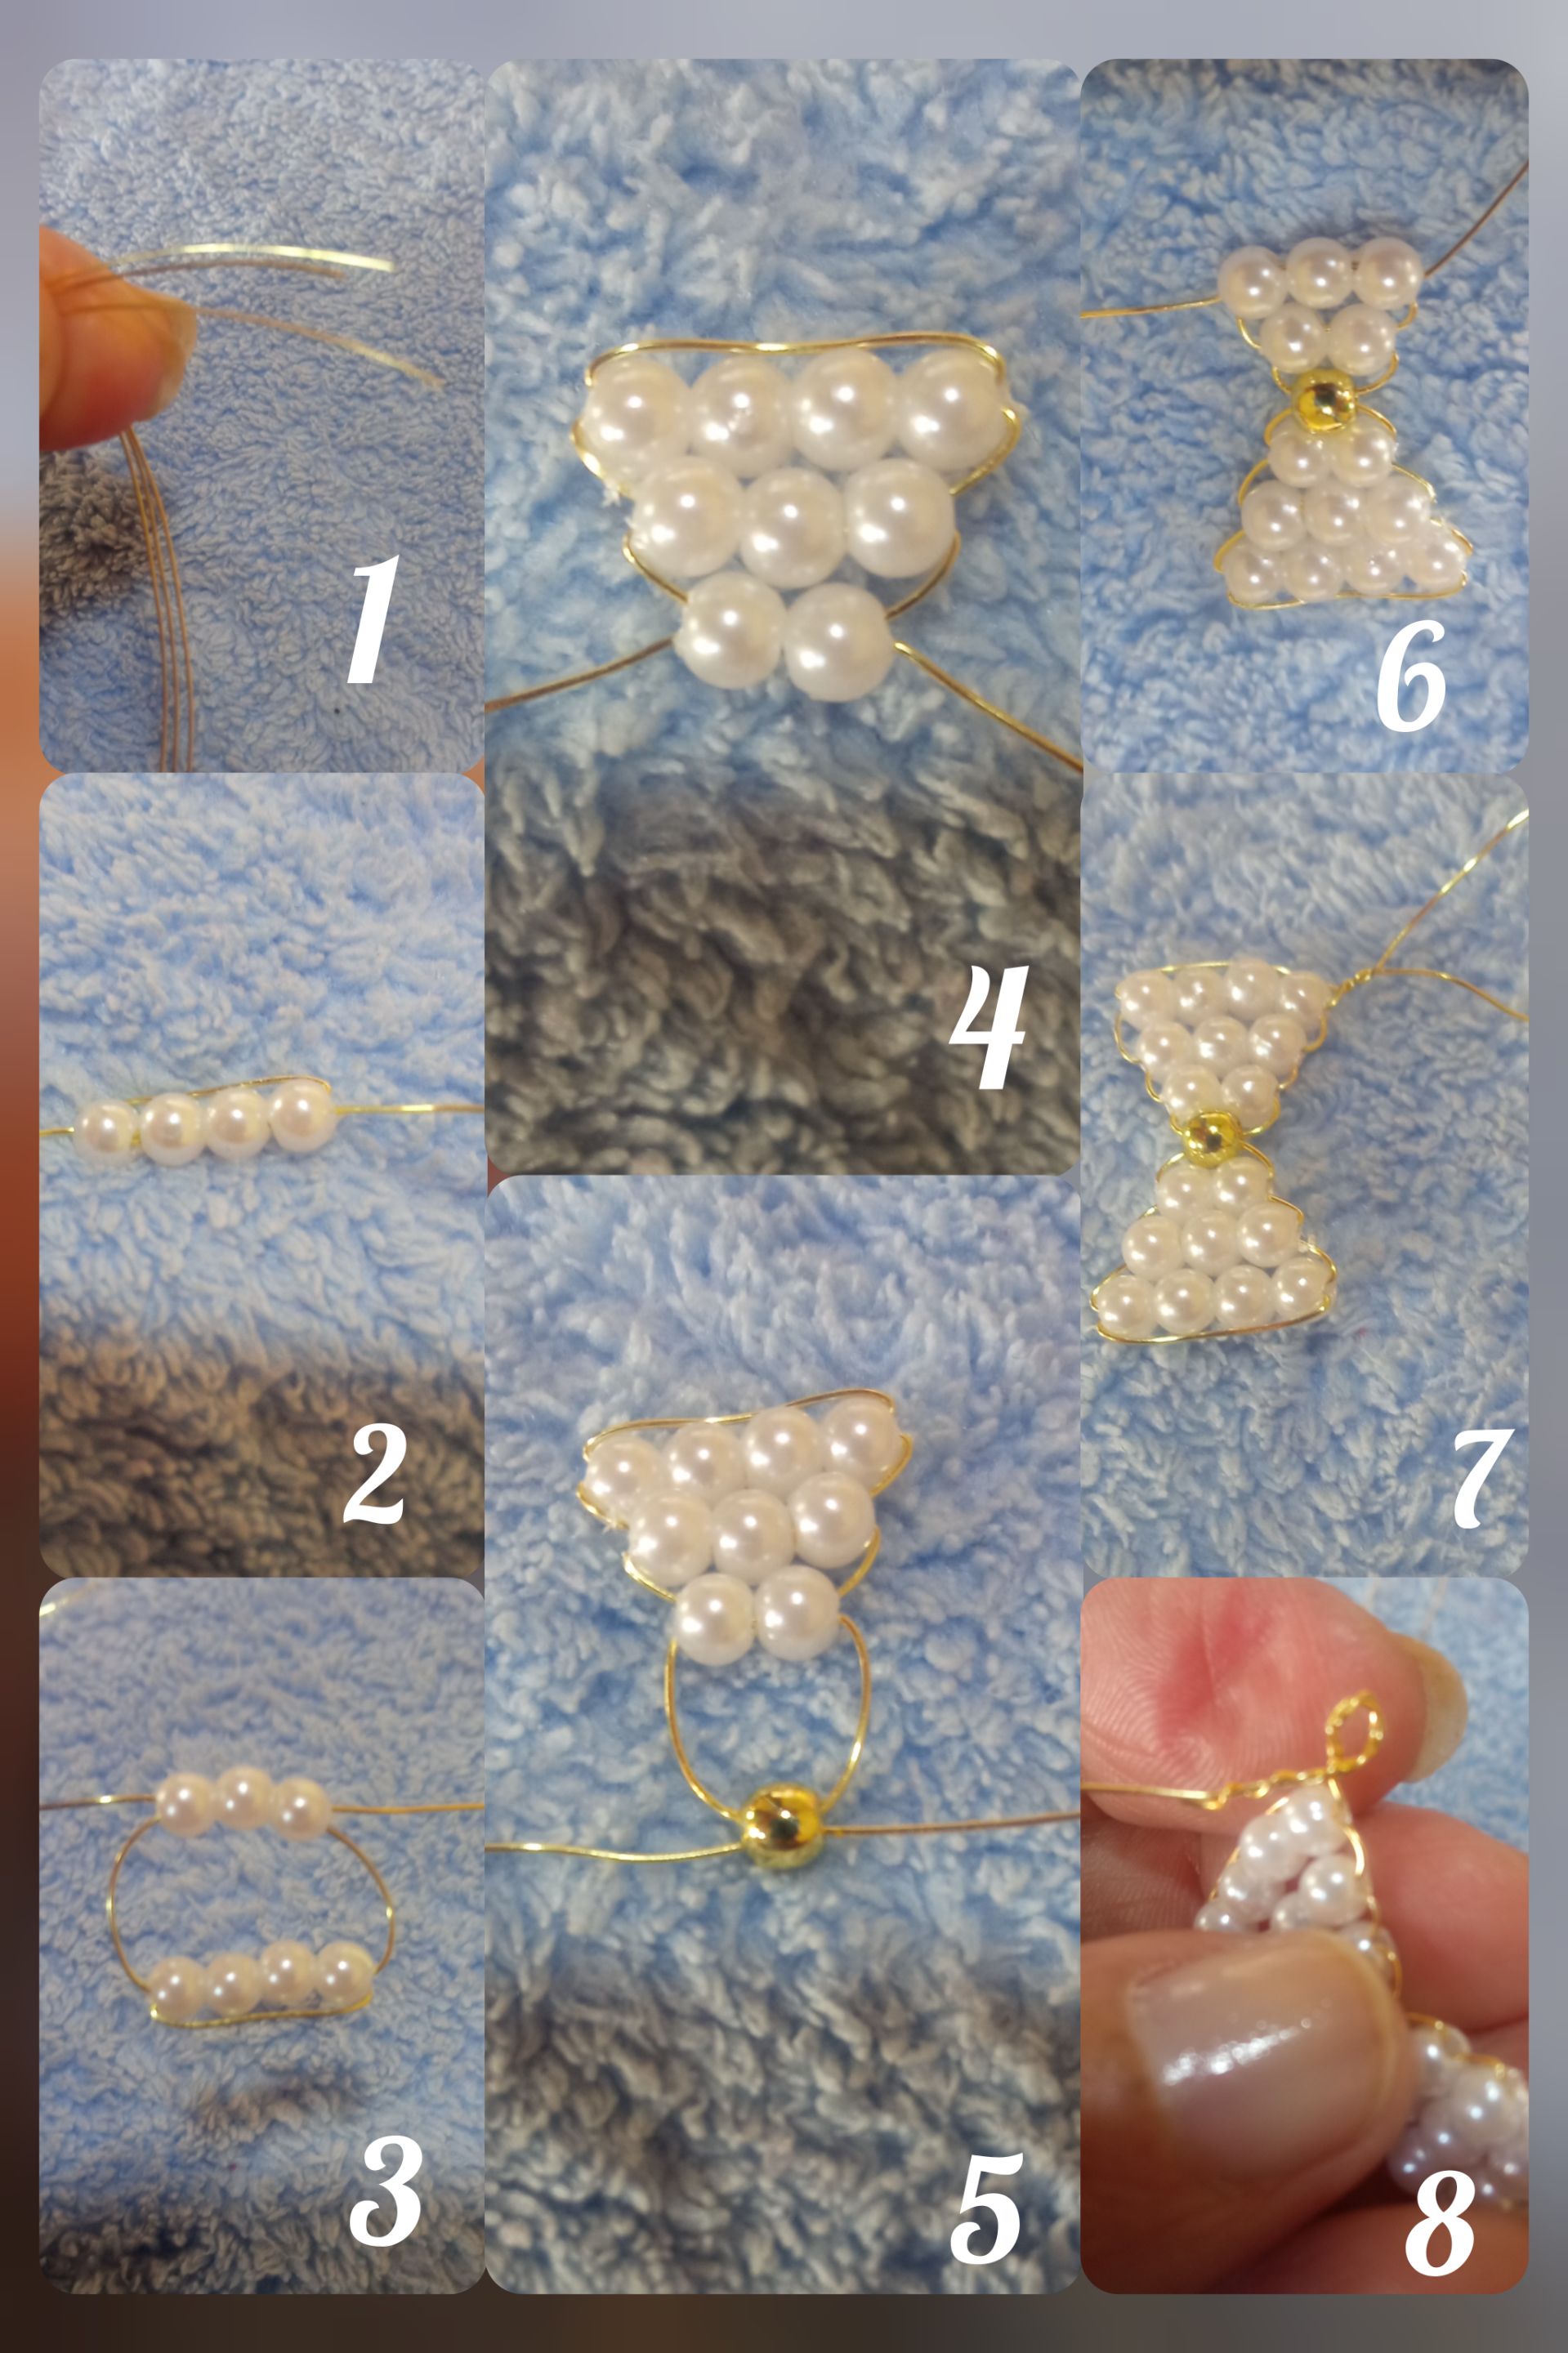
Inicio cortando tres tramos de alambre tpc No 26 de 25 cm cada uno, luego en uno de los alambres introduzco primero 4 perlas las llevo al medio del alambre y cruzo el alambre entre las perlas quedando una primera línea bordeada por el alambre en la parte de arriba , luego introduzco 3 perlas y cruzo los alambres luego 2 perlas cruzo e introduzco 1 balín en acero No 4 , repito ese mismo procedimiento en el otro extremo y llevo uno de los alambres al otro extremo y doy varias vueltas para unirlos ,esto debo hacerlo con mucho cuidado ya que el alambre No 26 es muy delgado y tiende a romperse, luego con la pinza punta redonda realizo un lub o aro cerrando con varias vueltas,corto el excedente de alambre y aplano las puntas con la pinza punta plana para evitar que quede un alambre y pueda mome( 1 al 8 ).
Tutorial or step by step
I start by cutting three lengths of wire tpc No 26 of 25 cm each, then in one of the wires I introduce first 4 beads I take them to the middle of the wire and cross the wire between the beads leaving a first line bordered by the wire at the top, then I introduce 3 beads and cross the wires then 2 beads I cross and introduce 1 No 4 steel pellet , I repeat the same procedure at the other end and take one of the wires to the other end and give several turns to join them, I must do this very carefully because the wire No 26 is very thin and tends to break, then with the round tip pliers I make a lub or ring closing with several turns, cut the excess wire and flatten the tips with the flat tip pliers to prevent a wire and can mome (1 to 8).
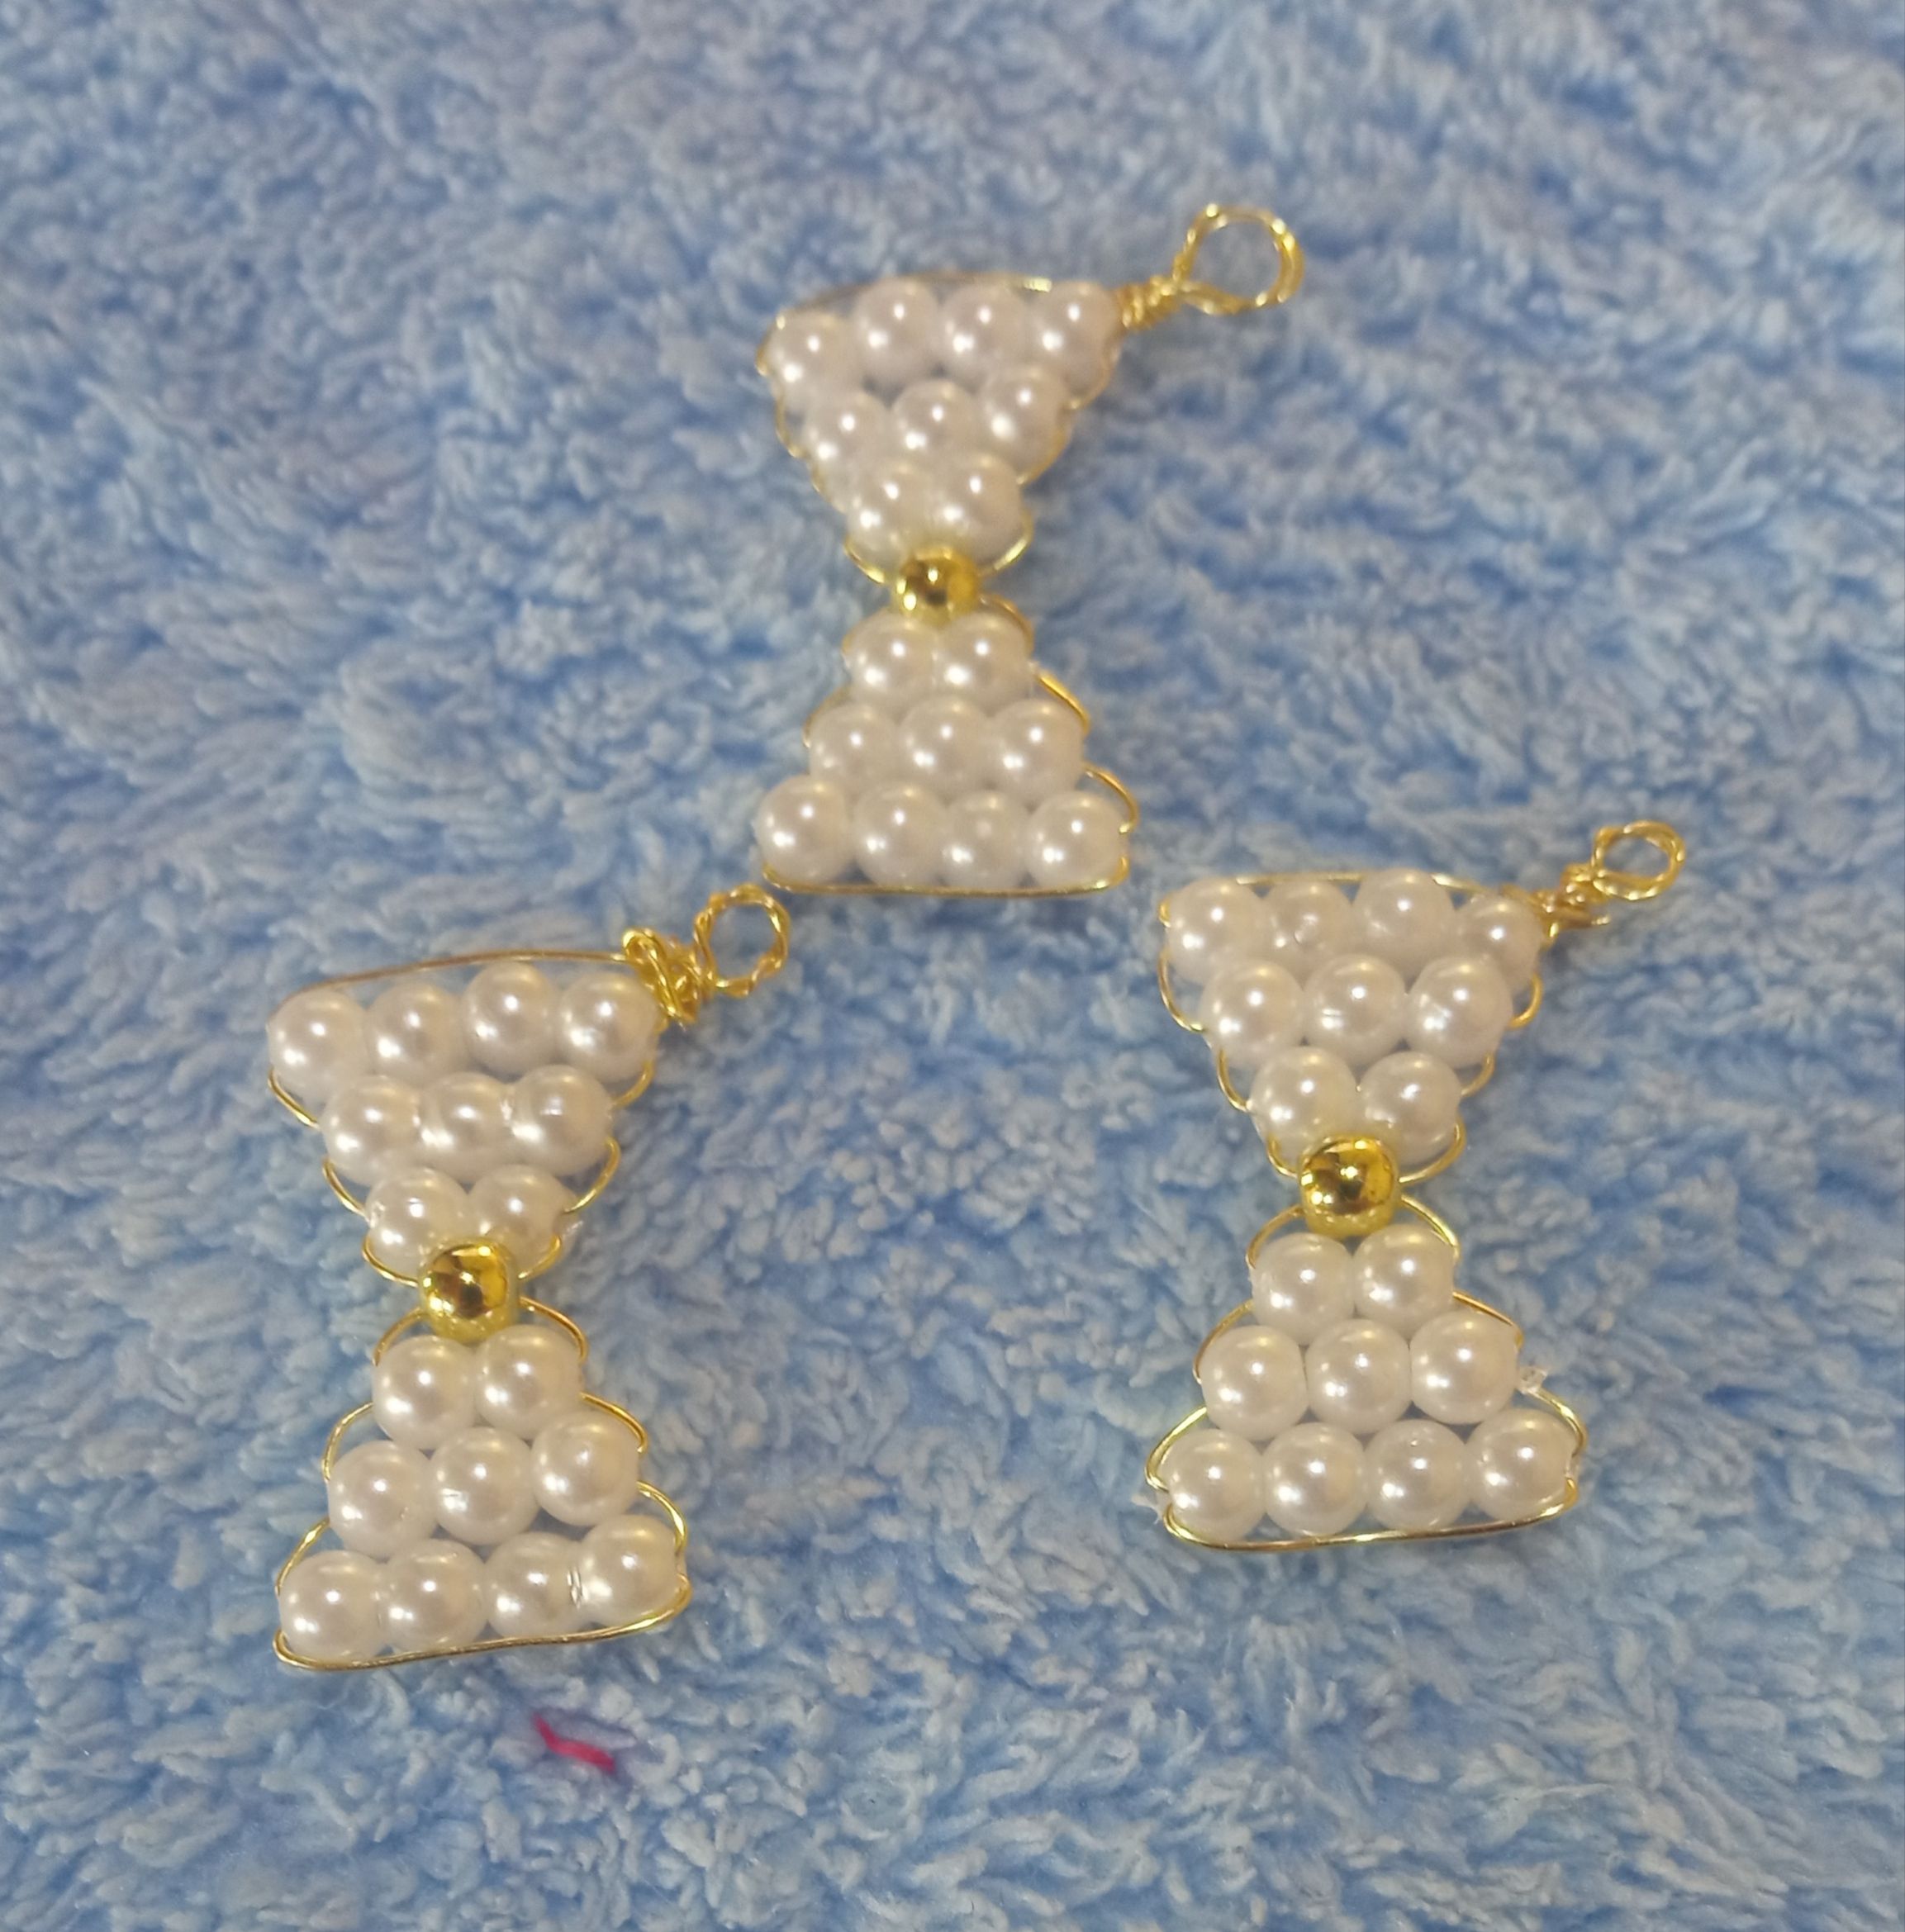
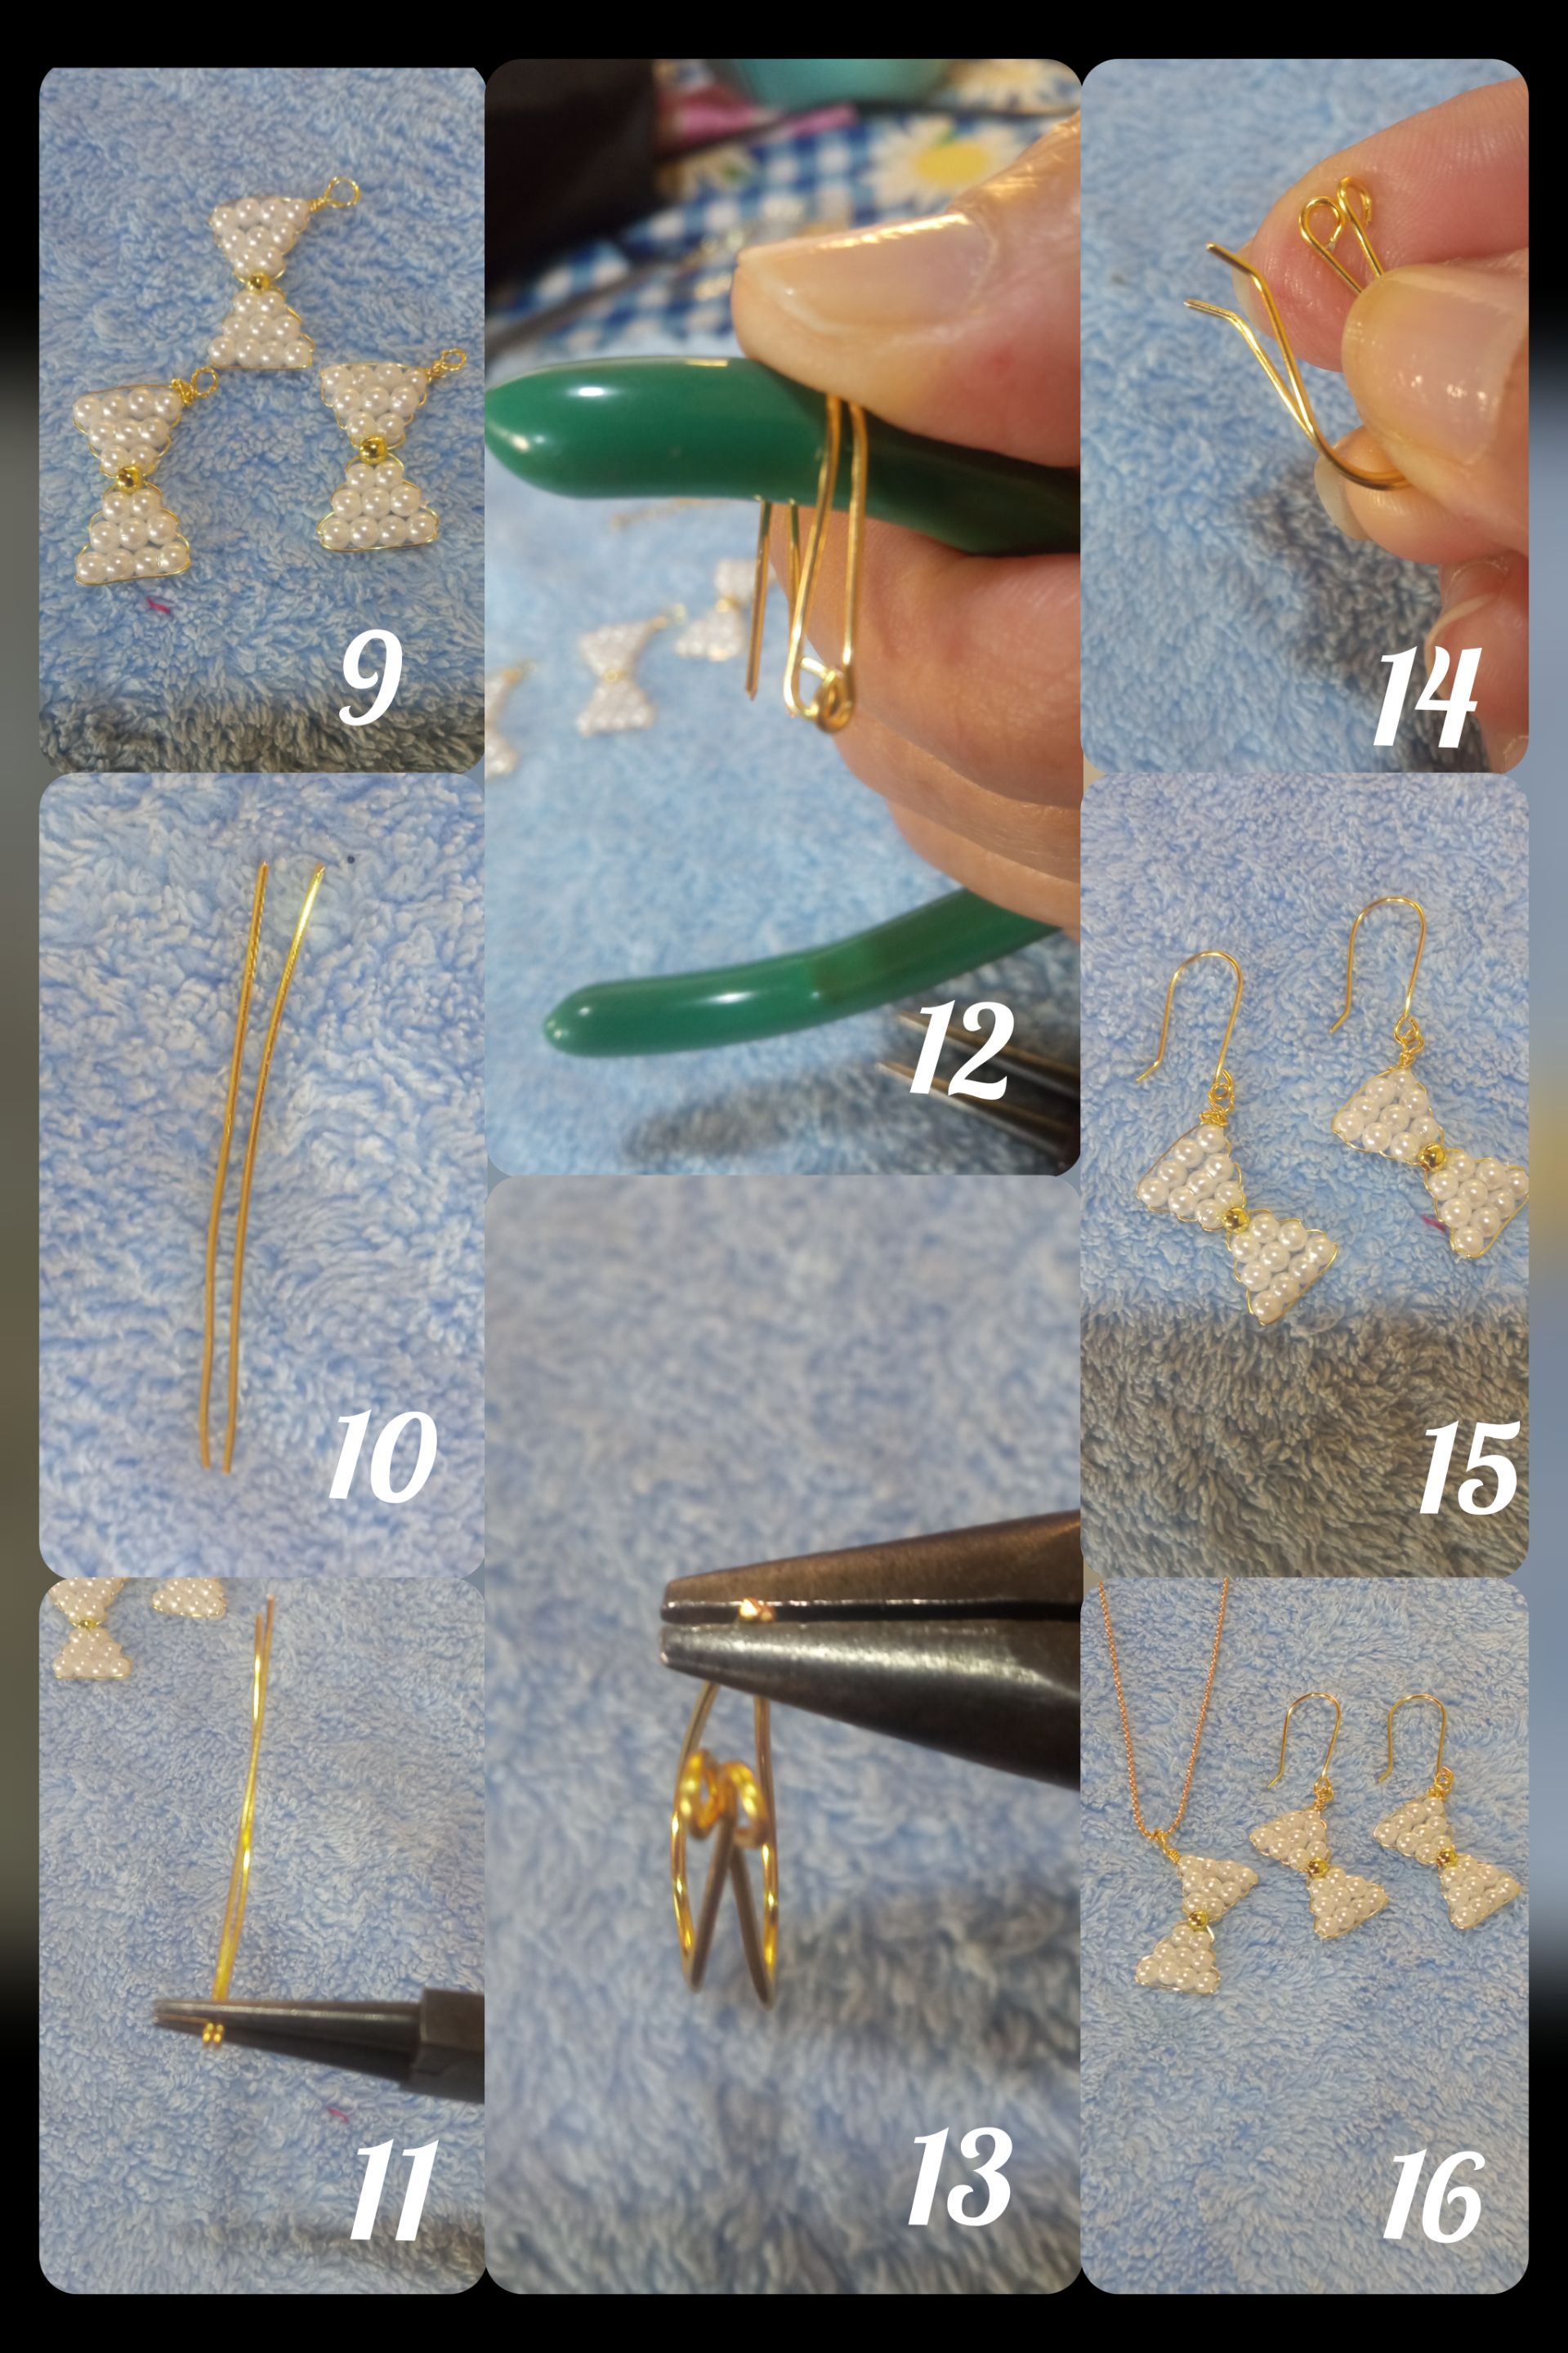
De esa misma manera realizo los otros dos lazos , en el lazo que voy a utilizar como dije el lub o aro lo realizo un poco más grande ya que es el que va a pasar por la cadena , luego paso a elaborar los anzuelos para los aretes corto 2 tramos de alambre tpc No 20 de 5 cm , junto los dos tramos de alambre y en uno de los extremos con la pinza punta redonda realizo un lub o aro, luego coloco ambos alambres en uno de los mangos de una pinza y doblo para realizar los anzuelos y que queden igual, luego con la pinza punta plana realizo un pequeño dobles en ambas puntas , luego abro el lub en los anzuelos y coloco los lazos correspondientes para los aretes y coloco el tercer lazo en la cadena , siempre reviso que este todo bien y así doy por terminado este bello proyecto ( 9 al 16).
In the same way I make the other two loops, in the loop that I am going to use as I said the lub or ring I make it a little bigger because it is the one that will go through the chain, then step to elaborate the hooks for the earrings I cut 2 lengths of wire tpc No 20 of 5 cm, together the two lengths of wire and at one end with the round tip pliers I make a lub or ring, then I place both wires in one of the handles of the pliers and bend them to make the hooks so that they are the same, then with the flat tip pliers I make a small double in both ends, then I open the lub in the hooks and place the corresponding loops for the earrings and place the third loop in the chain, I always check that everything is ok and so I finish this beautiful project(9 to 16).
Esperando sea de su agrado y estar pronto por acá con ustedes compartiendo mis trabajos.
I hope you like it and that I will be here soon sharing my work with you.
Todas las fotos son de mi autoría @Lupasbra21.
Usé la aplicación polish para la edición de fotos.
Usé el traductor Deepl translate.
All photos are by me @Lupasbra21.
I used the polish application for photo editing.
I used the translator Deepl translate.