Felíz y bendecido domingo queridos miembros de la comunidad DiyHub, espero se encuentren bien disfrutando del fin de semana, yo llegando hoy de la playa super agotada pero felíz, ya necesitaba un momento de descanso y distracción, la mejor terapia para mí, por otra parte me encuentro por en este espacio para compartir una vez mi participación en el concurso de arte Splinterlands semanal a través del arte de las manualidades utilizando diferentes materiales.
Happy and blessed Sunday dear members of the DiyHub community, I hope you are well enjoying the weekend, I arrived today from the beach super exhausted but happy, I needed a moment of rest and distraction, the best therapy for me, on the other hand I am in this space to share once again my participation in the weekly Splinterlands art contest through the art of crafts using different materials.

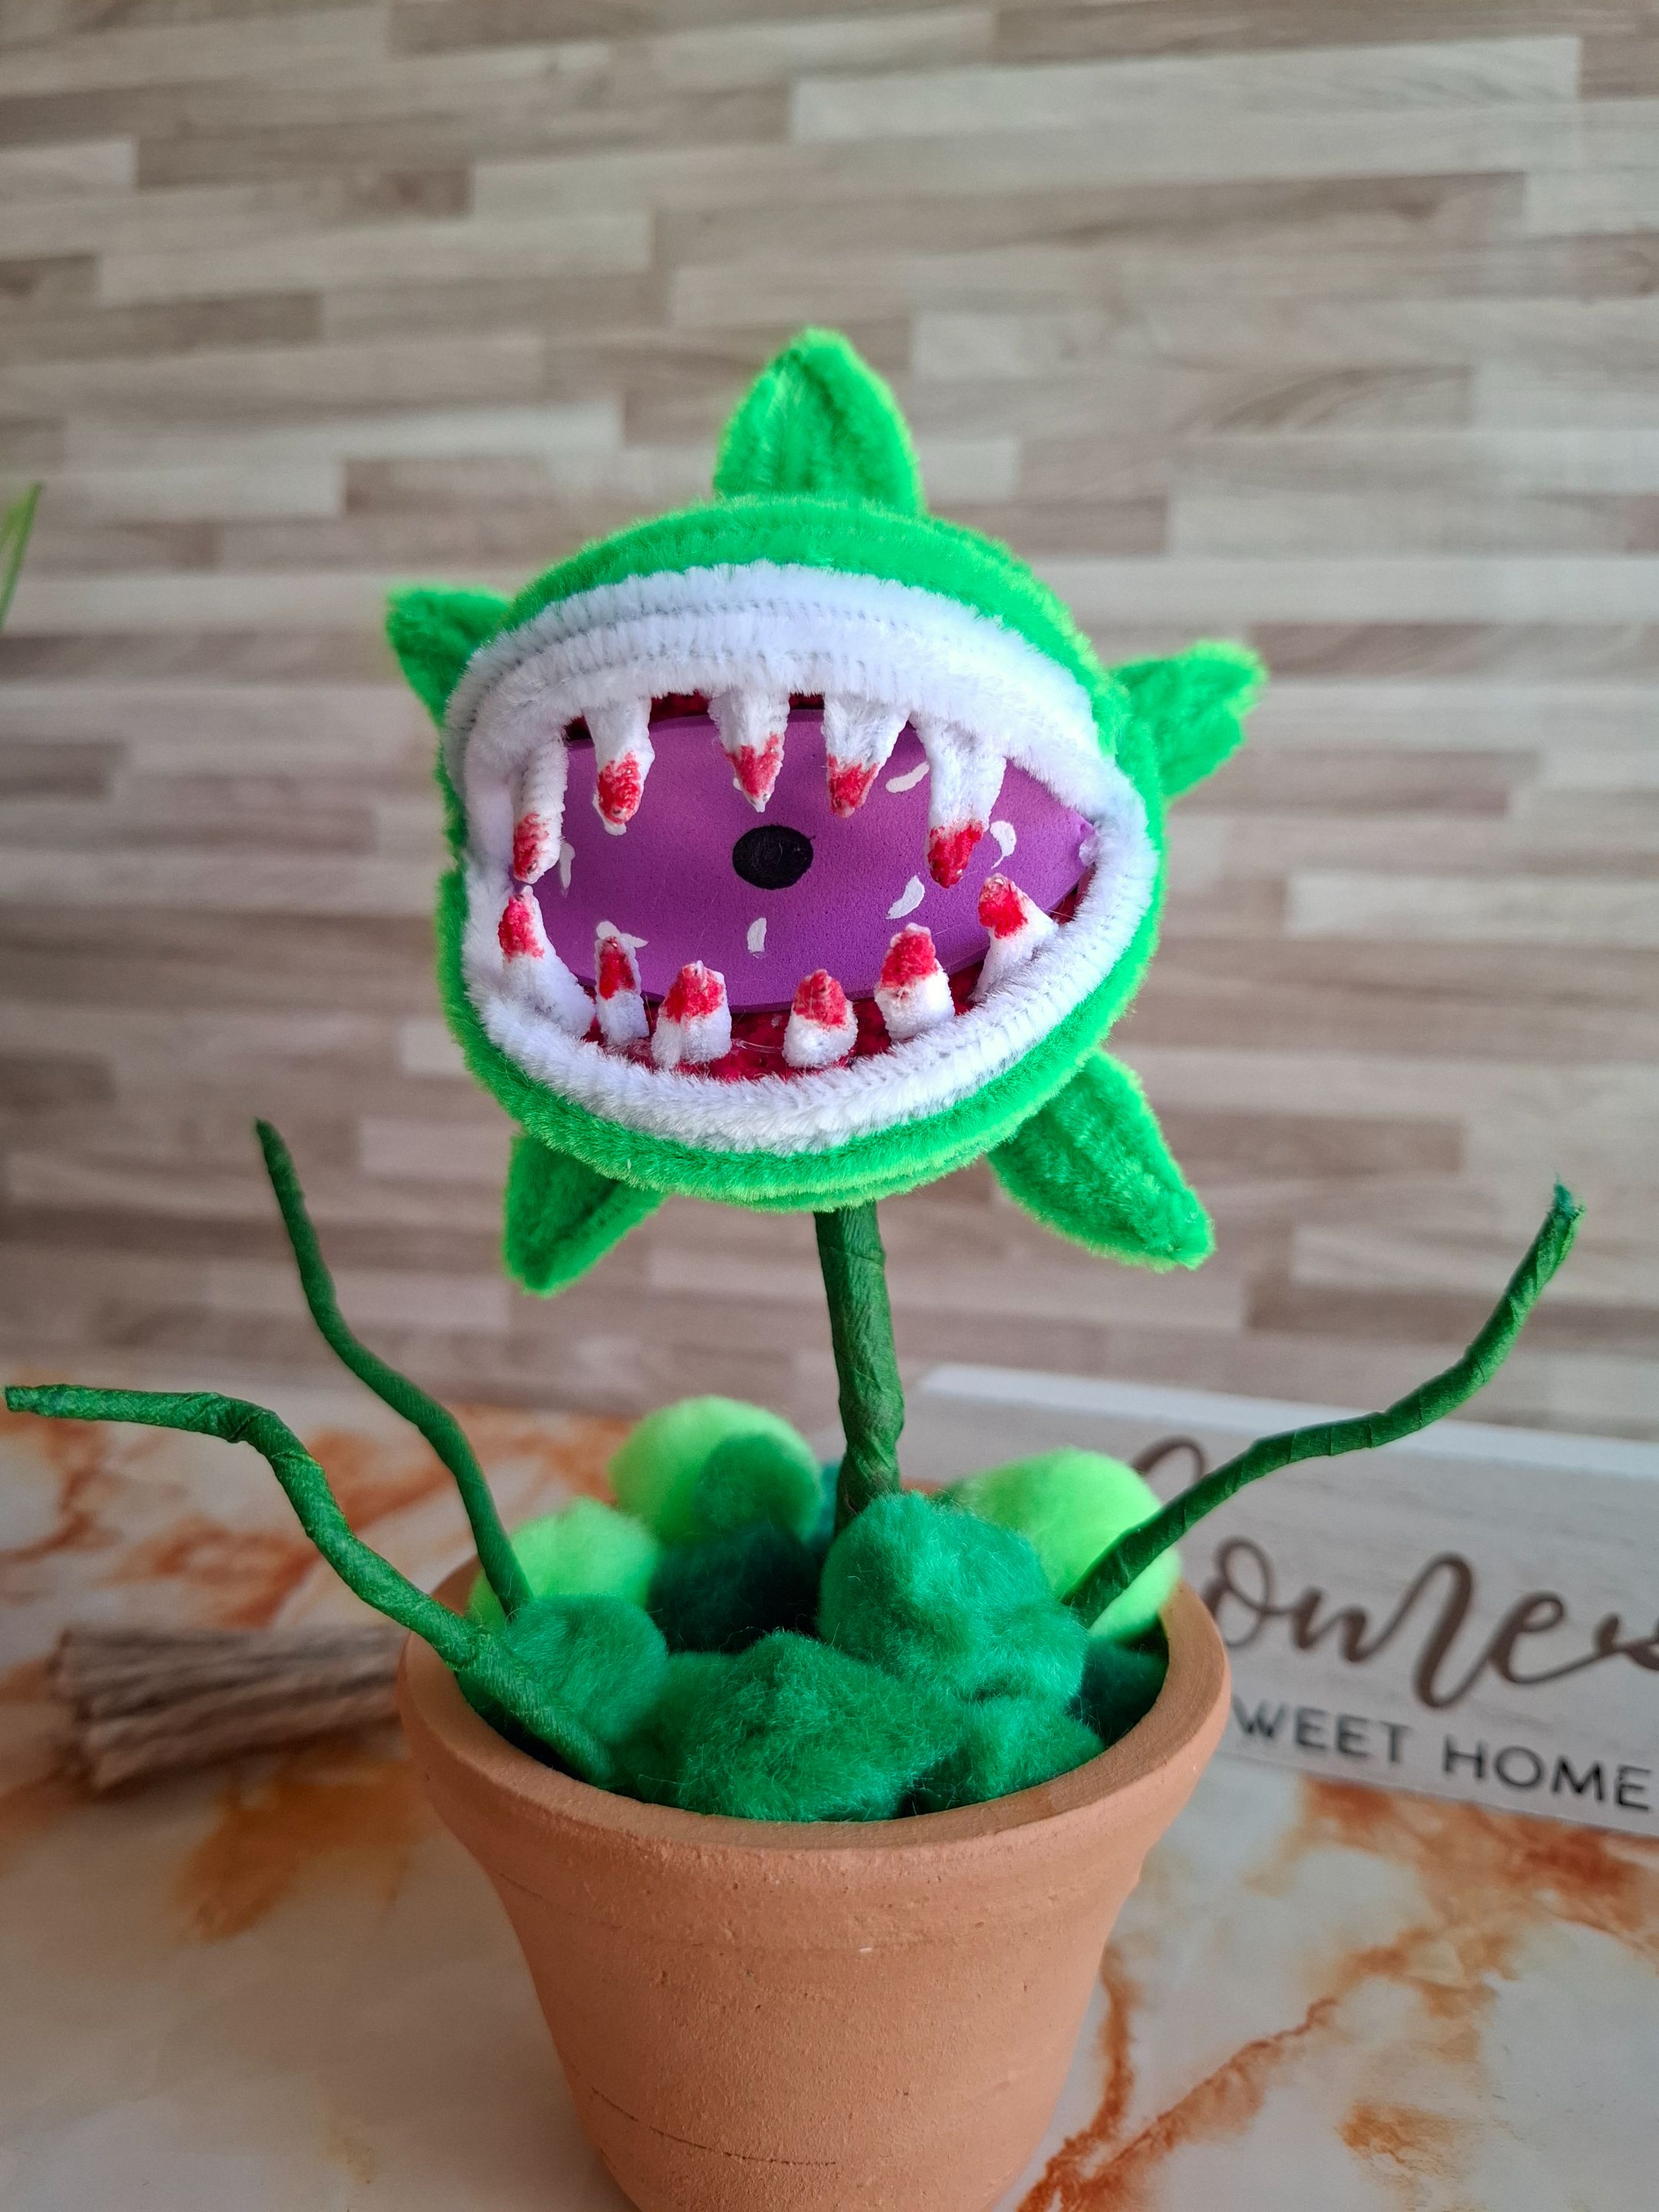
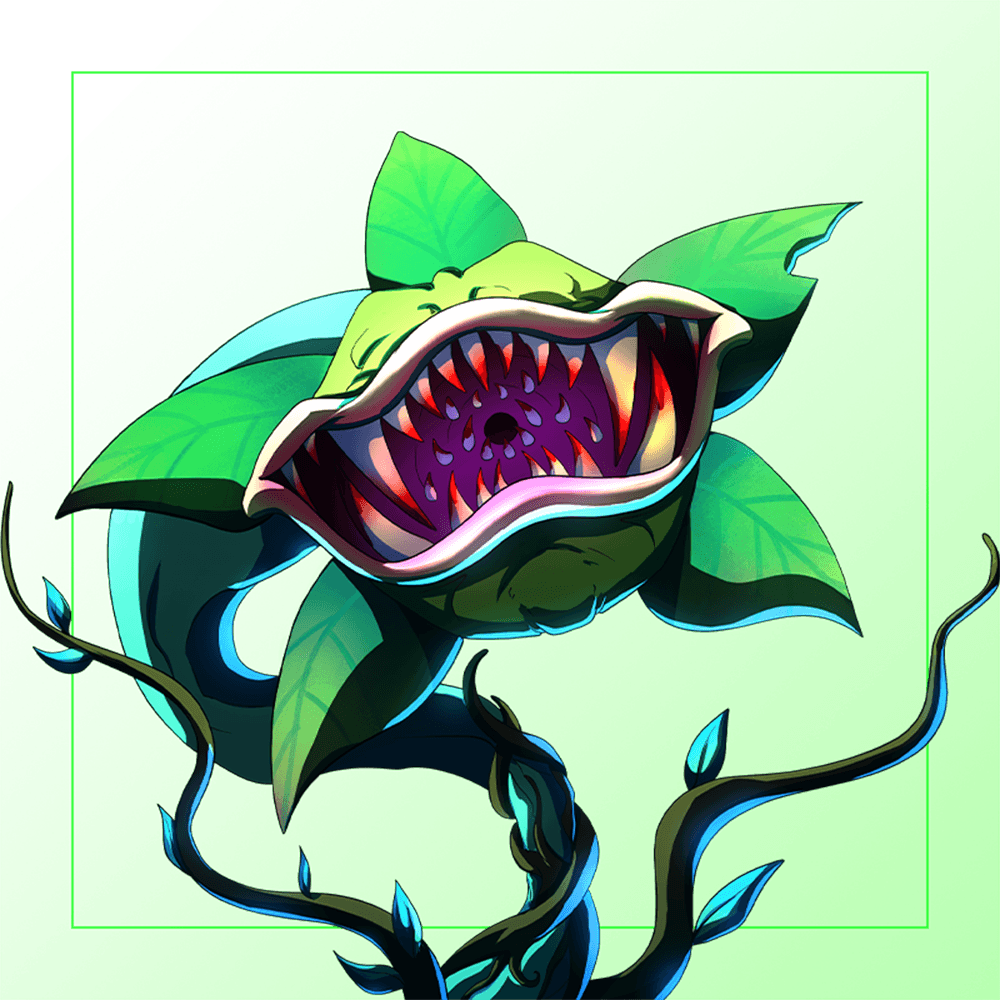
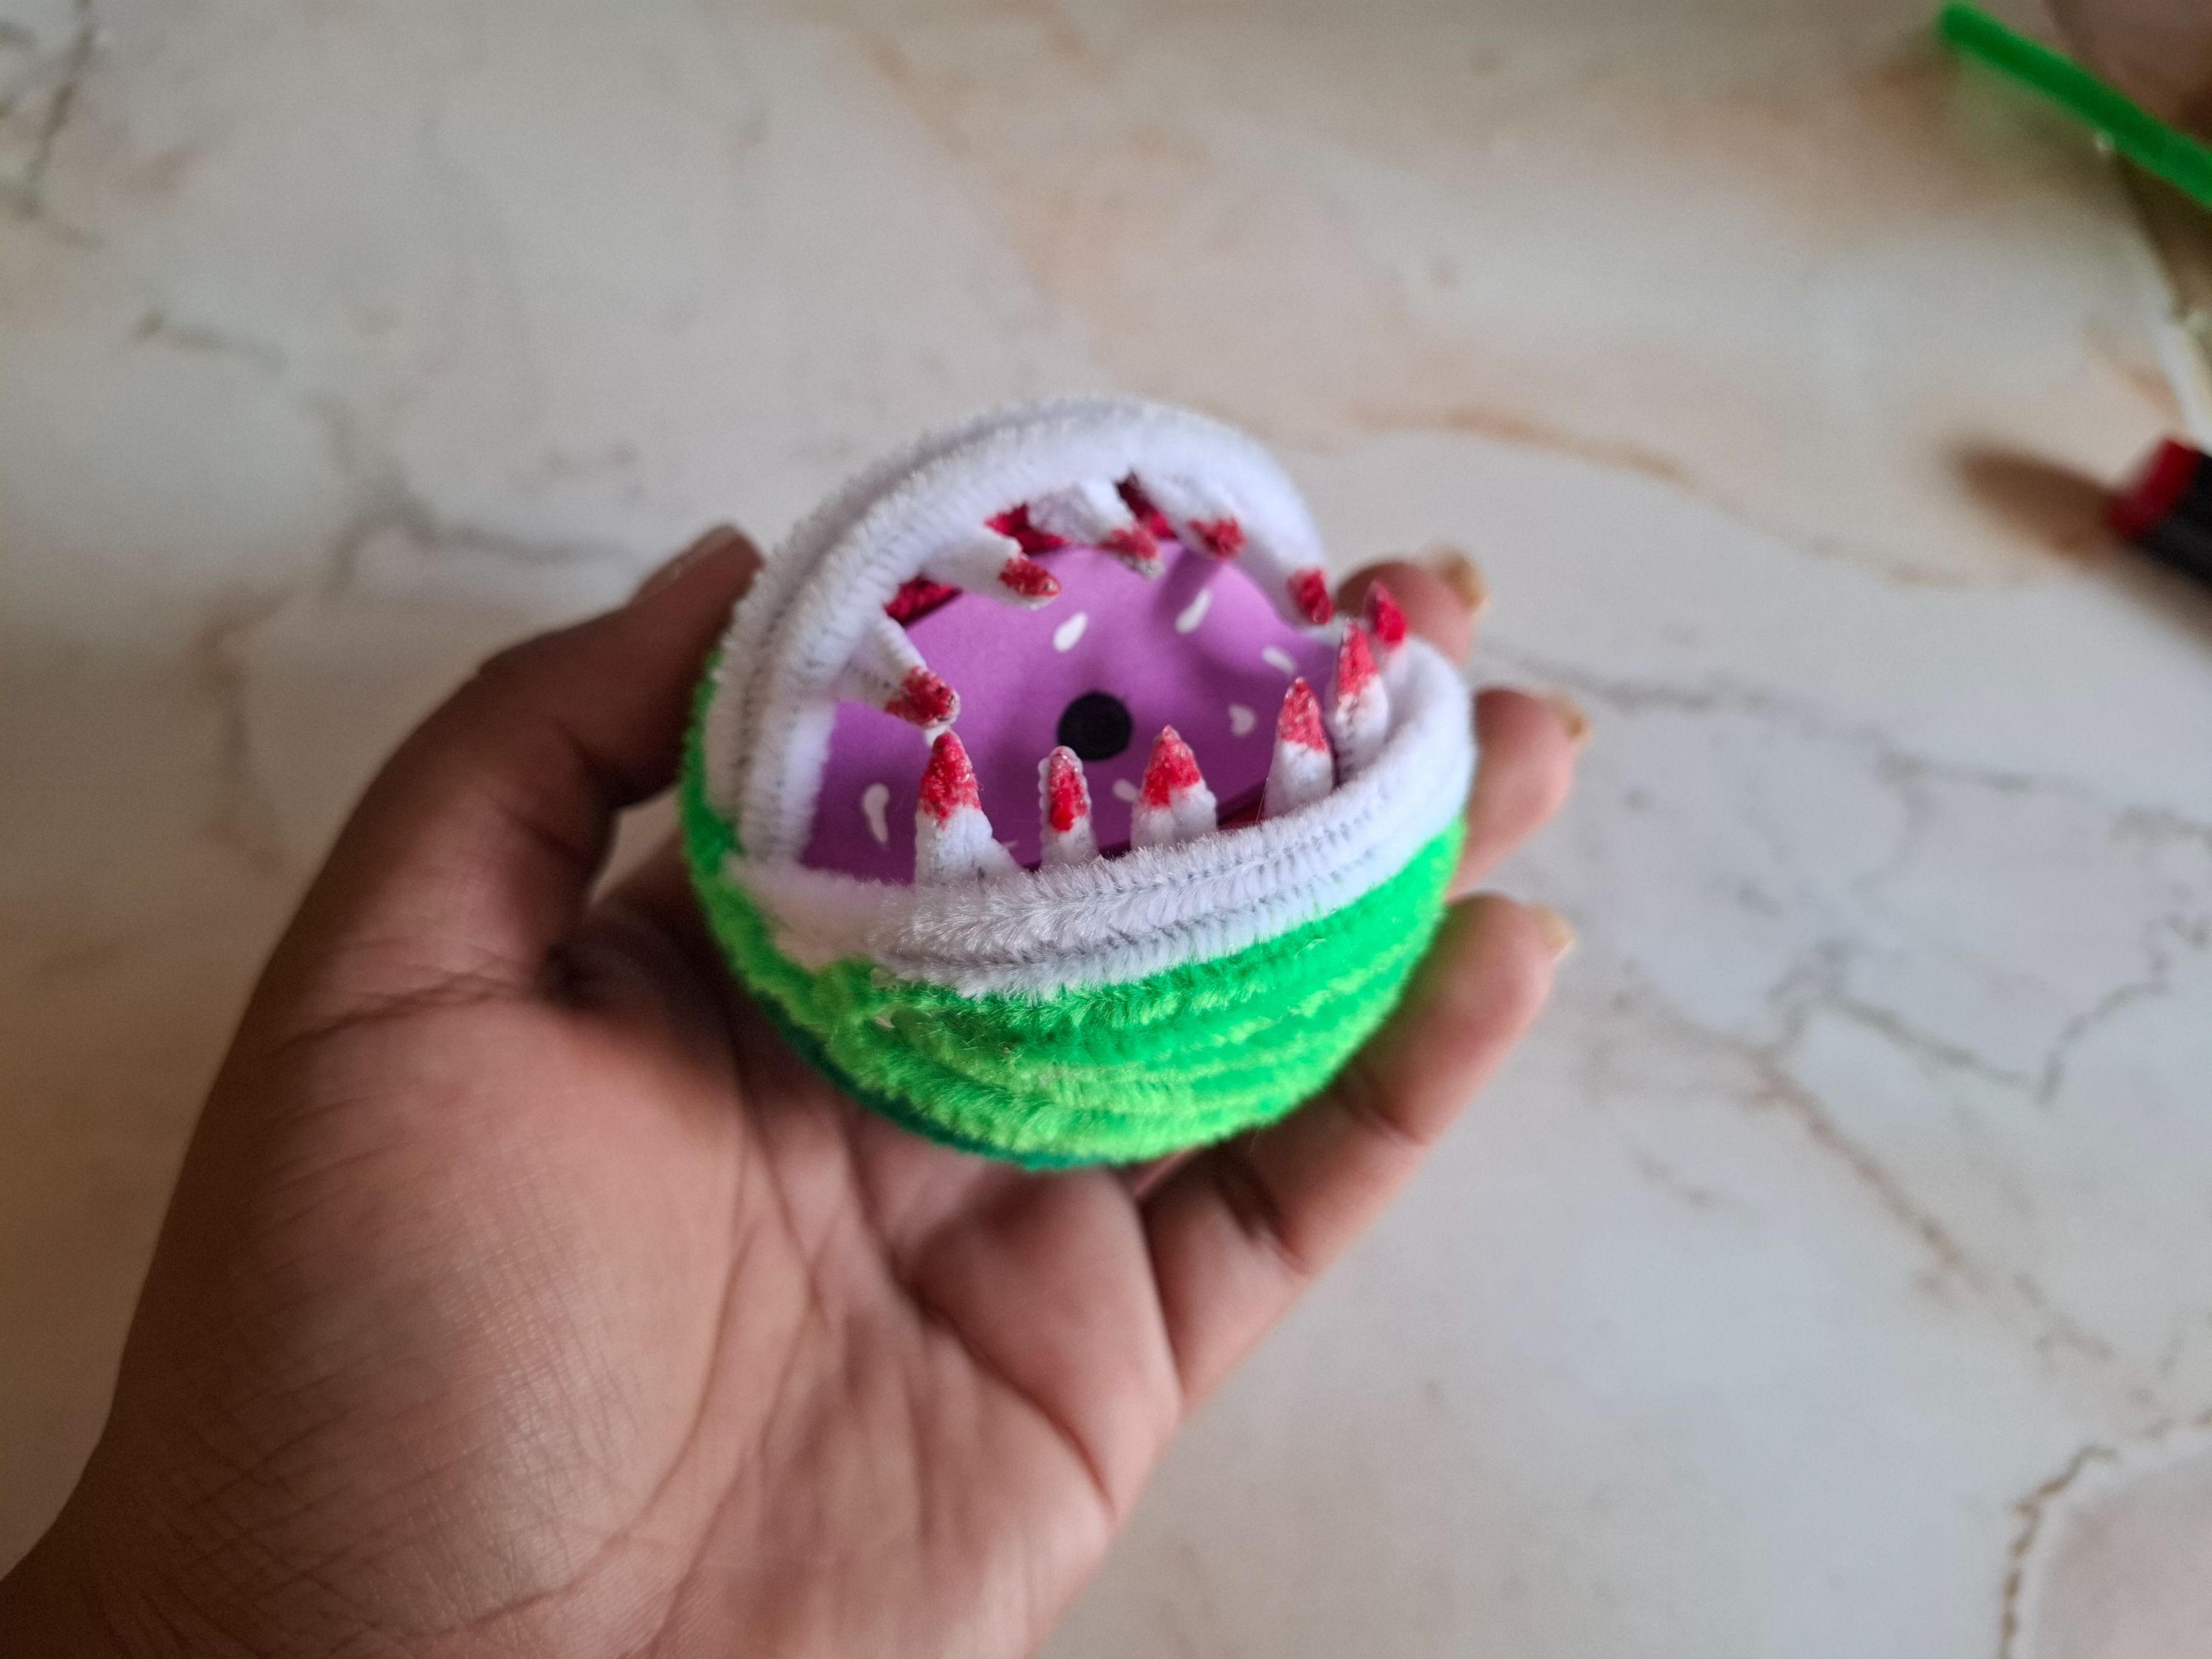
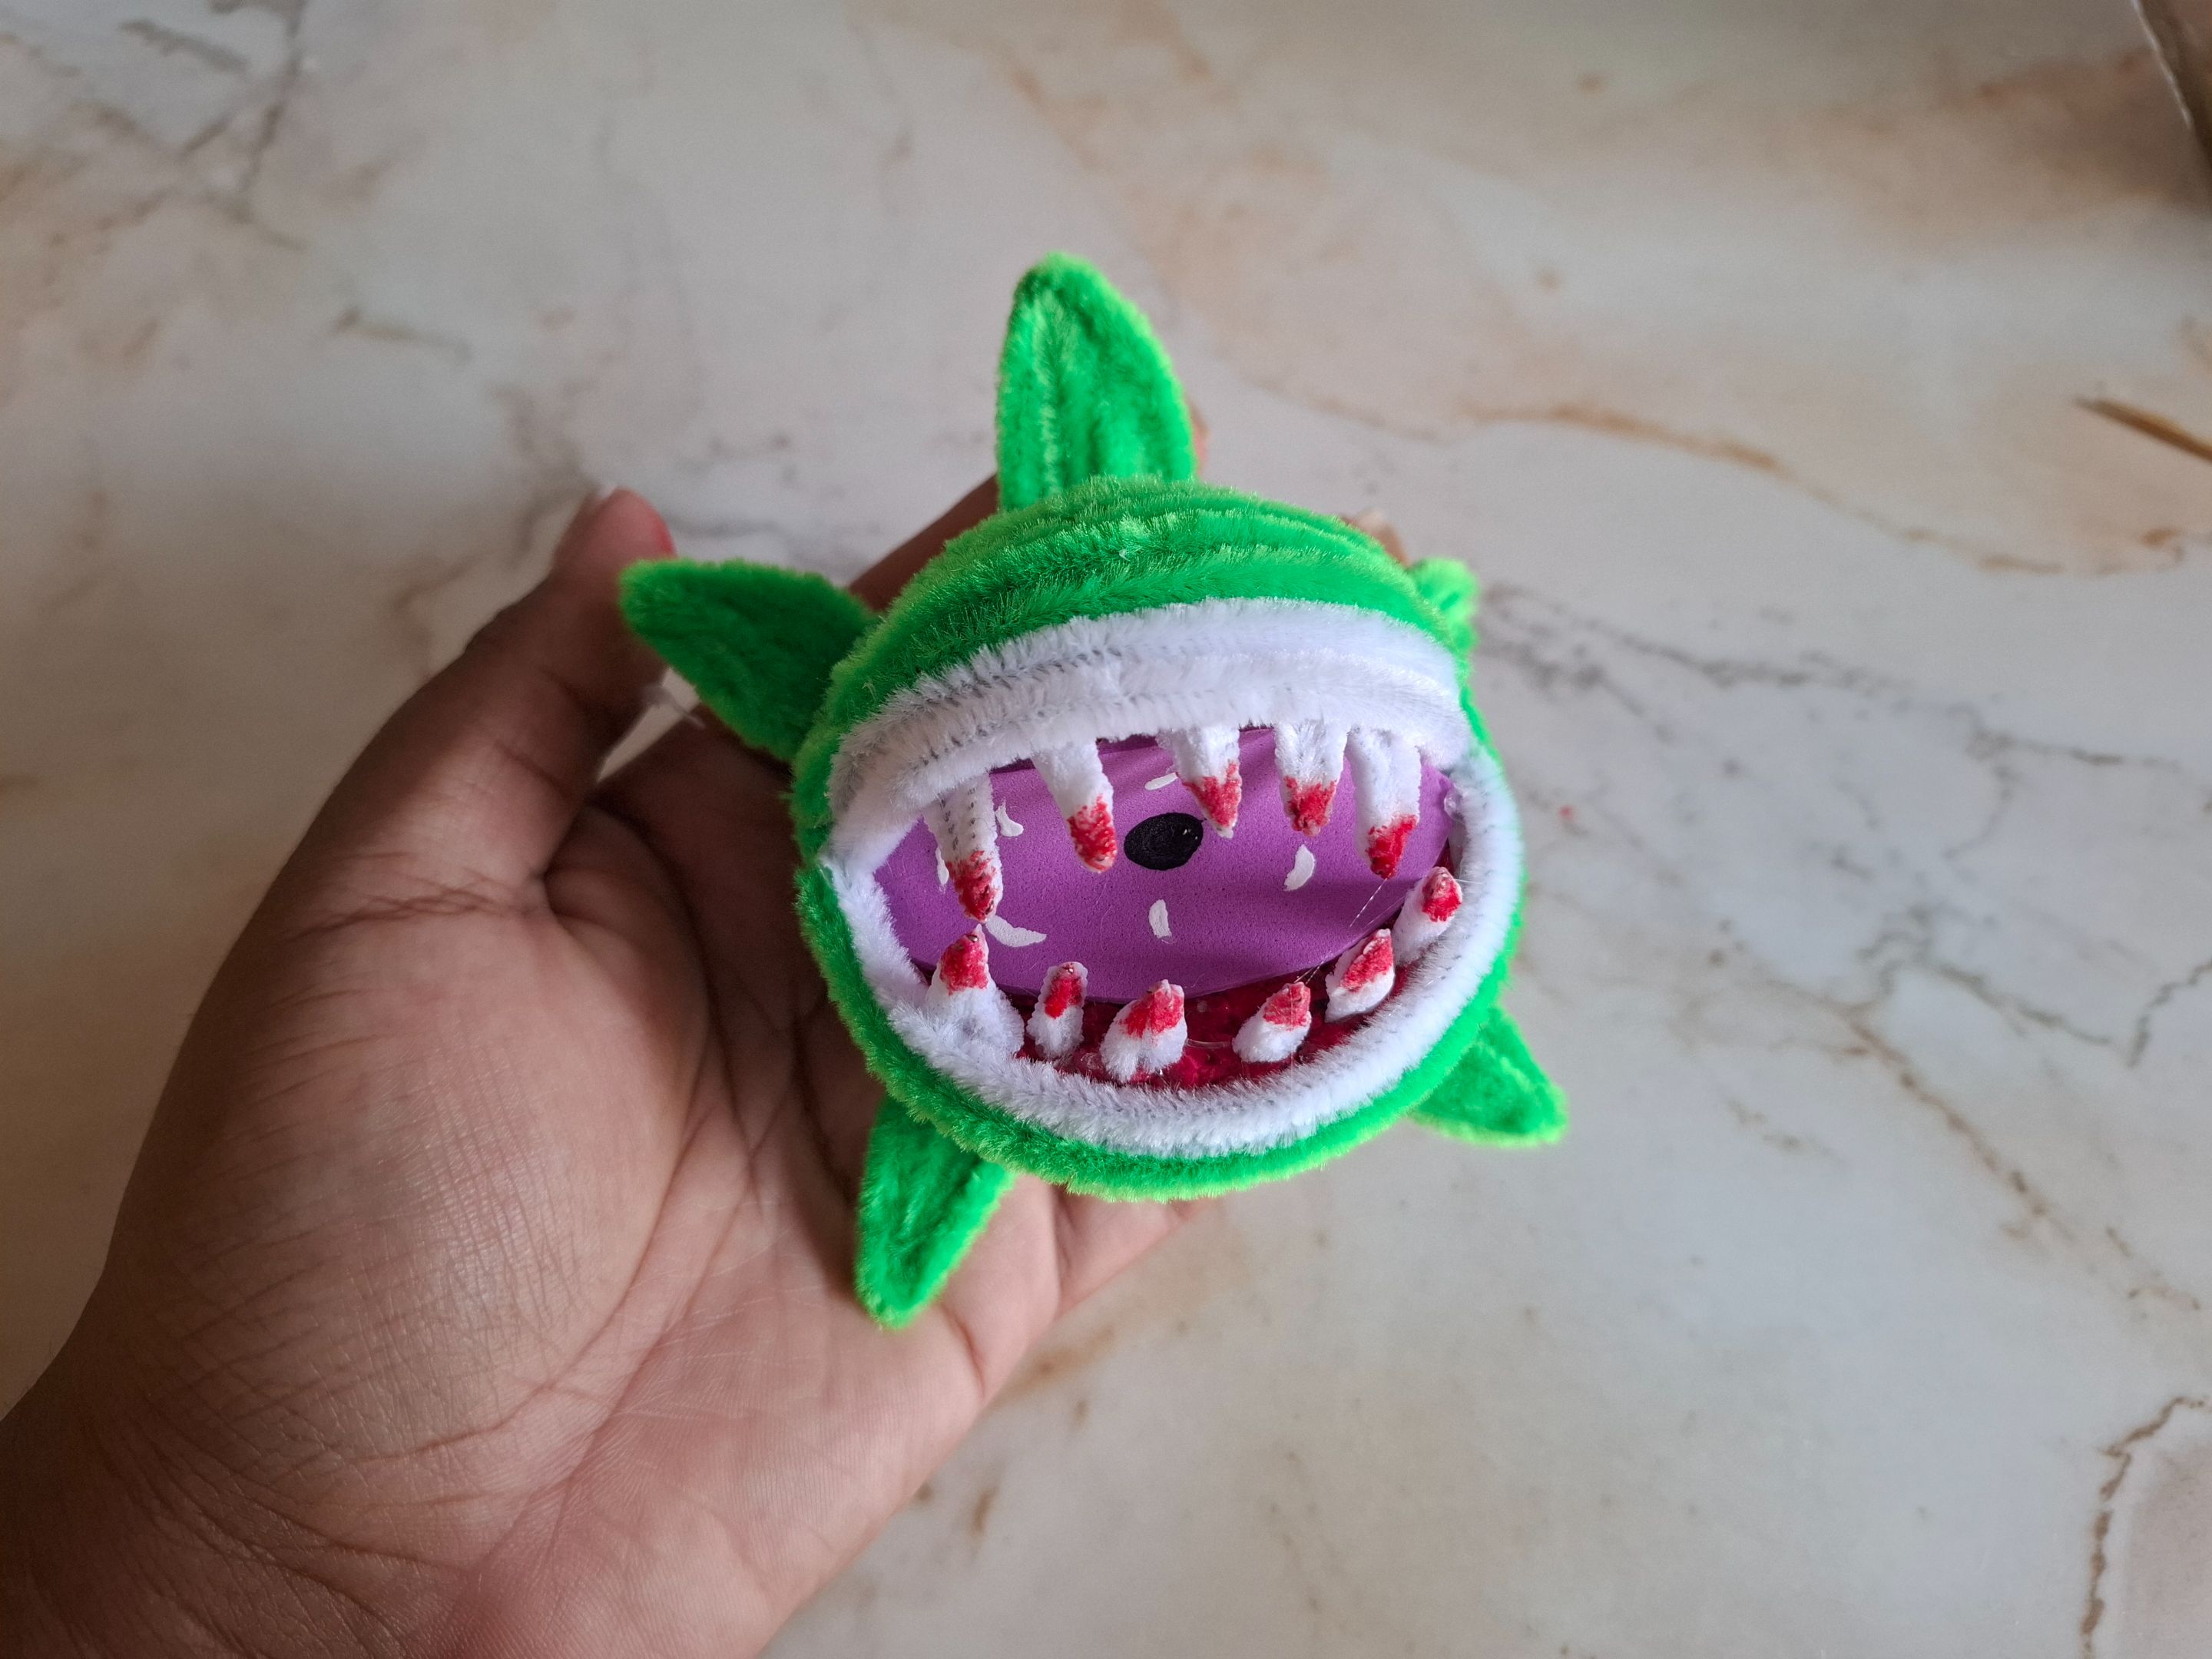
Para el concurso de arte Splinterlands semana 364, estuve buscando alguna carta que pudiera combinar con el arte del limpiapipas, así que encontré a la flor vampírica, esta carta a simple vista se ve algo tenebrosa, con sus dientes afilados en una posición de cacería, más sin embargo me atreví a realizar en limpiapipas, sé que es una carta difícil de recrear pero siempre debemos confiar en el proceso.
For the Splinterlands week 364 art contest, I was looking for a card that could go with the pipe cleaner art, so I found the vampire flower. At first glance, this card looks somewhat scary, with its sharp teeth in a hunting position, but nevertheless, I dared to make it in pipe cleaners. I know it's a difficult card to recreate, but we should always trust the process.
Comencé a realizarla en la noche y la terminé al día siguiente ya que estaba algo ocupada, creo que la parte que más me costó fue tratar de dar el parecido en la parte central además que no tenía idea como iba a realizar los dientes, así que dejé fluir y confíe en el proceso, obteniendo un resultado adecuado. A continuación les muestro los materiales y paso a paso.
I started it that night and finished it the next day because I was a bit busy. I think the hardest part was trying to create a similar look in the center. I also had no idea how I was going to do the teeth, so I just went with the flow and trusted the process, resulting in a decent result. Below, I'll show you the materials and the steps.
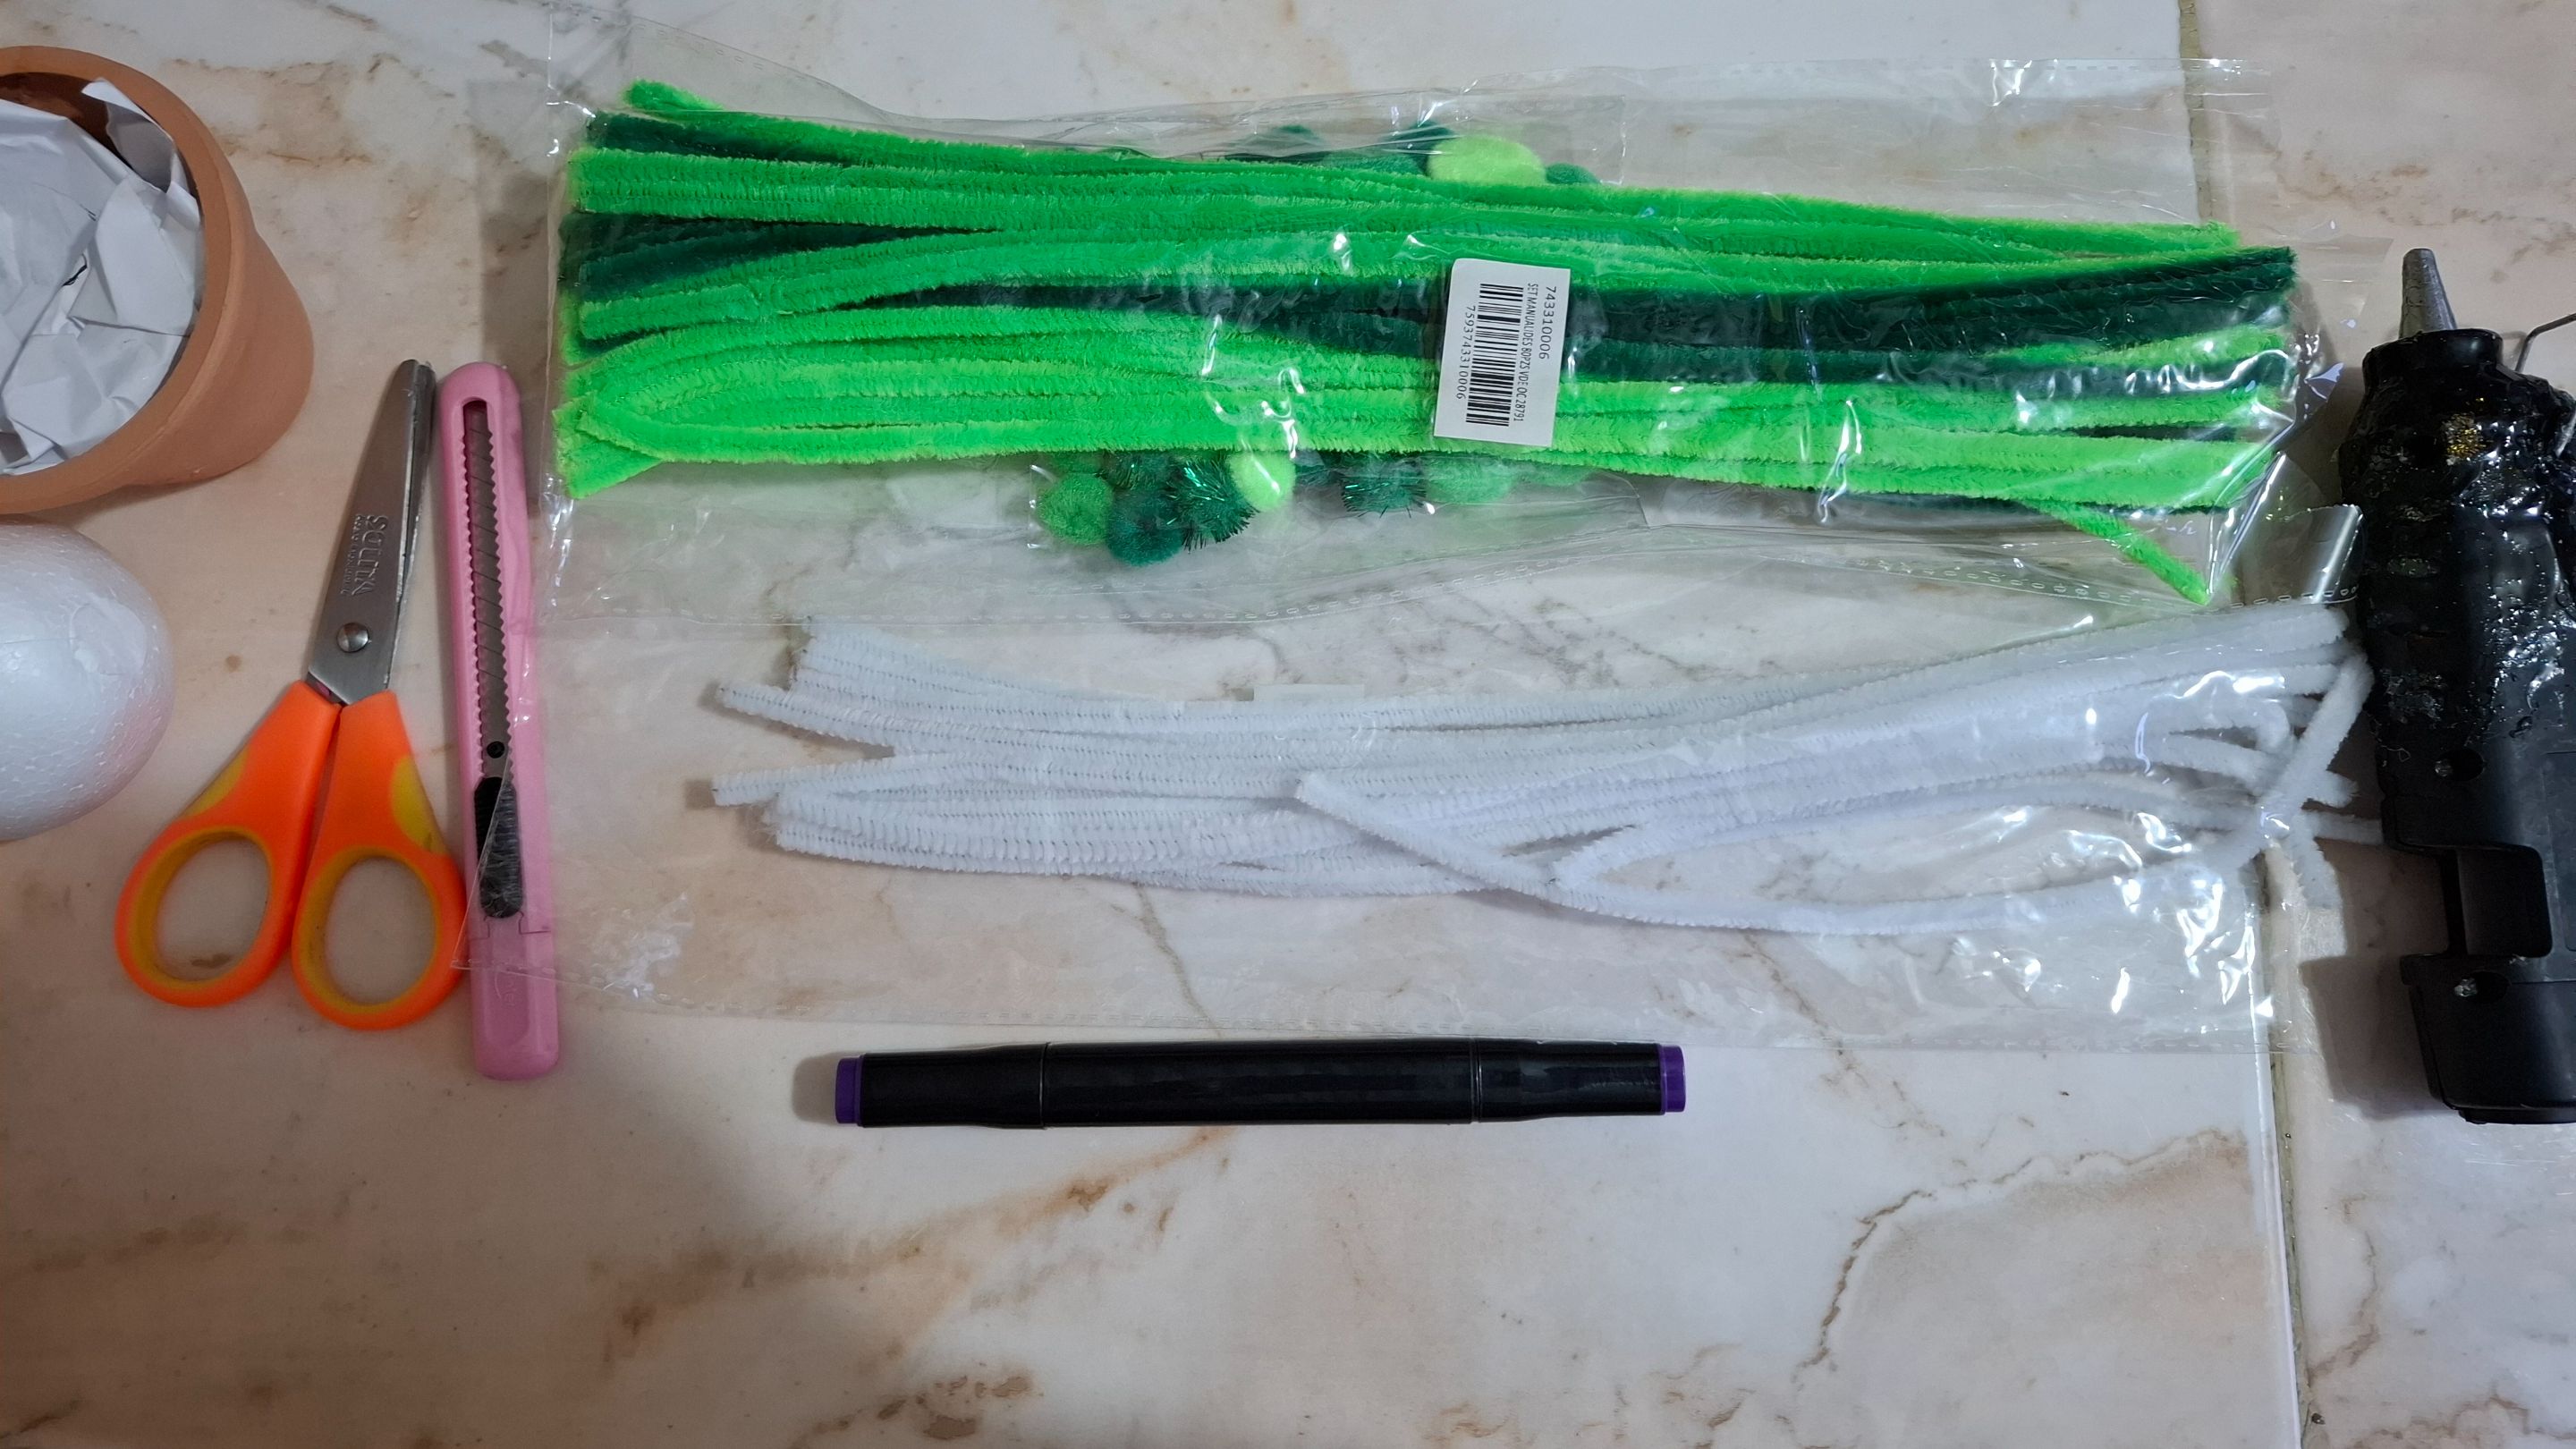
| Materiales | Materials |
|---|---|
| Limpiapipas verde | green pipe cleaner |
| Limpiapipas blanco | white pipe cleaner |
| Esfera de anime | anime sphere |
| Pintura, marcador | Paint, marker |
| Foami, tijera | Foami, scissors |
| Silicón, cúter | Silicone, cutter |
| Pompones | Pompoms |
| Maceta | Flowerpot |
| Cinta floral | floral ribbon |
Paso a paso / Step by step
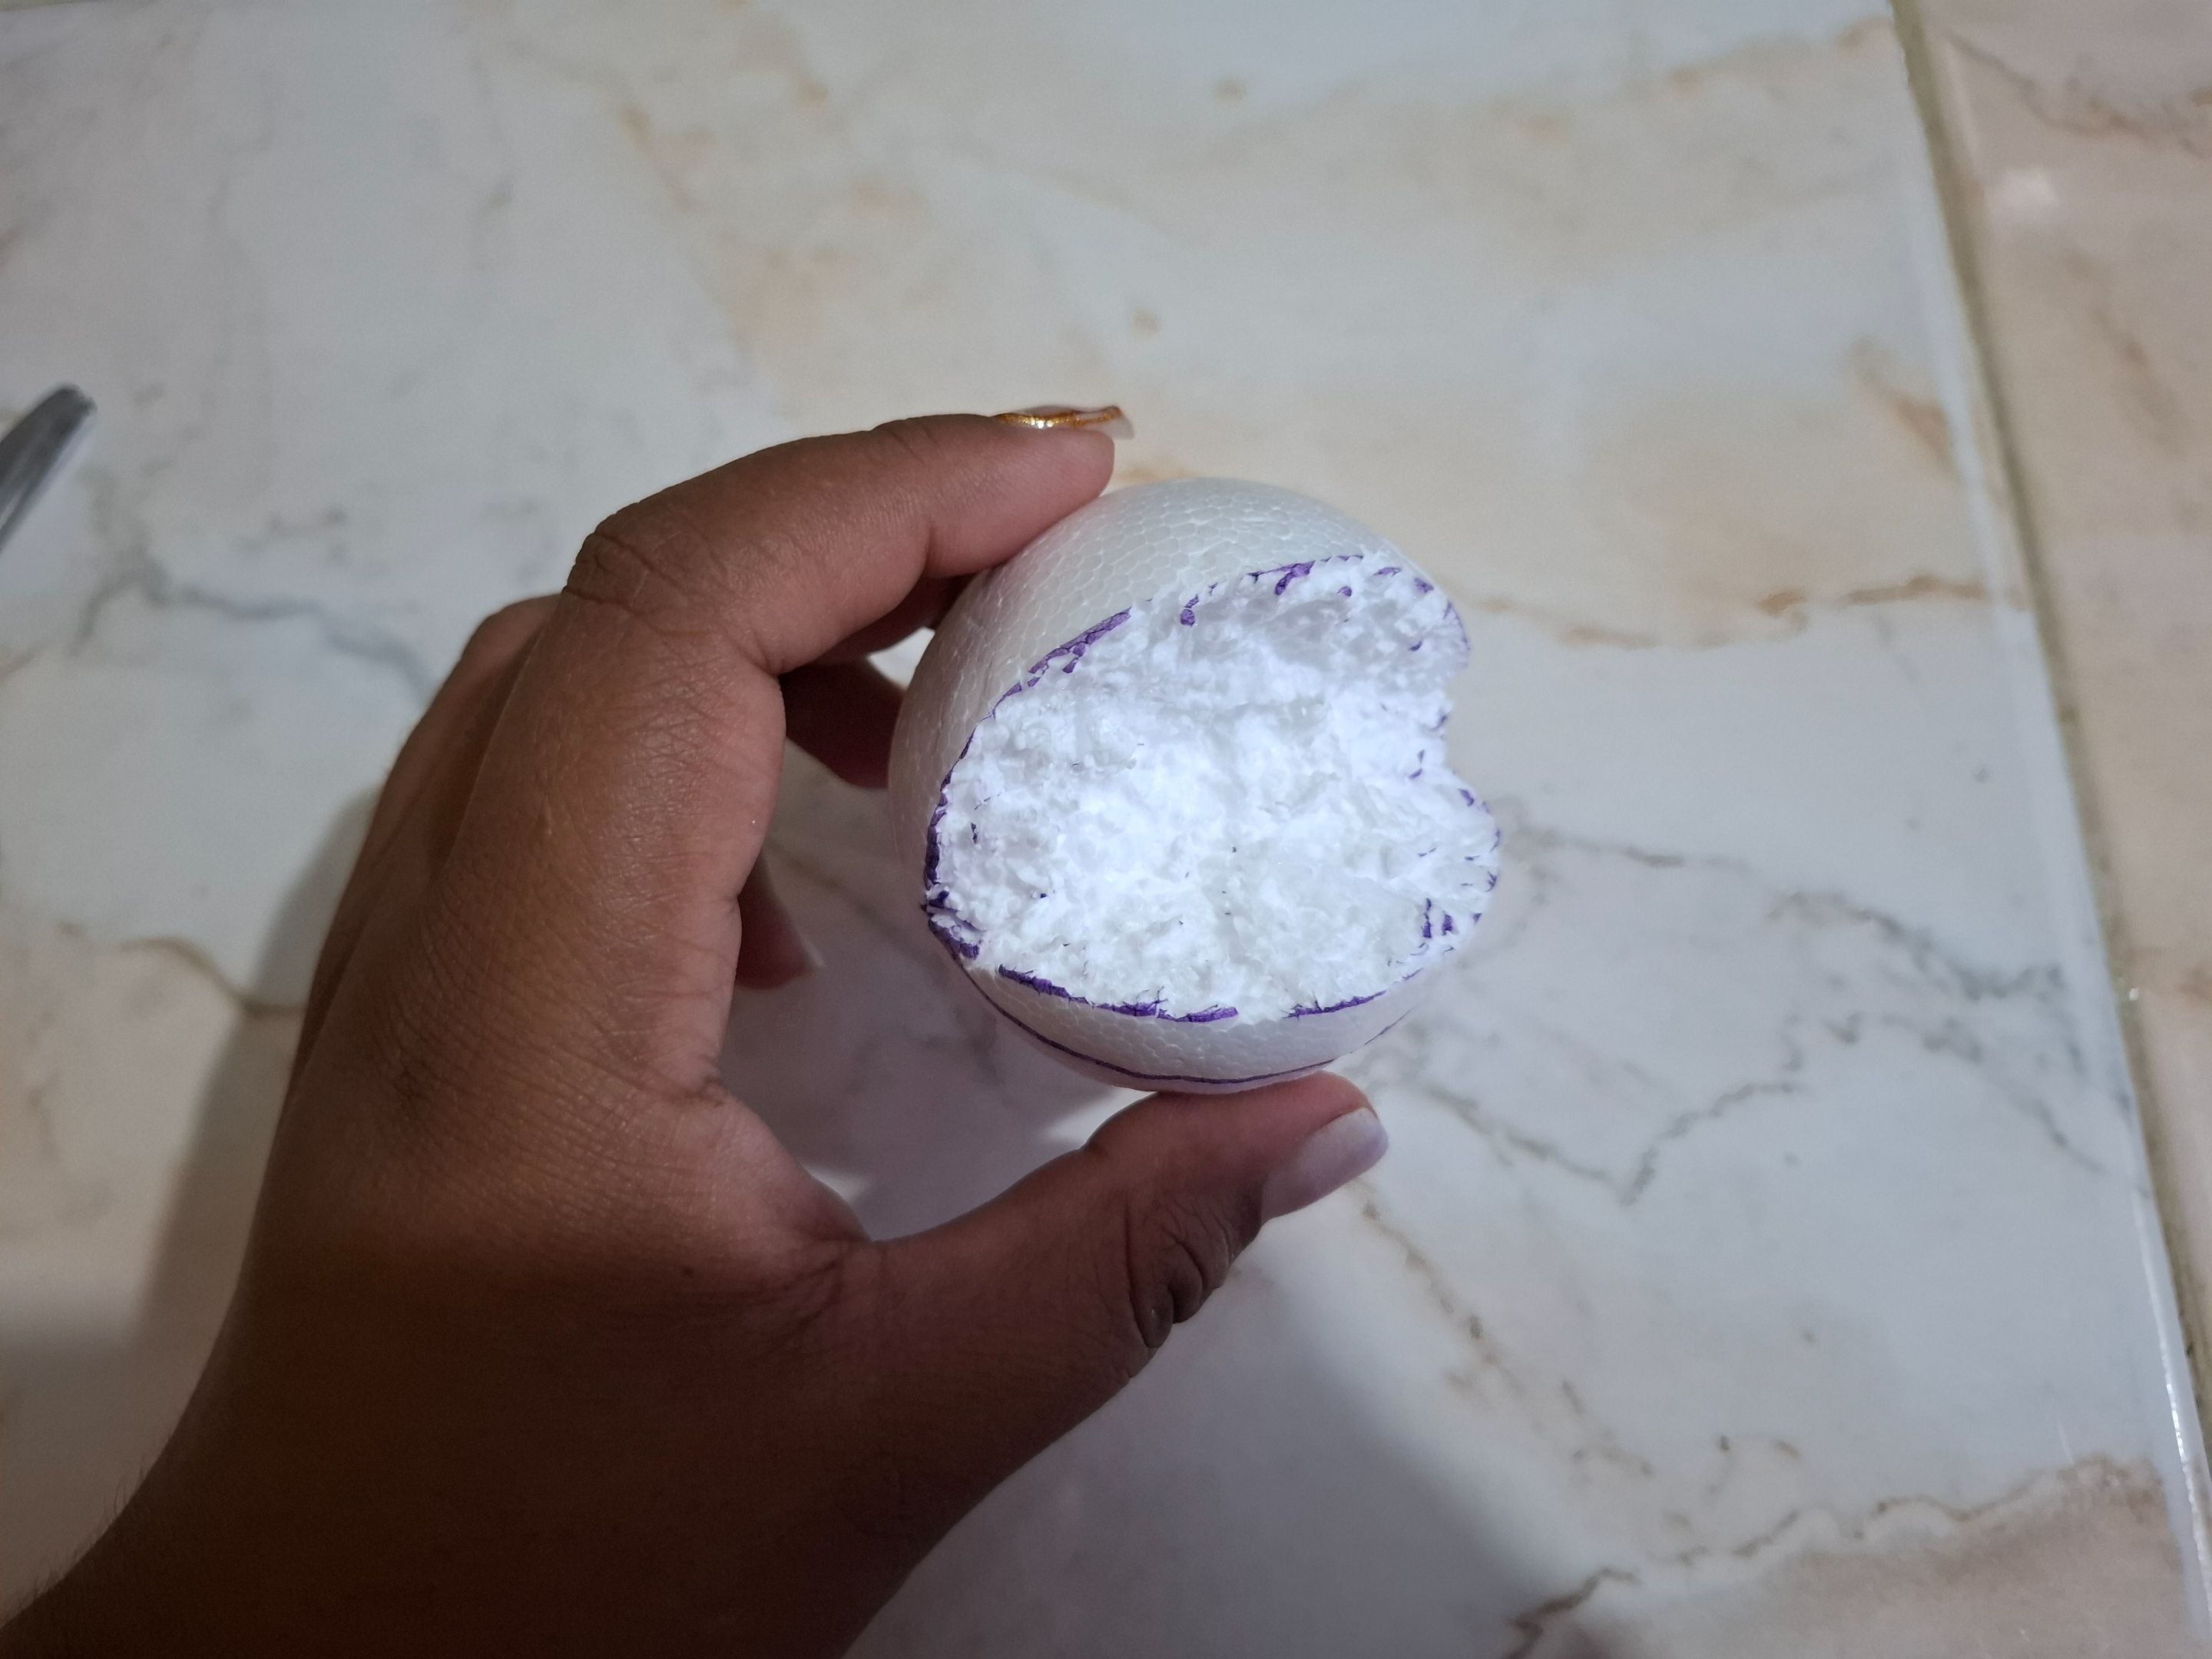
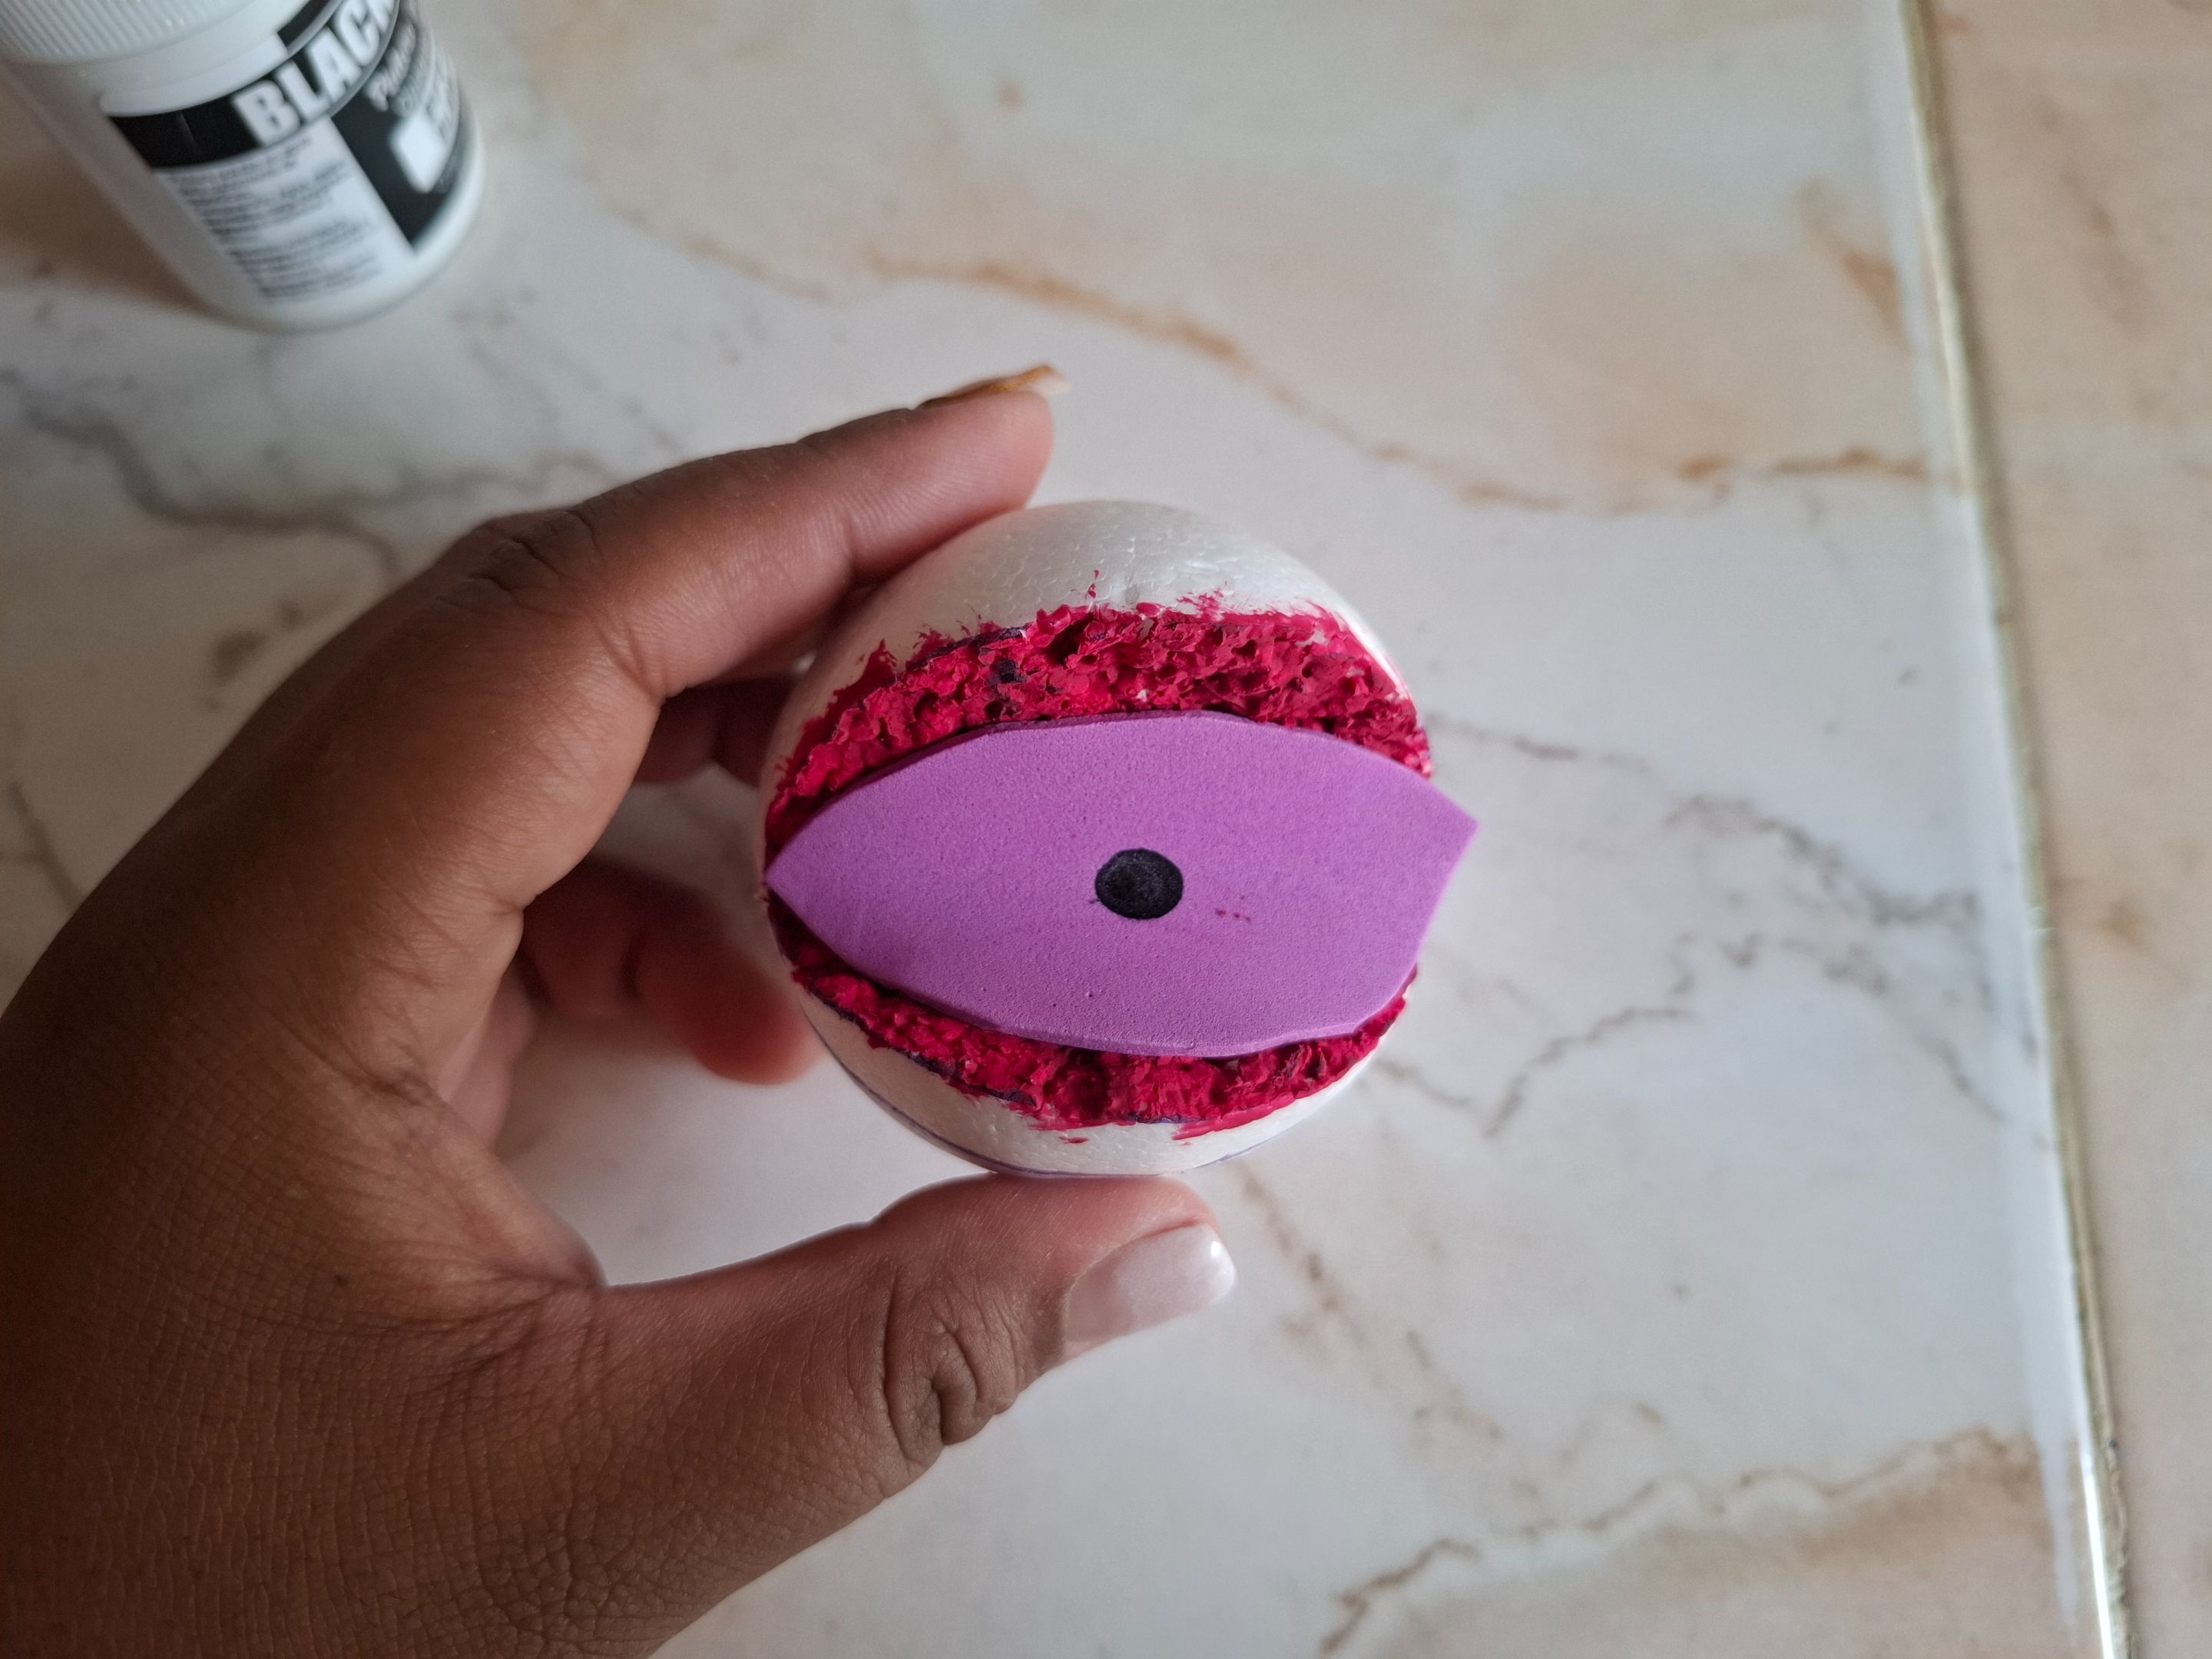
El primer paso será realizar un corte en la esfera de anime con la ayuda del cúter, imagina que quieres realizar una pequeña abertura para una boca, debes marcar una linea para guiarte, luego retiramos el exceso hasta obtener la forma deseada.
The first step will be to make a cut in the anime sphere with the help of the cutter, imagine that you want to make a small opening for a mouth, you must mark a line to guide you, then we remove the excess until we obtain the desired shape.
 |
 |
|---|---|
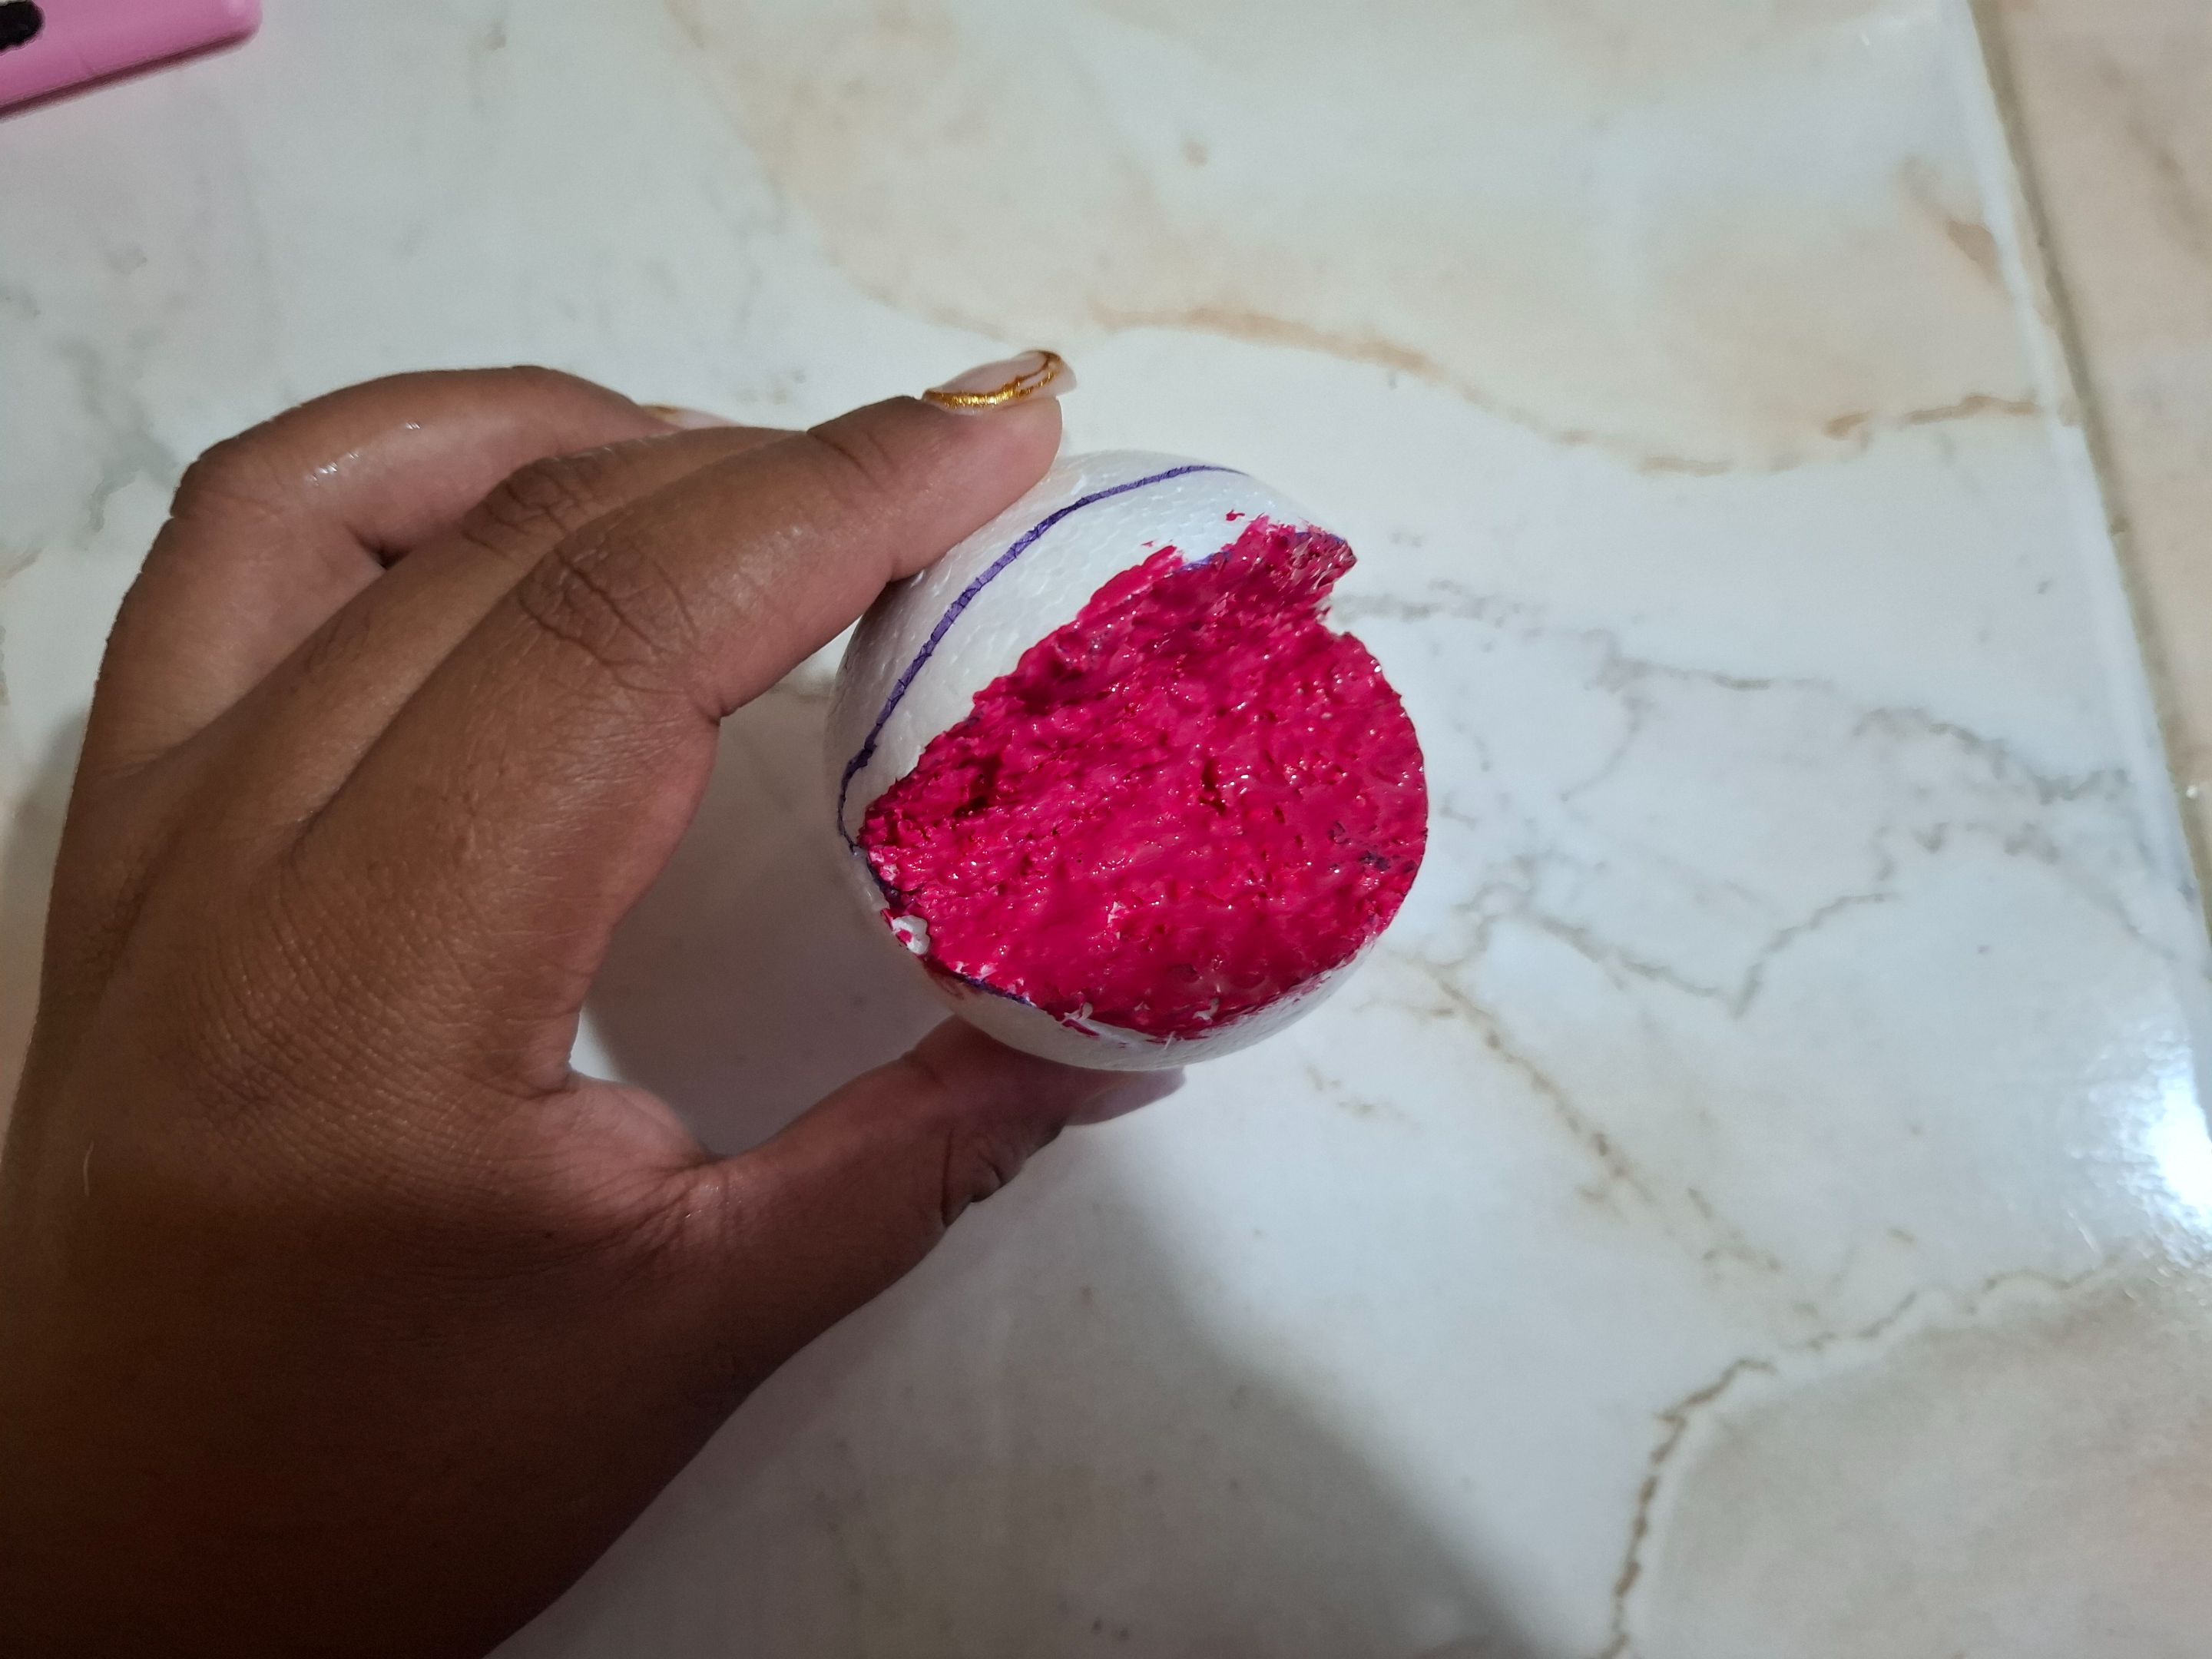
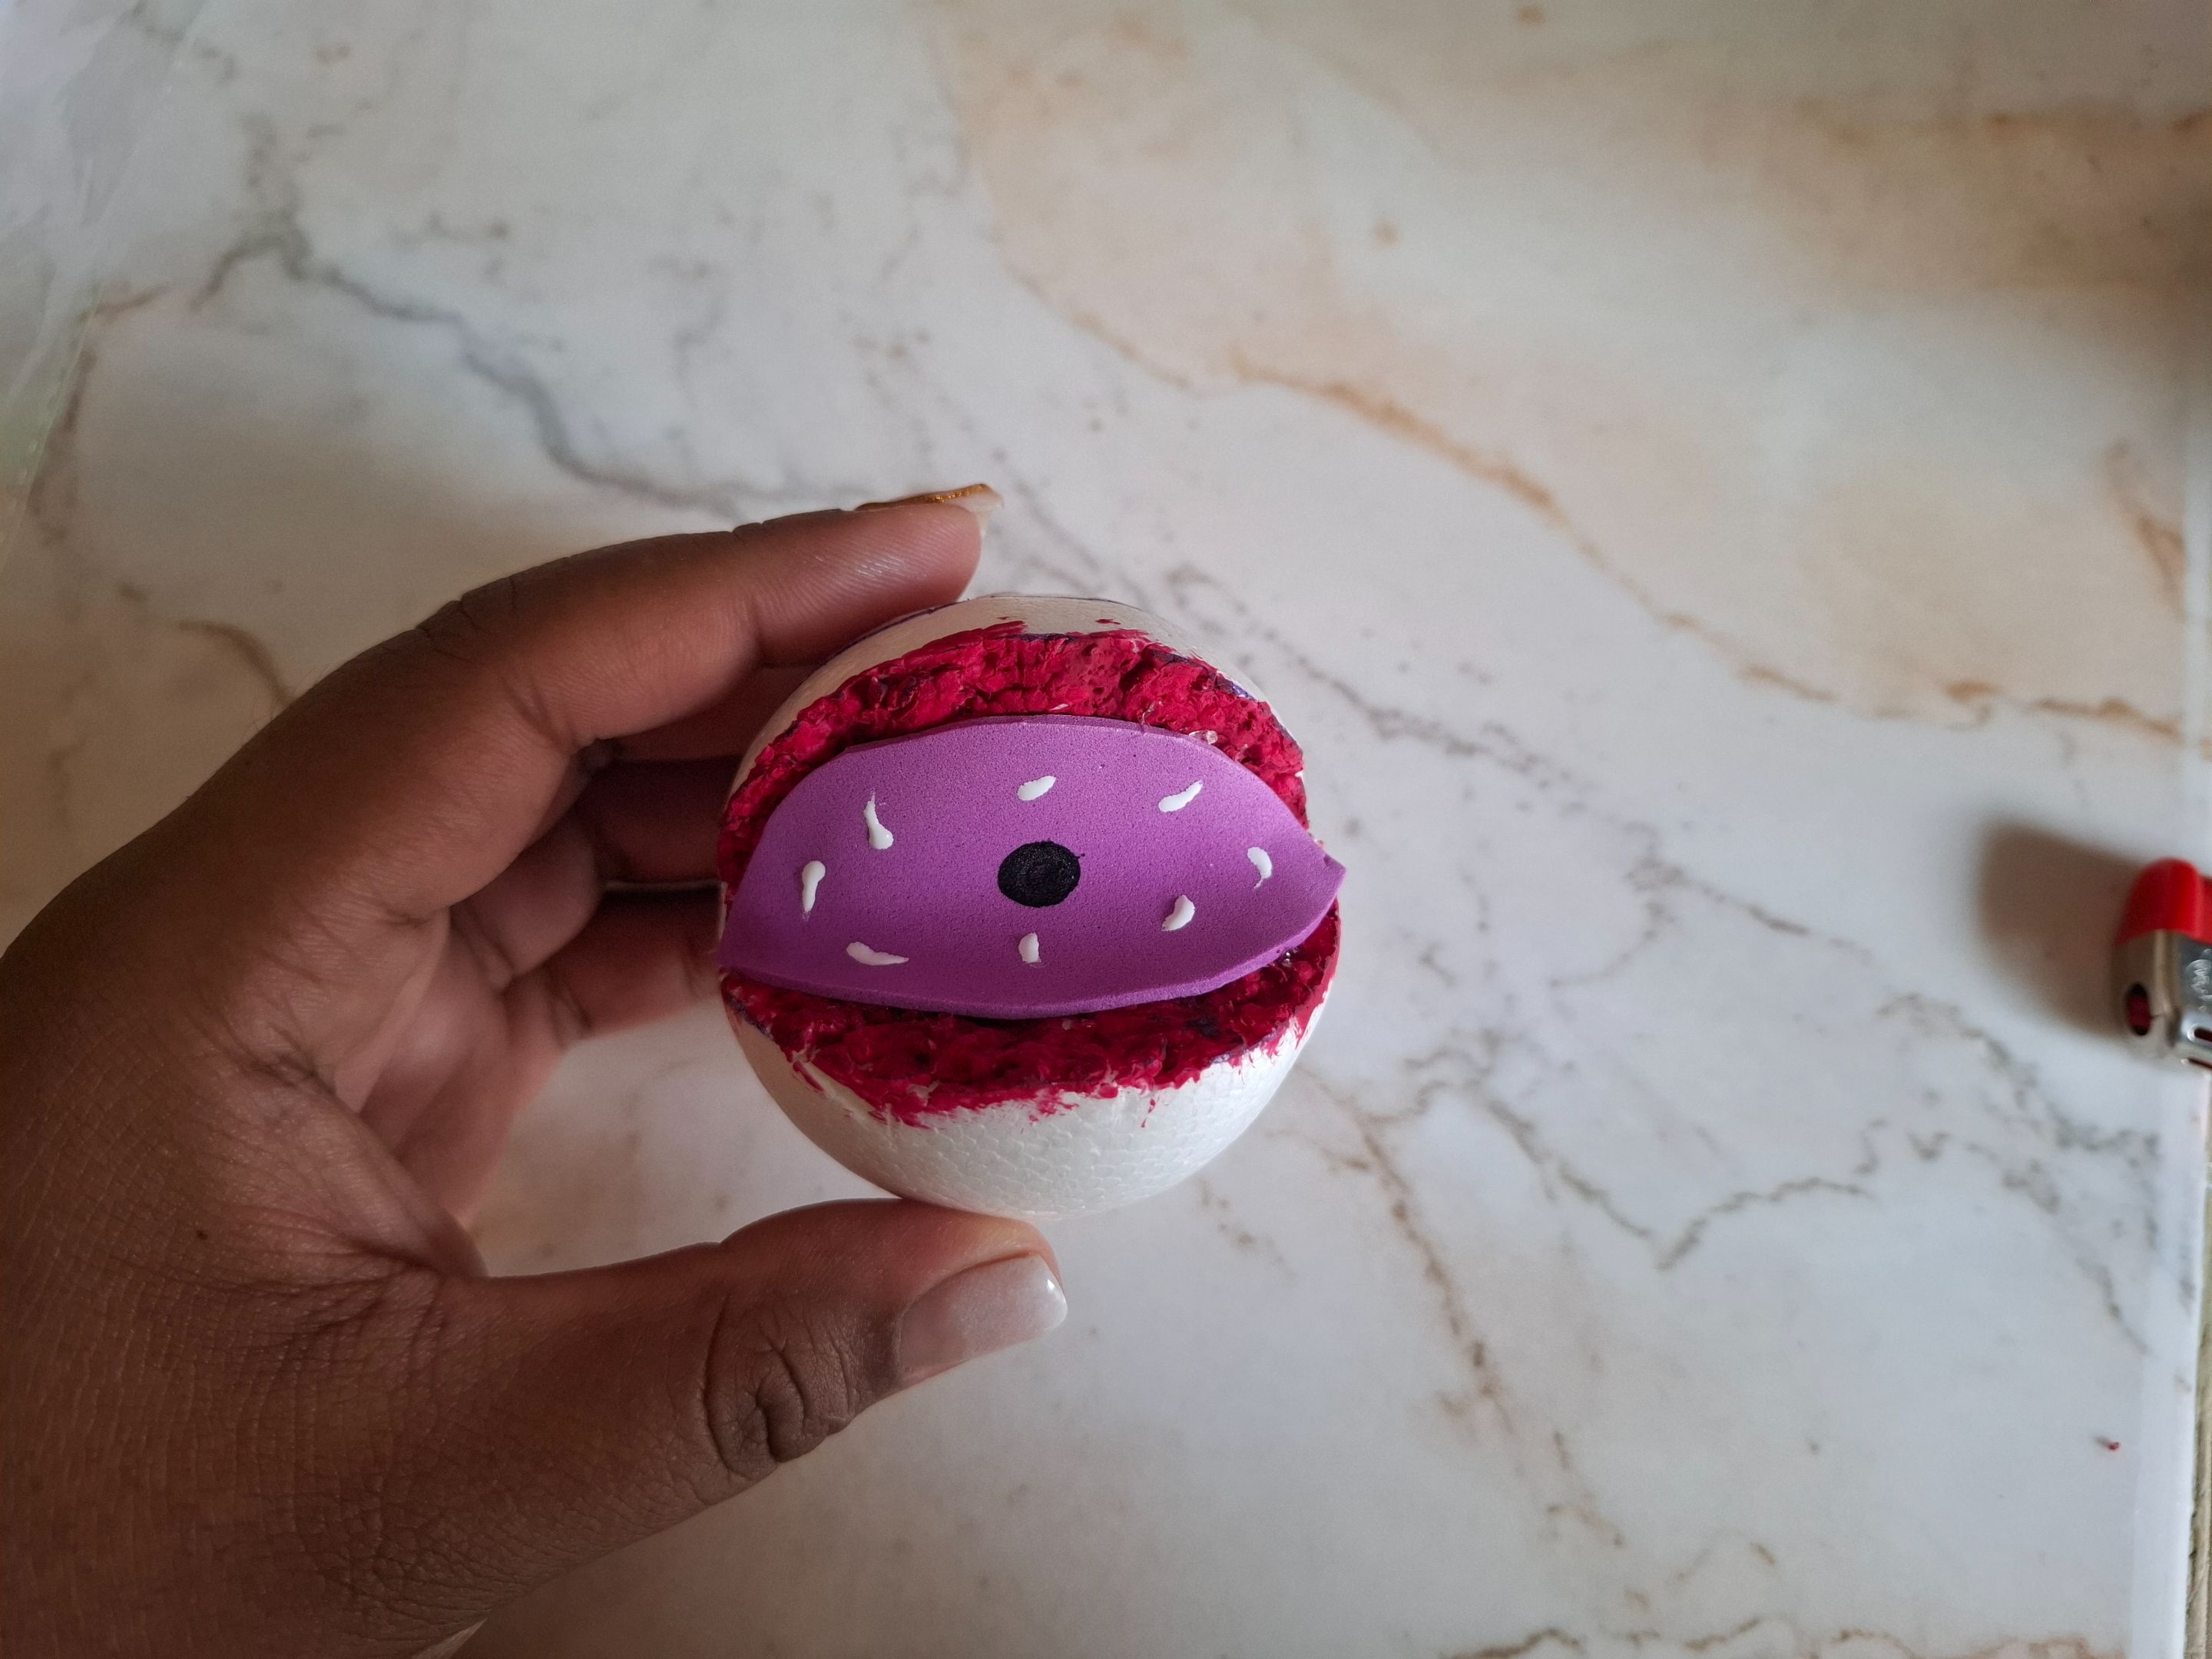
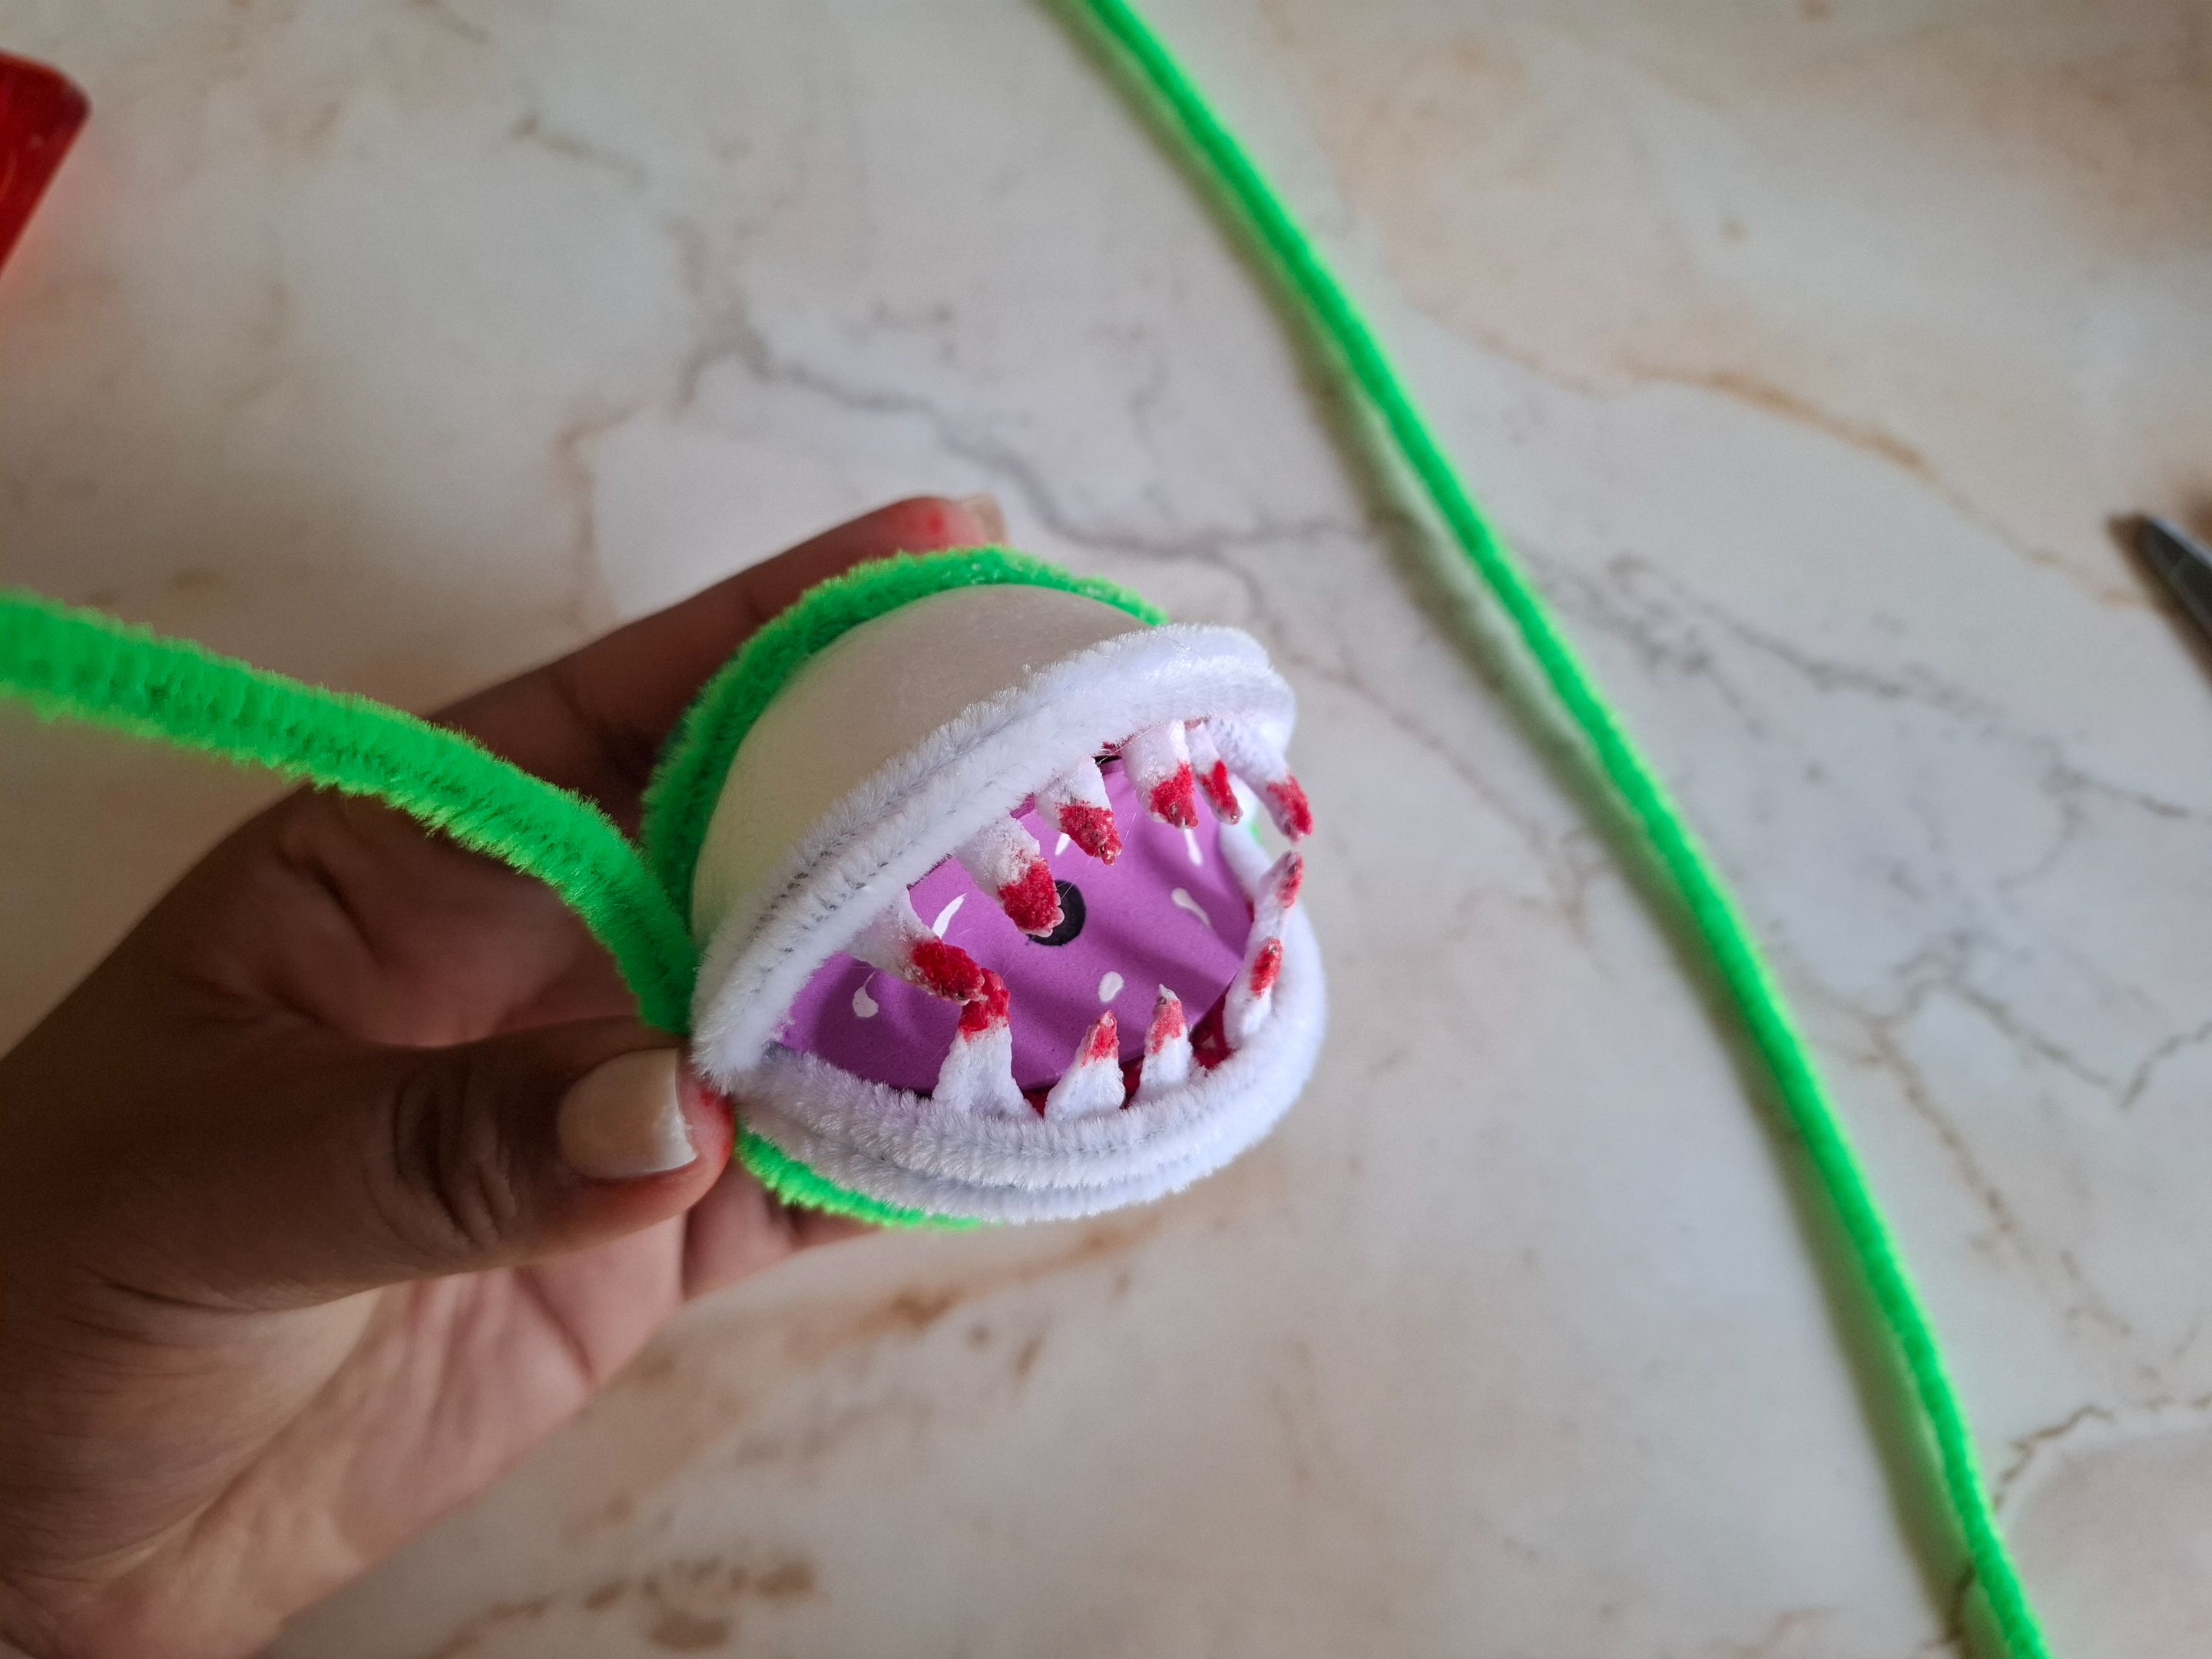
Quise pintar el centro en color fucsia, luego voy a cortar el foami en foami morado, lo pegamos en el centro y sobre él pintamos el círculo negro y las marcas blancas, esperamos que seque mientras voy a ir formando los dientes.
I wanted to paint the center in fuchsia, then I'm going to cut the foam in purple foam, glue it in the center and on it we paint the black circle and the white marks, wait for it to dry while I go on to form the teeth.
 |
 |
 |
|---|---|---|
 |
 |
|---|---|
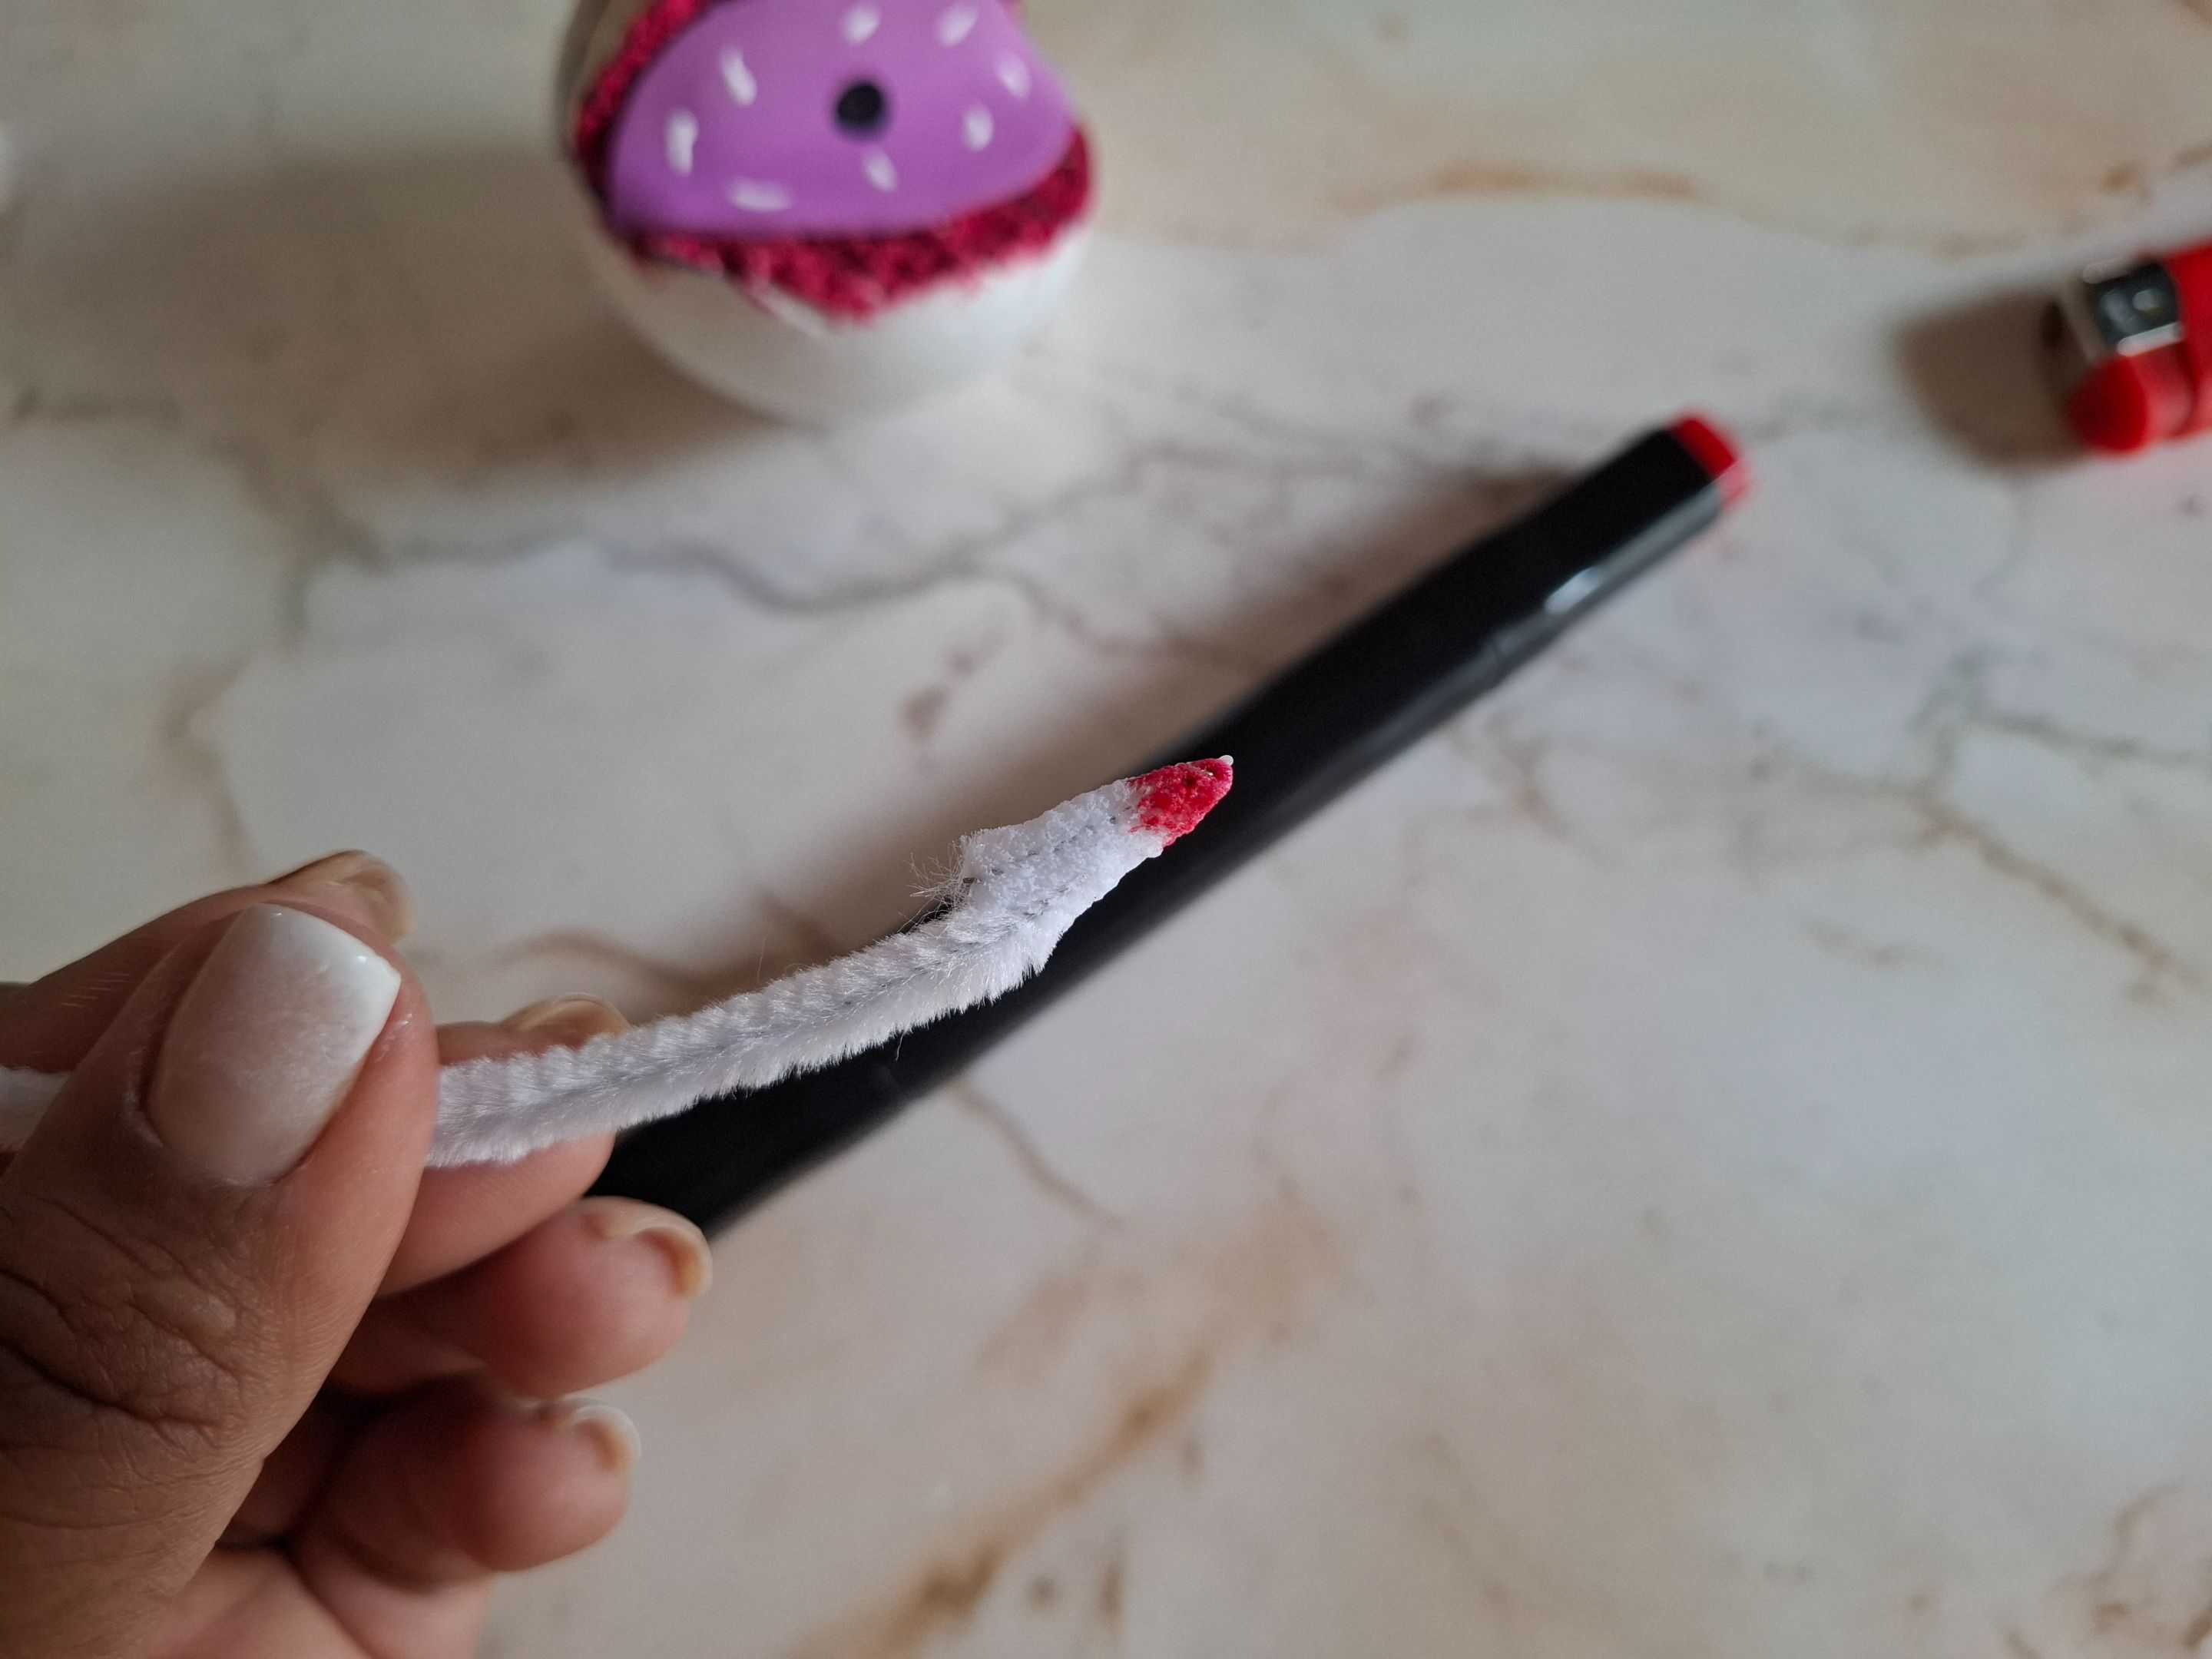
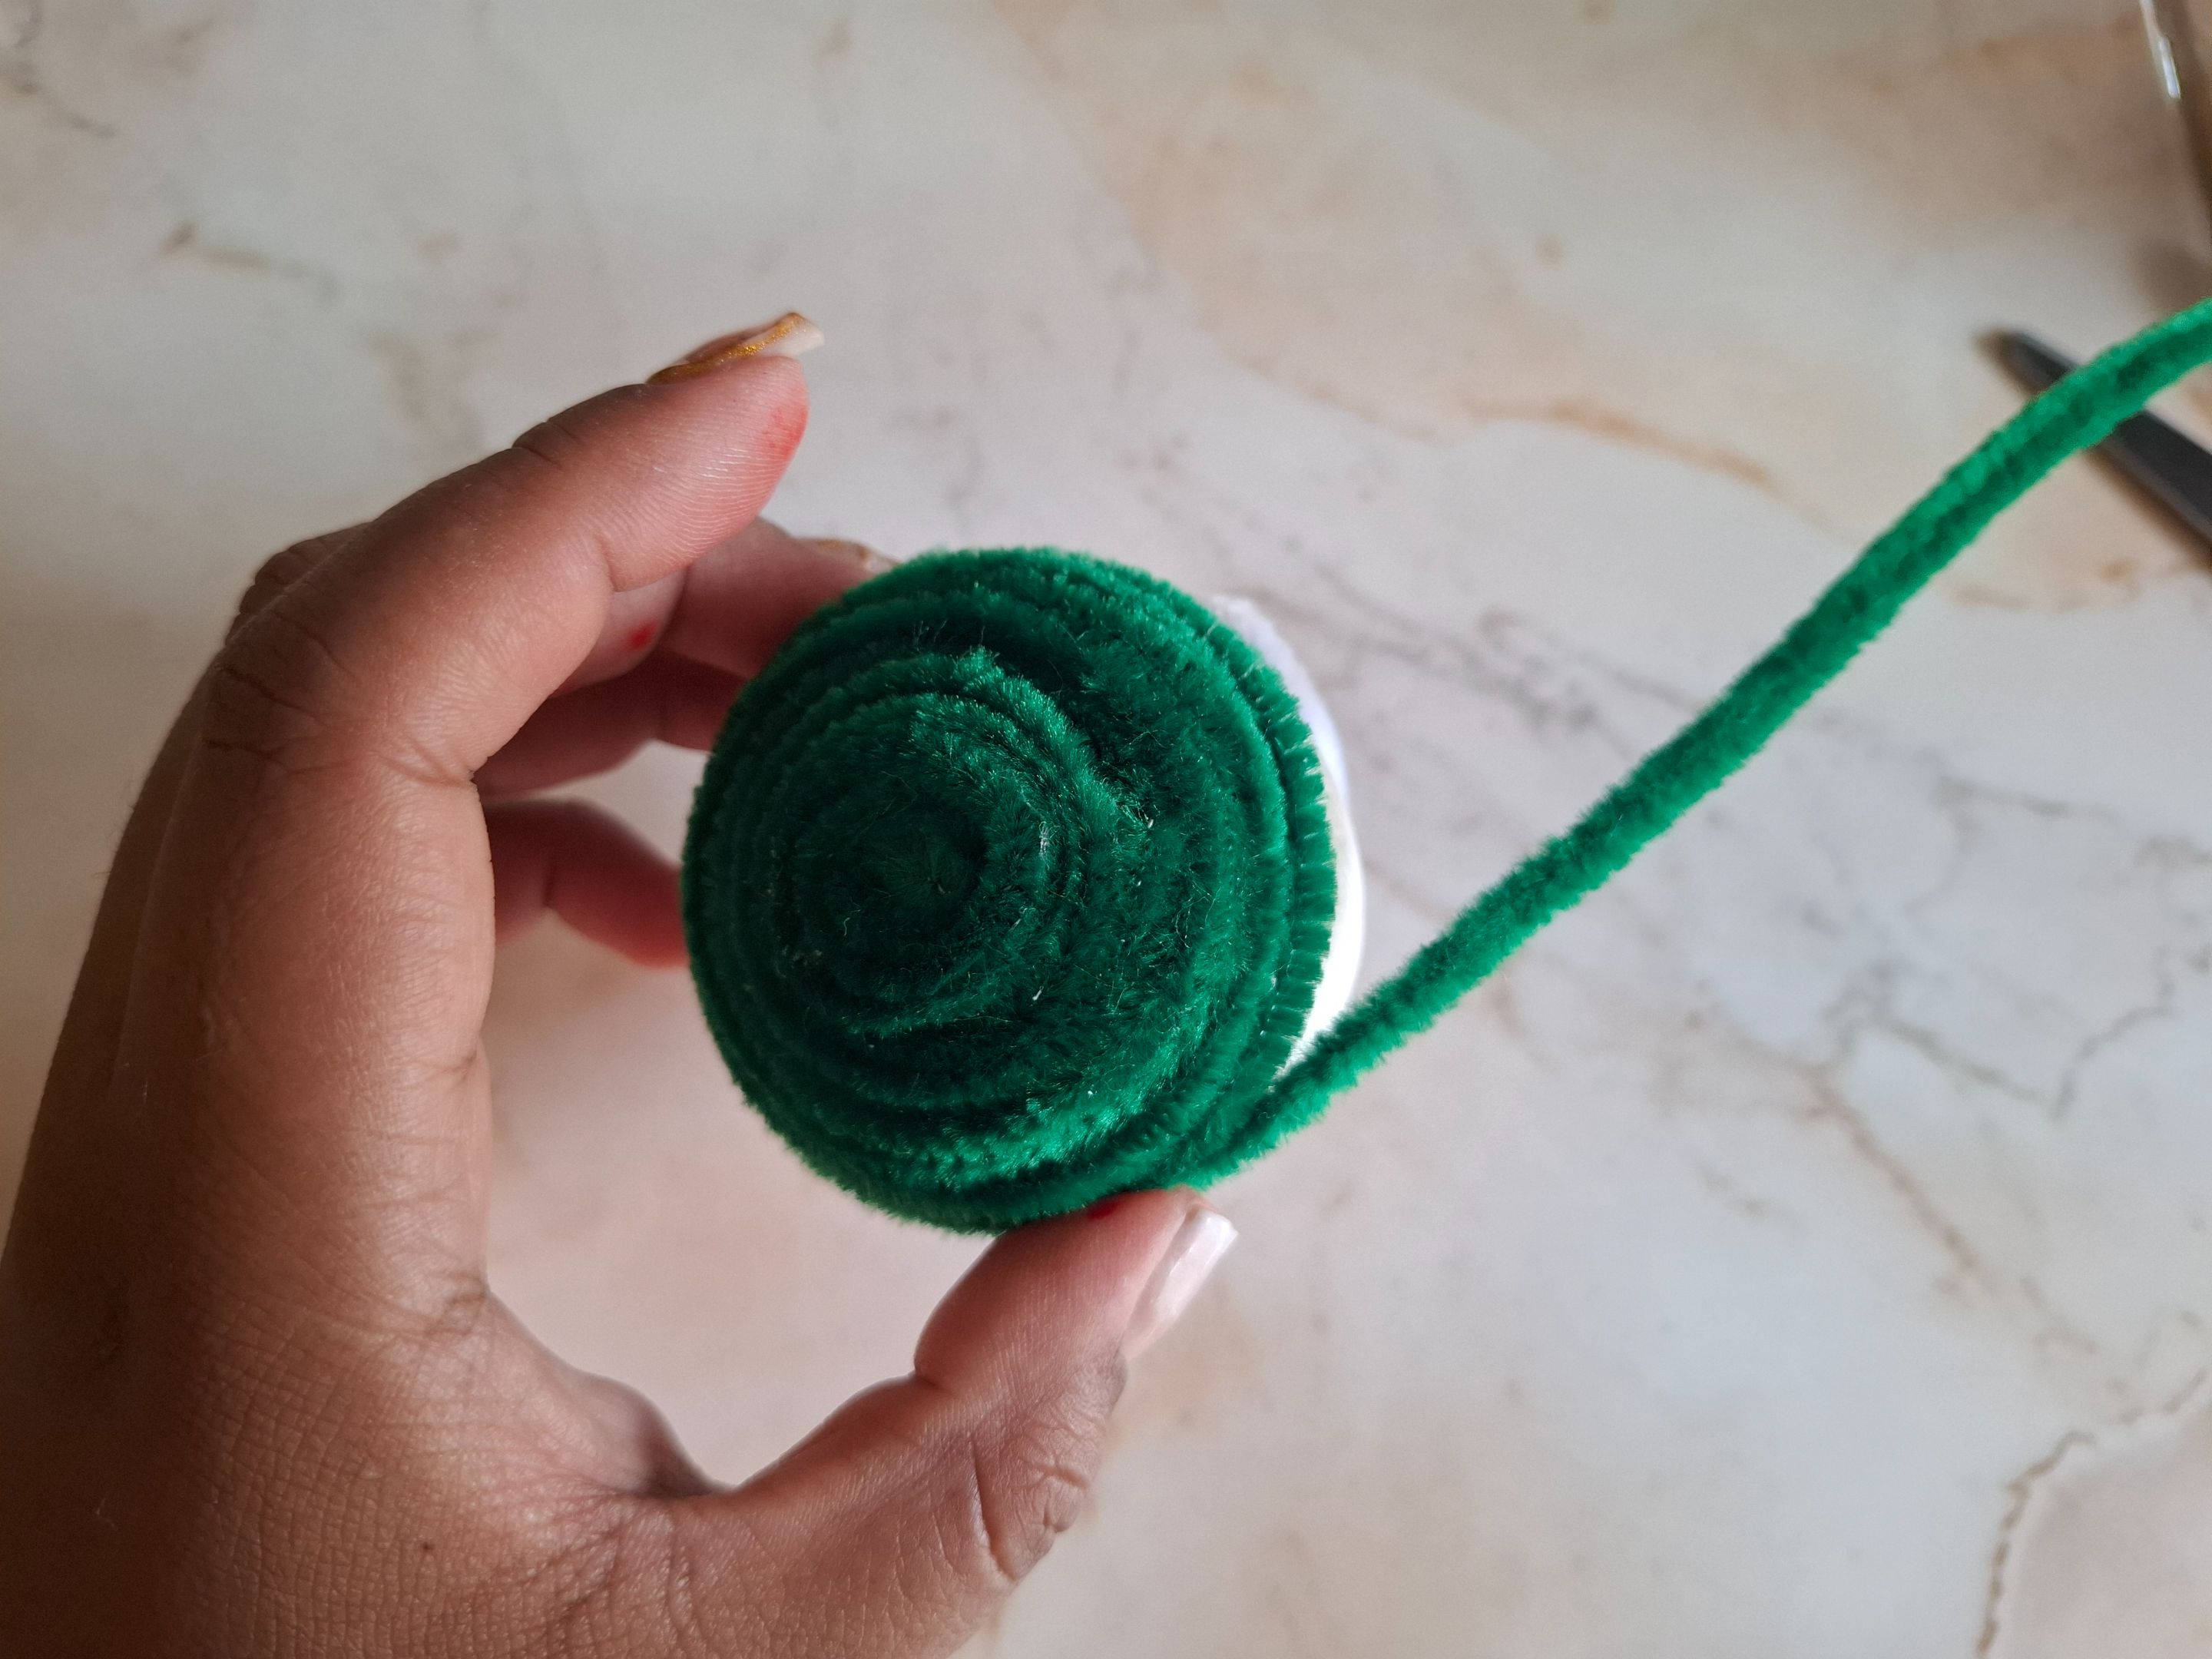
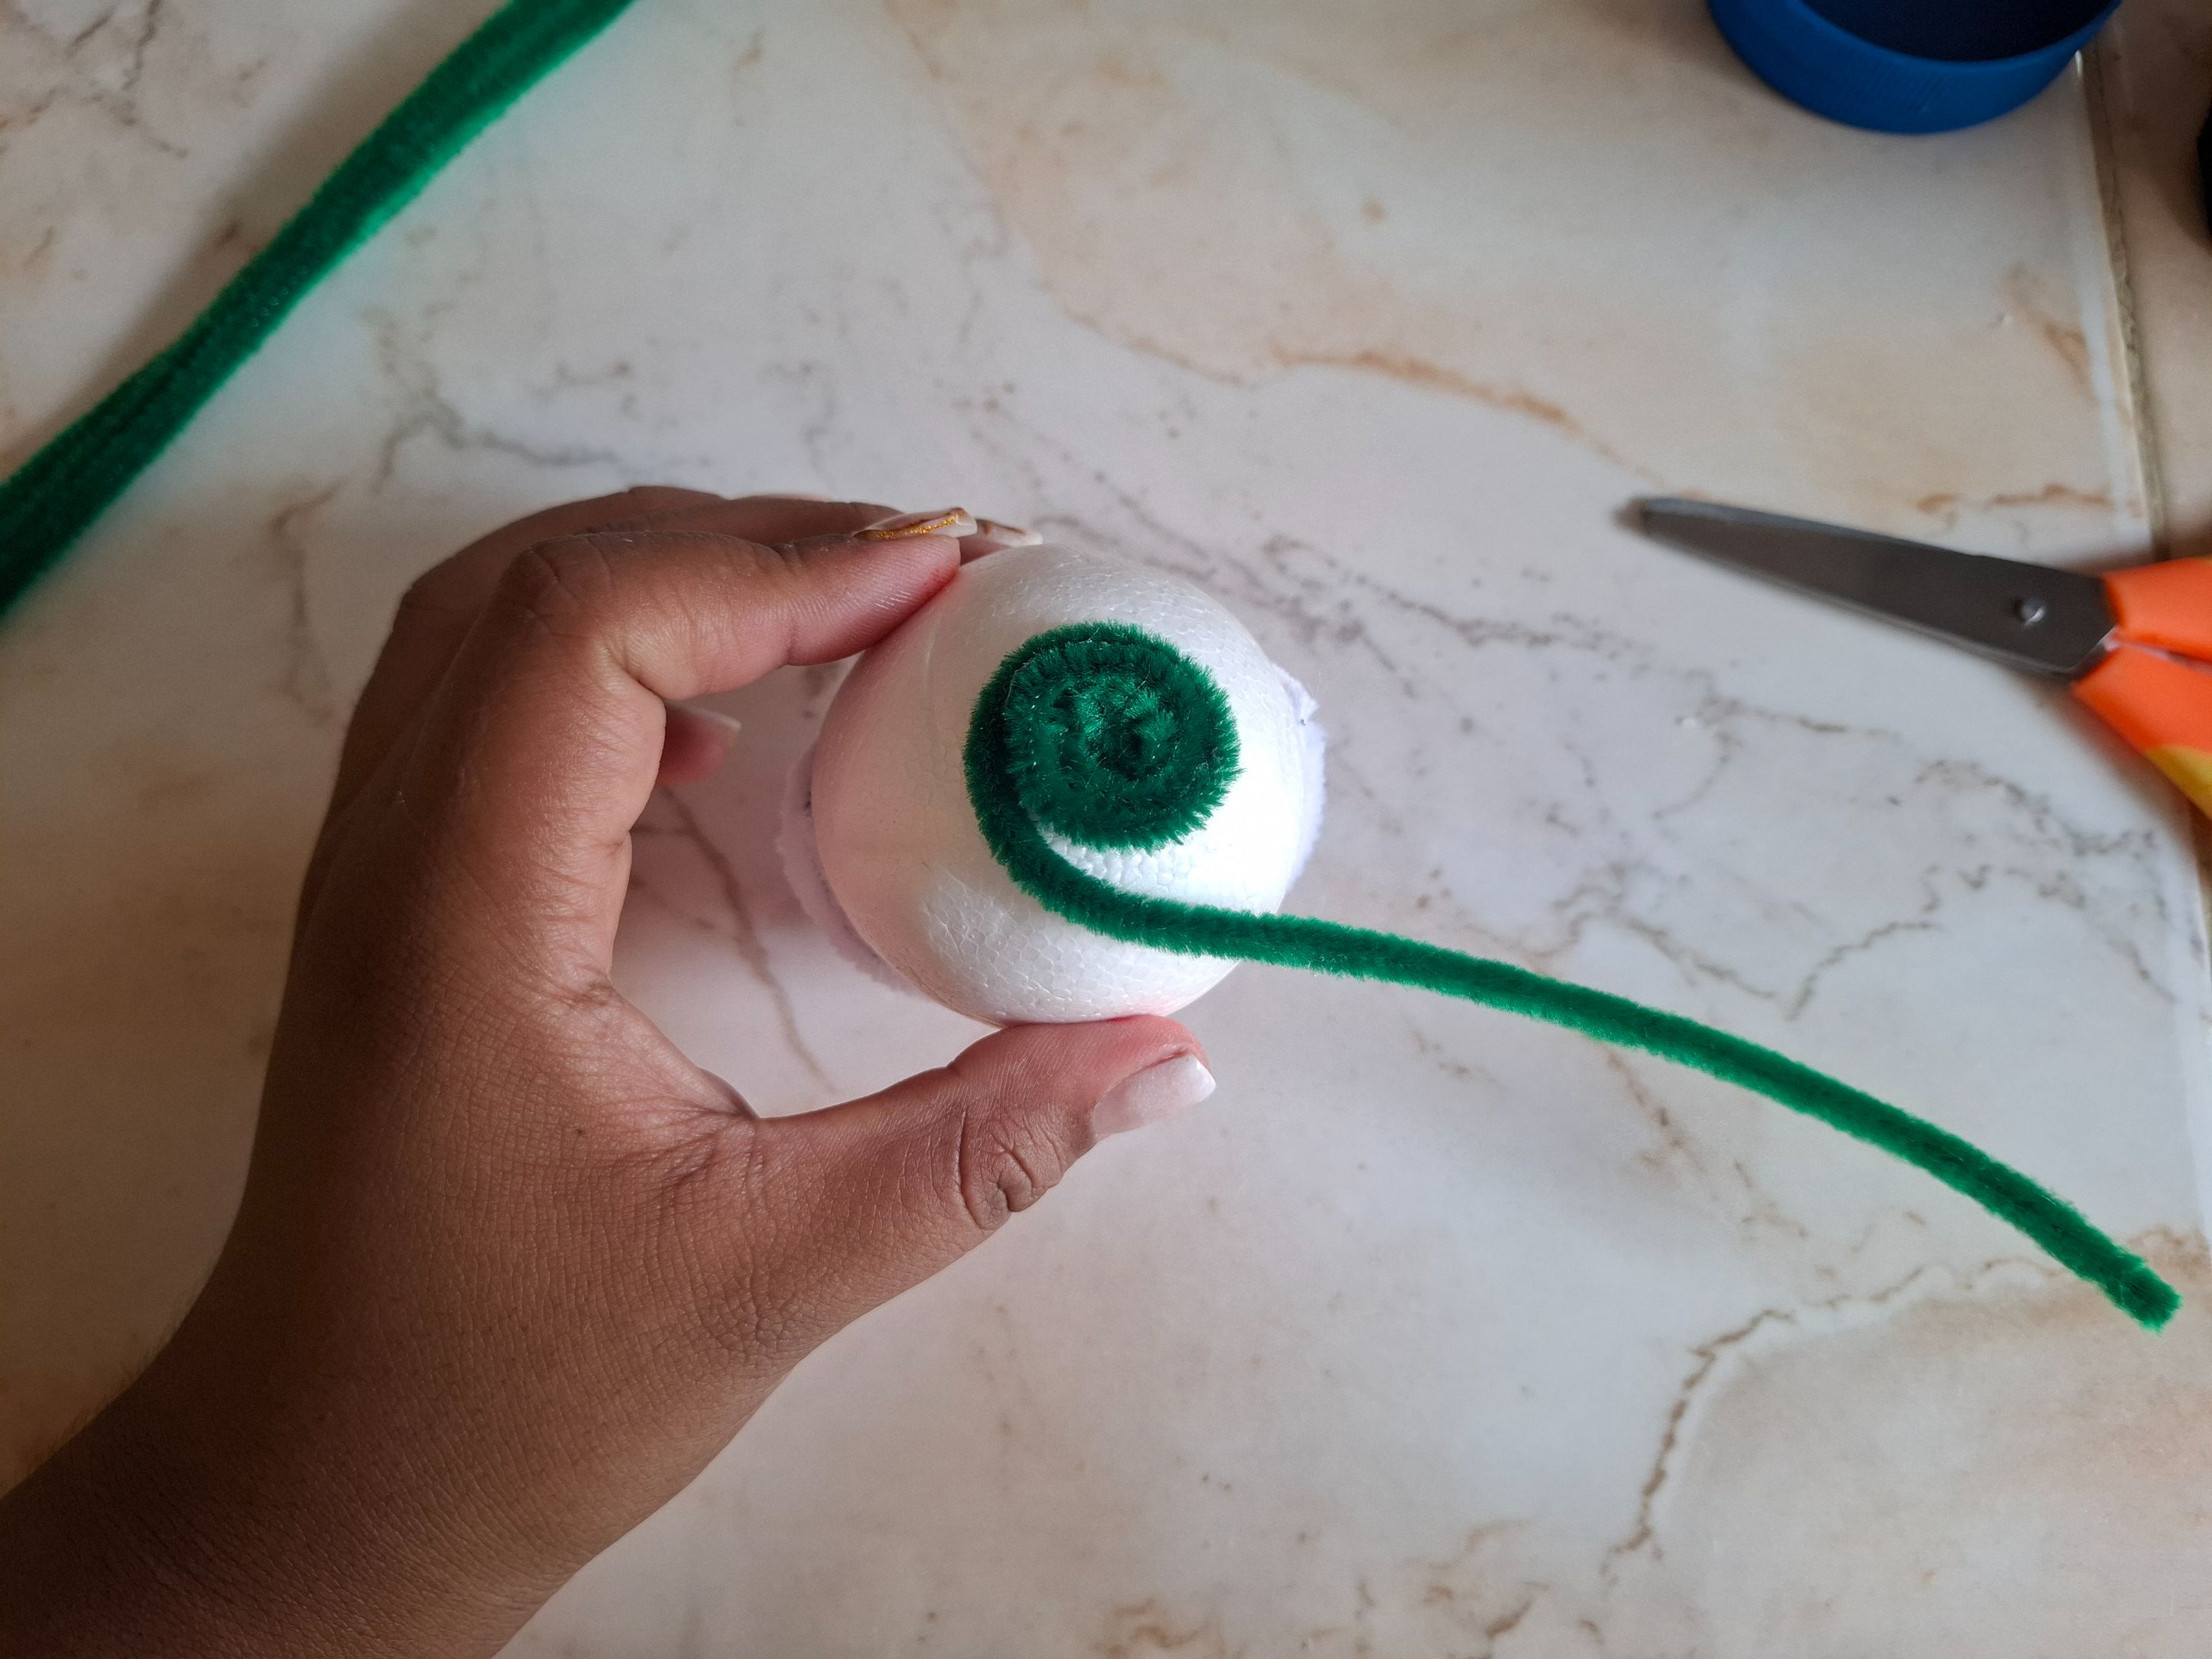
Para que los dientes tengan una forma similar a la imagen principal, voy a cortar pequeñas piezas de limpiapipas, afinamos la punta con ayuda de un encendedor para dar esa forma puntiaguda, y colocamos marcador rojo. Luego voy pegar cada uno de los dientes con silicón caliente.
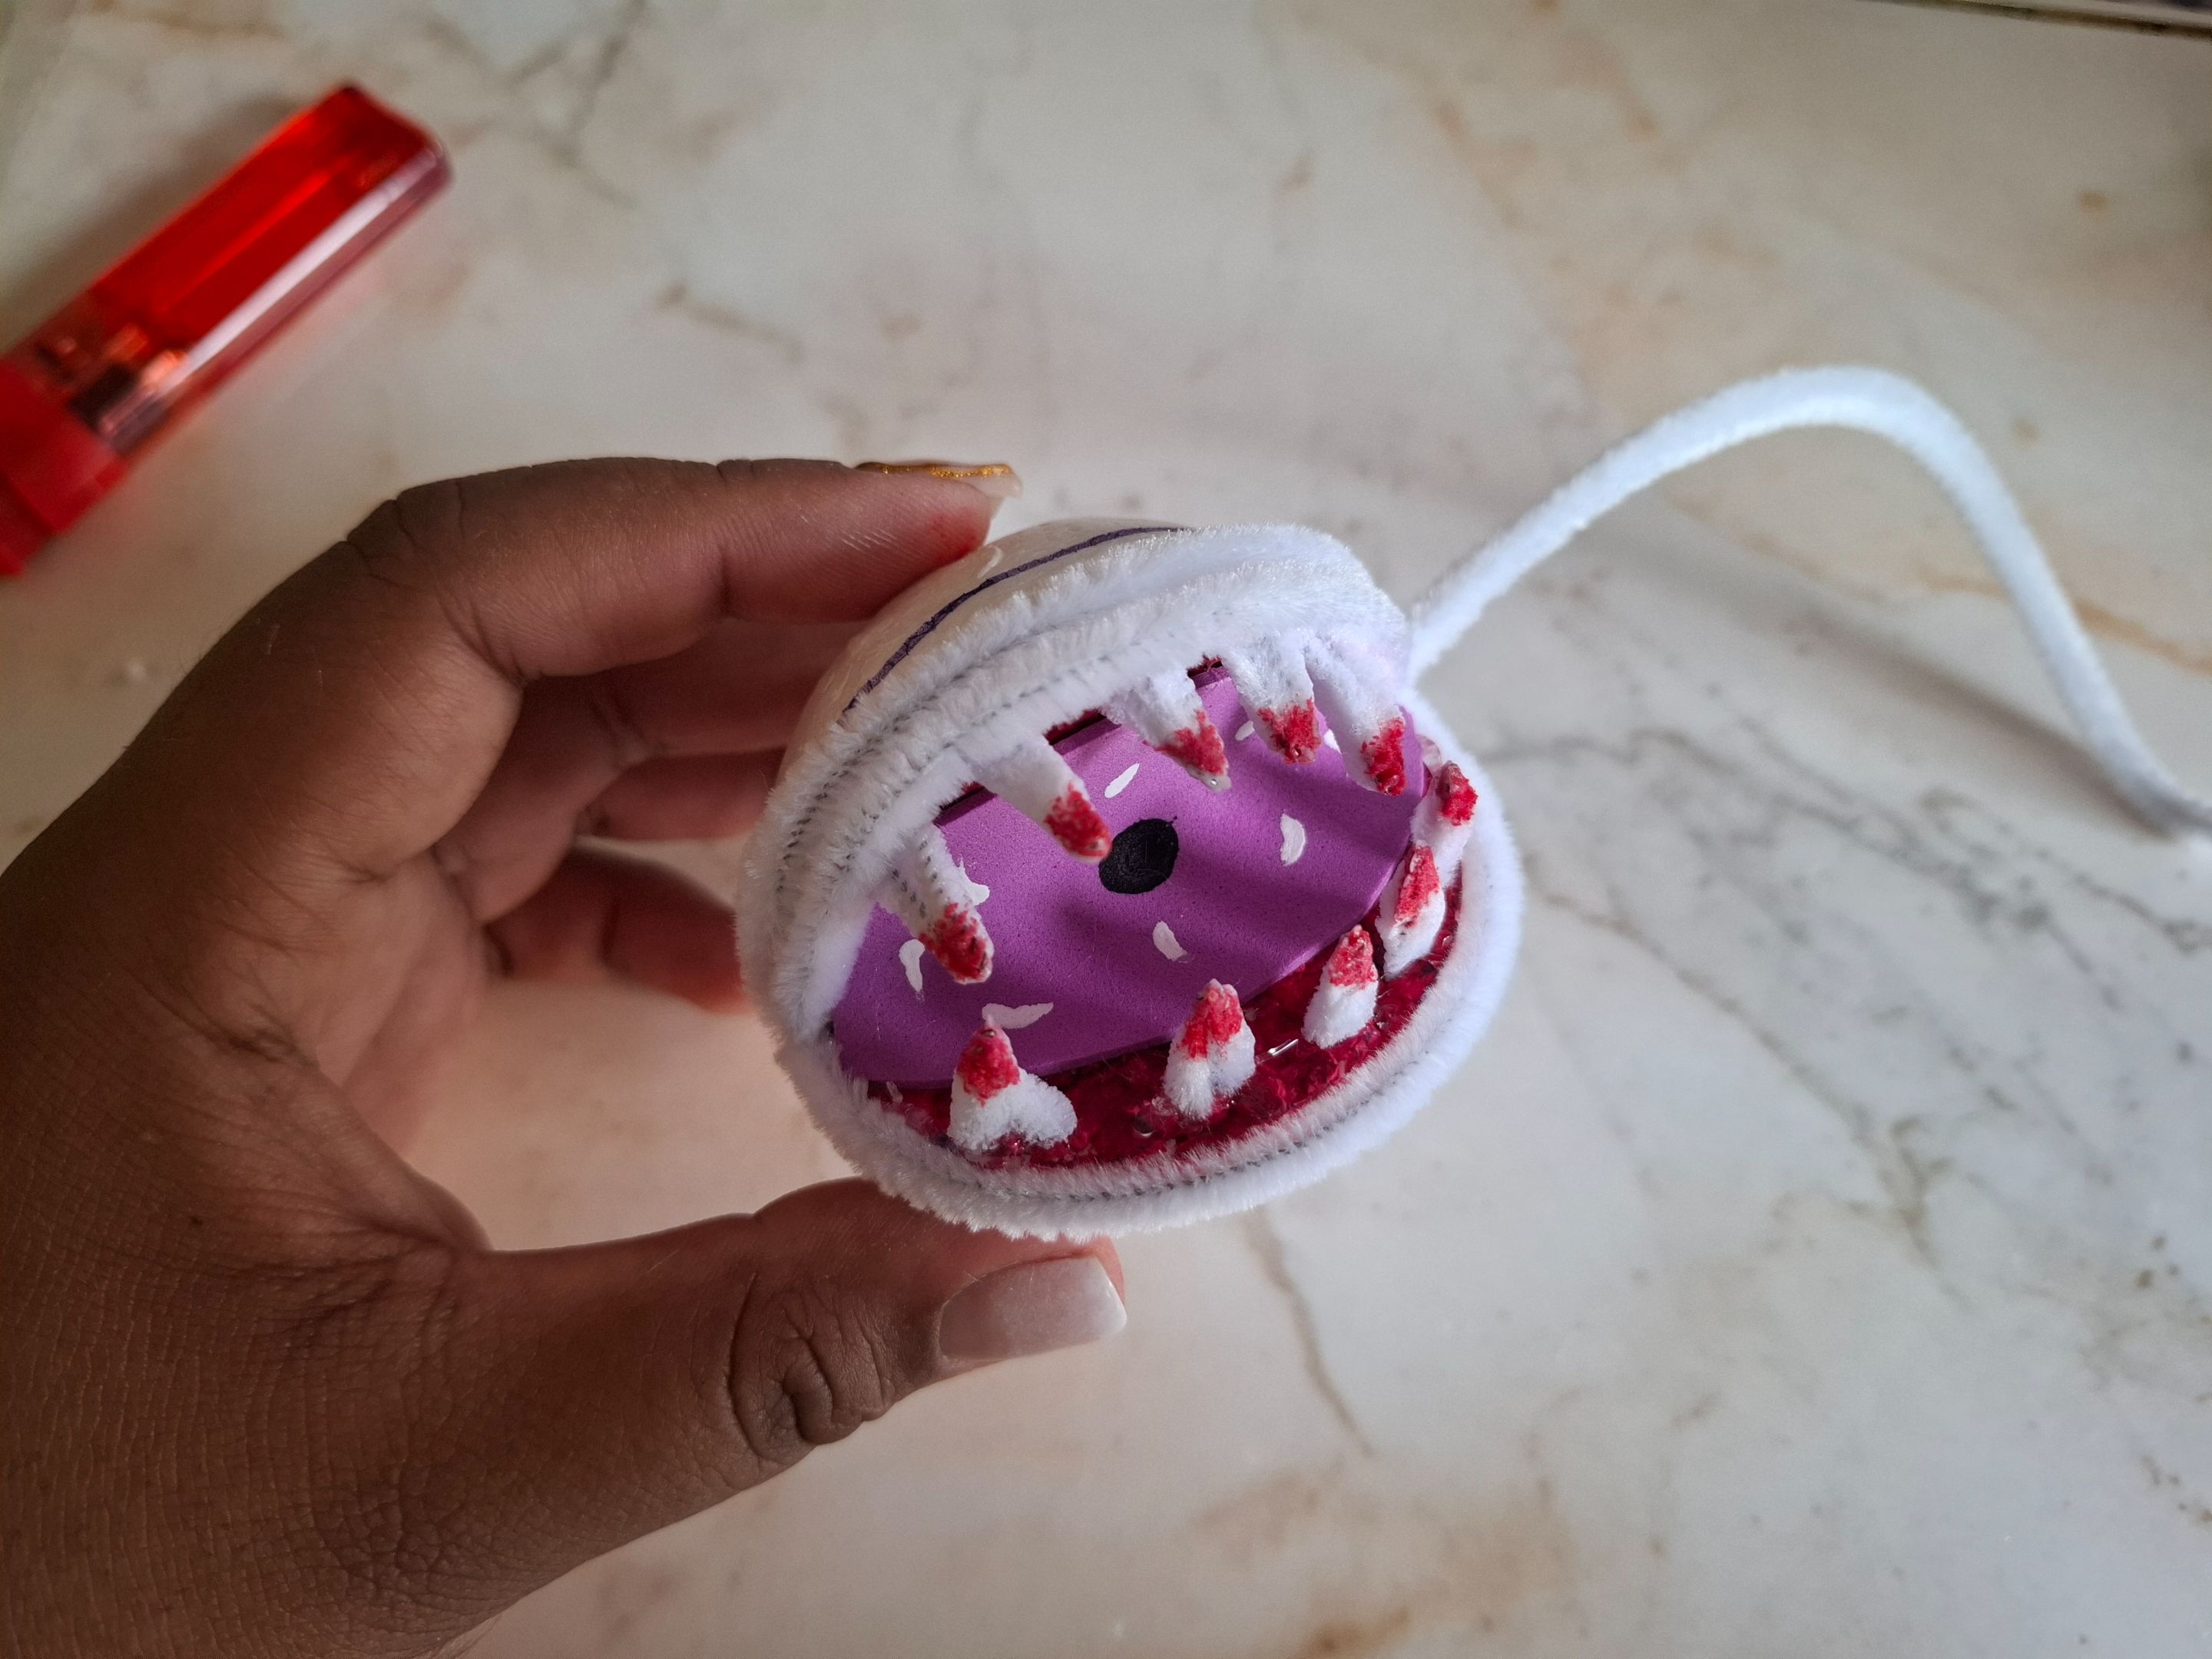
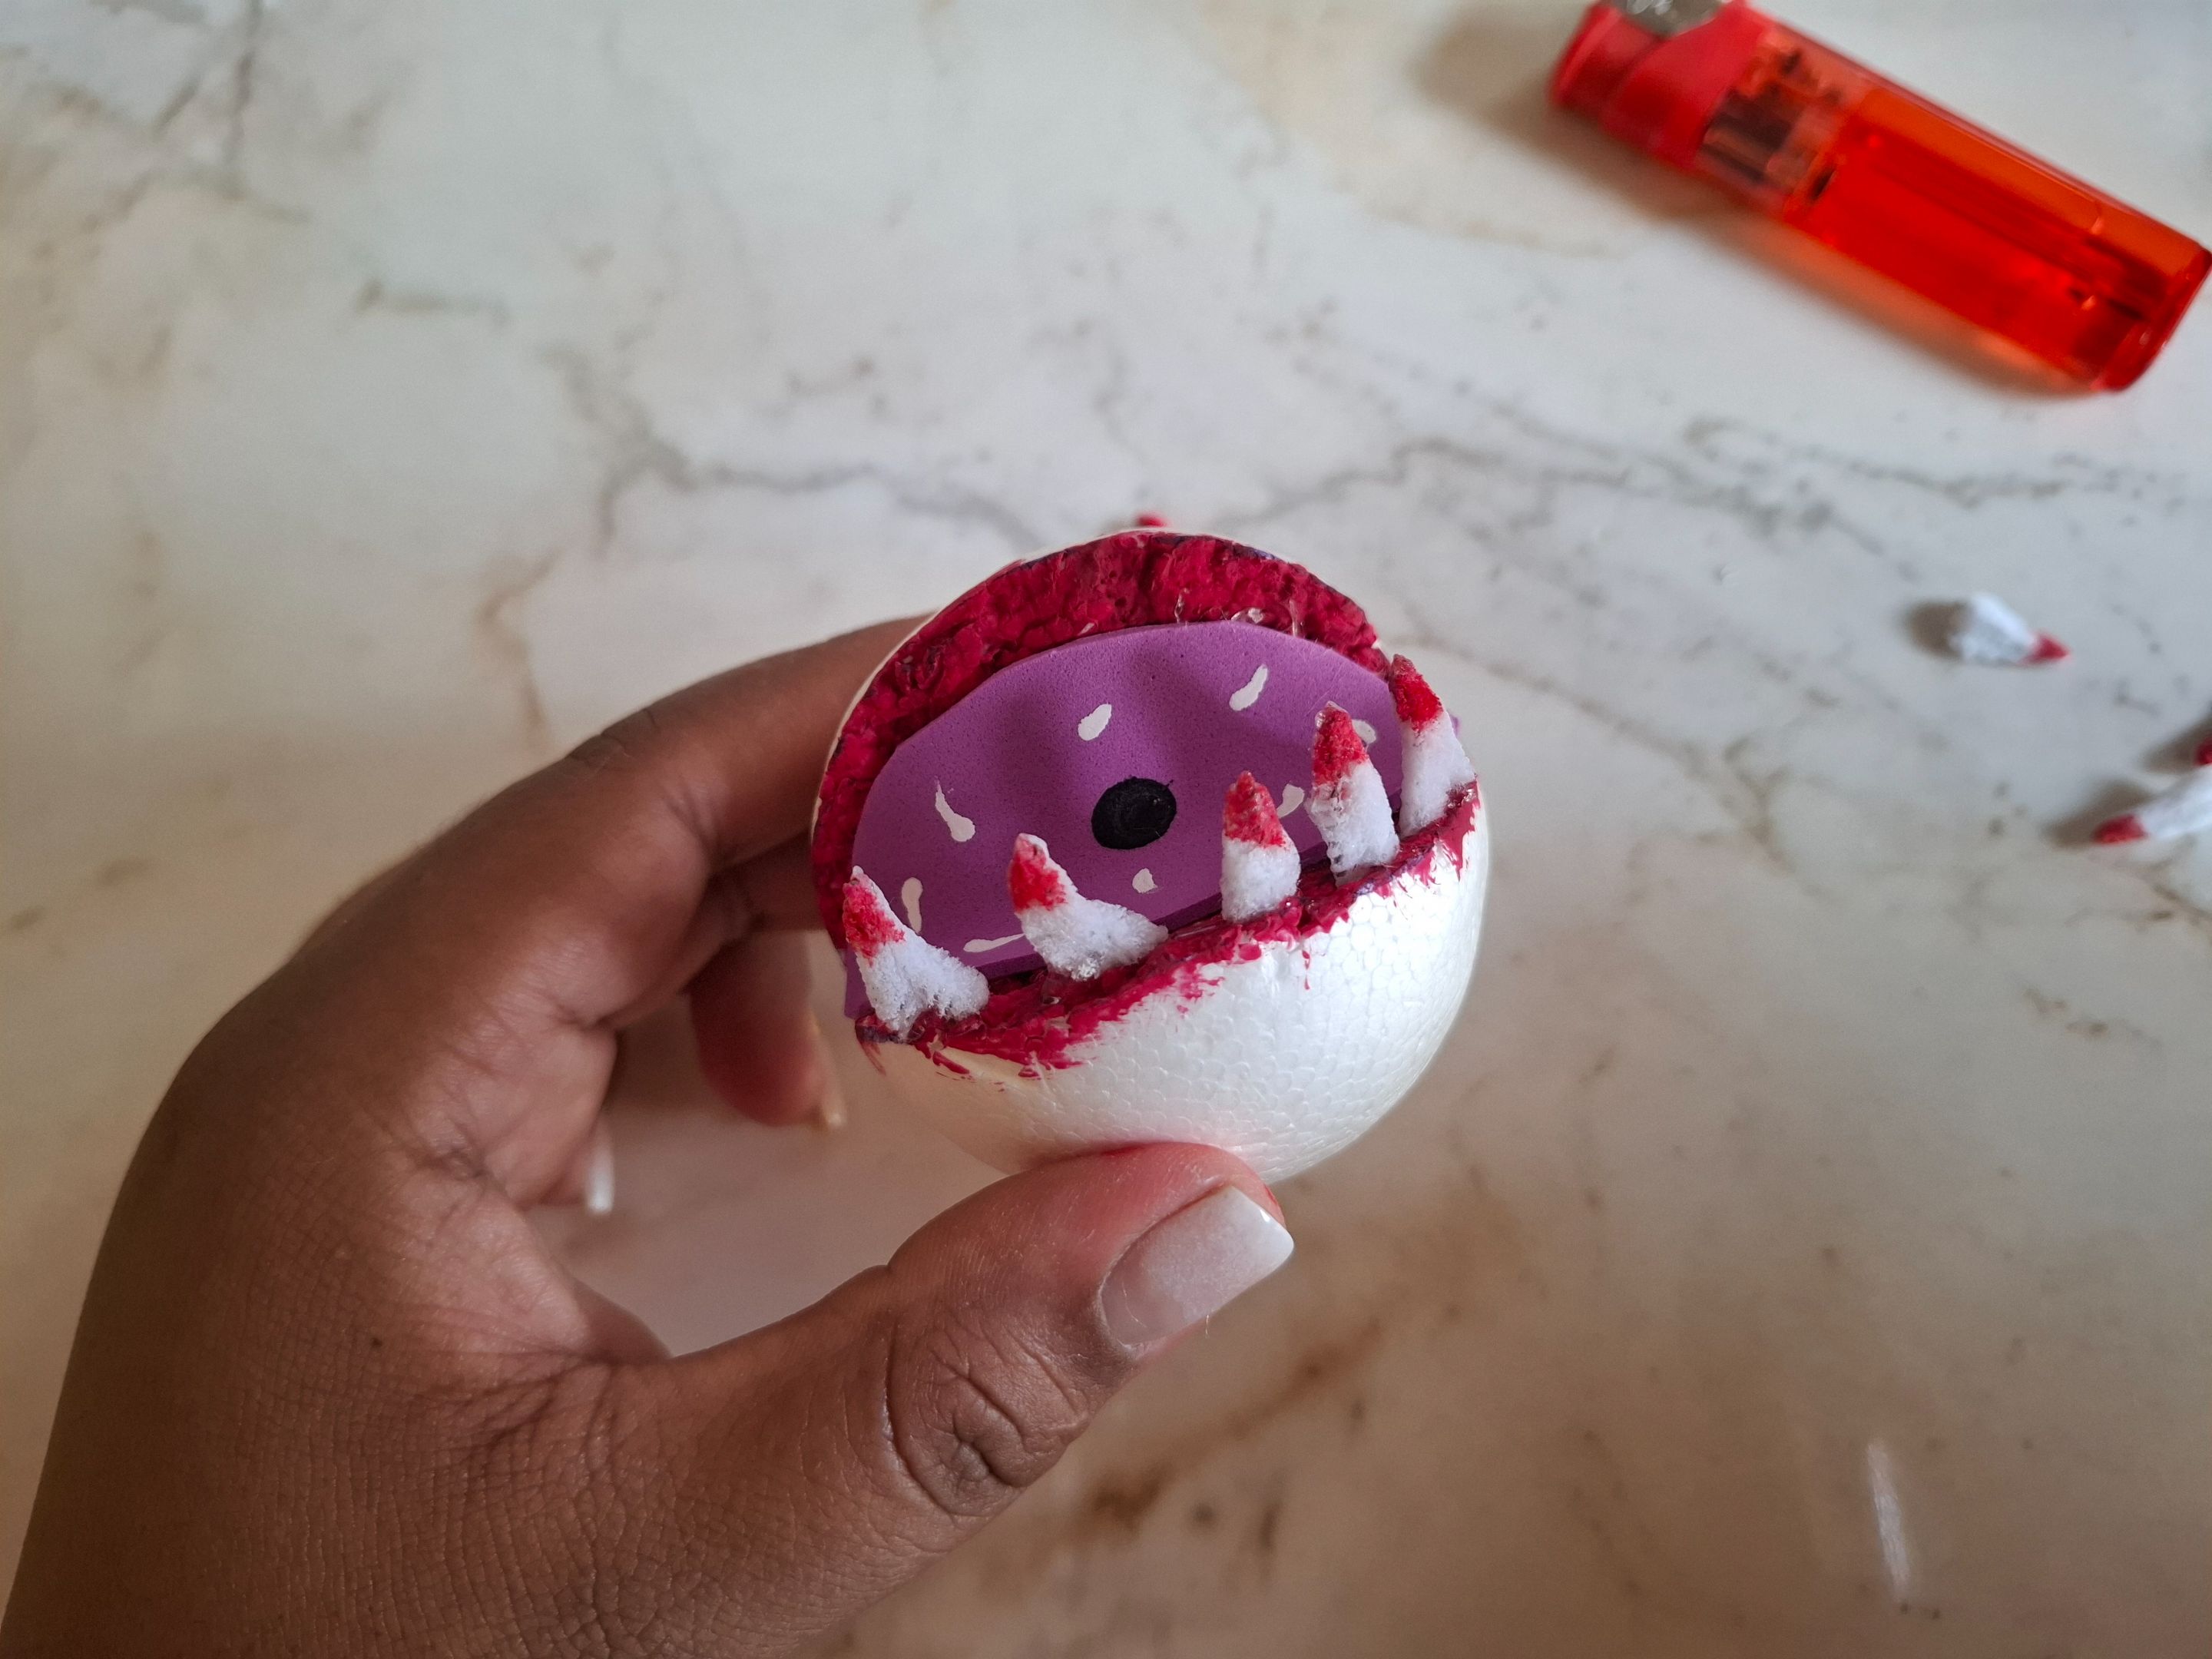
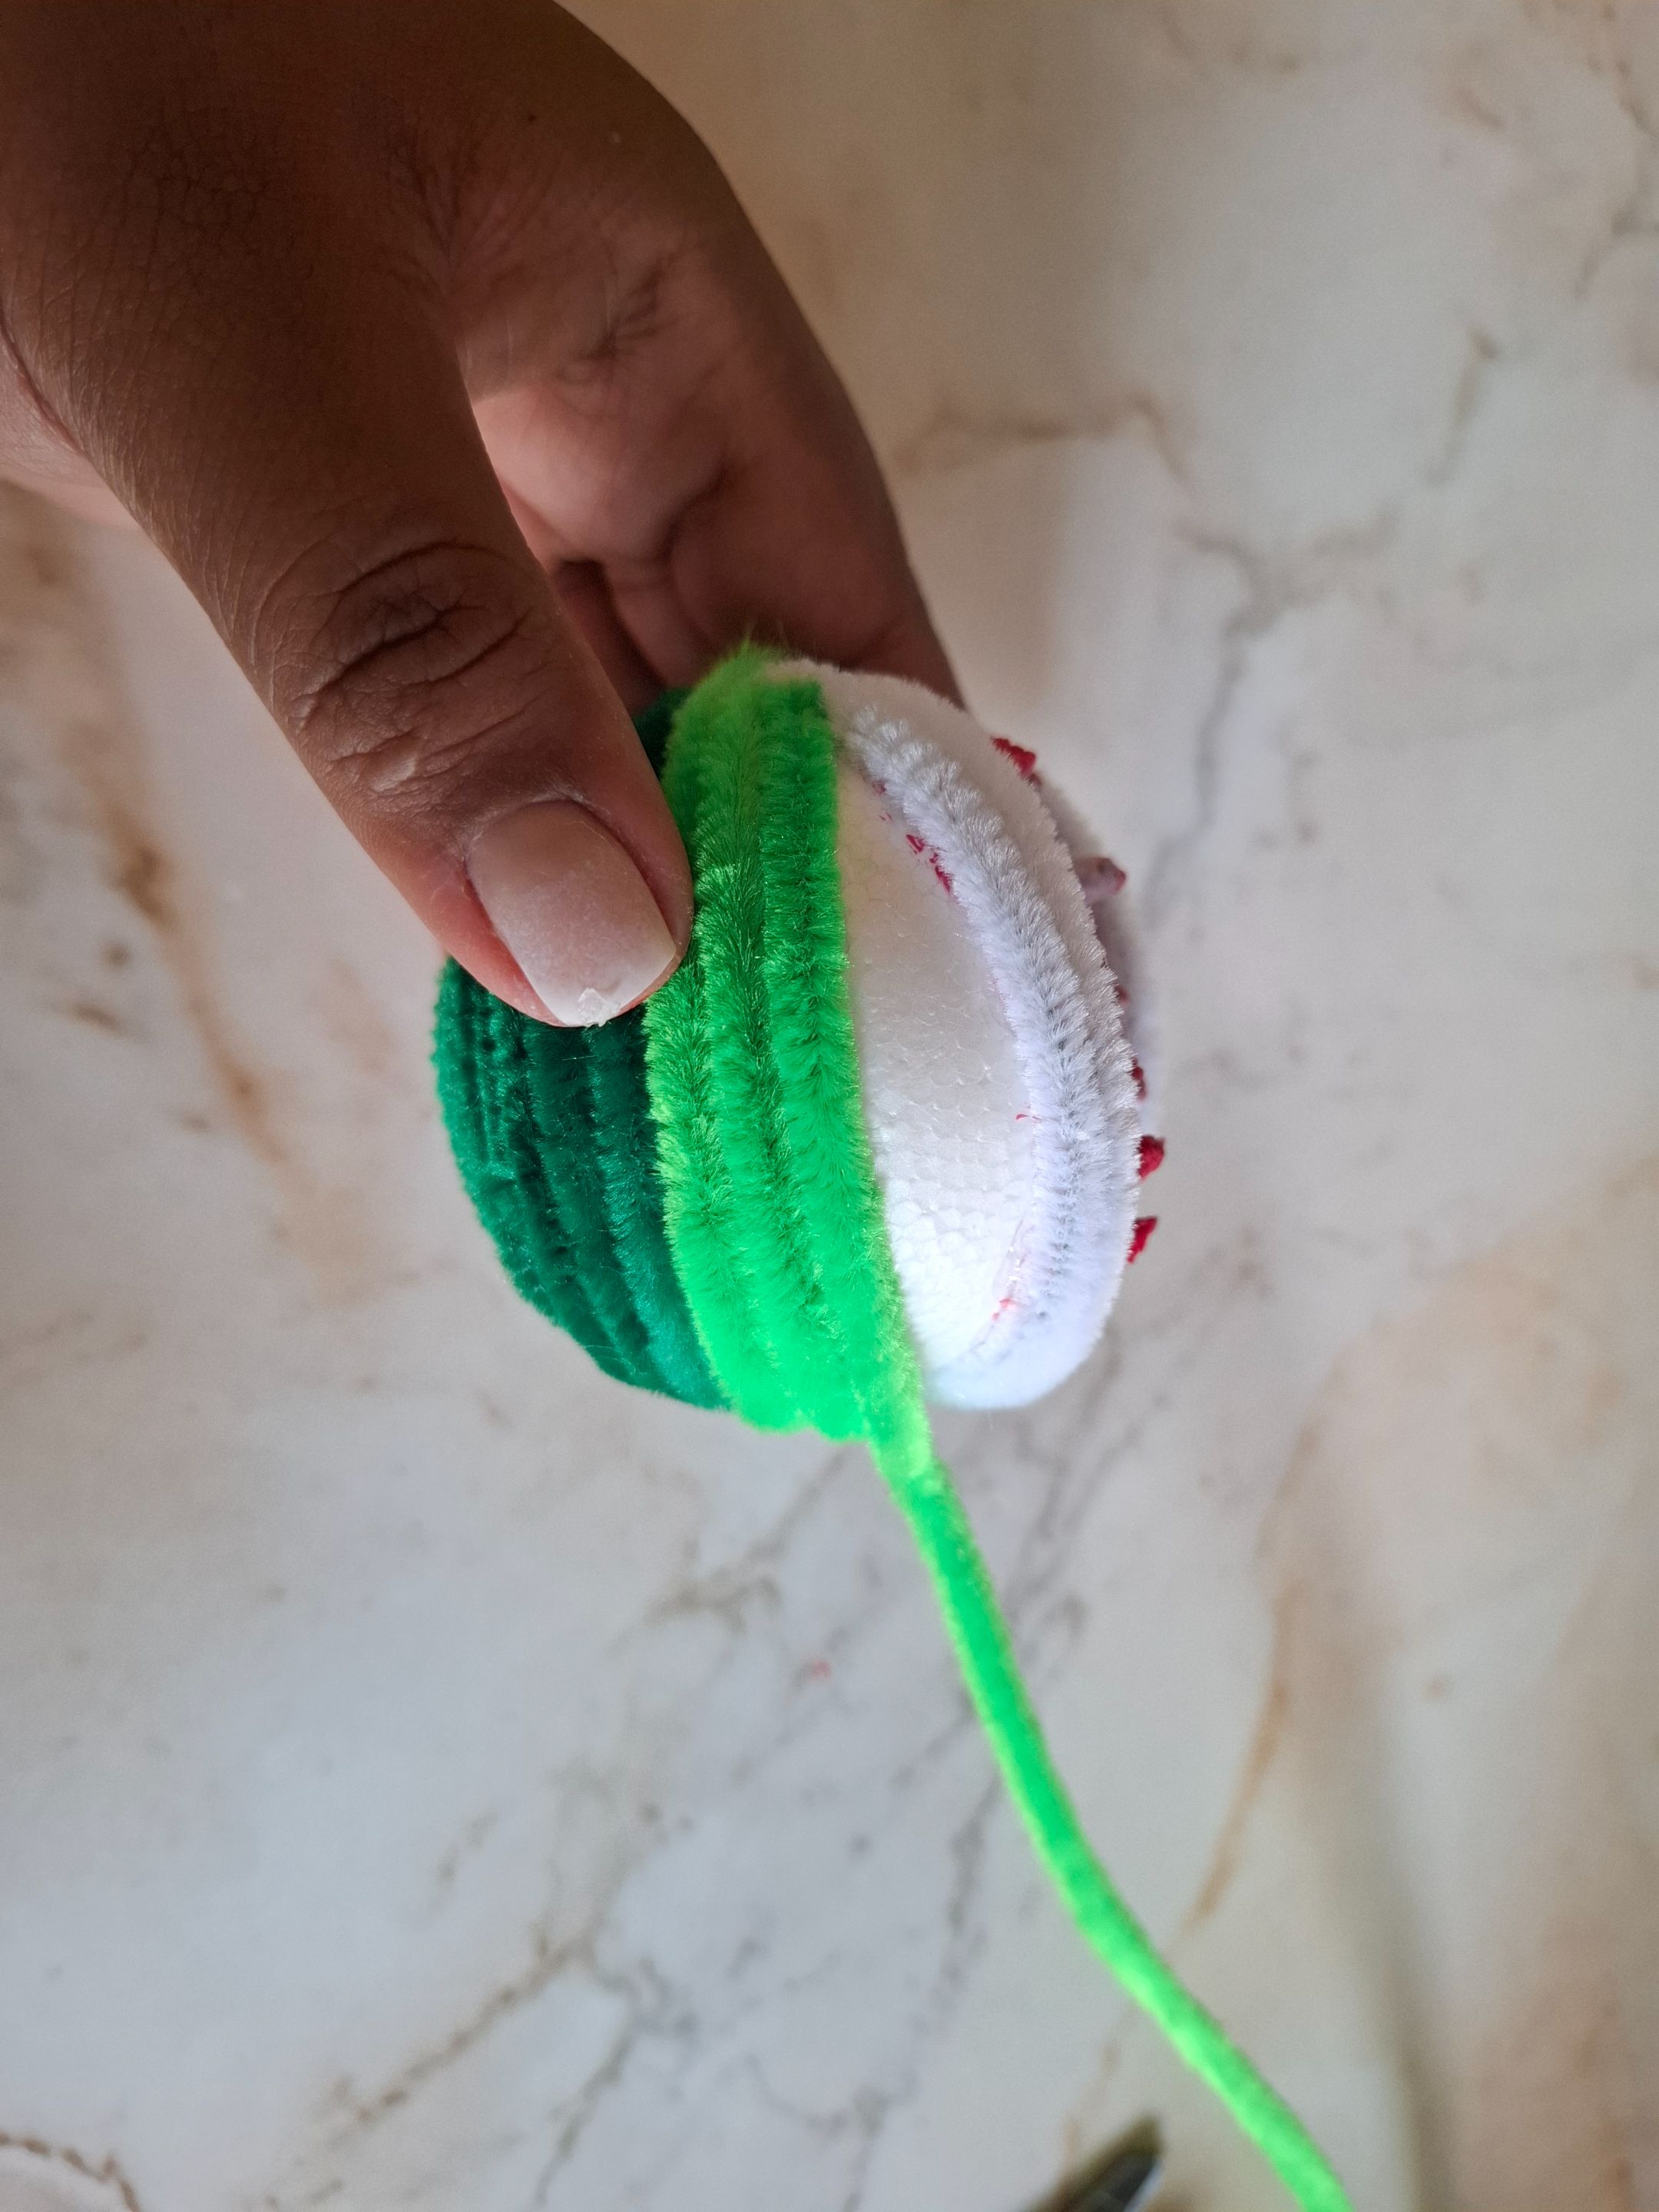
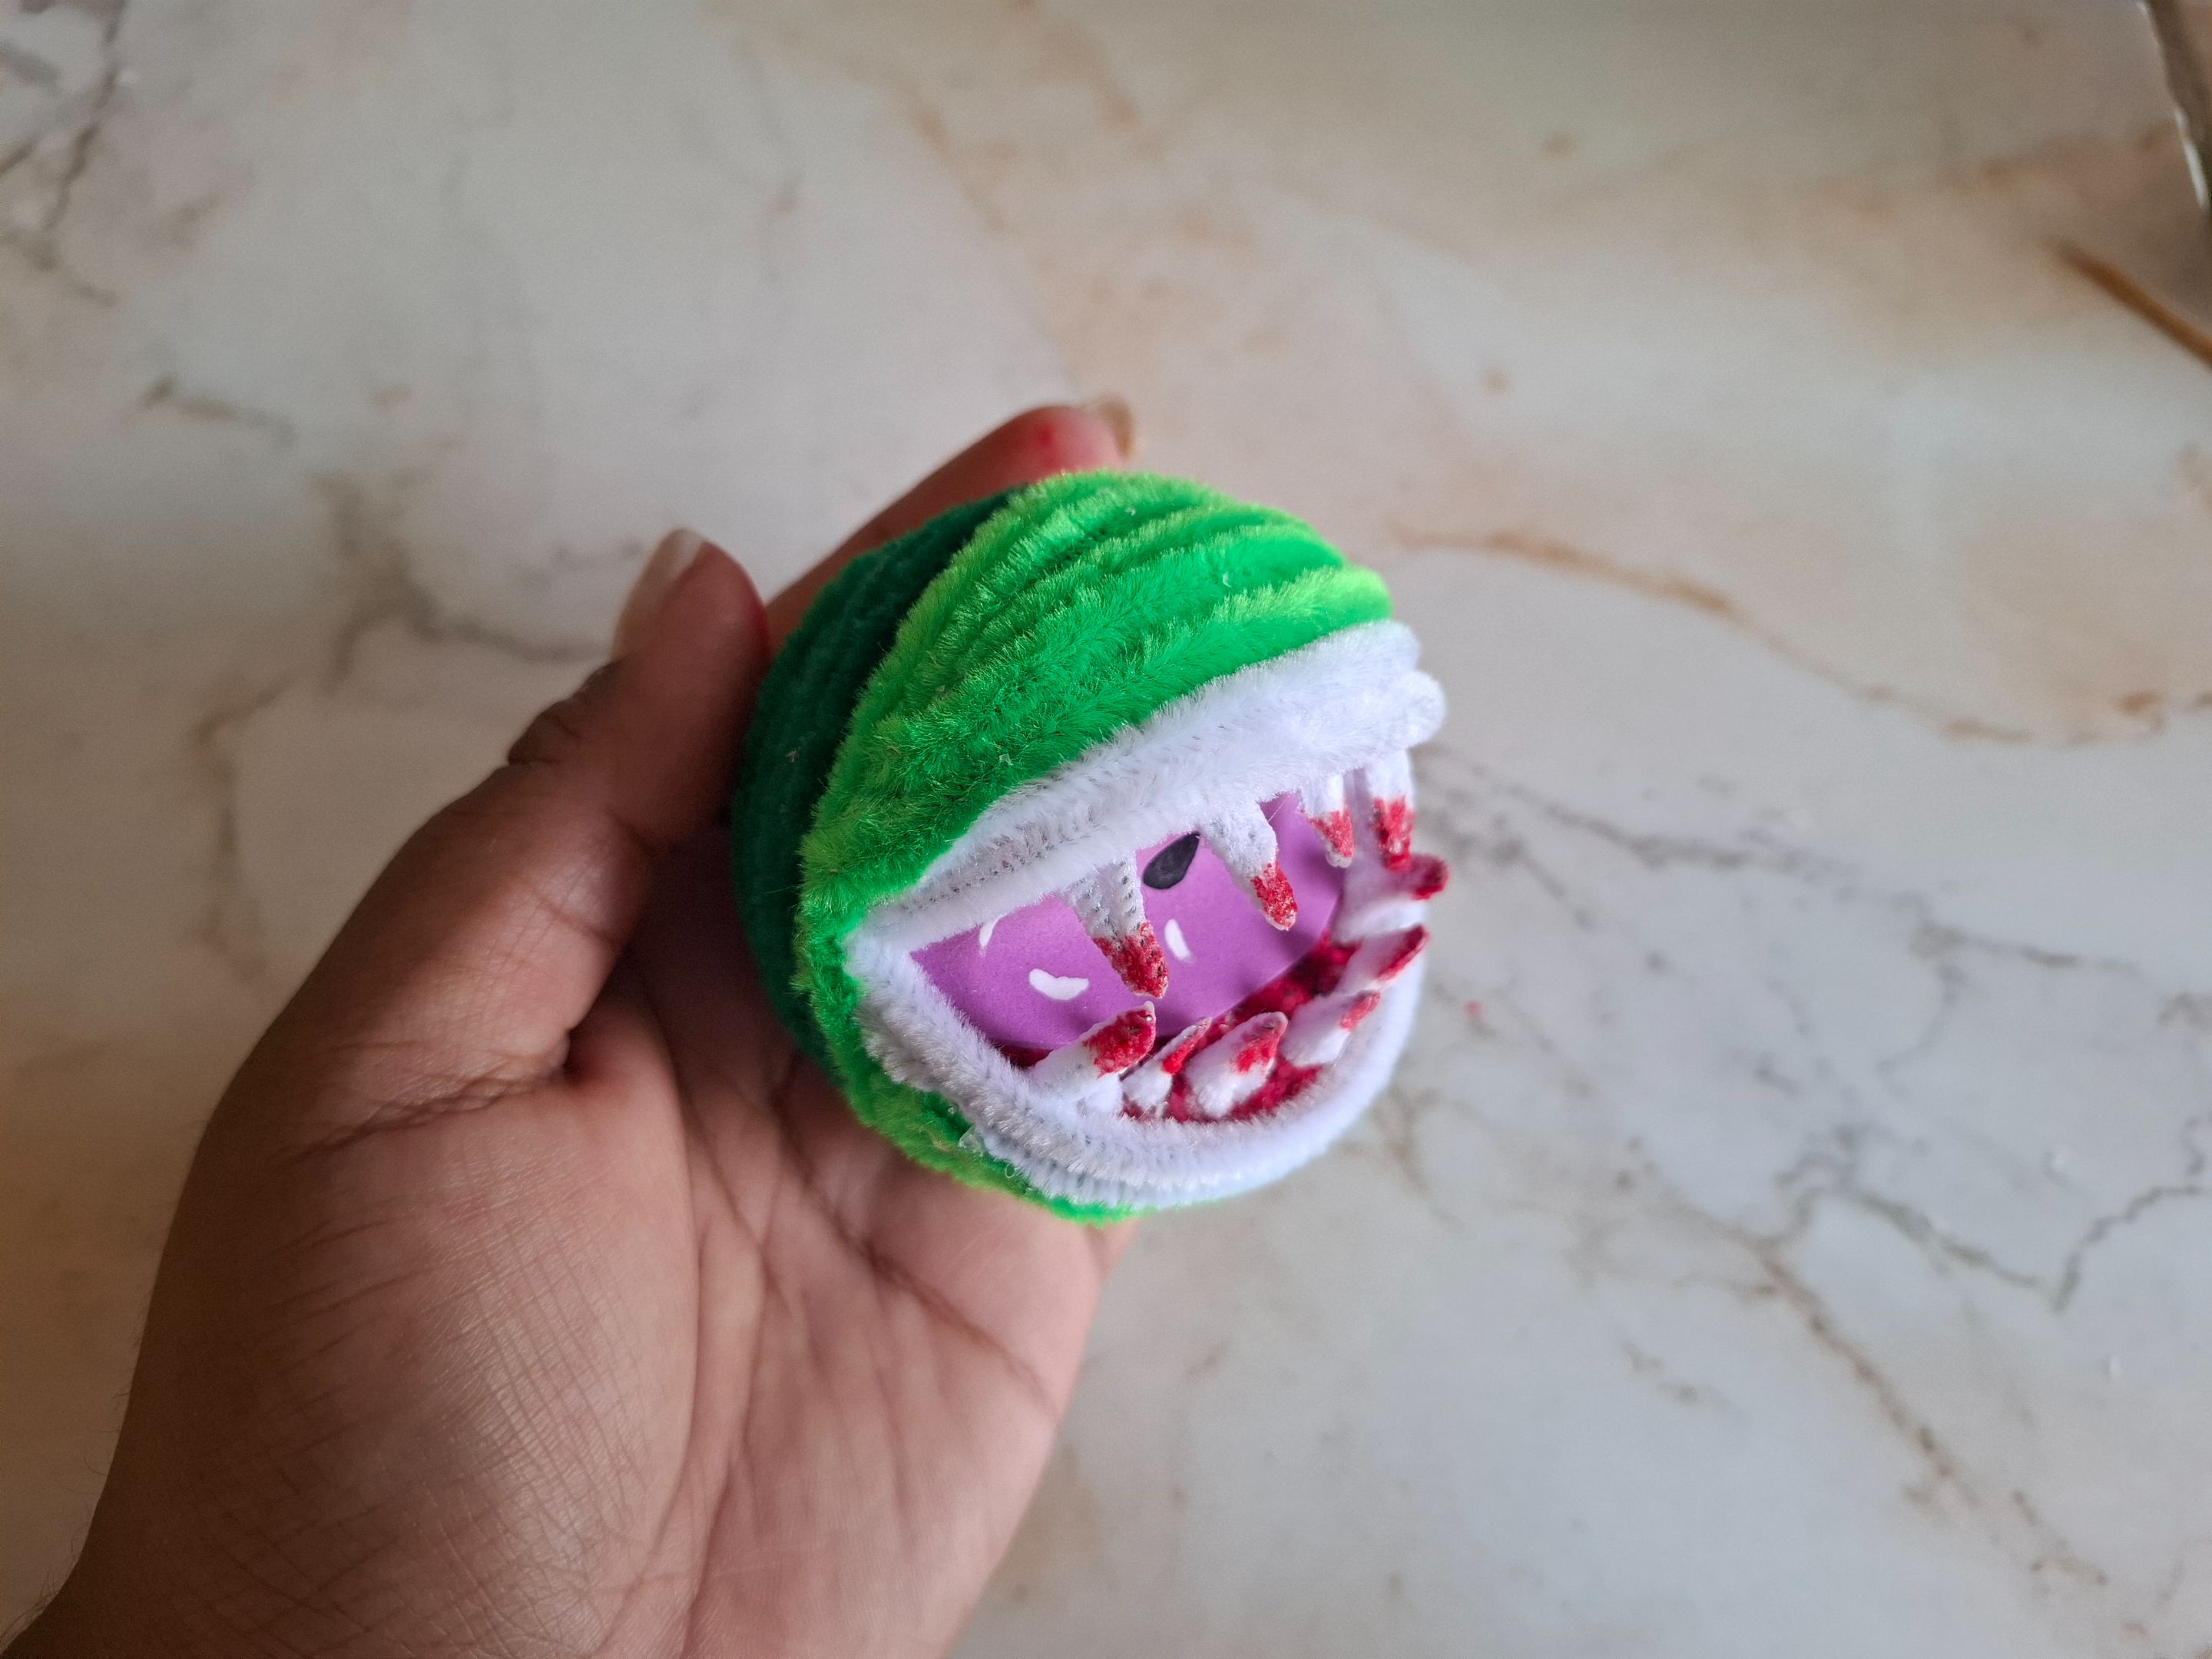
Para continuar voy a cubrir el borde con limpiapipas blanco, colocamos dos capas, al terminar voy a comenzar a cubrir la parte trasera con el limpiapipas verde oscuro, hasta alcanzar más de la mitad, luego lo voy a combinar con el limpiapipas verde claro hasta terminar de cubrir.
To make the teeth similar in shape to the main image, I'll cut small pieces of pipe cleaner, sharpen the tips with a lighter to create a pointed shape, and apply a red marker. Then I'll glue each tooth together with hot glue.
To continue, I'm going to cover the edge with white pipe cleaners, placing two layers. When I'm finished, I'm going to start covering the back with the dark green pipe cleaner, until I reach more than halfway, then I'm going to combine it with the light green pipe cleaner until it's completely covered.
 |
 |
|---|---|
 |
 |
|---|---|
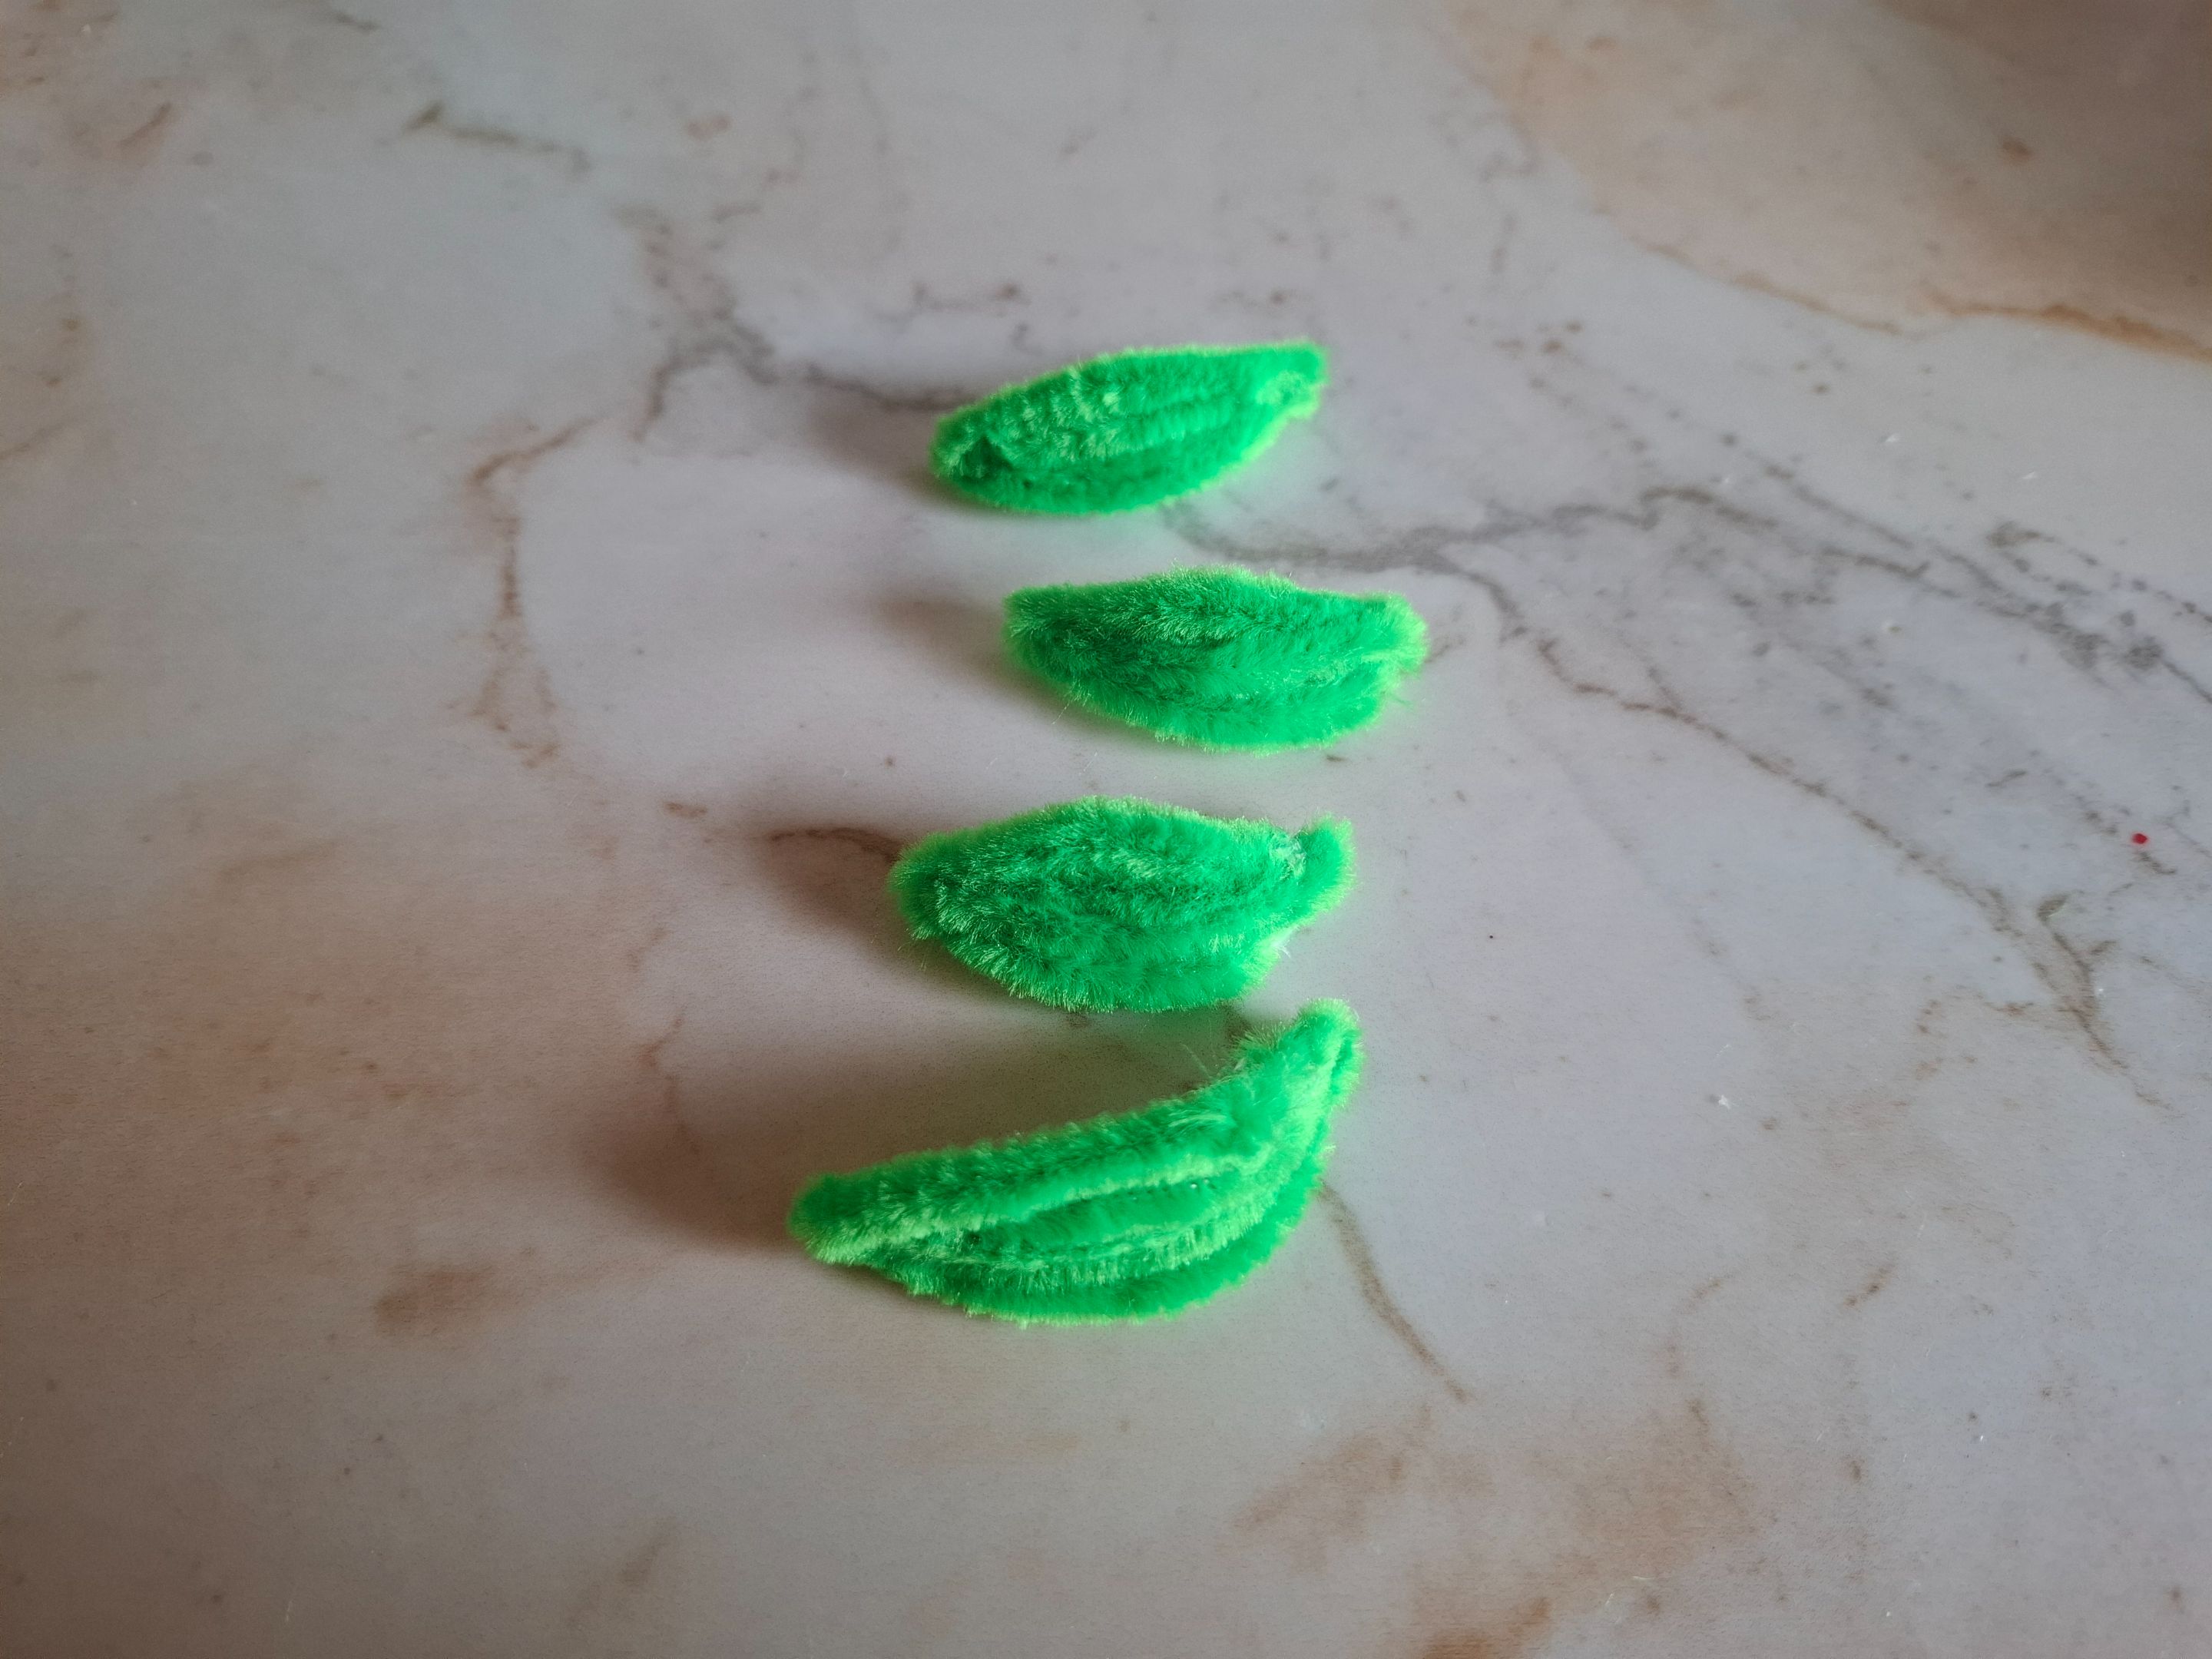
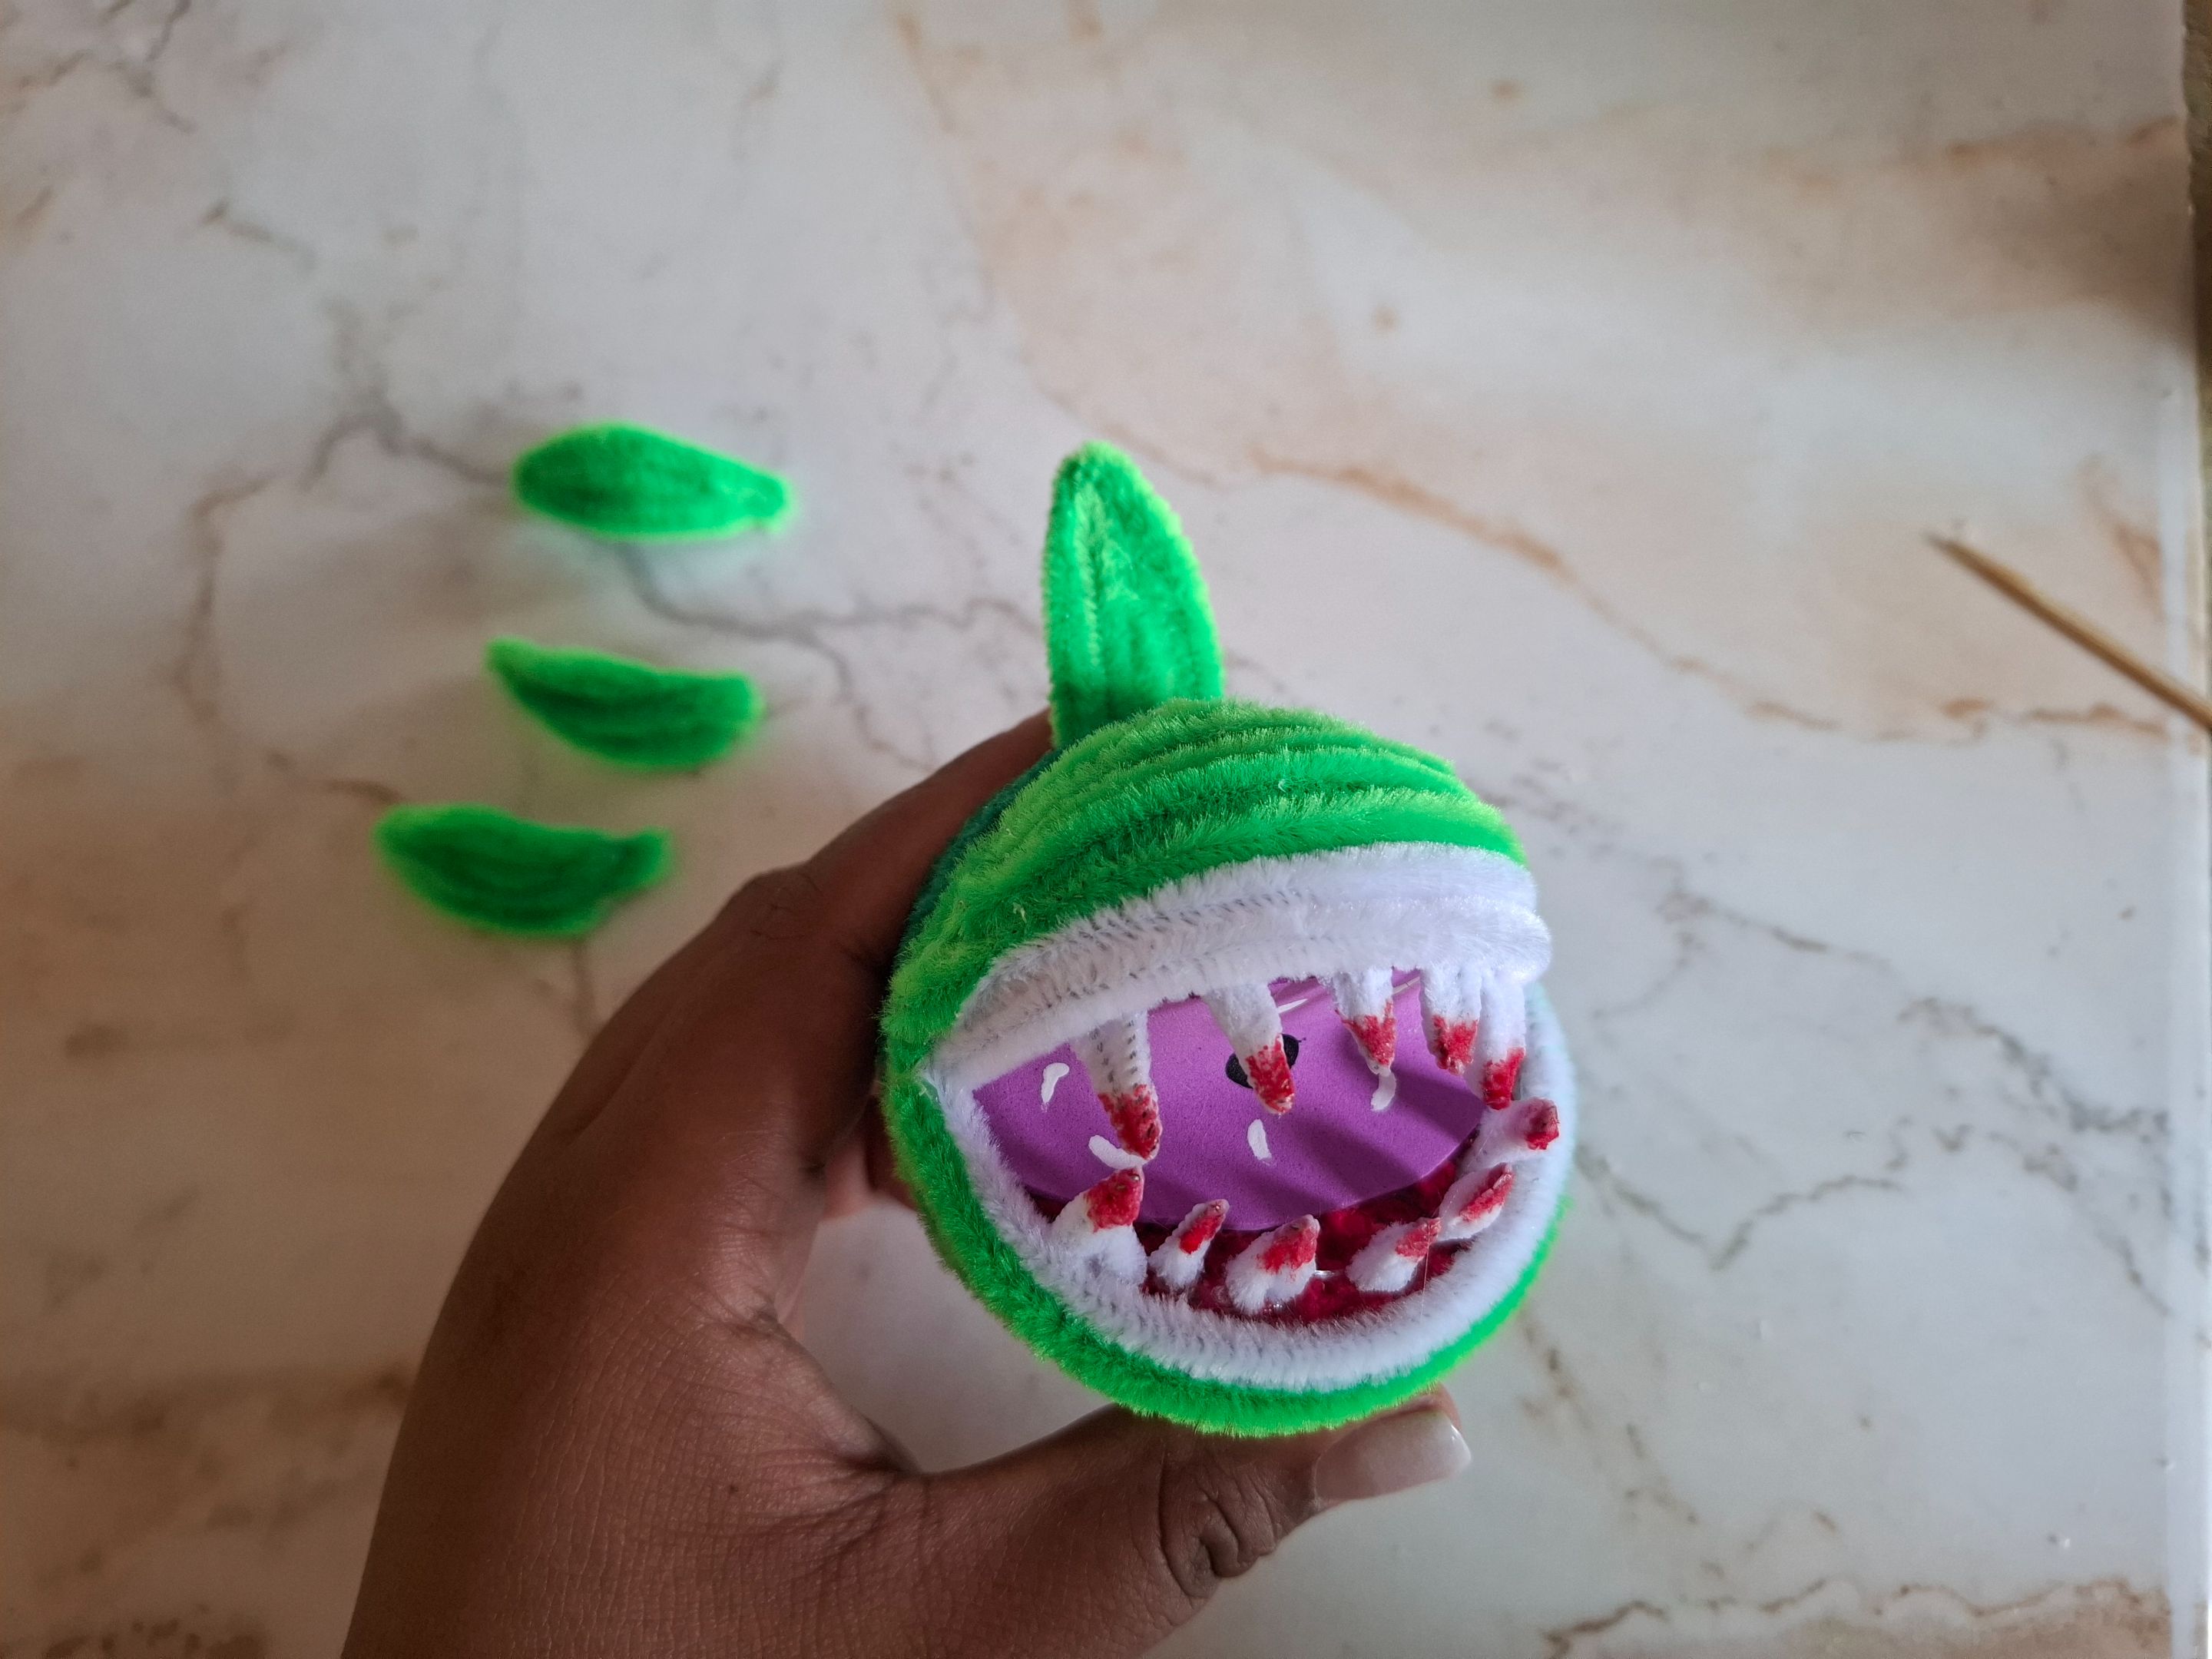
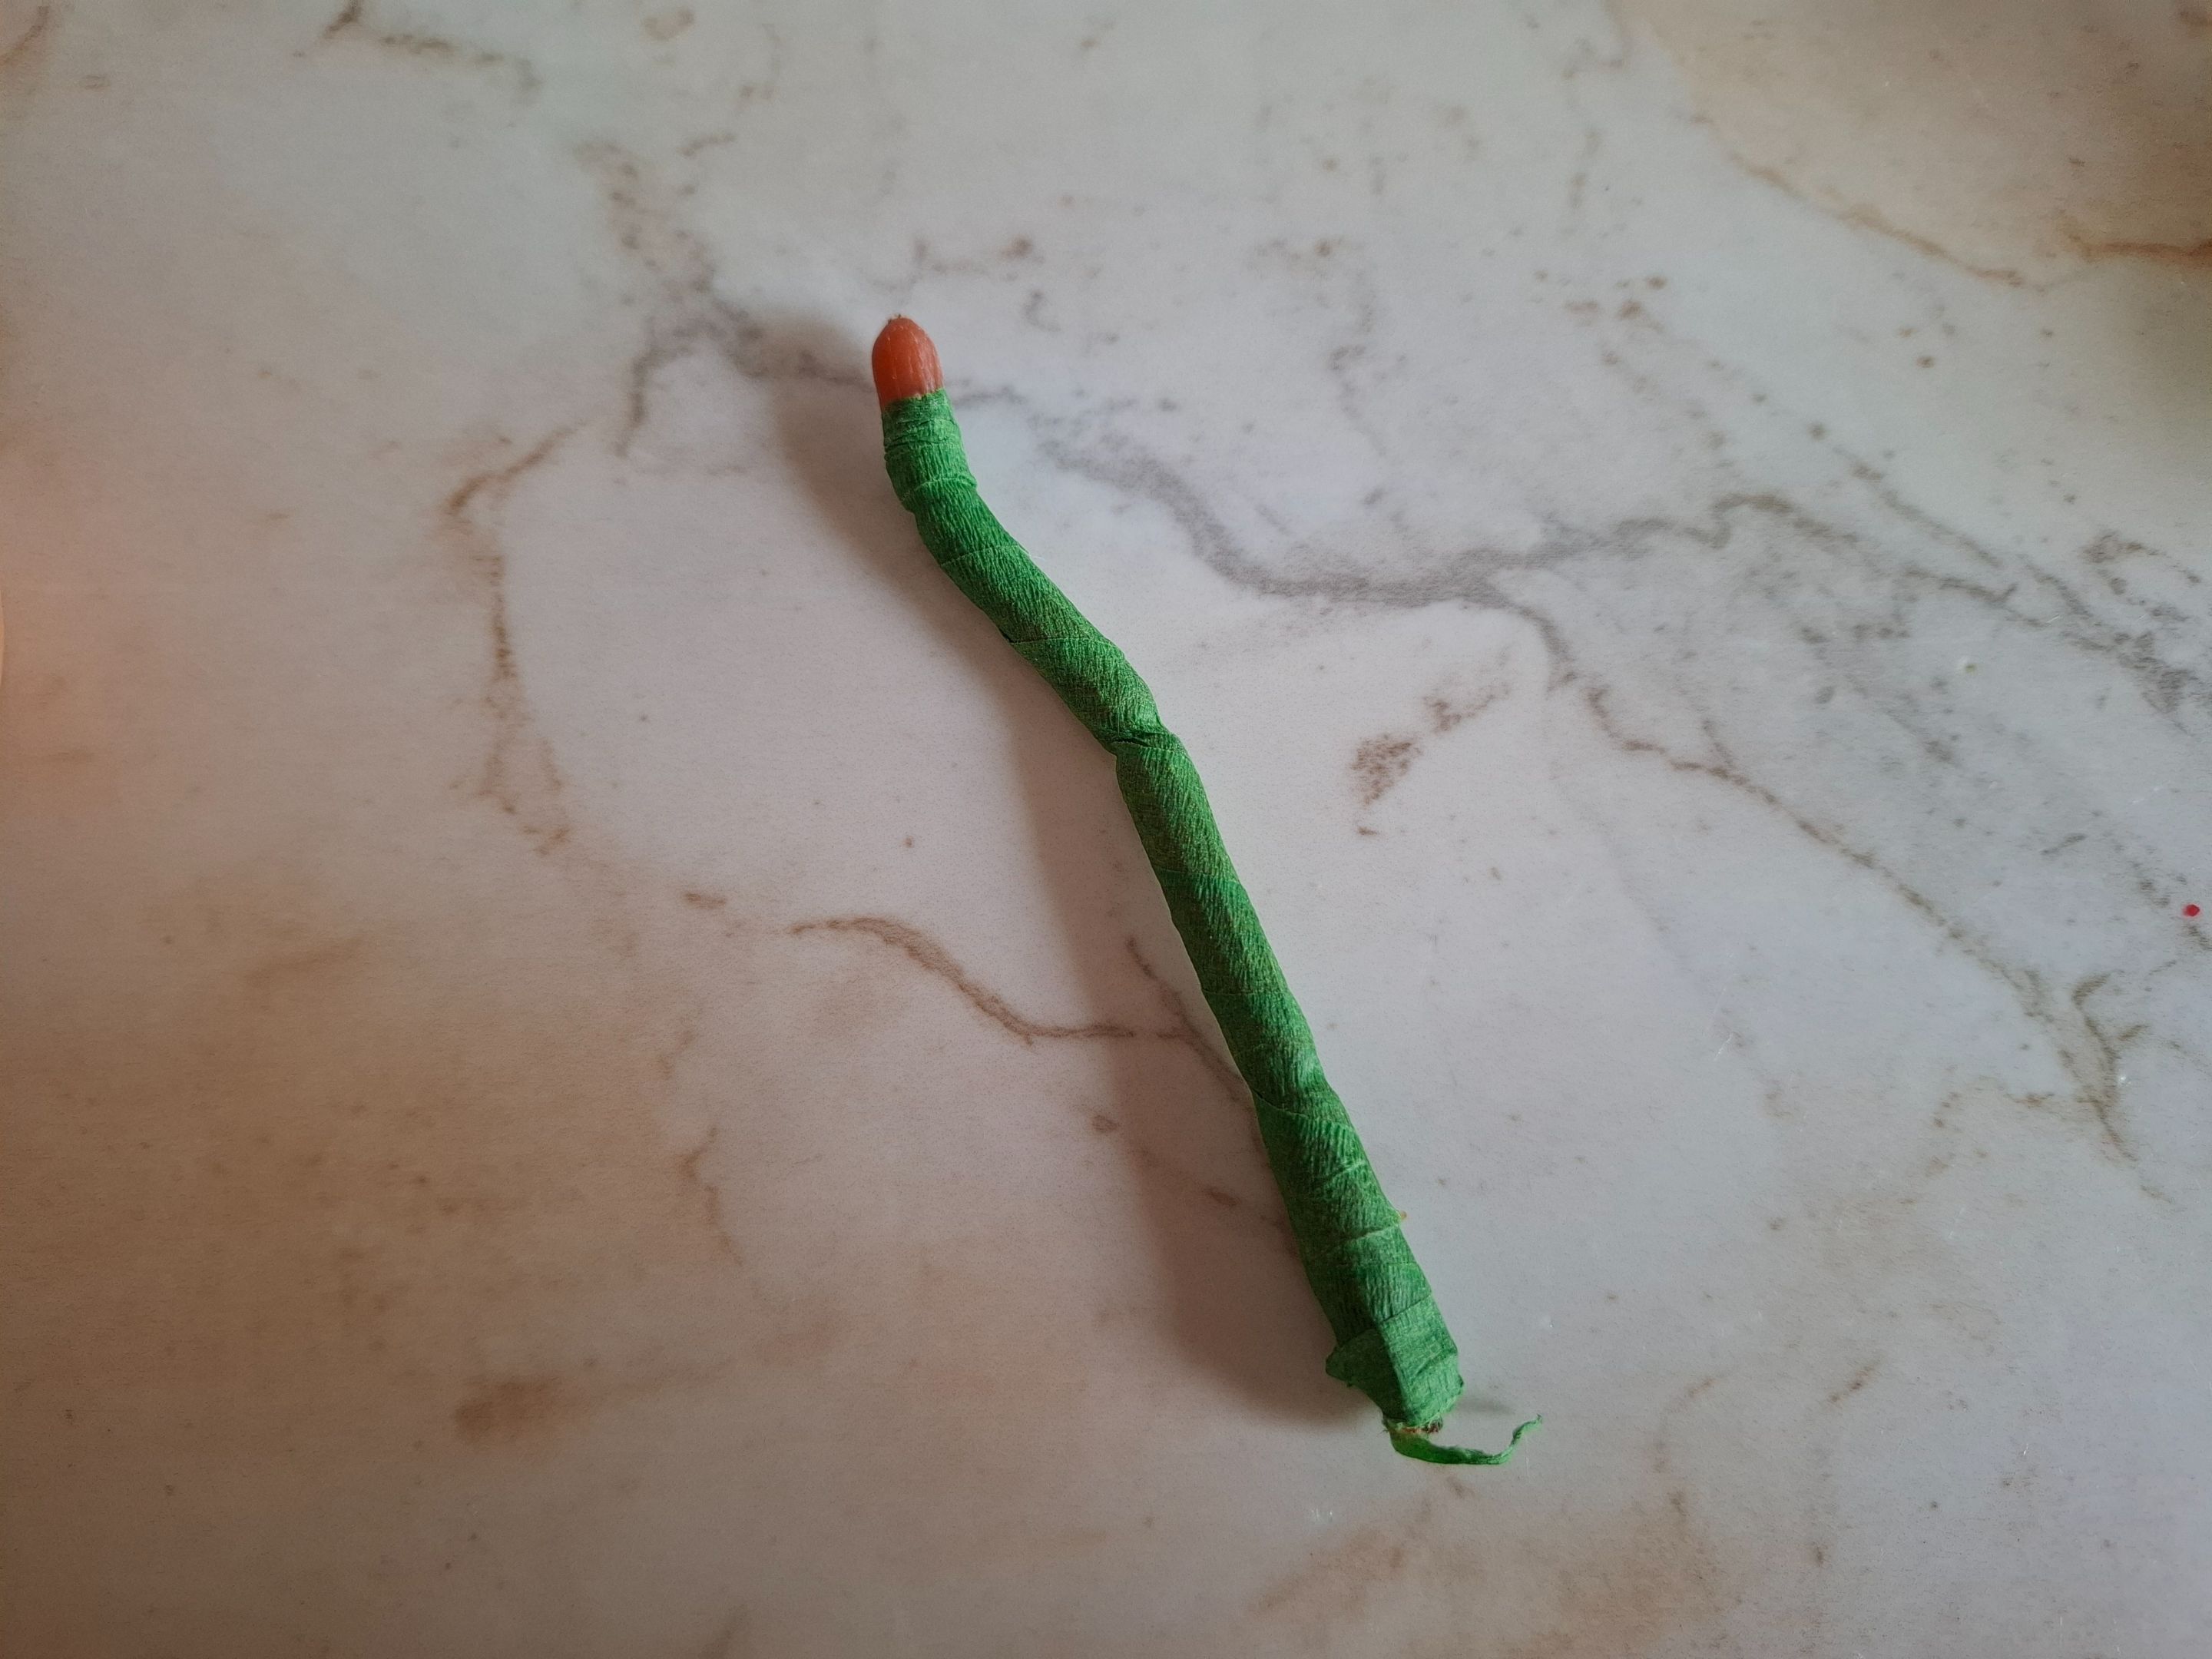
Luego de esto voy a realizar las hojas utilizando para cada una la mitad de un limpiapipas verde claro, las voy a ubicar desde la parte trasera, luego tomaré un palito y lo voy a cubrir con cinta floral este será la base de la flor.
After this, I'm going to make the leaves using half a light green pipe cleaner for each one. I'm going to place them from the back, then I'm going to take a stick and cover it with floral tape. This will be the base of the flower.
 |
 |
|---|---|
 |
 |
|---|---|
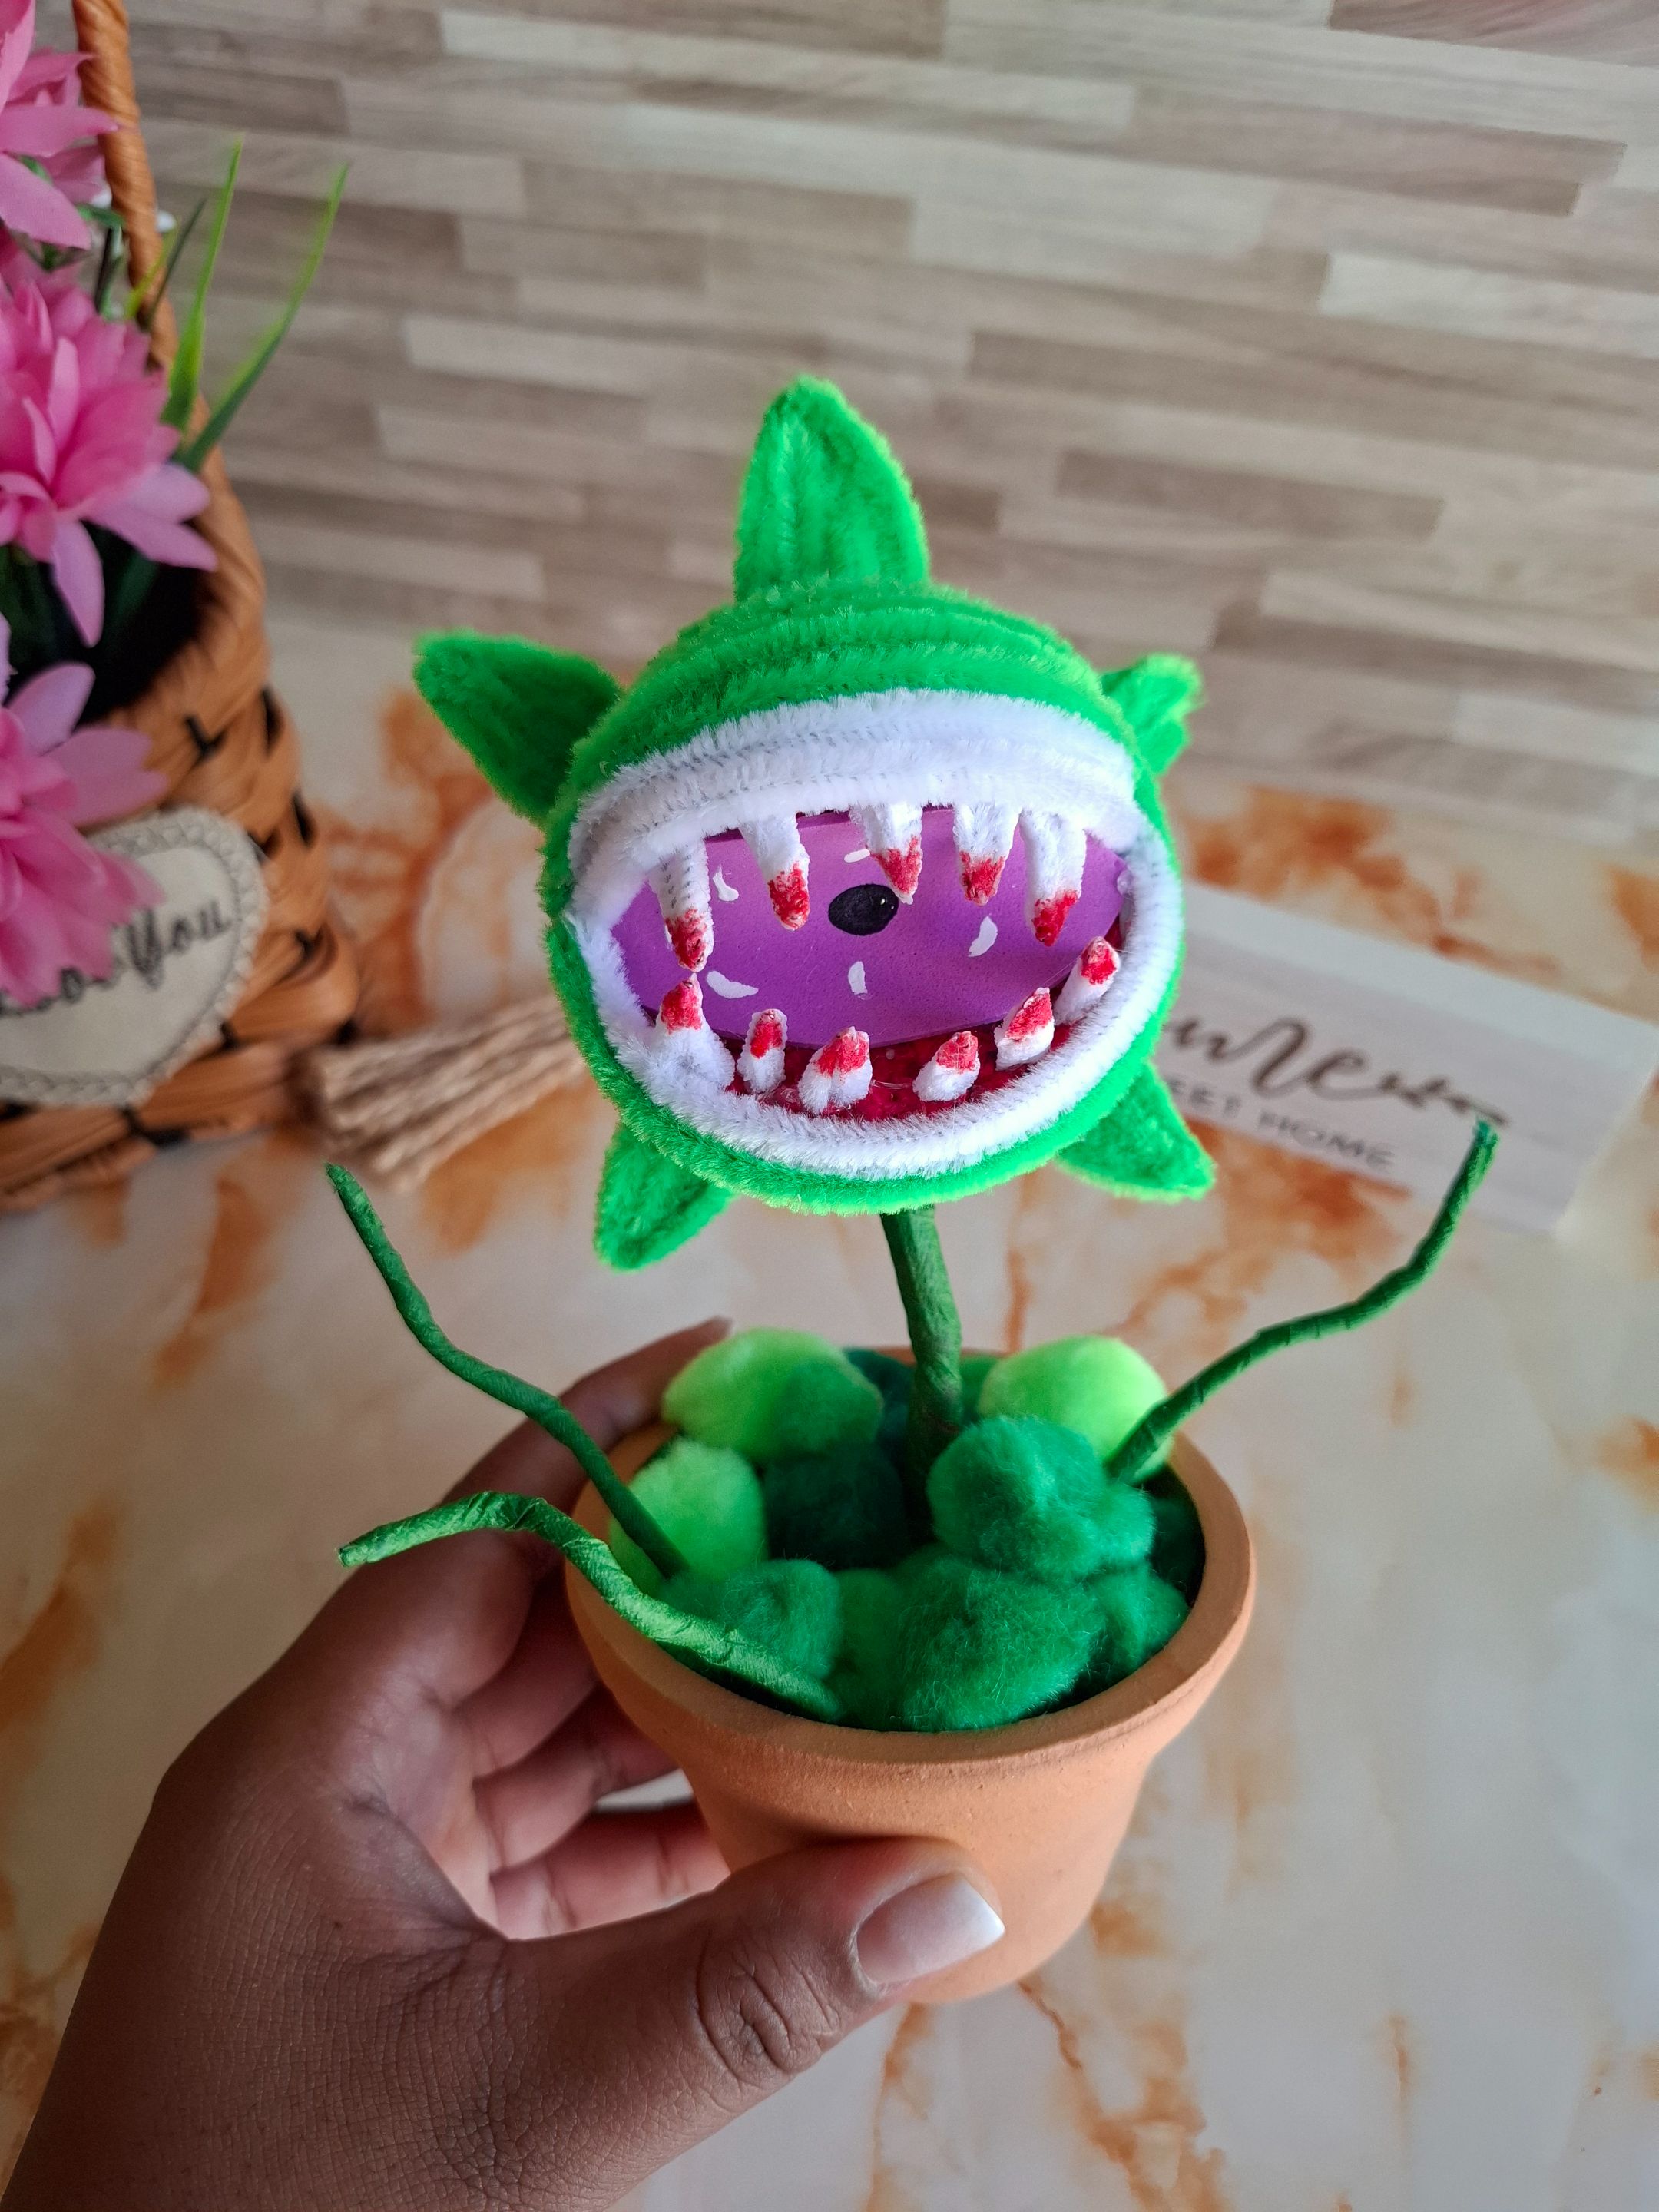
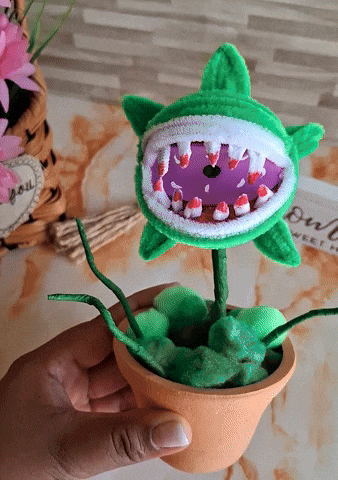
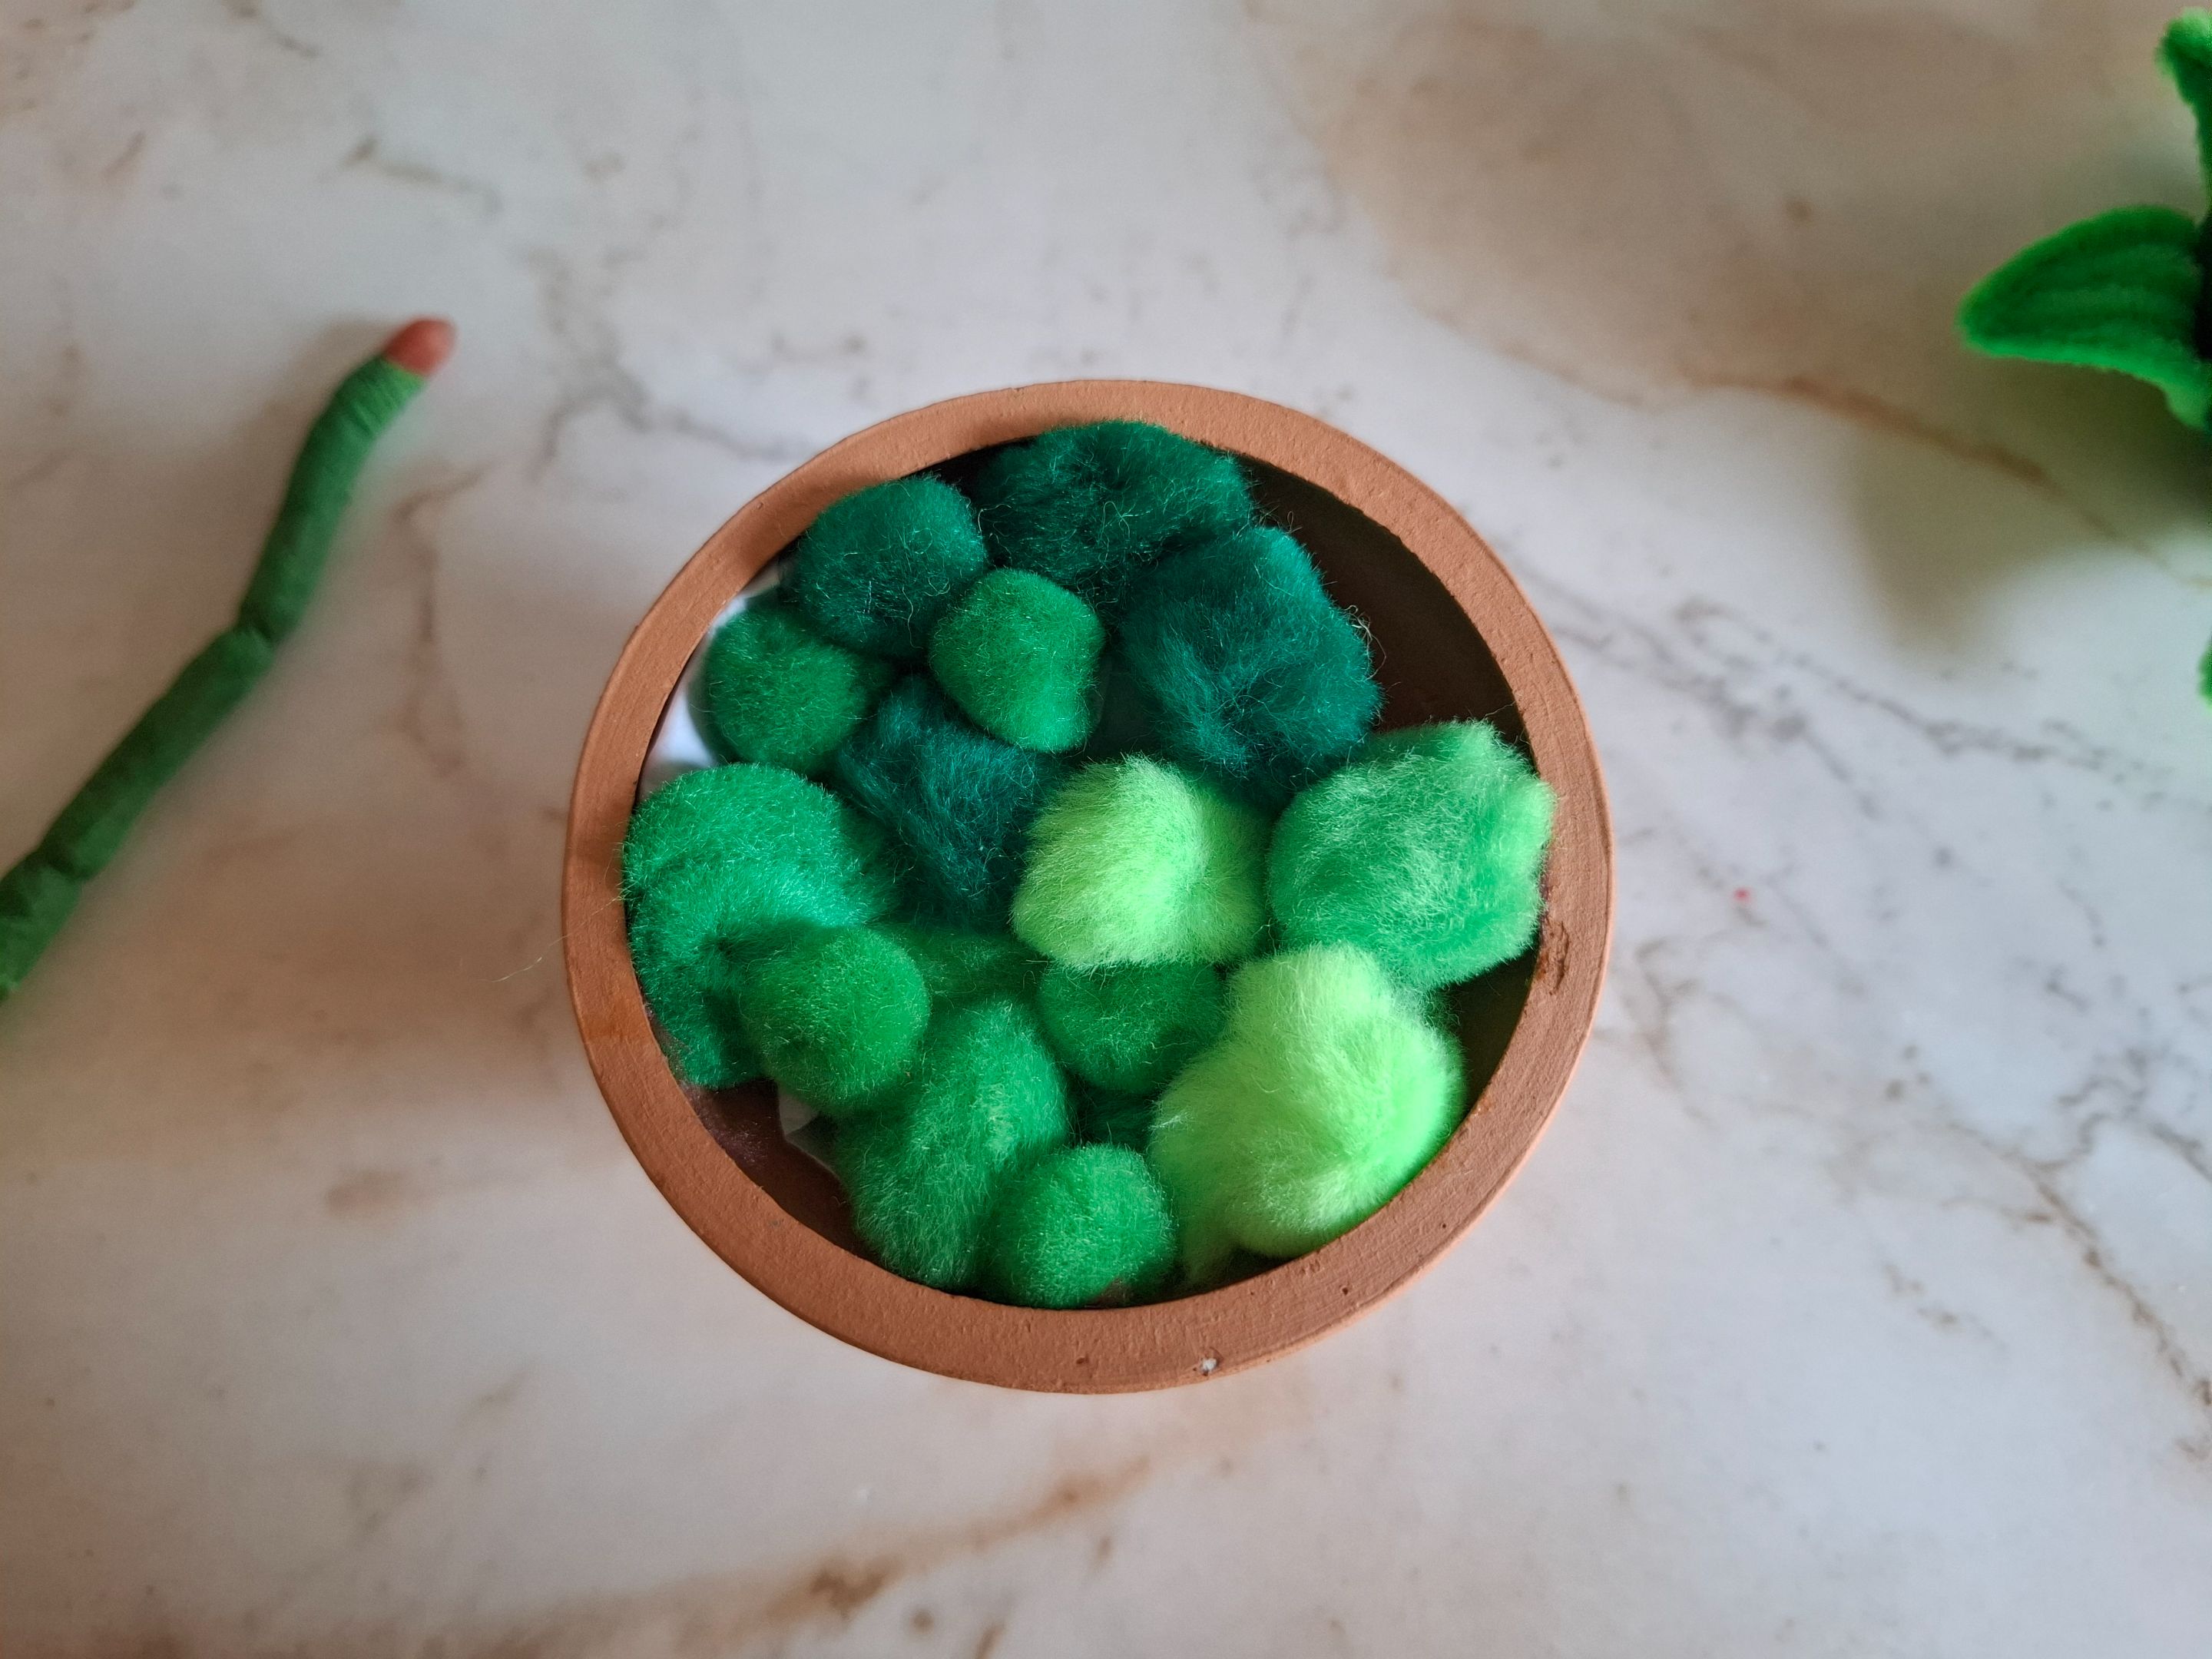
El último paso se trata de rellenar la maceta con pompones de color verde, también puedes rellenar con limpiapipas pero los pompones es una idea si no tienes suficiente material, además realicé algunas ramas cubriendo con cinta floral pequeñas piezas de limpiapipas, las colocamos dentro y listo. Ya tenemos lista a la foto vampírica.
The last step is to fill the pot with green pom-poms. You can also fill it with pipe cleaners, but pom-poms are a great idea if you don't have enough material. I also made some branches by covering small pieces of pipe cleaners with floral tape. We placed them inside, and that's it. The vampire photo is ready.
 |
 |
 |
|---|---|---|
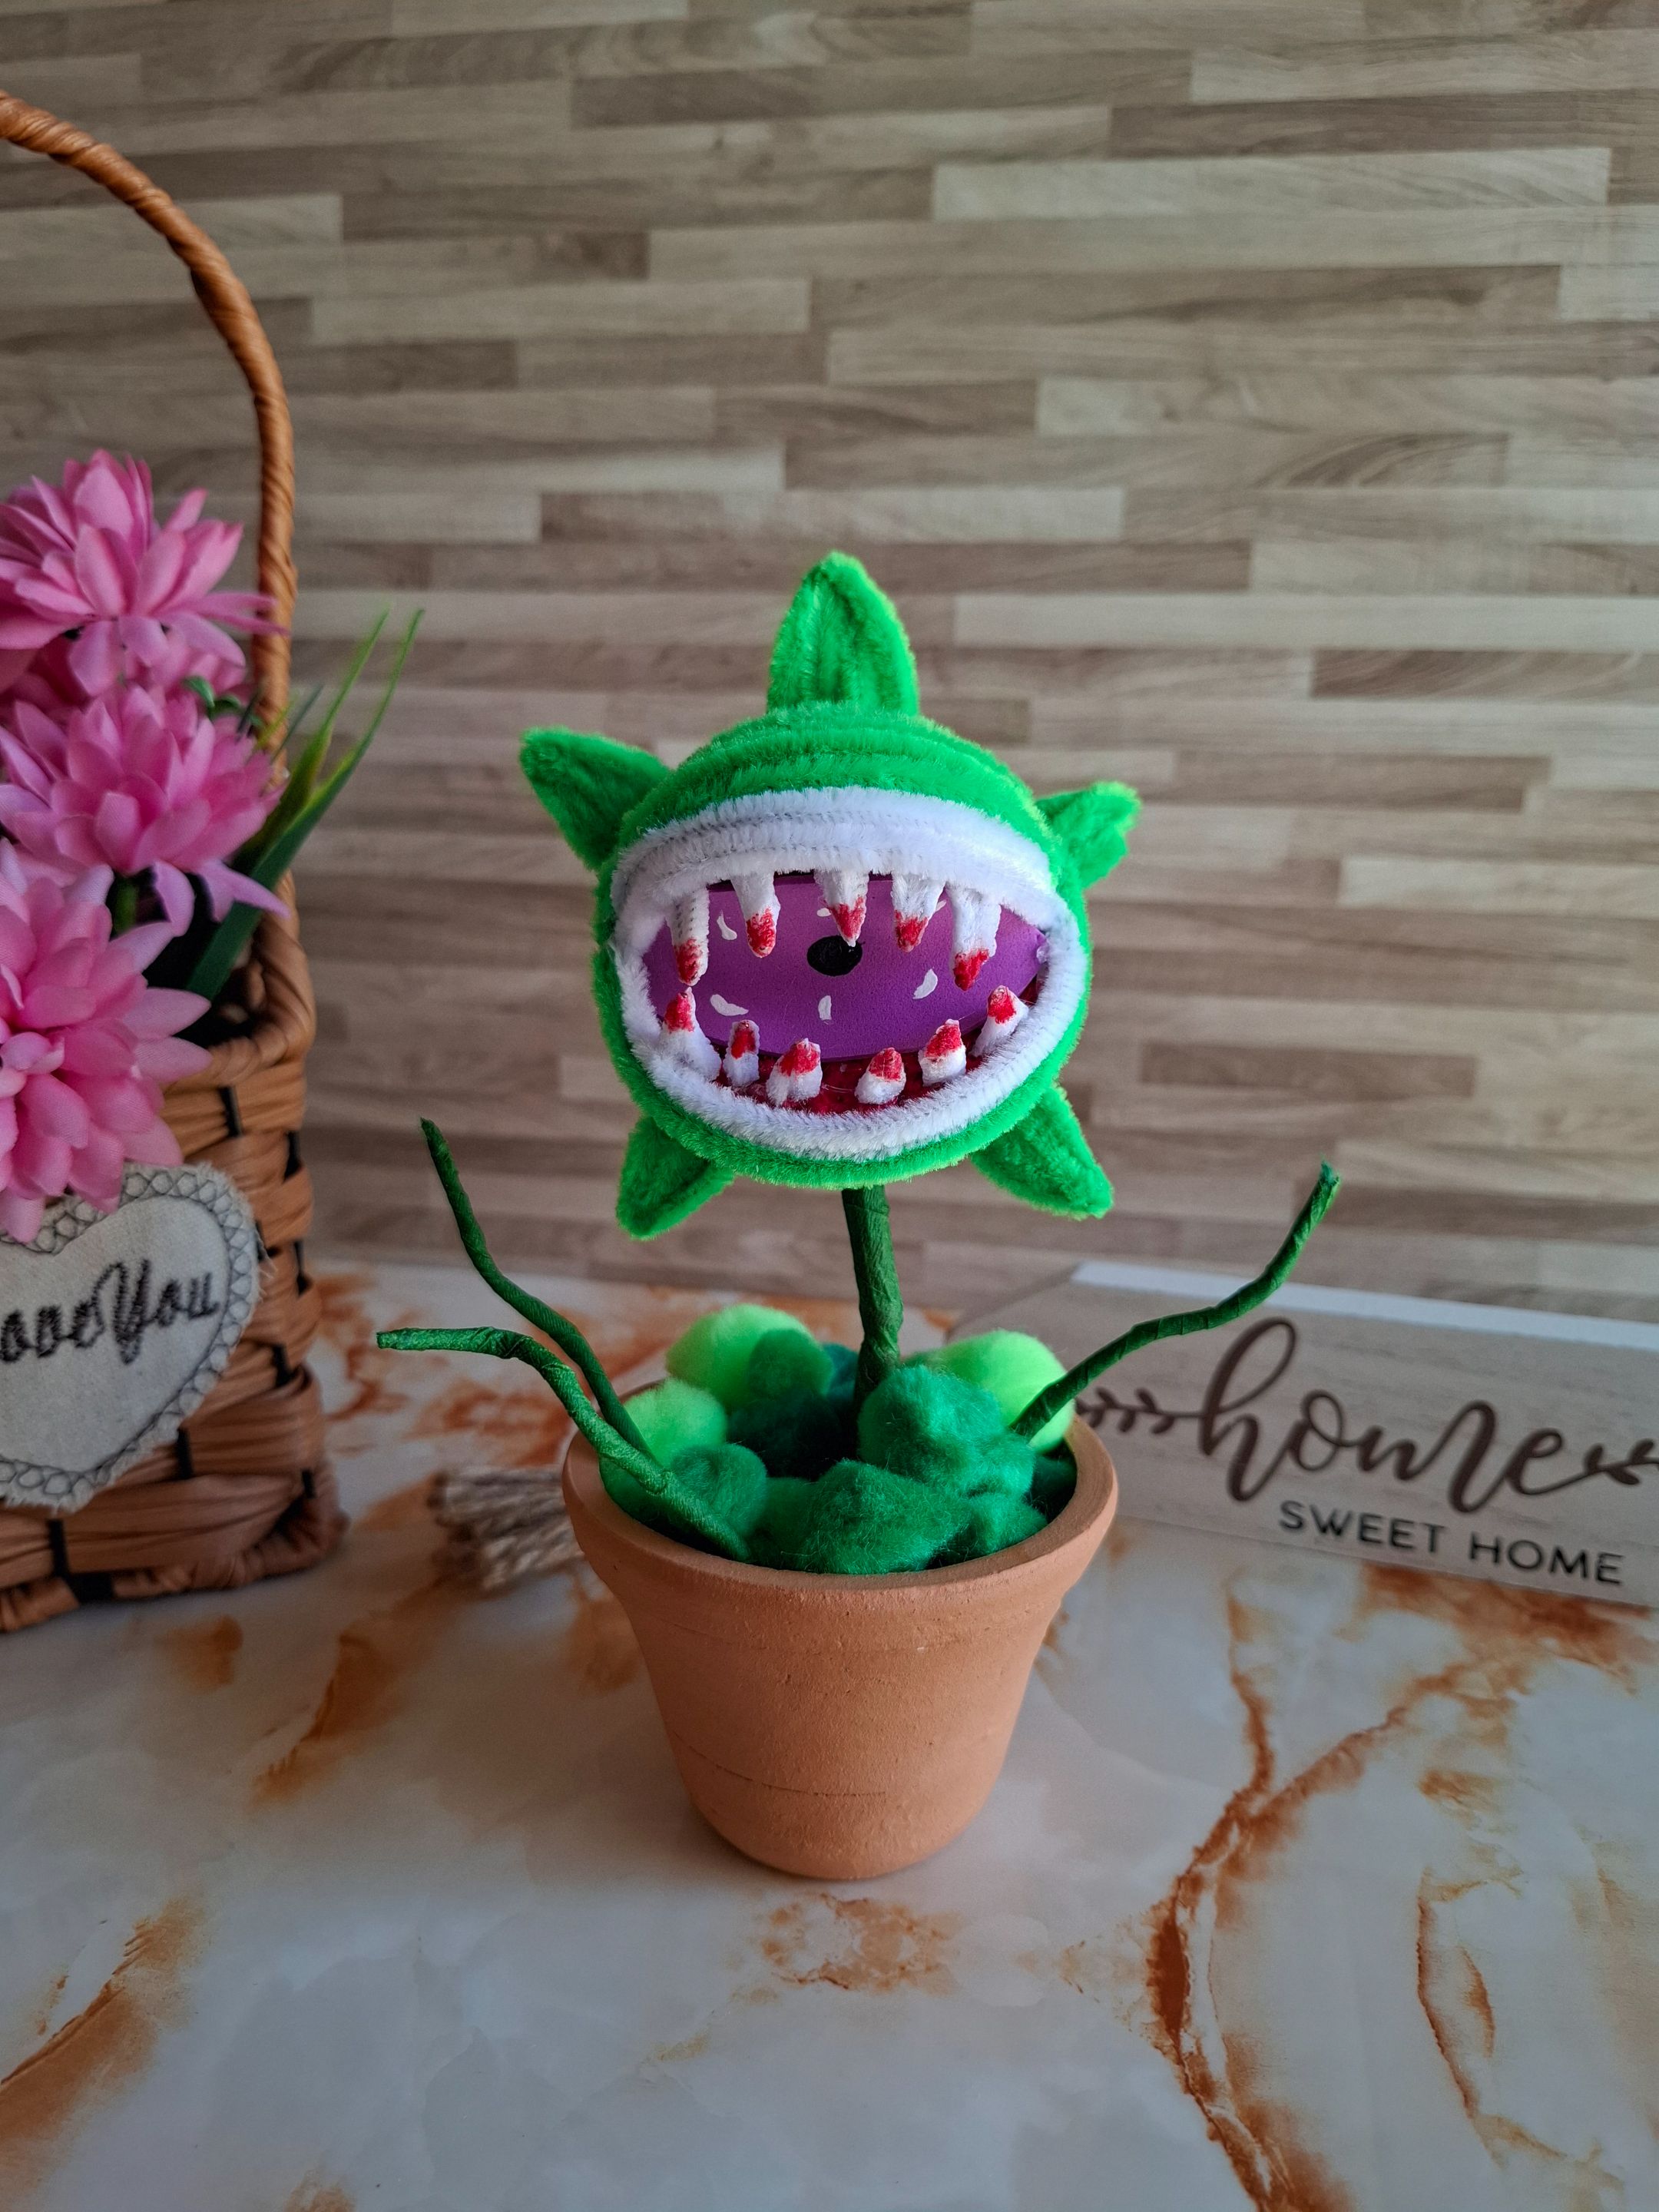
Espero les haya gustado el resultado, me siento súper contenta de seguir mostrando manualidades creativas, muchas gracias por visitar mi publicación agradezco a todas aquellas personas que me apoyan y que me han motivado a seguir creando, nos vemos en una próxima oportunidad con más ideas creativas.
I hope you liked the result. I feel super happy to continue showing creative crafts. Thank you very much for visiting my post. I am grateful to all those who support me and have motivated me to continue creating. See you next time with more creative ideas.