Saludos amigos de Hive, sean bienvenidos a mi blog, el día de hoy me siento súper contenta de compartir con ustedes, ya va corriendo la semana y hay mucho por hacer pero siempre apartando tiempo para realizar algo lindo para compartir con ustedes, seguimos con las manualidades en limpiapipas fáciles de realizar.
Greetings, Hive friends, welcome to my blog. Today I feel super happy to share with you. The week is already underway and there's a lot to do, but I always make time to make something nice to share with you. We continue with easy-to-make pipe cleaner crafts.

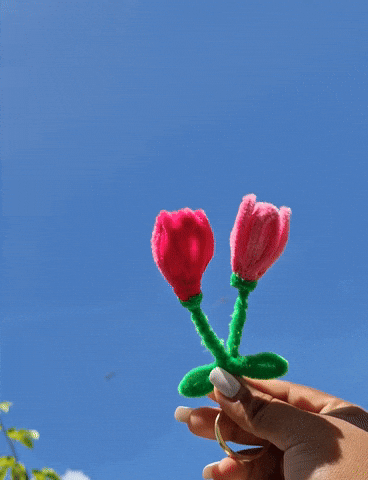
Para esta oportunidad realicé un bello llavero de tulipanes en limpiapipas, este llavero es pequeño y súper fácil de realizar lo podrás utilizar para tus llaves, para bolso, cartera, puedes utilizar los colores que desees, también puedes ver en Pinterest este modelo Tulipán llavero a continuación les muestro los materiales y el paso a paso.
For this opportunity I made a beautiful tulip keychain in pipe cleaners, this keychain is small and super easy to make, you can use it for your keys, for a bag, wallet, you can use the colors you want, you can also see this model on Pinterest Tulip keychain below I show you the materials and the step by step.

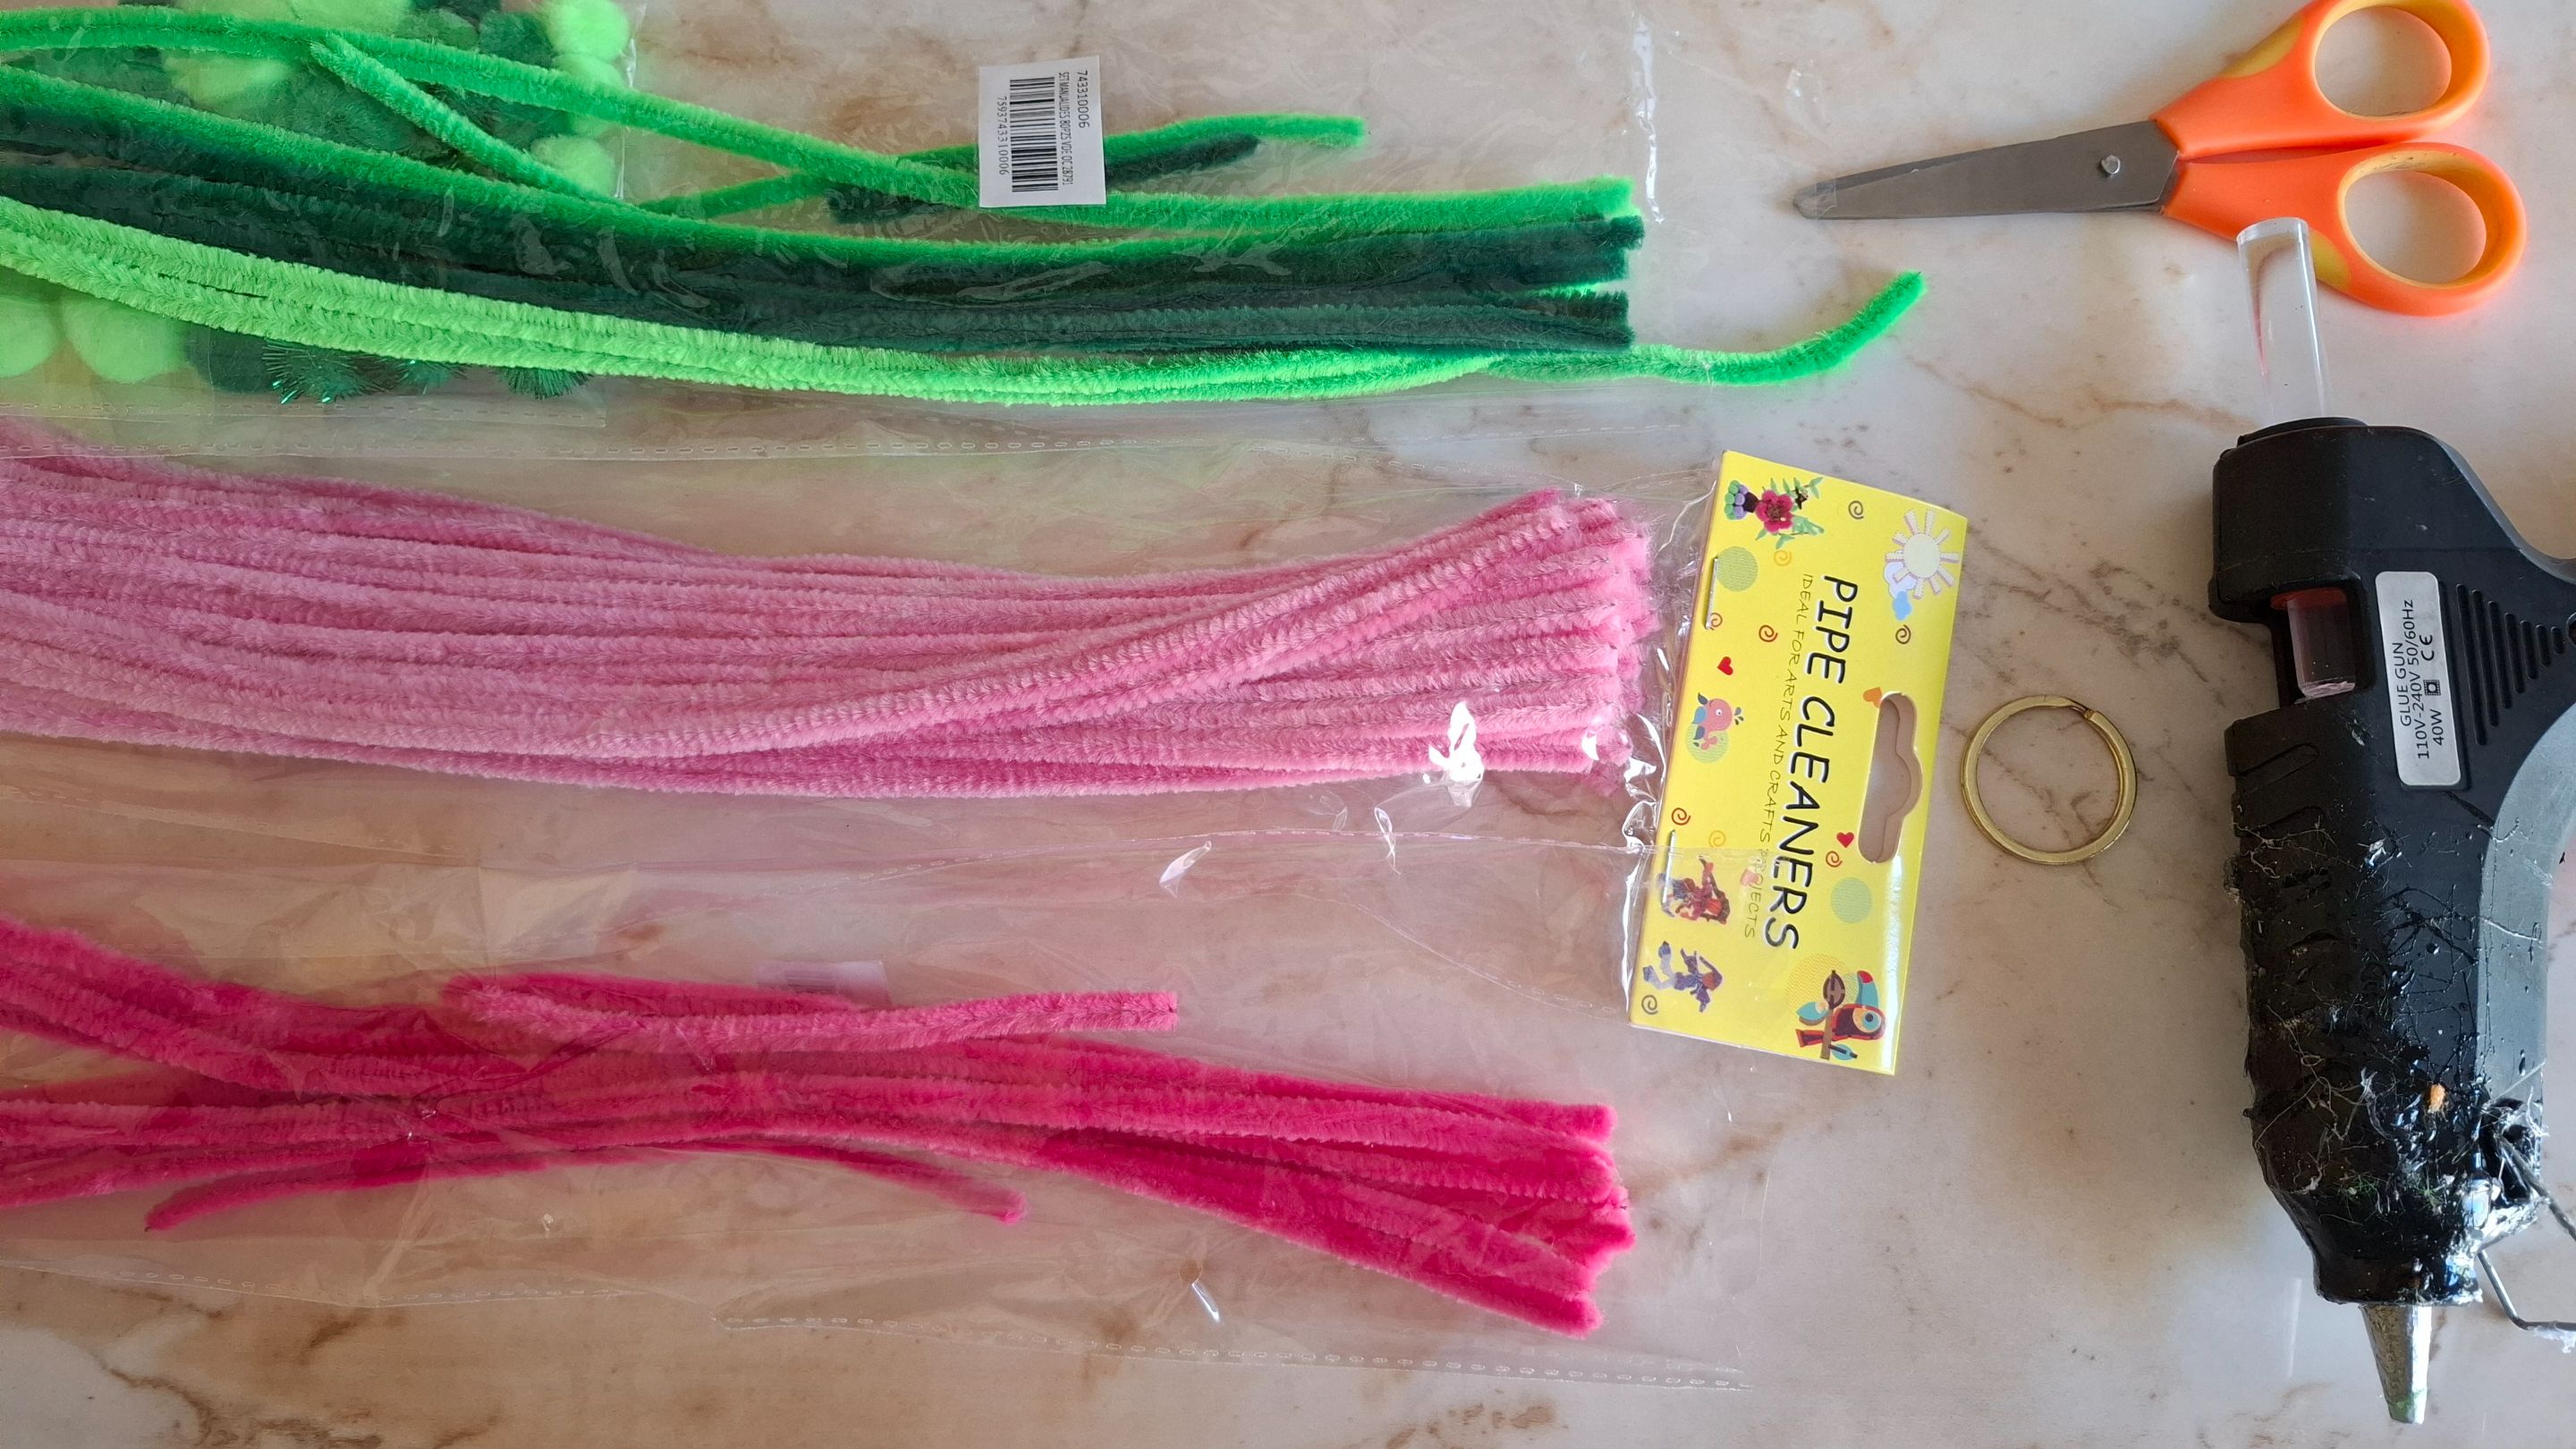
| Materiales | Materials |
|---|---|
| Limpiapipas fucsia | Fuchsia pipe cleaners |
| Limpiapipas rosa | pink pipe cleaner |
| Limpiapipas verde | green pipe cleaner |
| Tijera | Scissors |
| Silicón | Silicone |
| Aro para llavero | Keychain ring |
Paso a paso / Step by step
El primer paso que voy a realizar será armar los pétalos en este caso solo serán de cuatro por lo que es mucho más fácil armarlo así que no necesitas mucha práctica, los realicé en dos tonos de rosa, lo elegí así porque es mi color favorito.
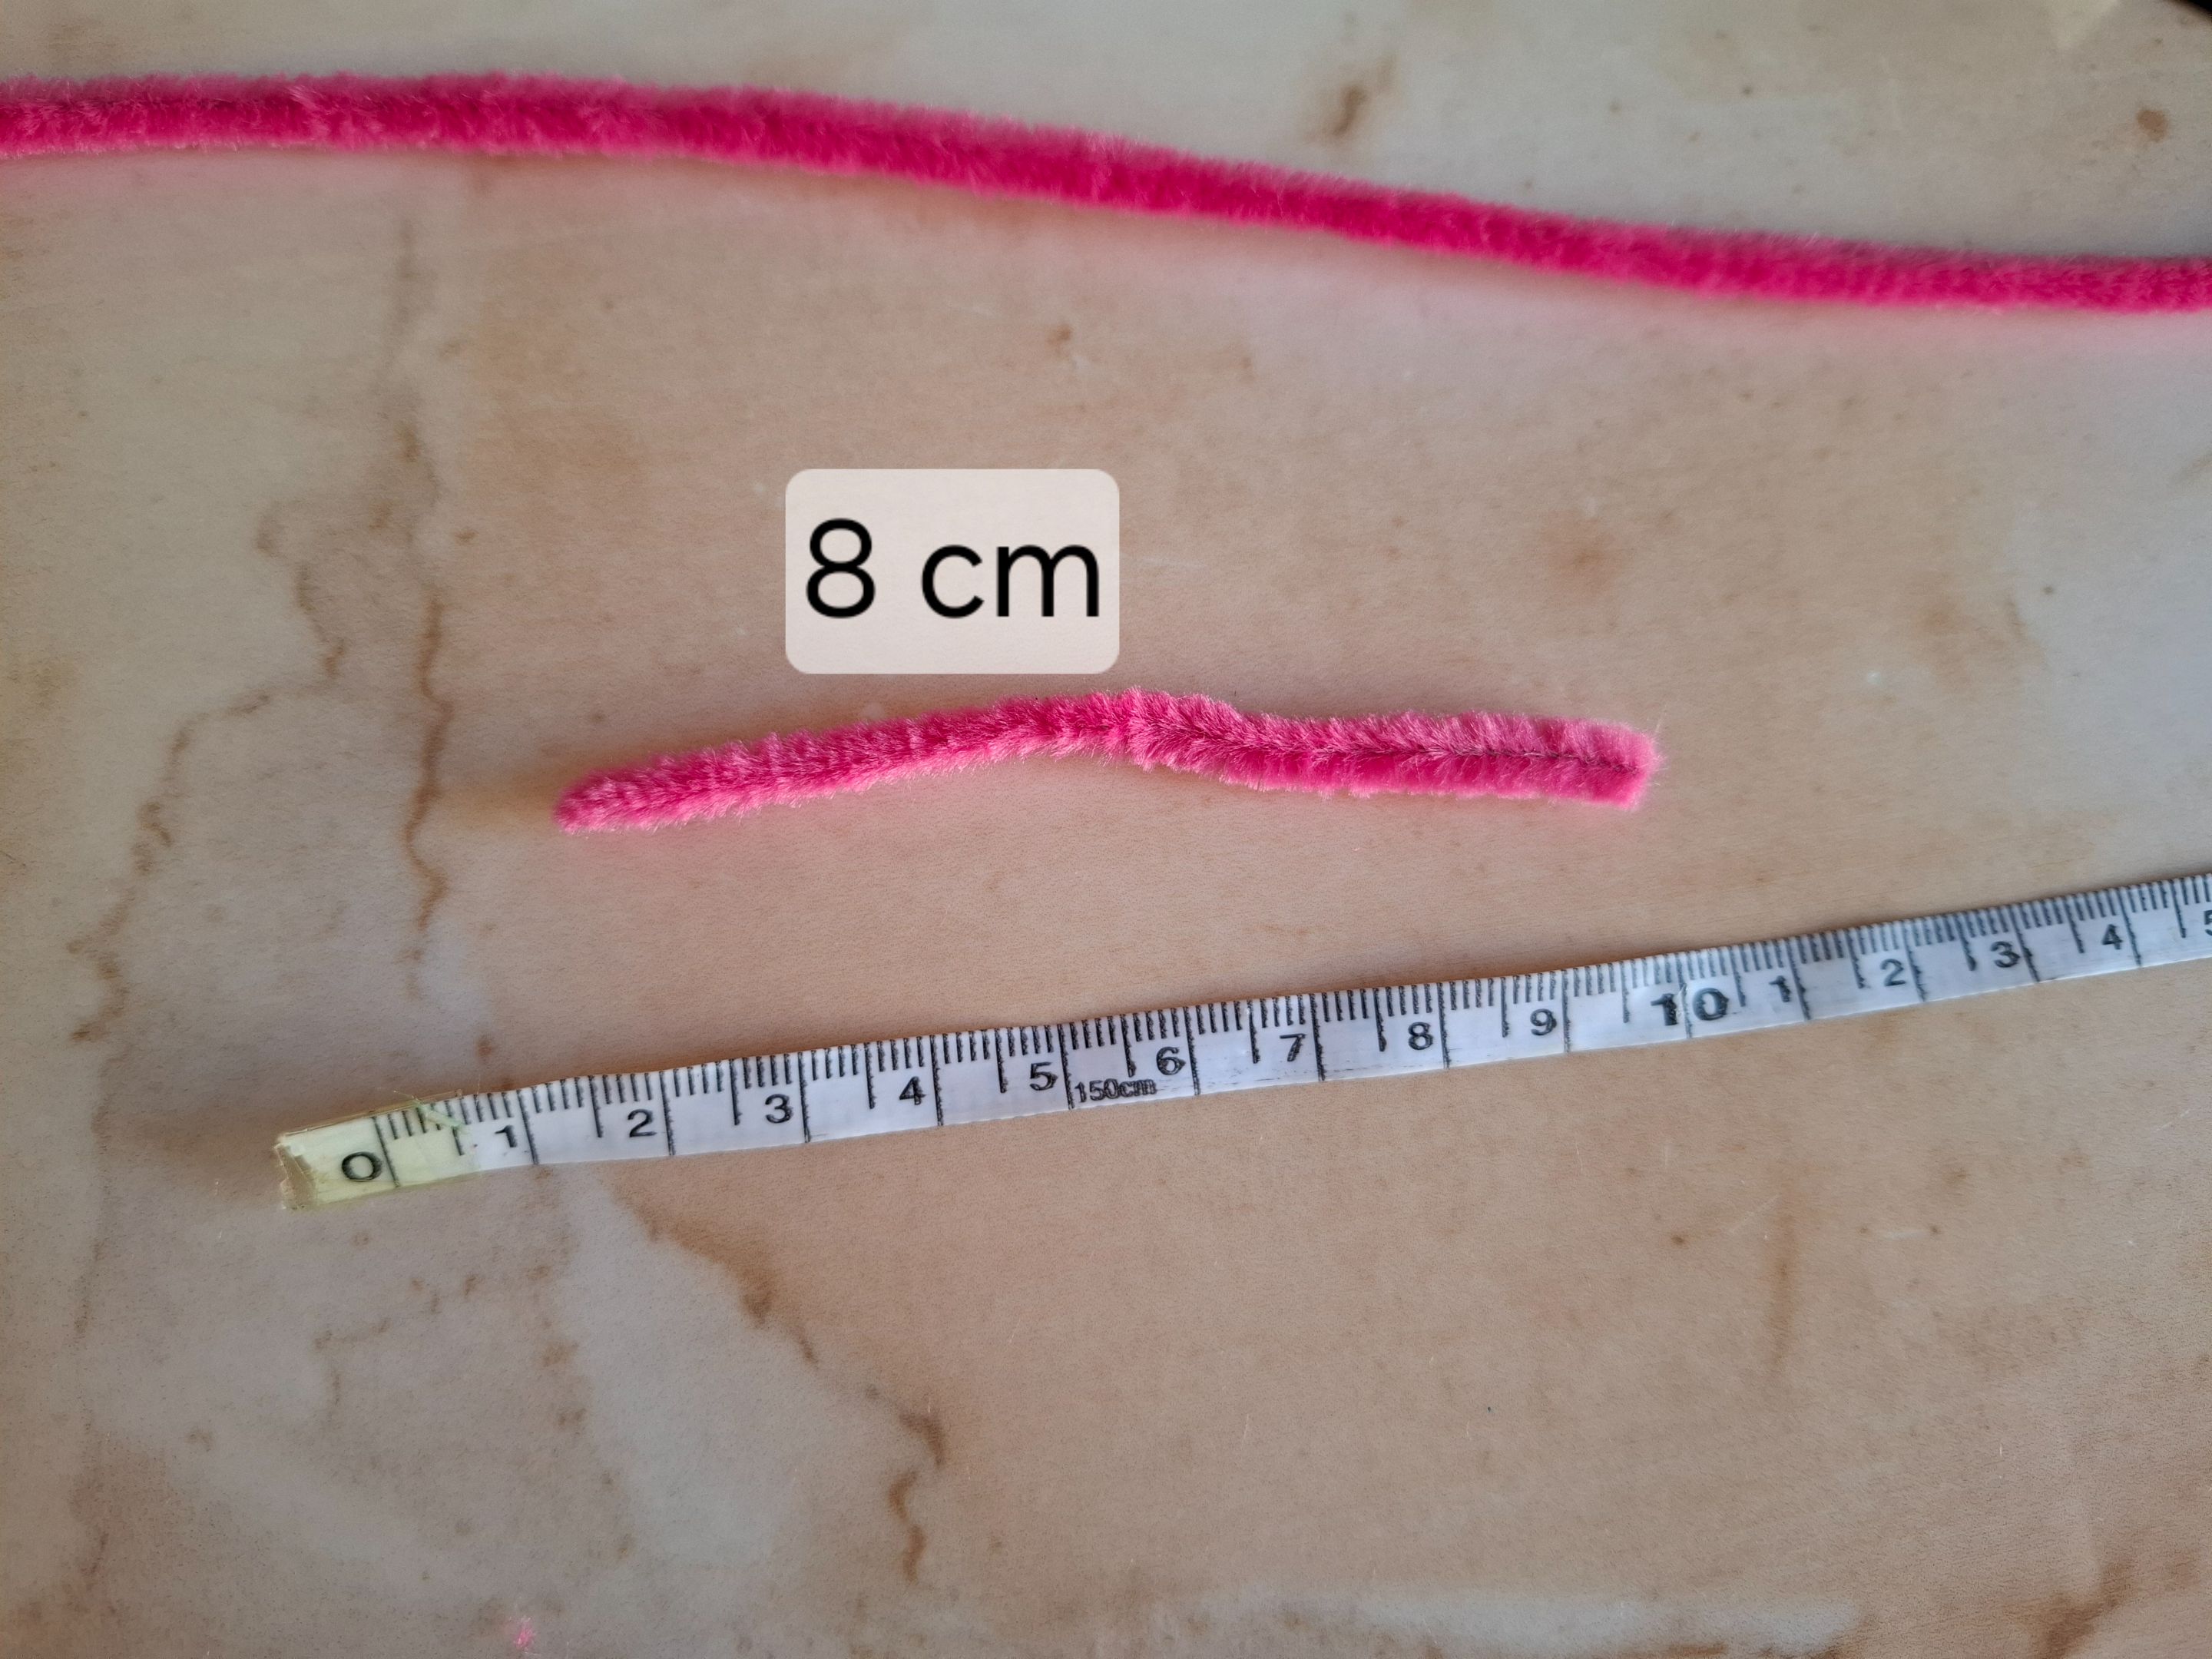
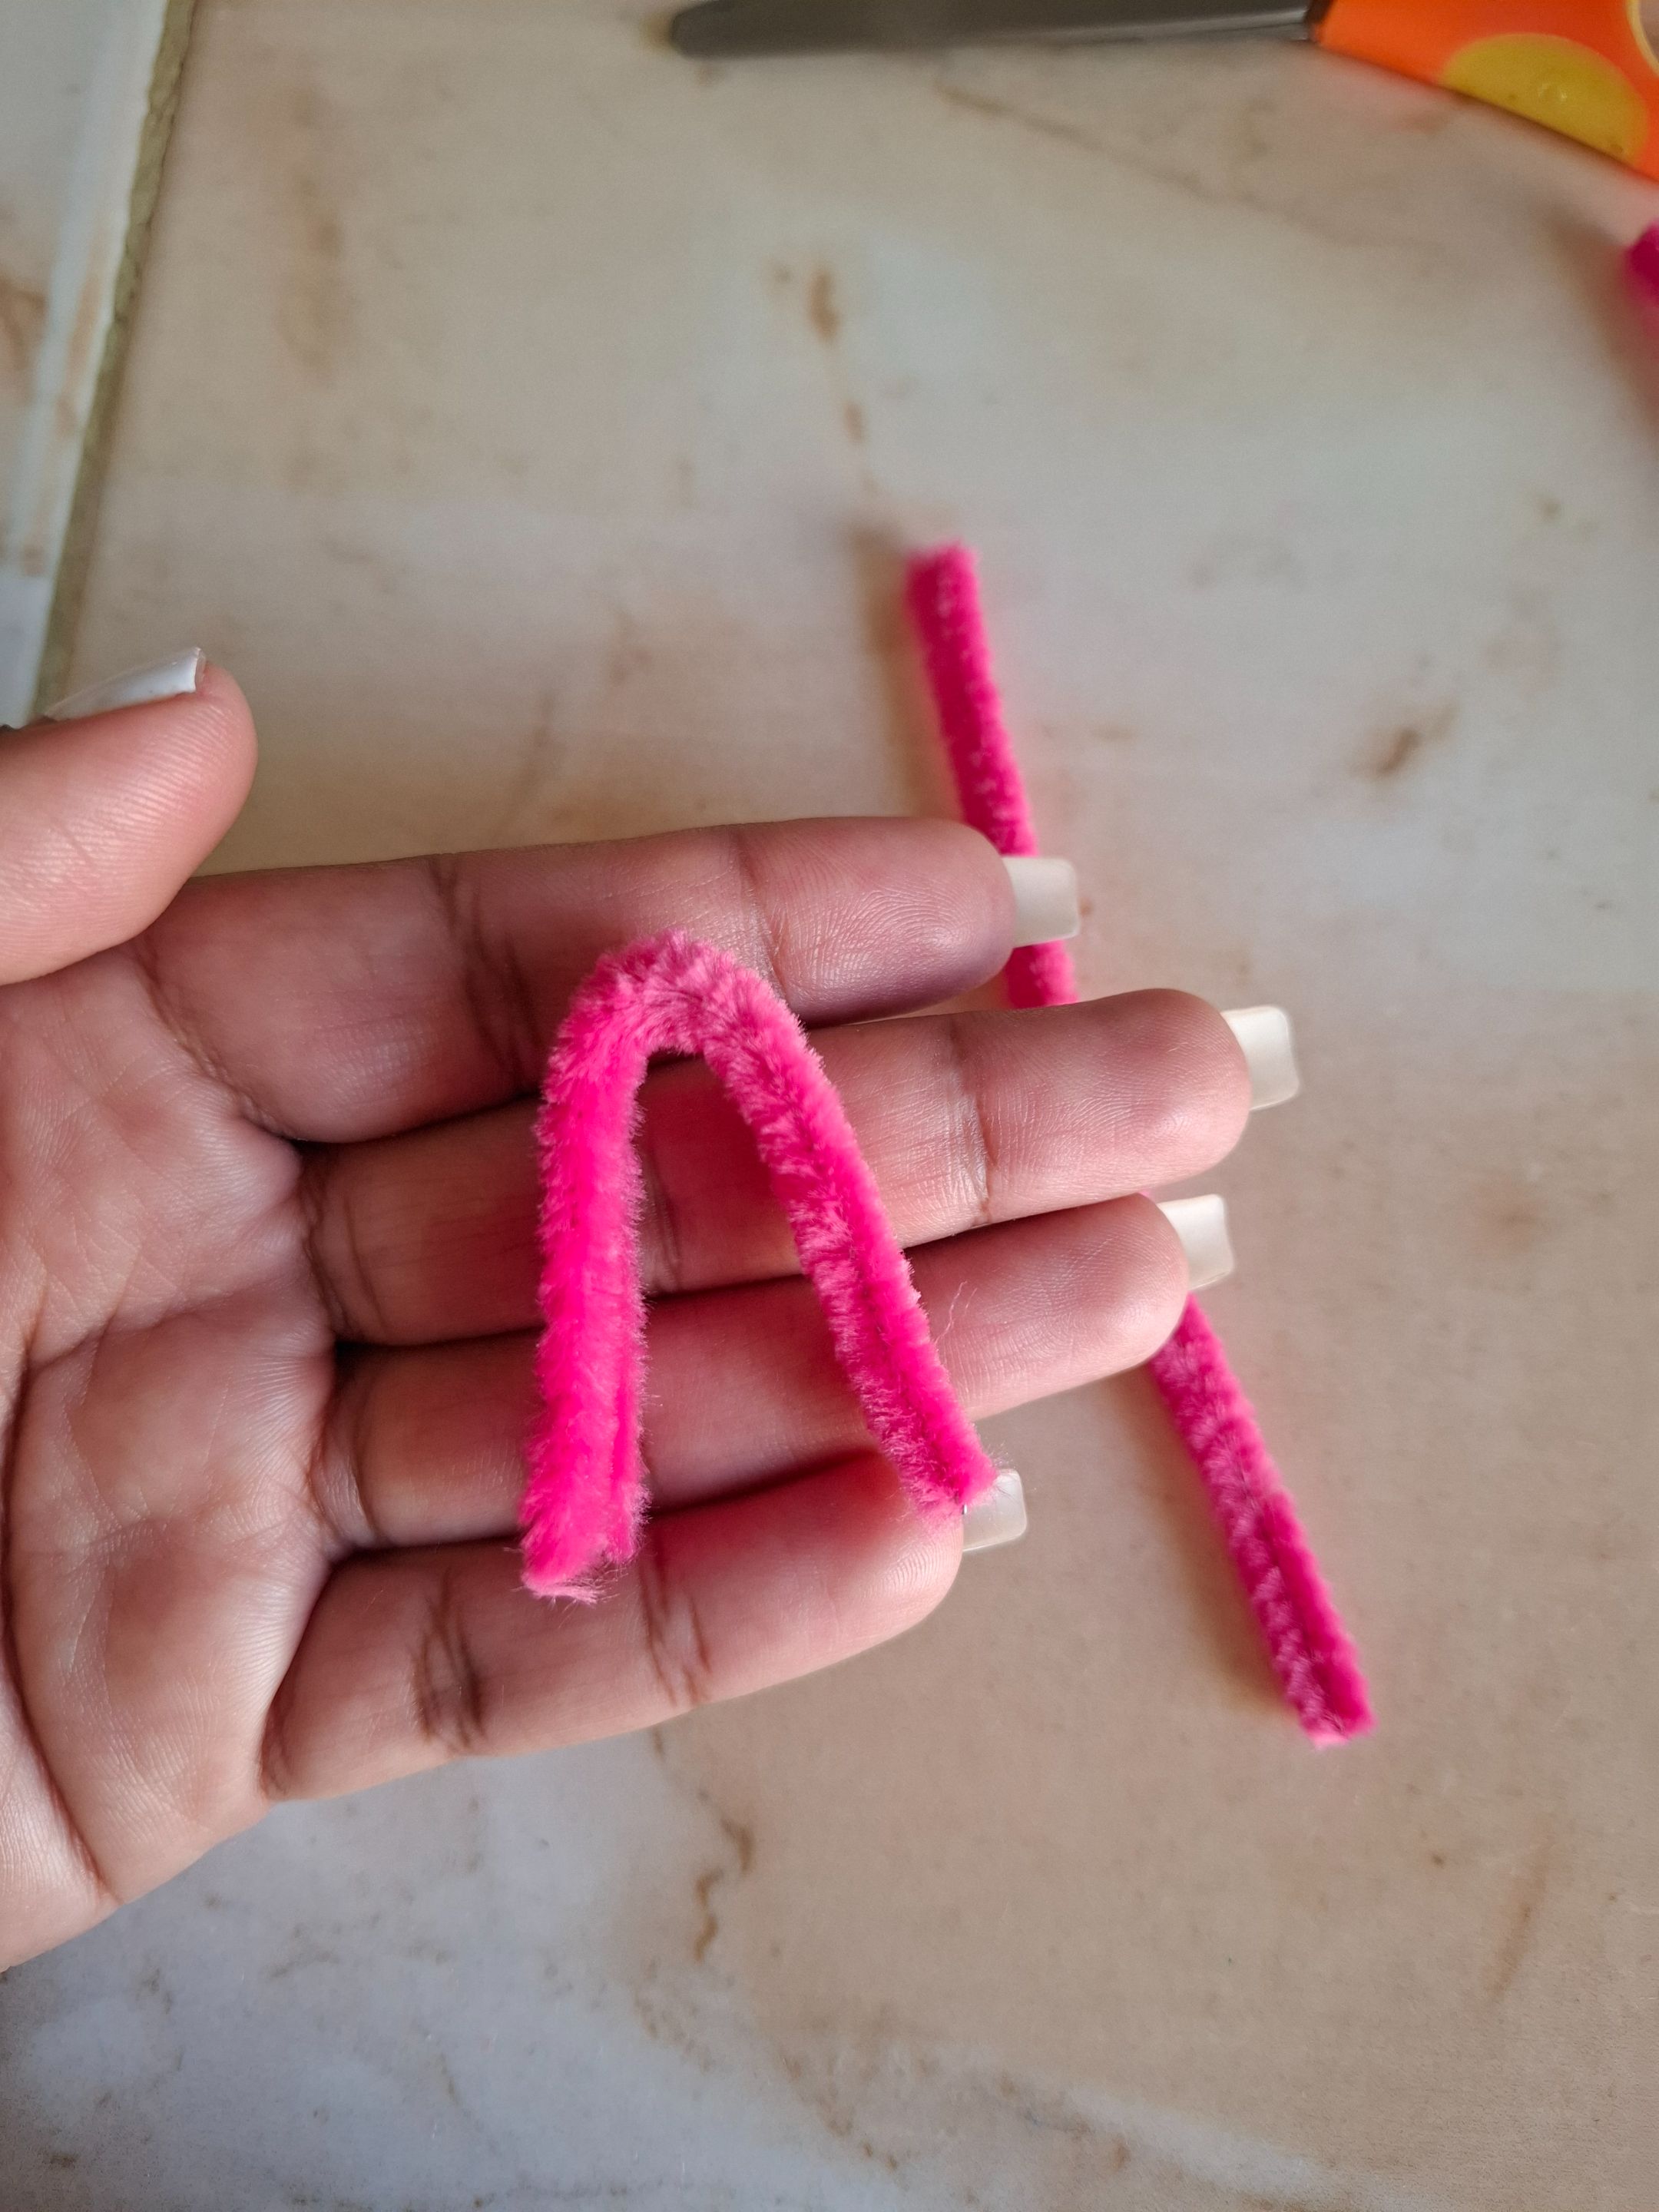
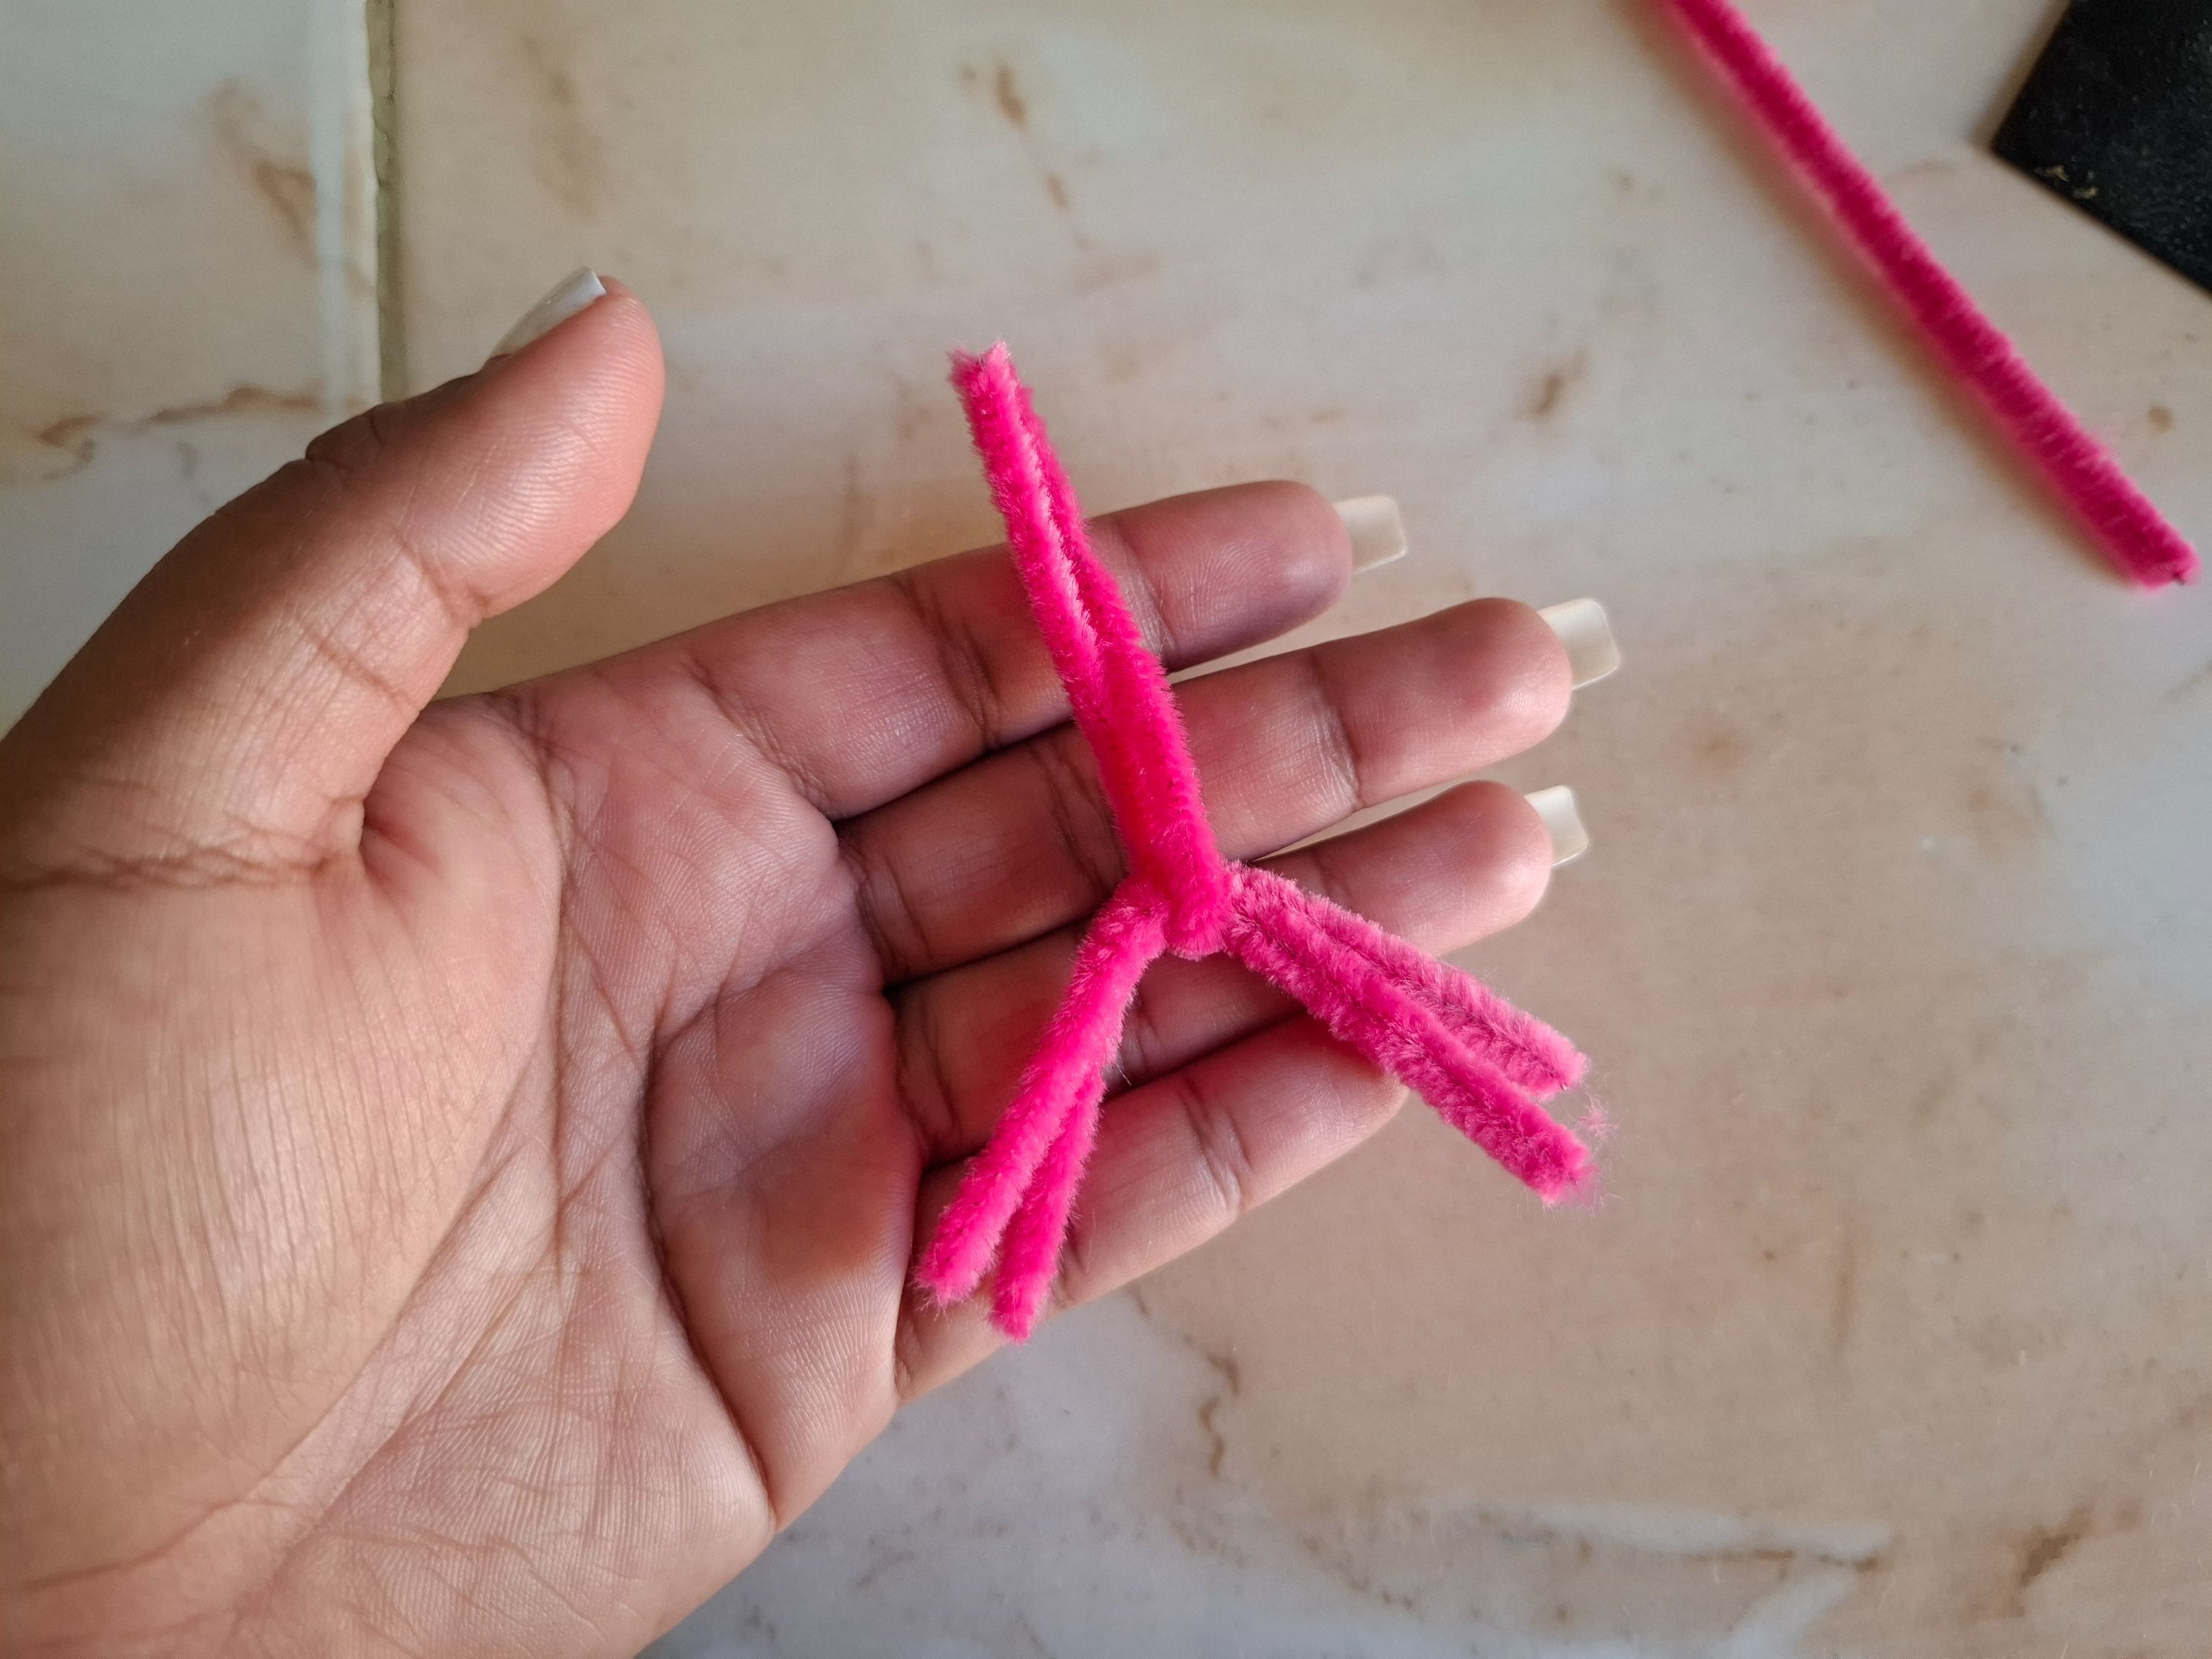
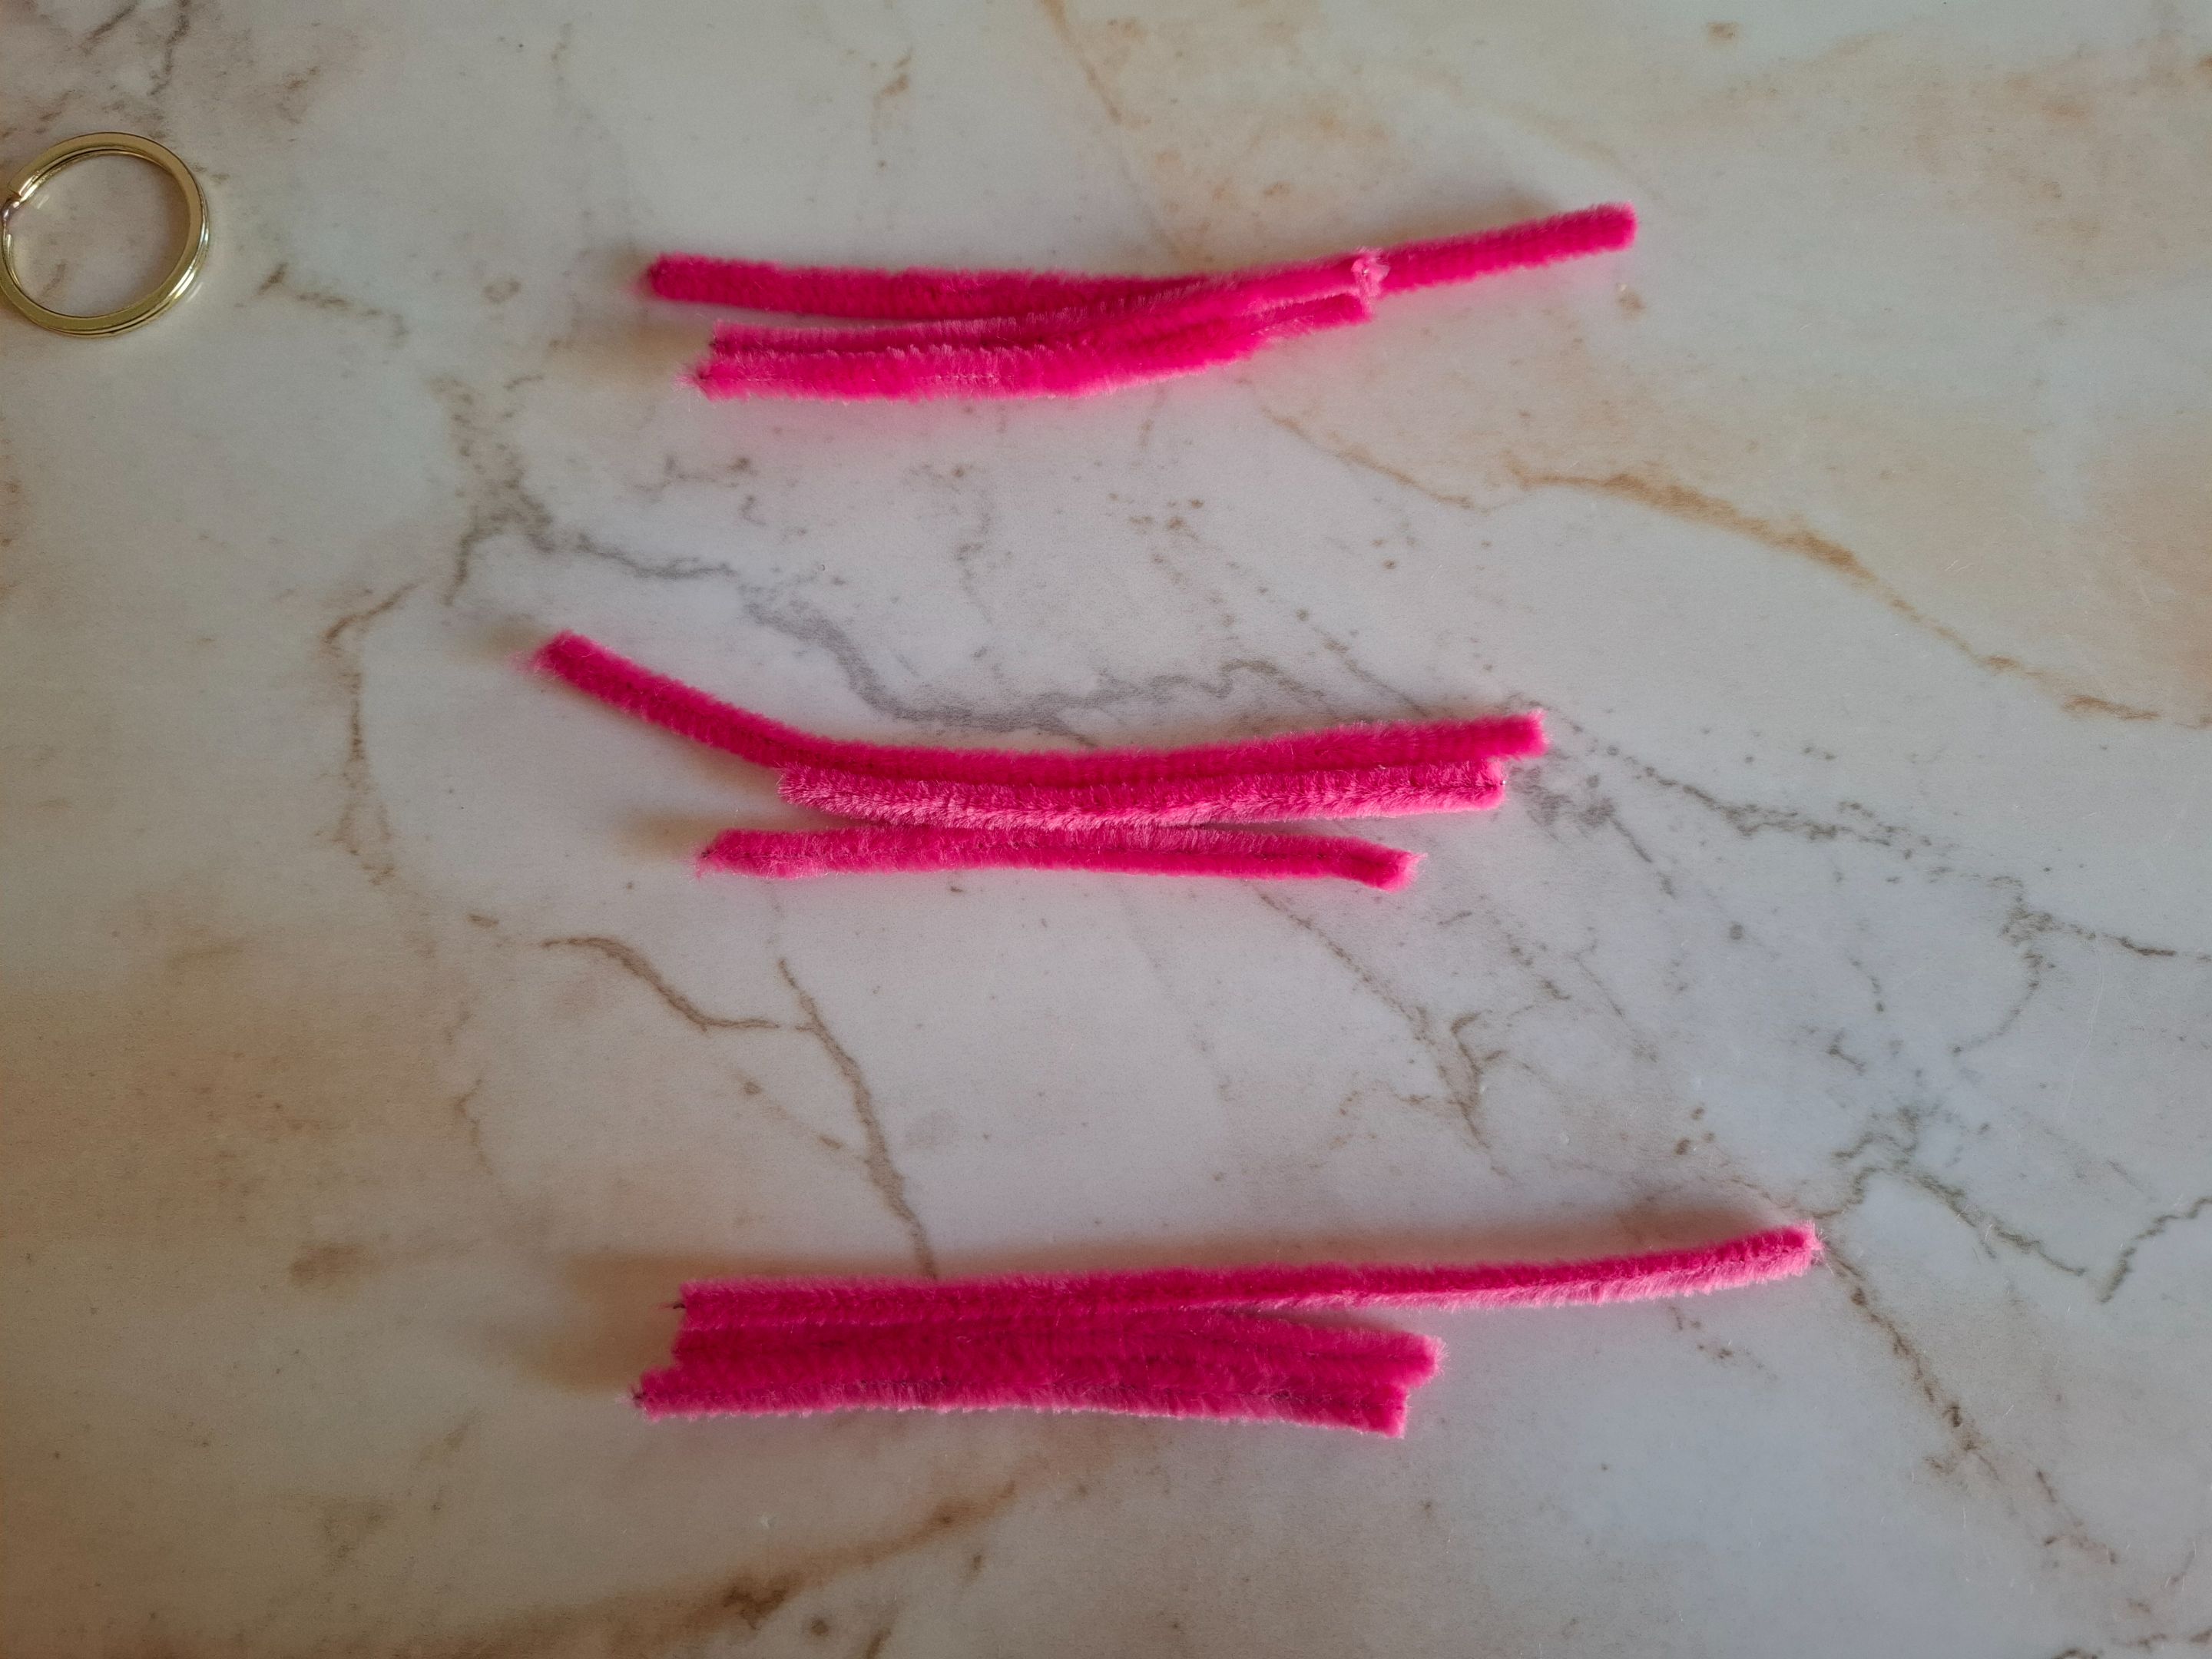
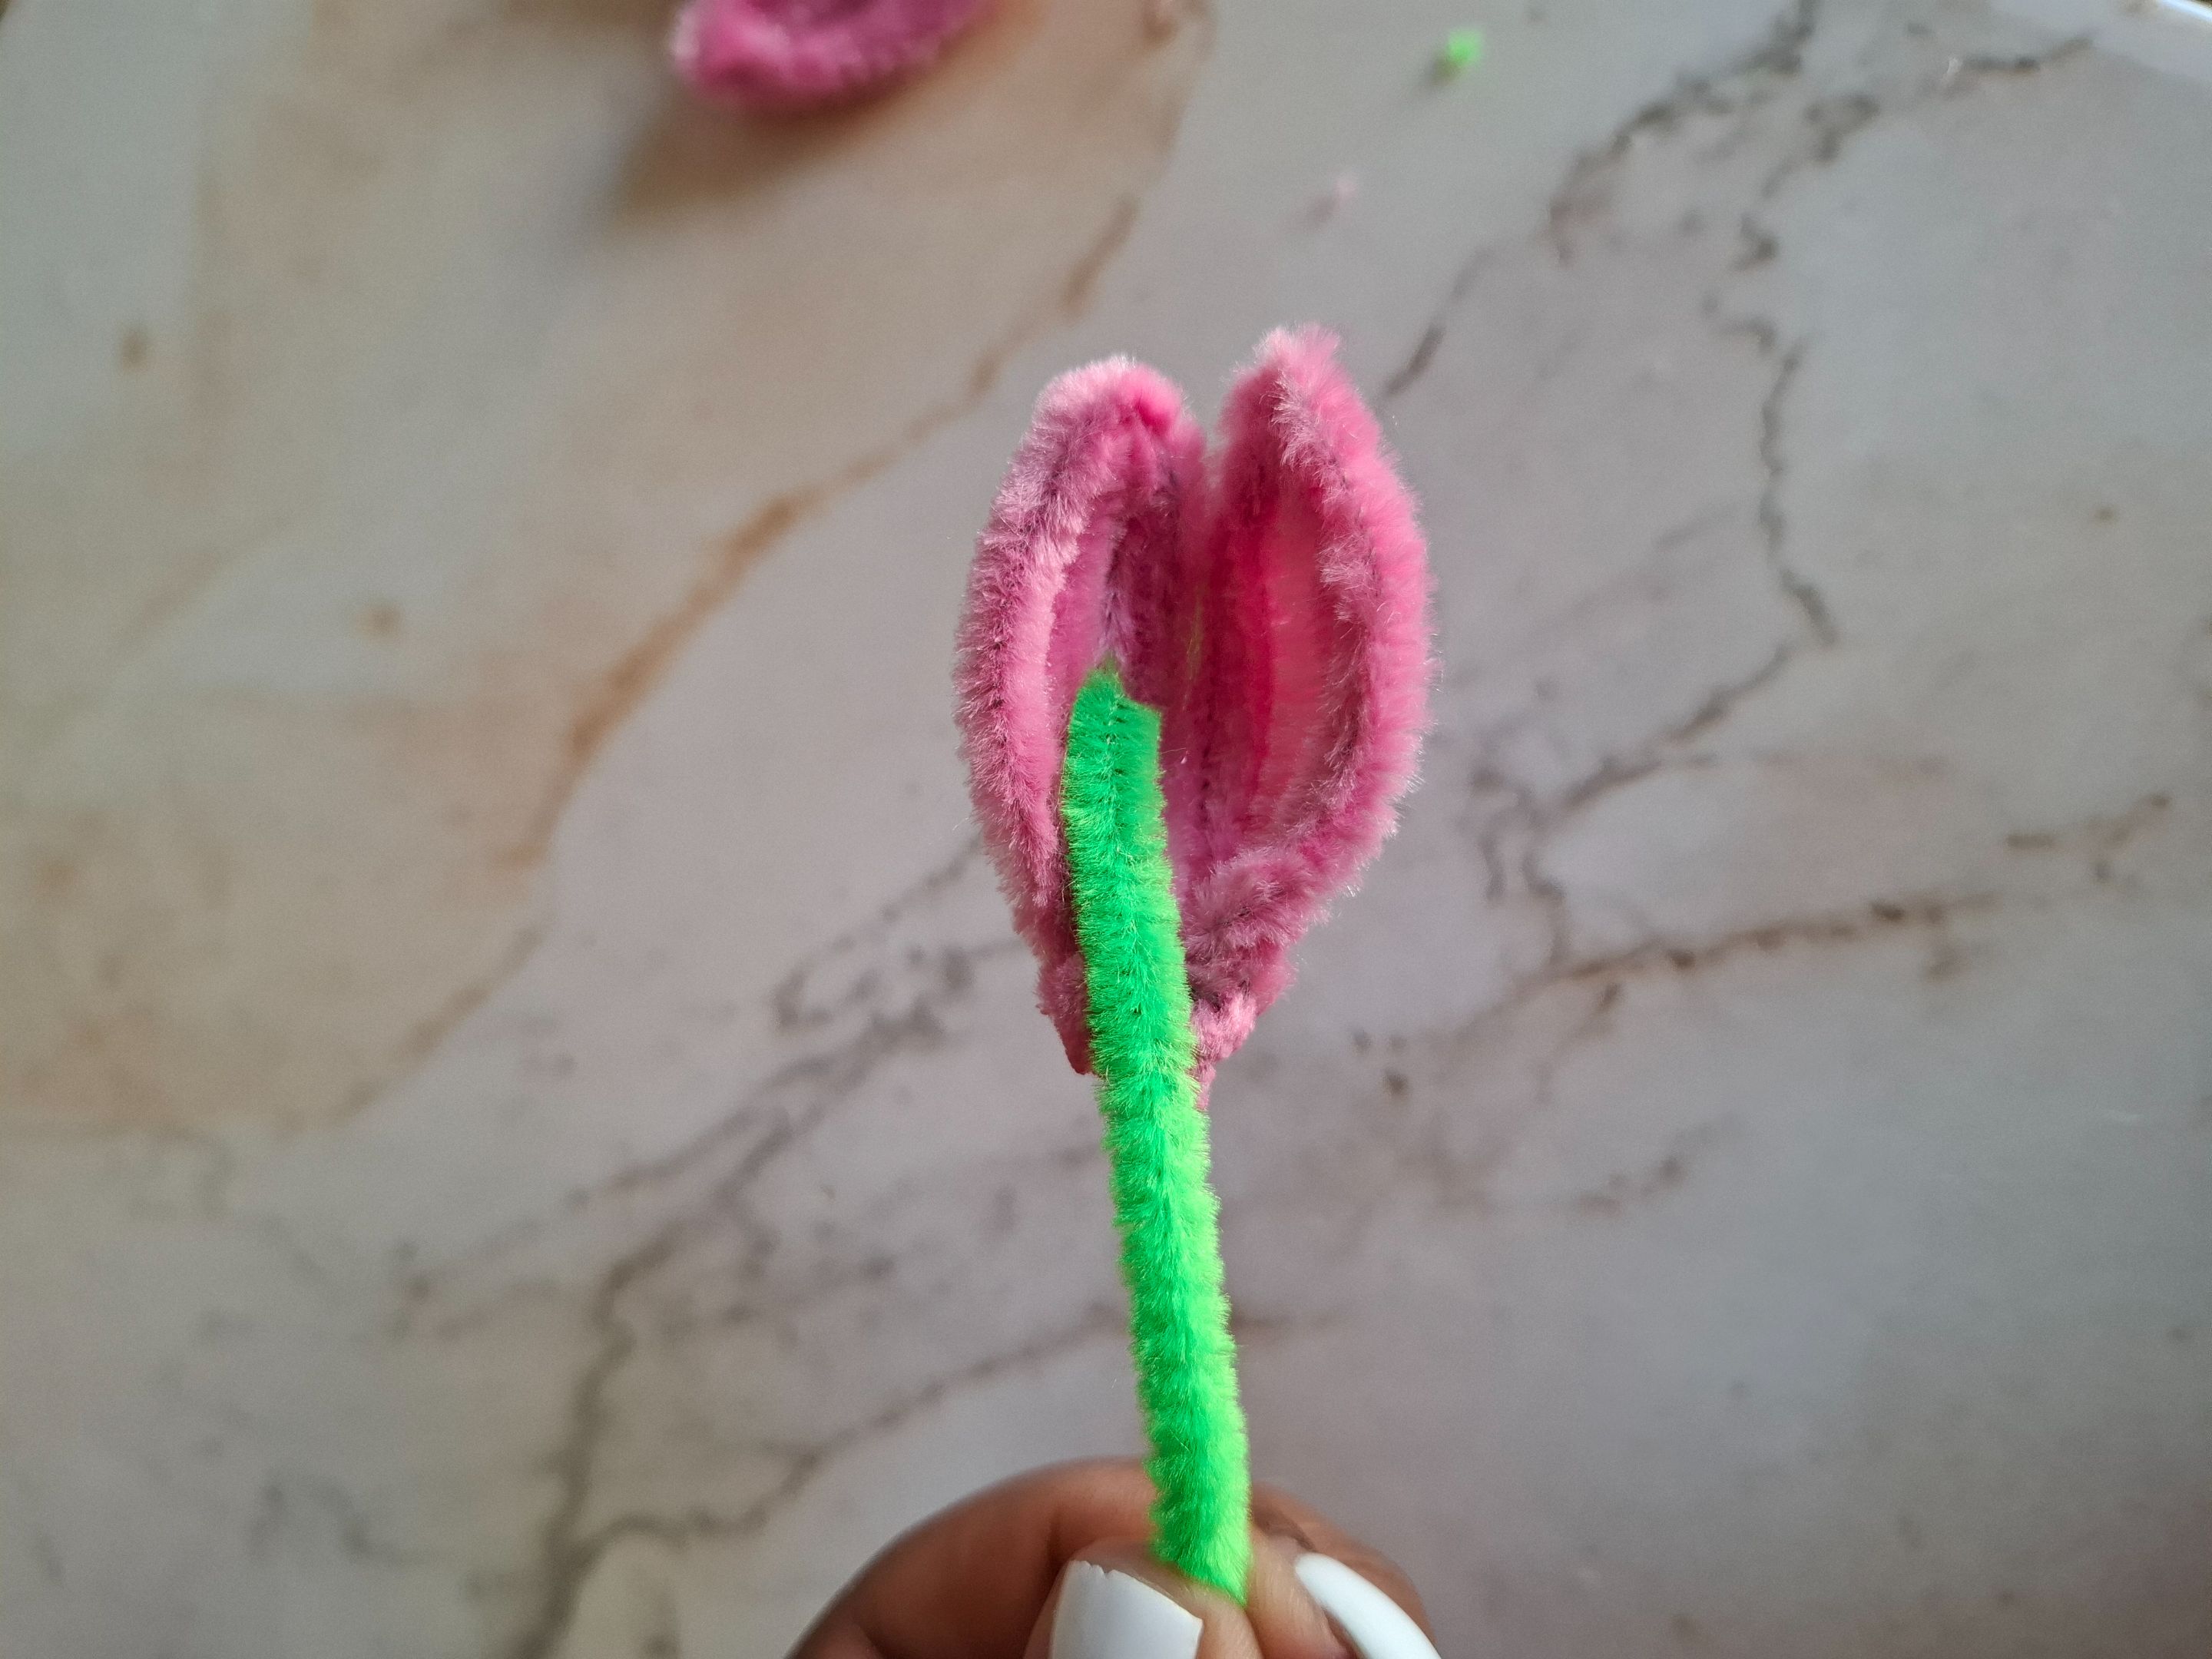
Ahora voy a cortar dos piezas de limpiapipas fucsia de 8 cm, y una tercera pieza de aproximadamente 14 cm, voy a doblar en la mitad ambas piezas de 8 cm y en el centro vamos a colocar la pieza más grande, procedemos a unir girando en el centro.
The first step I'm going to take is to assemble the petals. In this case, there will only be four, so it's much easier to assemble, so you don't need much practice. I made them in two shades of pink, which I chose because it's my favorite color.
Now I'm going to cut two 8 cm pieces of fuchsia pipe cleaners, and a third piece of approximately 14 cm. I'm going to fold both 8 cm pieces in half, and place the largest piece in the center. We proceed to join them by twisting them in the center.
 |
 |
|---|---|
 |
 |
|---|---|
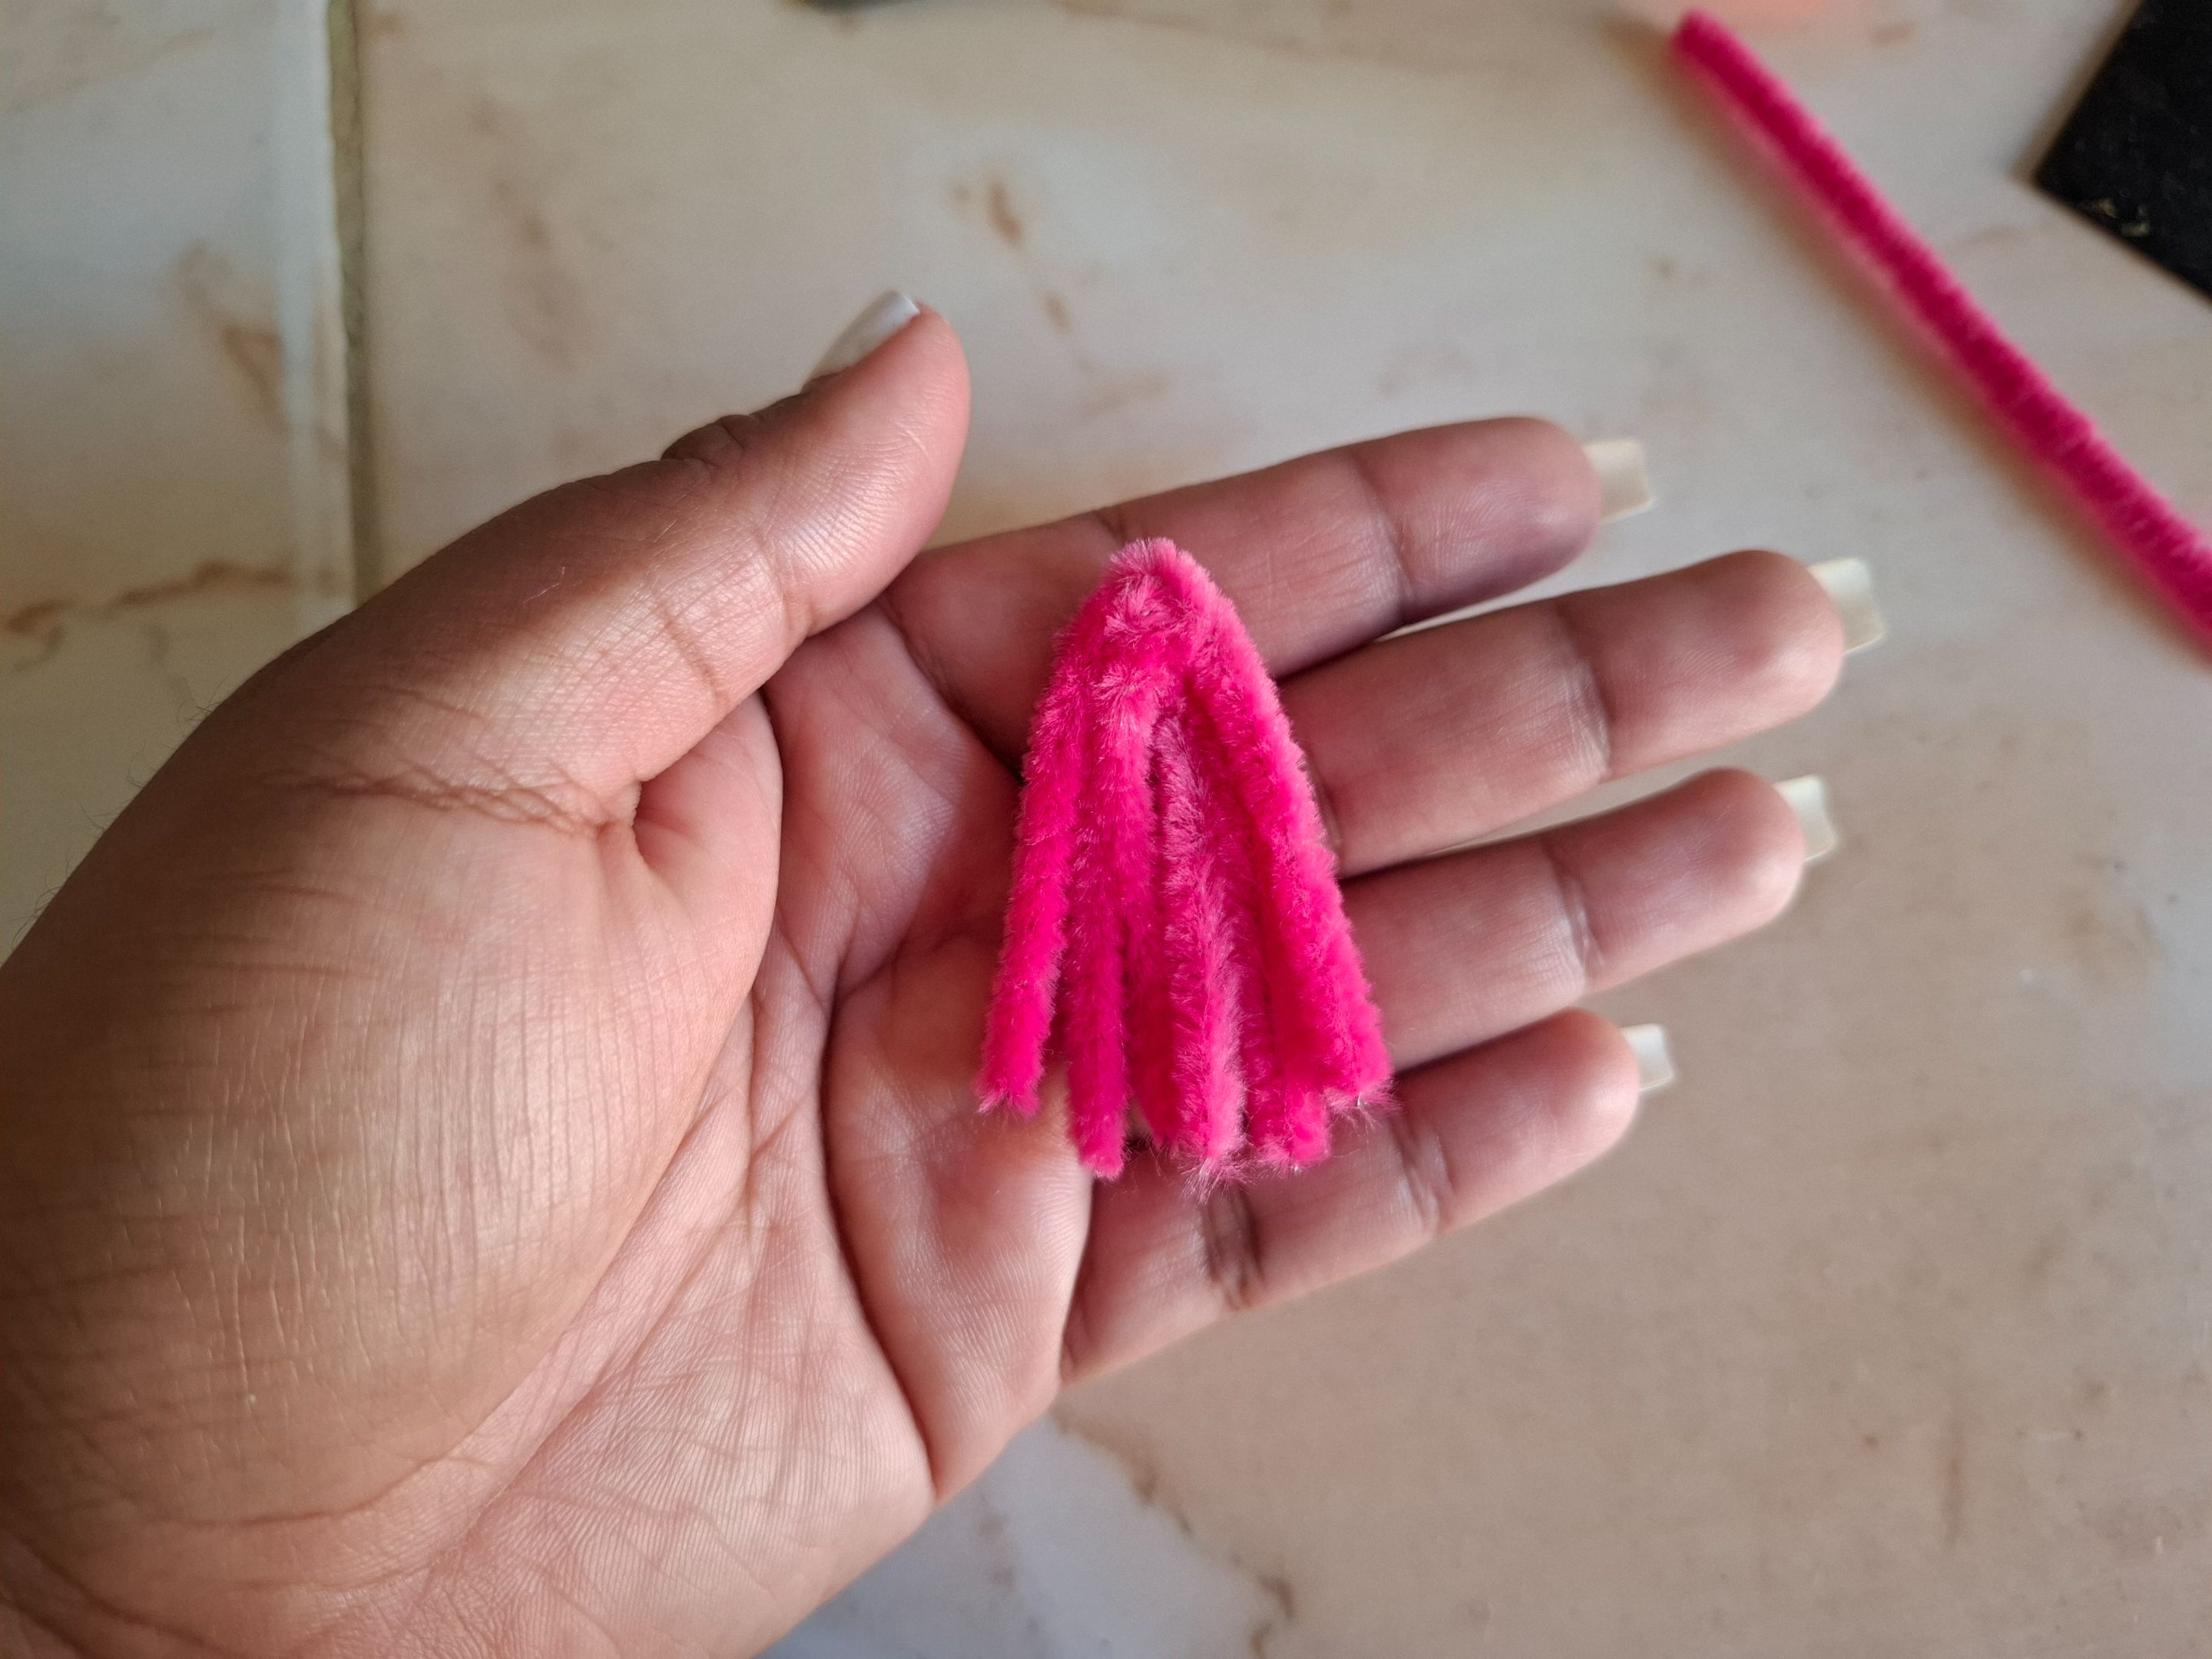
Acomodamos el limpiapipas evitando que queden aglomerados, ahora voy a tomar la punta más larga y unimos en la parte inferior, cortamos y sellamos con el encendedor. Con ayuda de los dedos hacemos un poco de presión en el centro hacia afuera.
We arrange the pipe cleaner, avoiding clumping. Now I'll take the longer end and join it together at the bottom. We cut and seal it with the lighter. Using our fingers, we apply a little pressure from the center toward the outside.
 |
 |
 |
|---|---|---|
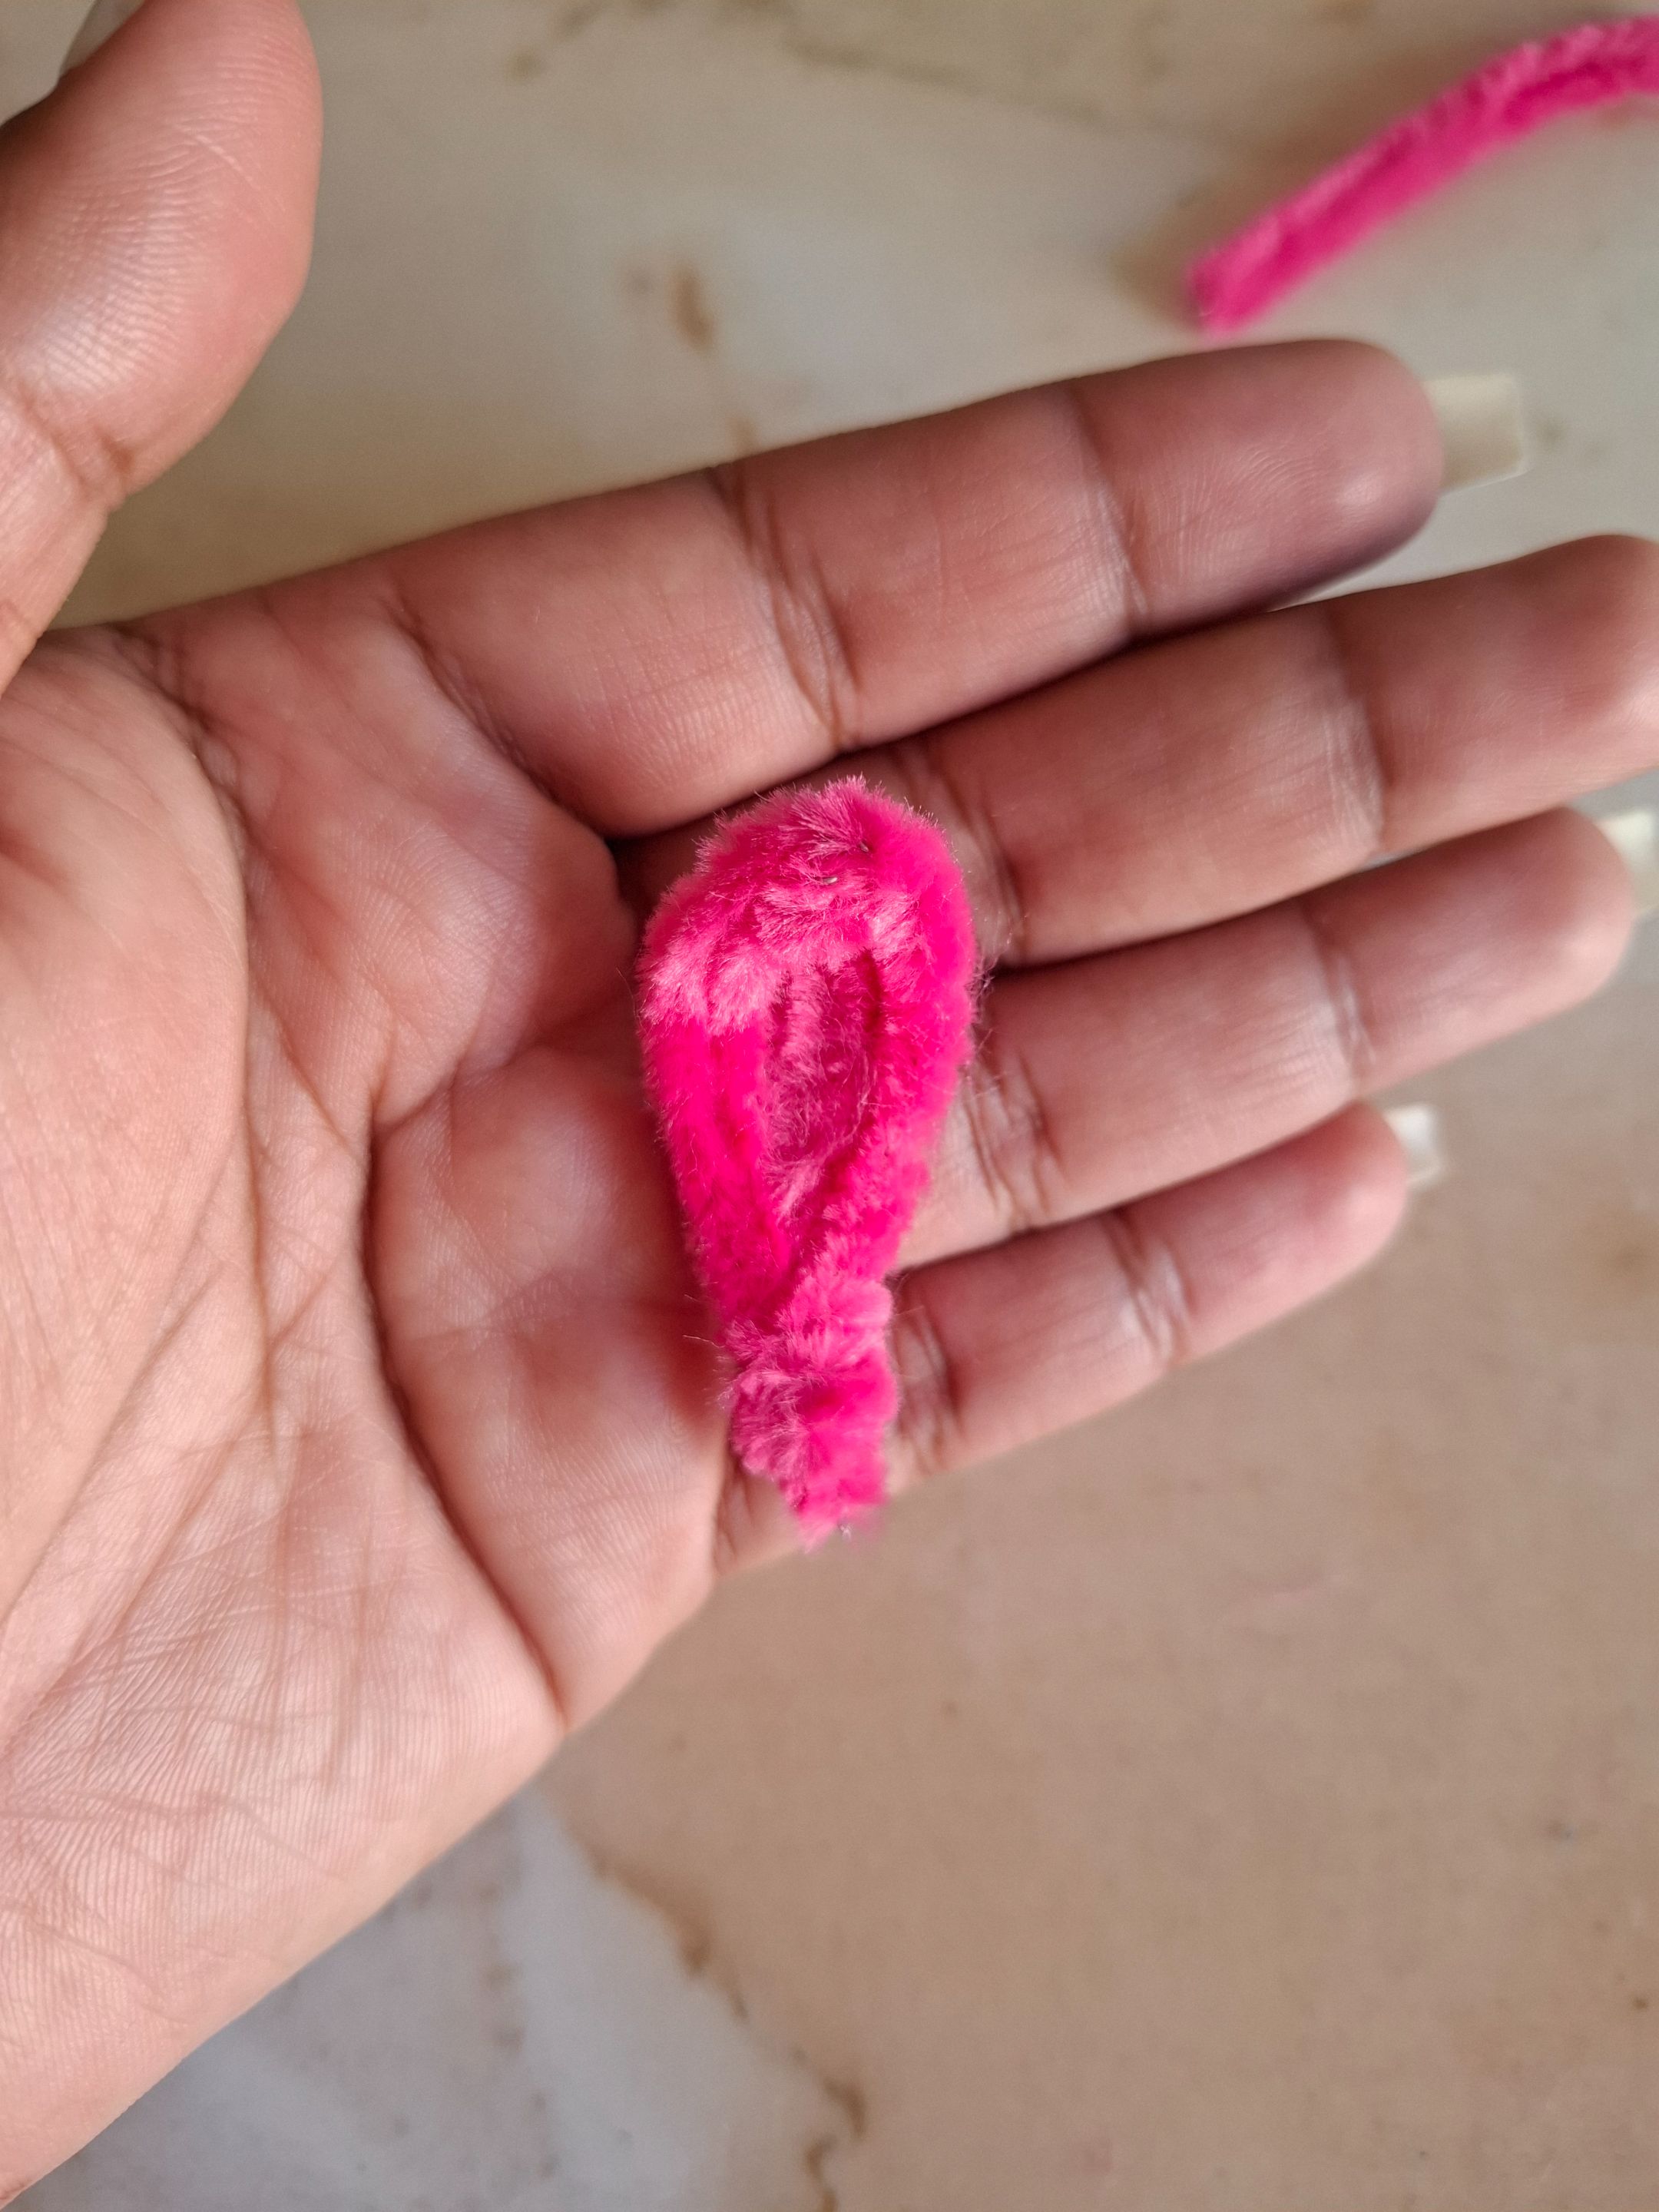
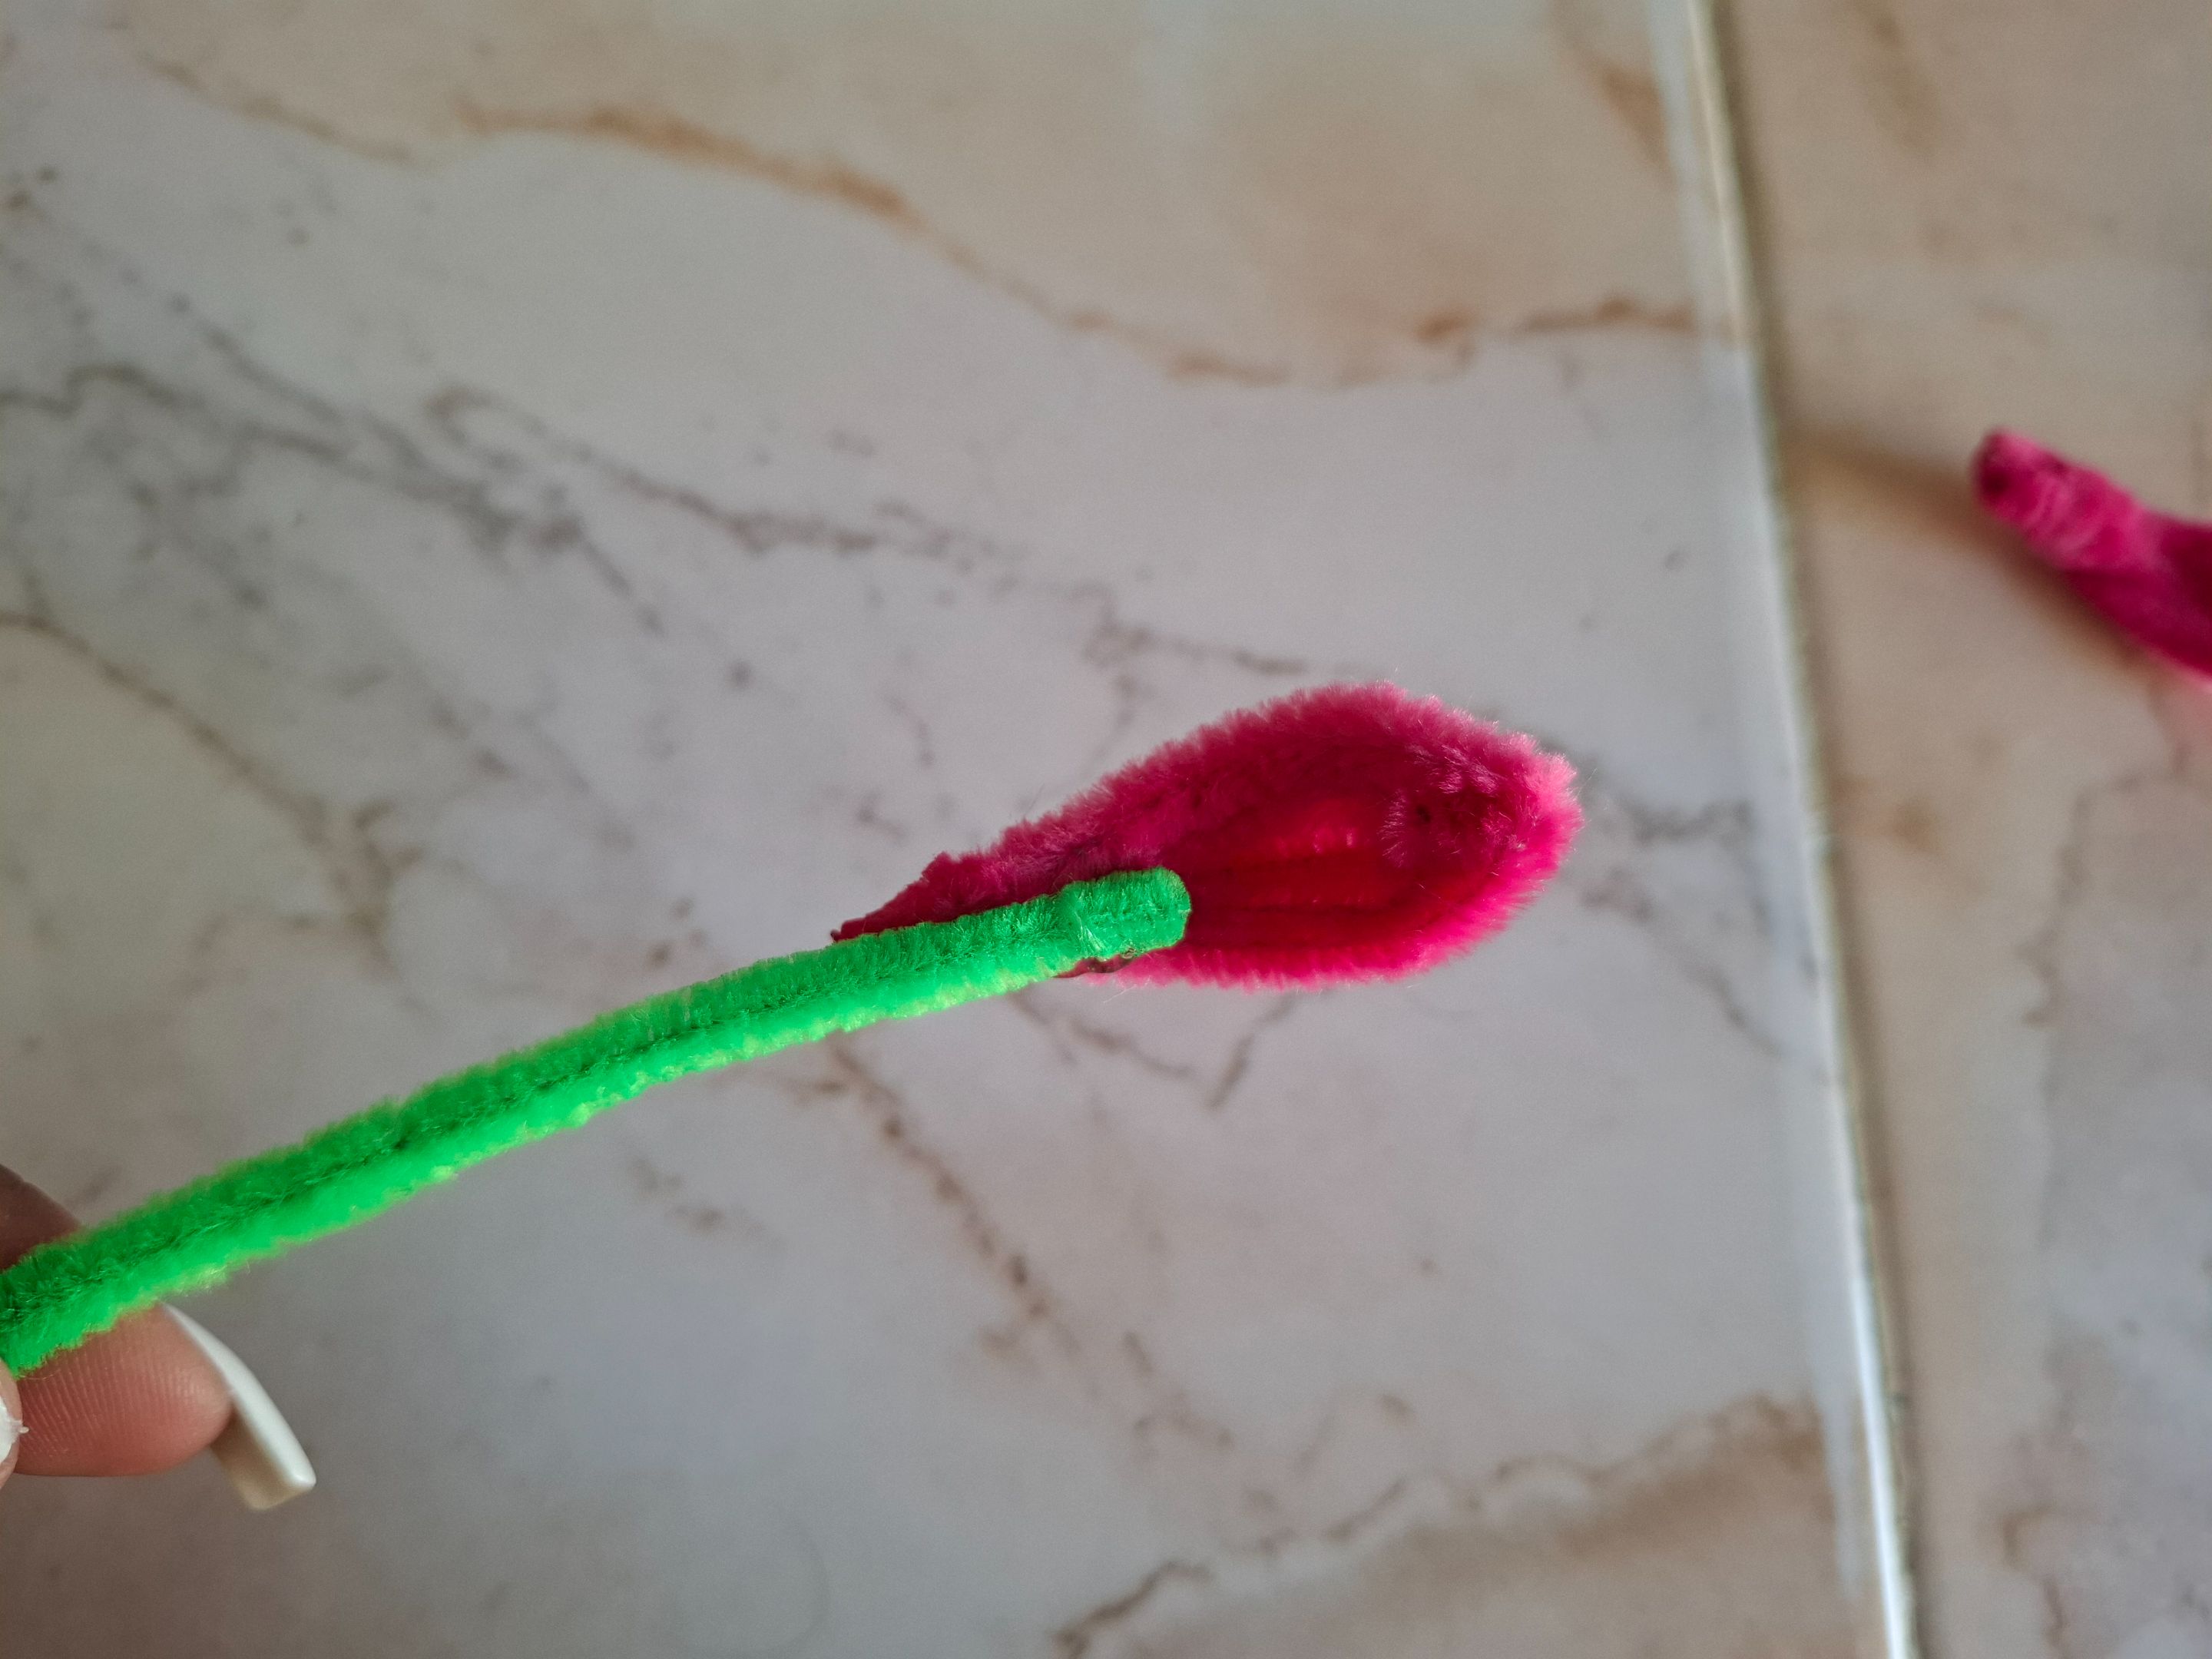
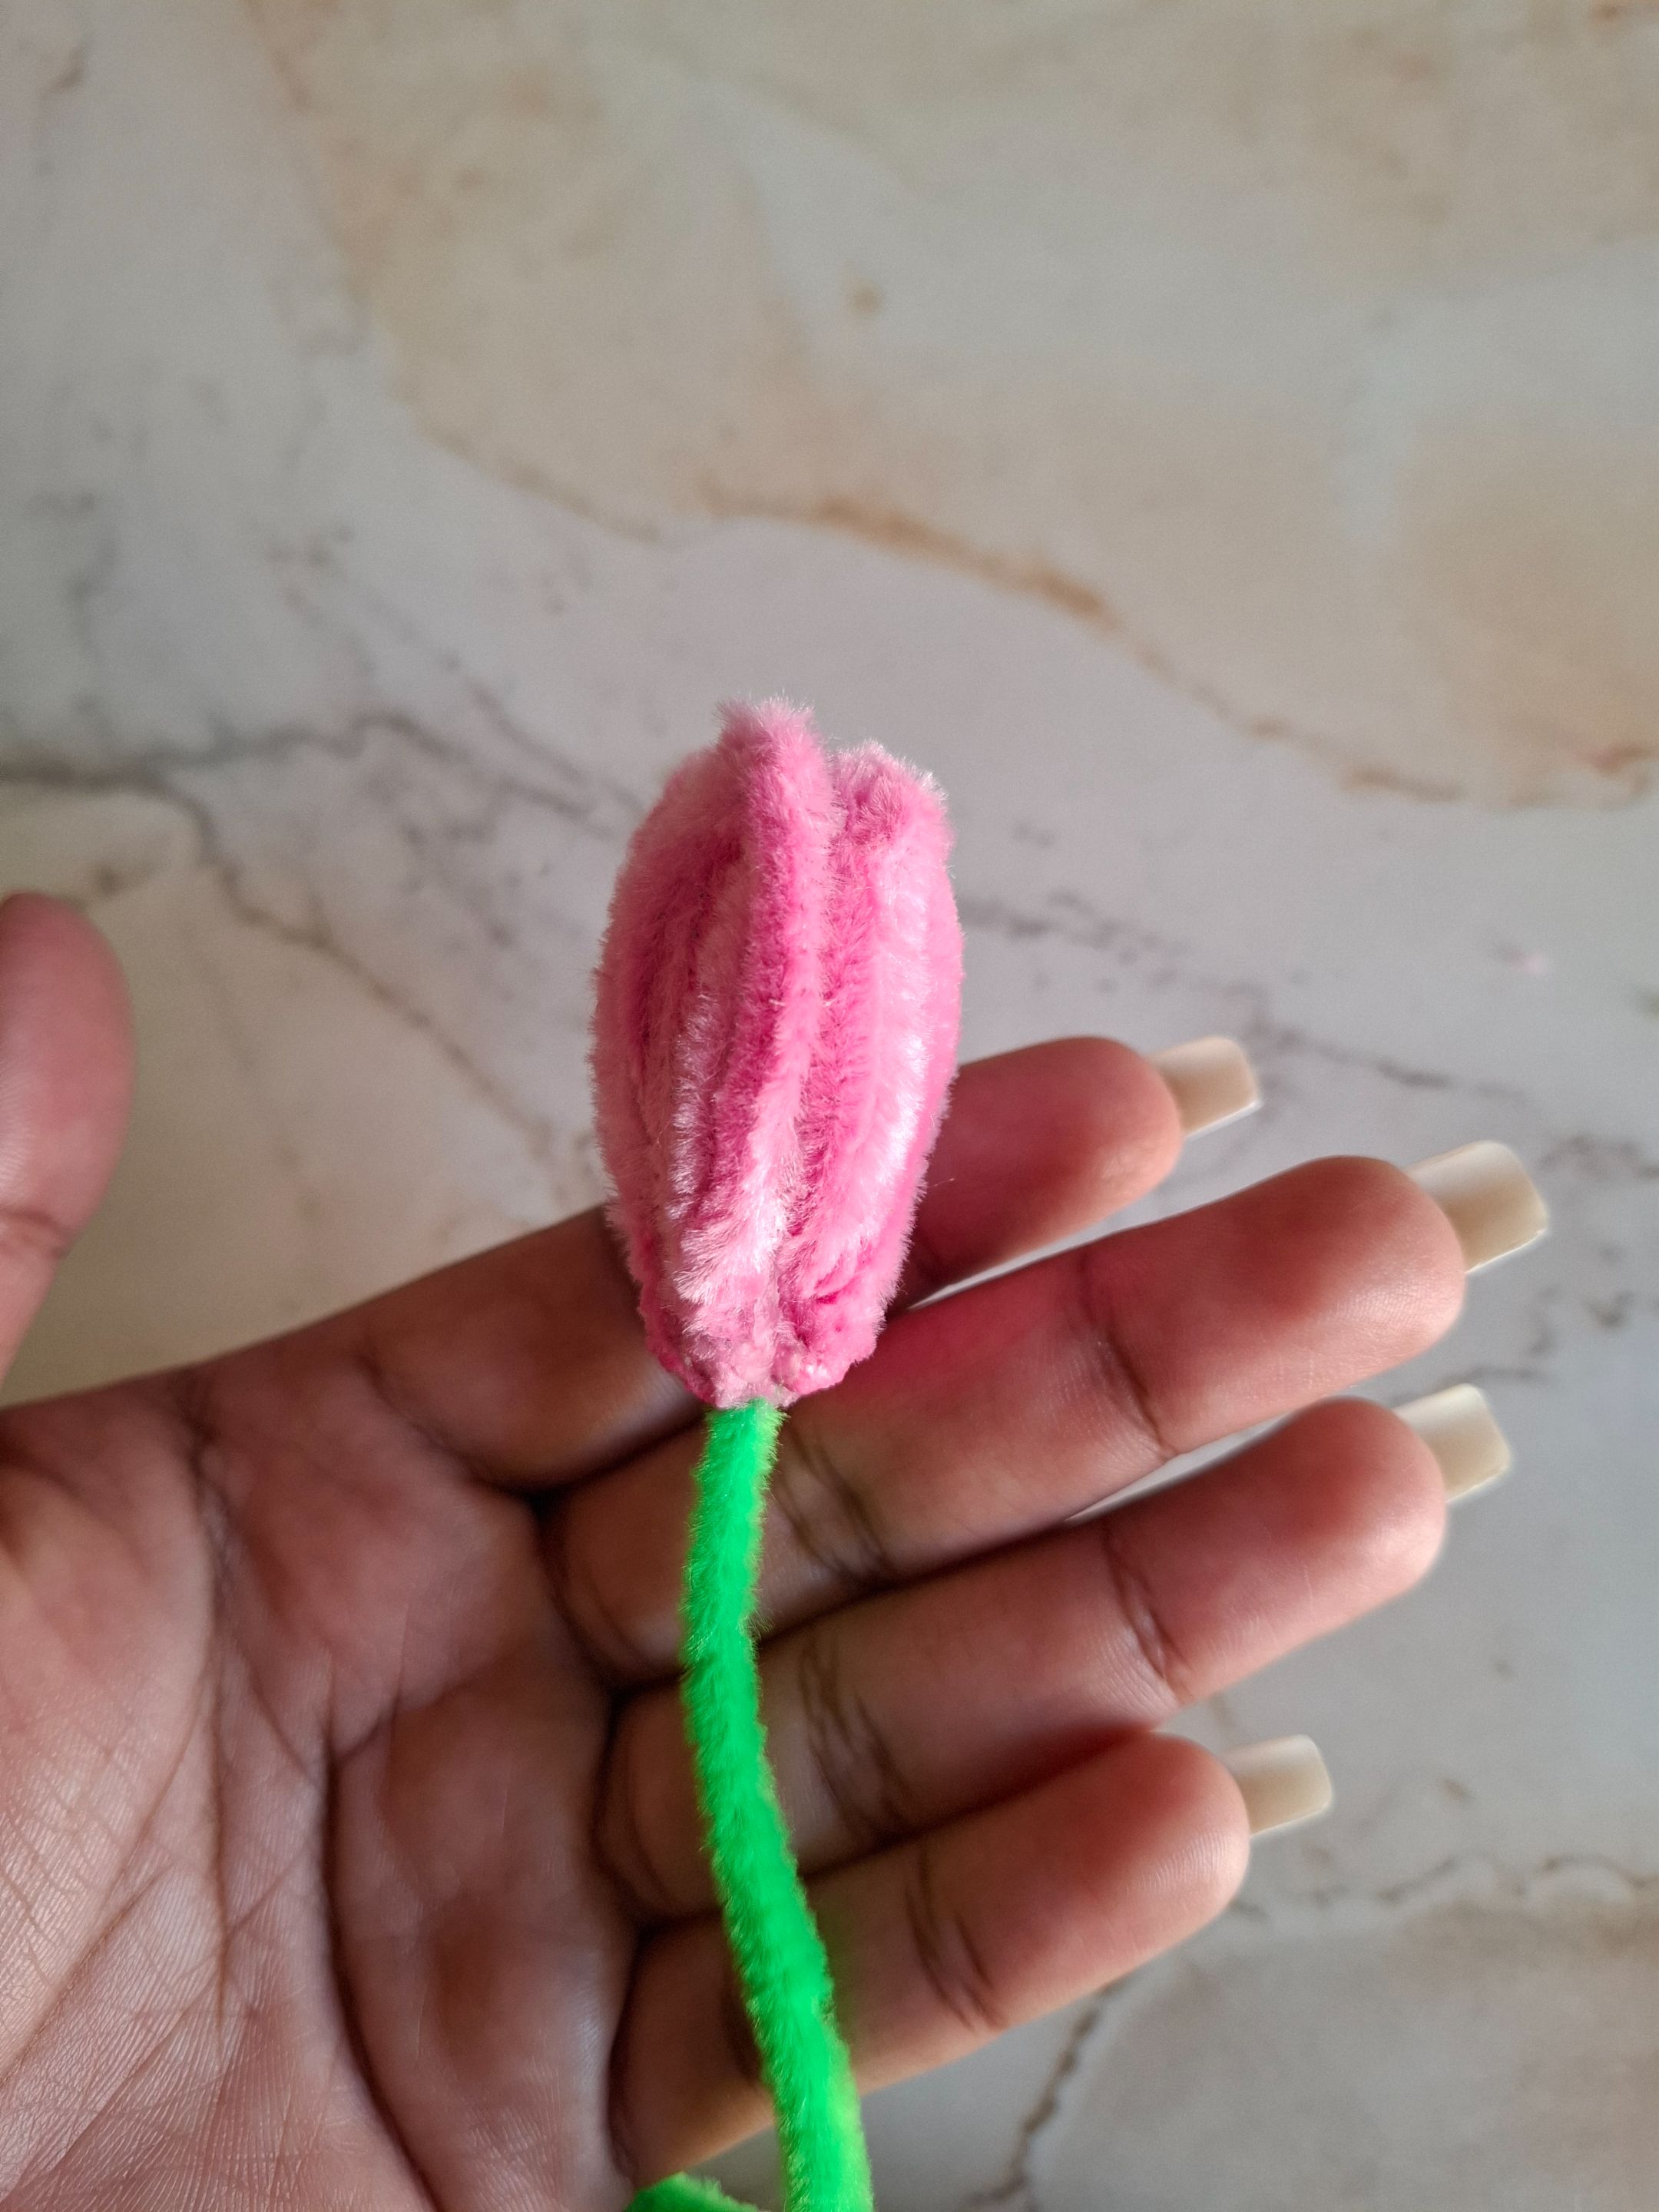
Este paso lo realicé tres veces más, el mismo paso realicé con el siguiente Tulipán con la diferencia que será de color rosa claro, ahora voy a tomar un limpiapipas verde y al rededor de una de las puntas voy a comenzar a pegar los pétalos.
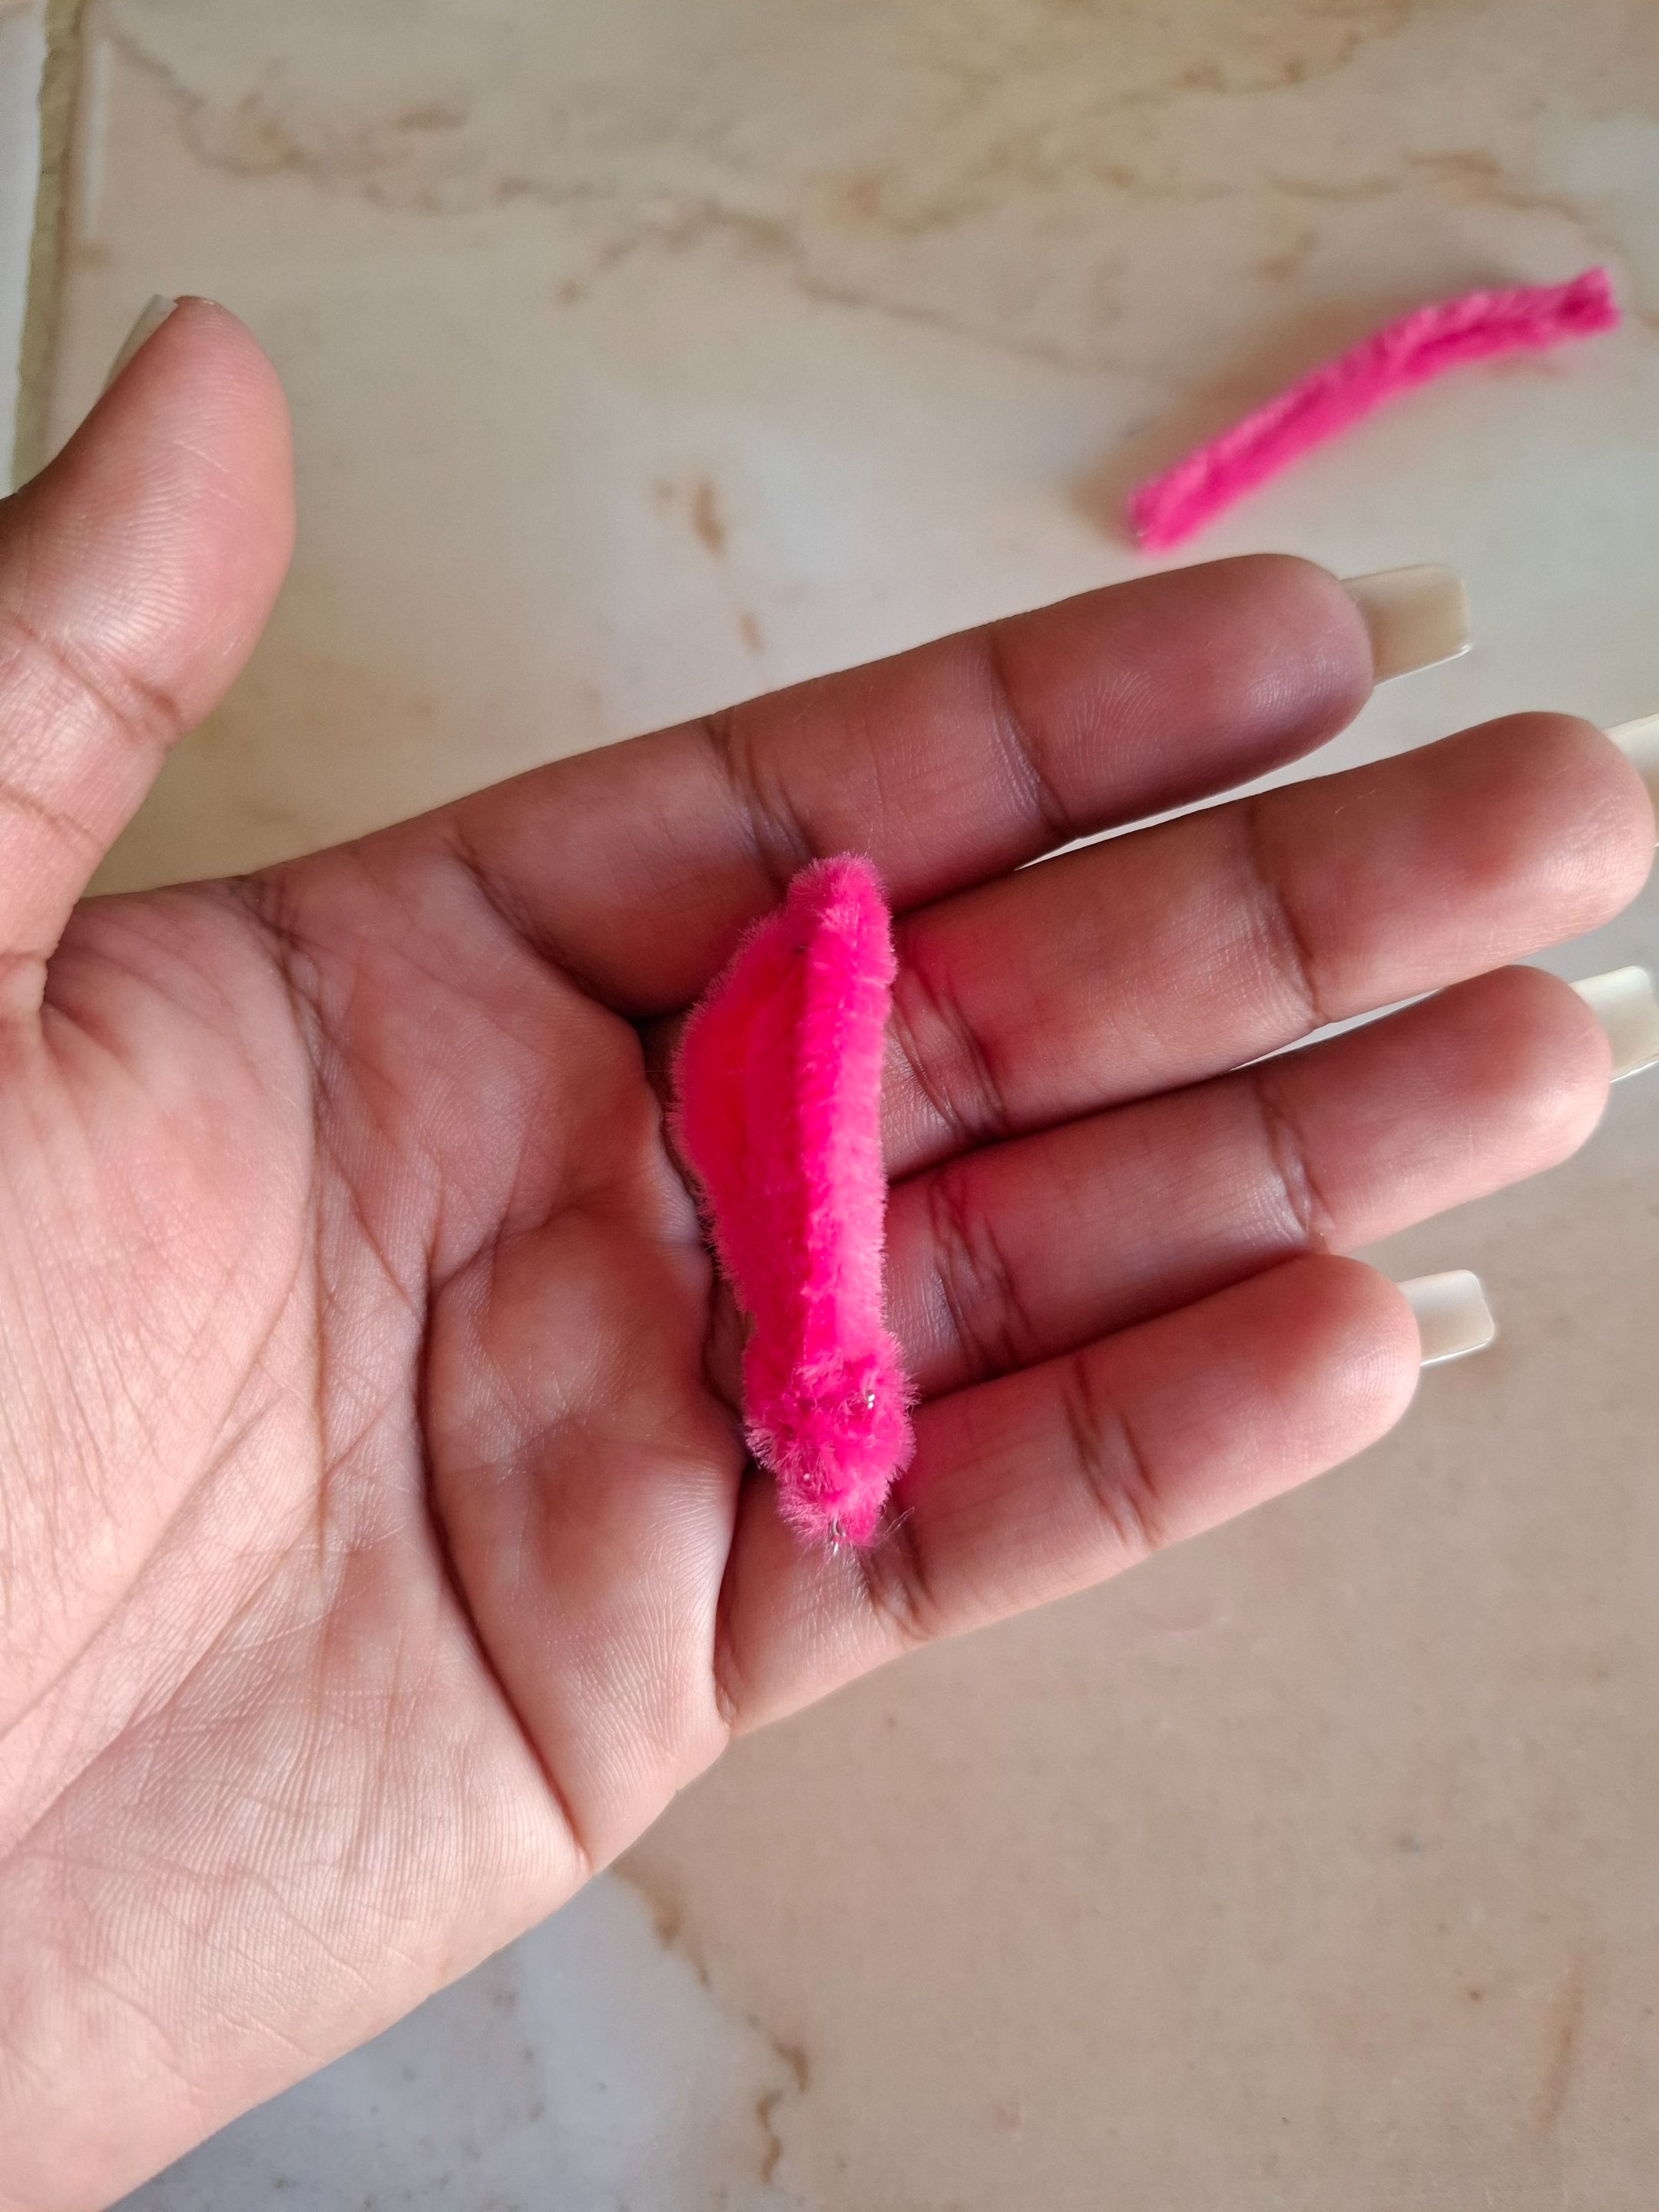
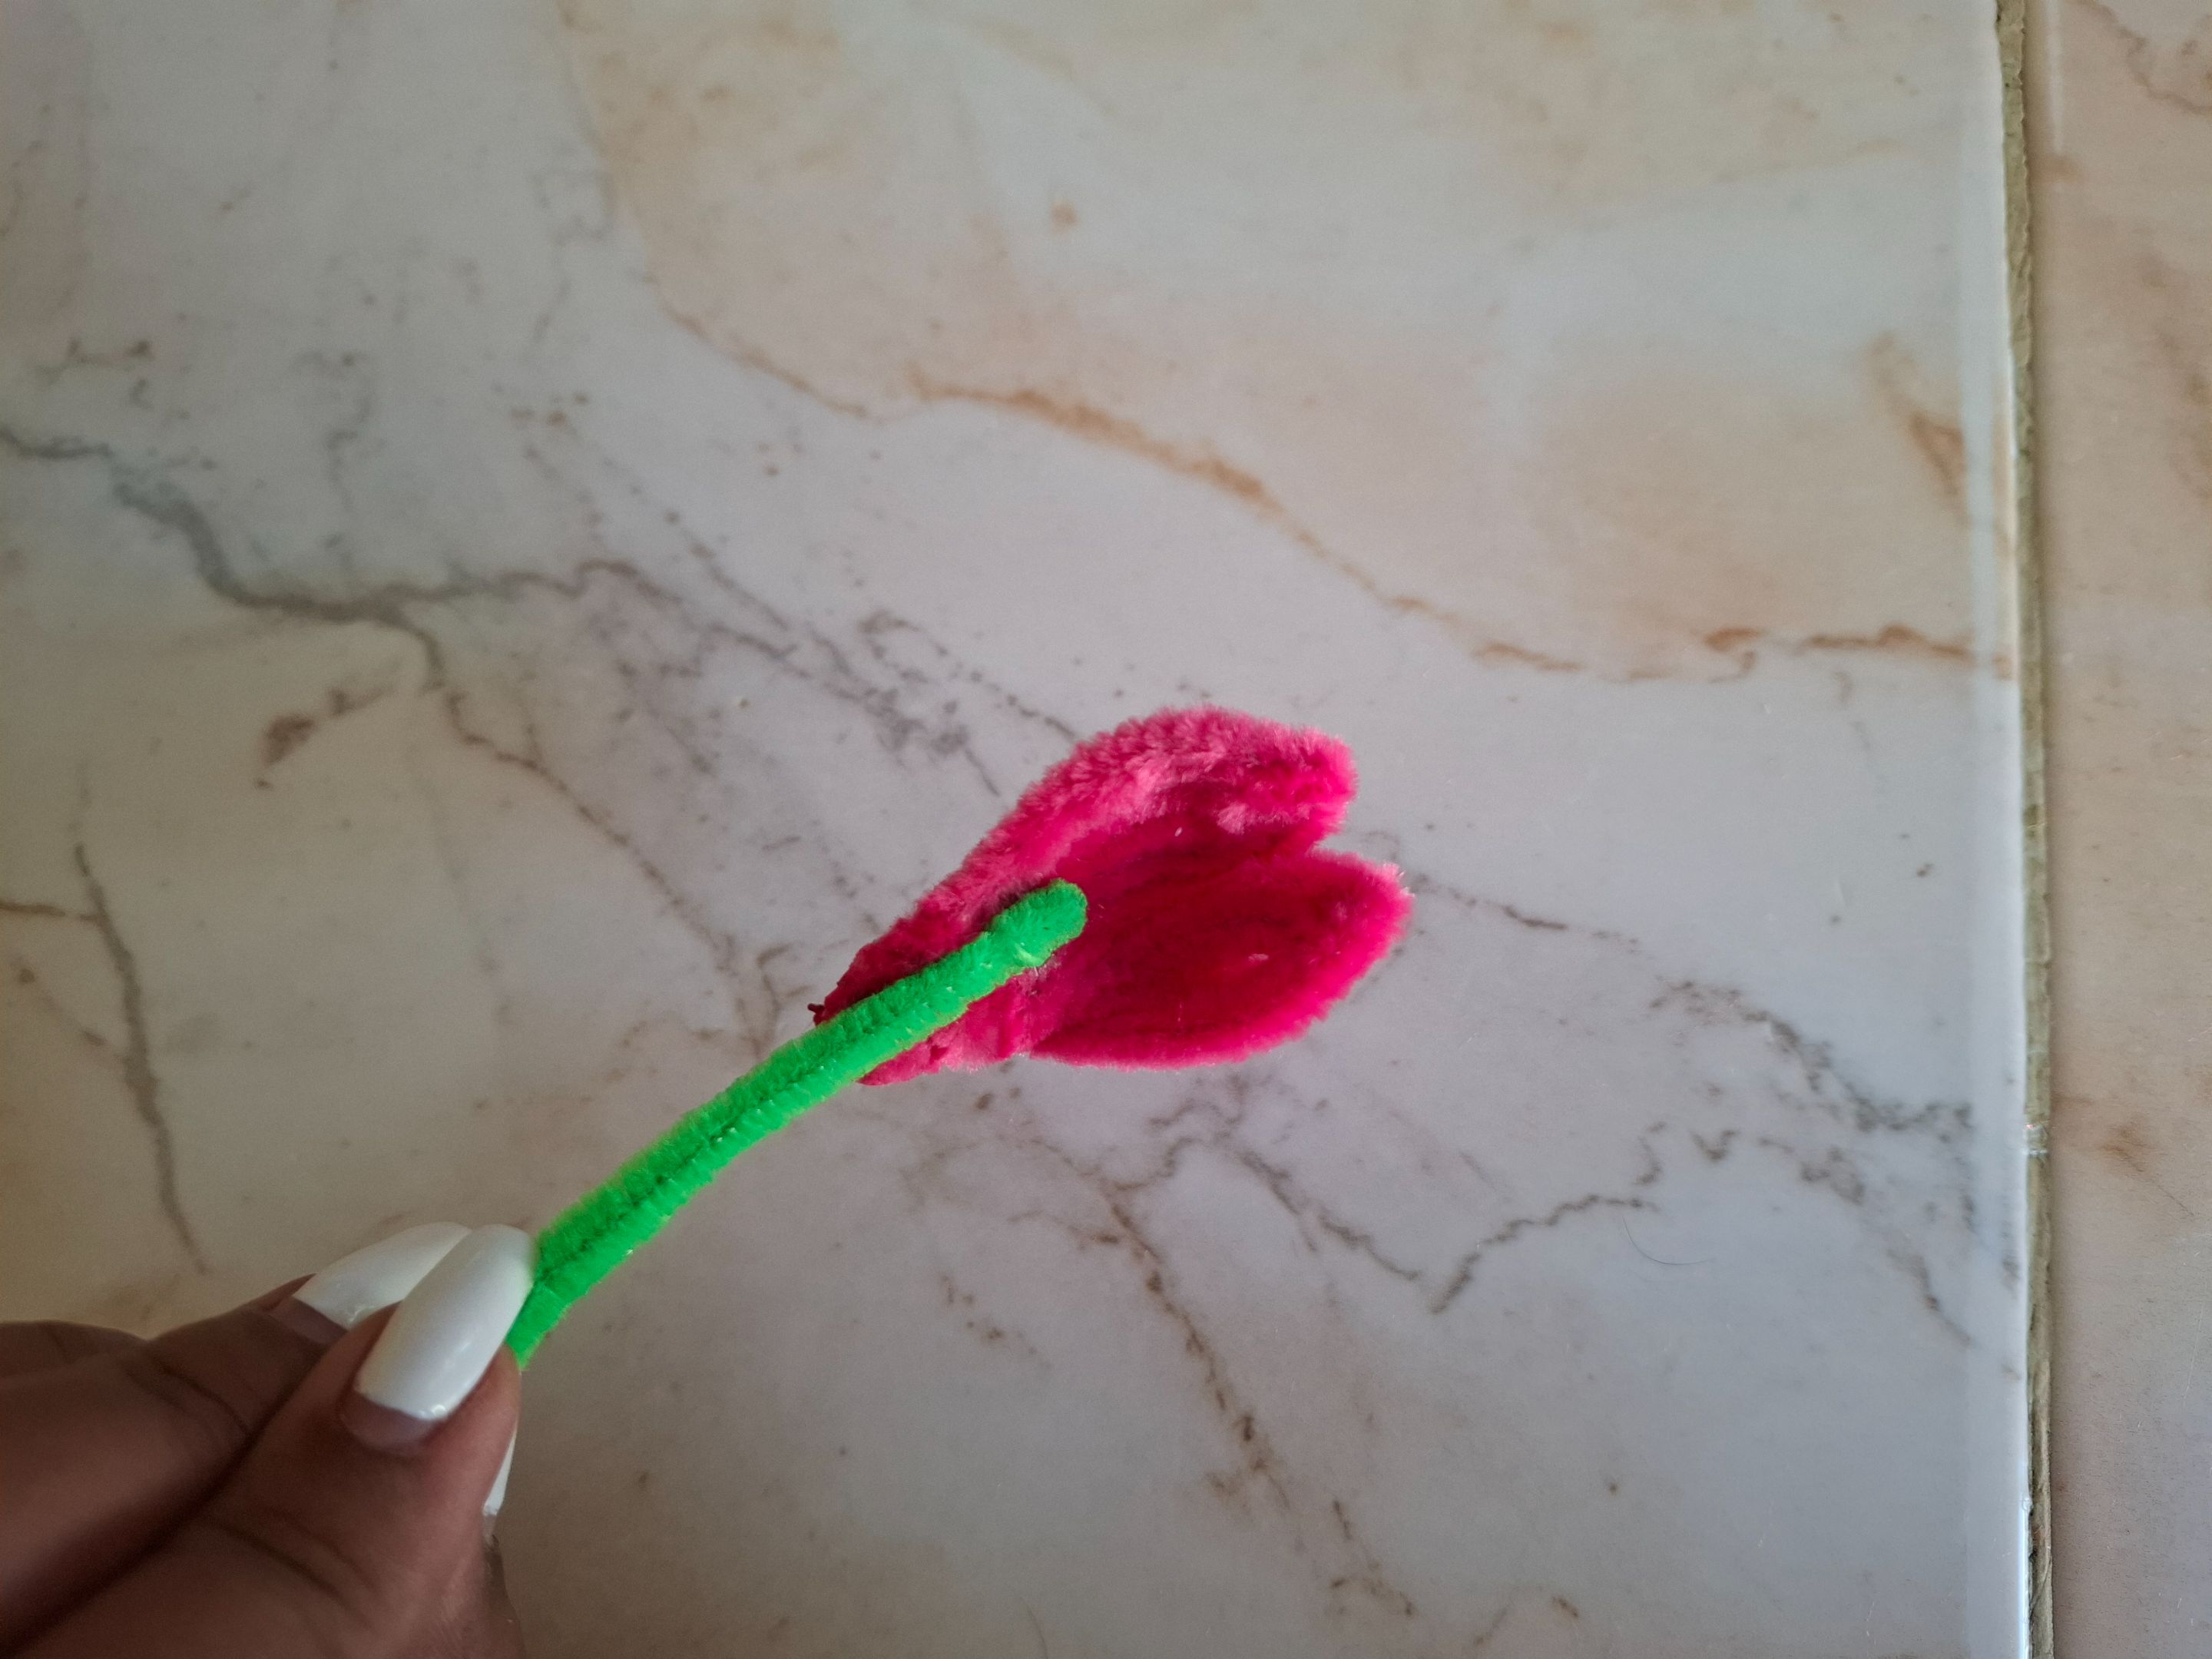
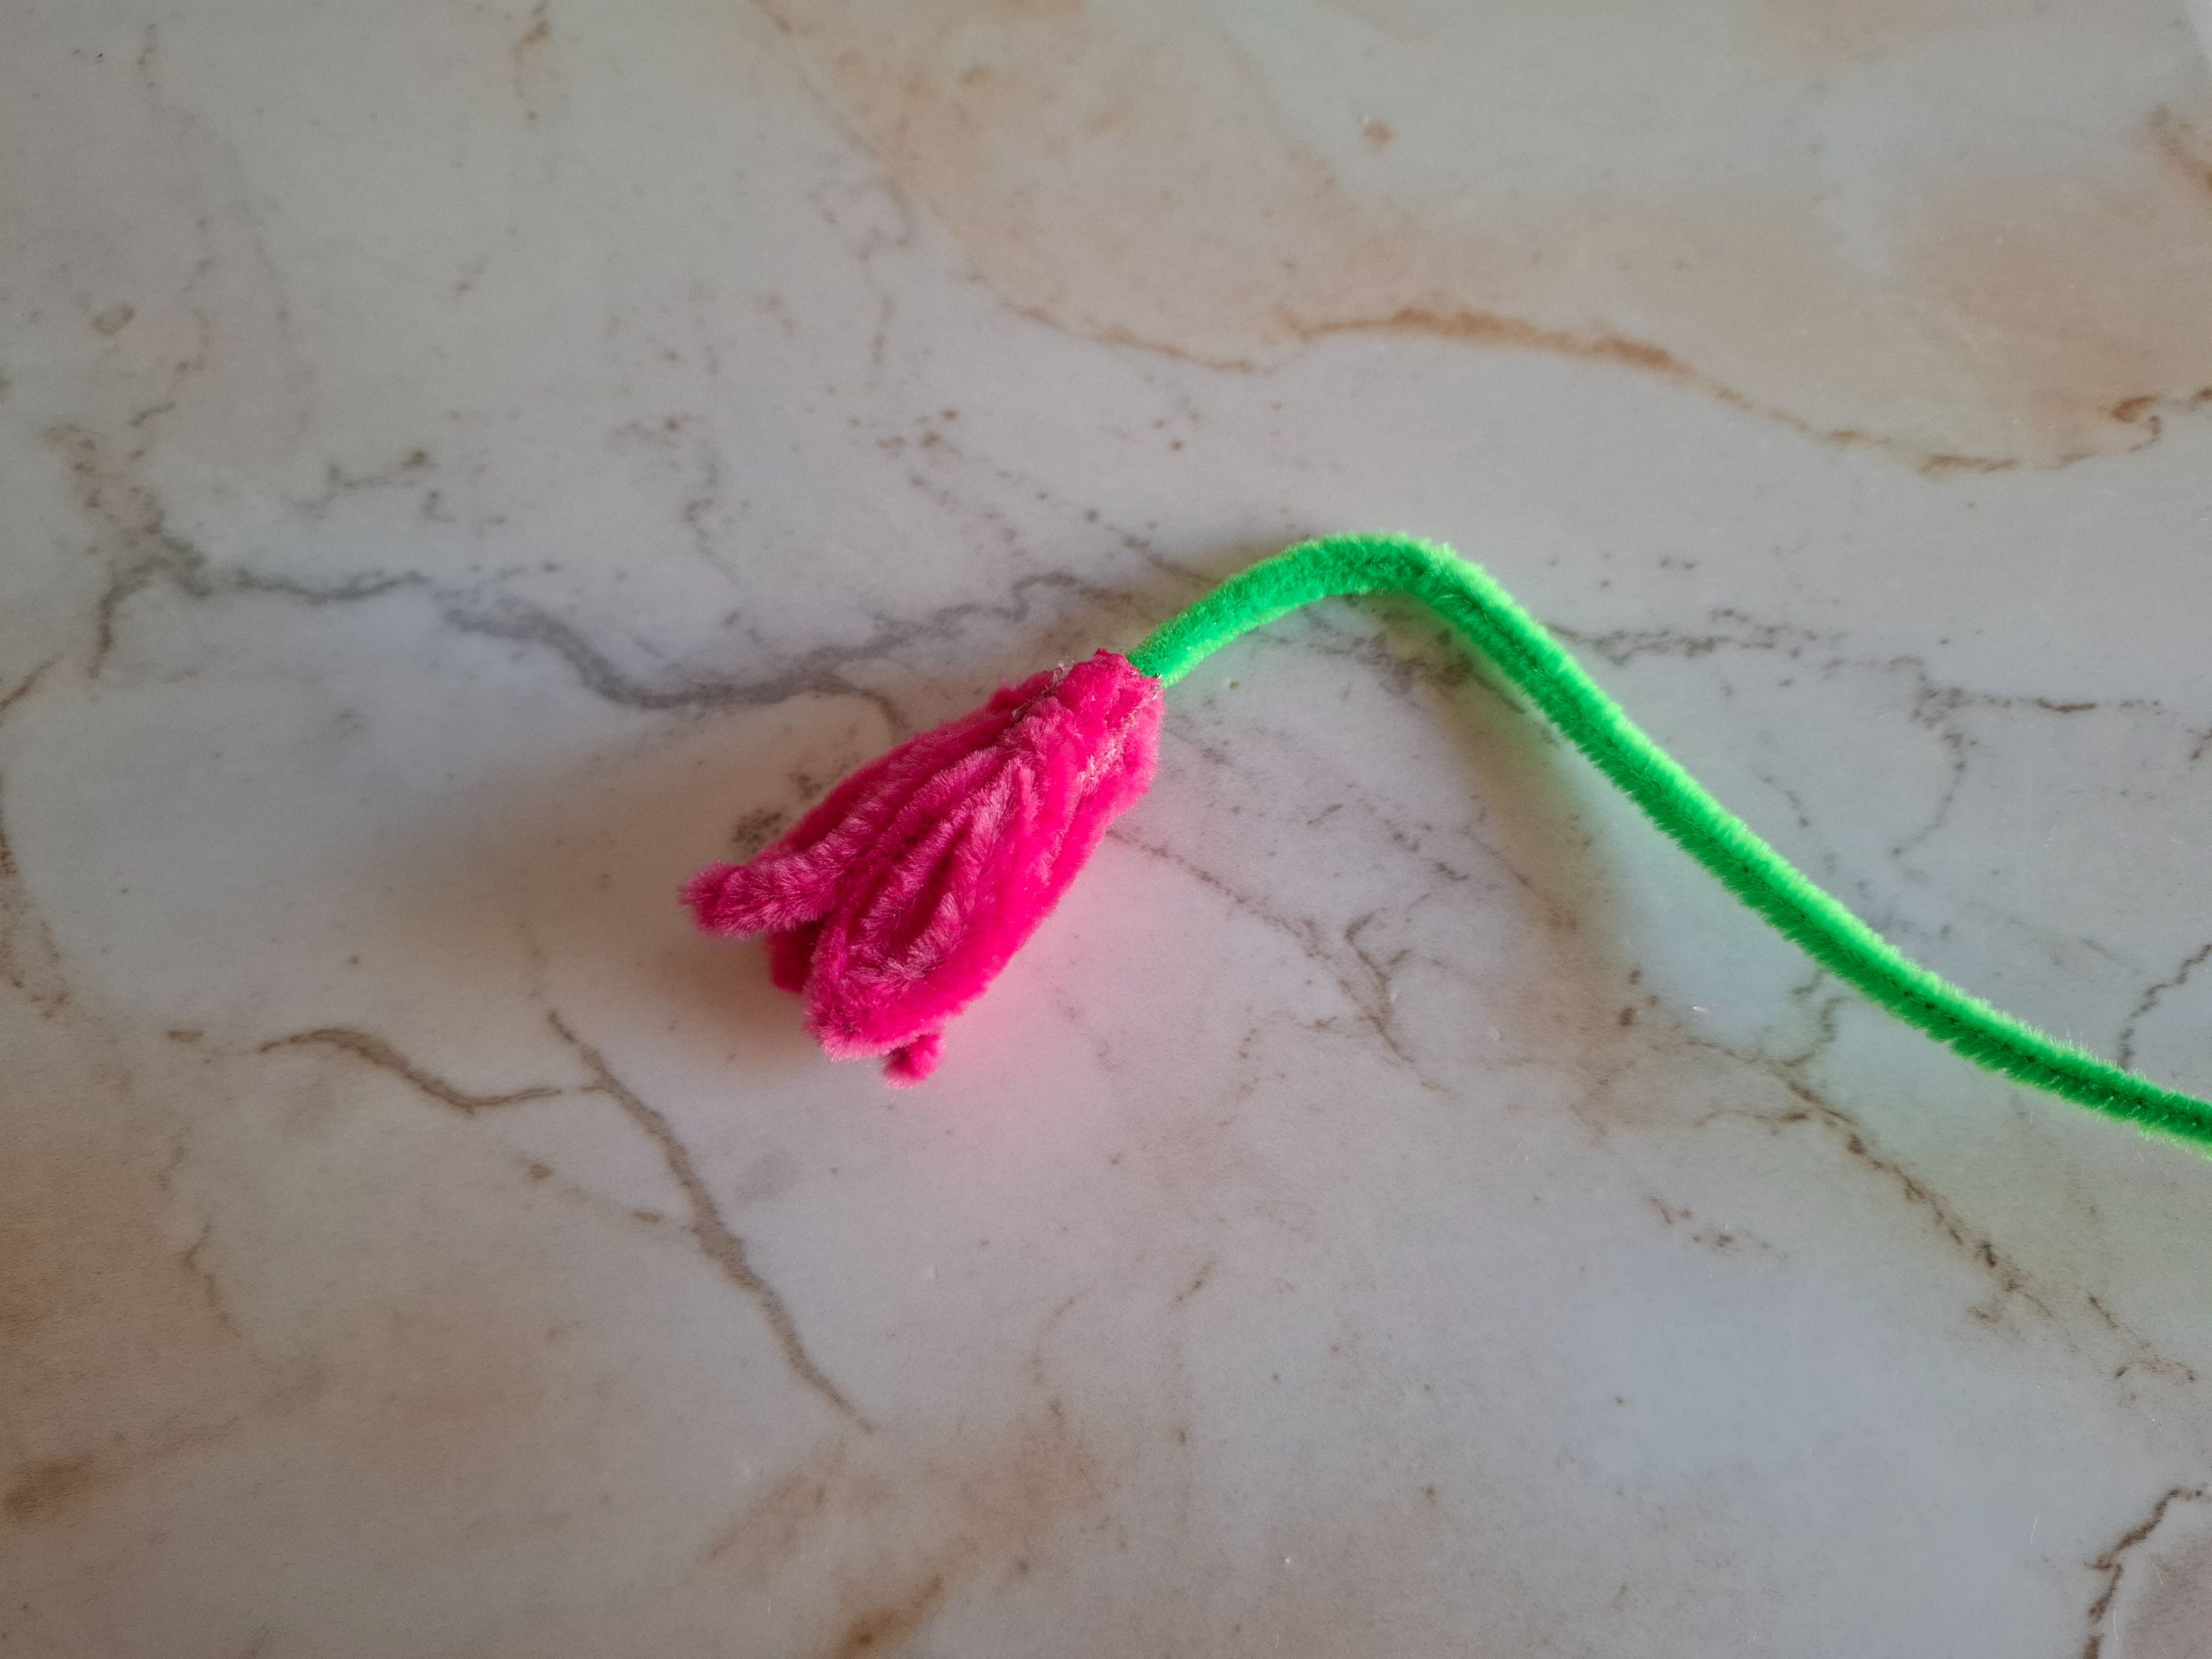
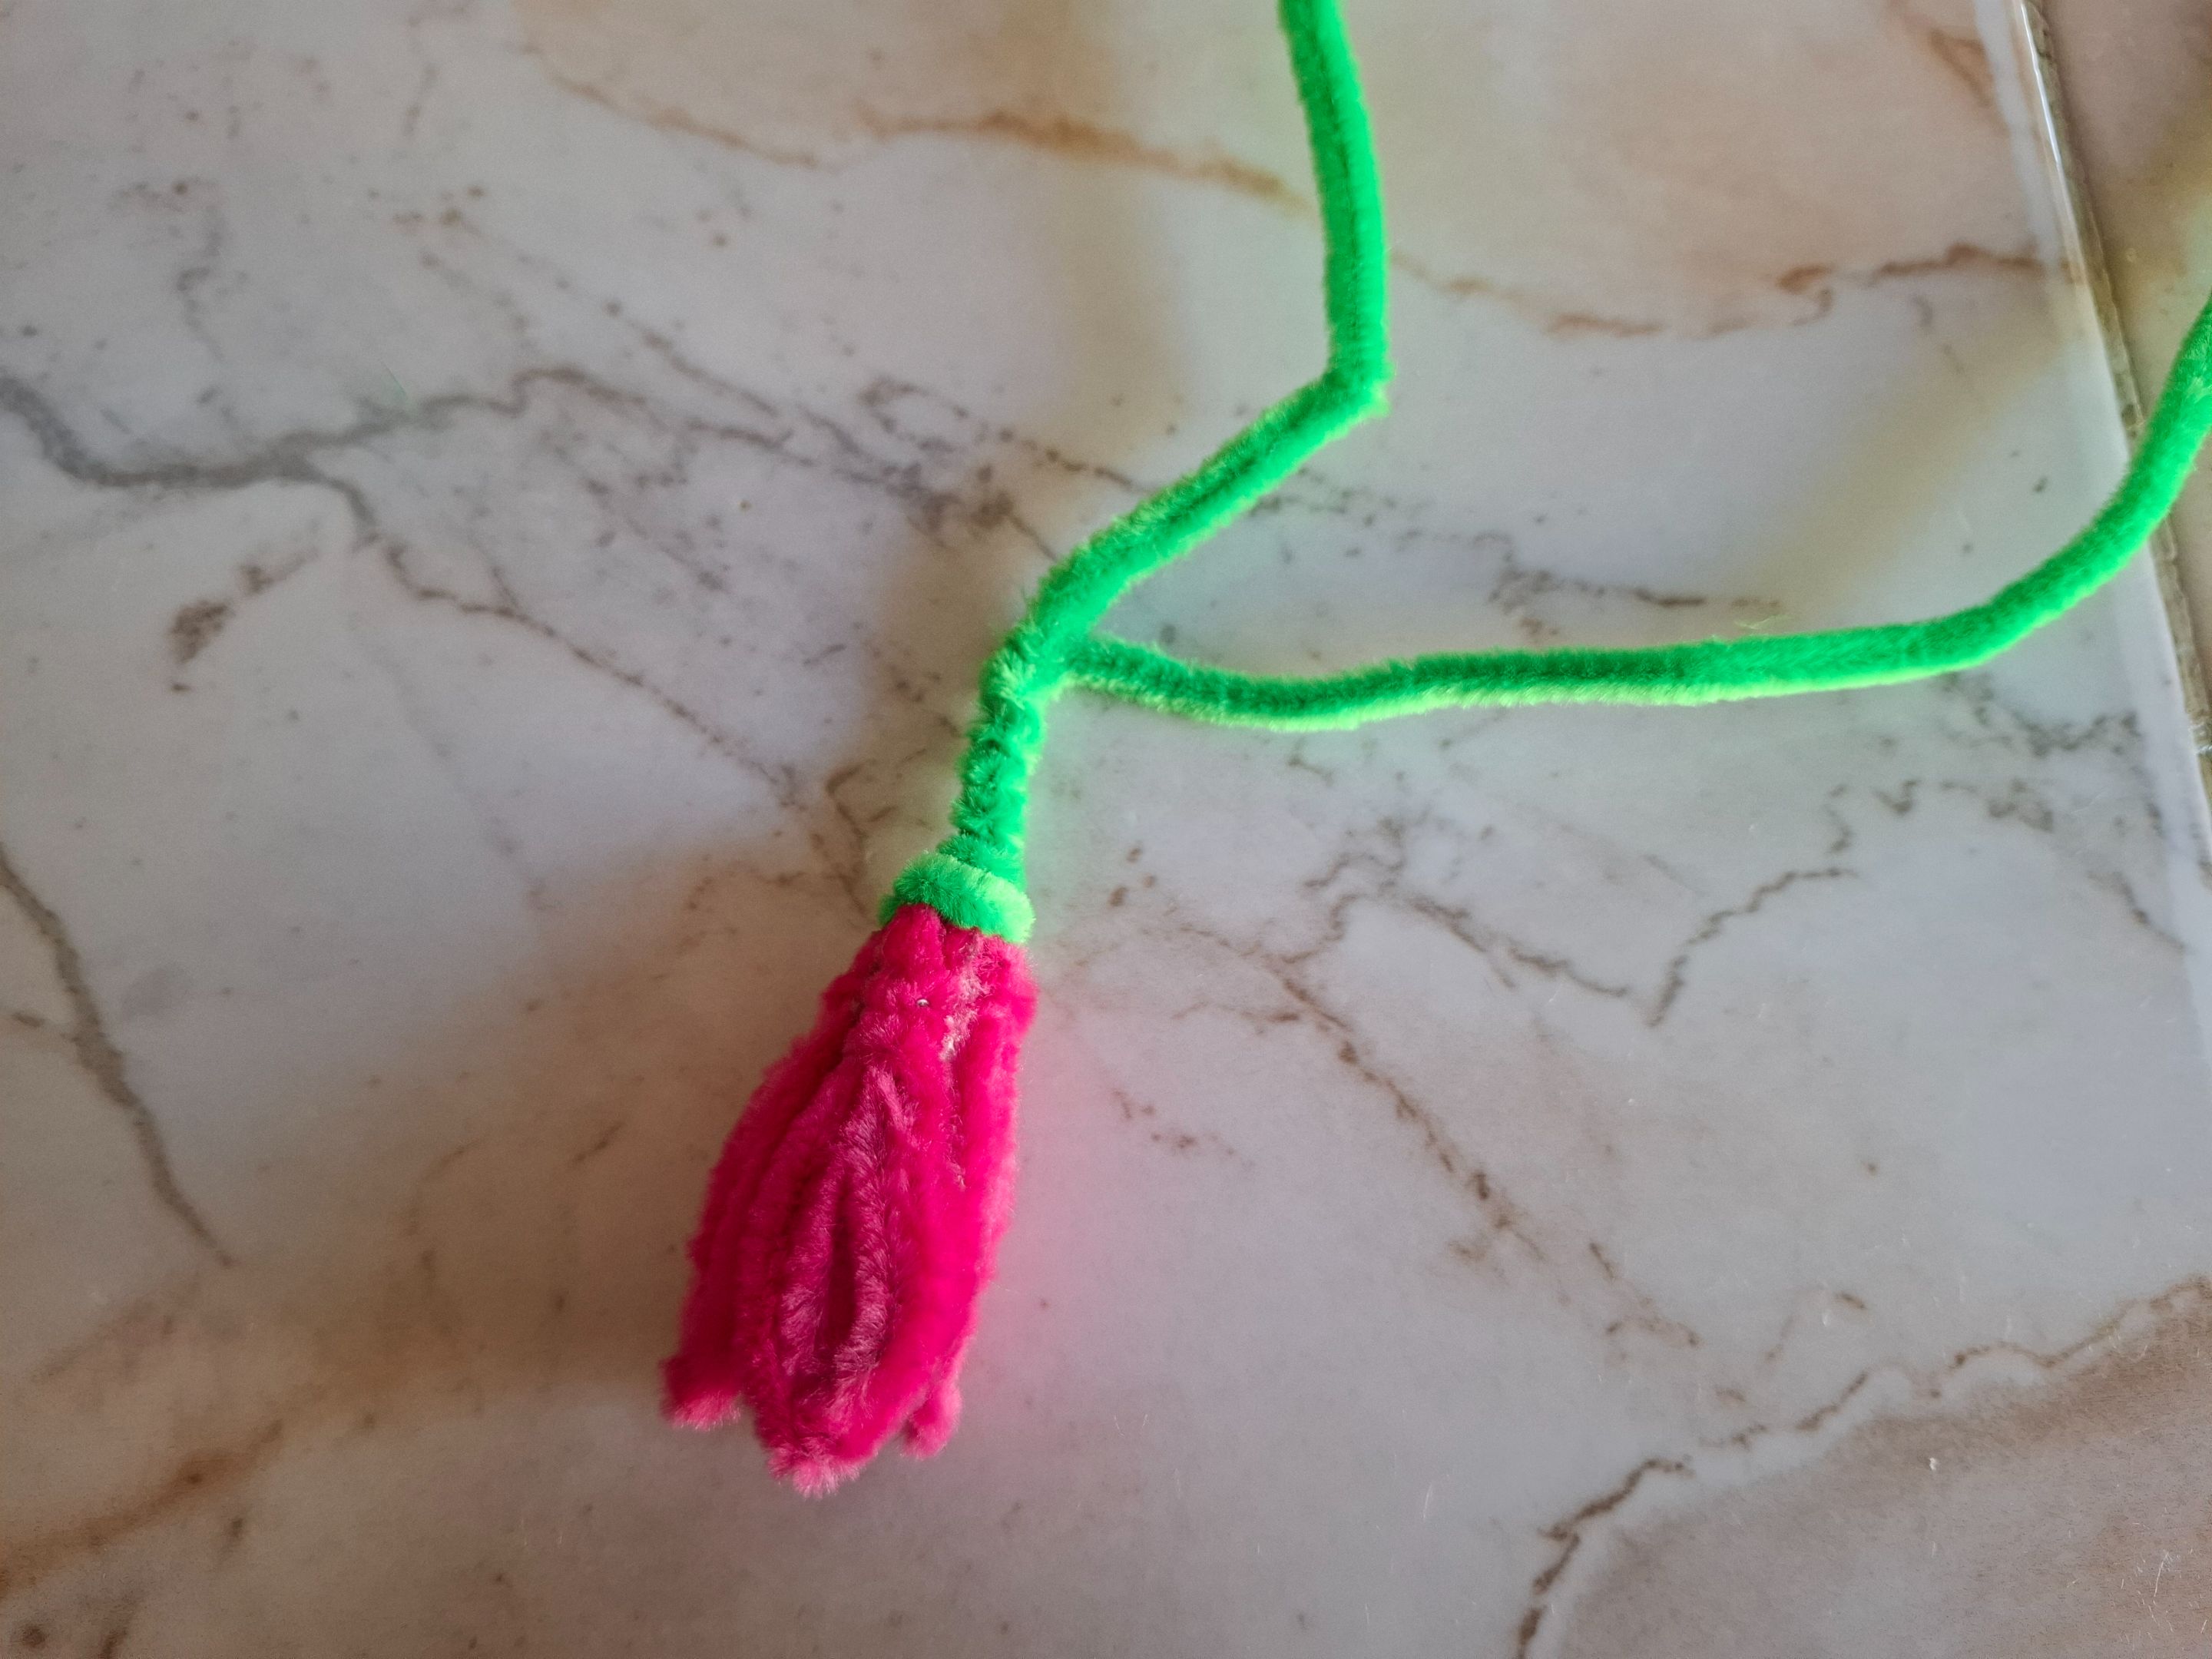
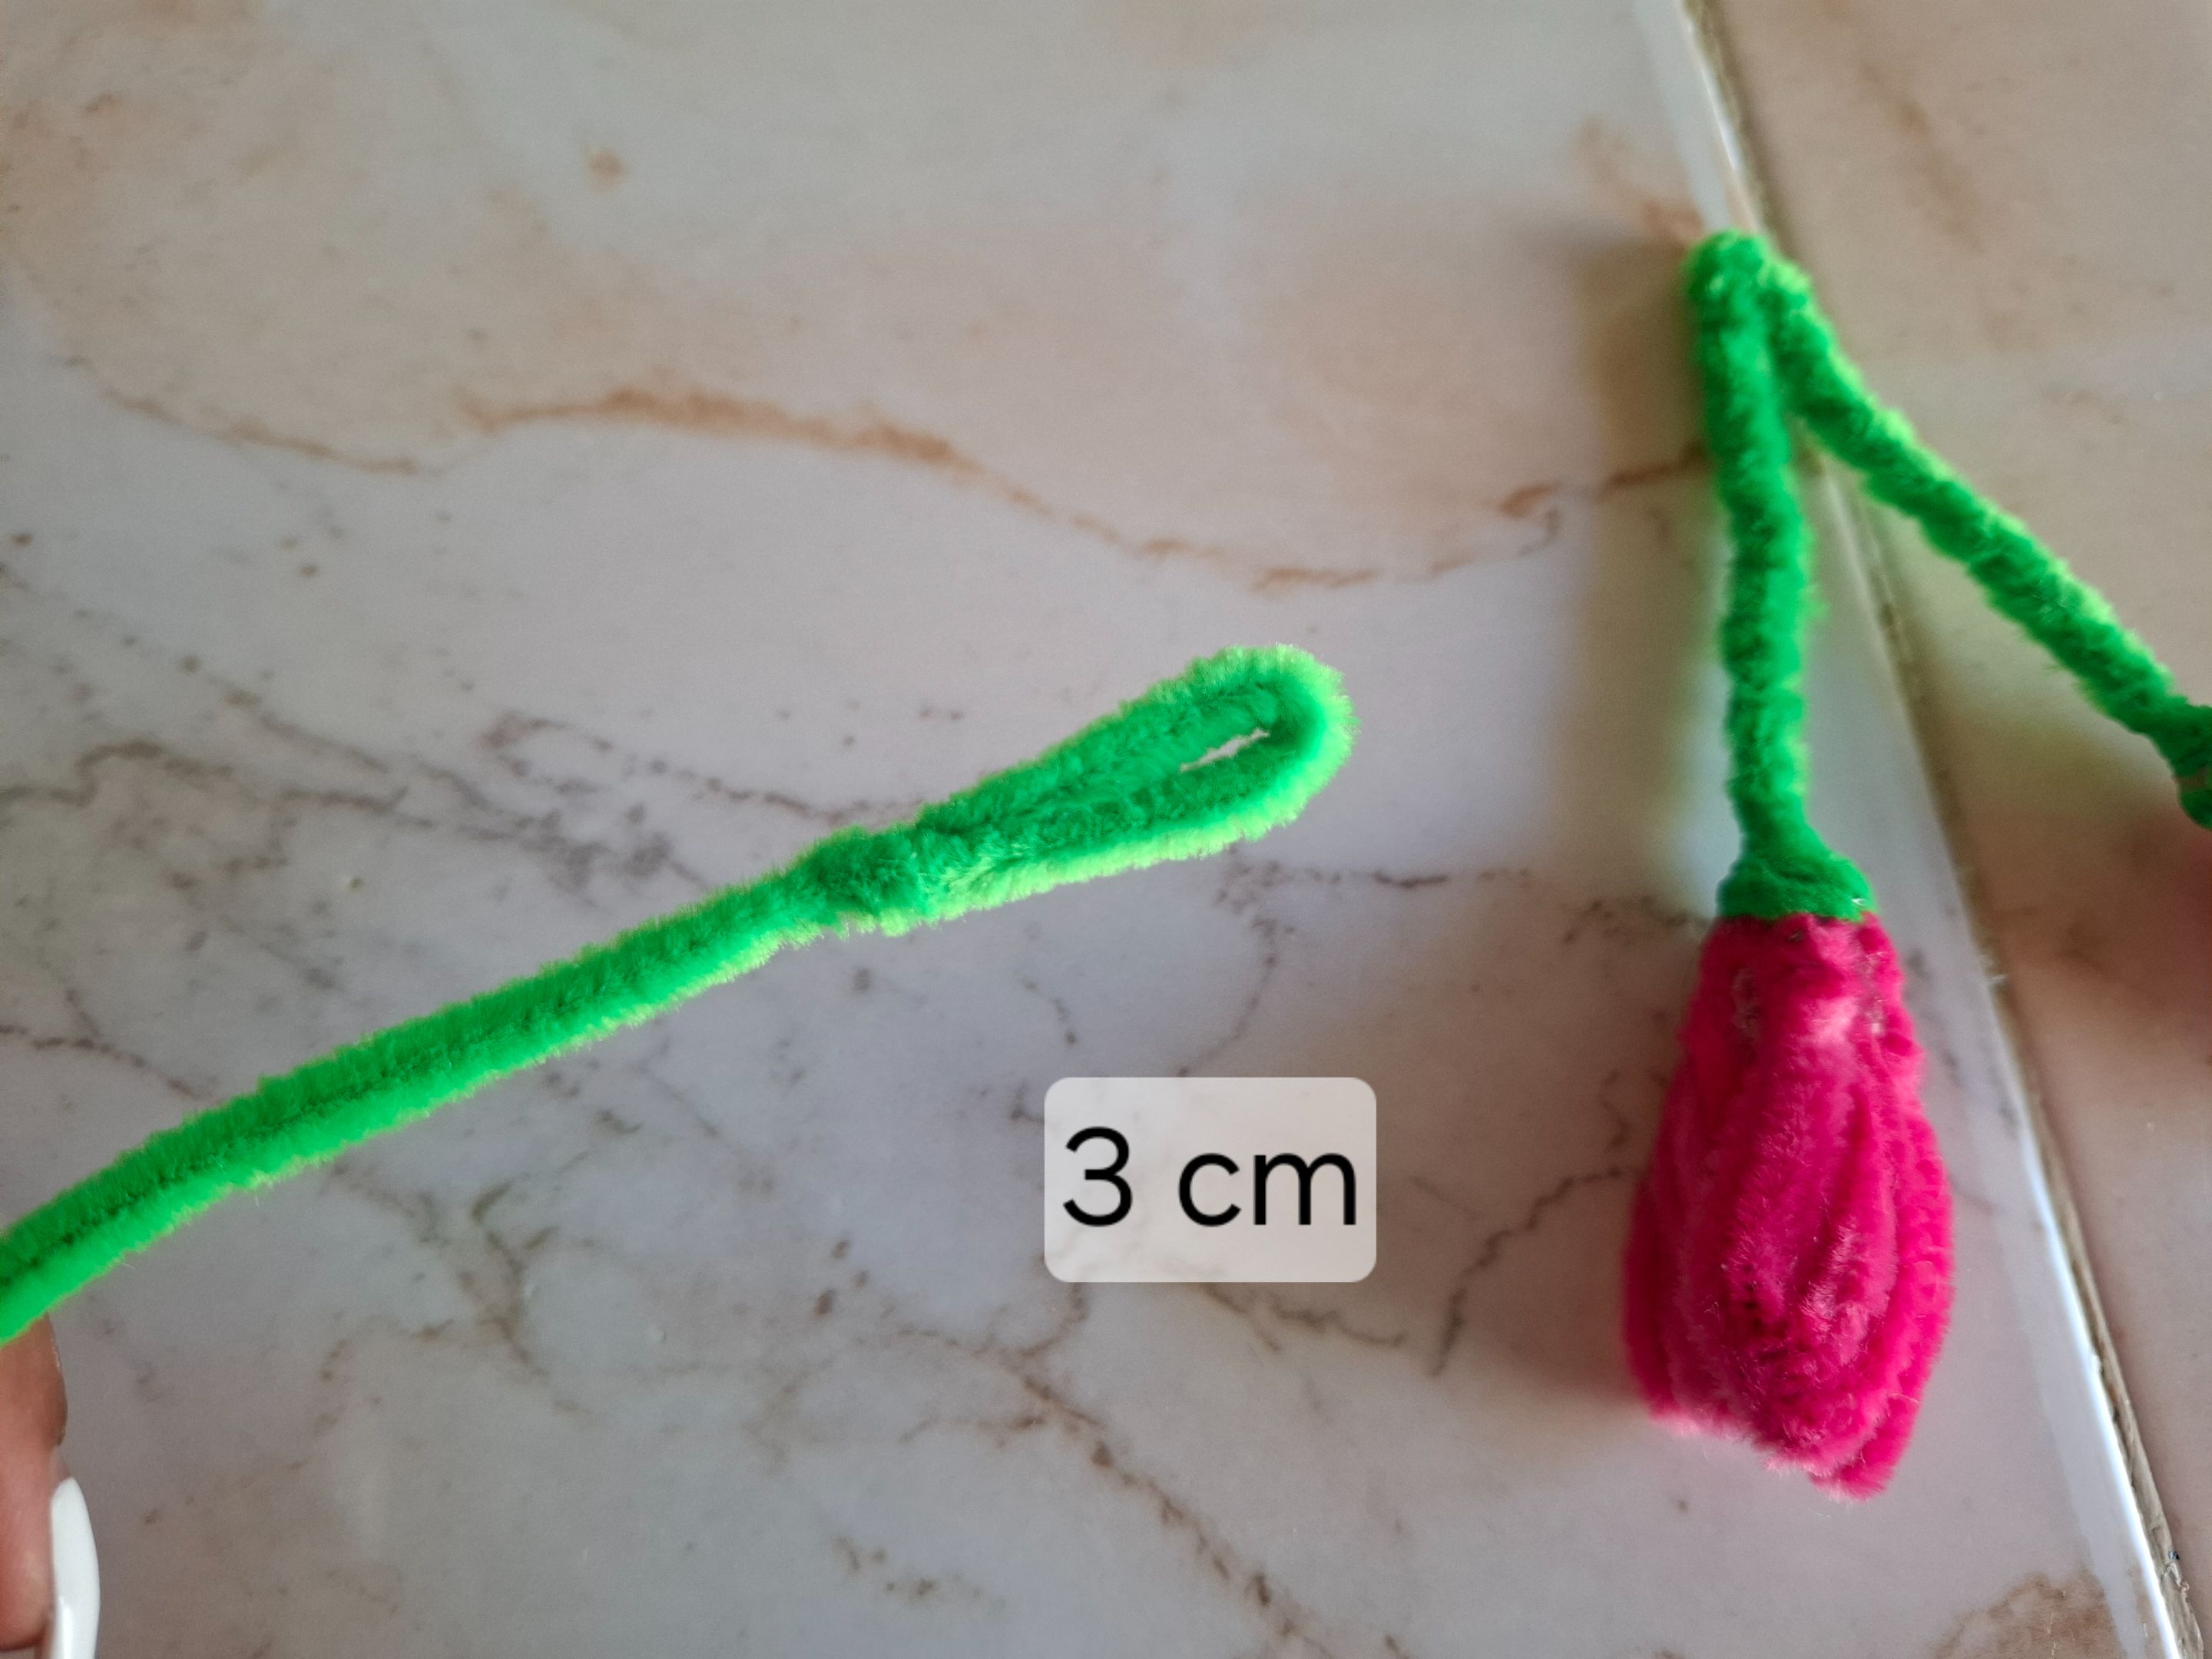
Doblamos en la mitad y pegamos el otro pétalo, también cubri con un limpiapipas del mismo color verde para dar más grosor, realizamos unas hojitas de 3 cm y ubicamos en el centro.
I repeated this step three more times. I did the same step with the next tulip, except it will be light pink. Now I'm going to take a green pipe cleaner and start gluing the petals around one of the tips.
Fold it in half and glue the other petal. I also covered it with a pipe cleaner of the same green color to give it more thickness. Make some 3 cm leaves and place them in the center.
 |
 |
|---|---|
 |
 |
|---|---|
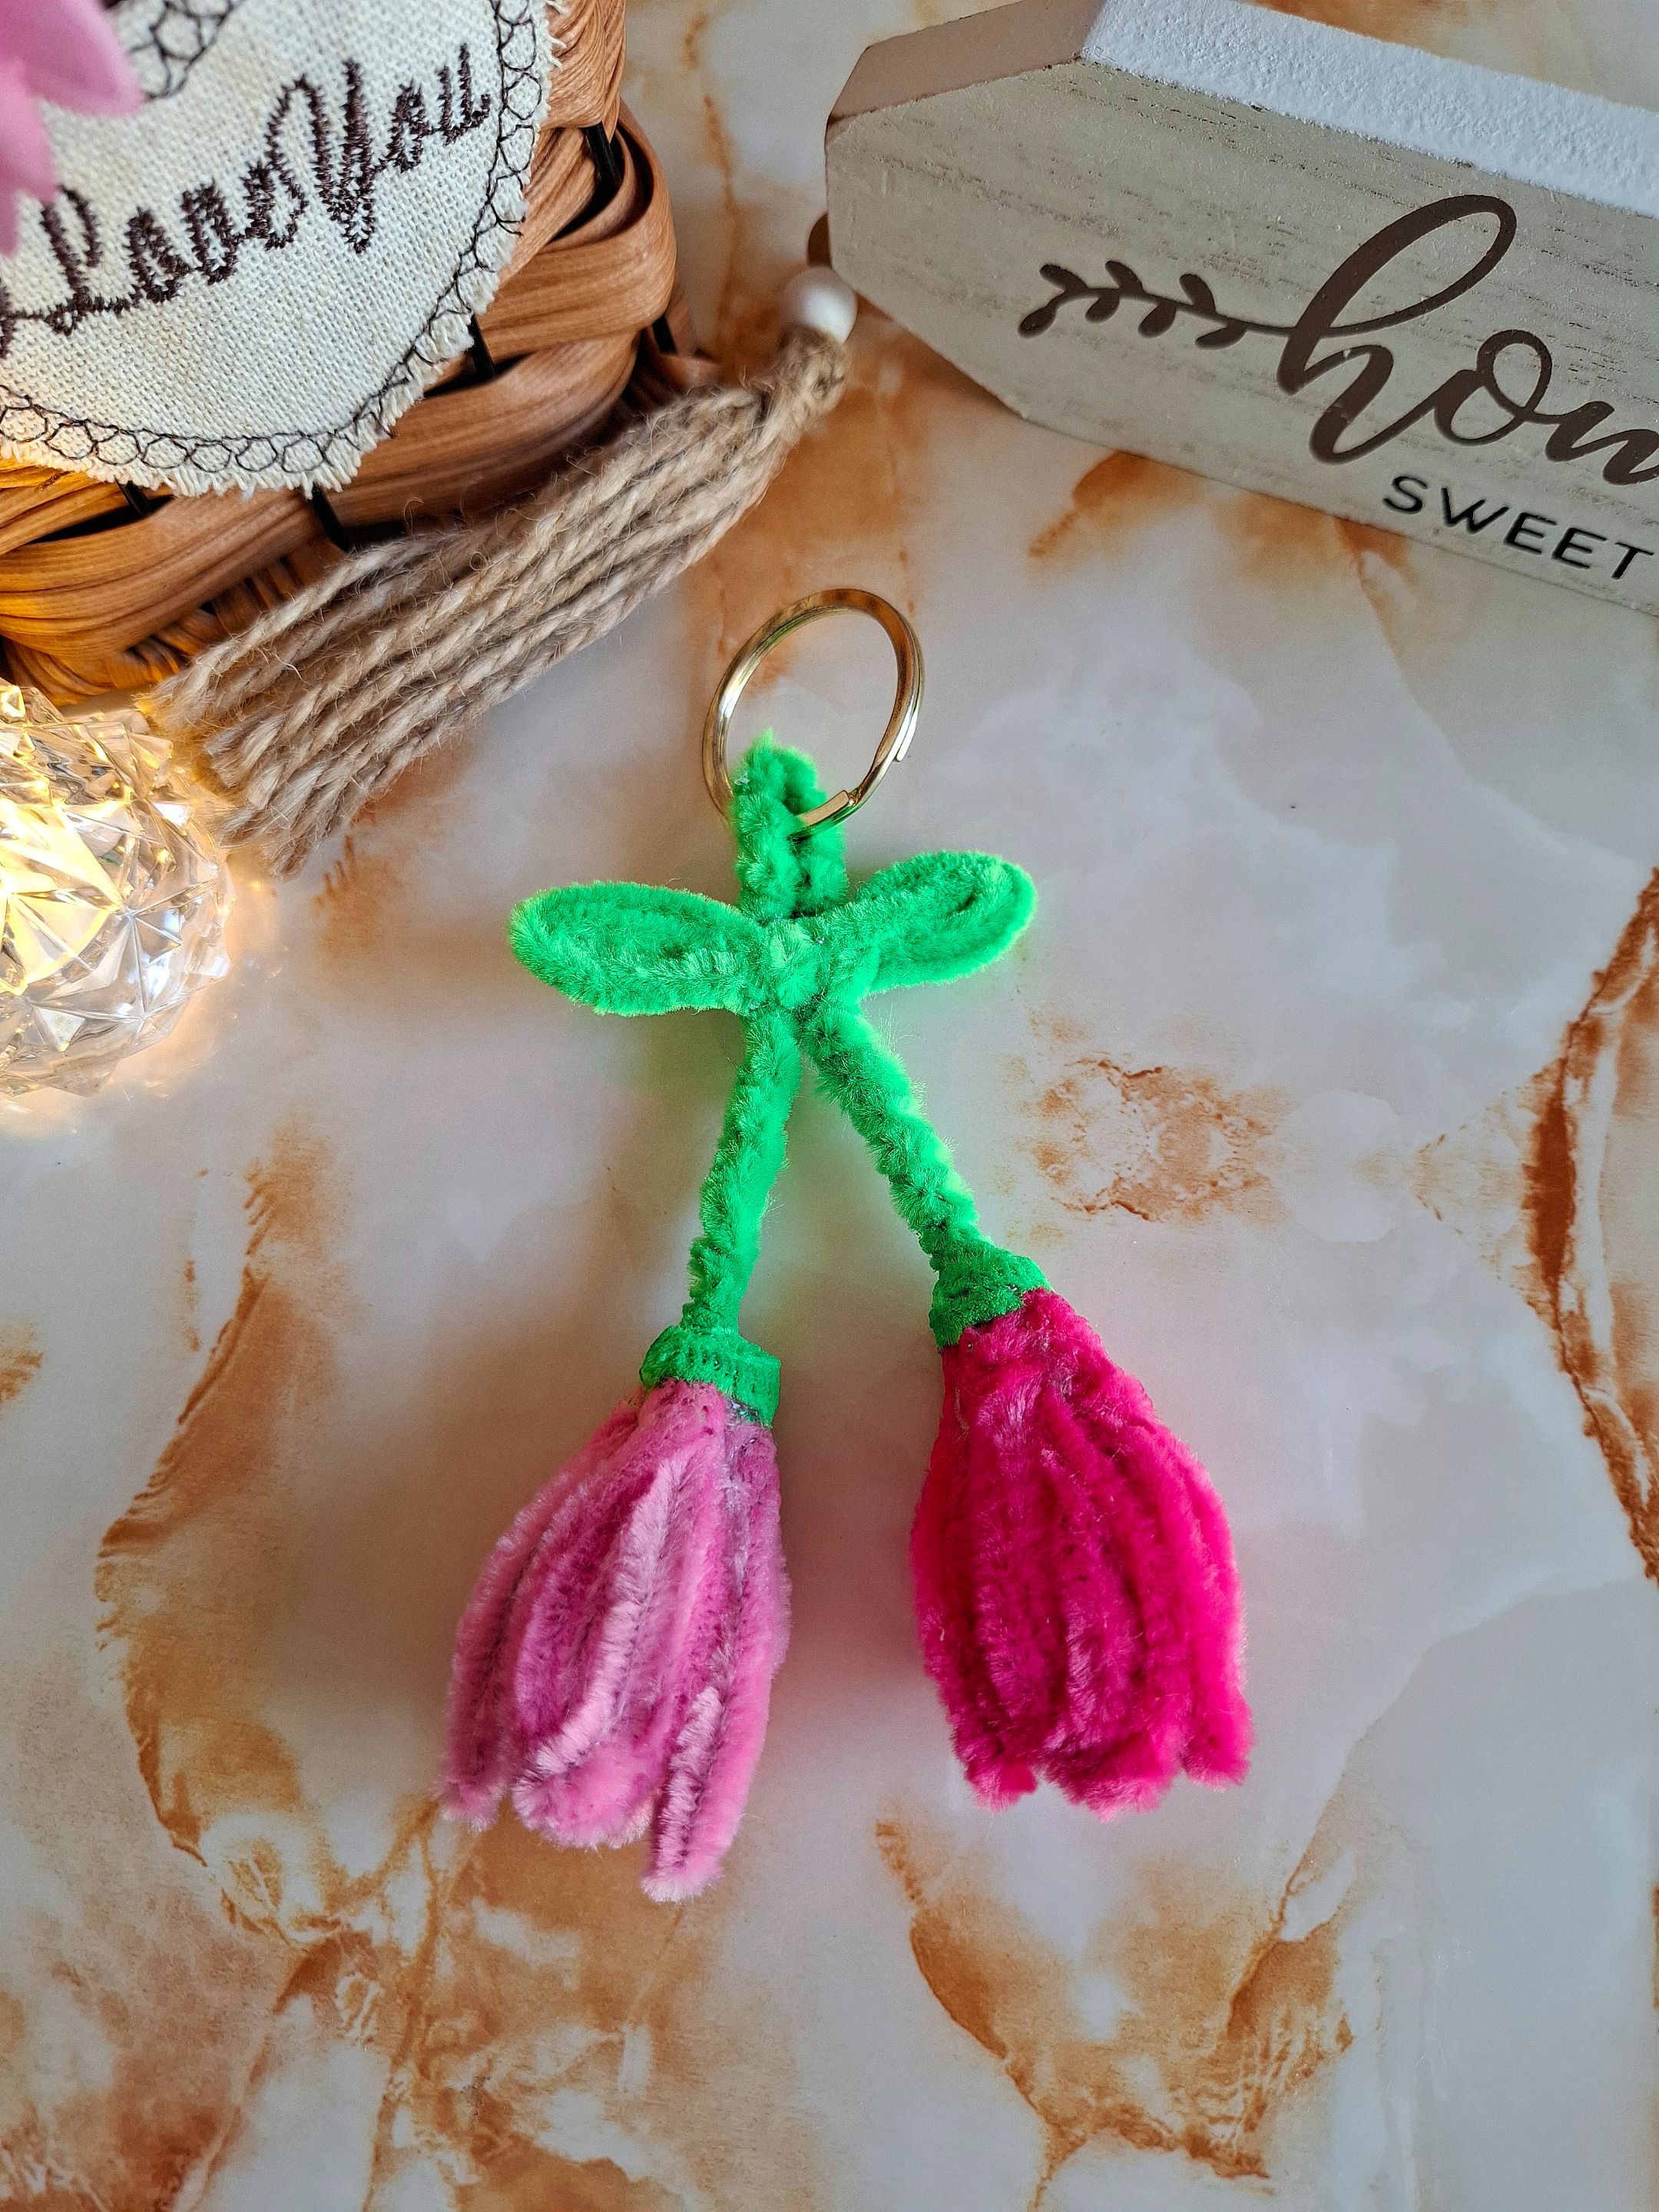
El último paso será colocar el aro para llavero y listo, de esta forma terminé mi llaverito de mini tulipanes, espero les haya gustado el resultado, muchas gracias por visitar mi publicación, nos vemos en una próxima oportunidad con más ideas creativas.
The last step is to attach the key ring and that's it. This is how I finished my mini tulip keychain. I hope you liked the result. Thank you very much for visiting my post. See you next time with more creative ideas.
 |
 |
 |
|---|---|---|
También quiero agradecer a las personas que visitan mi blog, me he sentido muy feliz y motivada con sus mensajes, espero poder seguir creando más cositas hermosas.
I also want to thank the people who visit my blog. I've felt very happy and motivated by your messages. I hope to continue creating more beautiful things.
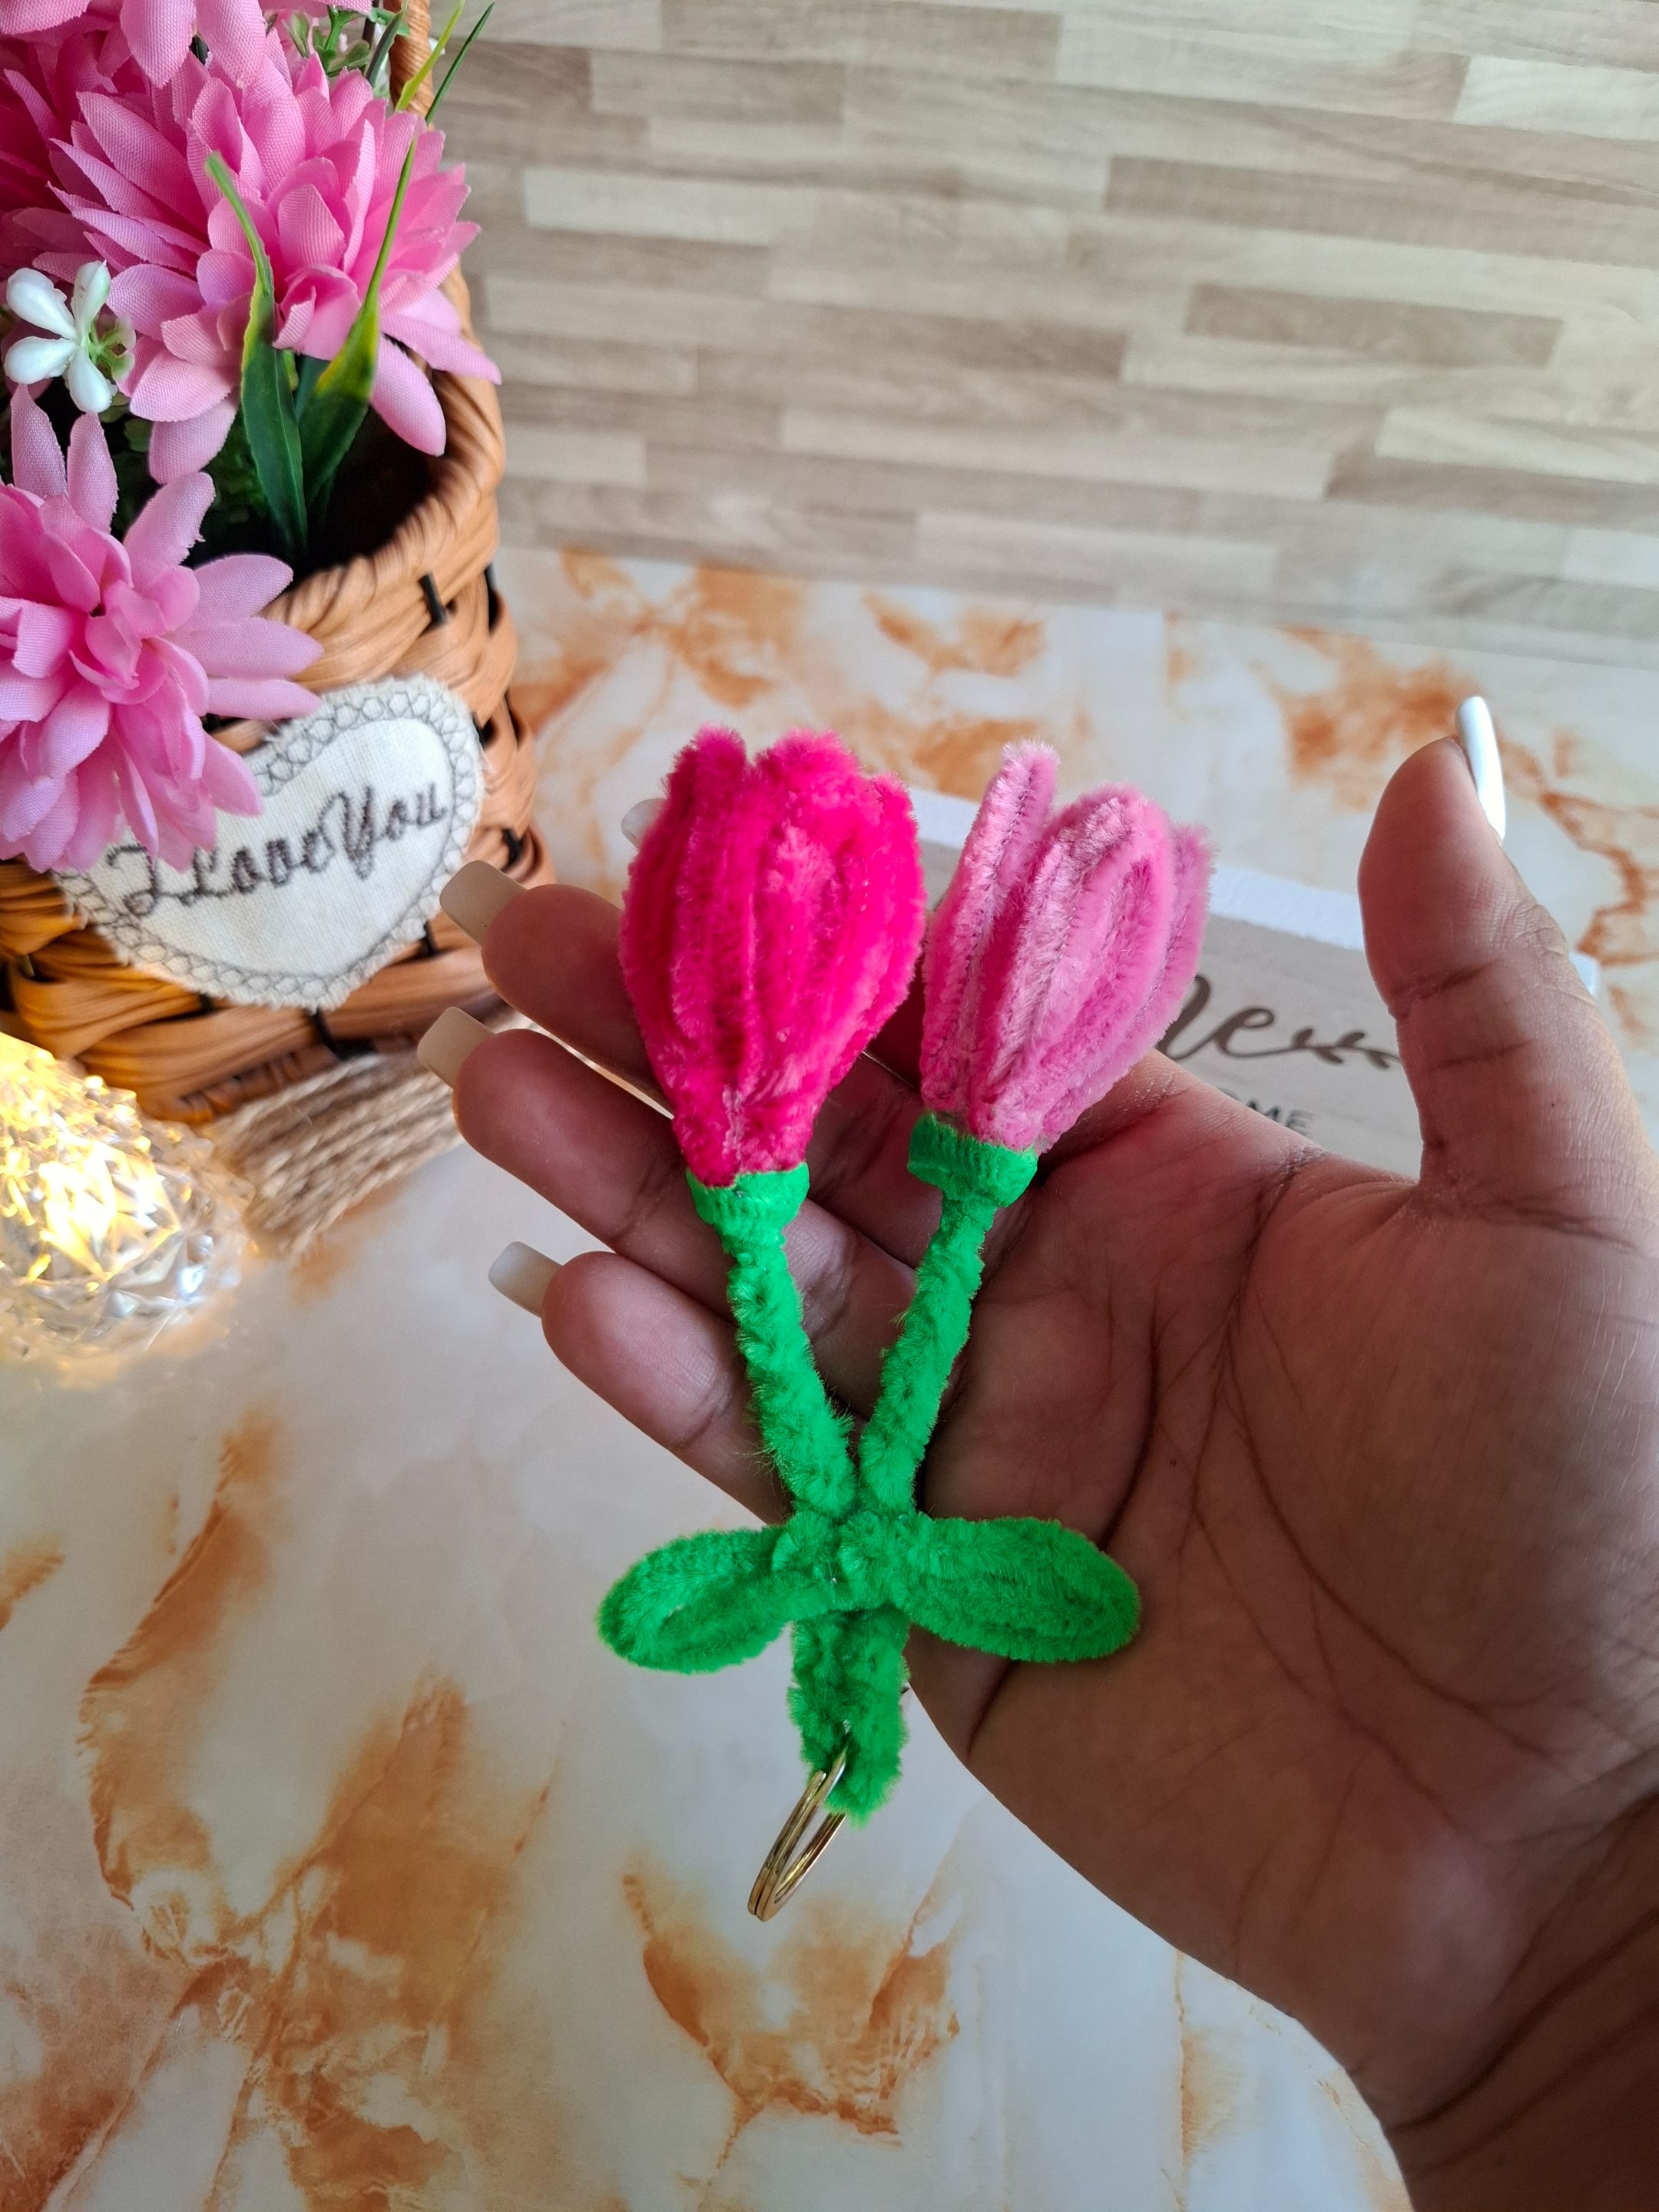
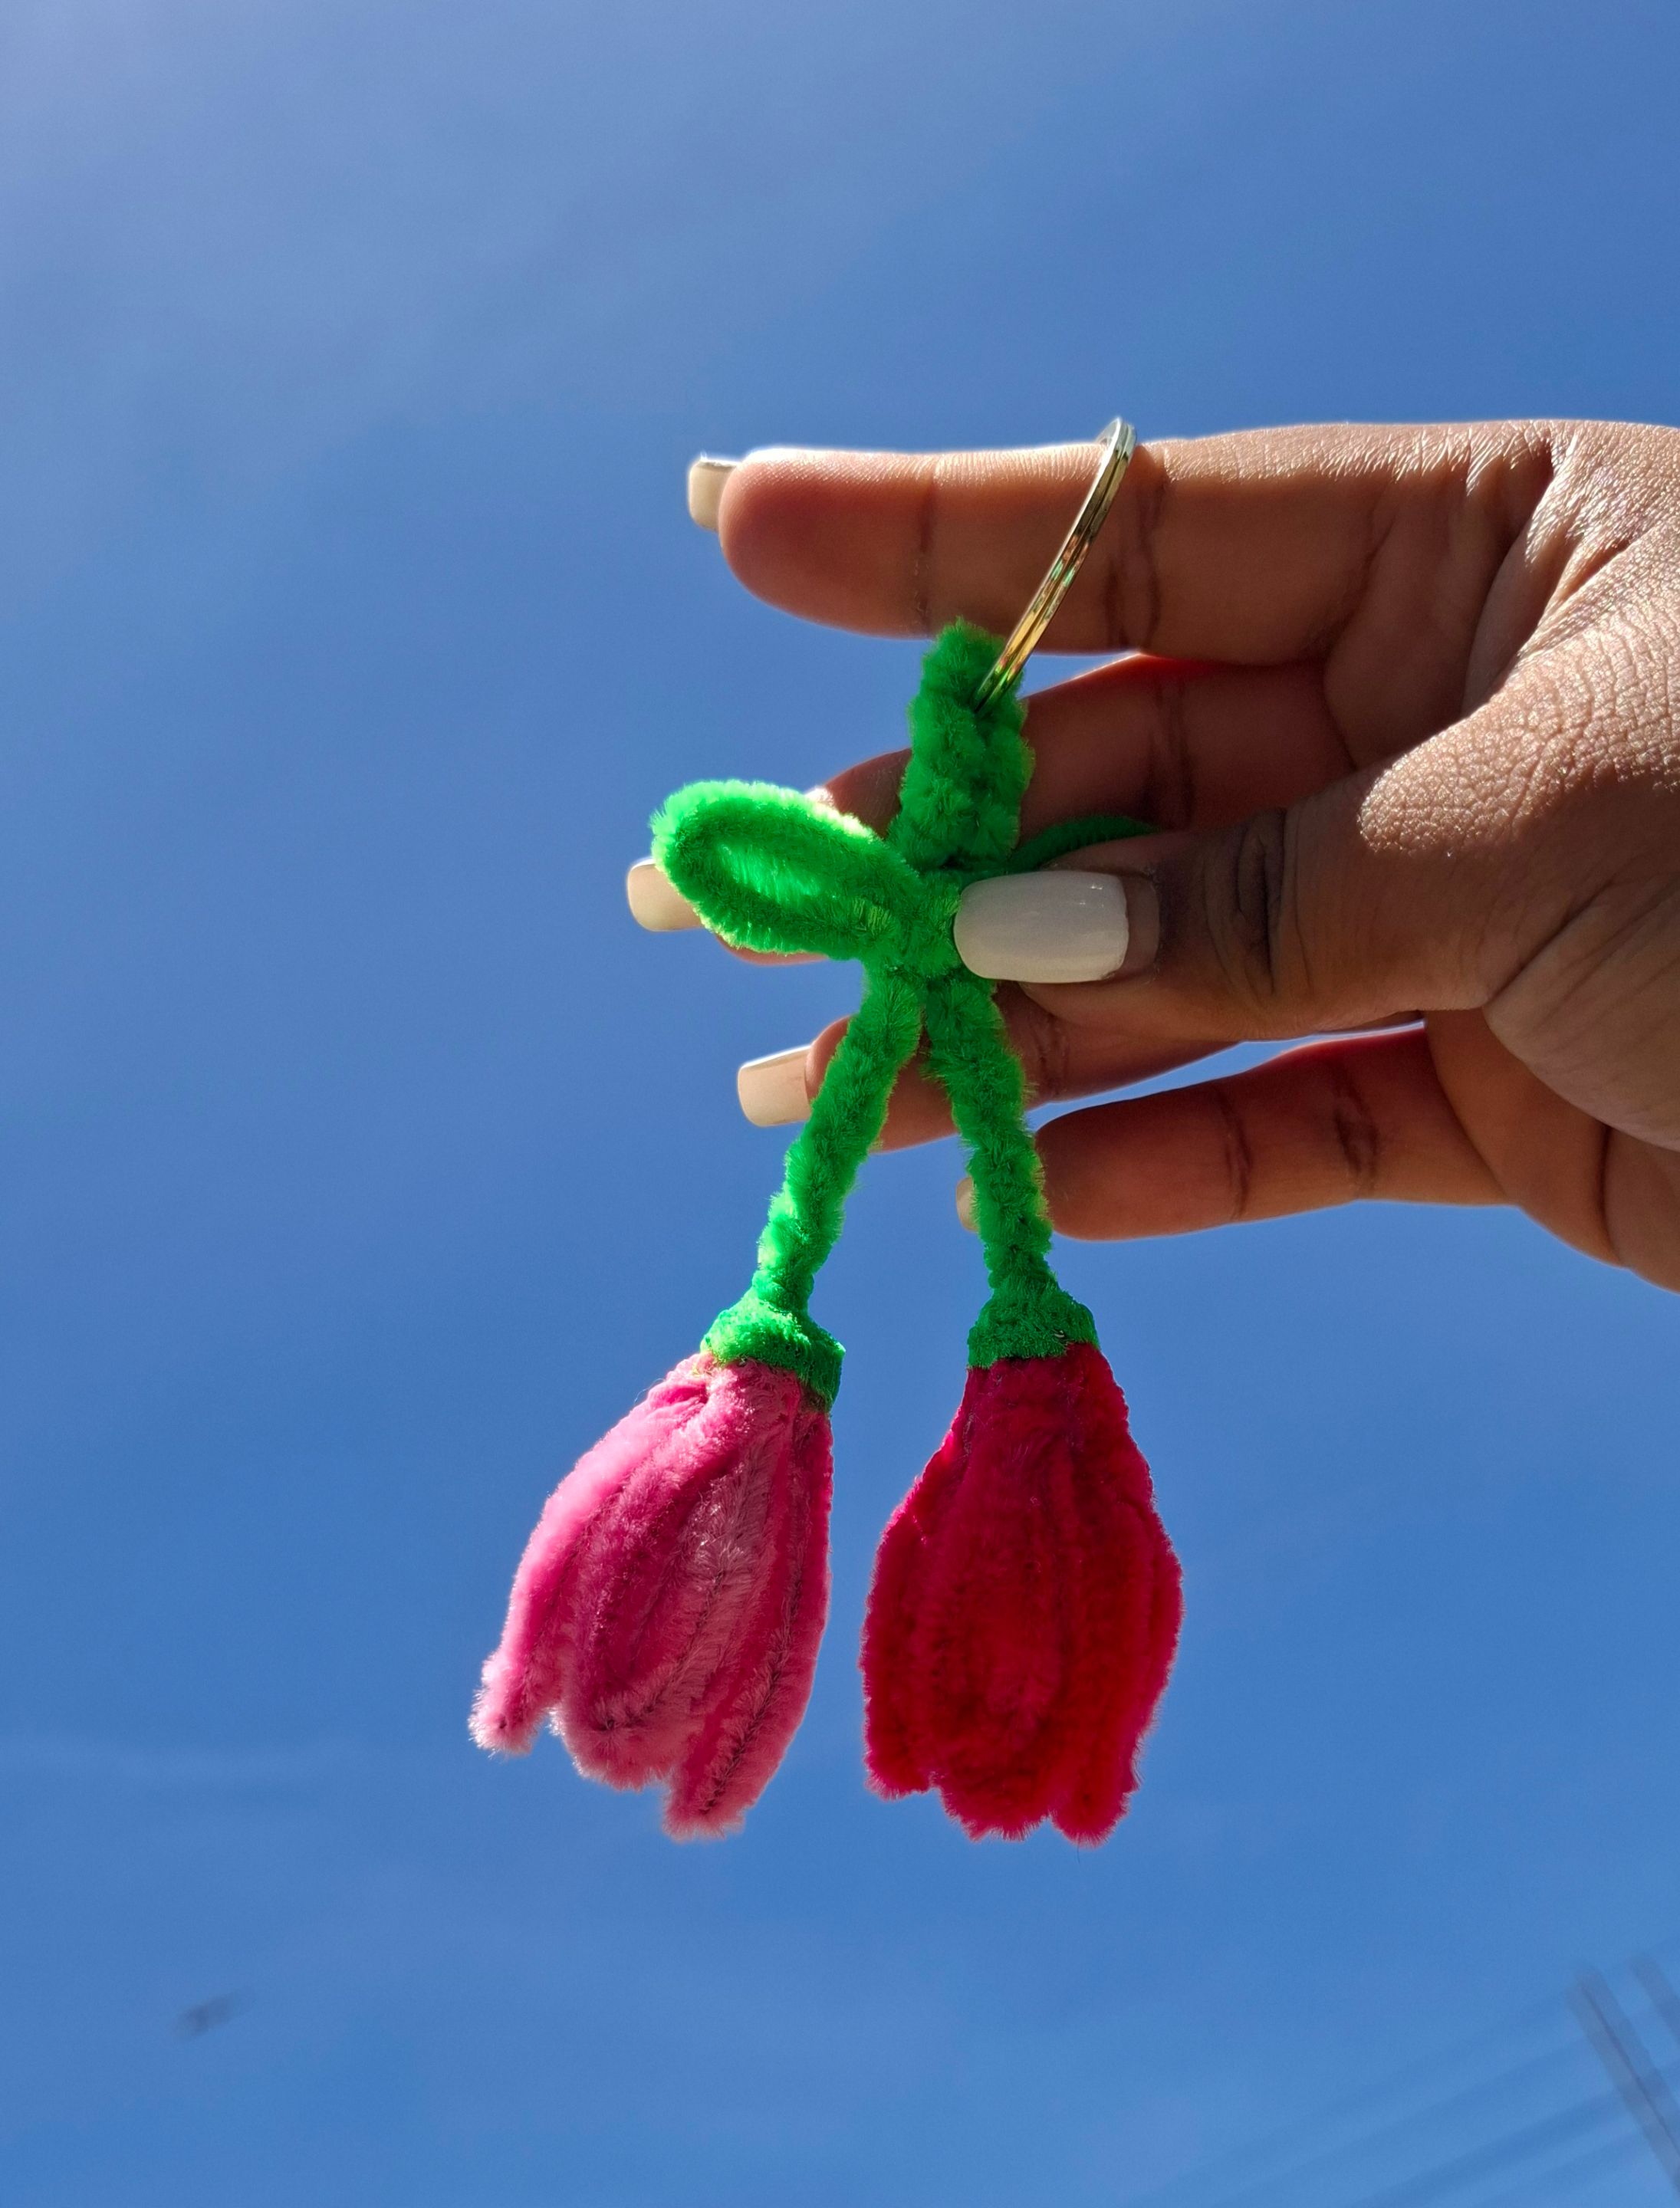
Más del resultado final:
More of the final result:

Contenido original. - original content.
Los separadores y banner fueron realizados en Canva. - The dividers and banner were made in Canva.
Fotografías tomadas con mi Samsung A55. - Photographs taken with my Samsung A55.
Gif creado desde Giphy / Gif created from Giphy
Traducción de: Google traductor - Translation of: Google translator.
Posted Using INLEO