Feliz y bendecido domingo queridos amigos de la comunidad DiyHub, un gusto saludarles el día de hoy, espero se encuentren bien y hayan pasado excelente semana, ya finalizando el domingo mañana comienza un nuevo día de trabajo o ocupaciones, por otra parte me siento contenta de mostrarles una nueva manualidad para el concurso de arte Splinterlands semanal.
Happy and blessed Sunday, dear friends of the DiyHub community. It's a pleasure to greet you today. I hope you're all well and had a great week. As Sunday comes to an end, a new day of work or activities begins tomorrow. I'm also happy to show you a new craft for the weekly Splinterlands art contest.

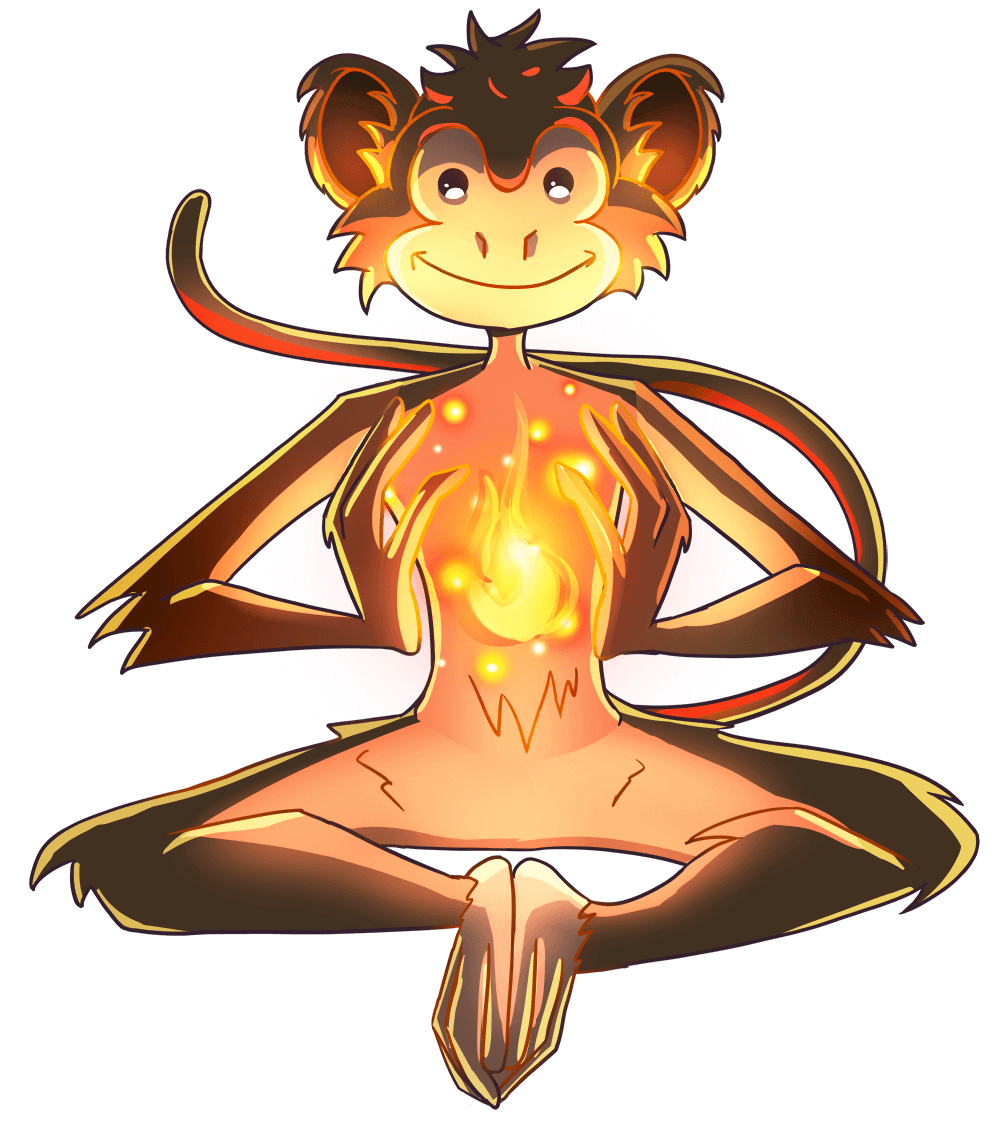
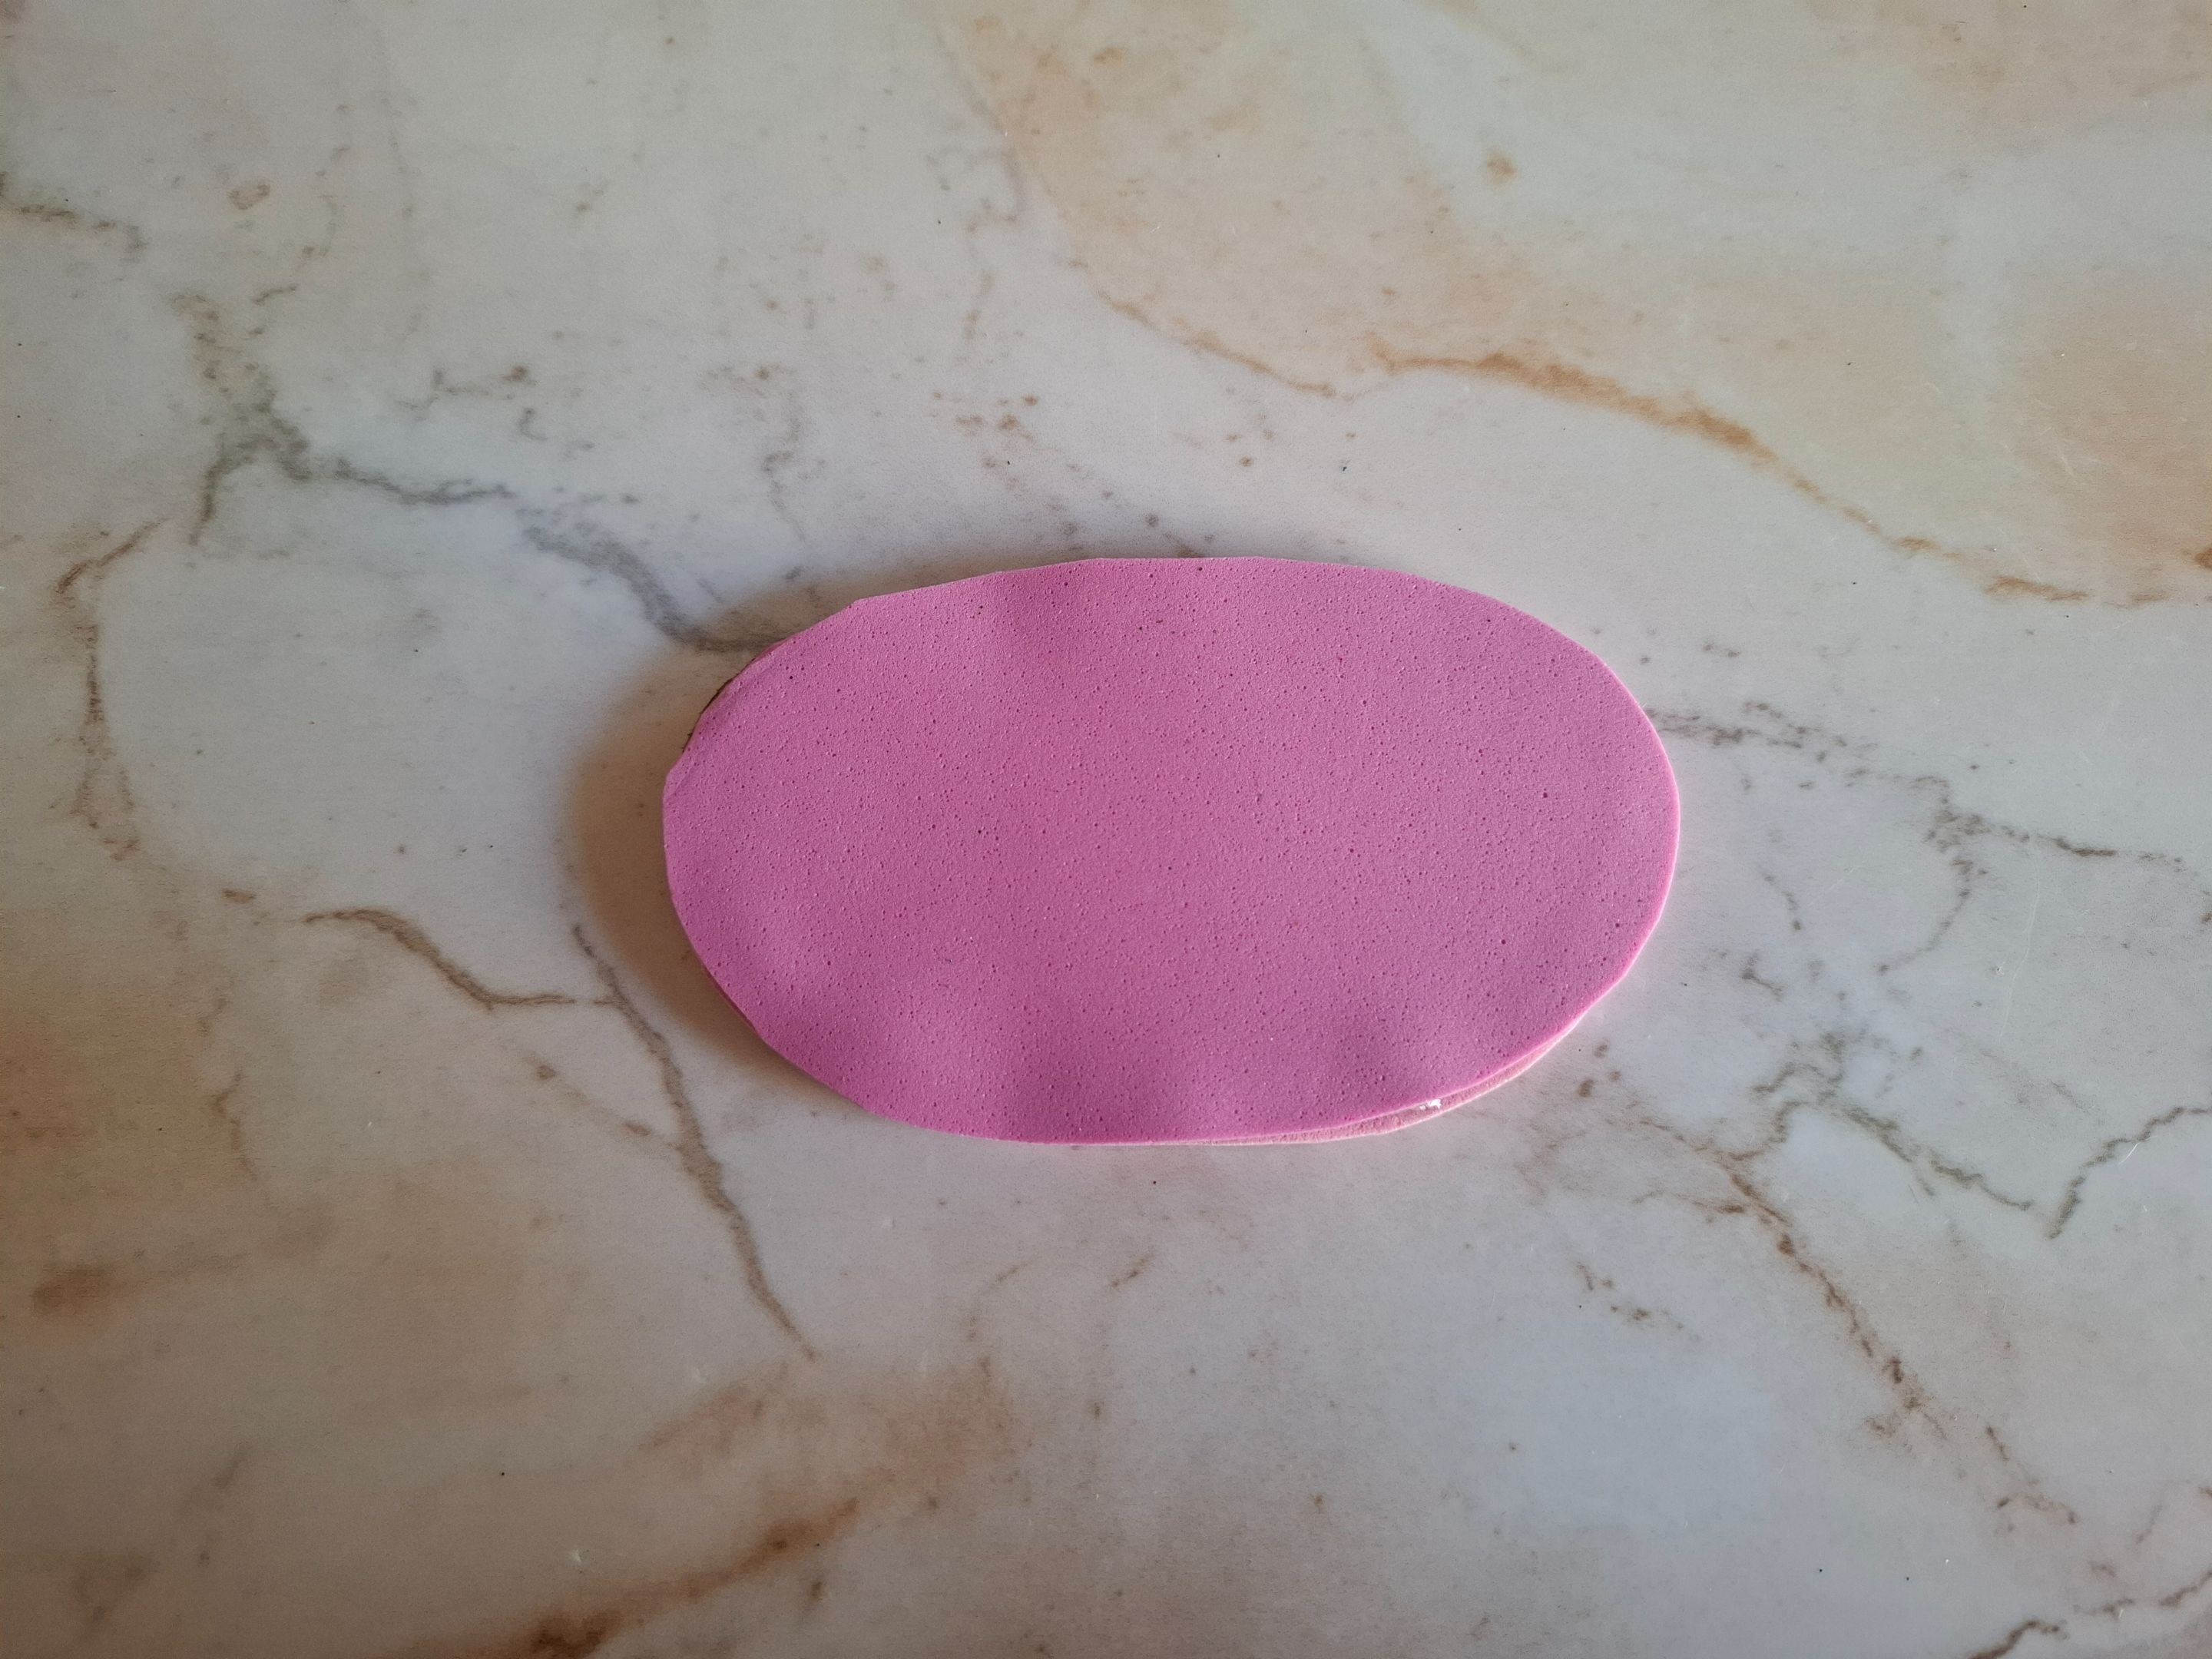
Para el concurso de arte Splinterlands semana 365 estuve buscando en qué carta podría inspirarme y con que manualidad podría relacionarla, ahora bien me inspiré en el mono de fuego, al verlo y analizar sus características lleva entre sus manos una bola de fuego, se ve sonriente y por ello tomé la parte de su cara para inspirarme.
For the Splinterlands week 365 art contest I was looking for a card I could get inspiration from and what craft I could relate it to. Now I was inspired by the fire monkey. When I looked at it and analyzed its characteristics, it was holding a ball of fire in its hands. It looked smiling, so I took the part of its face for inspiration.
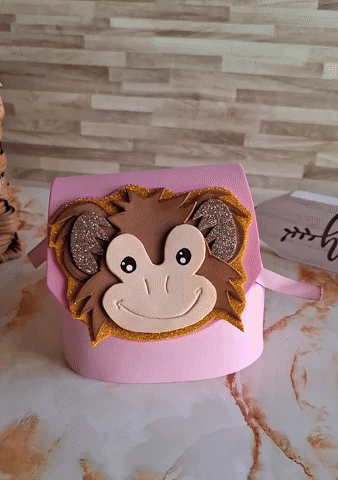
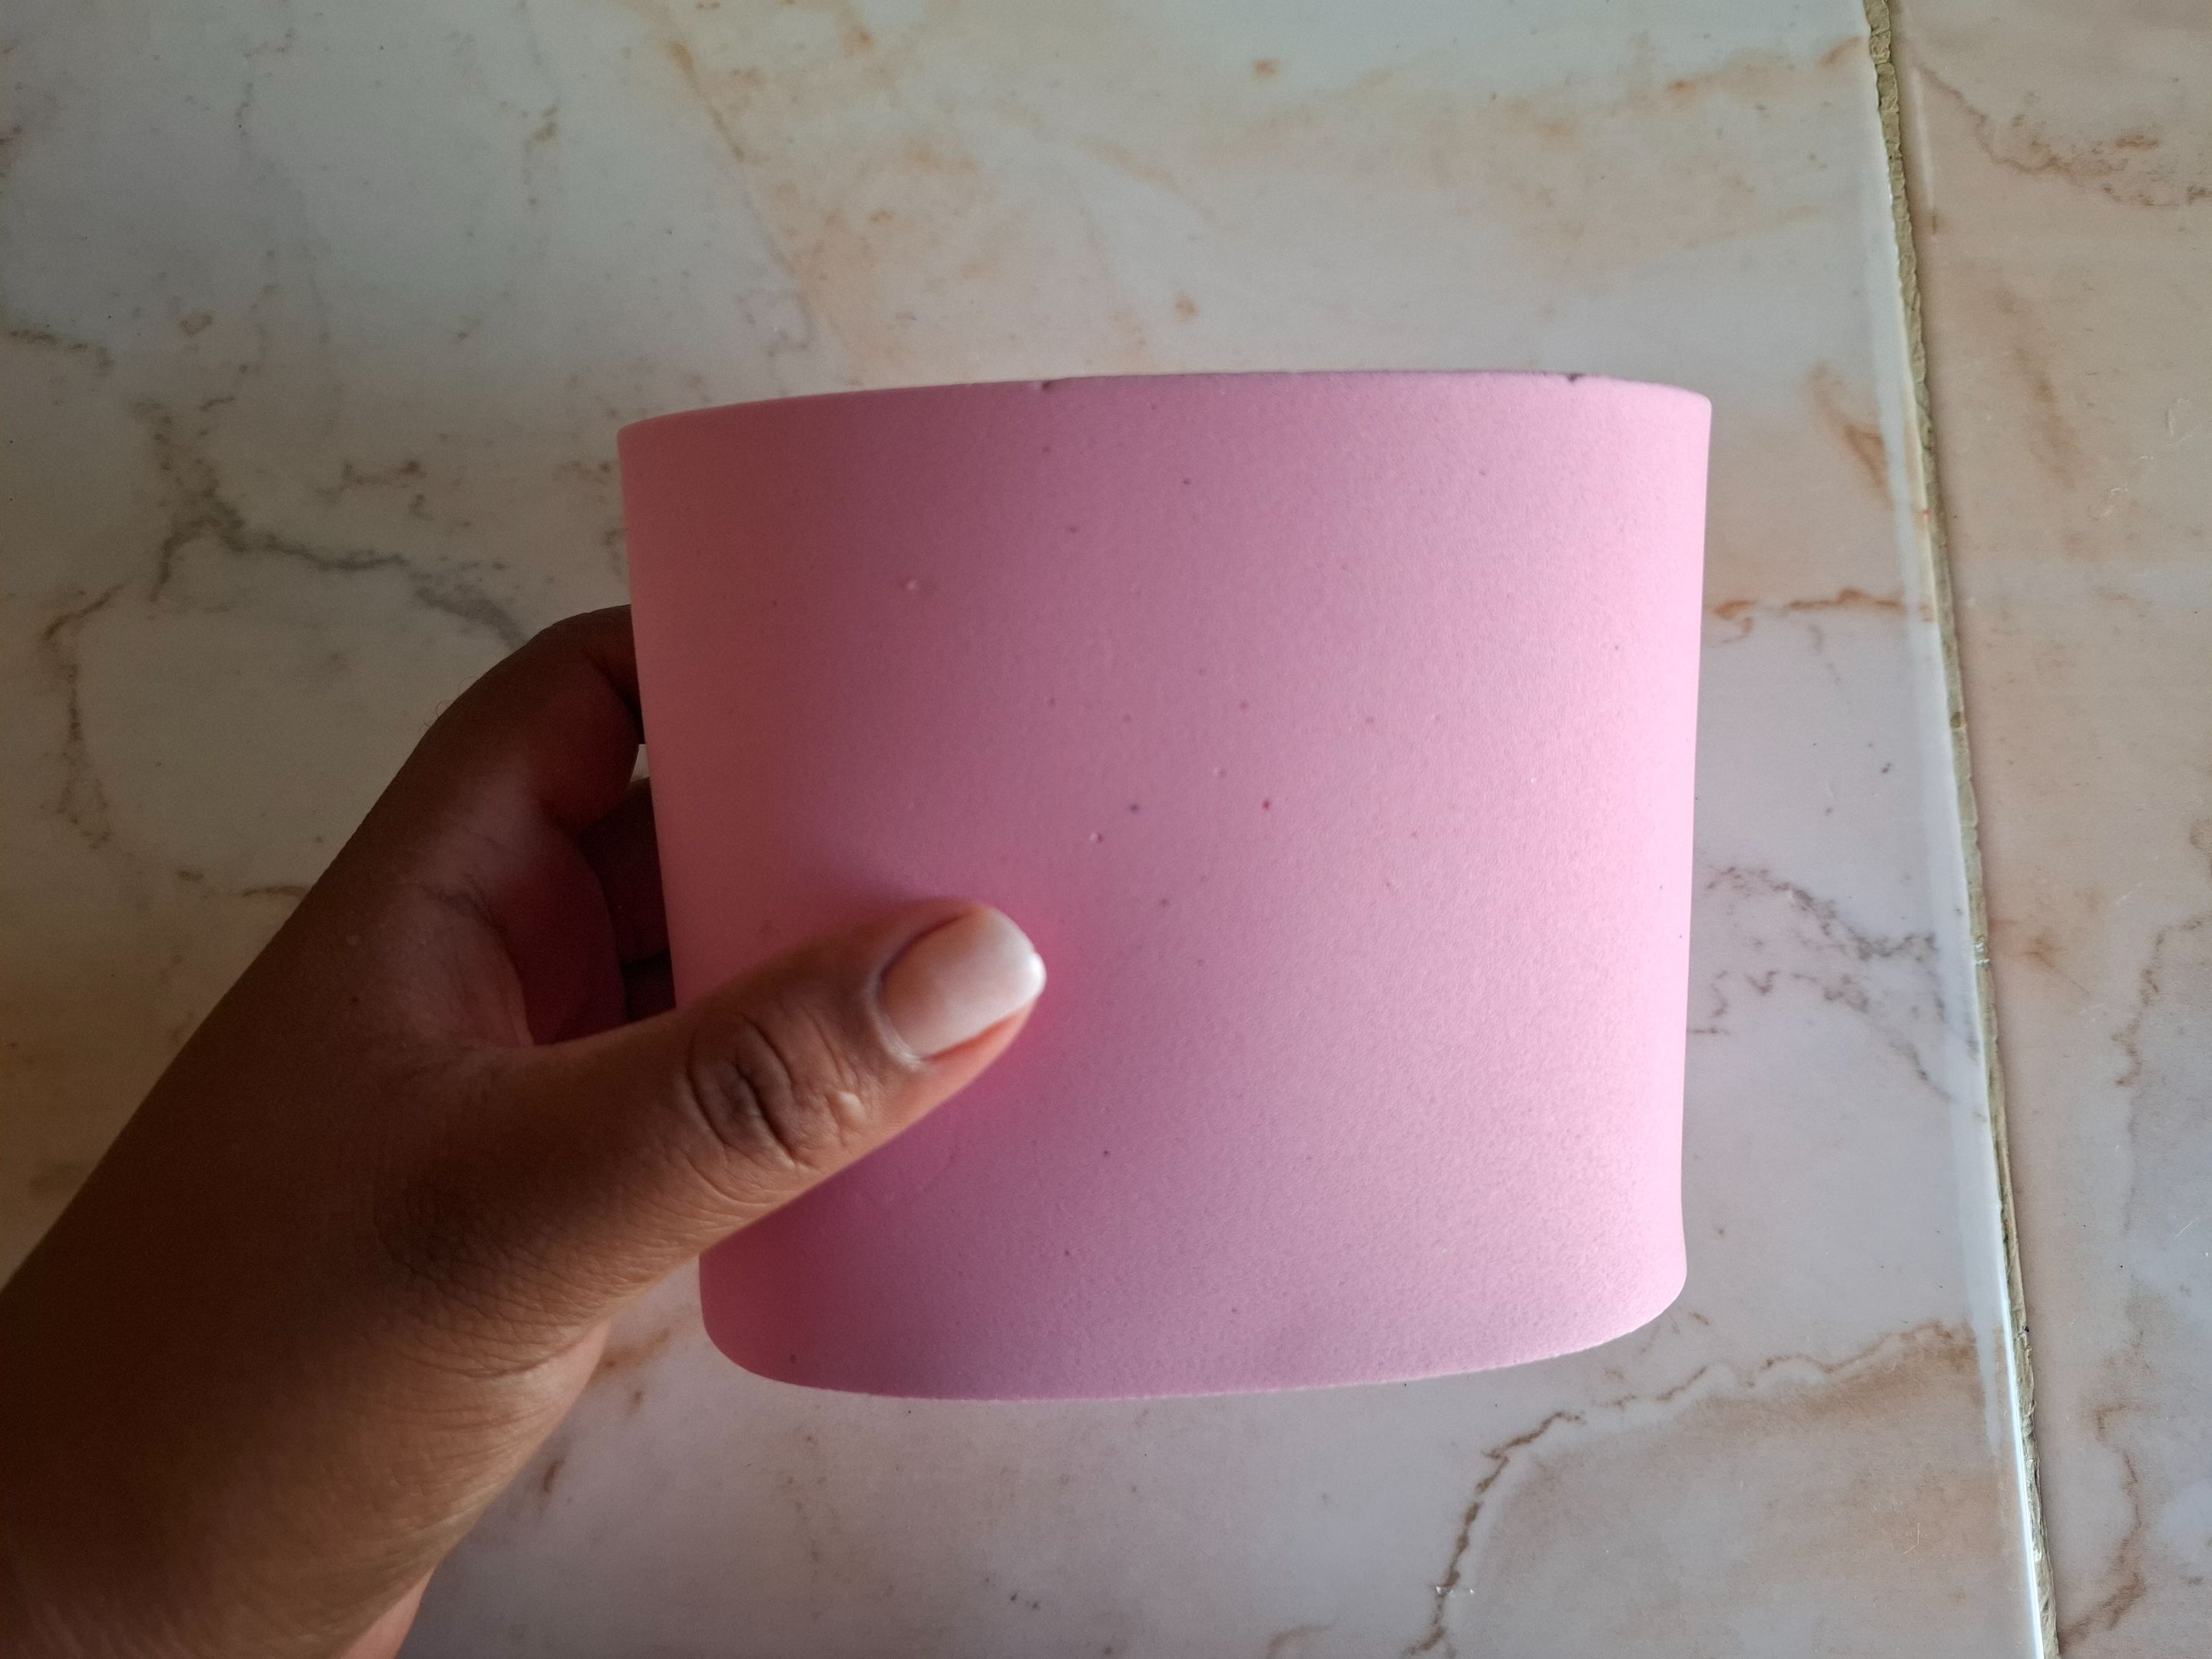
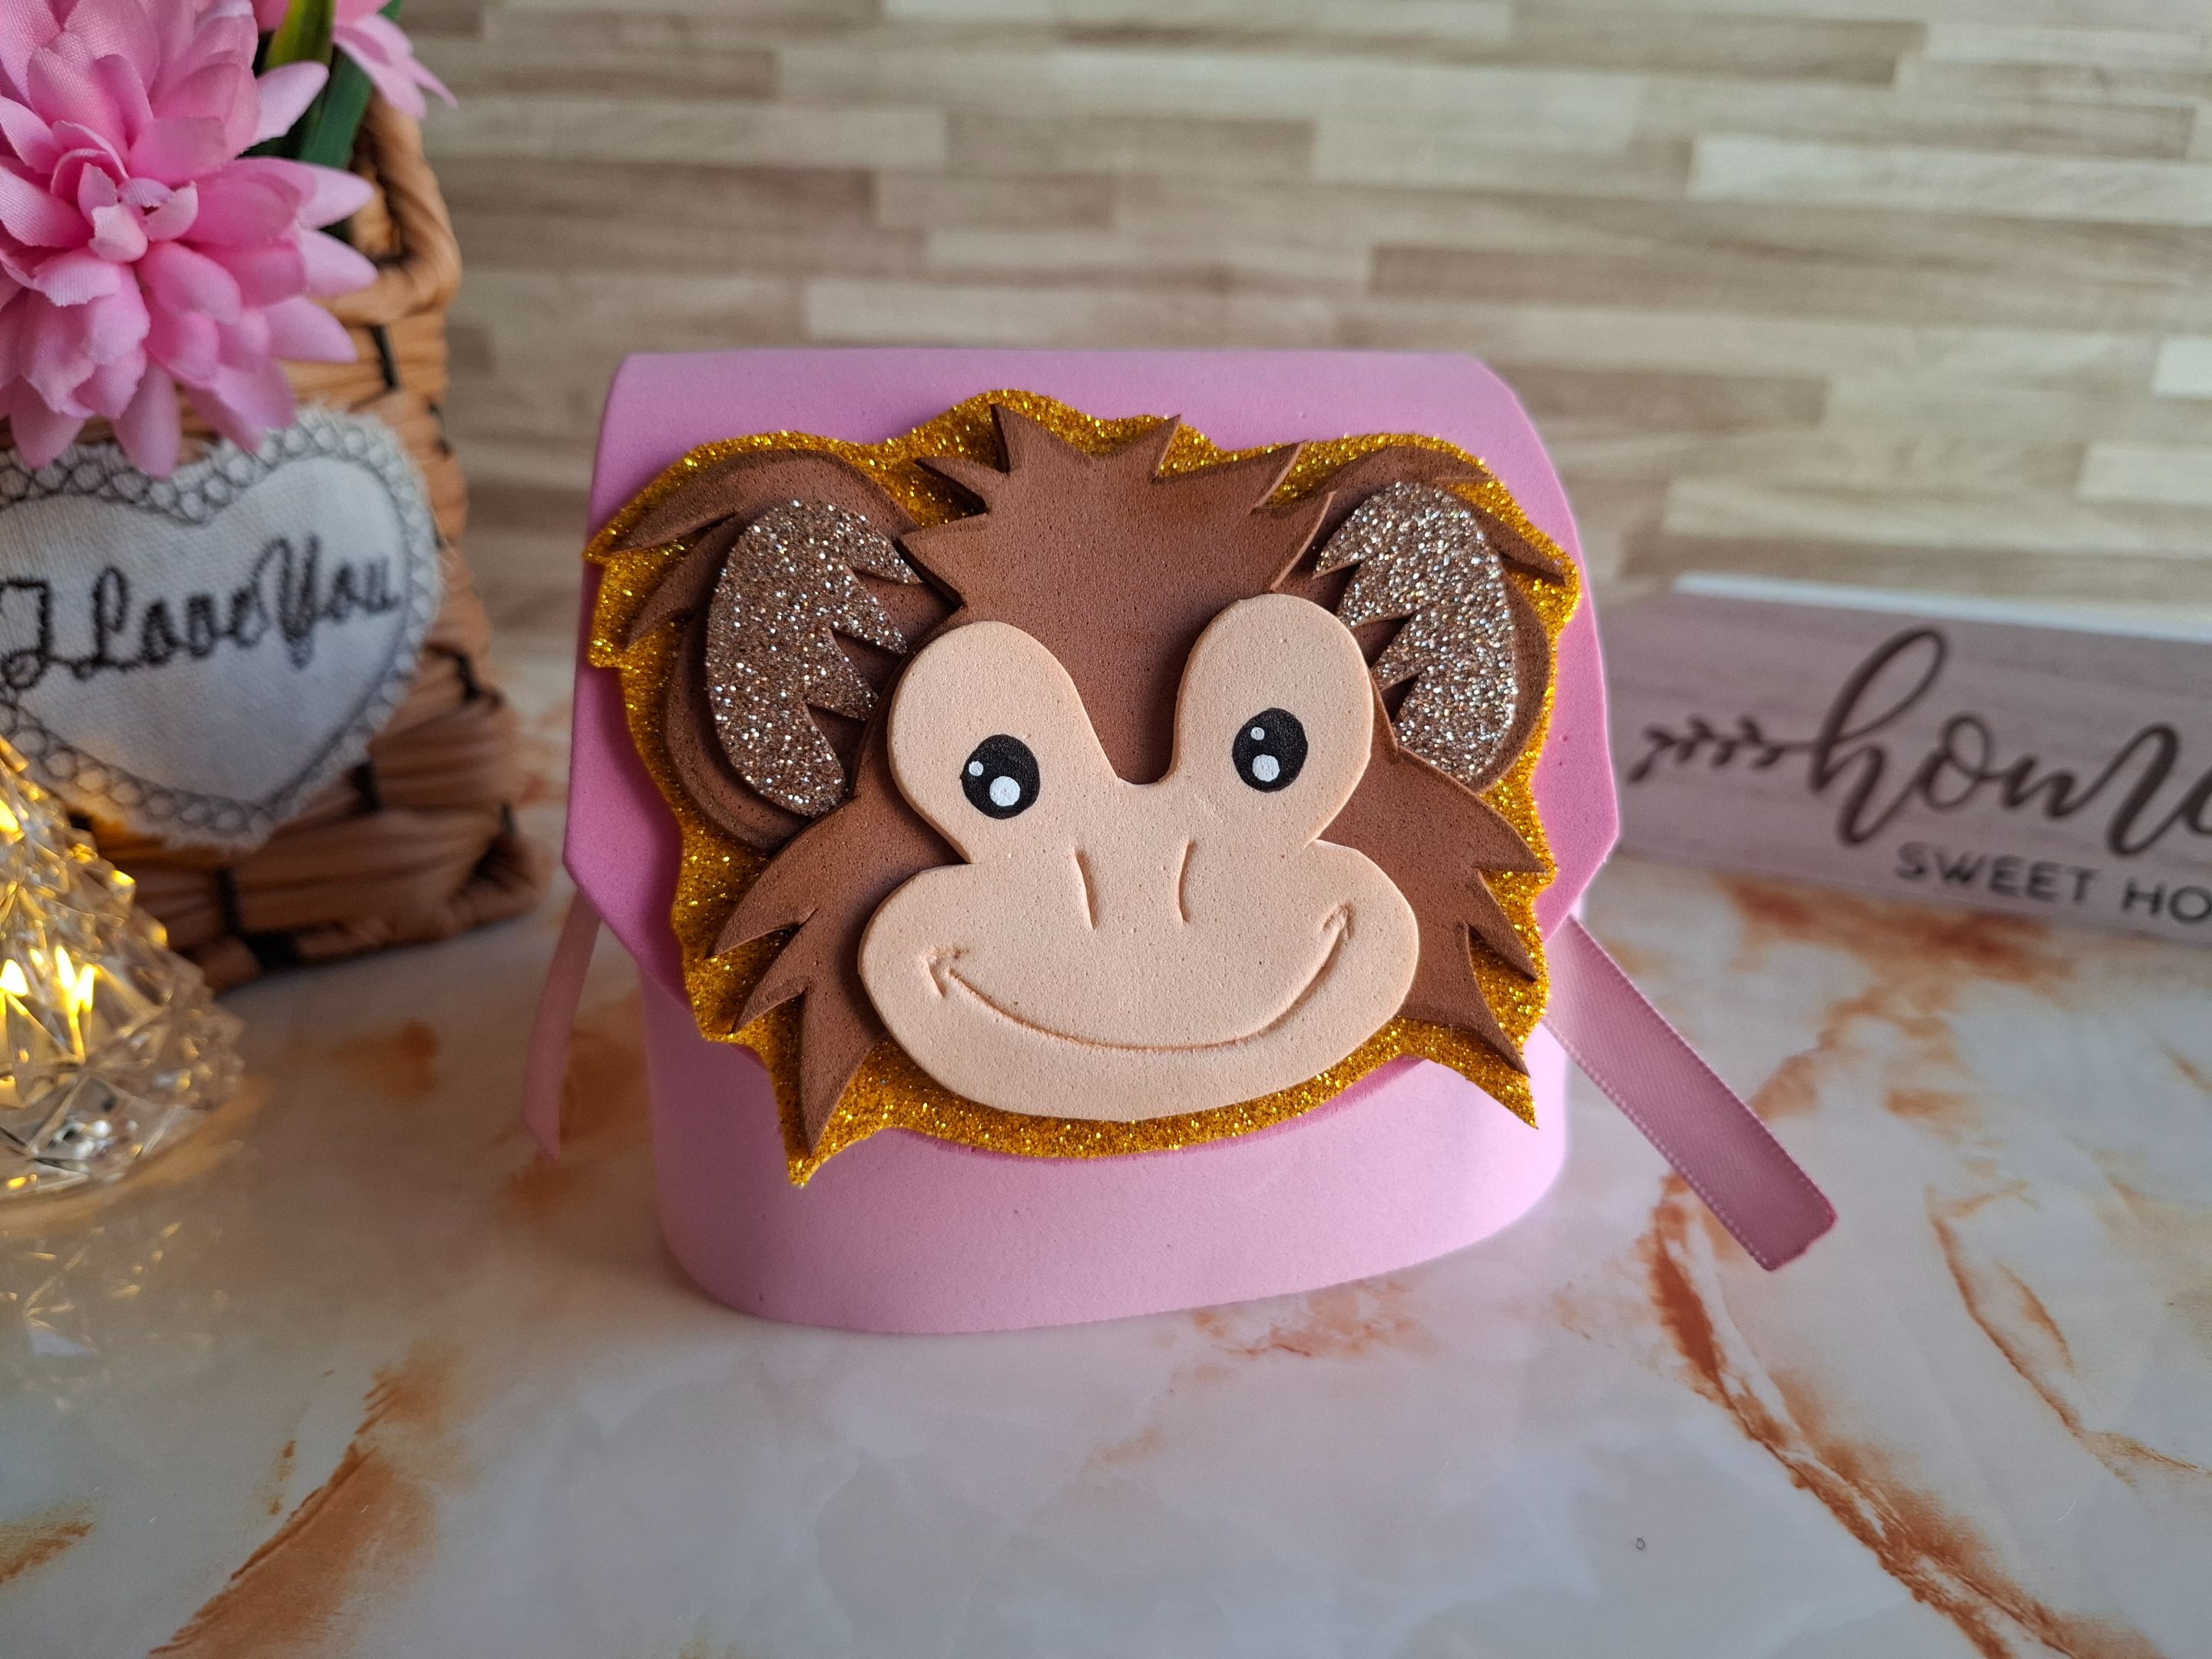
Realicé un morral en foami en color rosado, en el centro lleva la carita del mono de fuego, este morral lo puedes utilizar para niños, lo puede realizar del tamaño que quieras, es súper práctico de realizar no lleva muchos materiales ni necesitas ser experto para elaborar uno, así que deja volar tu imaginación, a continuación les muestro los materiales y el paso a paso.
I made a backpack out of pink foam. In the center is the Fire Monkey's face. You can use this backpack for children. You can make it any size you want. It's super practical to make; it doesn't require many materials, and you don't need to be an expert to make one. So, let your imagination run wild. Below I'll show you the materials and the step-by-step instructions.
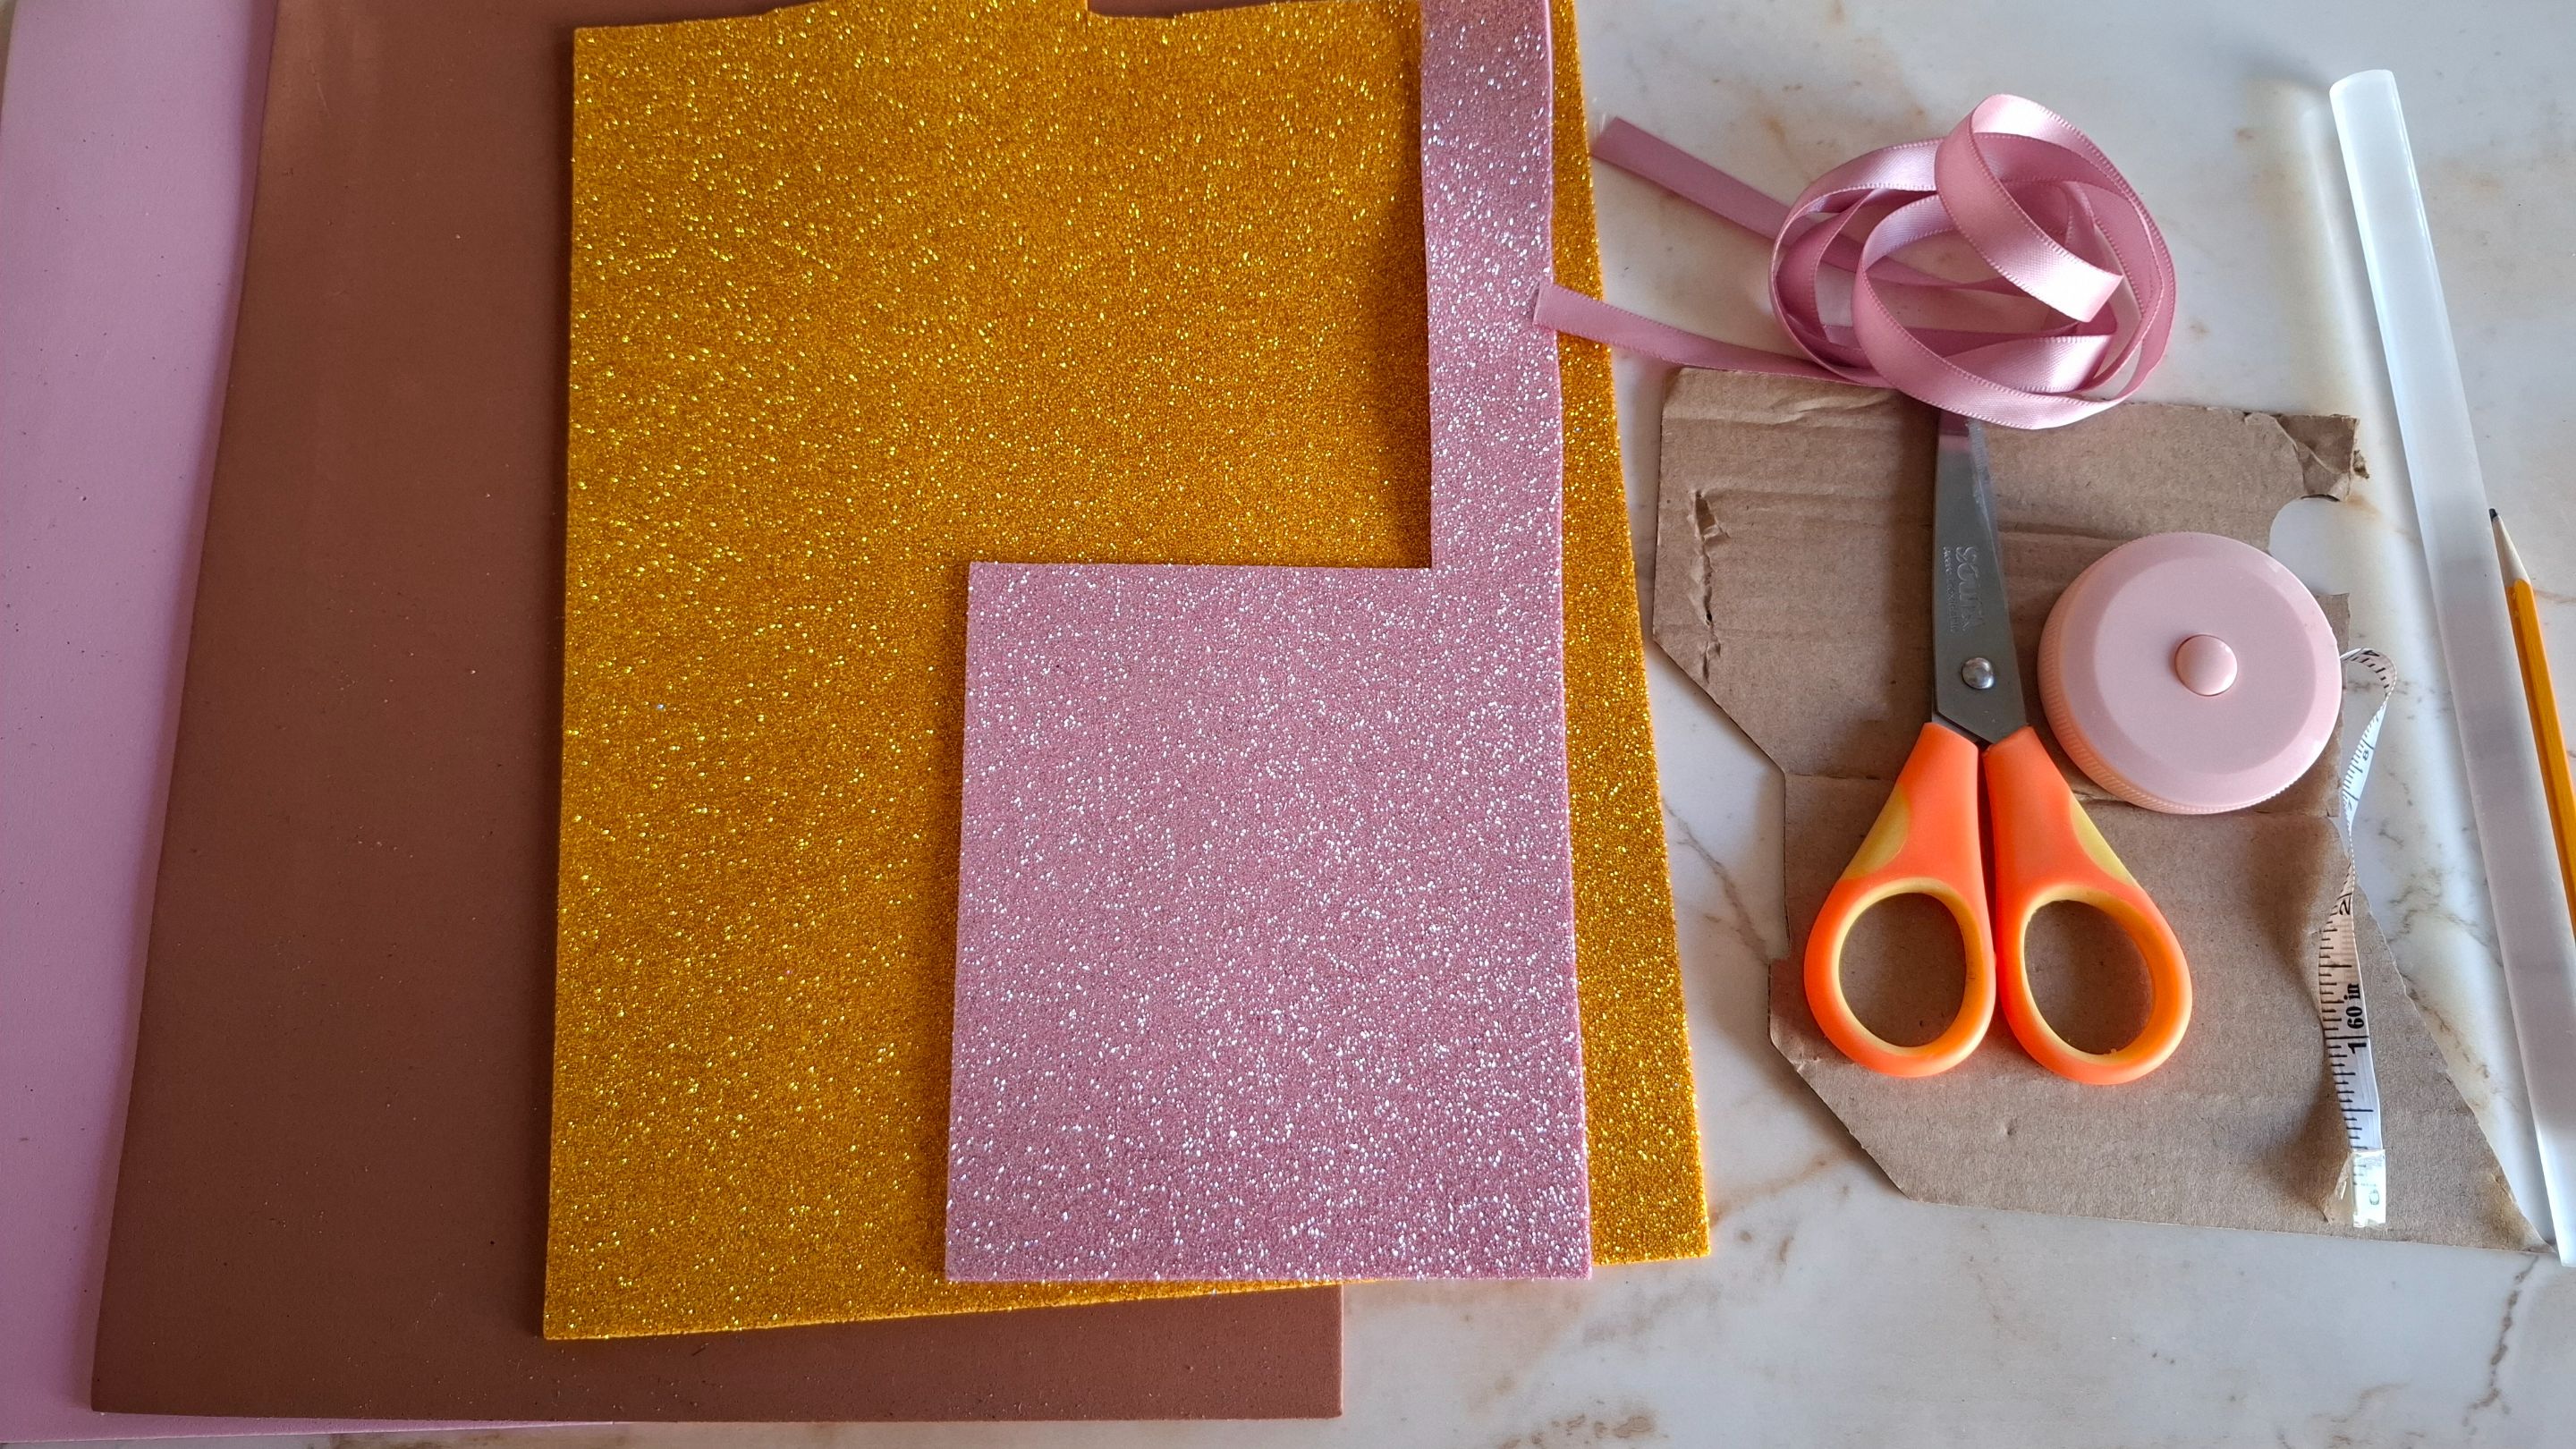
| Materiales | Materials |
|---|---|
| Foami rosado | Pink foam |
| Foami dorado | Golden foam |
| Foami marrón | Brown foam |
| Foami piel | Foami skin |
| Tijera, silicón | Scissors, silicone |
| Cinta rosada | pink ribbon |
| Pintura, Cartón | Paint, Cardboard |
Paso a paso | Step by step
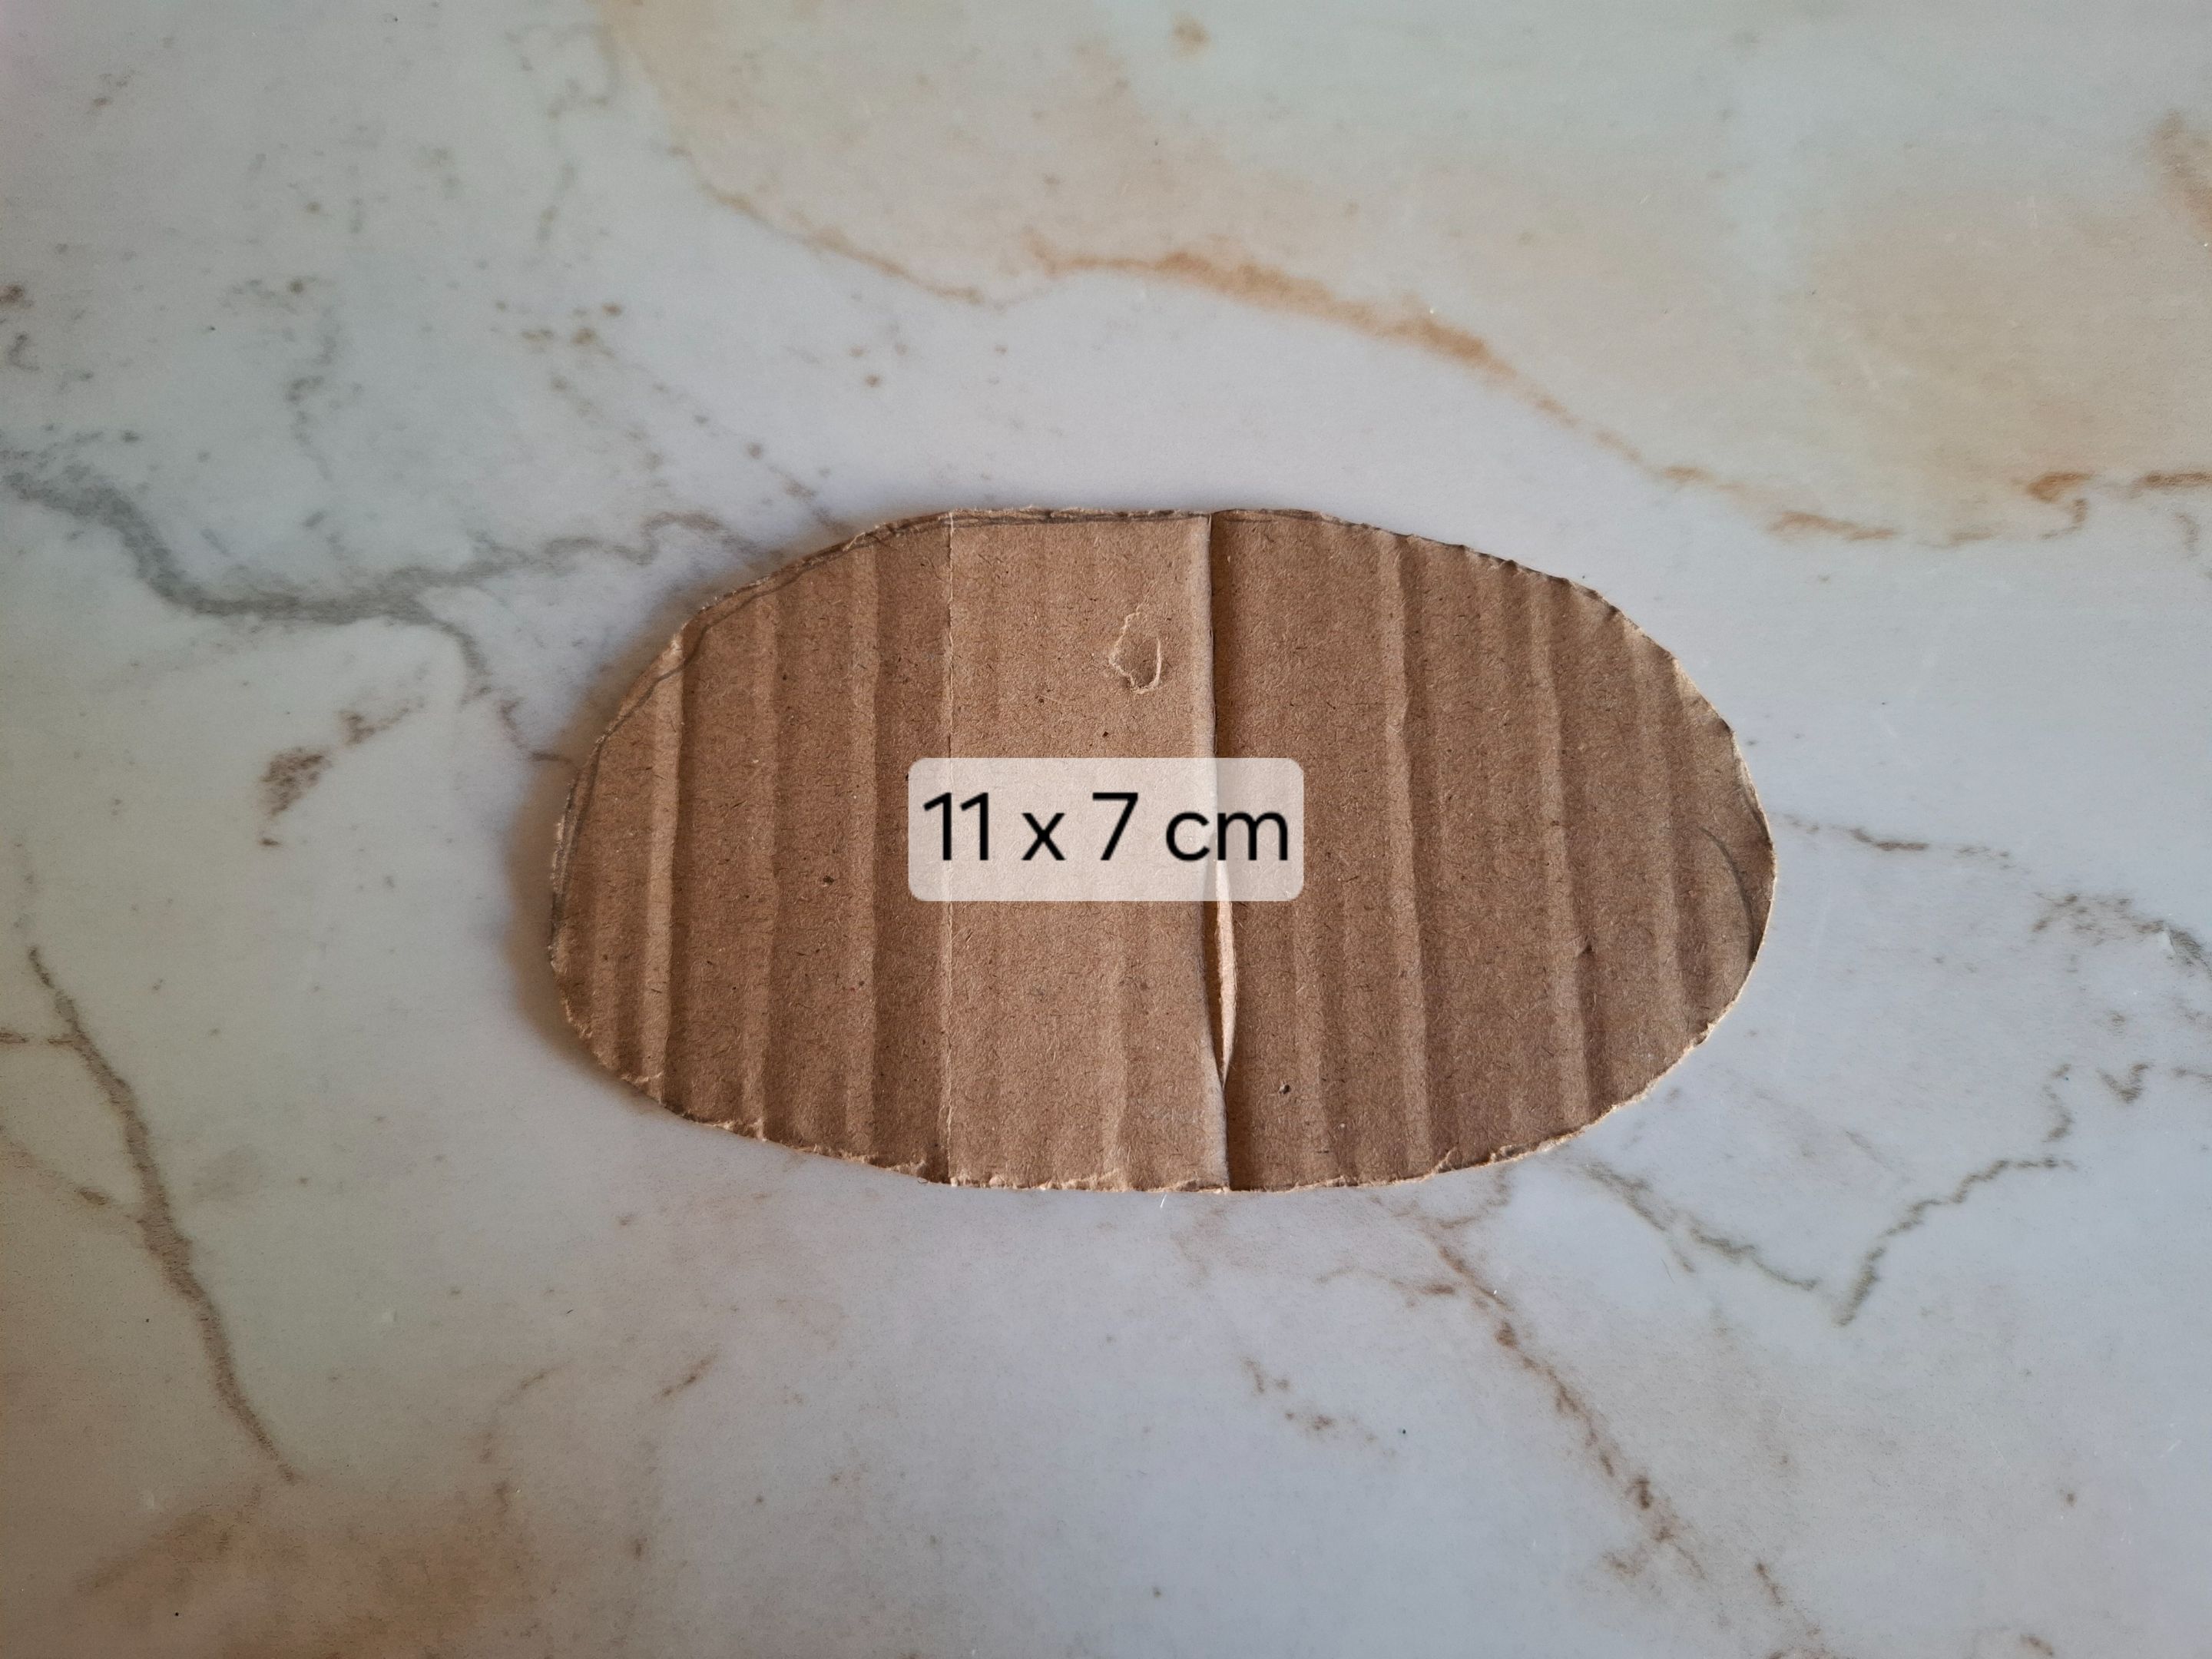
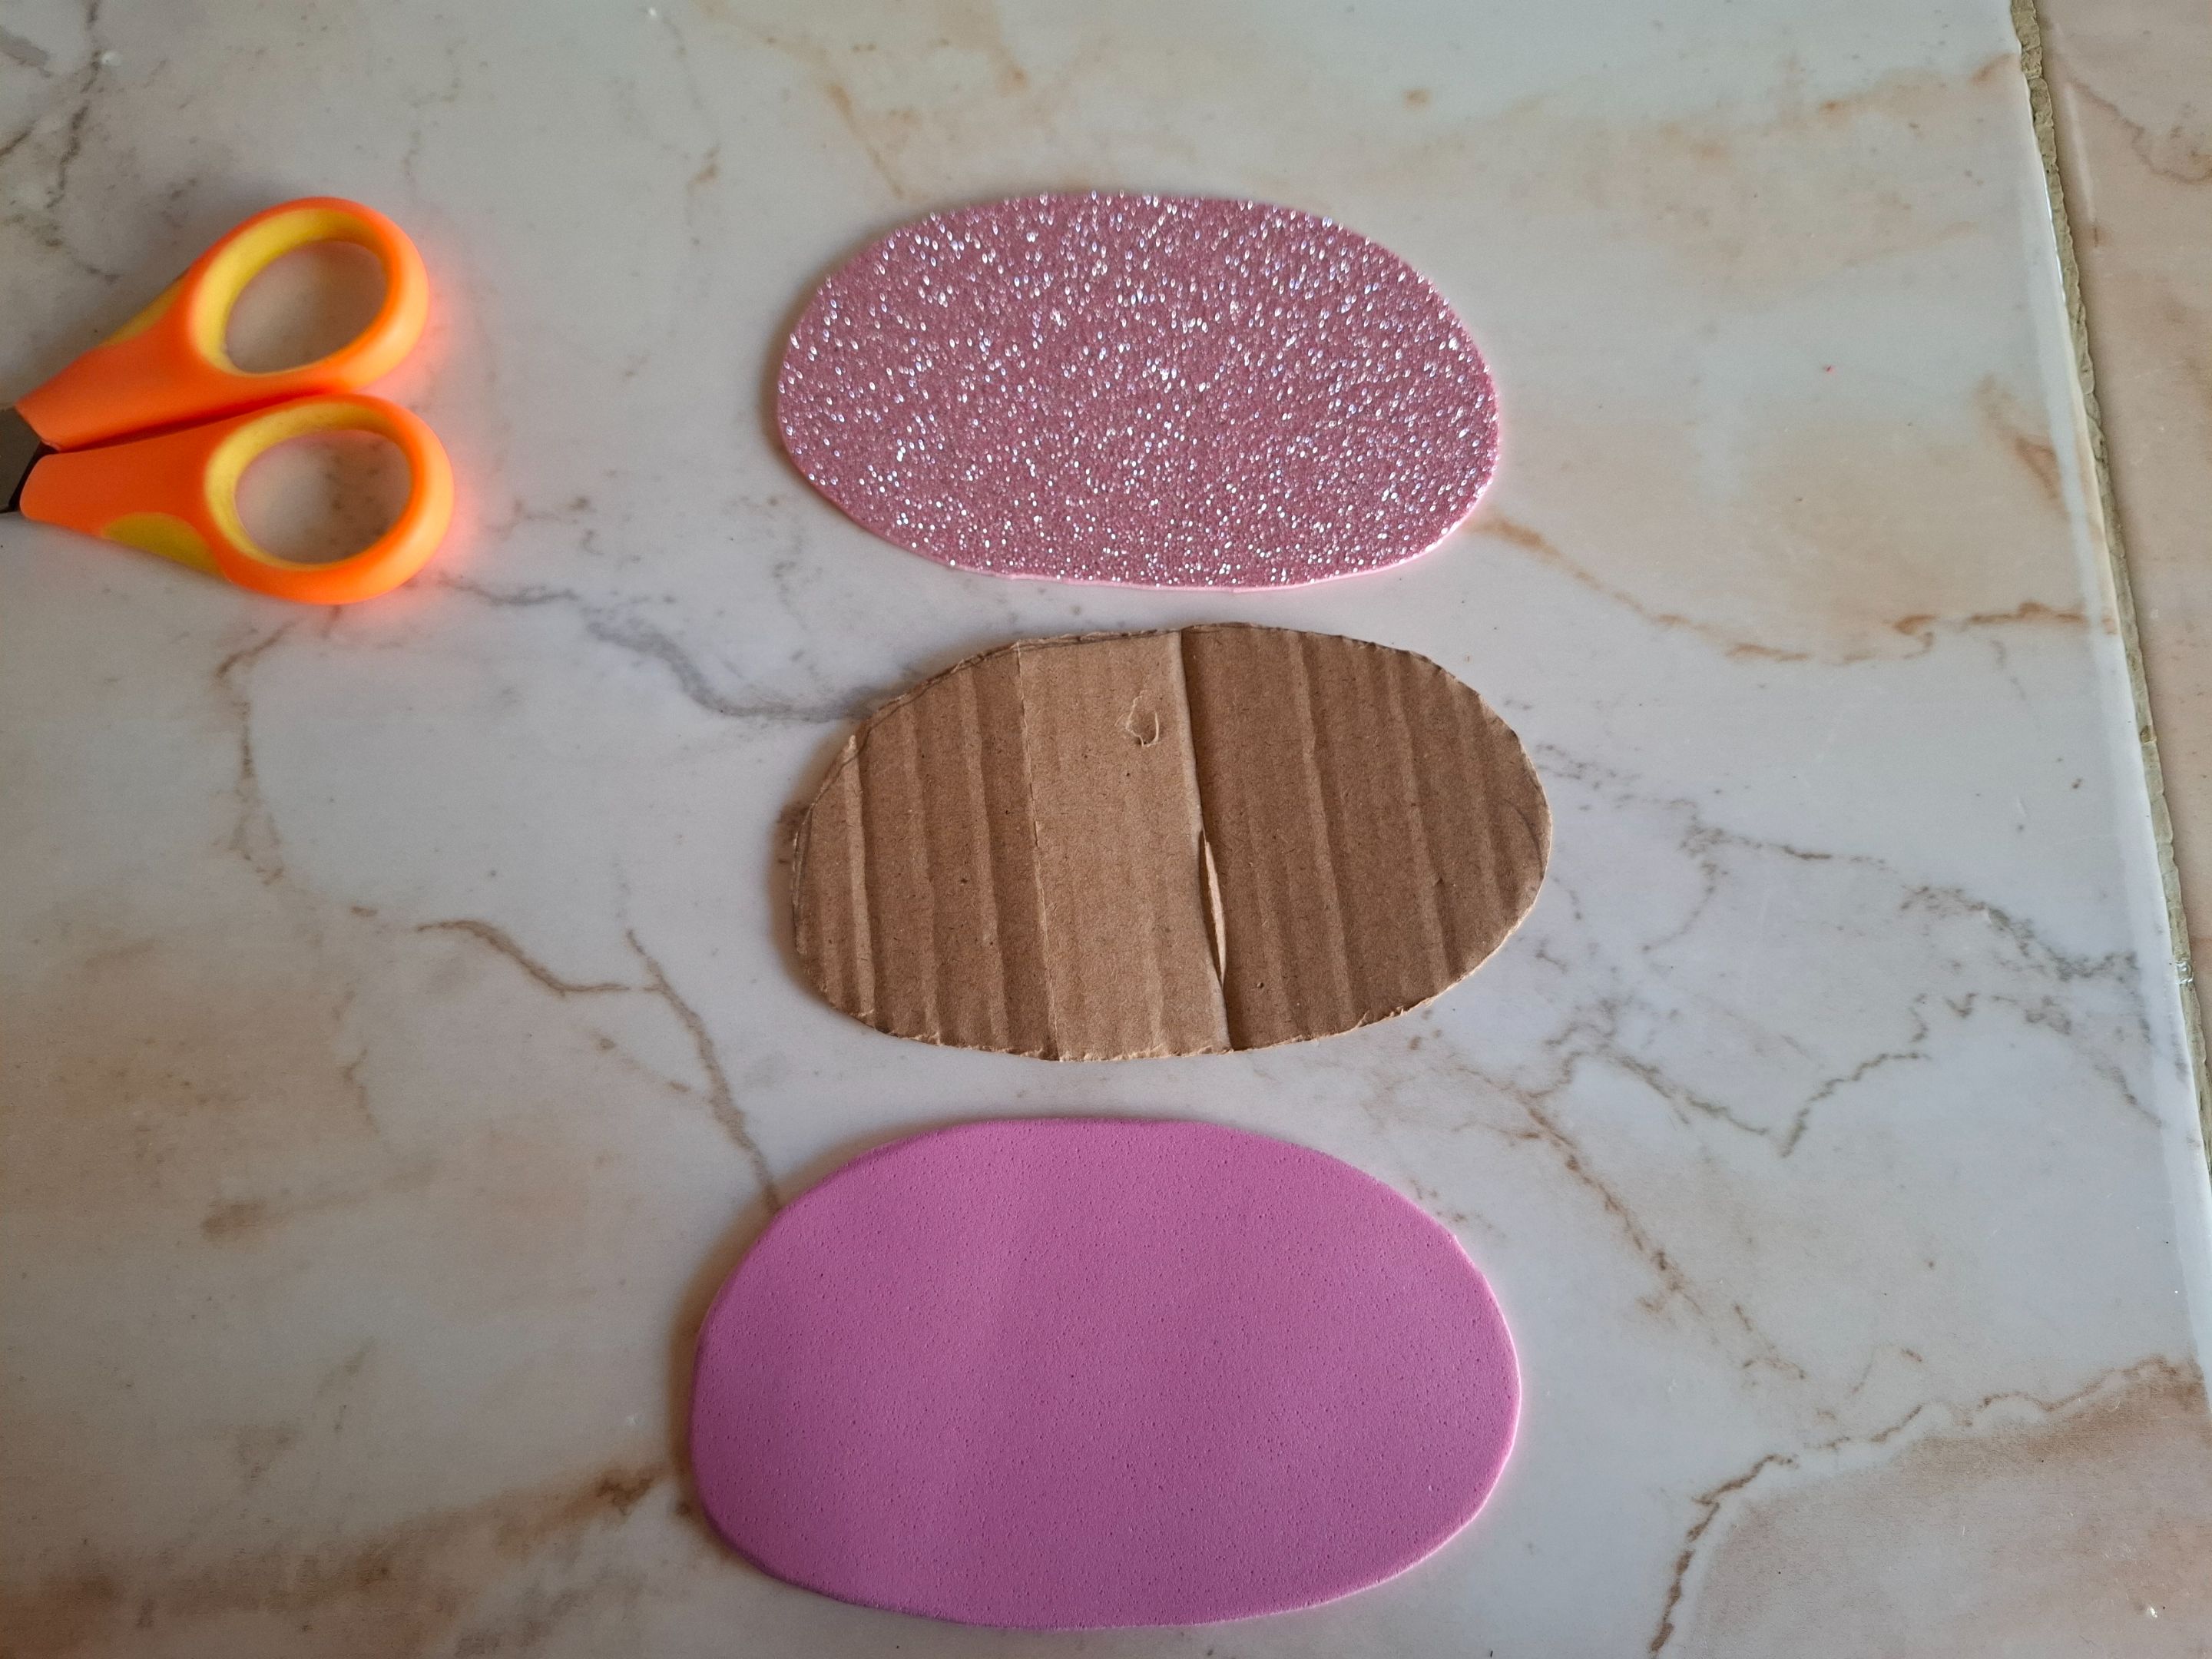
El primer paso que voy a realizar será cortar el cartón para la base del morral tendrá una medida de 11 x 7 cm, voy a cortar dos piezas de foami para cubrir ambos lados del cartón, utilicé foami rosa simple y escarchado.
The first step I'm going to take is to cut the cardboard for the base of the backpack. It will measure 11 x 7 cm. I'm going to cut two pieces of foam to cover both sides of the cardboard. I used plain pink and frosted foam.
 |
 |
|---|---|
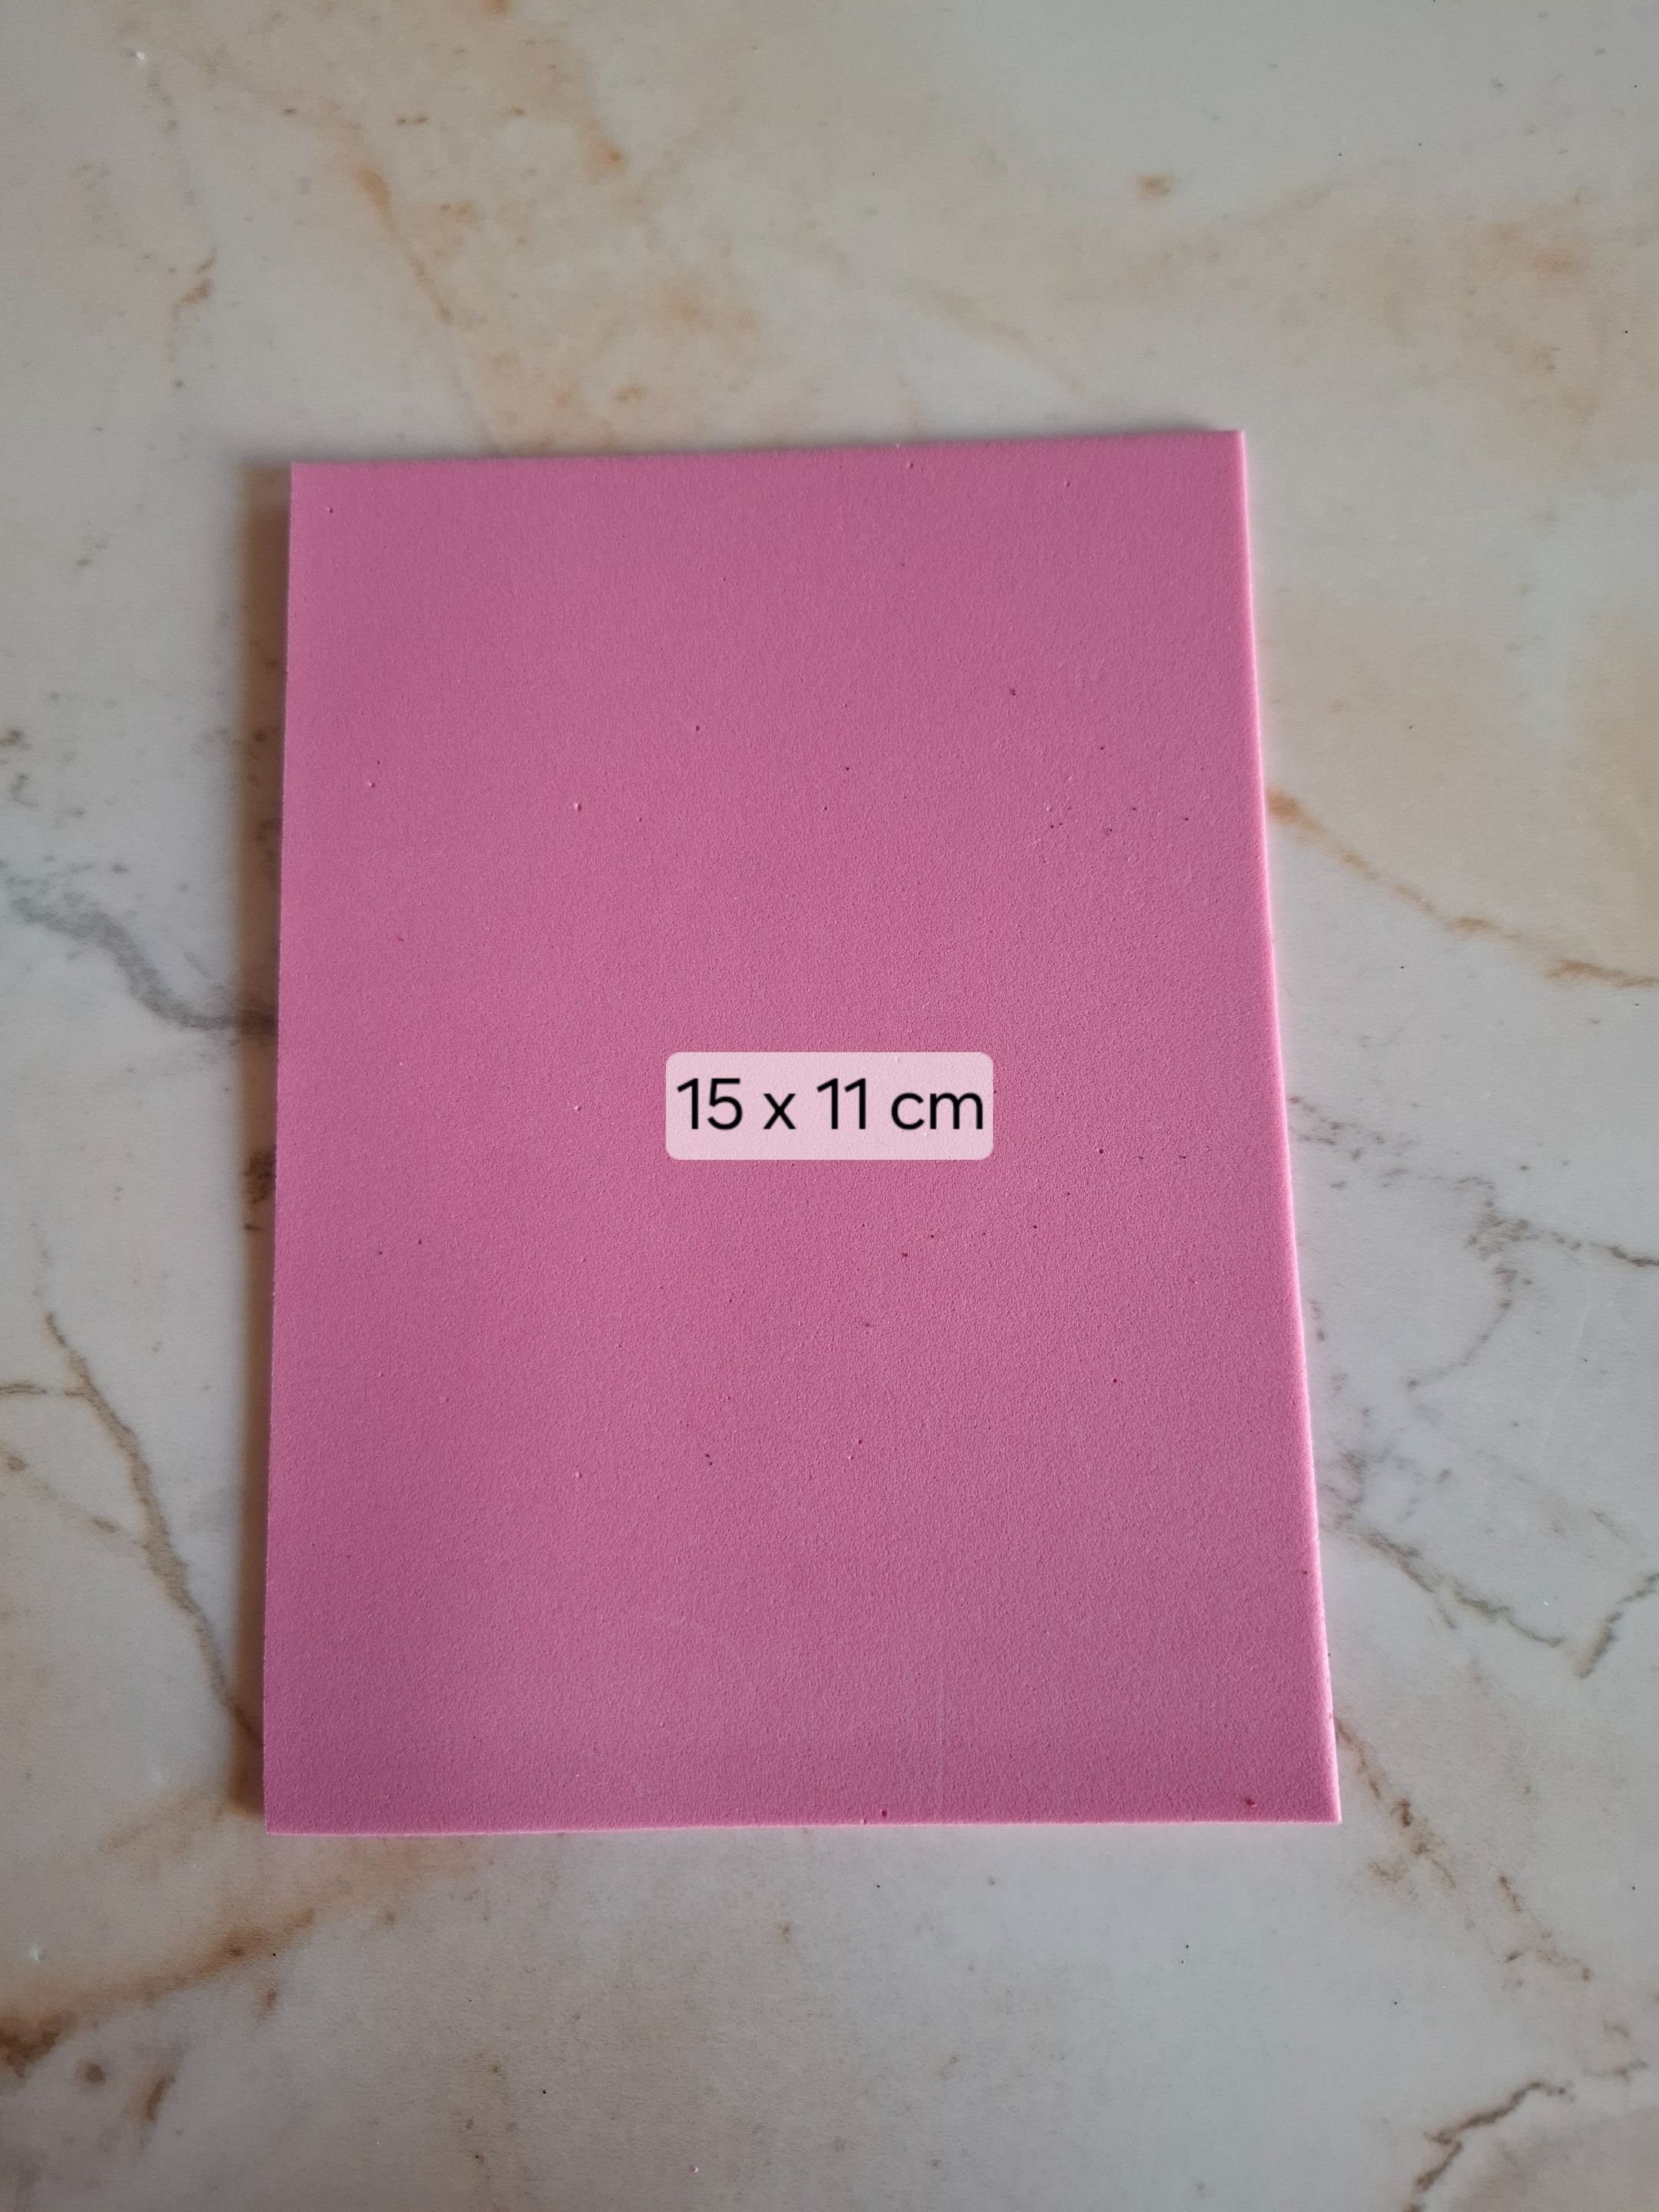
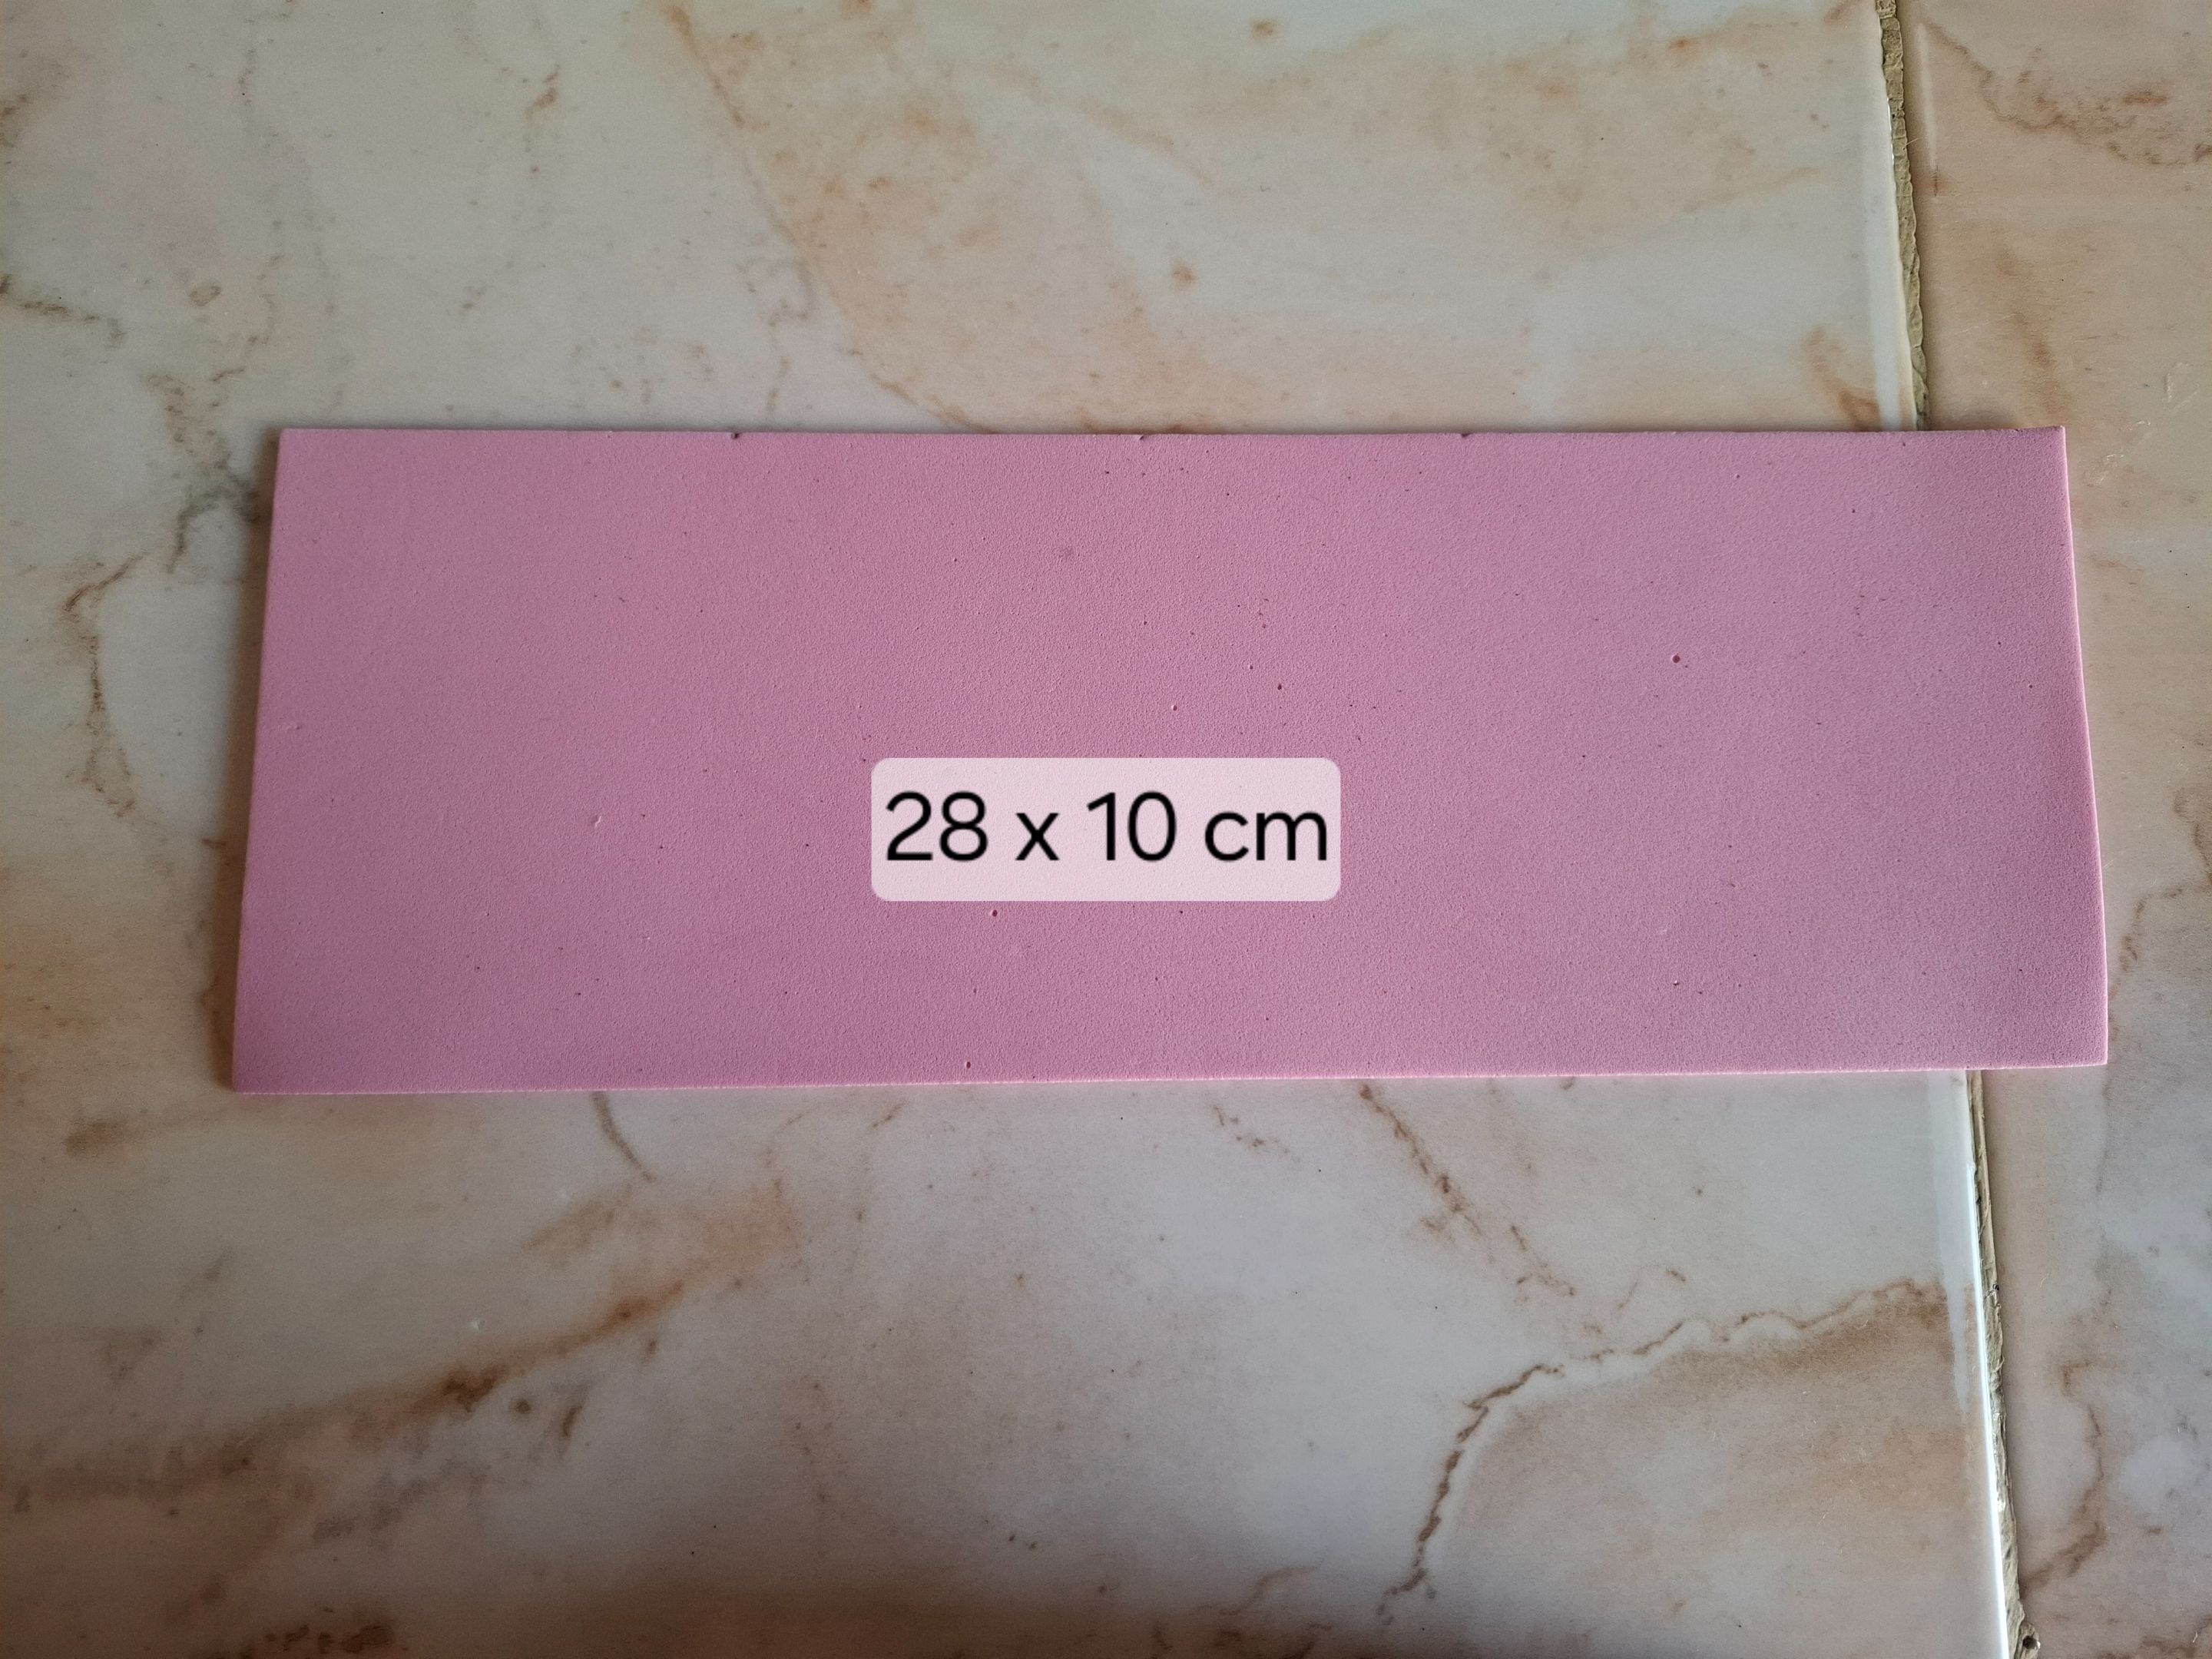
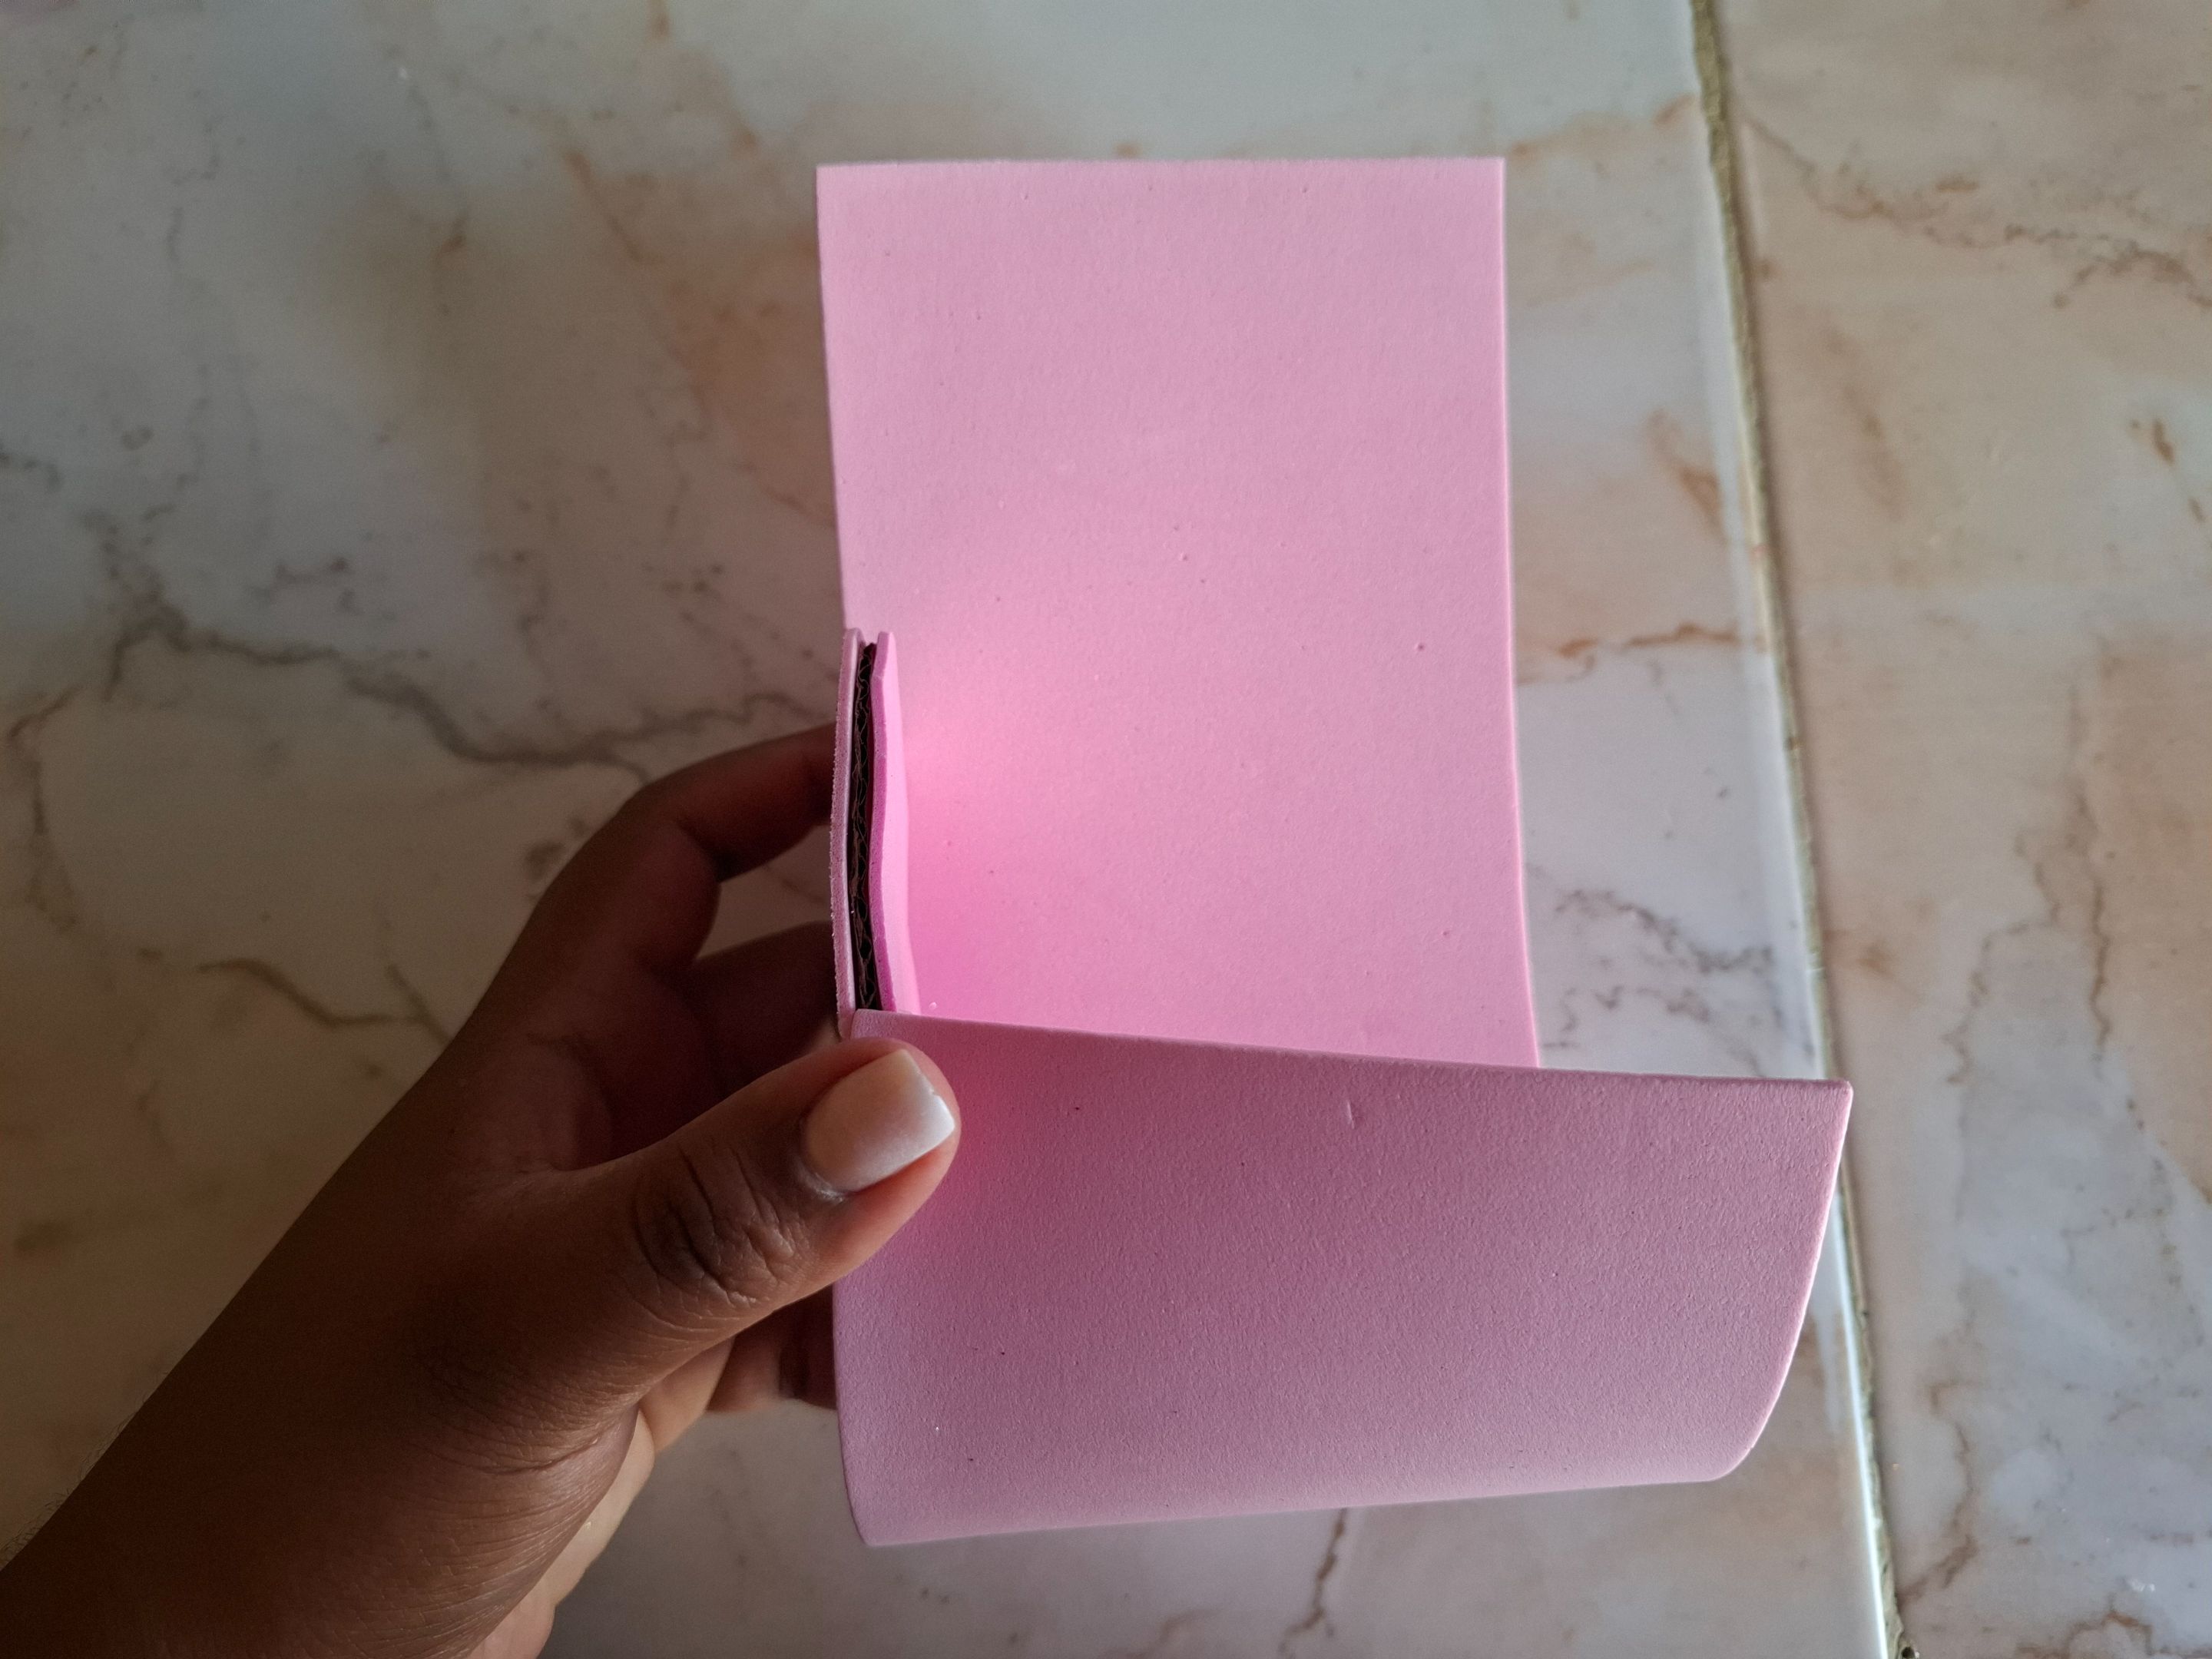
Para empezar armar el morral voy a cortar una pieza de 28 x 10 cm, y otro cuadro de 15 x 11 cm, voy a tomar el cuadro de 28 x 10 y pegamos al rededor de la base de cartón utilizando silicón caliente, en la parte que nos quede abierta colocamos otra tira de foami para cubrir del mismo tamaño.
To start assembling the backpack, I'm going to cut a piece measuring 28 x 10 cm, and another square measuring 15 x 11 cm. I'm going to take the 28 x 10 cm square and glue it around the cardboard base using hot silicone. On the part that's left open, I'll place another strip of foam to cover the same size.
 |
 |
 |
|---|---|---|
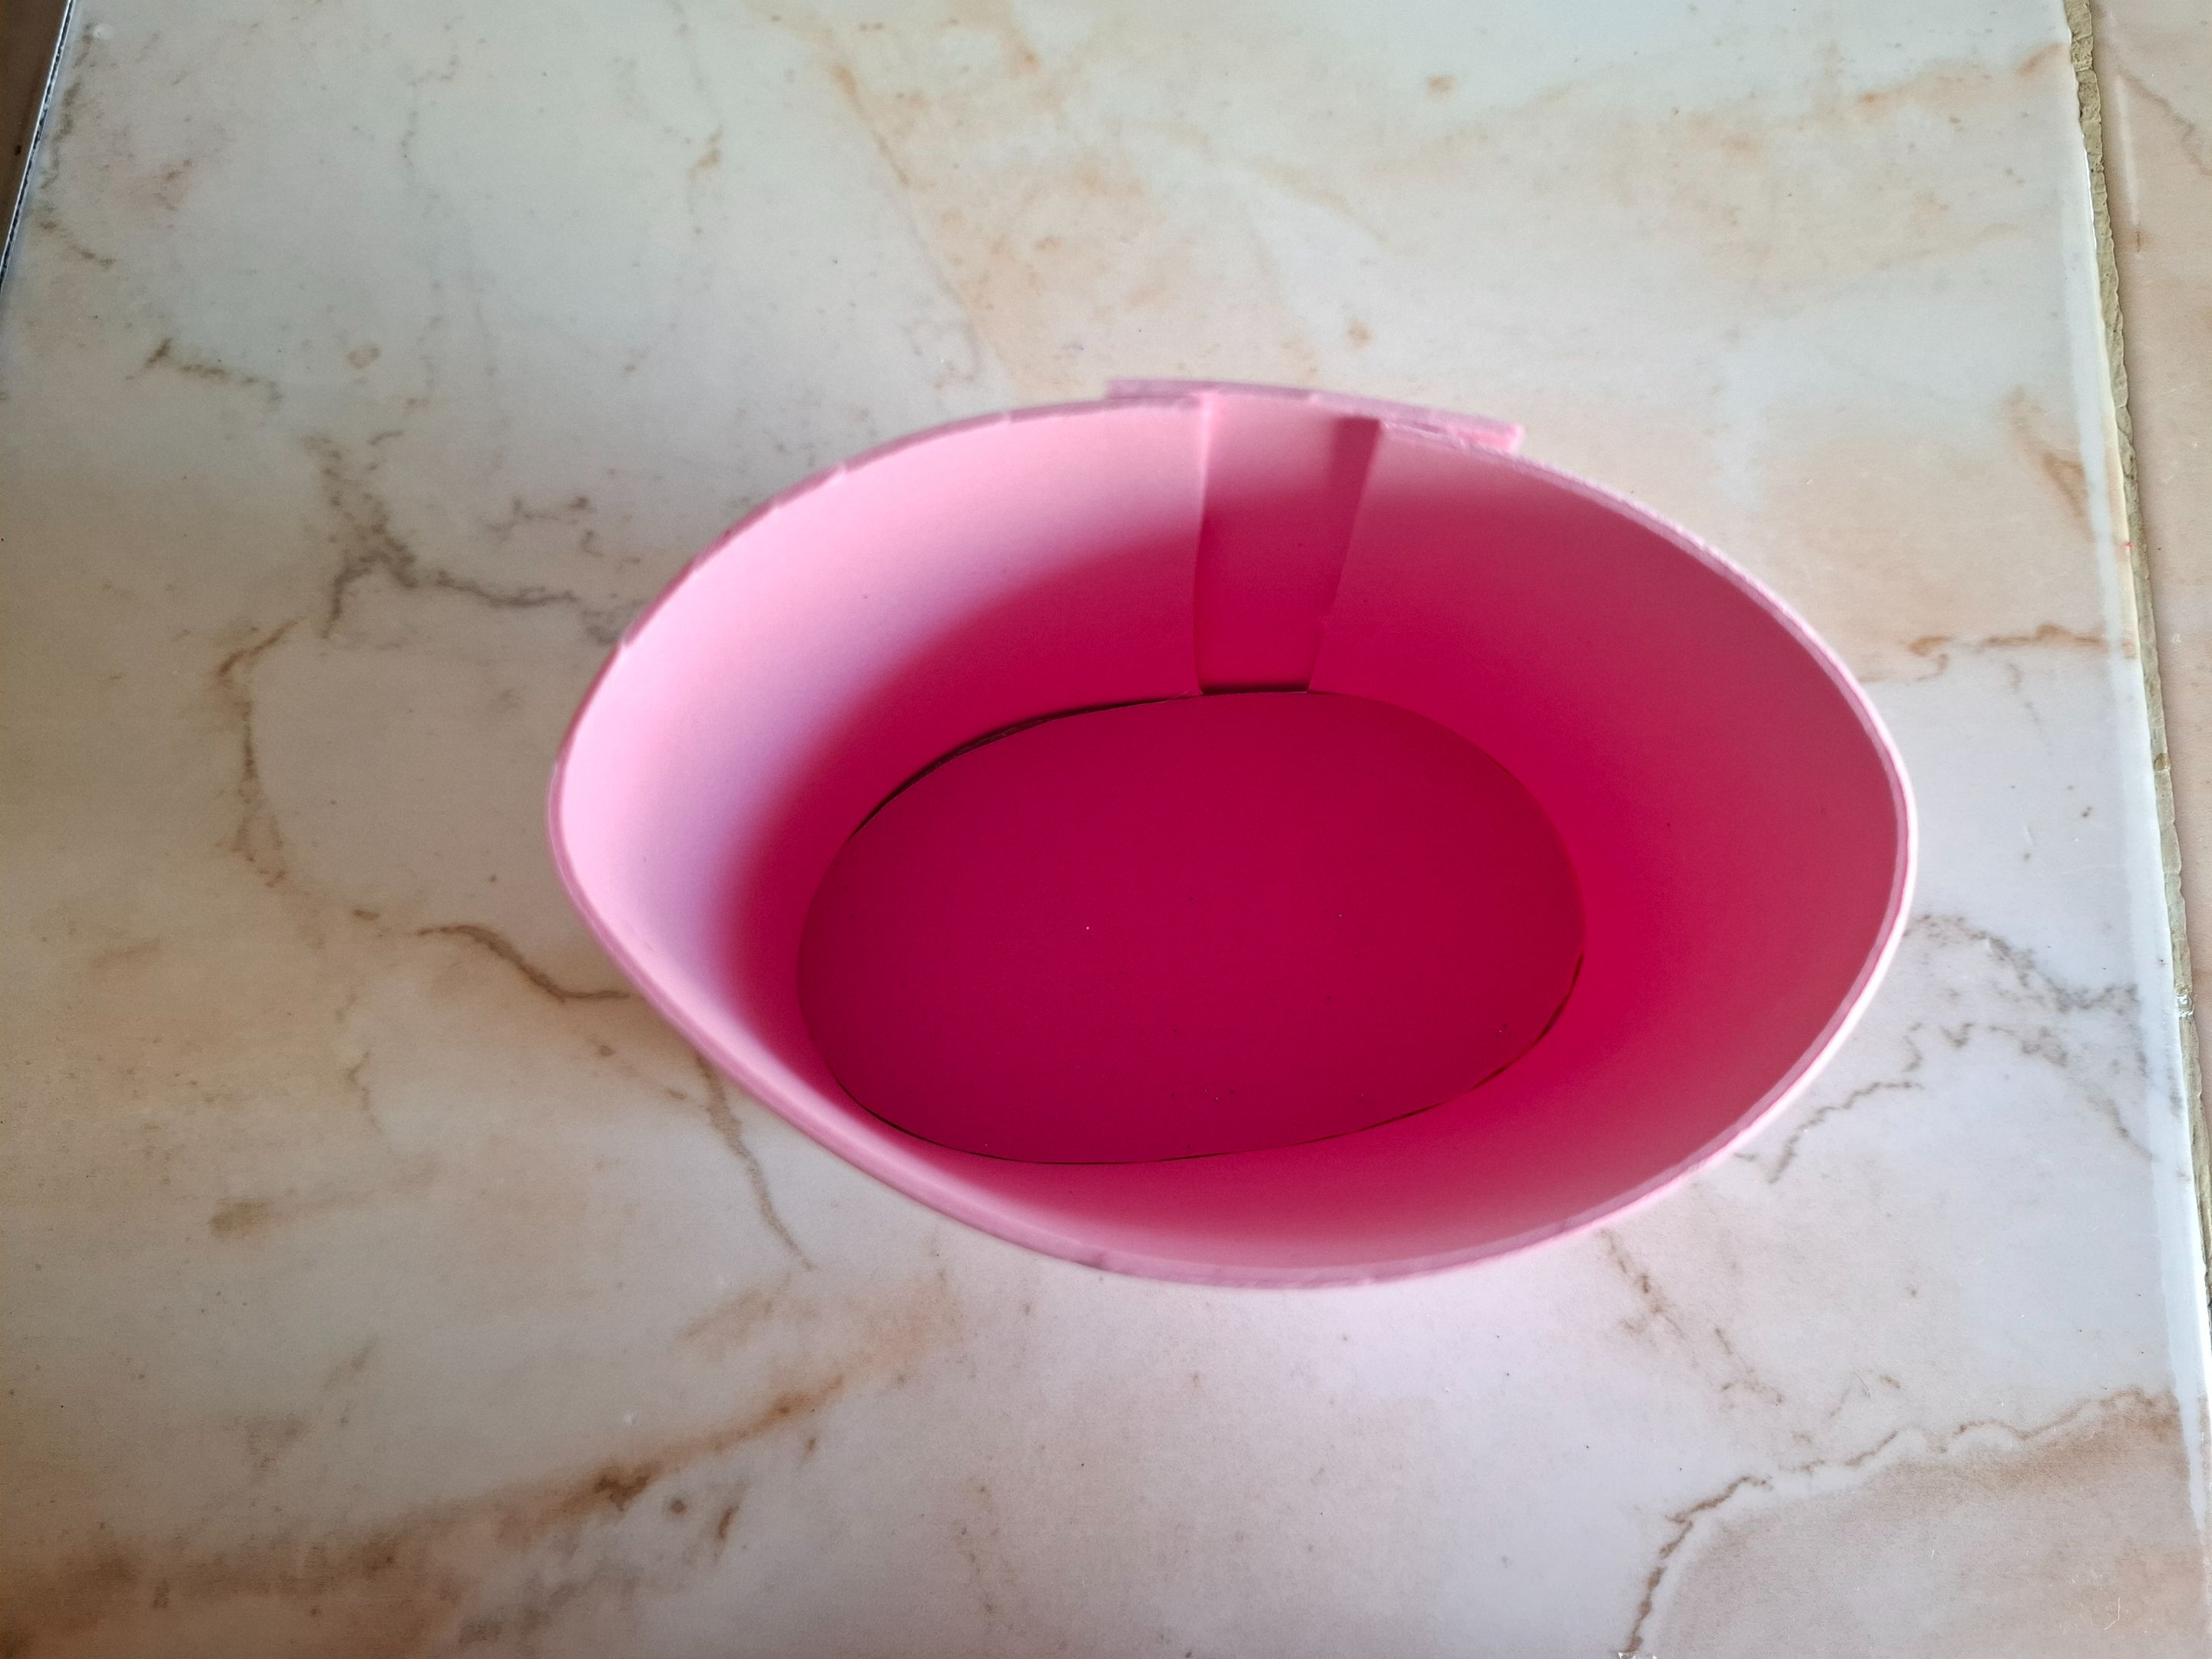
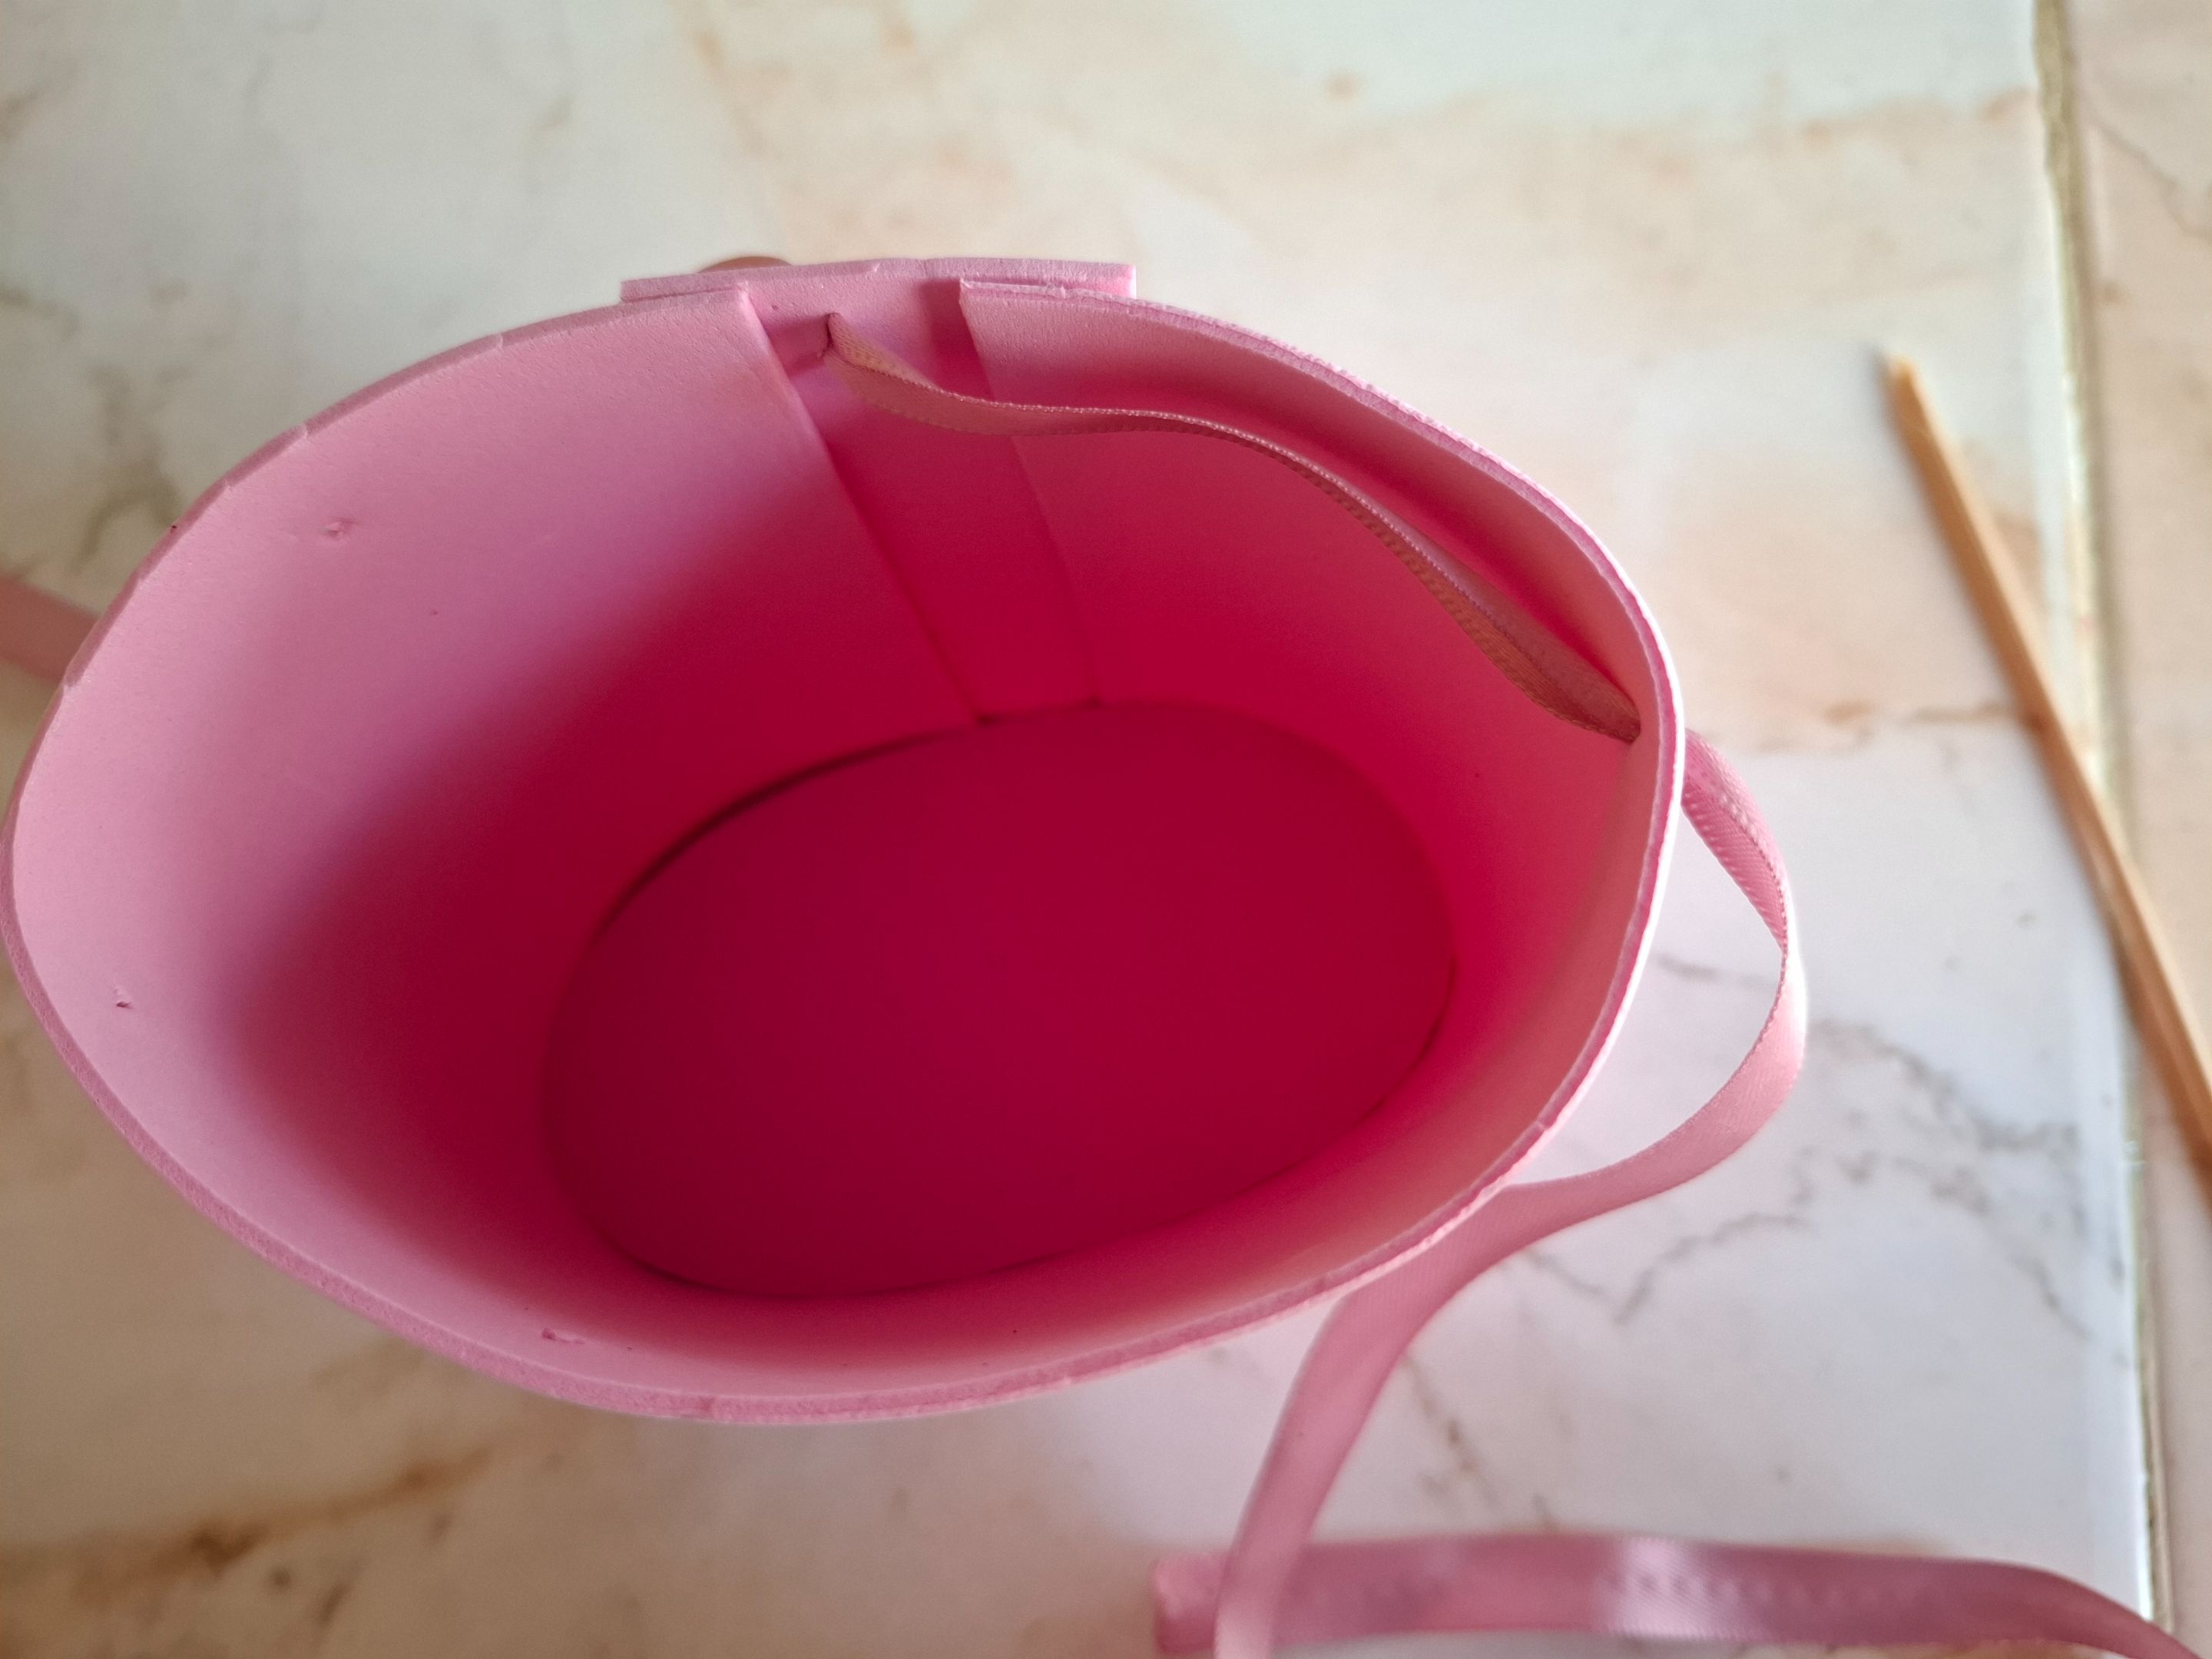
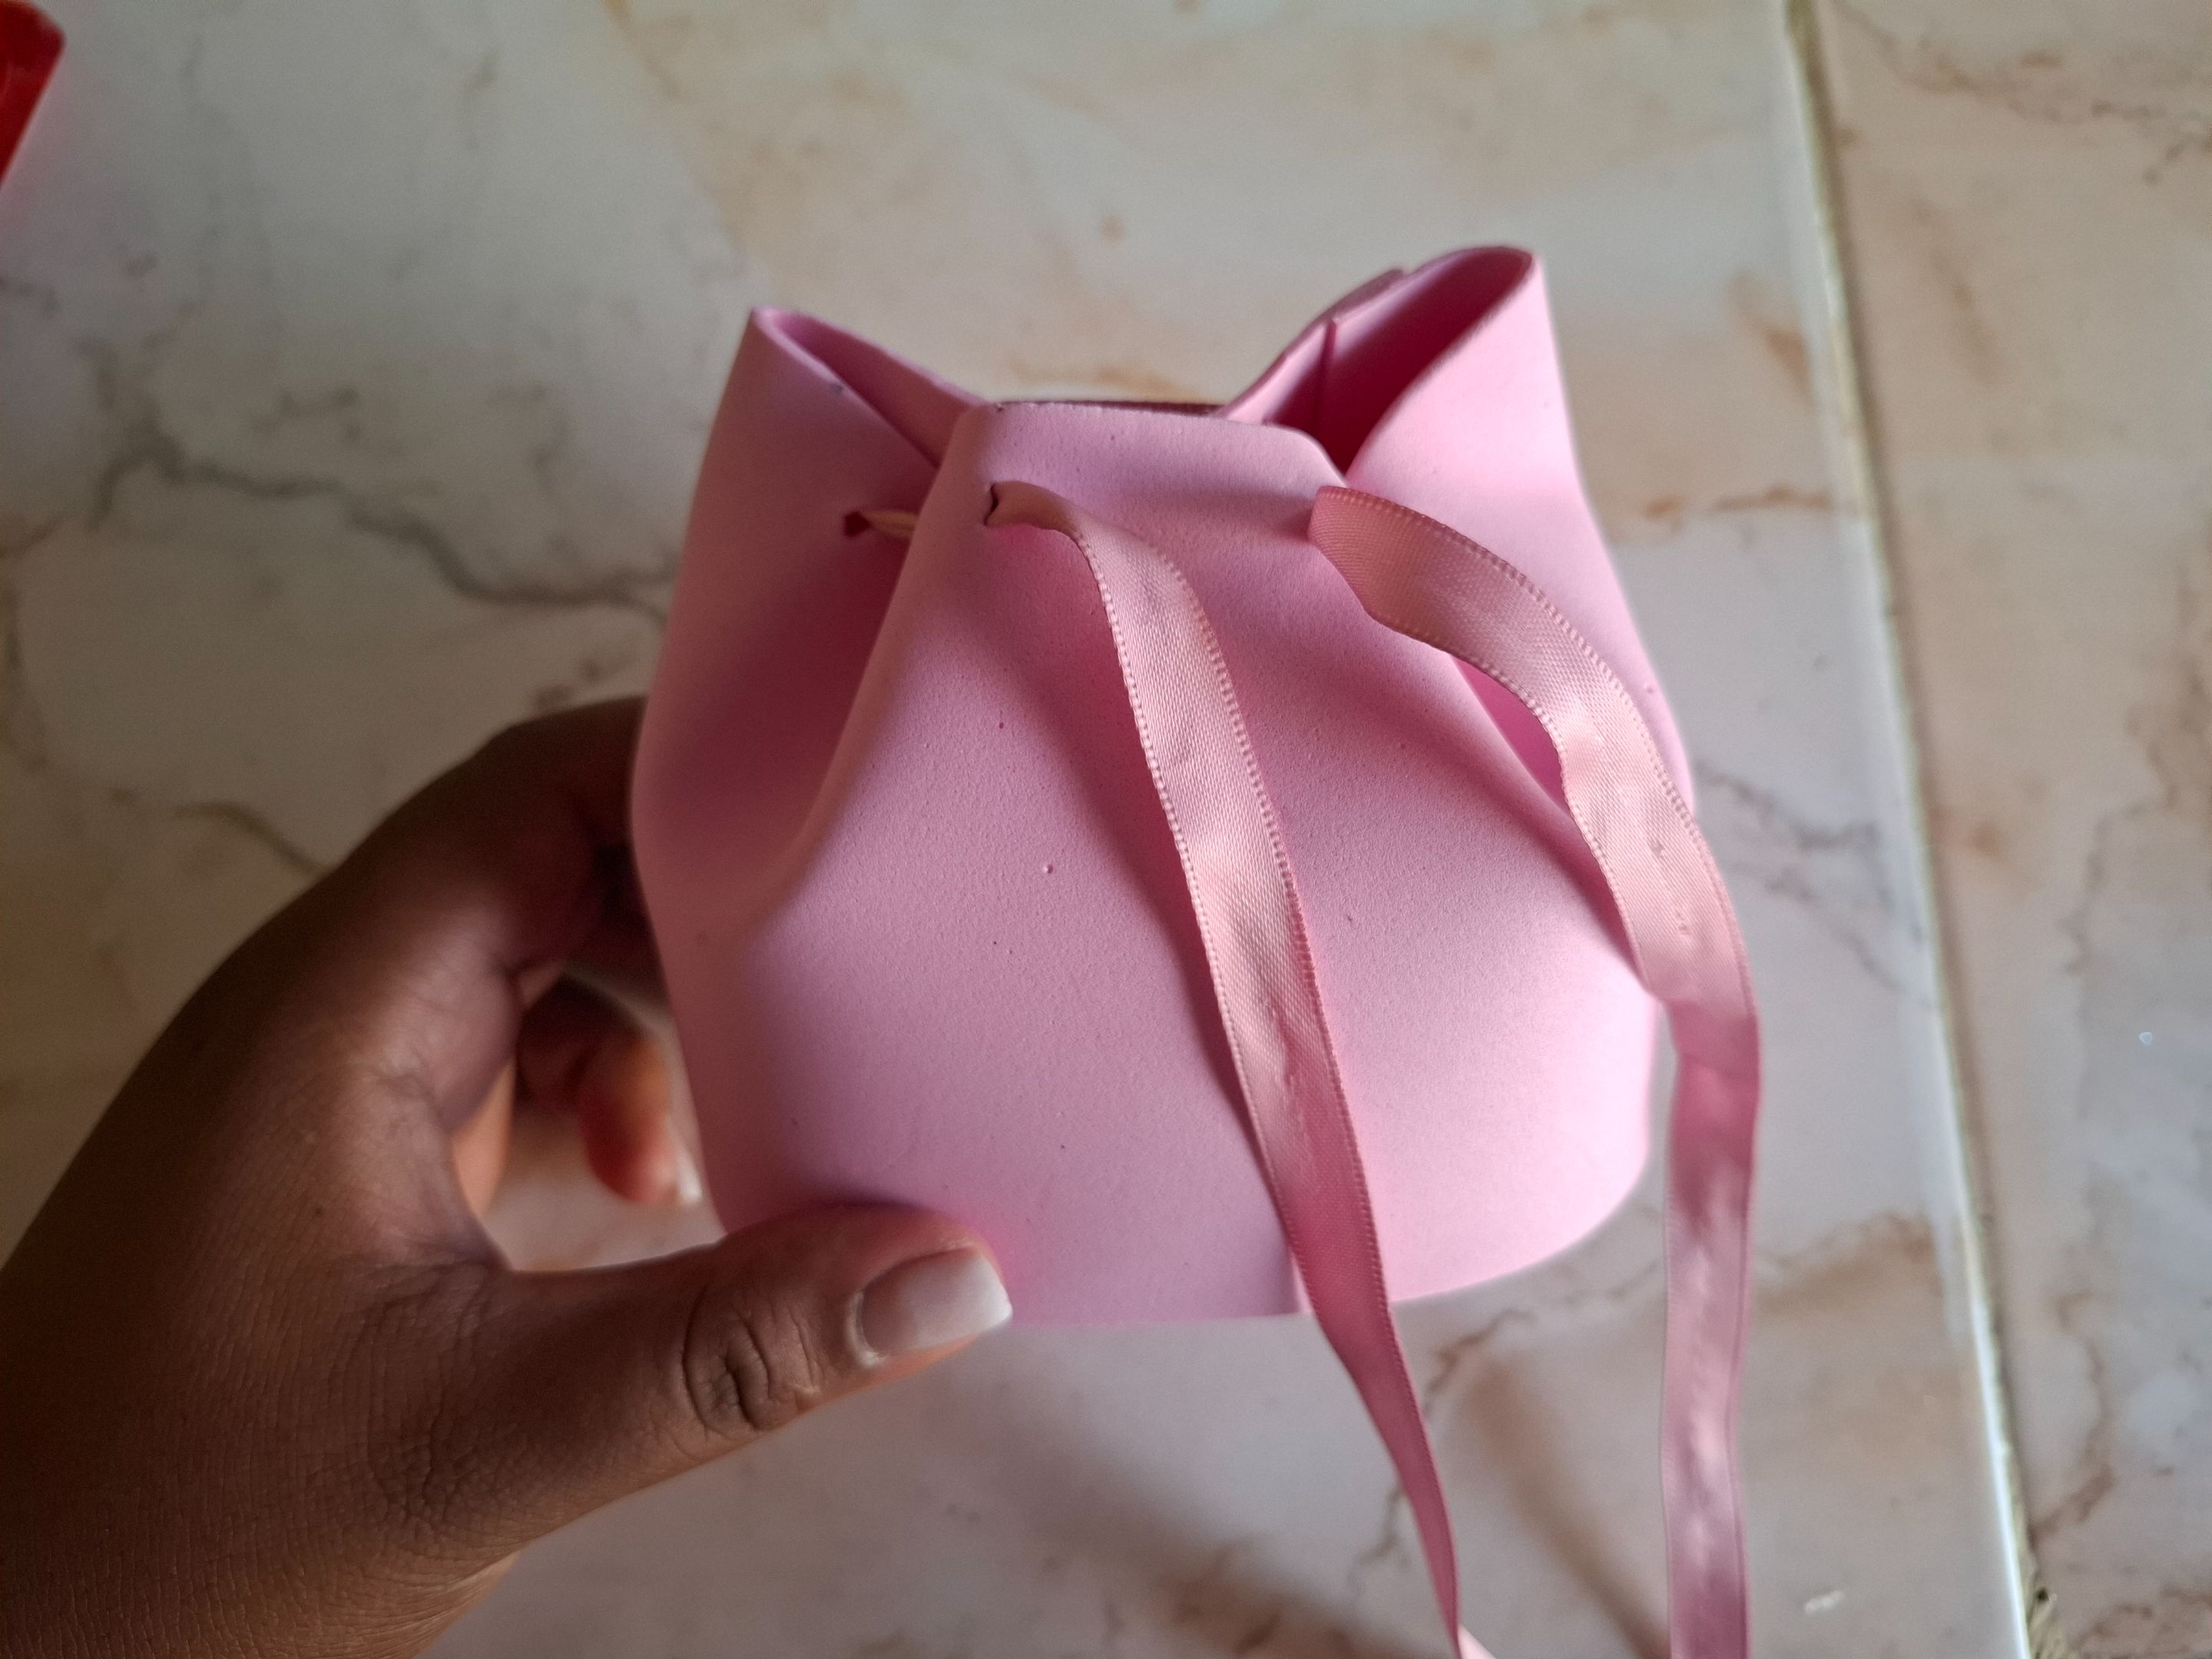
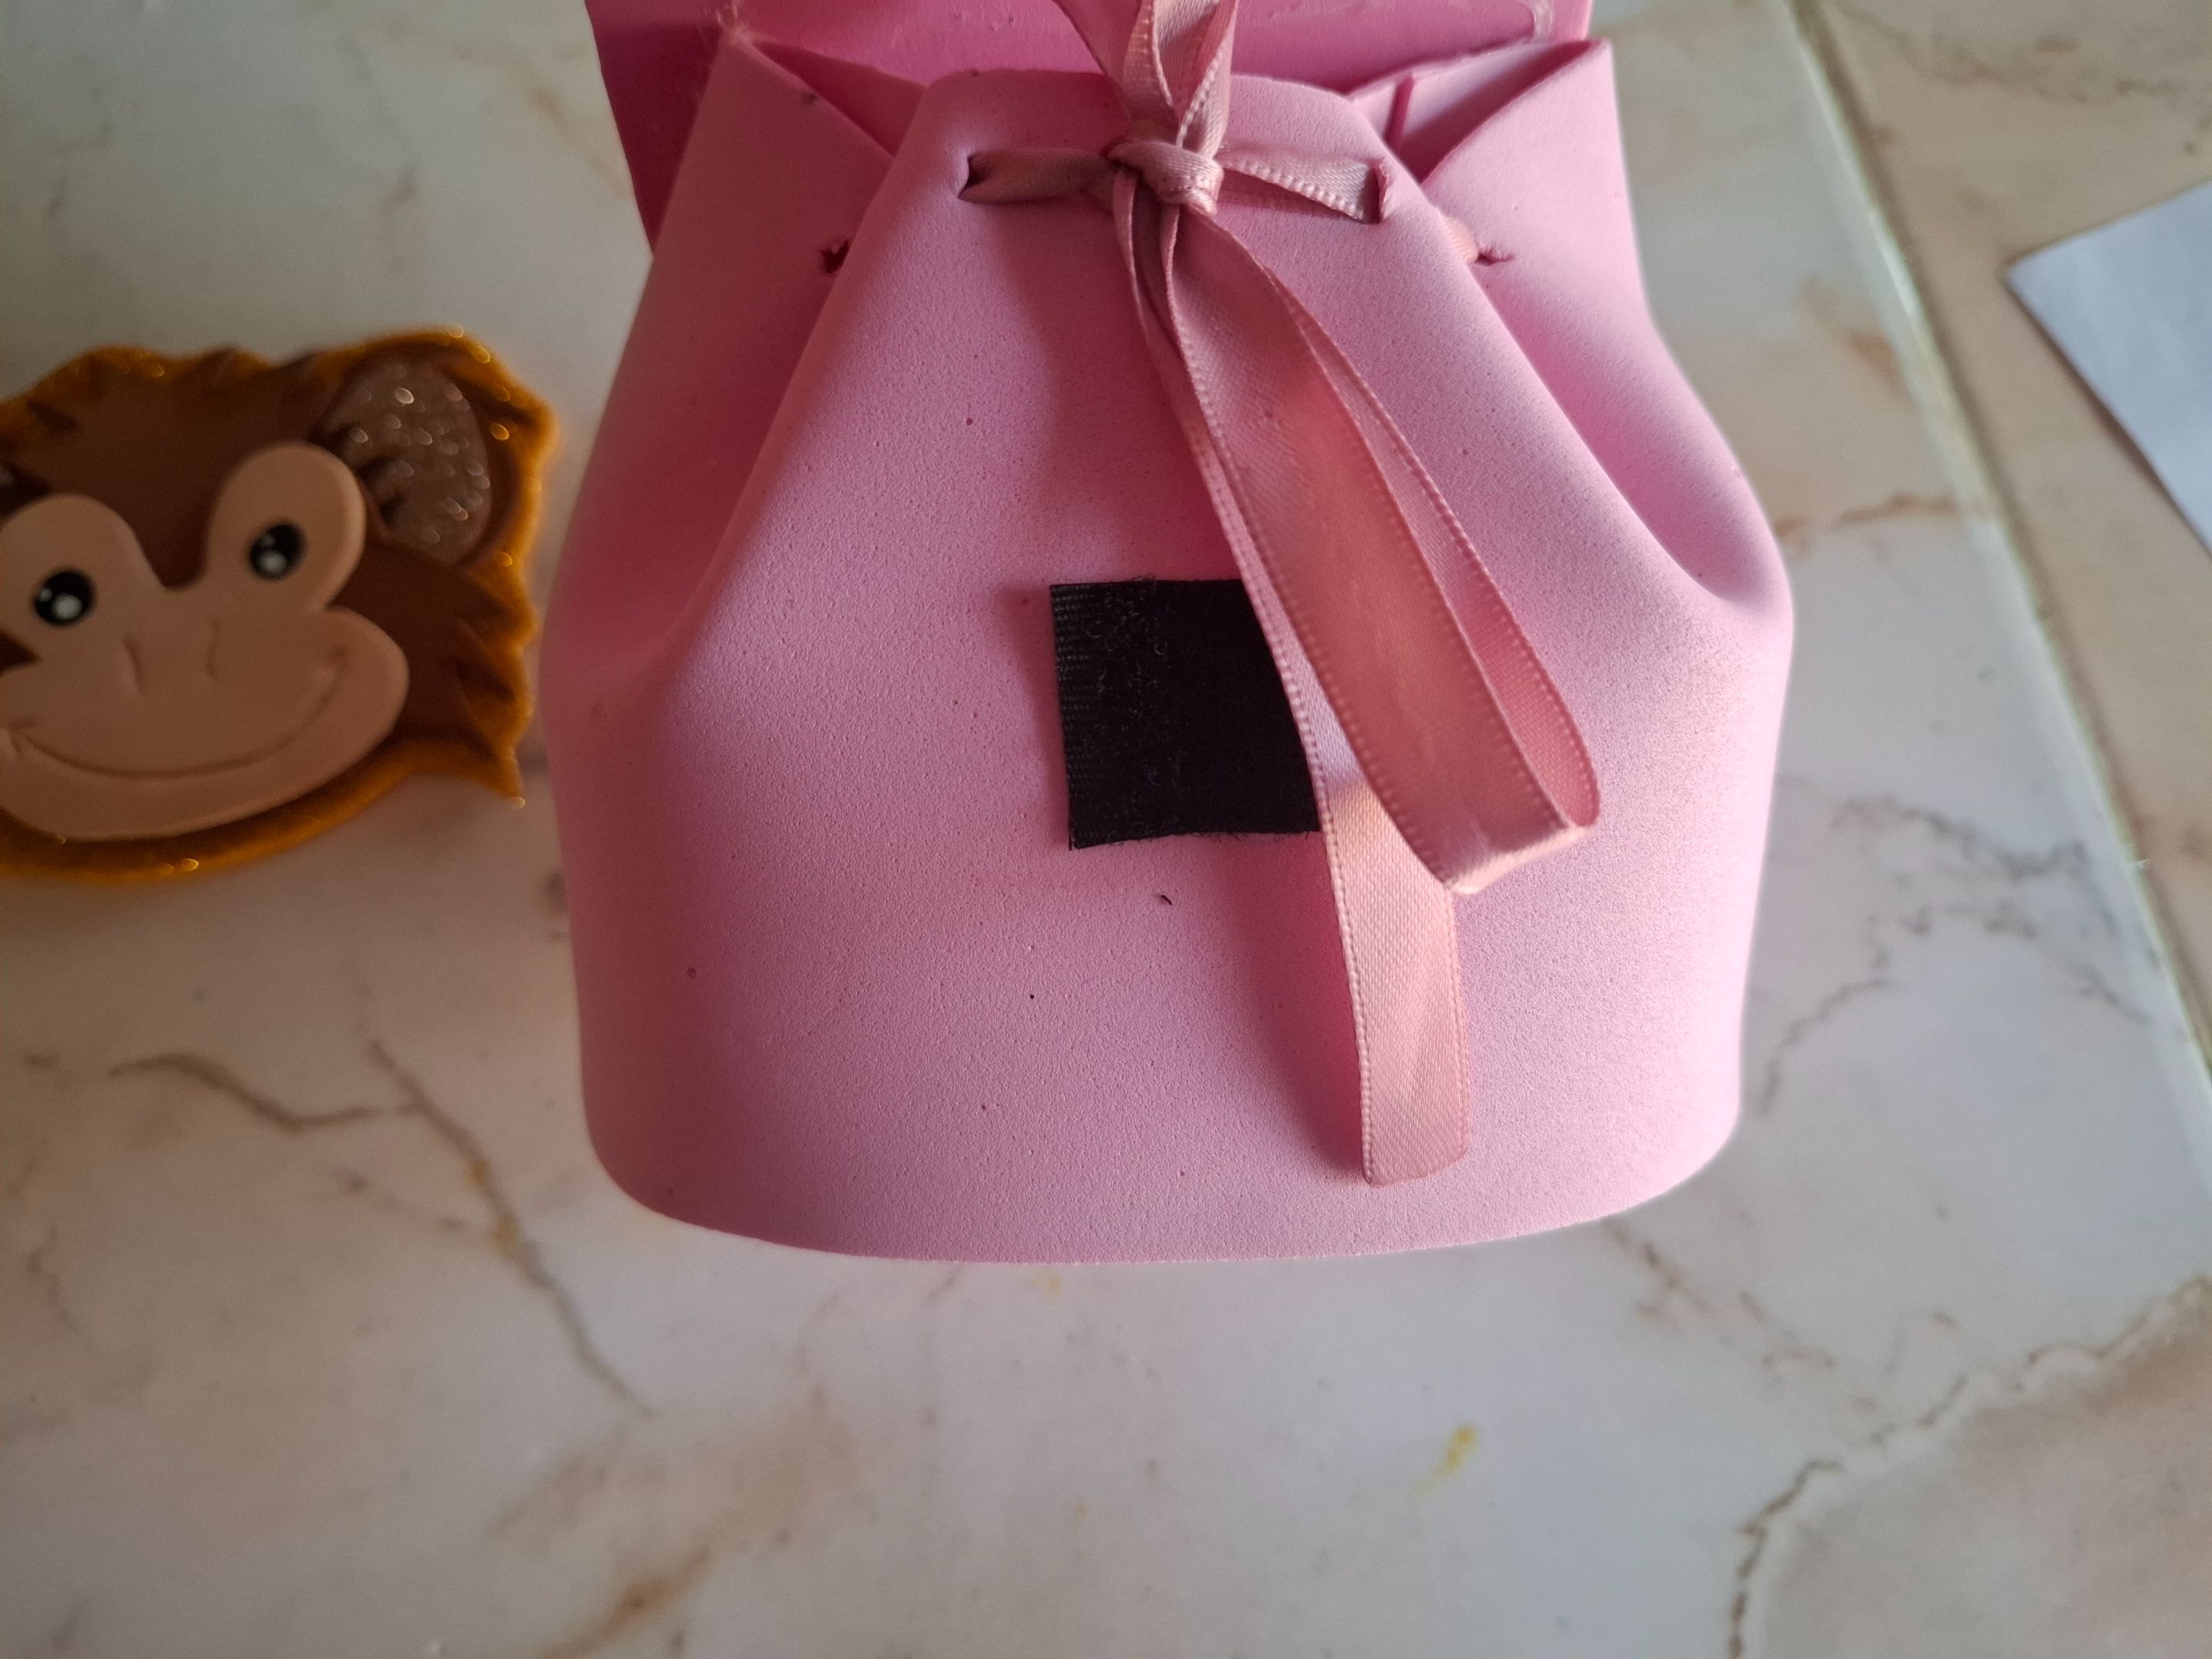
Ahora con un palillo voy a realizar agujeros en el borde del foami para colocar la cinta de color rosa esto nos sirve para cerrar el morral, luego de esto para la parte que cubre el morral que será el cuadro más pequeño voy a dar forma circular en el borde, al momento de ir amando las piezas ya podrás ir observando cómo va quedando, confía en el proceso.
Now with a toothpick I'm going to make holes in the edge of the foam to place the pink ribbon, this will help us close the backpack, after this for the part that covers the backpack, which will be the smallest square, I'm going to give it a circular shape on the edge, as you go kneading the pieces you'll be able to observe how it's going to turn out, trust the process.
 |
 |
|---|---|
 |
 |
|---|---|
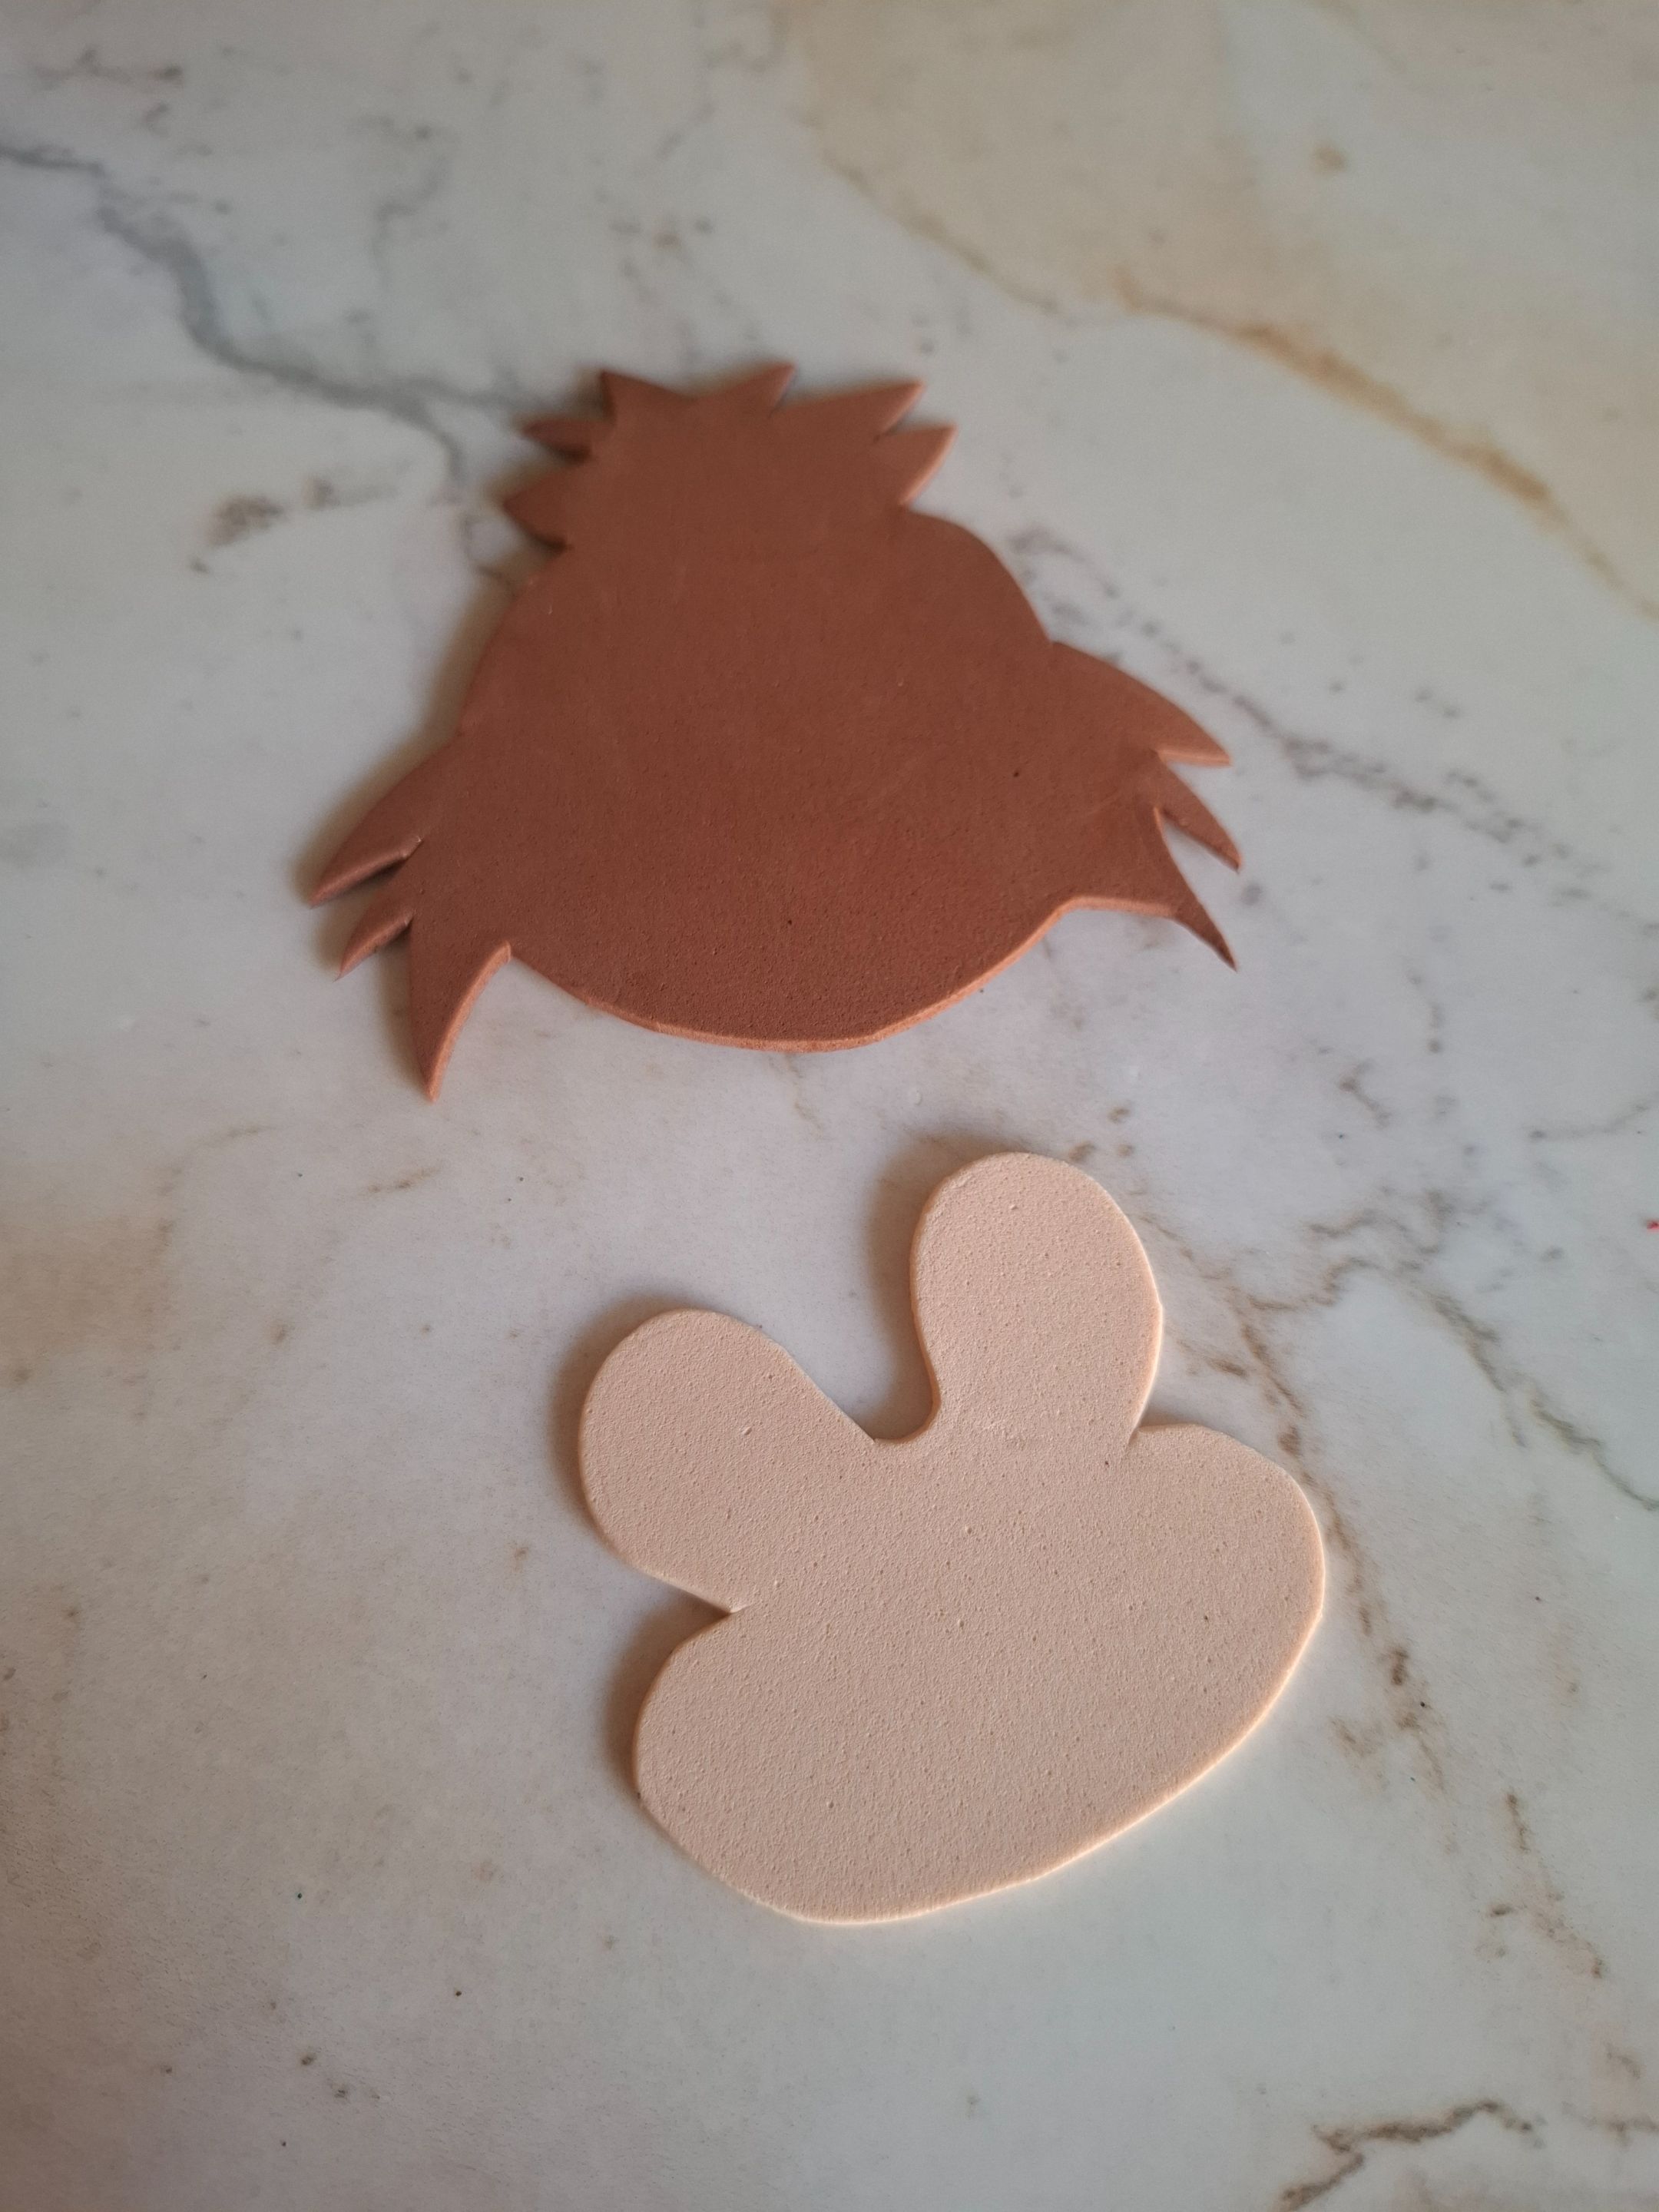
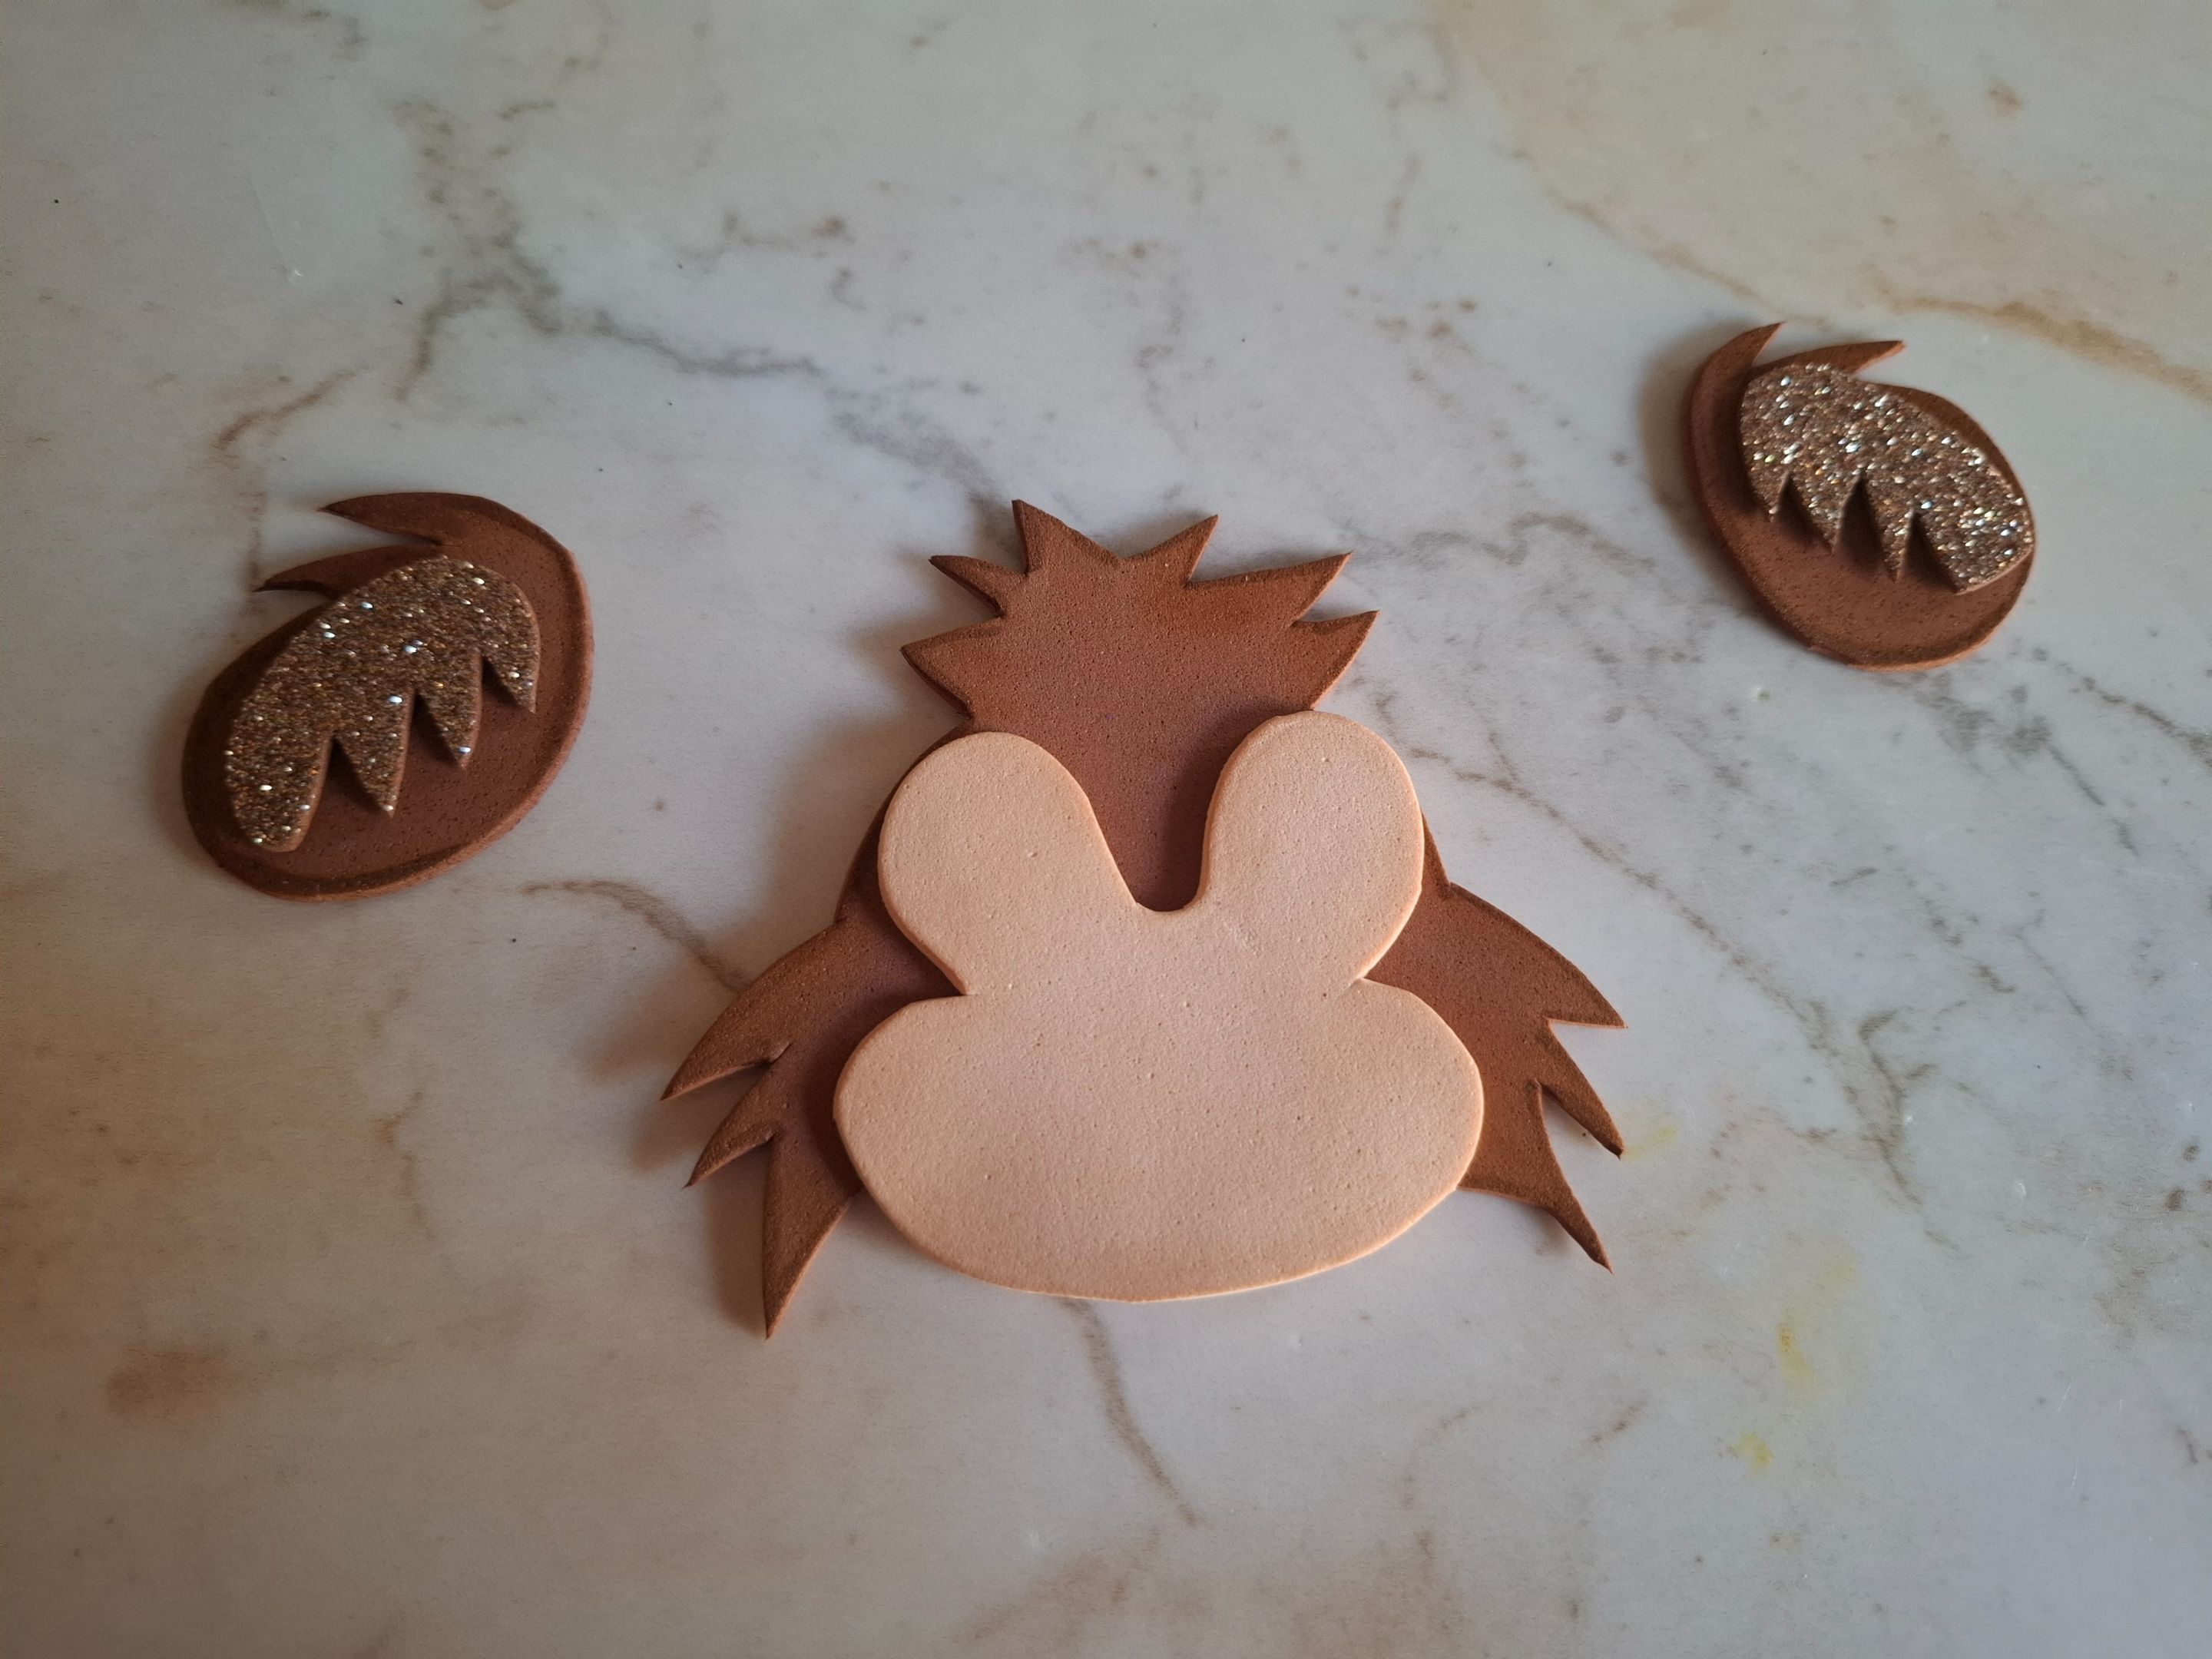
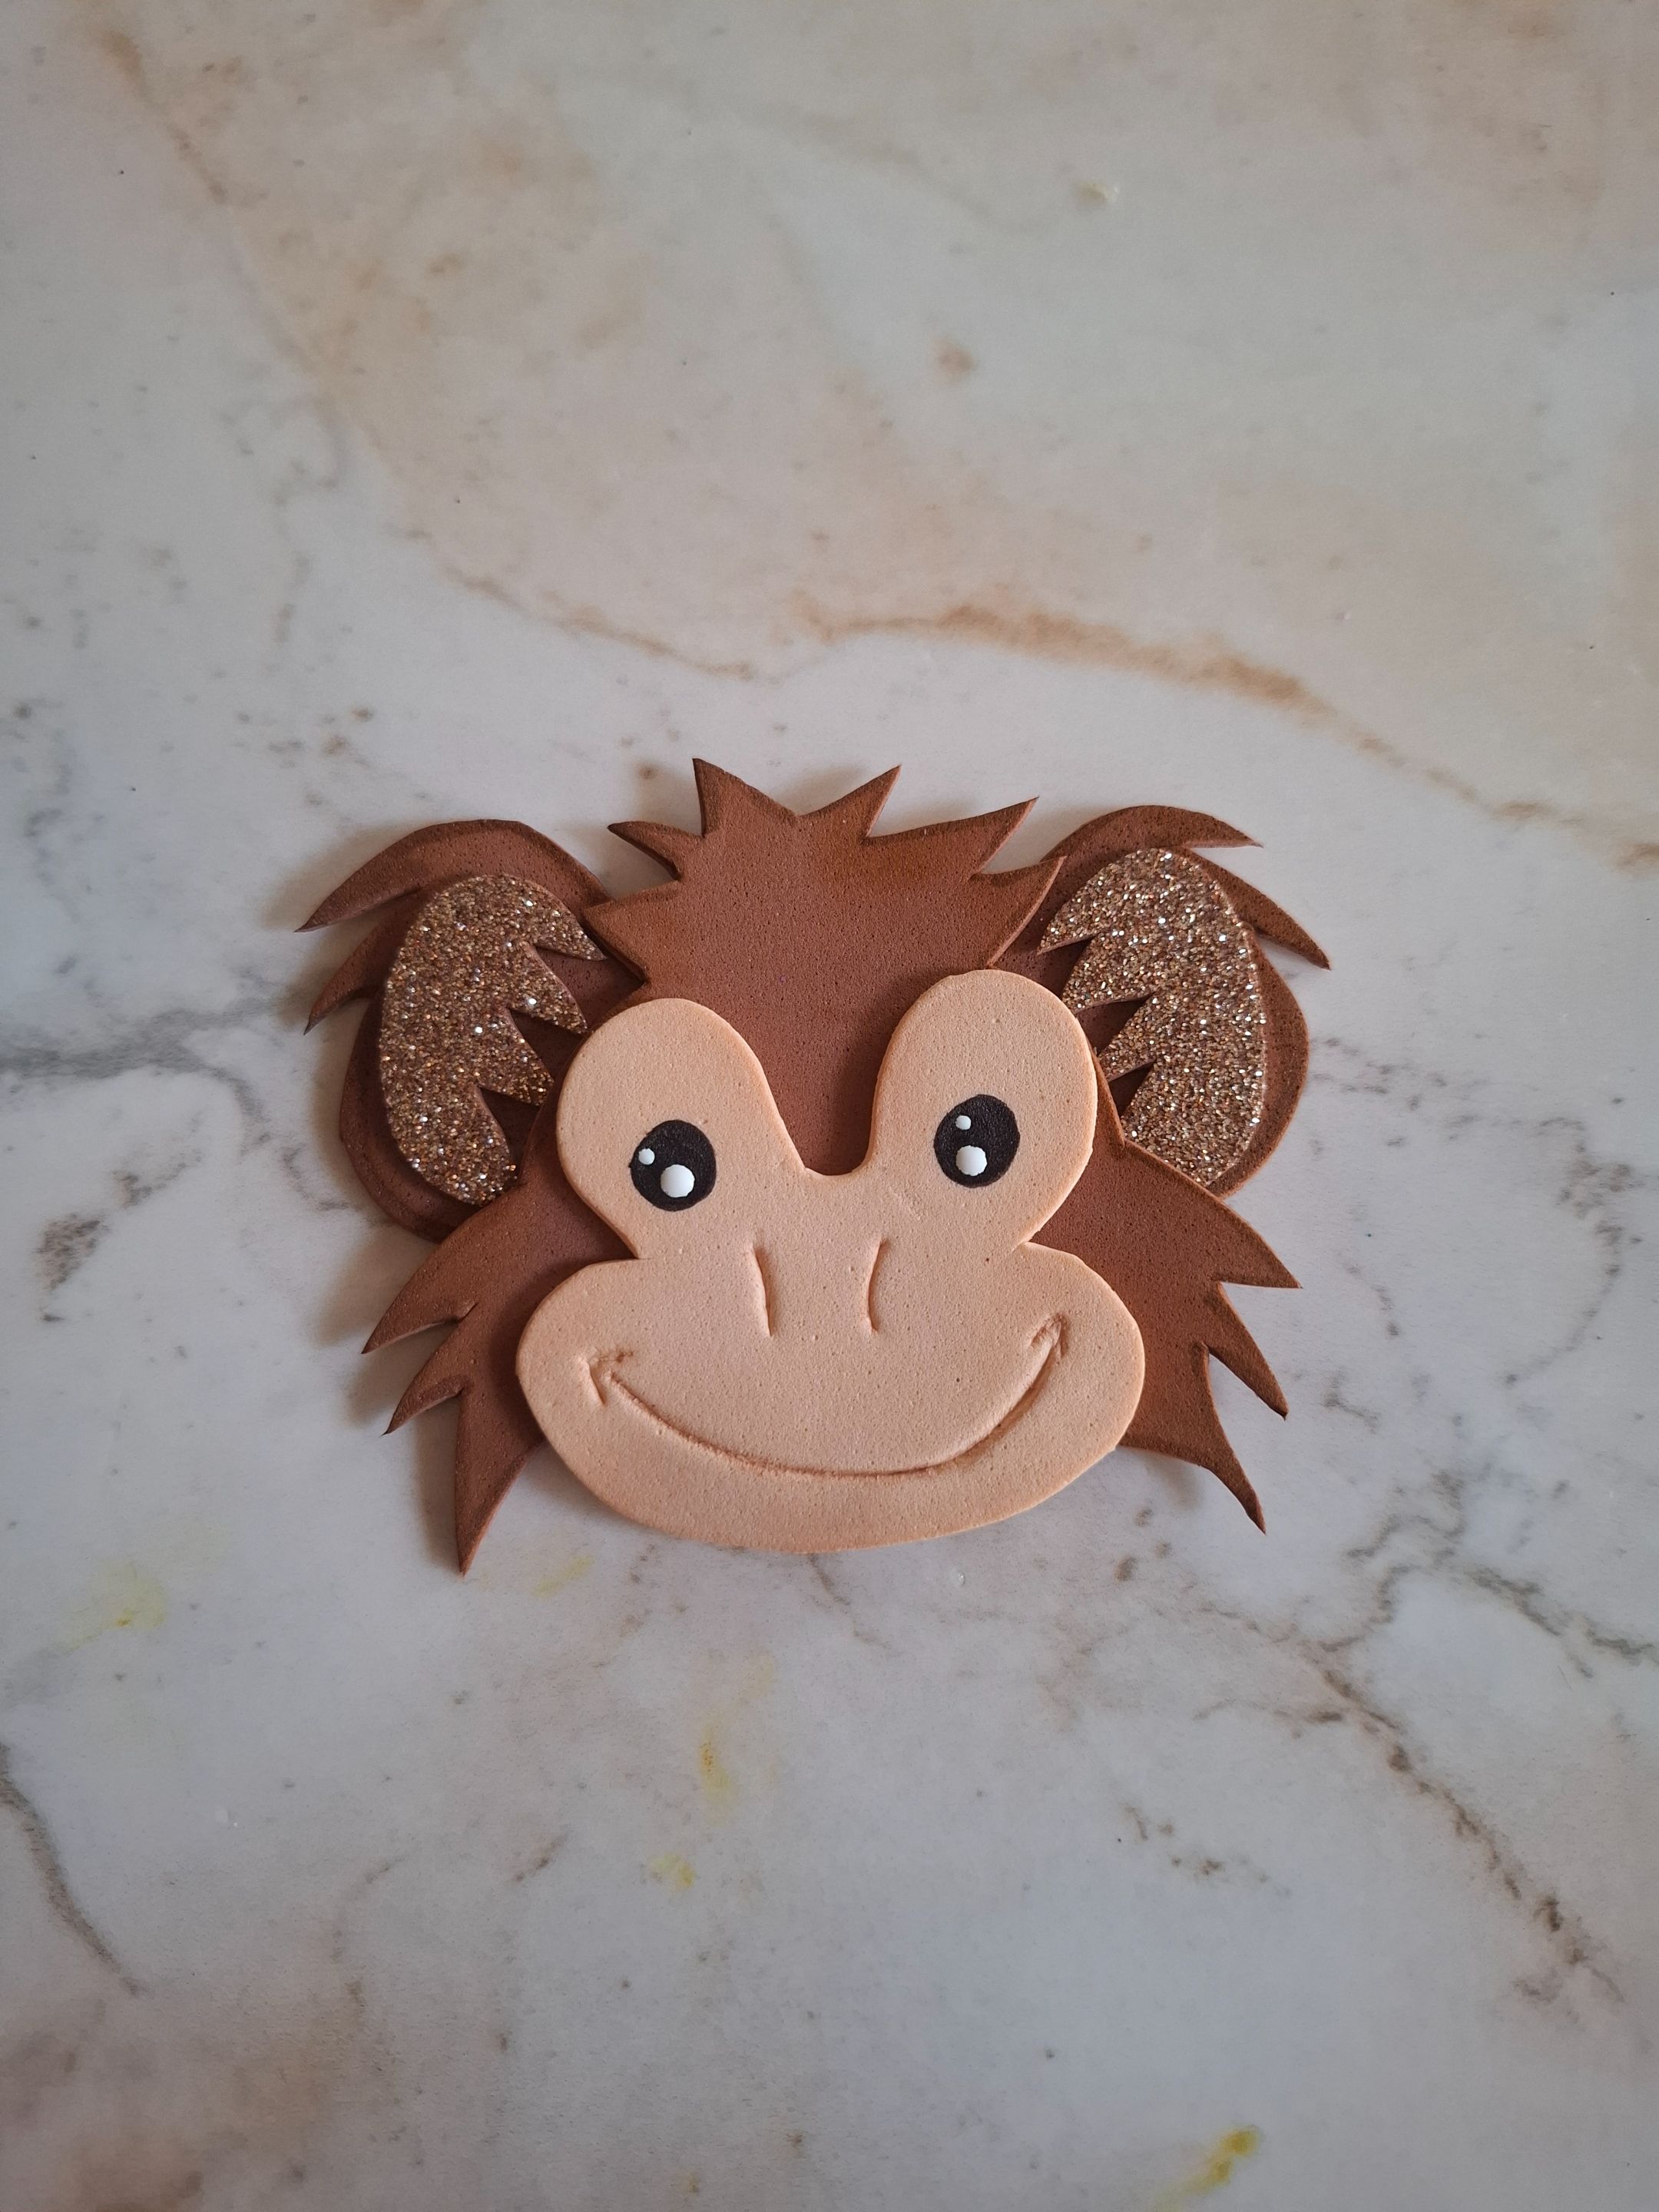
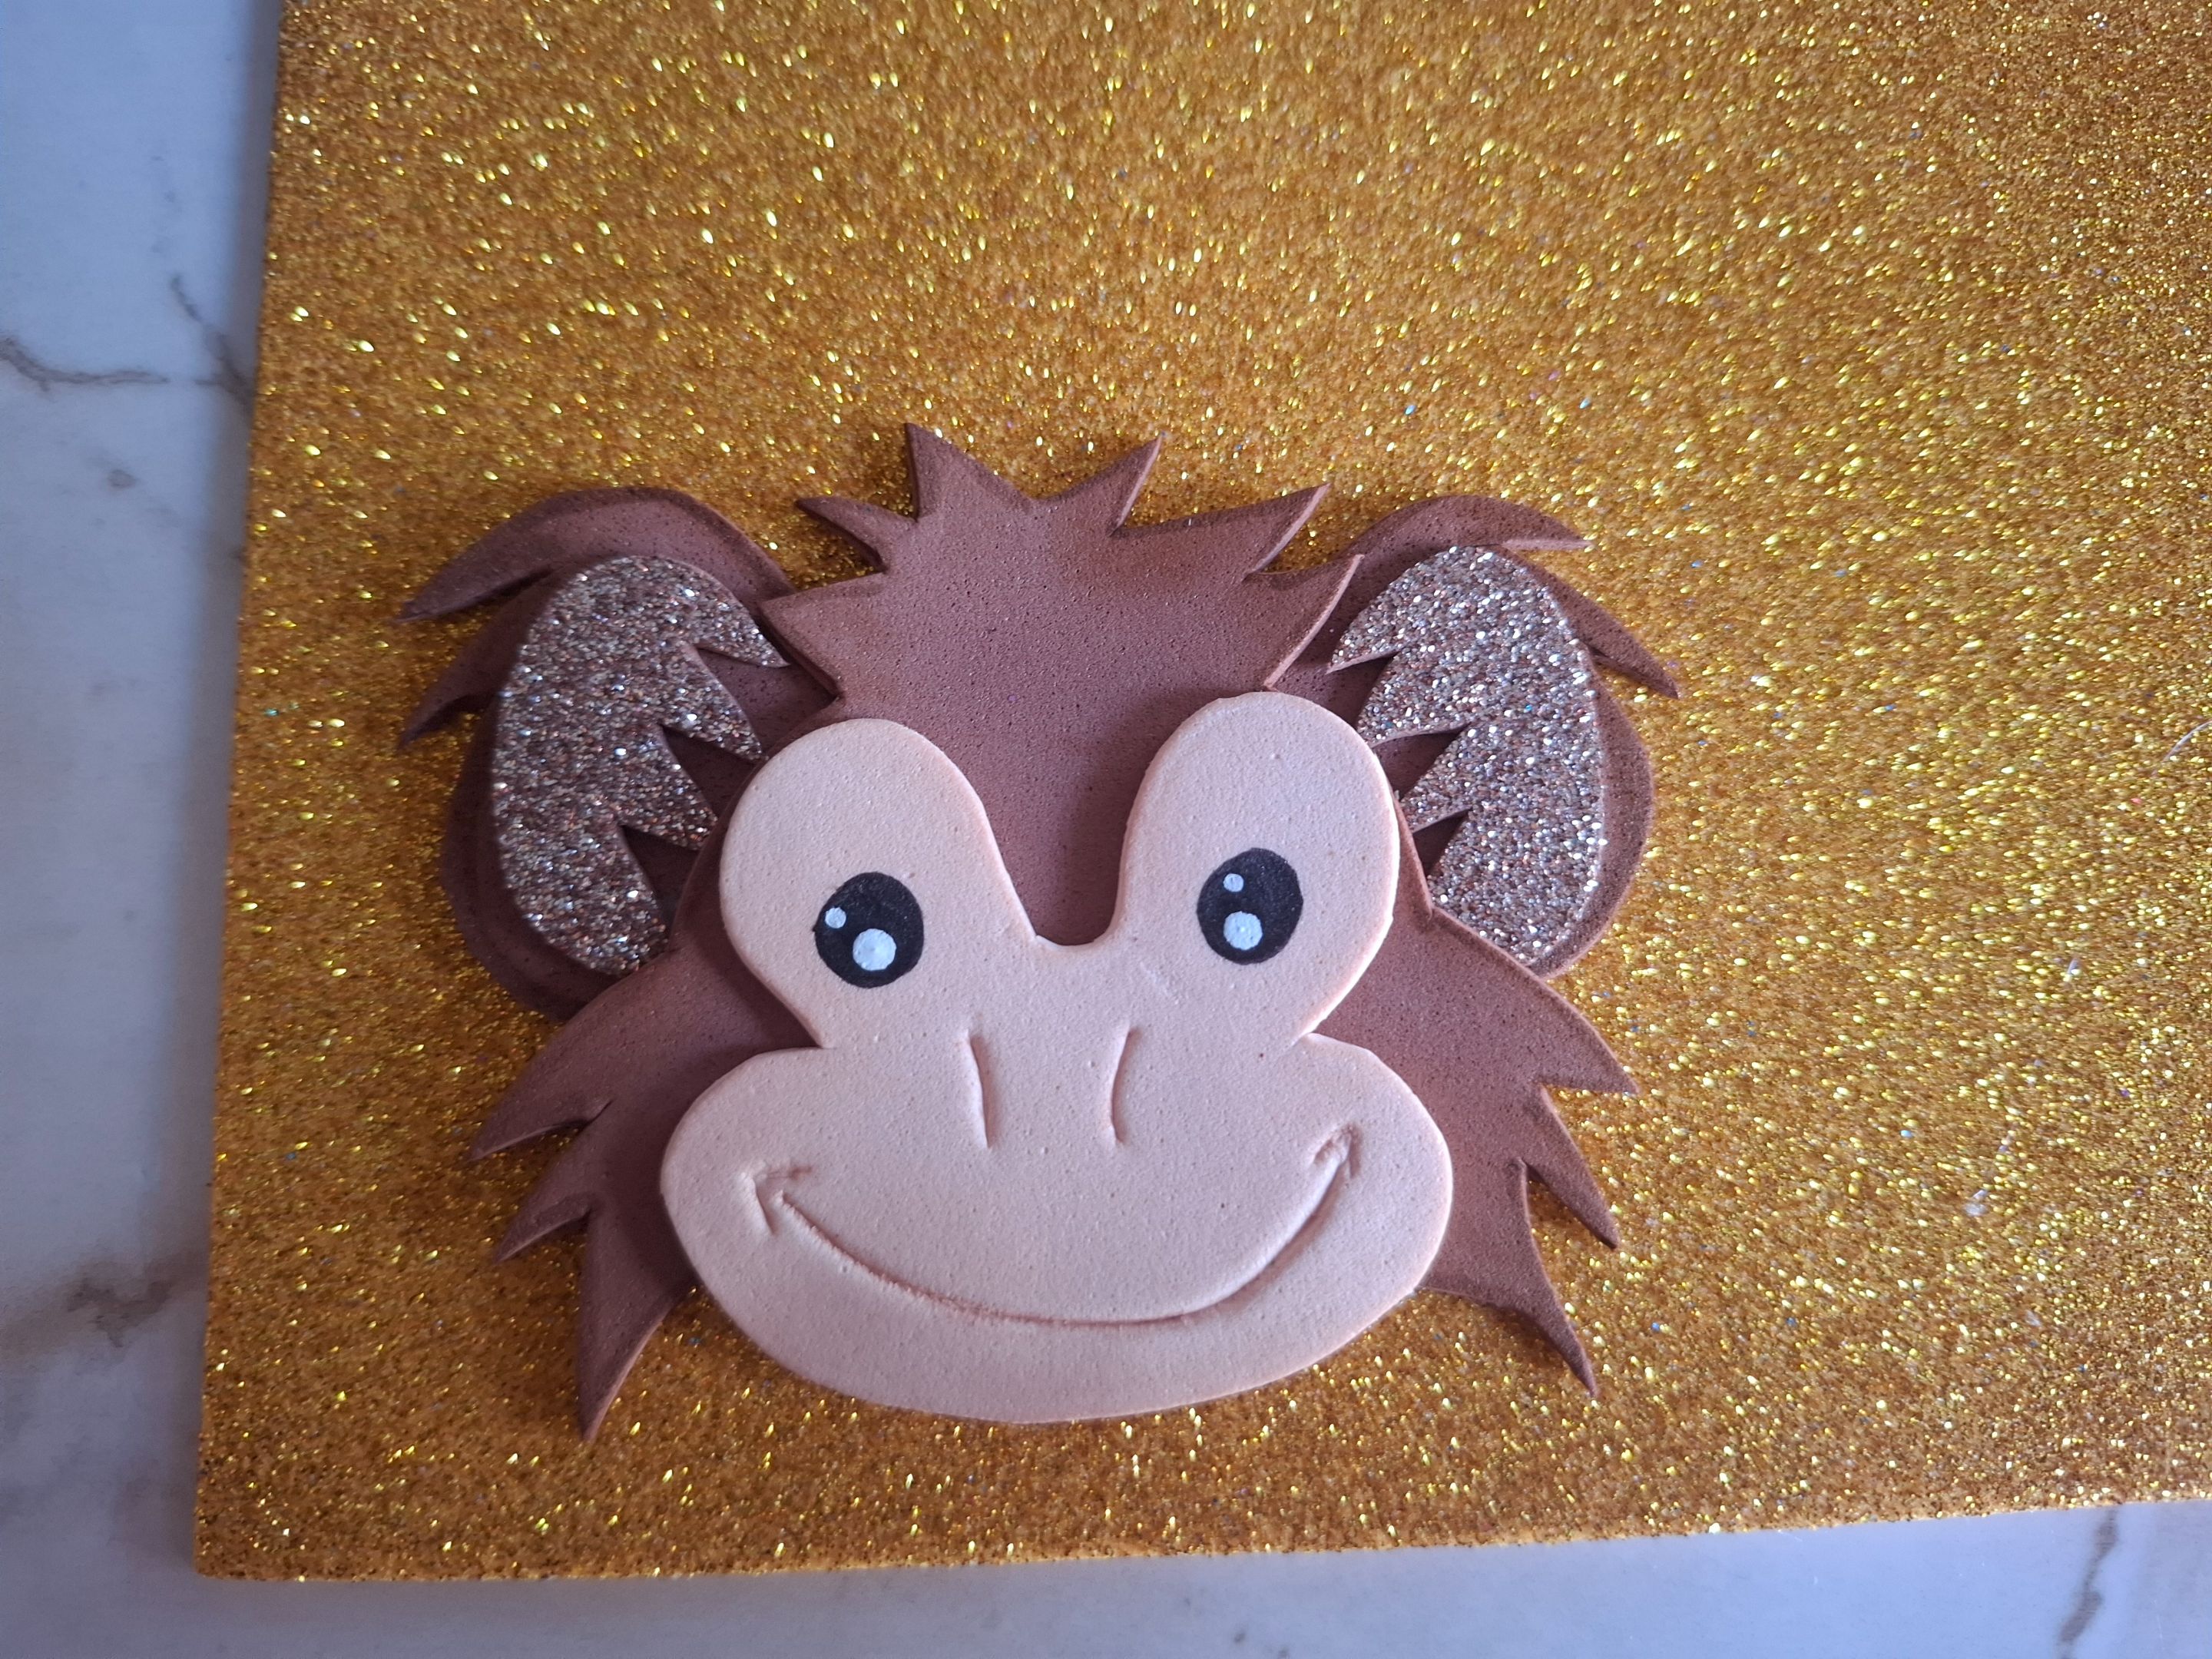
Luego de esto dibujamos en foami al mono de fuego, de tamaño mediano, primero la cara en color piel, sobre el coloqué sombra en tono beige claro, también realicé las otras partes en foami marrón oscuro, colocamos marcador en el bordel del foami y difuminamos. Para las orejas utilicé foami color marrón escarchado.
Con un palillo marcamos la nariz, boca allí mismo sombreamos un poco con el mismo palillo, también realicé sus ojitos con pintura negra y blanca, colocamos la figura sobre el foami dorado y cortamos de acuerdo a la figura. Ahora pegamos sobre el morral.
After this, we drew the medium-sized fire monkey on foam. First, the face was in skin tones. I shaded it in a light beige shade. I also drew the other parts in dark brown foam. I placed a marker on the edge of the foam and blended it. For the ears, I used frosted brown foam.
With a toothpick, we marked the nose and mouth, and shaded it a little with the same toothpick. I also made the eyes with black and white paint. We placed the figure on the gold foam and cut it out according to the shape. Now, we glue it onto the backpack.
 |
 |
 |
|---|---|---|
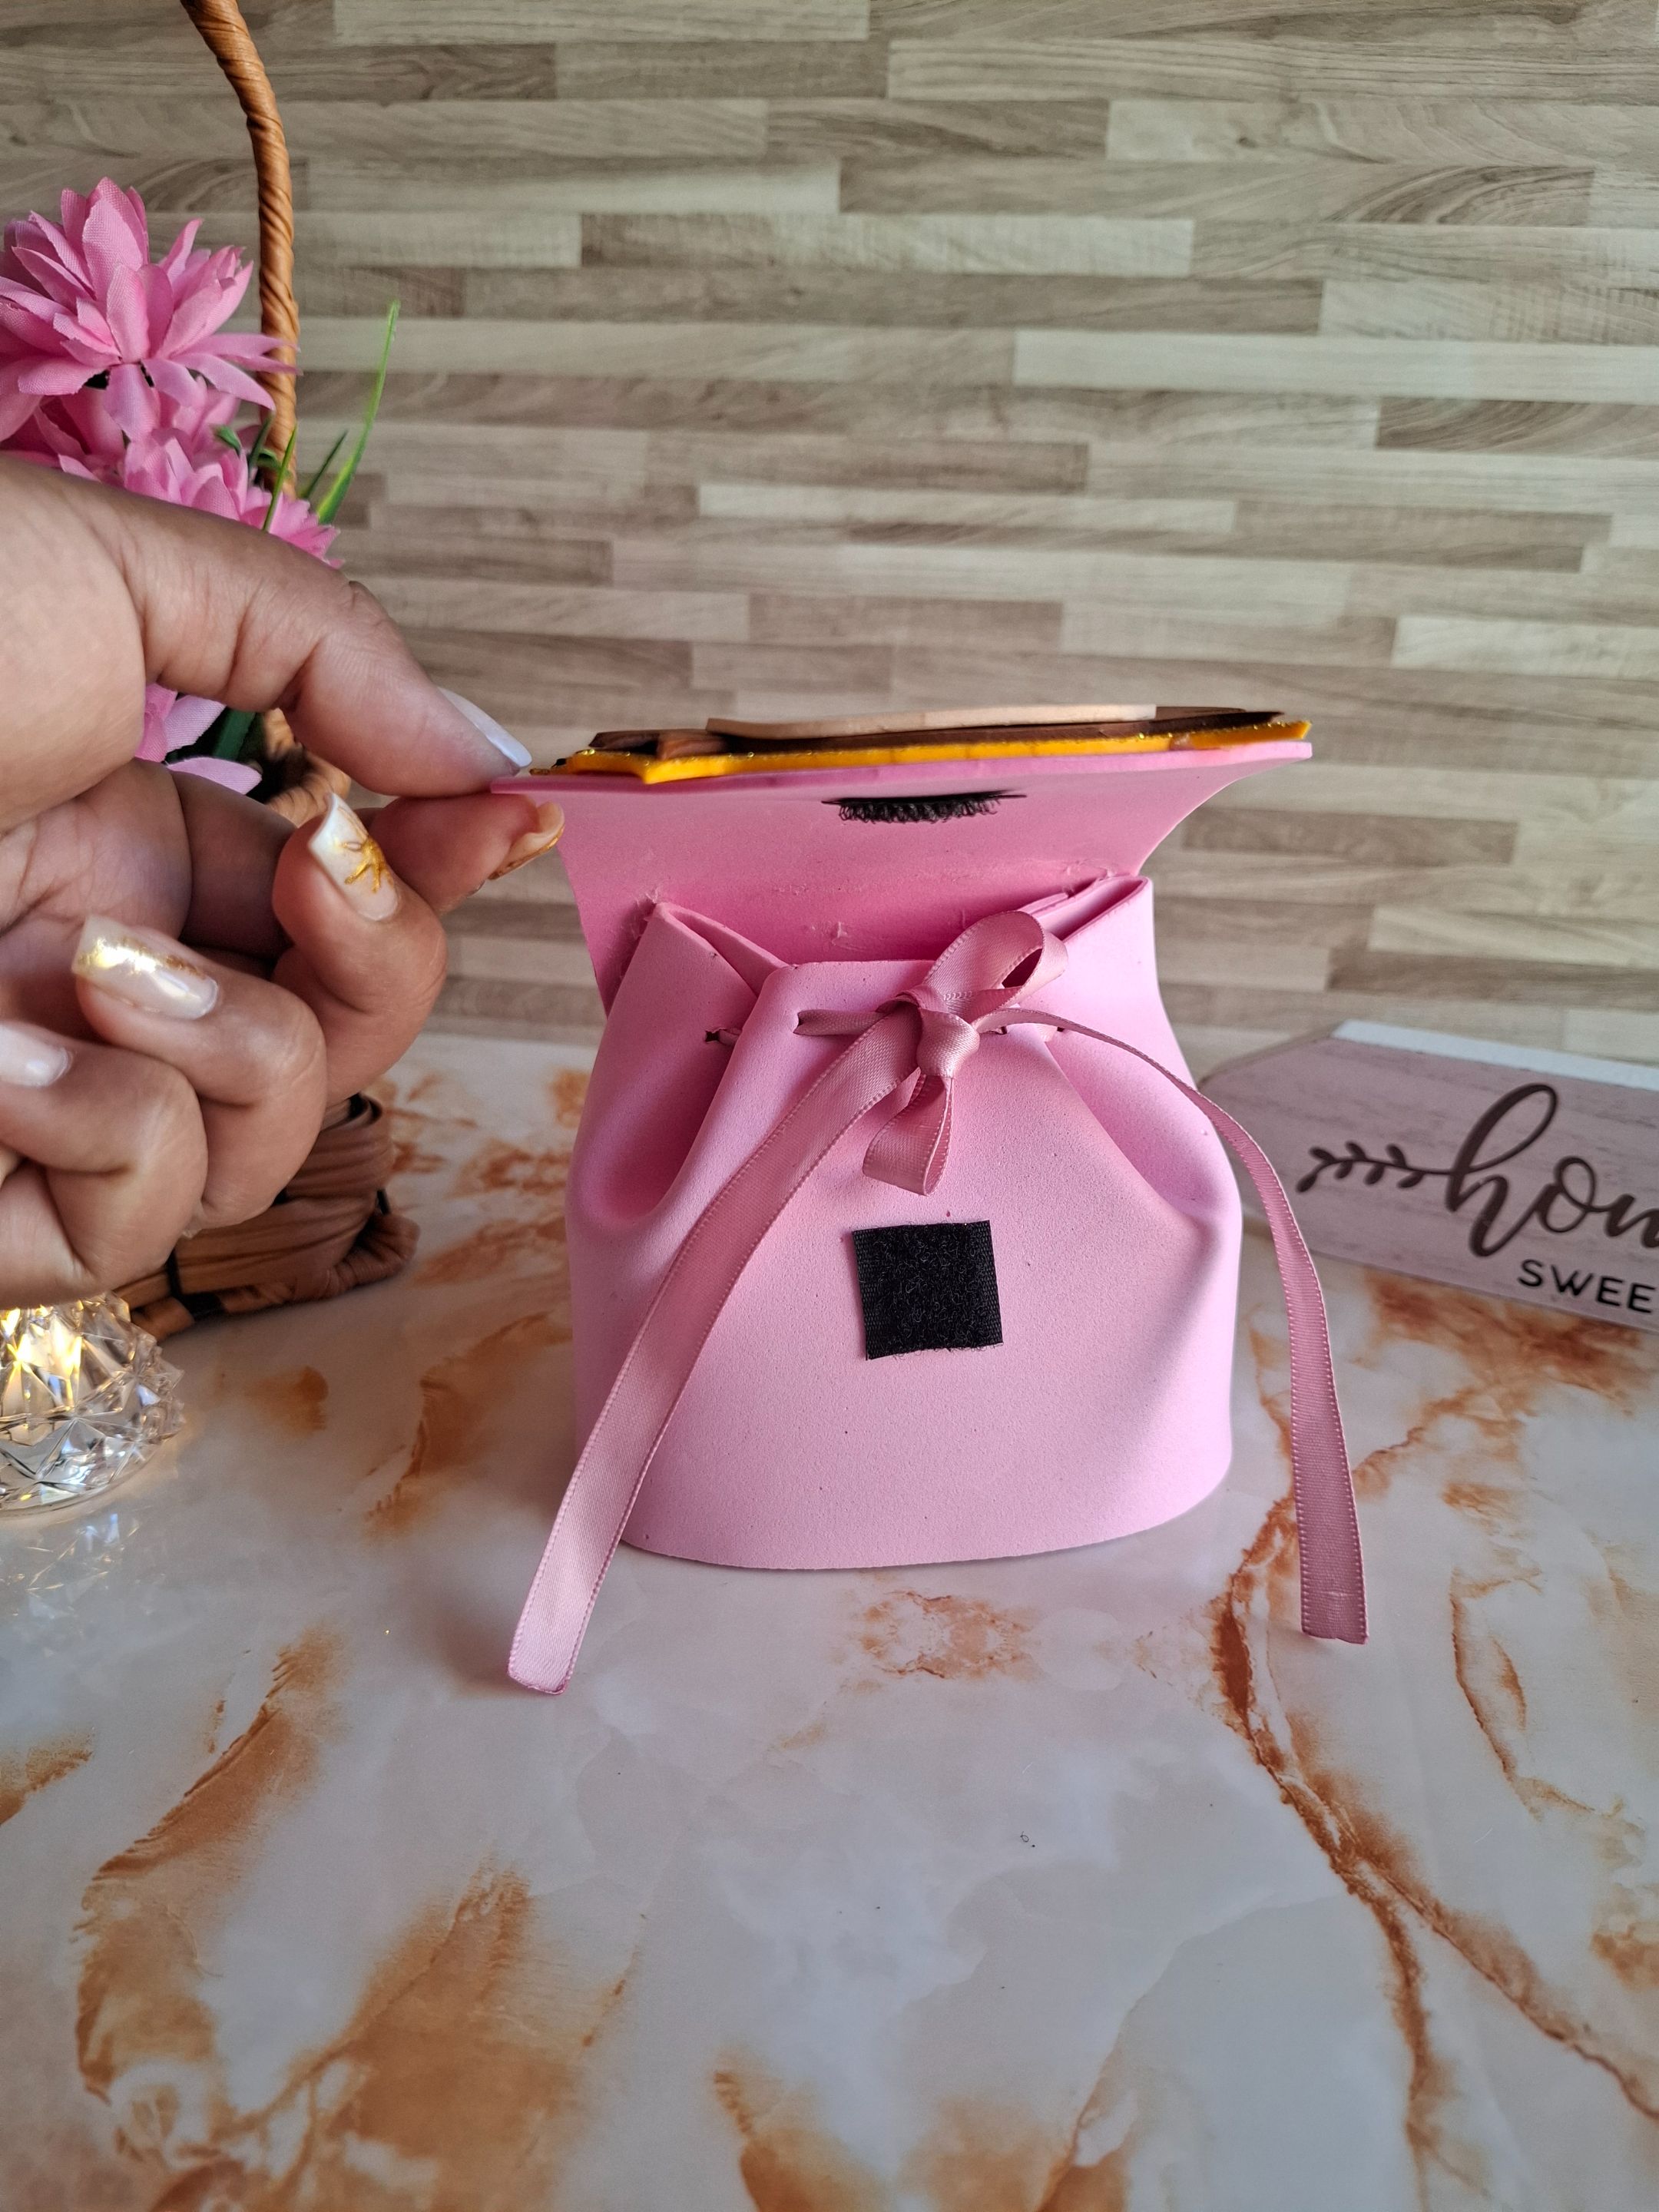
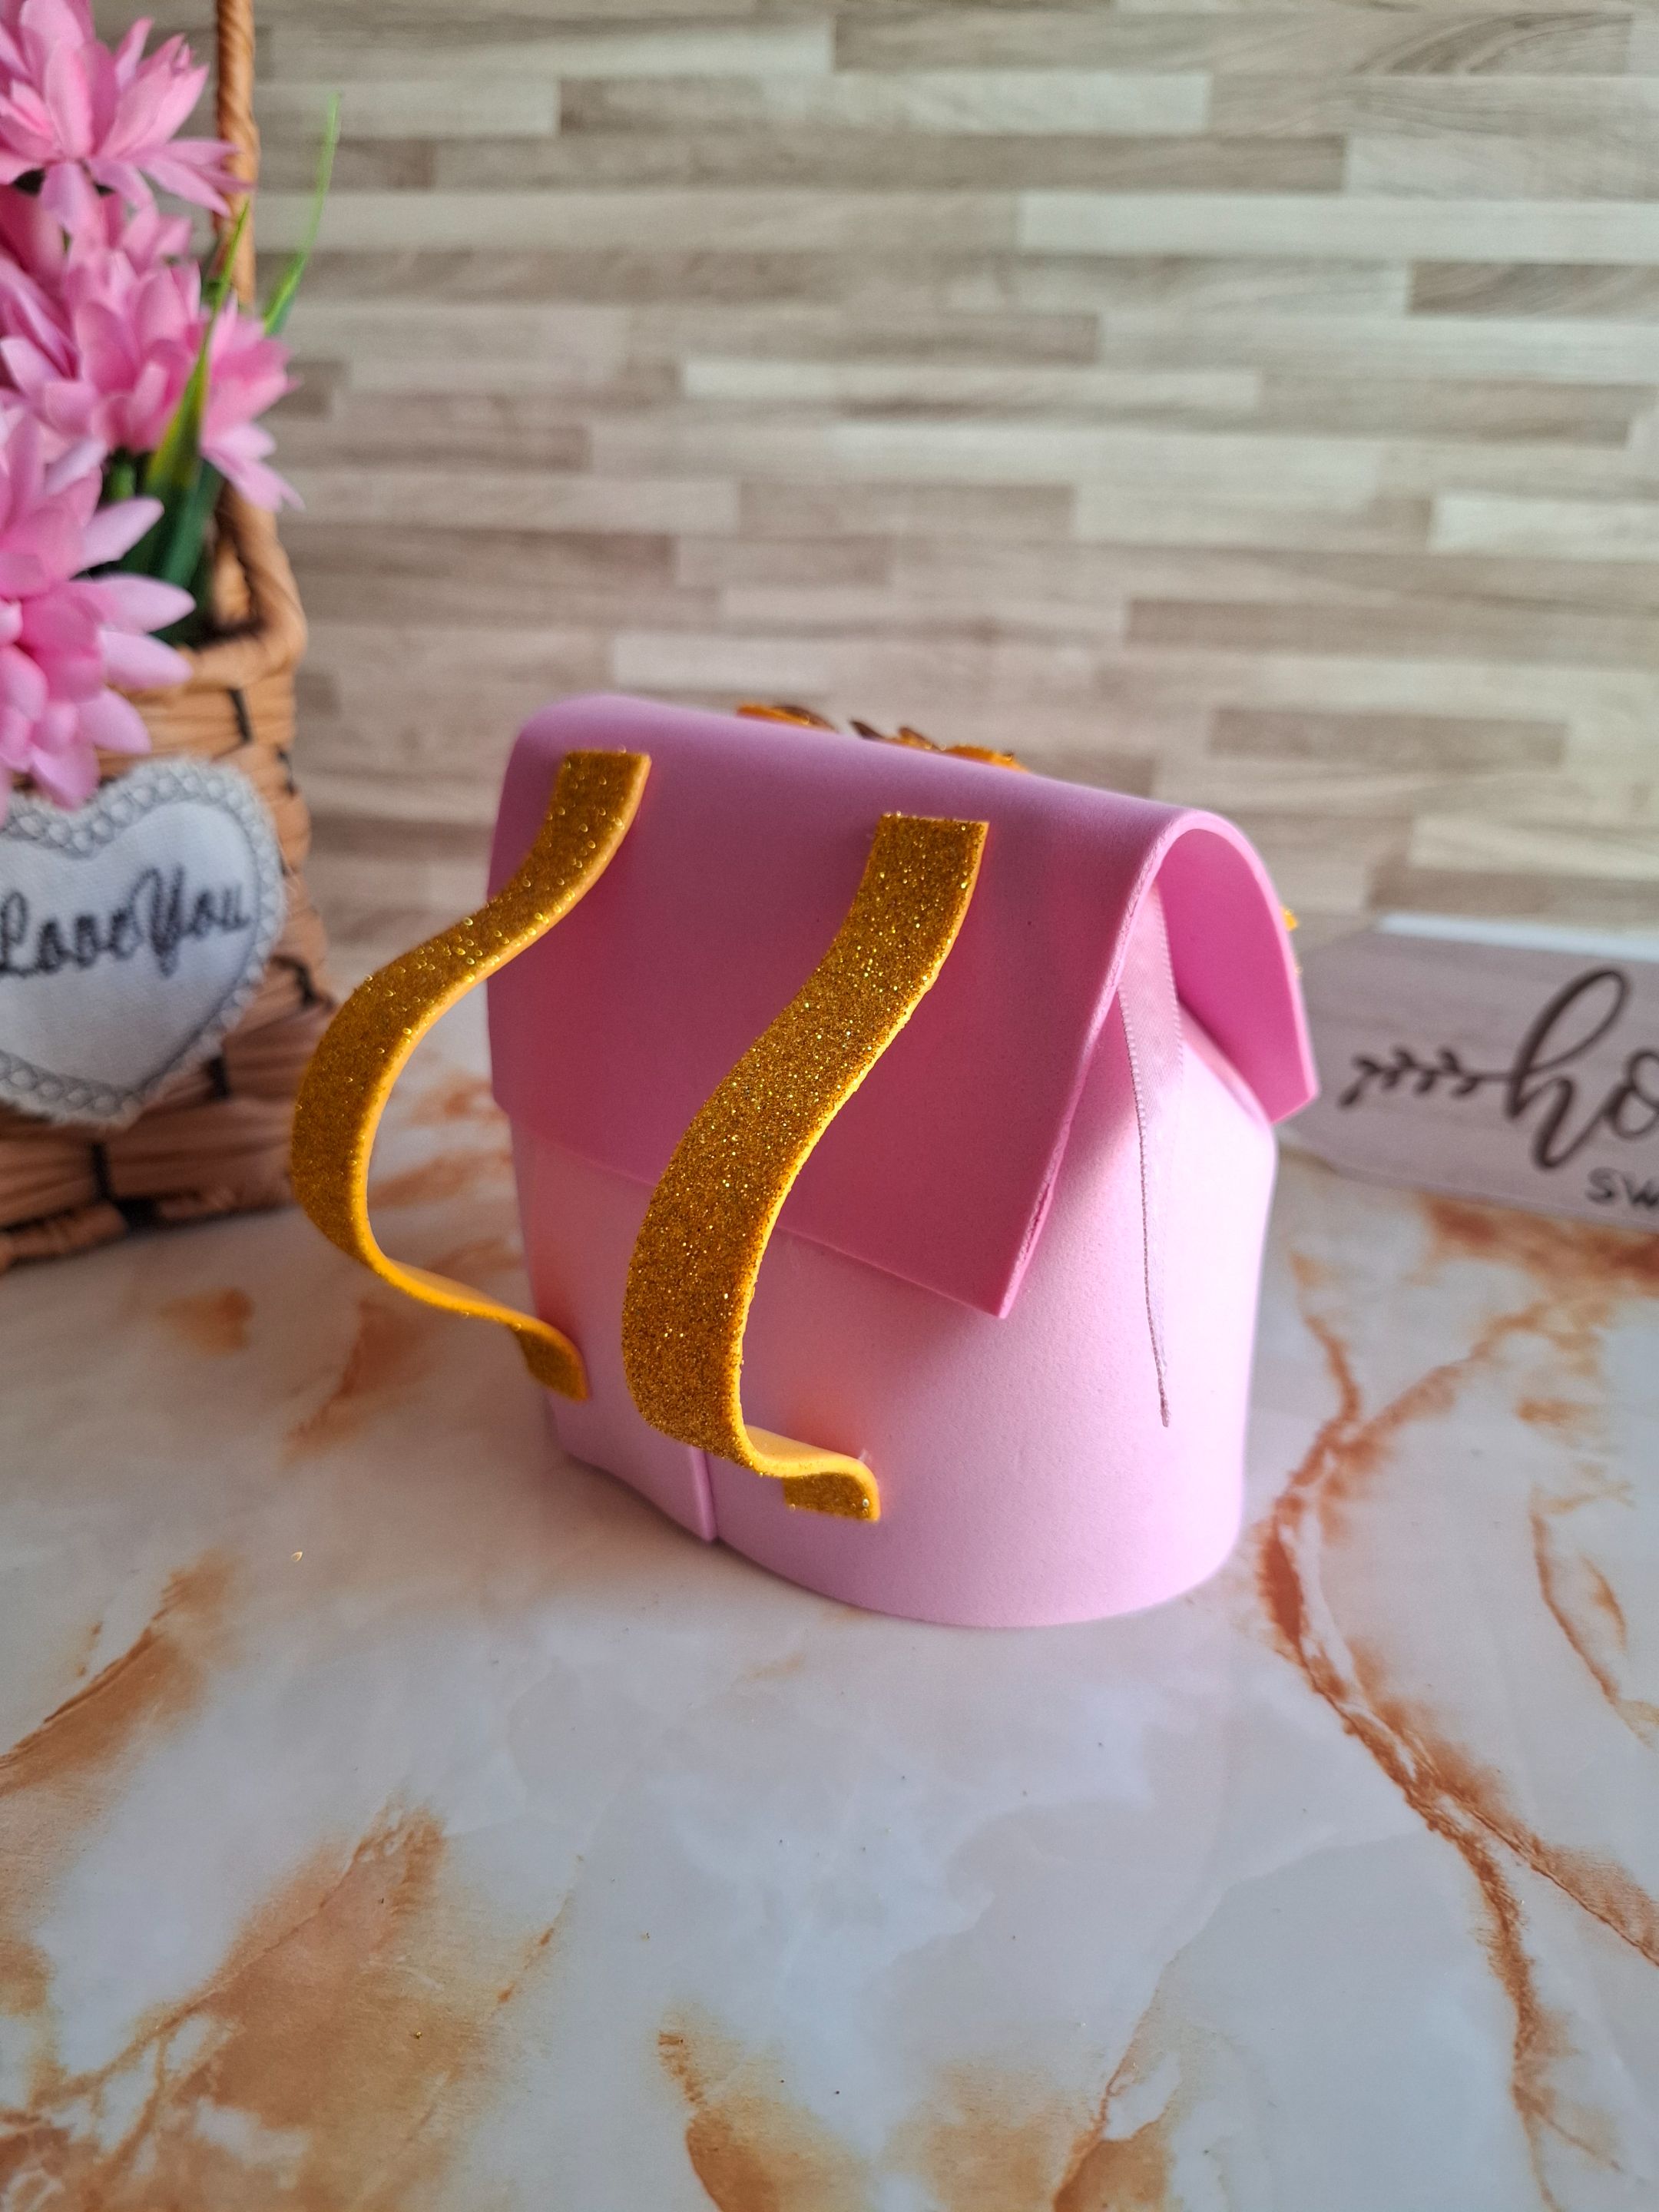
Para finalizar colocamos el cierre mágico, y en la parte trasera las correas del morral utilizando foami dorado, y de esta forma terminamos esta idea que además de creativa combina muy bien con el mono de fuego. Puedes personalizar de acuerdo al color de tu preferencia el rosa es mi favorito así que por eso lo elegí.
To finish, we added the magic closure, and on the back, we used gold foam to secure the backpack straps. This completes this idea, which is not only creative but also pairs well with the fire jumpsuit. You can customize it to your preferred color; pink is my favorite, so that's why I chose it.
 |
 |
 |
|---|---|---|
Espero les haya gustado el resultado estoy muy agradecida por el apoyo brindando tanto de los miembros de la comunidad DiyHub como de Splinterlands, también gracias por visitar ésta publicación, nos vemos en una próxima oportunidad con más ideas creativas inspiradas en las cartas del juego.
I hope you liked the result. I am very grateful for the support provided by both the members of the DiyHub community and Splinterlands. Also, thank you for visiting this post. See you next time with more creative ideas inspired by the game's cards.
Más del resultado final:
More of the final result: