Muy felíz noche querida comunidad Jewelry, saludos y bendiciones para todos, espero se encuentre muy bien que hayan tenido excelente miércoles, hoy un día más que agradecer de nuevas oportunidades de bendiciones me encuentro junto a ustedes en esta oportunidad para compartir unos bellos accesorios para lucir a diario o en una ocasión especial.
Very happy evening, dear Jewelry community, greetings and blessings to all. I hope you are doing well and that you had a great Wednesday. Today is another day to be thankful for, with new opportunities for blessings. I am with you on this occasion to share some beautiful accessories to wear every day or on a special occasion.
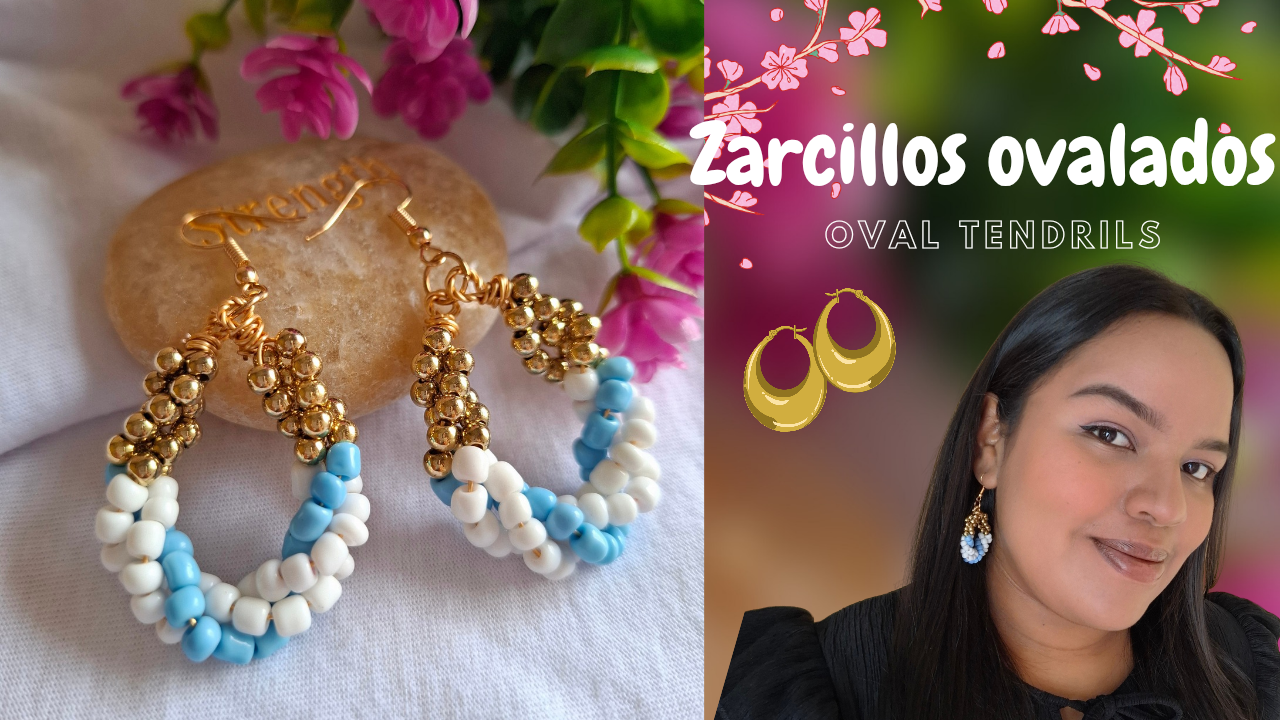
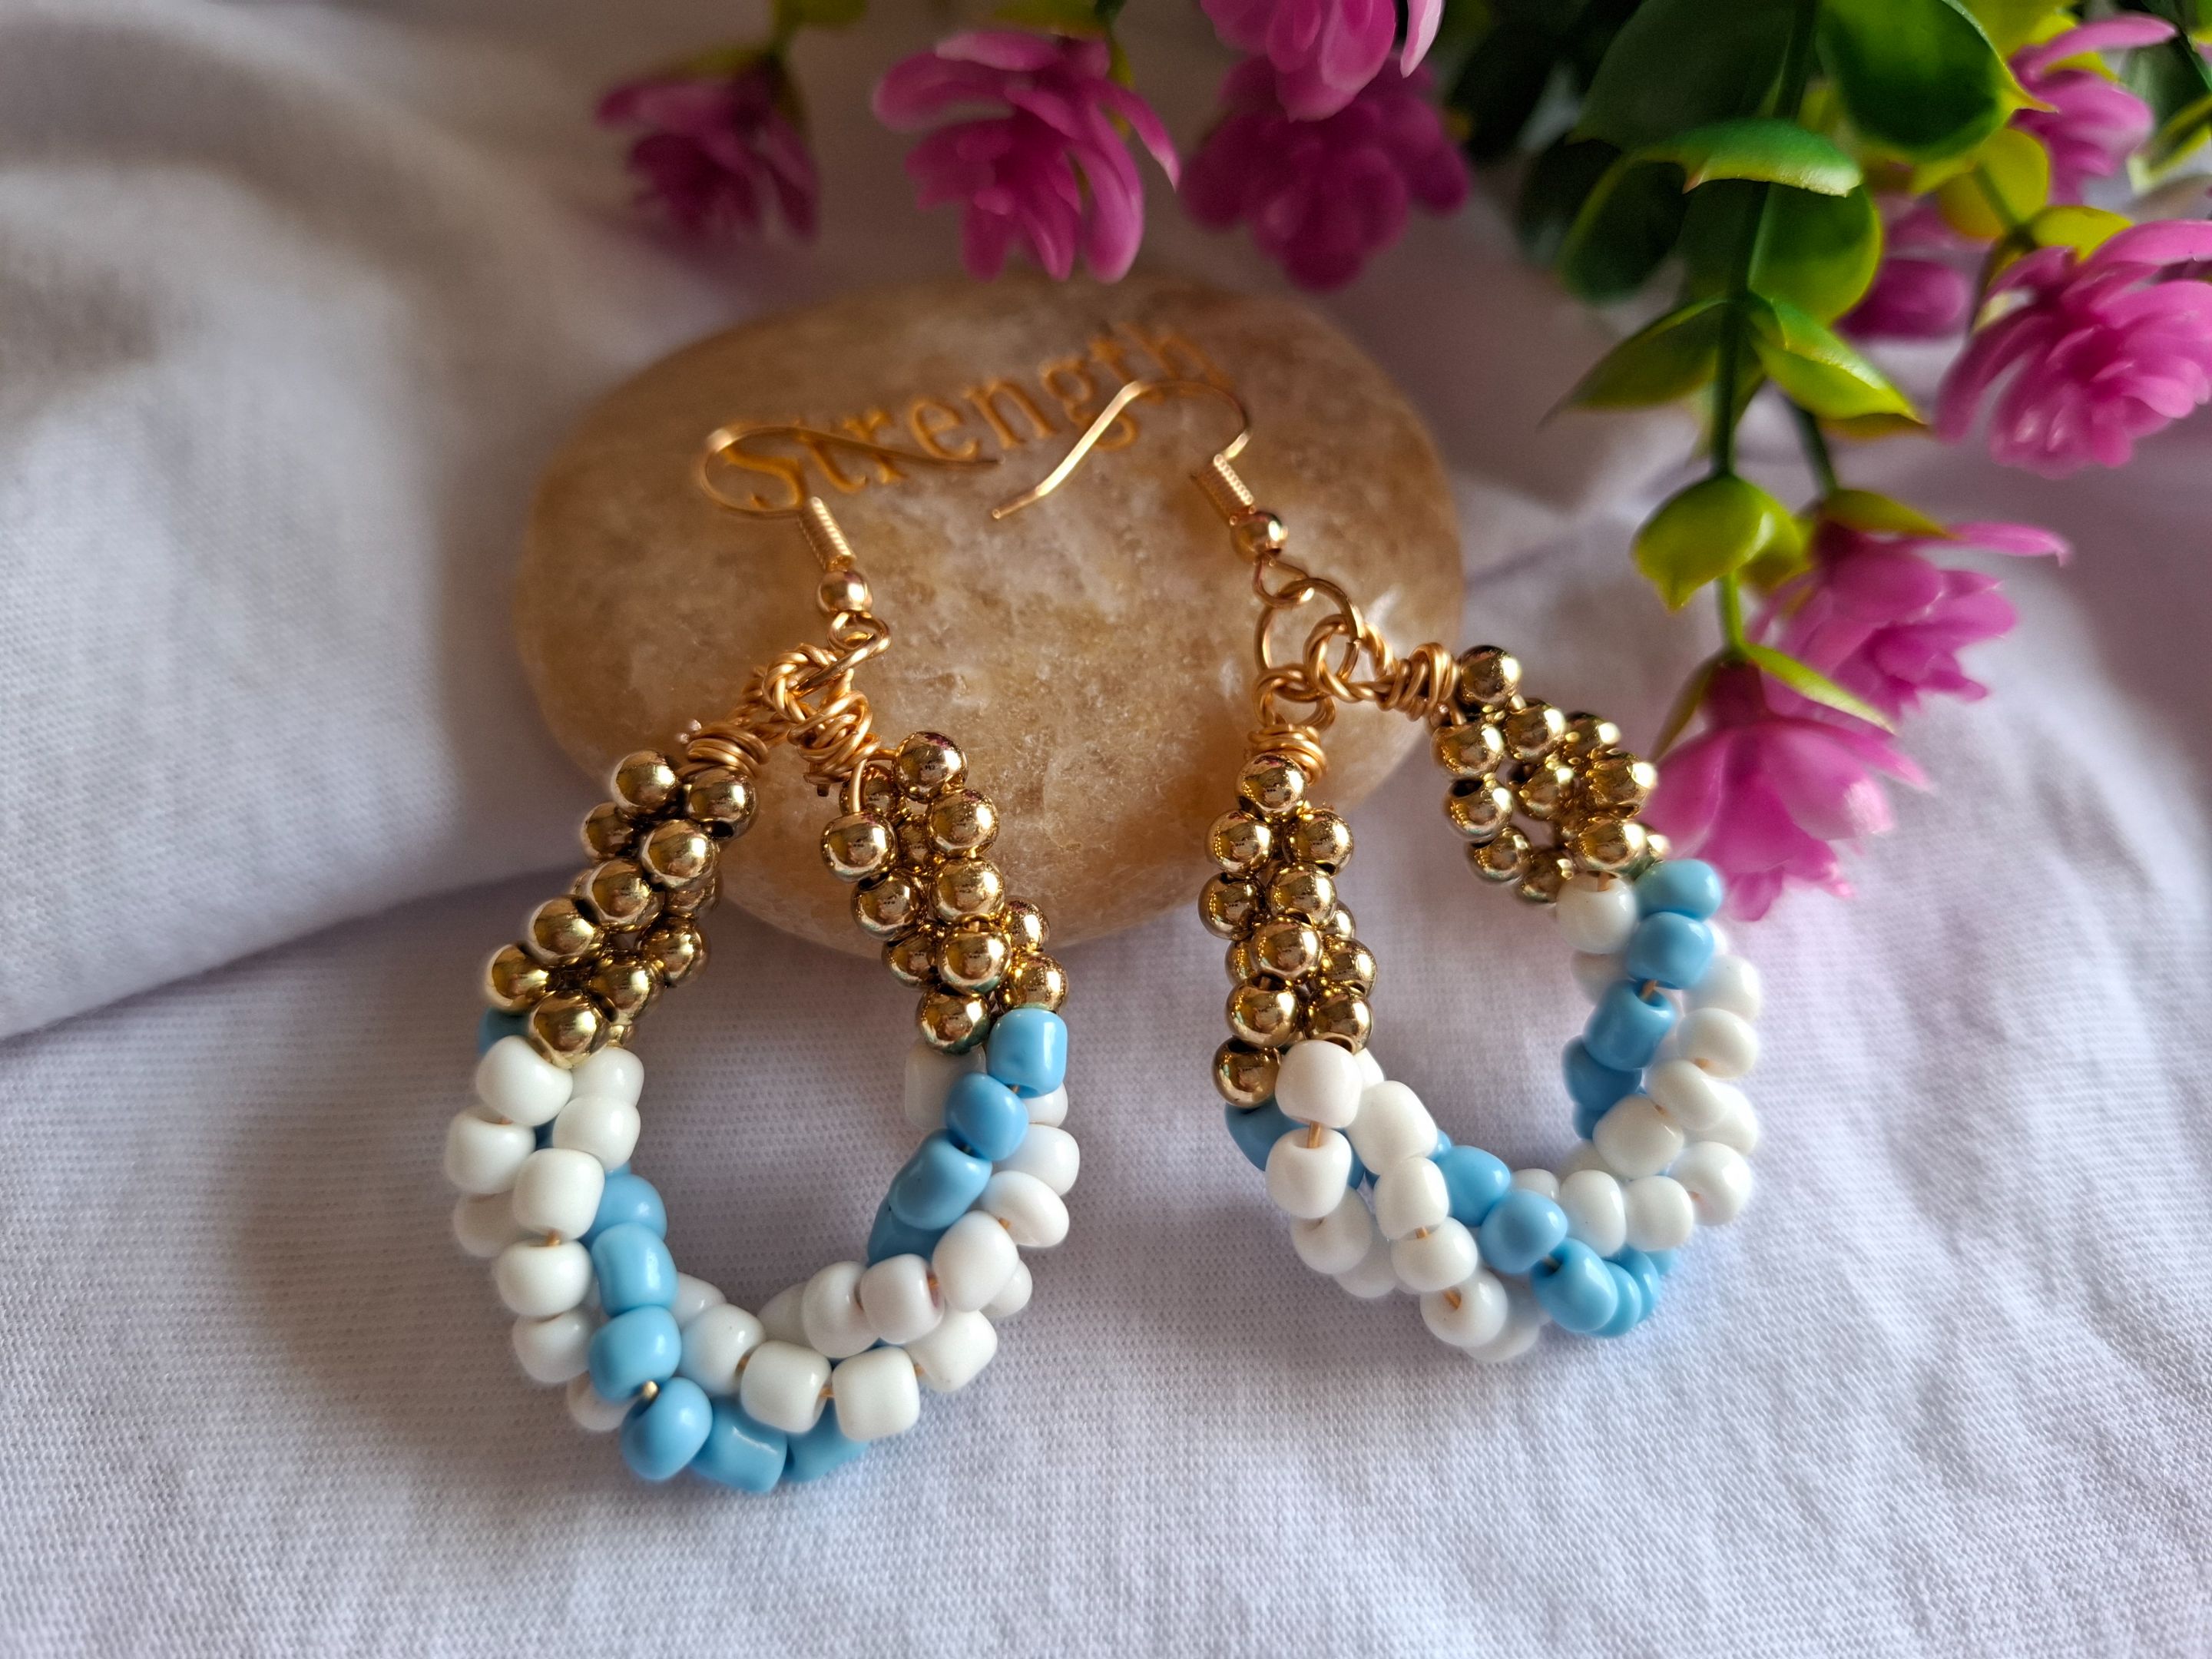
Se trata de unos zarcillos en forma ovalada utilizando alambre, mostacilla color azul, blanca y cuentas doradas. Estos zarcillos quedan hermosos son muy fáciles de hacer y vamos a utilizar pocos materiales en poco tiempo podrás obtener unos bellos aretes listos para lucir hechos por tus propias manos me inspiré de una imagen que ví en Instagram puedes realizarlos de los colores de tu preferencia, incluso combinando varias mostacillas Aretes sin más preámbulos les muestro los materiales y el paso a paso.
These are oval-shaped earrings using wire, blue, white, and gold beads. These earrings are beautiful, they are very easy to make, and we will use few materials. In a short time, you will be able to obtain some beautiful earrings ready to wear, made by your own hands. I was inspired by an image that I saw on Instagram. You can make them in the colors of your preference, even combining several beads. Earrings Without further ado, I will show you the materials and the step by step.
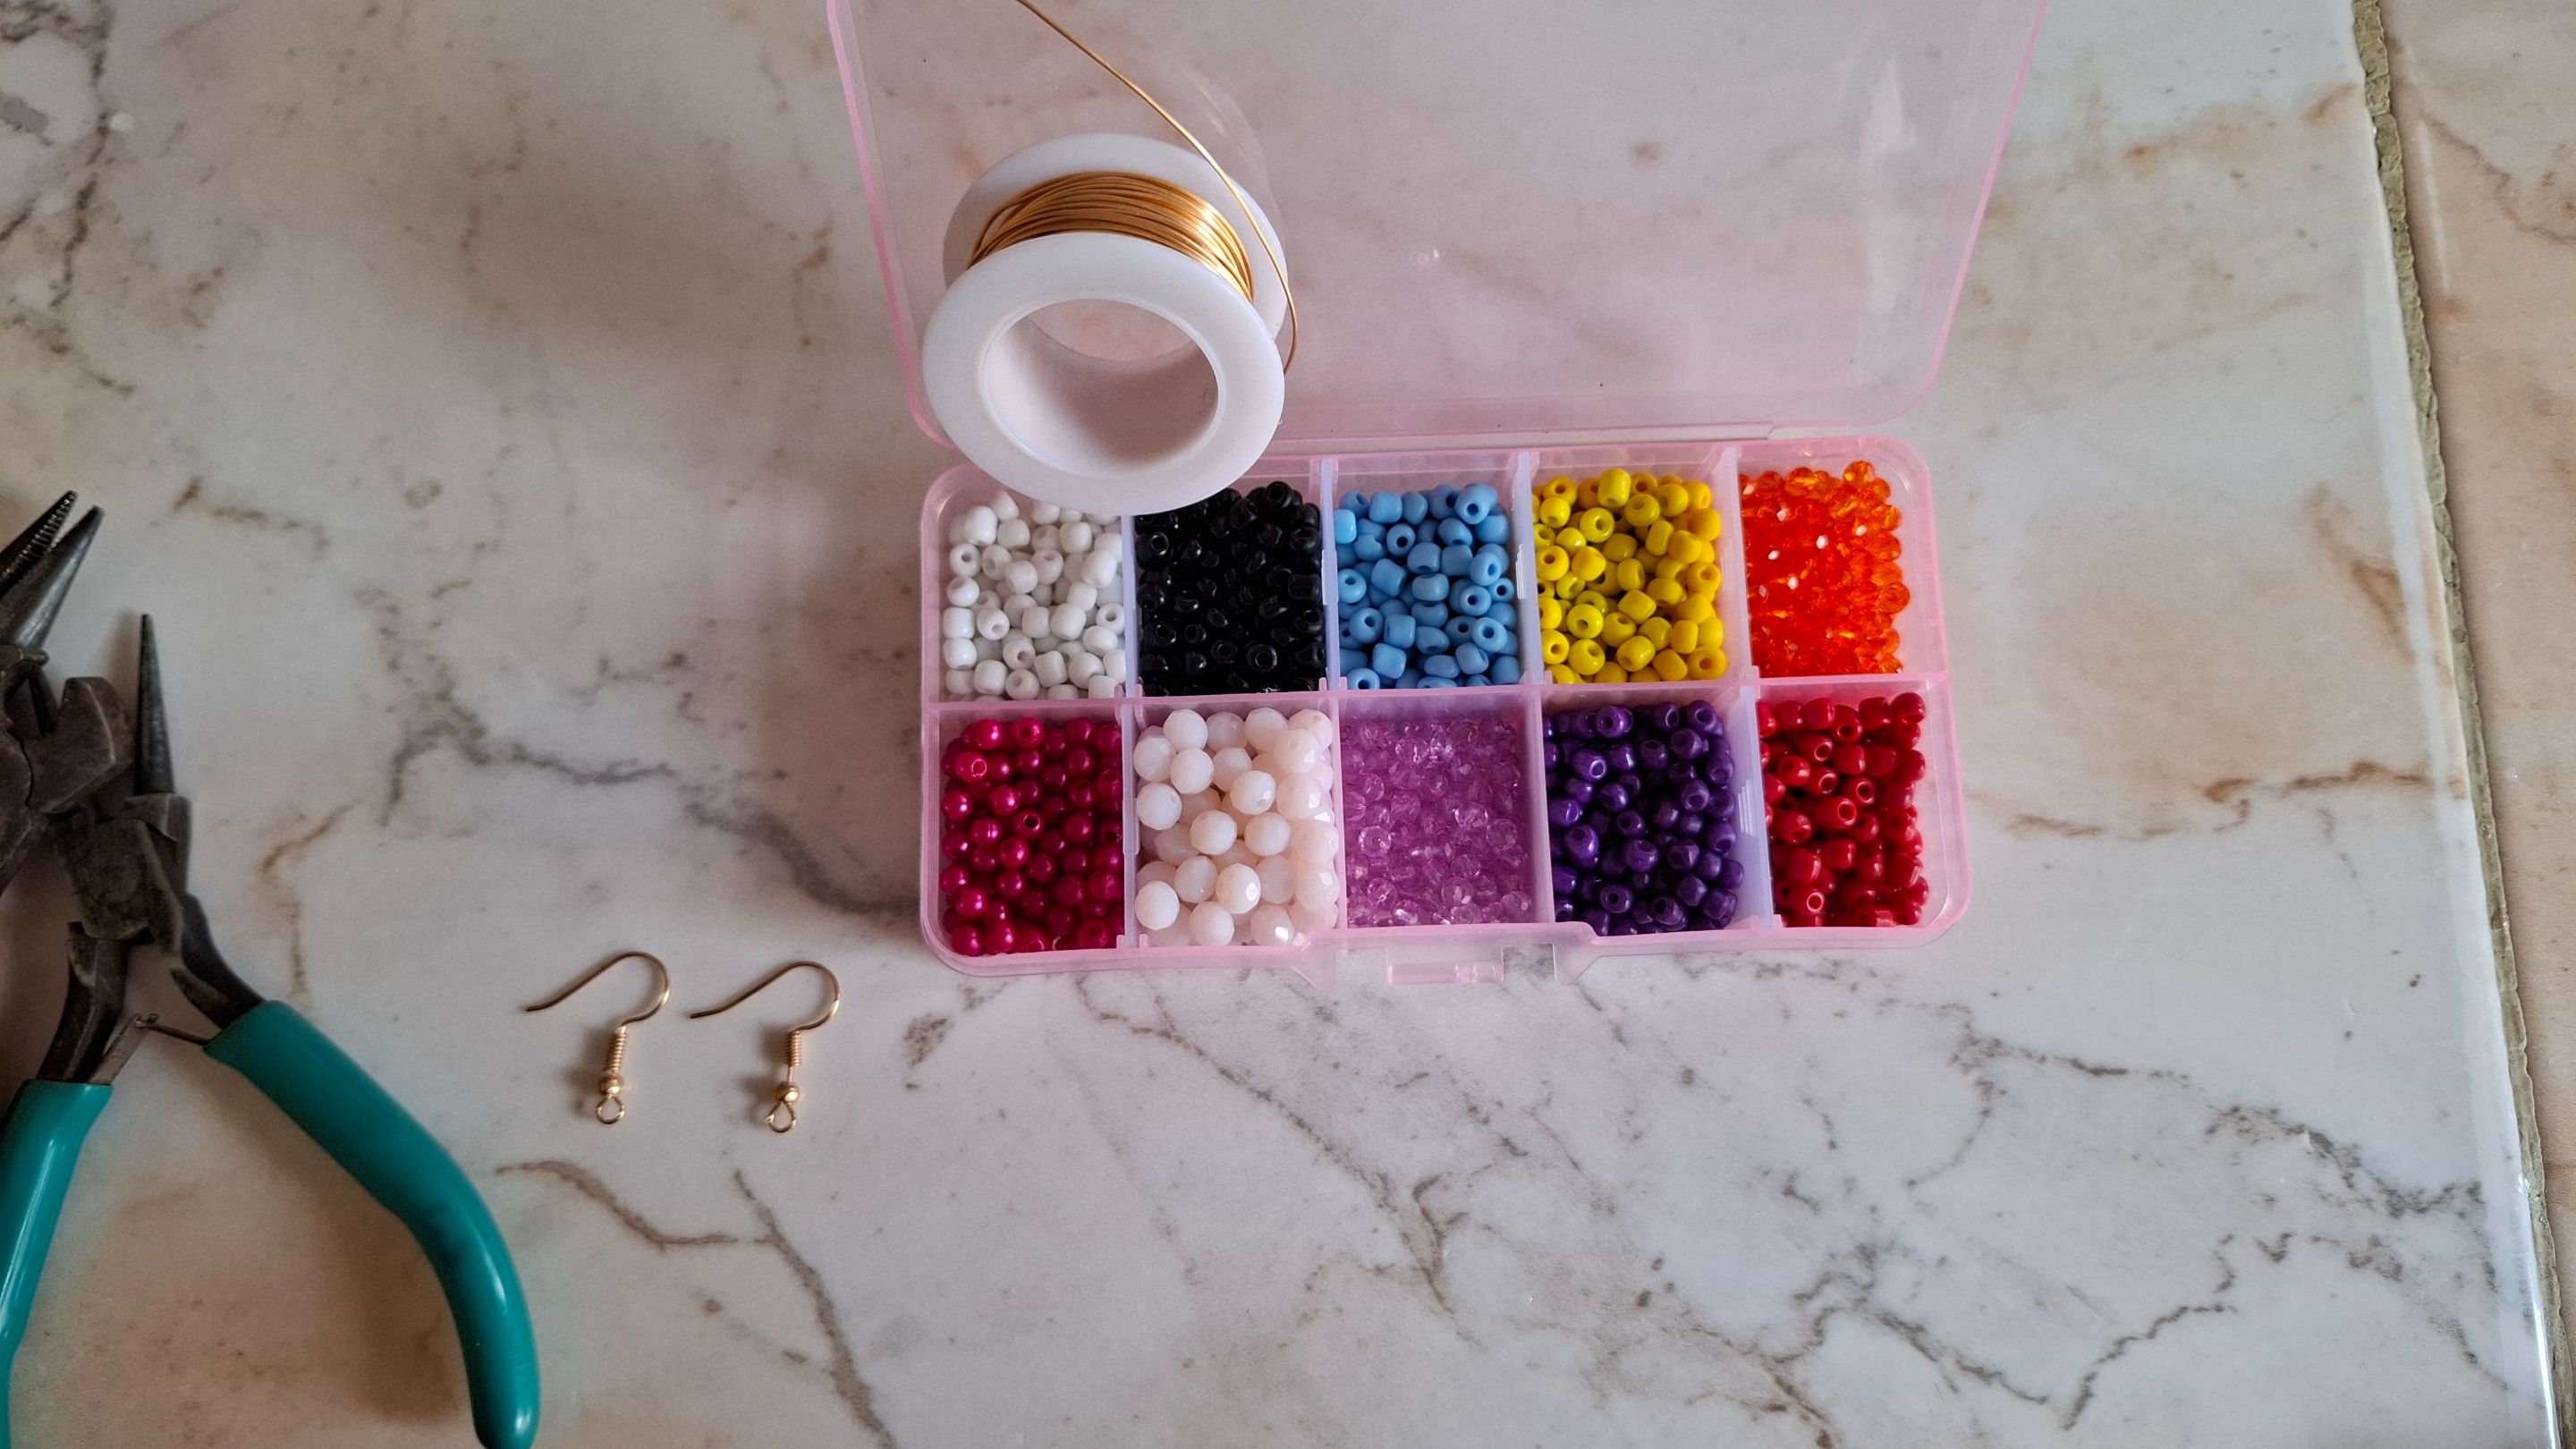
| Materiales | Materials |
|---|---|
| Alambre dorado # 22 | Gold wire #22 |
| Cuentas doradas | golden beads |
| Mostacilla azul y blanca | Blue and white seed beads |
| Pinzas de bisutería | Jewelry tweezers |
| Gancho de aro | Hoop hook |
| Argollas | Hoops |
| Cinta métrica | Measuring tape |
Paso a paso / Step by step
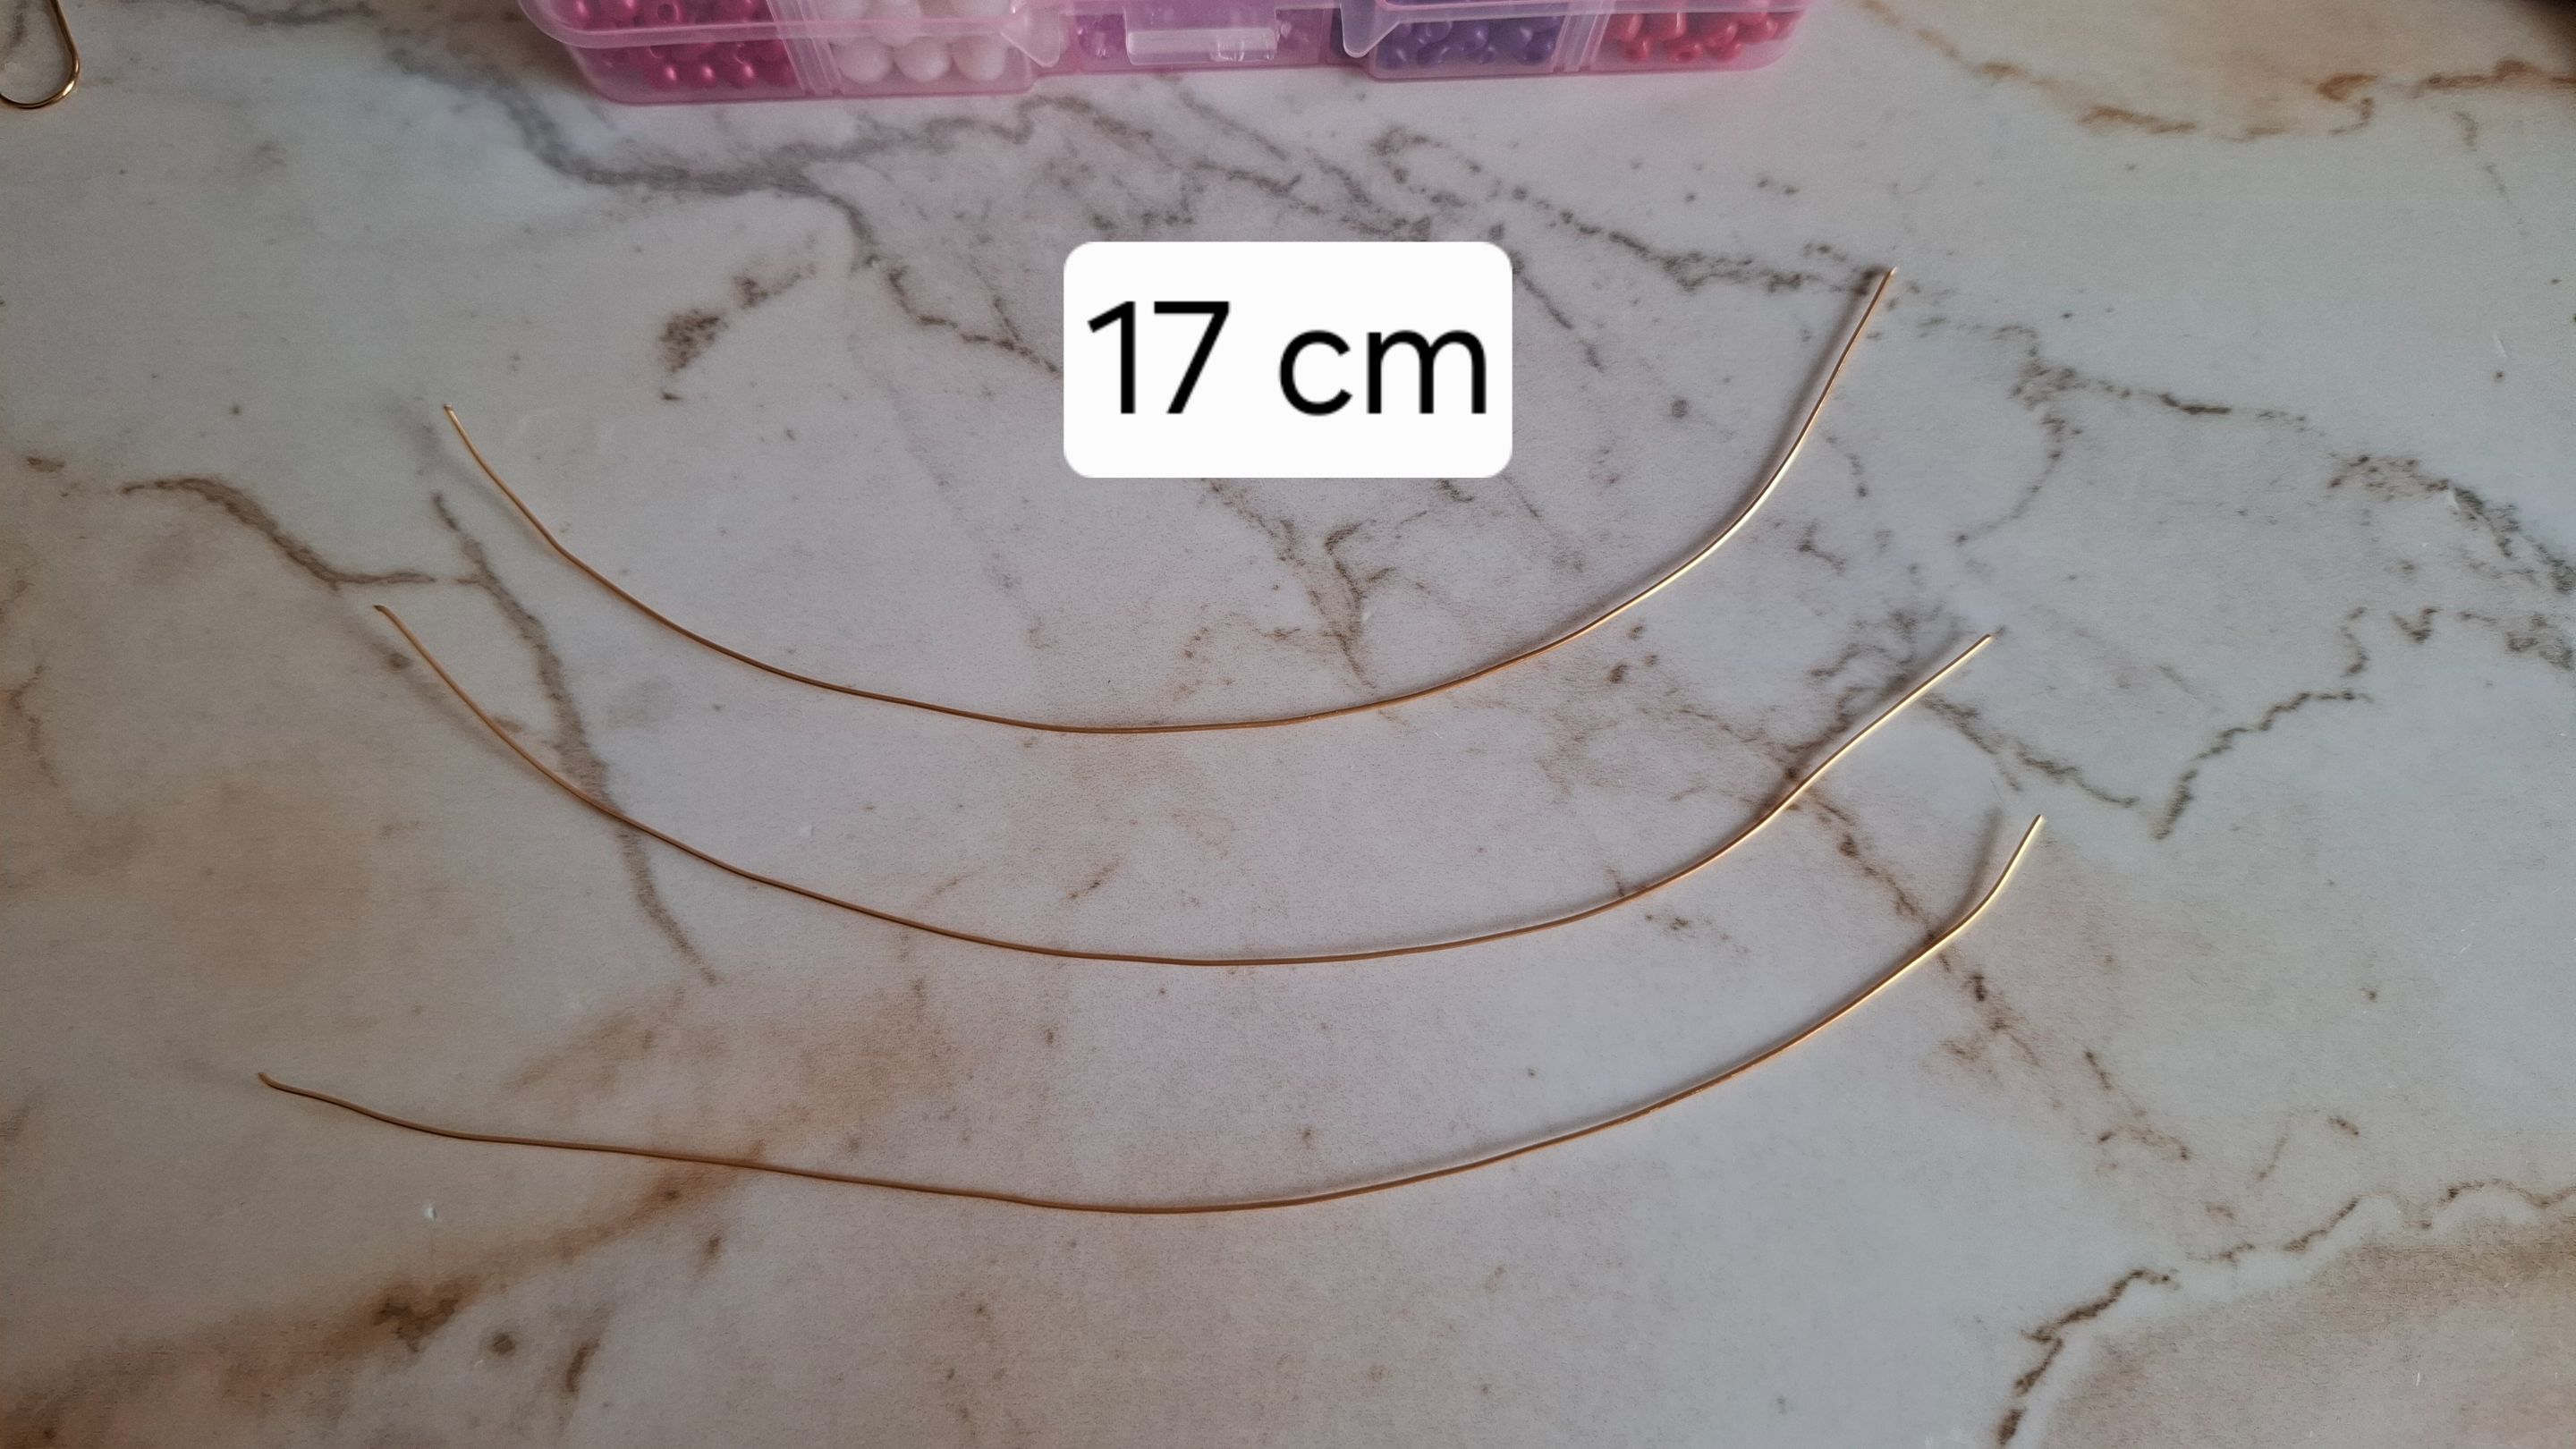
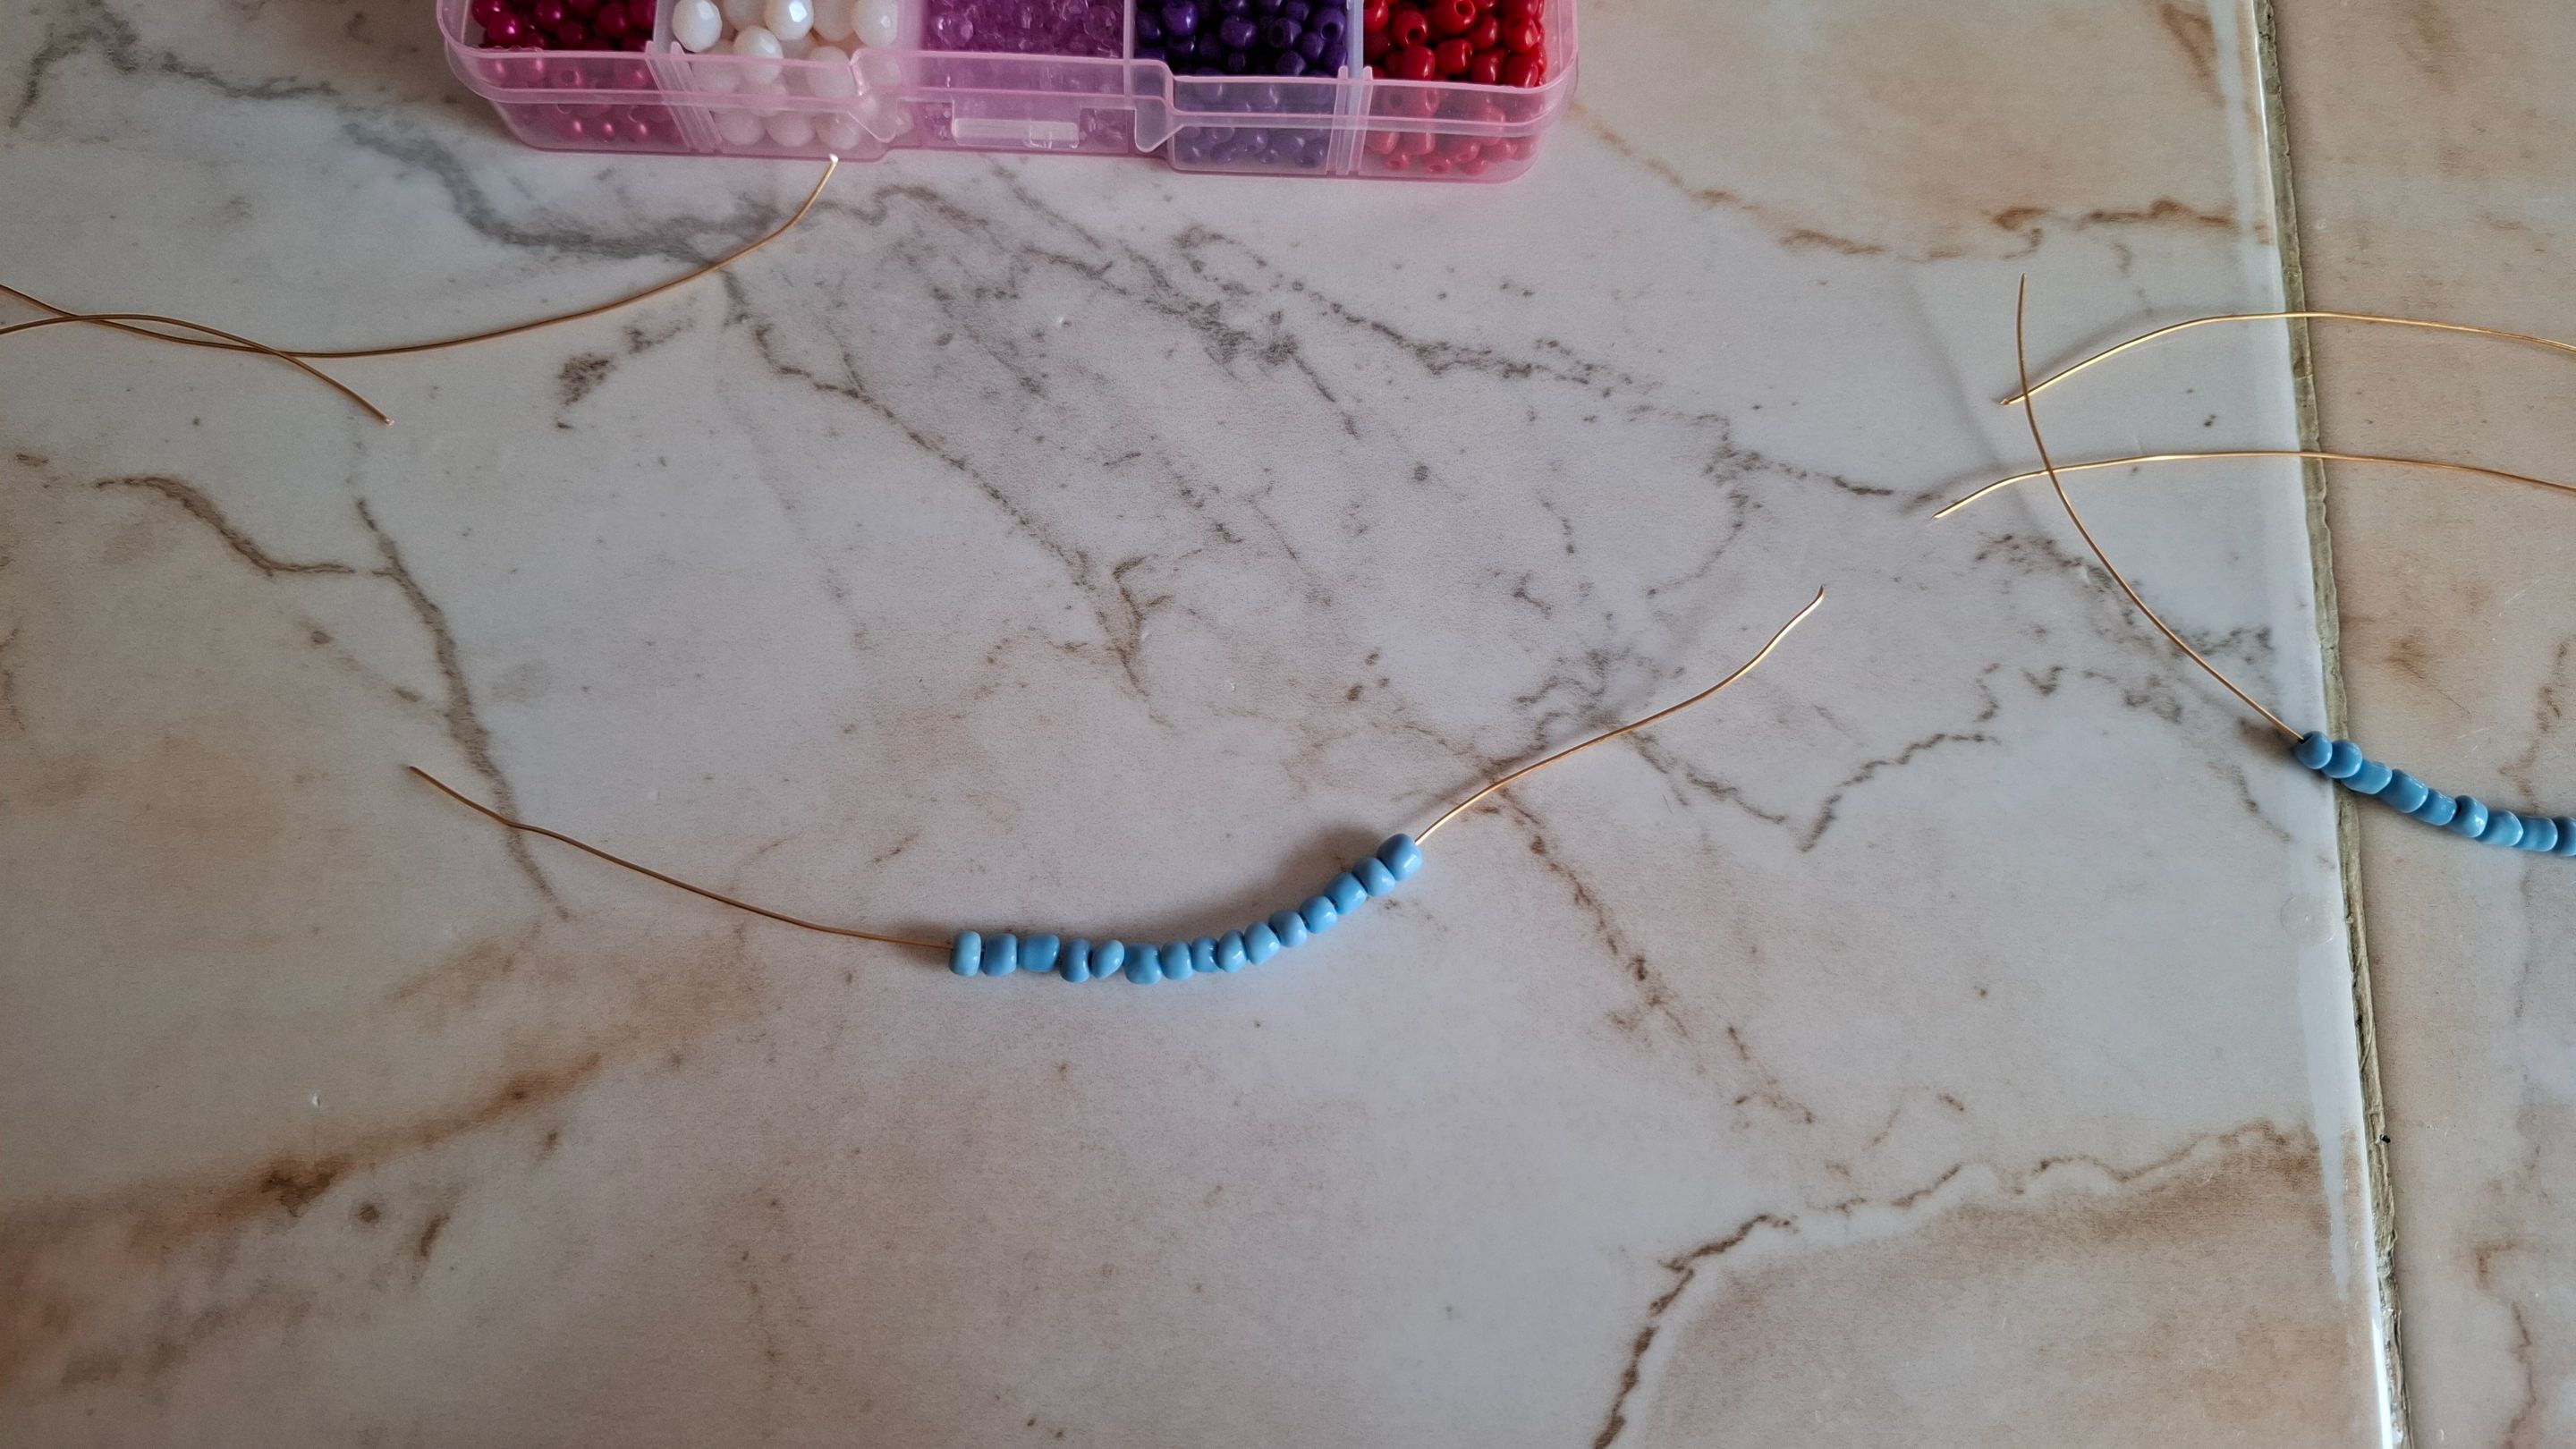
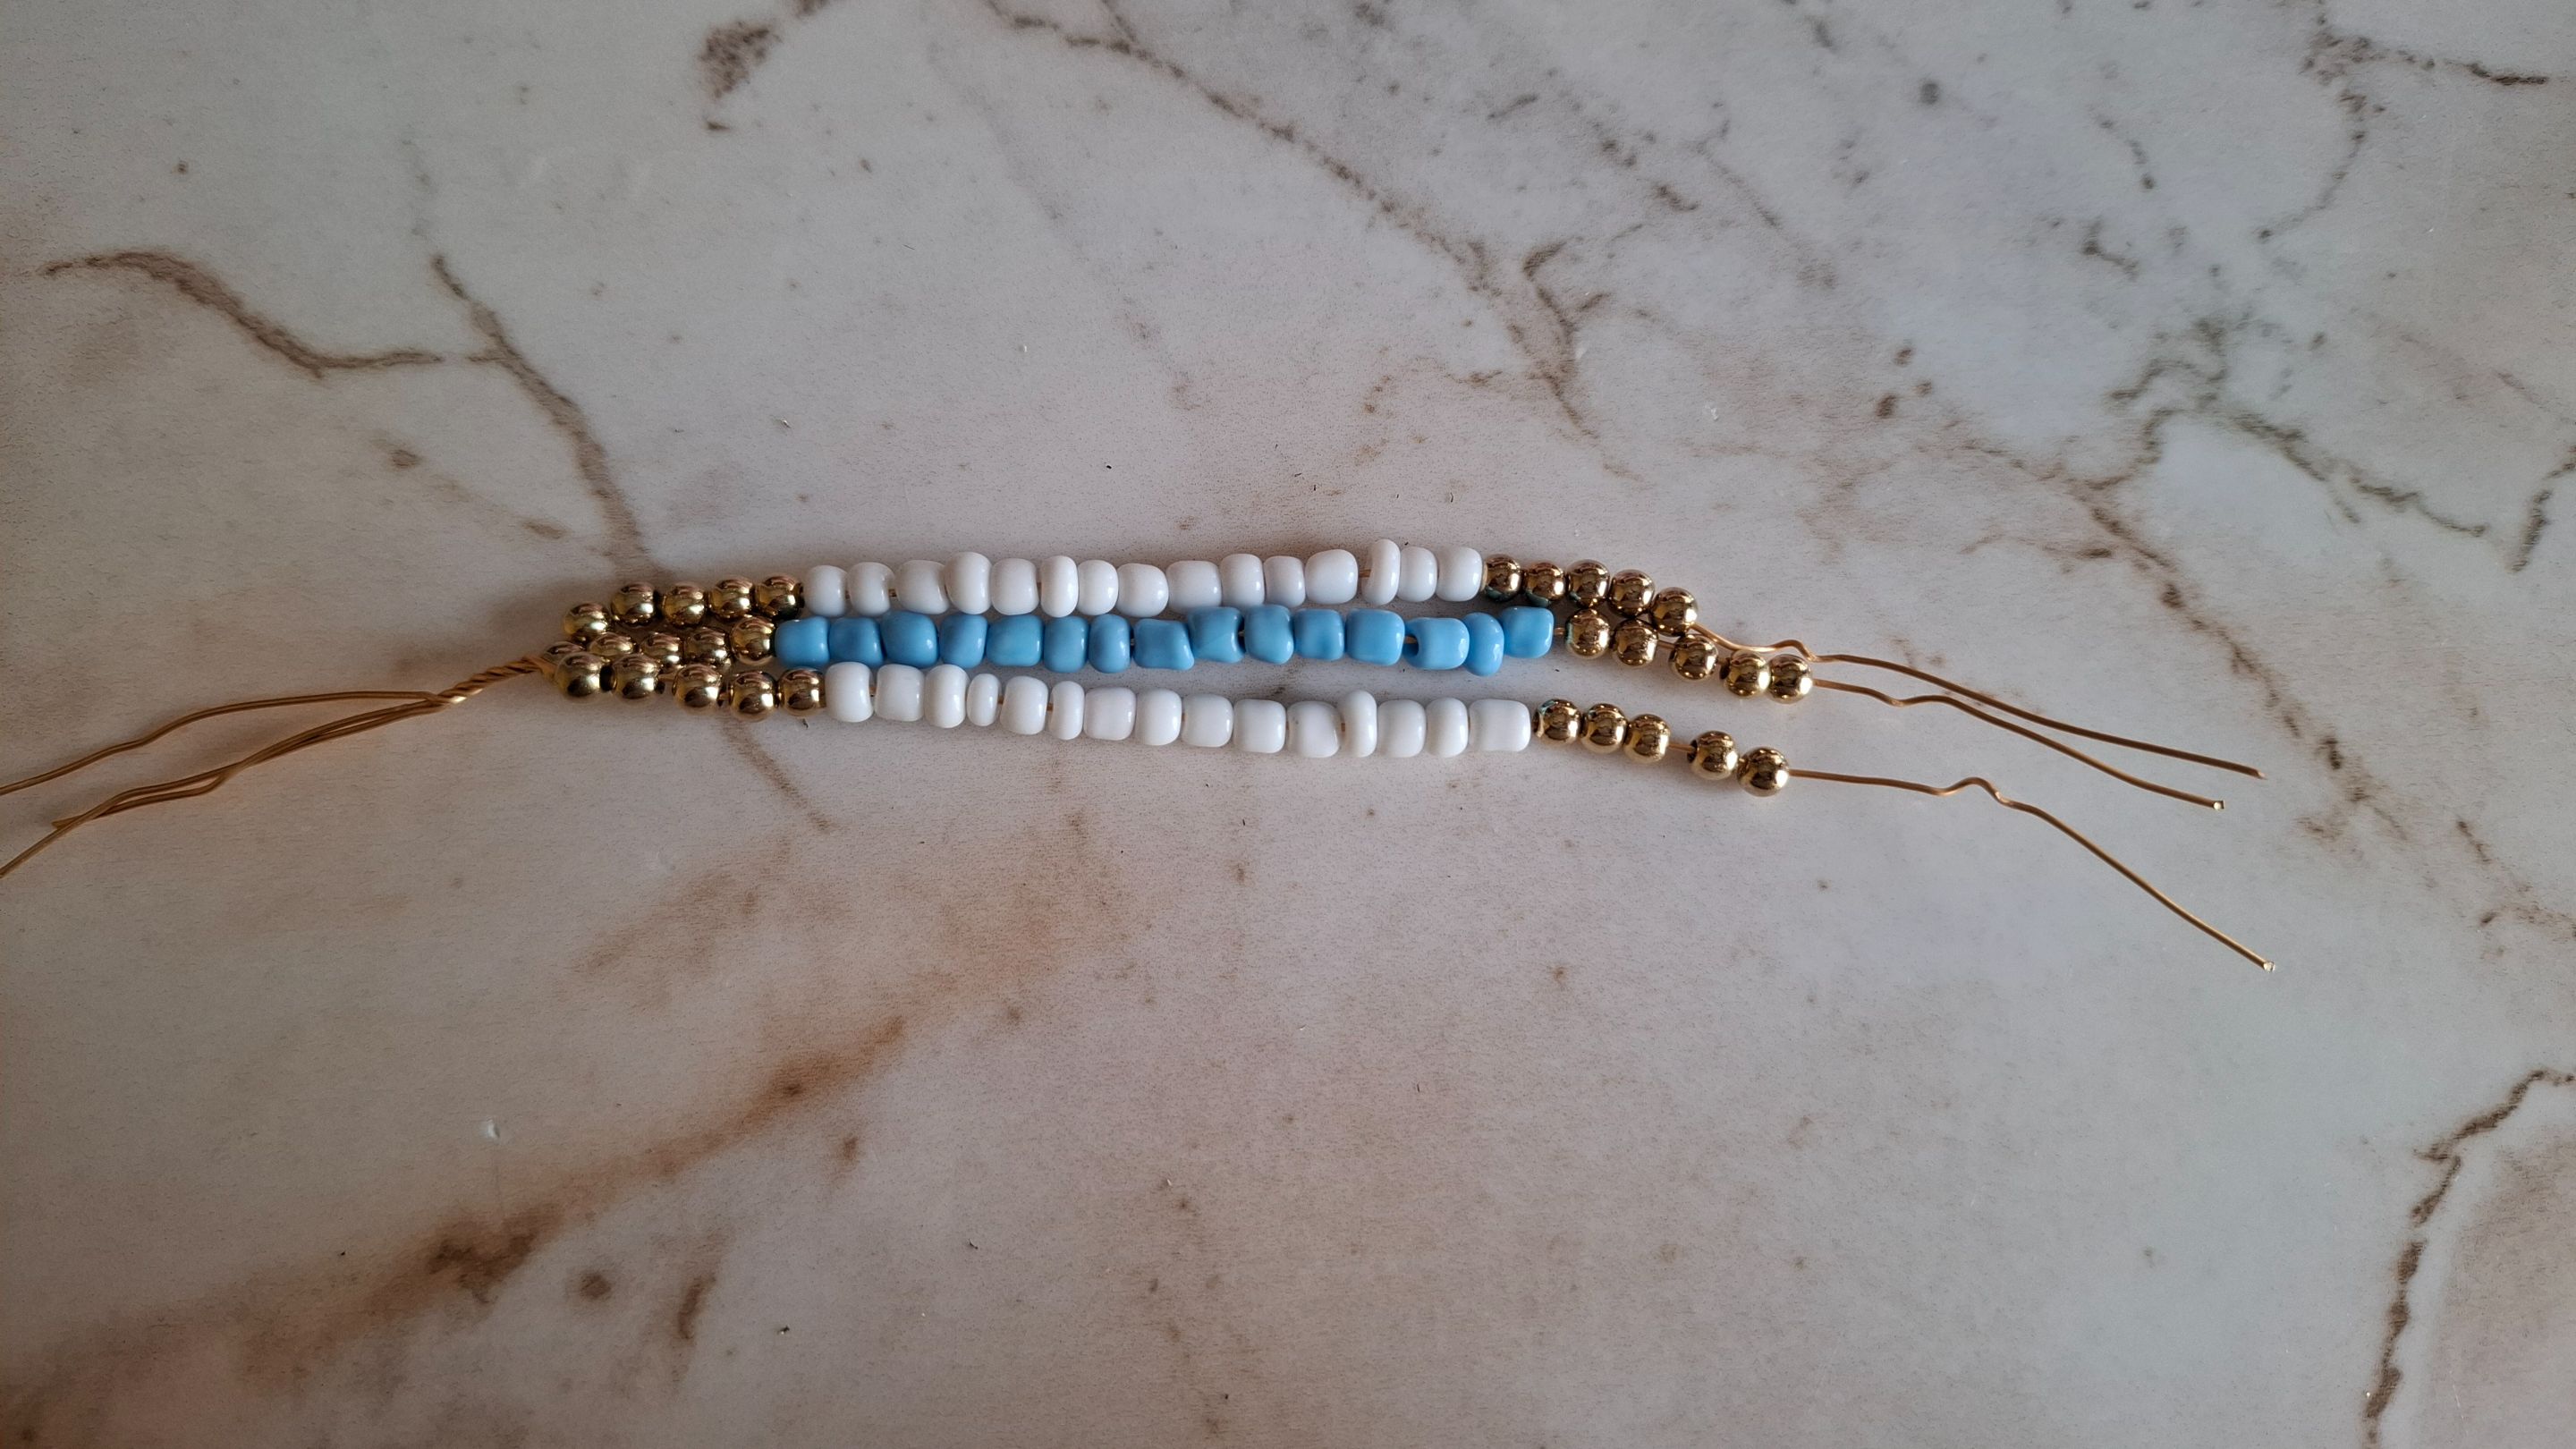
Para comenzar voy a cortar tres retazos de alambre número 22, estos alambres cada uno debe de tener una medida de 17 cm. Ahora con mucho cuidado voy a comenzar a colocar las mostacillas.
To begin, I'm going to cut three pieces of size 22 wire. Each piece should be 17 cm long. Now, very carefully, I'm going to start placing the beads.
 |
 |
 |
|---|---|---|
En uno de los alambres coloqué 15 mostacillas color azul, para que no se me salieran y disperseran por todas partes doble un poco el alambre así las fui colocando, luego en los dos alambres sobrantes colocamos 15 mostacillas blancas en cada siguiendo la misma secuencia.
On one of the wires I placed 15 blue beads, so that they wouldn't come off and scatter everywhere, I bent the wire a little and that's how I placed them, then on the two remaining wires we placed 15 white beads on each one following the same sequence.
 |
 |
|---|---|
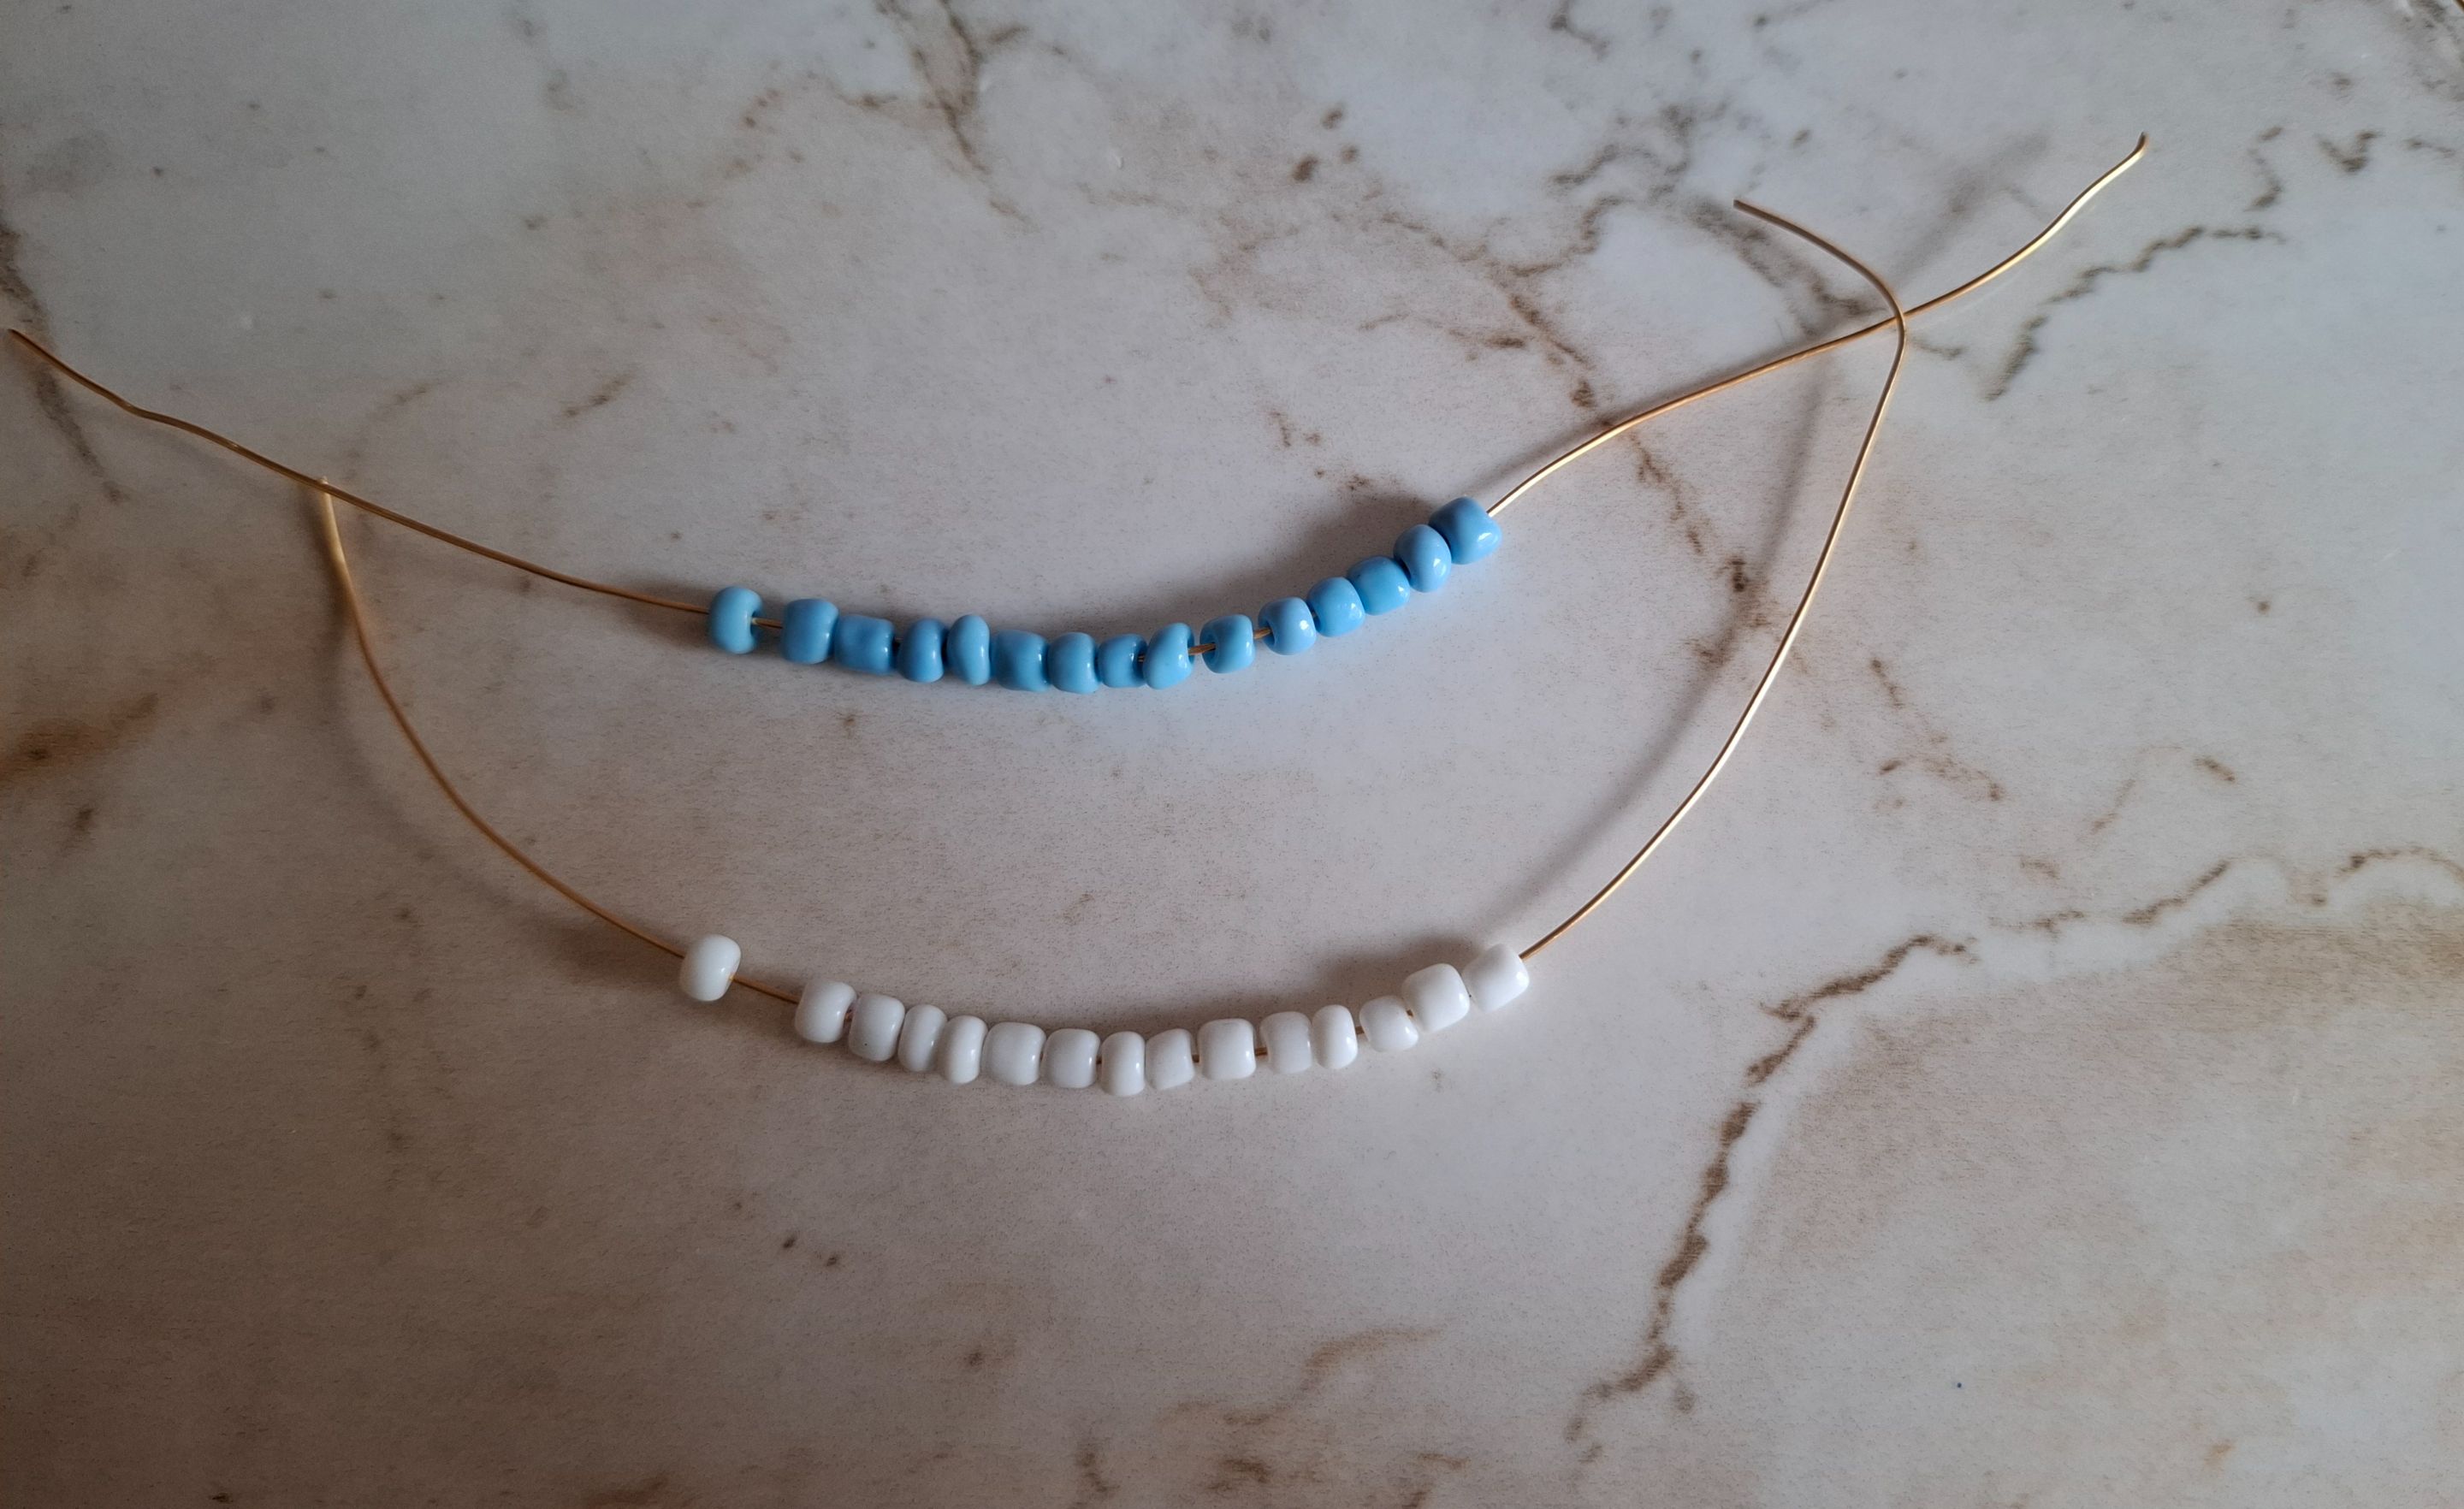
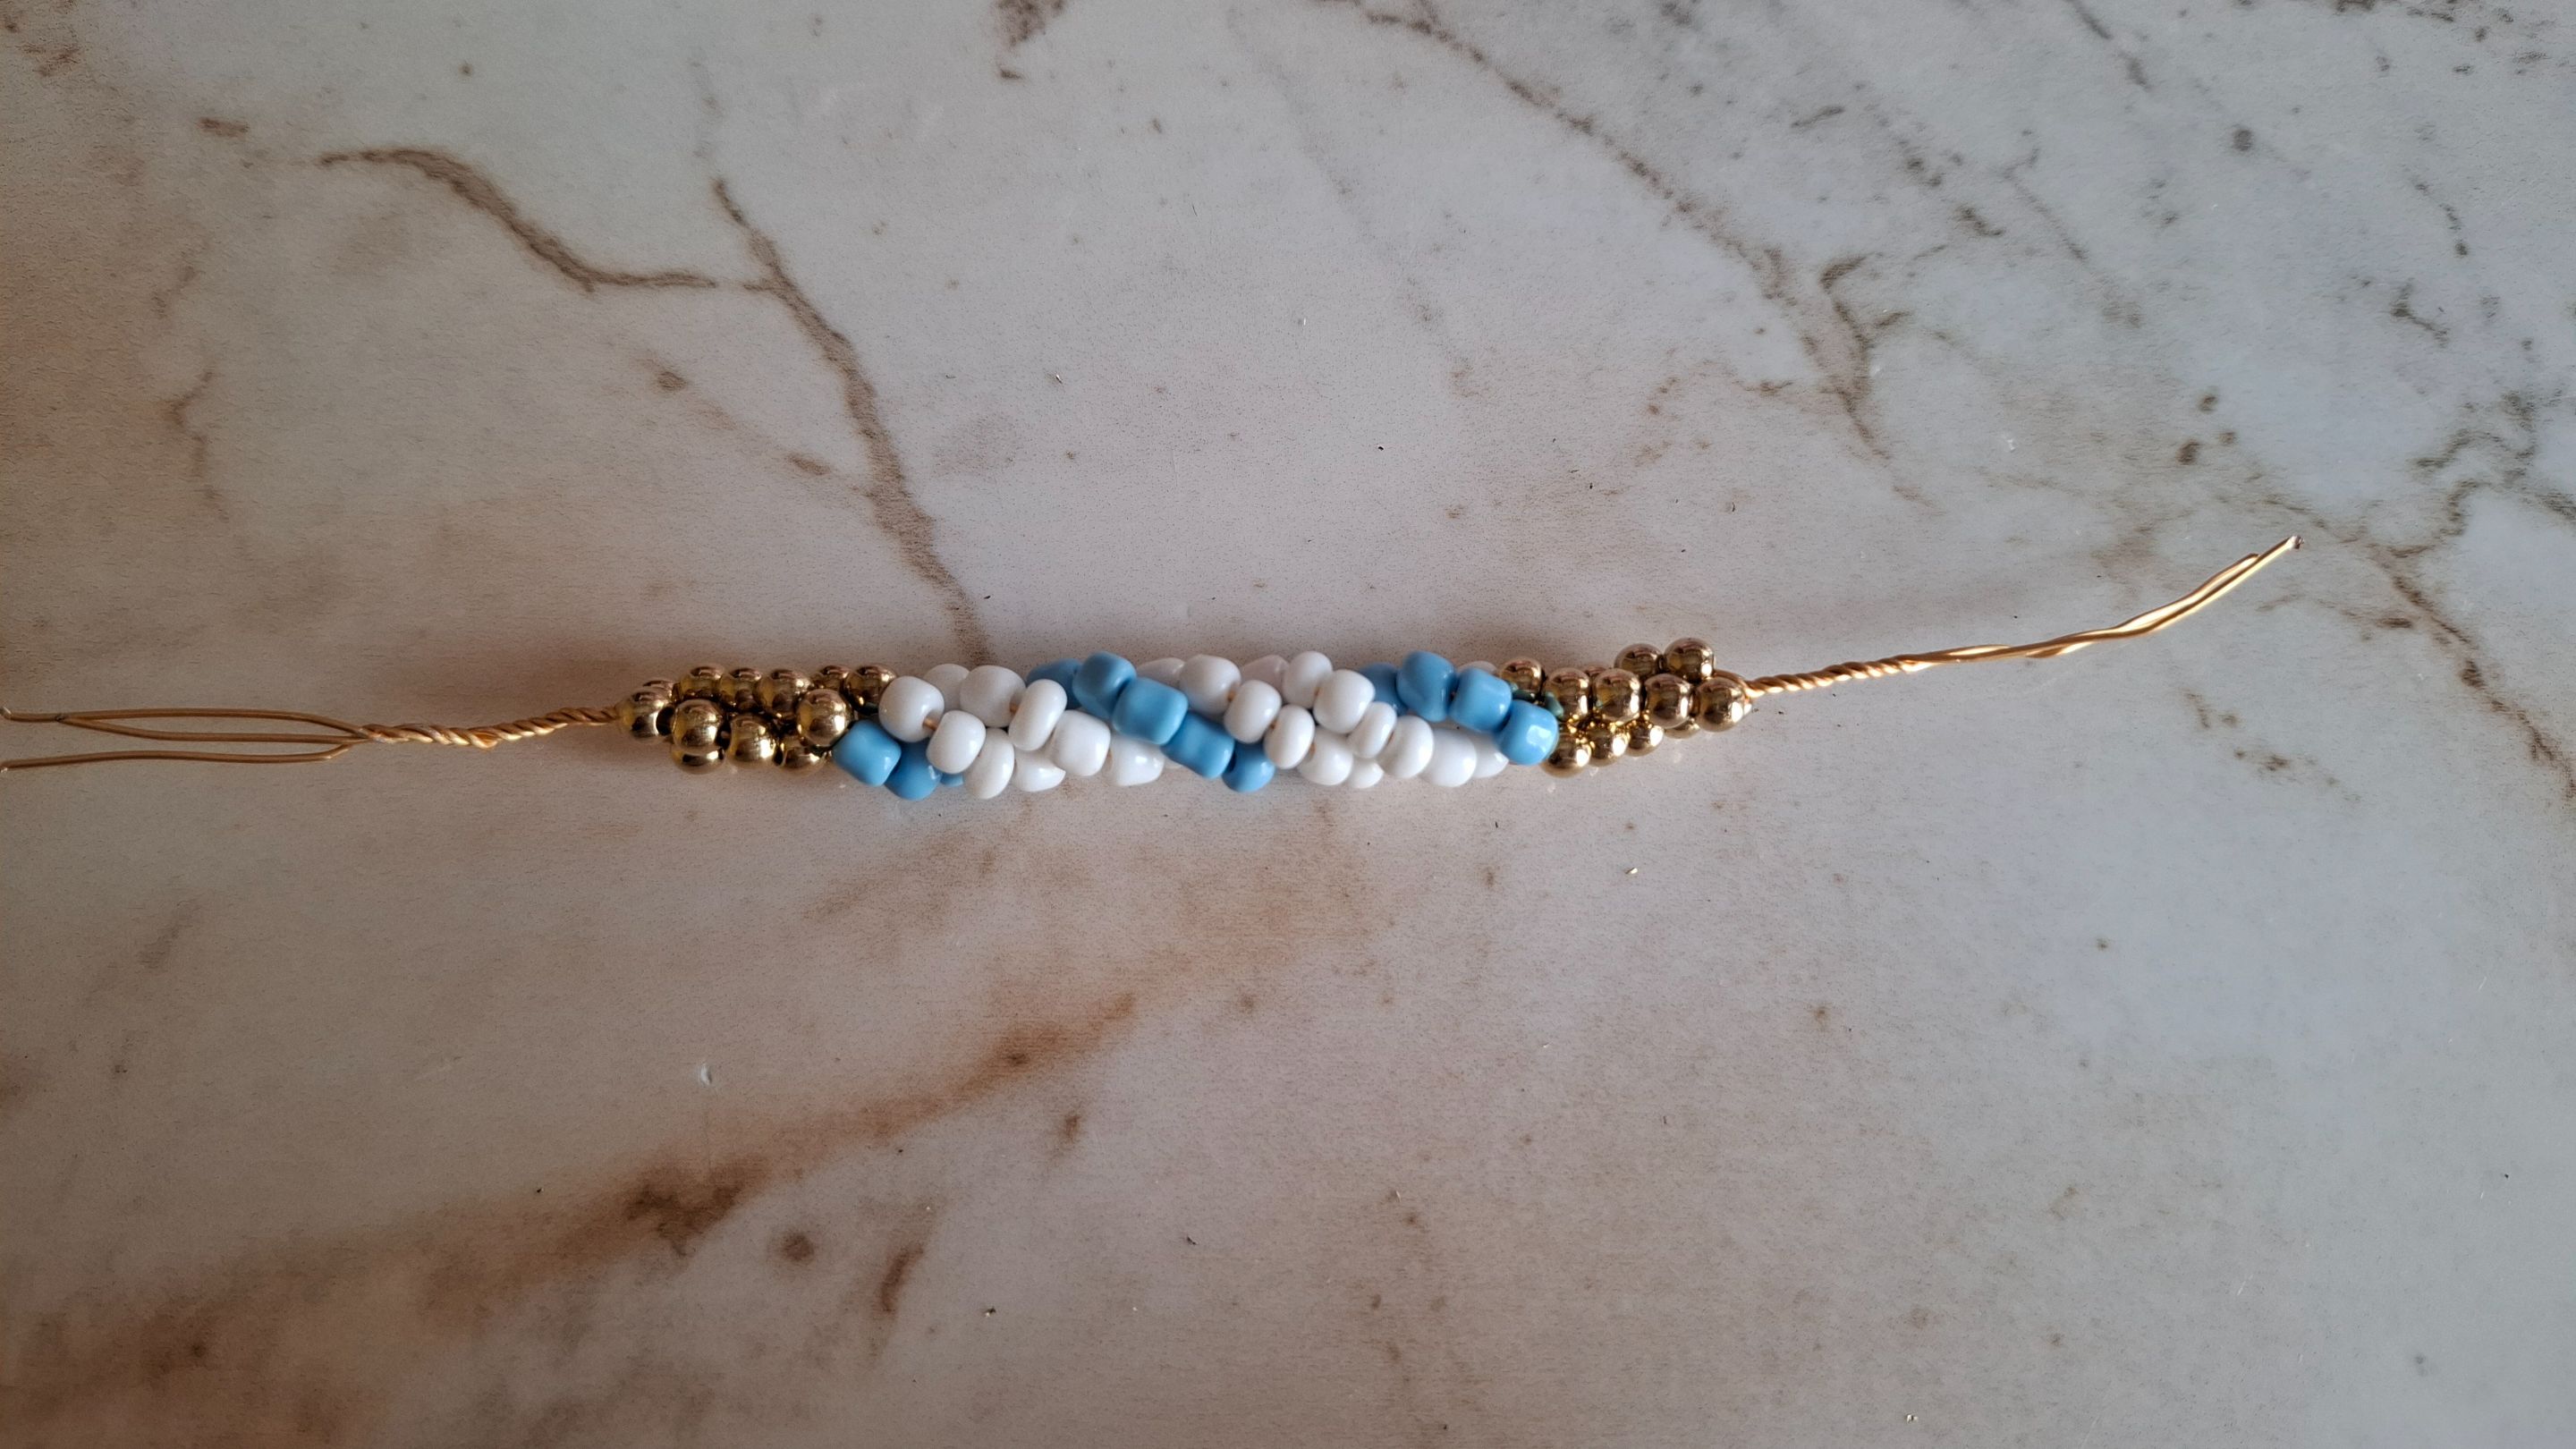
Luego cortamos tres alambres de la misma medida y realizamos el mismo procedimiento, ahora ya tenemos todas las mostacillas, el siguiente paso será colocar 5 balines dorados pequeños en cada extremo del alambre, los coloqué de último para ir observando más o menos el tamaño que quería.
Then we cut three wires of the same length and performed the same procedure. Now we have all the beads. The next step is to place 5 small golden balls on each end of the wire. I placed them last to observe more or less the size I wanted.
 |
|
|
|---|---|---|
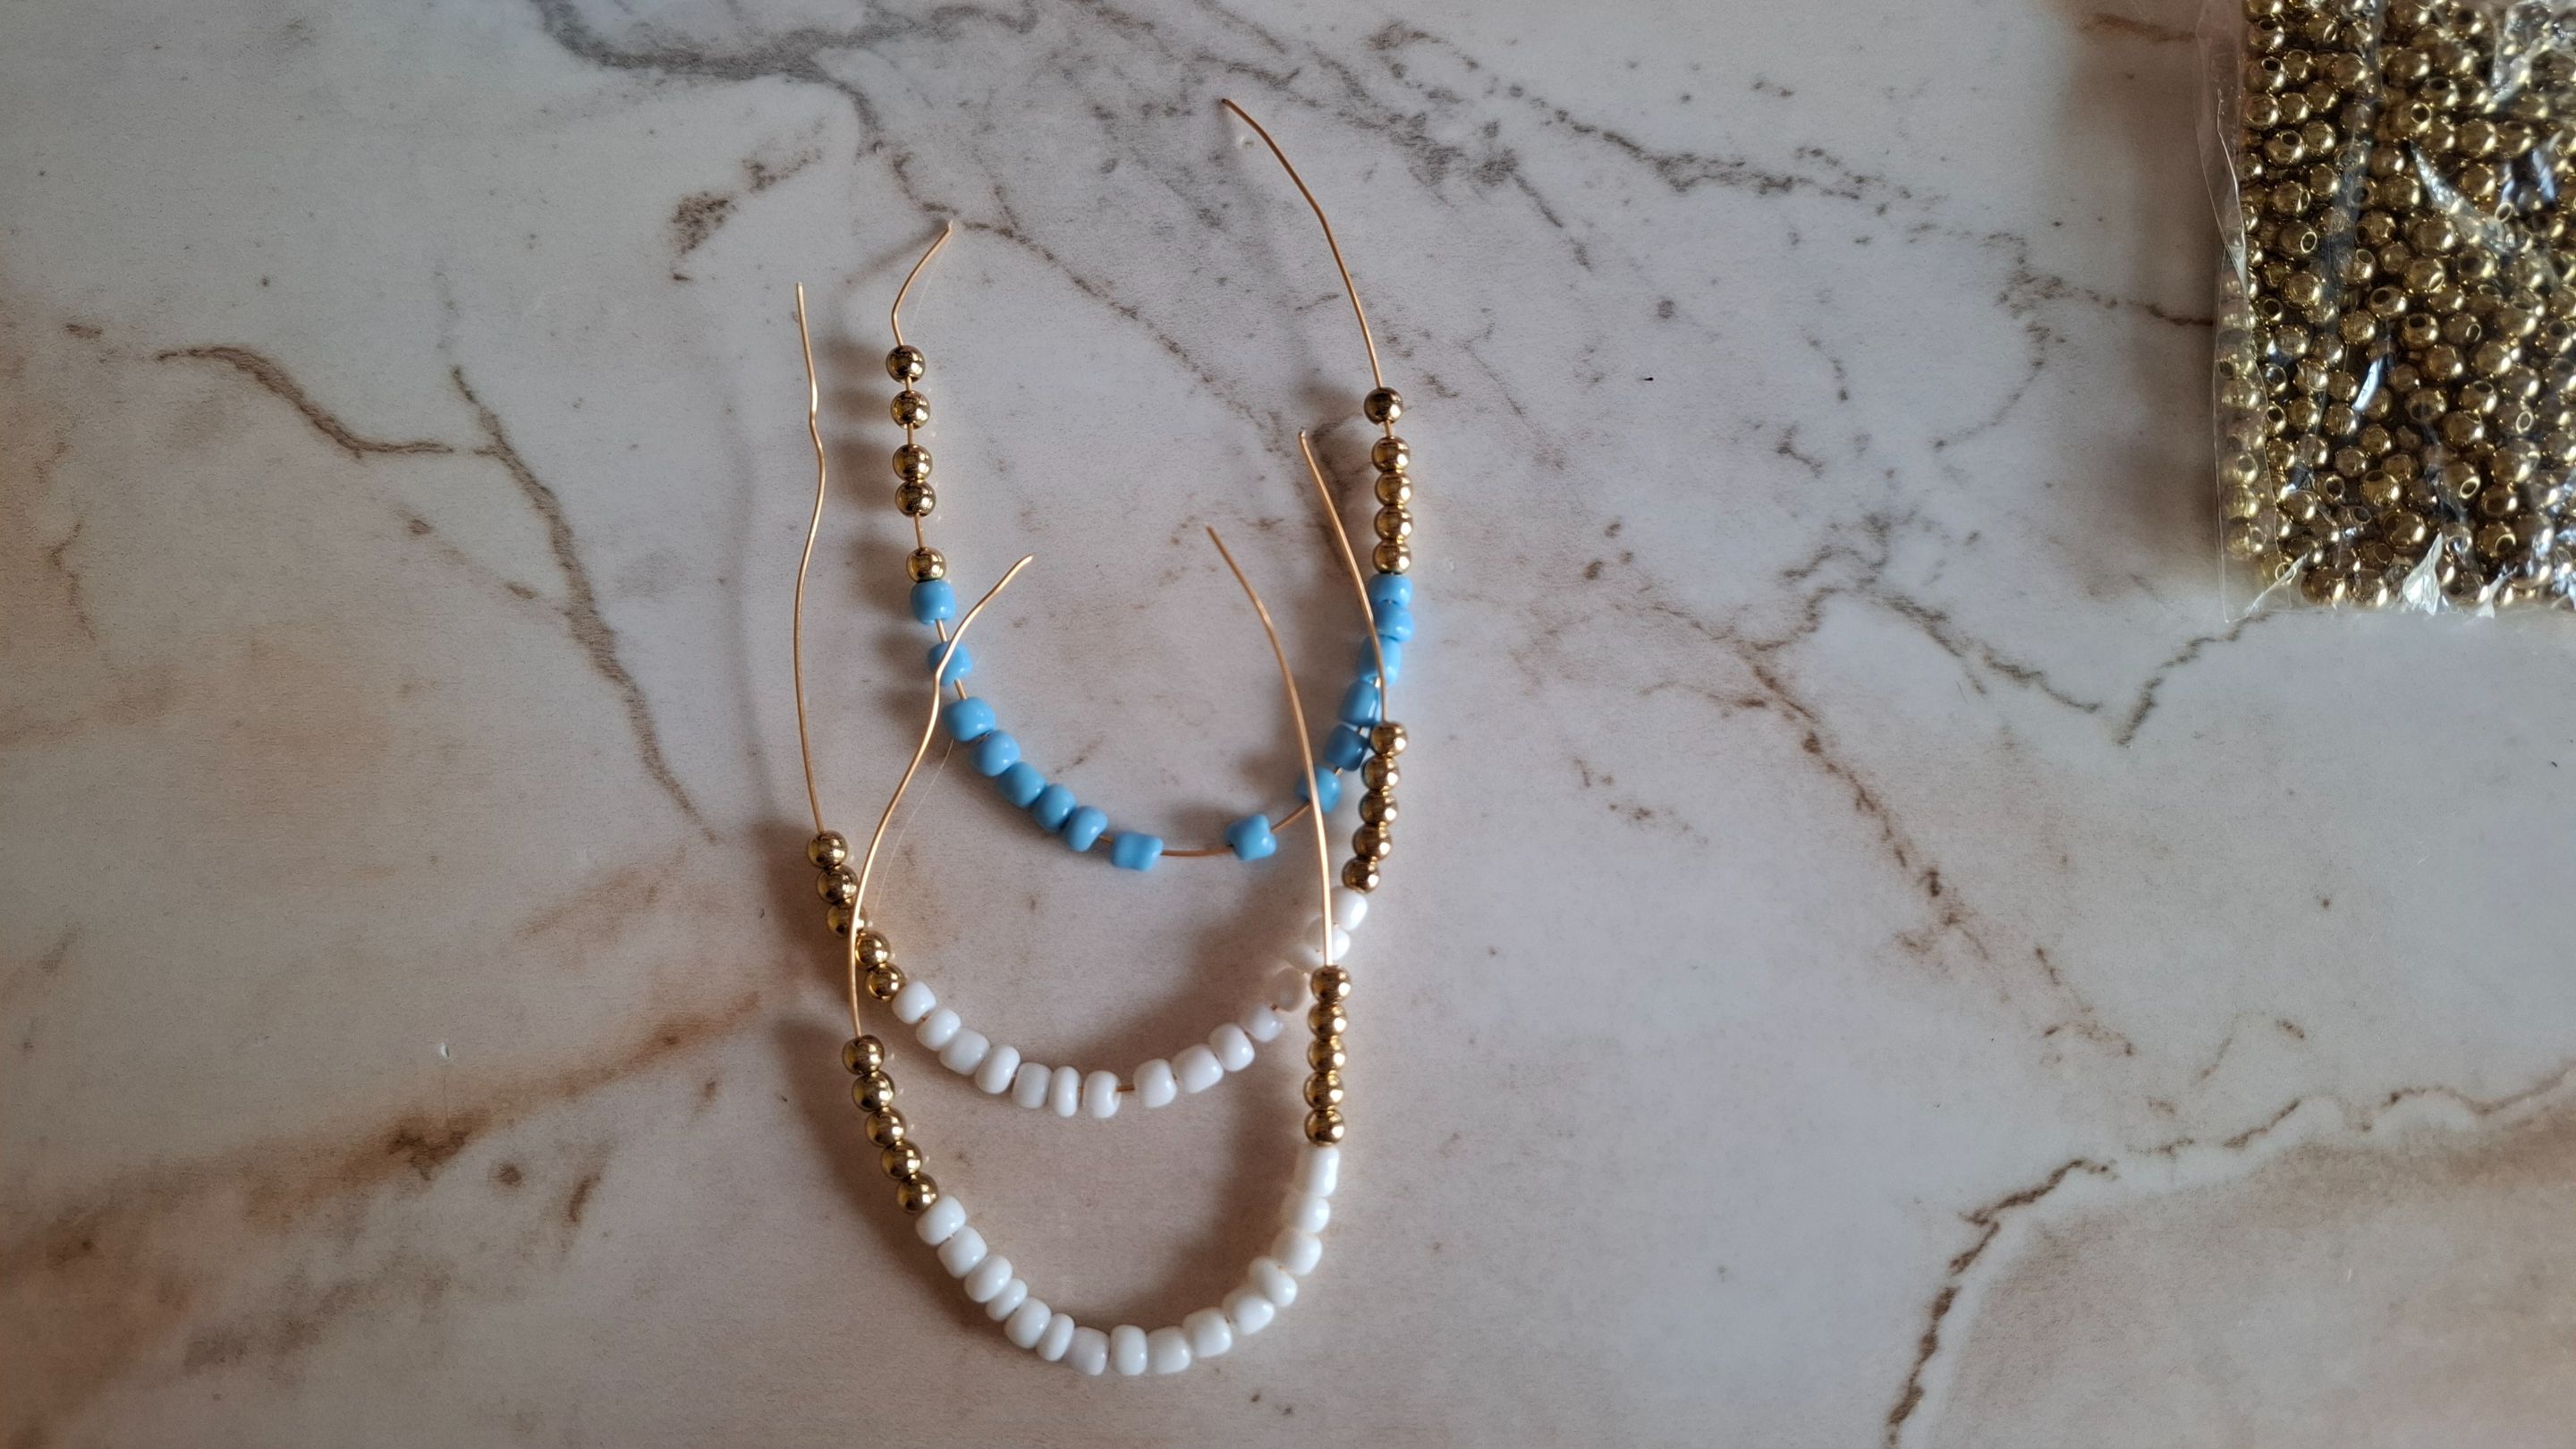
Cuando terminemos de colocar todos los balines dorados voy a colocar en el centro el alambre de mostacillas azul y en cada lado el blanco, con mucho cuidado voy a tomar los tres alambres y voy a ir girando y entorchando poco a poco el alambre de la derecha, luego realizamos lo mismo en la izquierda.
When we finish placing all the gold balls, I'm going to place the blue beaded wire in the center and the white wire on each side. Very carefully, I'm going to take the three wires and I'm going to slowly twist and twist the wire on the right, then we'll do the same on the left.
 |
 |
|---|---|
 |
 |
|---|---|
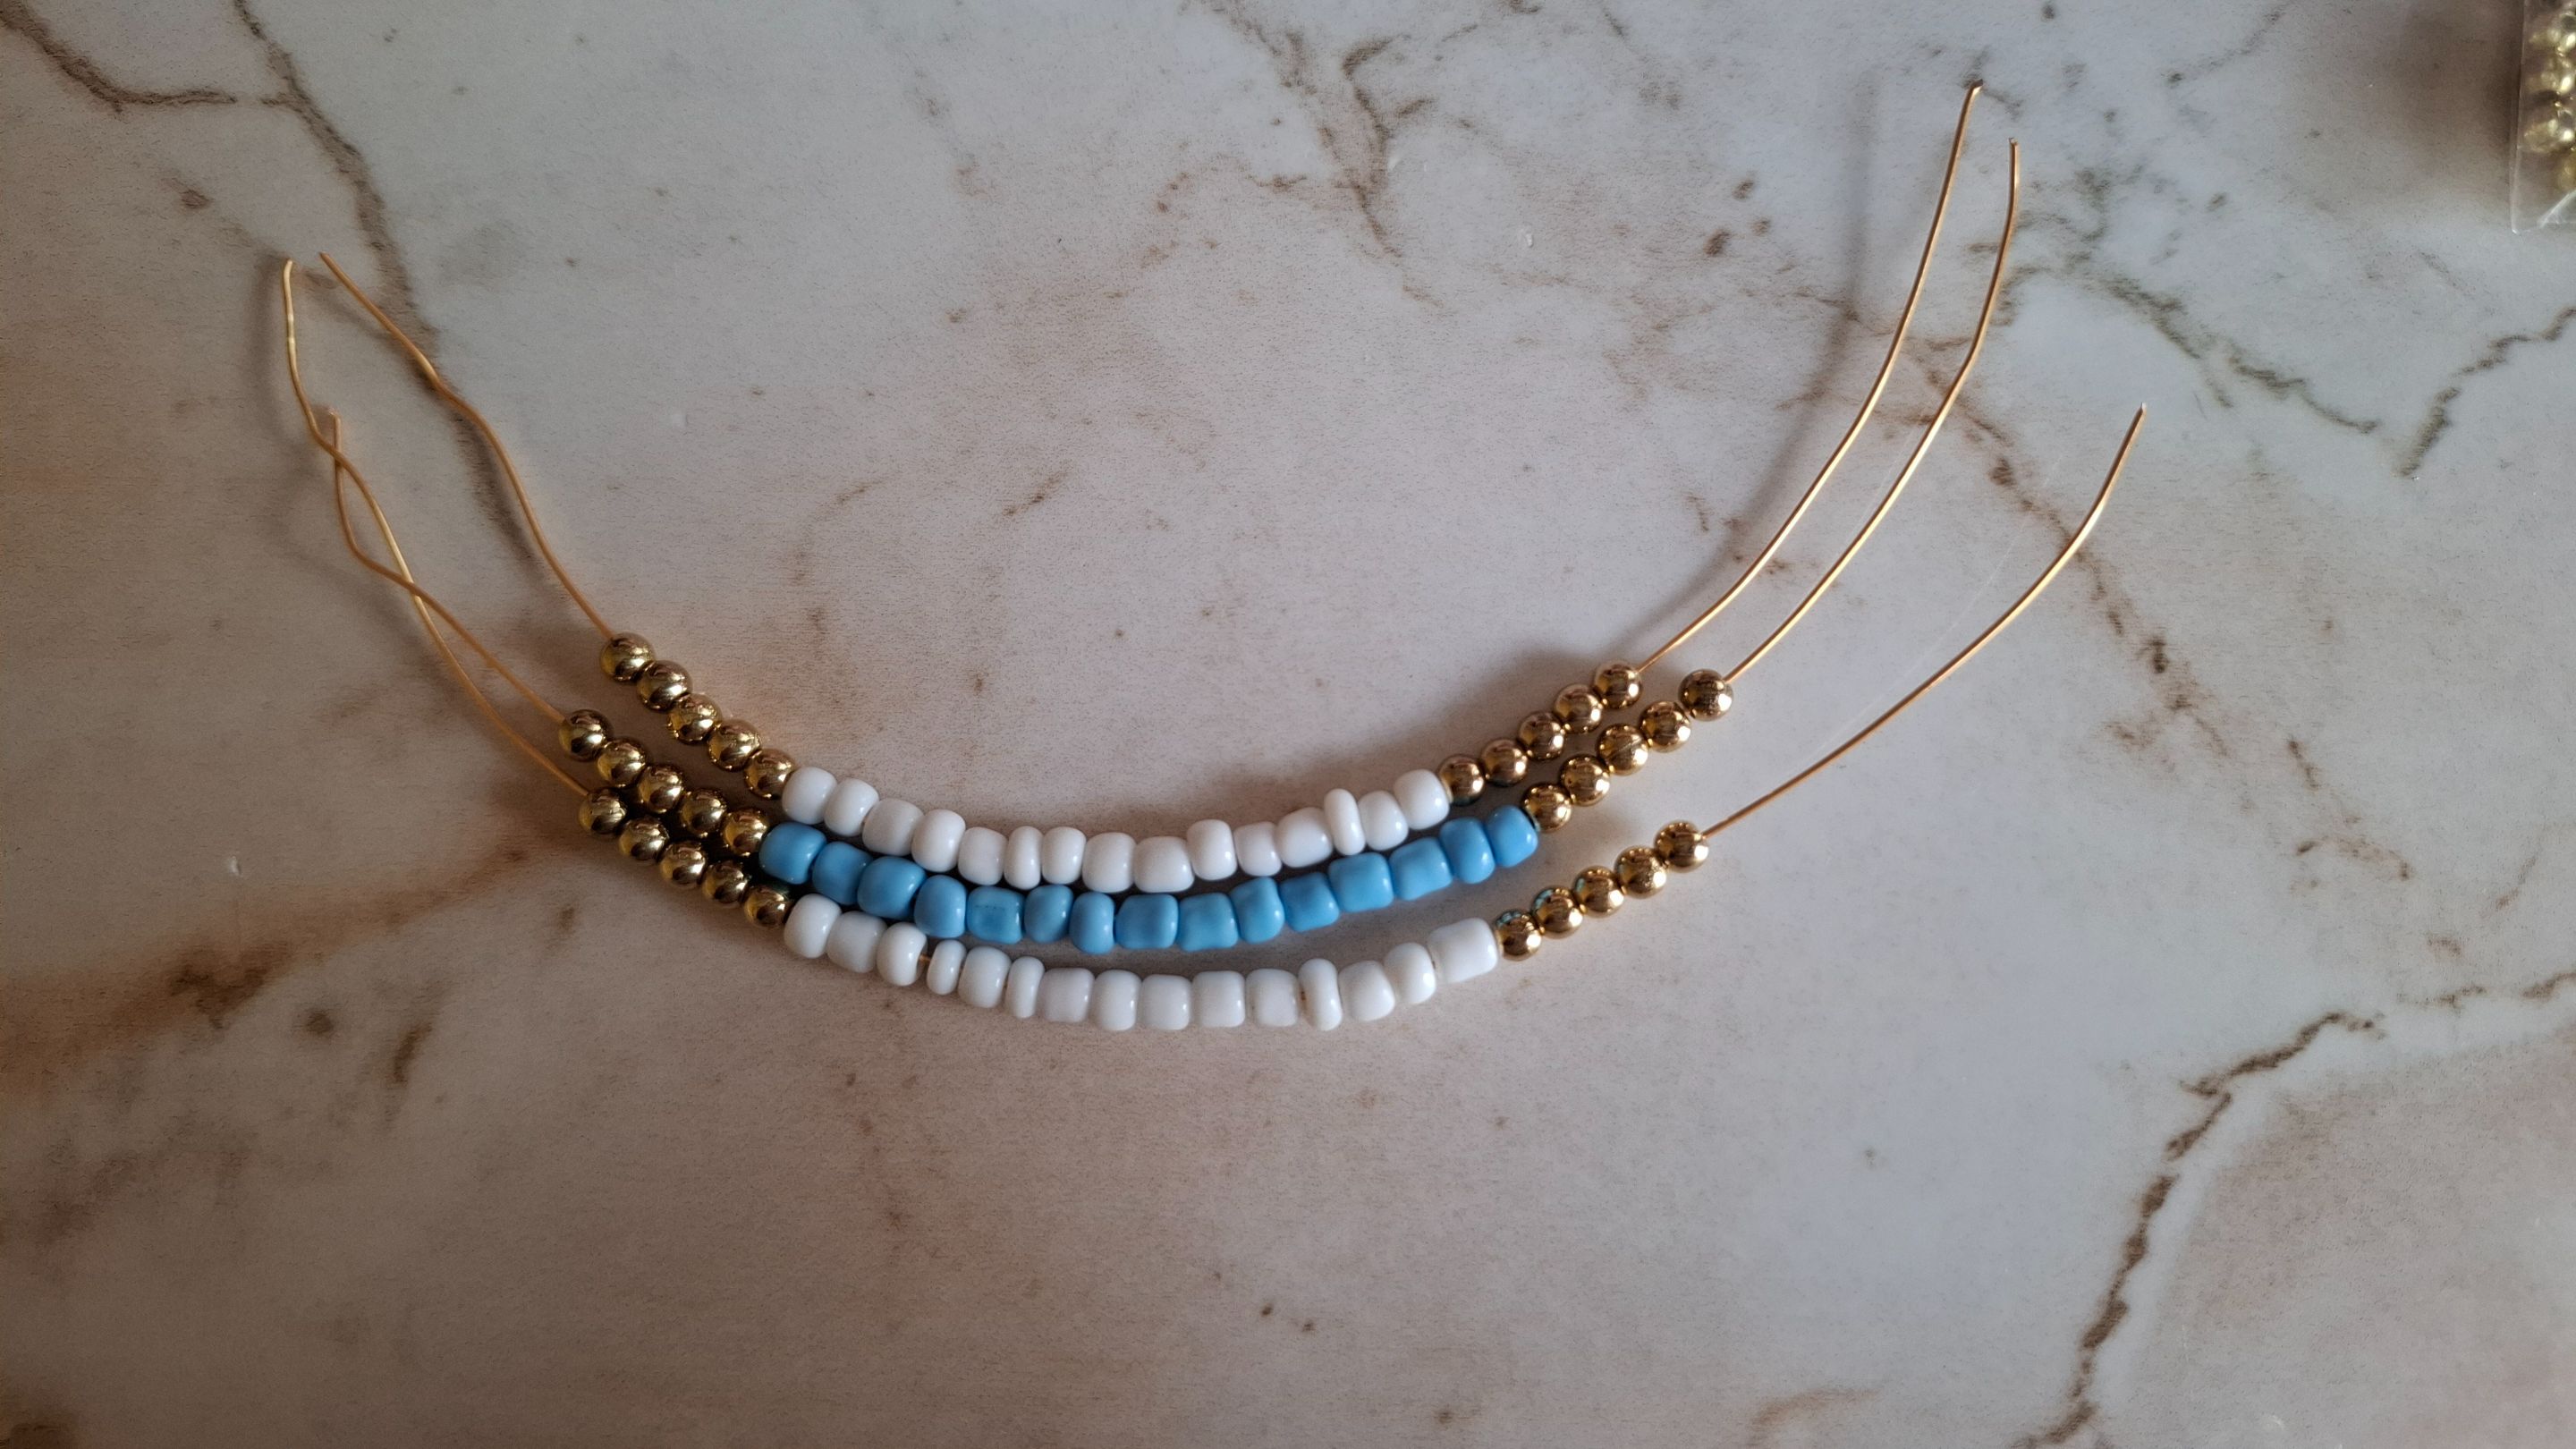
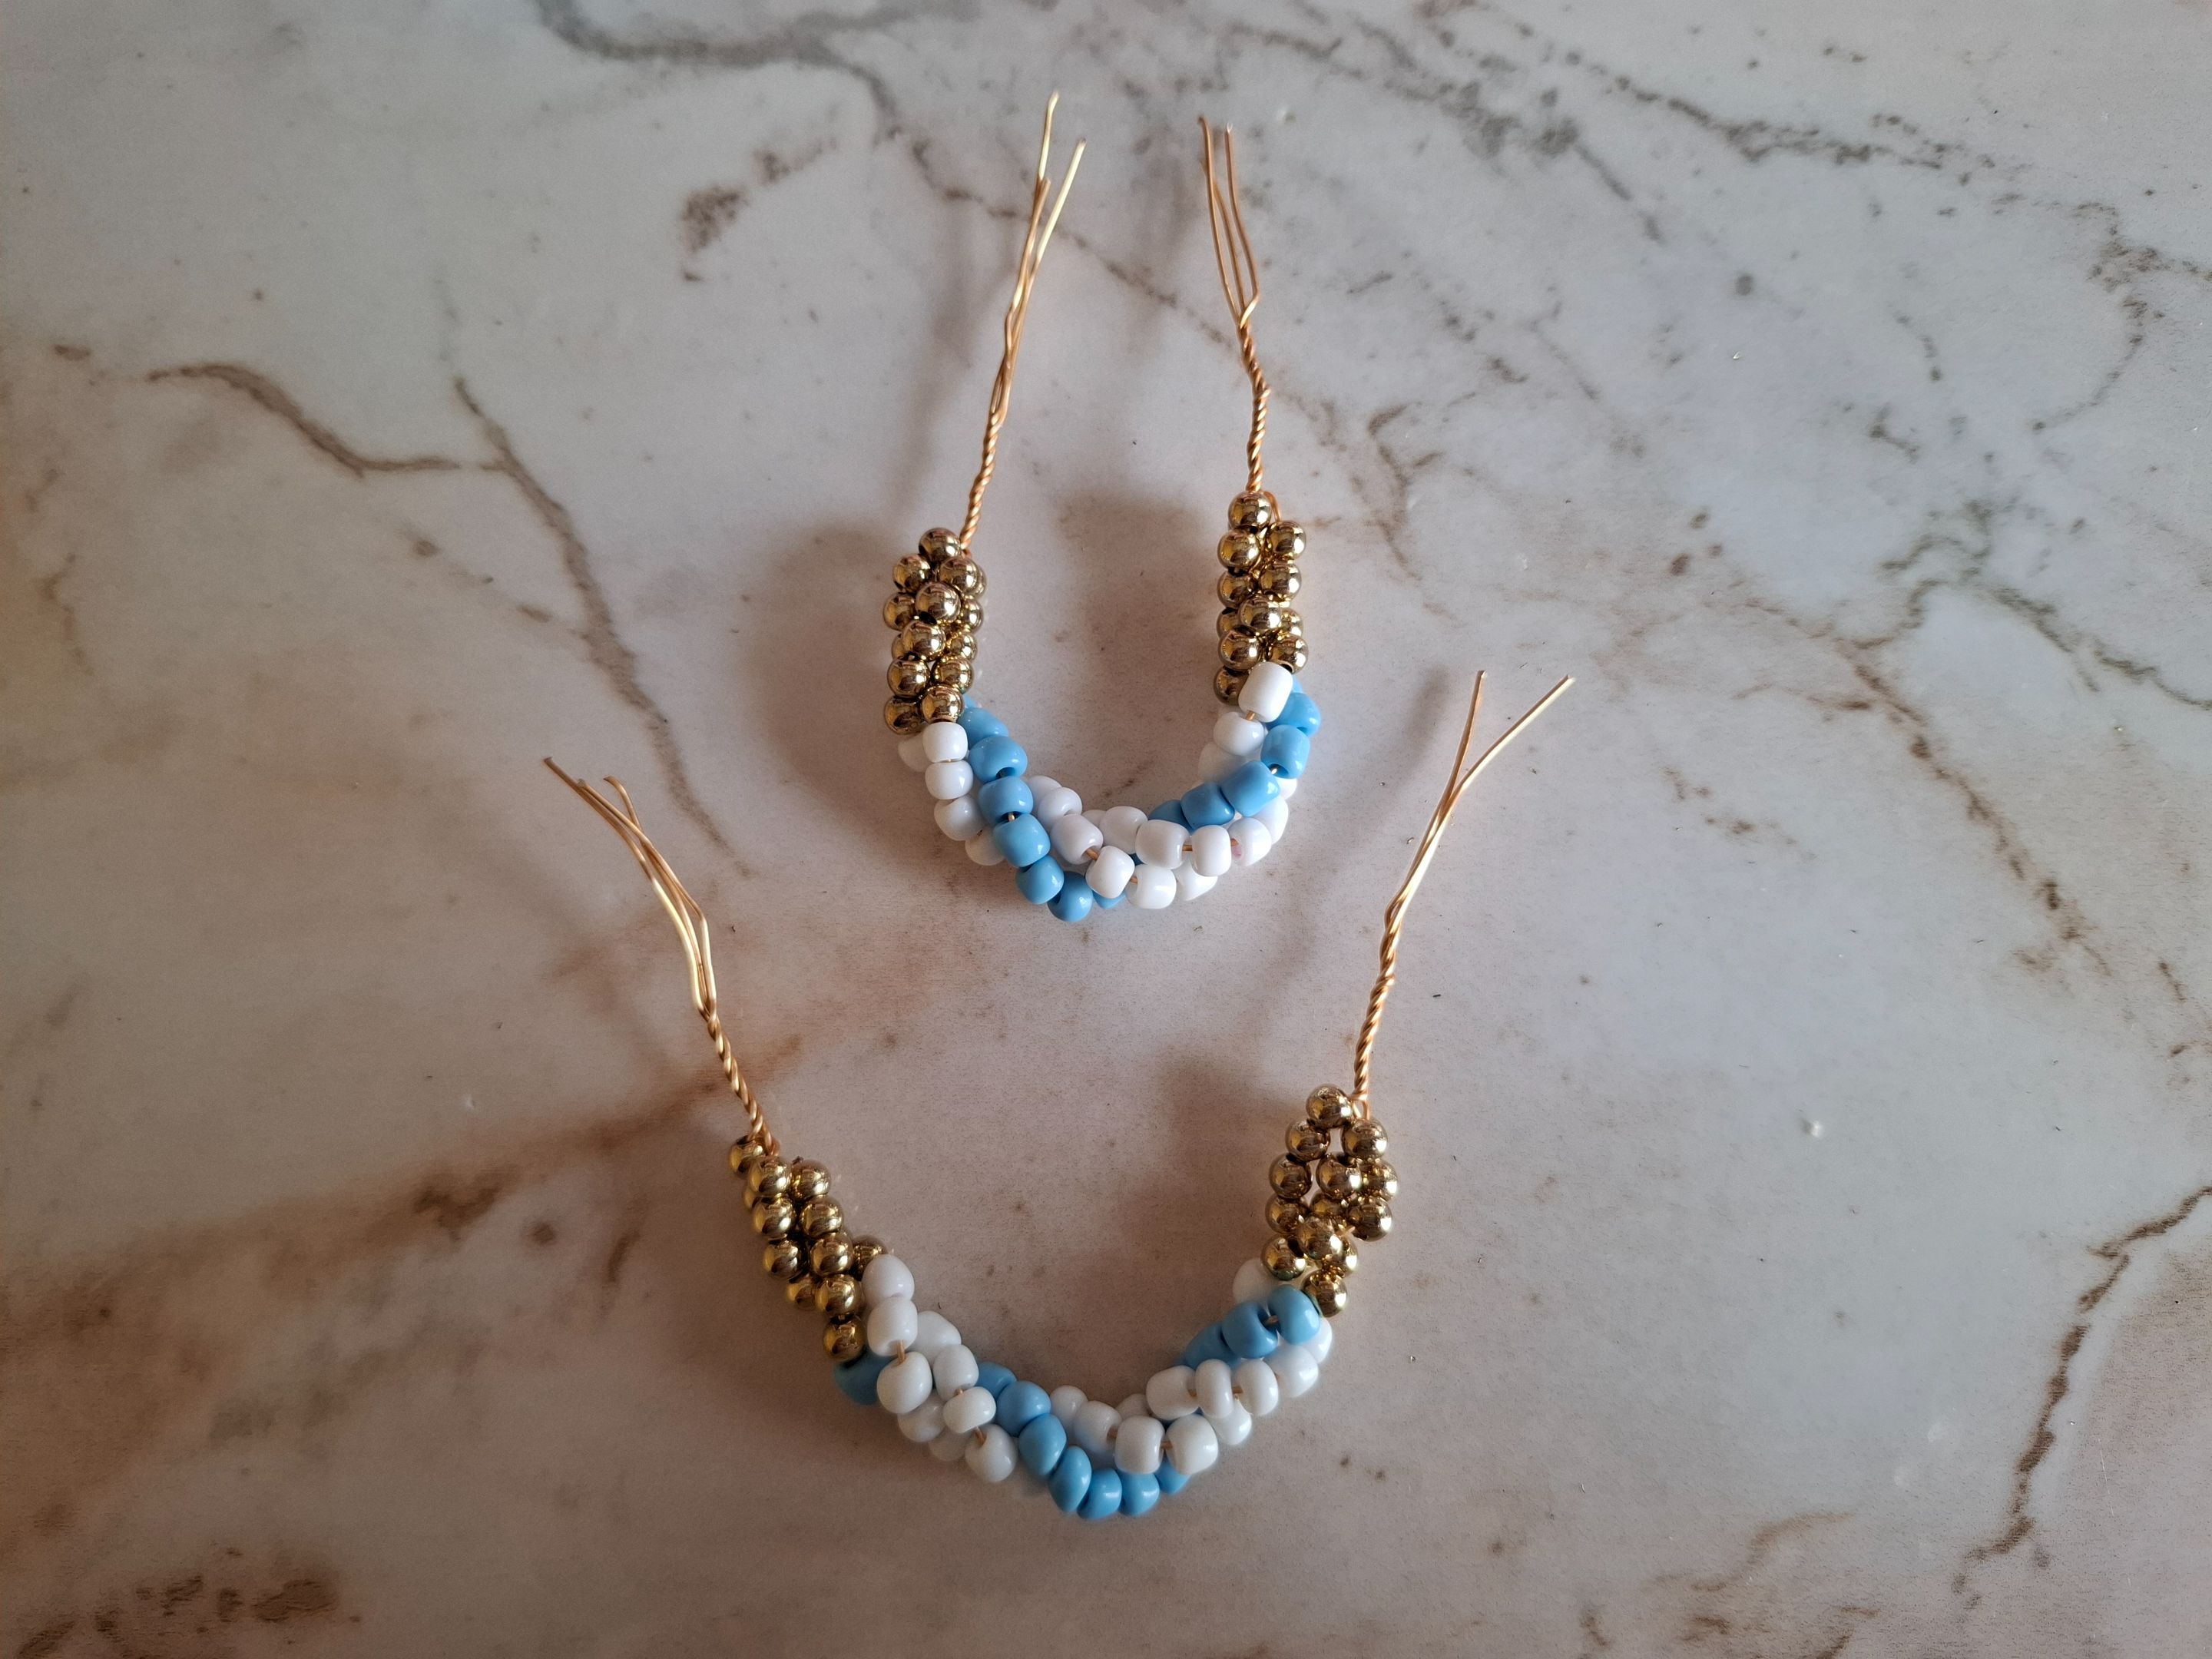
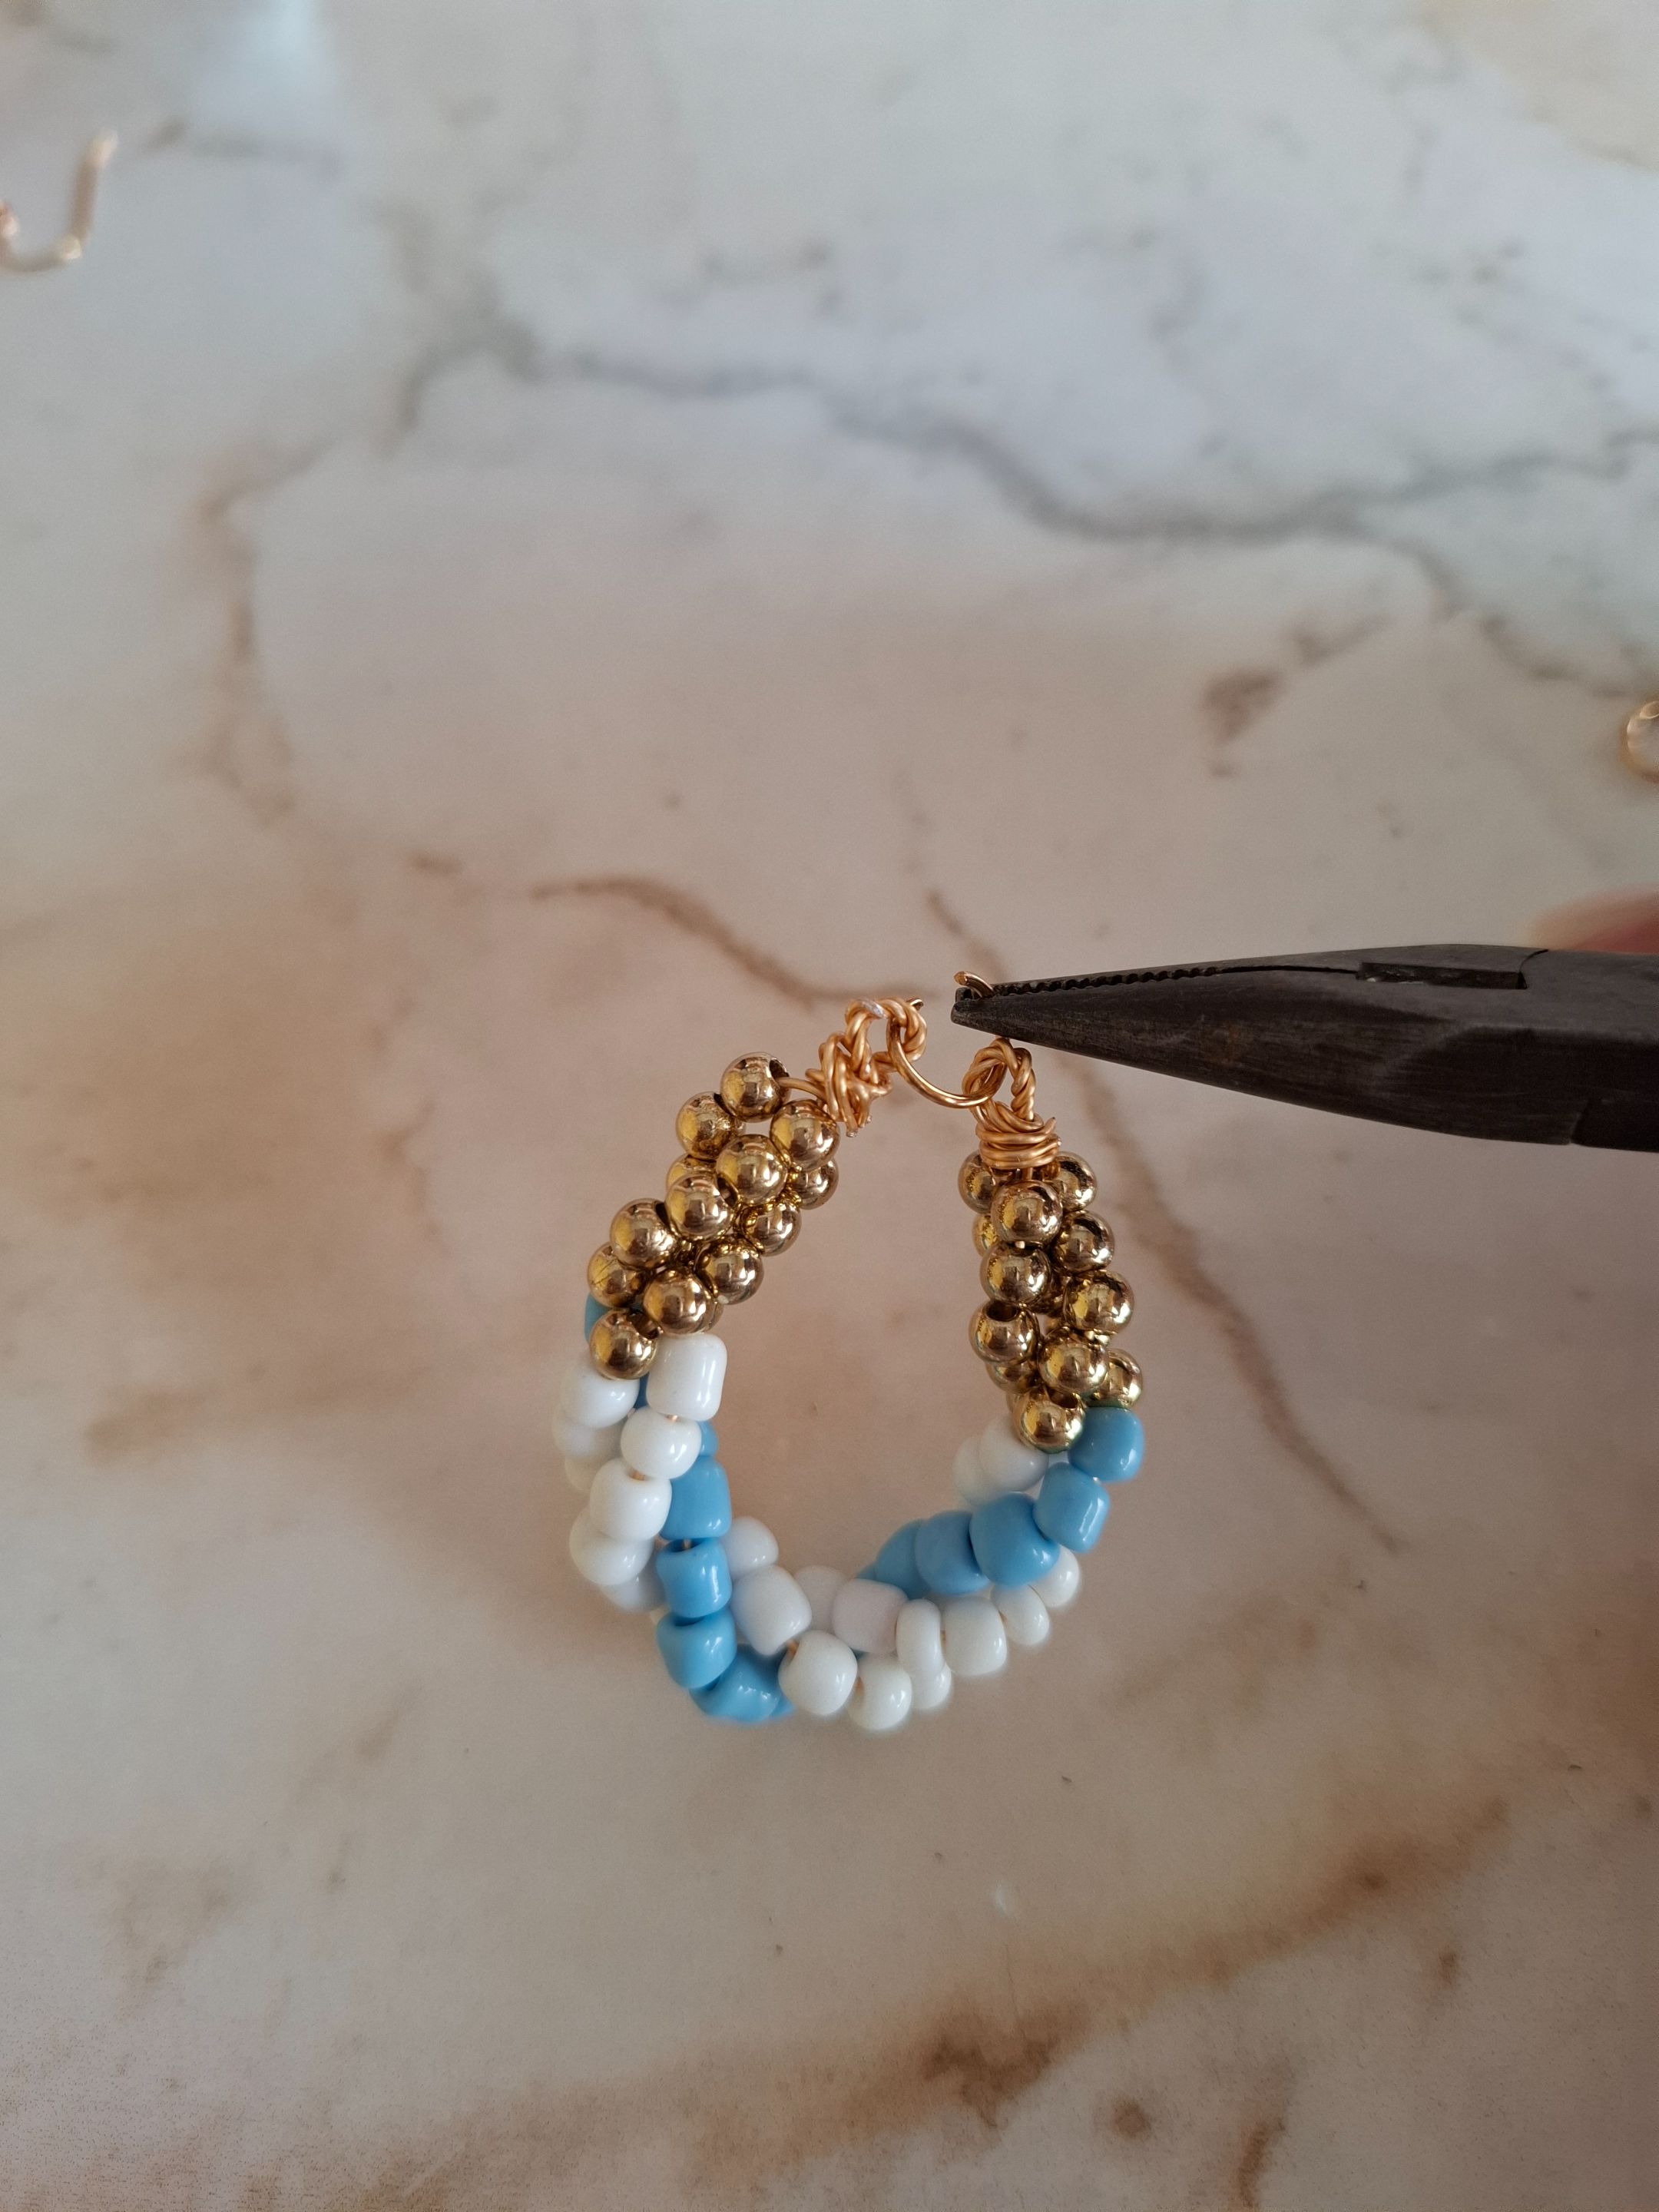
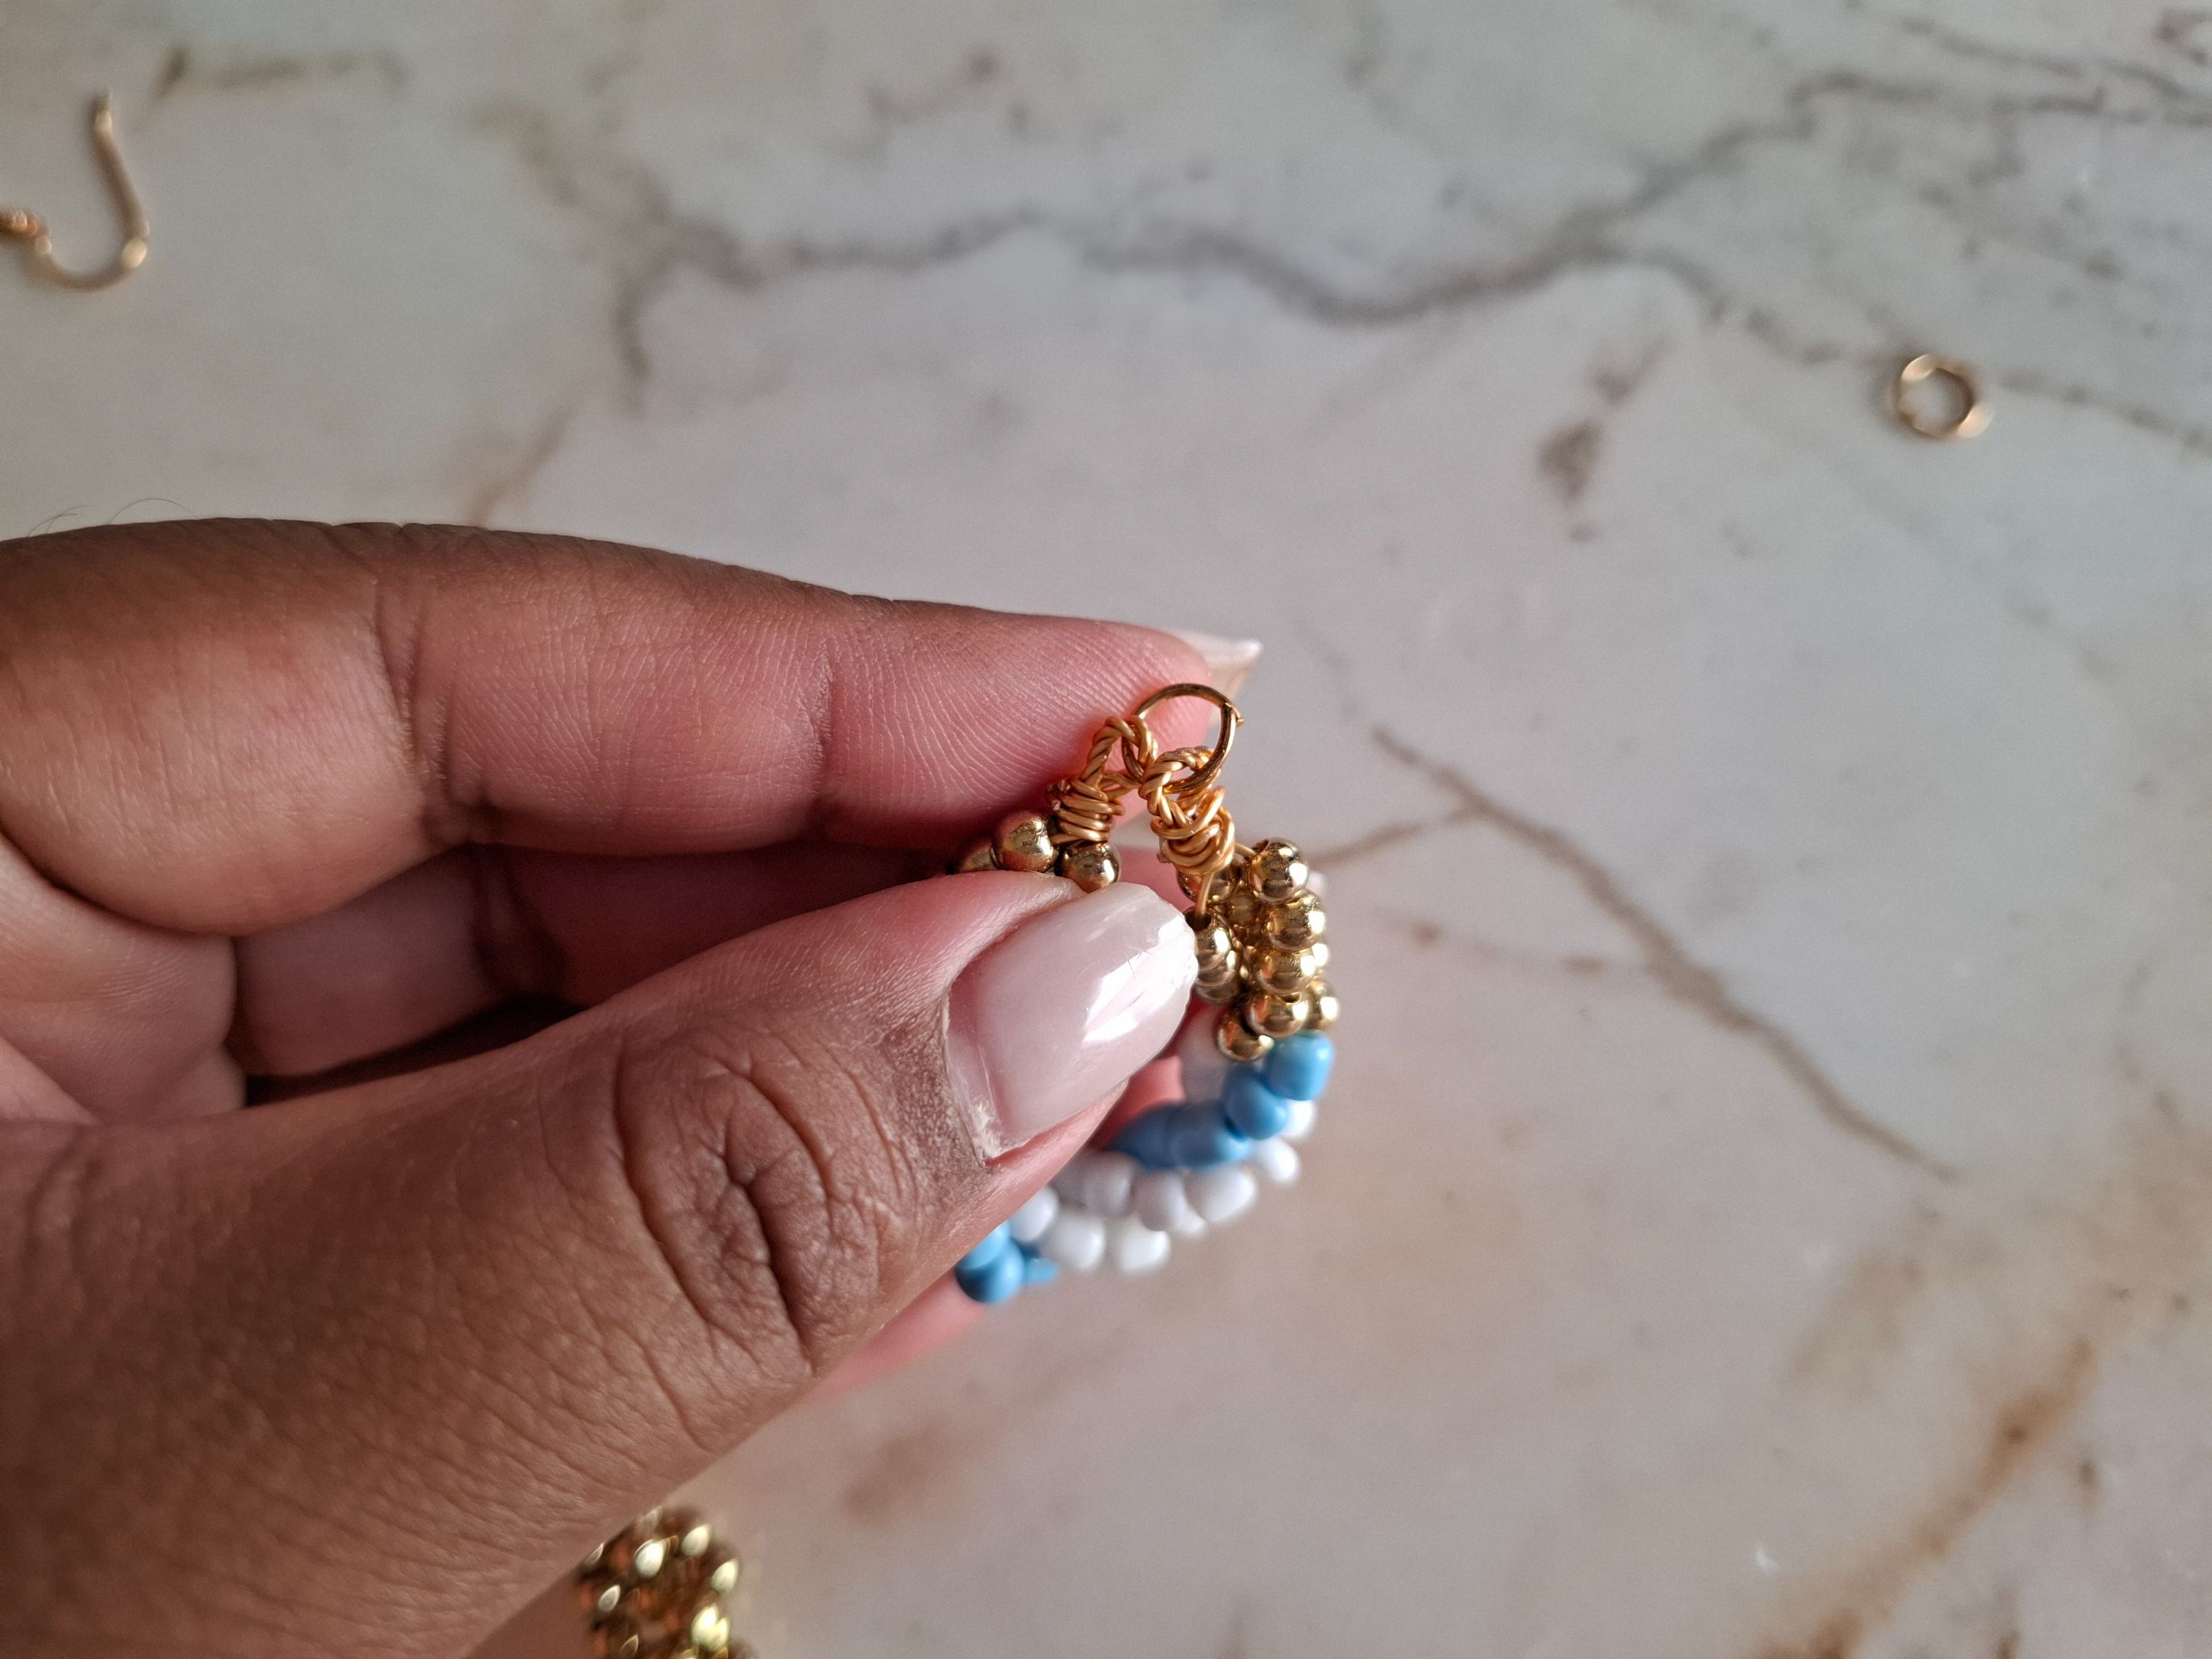
Luego con la pinza terminamos de entorchar hasta que quede bien, con la pinza punta redonda realizamos una argolla y cortamos el sobrante, ahora colocamos una argolla entre los dos orificios, seguido de esto colocamos el gancho listo.
Then, with the pliers, we finish twisting until it is correct. With the round-tip pliers, we make a ring and cut off the excess. Now, we place a ring between the two holes, followed by the hook, ready.
 |
 |
|---|---|
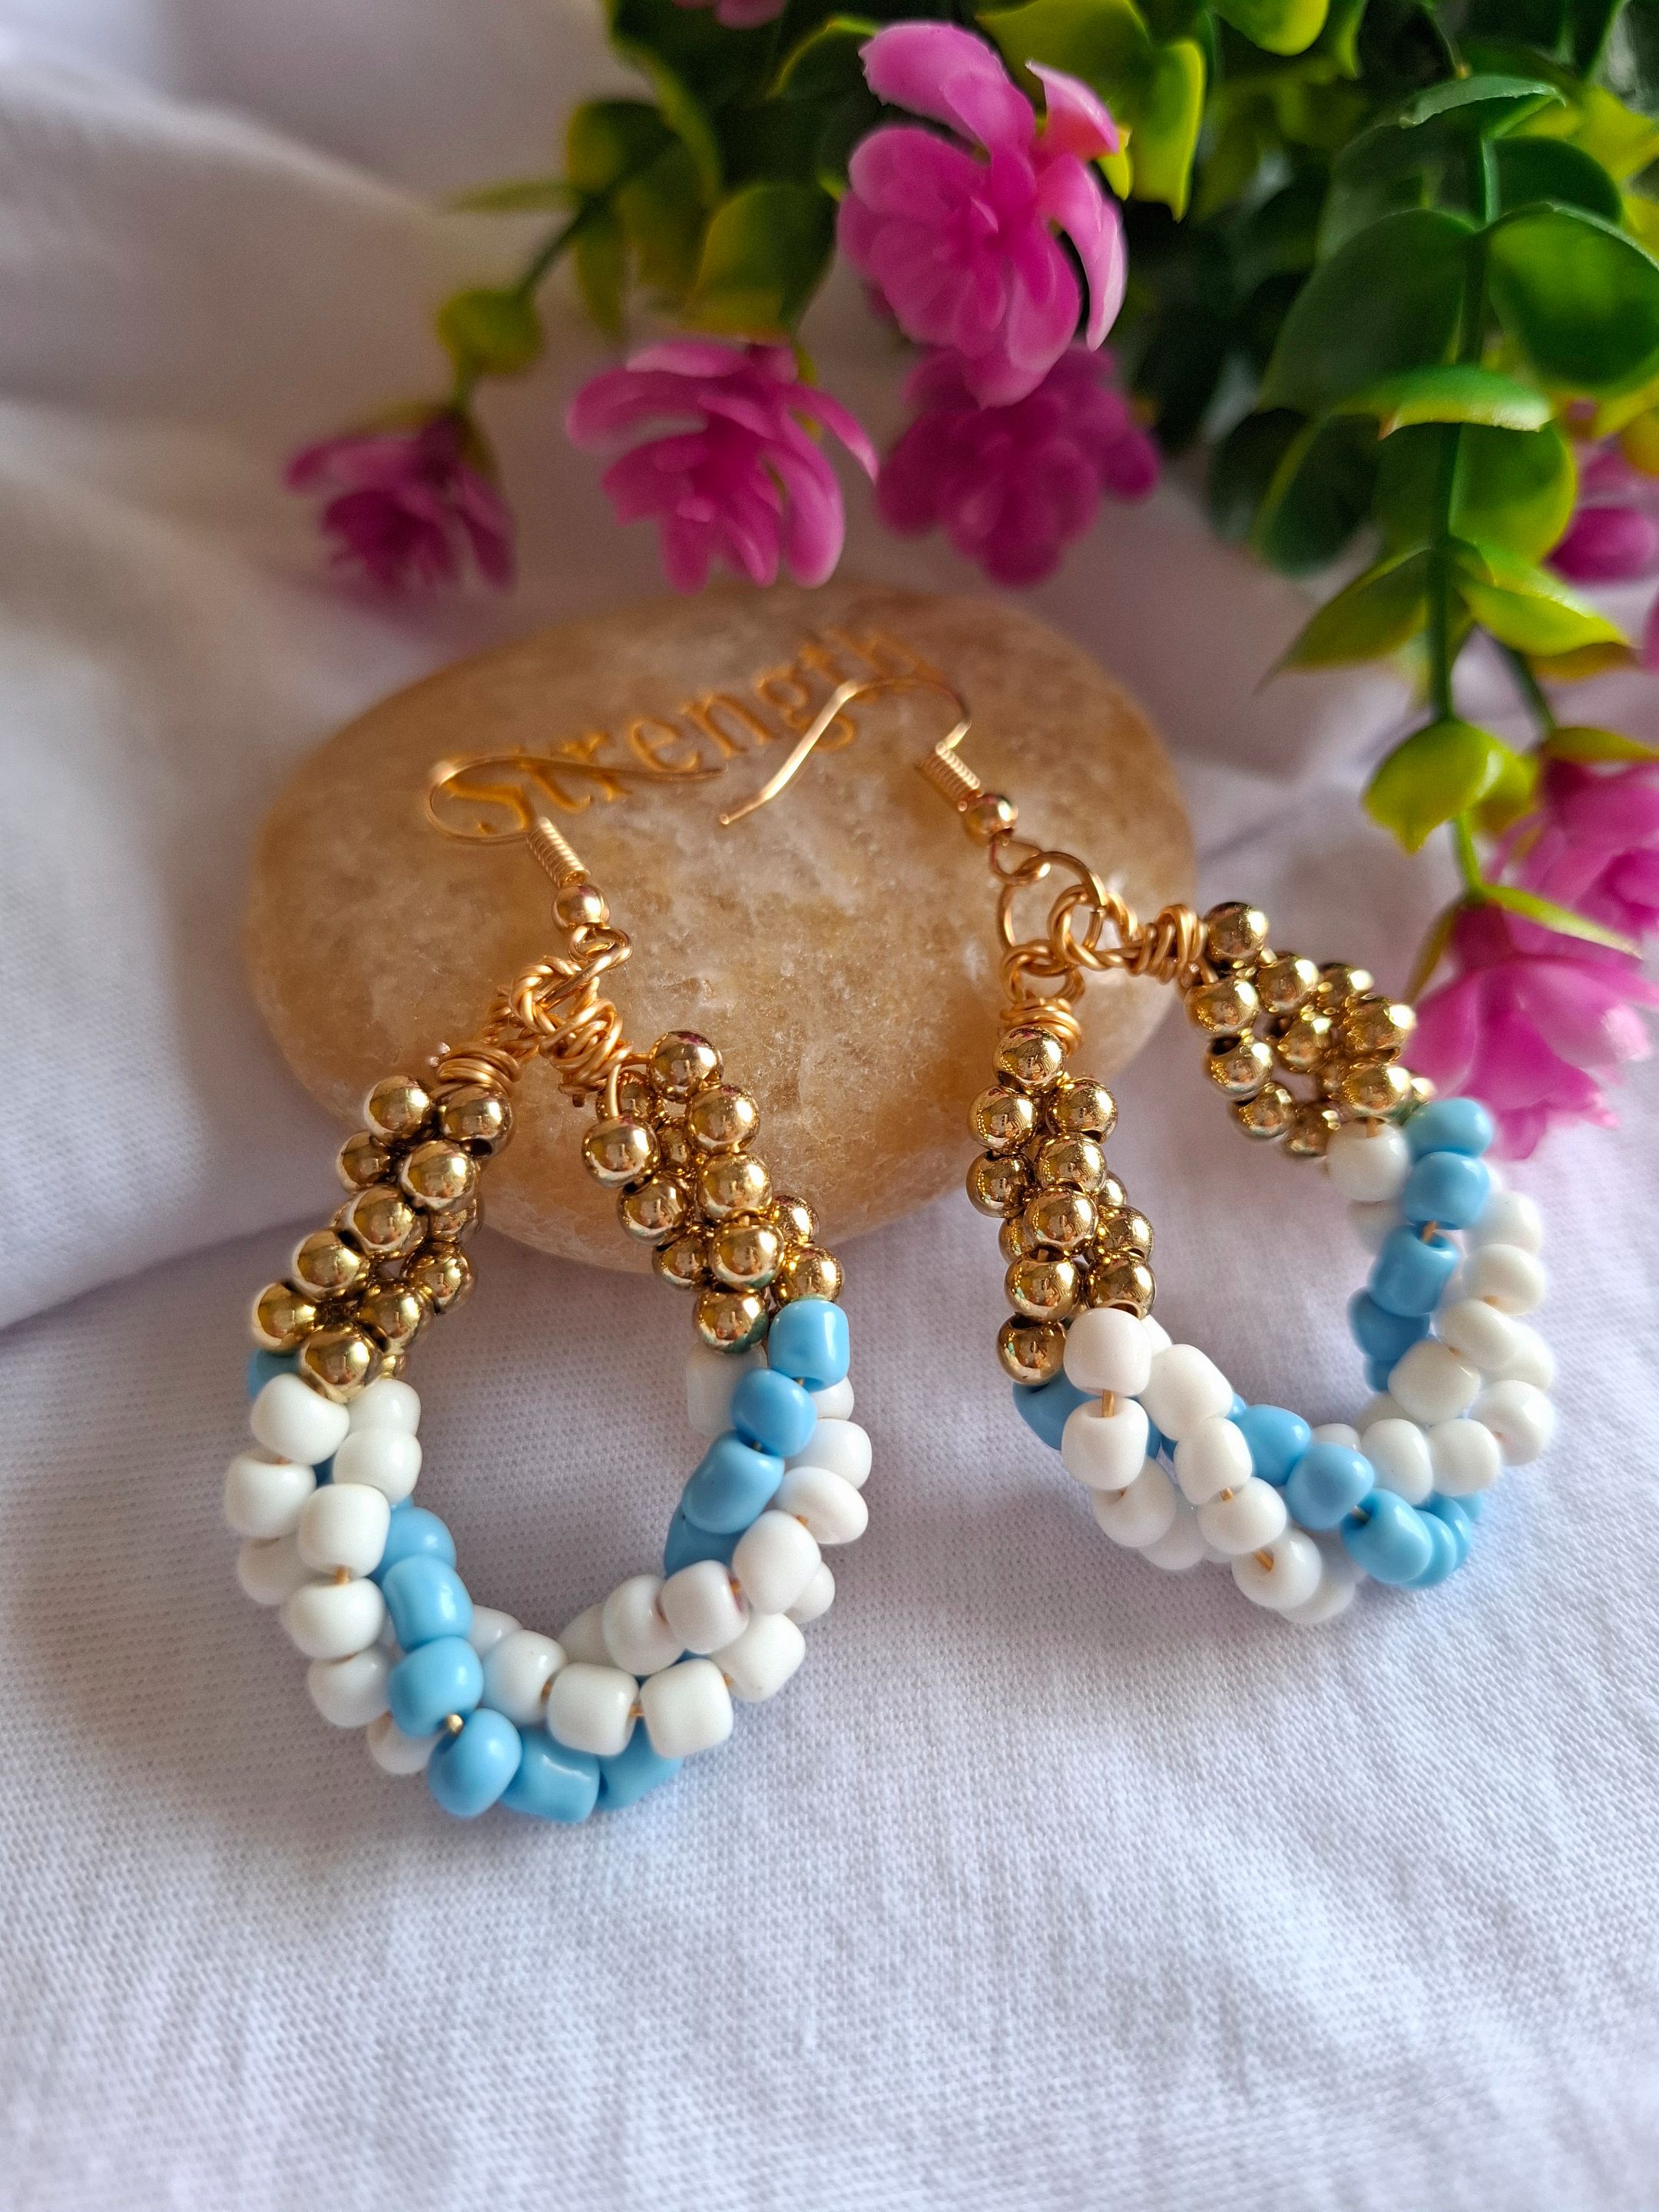
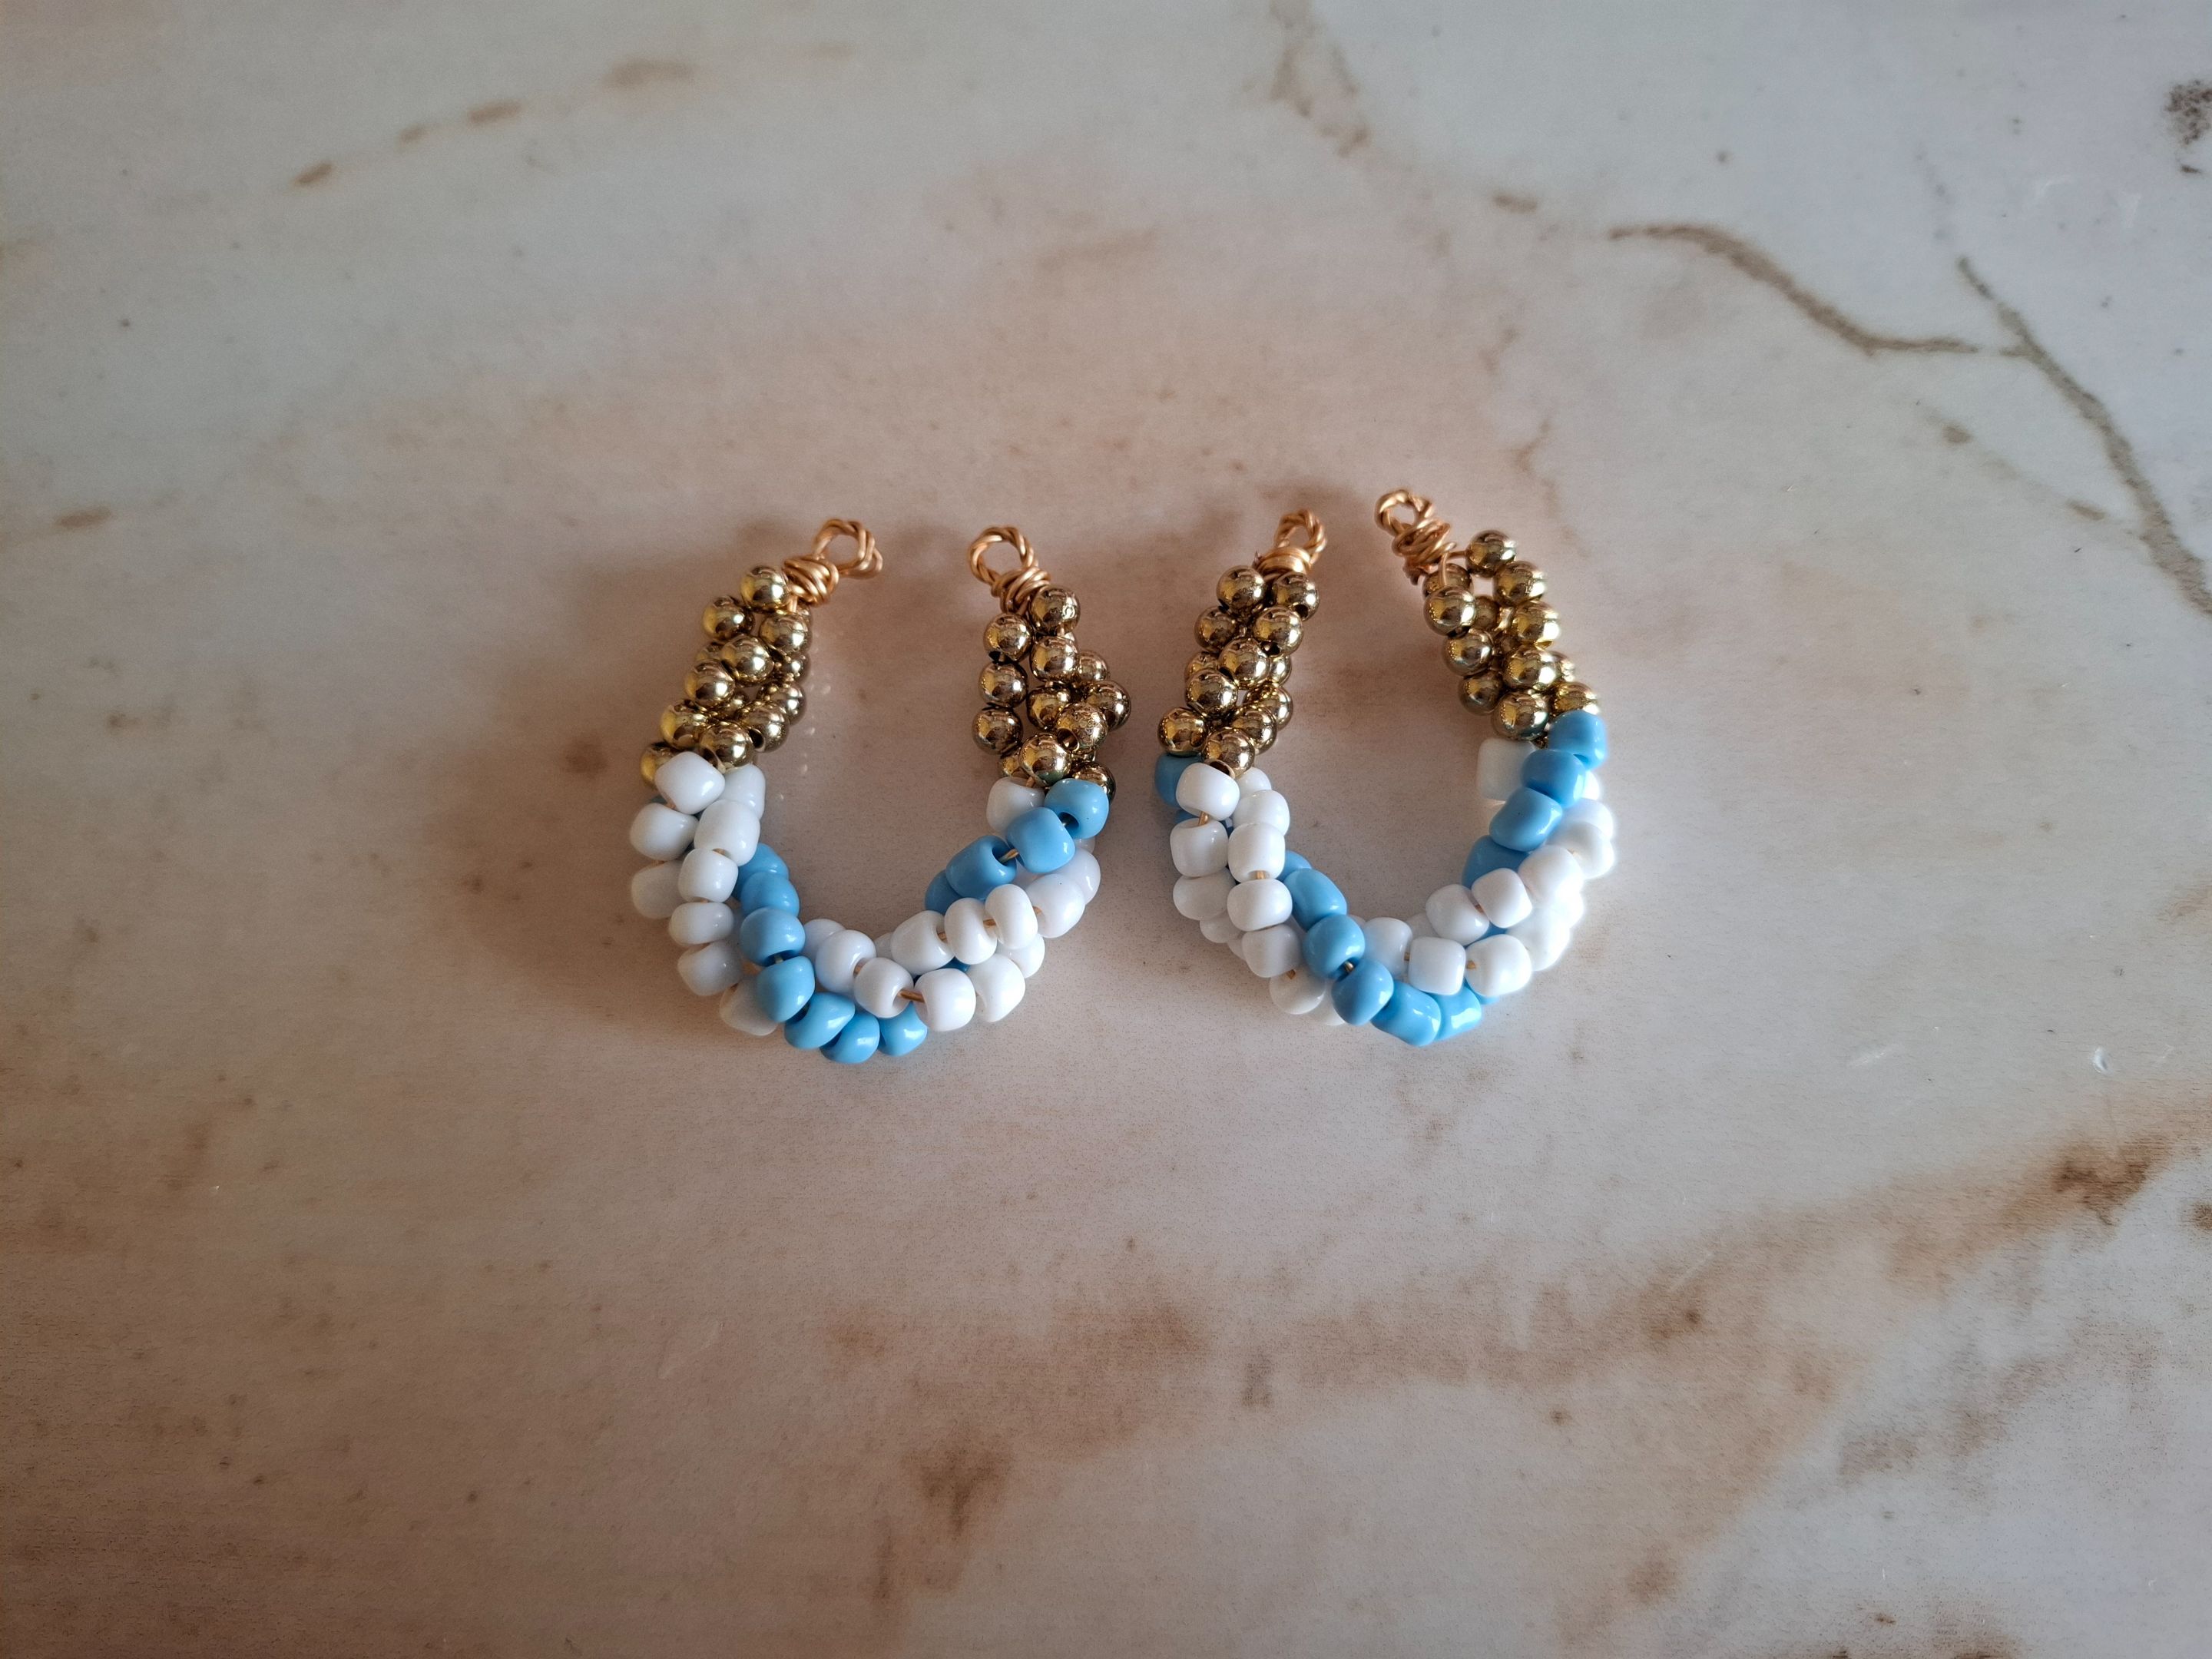
De esta forma súper fácil terminé estos zarcillos ovalados, el tamaño que quería y quedan súper lindos, espero les haya gustado el resultado, muchas gracias por visitar mi publicación nos vemos en una próxima oportunidad con más ideas creativas.
In this super easy way I finished these oval earrings, the size I wanted and they look super cute, I hope you liked the result, thank you very much for visiting my publication, see you next time with more creative ideas.