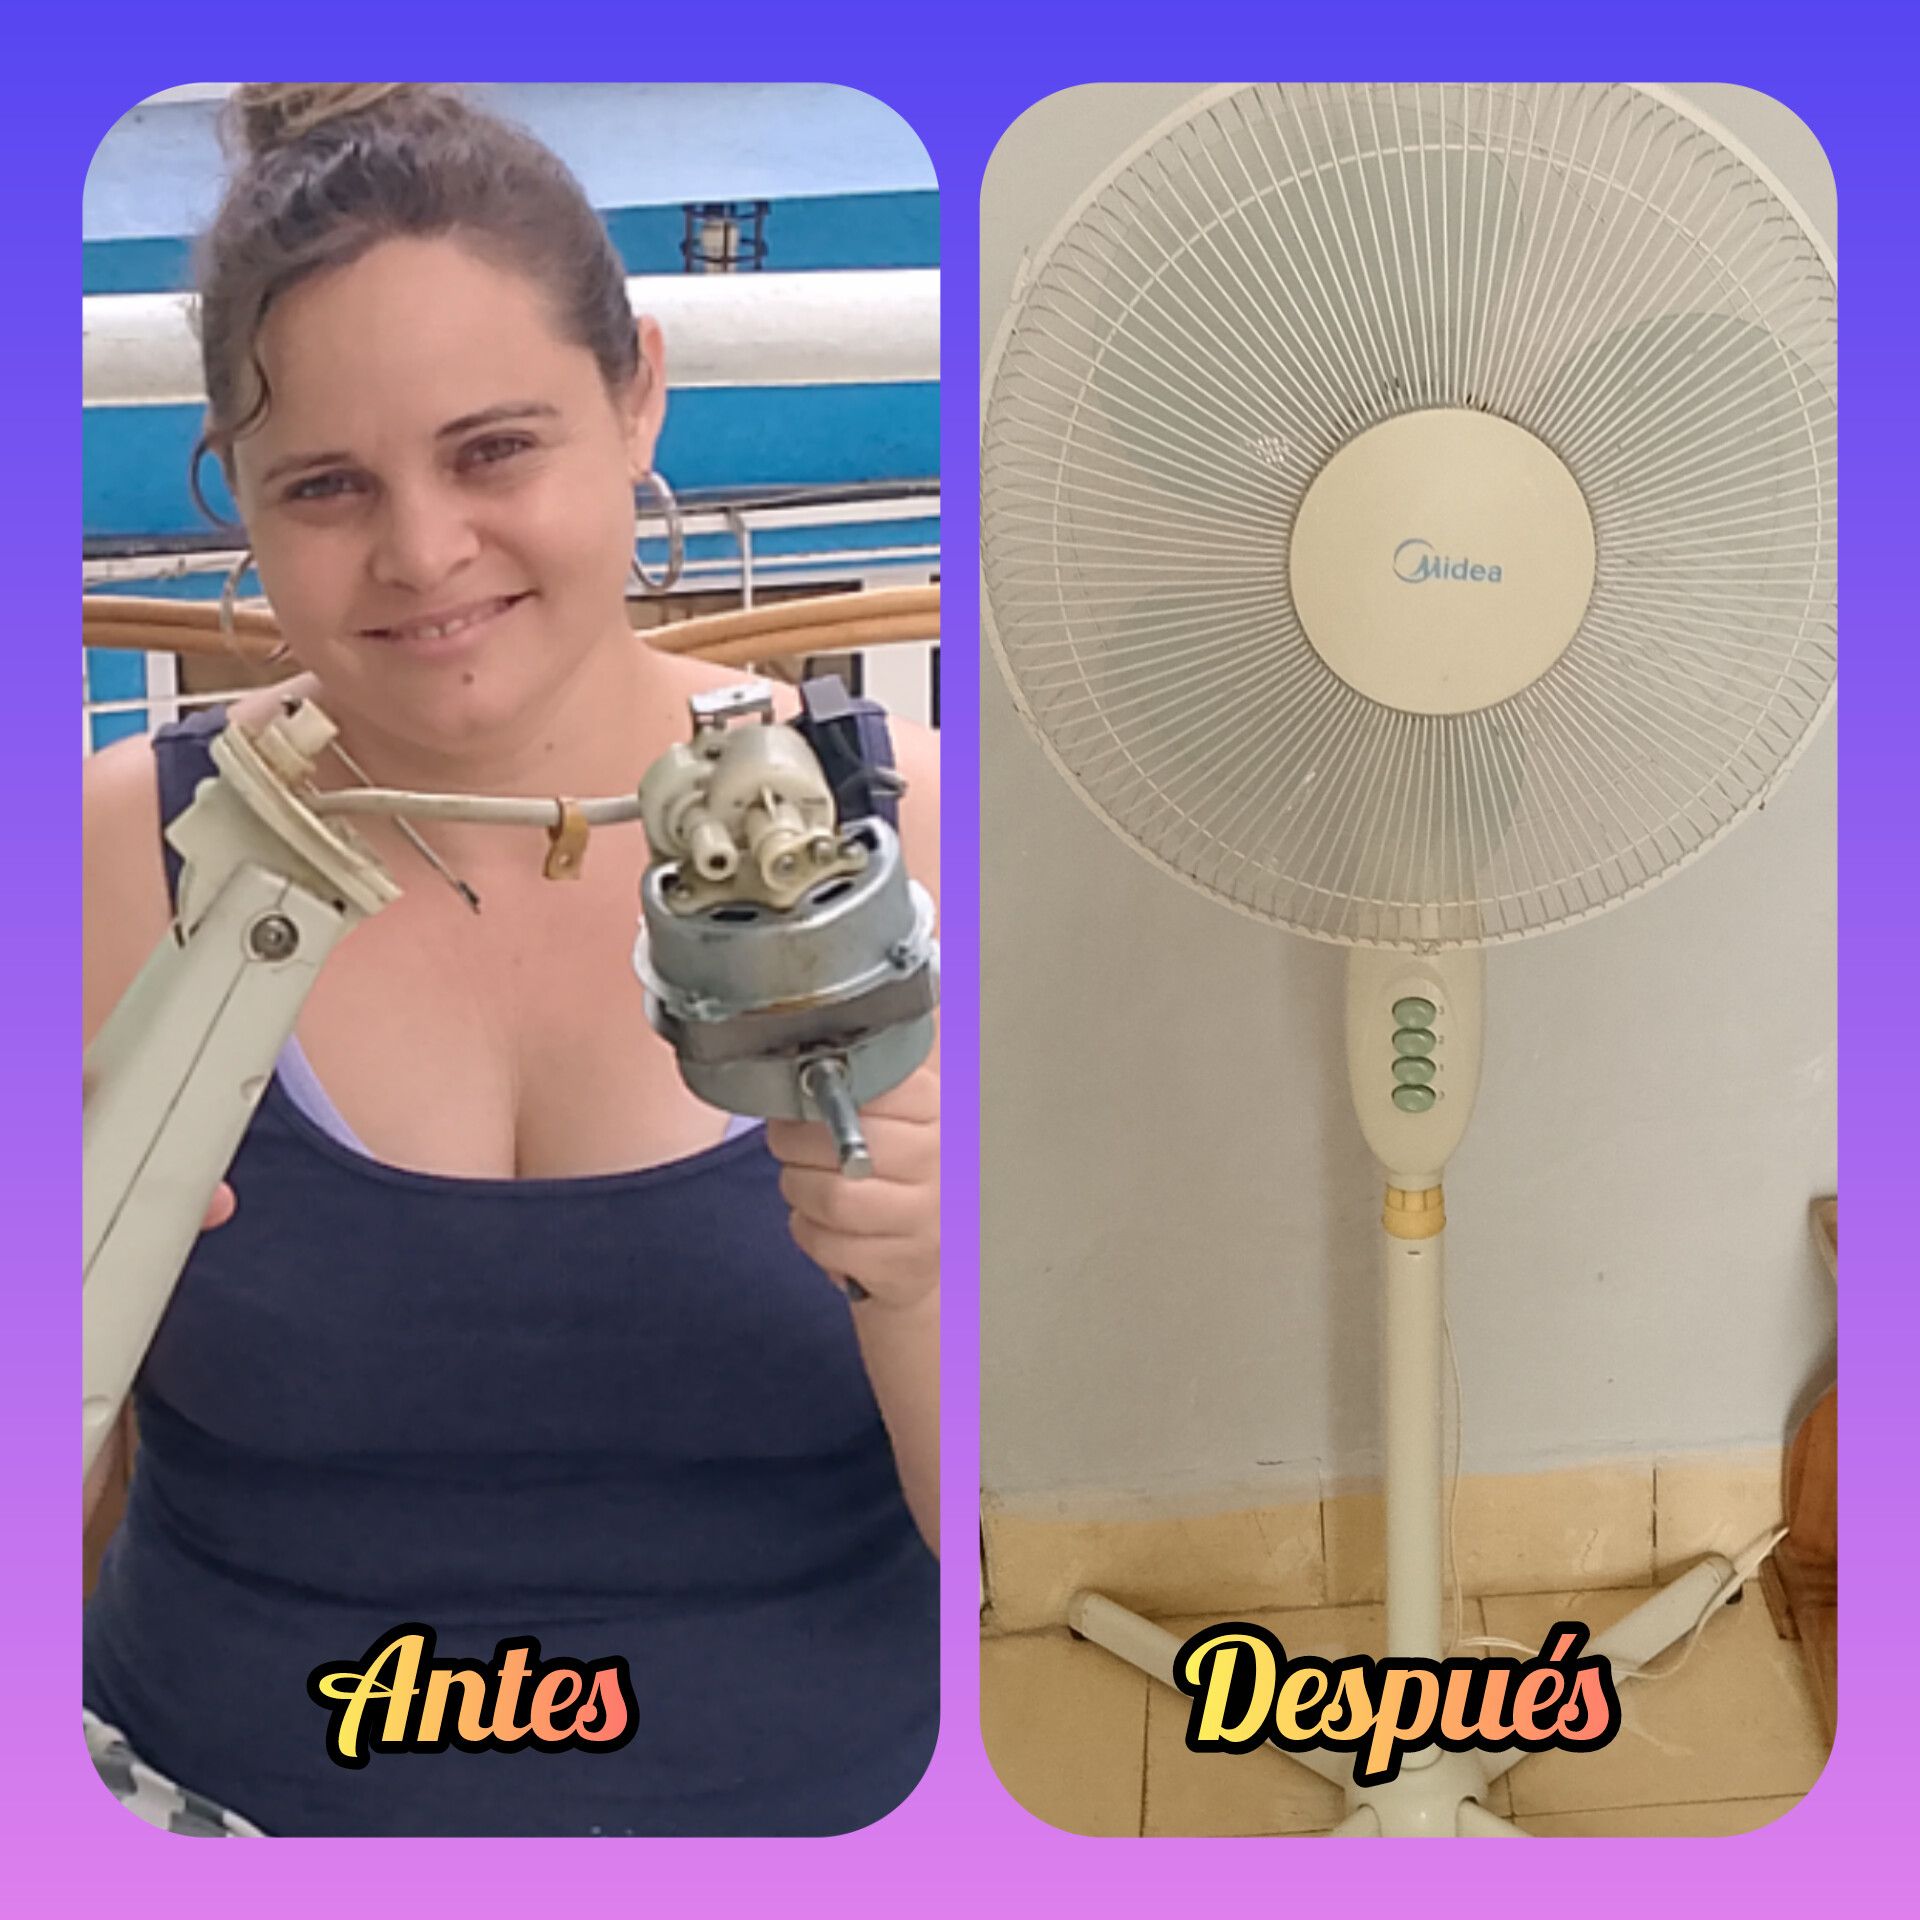
Hola amigos de #hive y en especial a la comunidad @home.solutions como siempre espero que se encuentren bien al igual que sus familiares y amigos, en el día de hoy paso por acá para contarles cómo engrasé y di mantenimiento a mi ventilador, una tarea muy importante en el hogar para mantener su buen funcionamiento. Bueno les cuento que hace unos días estuvo mi ventilador de la sala un poco trancado y precisamente fue por falta de mantenimiento, pues en sus interiores se va acumulando suciedad, así que estaba trancado.
Este ventilador que tengo en la sala es uno de los que más me gusta en la casa, pues precisamente ese, es el que más aire echa y el que más refresca toda la sala y tiene un ángulo de giro que perfectamente le da a todas las posiciones de los asientos que hay en ella, así que todo el que se siente en la sala podrá tomar aire y refrescar de las altas temperaturas que haya en estos días por esta zona del caribe.
Resulta que los calores son insoportables y aún no había cobrado mi salario del mes para poder llevarlo al mecánico a qué me le diera mantenimiento, así que sin pensarlo lo agarré y me puse yo misma a hacerlo, este ventilador me gusta mucho, pero la verdad, así no servía, así que cualquier contratiempo que ocurriera en el camino, pues ni modo, quien no se arriesga ni gana ni pierde ja, ja, ja, aunque les debo confesar que he visto hacer esto muchas veces ja, ja, ja, así que ya tenía una ligera idea de lo que había que hacer.
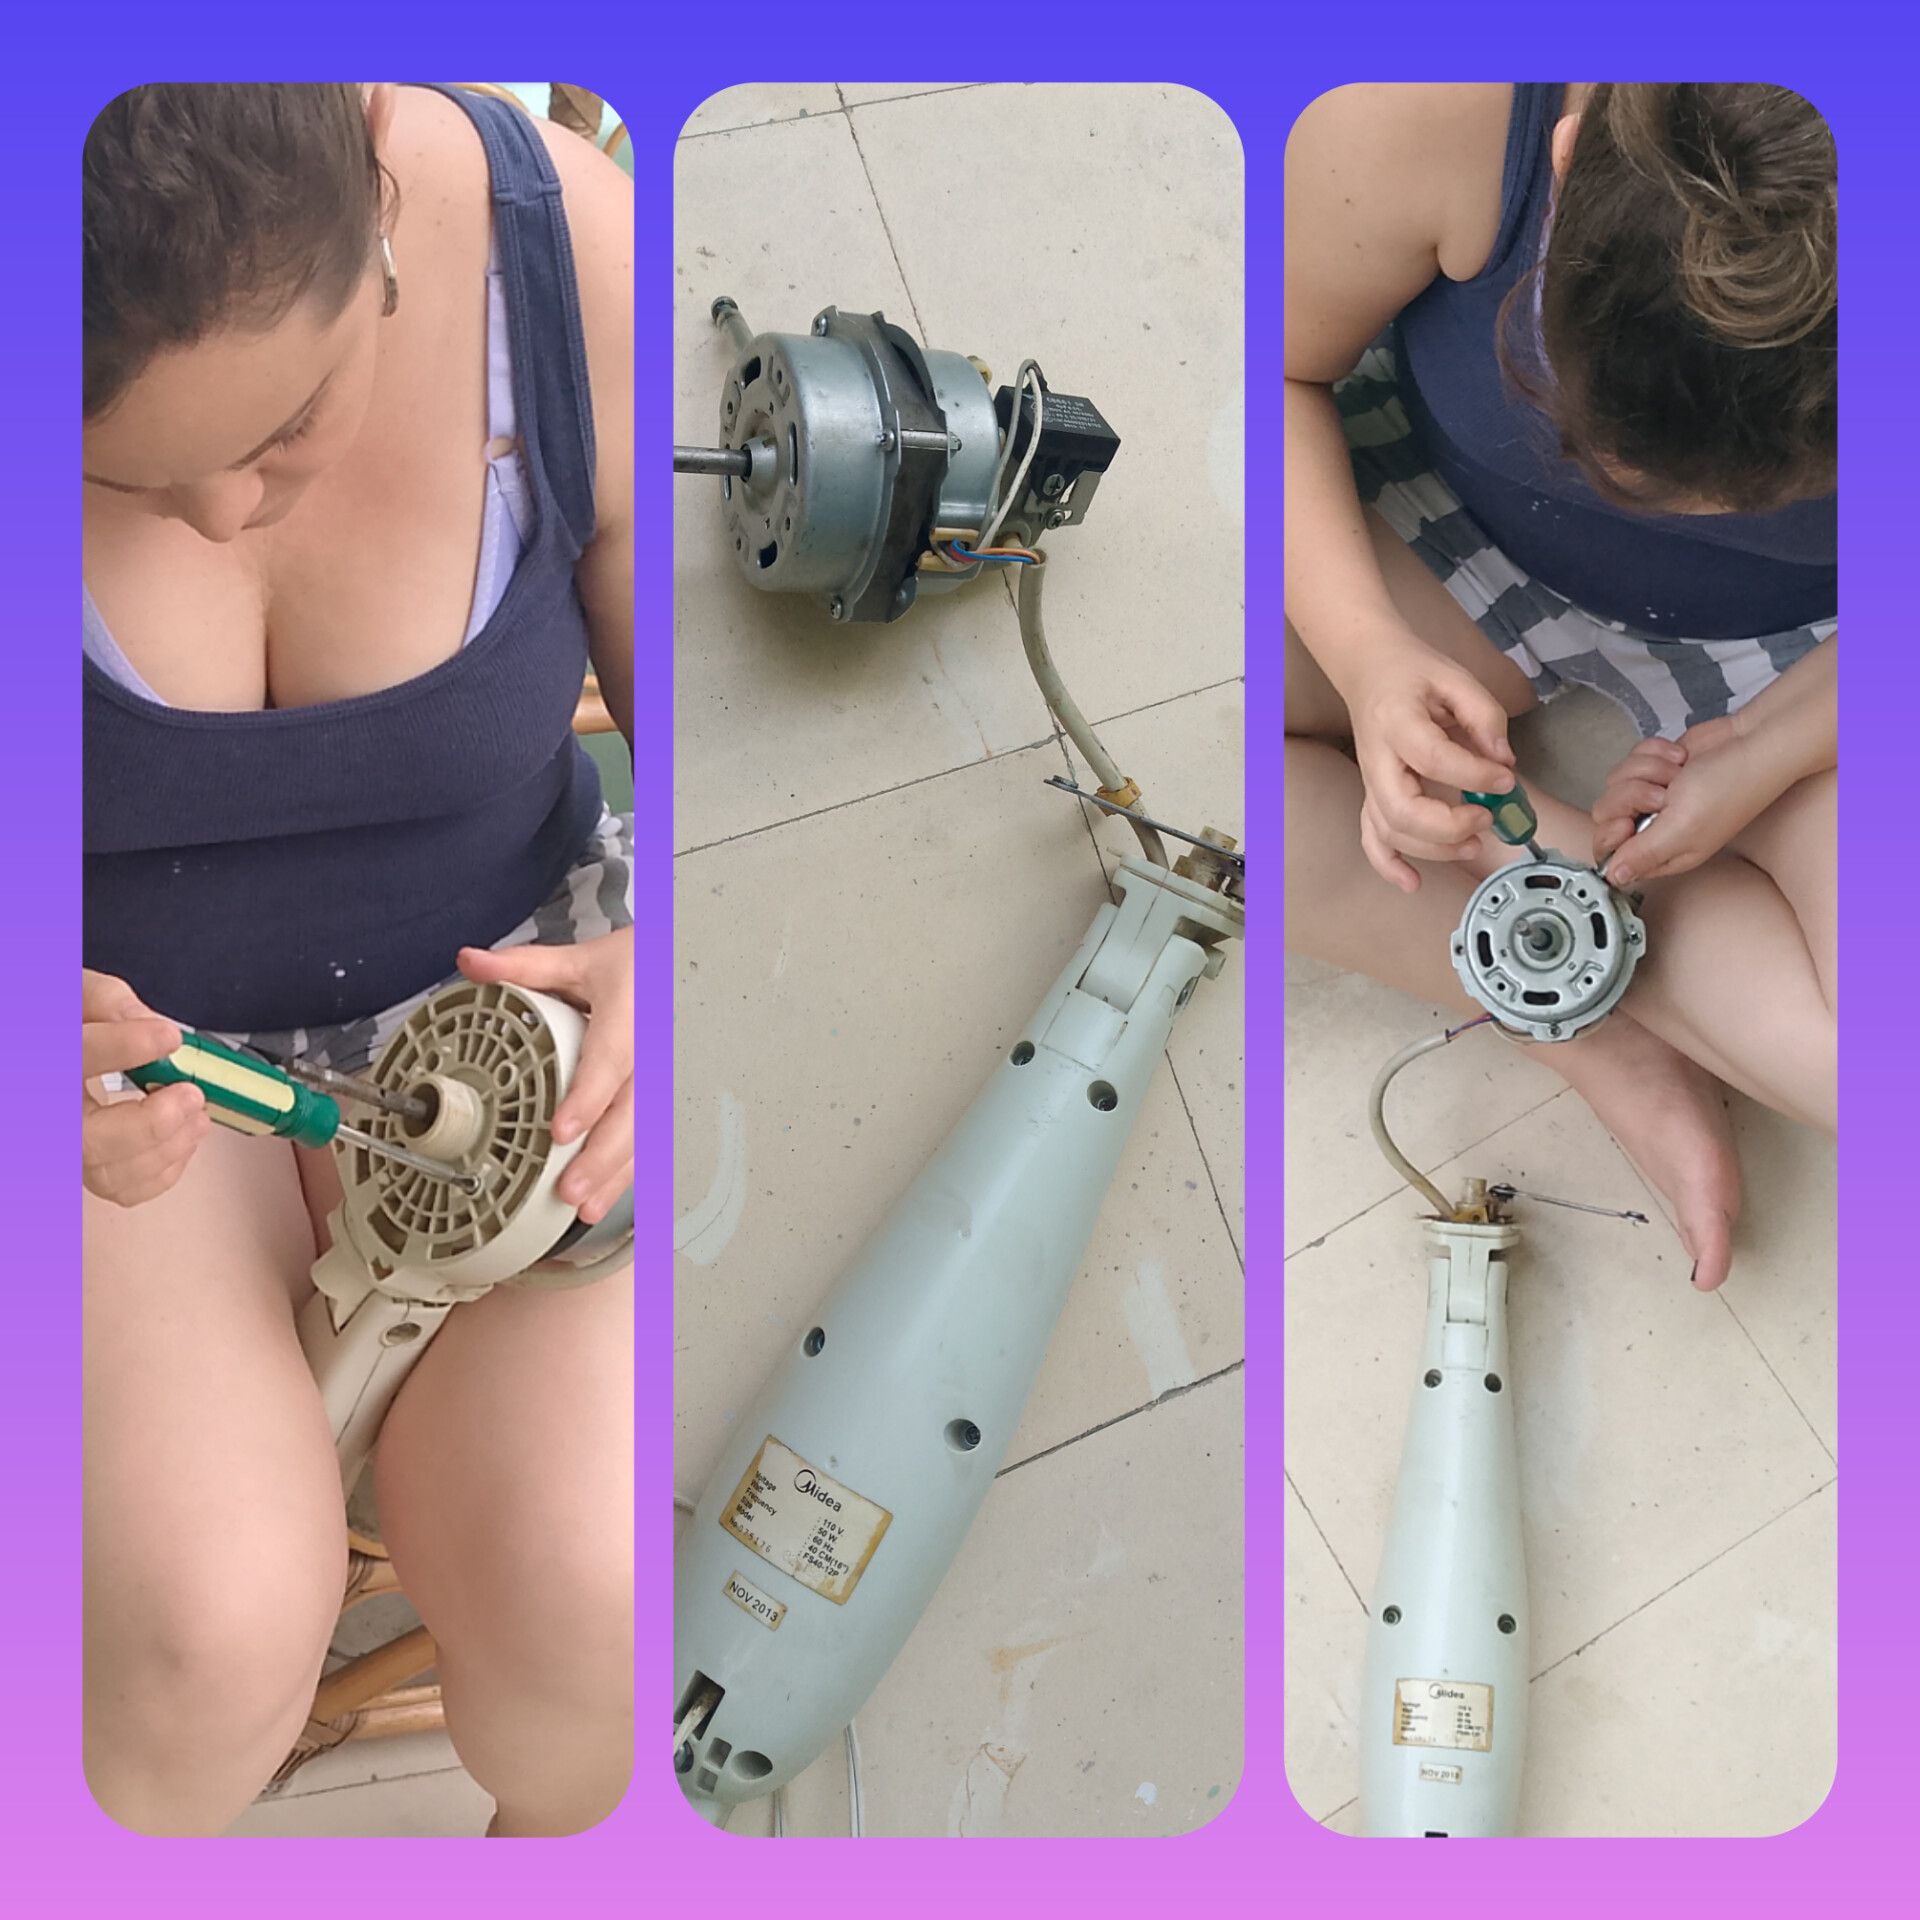
Sin dudar y con la firmeza de que todo saldrían bien, pues me puse a quitar tornillos y tuercas y a quitar pieza por pieza, con cuidado y delicadeza para no dañar nada y en un orden lógico para saber después como tenía que colocar todo de nuevo y que todo resultara bien y sin contratiempos. Lo primero que hice fue quitar toda la parte externa de plástico para poder trabajarlo bien, de hecho si no quitas eso no puedes hacer nada ja, ja, ja.
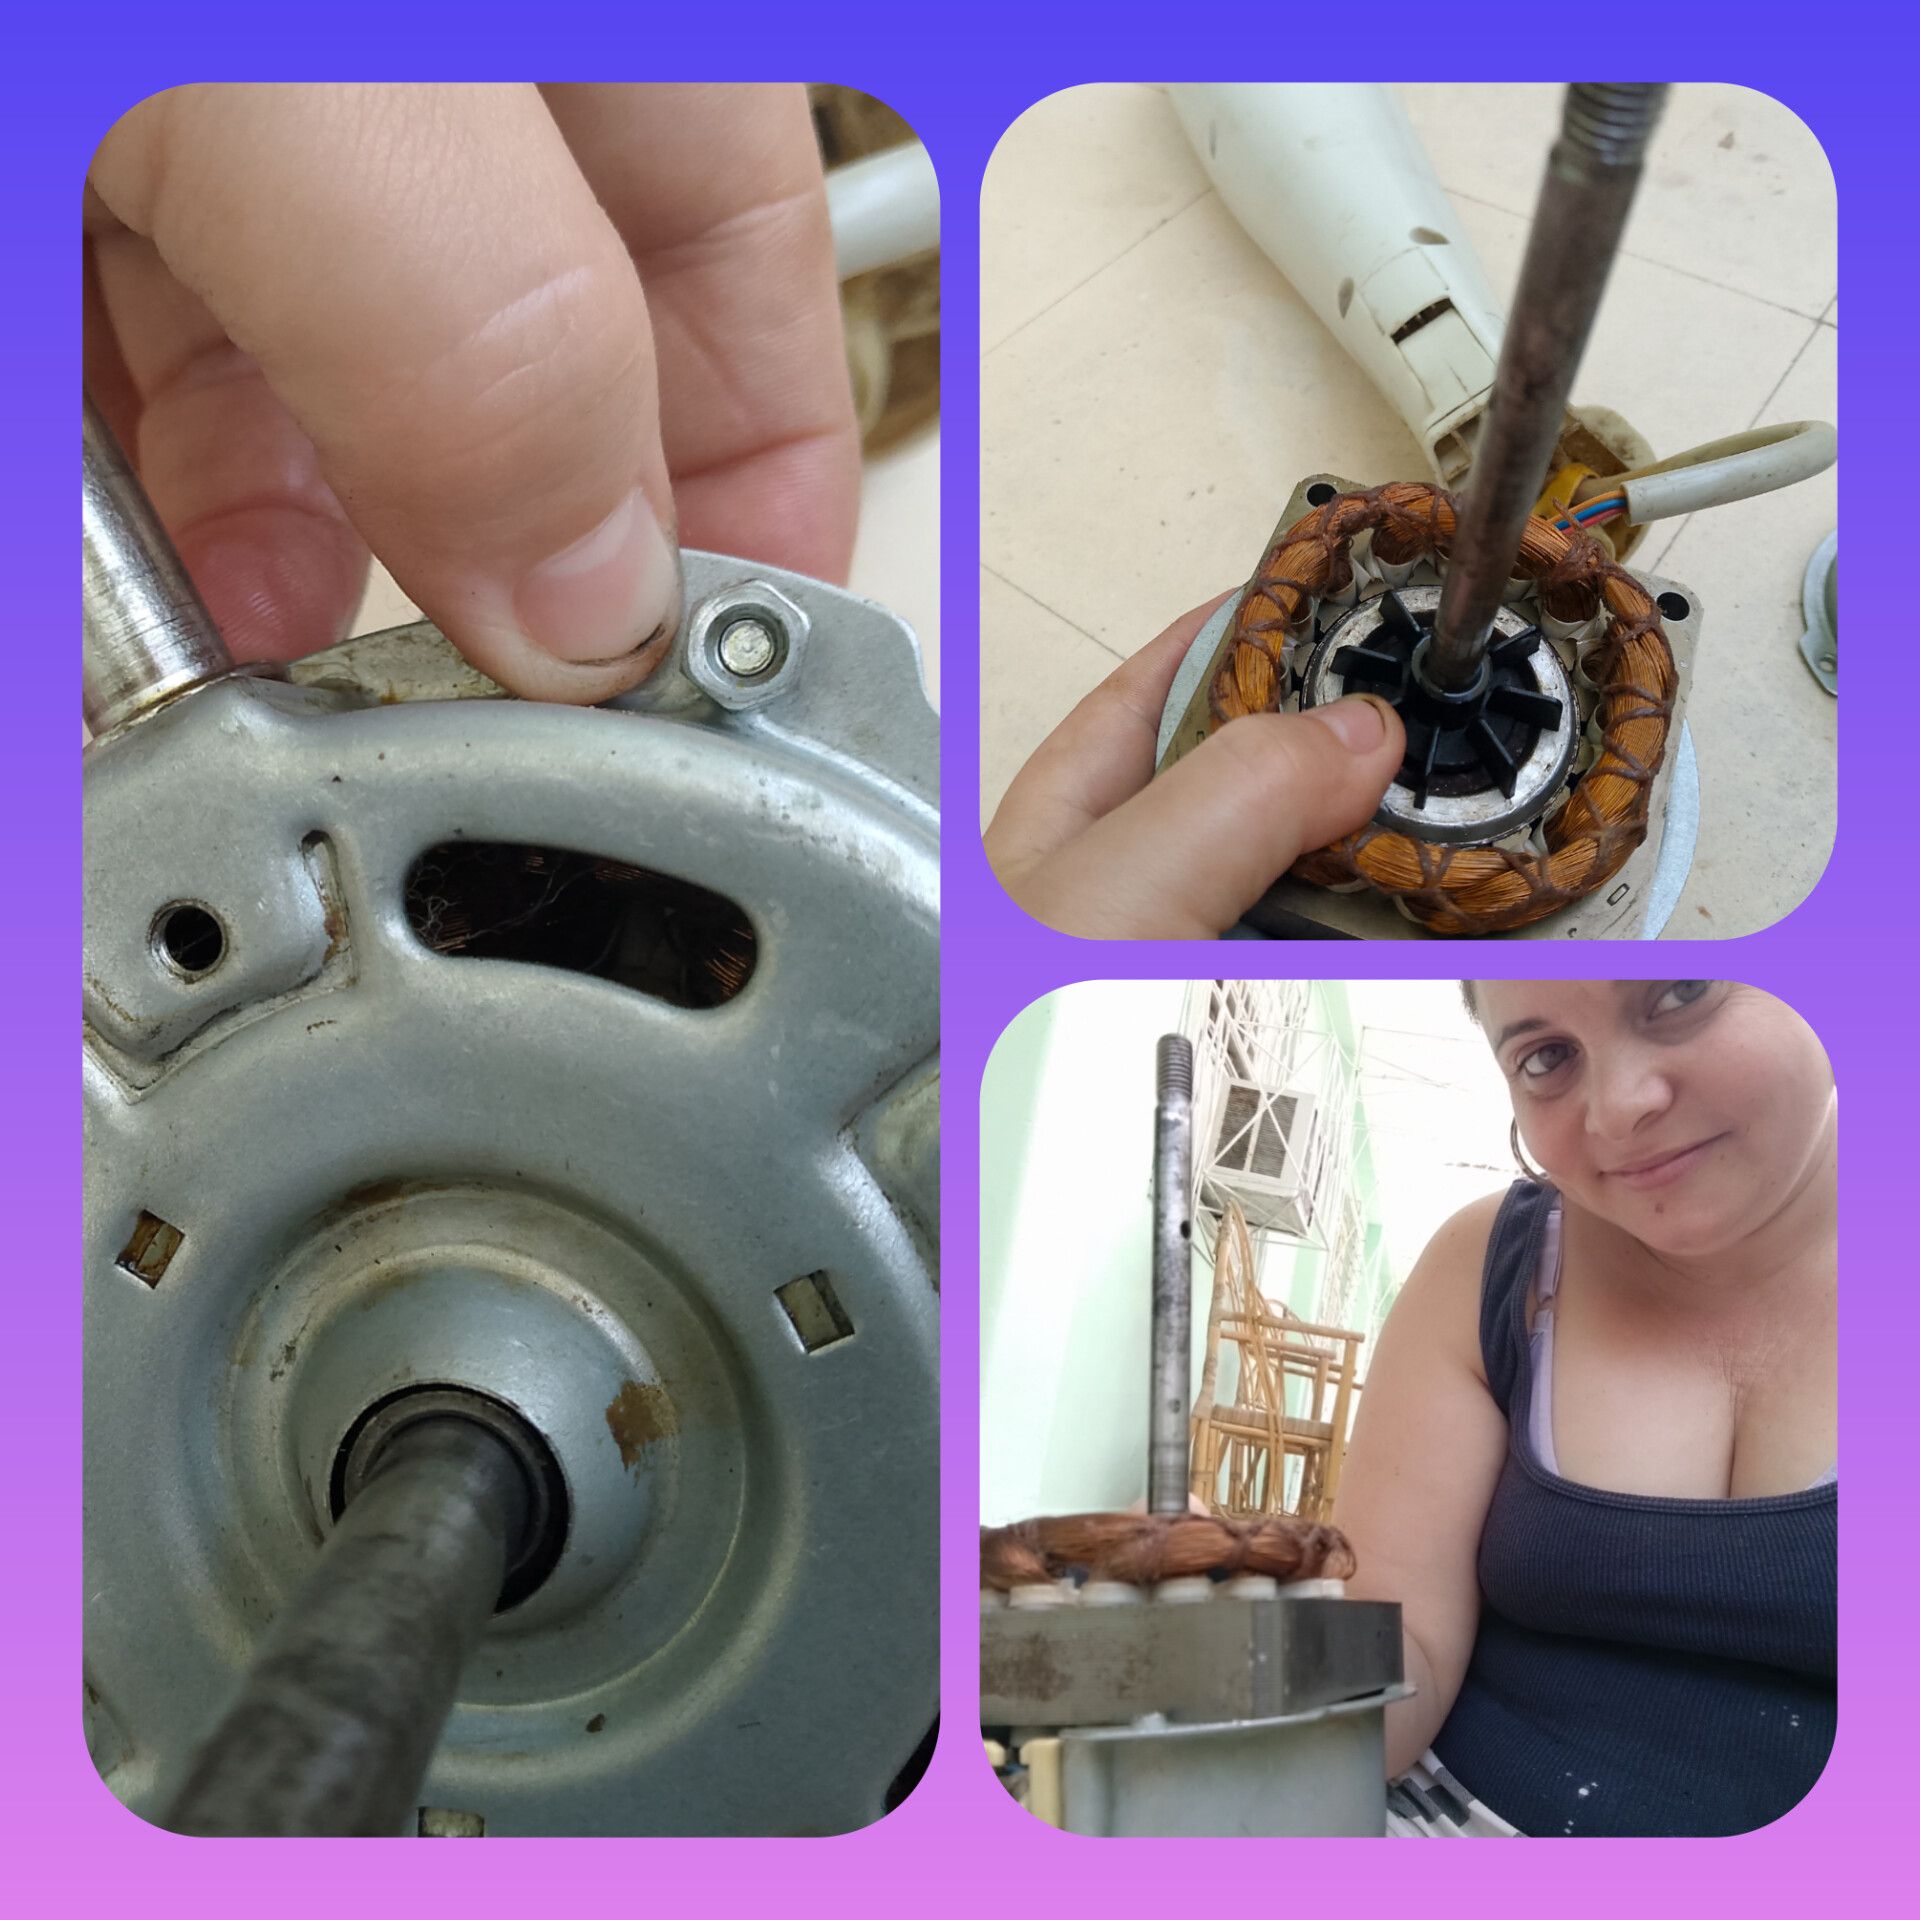
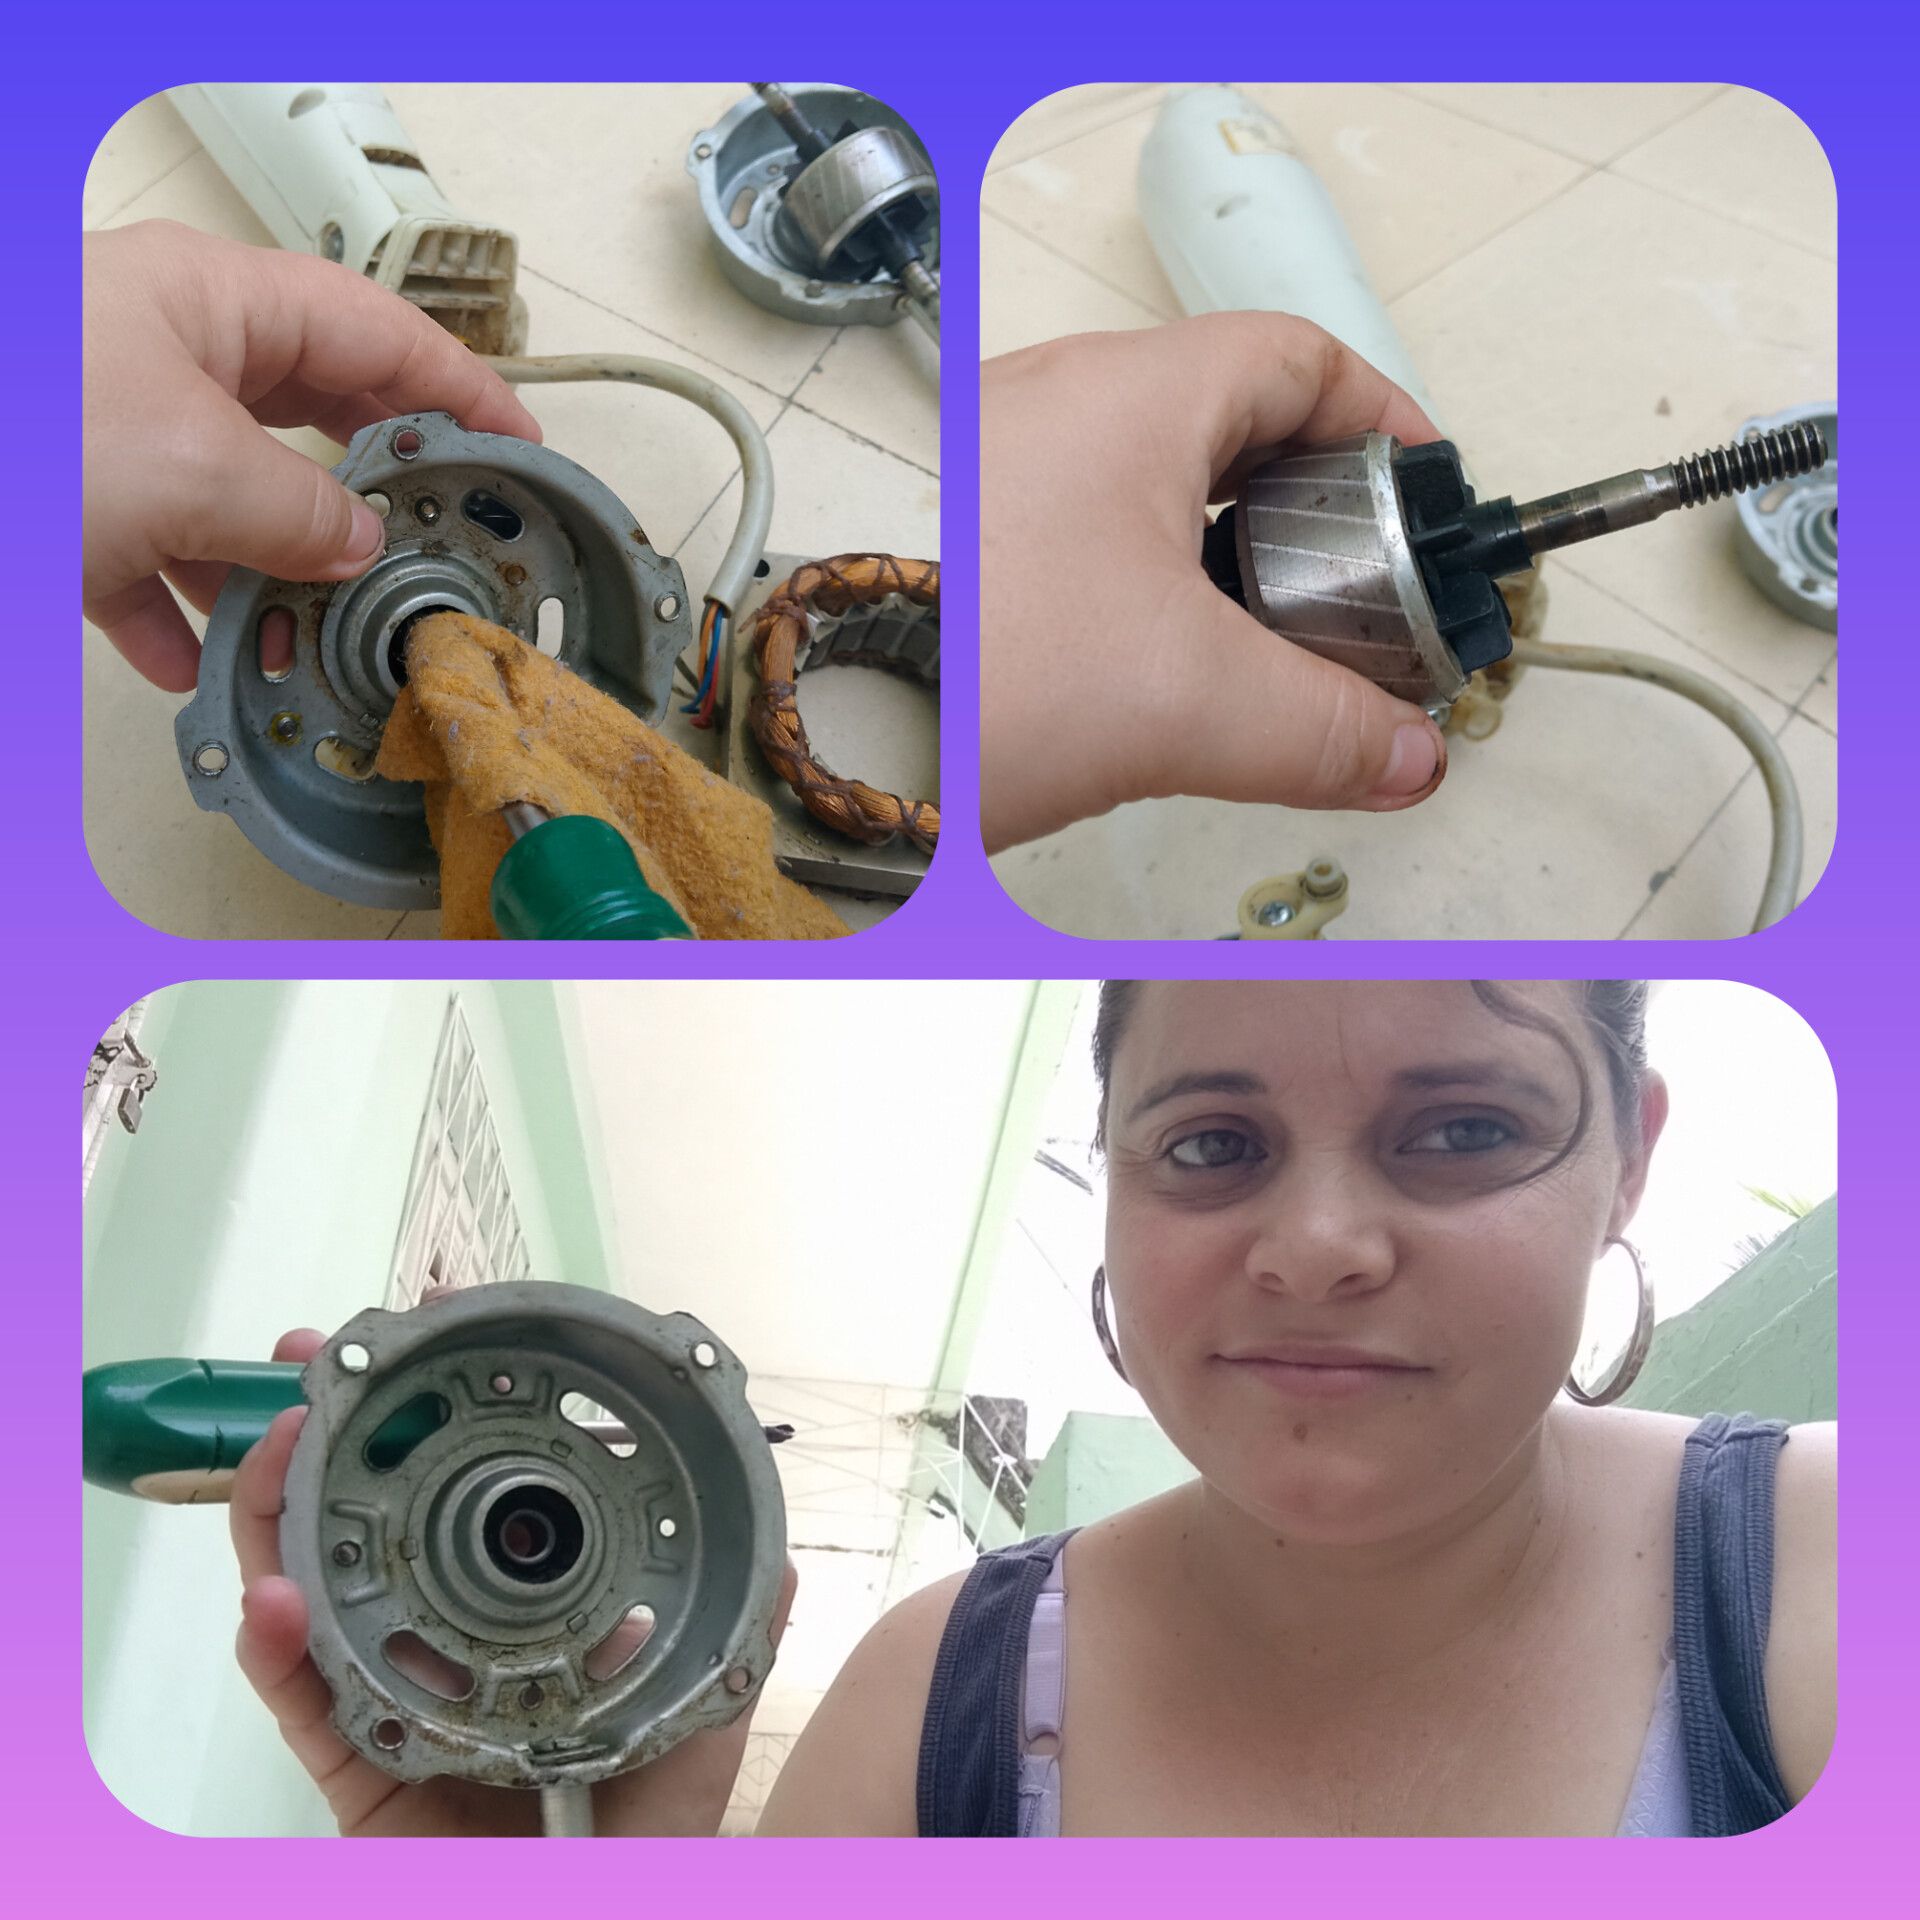
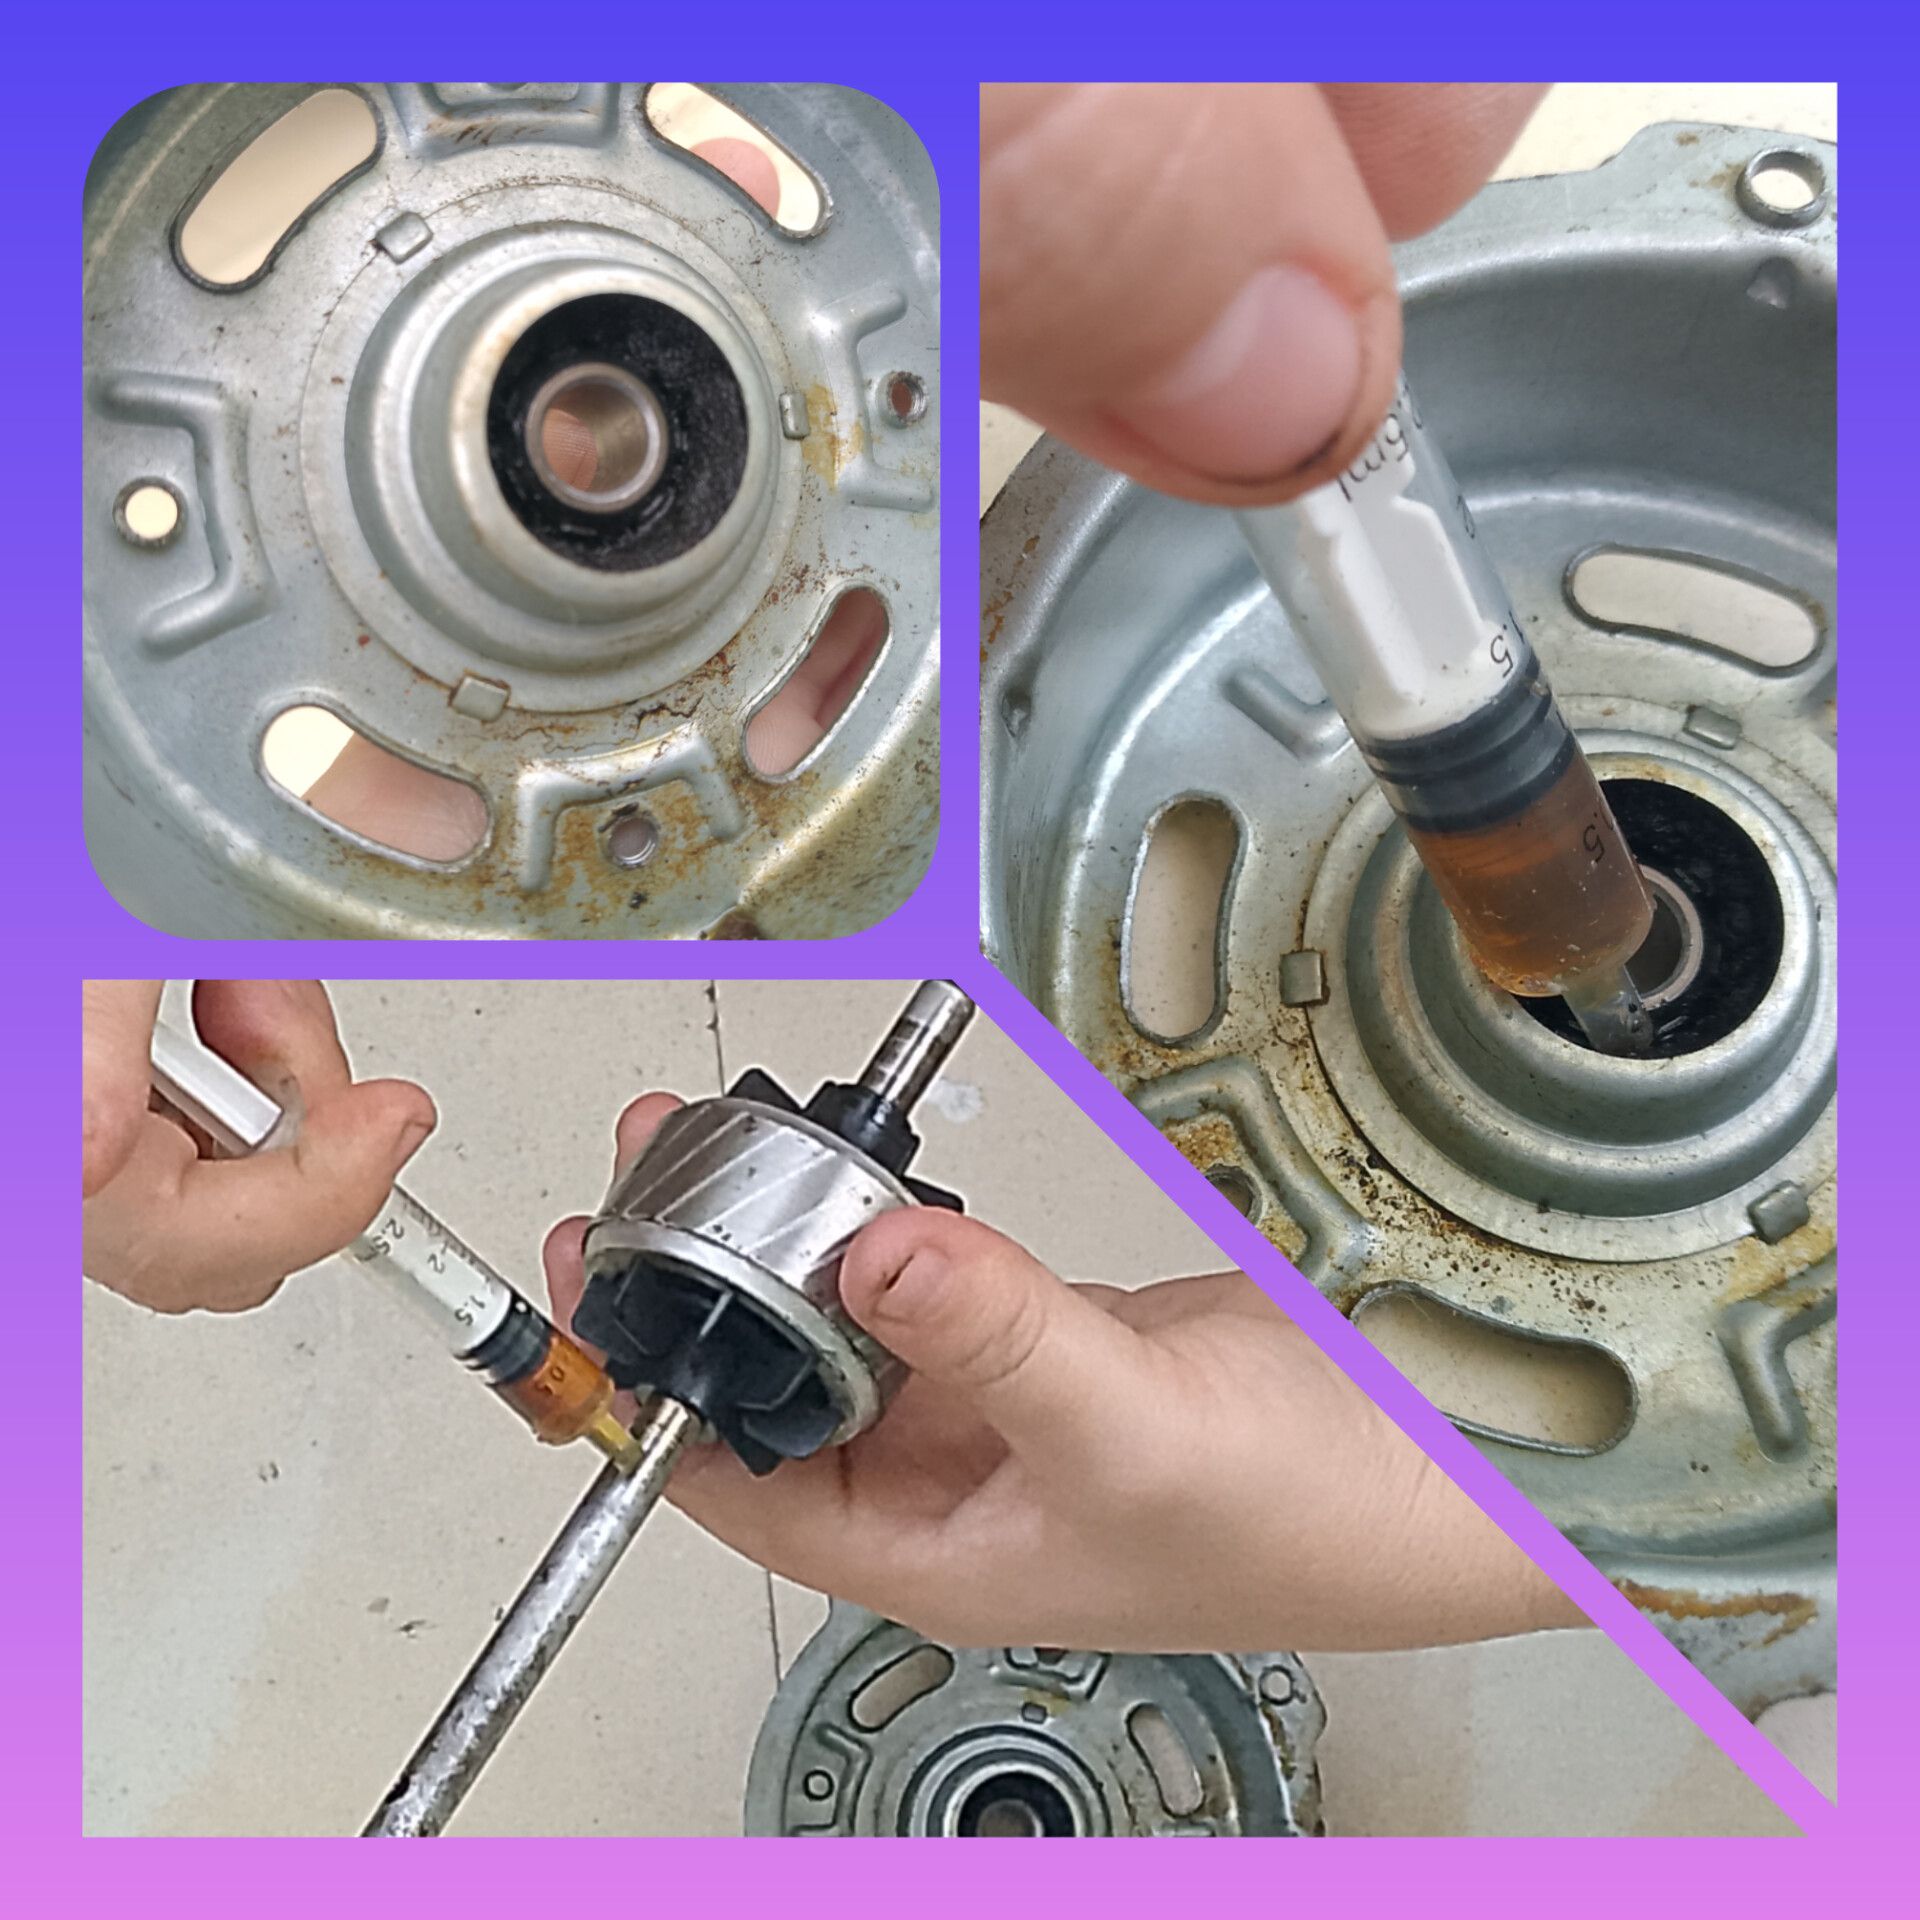
Luego de zafar todo, comencé a abrir el motor para poder limpiarlo y engrasarlo por dentro, ya una vez abierto le saqué el eje con la bobina y con un pañito seco lo comencé a limpiar bien para que no chocara nada, les cuento que estaba demasiado sucio, luego de limpiar el eje también limpié los bujes que quedaran brillando, para que funcionara a la perfección. Cuando todo estuvo limpio tomé una jeringuilla con grasa fina de la que se usa para este tipo de cosas que casualmente me habían regalado un poquito en estos días, y poco a poco comencé a echarle dónde la necesitara, y con mucho cuidado para que no callera en el enrollado.
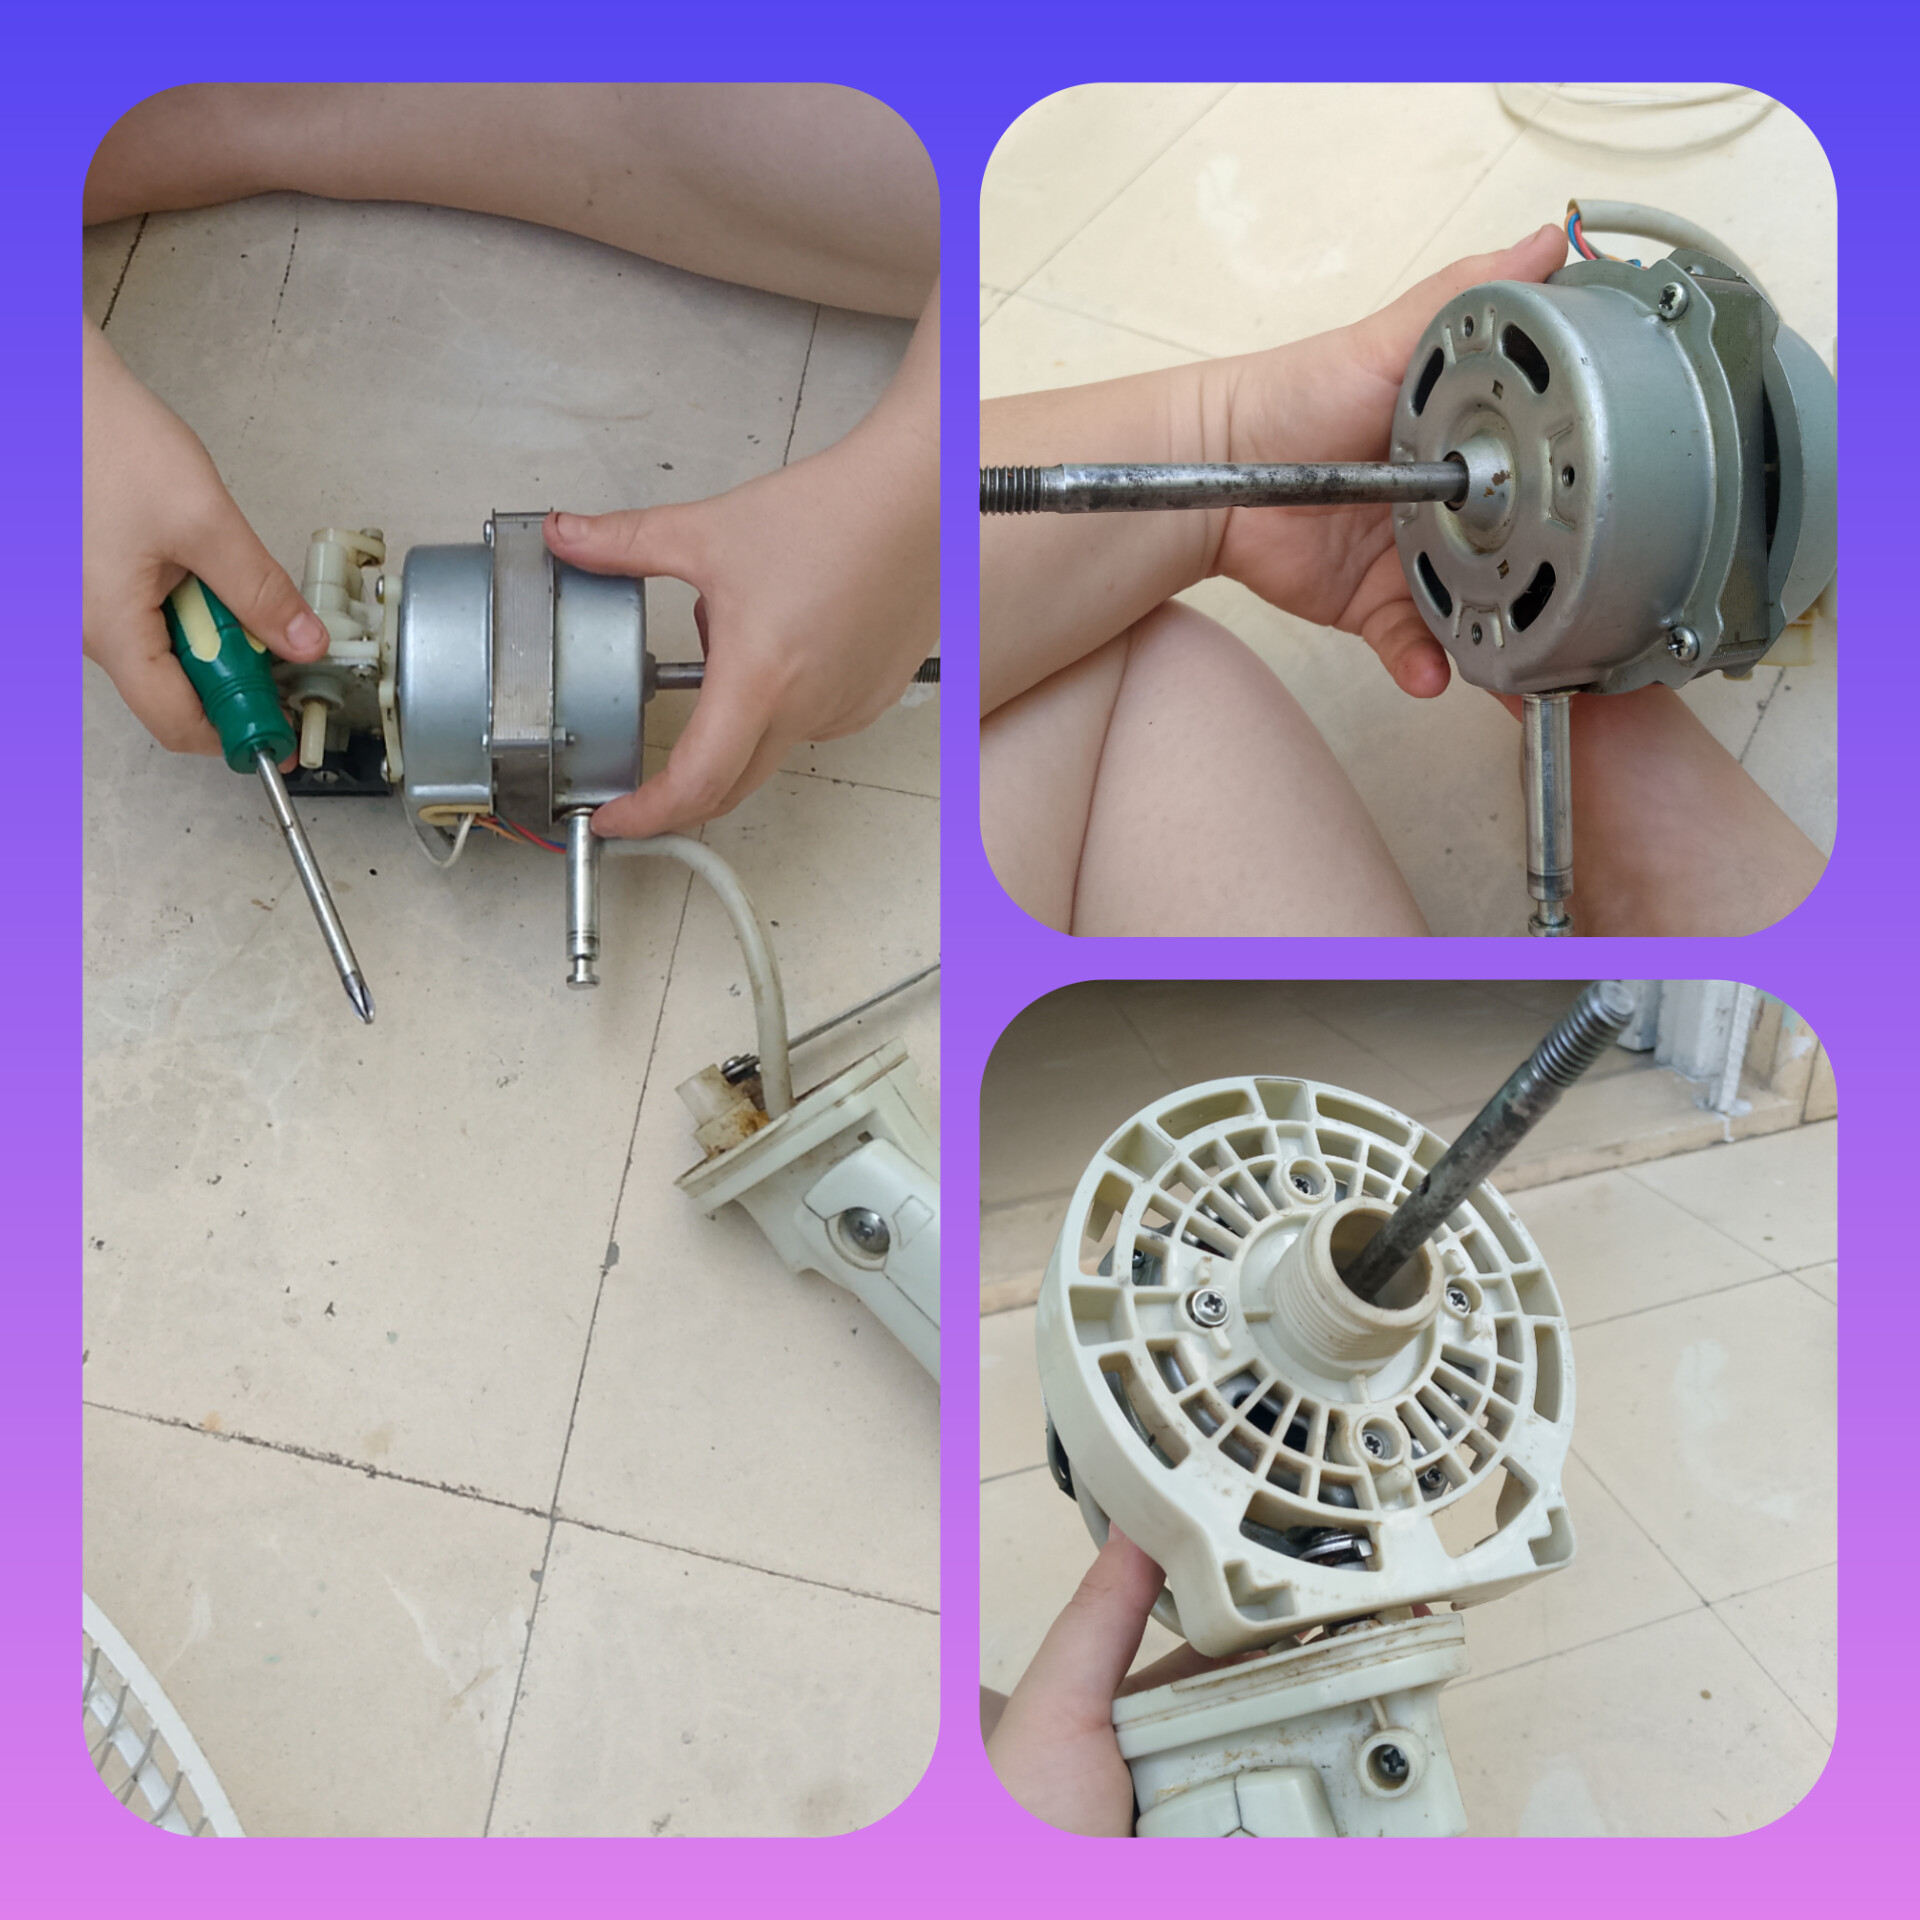
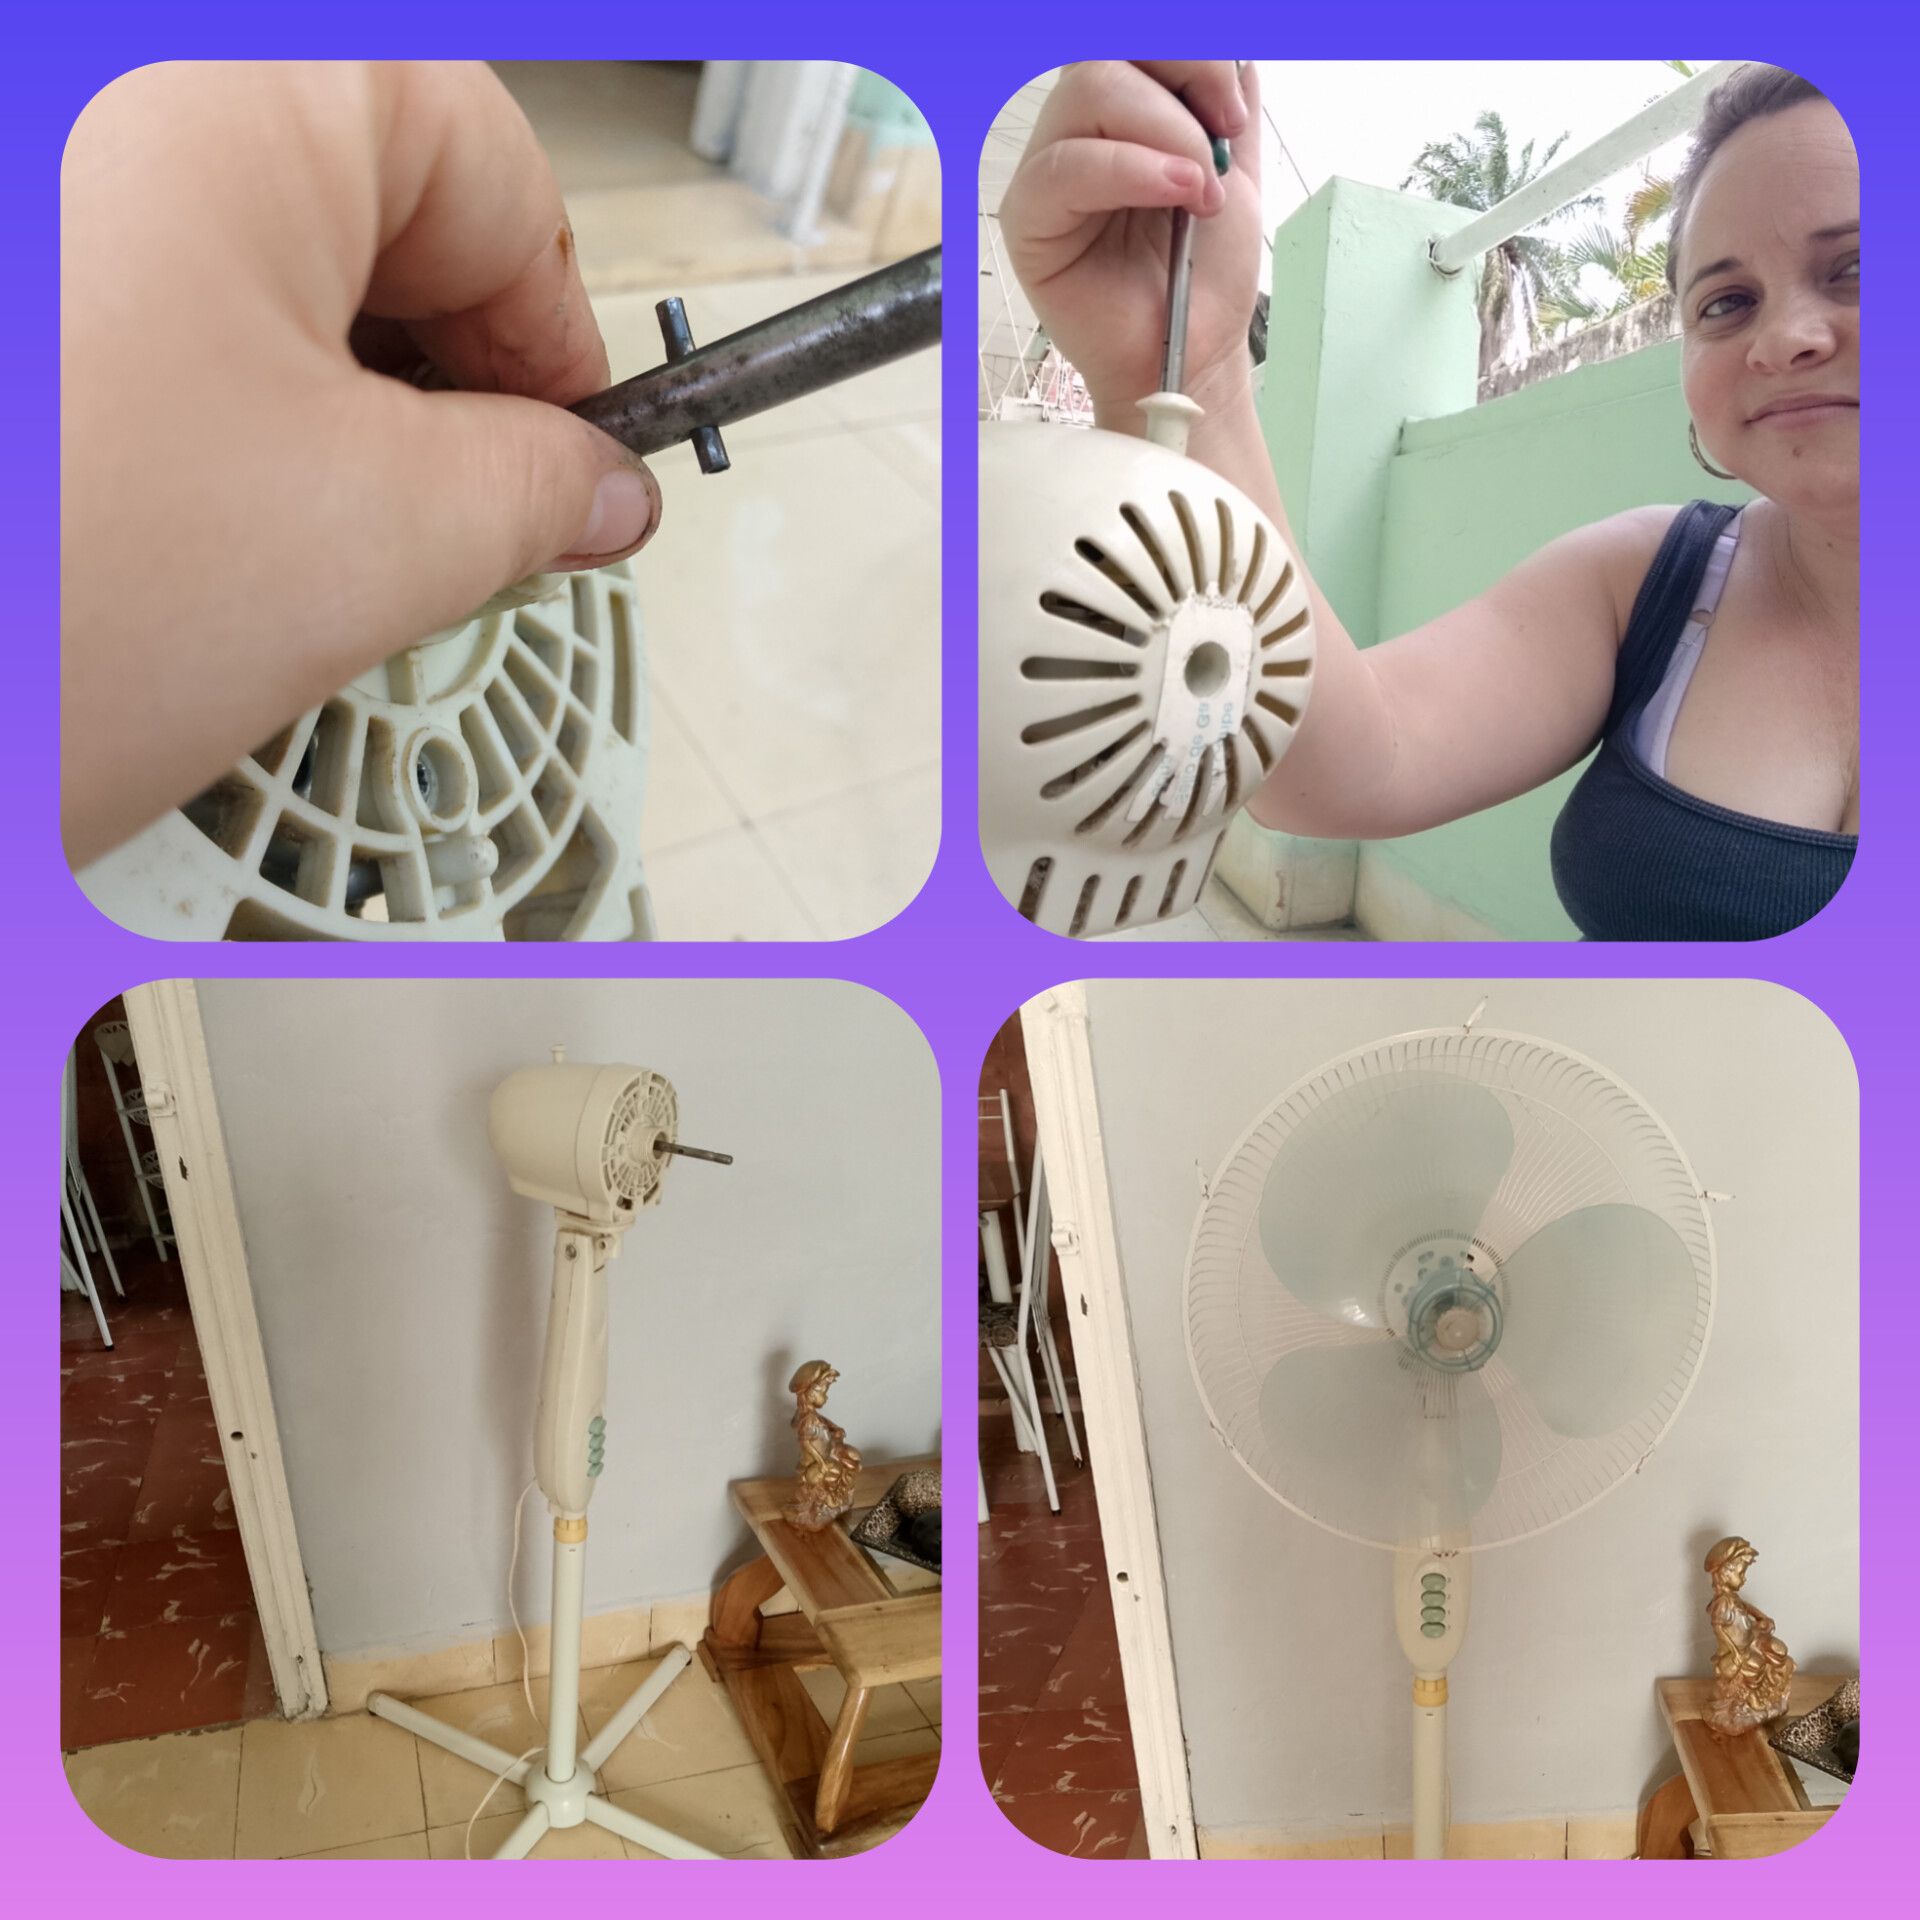
Después de echarle la grasita y limpiarlo bien todo, tomé las partes y comencé a armar de nuevo, paso por paso y poniendo cada cosa en su lugar y simétricamente para que no me quedara el eje descencentrado y siguiera chocando, así que acomodé bien todo para que rodara bien. Lo armé de nuevo y coloque también su pasador y sus partes plásticas, con mucho cuidado de no romper nada, hasta que quedó armado totalmente. Amigos les cuento que cuando lo probé me quedé sorprendida ja, ja, ja, pues me quedó mejor de lo esperado, y más para ser mi primera vez en esta tarea ja, ja, ja, Ah, y lo más importante, no me sobró ninguna pieza ja, ja, ja, todo quedó en su lugar. Sin más me despido de ustedes, y hasta el próximo arreglo por acá por casa. Saludos a todos y bendiciones miles.
Las imágenes utilizadas en el post son de mi propiedad, tomadas con mi móvil Tecno Spark Go del 2024. Fotos editadas en la app disponible para móviles [InShort](https://play.google.com/store/apps/details?id=com.camerasideas.instashot). Textos llevados al Inglés por [Deepl Traslate](https://www.deepl.com/mobile-apps/?utm_source=android&utm_medium=app&utm_campaign=share-with-friends).
ENGLISH VERSION (click here!)
Hello friends of #hive and especially to the community @home.solutions as always I hope you are well as your family and friends, today I'm here to tell you how I greased and maintained my fan, a very important task at home to keep it working properly. Well I tell you that a few days ago my living room fan was a little stuck and it was precisely for lack of maintenance, because inside it accumulates dirt, so it was stuck.
This fan that I have in the living room is one of those that I like most in the house, because precisely that, is the one that throws more air and the one that cools the whole room and has a rotation angle that perfectly gives all positions of the seats that are in it, so everyone who sits in the room can take air and cool the high temperatures that are in these days in this area of the Caribbean.
It turns out that the heat is unbearable and I had not yet received my salary for the month to be able to take it to the mechanic for maintenance, so without thinking I grabbed it and I started to do it myself, I really like this fan, but the truth, I really like this fan, but it was no good, so any mishap that happened on the way, well, no way, he who does not risk neither wins nor loses ha, ha, ha, ha, although I must confess that I have seen this done many times ha, ha, ha, ha, so I already had a slight idea of what had to be done.
Without hesitation and with the firmness that everything would go well, I started to remove nuts and bolts and remove piece by piece, carefully and delicately so as not to damage anything and in a logical order to know then how I had to put everything back and that everything would turn out well and smoothly. The first thing I did was to remove all the external plastic part to be able to work well, in fact if you do not remove that you can not do anything ha, ha, ha, ha.
After I got everything out, I started to open the engine to clean it and grease it inside, once it was open I took out the shaft with the coil and with a dry cloth I started to clean it well so that it would not crash anything, I tell you that it was too dirty, after cleaning the shaft I also cleaned the bushings that were shining, so that it would work perfectly. When everything was clean I took a syringe with fine grease that is used for this type of things that I happened to have been given a little bit these days, and little by little I began to pour it where I needed it, and very carefully so that it would not fall in the winding.
After pouring the grease and cleaning everything well, I took the parts and began to assemble again, step by step and putting everything in its place and symmetrically so that the axle would not be off-center and continue to crash, so I arranged everything well so that it would roll well. I put it back together again and also placed its pin and plastic parts, being very careful not to break anything, until it was fully assembled. Friends I tell you that when I tried it I was surprised ha, ha, ha, ha, because it was better than expected, and more for my first time in this task ha, ha, ha, ha, ha, Ah, and most importantly, I did not have any piece left over ha, ha, ha, ha, everything was in place. Without further ado, I bid you farewell, and until the next arrangement here at home. Greetings to all and thousands of blessings.
The images used in the post are my own, taken with my Tecno Spark Go cell phone from 2024. Photos edited in the app available for cell phones [InShort](https://play.google.com/store/apps/details?id=com.camerasideas.instashot). Texts translated into English by [Deepl Translate](https://www.deepl.com/mobile-apps/?utm_source=android&utm_medium=app&utm_campaign=share-with-friends).