***Saludos amigos de NEEDLEWORKMONDAY!*** 🪡 🧵❤️
Hoy quiero compartir con ustedes una idea para hacer una cartuchera para guardar las herramientas, muchas veces las herramientas andan rodando por toda la casa o simplemente no tenemos cómo organizarlas, pensé en hacer esta cartuchera ya que así es más fácil para transportarlas, a veces necesito llevármelas a otro lugar, así que me pareció perfecto hacer una cartuchera especial para ellas, acompáñame y te comparto el paso a paso:
> Greetings, NEEDLEWORKMONDAY friends! 🪡 🧵❤️
>
> Today I want to share with you an idea for making a tool pouch. Often, tools end up rolling around the house, or we simply don't have a way to organize them. I thought I'd make this pouch since it makes them easier to transport. Sometimes I need to take them somewhere else, so it seemed perfect to make a special pouch for them. Join me as I share the step-by-step instructions.

---
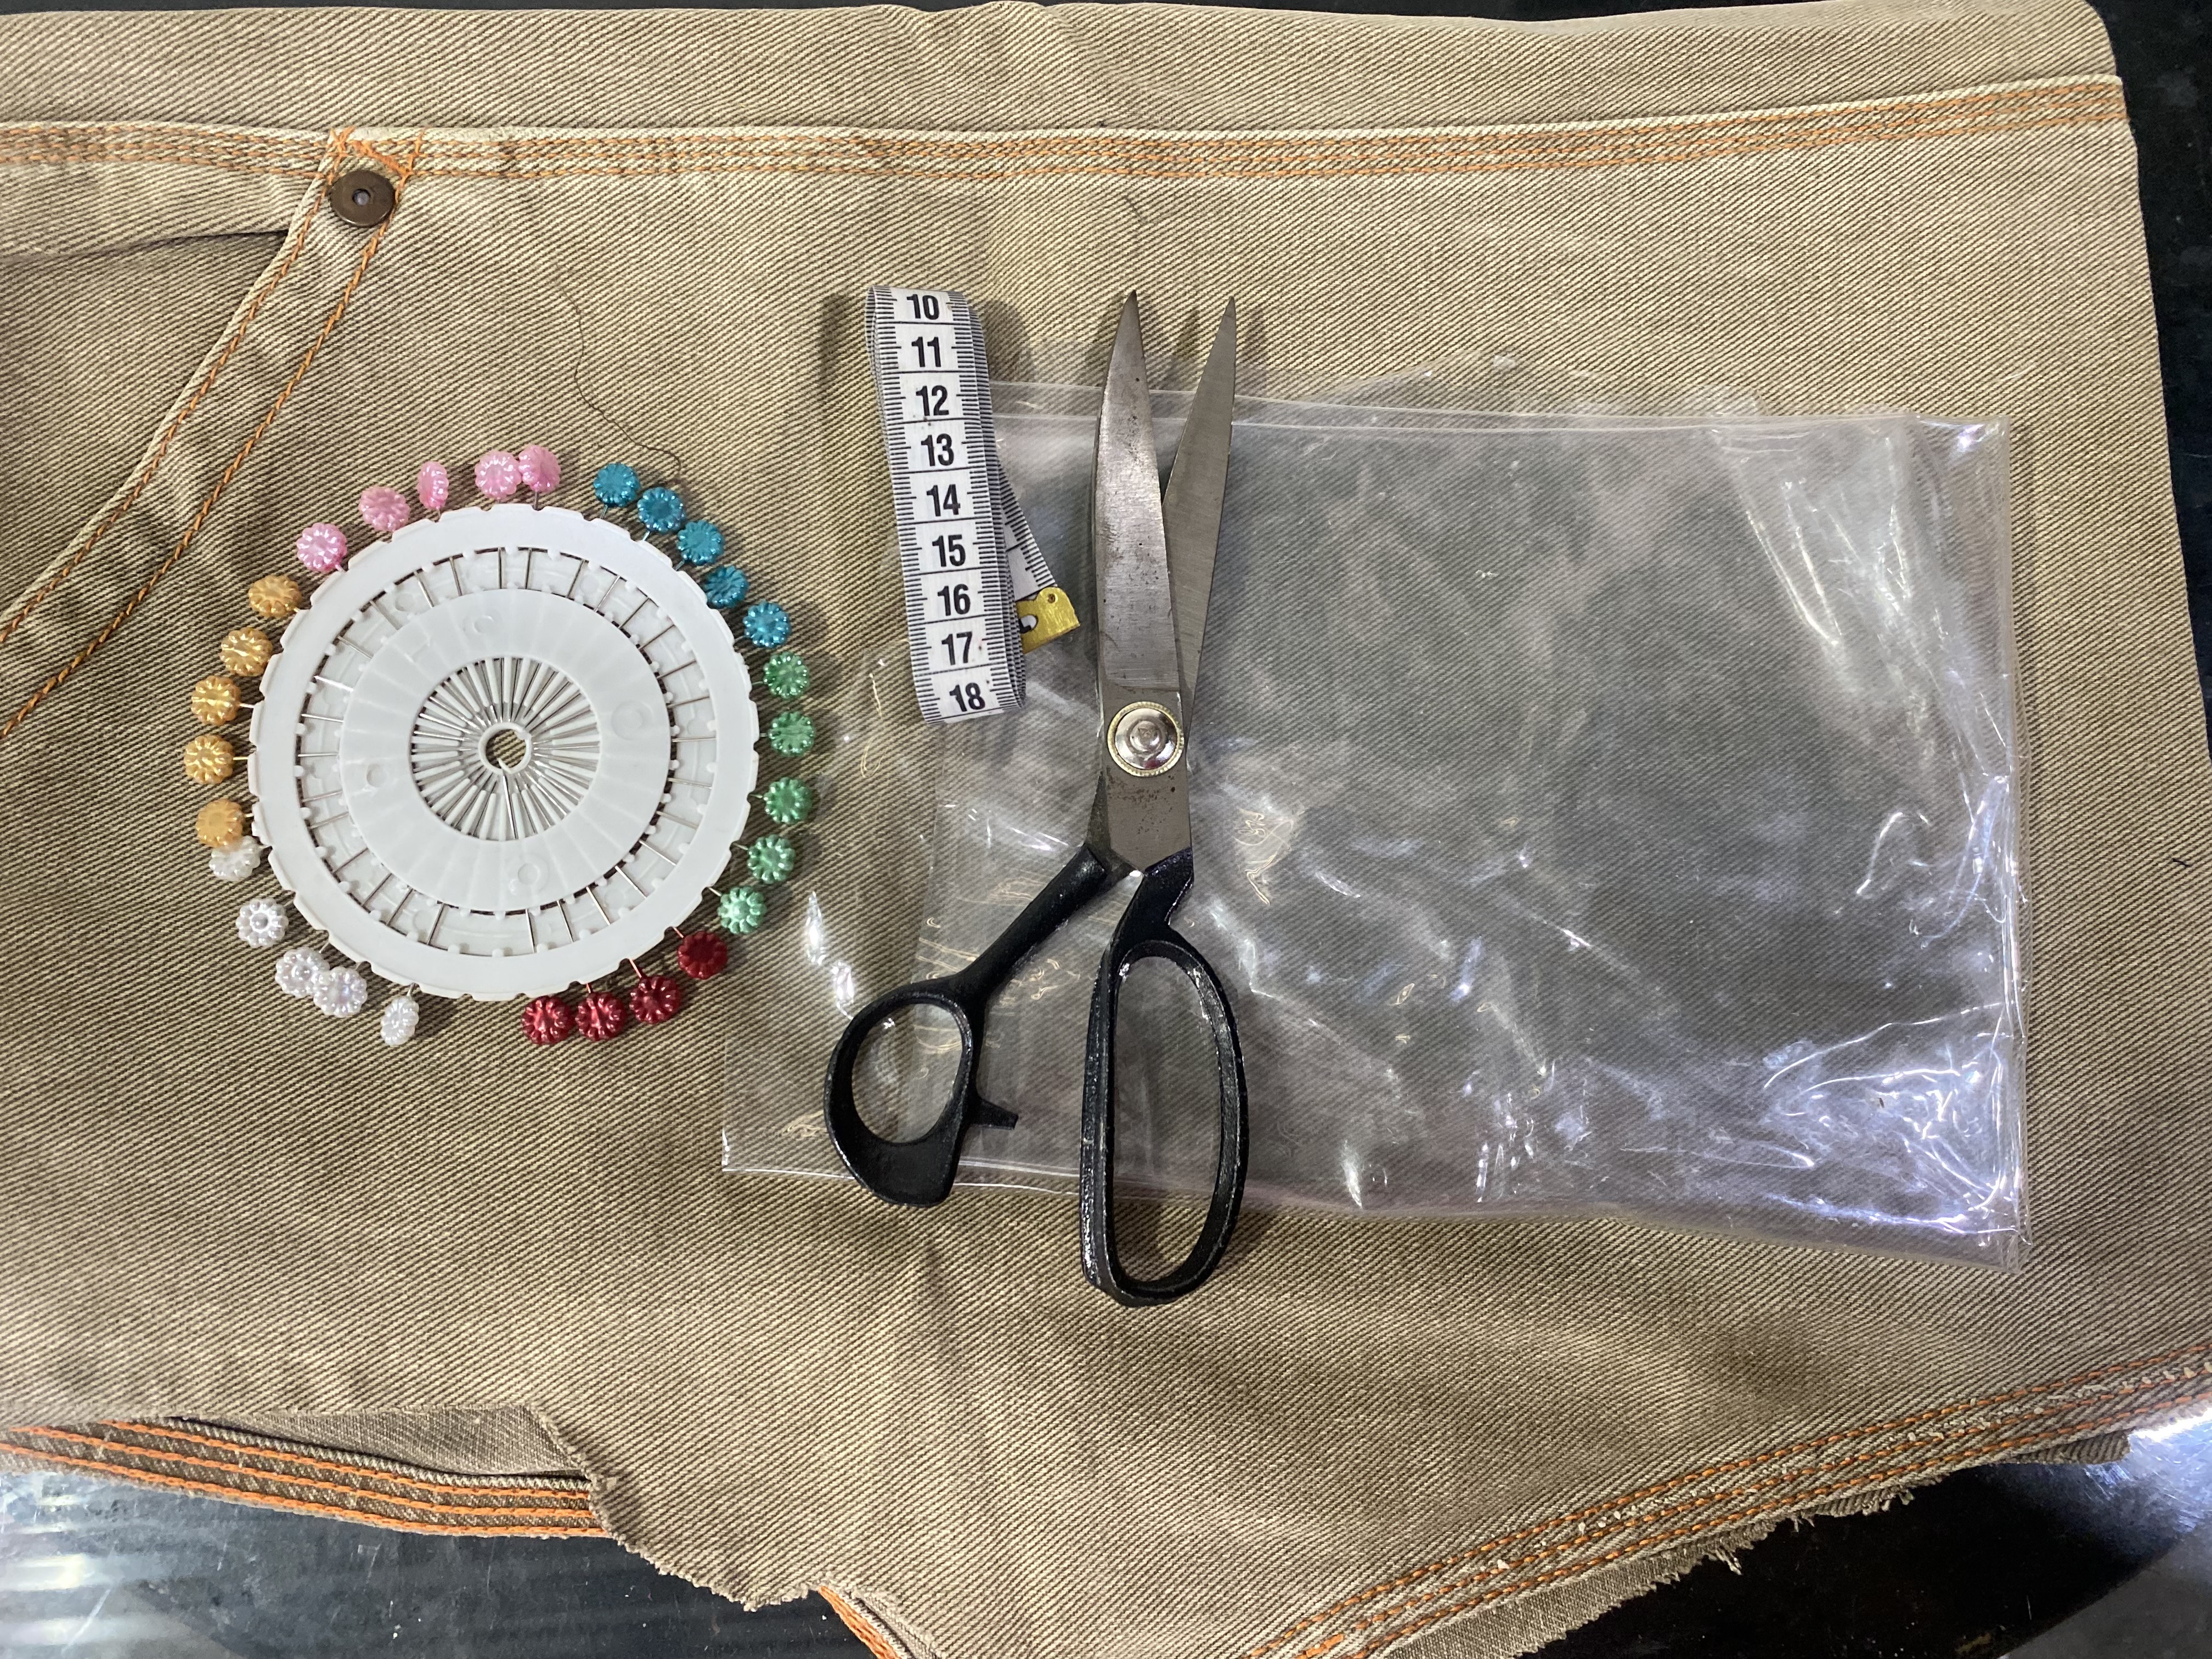
Me gusta mucho tener herramientas, con ellas se me facilitan los trabajos o manualidades que vaya a hacer y a veces las tengo regadas en varios lugares de mi hogar y a la hora de necesitarlas no recuerdo donde las dije, ja ja, es por esto que pensé en la idea de hacer una cartuchera para organizarlas y tenerlas a la mano, al principio pensé en hacer una cartuchera tradicional con cremallera, pero sentí que era incómodo a la hora de utilizarlas, Entonces pensé en la idea de hacer una cartuchera como un sobre, de manera que podamos meter o sacar las herramientas fácilmente, aquí les dejo la lista de materiales a utilizar:
- Retazo de jeans
- Cierre mágico
- cintas o tela que te sirva como sesgo
- Tijeras
- Plástico transparente
- Máquina de coser, en caso de no poseer máquina puedes hacerlo a mano ya que es un proyecto sencillo
> I really like having tools. They make the jobs or crafts I'm going to do easier, and sometimes I have them scattered in various places around my home, and when I need them, I can't remember where I mentioned them. Haha. That's why I thought of making a pencil case to organize them and have them handy. At first, I thought of making a traditional zippered pencil case, but I felt it was awkward to use. So, I came up with the idea of making a pencil case like an envelope, so we can easily put tools in and take them out. Here's the list of materials to use:
>
> - Scraps of jeans
> - Magic clasp
> - Ribbons or fabric that you can use as a bias tape
> - Scissors
> - Clear plastic
> - Sewing machine. If you don't have one, you can do it by hand, as it's a simple project.
___MATERIALES___
> MATERIALS
---
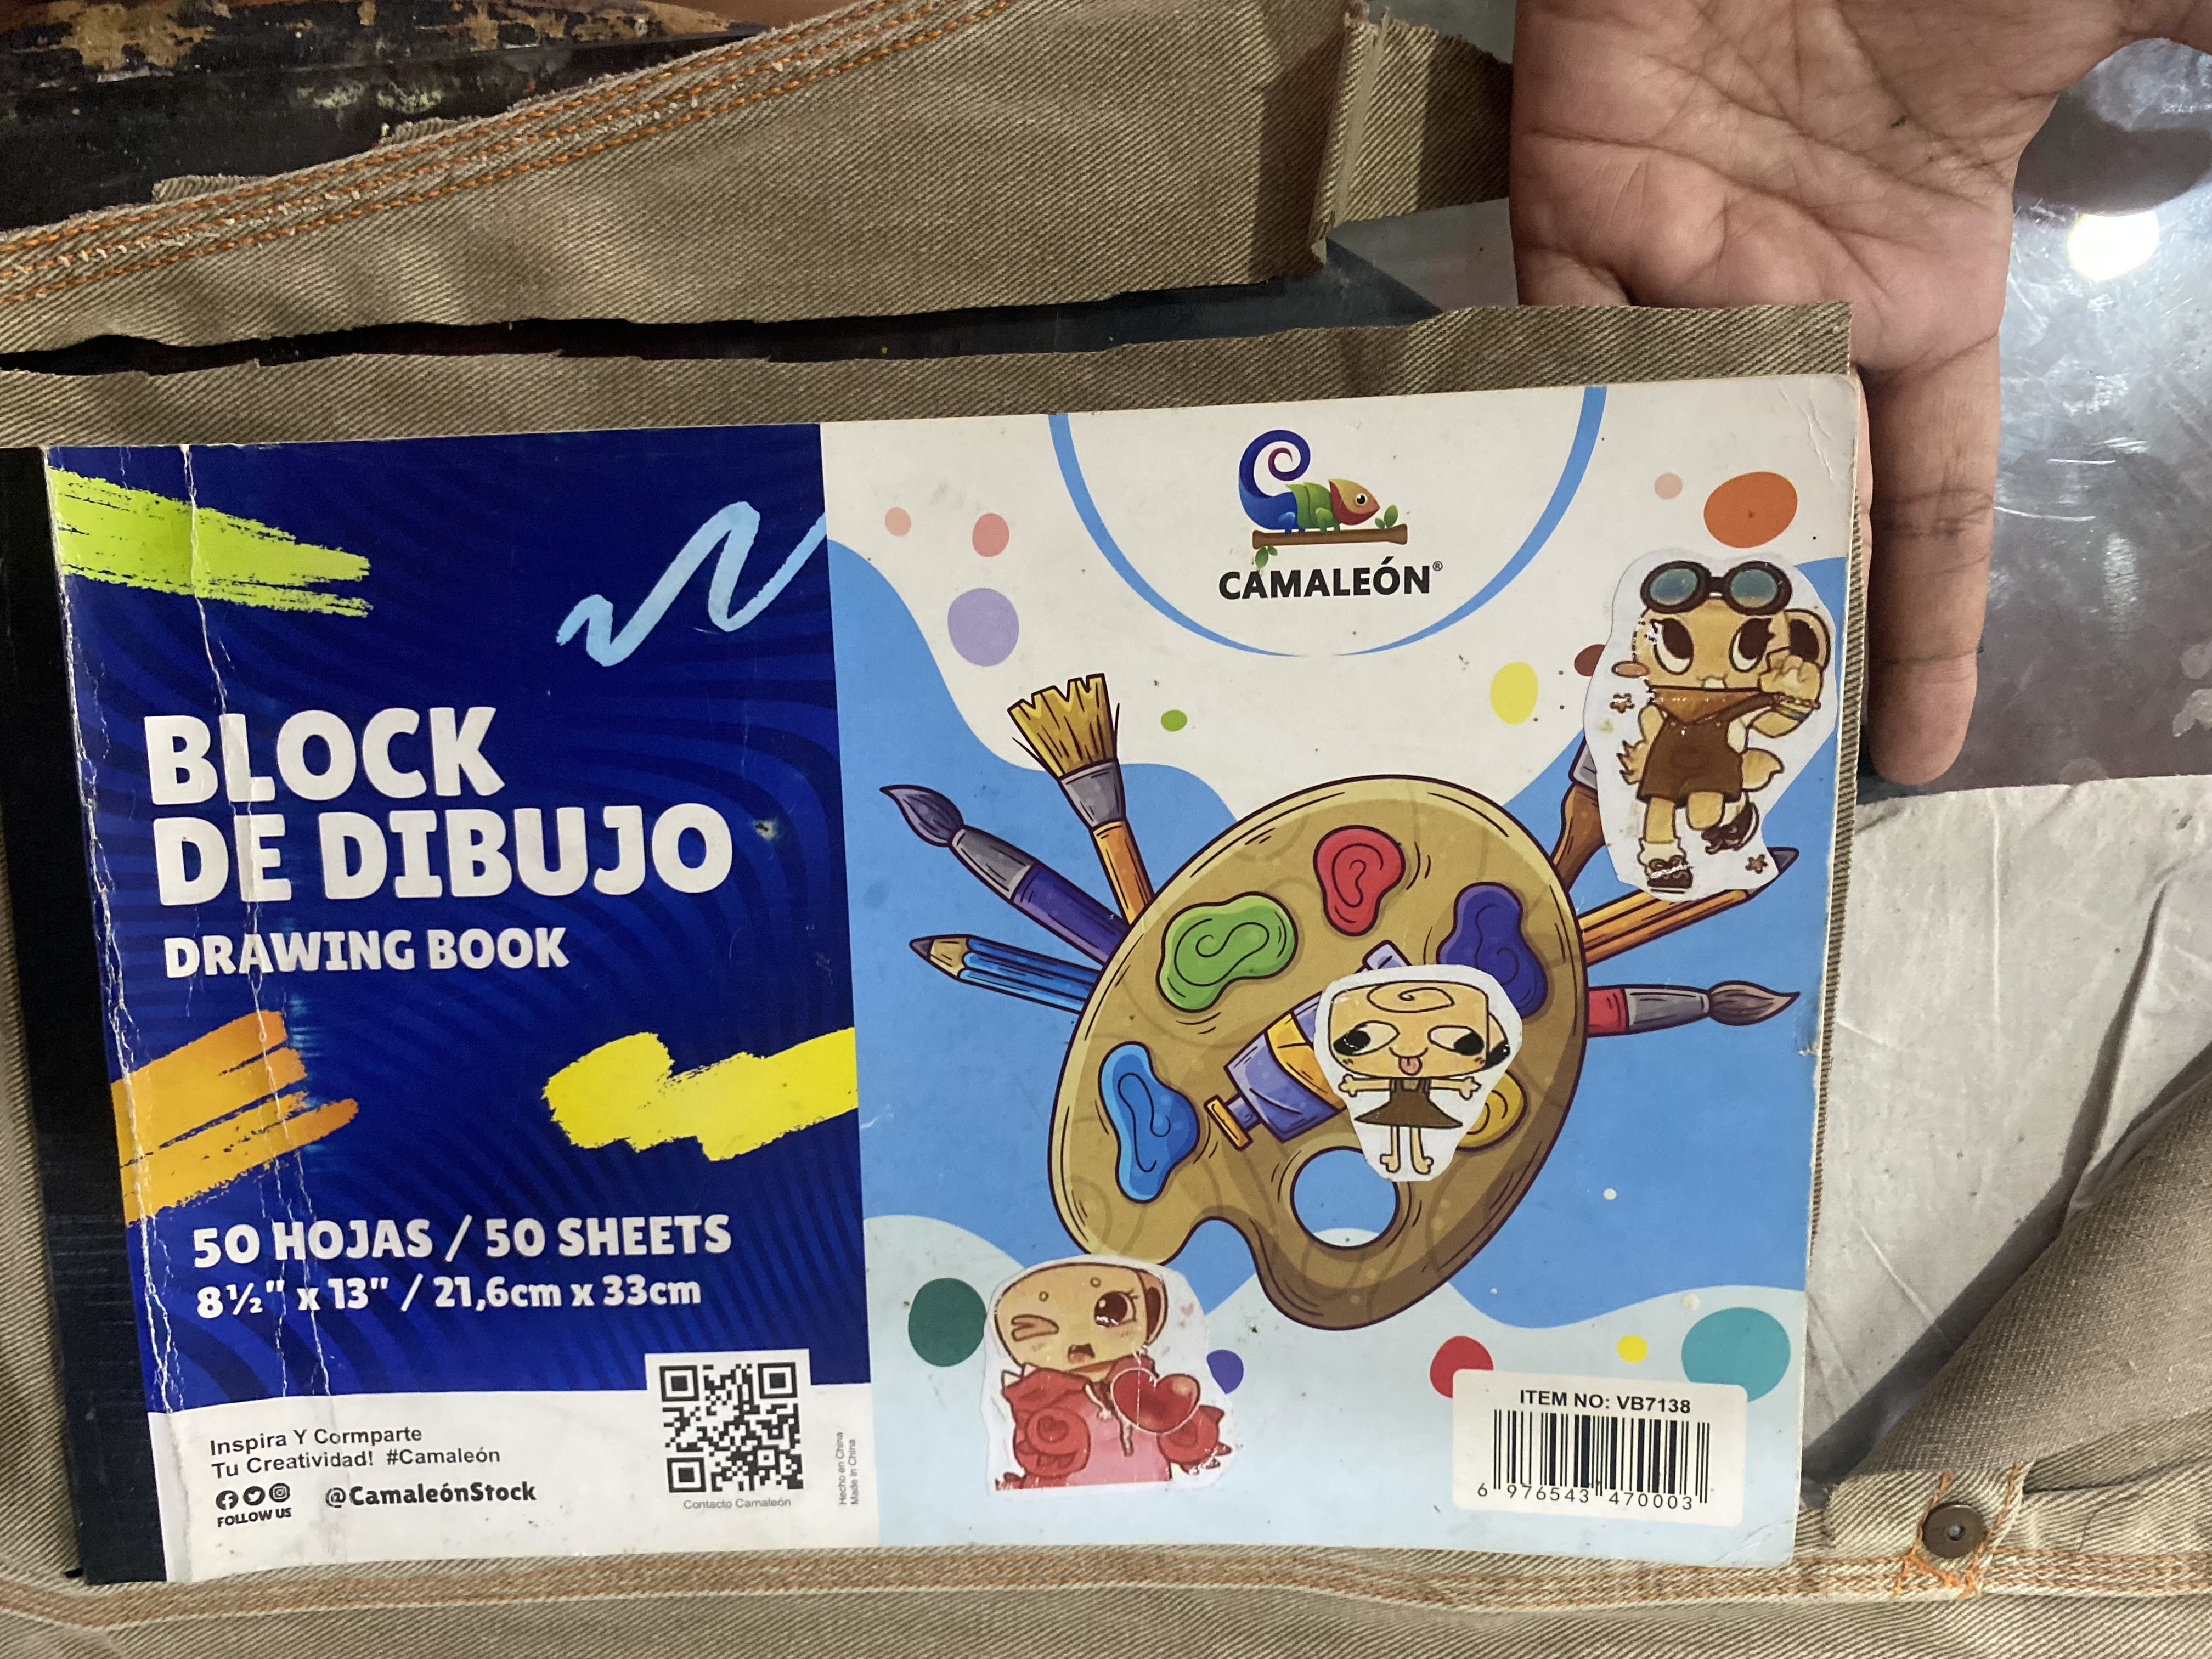
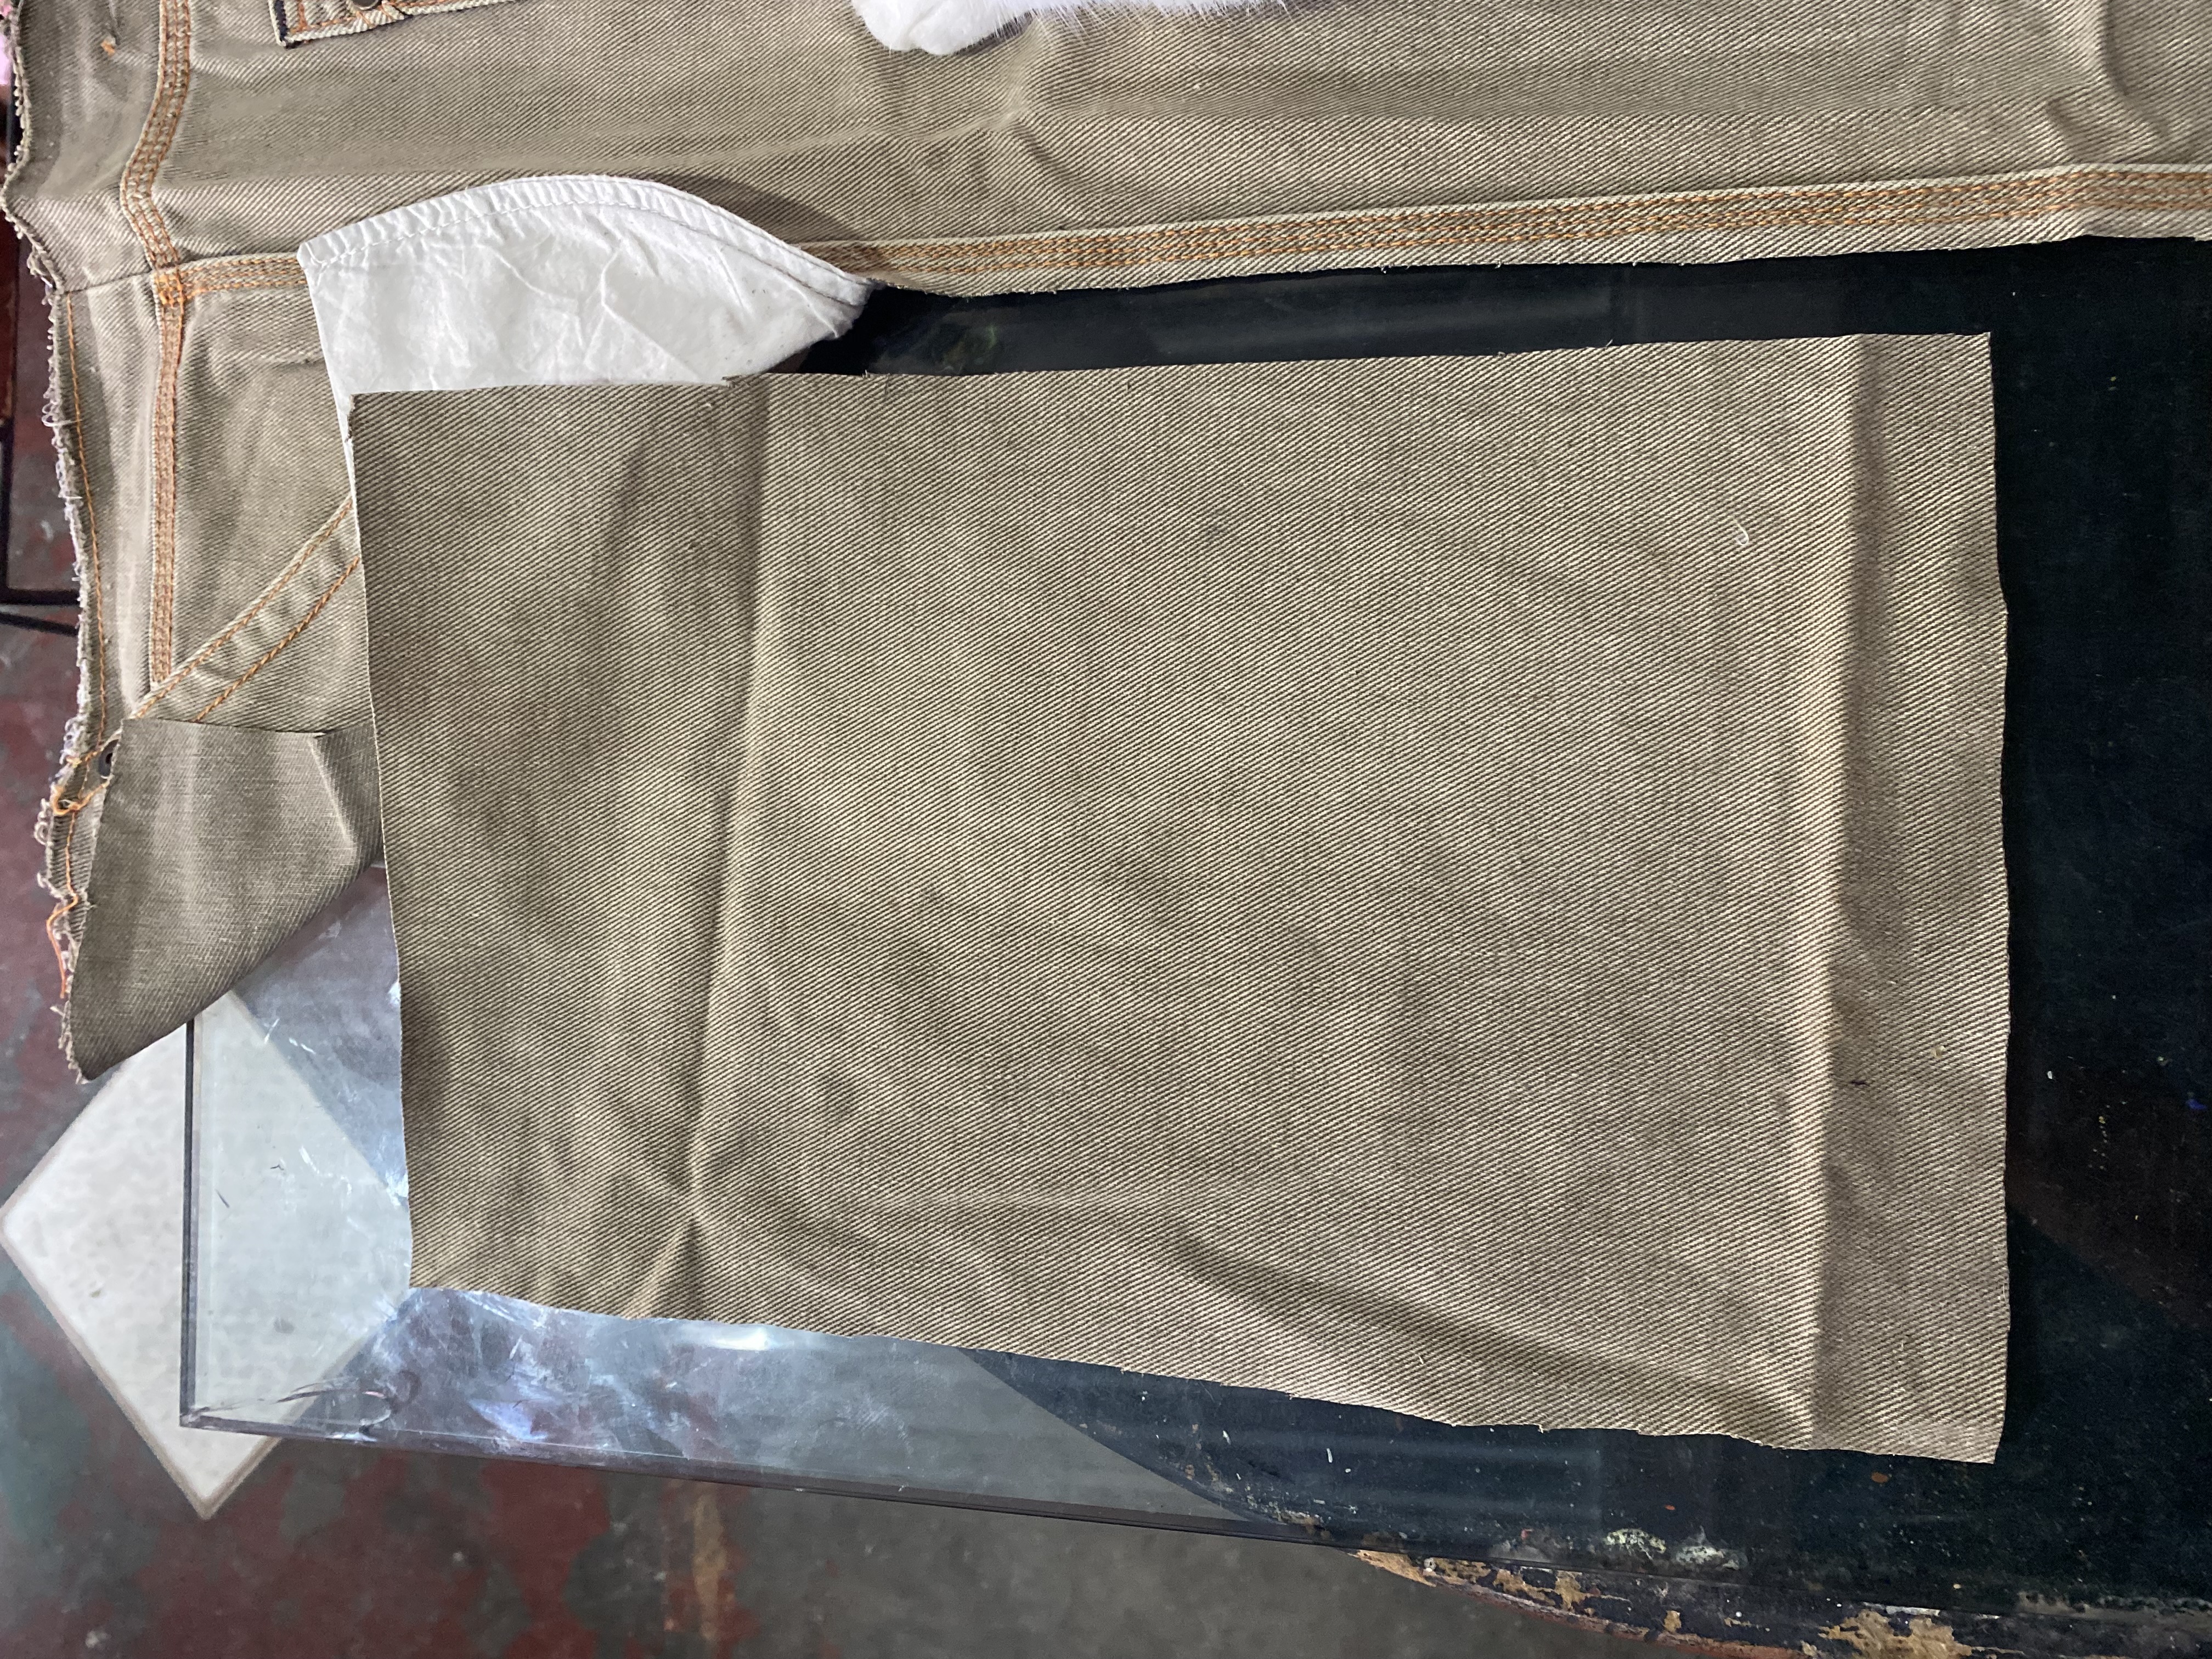
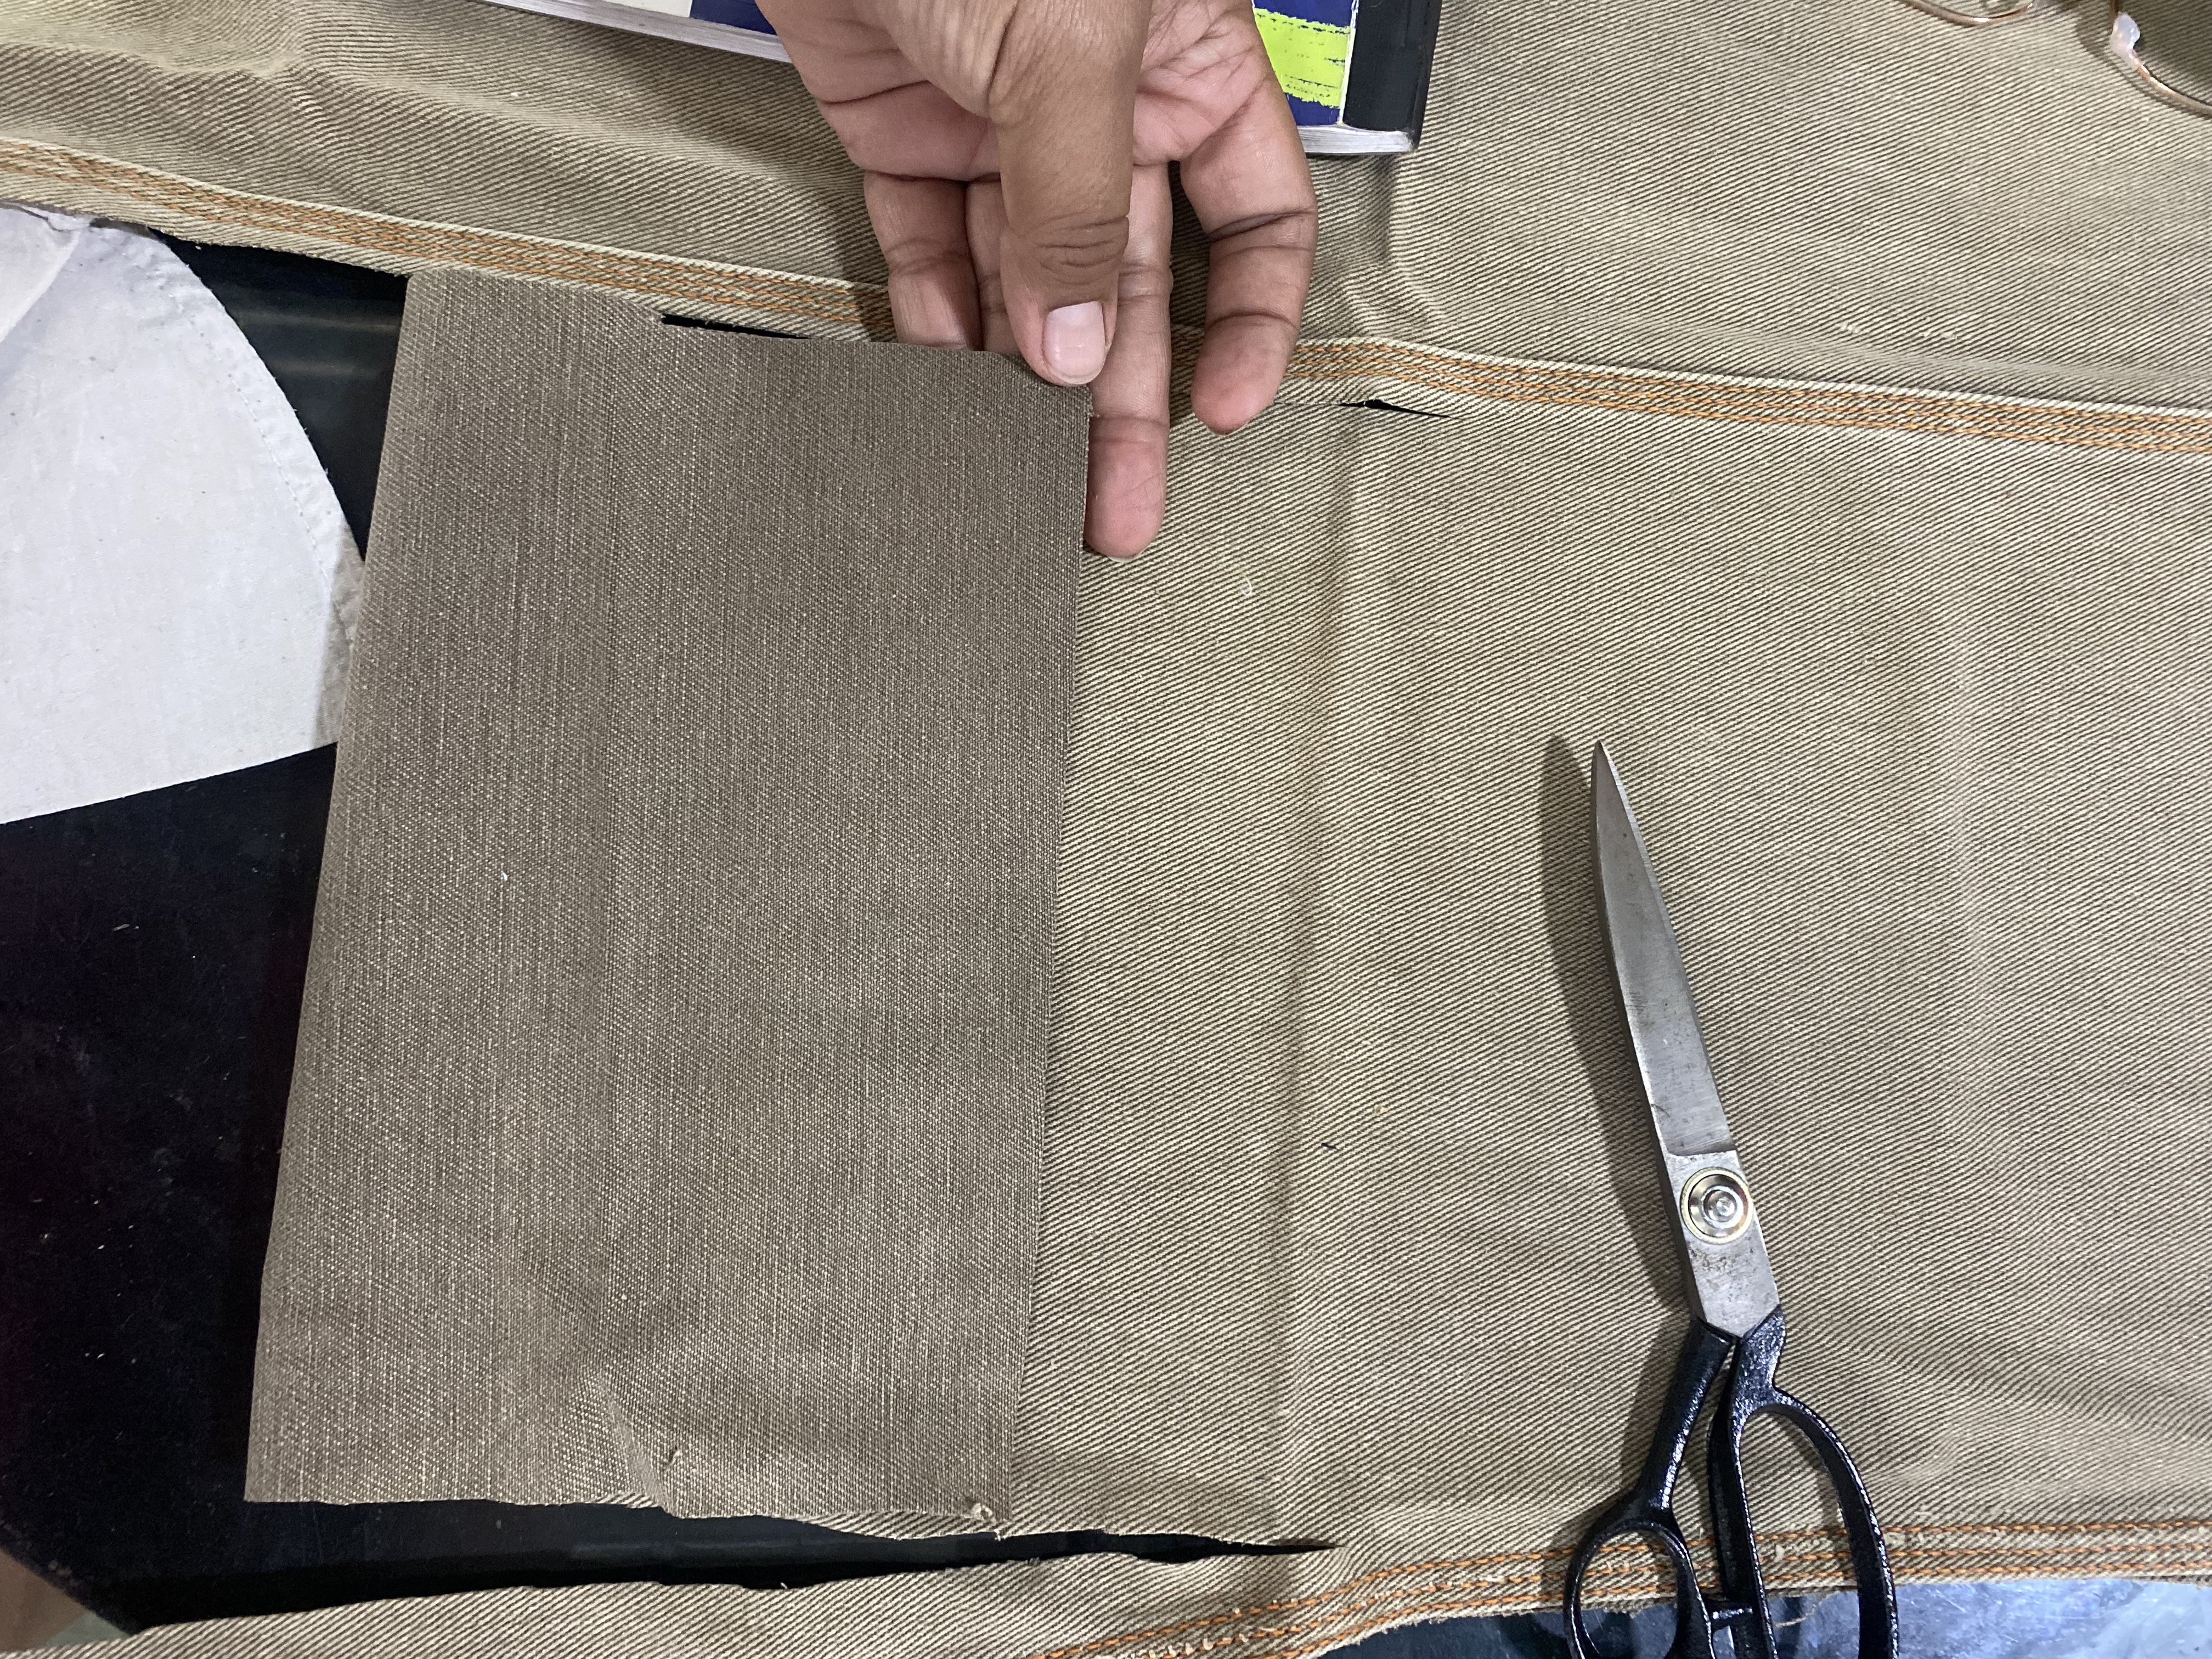
Ahora sí, comencemos a hacer esta linda cartuchera, primero vamos a buscar un retazo de jeans, yo conseguí entre mis retazos uno grande de jeans de un viejo pantalón, de este voy a extraer tan sólo una parte, me ayude con un block de dibujo para darle la forma recta, calculamos aproximadamente el tamaño que lo queremos, el tamaño del block me pareció perfecto así que lo corté casi igual, sólo le aumenté algunos centímetros en lo largo.
> Now yes, let's start making this cute pencil case, first we're going to look for a scrap of jeans, I found among my scraps a large one from an old pair of jeans, from this I'm going to extract just a part, I helped myself with a drawing block to give it the straight shape, we approximately calculated the size we want it, the size of the block seemed perfect to me so I cut it almost the same, I only increased a few centimeters in length.
___PASO A PASO___
> STEP BY STEP
|||
|---|---|
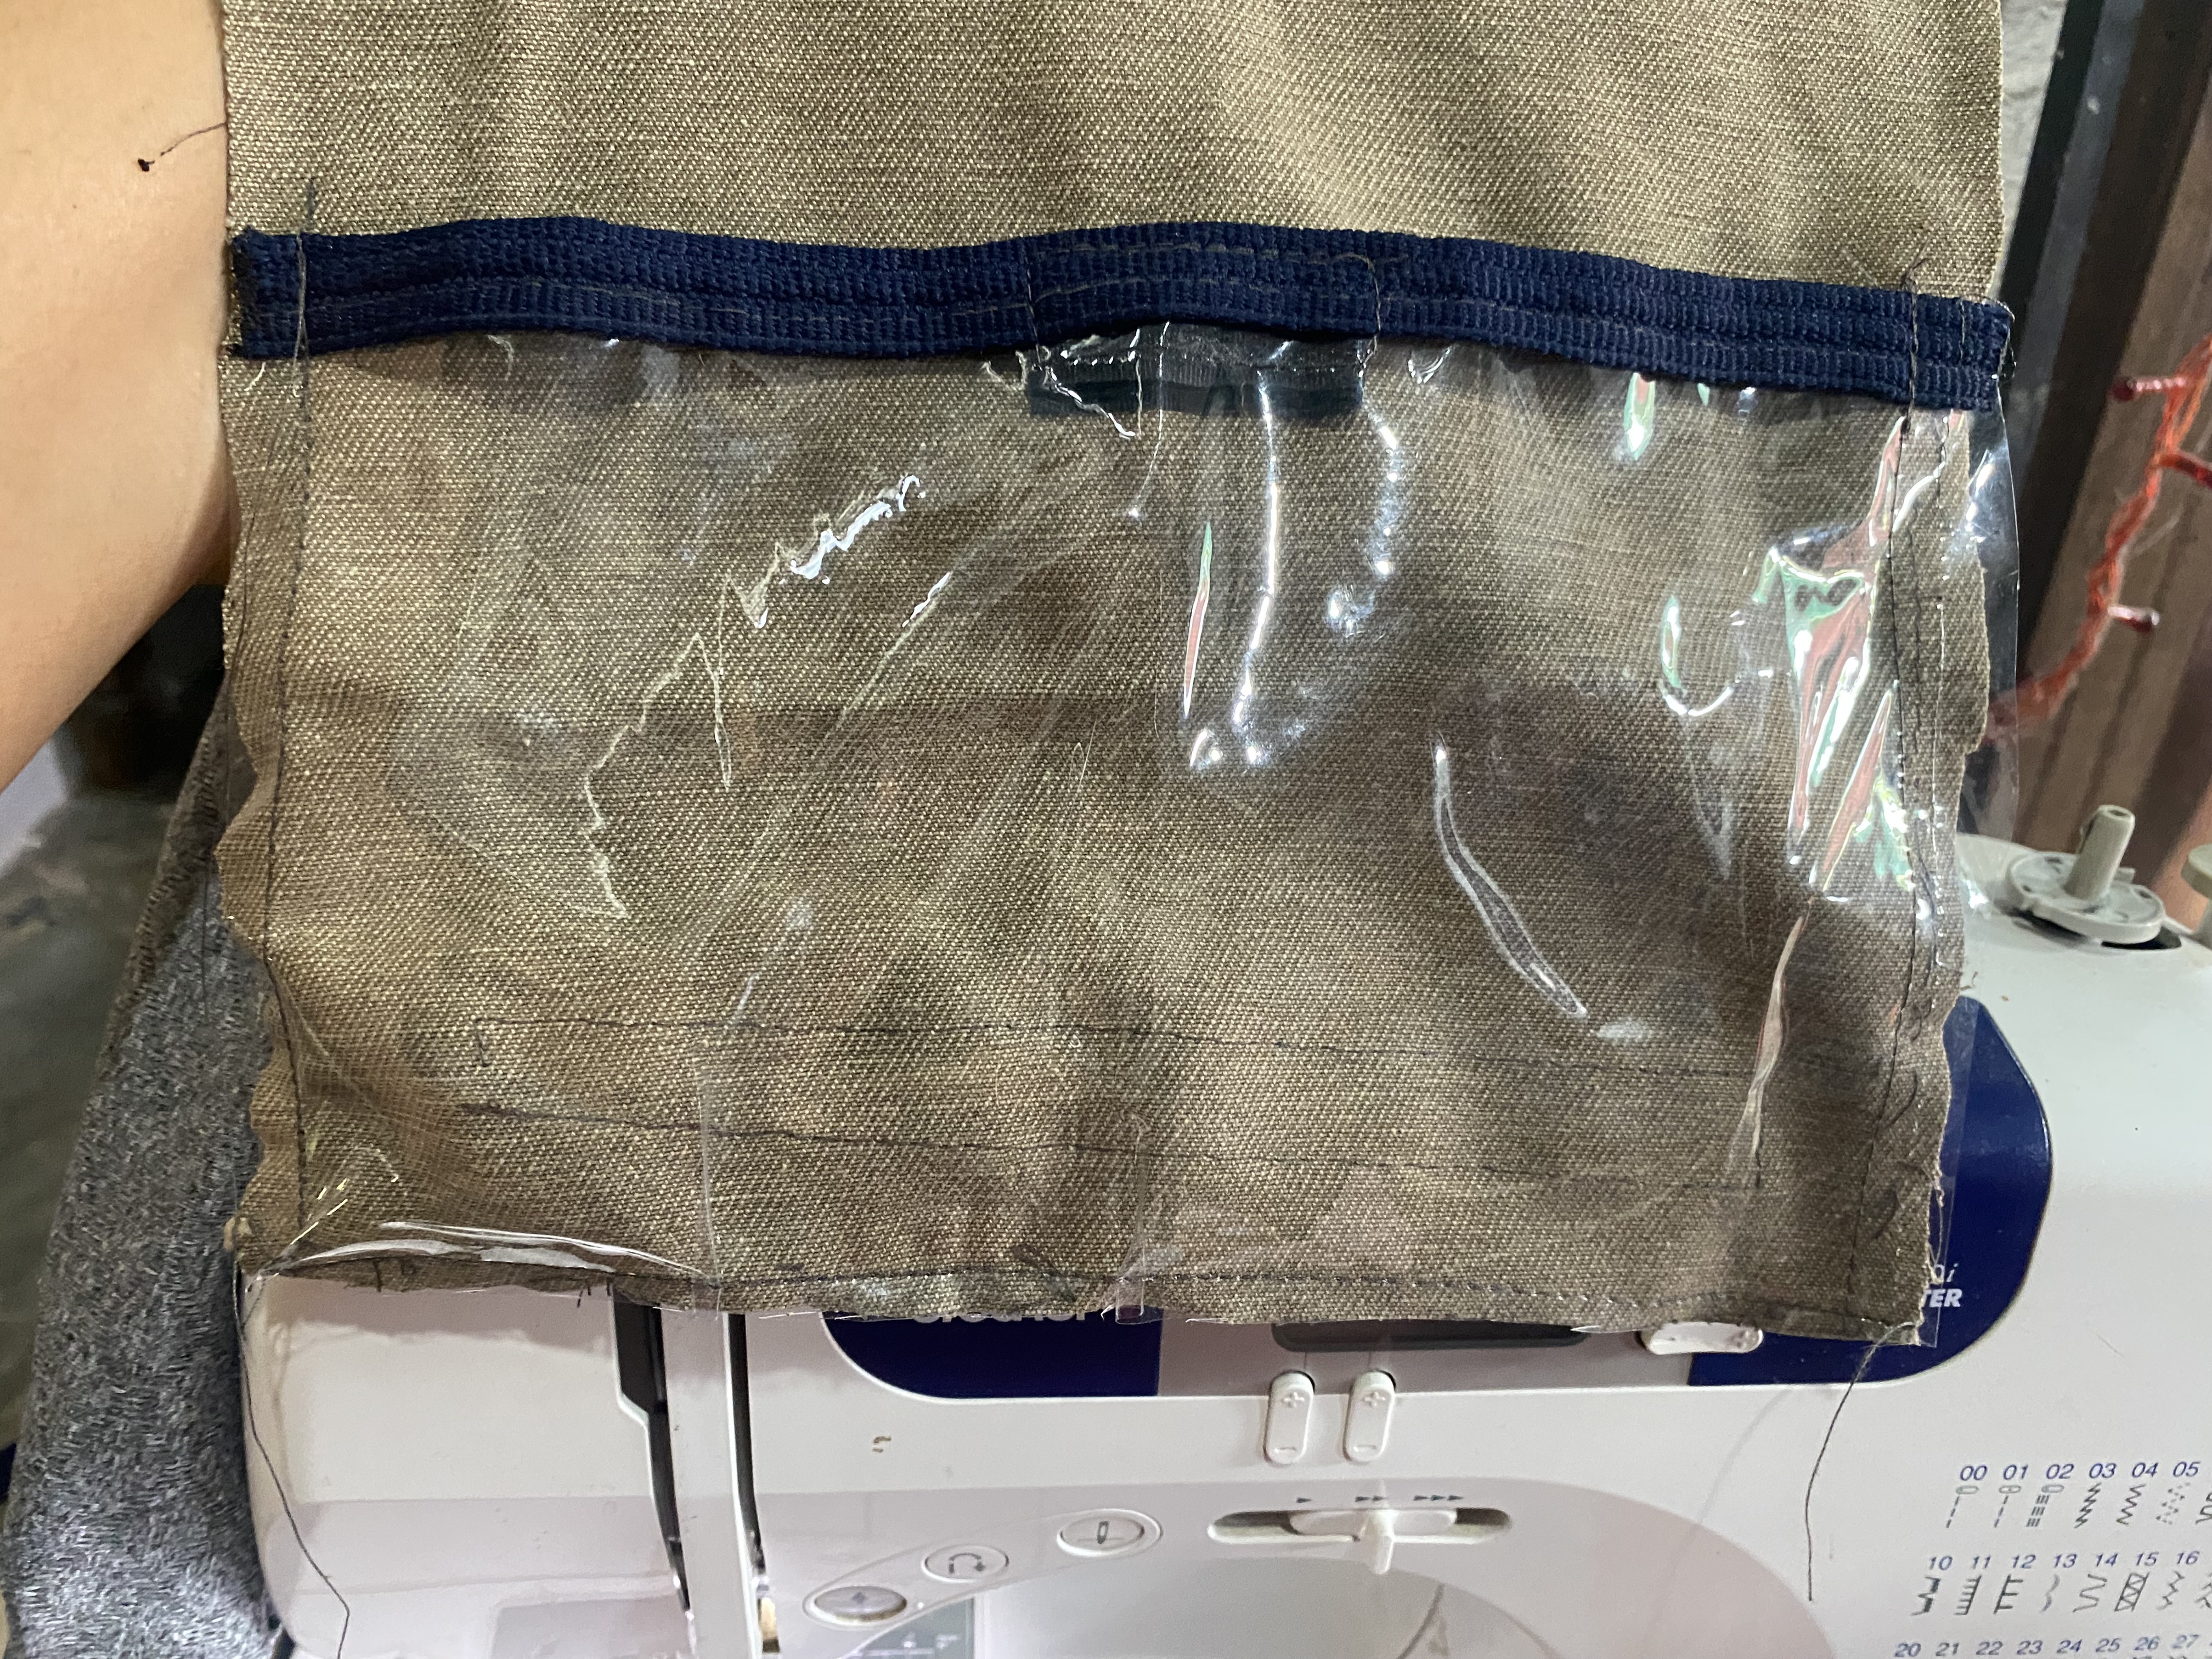
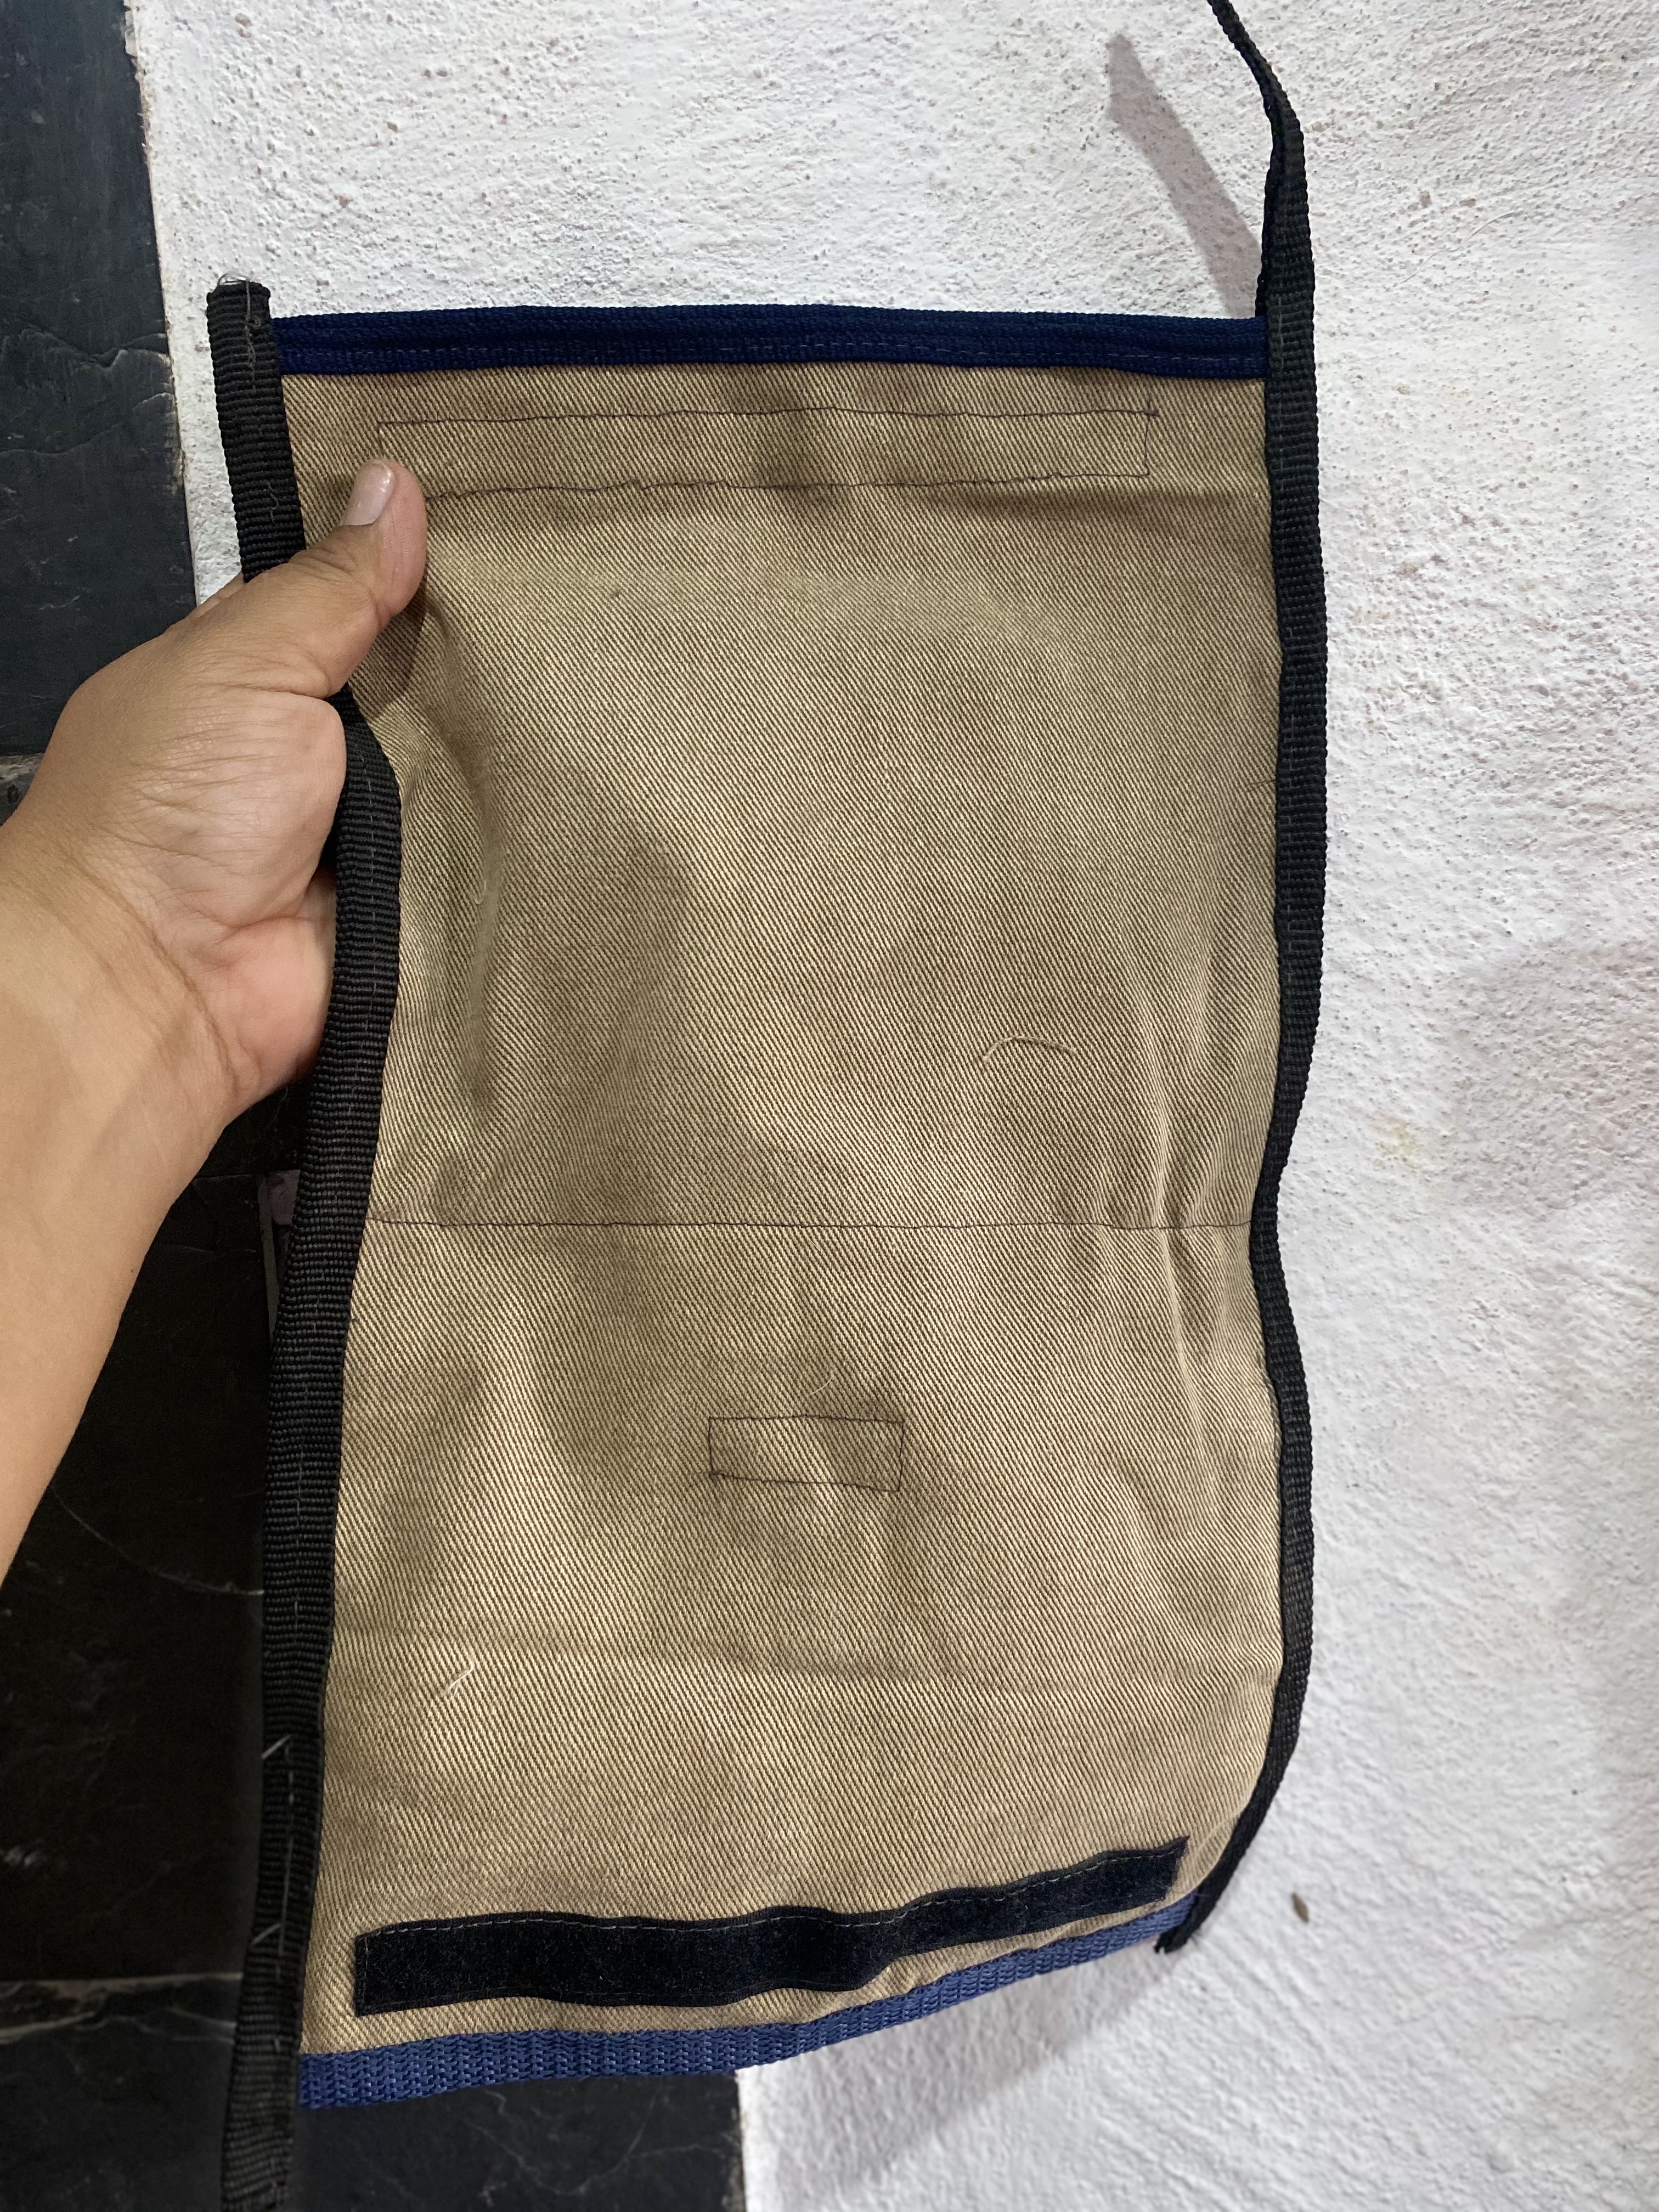
Luego de cortar la tela vamos a doblarla en forma de sobre, cortaremos un trozo de cierre mágico y ubicarlo en los extremos para cerrar el sobre, aparte cortaremos dos rectángulos en plástico transparente para hacer los bolsillos donde colocaremos nuestras herramientas, estos bolsillos deben ser del tamaño aproximado de cada doblez de nuestra cartuchera tipo sobre.
|||
|---|---|
|||
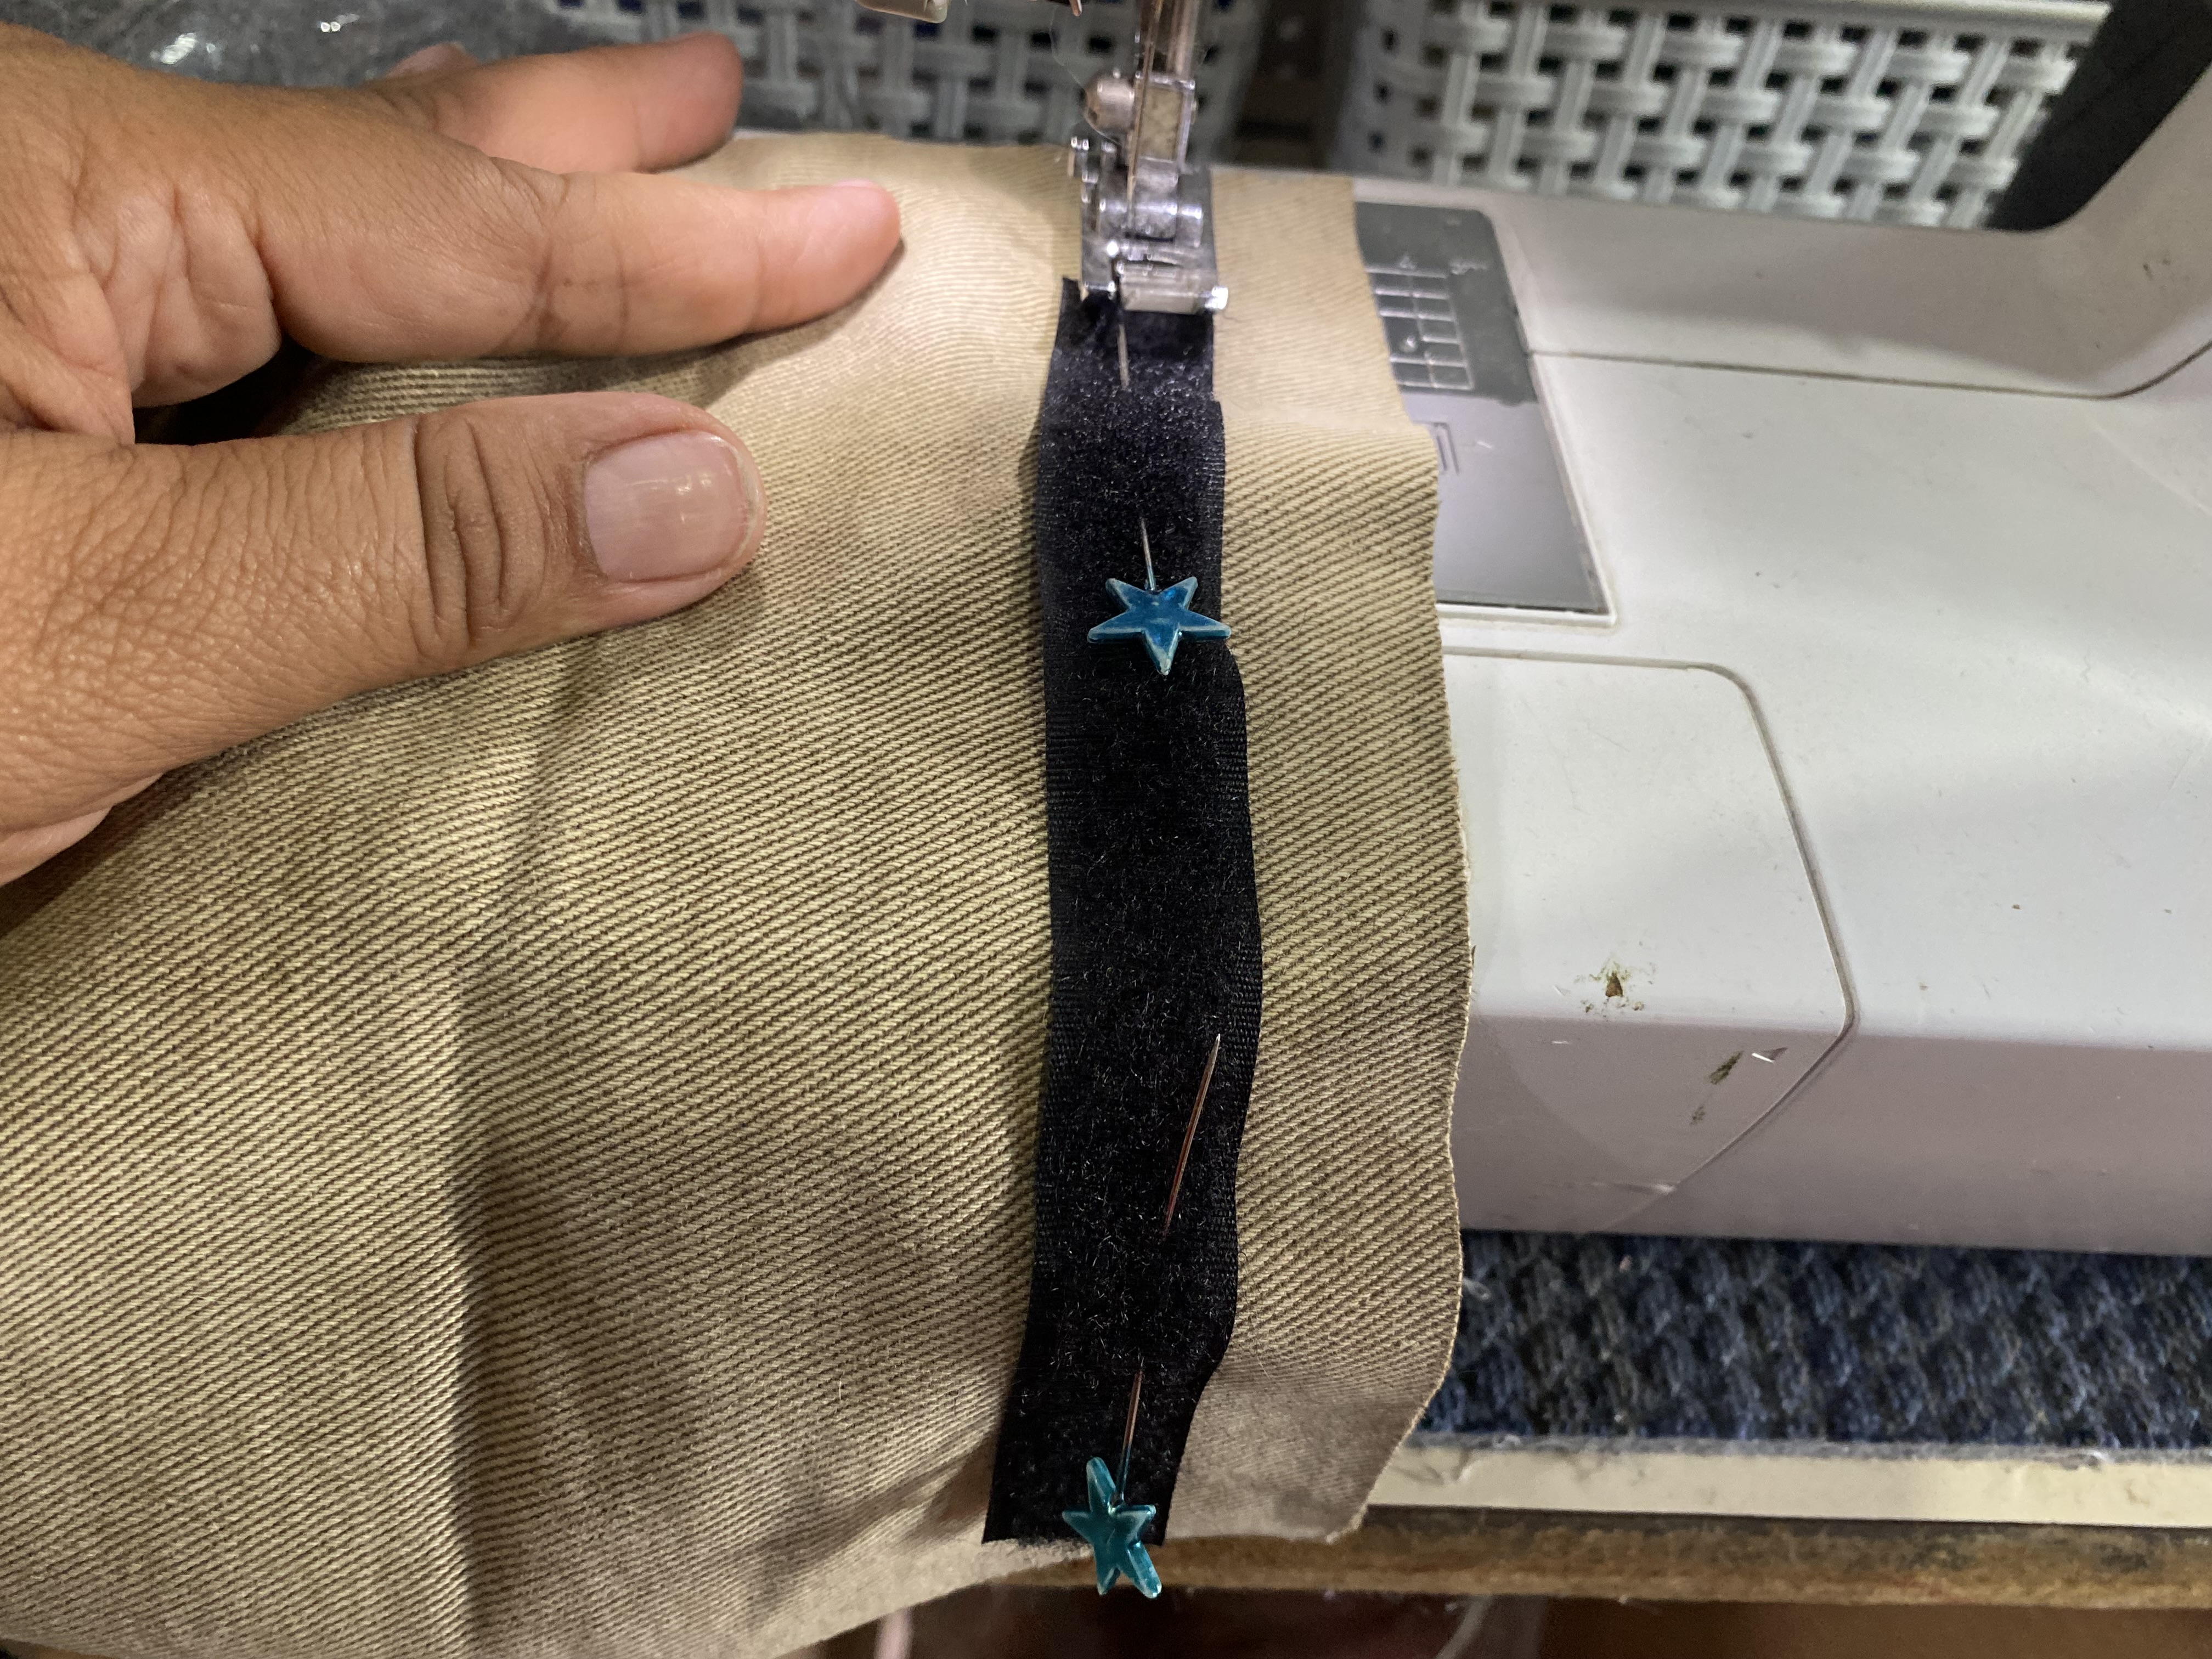
Para el siguiente paso vamos a comenzar con las costuras, lo primero que vamos a hacer es ubicar el cierre mágico para abrir y cerrar nuestra cartuchera tipo sobre, ubicamos uno de los cierres mágicos en la parte externa en la orilla, luego ubicamos el otro estratégicamente en la otra orilla por la parte interna, nos debe quedar en la misma posición.
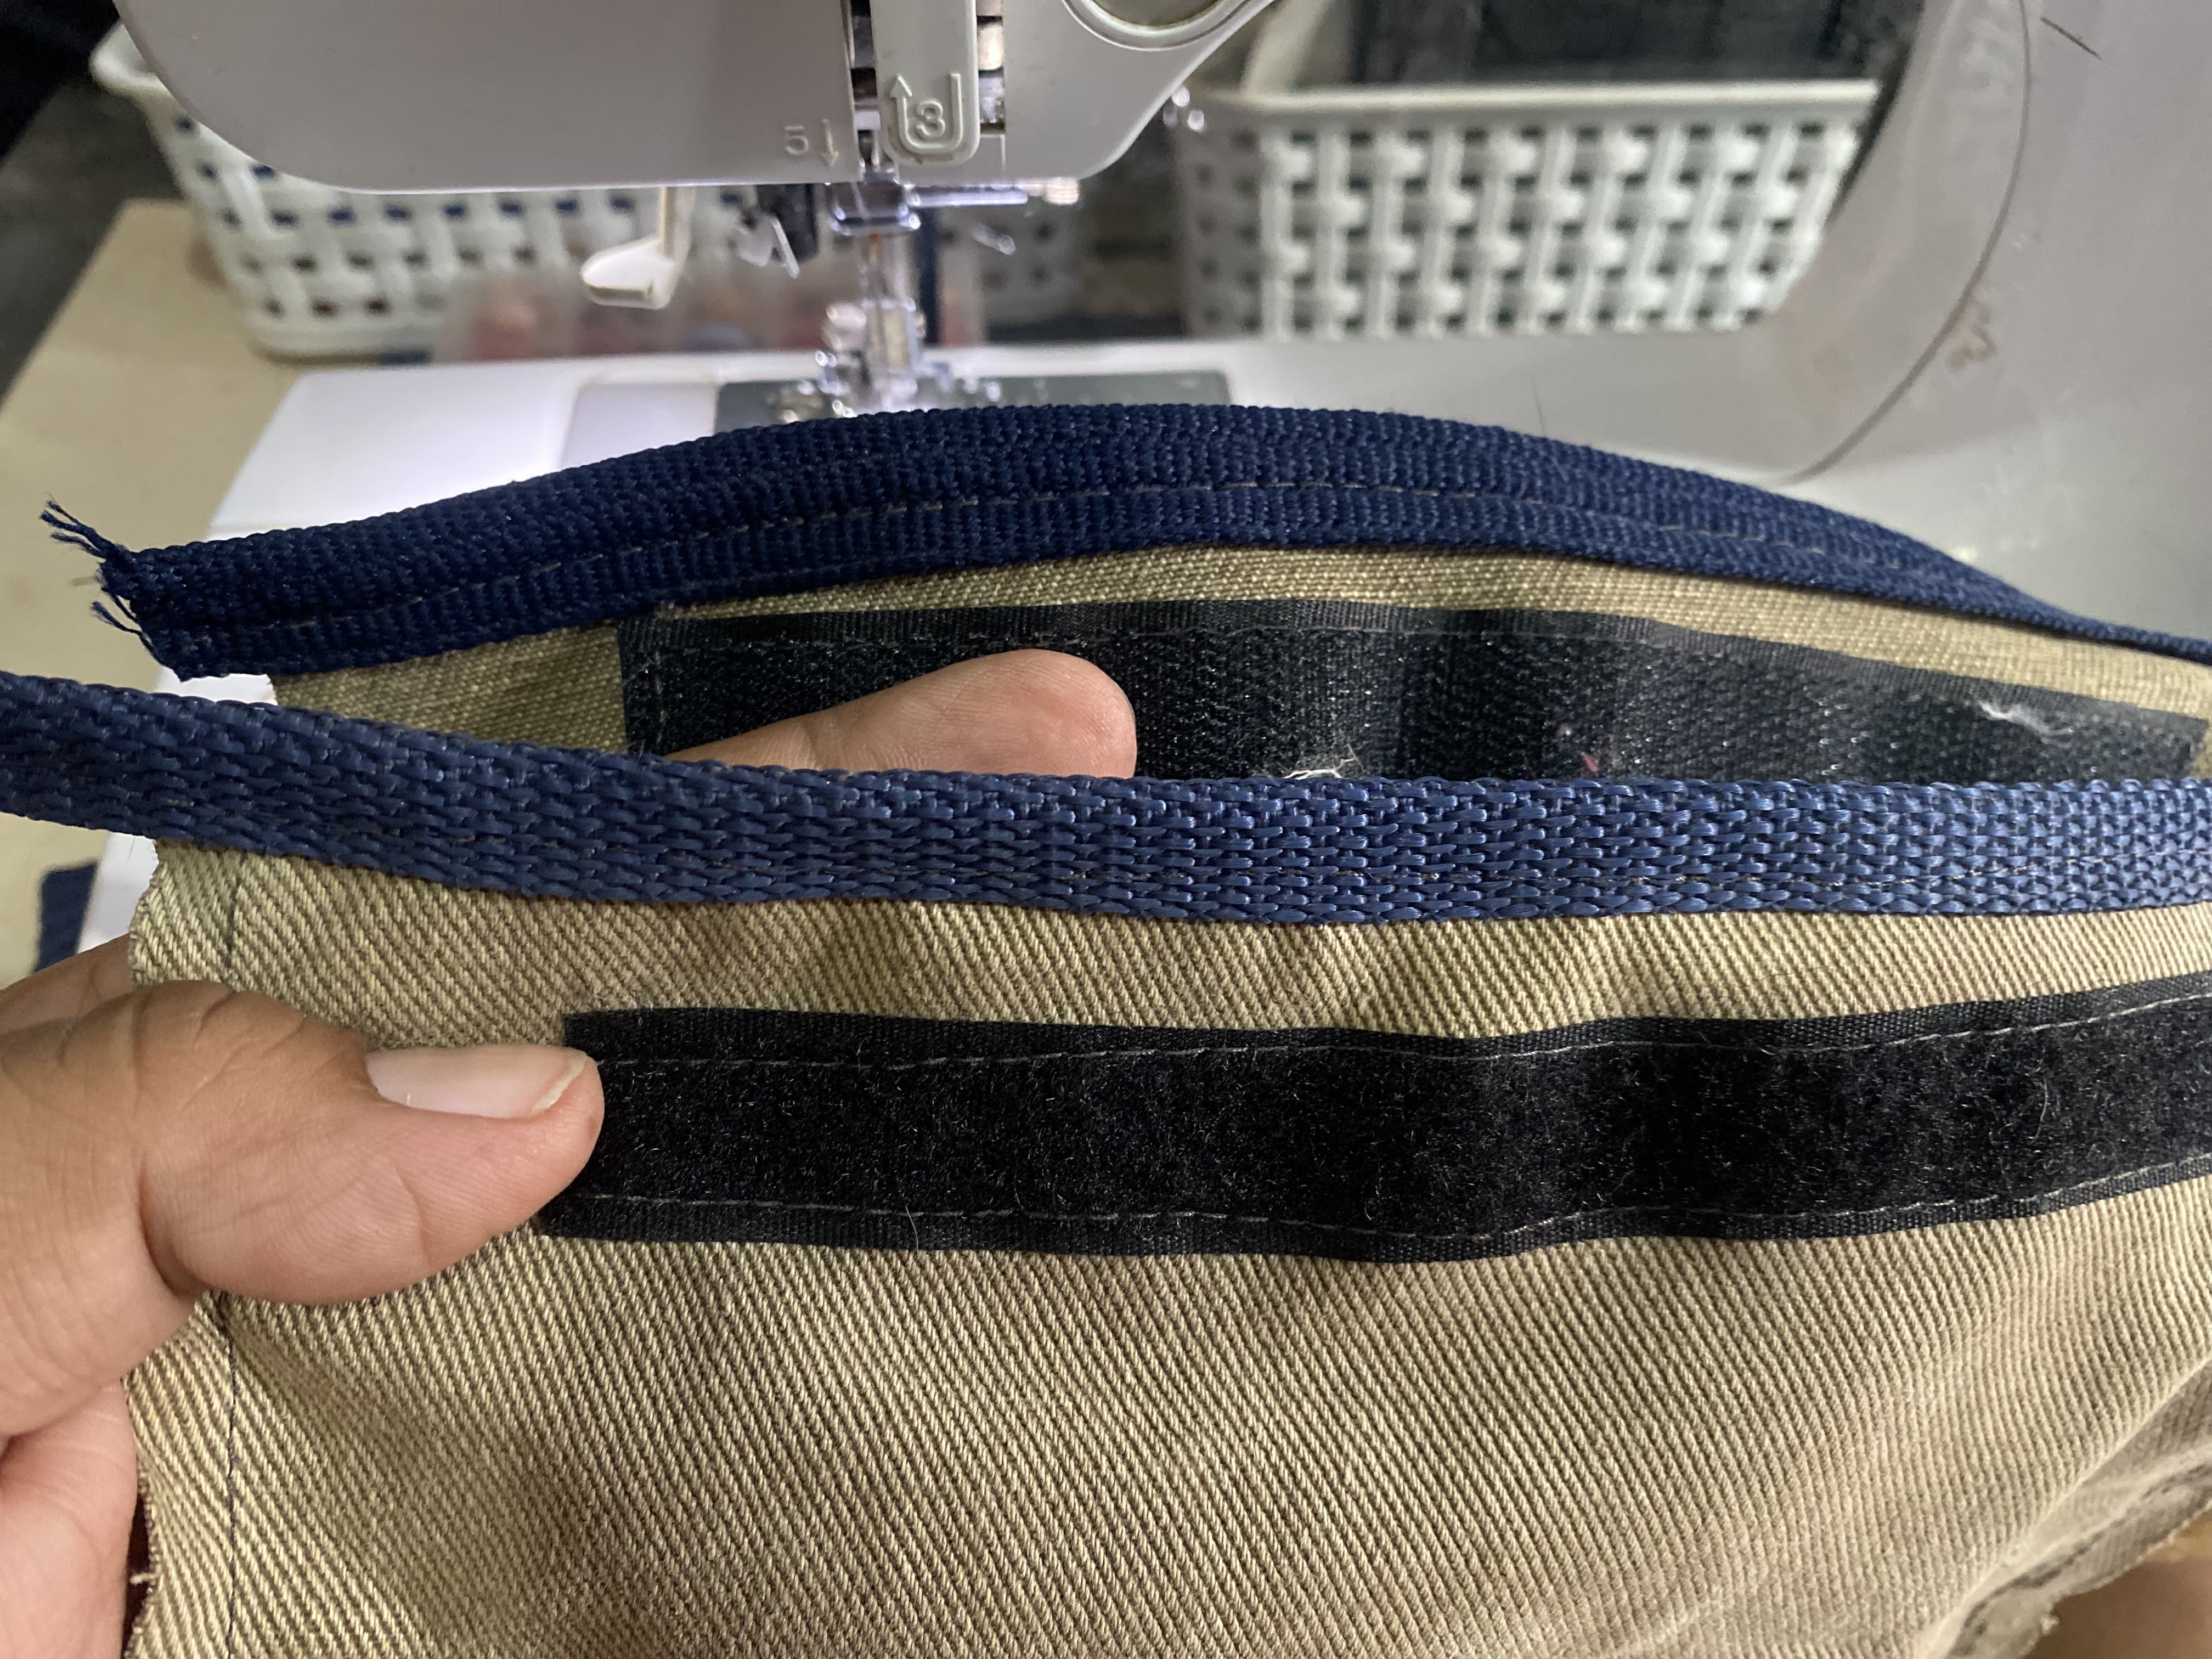
Acostumbro a guardar toda la parte útil de los morrales o bolsos que se van dañando, a esto les saco las cremalleras, las tiras, etc. y hoy buscándo entre mis cosas, conseguí varias tiras de morrales y me parecieron perfectas para hacer el sesgo de todas las orillas de esta cartuchera, le colocaré al plástico transparente en la orilla, para esto también se puede utilizar alguna tela que tengamos a la mano y le hacemos el doble necesario.
la idea de colocarle sesgo sobre todo en las orillas de los bolsillos es para que sea más resistente, a uno de los bolsillos le voy a colocar un pequeño trozo de cierre mágico para que las herramientas que quedan en ese bolsillo no se salgan.
> For the next step, we'll start with the stitching. The first thing we'll do is locate the magic closure to open and close our envelope-style pencil case. We'll place one of the magic closures on the outside edge, then strategically place the other one on the other edge on the inside. It should be in the same position.
>
> I usually save all the useful parts of backpacks or bags that get damaged, for this I remove the zippers, straps, etc. and today looking through my things, I found several strips of backpacks and they seemed perfect to make the bias of all the edges of this pencil case, I will place the transparent plastic on the edge, for this you can also use any fabric you have on hand and make the necessary double.
>
> The idea of placing bias, especially on the edges of the pockets, is to make it more resistant. I'm going to place a small piece of magic closure on one of the pockets so that the tools left in that pocket don't come out.
|||
|---|---|
|||
|---|---|
|||
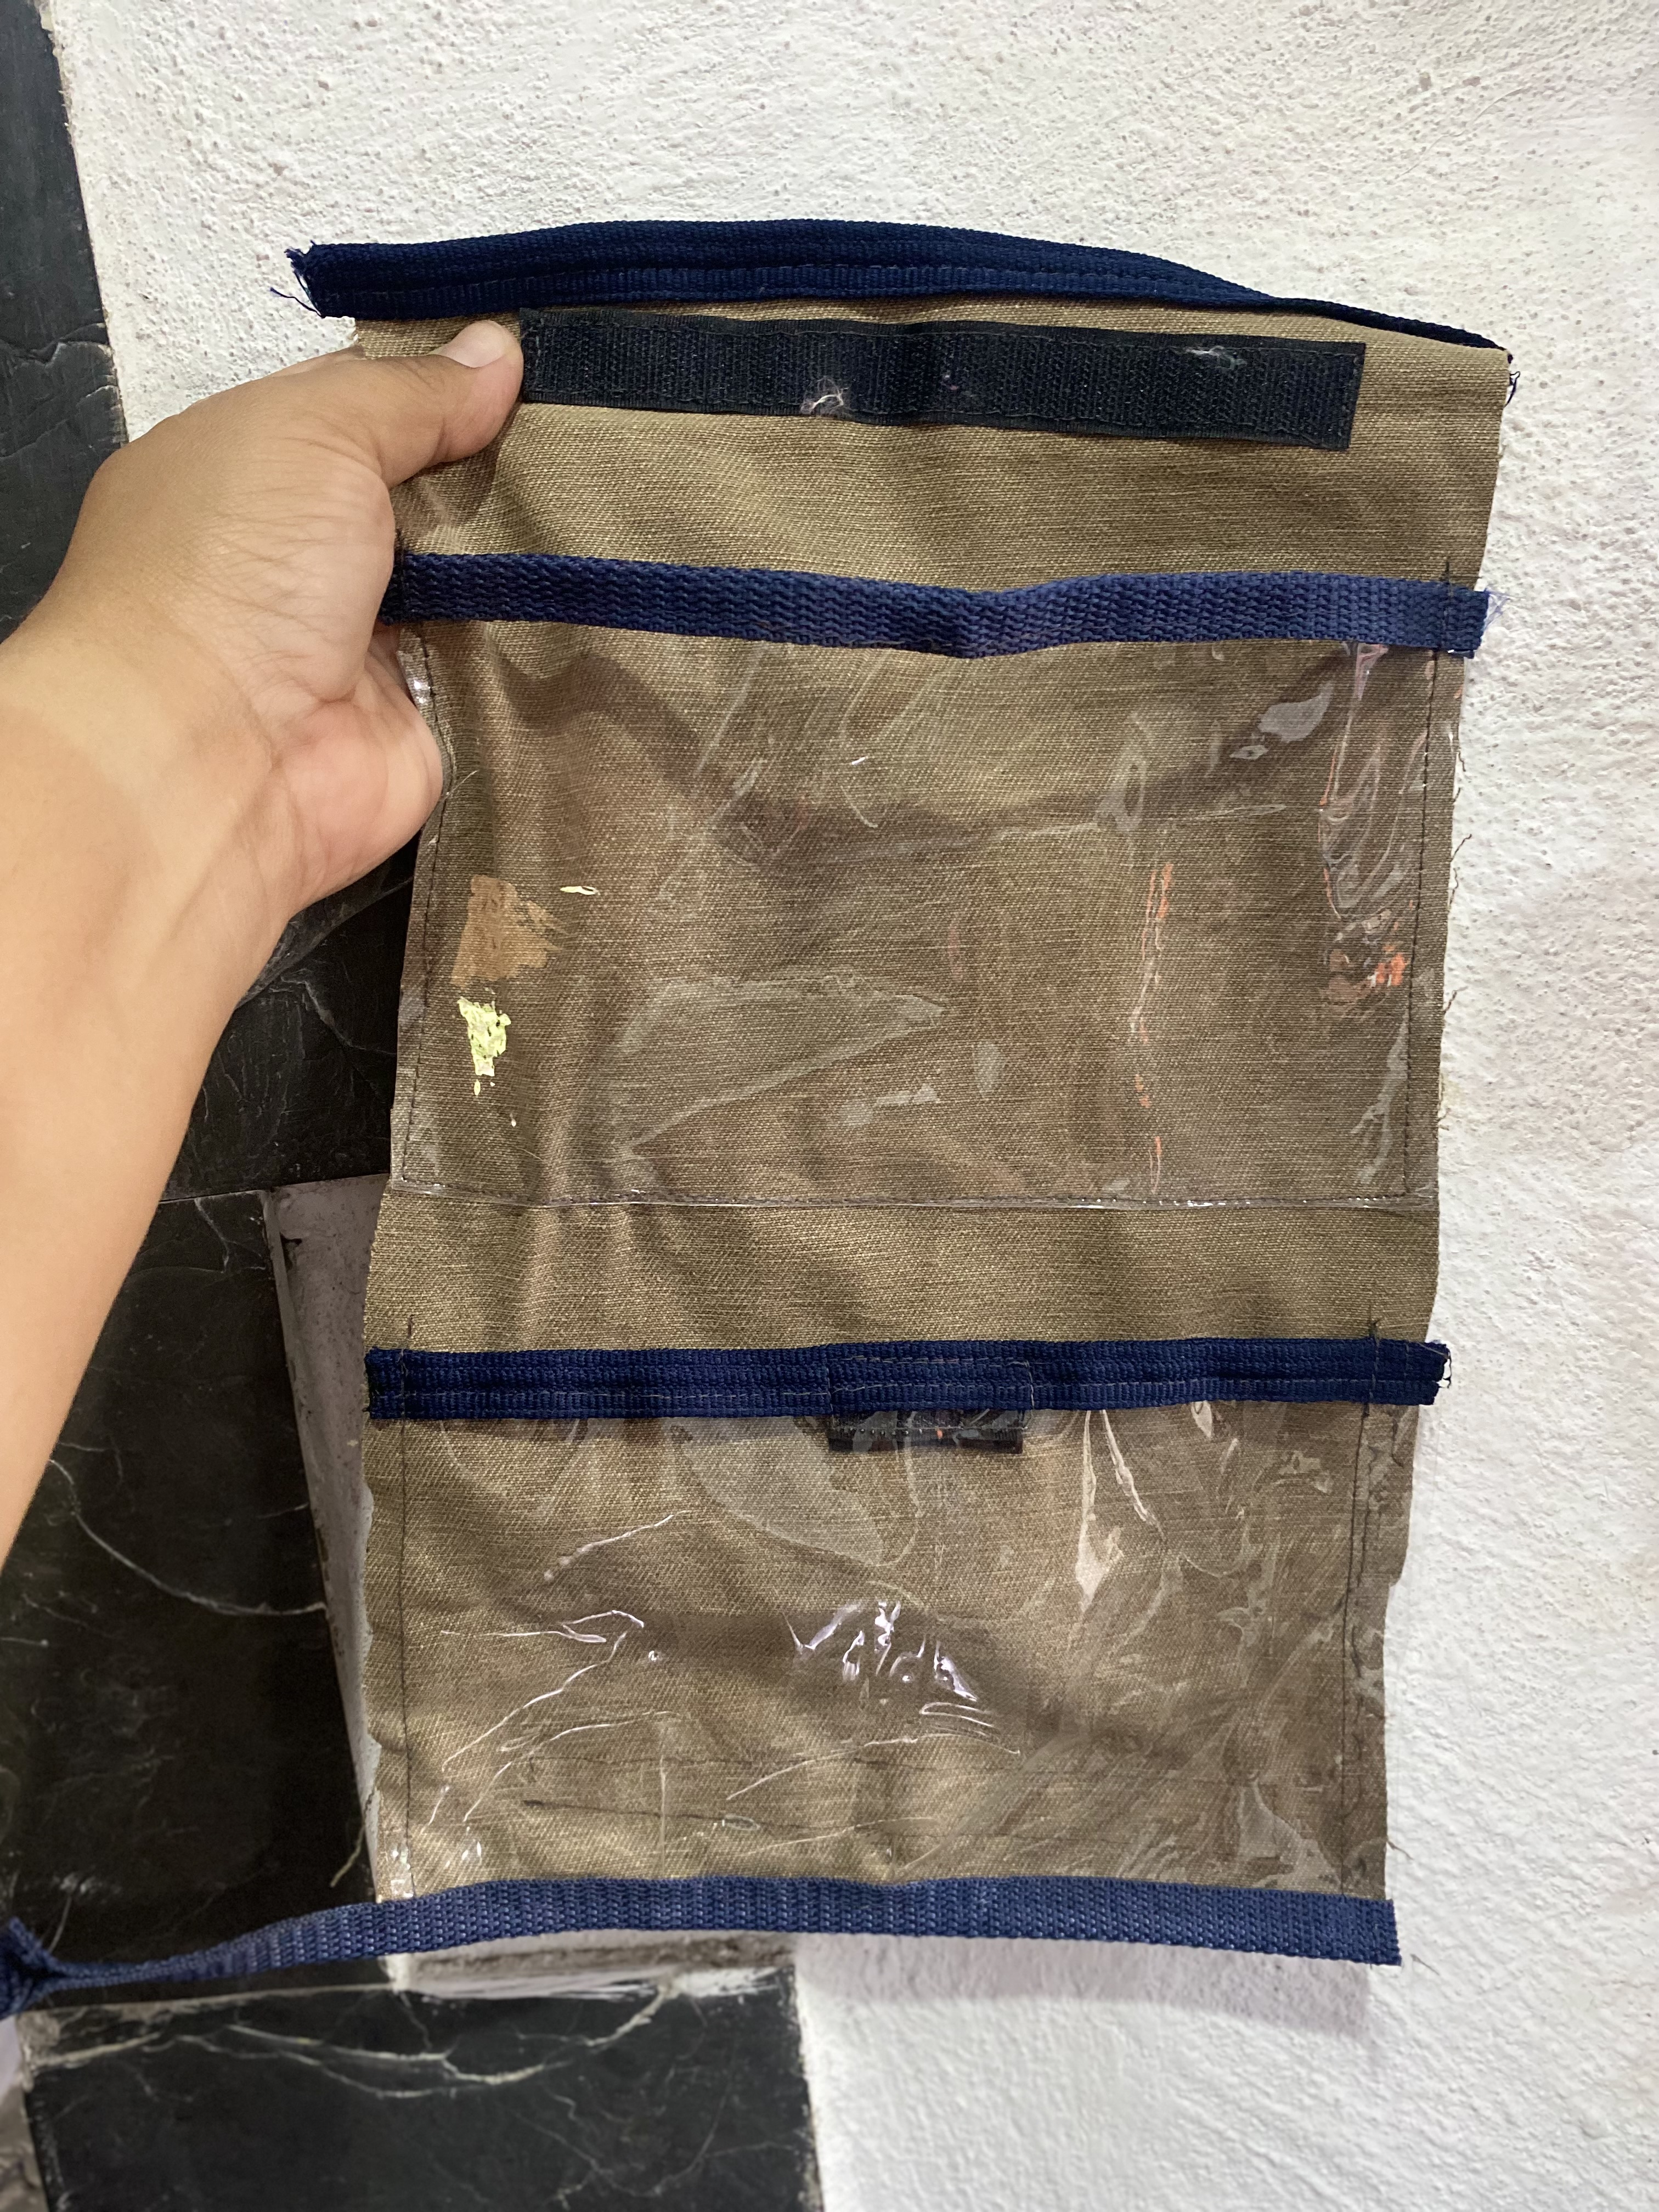
Luego de ubicar los bolsillos voy a colocarle sesgo por toda la orilla a la cartuchera, este tipo de tiras tiende ahí lucharse así que es importante quemarlas en las orillas para que no se dañen, en una de las orillas superiores voy a dejar una tira larga para hacerle una argolla de manera que pueda servir para agarrarla por allí, y así ya está lista esta linda cartuchera tipo sobre para guardar mis herramientas.
> After locating the pockets, I'm going to put bias tape all around the edge of the pouch. These types of strips tend to curl there, so it's important to burn them on the edges so they don't get damaged. On one of the upper edges, I'm going to leave a long strip to make a ring so that I can use it to hold it there. And that's how this nice envelope-style pouch is ready to store my tools.
|||
|---|---|
|||
Estoy muy feliz con el resultado de mi nueva cartuchera tipo sobre para guardar mis herramientas, ahora puedo tenerlas organizadas y a la mano para cuando las vaya a utilizar, espero les haya gustado esta idea, de antemano estoy muy agradecida de qué hayan visitado mi Publicación, me despido por hoy deseándoles muchos éxitos y bendiciones ❤️
> I am very happy with the result of my new envelope-type pencil case to store my tools, now I can have them organized and at hand for when I need to use them, I hope you liked this idea, in advance I am very grateful that you have visited my publication, I say goodbye for today wishing you much success and blessings ❤️
|||
|---|---|
---

***las fotos aquí compartidas son de mi propiedad tomadas con mi teléfono iPhone 11, la edición fue hecha en Canva, para la traducción del inglés utilice el traductor de Google***