Español
Saludos amigos amantes de las manualidades.💁🌈
¡Feliz día para todos! Estos días amigos , han sido tensos en mi familia por la llegada casi inminente del ciclón Melissa en la región Oriental de Cuba, lugar donde habito actualmente. Para aliviar estás tensiones debido a los pensamientos negativos sobre posibles consecuencias de su paso, me refugié en el mundo de las telas, logrando confeccionar bellas alfombras con flores para múltiples funciones como: decorado del piso en habitaciones, tapetes para balances y muebles.

Los invito a que me acompañen a conocer el método que empleé para su confección. ¡Comencemos!
🌸Alfombras con flores🌸
🌸Materiales
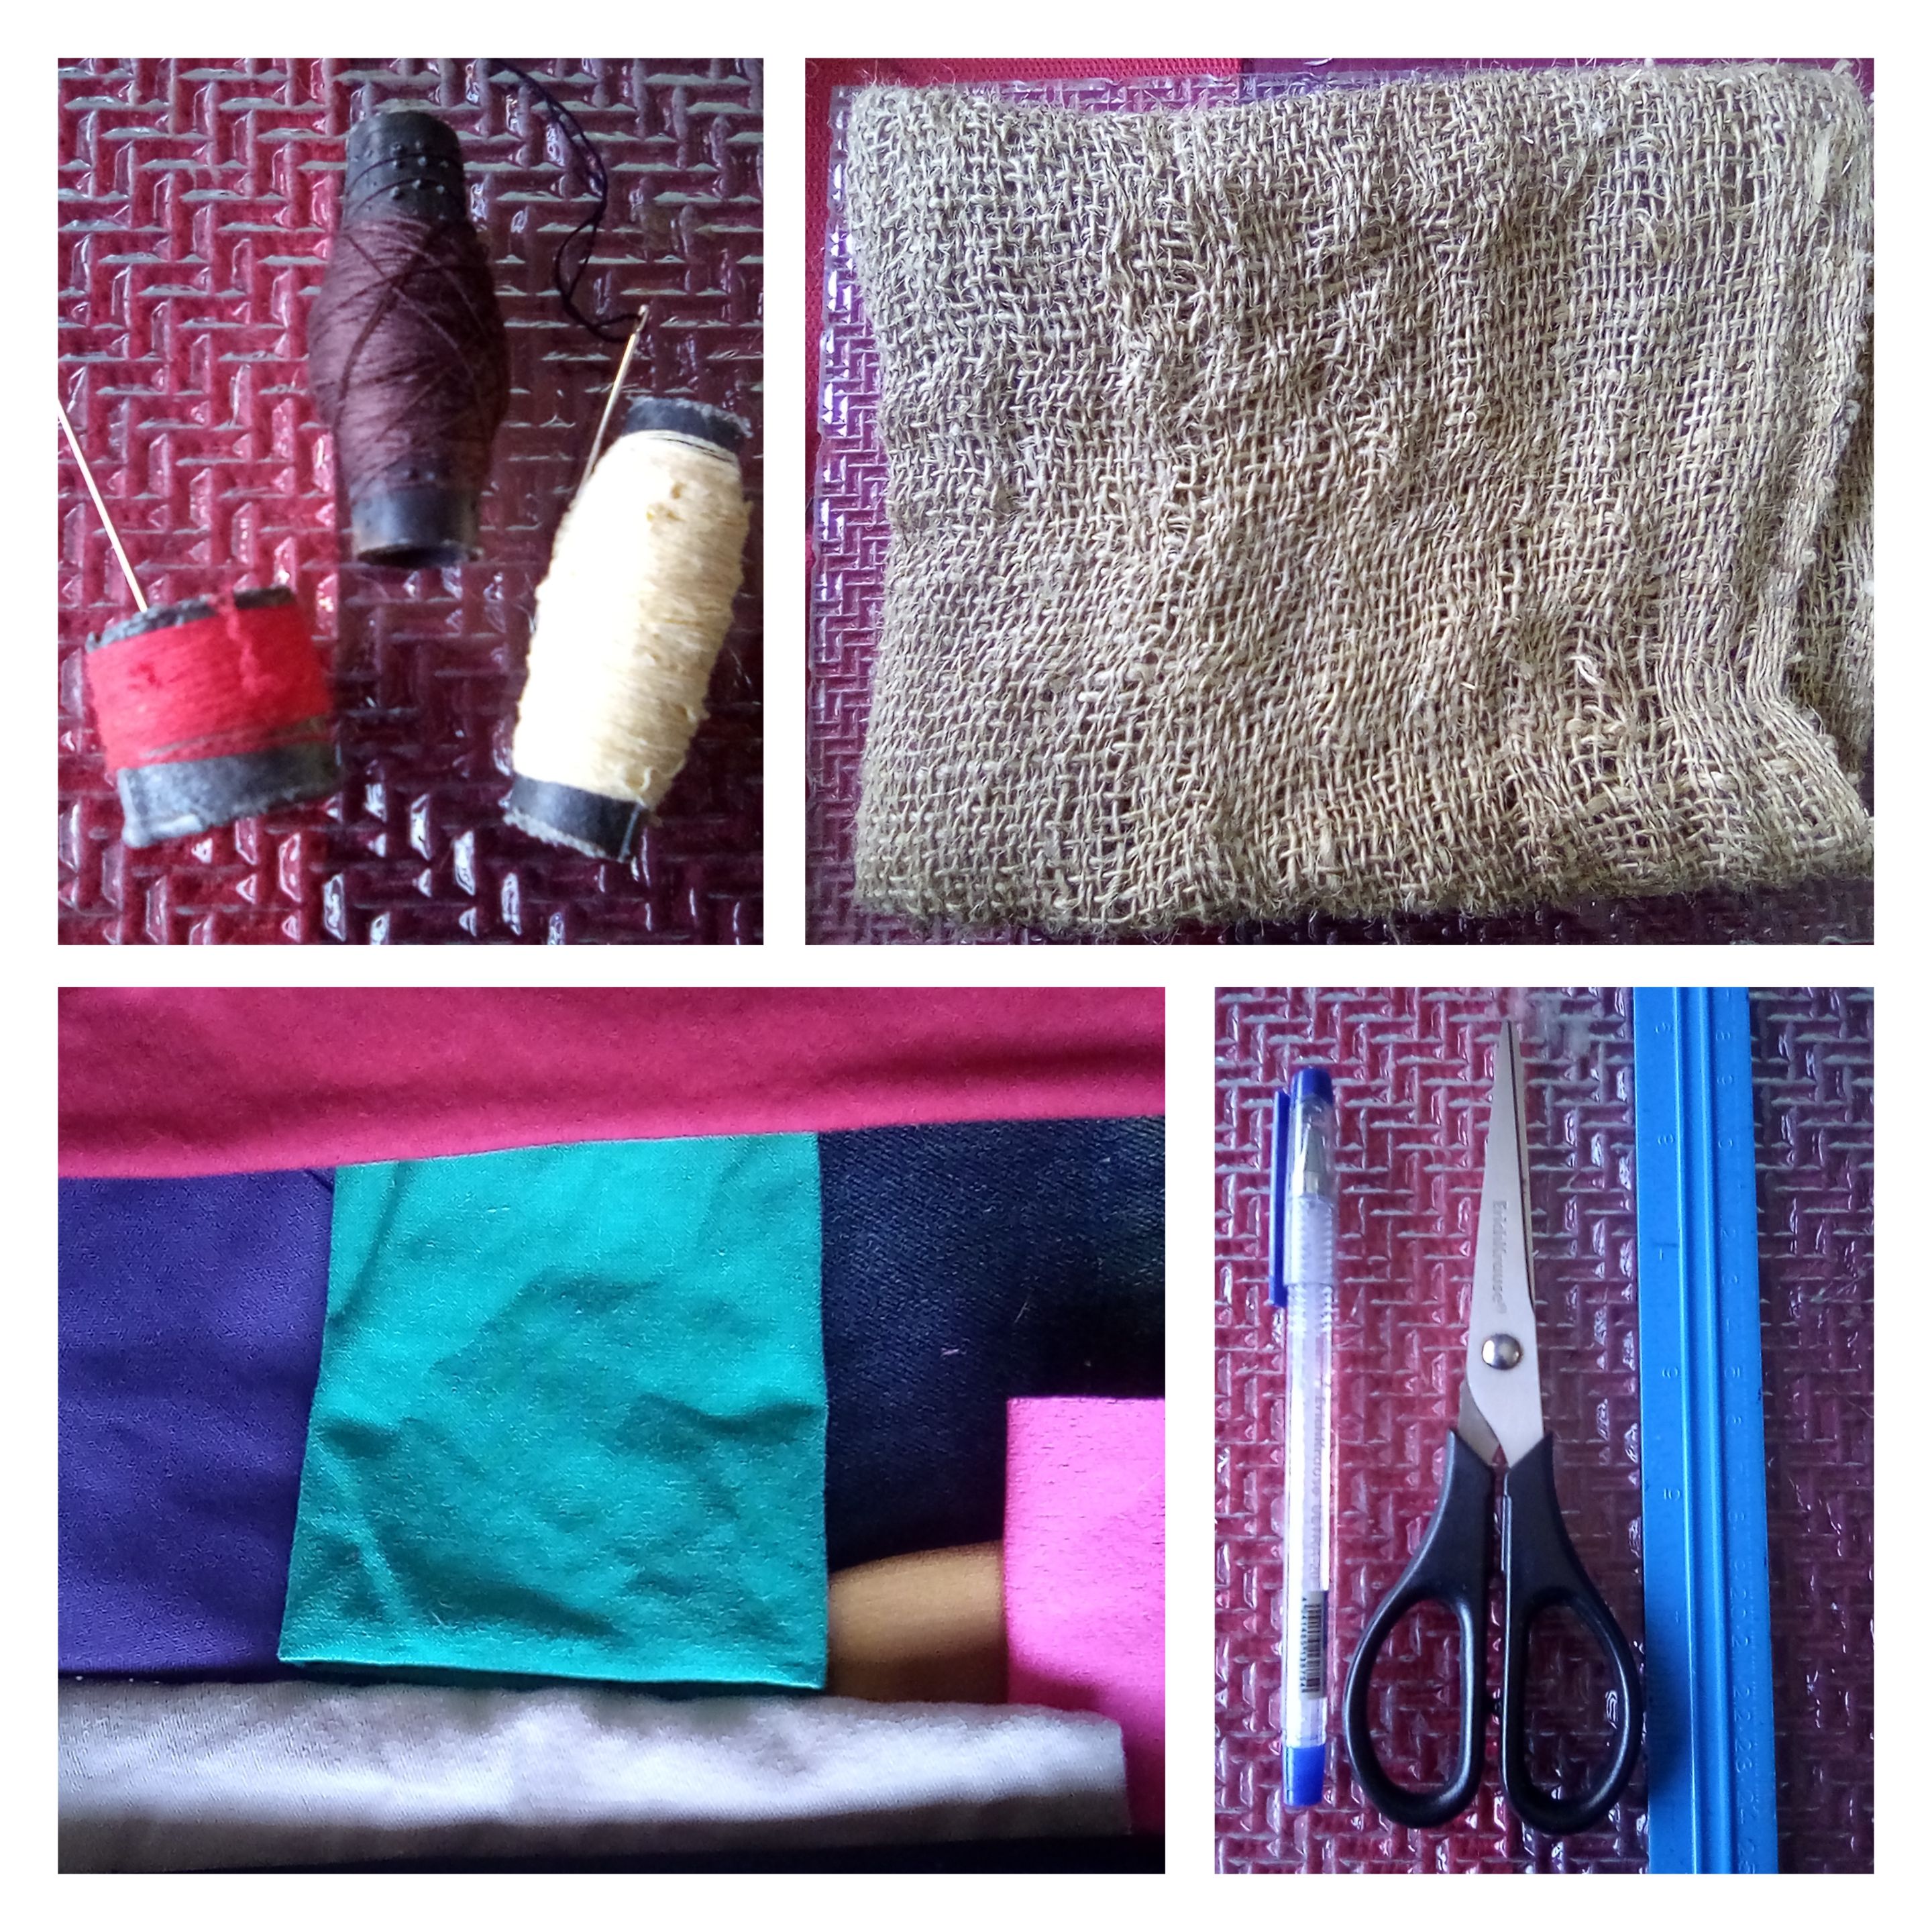
.Retazos de tela .Saco .Aguja de coser .Aguja de tejer .Hilo de coser .Lapicero .Regla
🌸Modo de confección🌸
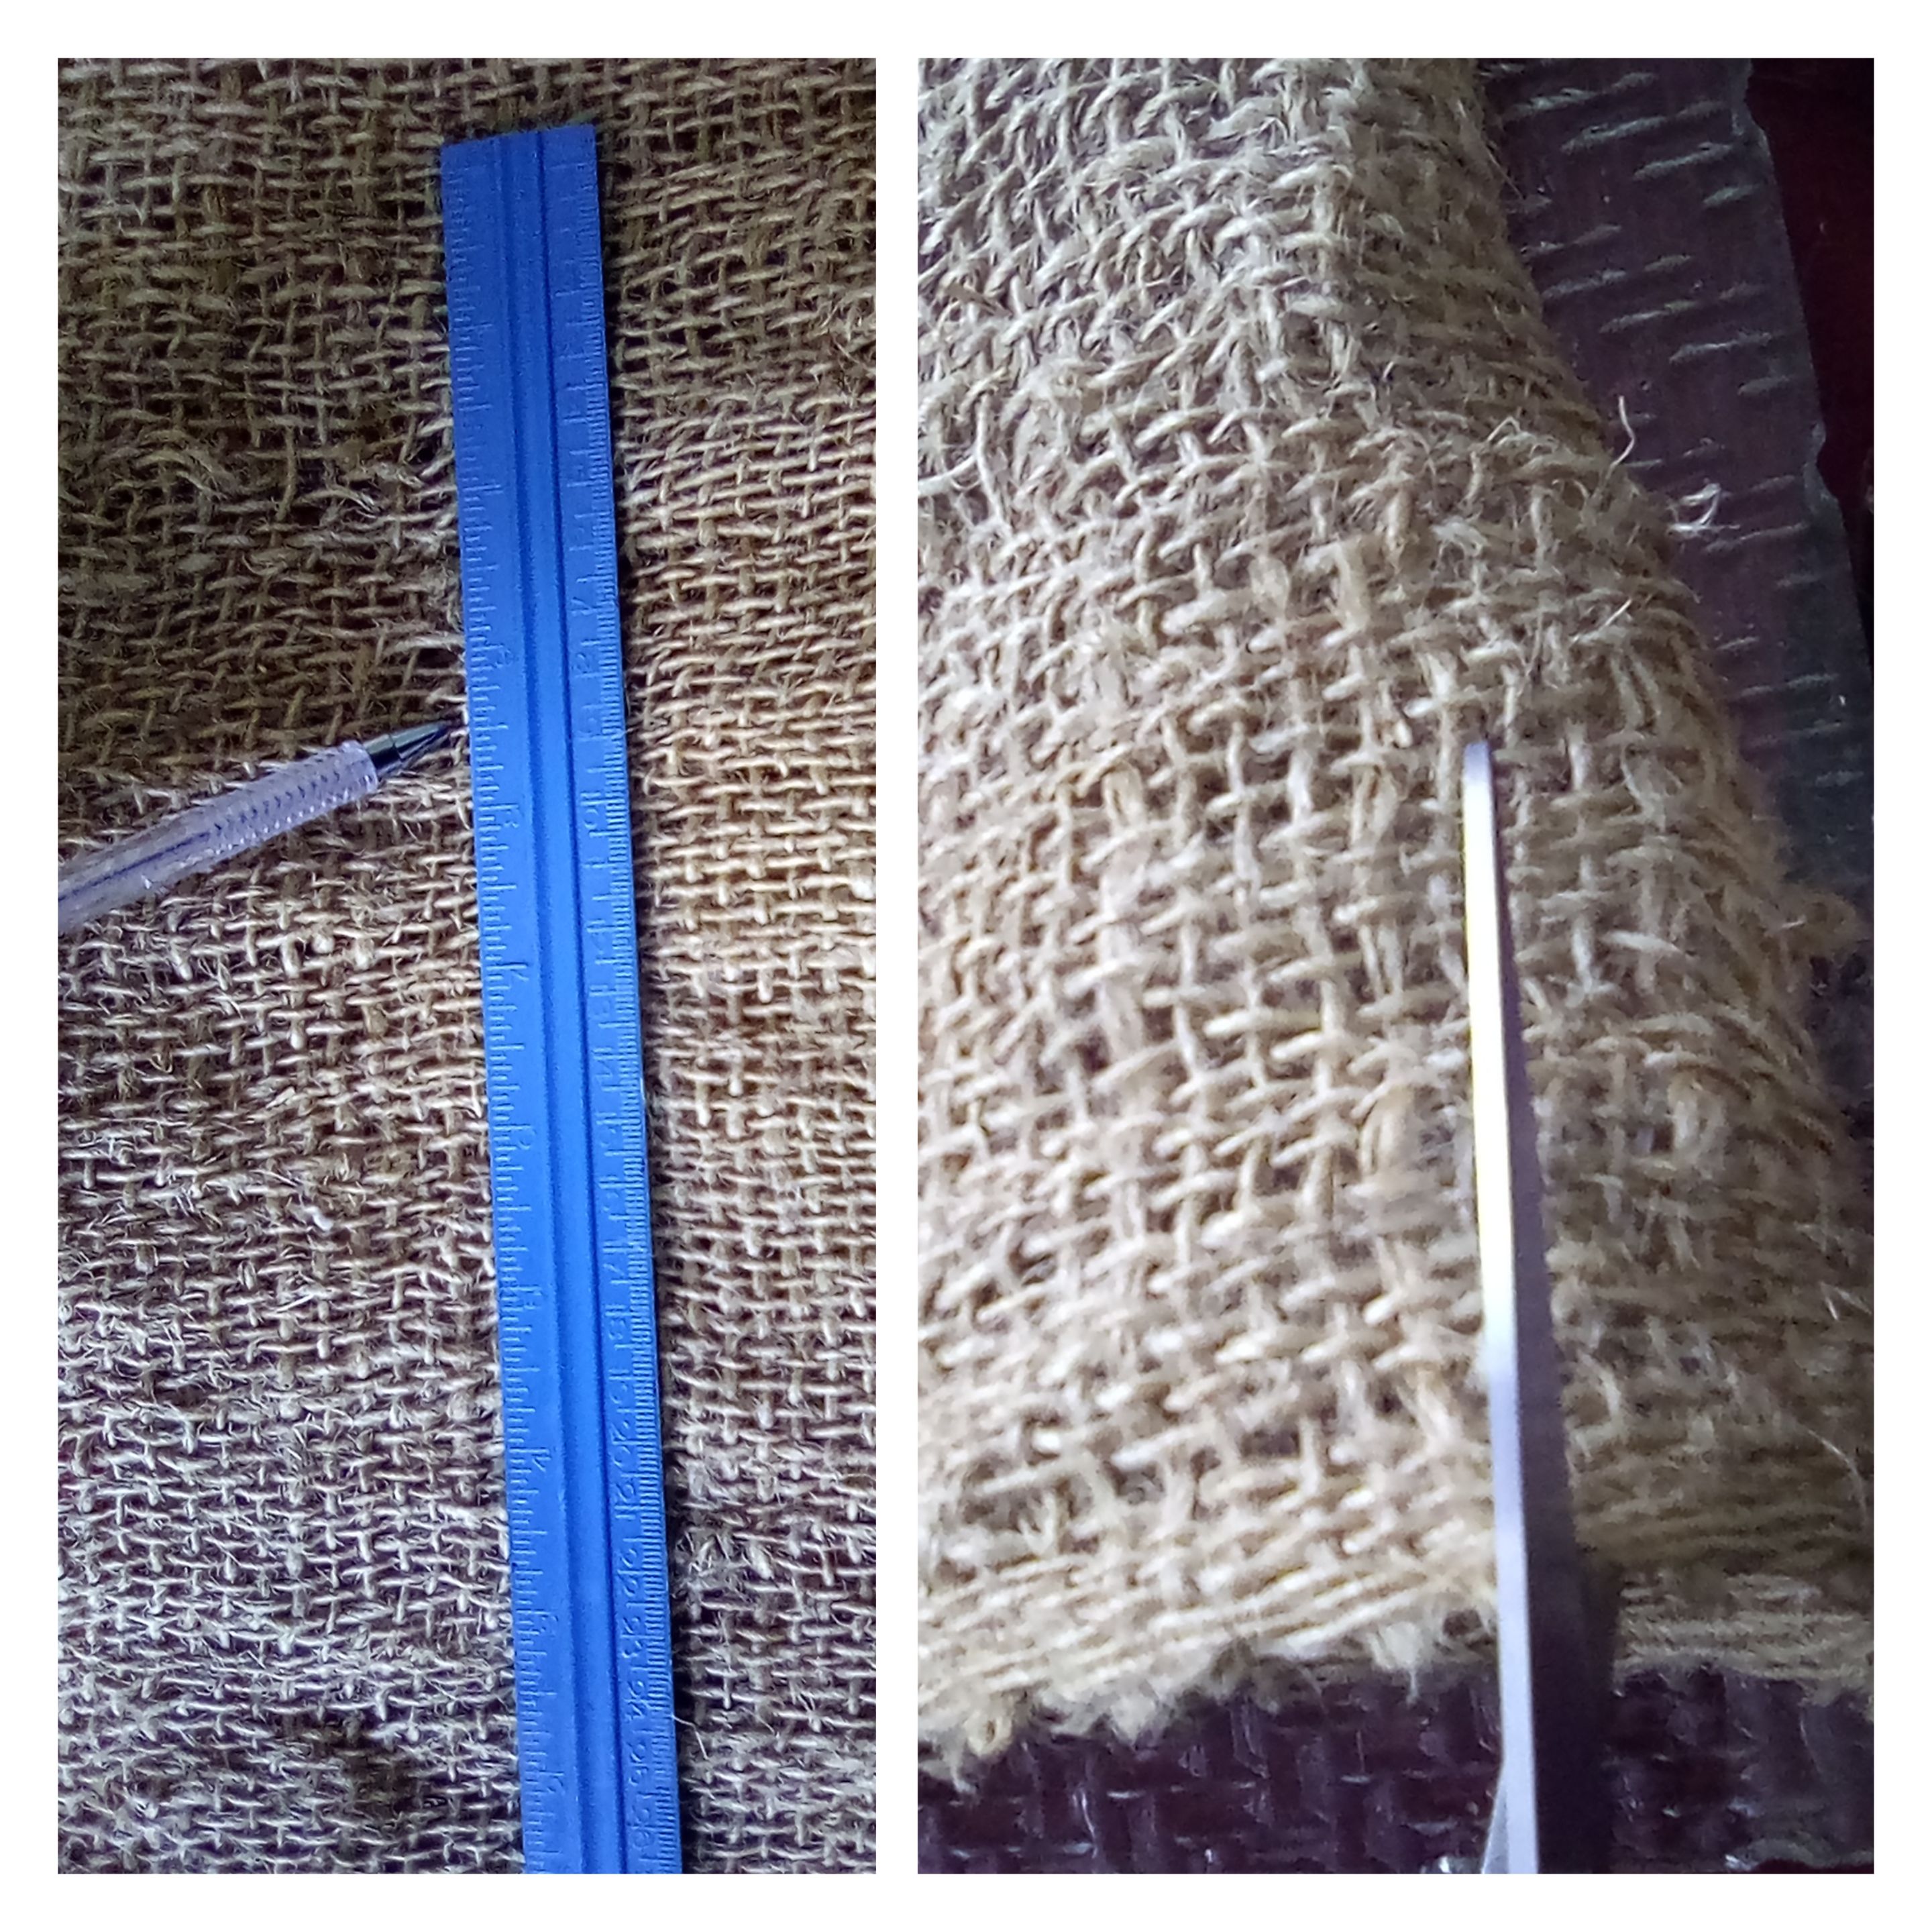
Comenzamos marcando con ayuda de regla y lapicero un cuadrado en el saco, con los diámetros deseados para la alfombra.Yo utilicé 30 centímetros de largo y ancho. Seguidamente, pasaremos a cortar con la tijera el cuadrado de saco, siguiendo la guía marcada.
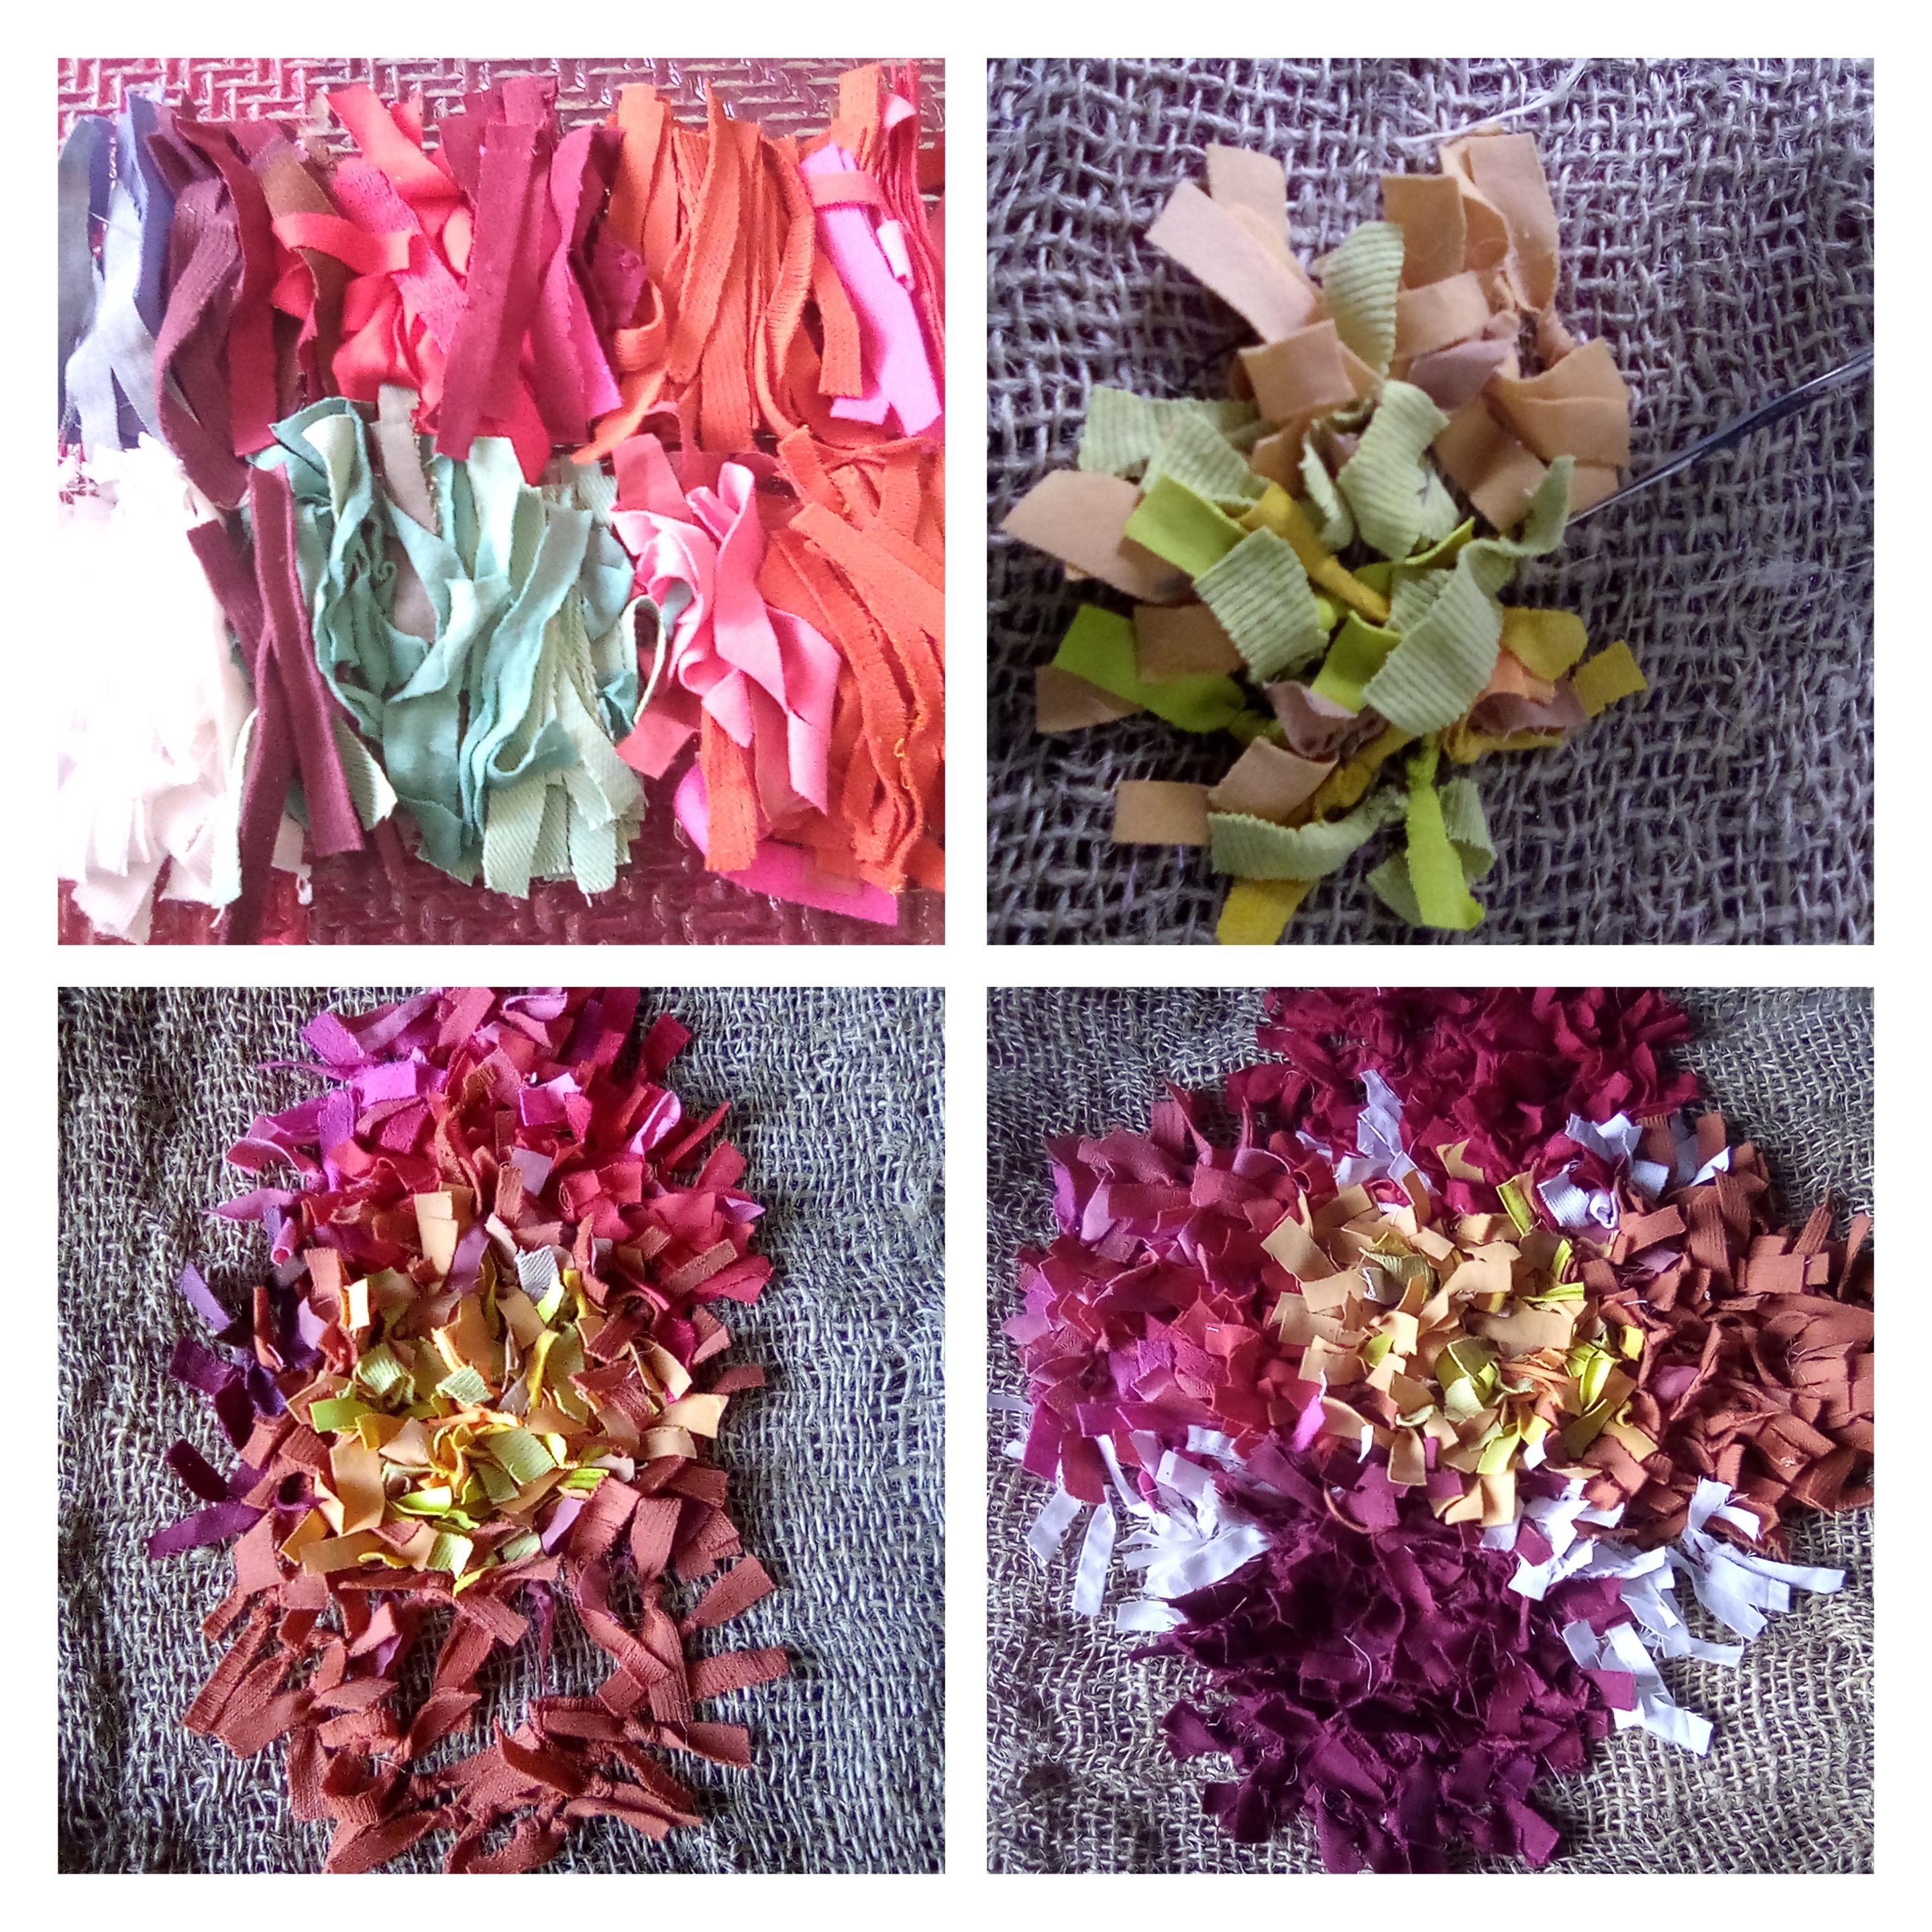
Continuamos el proceder dibujando en el saco el diseño para la alfombra , yo escogí las flores, inspirada en la bella, colorida, naturaleza tropical.Ustedes pueden realizar el que deseen. Ya teniendo el diseño, vamos a recortar los retazos de tela en finas tiras, clasificarlas por su color, y con ayuda de la aguja de tejer, vamos a realizar el siguiente proceder con cada una de ellas: Introducimos la punta de la tira por un orificio del saco hasta su cara posterior, volvemos a regresarla a la cara delantera por el orificio consecutivo del saco, y luego, amarramos ambas puntas de la tira.
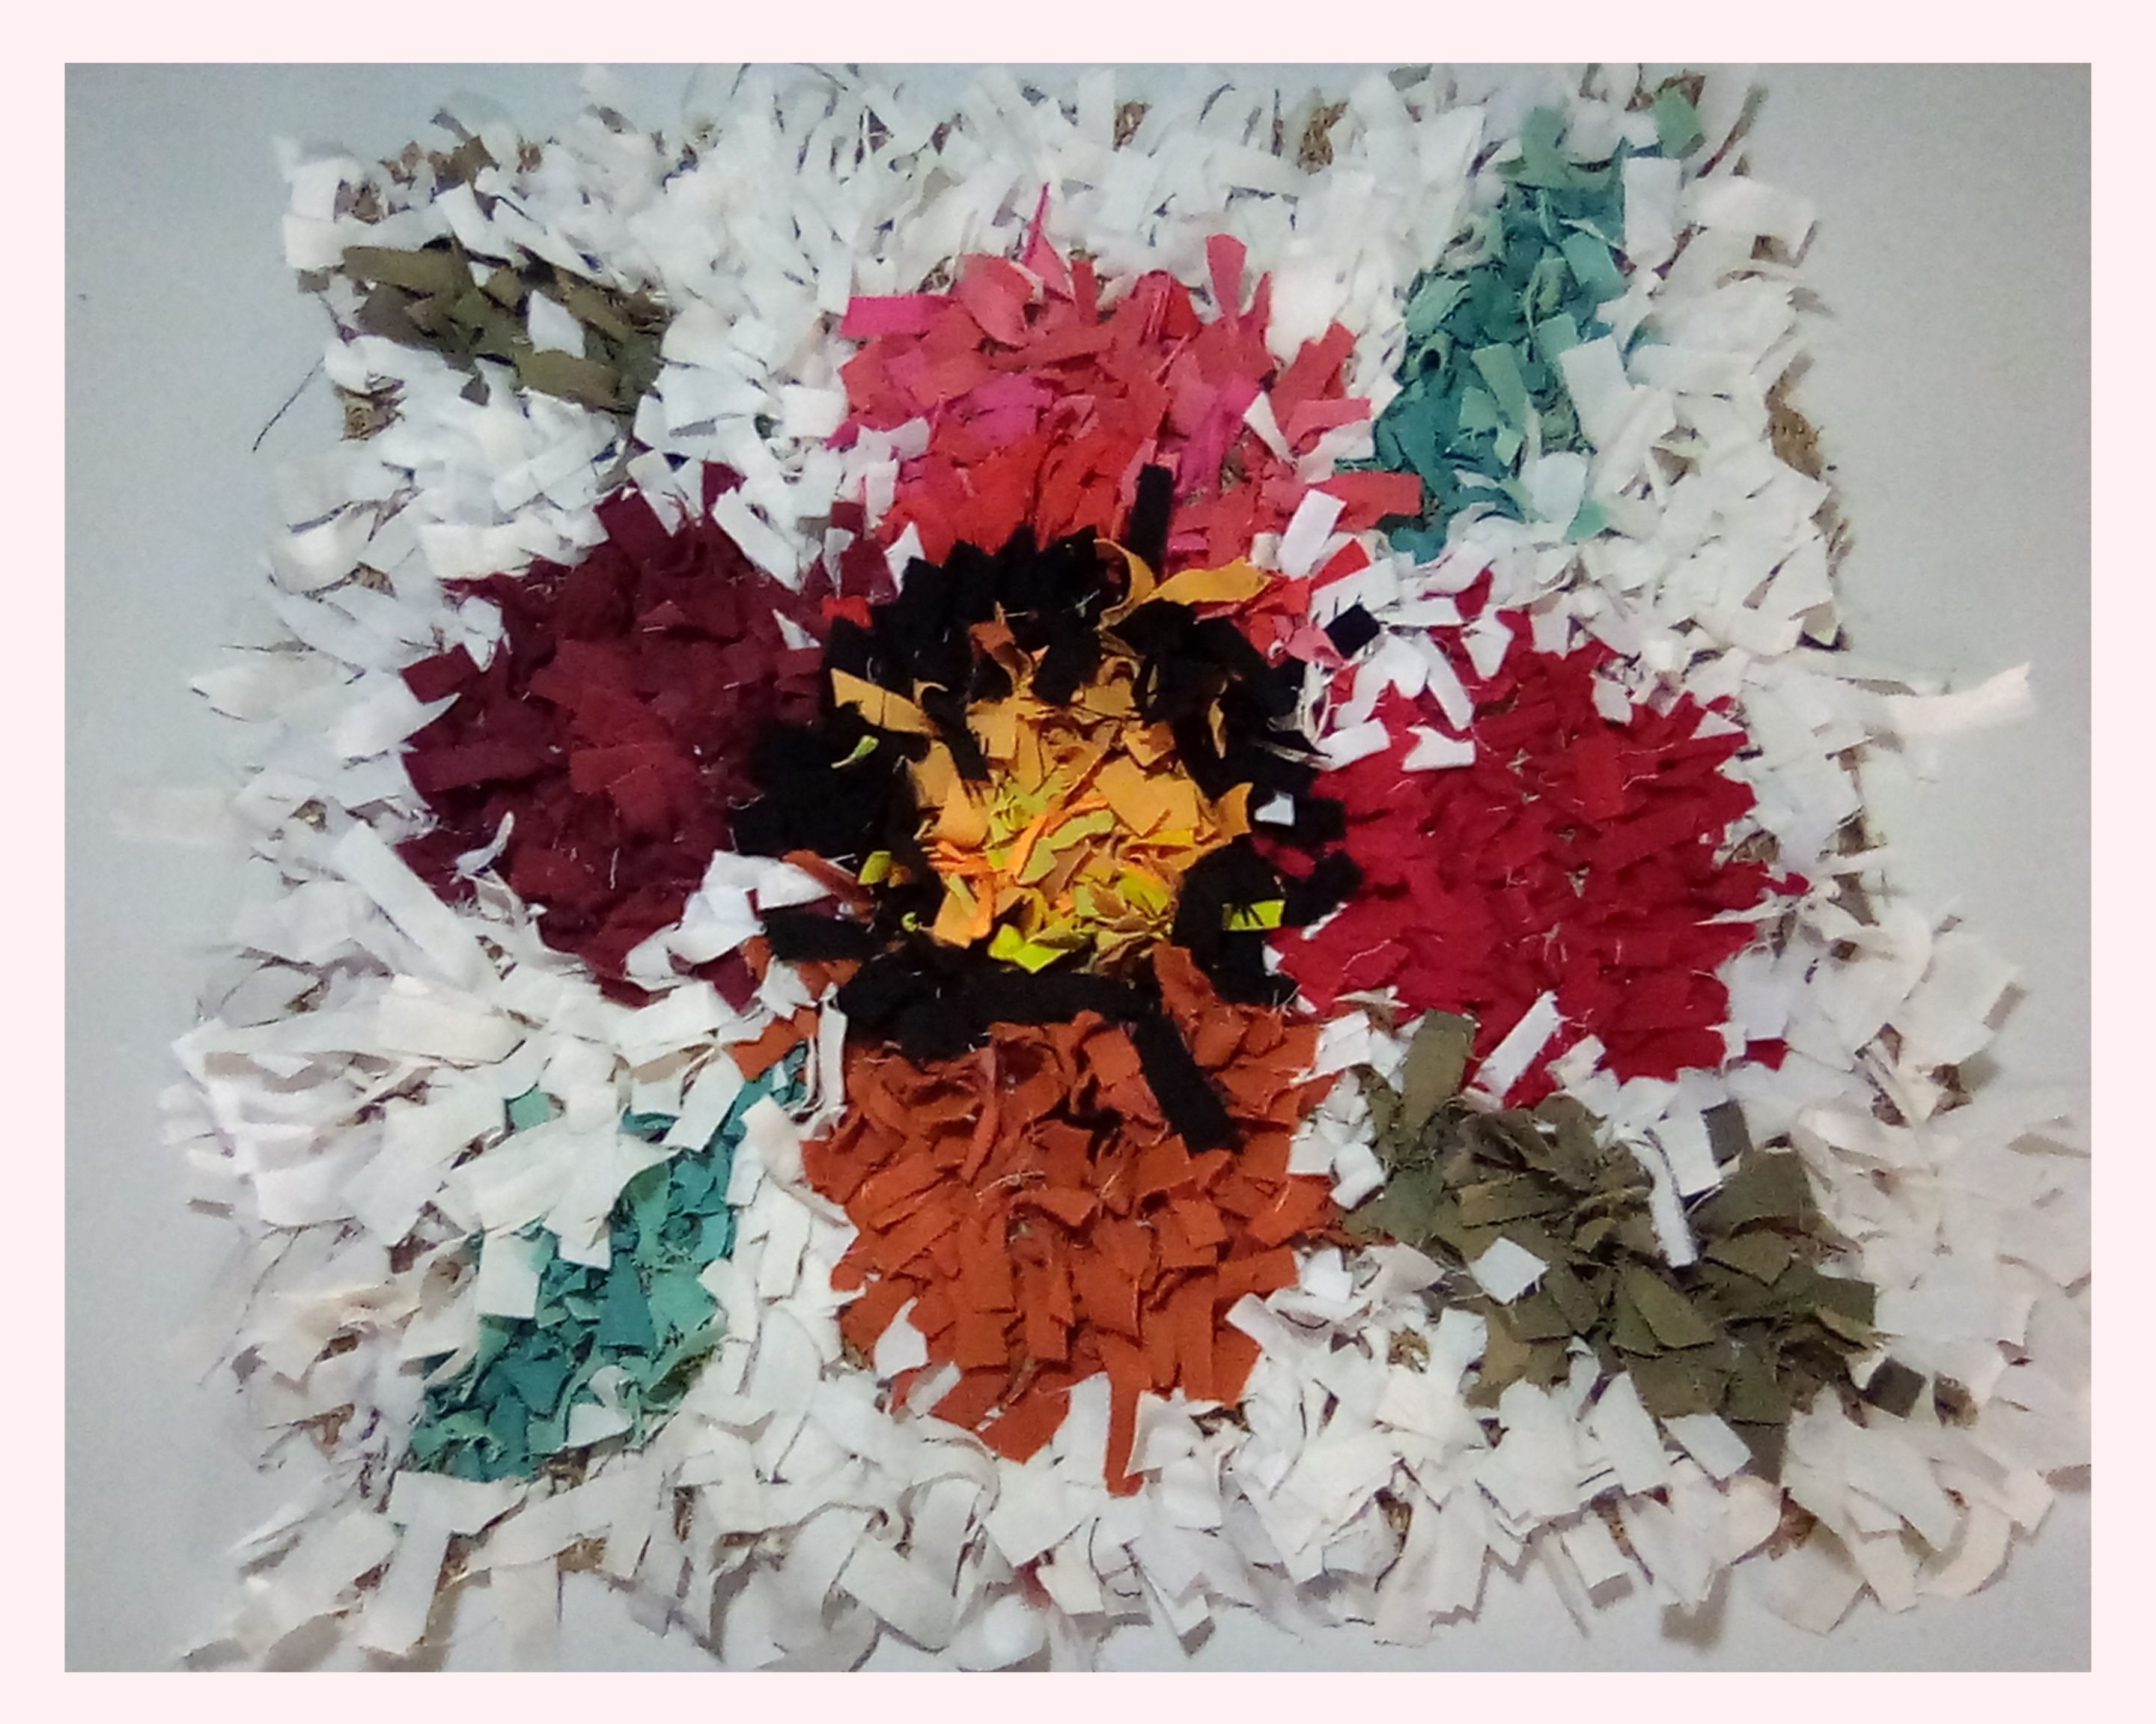
Este procedimiento lo realizamos disponiendo las tiras continuas según el diseño creado.El verde, para las hojas; rojo, naranja, rosado, amarillo, negro, para los pétalos y centro; blanco, para el fondo, fue la distribución de tonalidades que empleé, para lograr esta bella alfombra personalizada con flor.
Amigos, me encantó el resultado, además, que relajante, desestresante, me resultó el proceso de su confección. Espero que a ustedes también les haya gustado y que se animen a su futura creación,¡ quedarán hermosas en sus hogares! Vibras positivas a todos.💁🌈 Fotografías propias.
English
Greetings friends who love crafts.💁🌈
Happy day to everyone! These days, friends, have been tense in my family because of the almost imminent arrival of Cyclone Melissa in the Eastern region of Cuba, where I currently live. To relieve these tensions due to the negative thoughts about possible consequences of their passage, I took refuge in the world of fabrics, managing to make beautiful carpets with flowers for multiple functions such as: floor decoration in rooms, mats for balances and furniture.
I invite you to join me to know the method I used for its preparation. Let's get started!
🌸Carpets with flowers🌸
🌸Materials
.Scraps of fabric .Sack .Sewing needle .Knitting needle .Sewing thread .Pen holder .Rule
🌸Mode of preparation🌸
We start by marking with the help of a ruler and a pencil a square in the sack, with the desired diameters for the carpet.I used 30 centimeters in length and width. Next, we will cut the bag square with the scissors, following the marked guide.
We continued the procedure by drawing the design for the carpet on the sack, I chose the flowers, inspired by the beautiful, colorful, tropical nature.You can do whatever you want. Once we have the design, we are going to cut the pieces of fabric into thin strips, classify them by their color, and with the help of the knitting needle, we are going to carry out the following procedure with each of them: We introduce the tip of the strip through a hole in the bag to its back face, we return it to the front face through the consecutive hole in the bag, and then, we tie both ends of the strip.
We perform this procedure by arranging the continuous strips according to the created design.The green, for the leaves; red, orange, pink, yellow, black, for the petals and center; white, for the background, was the distribution of shades that I used, to achieve this beautiful personalized carpet with flower.
Friends, I loved the result, in addition, how relaxing, de-stressing, the process of making it turned out to be. I hope you liked it too and that you are encouraged to your future creation, they will look beautiful in your homes! Positive vibes to everyone.💁🌈 Own photographs.