Español
Saludos amigos amantes de las manualidades💁🌈
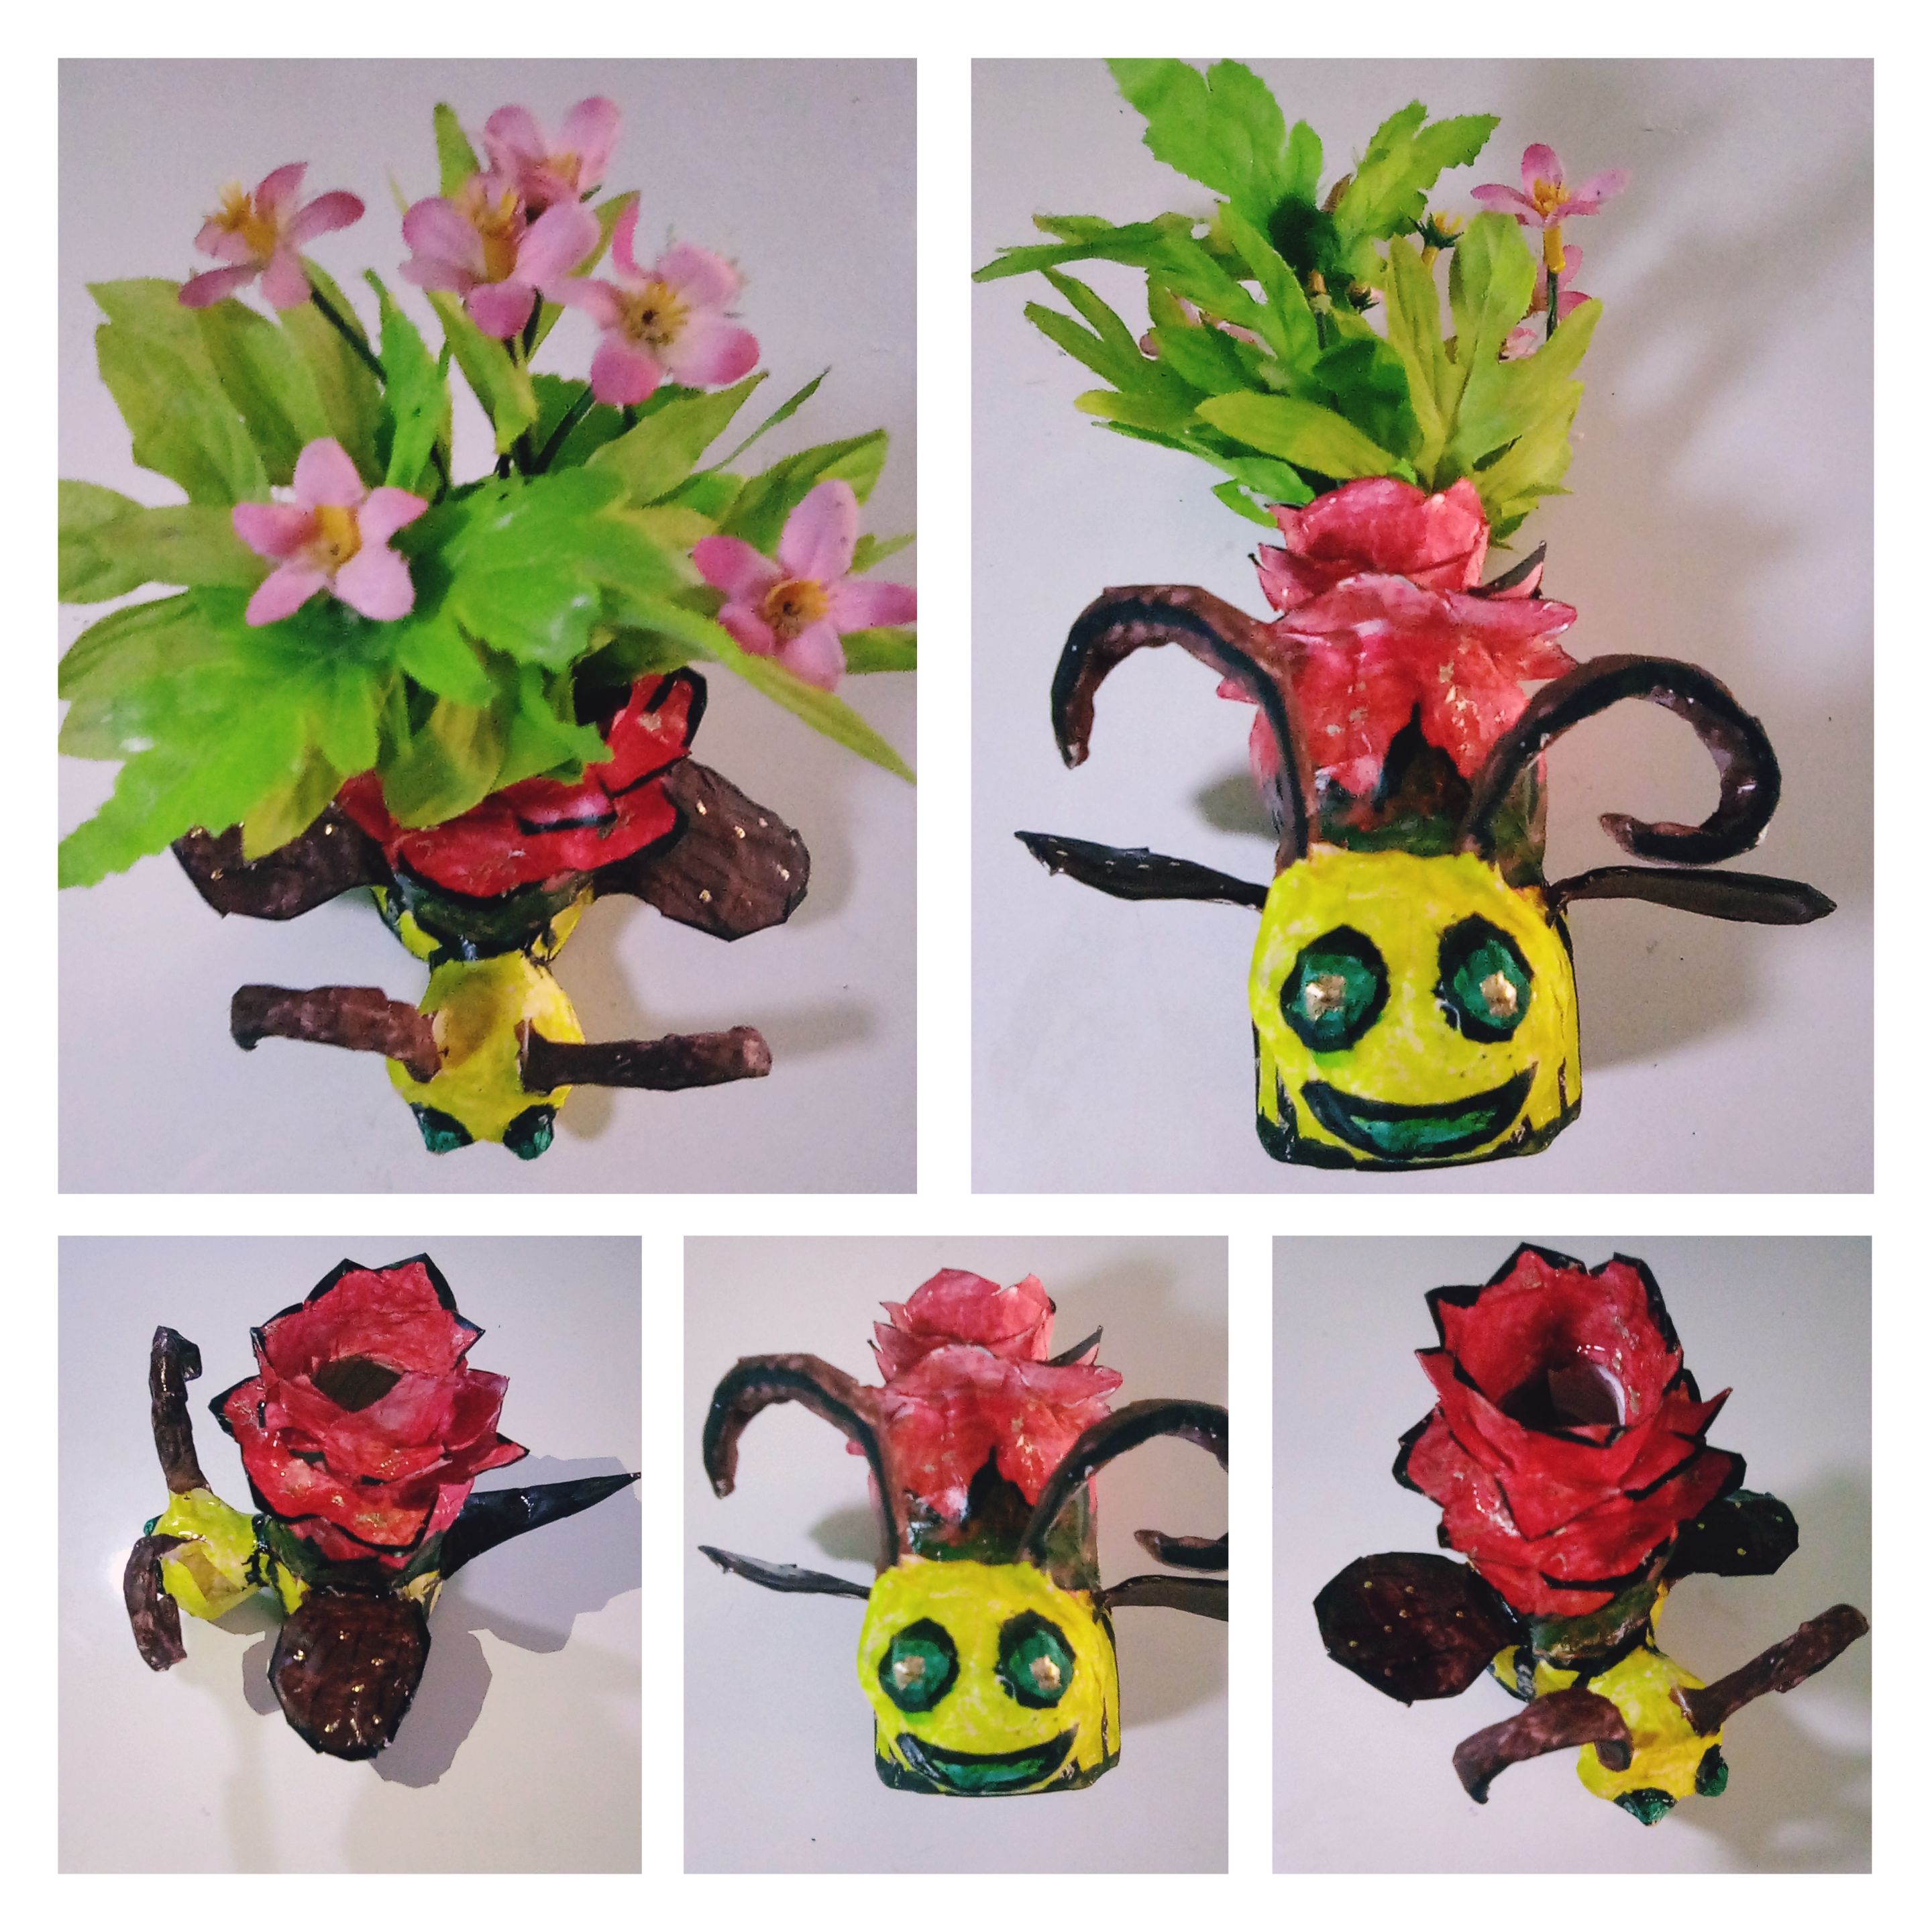
¡Excelente día para todos! Hoy amigos , les quiero compartir el pequeño búcaro mixto de abeja y flor que realicé para decorar mi hogar, inspirada en la temática del mes: Abejas.
Este búcaro personalizado, lo realicé reciclando utilizando la técnica de papel maché, técnica, que los invito a su práctica relajante con el siguiente tutorial.
✨ Búcaro de abeja y flor✨
✨ Materiales

.Pomo pequeño de plástico .Papel variado .Tiras de papel blanco .Pega elaborada de harina .Pegamento .Tijera .Acuarelas .Pincel .Barniz .Piedras pequeñas brillantes
✨ Modo de confección
Para la confección de este búcaro mixto decorativo vamos a dividir el proceso en tres momentos, un primer momento , crearemos el búcaro que tendrá su aspecto de flor, un segundo momento, crearemos las partes de la abeja, y un tercero, unificando ambas estructuras para obtenerlo conformado ¡Comencemos!
✨Pasos para crear el búcaro con aspecto de flor.
Tomamos un pomo pequeño o del tamaño que deseemos para nuestro búcaro y vamos a darles tres capas de empapelado con tiras de papel y pega elaborada de harina. Dejamos secar por ocho horas.Seguidamente, utilizando una tijera , vamos a realizar una delgada grieta en uno de sus laterales, que nos permitirá desmontarlo de su molde.Luego, cerramos la apertura con tiras de papel y pega elaborada de harina, mientras realizamos presión en su región central, para así delimitar la parte superior del búcaro, que tendrá el aspecto de nuestra flor, de la parte inferior, que constituirá el cuerpo de la abeja. Hasta aquí tenemos realizada la base del búcaro , ahora, vamos a darle la forma de flor a la parte superior, adhiriendo con pega elaborada de harina, pequeños pedazos de papel conformando pétalos.Ustedes amigos, pueden escoger el modelo de flor que deseen, yo escogí las rosas, pues me han cautivado siempre por su aroma perfumado y la forma espectacular de abrir su capullo.Ya teniendo los pétalos dispuestos, le daremos una capa de empapelado para generar dureza a toda la estructura.
✨Pasos para crear las partes de la abeja
Cabeza: Estrujamos papel en forma de bola mediana.Seguidamente, le adherimos con pega elaborada de harina dos bolitas de papel pequeñas en su región central, para así conformar sus ojos, luego, le damos tres capas de empapelado para fortalecer la estructura creada. Antenas:Enrollamos dos papeles de un mismo diámetro, conformando pequeños tabacos.Luego, le realizamos dobleces para generar un aspecto natural en las antenas y mantenemos la estructura, dándole una capa de empapelado, con tiras de papel y pega elaborada de harina. Alas: Dibujamos en una cartulina dos óvalos de un mismo diámetro, luego, los recortamos, y le damos una capa de empapelado en su totalidad. Aguijón: Dibujamos y recortamos un cuadrado de cartulina. Luego, lo enrollamos conformando un pequeño cono puntiagudo y mantenemos la estructura con pegamento.

Ya teniendo nuestro búcaro en forma de flor y las partes de las abejas creadas.Pasamos a unificarlos con pegamento, colocando cabeza y antenas, en la región delantera inferior, alas,en los laterales inferiores, y aguijón, en la parte inferior trasera. Seguidamente, le daremos una capa de empapelado a la estructura completa, dejándola lista para decorar y pintar una vez secada su superficie.
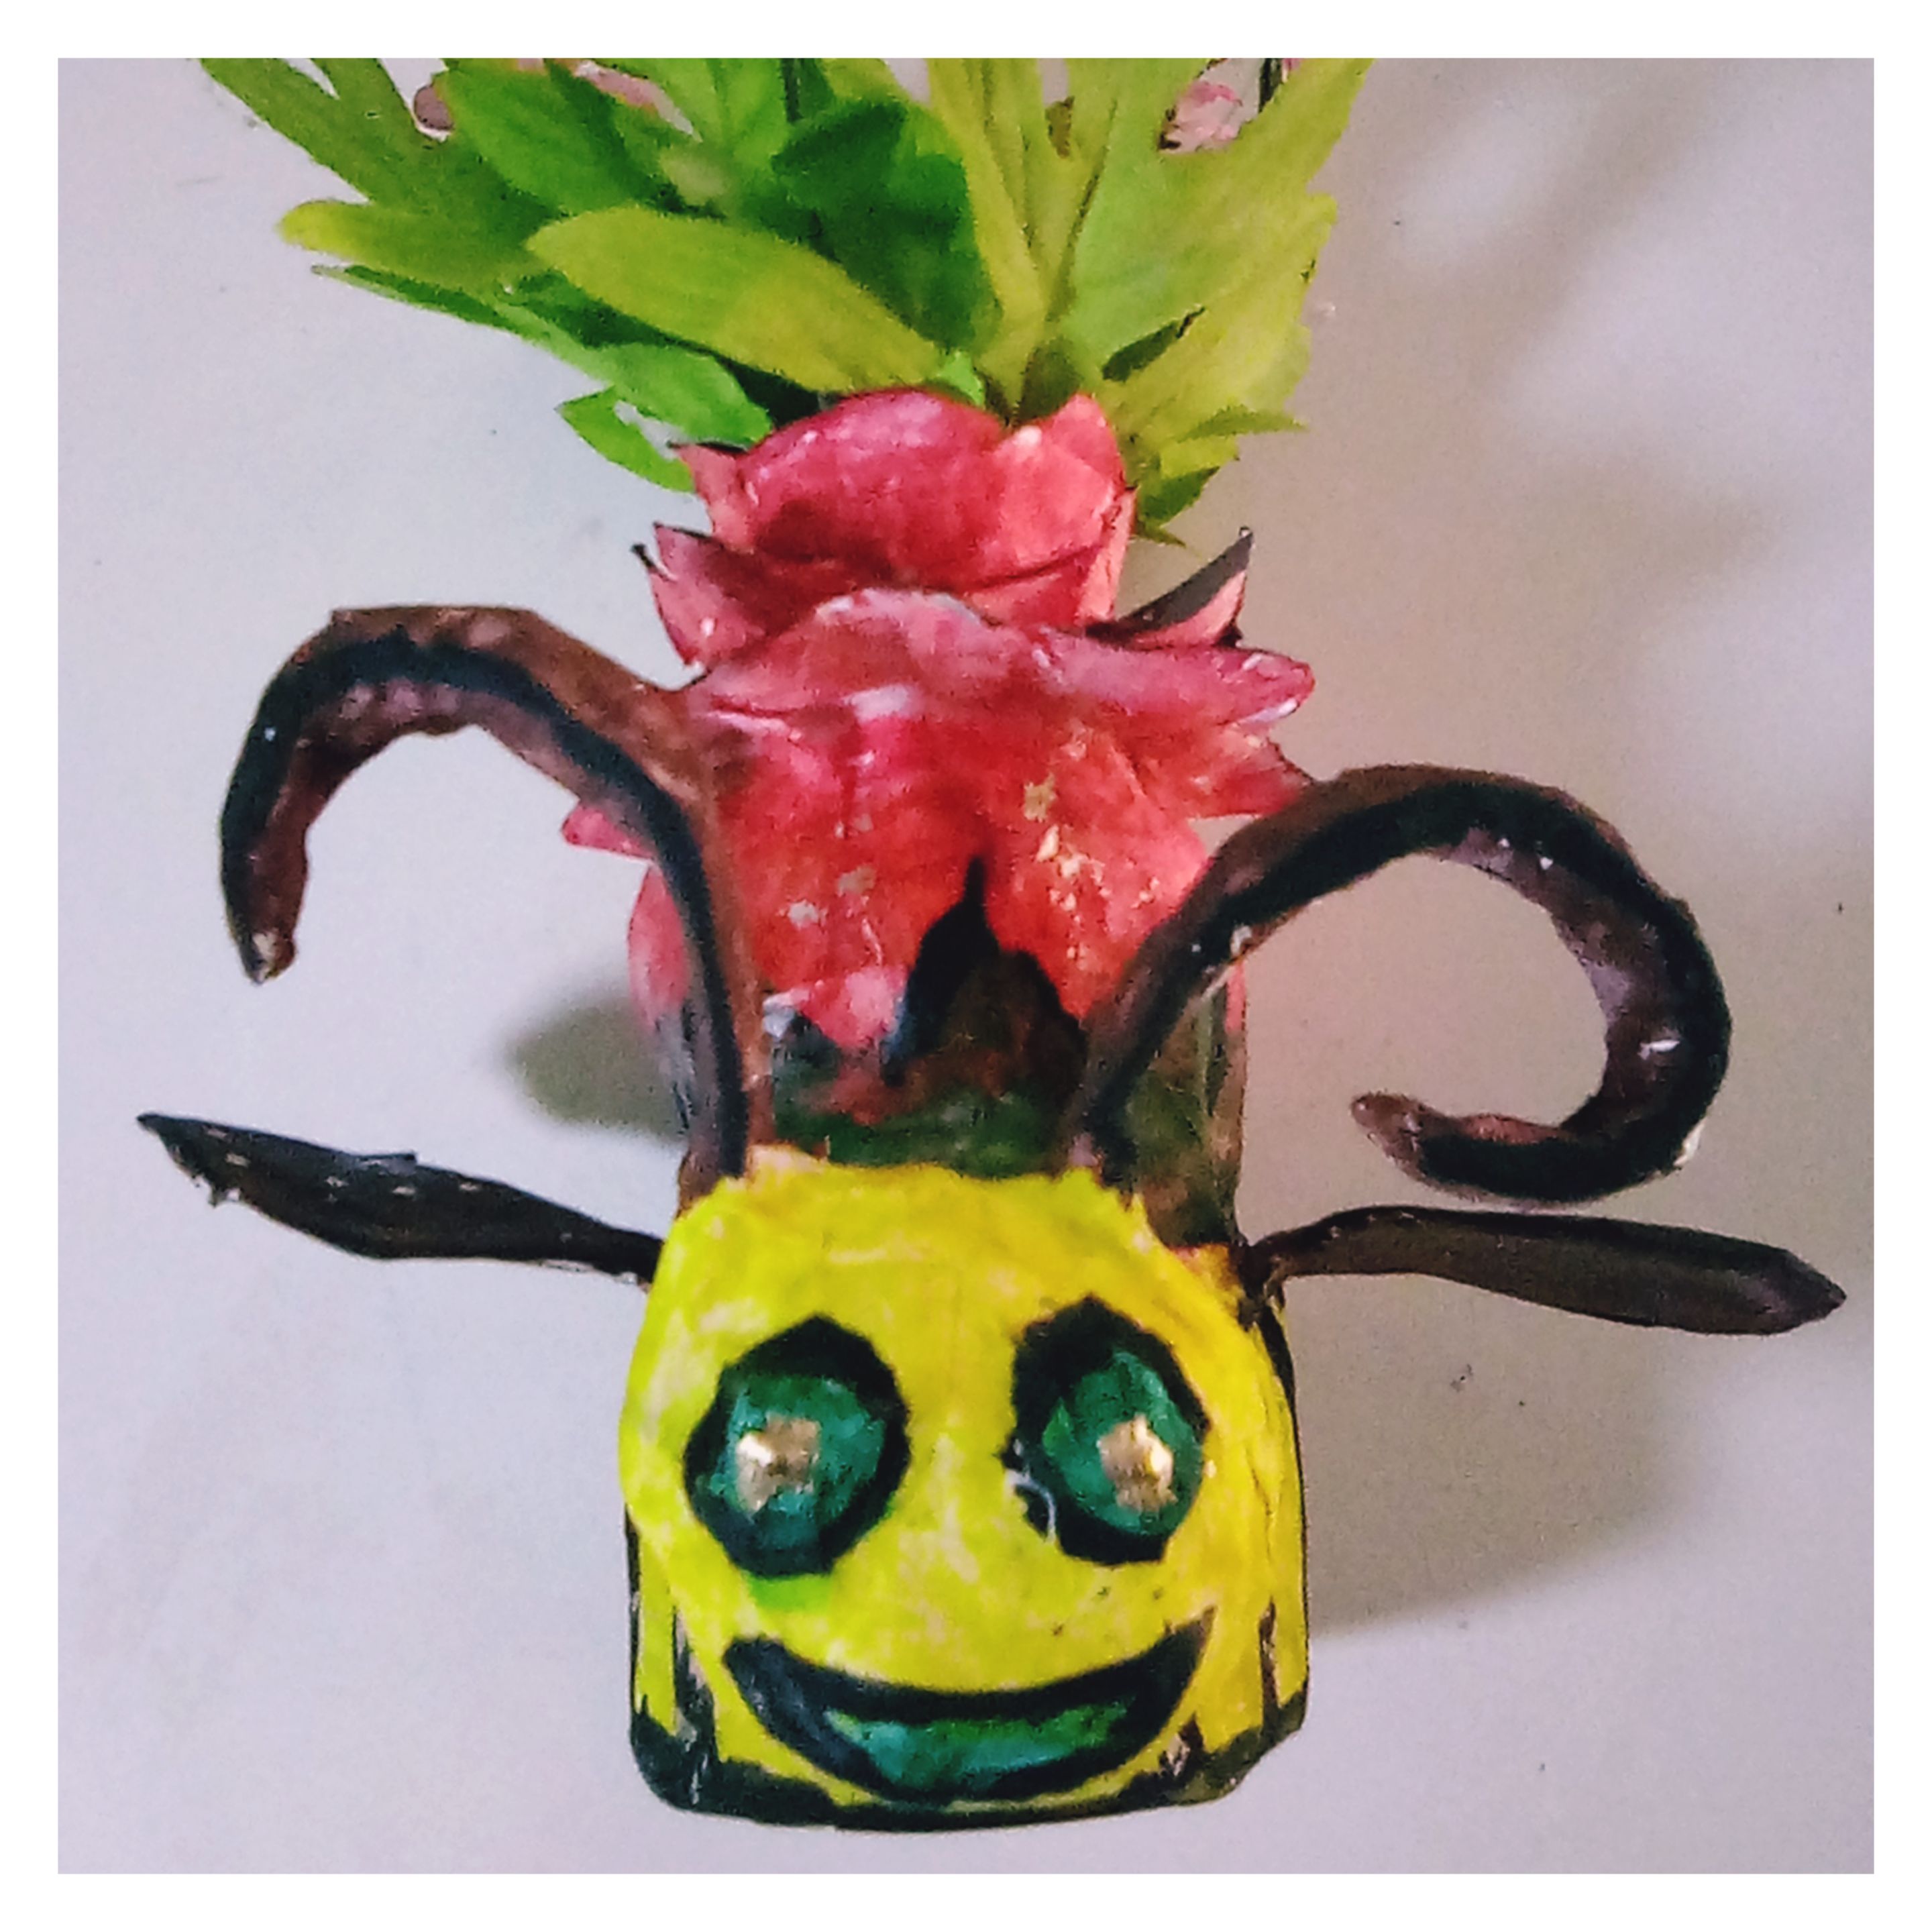
Tonalidades de los colores amarillo, verde, rojo, negro, fueron las que empleé para darle vida a este pequeño búcaro combinado , que resultó encantador a la vista, al lucir en mi hogar una abeja, bellas flores coloridas.
Espero amigos que a ustedes también les haya gustado, y que se animen a disfrutar su proceso creativo próximamente, reciclando. Buenas vibras a todos.💁🌈 Fotografías propias.
English
Greetings friends who love crafts💁🌈
Excellent day for everyone! Today friends, I want to share the little bee and flower mixed bouquet that I made to decorate my home, inspired by the theme of the month: Bees.
This personalized boucaro, I made it by recycling using the papier mache technique, technique, that I invite you to your relaxing practice with the following tutorial.
✨ Bee and flowerbouquet✨
✨ Materials
.Small plastic knob .Varied role .White paper strips .Paste made of flour .Glue .Scissor .Watercolors .Brush .Varnish .Shiny small stones
✨ Mode of making
For the preparation of this decorative mixed bouquet we are going to divide the process into three moments, a first moment, we will create the bouquet that will have its flower appearance, a second moment, we will create the parts of the bee, and a third, unifying both structures to get it shaped Let's Get started!
✨Steps to create the flower-like boucaro.
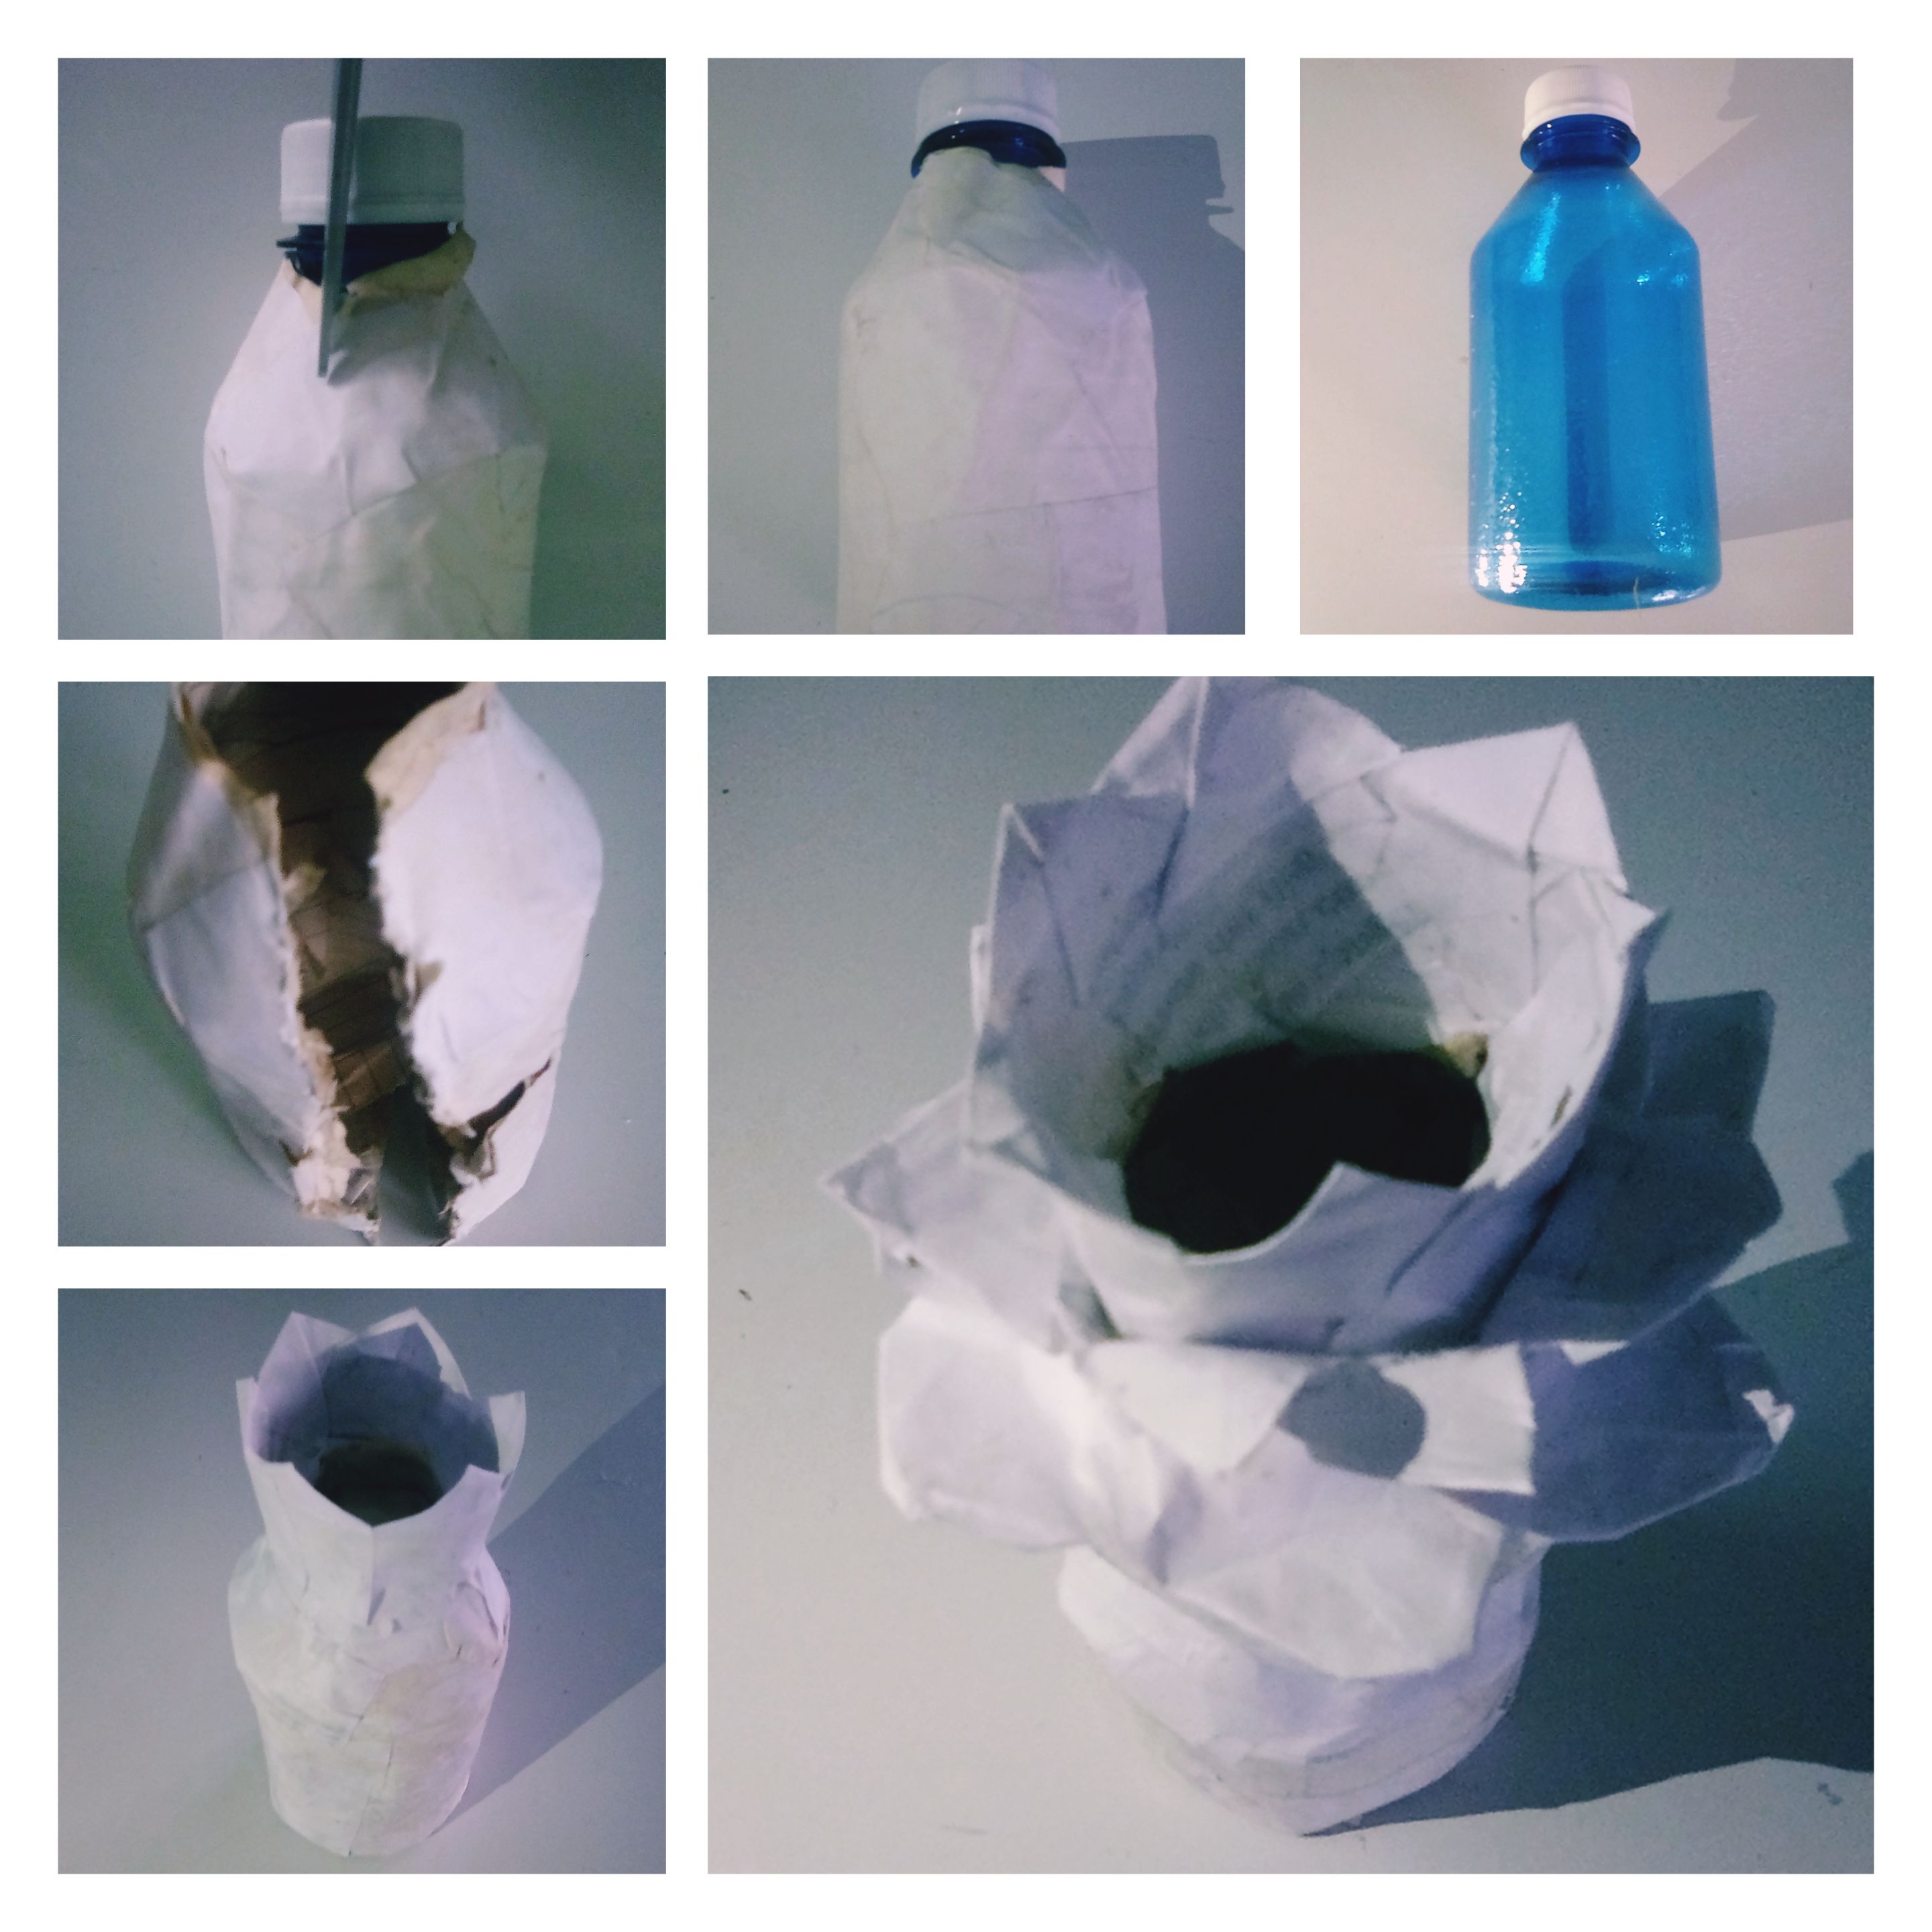
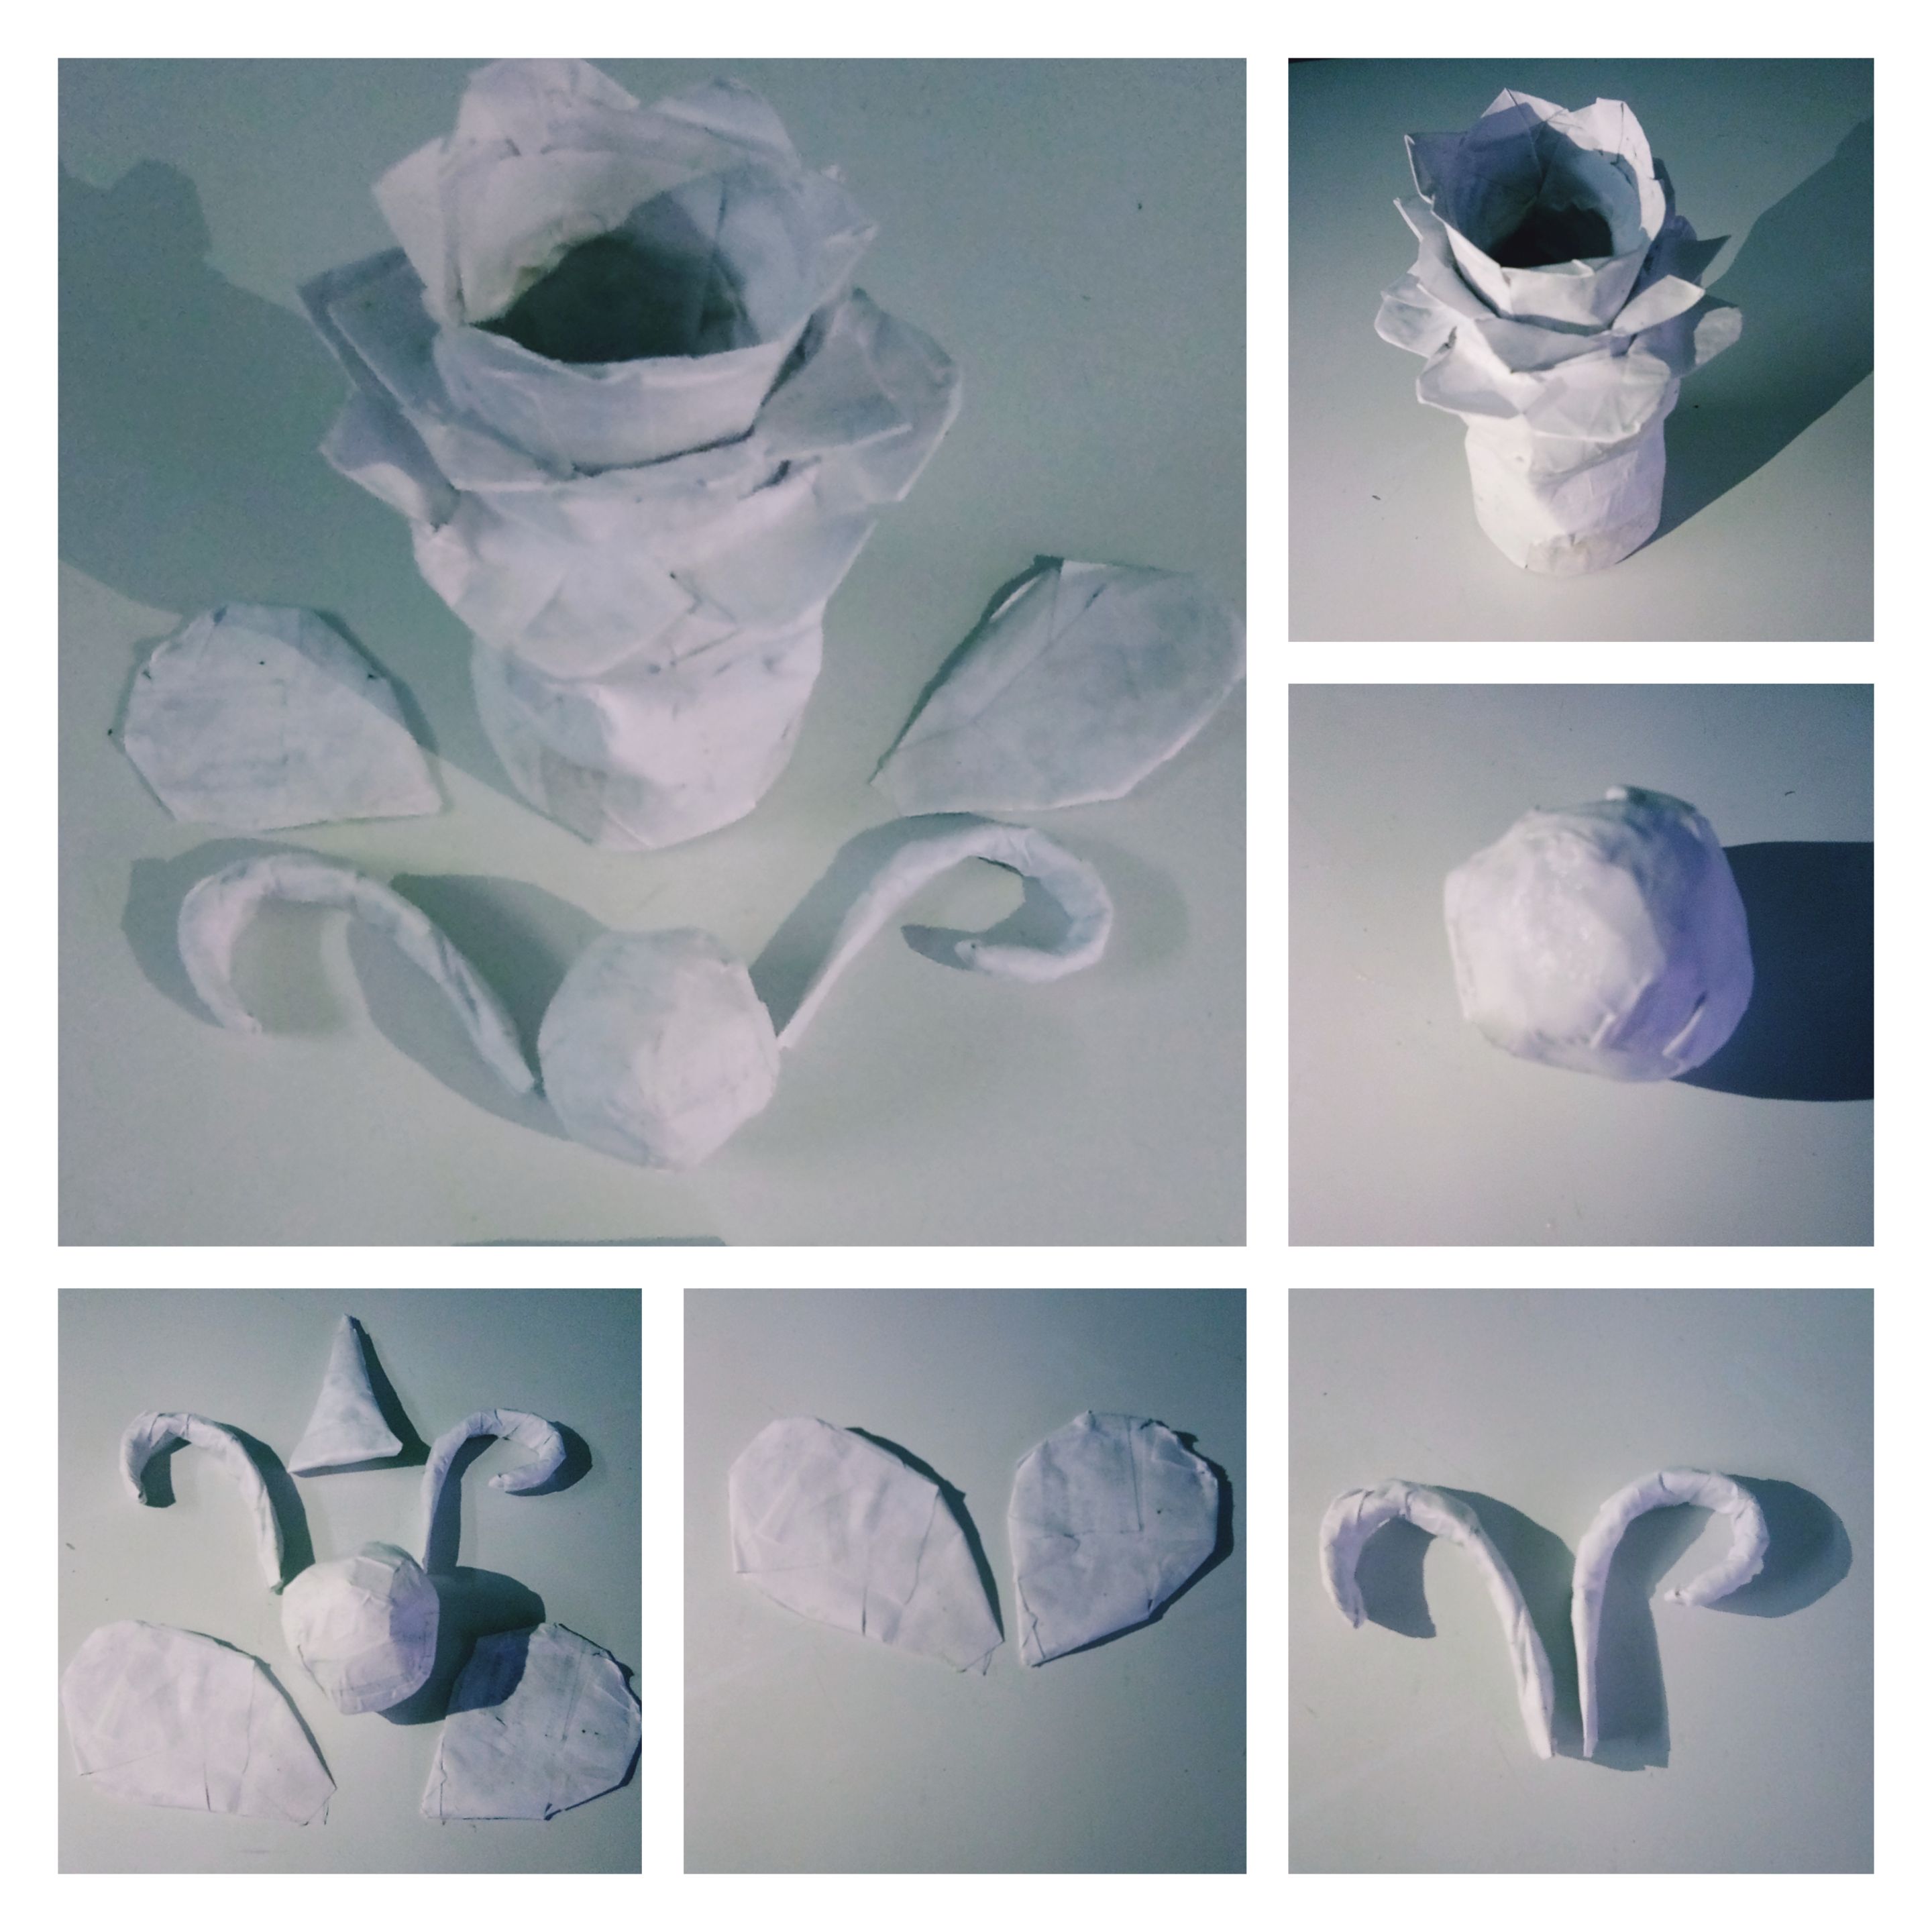
We take a small knob or the size we want for our búcaro and we are going to give them three layers of wallpaper with strips of paper and glue made of flour. Let it dry for eight hours.Then, using a scissors, we are going to make a thin crack in one of its sides, which will allow us to disassemble it from its mold.Then, we close the opening with strips of paper and glue made of flour, while we press on its central region, in order to delimit the upper part of the búcar, which will have the appearance of our flower, from the lower part, which will constitute the body of the bee. So far we have made the base of the búcaro, now, we are going to give the shape of a flower to the top, adhering with glue made of flour, small pieces of paper forming petals.You friends, you can choose the flower model you want, I chose the roses, because they have always captivated me by their fragrant aroma and the spectacular way of opening their bud.Already having the petals arranged, we will give it a layer of wallpaper to generate hardness to the entire structure.
✨Steps to create the parts of the bee
Head: We squeeze paper in the form of a medium ball.Next, we adhere two small paper balls in its central region with glue made of flour, in order to shape its eyes, then we give it three layers of wallpaper to strengthen the created structure. Antennas: We roll two papers of the same diameter, forming small tobaccos.Then, we make folds to generate a natural appearance in the antennas and maintain the structure, giving it a layer of wallpaper, with strips of paper and glue made of flour. Wings: We draw two ovals of the same diameter on a cardboard, then we cut them out, and we give a layer of wallpaper in its entirety. Stinger: We drew and cut out a square of cardboard. Then, we roll it into a small pointed cone and keep the structure with glue.
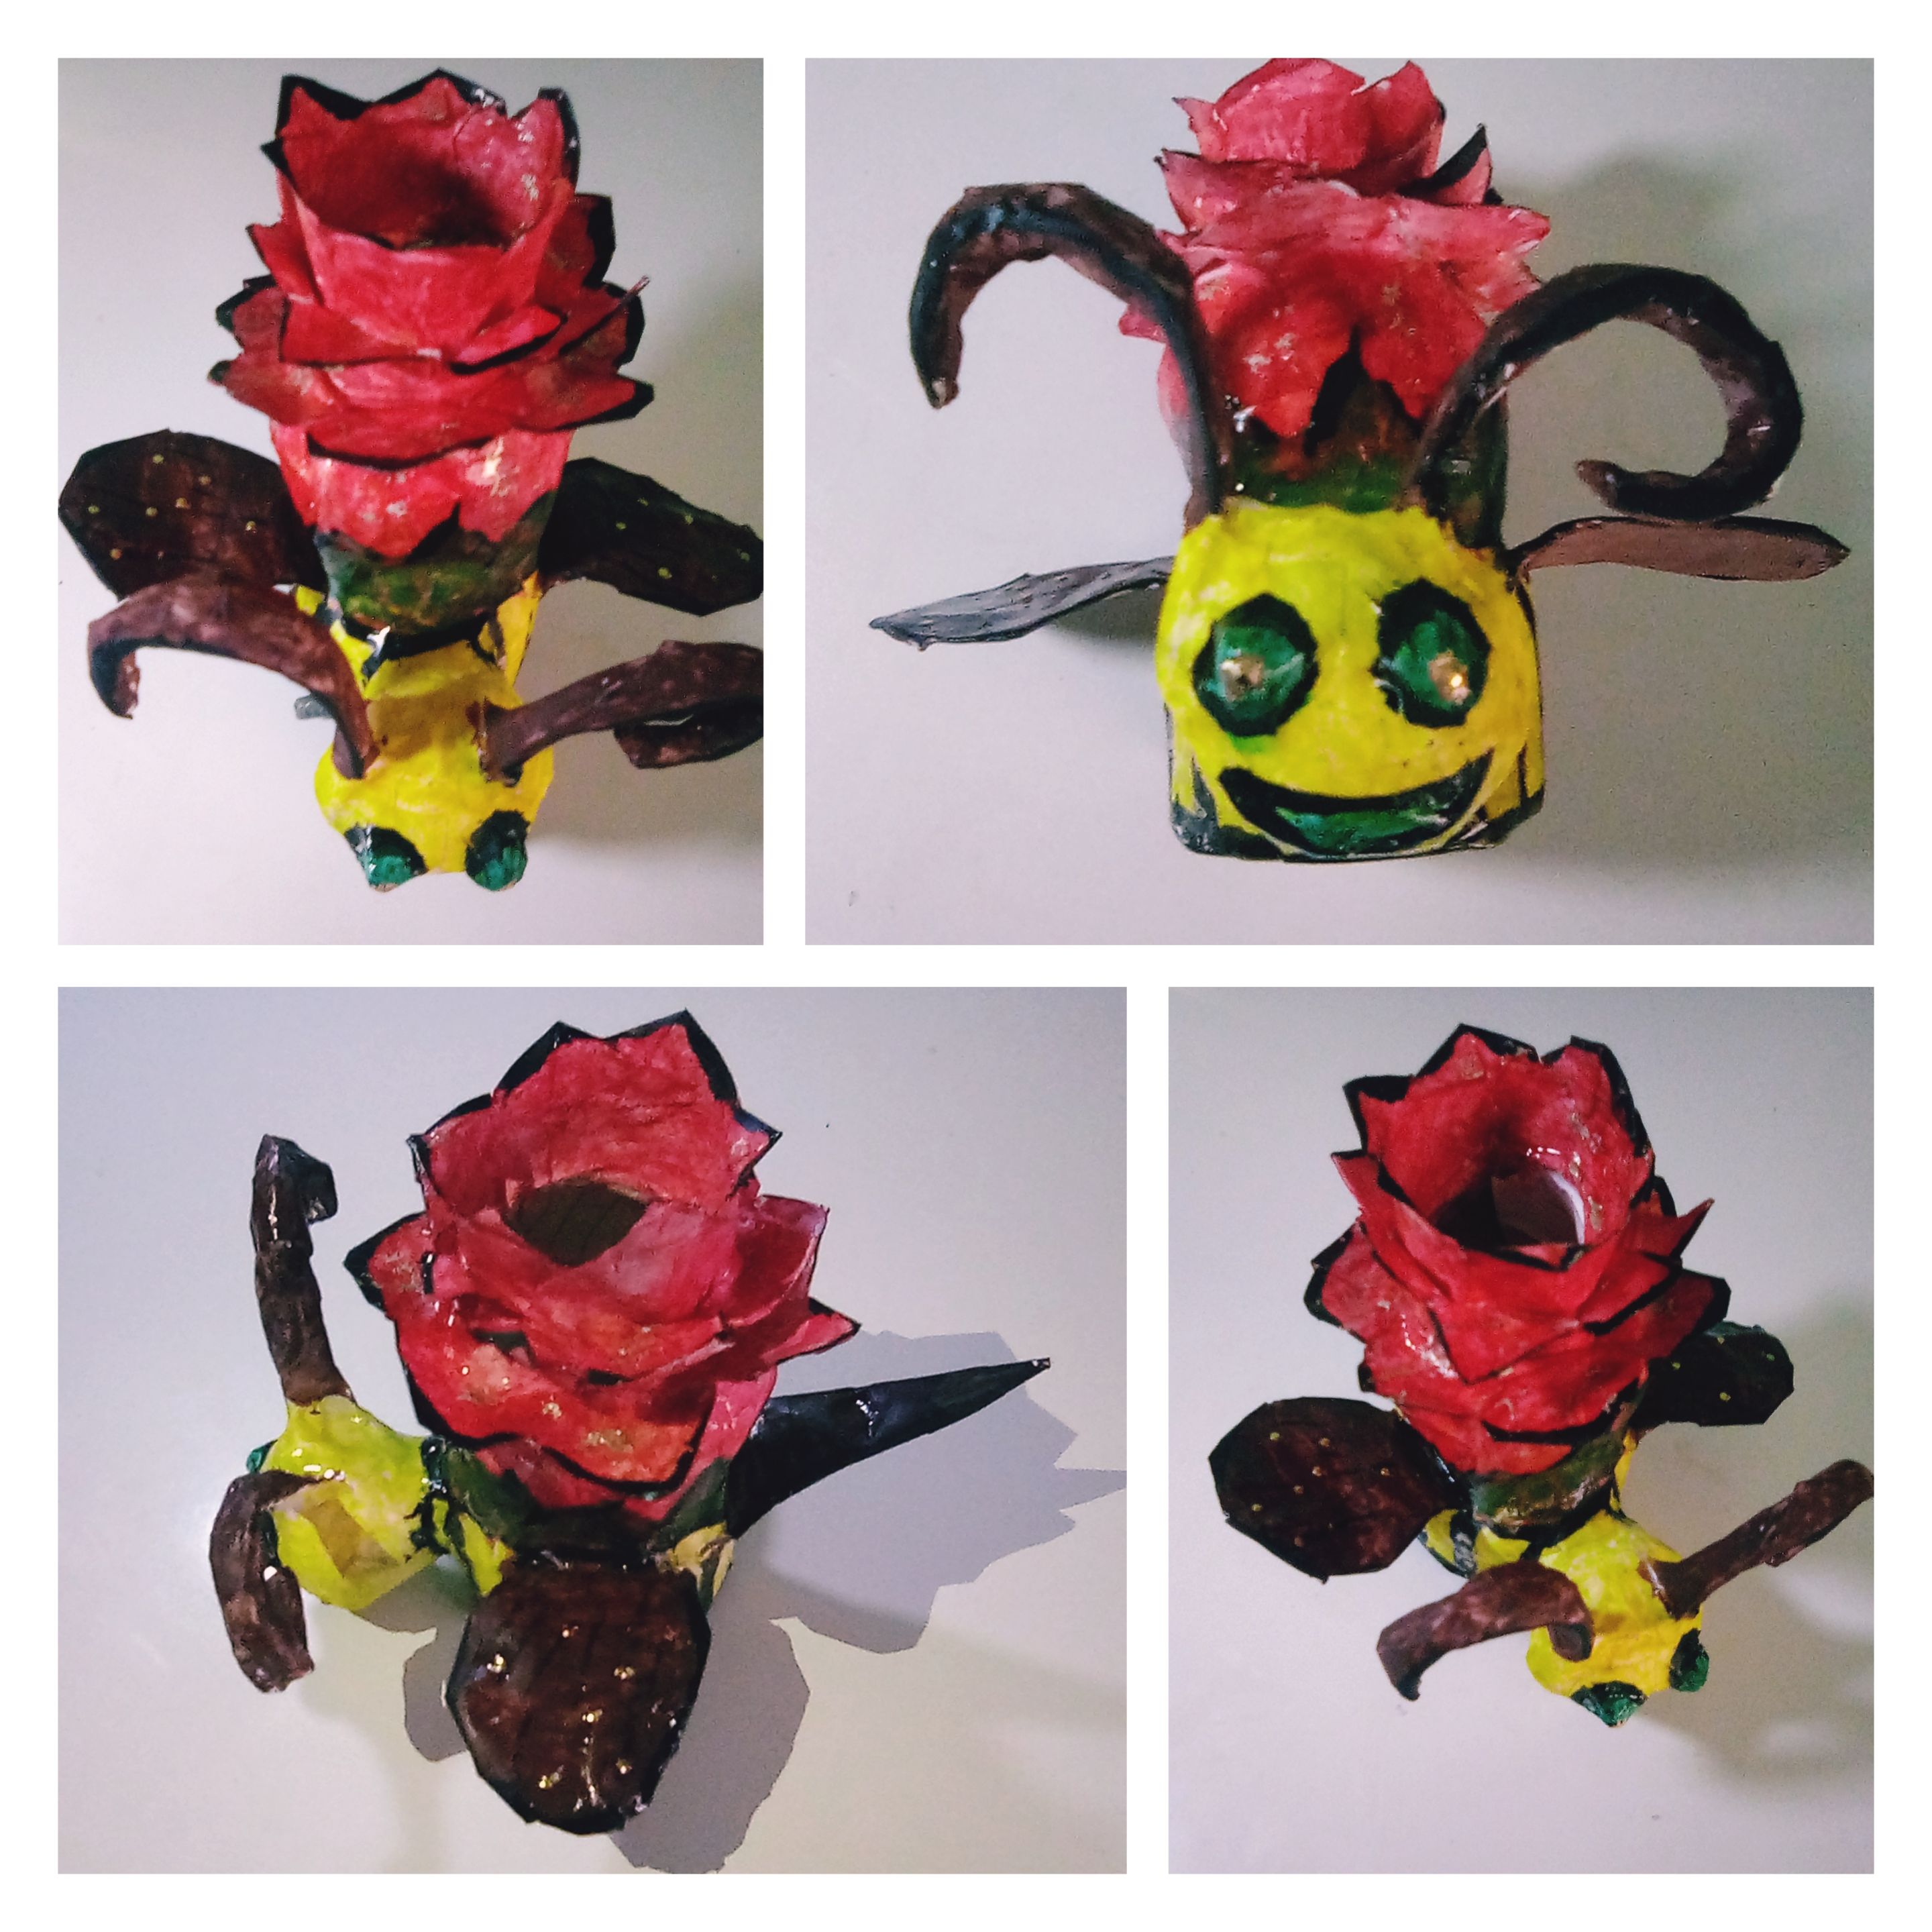
Already having our búcaro in the form of a flower and the parts of the bees created.We move on to unify them with glue, placing head and antennas, in the lower front region, wings, on the lower sides, and stinger, in the rear lower part. Next, we will give a layer of wallpaper to the complete structure, leaving it ready to decorate and paint once its surface has dried.
Shades of the colors yellow, green, red, black, were the ones I used to give life to this little combined bouquet, which turned out charming to the eye, when a bee showed in my home, beautiful colorful flowers.
I hope friends that you liked it too, and that you are encouraged to enjoy your creative process soon, recycling. Good vibes to everyone.💁🌈 Own photographs.