Español
Saludos amigos amantes de las manualidades💁🏵️🐝
¡Feliz día para todos! Realizar manualidades con papel siempre me resulta grato, por lo que hoy, he decidido retomar su práctica para confeccionar decorativos personalizados de flores y abejas, para el refrigerador de mi hogar.Los invito amigos a que me acompañen a conocer mediante un sencillo tutorial, el paso a paso para su confección.
✨ Materiales

.Papel variado .Tiras de papel blanco .Cartulina .Tijera .Pega elaborada de harina .Pegamento .Piedras brillantes. .Esmalte de uñas dorado .Acuarelas .Pincel .Imanes
✨Pasos para confeccionar la flor
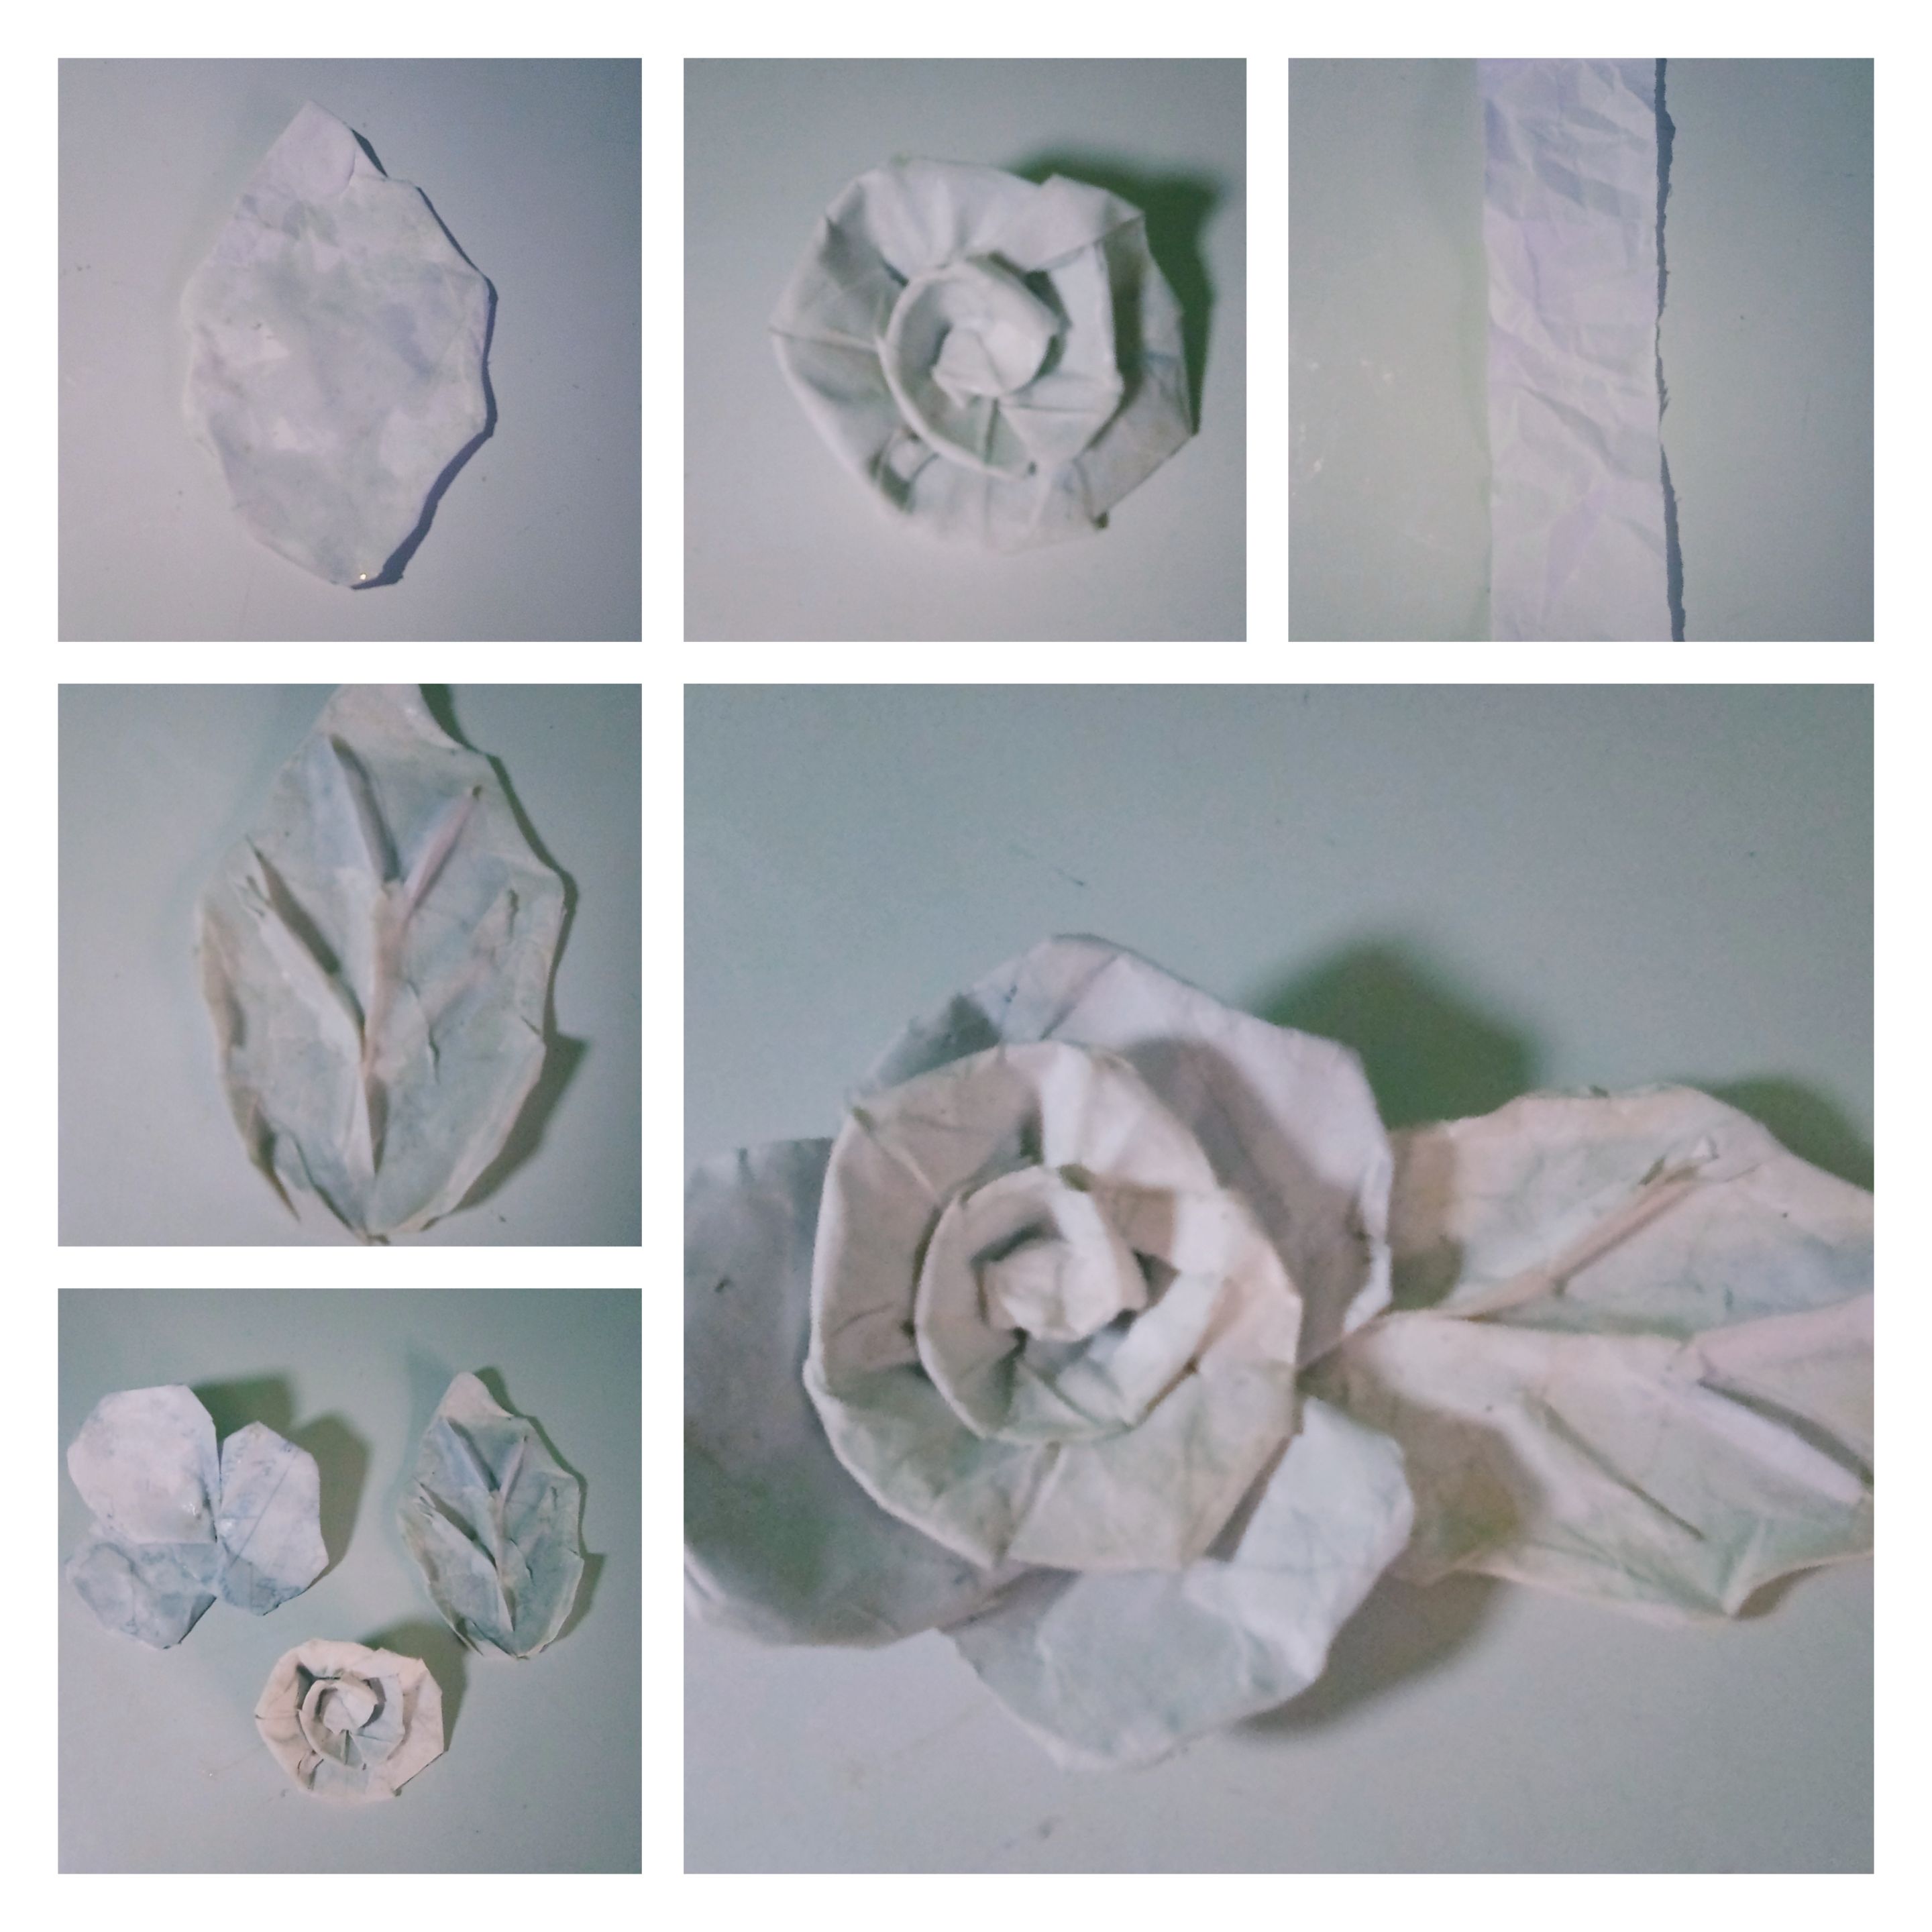
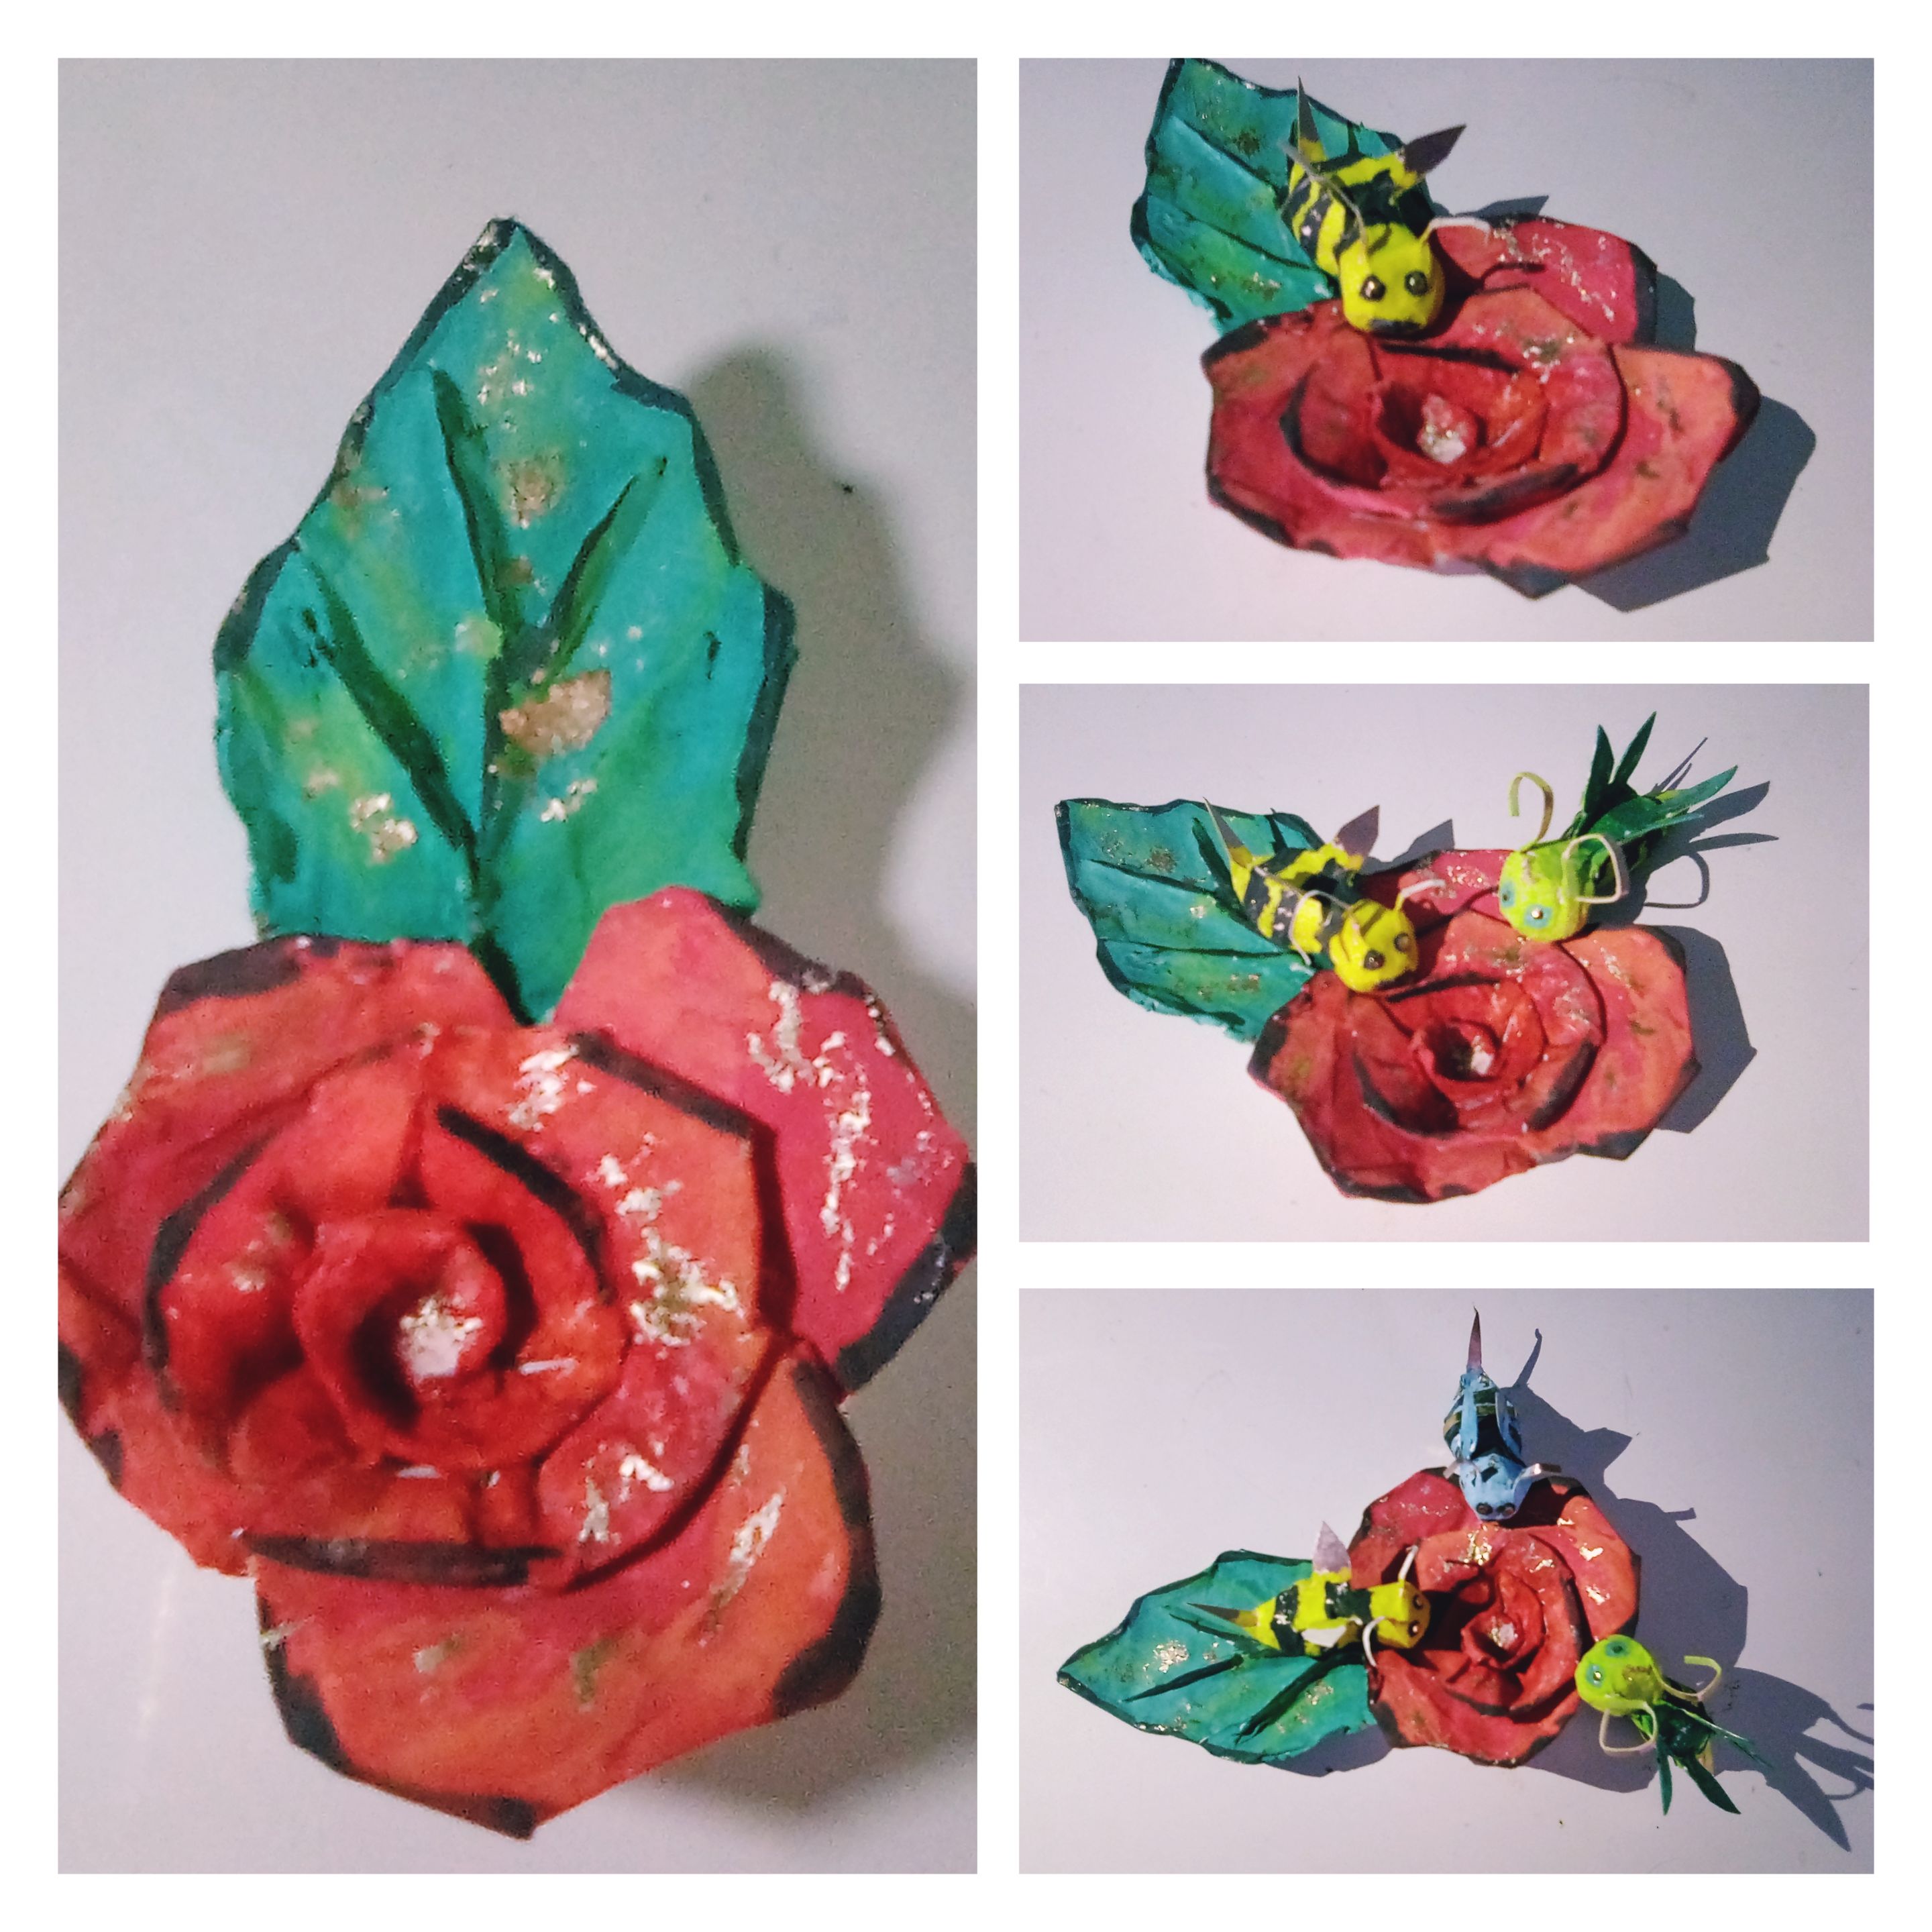
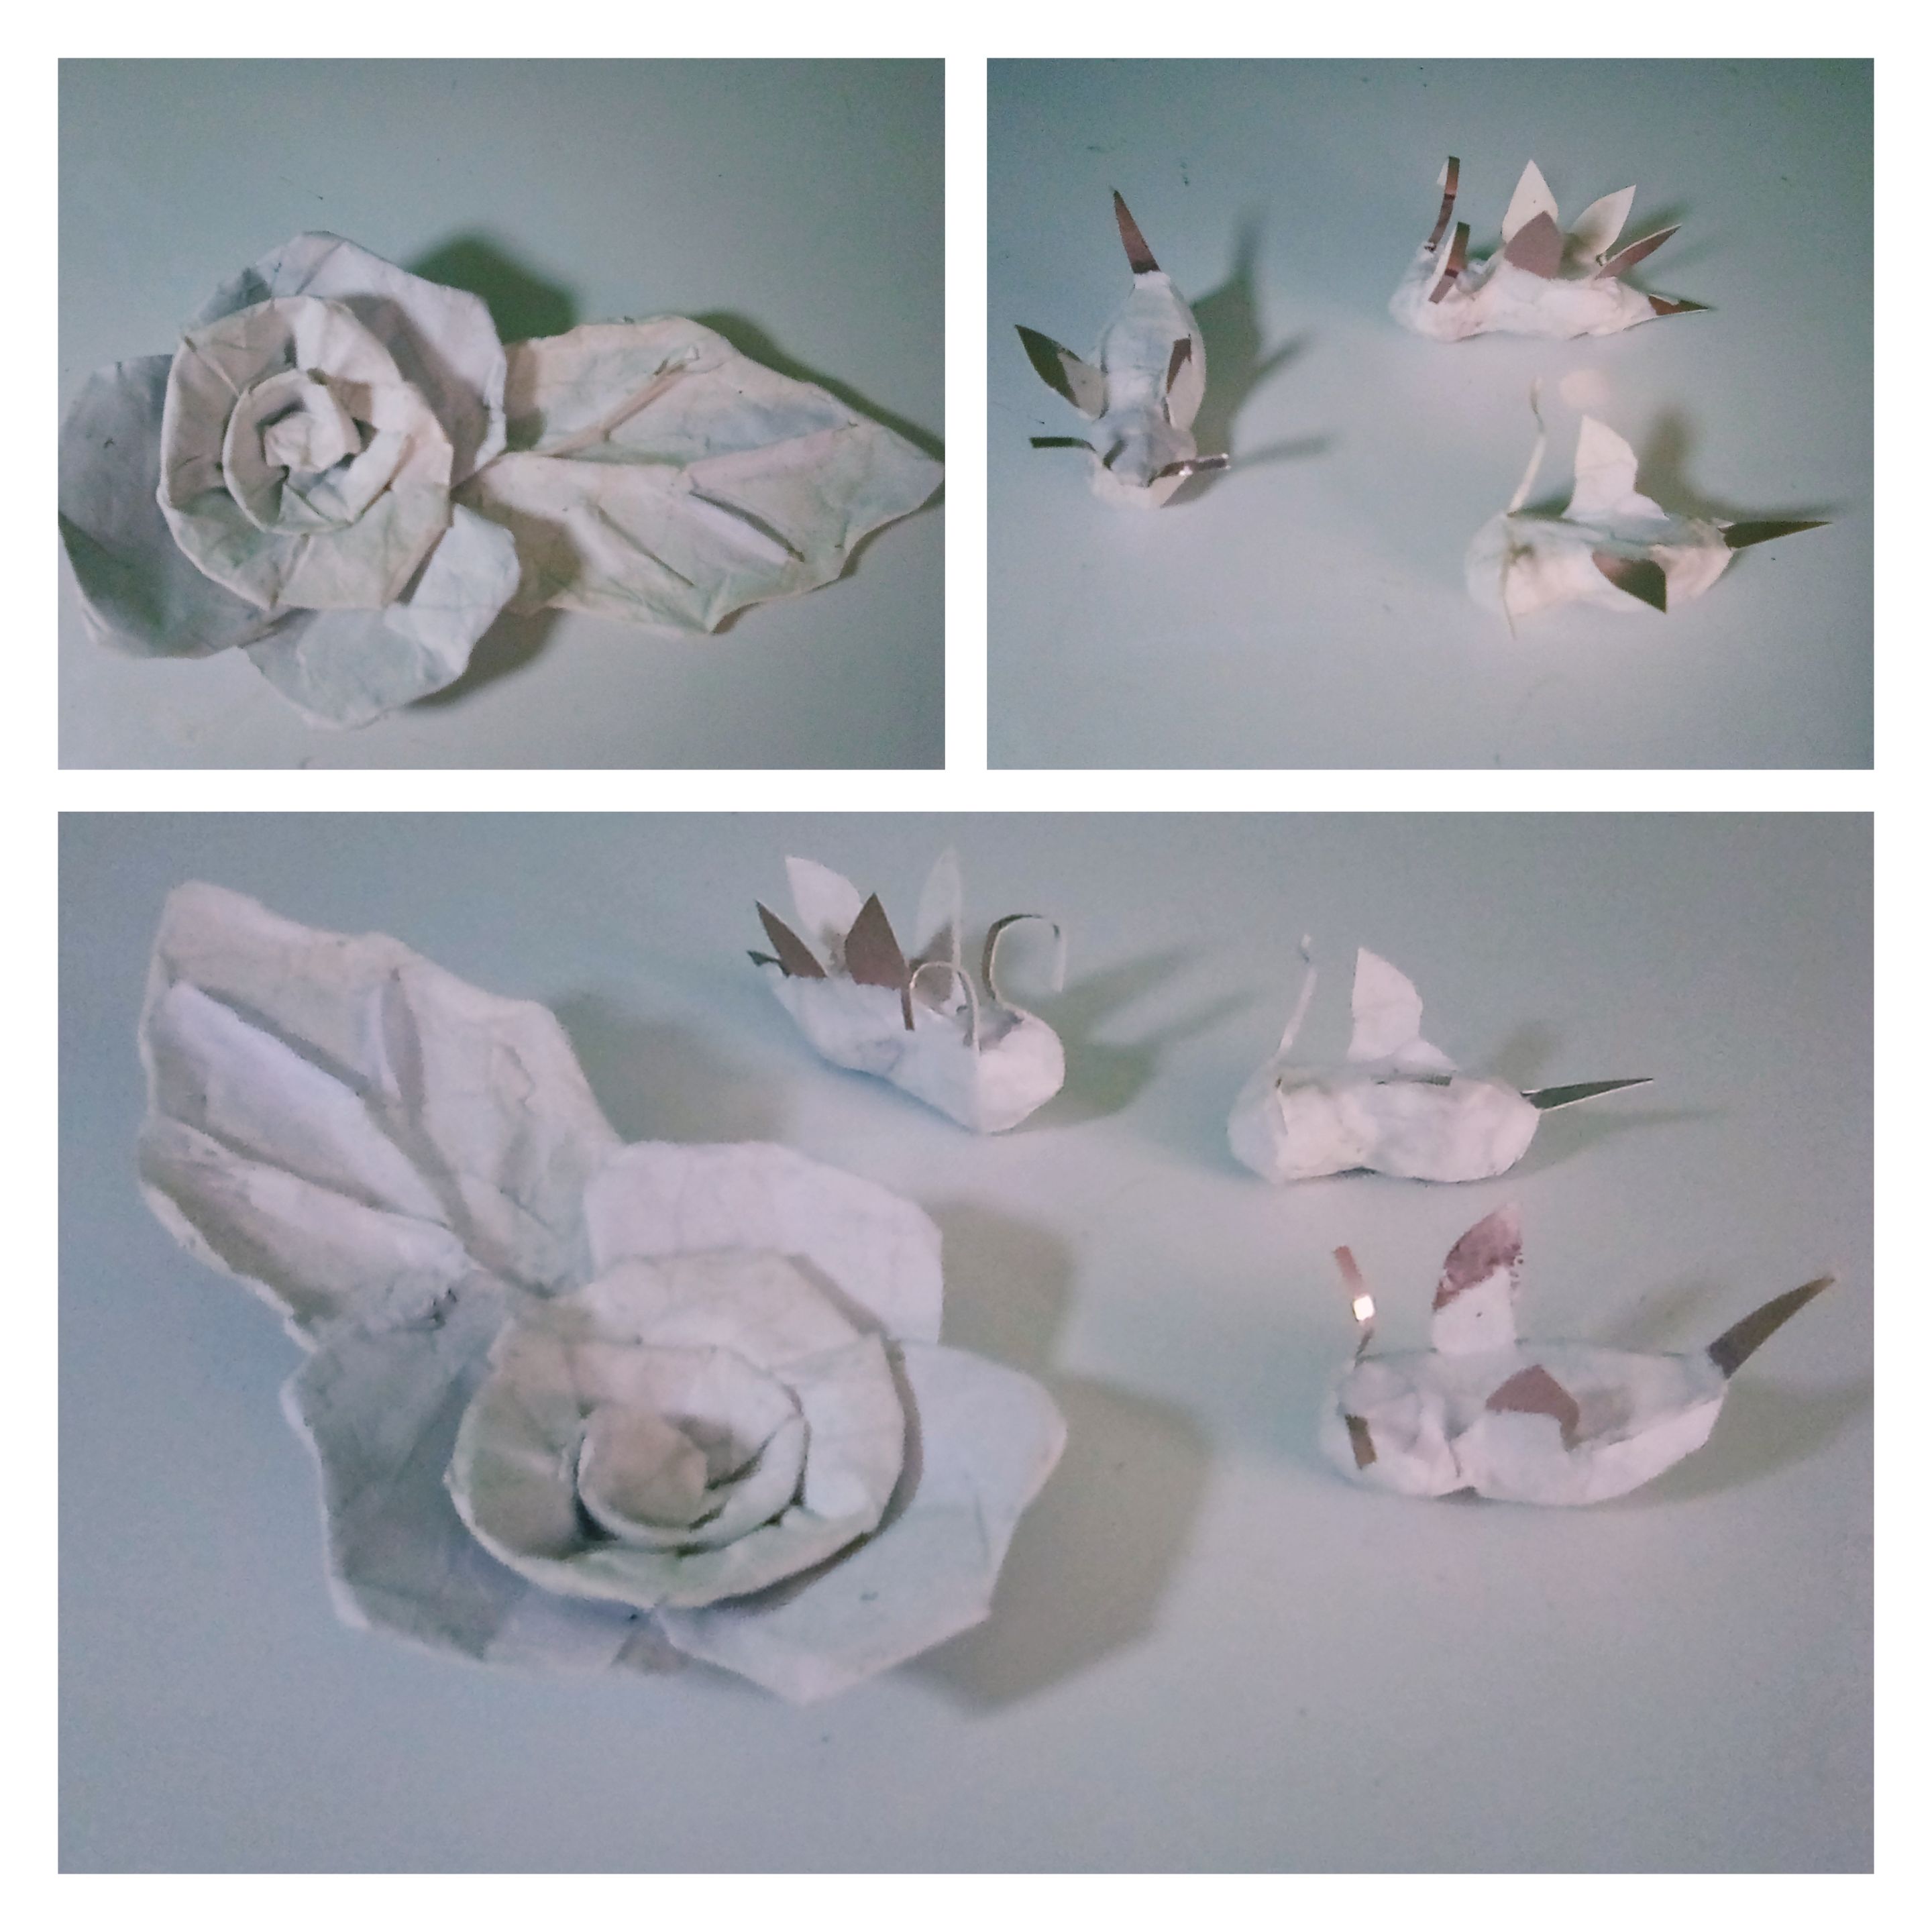
Iniciamos la flor realizando su región central de la siguiente forma: cortamos un listón de papel blanco, lo estrujamos y doblamos por su centro. Seguidamente, comenzamos a enrollarlo, mientras realizamos dobleces según el modelo de flor deseado. Mantenemos la estructura con pegamento. Continuamos confeccionando la región externa de la flor, creando tres pétalos con el método siguiente: Realizamos tres círculos de un mismo diámetro de papel, y luego, con ayuda de la pega elaborada de harina, le haremos dobleces por todo su borde asemenjándolos a pétalos de flores naturales. Pasos para crear la hoja : Dibujamos la estructura de una hoja en la cartulina. Seguidamente la recortamos, y le realizamos relieve con tiras de papel blanco y pega elaborada de harina, para lograr así un efecto visual real. Luego, adherimos la hoja con pegamento a la flor previamente creada, dejándola lista para decorar.
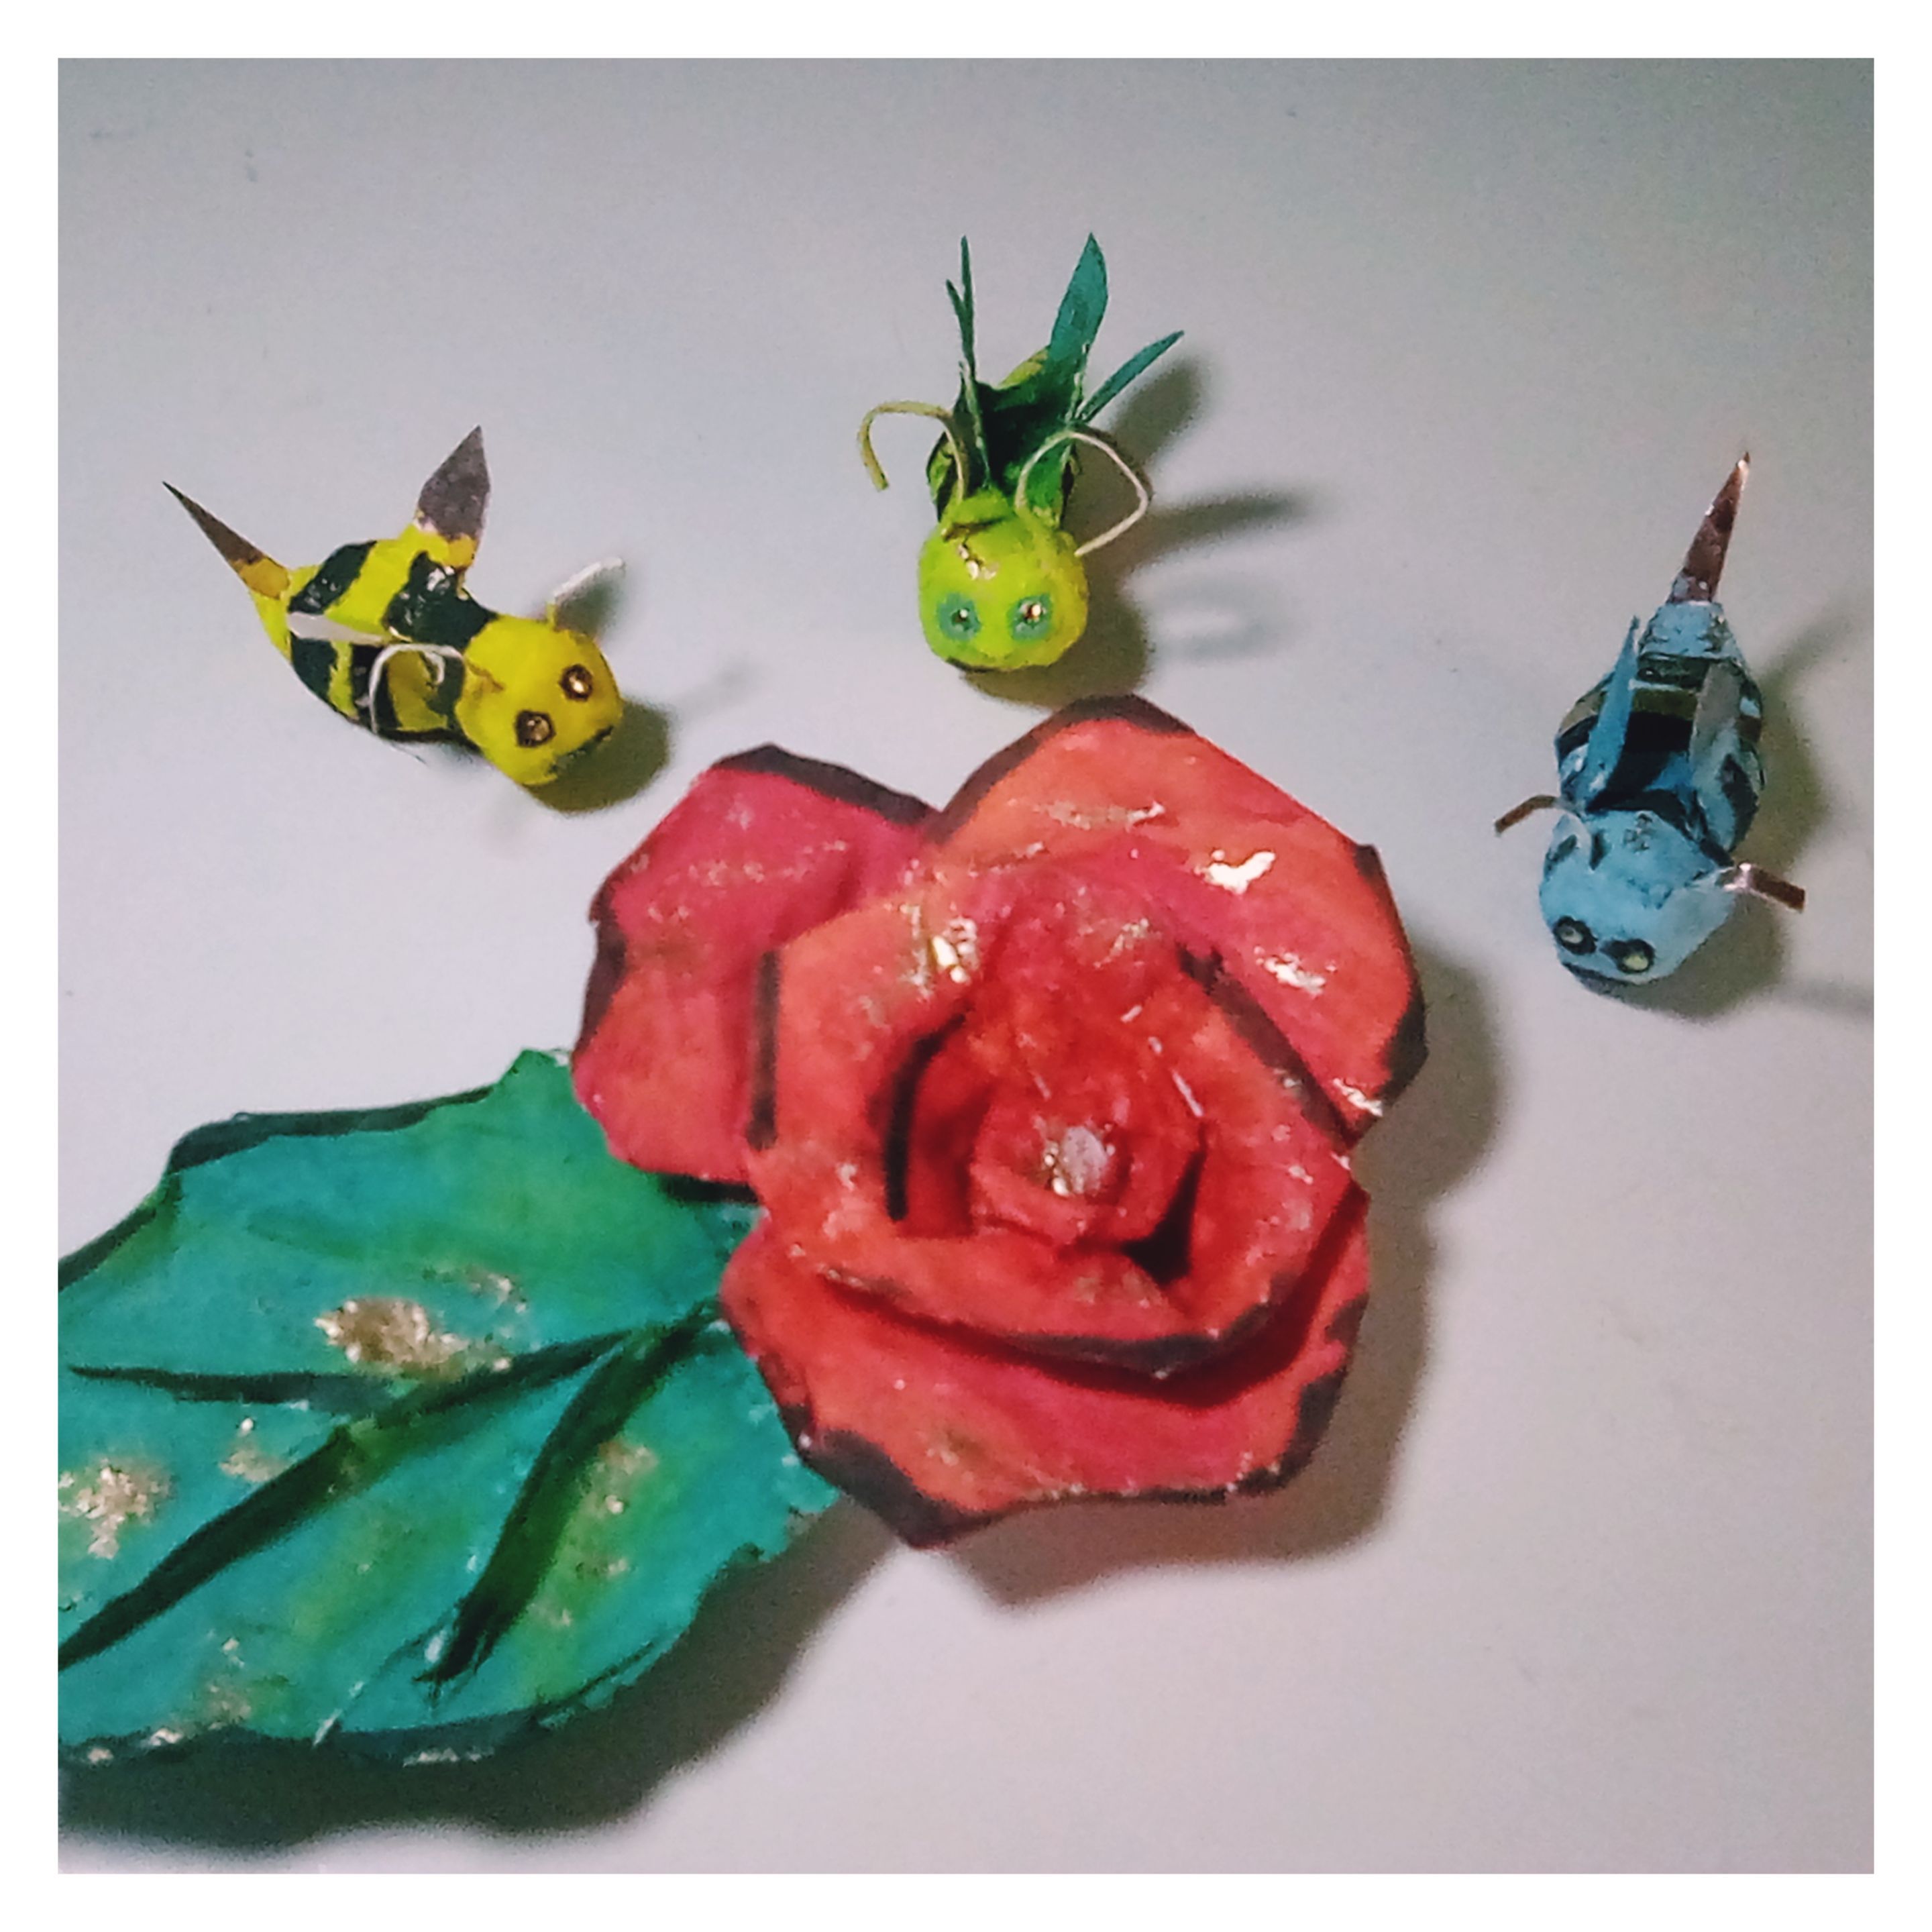
✨Pasos para confeccionar las abejas
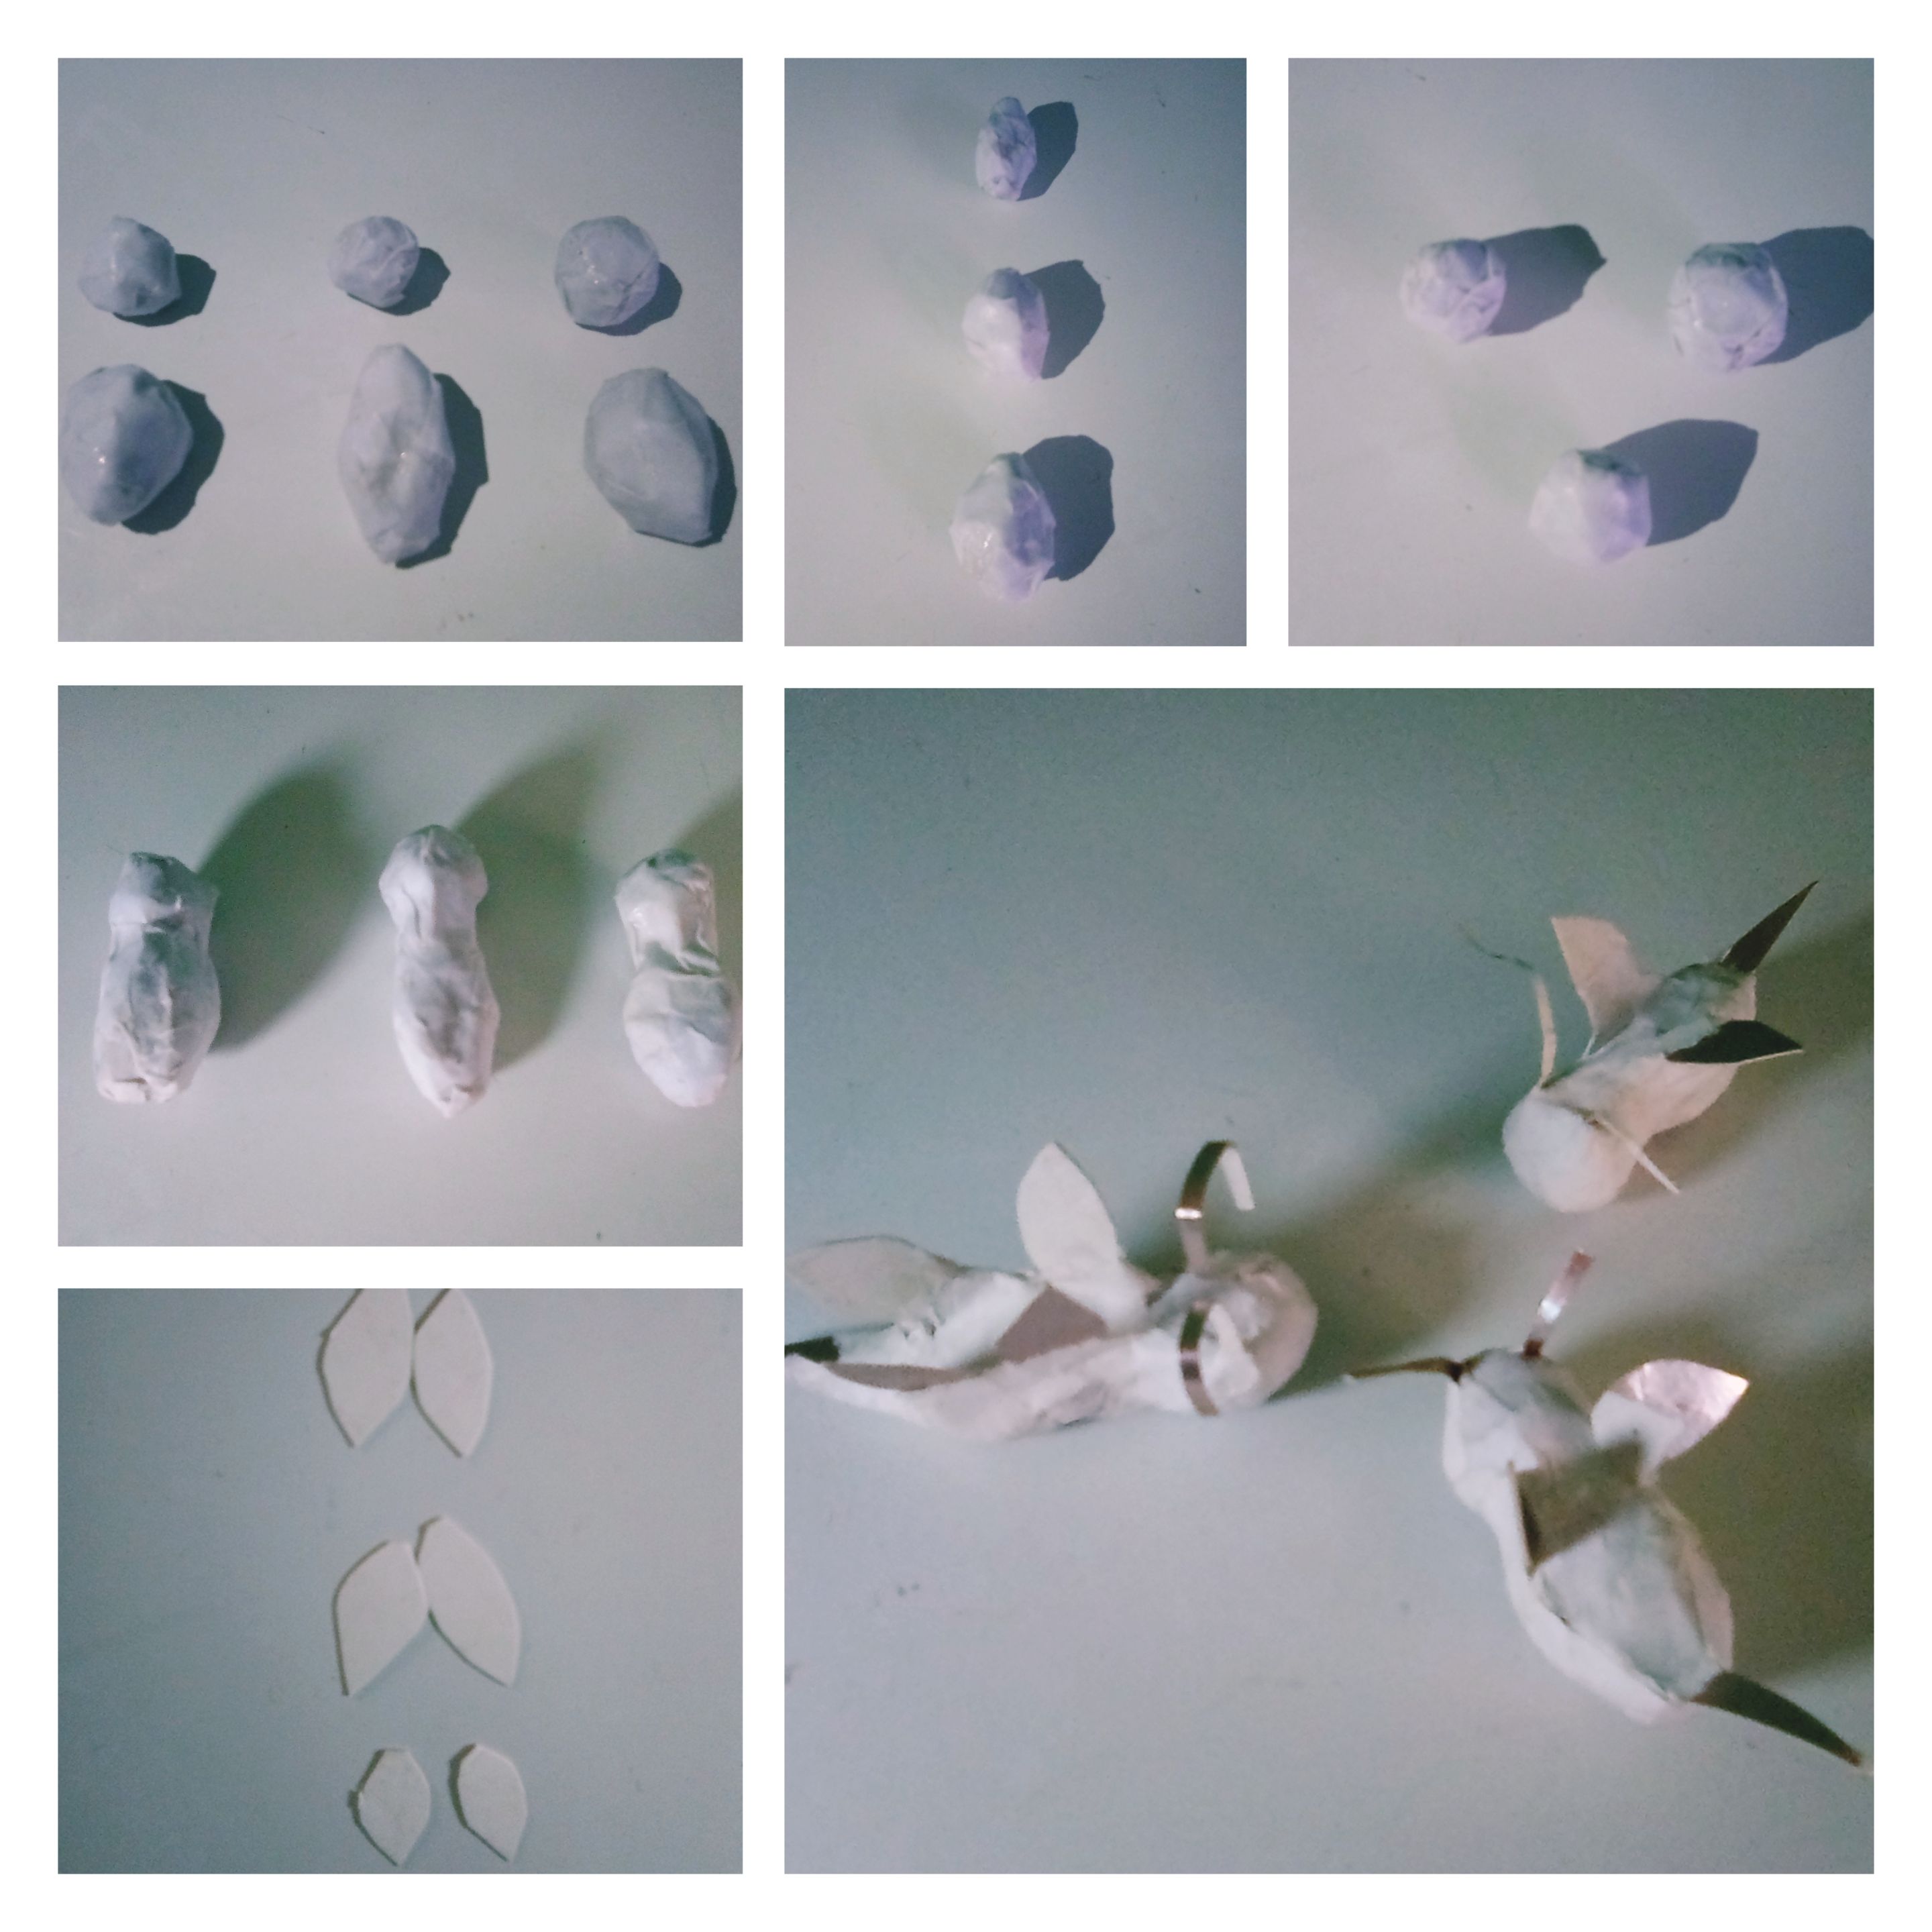
Comenzamos estrujando papel en forma de círculos pequeños que conformarán las cabezas de las abejas, y óvalos, para sus cuerpos.Seguidamente, vamos a darle a estás estructuras dos capas de empapelado con tiras de papel blanco y pega elaborada de harina, para proporcionarle una superficie lisa.Continuamos creando con la cartulina, las alas, antenas, según el modelo deseado. Ya teniendo cabeza, cuerpo , alas, antenas, confeccionadas, pasamos a conformar la abeja , unificando sus partes con pegamento y dándole una capa de empapelado en su totalidad, para generarle dureza a la estructura.Yo utilizando este método, realicé tres abejas decorativas.
Tanto la flor como las abejas lucen hermosas con el color blanco natural del papel , ustedes, si desean pueden barnizarlas y exhibirlas así, ó darles pinceladas con colores de su preferencia como lo realicé yo, que para la flor resalté tonalidades de rojo y verde, y para las abejas, azul, verde, amarillo, negro.Ambas opciones lograrán un efecto visual agradable y más, si agregamos en ellas con pegamento, piedrecitas brillantes o papel lumínico. Para lograr la adherencia en el frío o nevera de estos decorativos , vamos adherir con pegamento en su región inferior pequeños pedacitos de imanes.
Me encantó el resultado de los decorativos de abejas y flores para mi refrigerador ,¡ lucen hermosos!Espero que a ustedes también les haya gustado, y que los motive a disfrutar su proceso creativo utilizando las técnicas de papel maché, técnicas útiles para el reciclado. Buenas vibras y excelente día para todos.💁☀️ Fotografías propias.
English
Greetings friends who love crafts️️🐝
Happy day to everyone! Making crafts with paper is always pleasant to me, so today, I have decided to resume her practice to make personalized decorative flowers and bees, for my home refrigerator.I invite you friends to join me to get to know through a simple tutorial, the step by step for its preparation.
✨ Materials
.Varied role .White paper strips .Cardboard .Scissor .Paste made of flour .Glue .Shiny stones. .Gold nail polish .Watercolors .Brush .Magnets
✨Steps to make the flower
We start the flower by making its central region in the following way: we cut a ribbon of white paper, squeeze it and fold it through its center. Then, we begin to roll it, while we make folds according to the desired flower model. We maintain the structure with glue. We continue making the outer region of the flower, creating three petals with the following method: We make three circles of the same diameter of paper, and then, with the help of the glue made of flour, we will make folds all over its edge resembling them to natural flower petals. Steps to create the sheet : We draw the structure of a sheet on the cardboard. Then we cut it out, and we emboss it with strips of white paper and glue made of flour, to achieve a real visual effect. Then, we adhere the leaf with glue to the previously created flower, leaving it ready to decorate.
✨Steps to make the bees
We start by squeezing paper in the form of small circles that will form the heads of the bees, and ovals, for their bodies.Next, we are going to give these structures two layers of wallpaper with strips of white paper and glue made of flour, to provide a smooth surface.We continue creating with cardboard, wings, antennas, according to the desired model. Already having head, body, wings, antennas, ready-made, we go on to form the bee, unifying its parts with glue and giving it a layer of wallpaper in its entirety, to generate hardness to the structure.Using this method, I made three decorative bees.
Both the flower and the bees look beautiful with the natural white color of the paper, you, if you wish, can varnish and display them like this, or give them brushstrokes with colors of your preference as I did, which for the flower I highlighted shades of red and green, and for the bees, blue, green, yellow, black.Both options will achieve a pleasant visual effect and more, if we add in them with glue, shiny pebbles or luminous paper. To achieve the adhesion in the cold or refrigerator of these decorative, we are going to adhere with glue in its lower region small pieces of magnets.
I loved the result of the bee and flower decals for my fridge, they look beautiful!I hope you liked it too, and that it motivates you to enjoy your creative process using papier mache techniques, useful techniques for recycling. Good vibes and excellent day for everyone.💁☀️ Own photographs.