Español
Saludos amigos amantes de las manualidades💁☀️
¡Feliz día para todos! En estos días , me propuse ambientar la cocina de mi hogar para así generar vibras positivas.Hoy, inspirada en las frutas tropicales: Piña, plátano, naranja, melón, y en los beneficios que aportan a nuestro organismo, he querido confeccionar pequeños cuadros decorativos para así incentivar su consumo diario.Los invito amigos, a que me acompañen a conocer como utilizando la técnica de papel maché y reciclando, logré unos pequeños cuadros frutales encantadores a la vista¡Comencemos!

✨ Materiales ✨
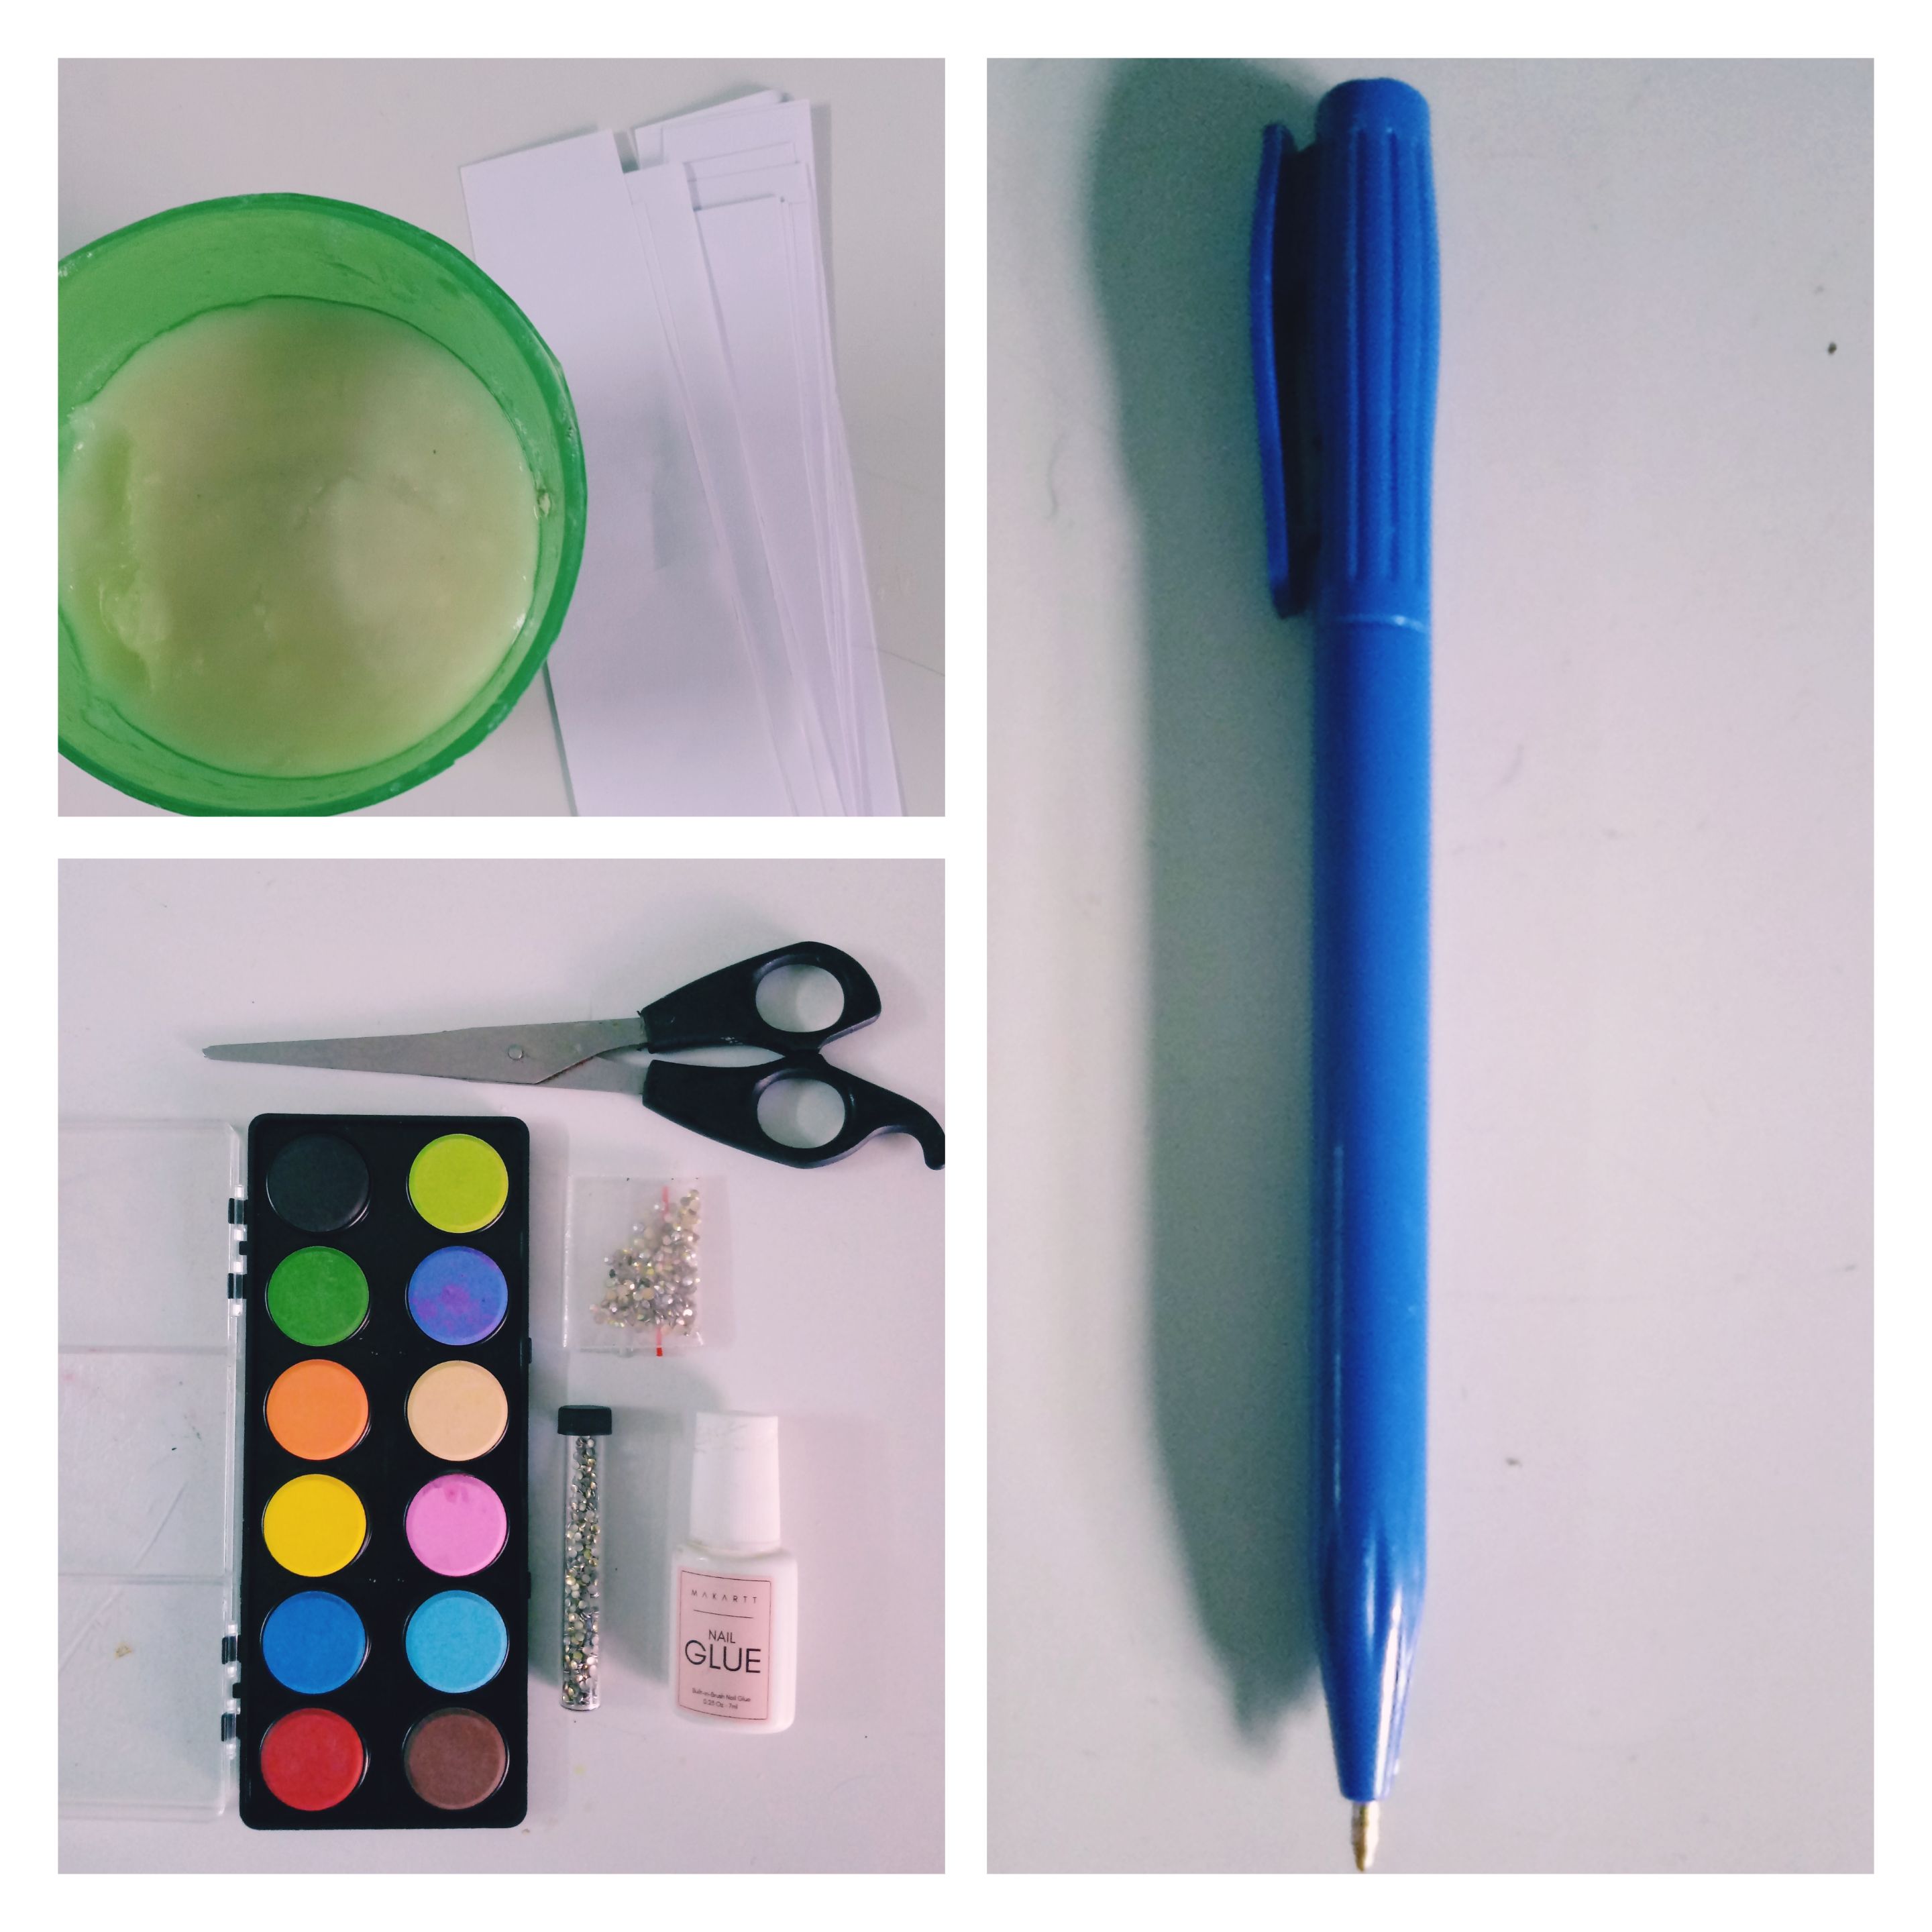
.Recipiente circular: Plato mediano .Cartulina .Papel variado .Pega elaborada de harina .Pegamento .Tiras de papel blanco .Tijera .Acuarelas .Pincel .Alambre grueso
✨Modo de confección ✨
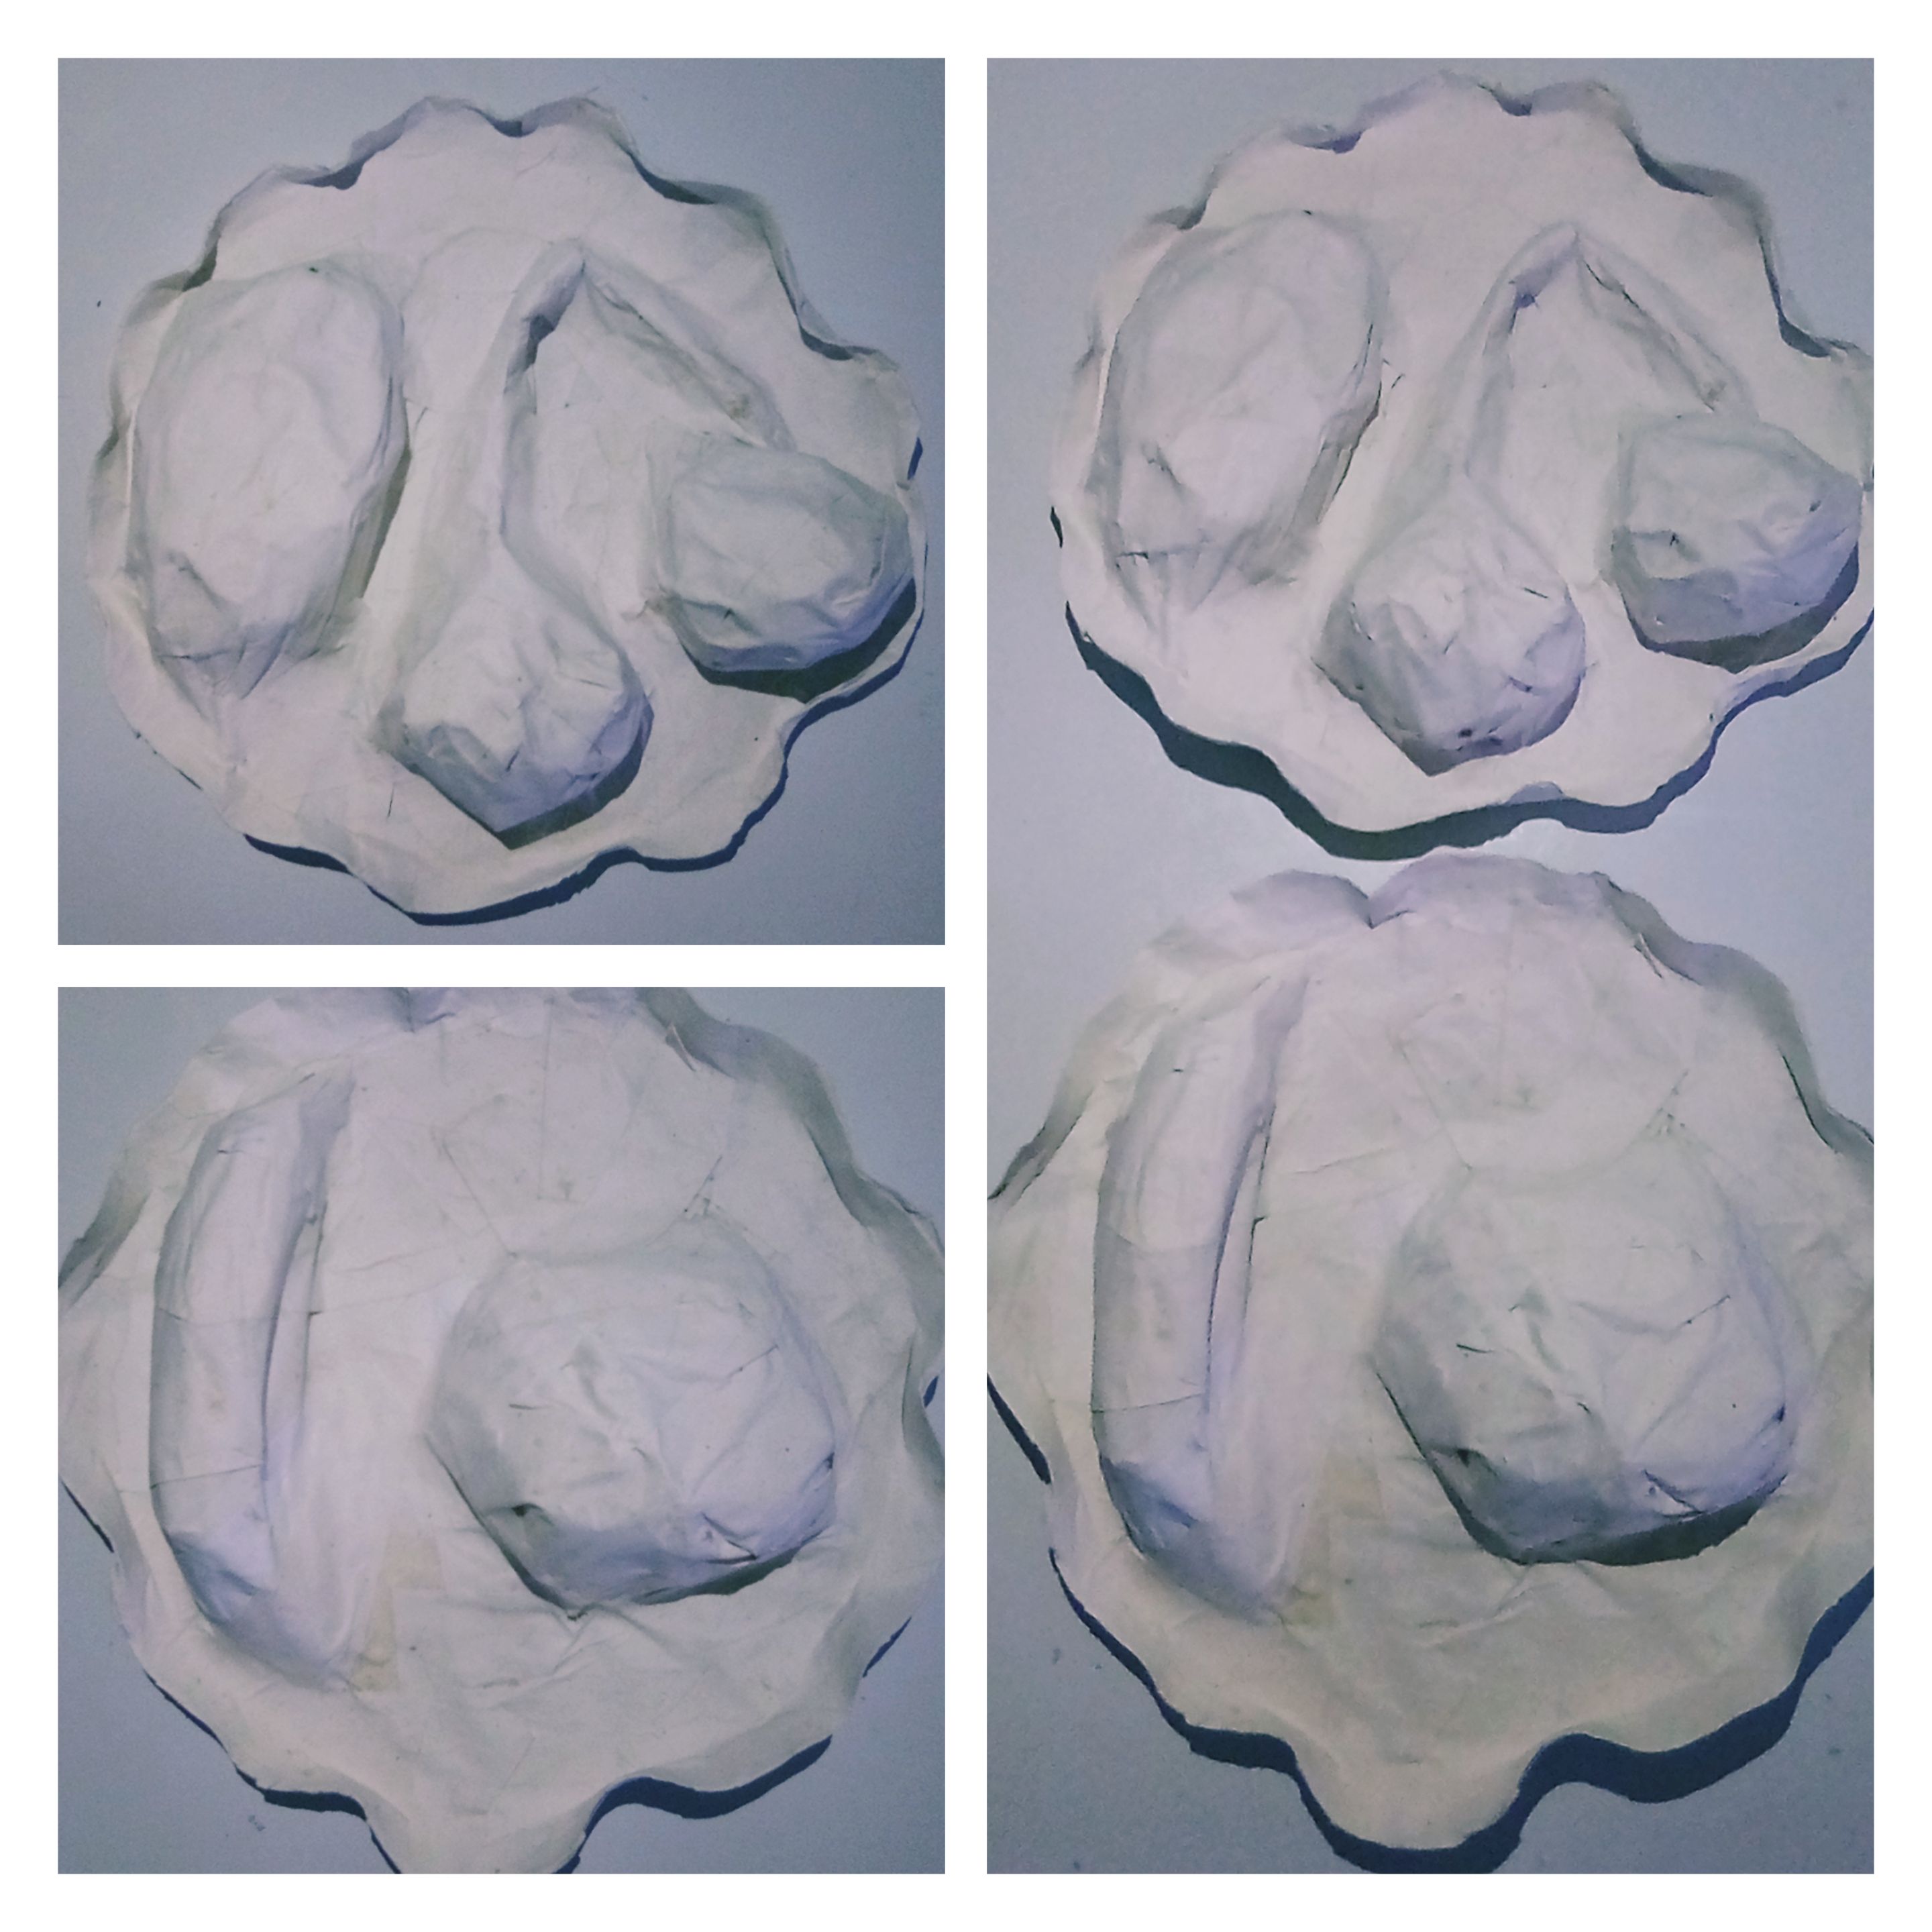
Iniciamos el proceder creando la base de nuestros cuadros de la siguiente forma: En una cartulina vamos a marcar con ayuda del plato y el lapicero tantas circunferencias como cuadros deseemos, yo dibujé dos. Seguidamente con la tijera, recortamos por la guía trazada. Ya teniendo la base para los cuadros, pasaremos a conformar nuestras frutas tropicales decorativas con el siguiente proceder: Estrujamos papel y amoldamos unido a la pega elaborada de harina según el aspecto de la fruta a crear.Yo amoldé papel alargado para el plátano y tallo, circular para las naranjas, piña, y ovalada, para el melón. Ustedes pueden crearlas a su gusto.

Hasta aquí, ya tenemos nuestras bases y frutas tropicales creadas , ahora pasaremos a adherir las frutas en la superficie de la base con pegamento, y seguidamente, le daremos tres capas de empapelado en su totalidad. Aprovechando , que la base se encontraba flexible, le realicé además pequeños dobleces por todo su borde, para darles toques decorativos.Luego, dejaremos secar la estructura por ocho horas.
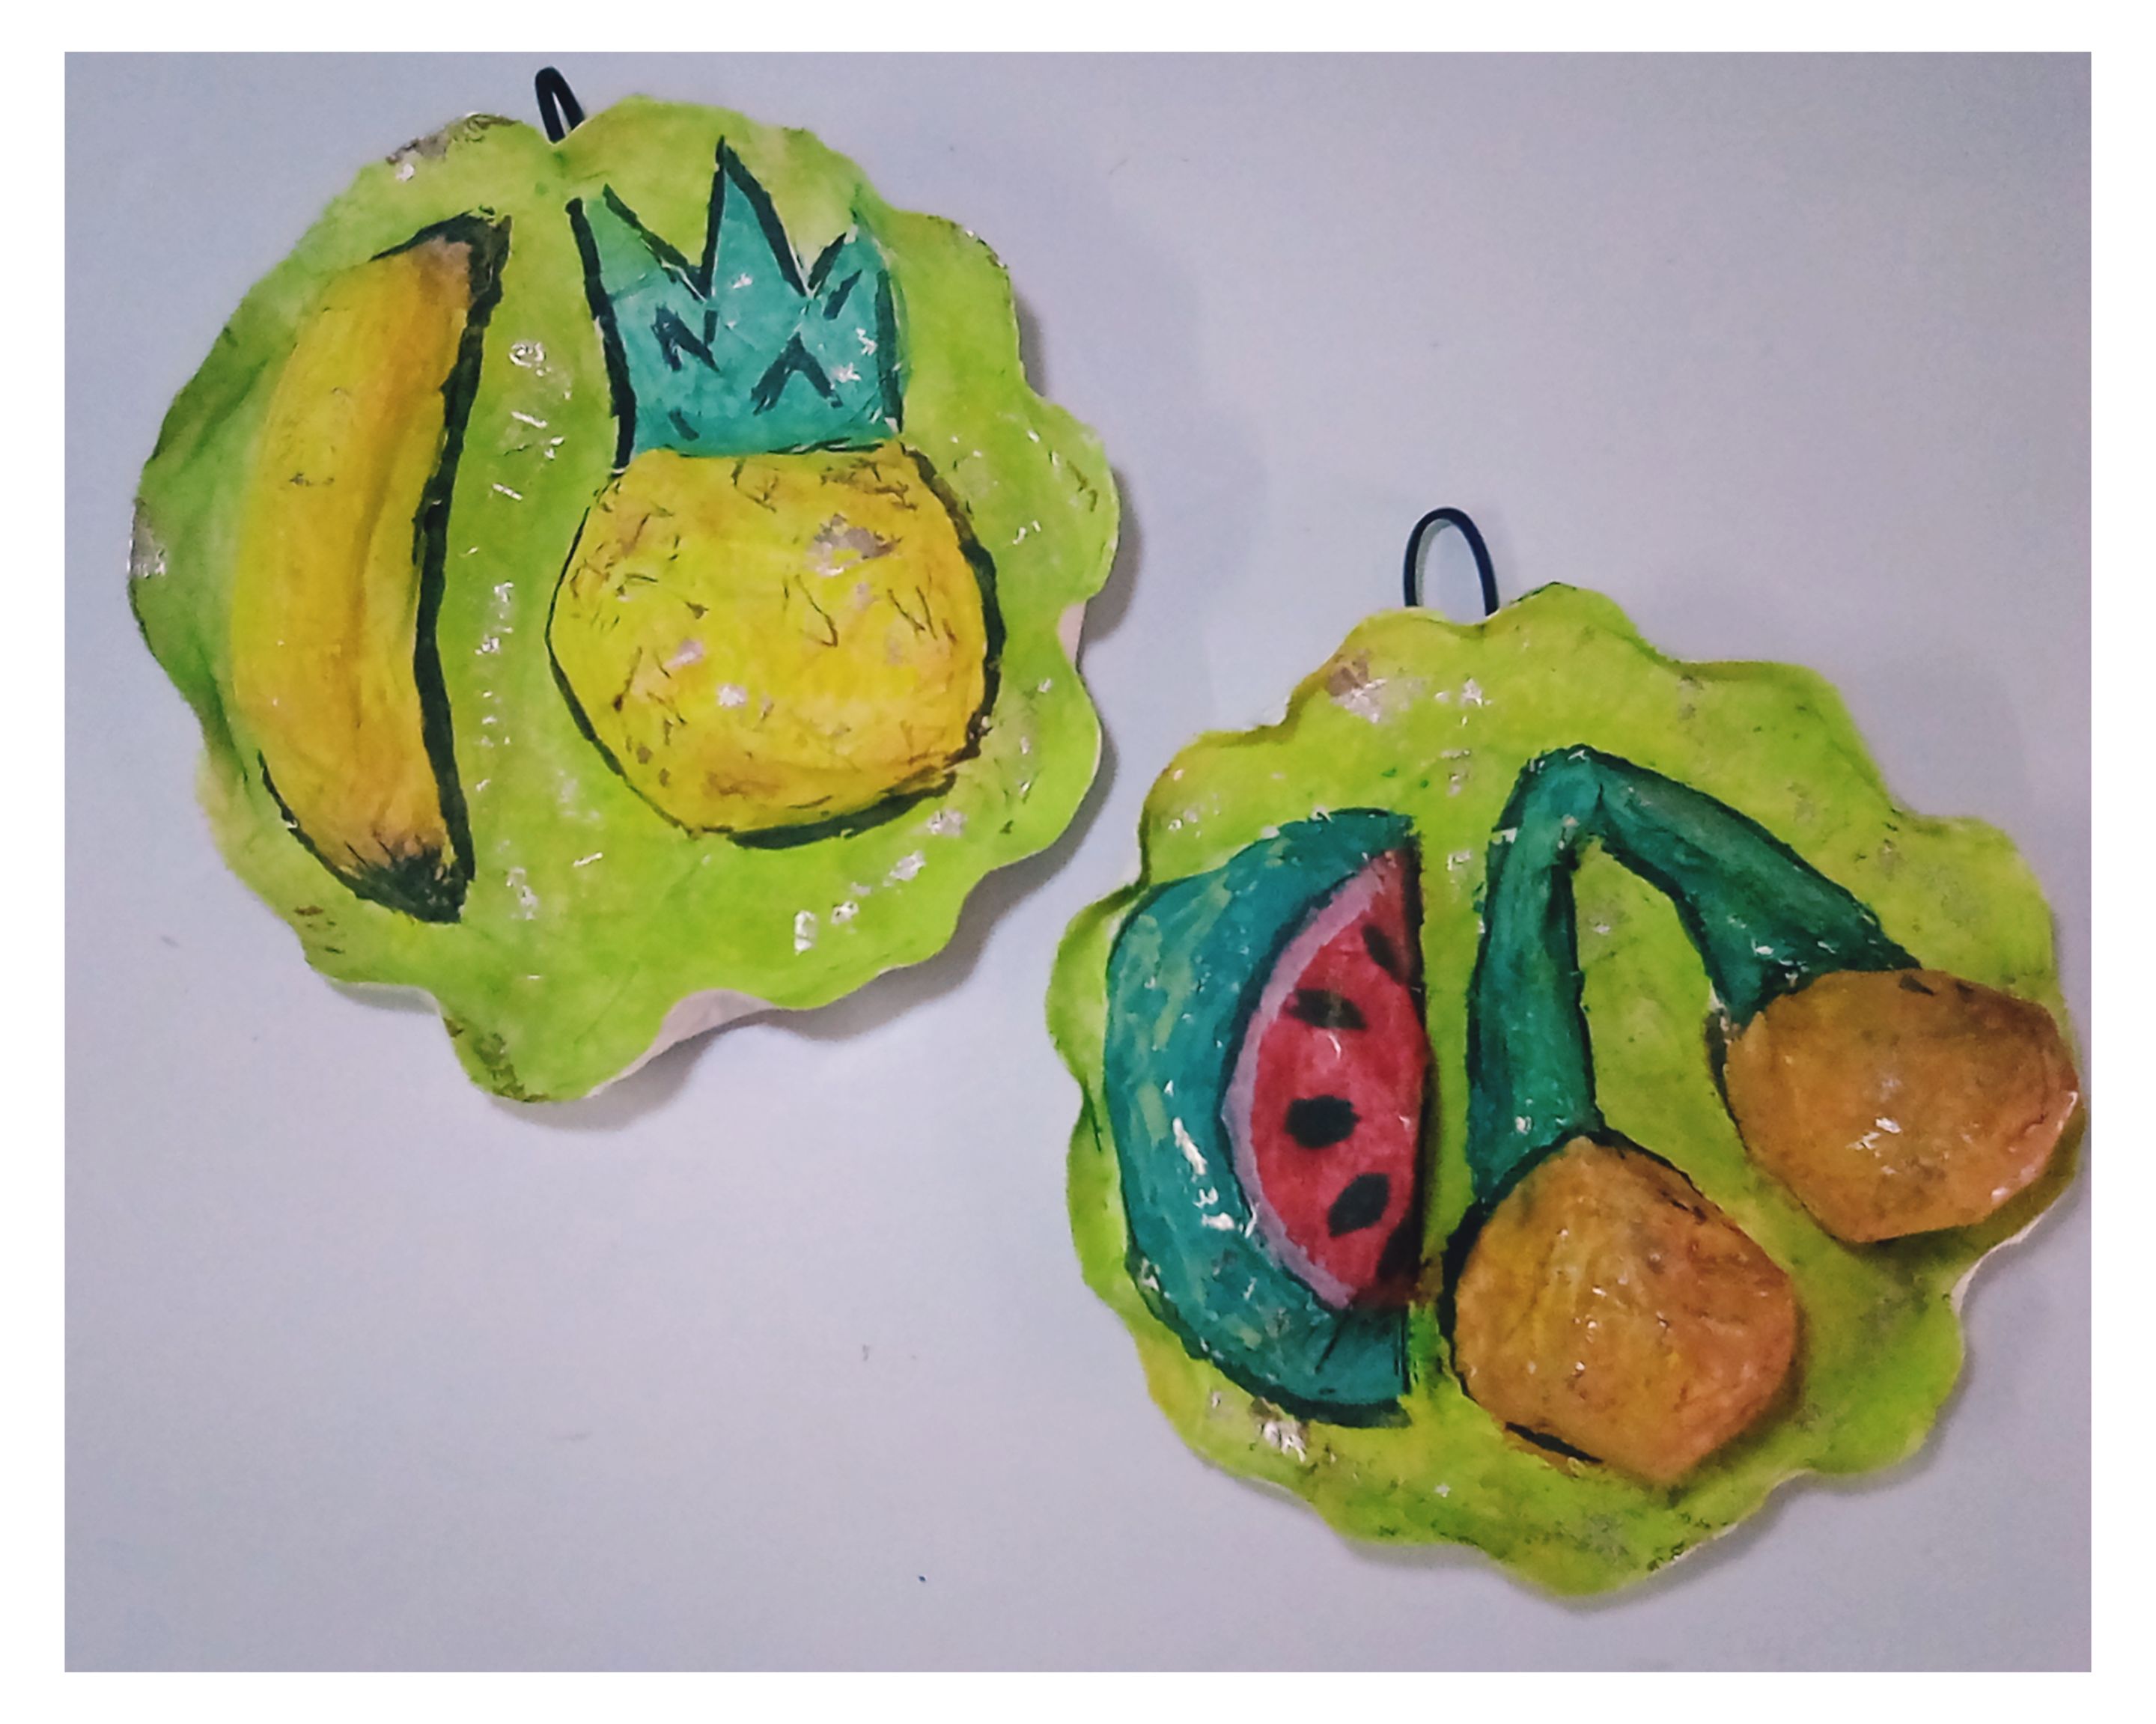
Transcurrido el tiempo de secado, nuestros cuadros estarán listos para decorar con pinceles y acuarelas.Tonalidades de naranja, verde, amarillo, rojo, fueron algunas de las que empleé para darle vida, resaltándolas con pinceladas de negro y dorado.
Para el colgado de los cuadros, adherí con pegamento pequeños alambres gruesos en forma de anillos, en su cara posterior.
Amigos, me encantaron como ambientan estos pequeños cuadros de frutas tropicales mi cocina.Espero que a ustedes también les hayan resultado atractivos, y que se animen a su confección futura, ya que pueden emplearlos para decorar, obsequiar a familiares que aman las manualidades hogareñas, ó utilizarlos como medios educativos para los pequeños de casa. Bendiciones a todos y una inspiradora, creativa semana.💁🌈 Fotografías propias.
English
Greetings friends who love crafts💁☀️
Happy day to everyone! These days, I decided to decorate the kitchen of my home to generate positive vibes.Today, inspired by tropical fruits: Pineapple, banana, orange, melon, and the benefits they bring to our body, I wanted to make small decorative pictures to encourage their daily consumption.I invite you friends, to join me to know how using the papier mache technique and recycling, I achieved some lovely little fruit paintings in sight Let's get started!
✨ Materials ✨
.Circular container: Medium plate .Cardboard .Varied role .Paste made of flour .Glue .White paper strips .Scissor .Watercolors .Brush .Thick wire
✨Mode of preparation ✨
We started the process by creating the base of our pictures as follows: On a cardboard we are going to mark with the help of the plate and the pencil as many circumferences as we want pictures, I drew two. Then with the scissors, we cut along the traced guide. Once we have the base for the paintings, we will proceed to shape our decorative tropical fruits with the following procedure: We squeeze paper and mold attached to the glue made of flour according to the appearance of the fruit to be created.I molded elongated paper for the banana and stem, circular for the oranges, pineapple, and oval, for the melon. You can create them to your liking.
So far, we have our bases and tropical fruits created, now we will stick the fruits on the surface of the base with glue, and then we will give it three layers of wallpaper in its entirety. Taking advantage of the fact that the base was flexible, I also made small folds around its edge, to give them decorative touches.Then, we will let the structure dry for eight hours.
After the drying time, our paintings will be ready to decorate with brushes and watercolors.Shades of orange, green, yellow, red, were some of the ones I used to bring it to life, highlighting them with brushstrokes of black and gold.
For the hanging of the paintings, I glued small thick wires in the form of rings, on the back side.
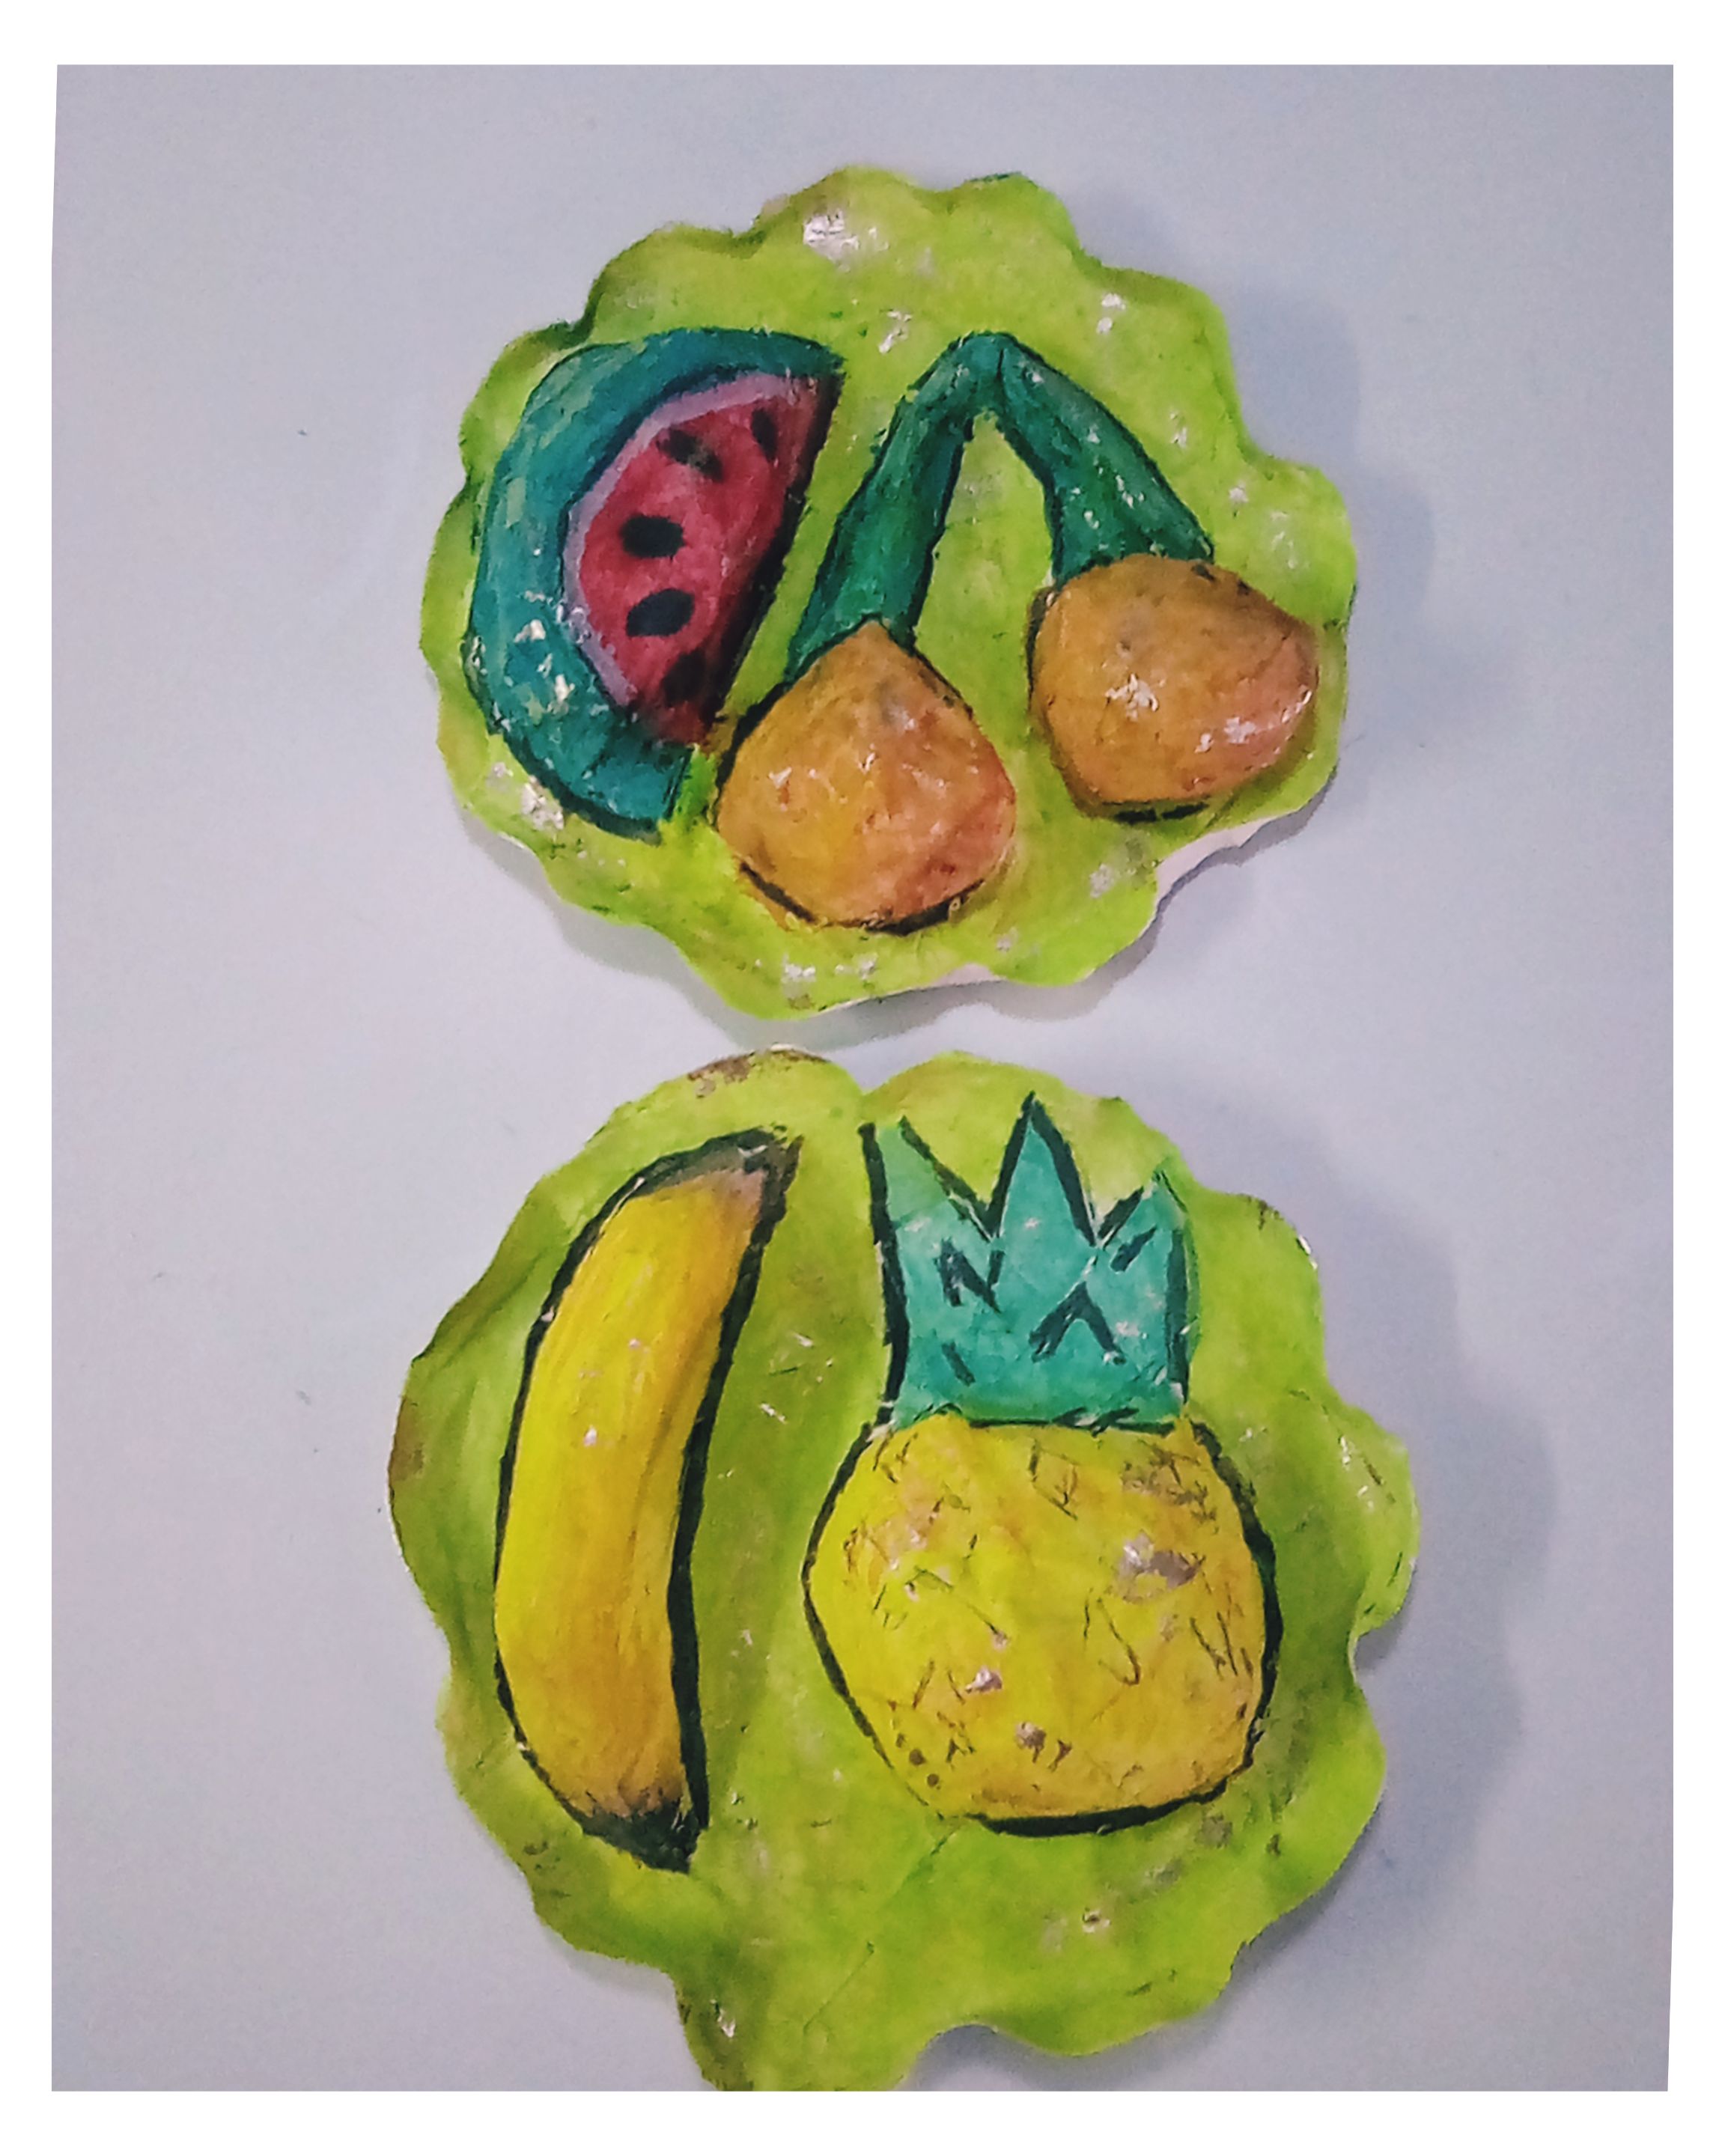
Friends, I loved how these little paintings of tropical fruits set my kitchen.I hope you have also found them attractive, and that you will be encouraged to make them in the future, since you can use them to decorate, give to relatives who love home crafts, or use them as educational means for the little ones at home. Blessings to all and an inspiring, creative week.💁🌈 Own photographs.