Español
Saludos amigos amantes de las manualidades.💁☀️
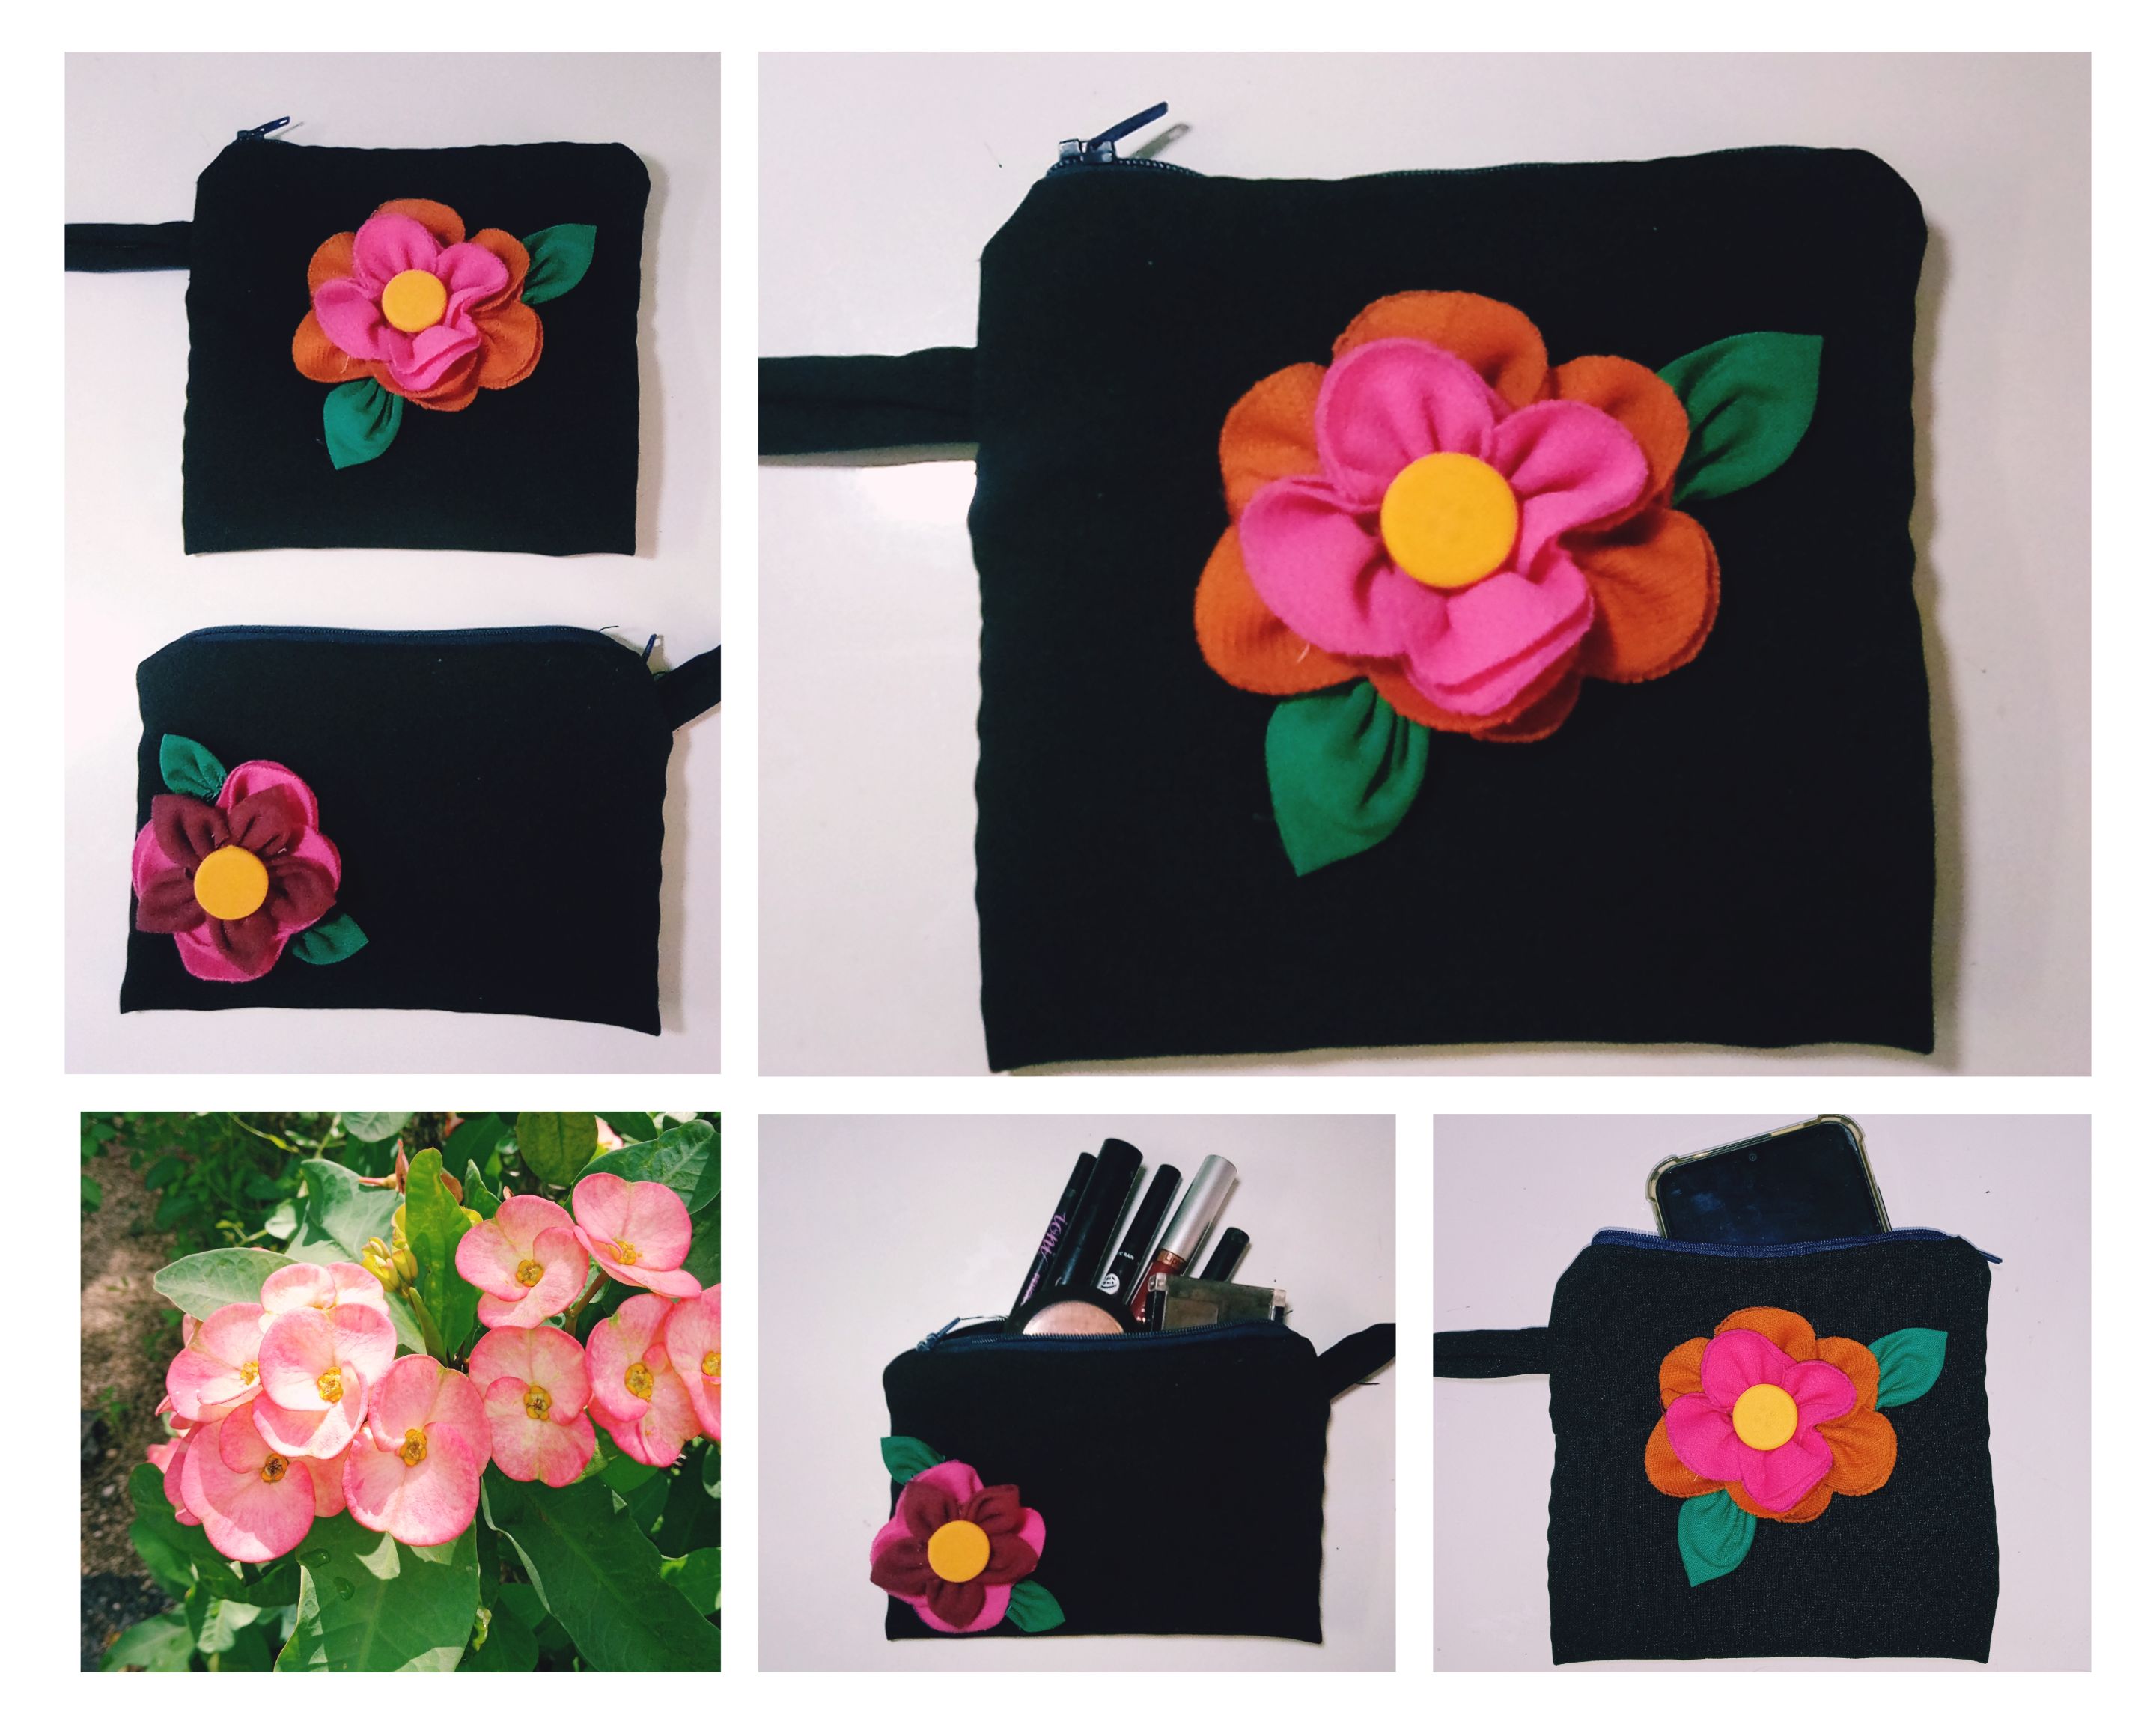
¡Excelente, creativa semana para todos! Próximamente, amigos, me encontraré viajando, por lo que en estos días me he puesto manos a la obra a realizar pequeñas carteras para portar mis objetos personales como: maquillajes, móvil, gafas. Hoy, los invito a que me acompañen a conocer mediante un sencillo tutorial, como obtener estás útiles carteras personalizadas con flores, inspirada en la temática tropical.¡Comencemos!
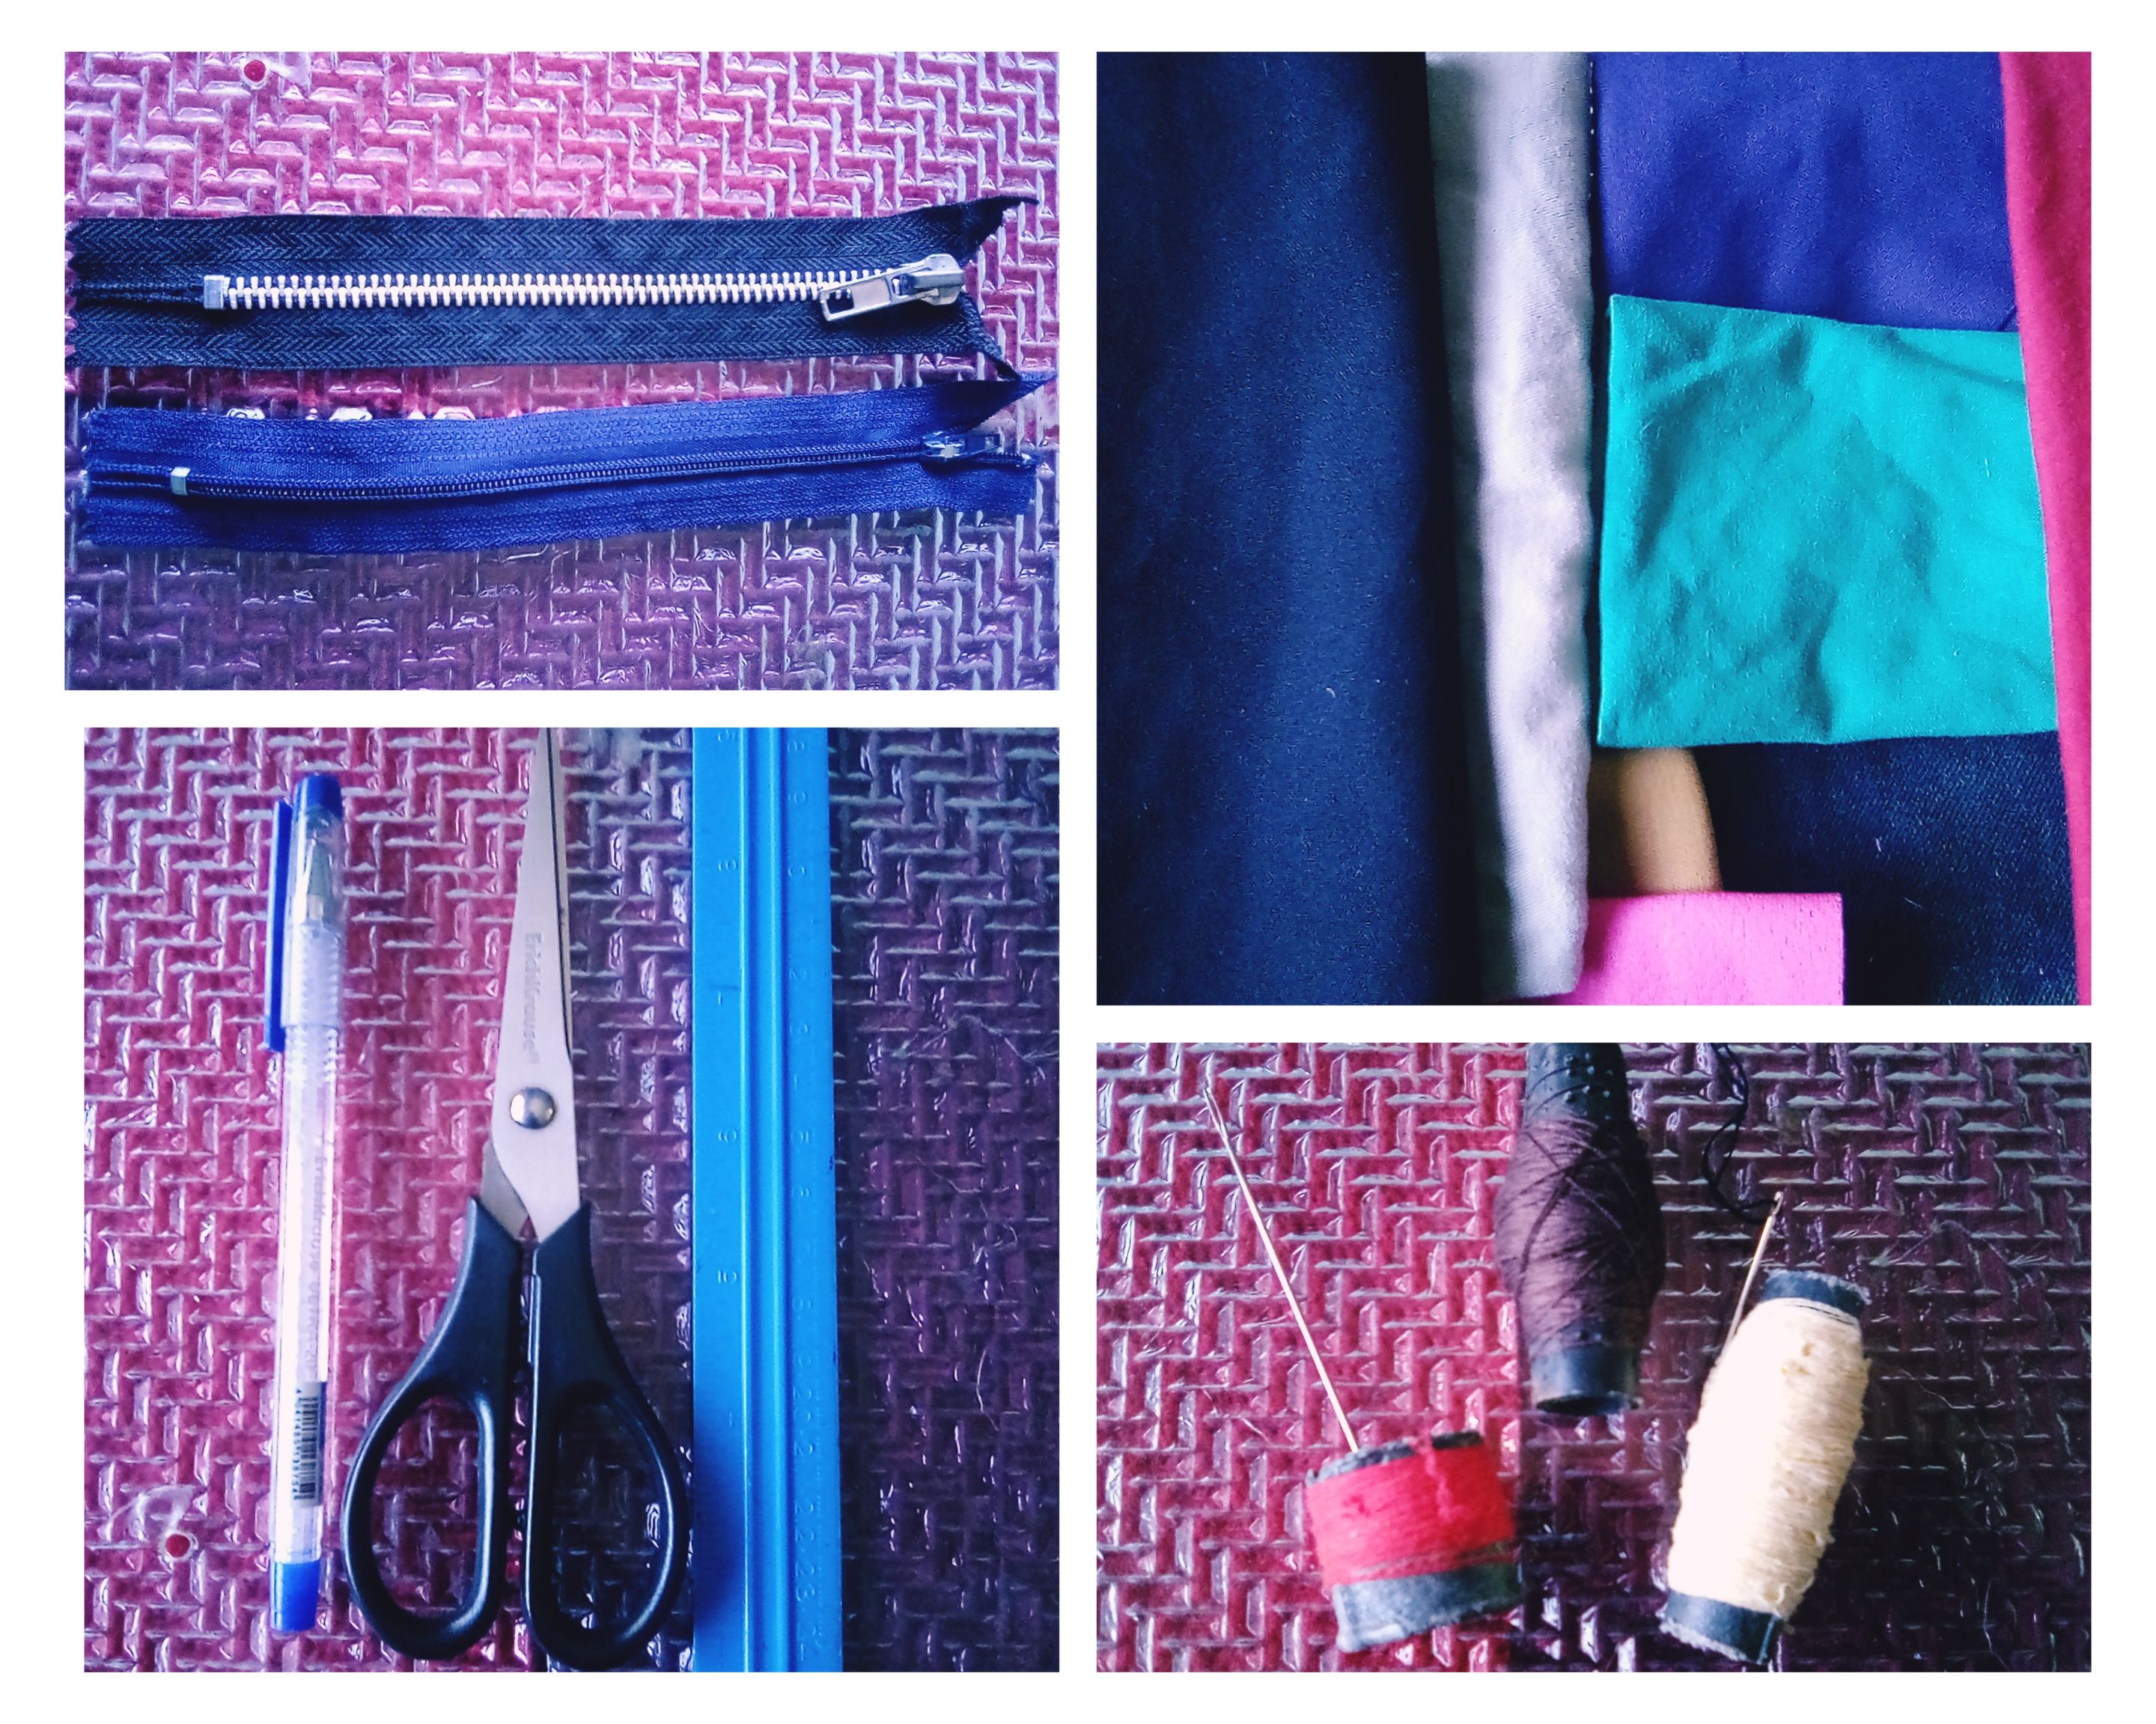
✨Materiales ✨
.Cartón .Retazos de tela de colores variados .Tijera .Regla .Lapicero .Hilo .Aguja .Sipers .Botón
✨Modo de confección✨
Para realizar estas pequeñas carteras , vamos a dividir su proceder en tres momentos, un primer momento donde realizaremos su base , en forma de sobre, un segundo momentos, donde crearemos las flores tropicales, y un tercero, dónde unificaremos ambas estructuras para lograr su terminado.
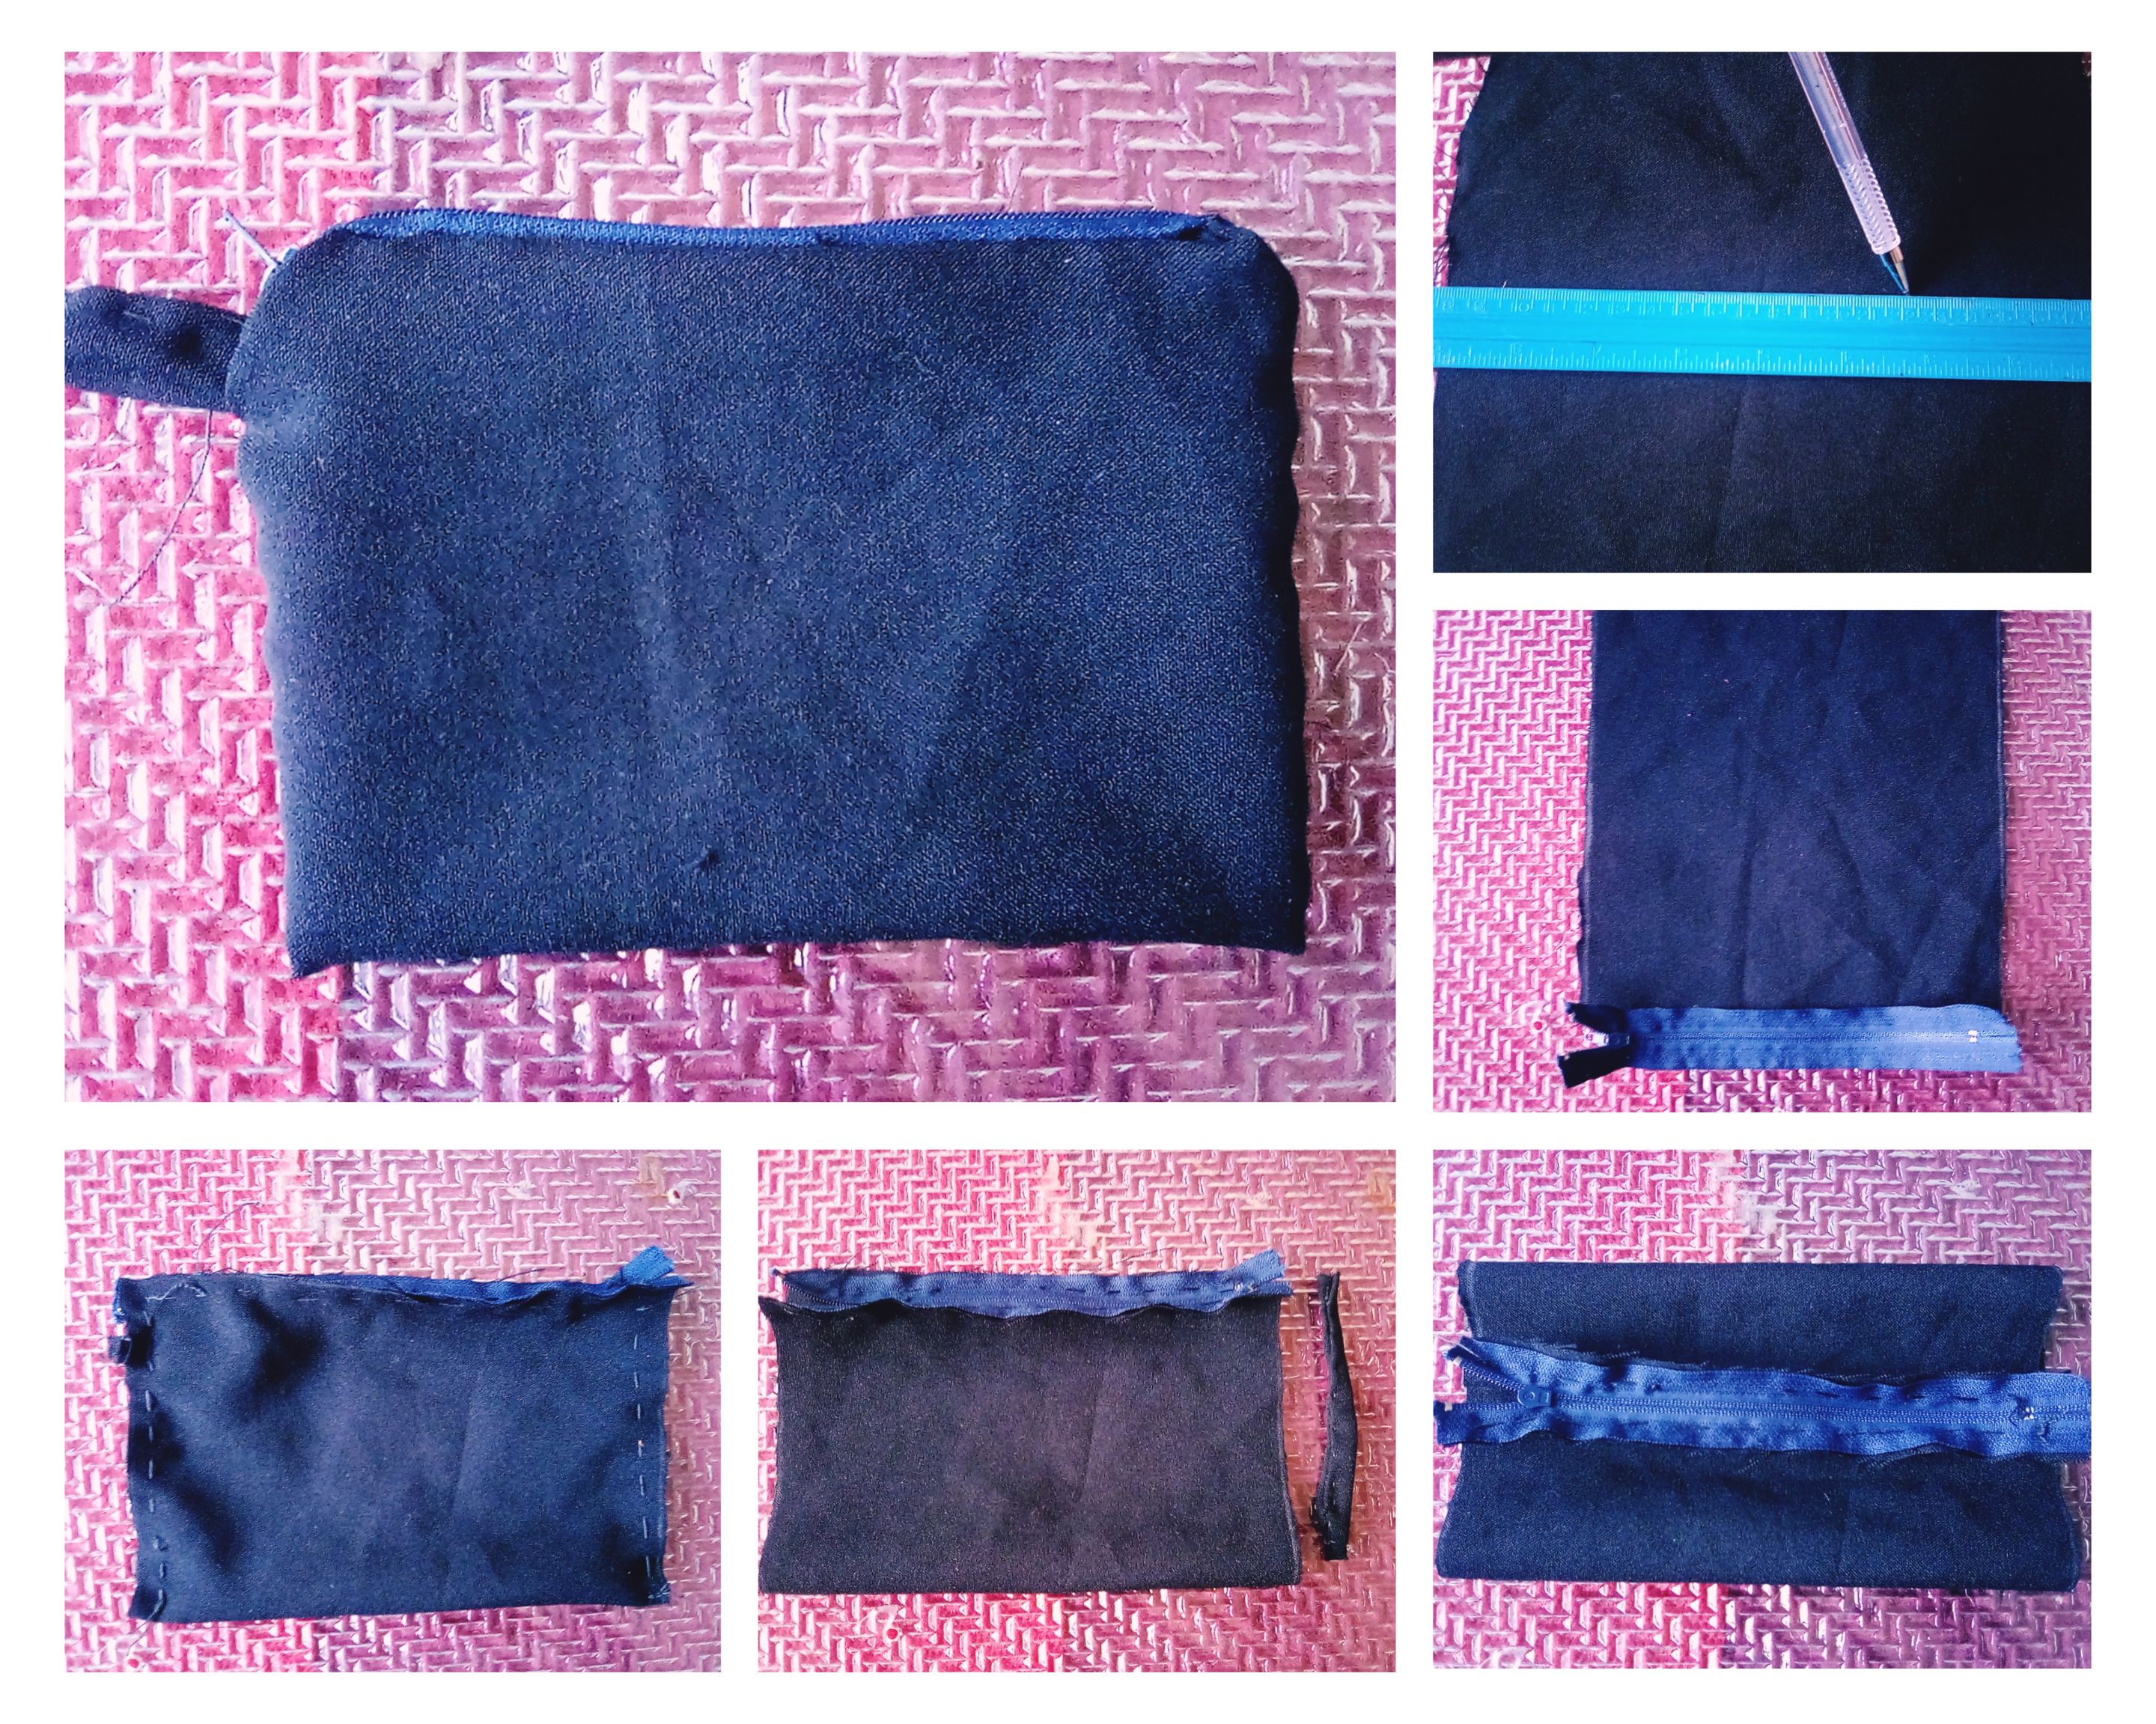
✨Pasos para crear la base de la cartera✨
Comenzamos escogiendo un retazo de tela del color de nuestra preferencia, yo escogí negro, para que el decorado con flores resaltara, ustedes pueden emplear el que deseen.Ya habiéndolo escogido, vamos a marcar con ayuda de una regla y lapicero, un rectángulo de 30 centímetros de largo y 17 centímetros de ancho, estas dimensiones amigos, pueden variarlas en dependencia del uso que le darán a sus carteras. Seguidamente, recortamos por la guia trazada, obteniendo un rectángulo bien conformado, al que doblaremos por su centro, y con ayuda de hilo y aguja, le coseremos el sipers que unificará ambos lados paralelos. Continuamos el proceder cosiendo, cerrando sus laterales abiertos, y agregándole a uno de ellos una pequeña asa de tela, confeccionada previamente, al doblar y coser un pequeño listón de tela.Luego, viramos toda la estructura por la apertura del siper, y nuestra base de cartera, ¡se encuentra lista para decorar!
✨Pasos para realizar las flores tropicales✨
Para realizar estás flores coloridas, vamos a dividir su proceso en: la creación de sus pétalos, creación de sus hojas, creación del centro.
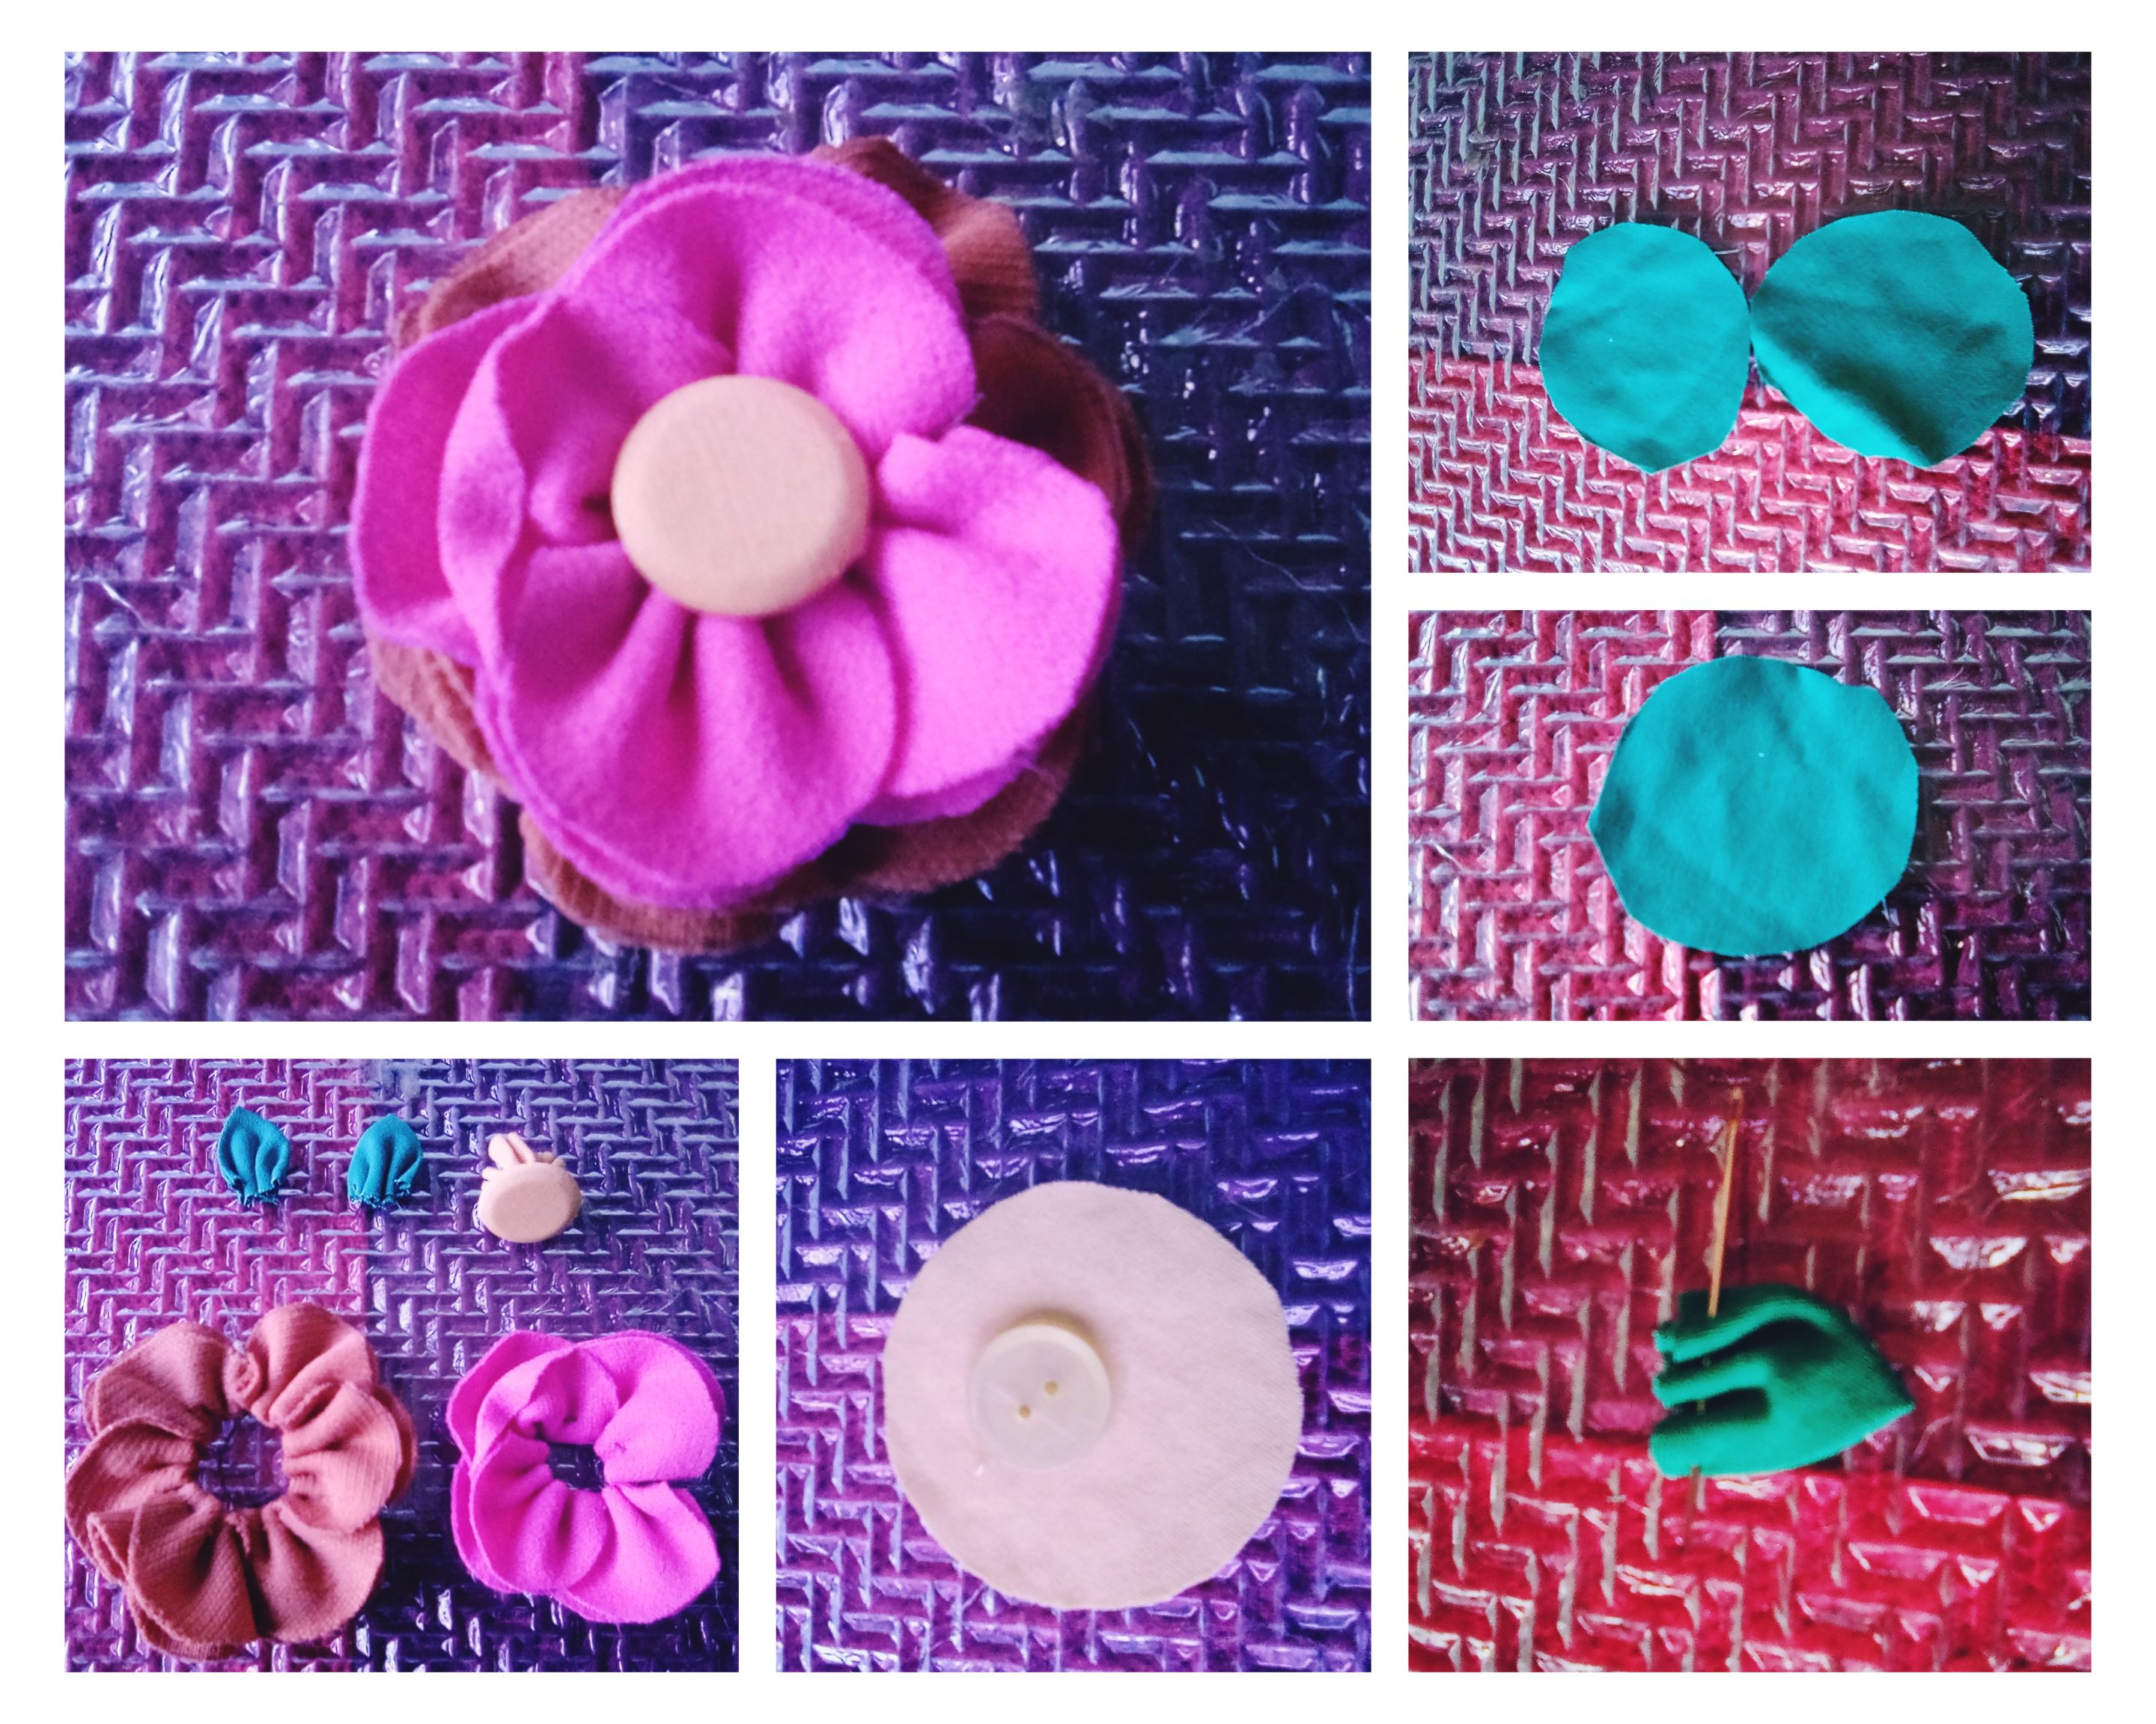
✨Pasos para crear los pétalos
Iniciamos confeccionando una circunferencia guía, de cartón, para trabajar en nuestros retazos escogidos de telas.Ya teniéndola creada, con ayuda de un lapicero, vamos a marcar en las telas, seis circunferencias de tonalidad naranja, cuatro rosadas, dos verdes, una amarilla, y vamos con ayuda de la tijera a cortarlas siguiendo la guía trazada. Habiendo conformado las circunferencias, reservaremos las de color verde, amarillo, mientras que tomaremos las de tonalidad naranja y rosada, y vamos a realizarle el siguiente proceder a cada agrupación: Doblamos cada circunferencia por su centro, y con aguja e hilo vamos a ensamblarlas realizando puntadas.Luego, alamos la hebra de hilo y anudamos, logrando obtener pétalos contínuos bien conformados de tonalidades naranja y rosado.
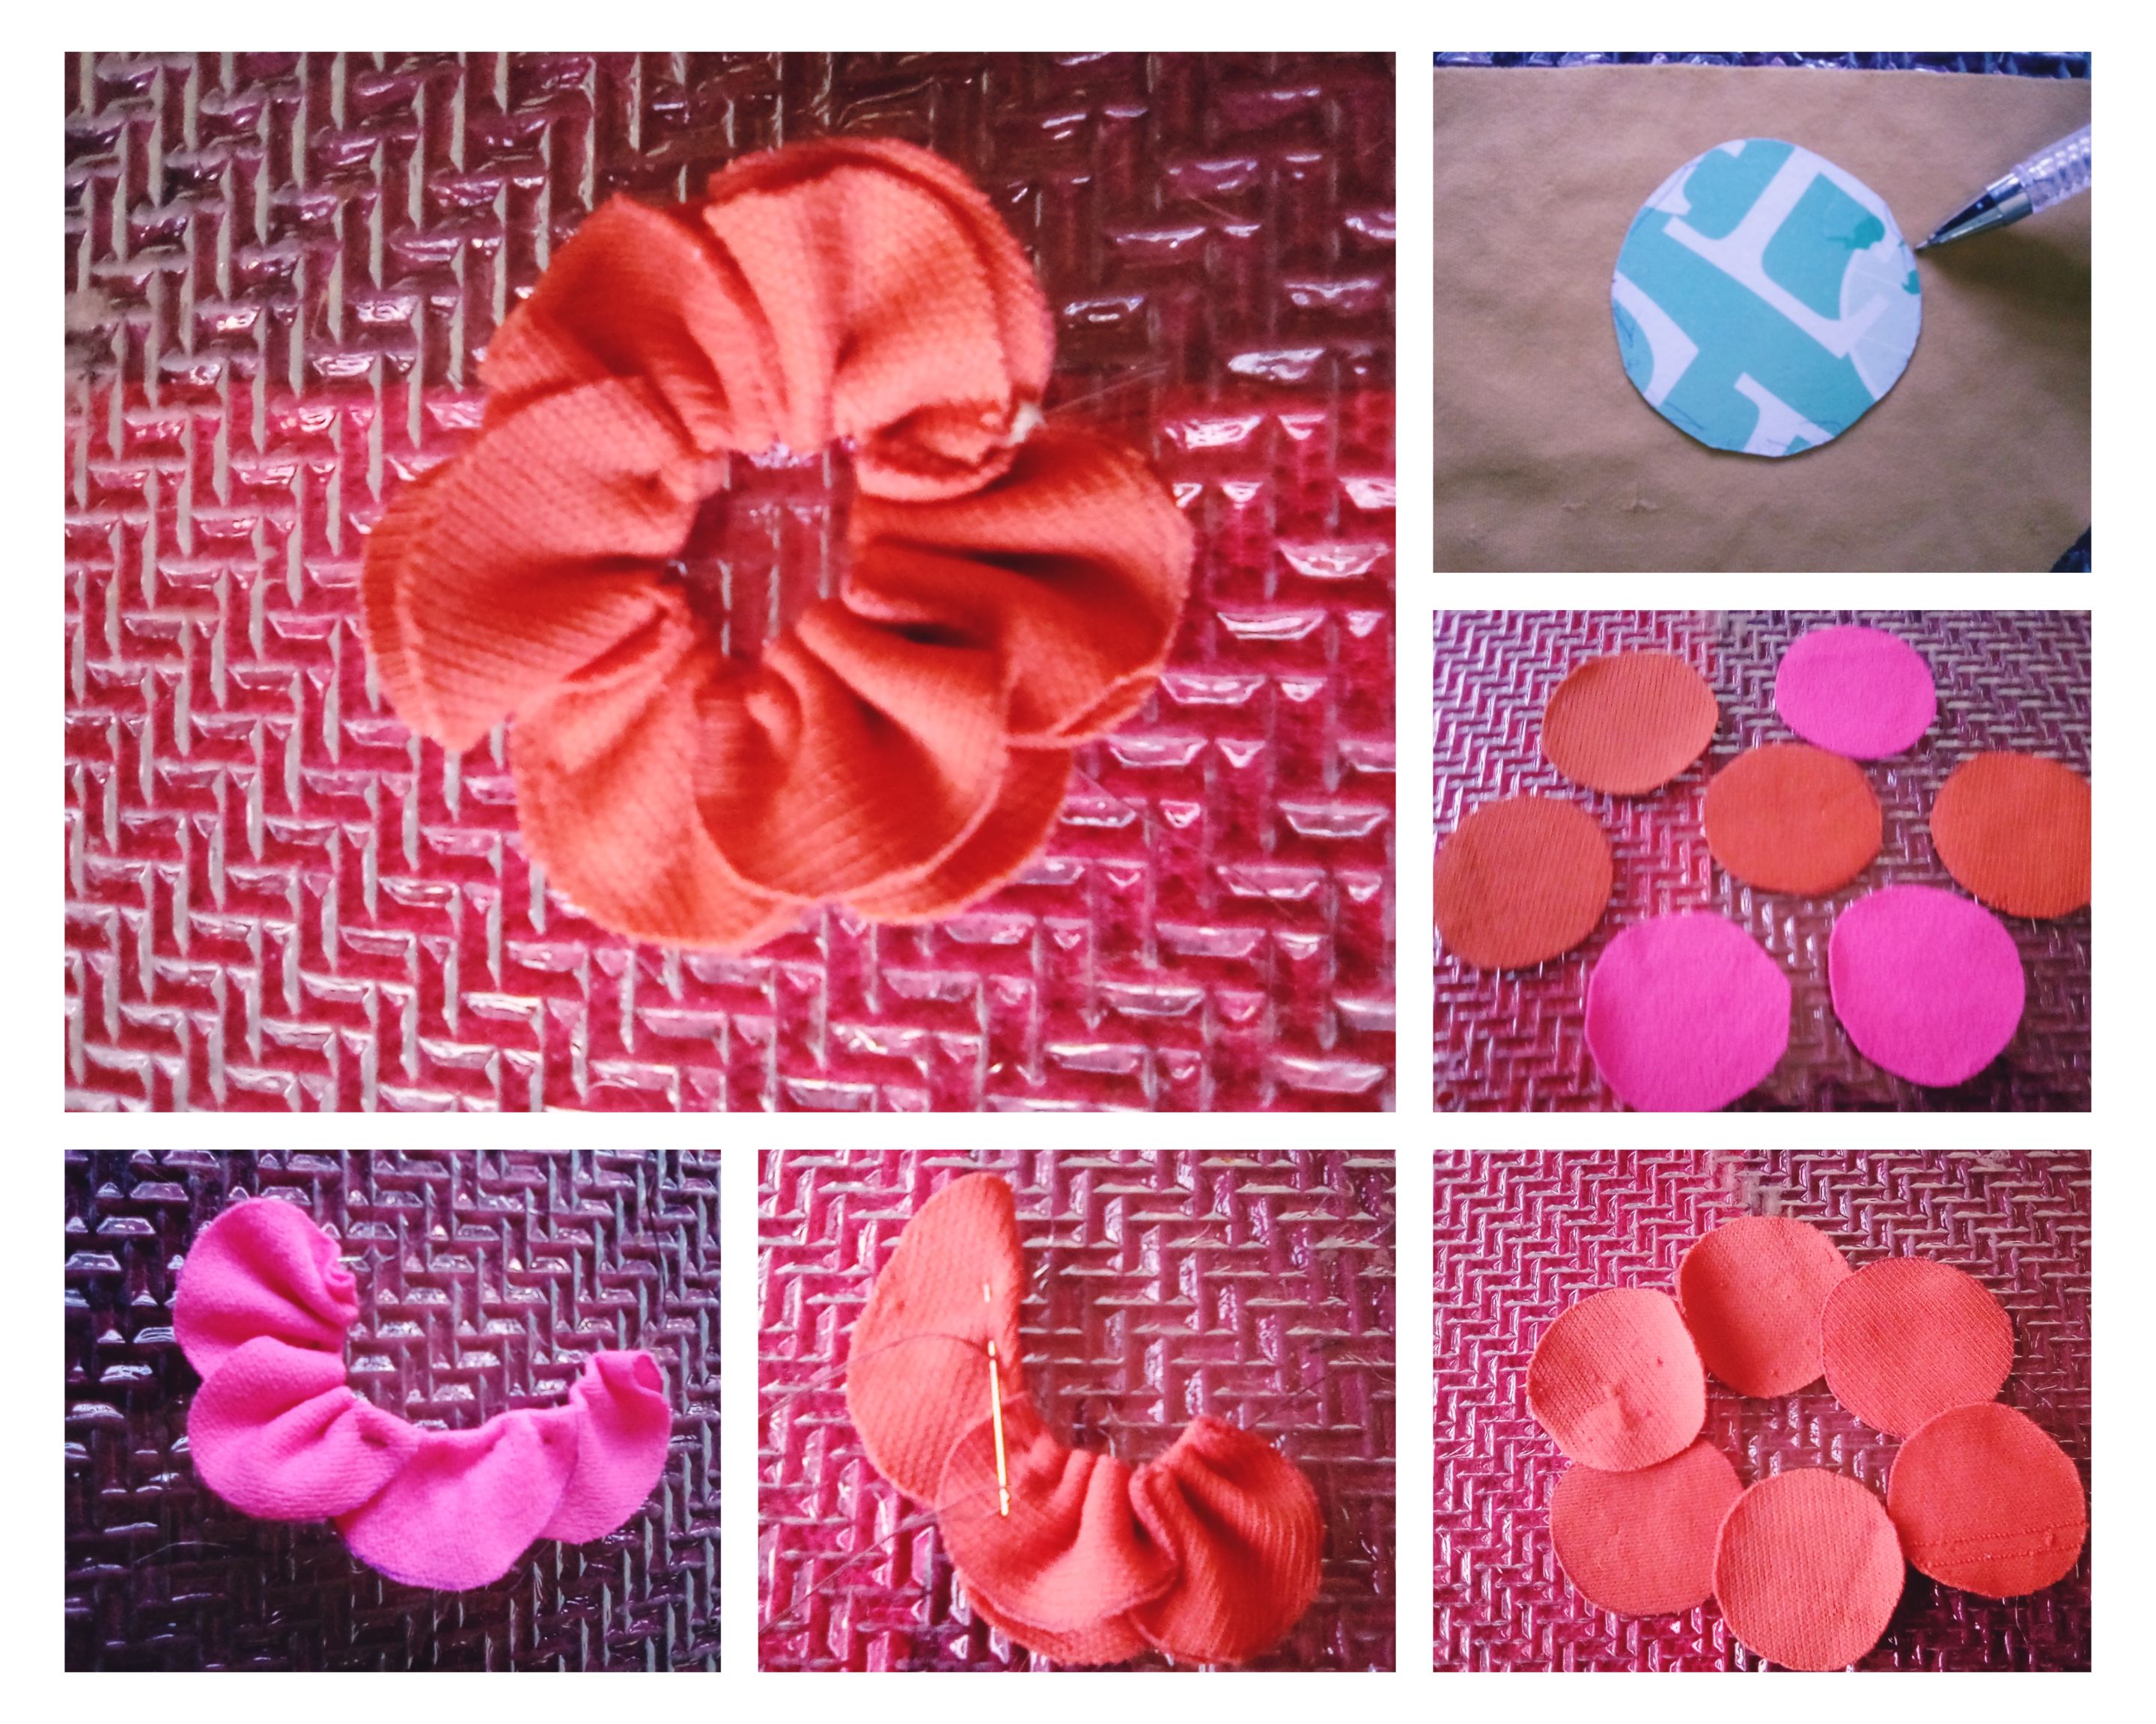
✨Pasos para crear las hojas
Tomaremos las dos circunferencias de tonalidades verdes y en cada una , realizamos el siguiente procedimiento:La doblamos a la mitad creando una semicircunferencia y luego, volveremos a doblarla.Seguidamente , con ayuda de aguja e hilo, vamos a realizar puntadas al lado opuesto del vértice estructurado, alamos la hebra, anudamos, y obtendremos nuestras hojas con pliegues creadas.
✨Pasos para crear el centro
Tomaremos la circunferencia amarilla y pondremos el botón en su centro. Seguidamente, cubrimos el botón con ella, y con ayuda de aguja e hilo, cosemos y anudamos la tela en la cara posterior del botón, manteniendo su cara delantera circular, amarilla, bien lisa.
Ya teniendo confeccionadas las partes de nuestra flor: pétalos, hojas, centro, pasaremos a conformarla con puntadas de hilo y aguja.
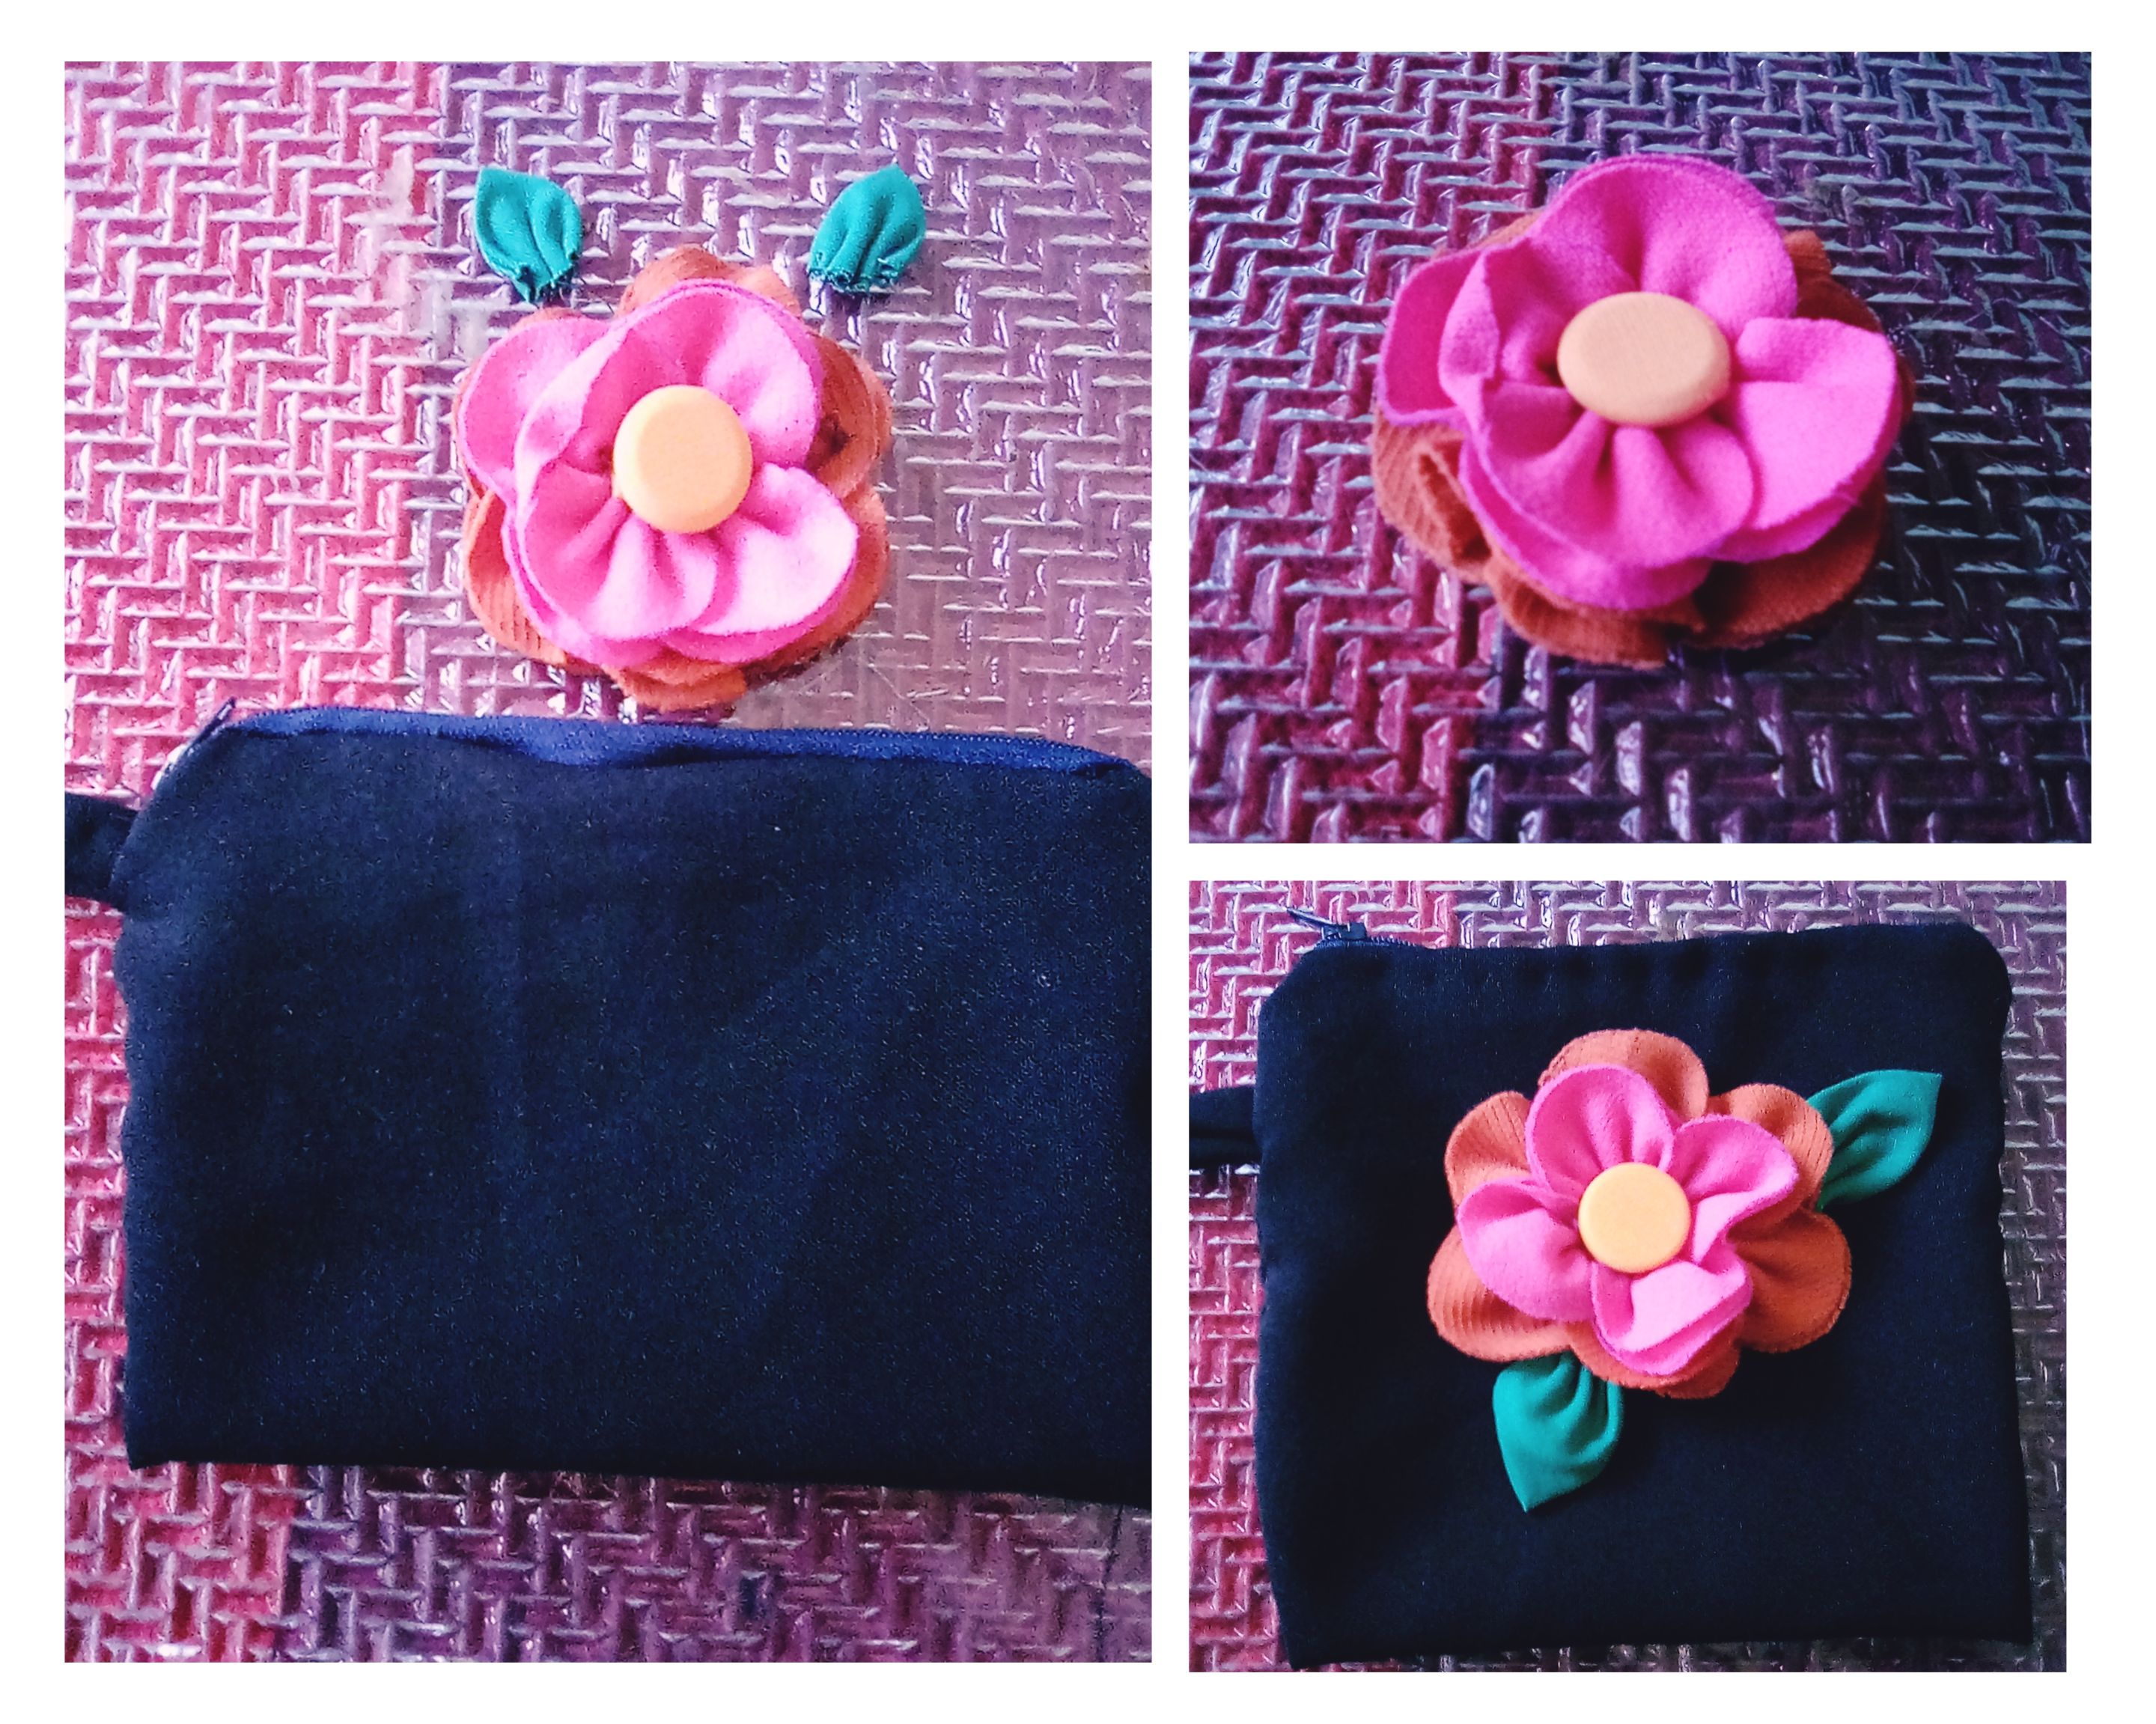
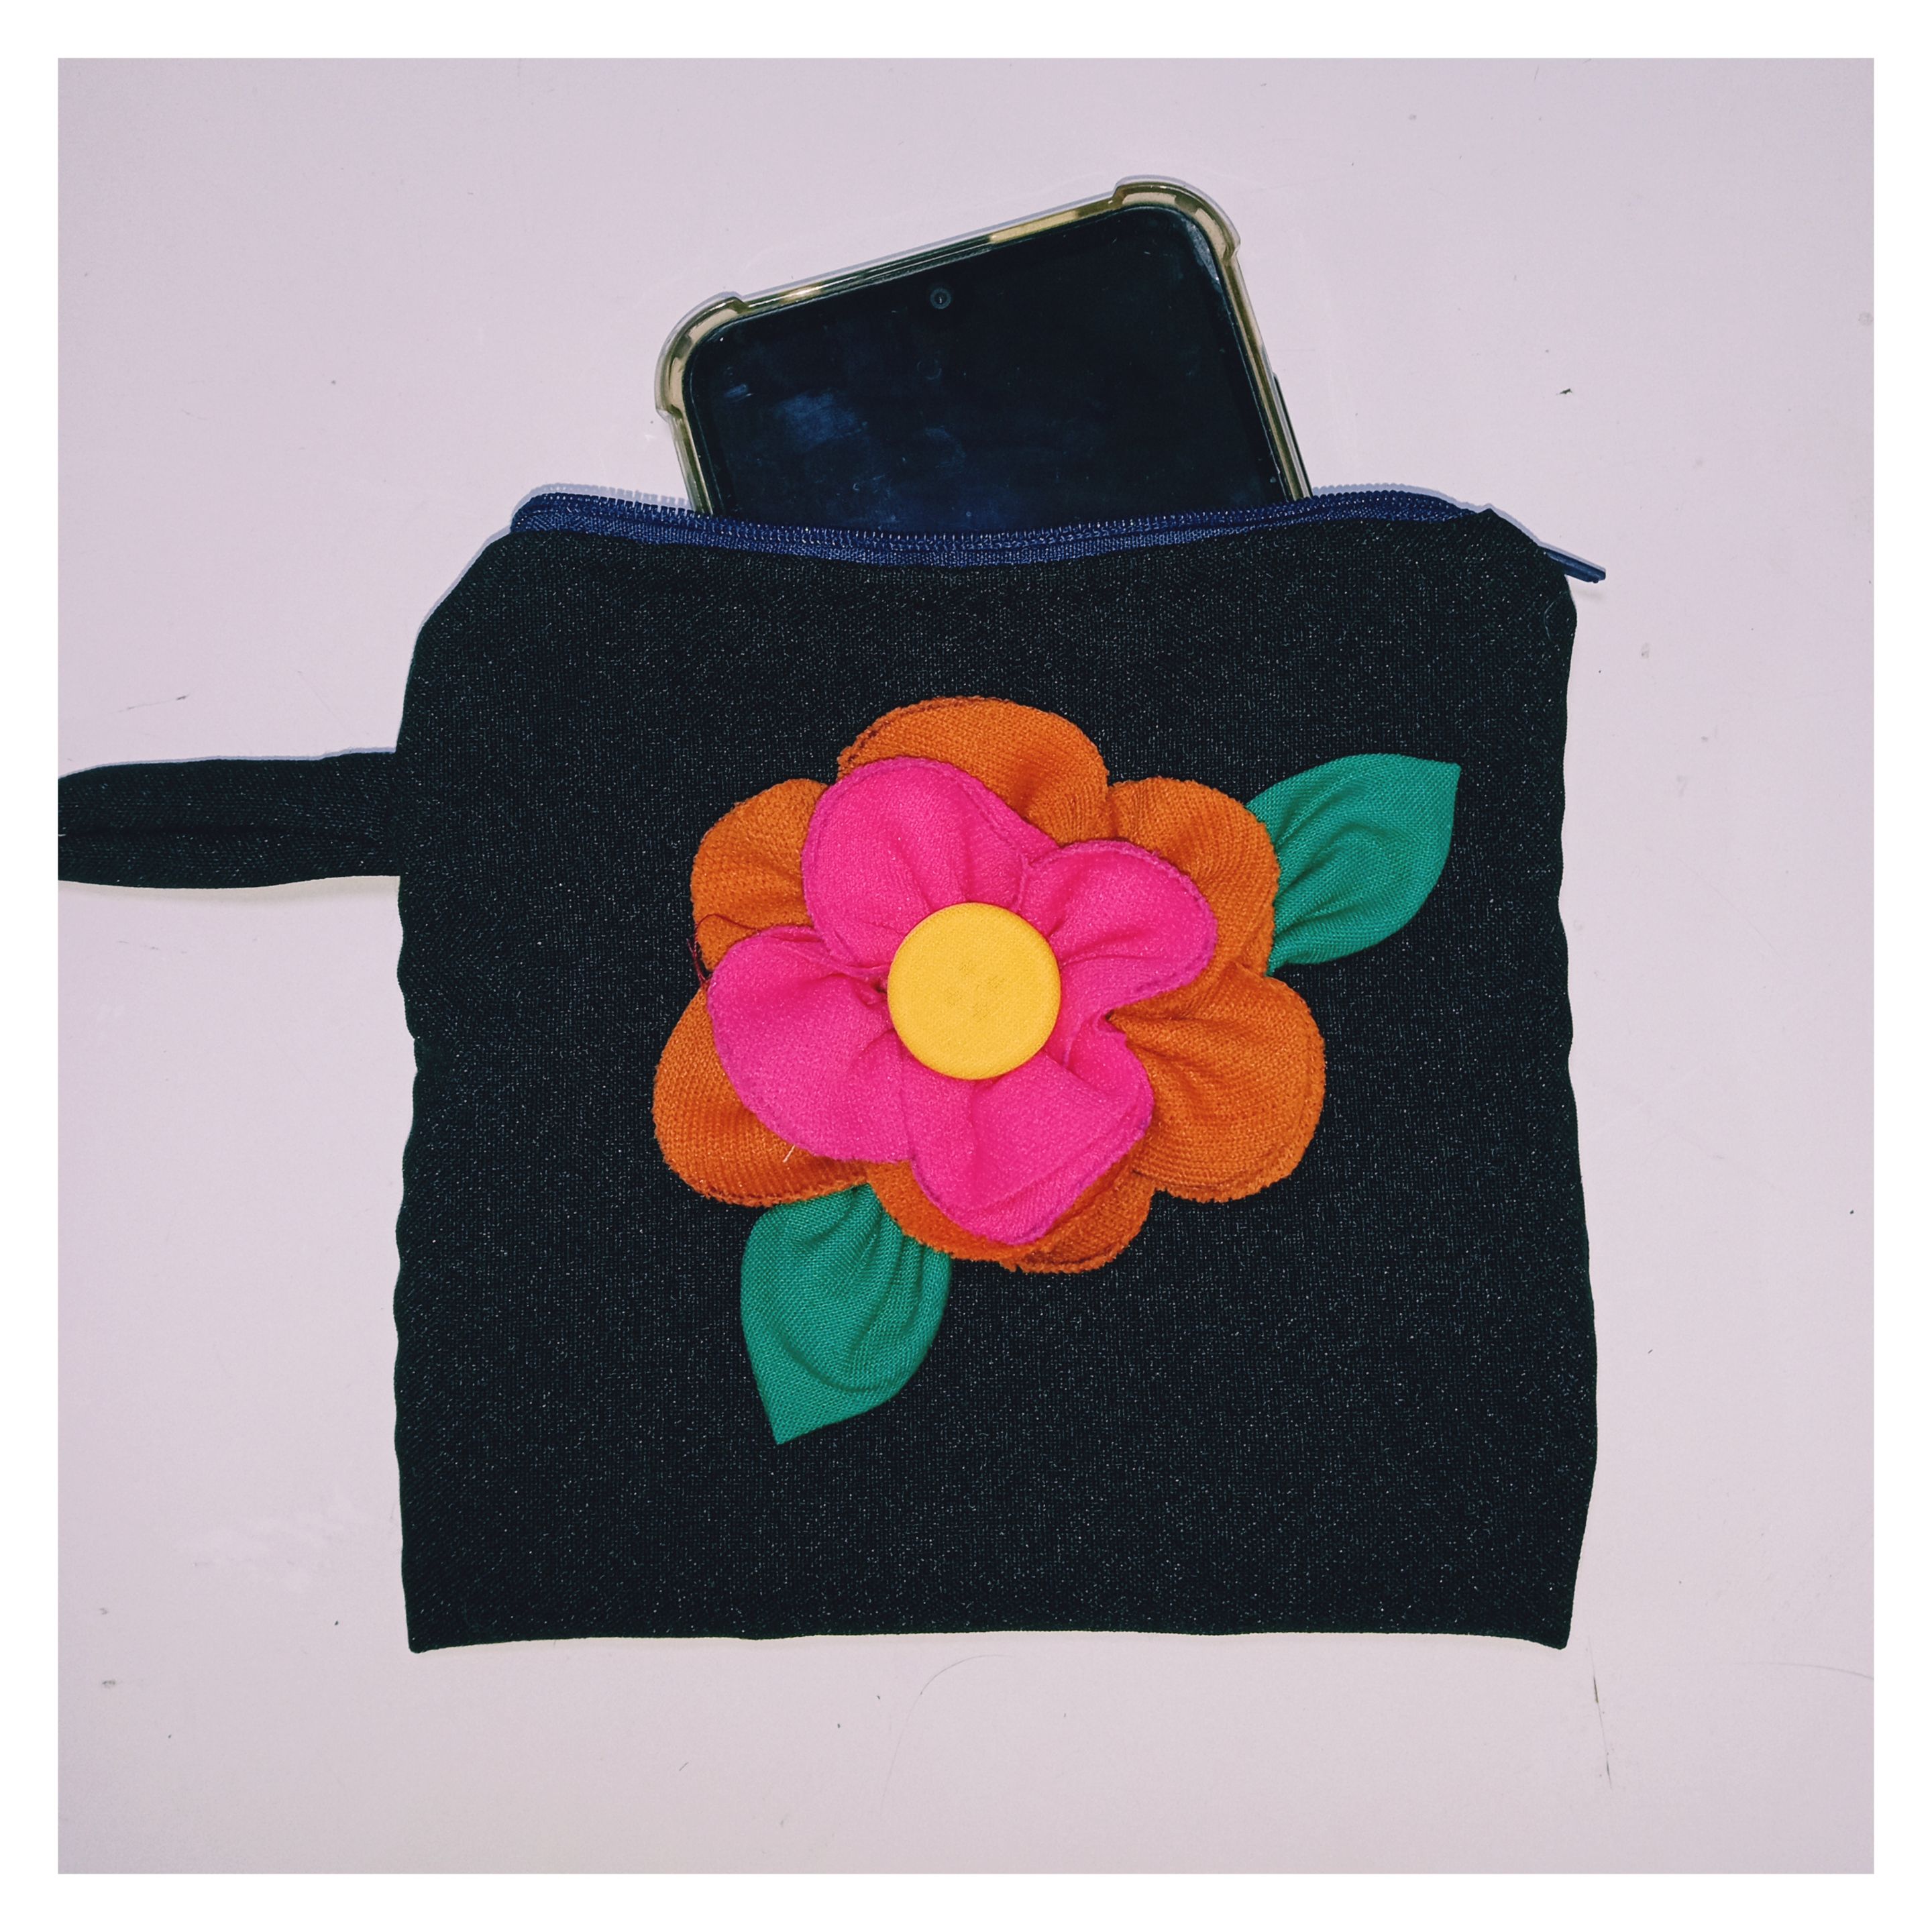
Tanto la base de la cartera como la flor tropical se encuentran creadas, ahora, las unificaremos con aguja e hilo, disponiendo el decorativo floral en la base, según nuestro estilo.
Amigos, disfruté el proceso creativo de estás útiles carteras personalizadas, que me encantaron, por lo bien que protegen y resguardan los diversos accesorios, con un toque floral y tropical. Espero que a ustedes también les hayan gustado, y que se animen aventurarse en el mundo de telas, agujas, costuras, ¡lo amarán!
Vibras positivas para todos.💁🌈 Fotografías propias
English
Greetings friends who love crafts.💁☀️
Excellent, creative week for everyone! Soon, friends, I will be traveling, so these days I have got down to work to make small wallets to carry my personal items such as: makeup, mobile, glasses. Today, I invite you to join me to know through a simple tutorial, how to get these useful personalized wallets with flowers, inspired by the tropical theme.Let's get started!
✨Materials ✨
.Cardboard .Scraps of fabric of various colors .Scissor .Rule .Pen holder .Thread .Needle .Sipers .Button
✨Mode of preparation✨
To make these small portfolios, we are going to divide their procedure into three moments, a first moment where we will make their base, in the form of an envelope, a second moment, where we will create the tropical flowers, and a third, where we will unify both structures to achieve their finished.
✨Steps to create the base of the portfolio✨
We started by choosing a piece of fabric of the color of our preference, I chose black, so that the decorated with flowers would stand out, you can use the one you want.Having already chosen it, we are going to mark with the help of a ruler and a pen, a rectangle 30 centimeters long and 17 centimeters wide, these dimensions, friends, can vary depending on the use they will give to their wallets. Next, we cut along the traced guide, obtaining a well-shaped rectangle, which we will fold through its center, and with the help of thread and needle, we will sew the sipers that will unify both parallel sides. We continue the sewing procedure, closing its open sides, and adding to one of them a small fabric handle, previously made, by folding and sewing a small strip of fabric.Then, we turned the whole structure by the opening of the siper, and our wallet base, is ready to decorate!
✨Steps to make tropical flowers✨
To make these colorful flowers, we are going to divide their process into: the creation of their petals, creation of their leaves, creation of the center.
✨Steps to create the petals
We start by making a guide circle, made of cardboard, to work on our chosen pieces of fabrics.Having already created it, with the help of a pencil, we are going to mark on the fabrics, six circles of orange hue, four pink, two green, one yellow, and we are going with the help of scissors to cut them following the traced guide. Having formed the circles, we will reserve the green, yellow ones, while we will take the orange and pink ones, and we are going to perform the following procedure for each grouping: We fold each circle through its center, and with needle and thread we are going to assemble them by making stitches.Then, we winged the thread strand and knotted, managing to obtain well-shaped continuous petals of orange and pink hues.
✨Steps to create the sheets
We will take the two circles of green shades and in each one, we perform the following procedure: We bend it in half creating a semicircle and then, we will bend it again.Then, with the help of needle and thread, we are going to make stitches to the opposite side of the structured vertex, wing the strand, knot, and we will get our leaves with folds created.
✨Steps to create the center
We will take the yellow circumference and put the button in its center. Next, we cover the button with it, and with the help of needle and thread, we sew and knot the fabric on the back side of the button, keeping its front side circular, yellow, well smooth.
Having already made the parts of our flower: petals, leaves, center, we will go on to shape it with thread and needle stitches.
Both the base of the wallet and the tropical flower are created, now, we will unify them with needle and thread, arranging the floral decorative on the base, according to our style.
Friends, I enjoyed the creative process of these useful personalized wallets, which I loved, because they protect and protect the various accessories, with a floral and tropical touch. I hope you liked them too, and that you are encouraged to venture into the world of fabrics, needles, stitching, you will love it!
Positive vibes for everyone.💁🌈 Own photographs