¡Hola, creativos!
Una vez más yo por aquí compartiendo un poco de colores y más...flores. Porque, sí, apesar de que me prometí que dejaría de hacer patrones de flores para jugar un poco con otras composiciones y formas, realmente no es como si esté logrando cumplir al 100% con este objetivo pero créanme que he hecho mi mayor esfuerzo. El punto importante aquí es que logré documentar parte del proceso esta vez y, realmente, me alegra porque el patrón una vez finalizado luce complicado pero la verdad es que es muy sencillo realizarlo.
**Hello, creatives!**
>Once again, I'm here sharing a little color and more...flowers. Because, yes, even though I promised myself I would stop making flower patterns to play around with other compositions and shapes, it's not really as if I'm managing to achieve this goal 100%, but believe me, I've done my best. The important thing here is that I managed to document part of the process this time, and I'm really happy about that because the pattern looks complicated once it's finished, but the truth is that it's very easy to make.

#### PASO A PASO
###### STEP BY STEP

#### FINALMENTE...
###### FINALLY...
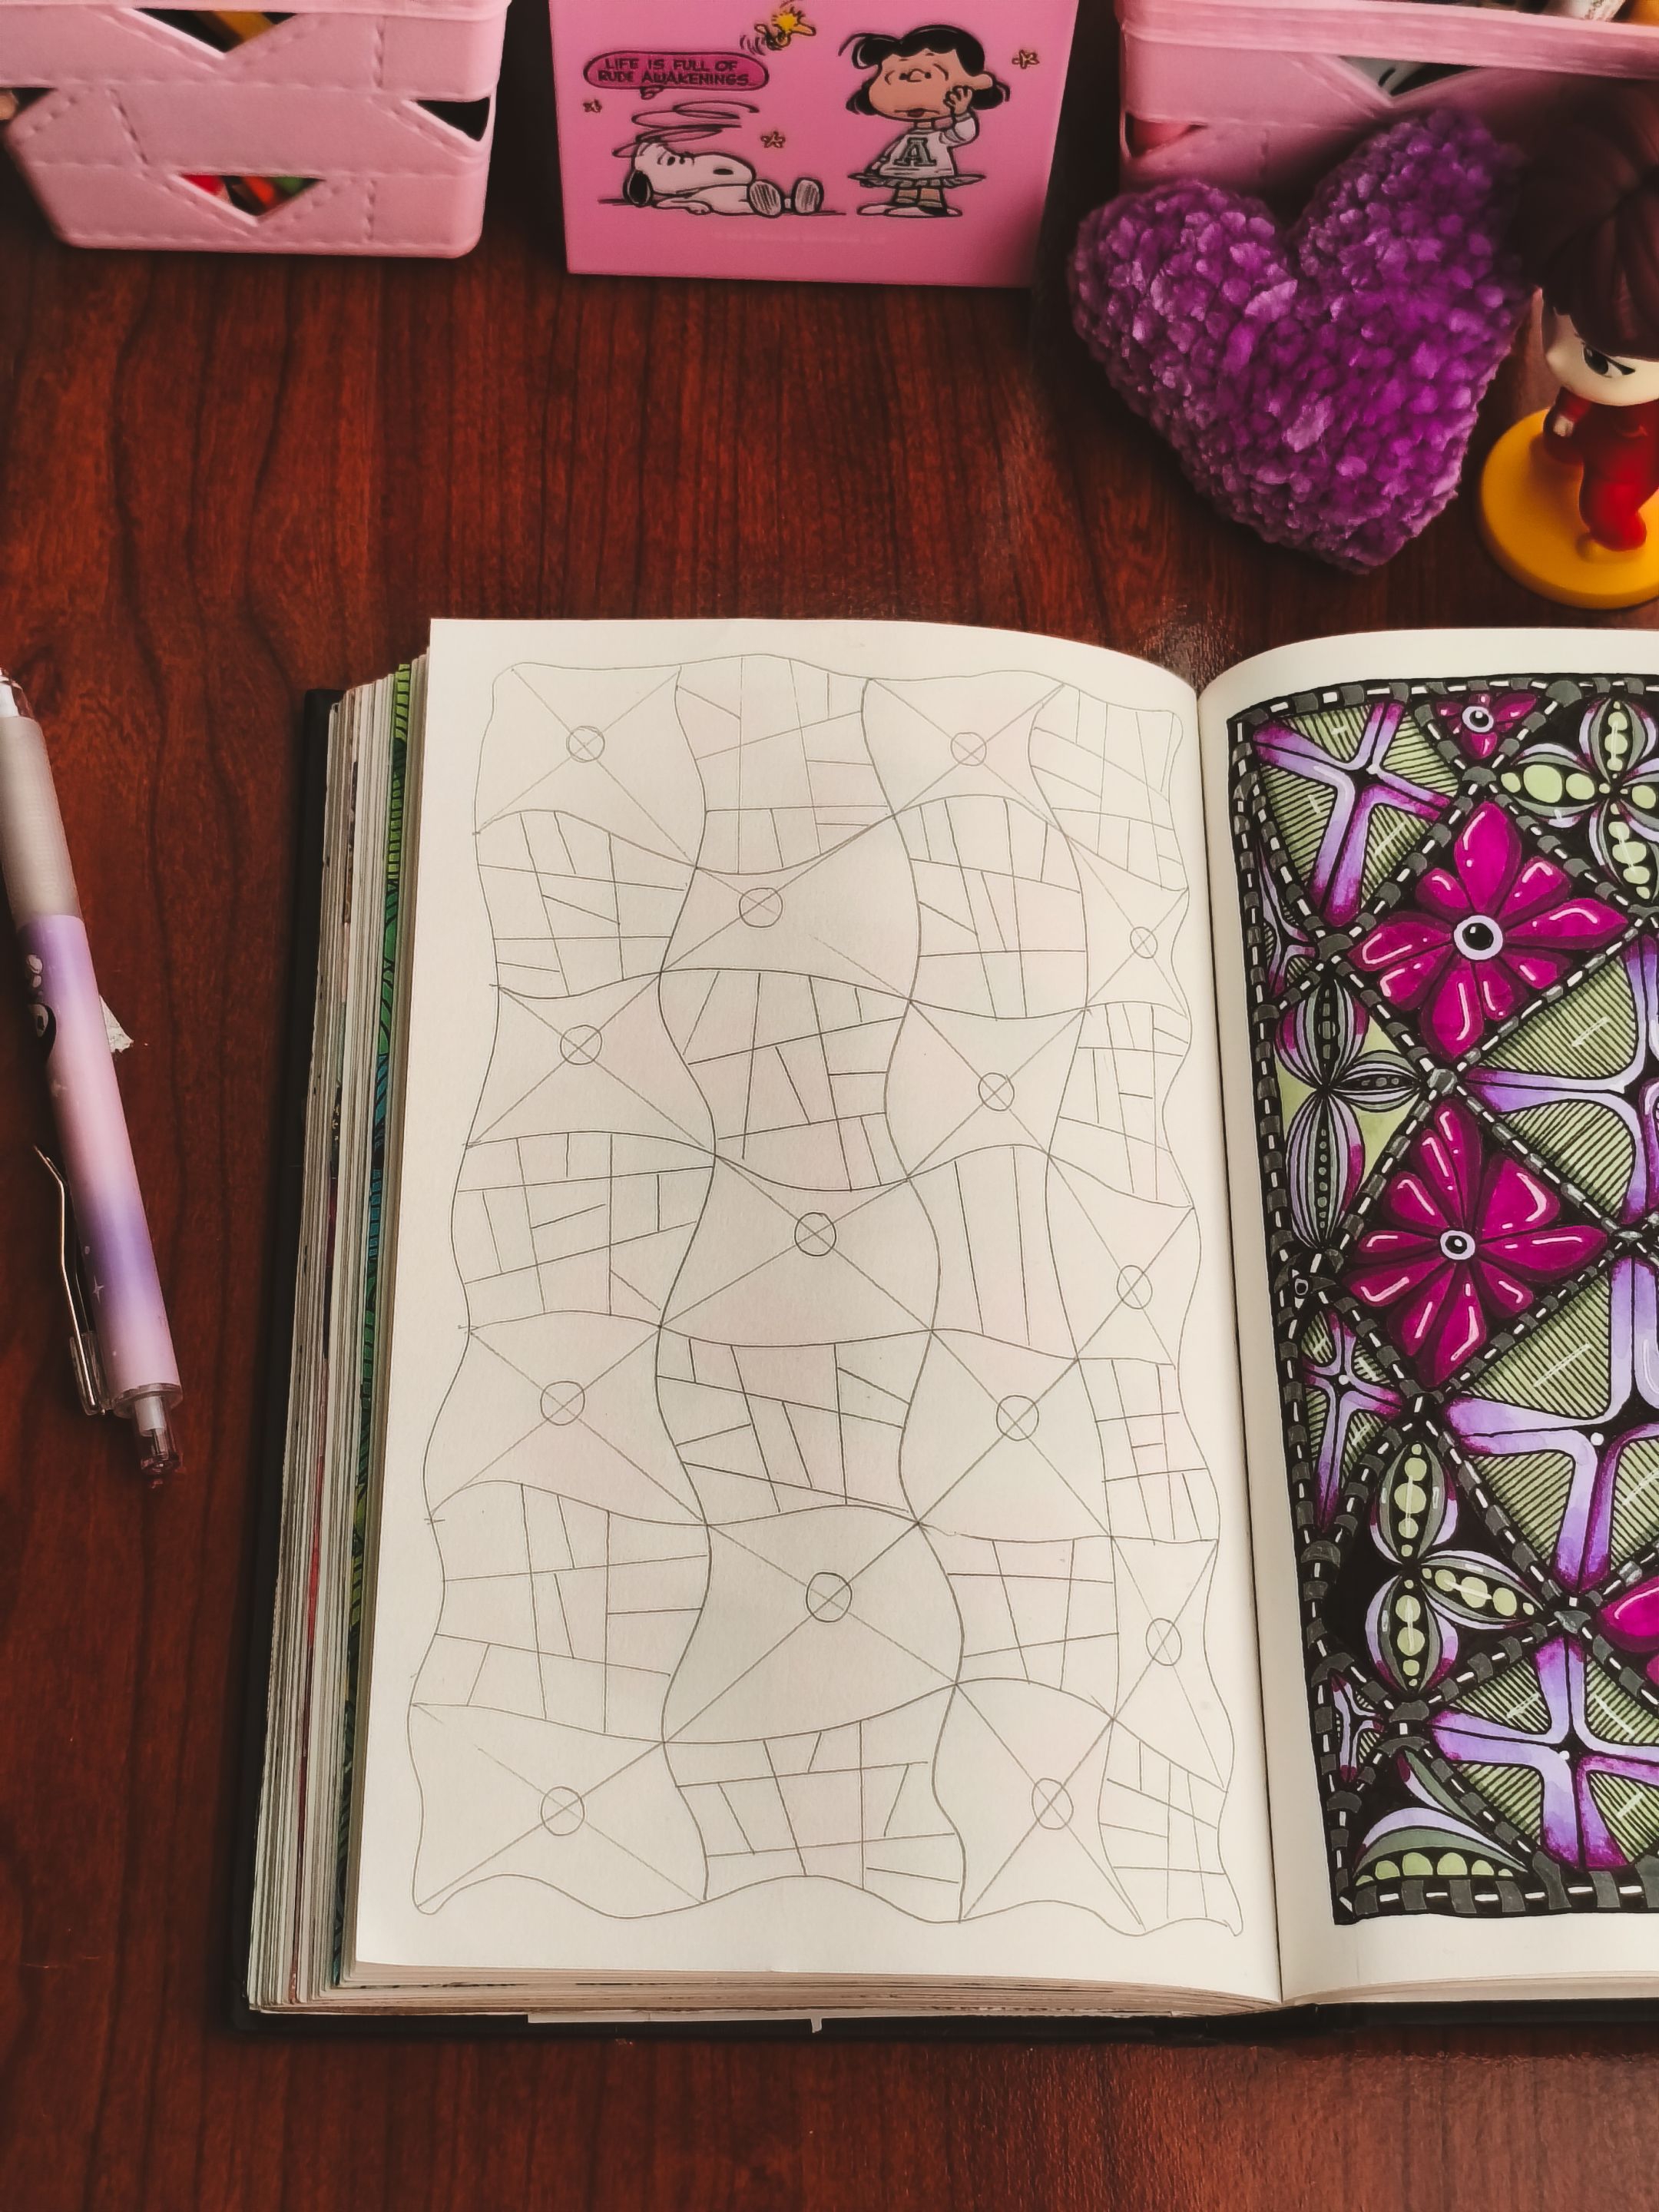
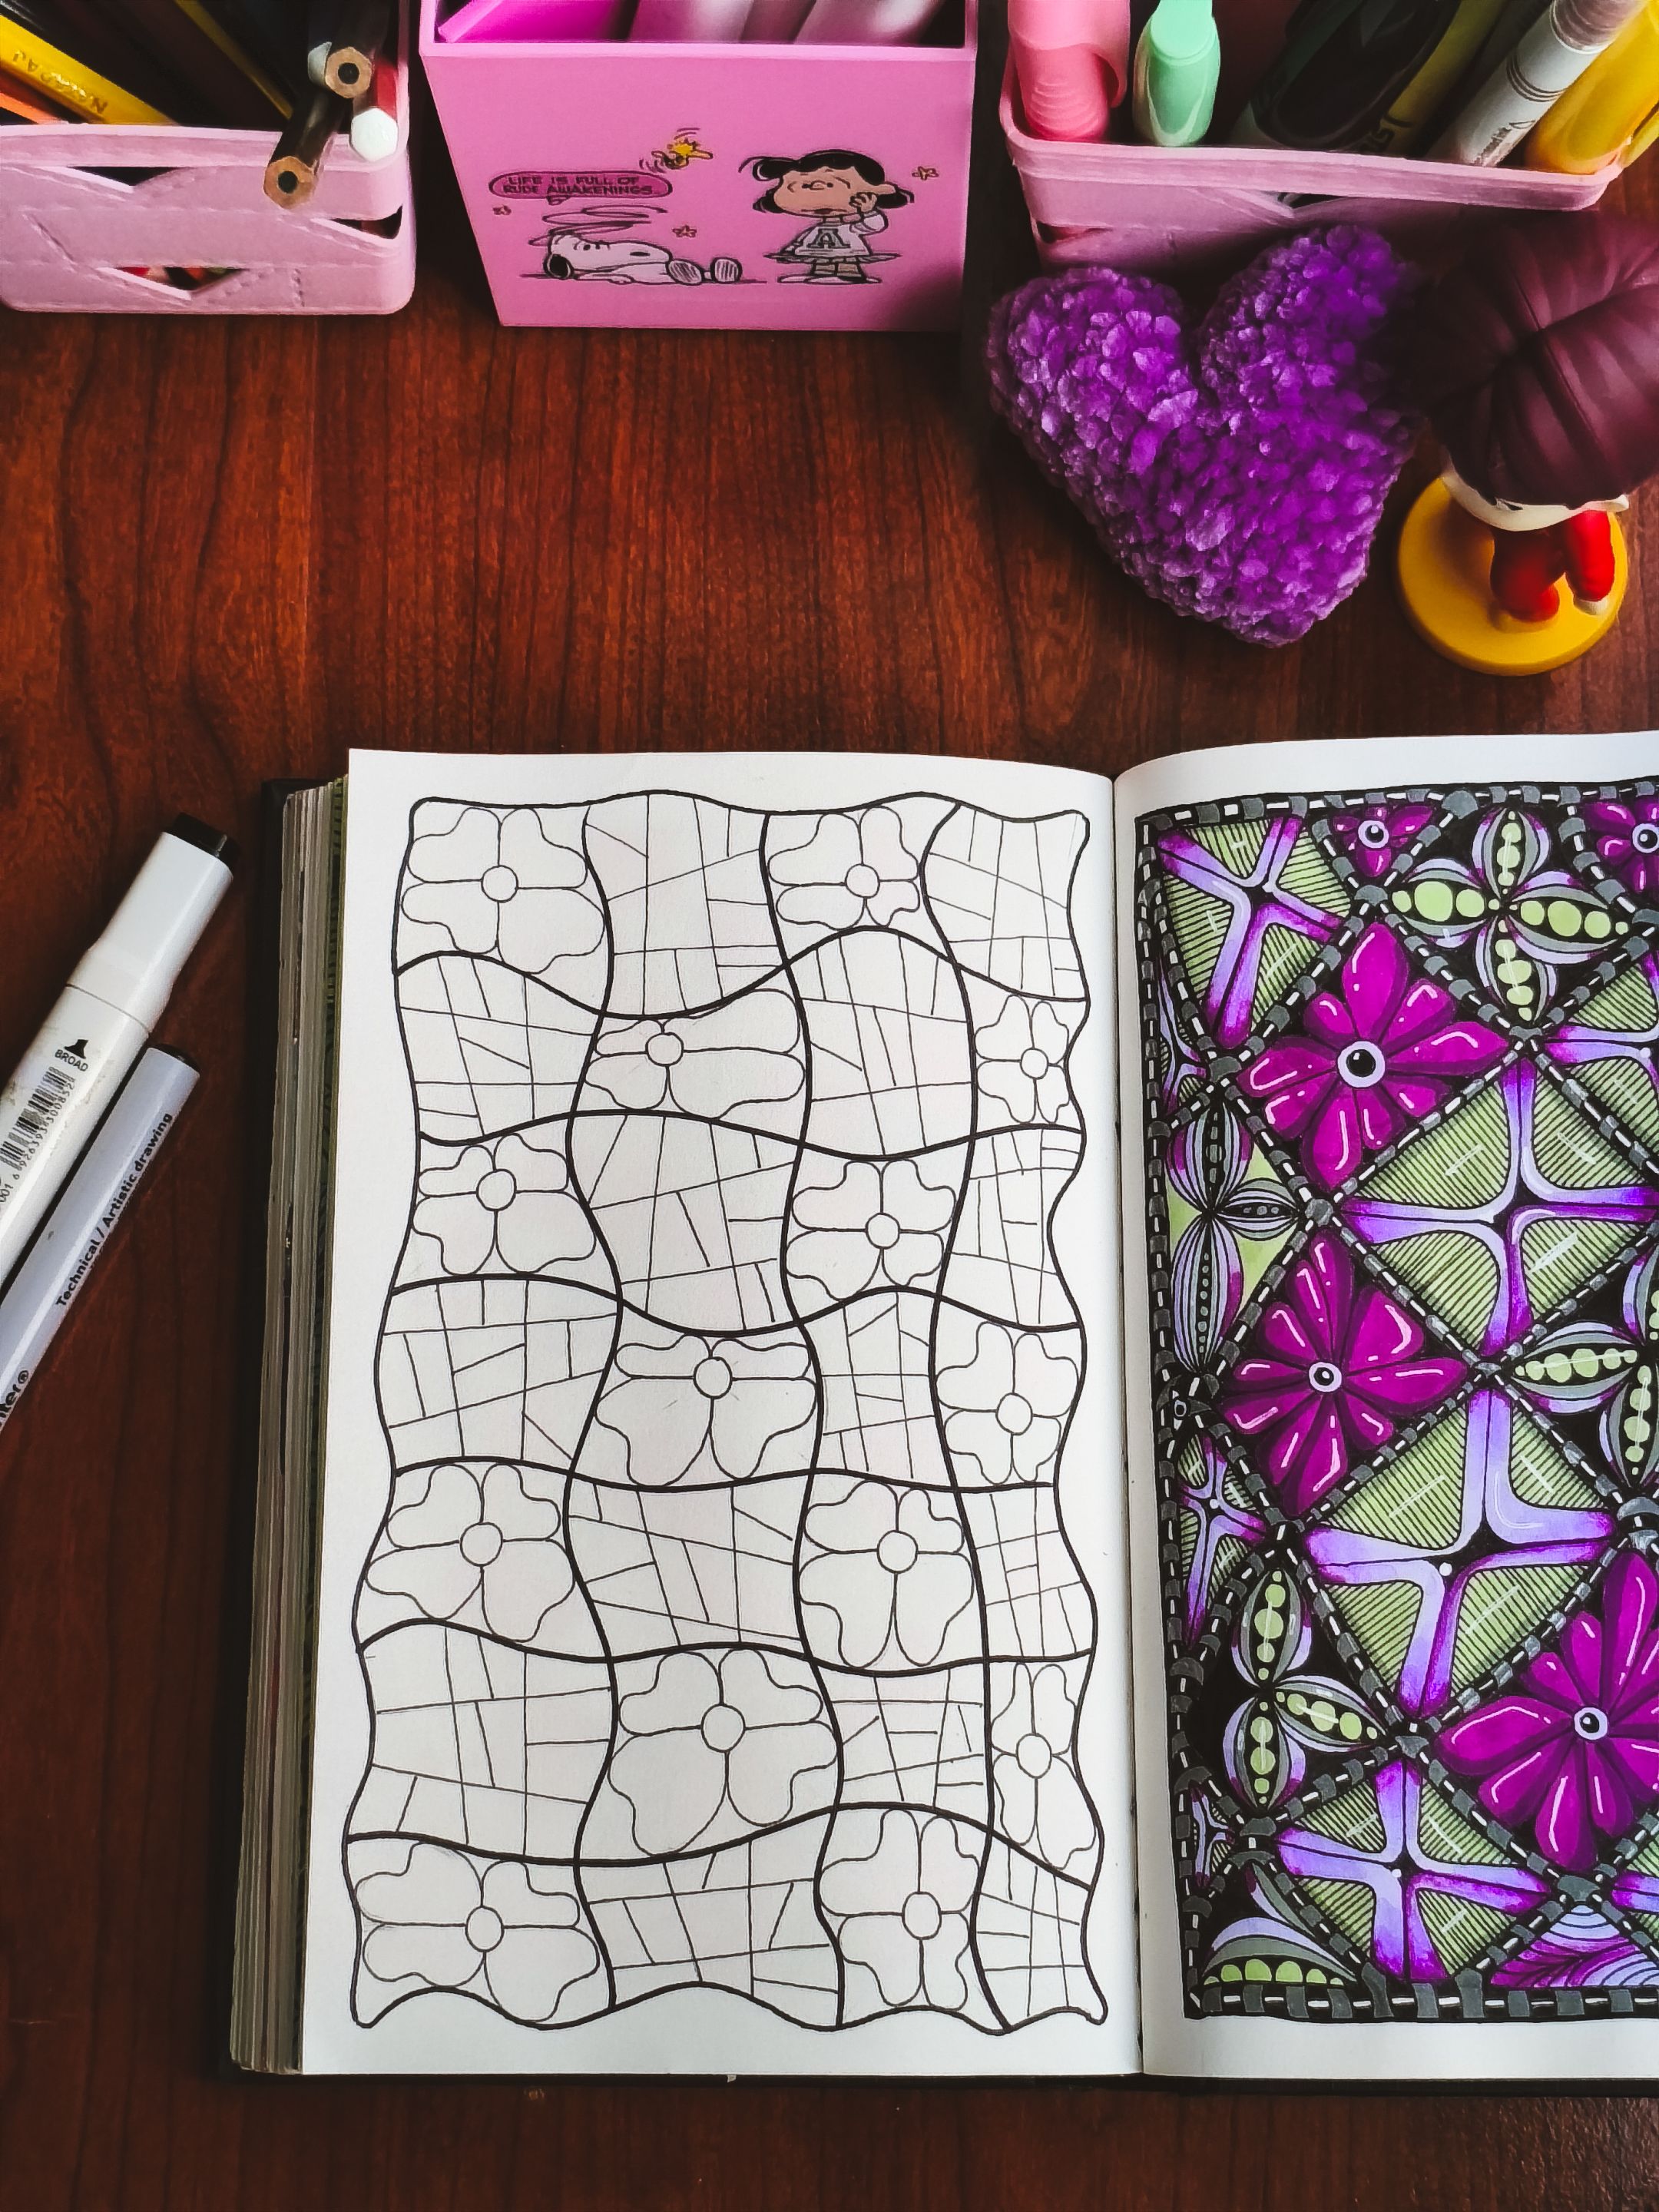
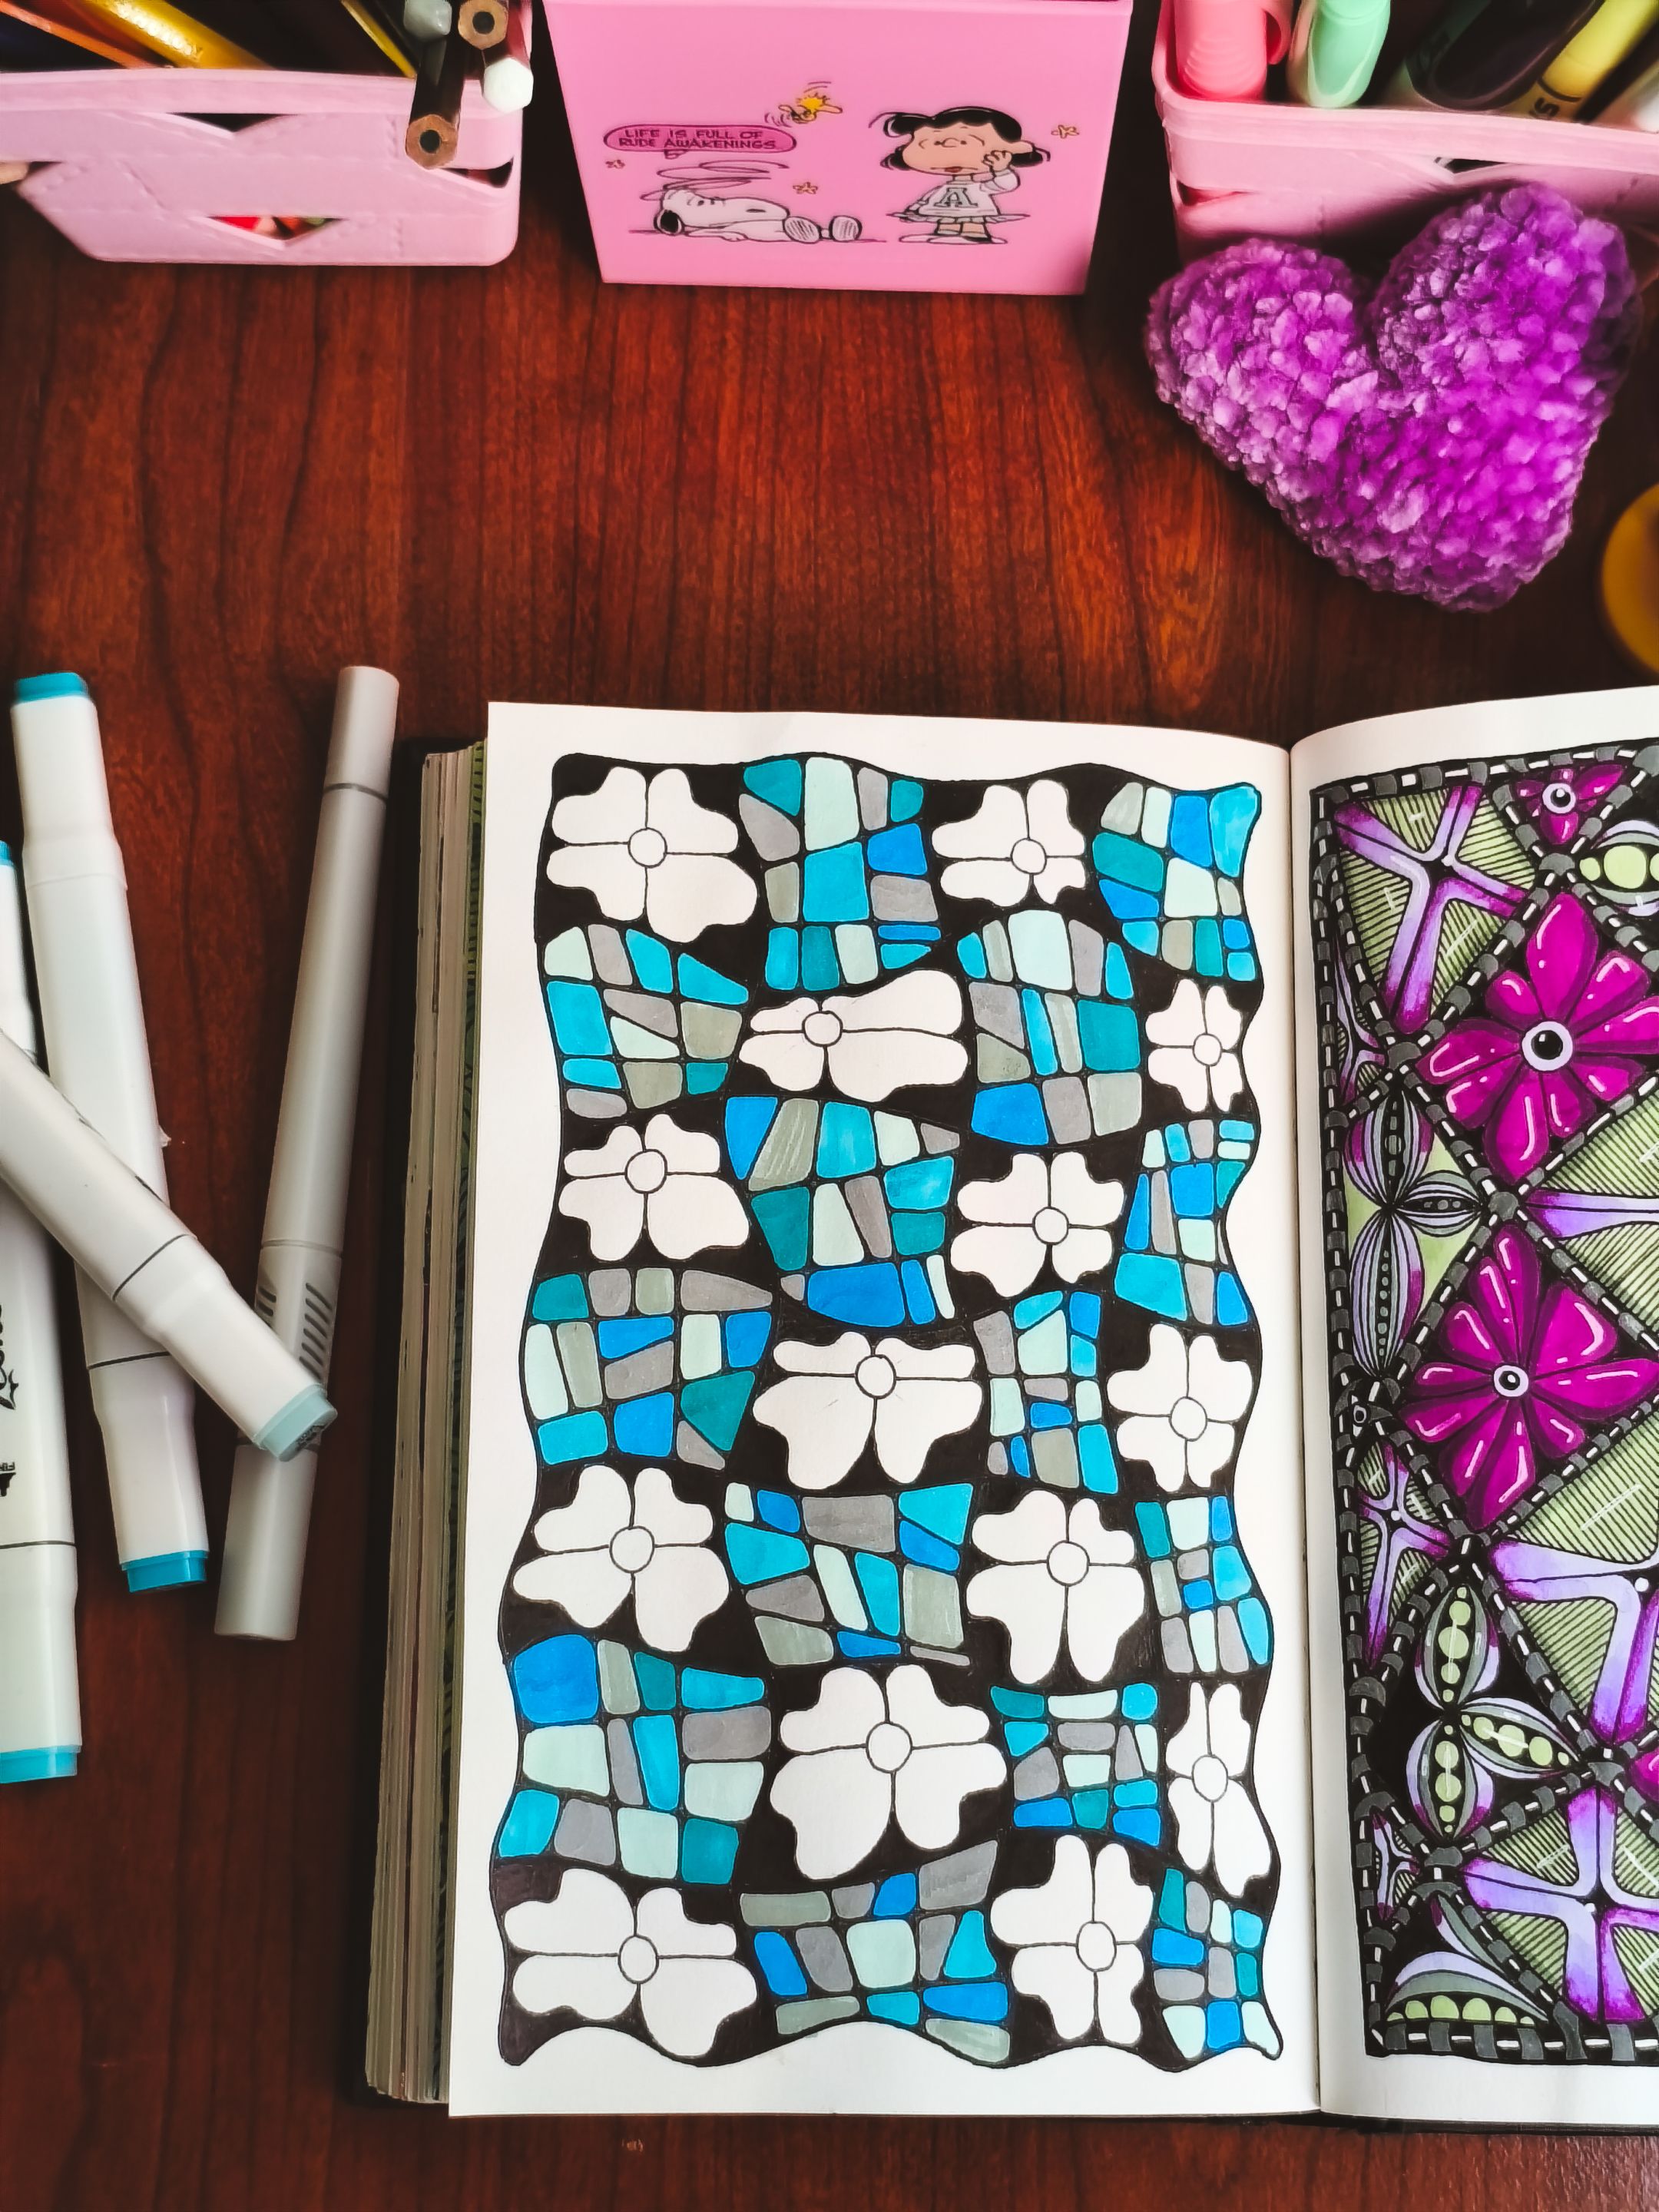
Comencé haciendo las líneas guías a lápiz. La intención es hacer cuadrados pero con líneas onduladas y en el interior de cada uno iremos alternando. En uno de los cuadrados trazaremos un pequeño círculo en el centro y luego líneas rectas que esquina a esquina, atravesando el círculo. En el otro cuadro haremos líneas como para hacer una especie de mosaicos.
Las líneas guías que contienen al cuadrado con el círculo nos servirán para hacer una especie de pétalos de flores y una vez que tengamos todas estas formas, resaltaremos con marcador negro. Yo usé uno más grueso para remarcar las líneas onduladas de los bordes y uno más fino para las líneas internas.
>I started by drawing the guide lines in pencil. The idea is to make squares with wavy lines, and we will alternate inside each one. In one of the squares, we will draw a small circle in the center and then straight lines from corner to corner, crossing the circle. In the other square, we will draw lines to make a kind of mosaic.
>The guide lines that contain the square with the circle will be used to make a kind of flower petals, and once we have all these shapes, we will highlight them with a black marker. I used a thicker one to highlight the wavy lines on the edges and a thinner one for the internal lines.
---
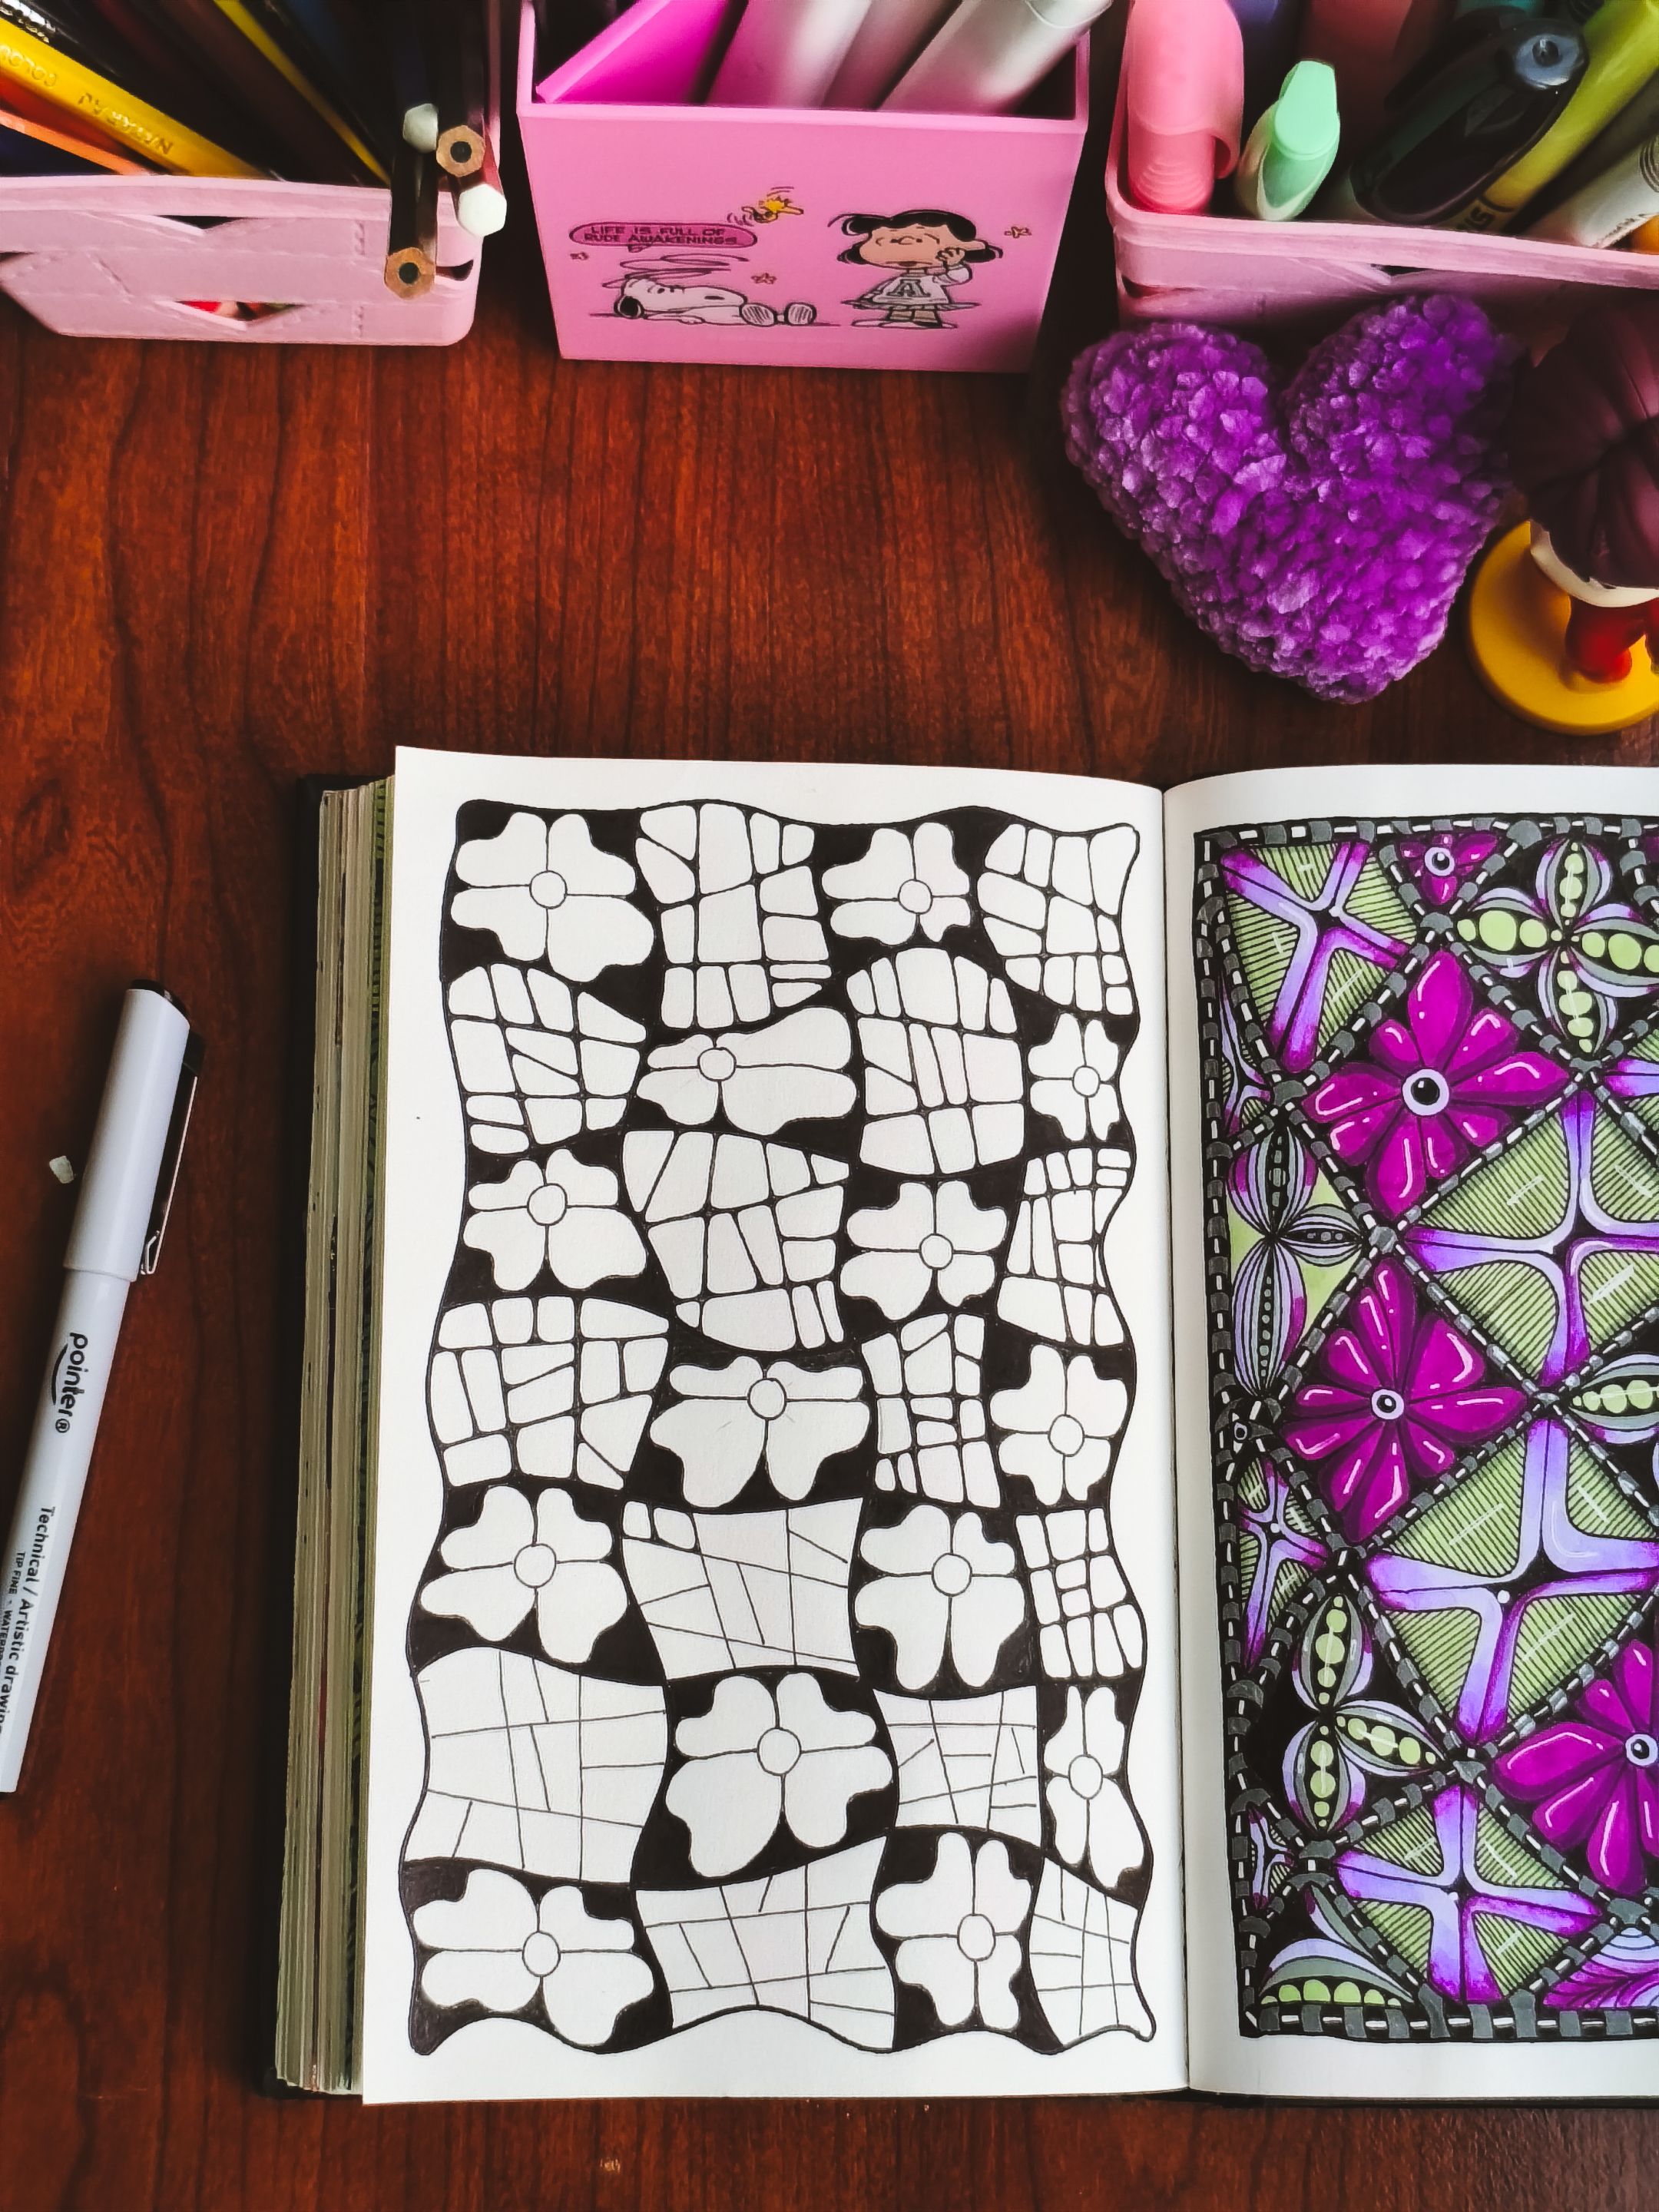
Ahora, poco a poco, vamos dando color. El fondo de los cuadrados que contienen las flores los pintaremos de negro mientras que la punta de los mosaicos los redondearemos un poco. Para elegir los colores que uso en cada composición, por lo general, me baso en el _círculo cromático y los colores complementarios_ pues esto a nivel visual genera un mejor contraste. Para este patrón elegí naranja y algunas tonalidades de azul que tenía disponible, pero esto es sólo una idea porque realmente cada quien puede darle su toque particular.
>Now, little by little, we're adding color. We'll paint the background of the squares containing the flowers black, while rounding off the corners of the mosaics a little. To choose the colors I use in each composition, I usually base my choices on the color wheel and complementary colors, as this creates better visual contrast. For this pattern, I chose orange and some shades of blue that I had available, but this is just an idea because everyone can really add their own special touch.
---
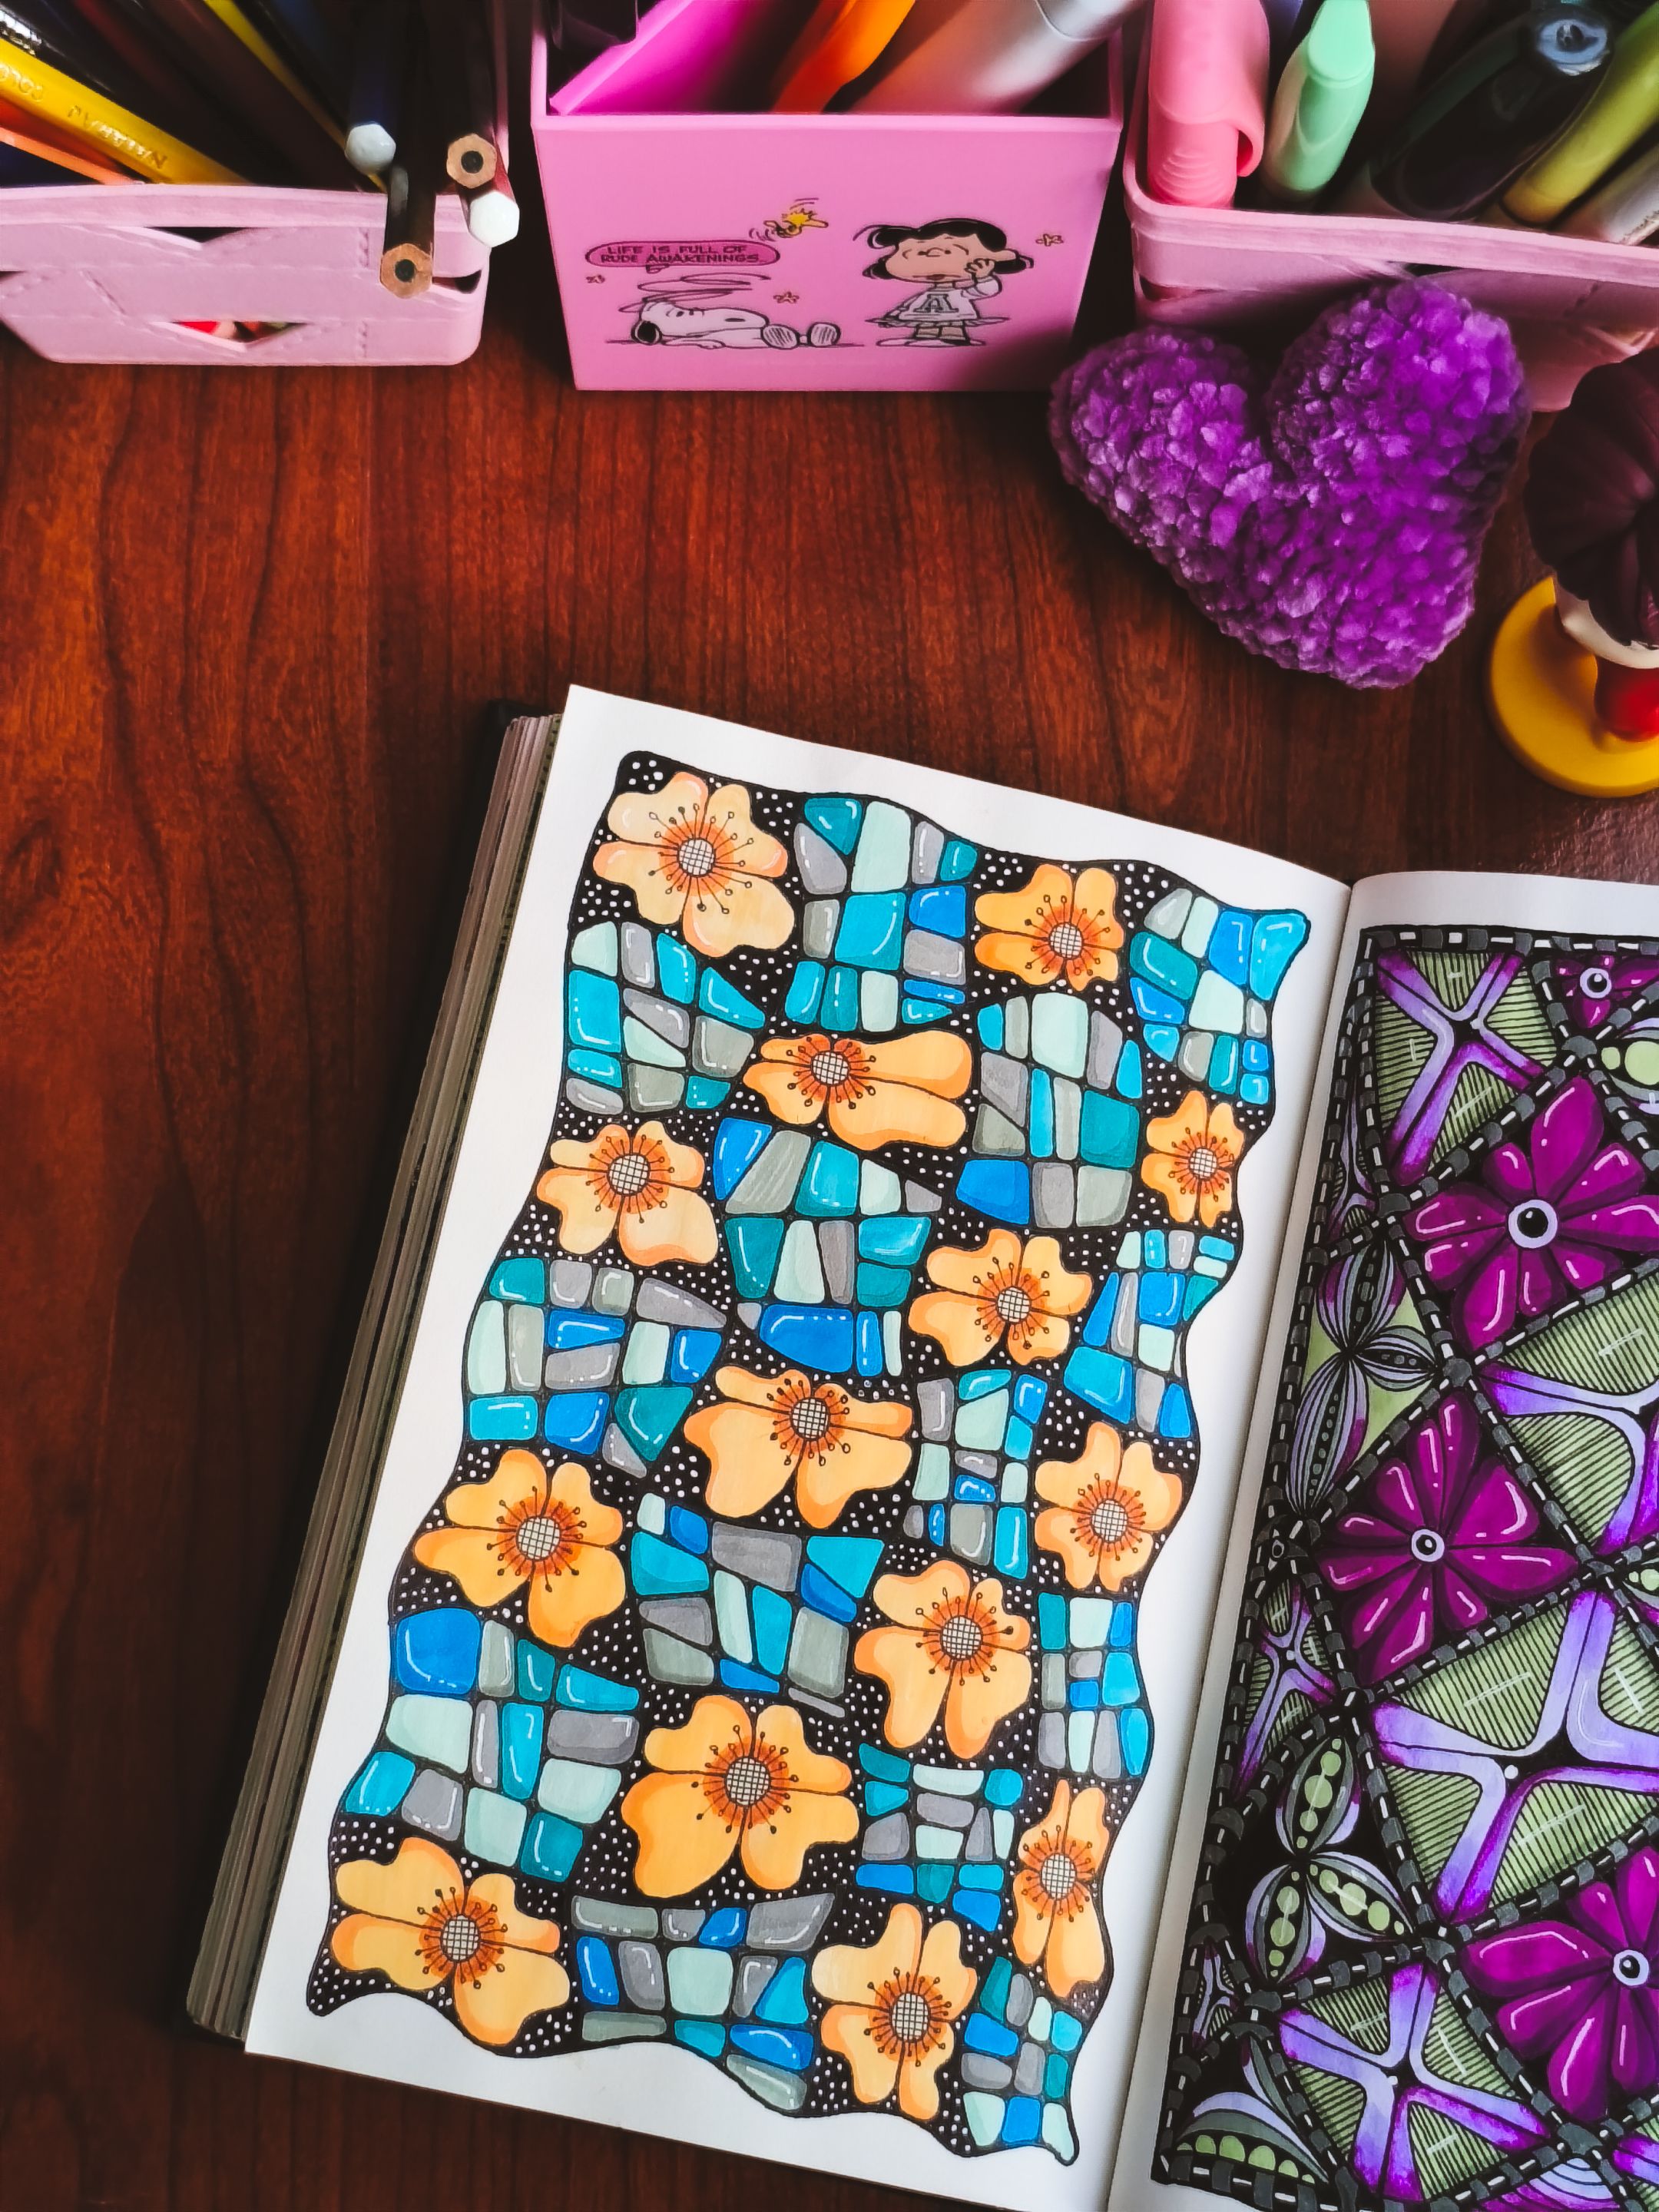
Aquí ya me salté un par de pasos, pero luego de darle color a la página la idea es agregar algunos detalles para darle un poco más de vida a la composición. Agregué sombras con los mimos colores que empleé pero en tonalidades más oscuras, también agregué algunos destellos y puntos con el bolígrafo en gel blanco.
Y, ¡listo! esto es todo. Suena sencillo y realmente lo es, aunque me tomó cerca de una hora y media finalizarlo.
>I skipped a couple of steps here, but after coloring the page, the idea is to add some details to give the composition a little more life. I added shadows using the same colors I used before, but in darker shades, and I also added some sparkles and dots with a white gel pen.
>And that's it! It sounds simple, and it really is, although it took me about an hour and a half to finish it.
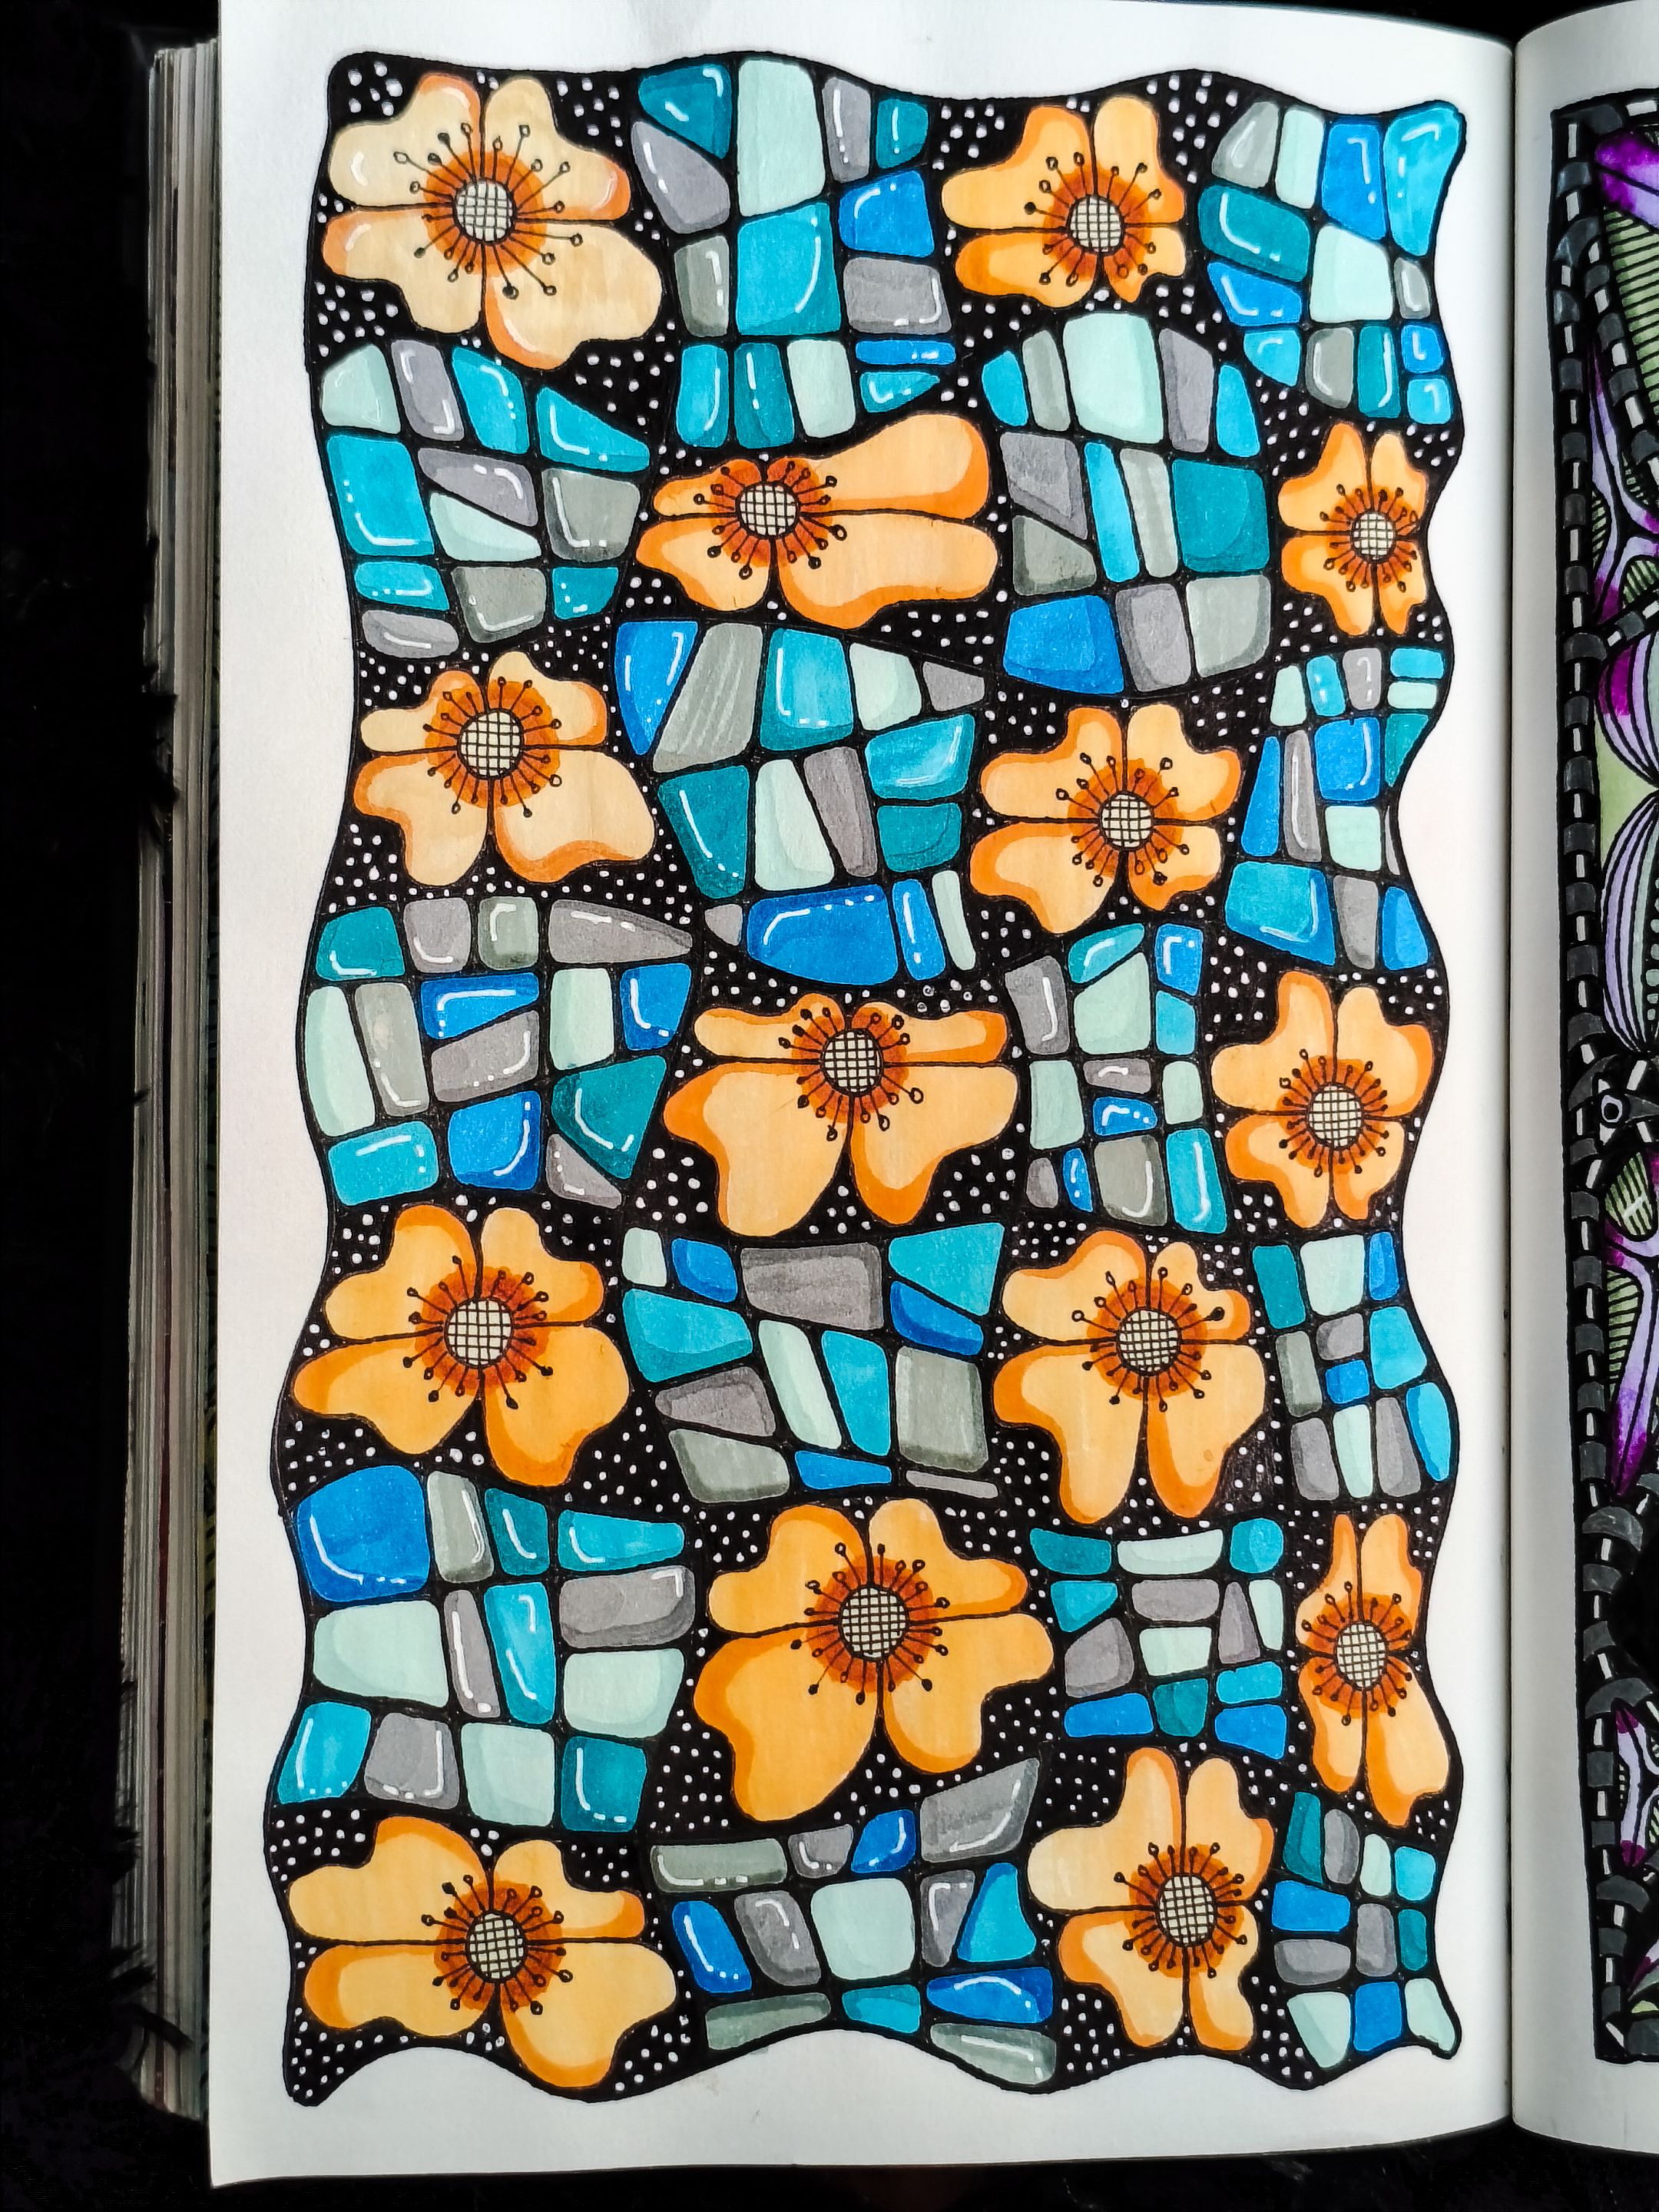
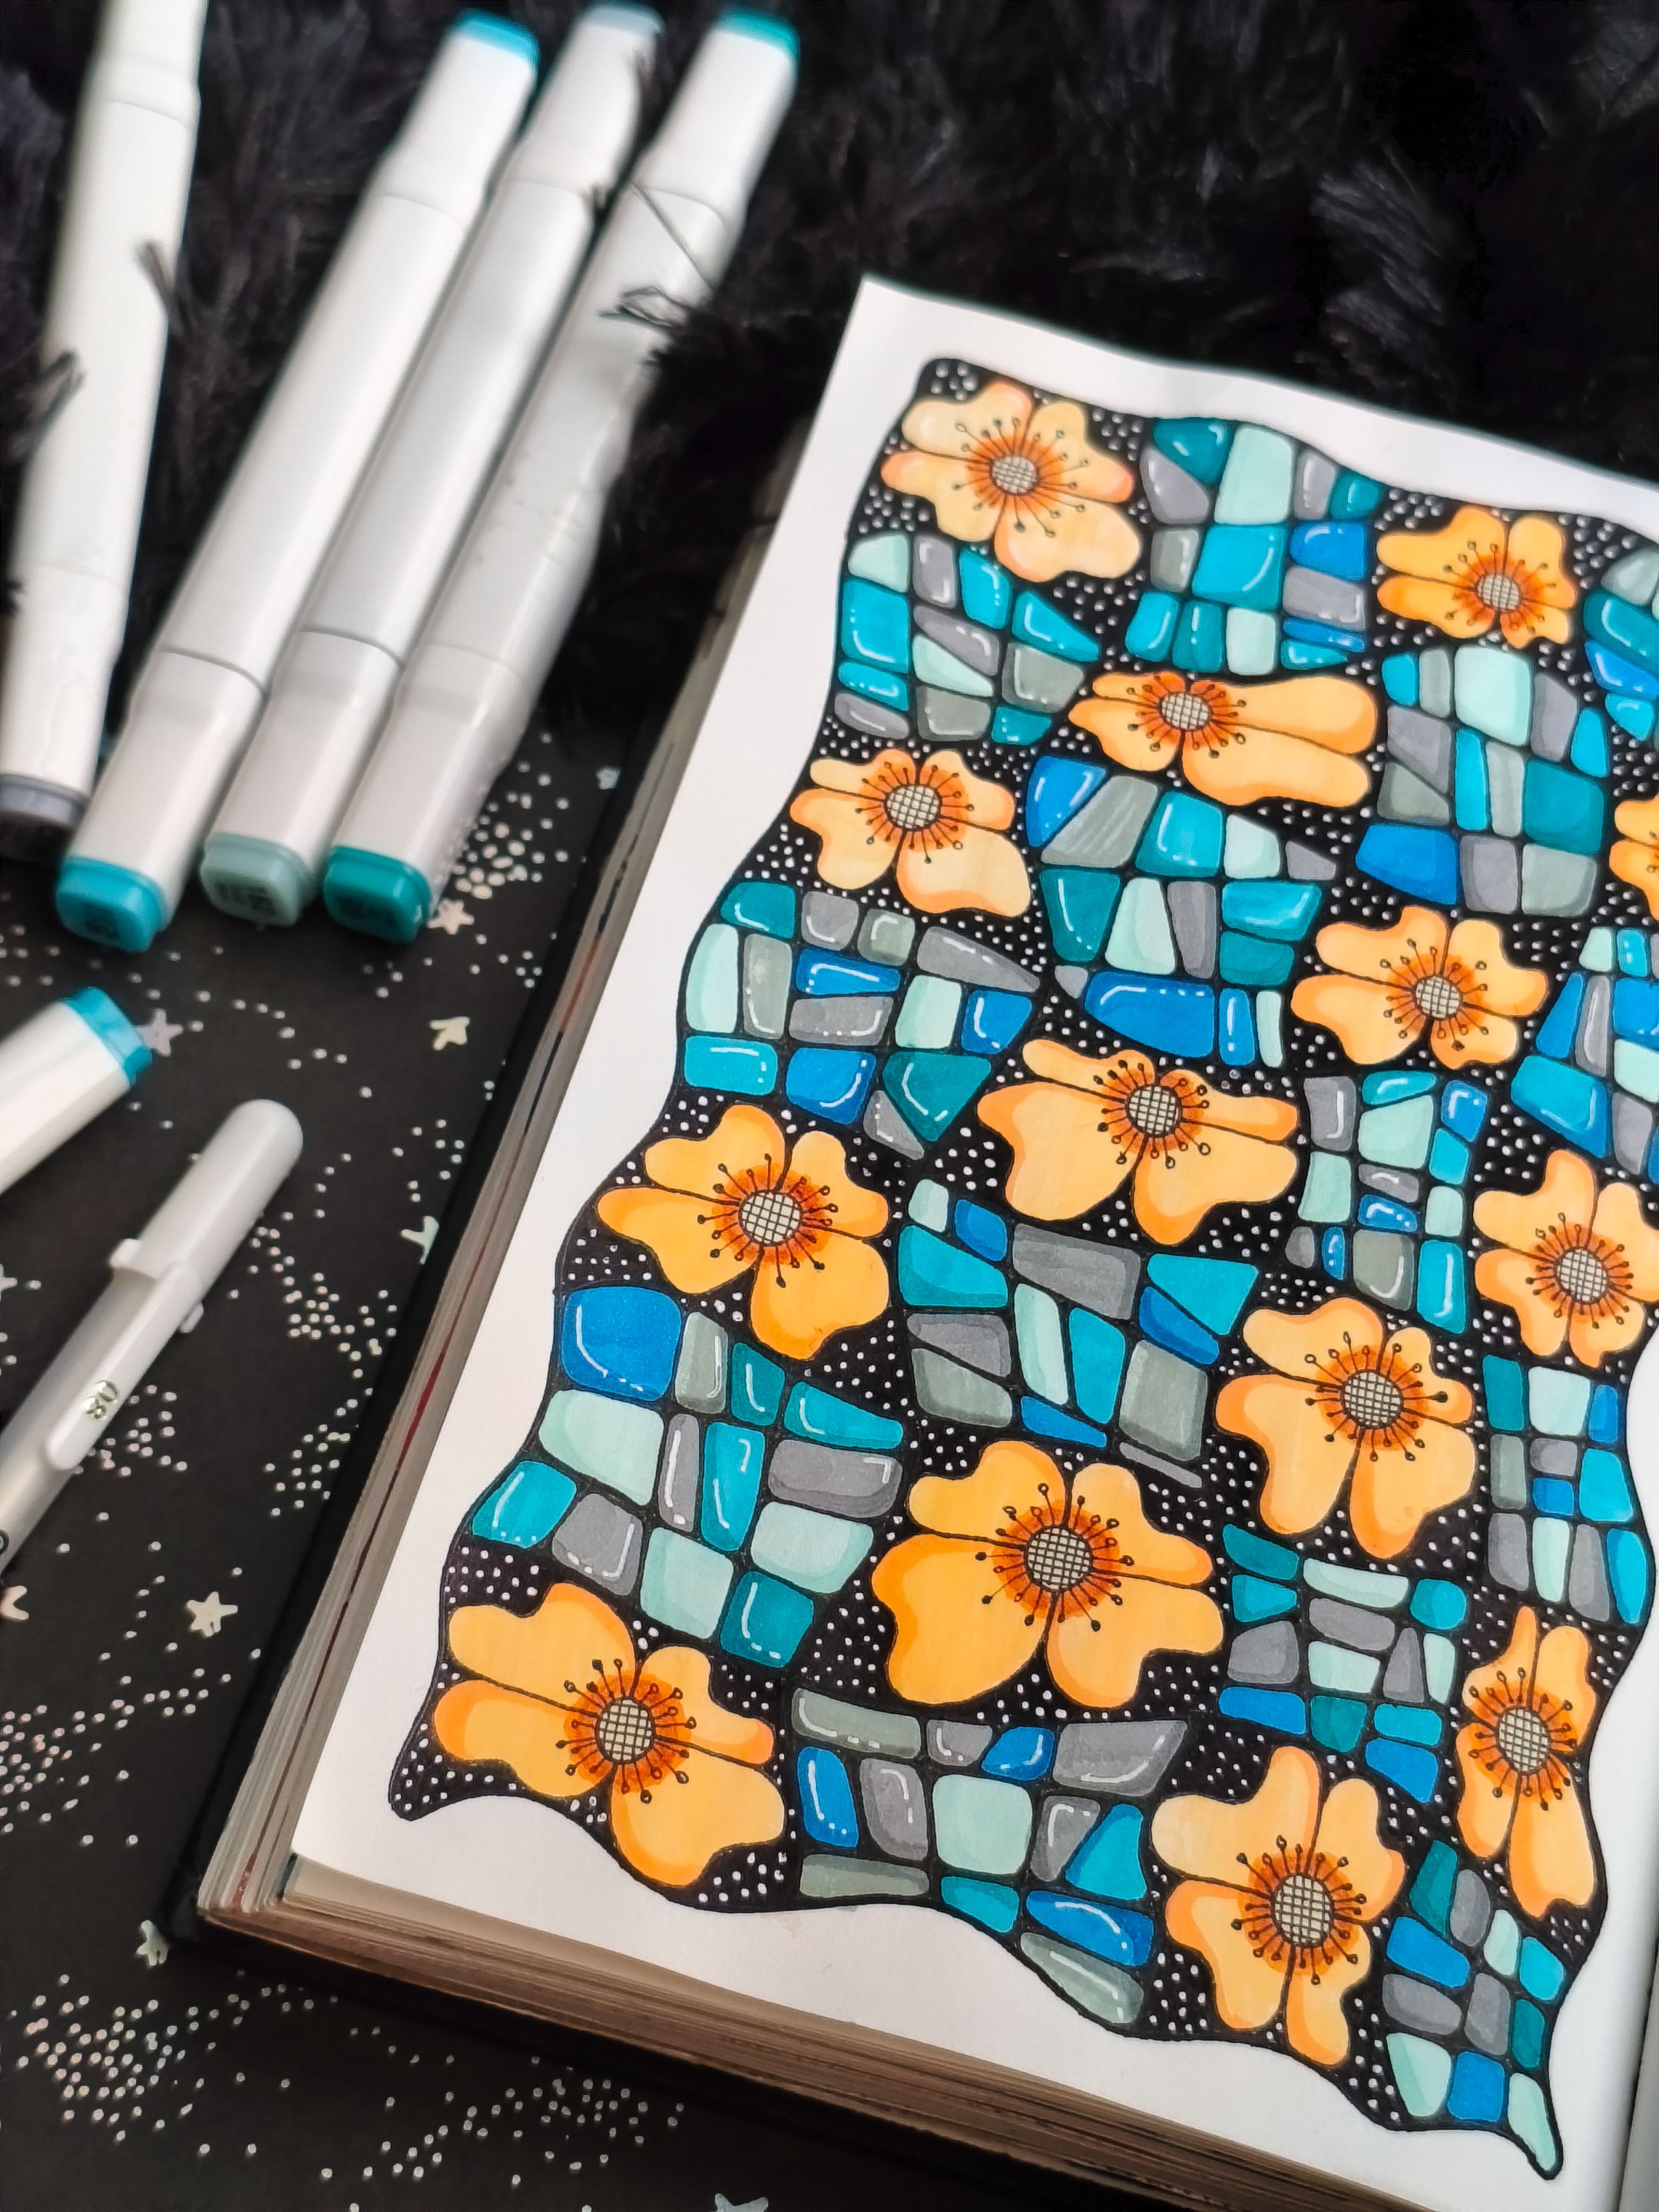
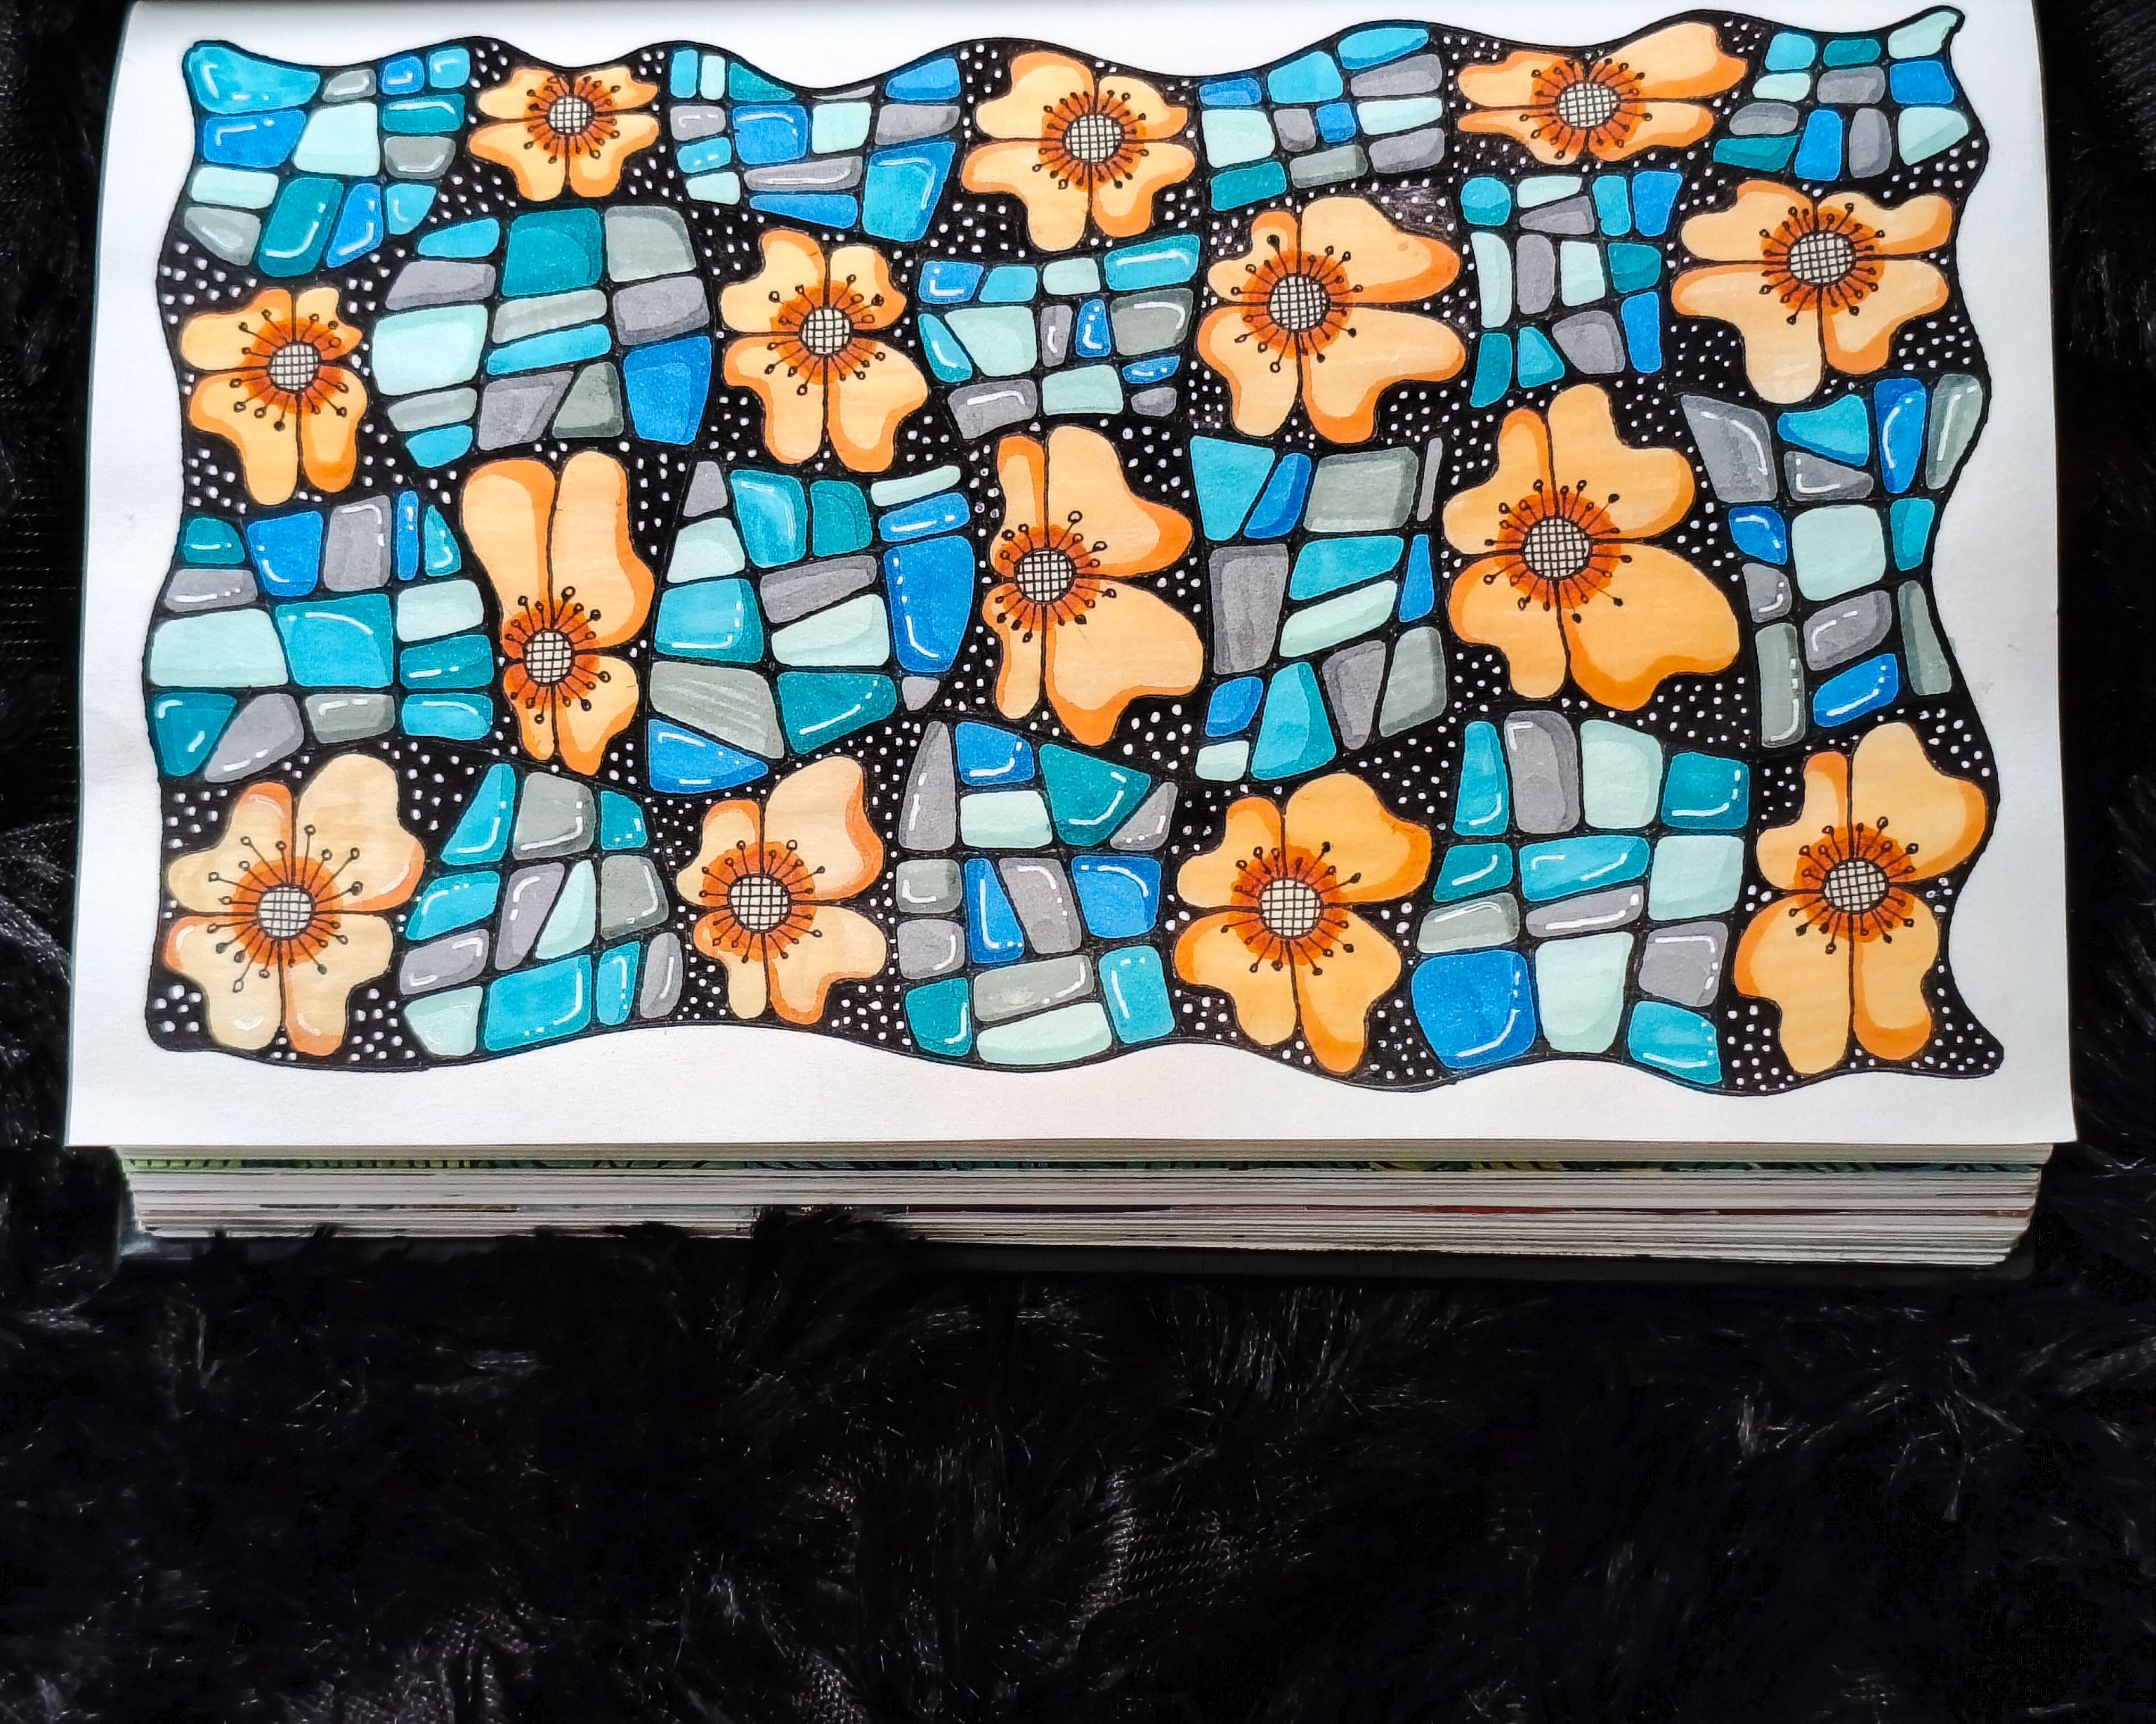
Y este es el resultado.
Creo que este patrón entra en mi top 5 de favoritos. Sin duda, los puntos blancos en el fondo negro y la combinación de azul con naranja fueron una excelente opción. Creo que simplemente no me lo puedo imaginar en otros colores, siento que no hubiese quedado igual de bien.
Cuéntame, ¿te aventurarías a realizarlo?
>And this is the result.
>I think this pattern is one of my top five favorites. Without a doubt, the white dots on the black background and the combination of blue and orange were an excellent choice. I just can't imagine it in other colors; I feel like it wouldn't have looked as good.
>Tell me, would you dare to try it?

**📷 Fotografía por | Photography by:** @maryed, Xiaomi Poco X7
**📷 Edición | Edition:** Adobe Photoshop Ligthroom
**Traducción con | Translated with:** DeepL.com (free version)