¡Hola mis muy queridos Hivers súper creativos! Uniéndome al [concurso]( https://peakd.com/hive-189641/@diyhub/august-contest-intern-honeybee-day) propuesto por la comunidad este mes, hoy les traigo una preciosa tarjeta pop-up siguiendo la temática de abejitas, así que hoy te enseño a hacer una tarjeta interactiva con una abejita muy tierna que sale de su panal a saludar, es fácil de realizar y te adelanto que al final de este post podrás verla en movimiento, así que sigue leyendo y no te pierdas ningún paso.
>Hello my very dear super creative Hivers! Joining the [contest]( https://peakd.com/hive-189641/@diyhub/august-contest-intern-honeybee-day) proposed by the community this month, today I bring you a beautiful pop-up card following the theme of little bees, so today I show you how to make an interactive card with a very cute little bee that comes out of its honeycomb to say hello, it is easy to make and I advance you that at the end of this post you can see it in motion, so read on and do not miss any step.

Imagen creada por mí en Canva / Image created by me in Canva
### Materiales:
* Cartulina
* Lápiz de grafito
* Lápices de colores/Marcadores
* Marcador punta ultrafina
* Tijeras
* Silicón caliente
* Pegamento blanco
* Cinta adhesiva
### Procedimiento:
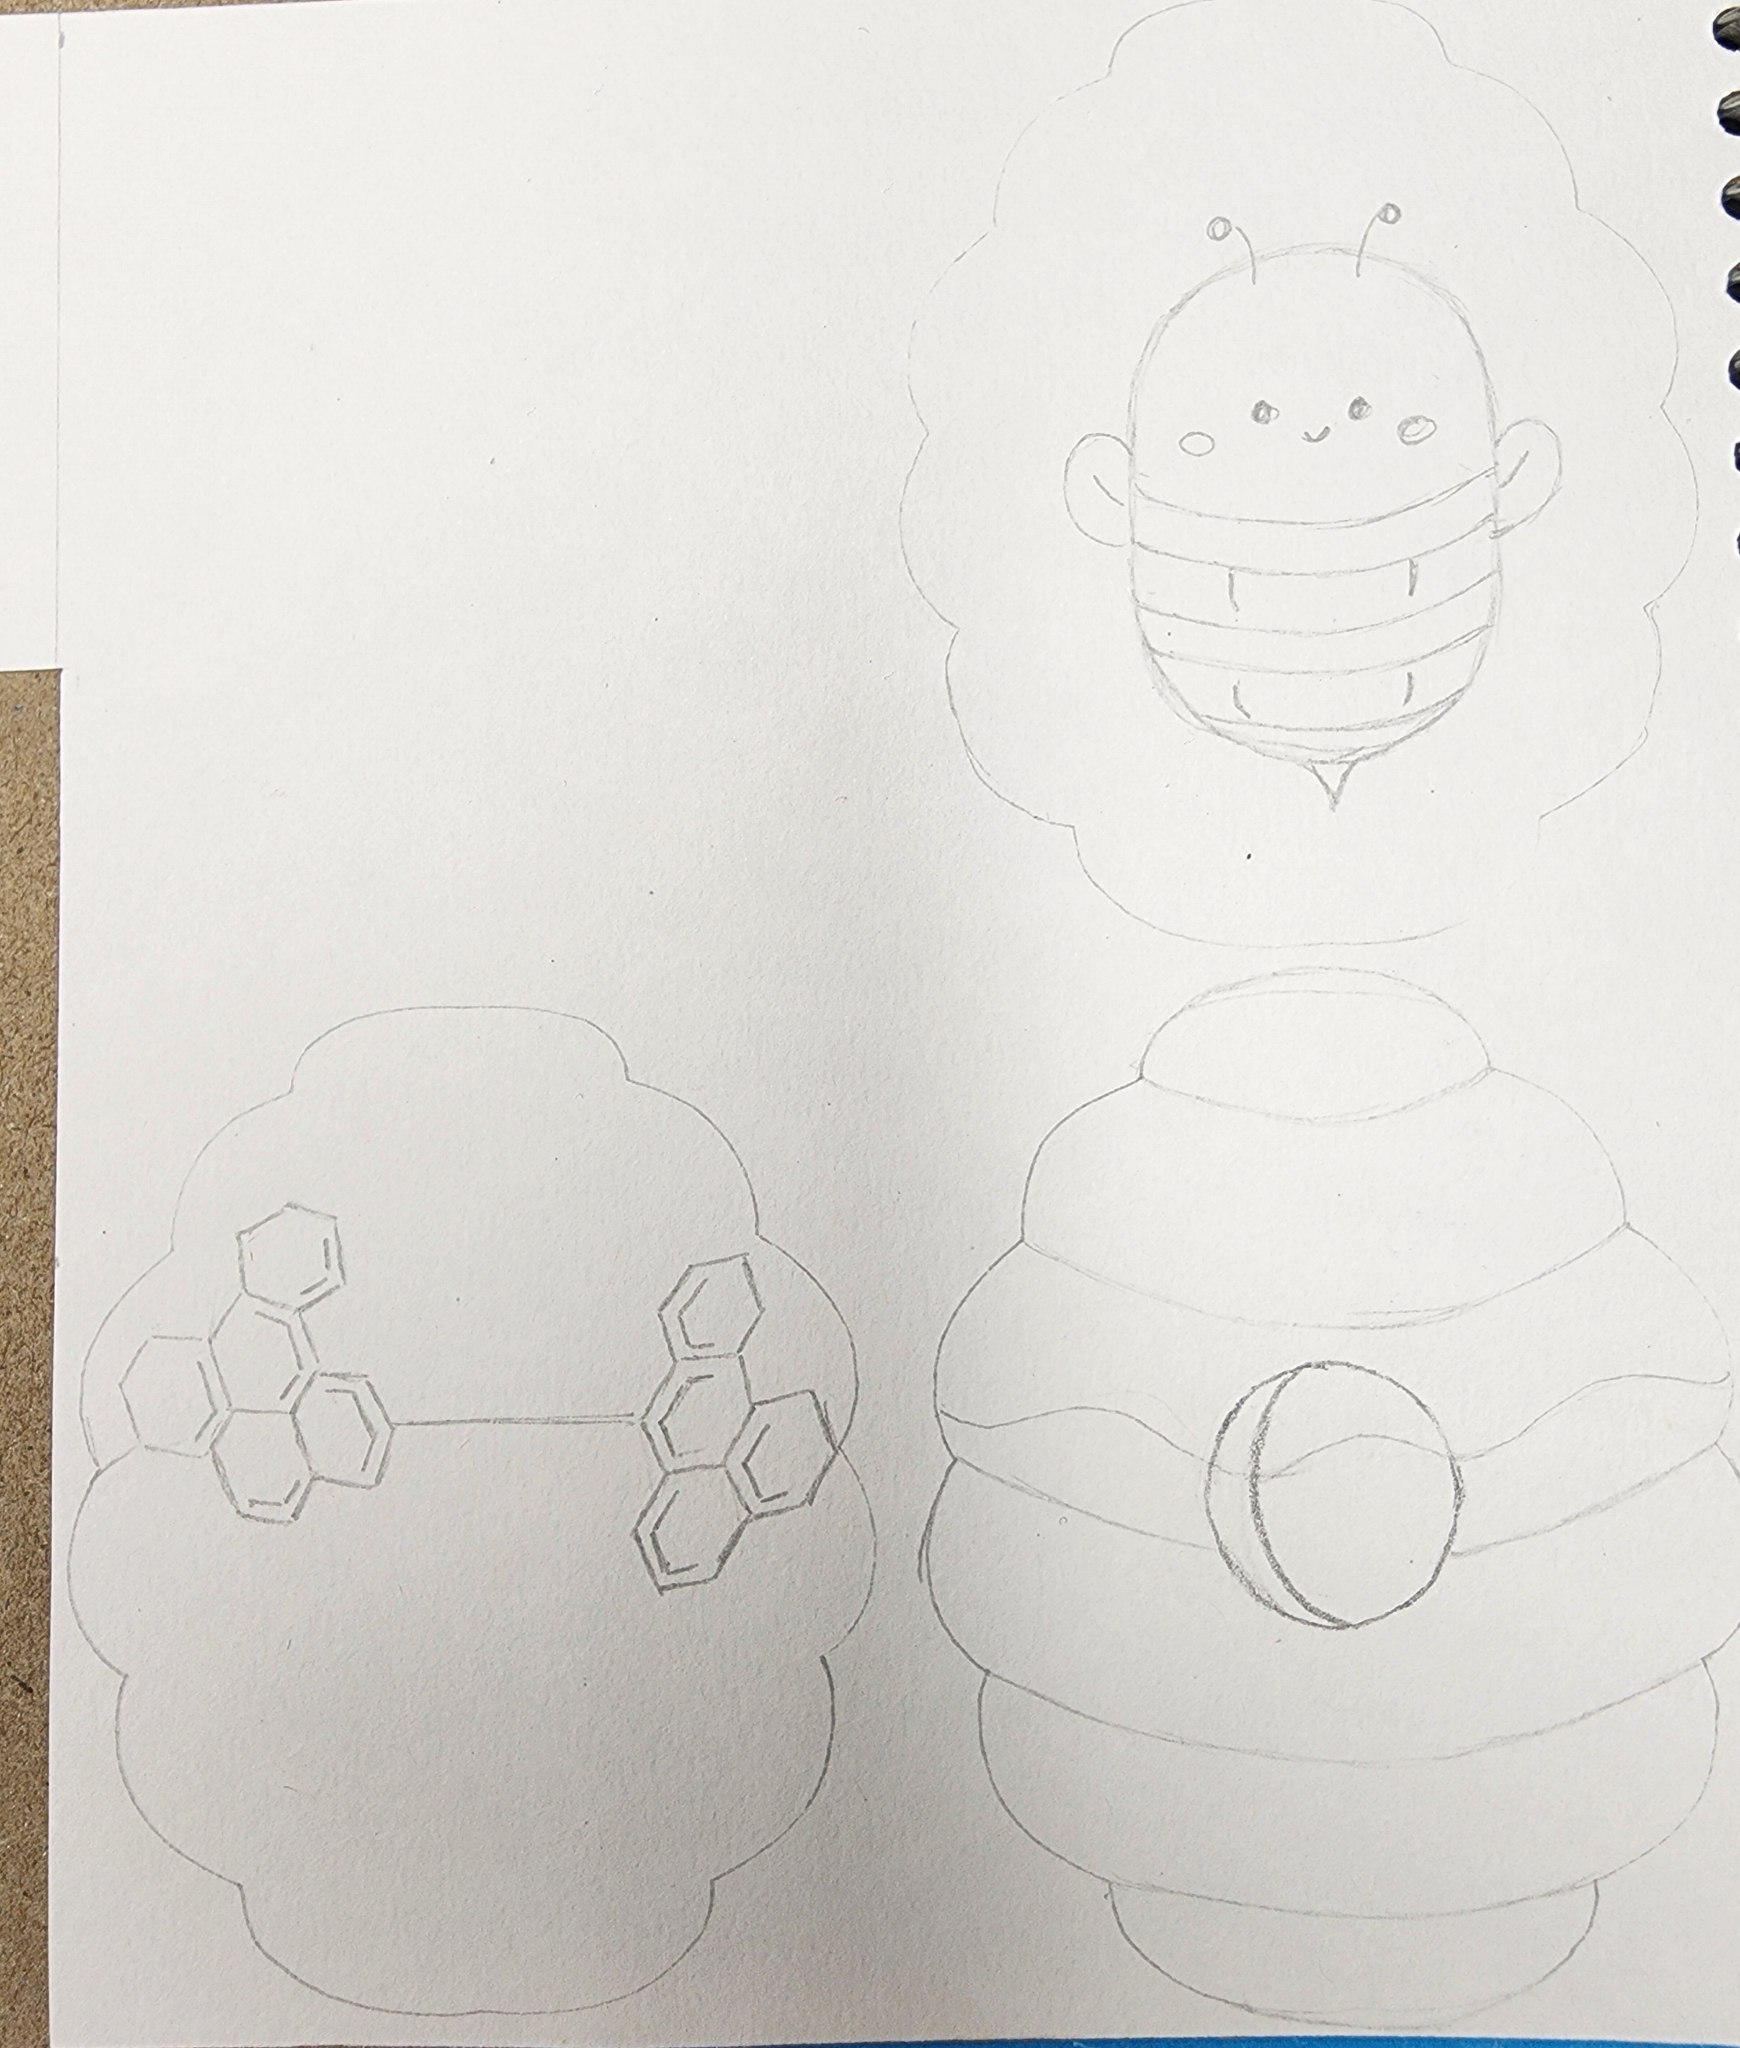
Iniciamos dibujando las partes de nuestra tarjeta, estas consistirán en la protagonista que es la dulce abejita, el panal completo para la parte frontal de la tarjeta y medio panal interno que será la parte trasera de la tarjeta. En el panal completo debemos dibujar también una línea de corte un poco más arriba de su centro.
>### Materials:
>
>* Cardboard
>* Graphite pencil
>* Colored pencils/Markers
>* Ultra fine tip marker
>* Scissors
>* Hot glue
>* White glue
>* Adhesive Tape
>
>### Procedure:
>
>We start by drawing the parts of our card, these will consist of the main character which is the sweet little bee, the full honeycomb for the front of the card and half inner honeycomb which will be the back of the card. On the full honeycomb we should also draw a cut line a little above its center.
Dibujo / Drawing
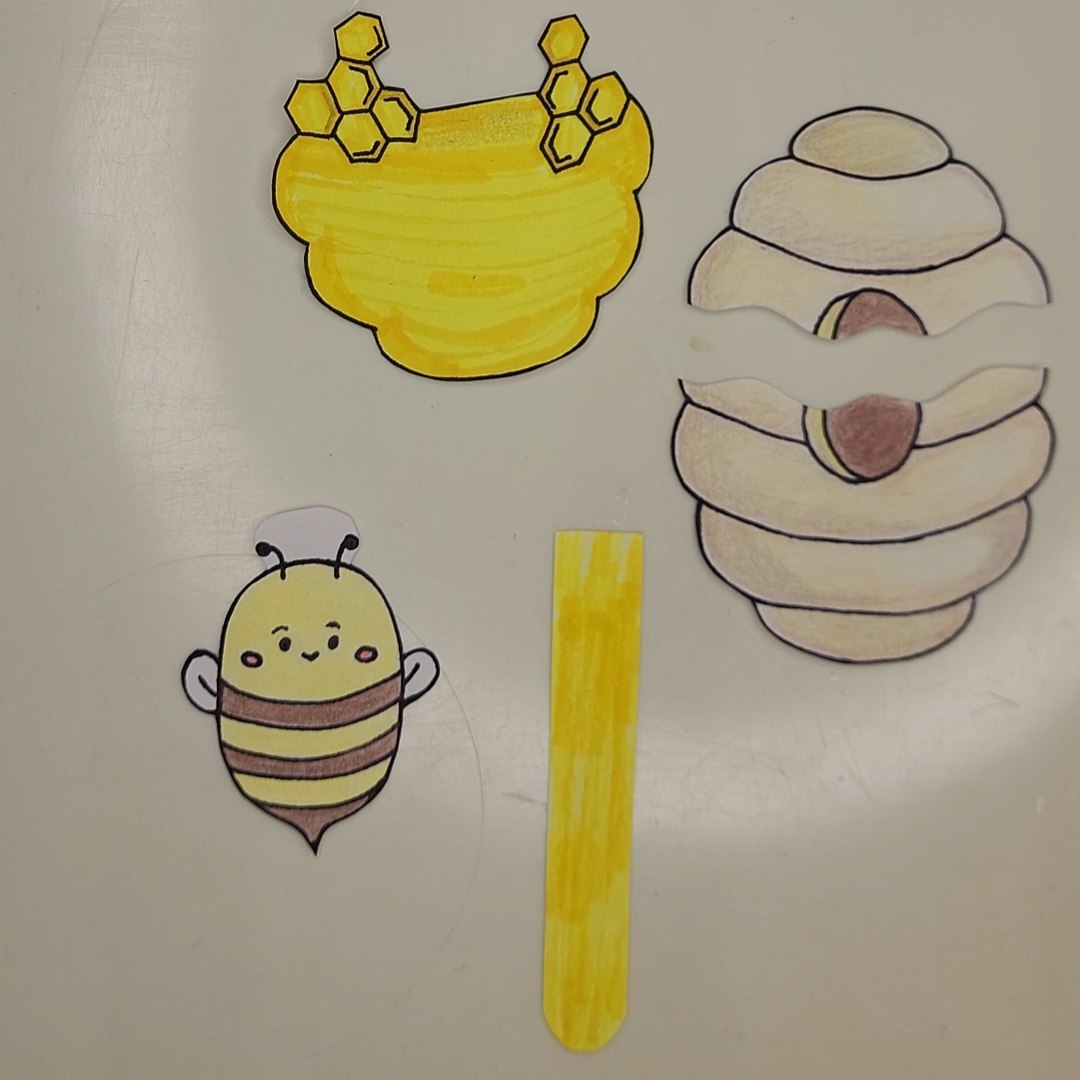
Coloreamos y recortamos las partes de la tarjeta. En la primera imagen del dibujo no se ve una pieza importante pero en la siguiente imagen sí está, se trata de un rectángulo no muy ancho al que hice curvo uno de sus extremos, este tiene una longitud similar a la altura del panal.
> We color and cut out the parts of the card. In the first image of the drawing you can't see an important piece but in the next image it is, it is a not very wide rectangle to which I curved one of its ends, this has a length similar to the height of the honeycomb.
Piezas recortadas / Trimmed pieces
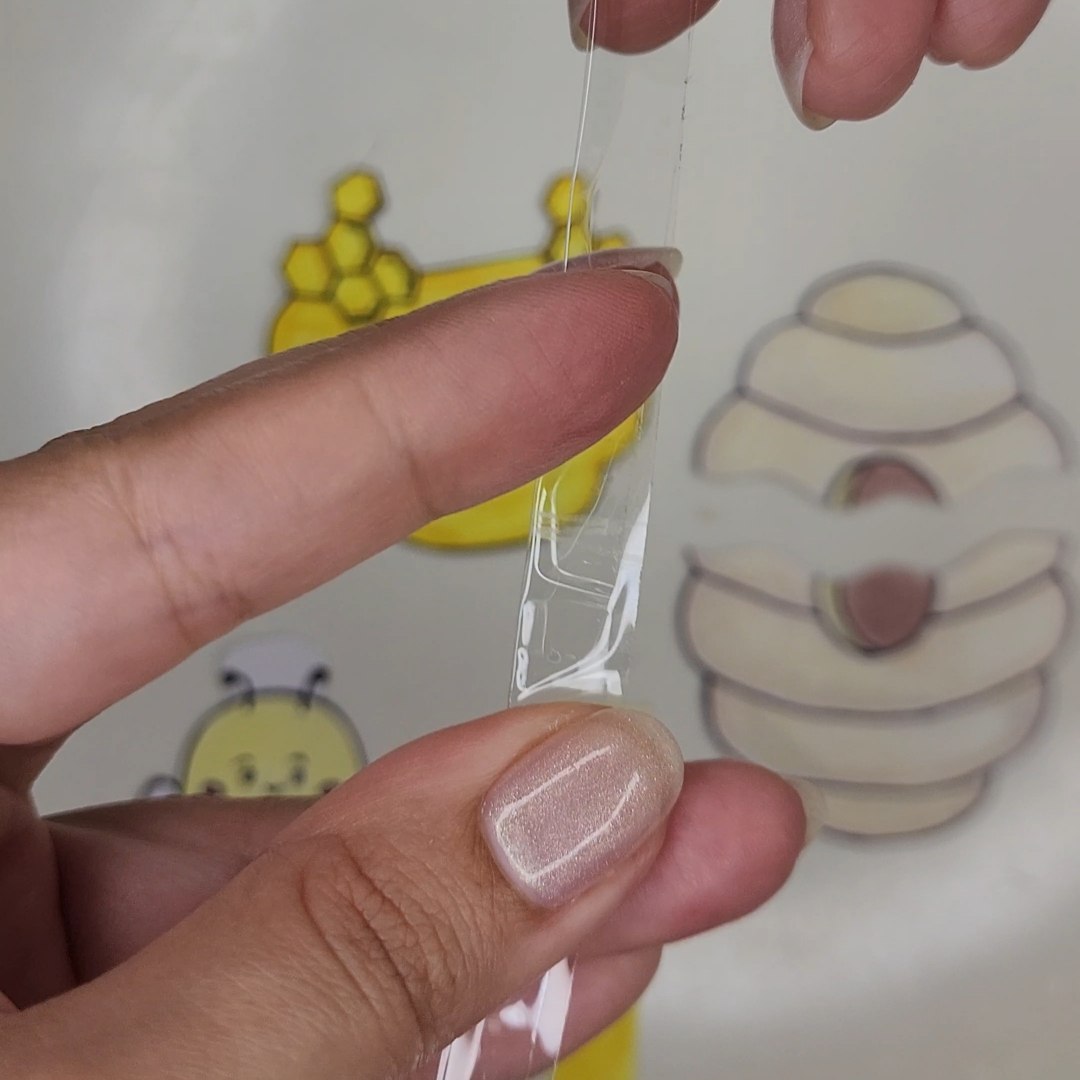
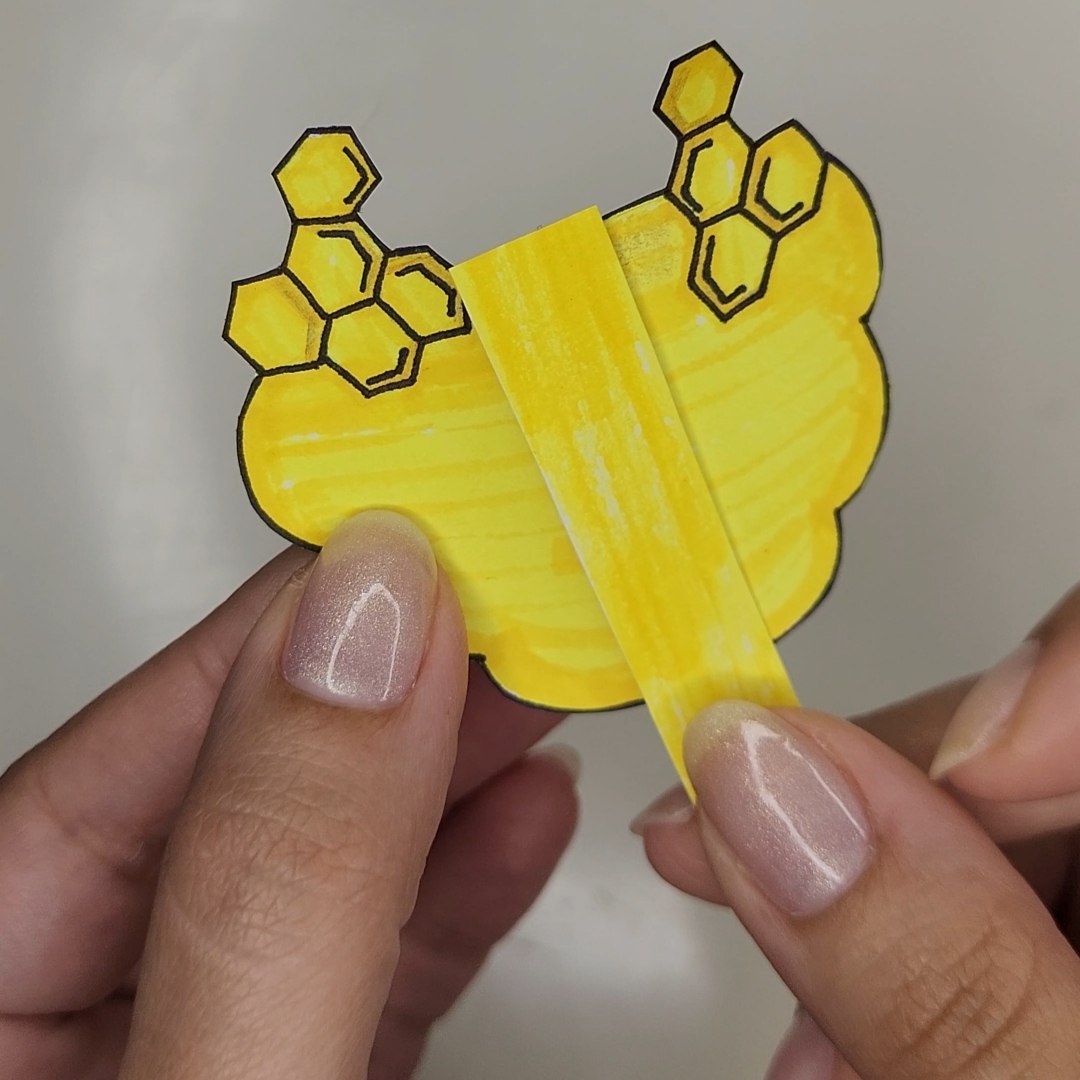
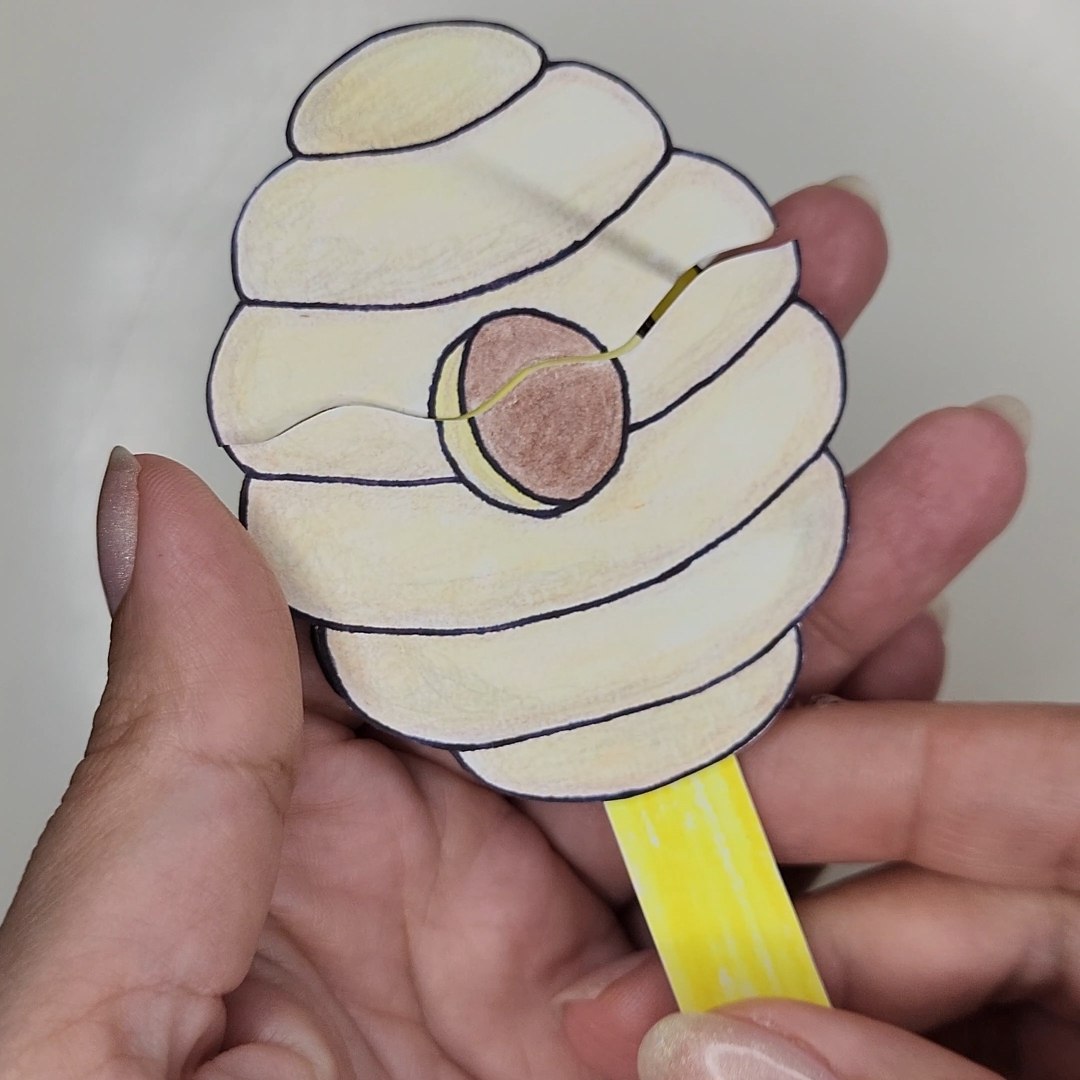
Tomaremos cinta adhesiva y la doblaremos longitudinalmente sobre sí misma, de modo que se toquen las partes adhesivas y nos quede una cinta plástica, recortamos con las tijeras los excedentes y la colocaremos rodeando el medio panal tal como se ve en las imágenes, para pegar sus extremos usaremos también cinta adhesiva. La idea es crear una especie de correa que se deslice fácilmente alrededor de esta parte de la tarjeta.
> We will take adhesive tape and fold it lengthwise on itself, so that the adhesive parts touch and we are left with a plastic tape, cut with scissors the excess and place it around the half honeycomb as shown in the images, to stick the ends we will also use adhesive tape. The idea is to create a kind of strap that slides easily around this part of the card.
 | 
--- | ---
Correa / Strap
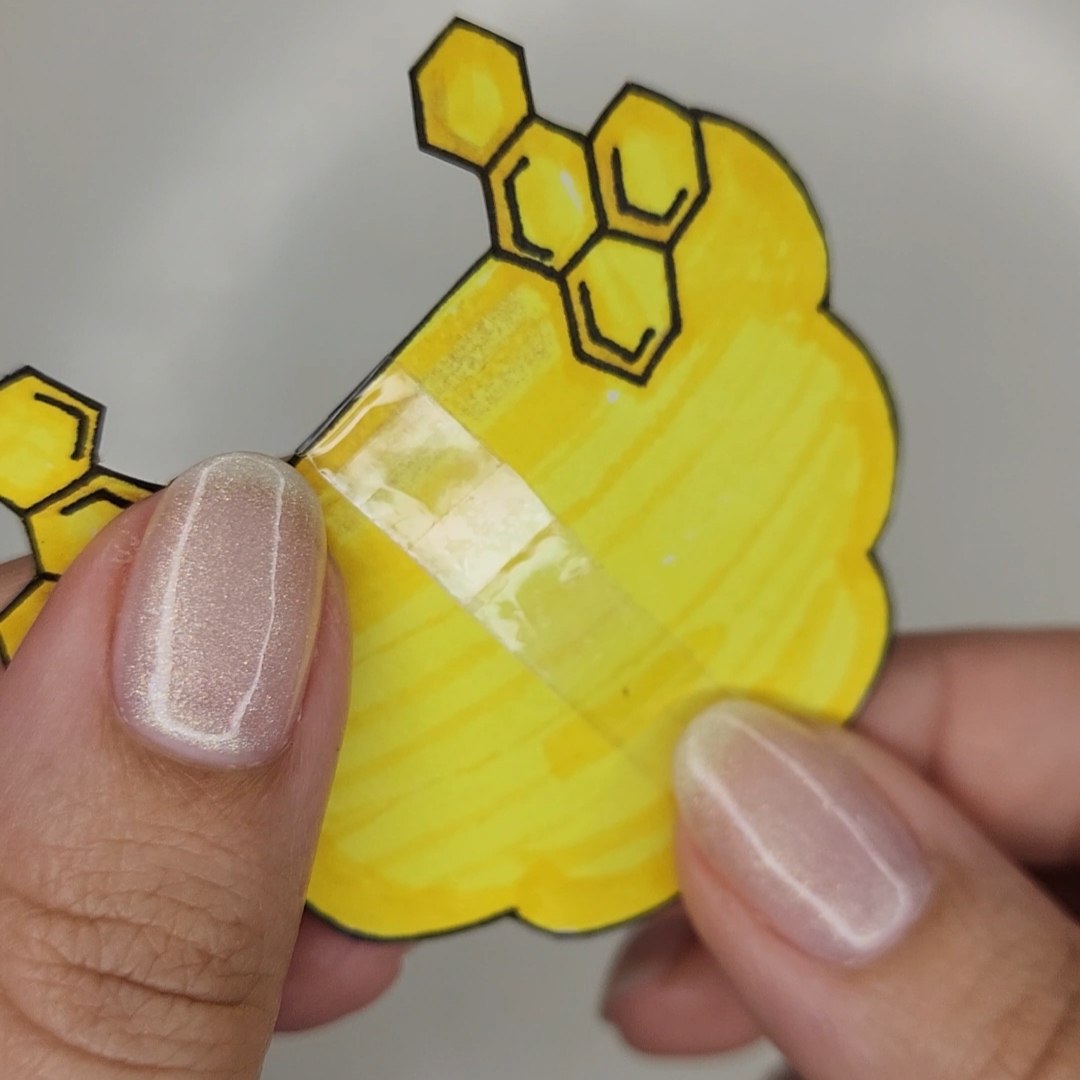
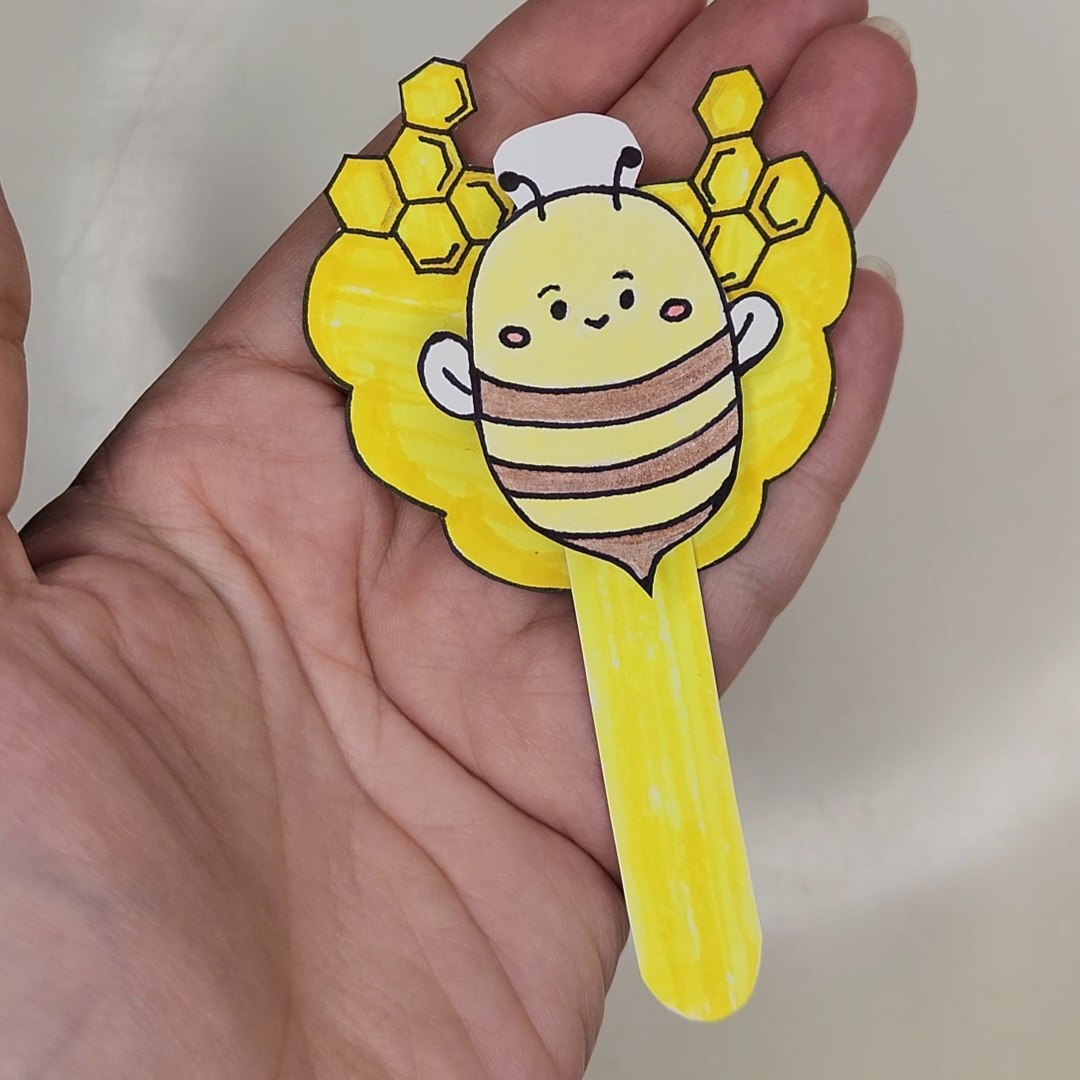
Sobre la correa que acabamos de crear, pegaremos con silicón la pieza rectangular, de modo que no sobresalga mucho por encima sino que el excedente quede en la zona inferior, ya que será la pestaña con la que se activará el mecanismo.
> On the strap that we have just created, we will glue the rectangular piece with silicone, so that it does not protrude too much on top but the excess remains in the lower area, since it will be the tab with which the mechanism will be activated.
Posicionando el rectángulo / Positioning the rectangle
Es momento de tomar a la linda abejita y adherirla con pegamento blanco a la pieza rectangular.
> It's time to take the cute little bee and attach it with white glue to the rectangular piece.
Posicionando la abejita / Positioning the bee
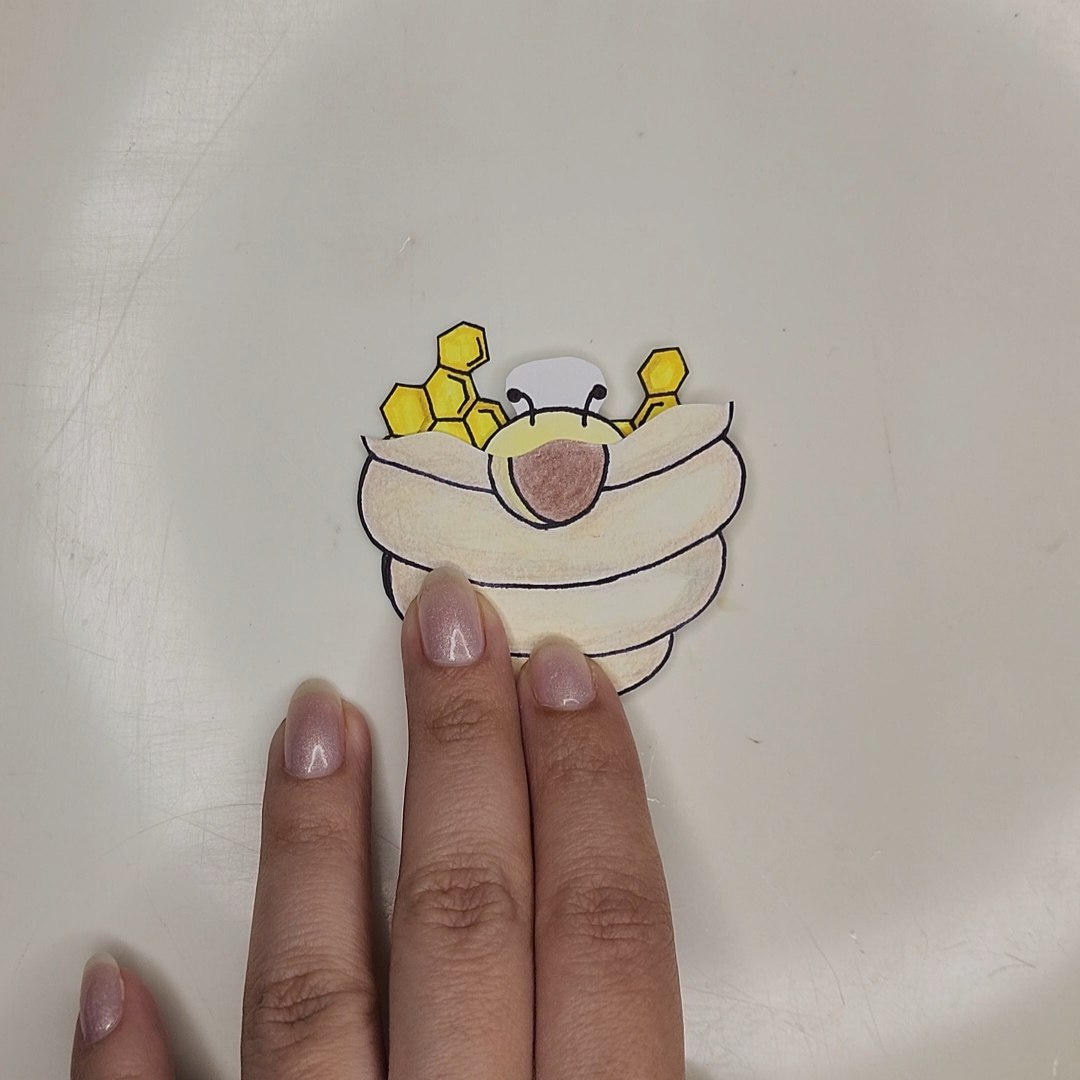
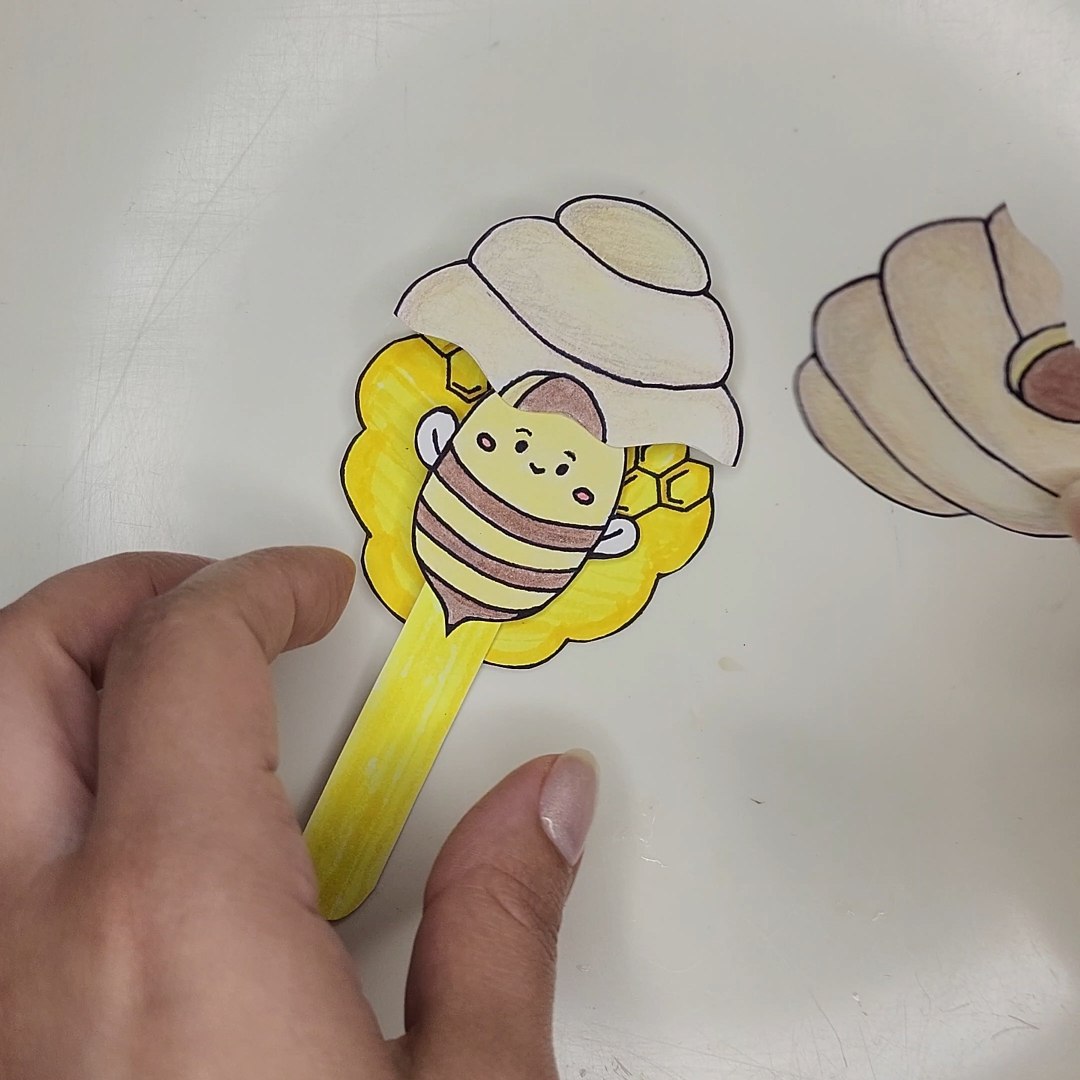
Para poder colocar las piezas del panal frontal correctamente, posicionaremos primero la parte de abajo pero sin pegarlo, luego añadiremos un poco de pegamento en la parte alta de la cabecita de la abeja y adherimos la parte de arriba del panal frontal en la posición correcta.
> In order to place the pieces of the front honeycomb correctly, we will first position the bottom part but without gluing it, then we will add a little glue on the top of the bee's little head and we will adhere the top part of the front honeycomb in the correct position.
 |  | 
--- | --- | ---
Parte alta del panal / Top of the honeycomb
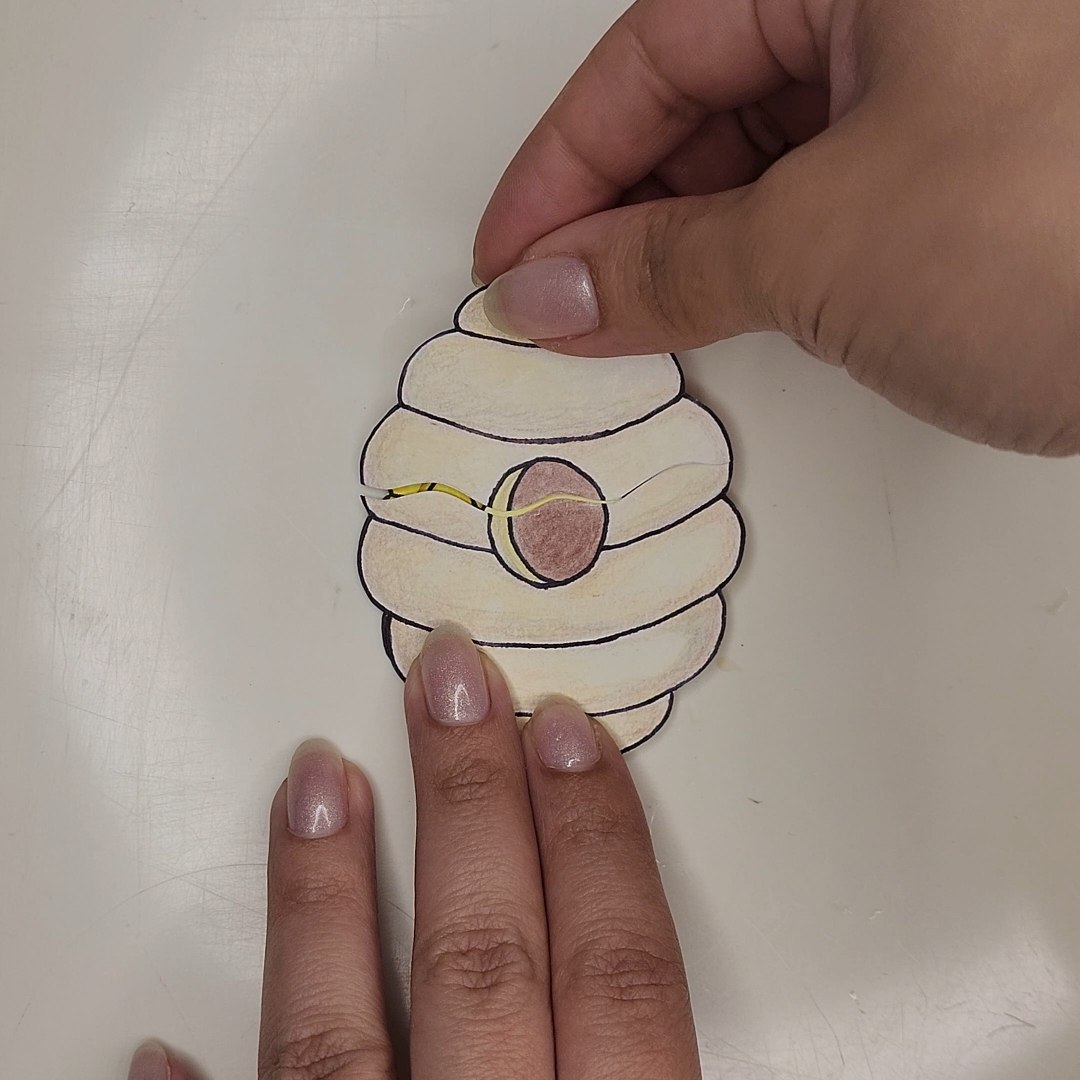
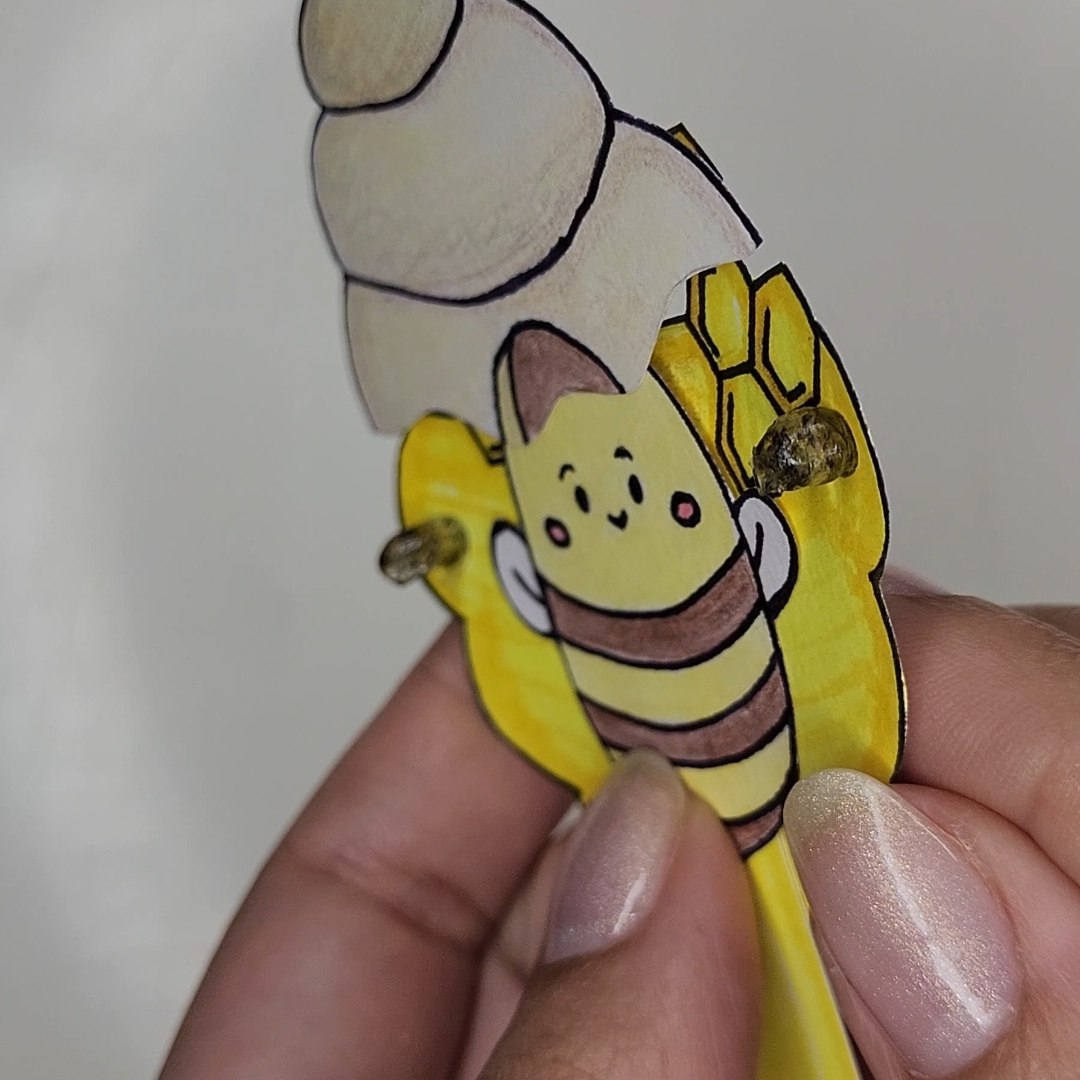
Acto seguido, añadimos dos puntos gorditos de silicón caliente, uno a cada lado del panal interno, esto es opcional pero a mí me gusta para aportar algo más de profundidad y volumen, sobre estos puntitos al ya haberse enfriado, añadiremos un poco más de silicón y adherimos la parte restante del panal frontal. Podemos usar pegamento blanco para asegurar el resto del área, por supuesto dejando libre el paso del rectángulo para activar el mecanismo.
> Next, we add two chubby dots of hot silicone, one on each side of the inner honeycomb, this is optional but I like to add some more depth and volume, on these dots when they have already cooled, we add a little more silicone and adhere the remaining part of the front honeycomb. We can use white glue to secure the rest of the area, of course leaving the rectangle free to activate the mechanism.
 |  | 
--- | --- | ---
Panal completo / Complete honeycomb
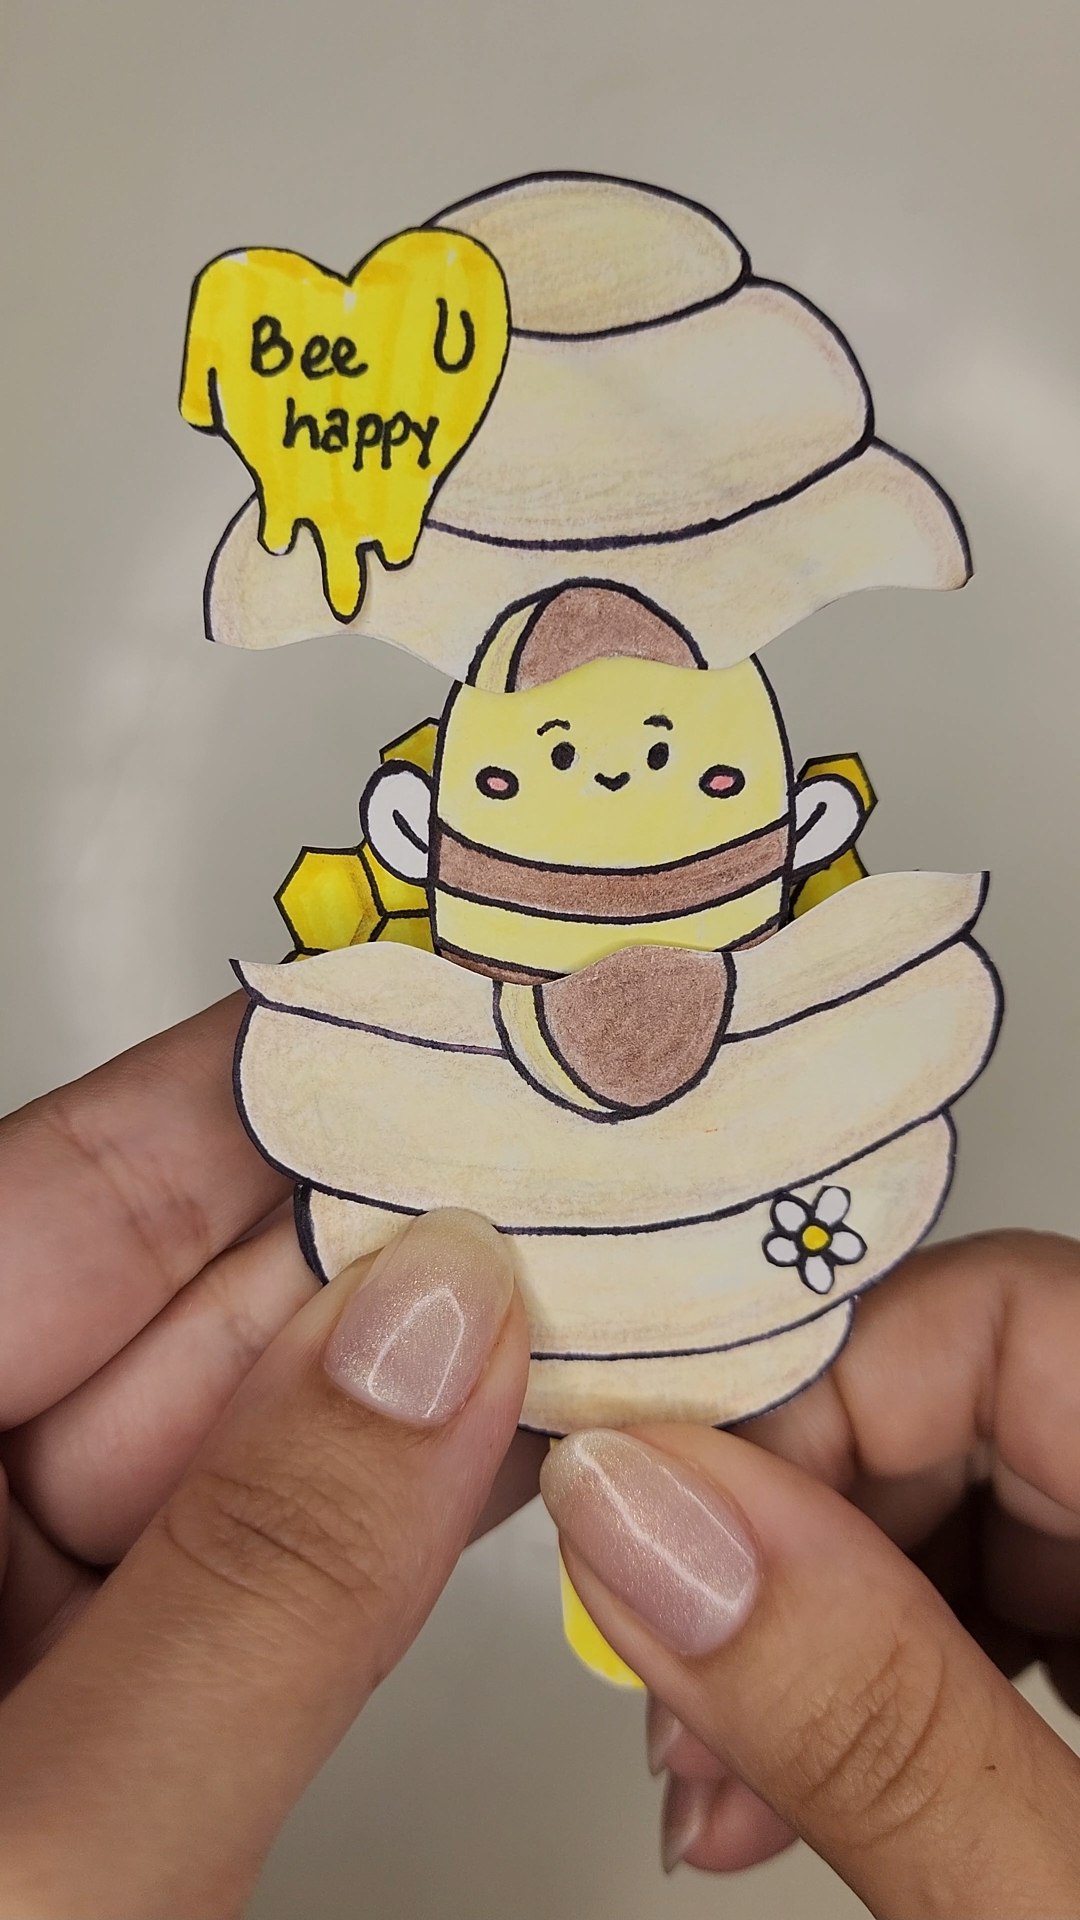
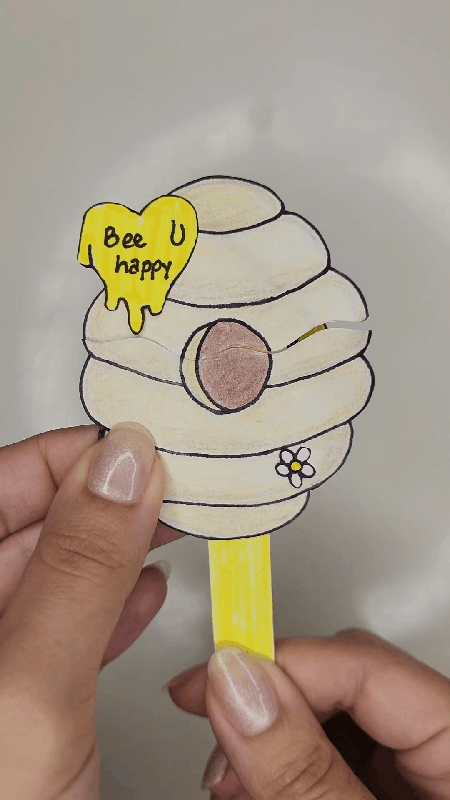
Para finalizar, agrego un par de decoraciones, un corazón de miel que dice “ Bee happy” y una florecita coqueta y tenemos a nuestra abejita feliz en su panal de miel.
> To finish, I add a couple of decorations, a honey heart that says “Bee happy” and a flirty little flower and we have our happy little bee in her honeycomb.
Resultado final / Final result
Miren lo encantador del movimiento de este diseño en el gif que está debajo, esta es una idea realmente linda, me encantó el resultado y lo mejor es que puede emplearse este mecanismo para muchas distintas ideas.
> Look at the lovely movement of this design in the gif below, this is a really cute idea, I loved the result and the best thing is that you can use this mechanism for many different ideas.
Movimiento / Movement
¡Muchas gracias por leerme! Thank you so much for reading me!
Fotografías propias, tomadas con mi Samsung Galaxy S22. Traducido al inglés con DeepL. GIF hecha con GIF Maker.
Own photographs, taken with my Samsung Galaxy S22. Translated to English with DeepL. GIF made with GIF Maker