¡Hola mis queridos Hivers! Hoy quiero compartirles una bonita decoración para el hogar, un cartelito súper lindo con letras tejidas y materiales sencillos pero que en conjunto hacen de cualquier espacio muy acogedor. Sigue leyendo y llénate de inspiración con el paso a paso de esta manualidad.
Hello my dear Hivers! Today I want to share with you a nice decoration for the home, a super cute little sign with woven letters and simple materials but that together make any space very cozy. Read on and get inspired with the step by step of this craft.
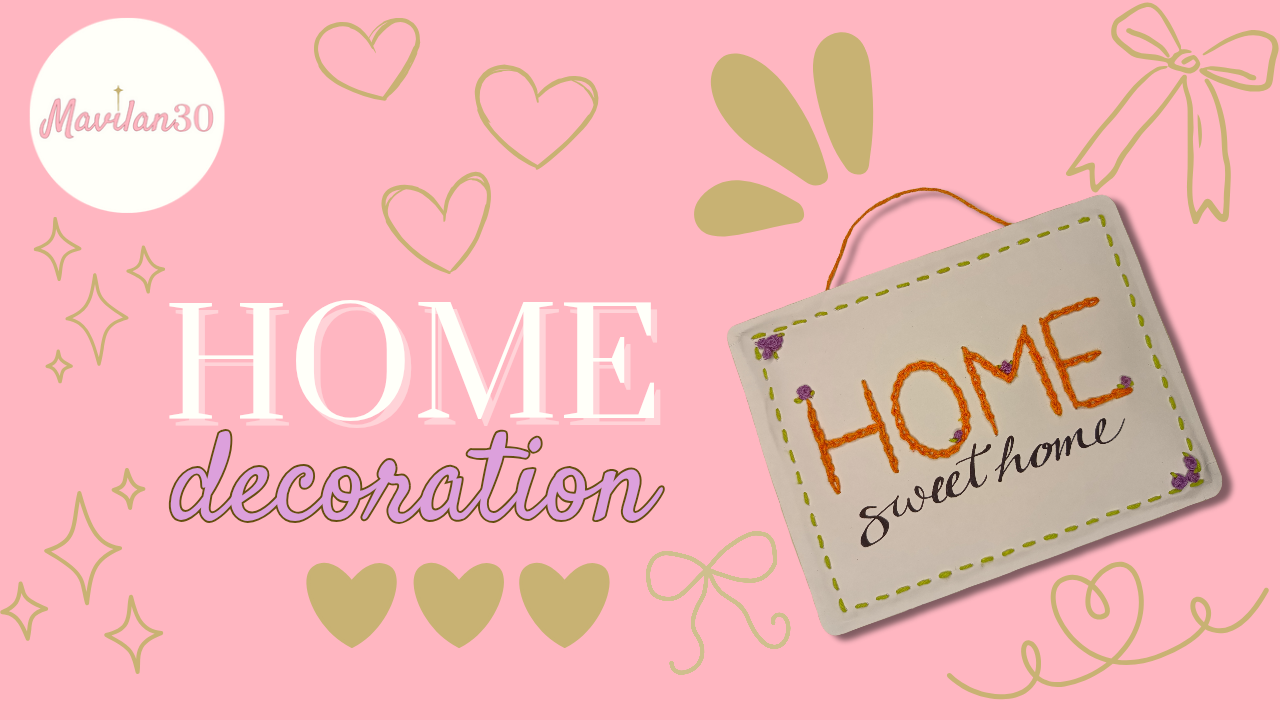 Imagen creada por mí en Canva / Image created by me in Canva
Materiales:
- Cartulina
- Hilos para tejer
- Aguja
- Tijeras
- Pegamento blanco
- Marcador de punta ultra fina
- Cinta adhesiva
Procedimiento:
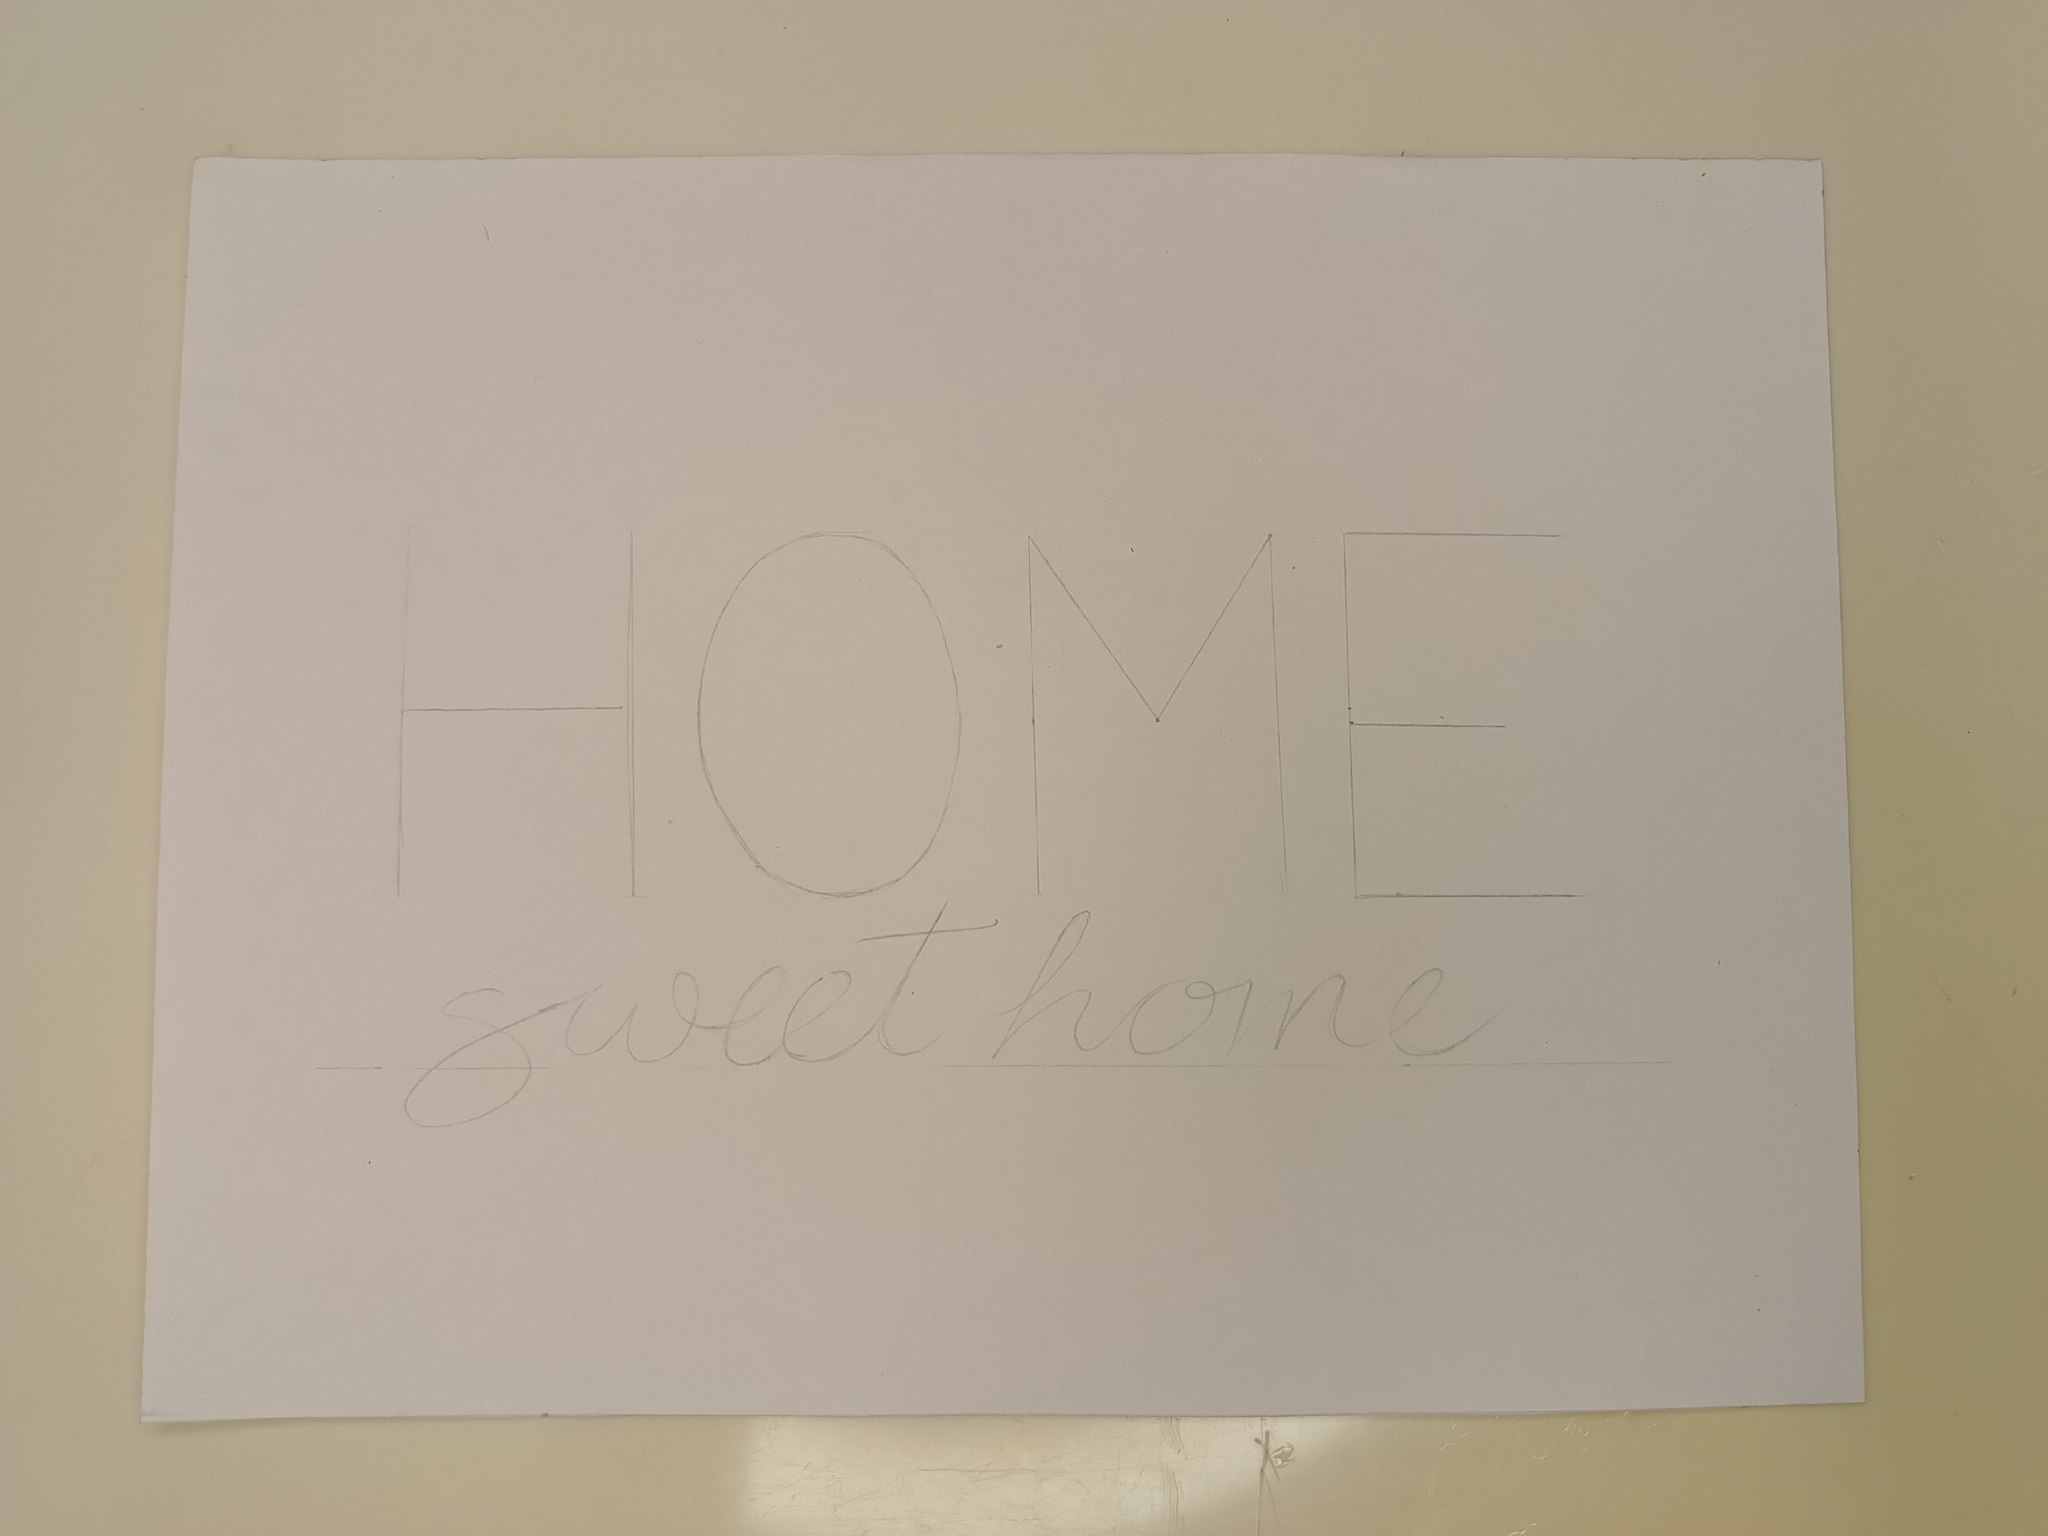
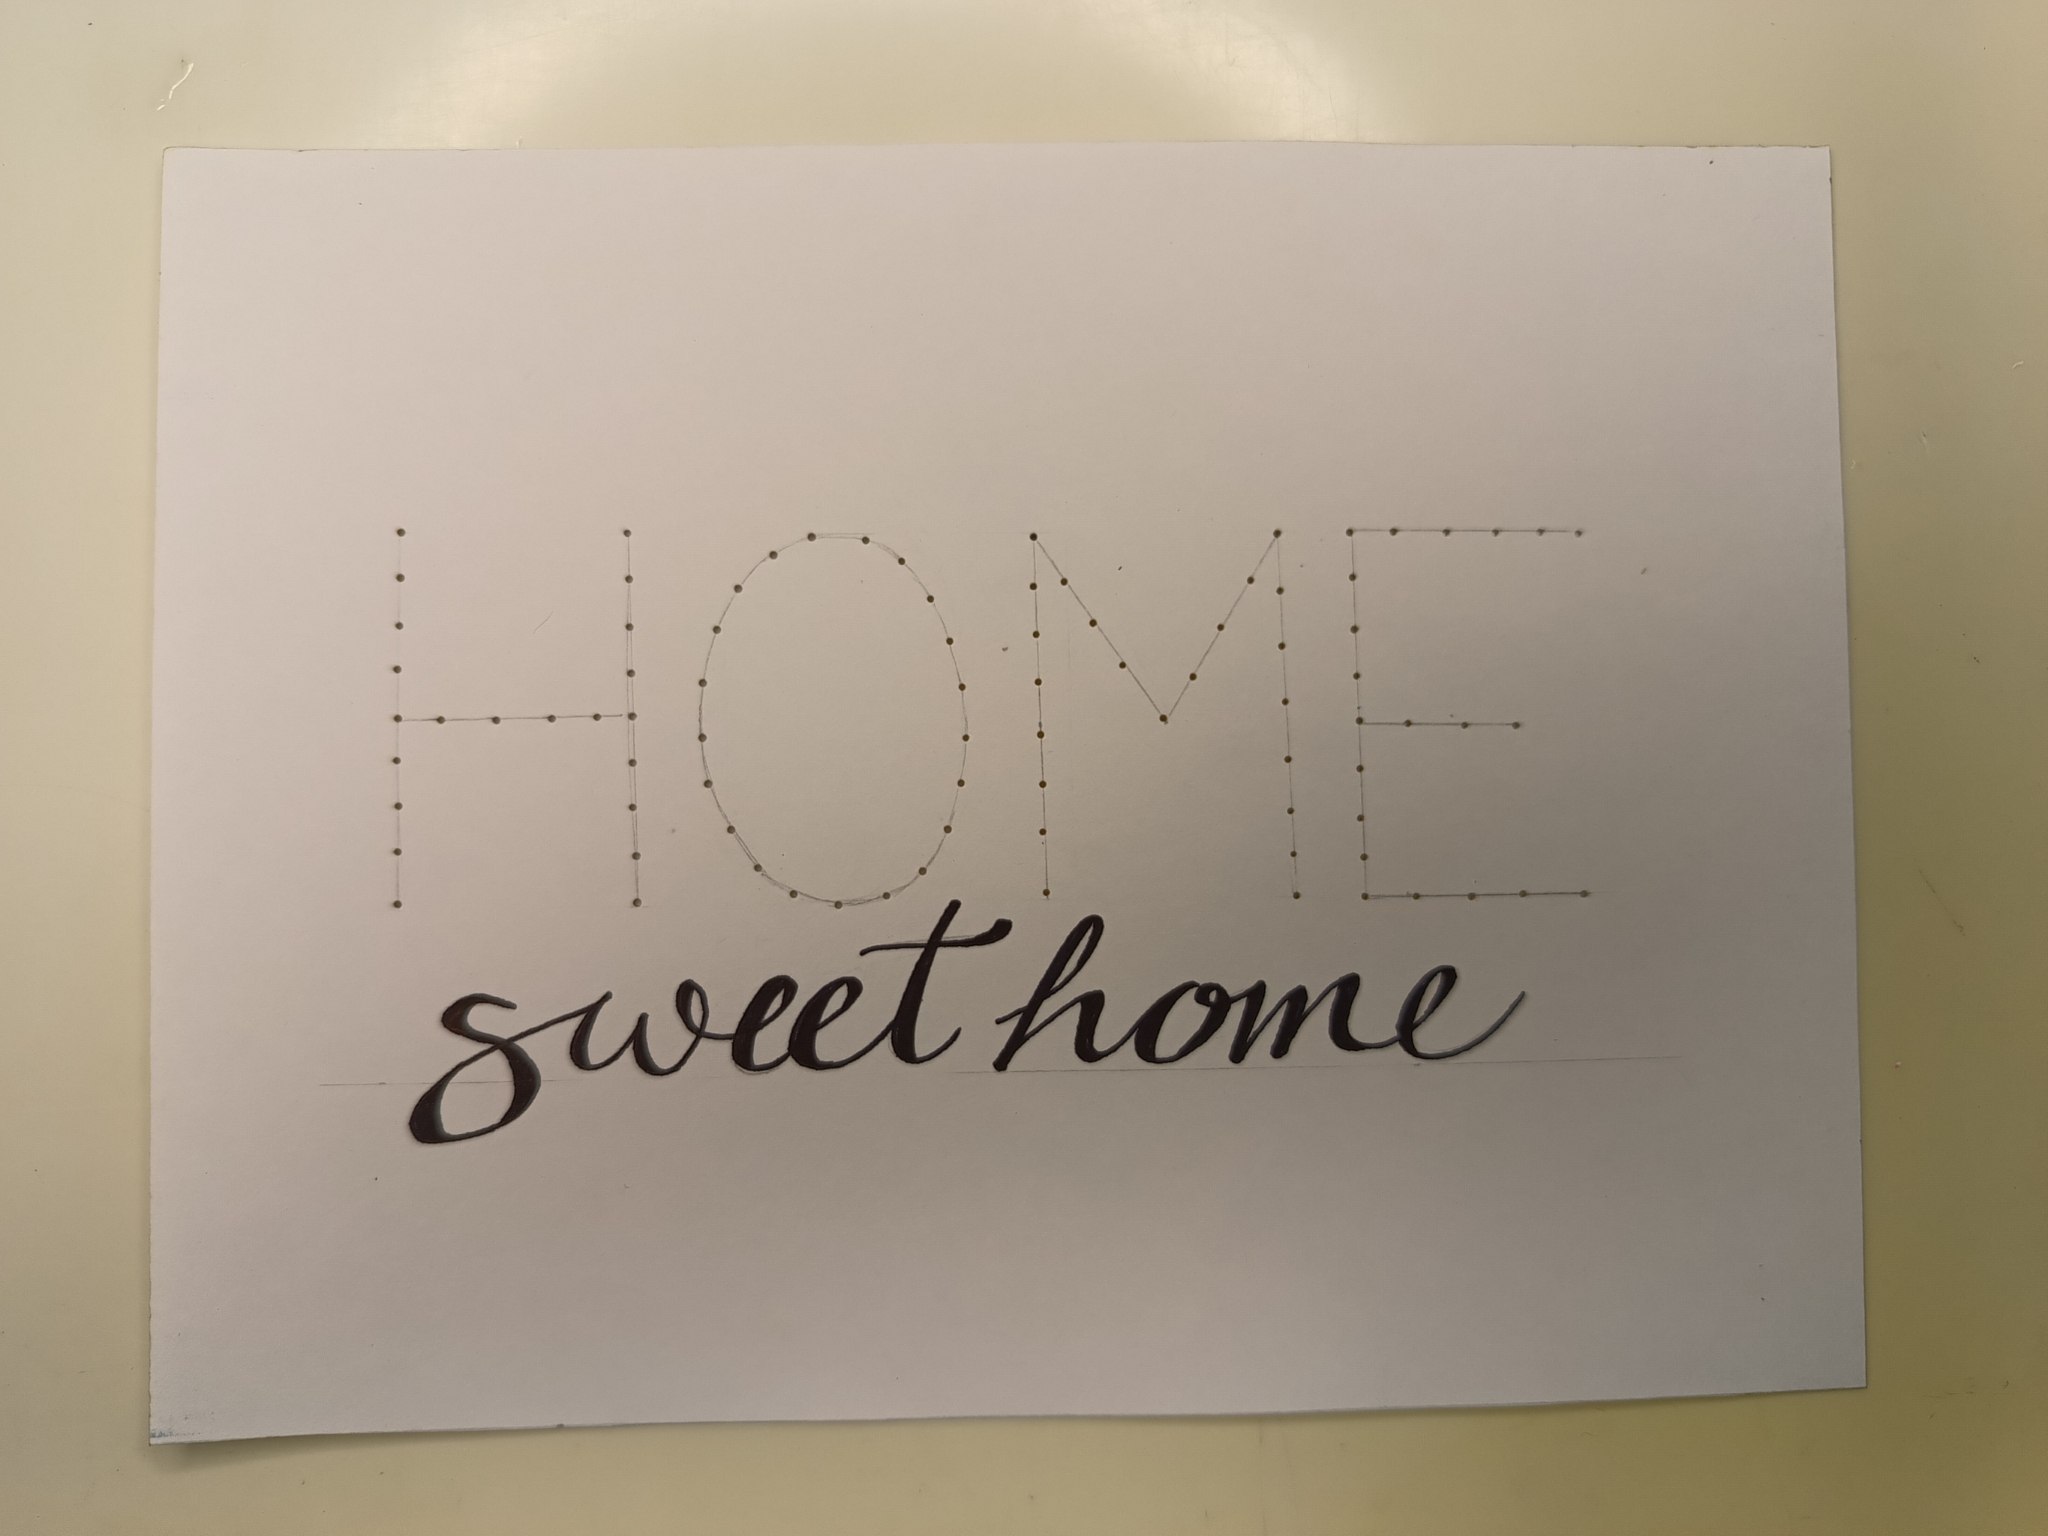
Iniciamos tomando una cartulina del tamaño que deseamos nuestro cartel, yo elegí color blanco para que los colores de los hilos no tengan que competir con el color de fondo, pero tú puedes elegir el color de tu preferencia. En esta cartulina, escribo a lápiz el mensaje central.
Materials:
- Cardboard
- Knitting yarn
- Needle
- Scissors
- White glue
- Ultra fine tip marker
- Adhesive tape
Procedure:
We start by taking a cardboard of the size we want our poster, I chose white color so that the colors of the threads do not have to compete with the background color, but you can choose the color of your preference. On this cardboard, I write in pencil the central message.
 |
 |
|---|---|
Mensaje escrito / Written message
Procedemos entonces a pintar las letras de la segunda línea con el marcador. En este caso hice un falso lettering con el marcador de punta ultrafina rellenando algunas secciones de las letras.
We then proceed to paint the letters of the second line with the marker. In this case I did a false lettering with the ultra fine tip marker filling in some sections of the letters.
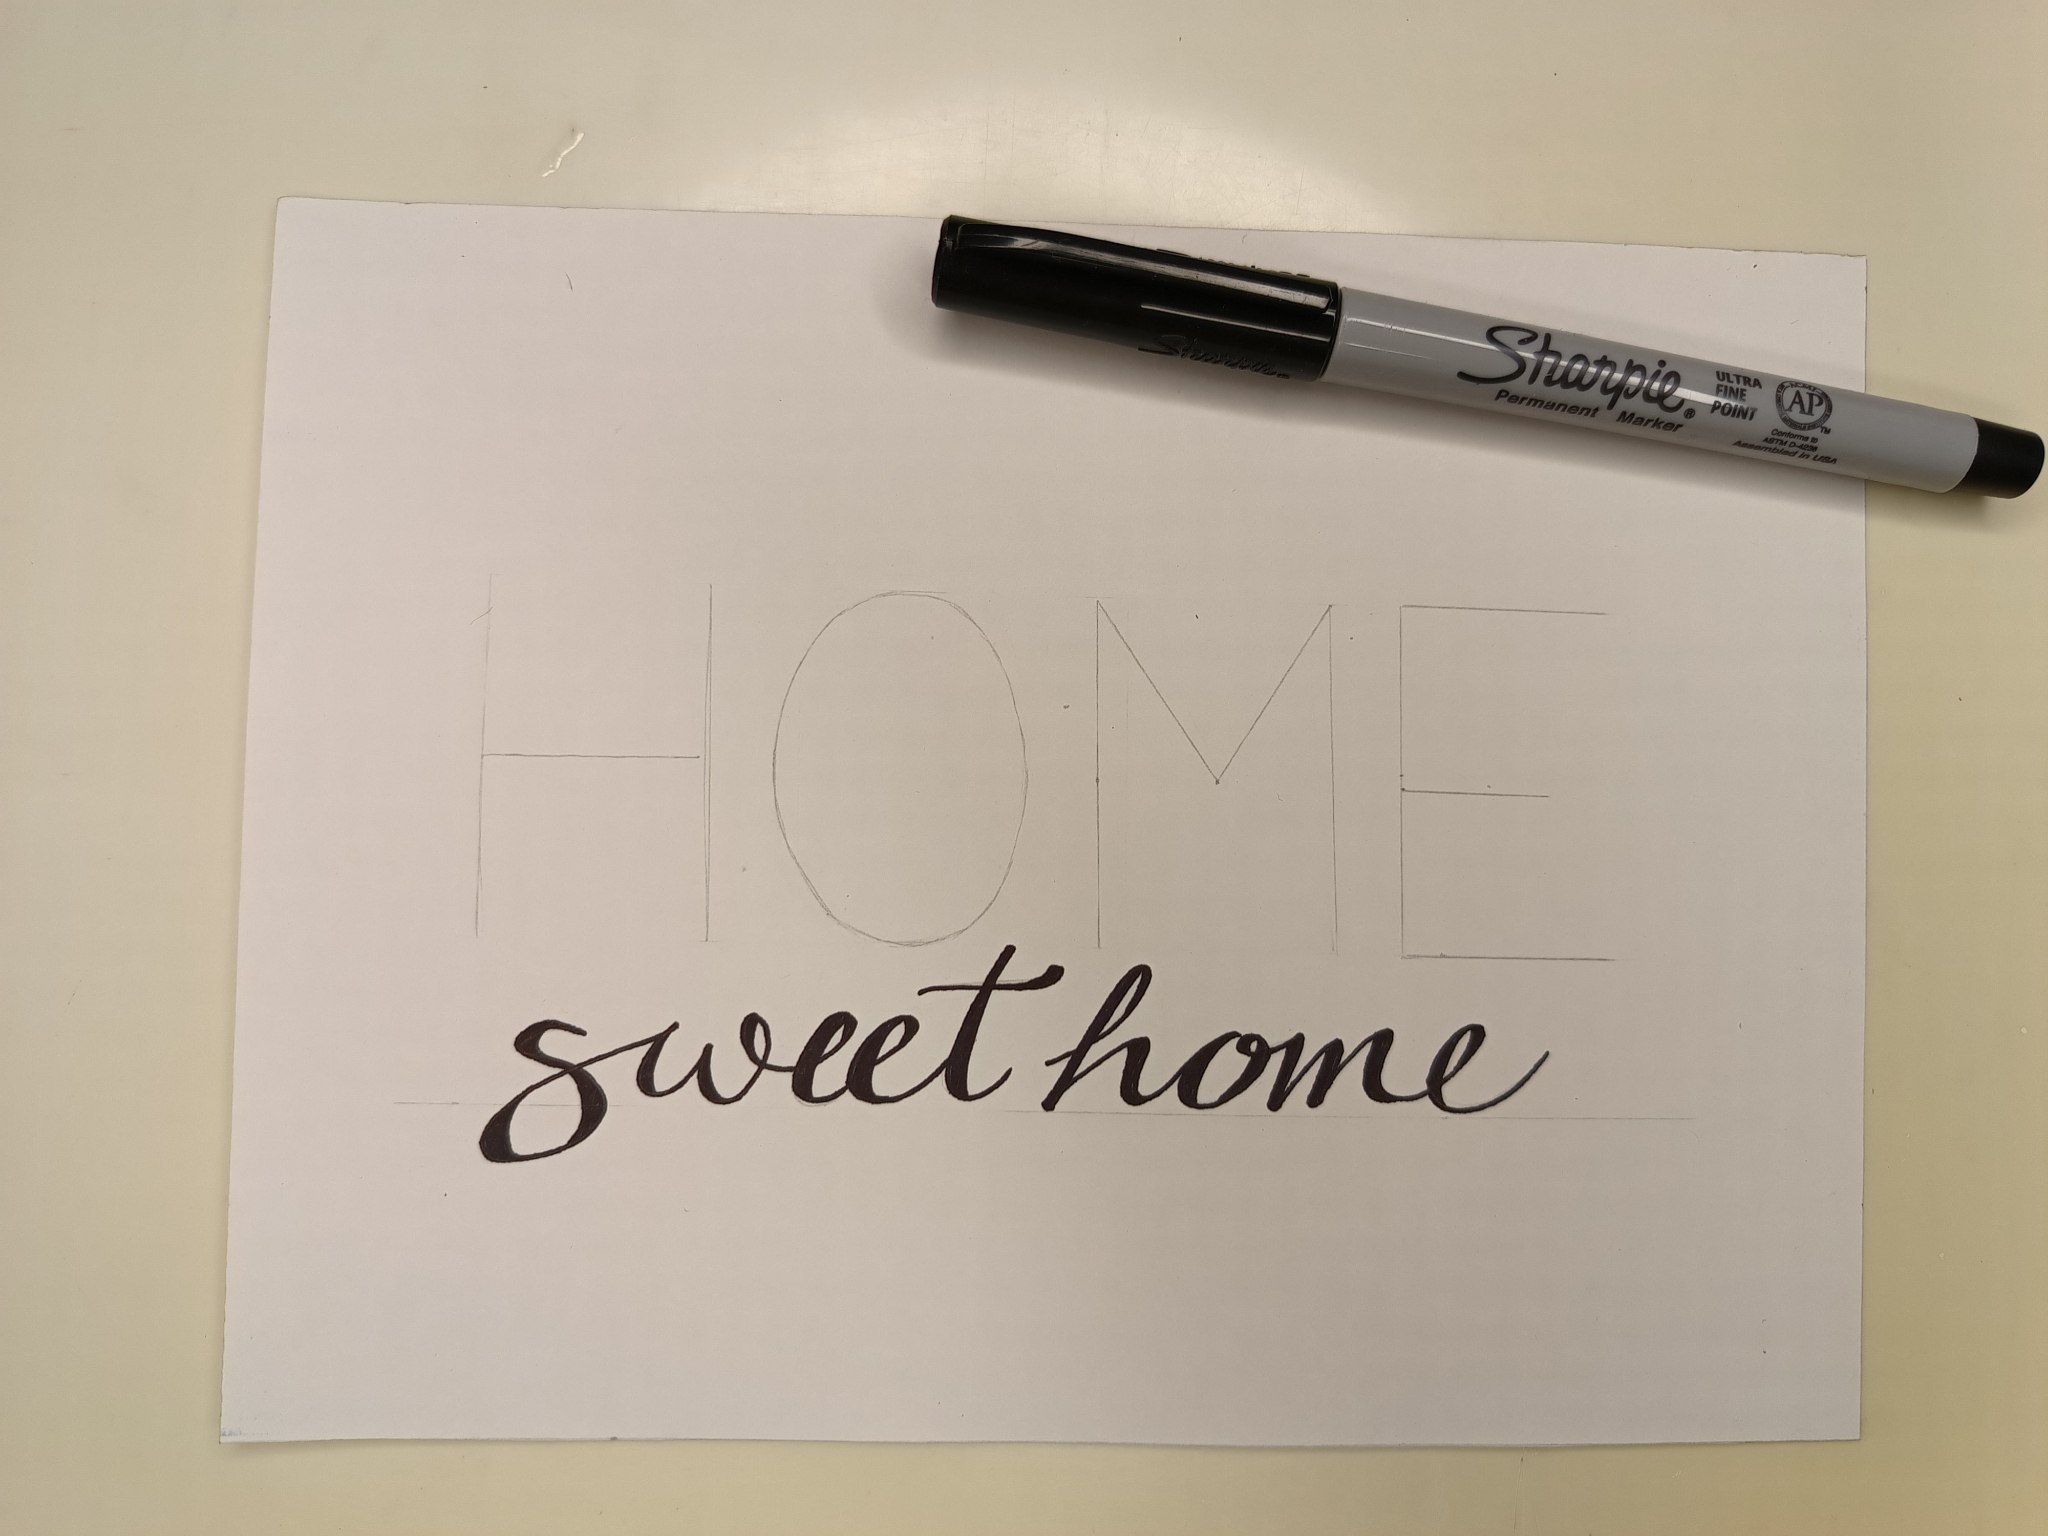
Falso lettering / False lettering
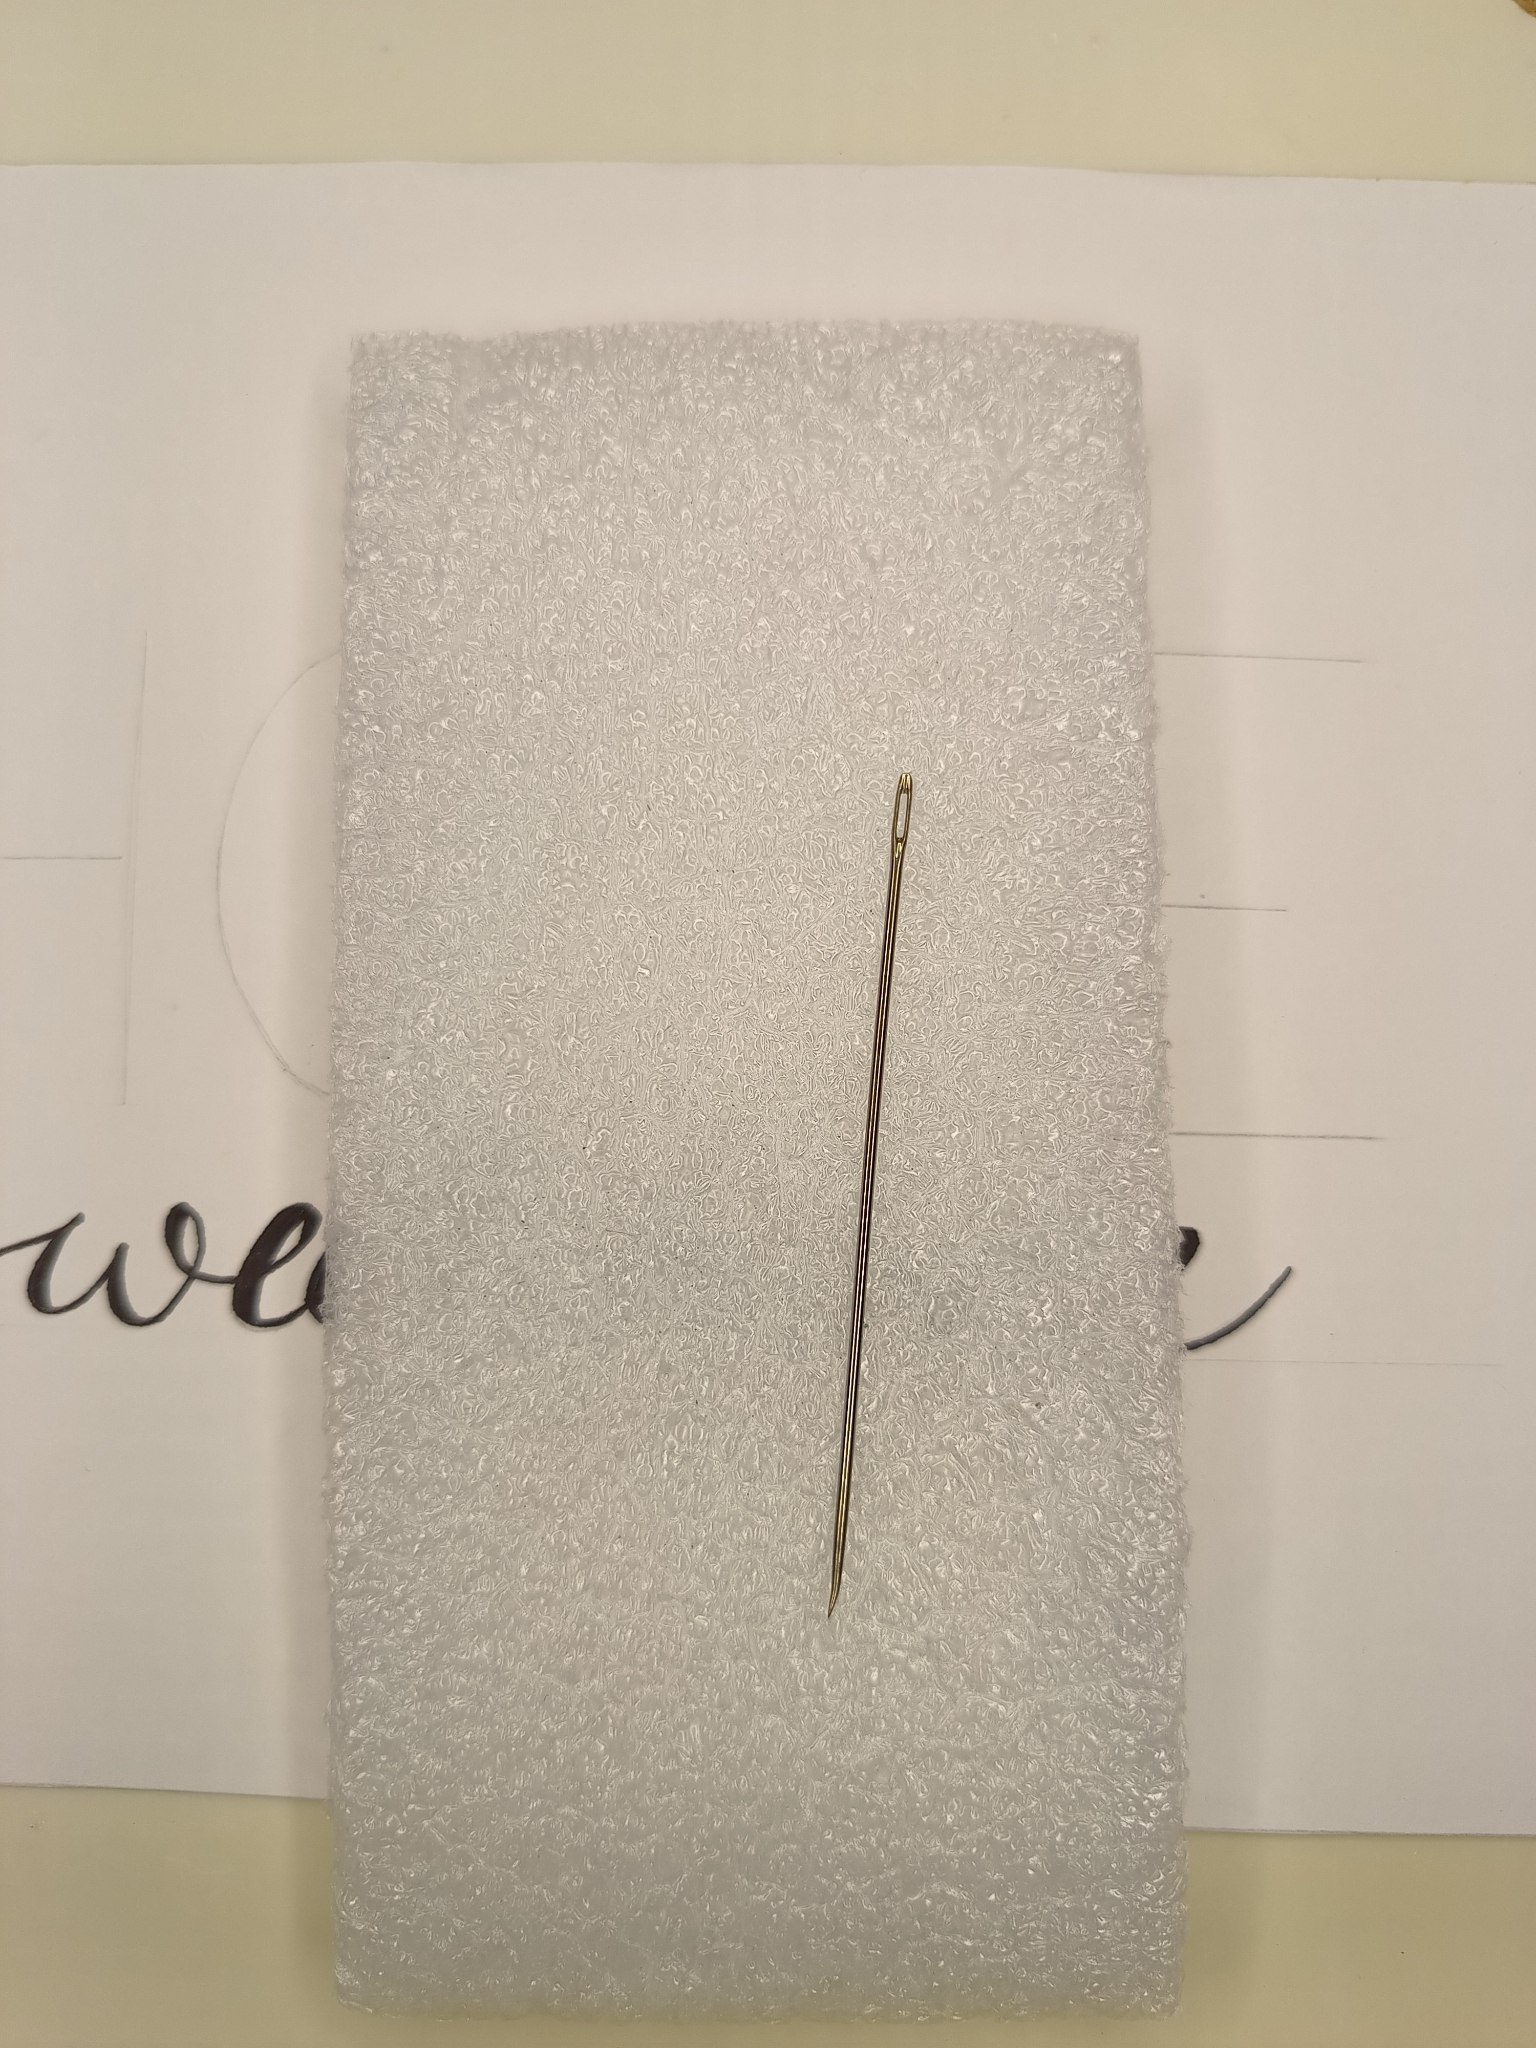
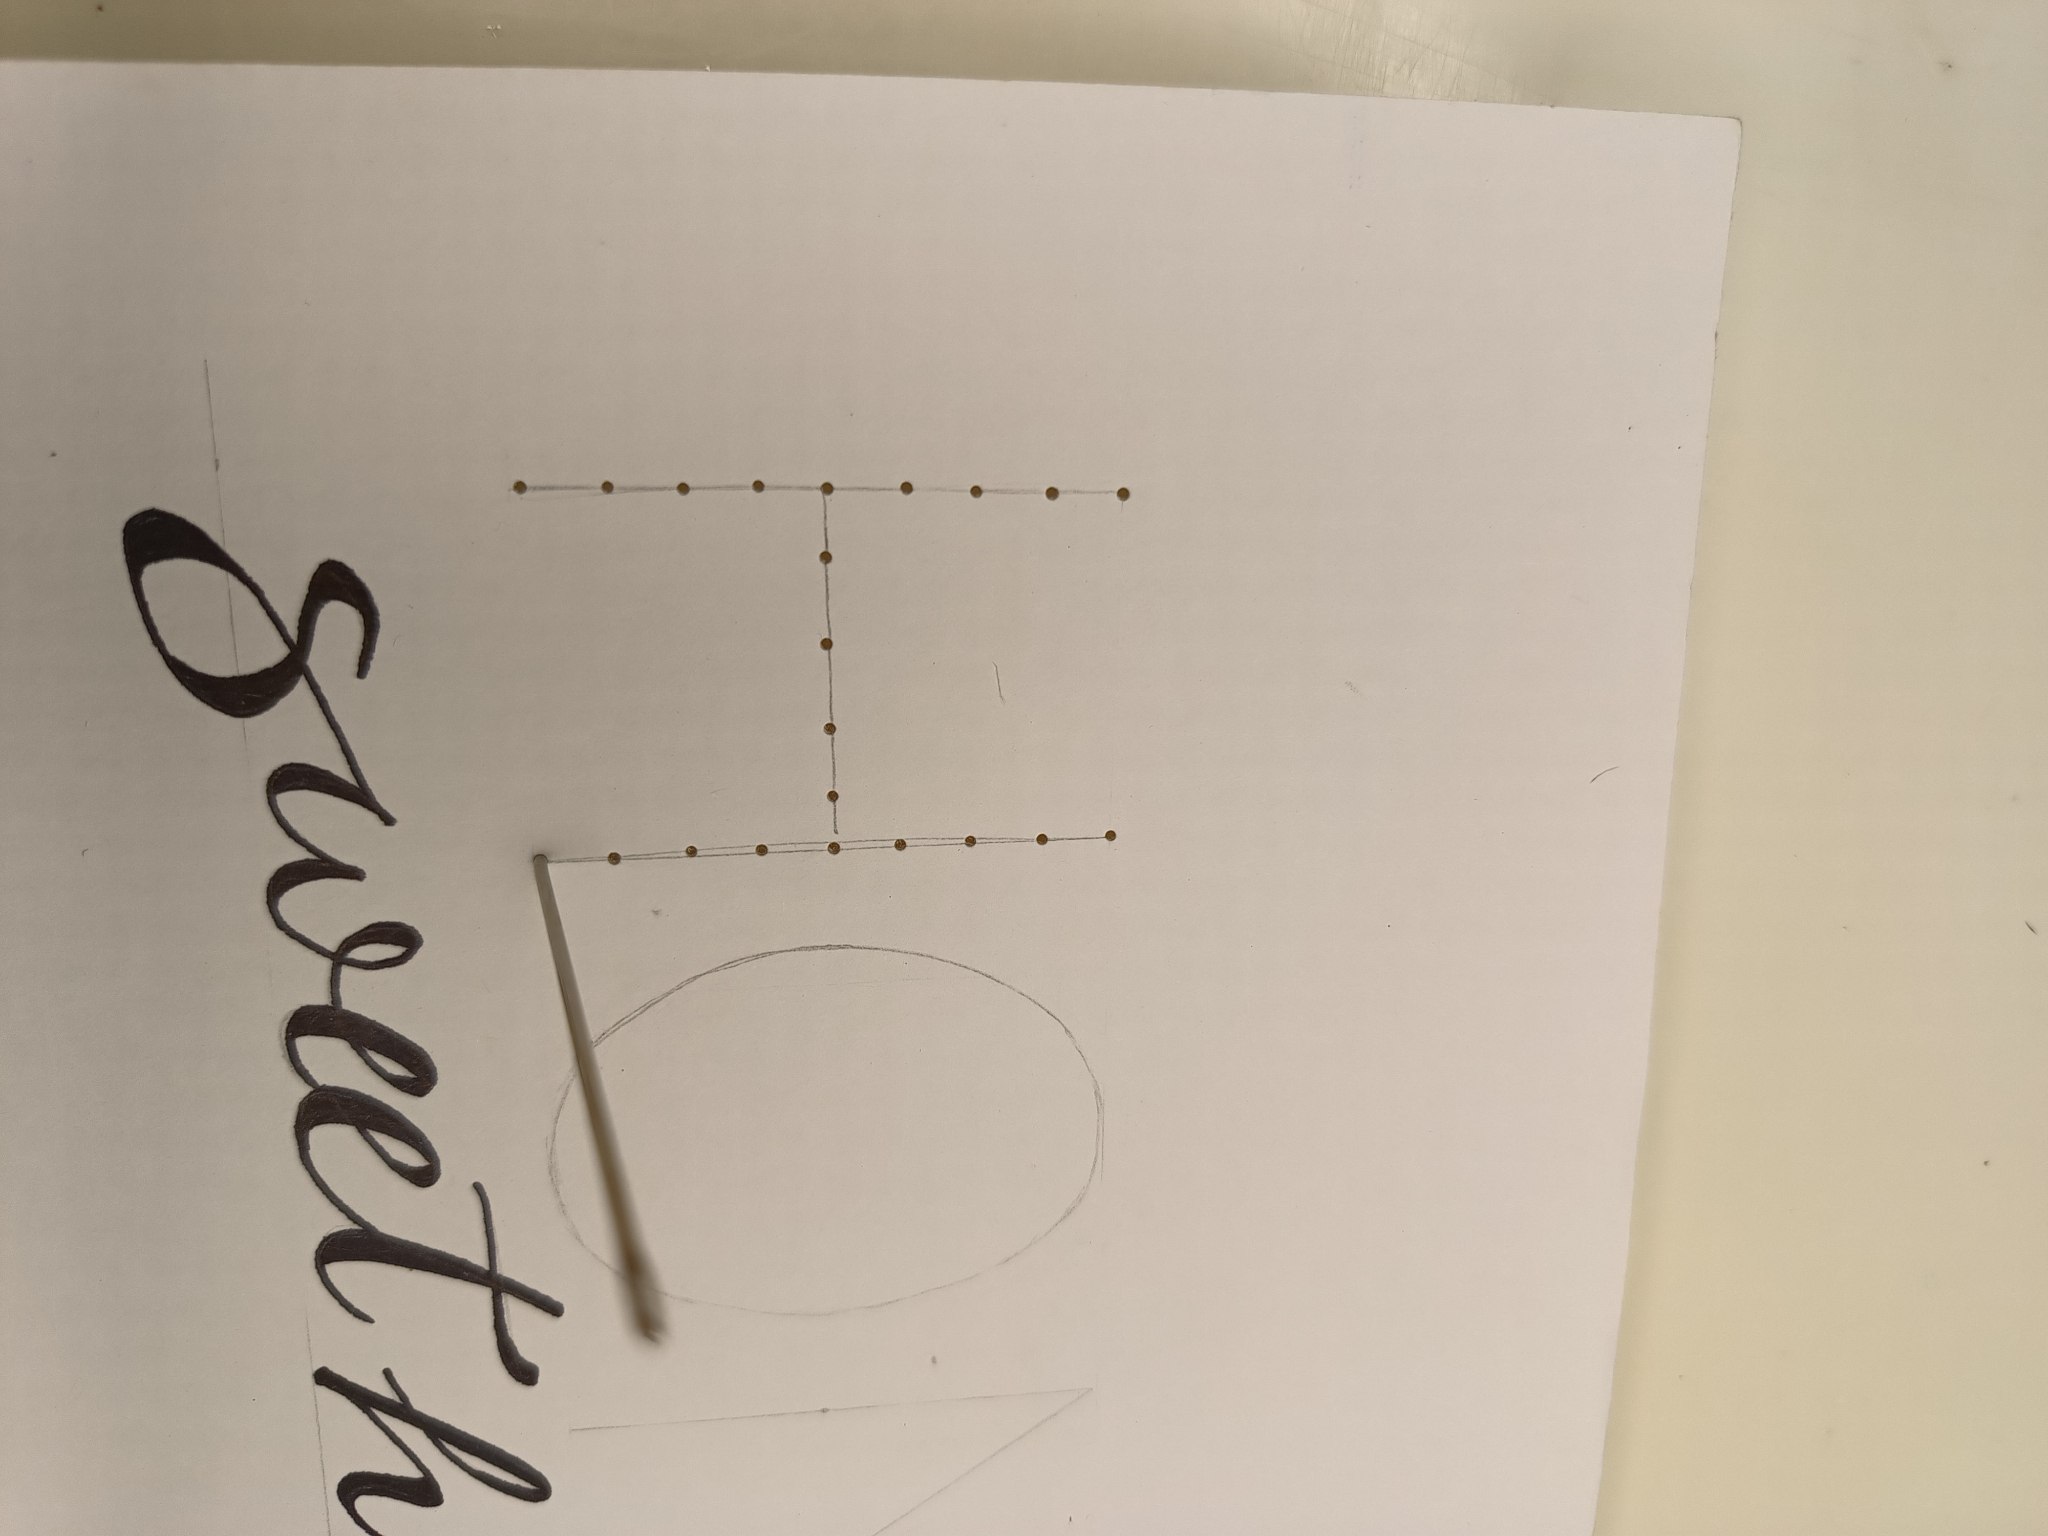
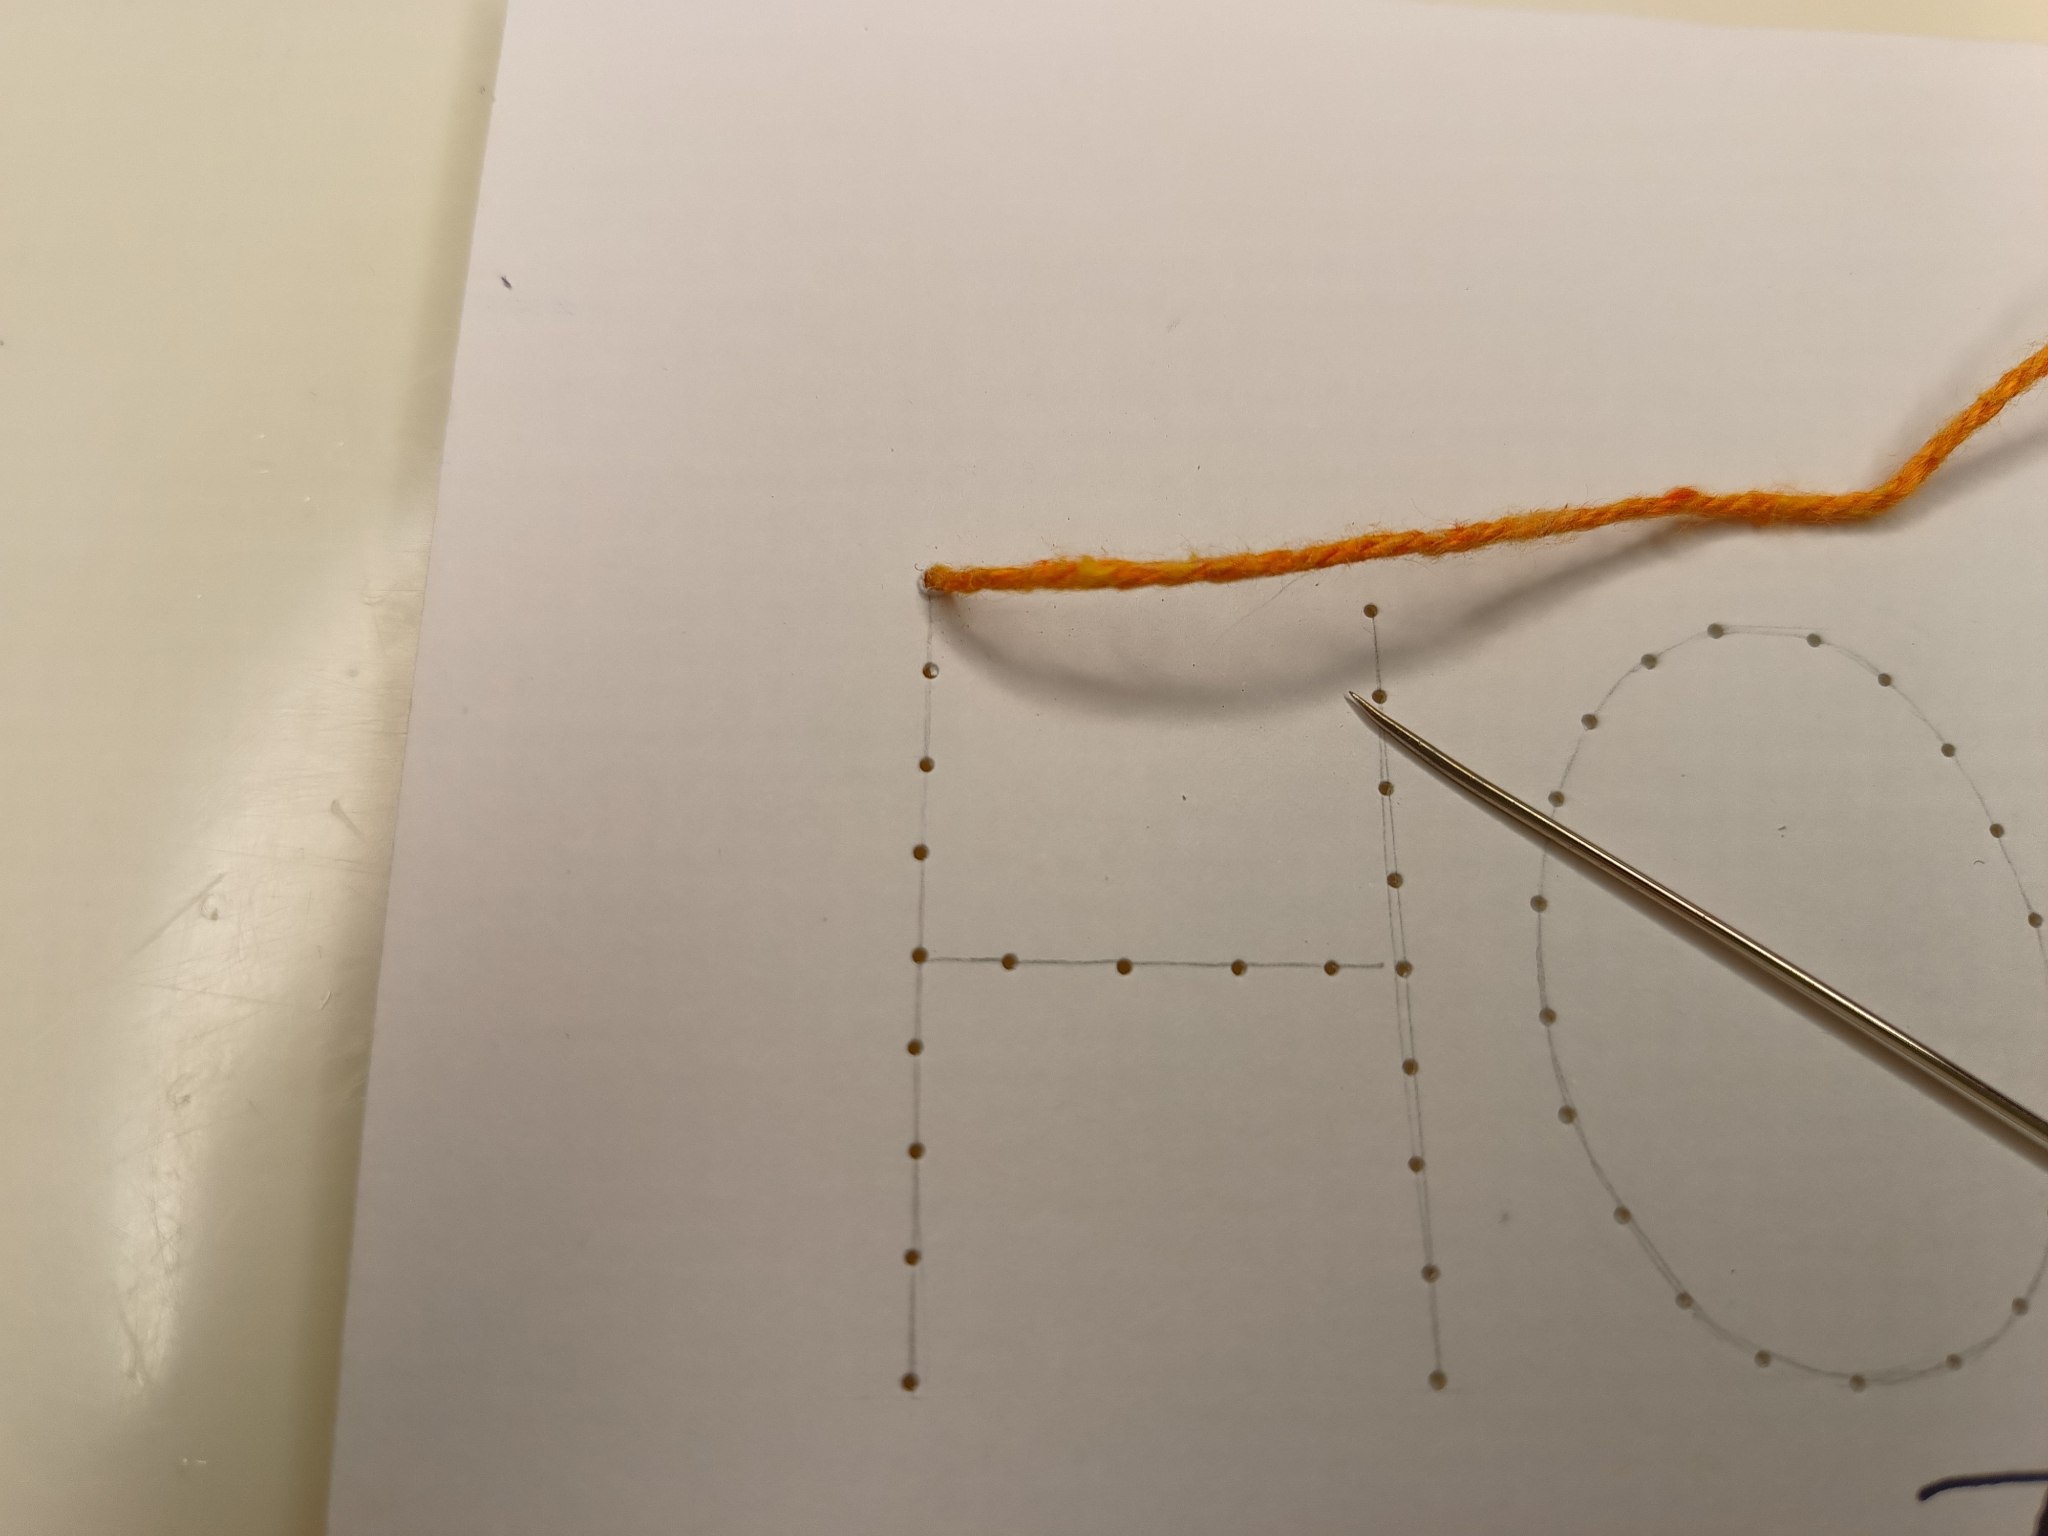
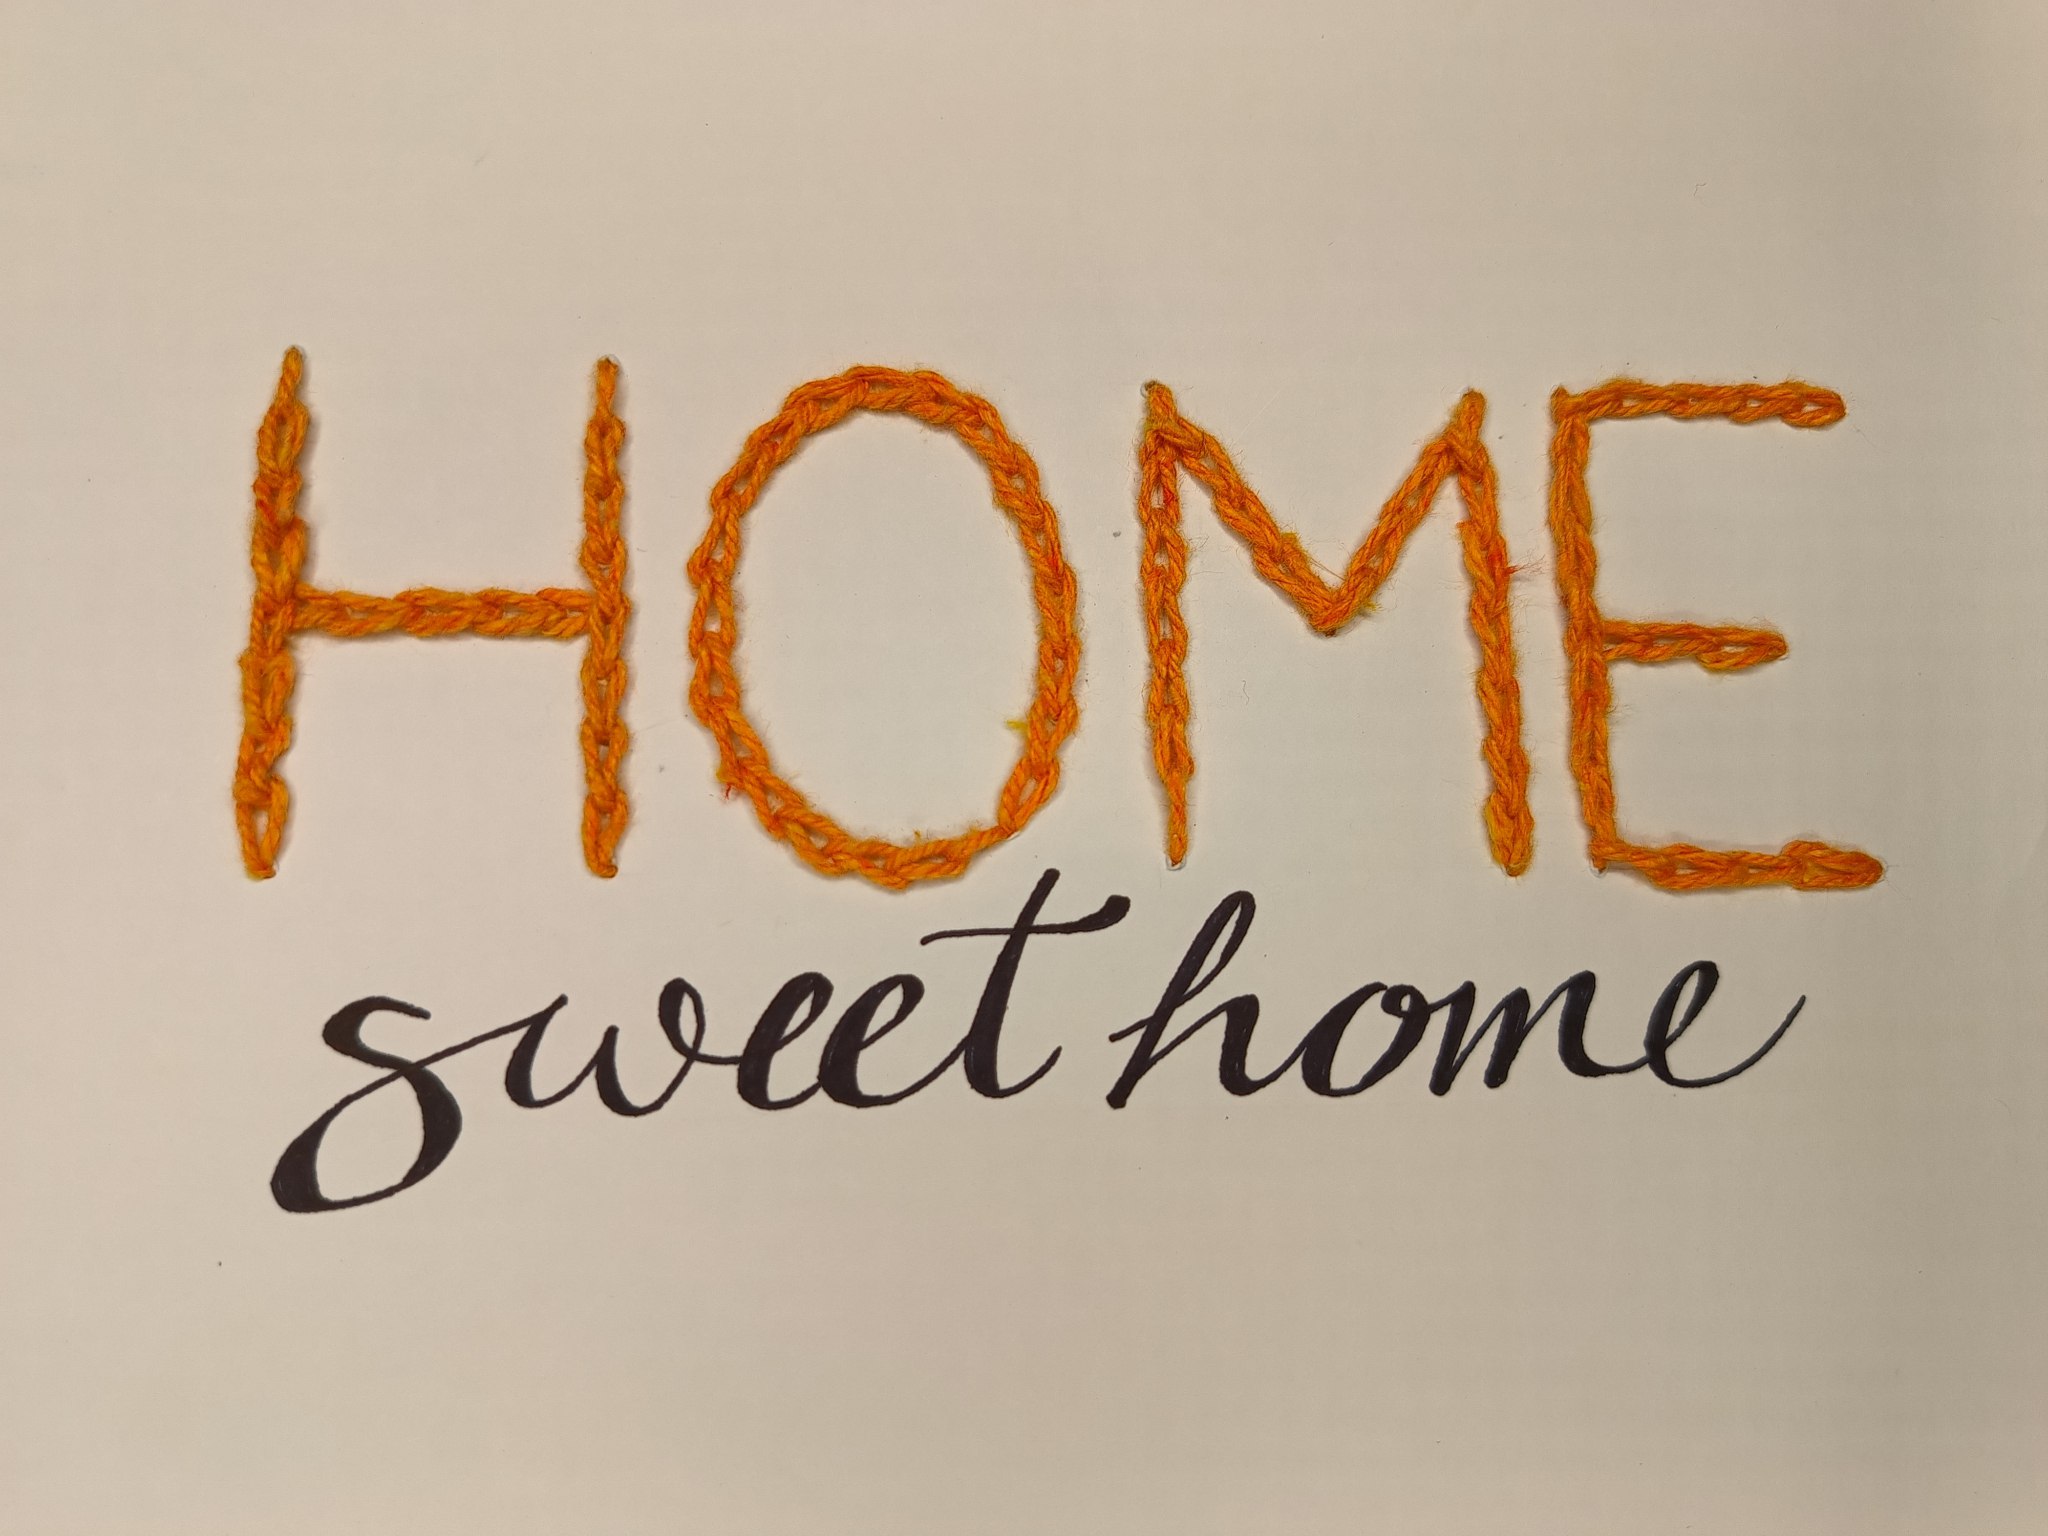
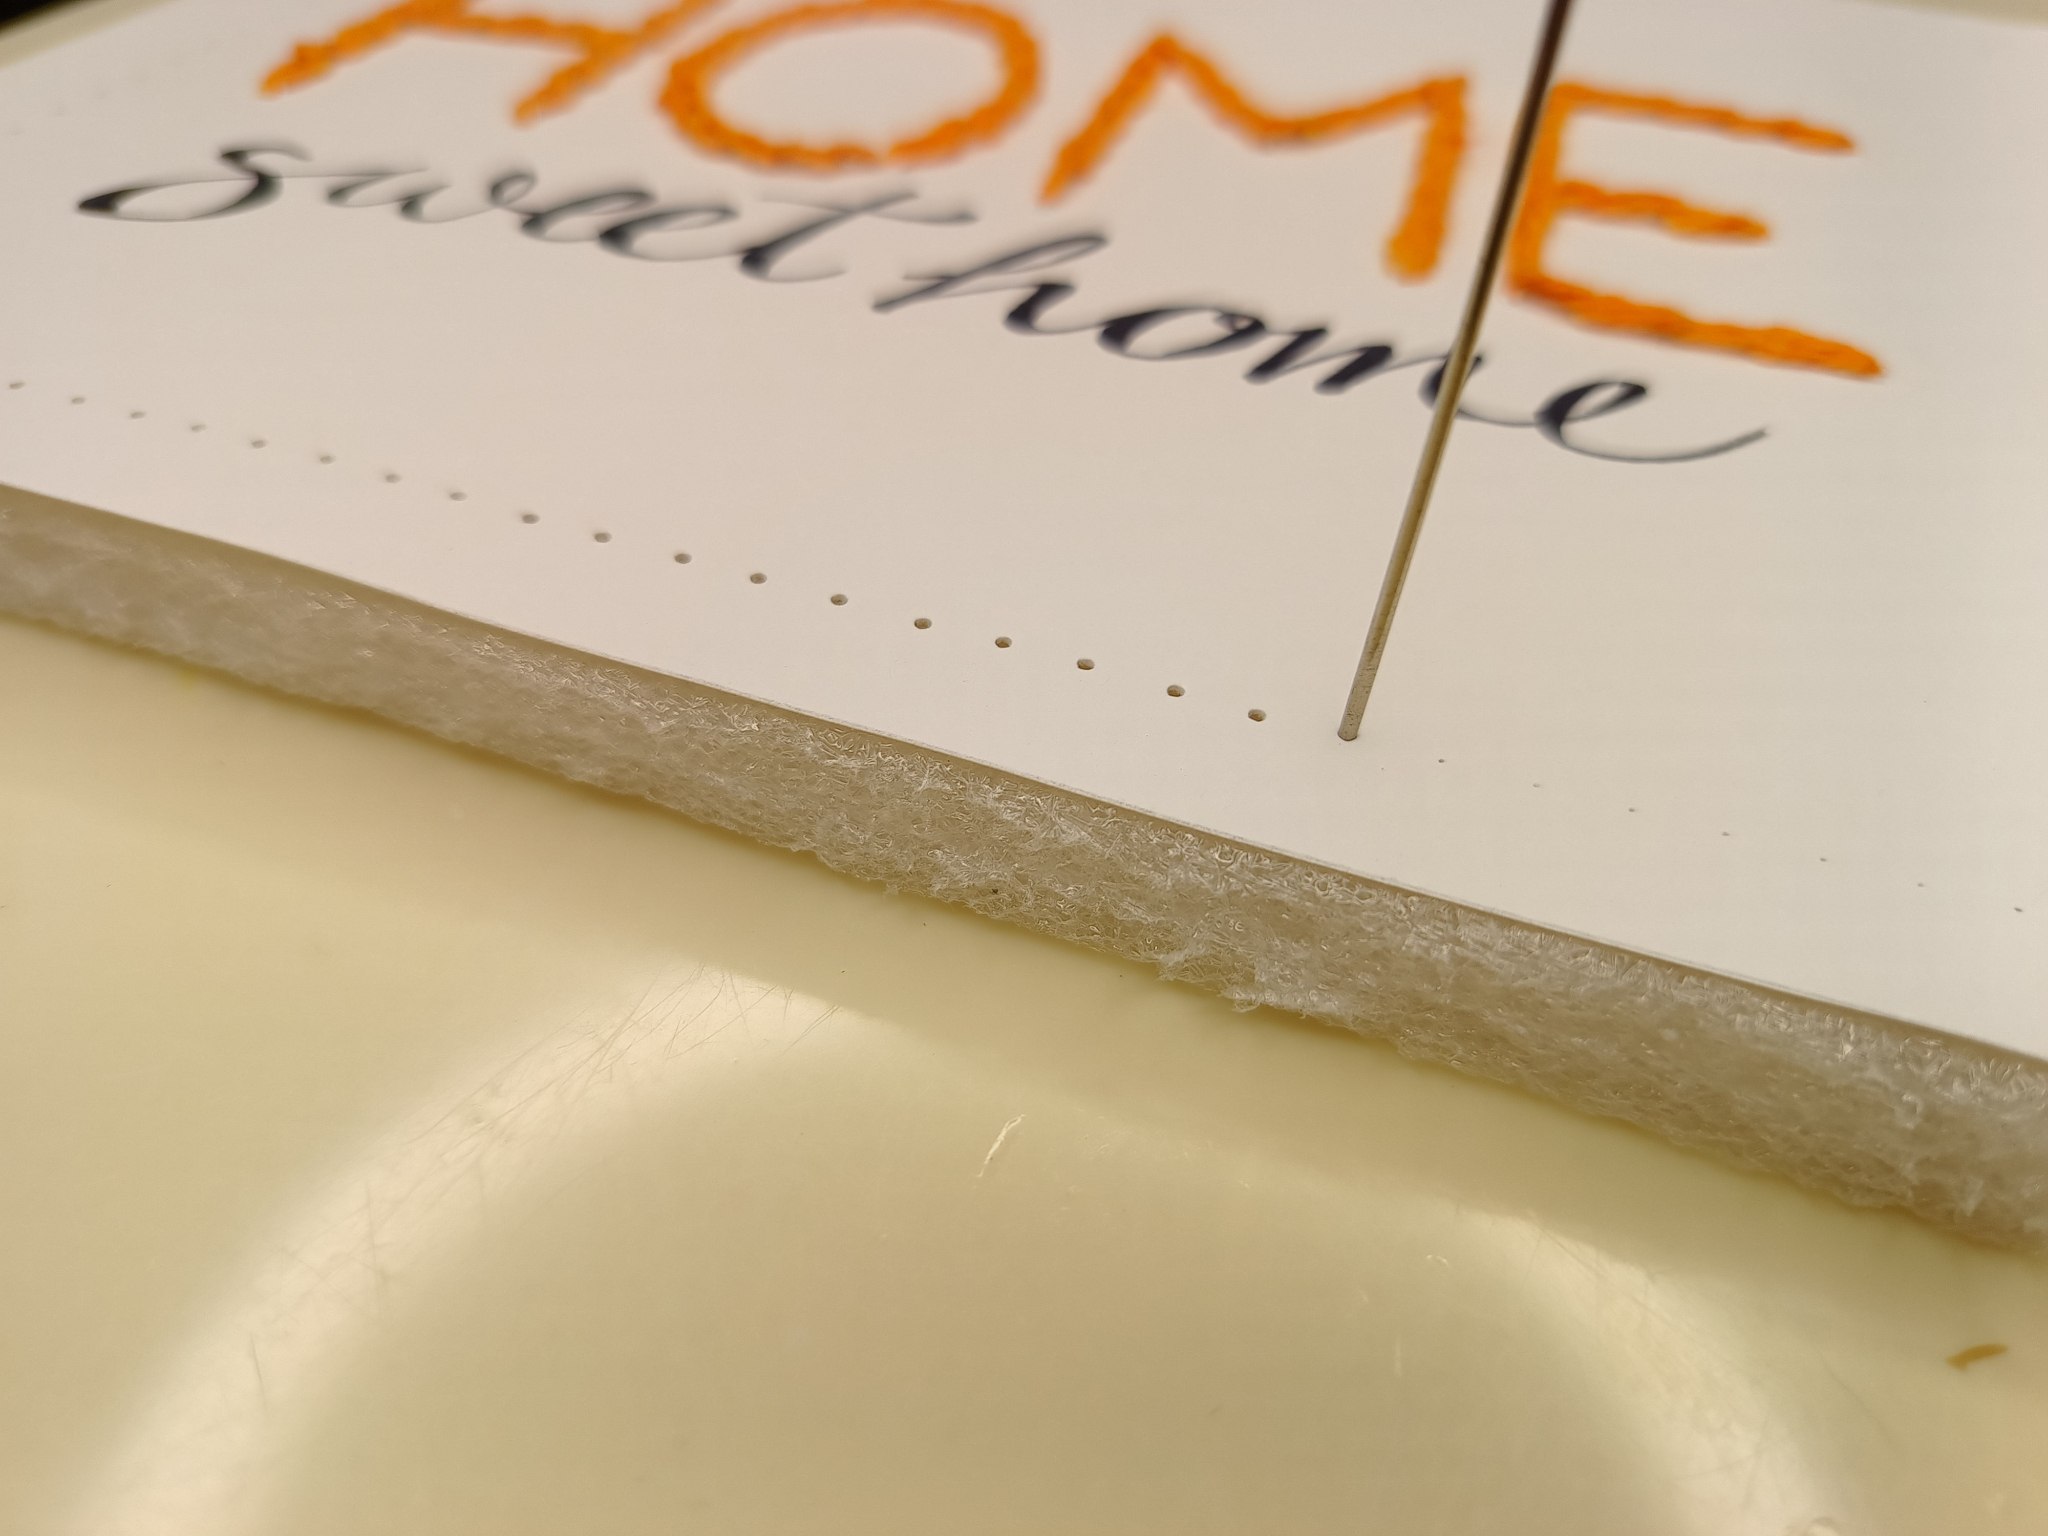
Como las letras que deseamos tejer para este diseño son las de la palabra “HOME”, entonces tomaremos una superficie blanda pero no muy deformable (como una goma espuma por ejemplo), la colocaremos debajo de la cartulina en la parte de las letras y punzaremos con una aguja repetidas veces de manera equidistante hasta completar todas las letras.
As the letters we want to weave for this design are the letters of the word “HOME”, we will take a soft but not very deformable surface (like a foam rubber for example), we will place it under the cardboard in the part of the letters and we will pierce it with a needle repeatedly in an equidistant way until completing all the letters.
 |
 |
|---|---|
Abriendo orificios / Opening holes
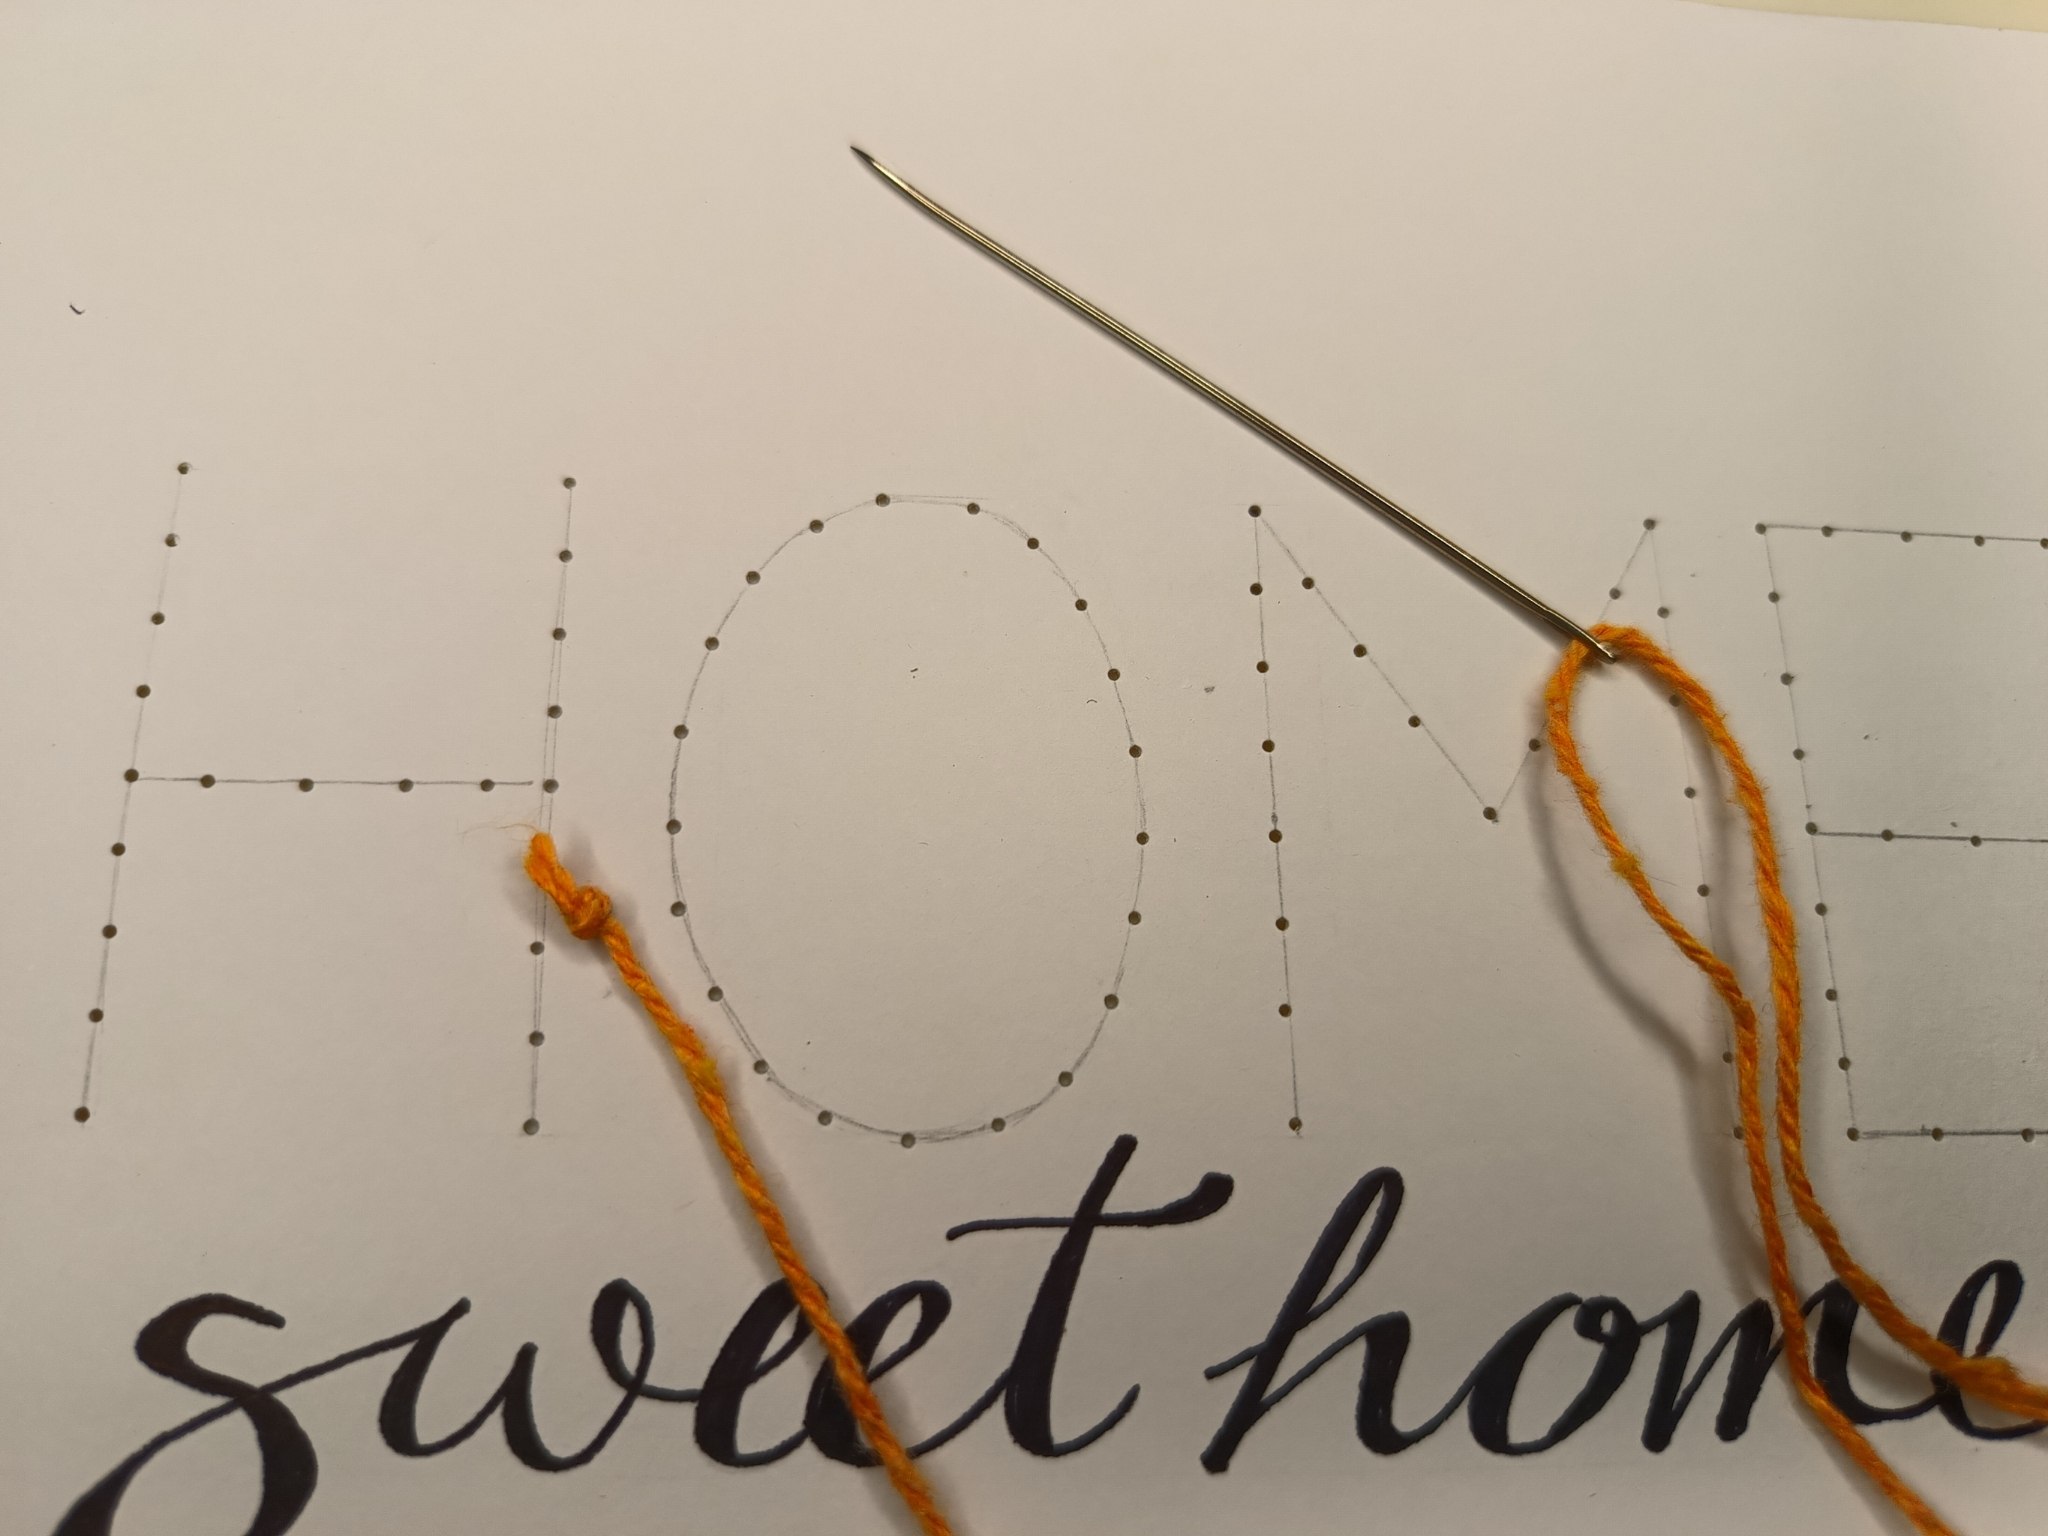
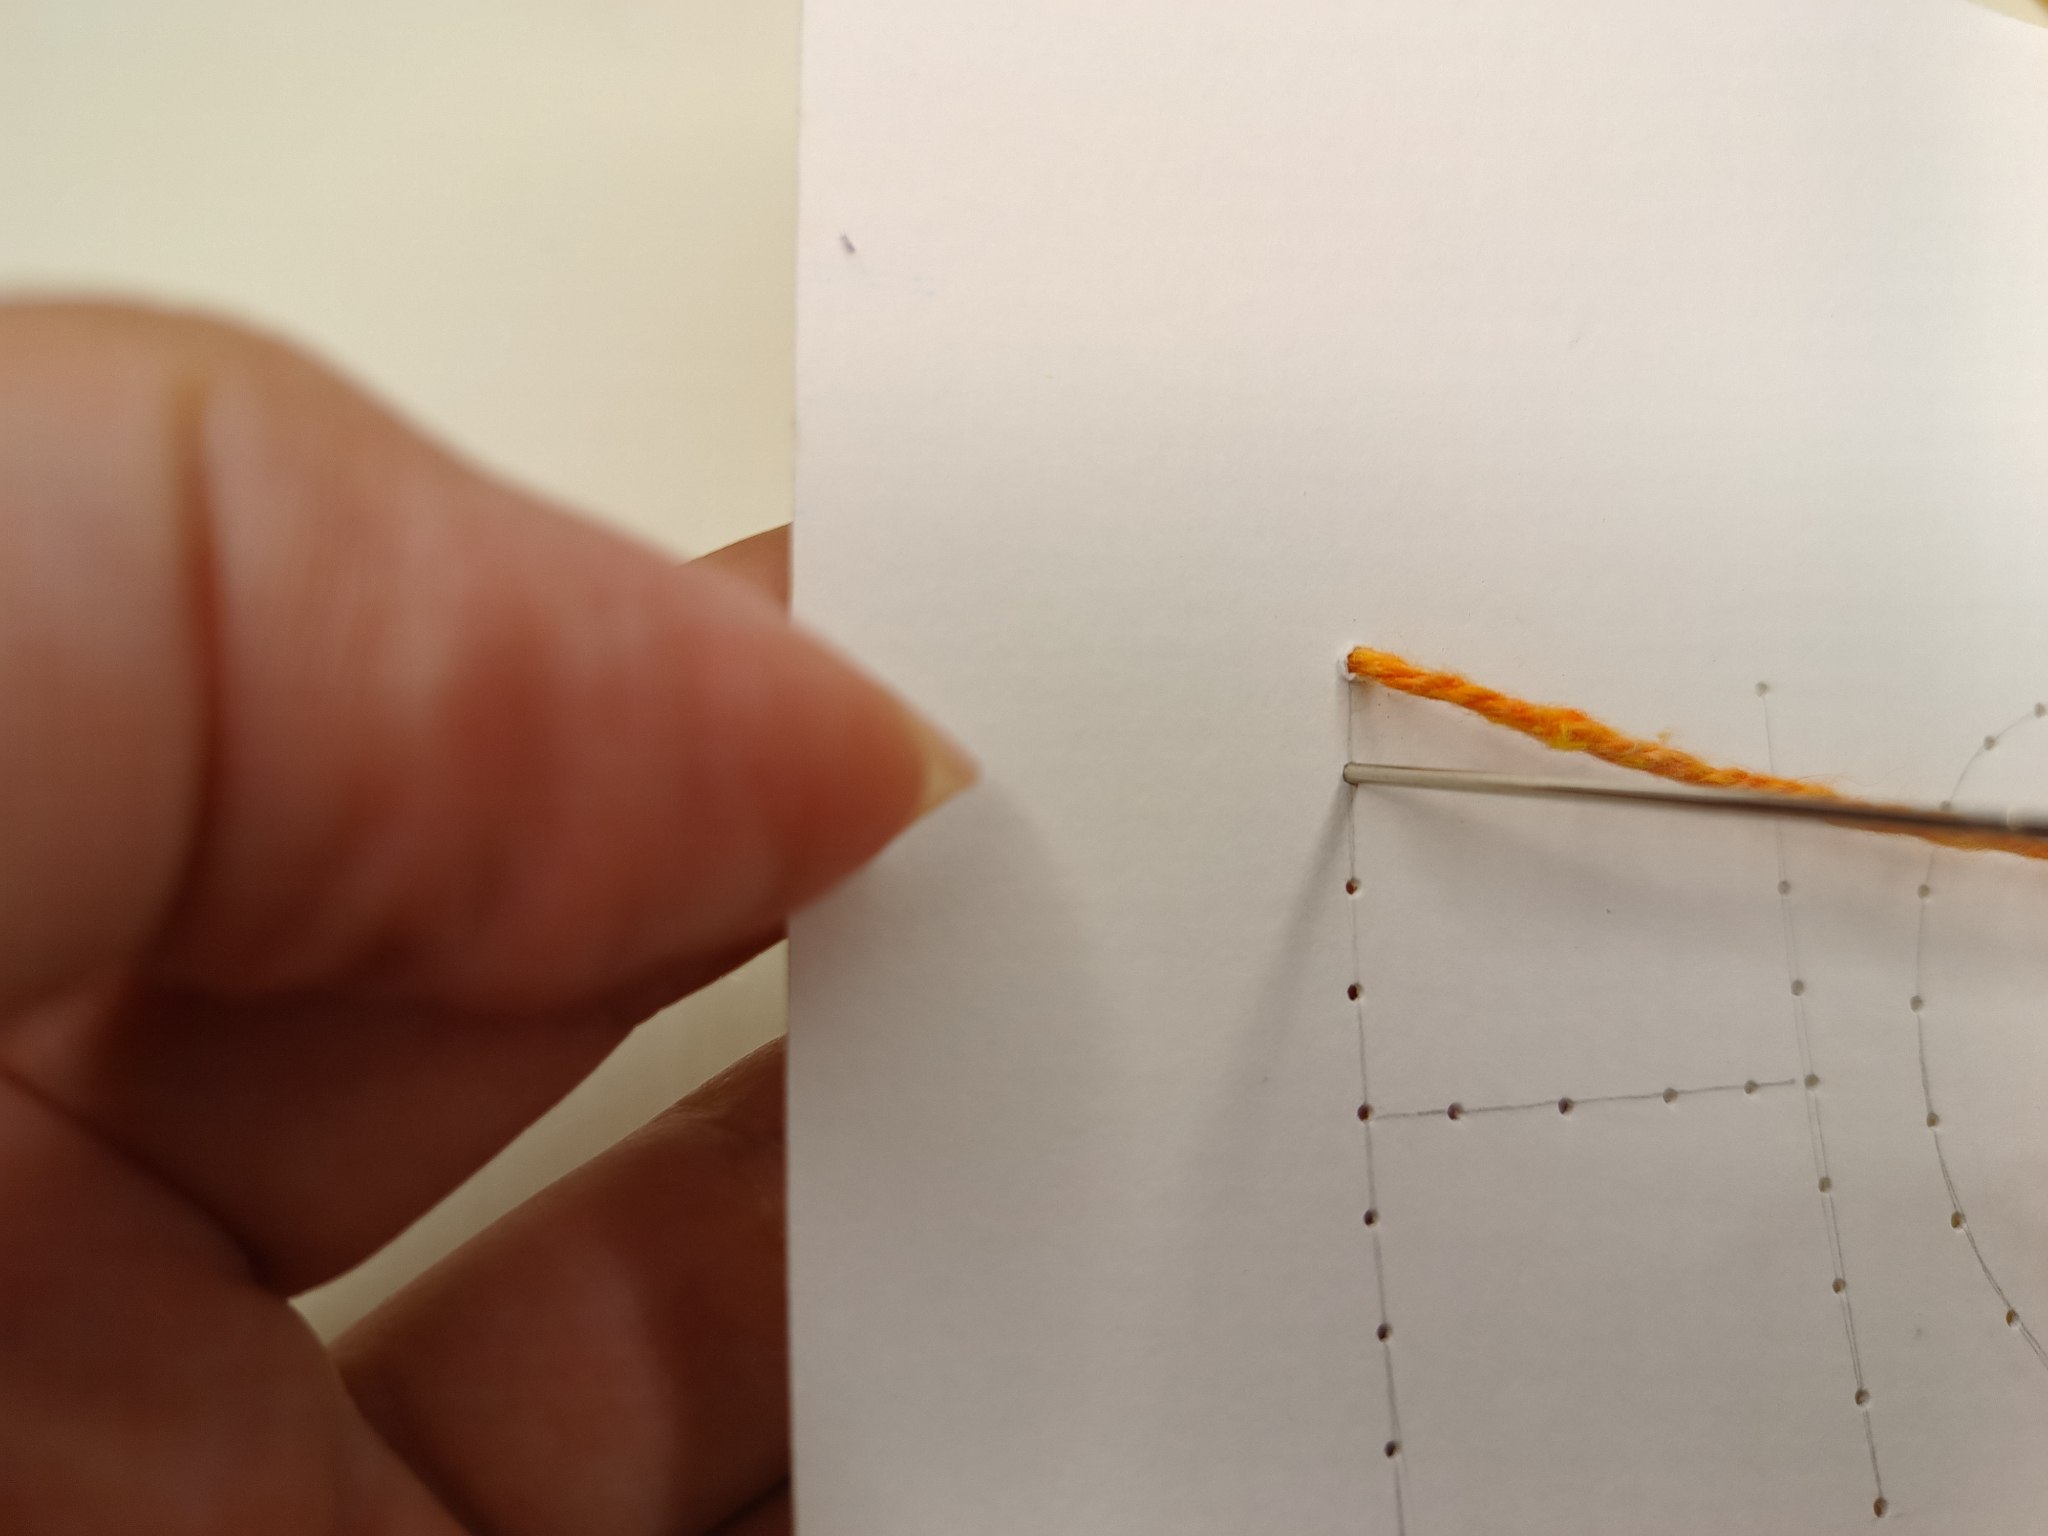
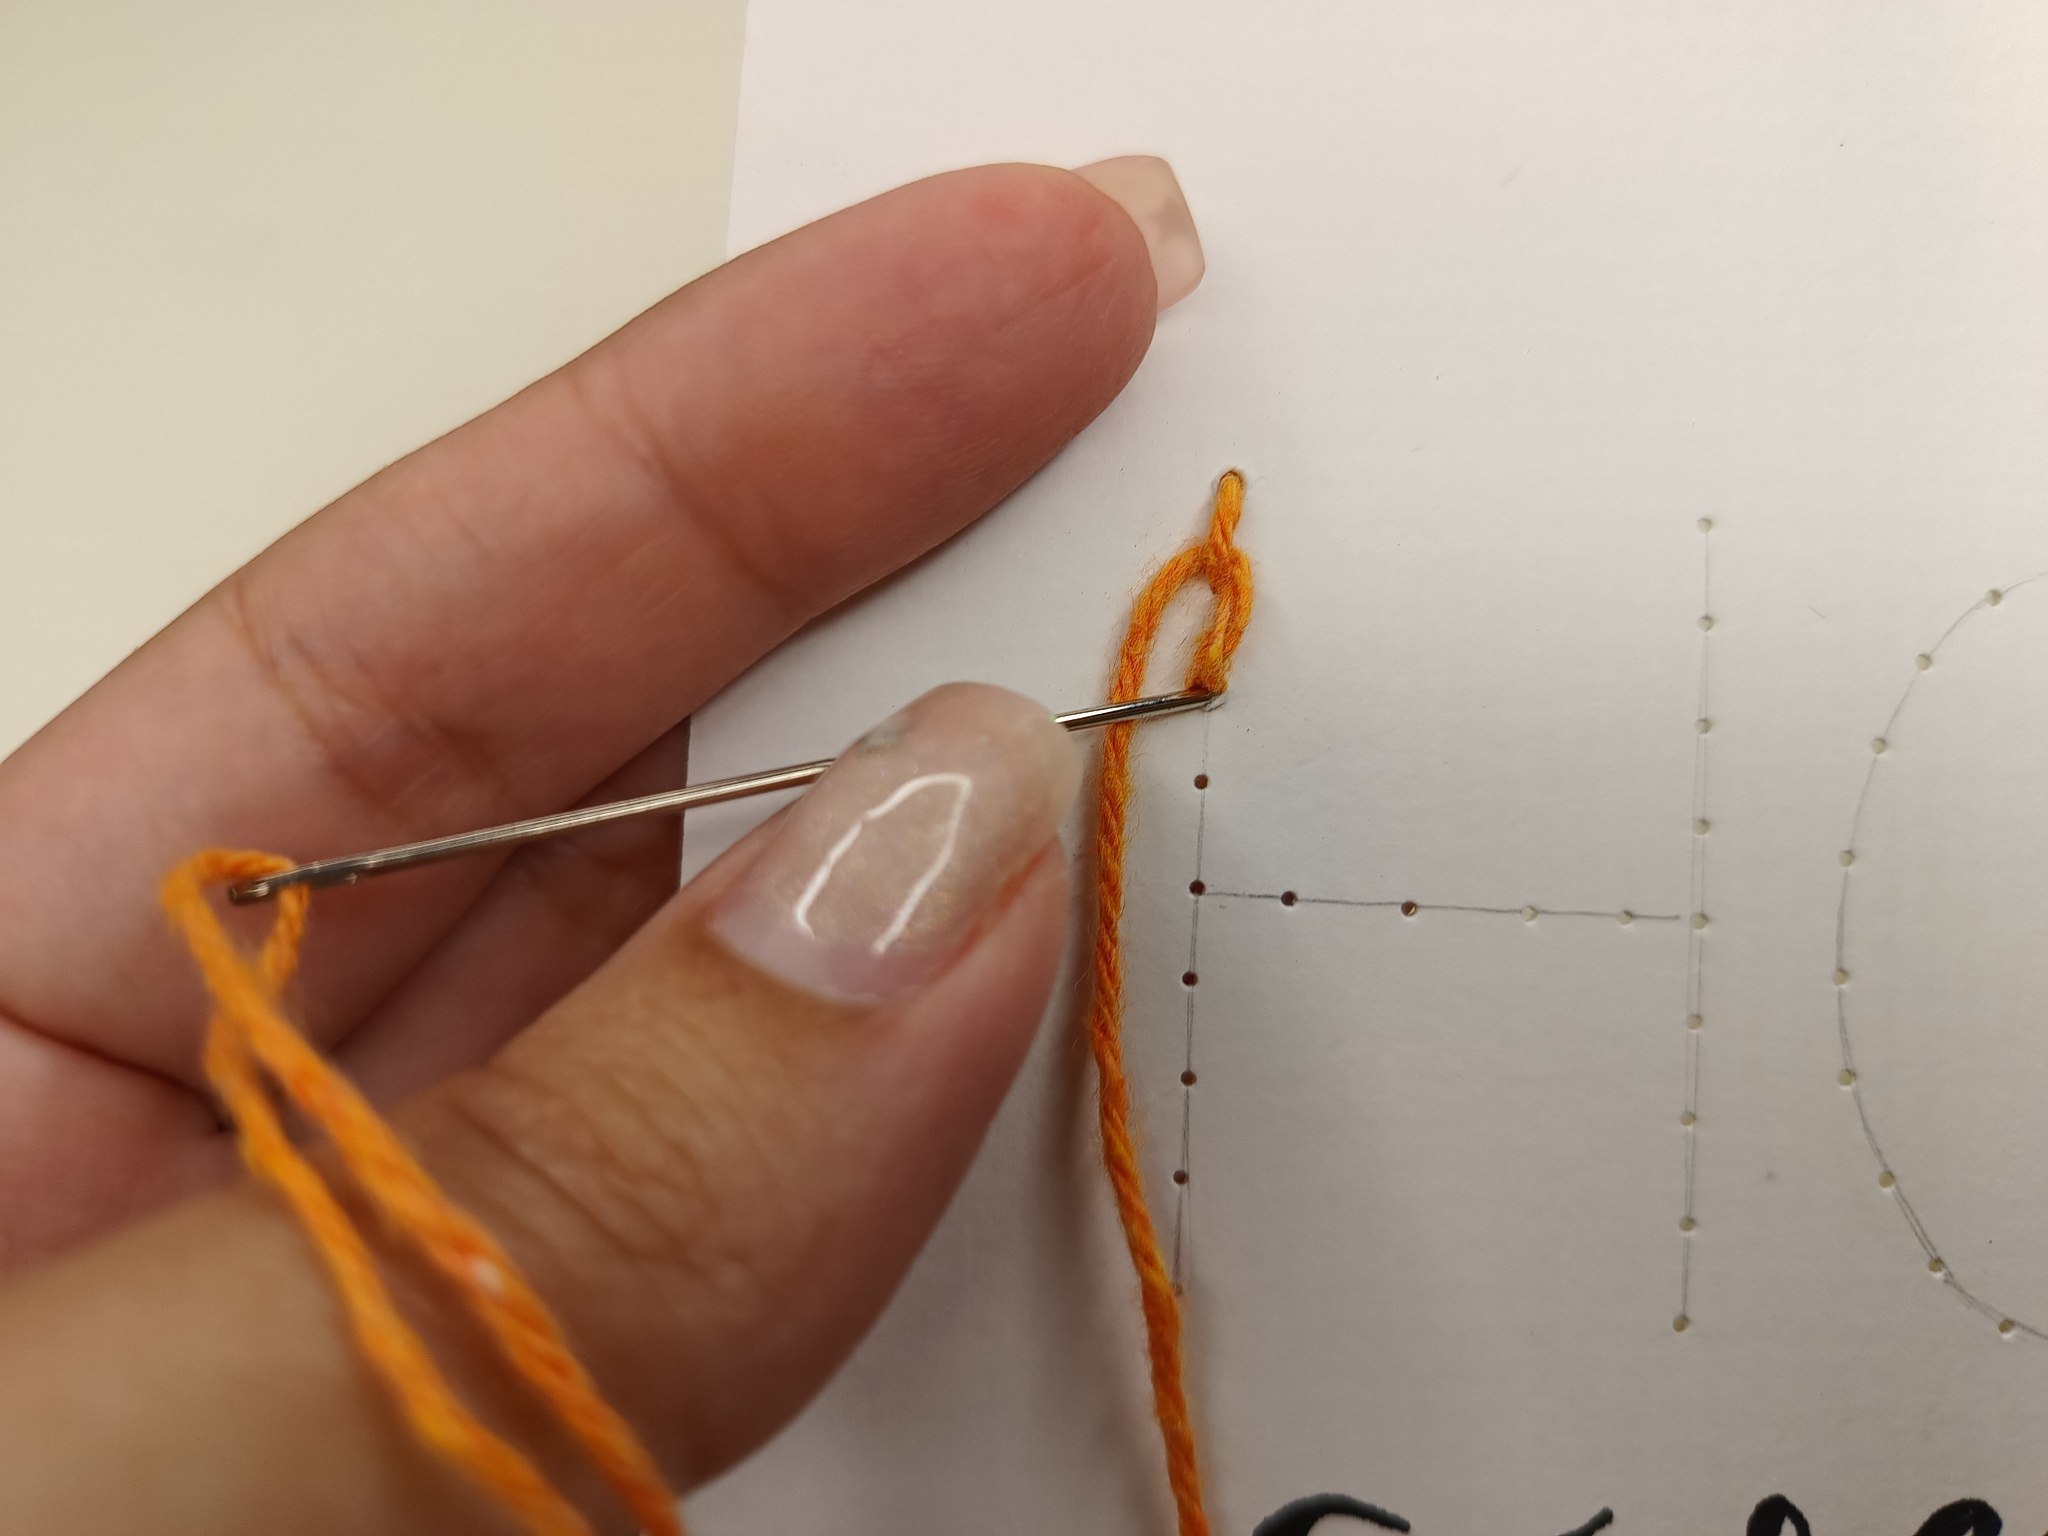
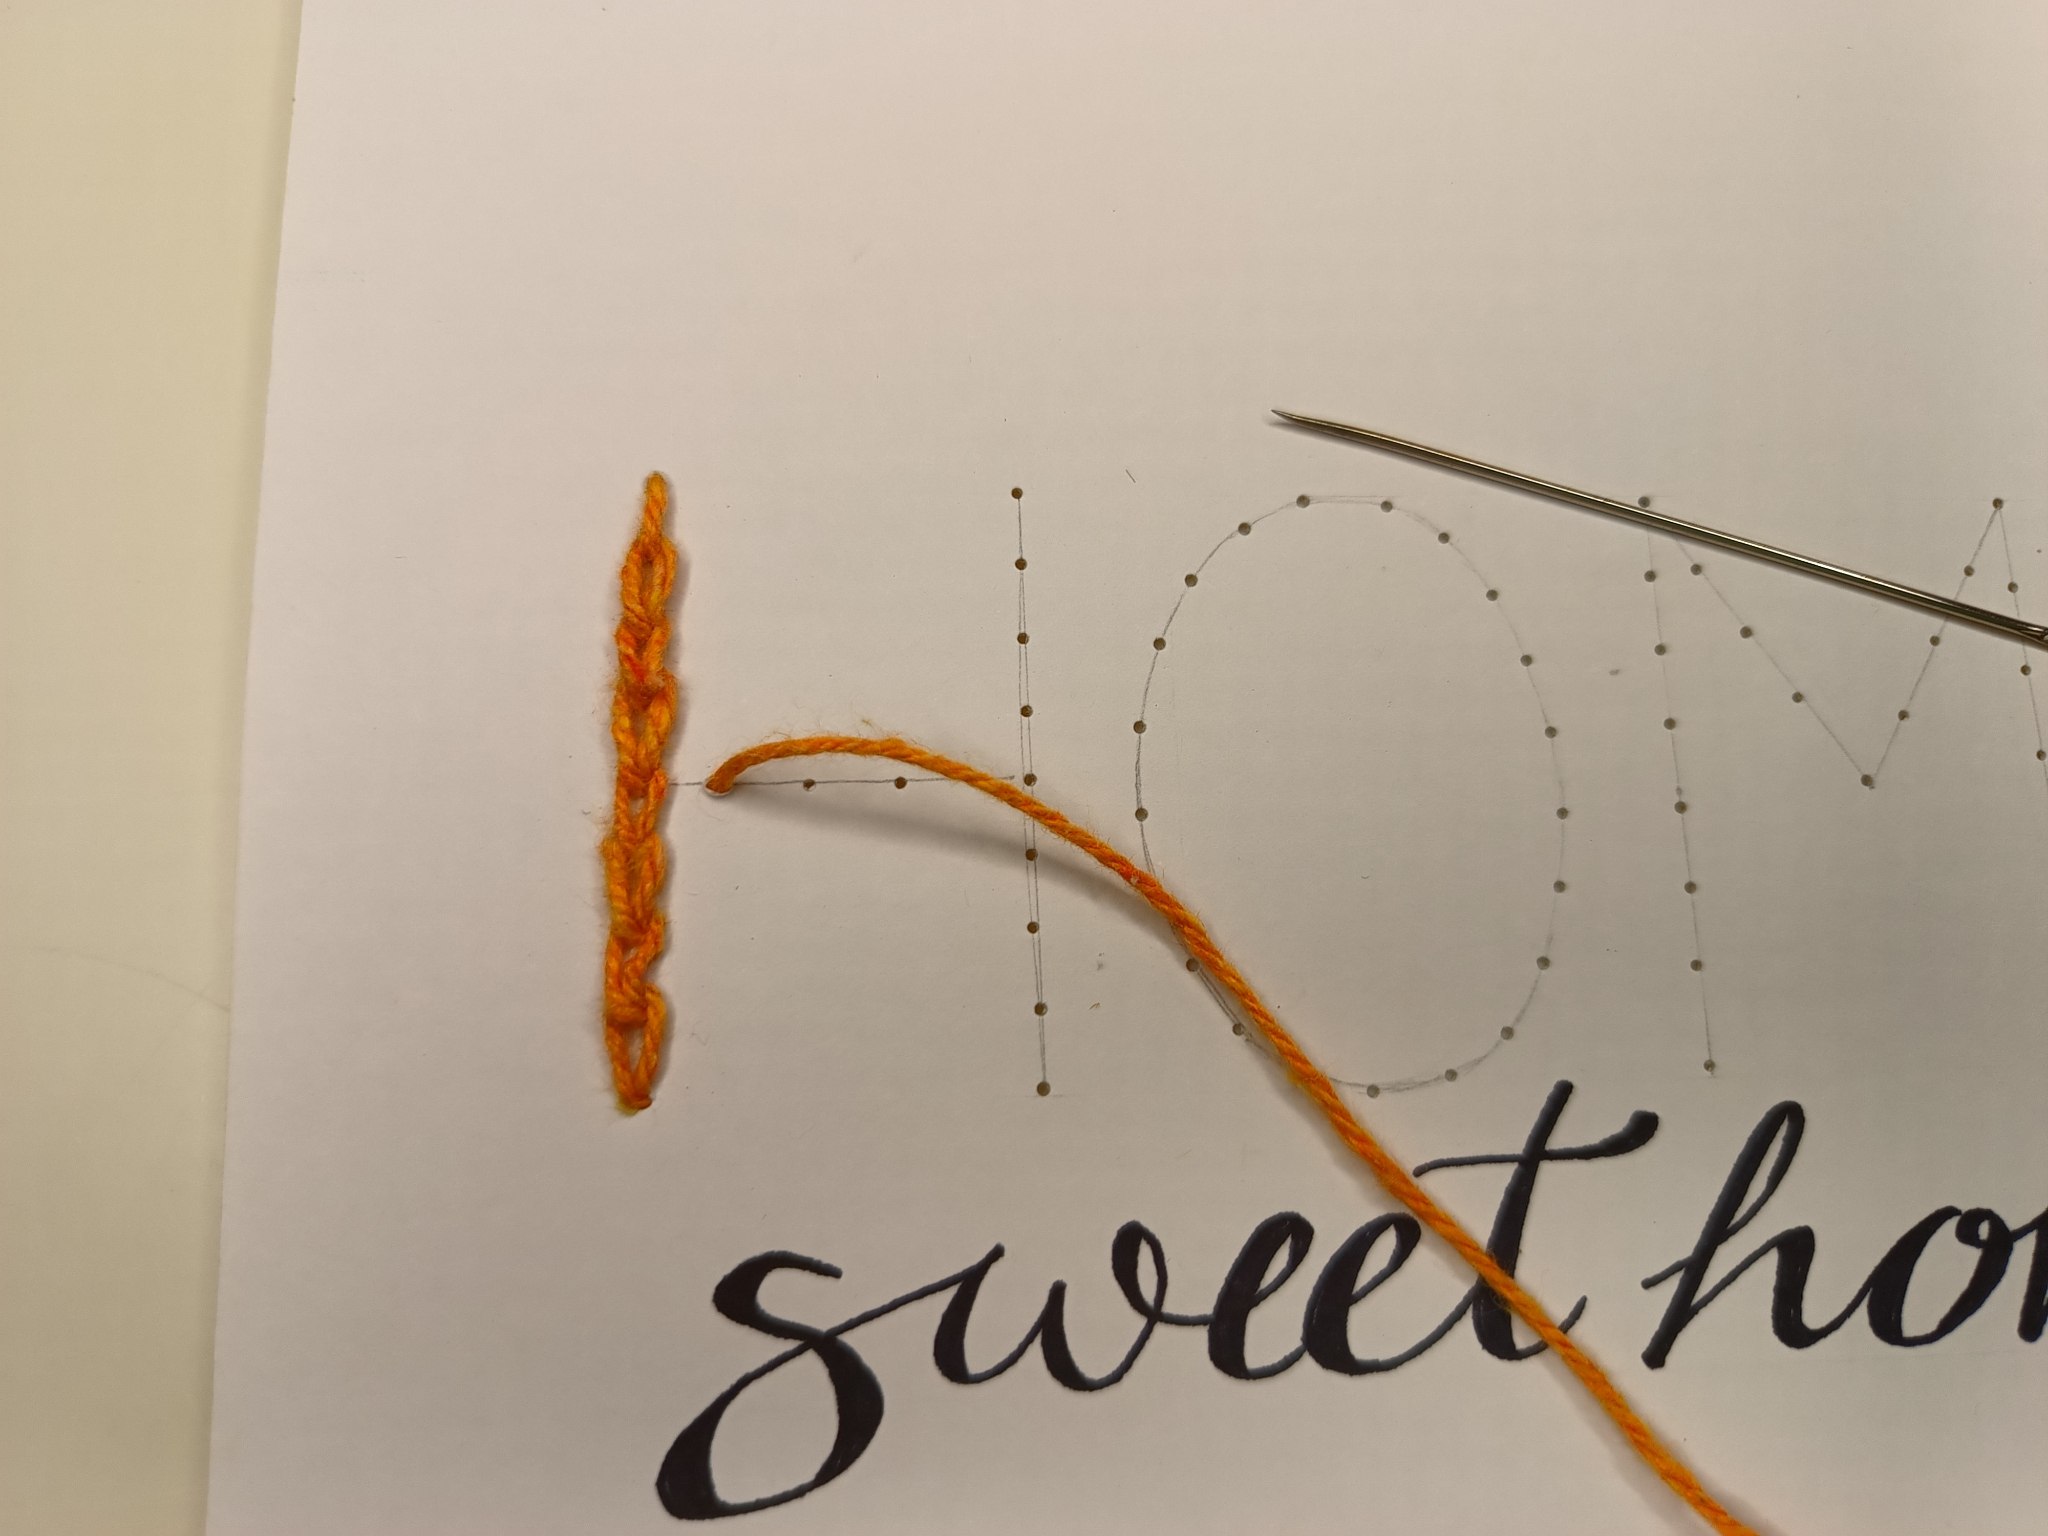
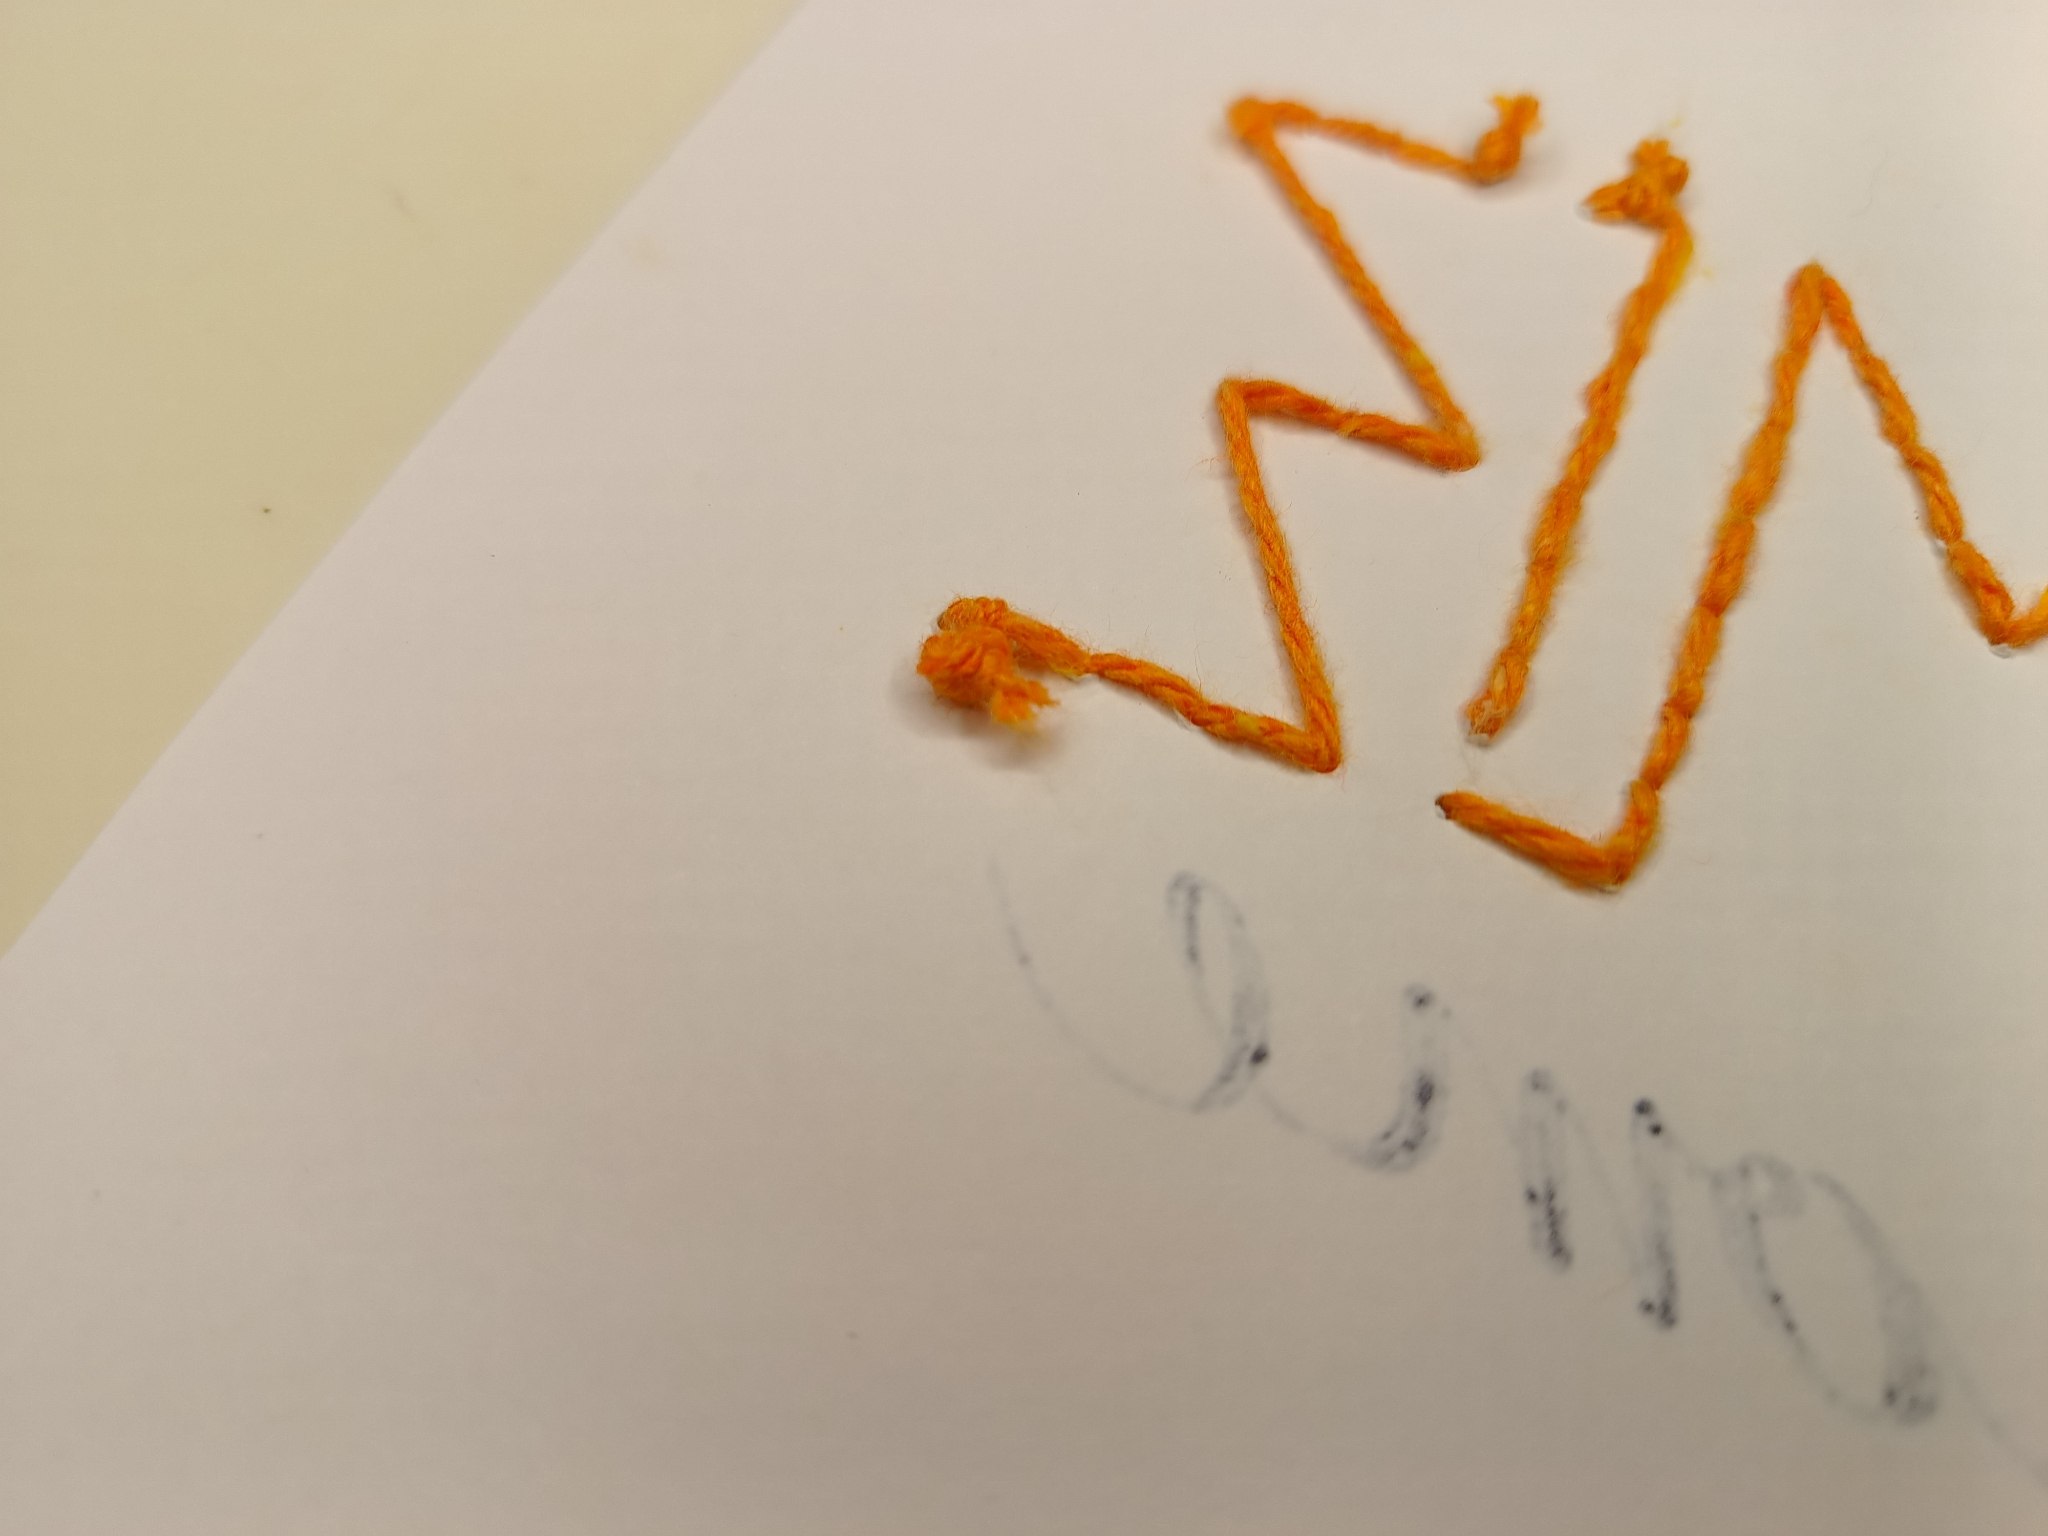
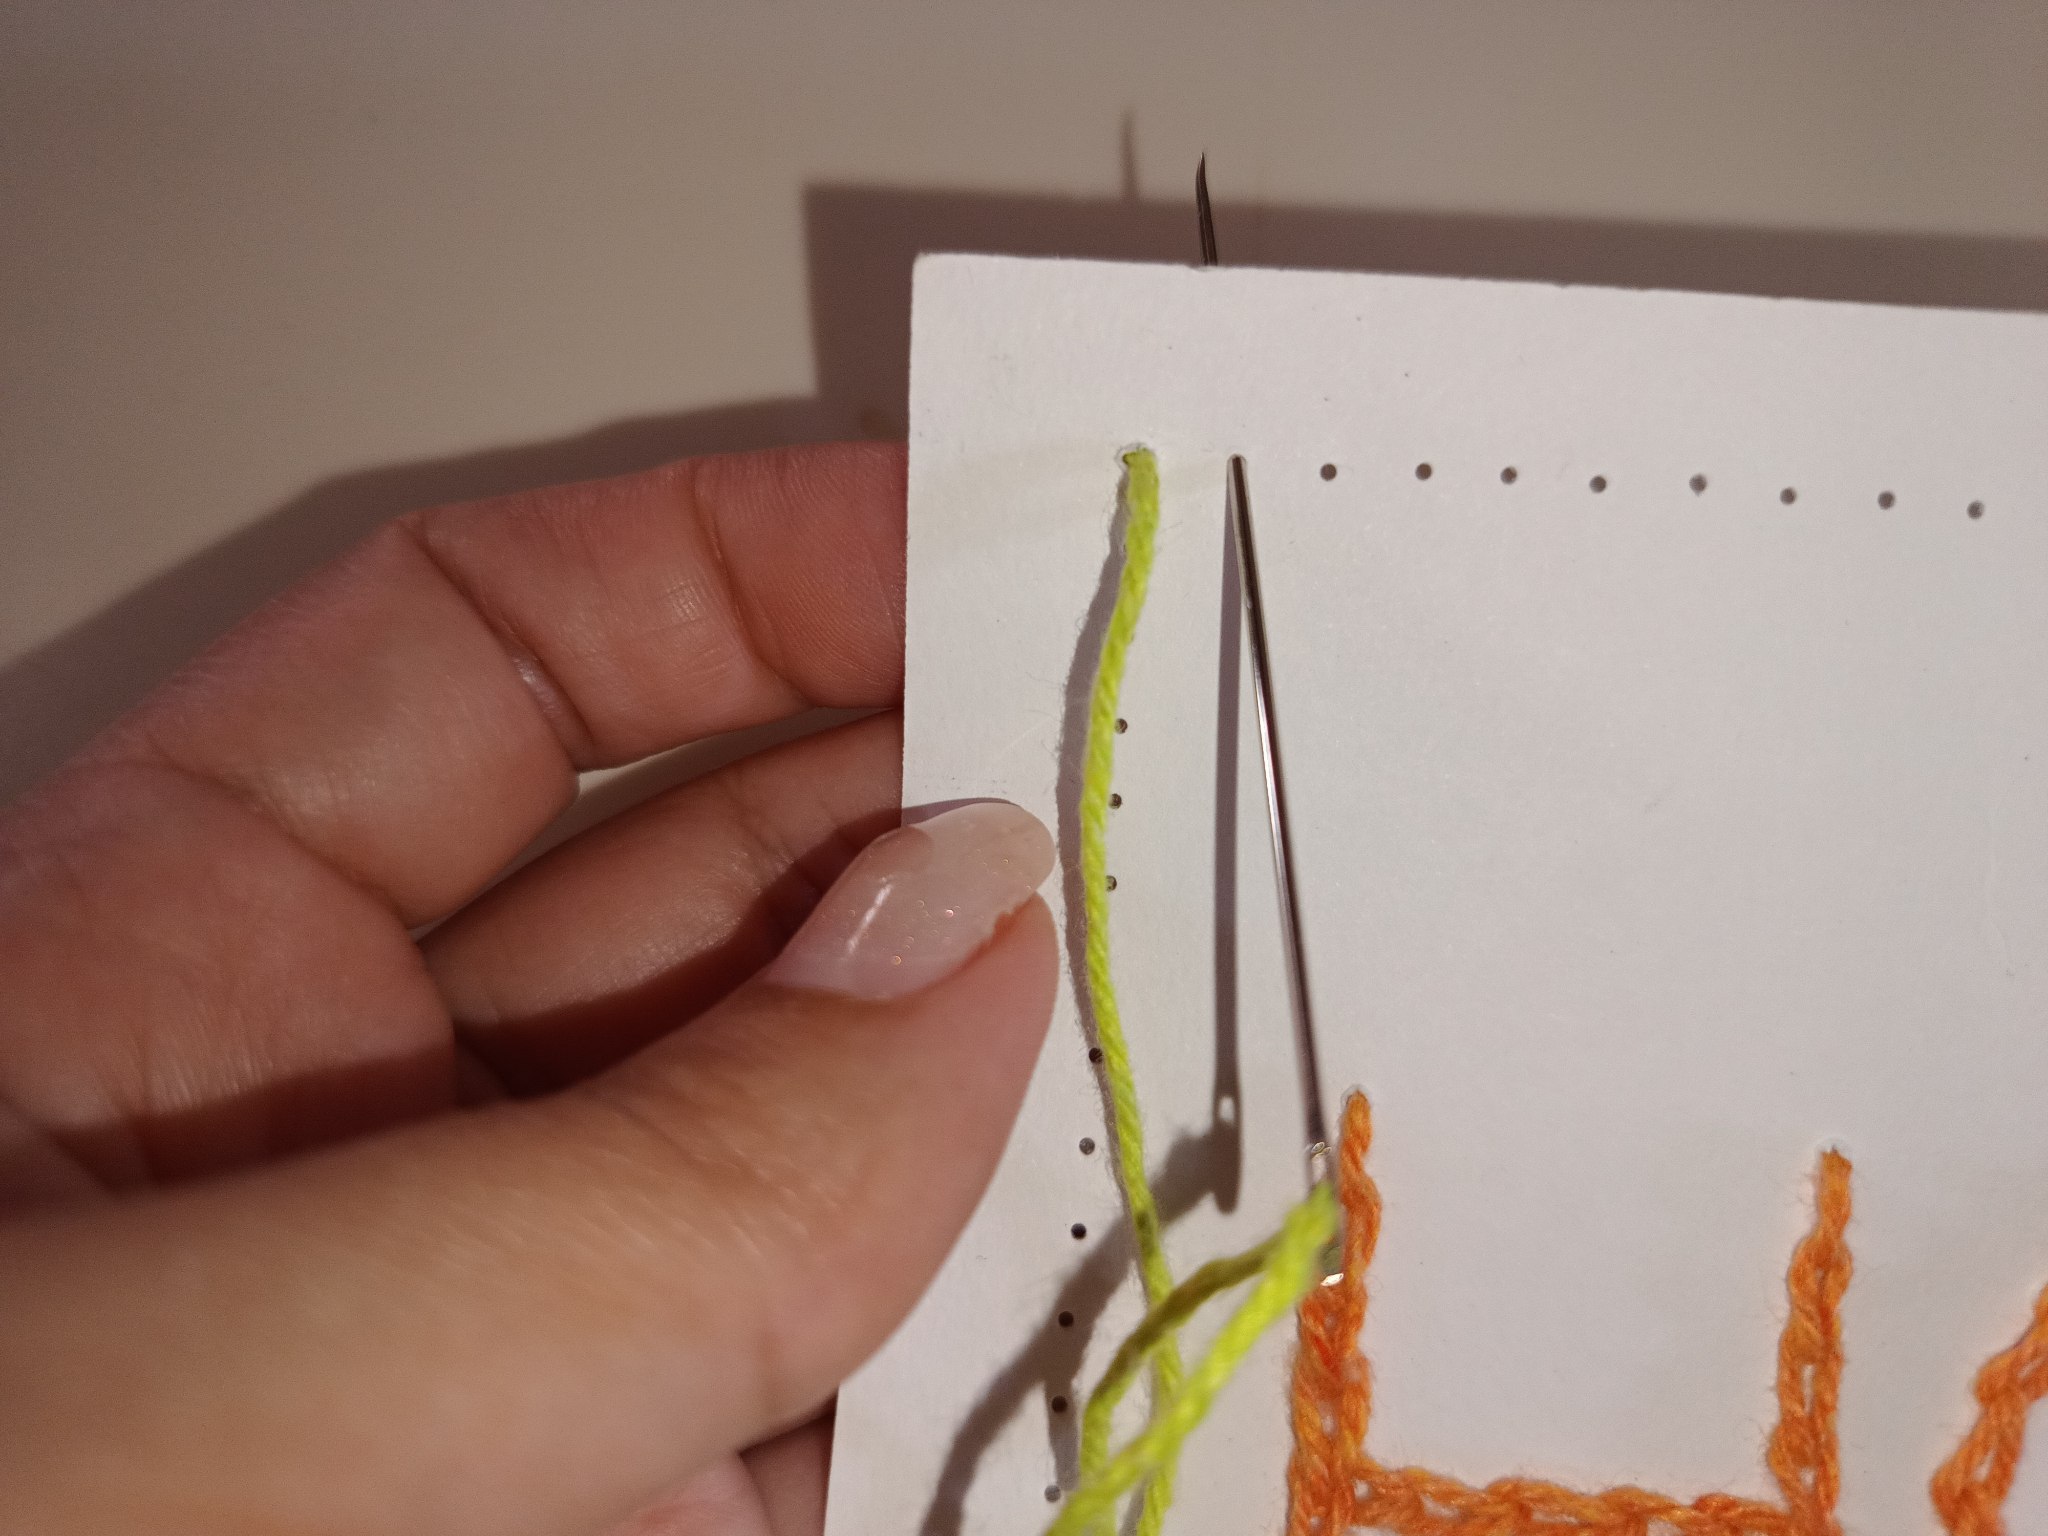
Es momento de empezar a tejer, para ello pasaremos el hilo naranja a través de la aguja y en el extremo libre anudaremos, luego, pasaremos con la aguja por medio del primer agujero de atrás hacia adelante y seguidamente pasaremos con la aguja por el siguiente agujero pero ahora en sentido contrario y de nuevo sacaremos la aguja por el agujero que sigue desde atrás hacia adelante.
It is time to start knitting, for this we will pass the orange thread through the needle and at the free end we will knot, then, we will pass the needle through the first hole from back to front and then we will pass the needle through the next hole but now in the opposite direction and again we will pull the needle through the hole that follows from back to front.
 |
 |
|---|---|
 |
 |
|---|---|
Inicio del tejido / Start of weaving
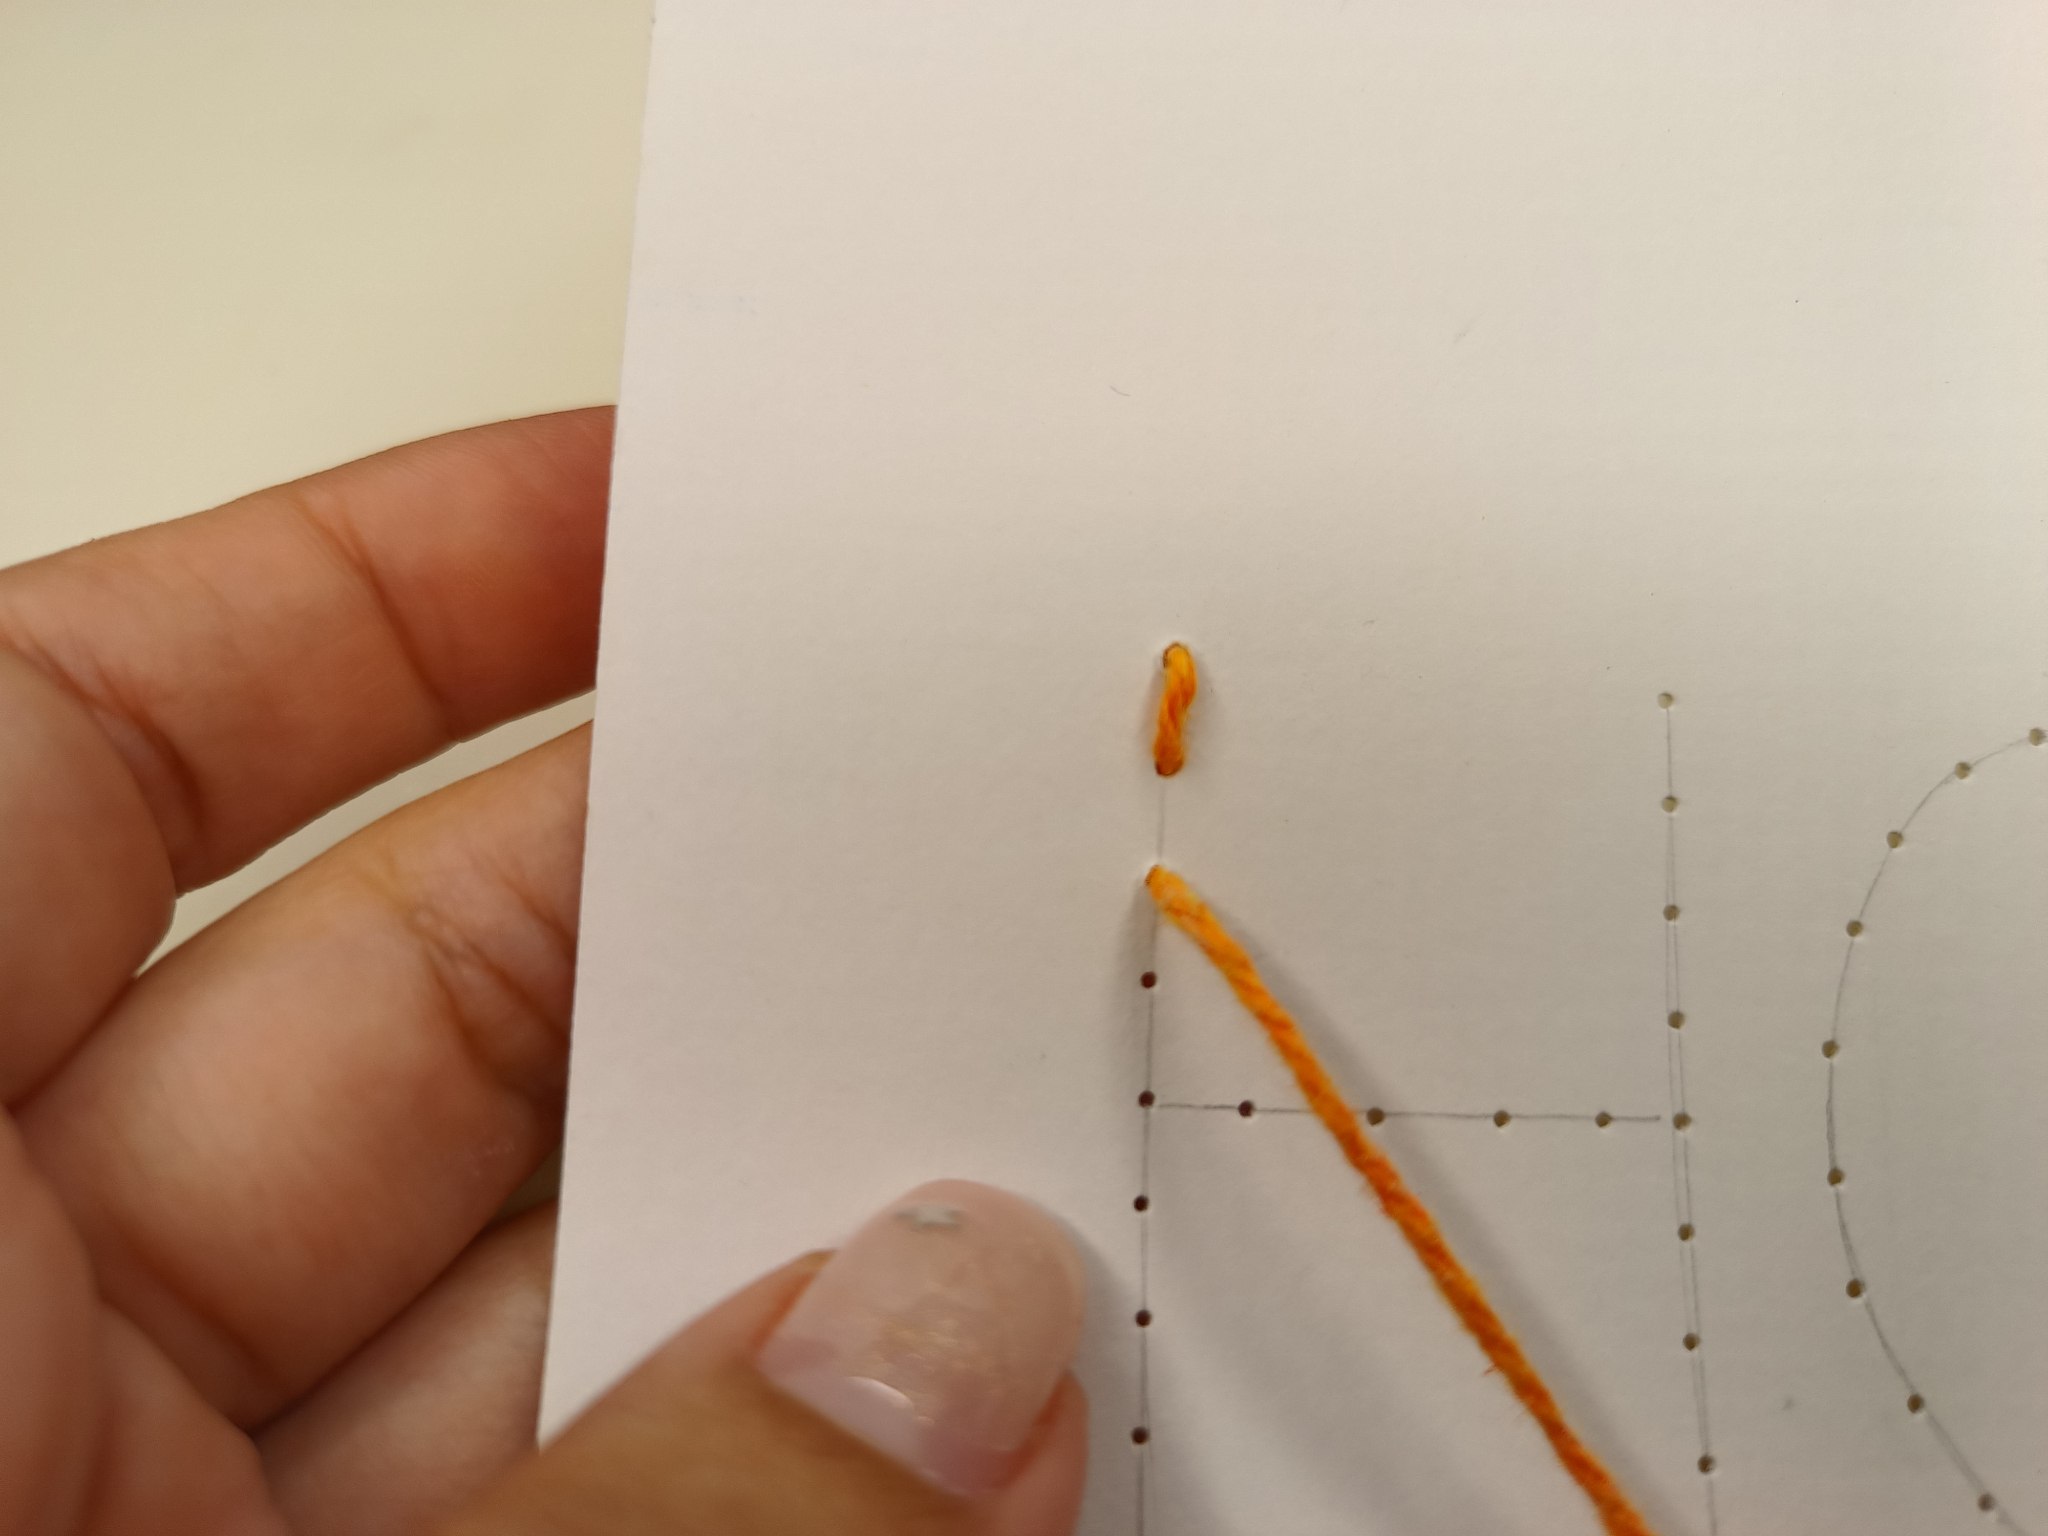
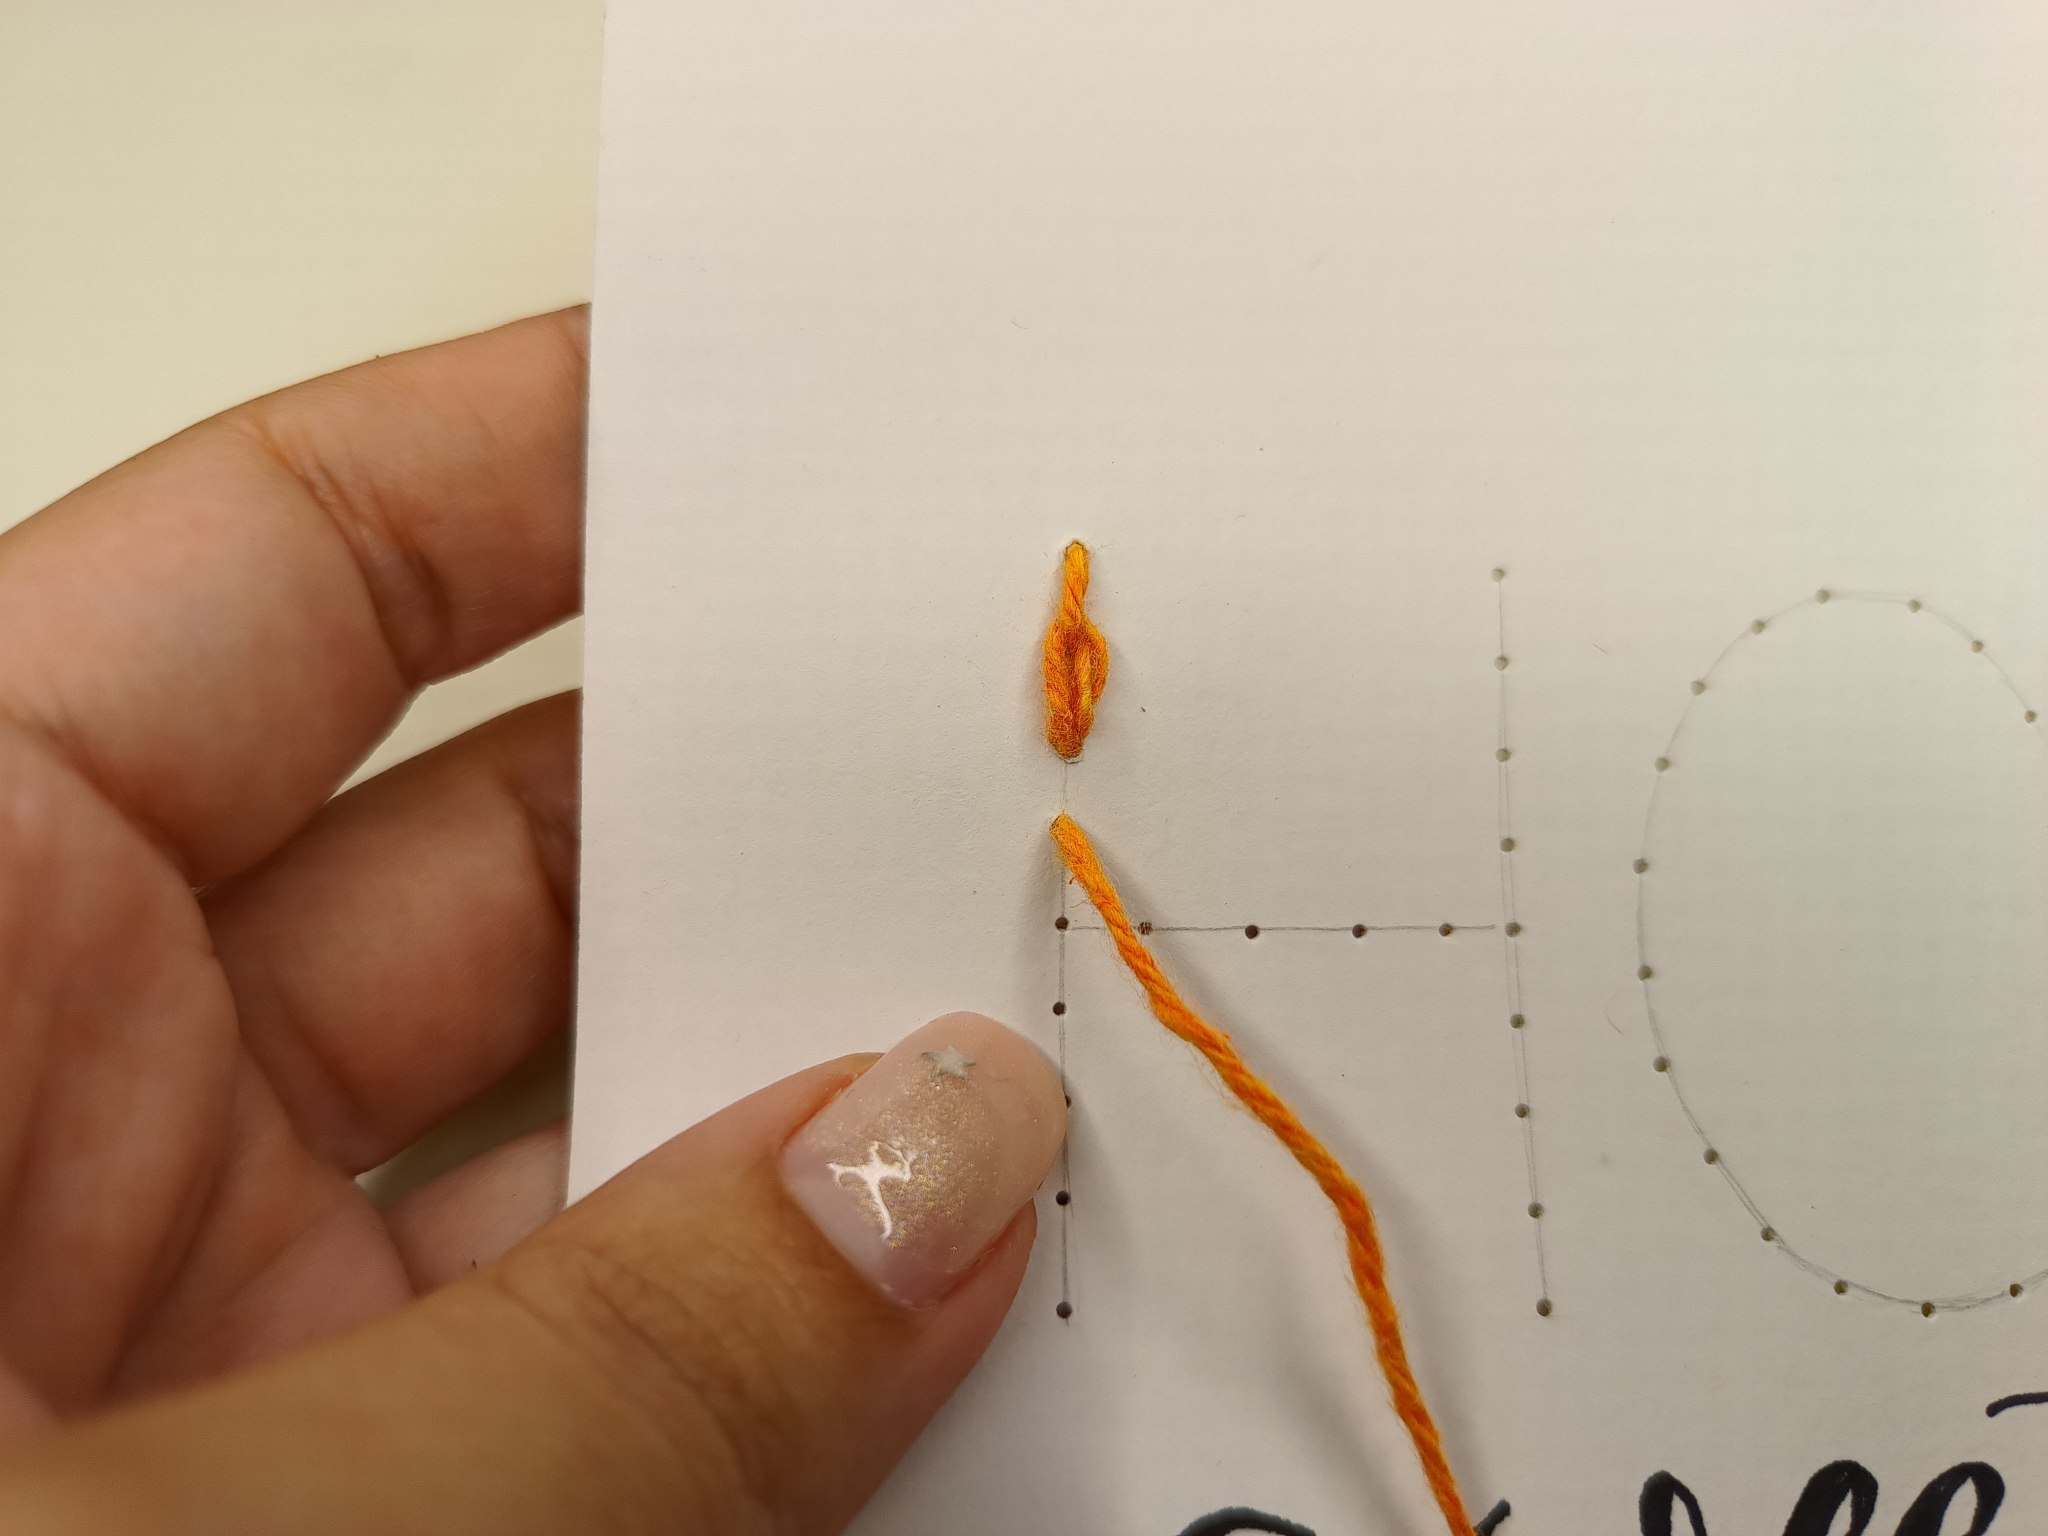
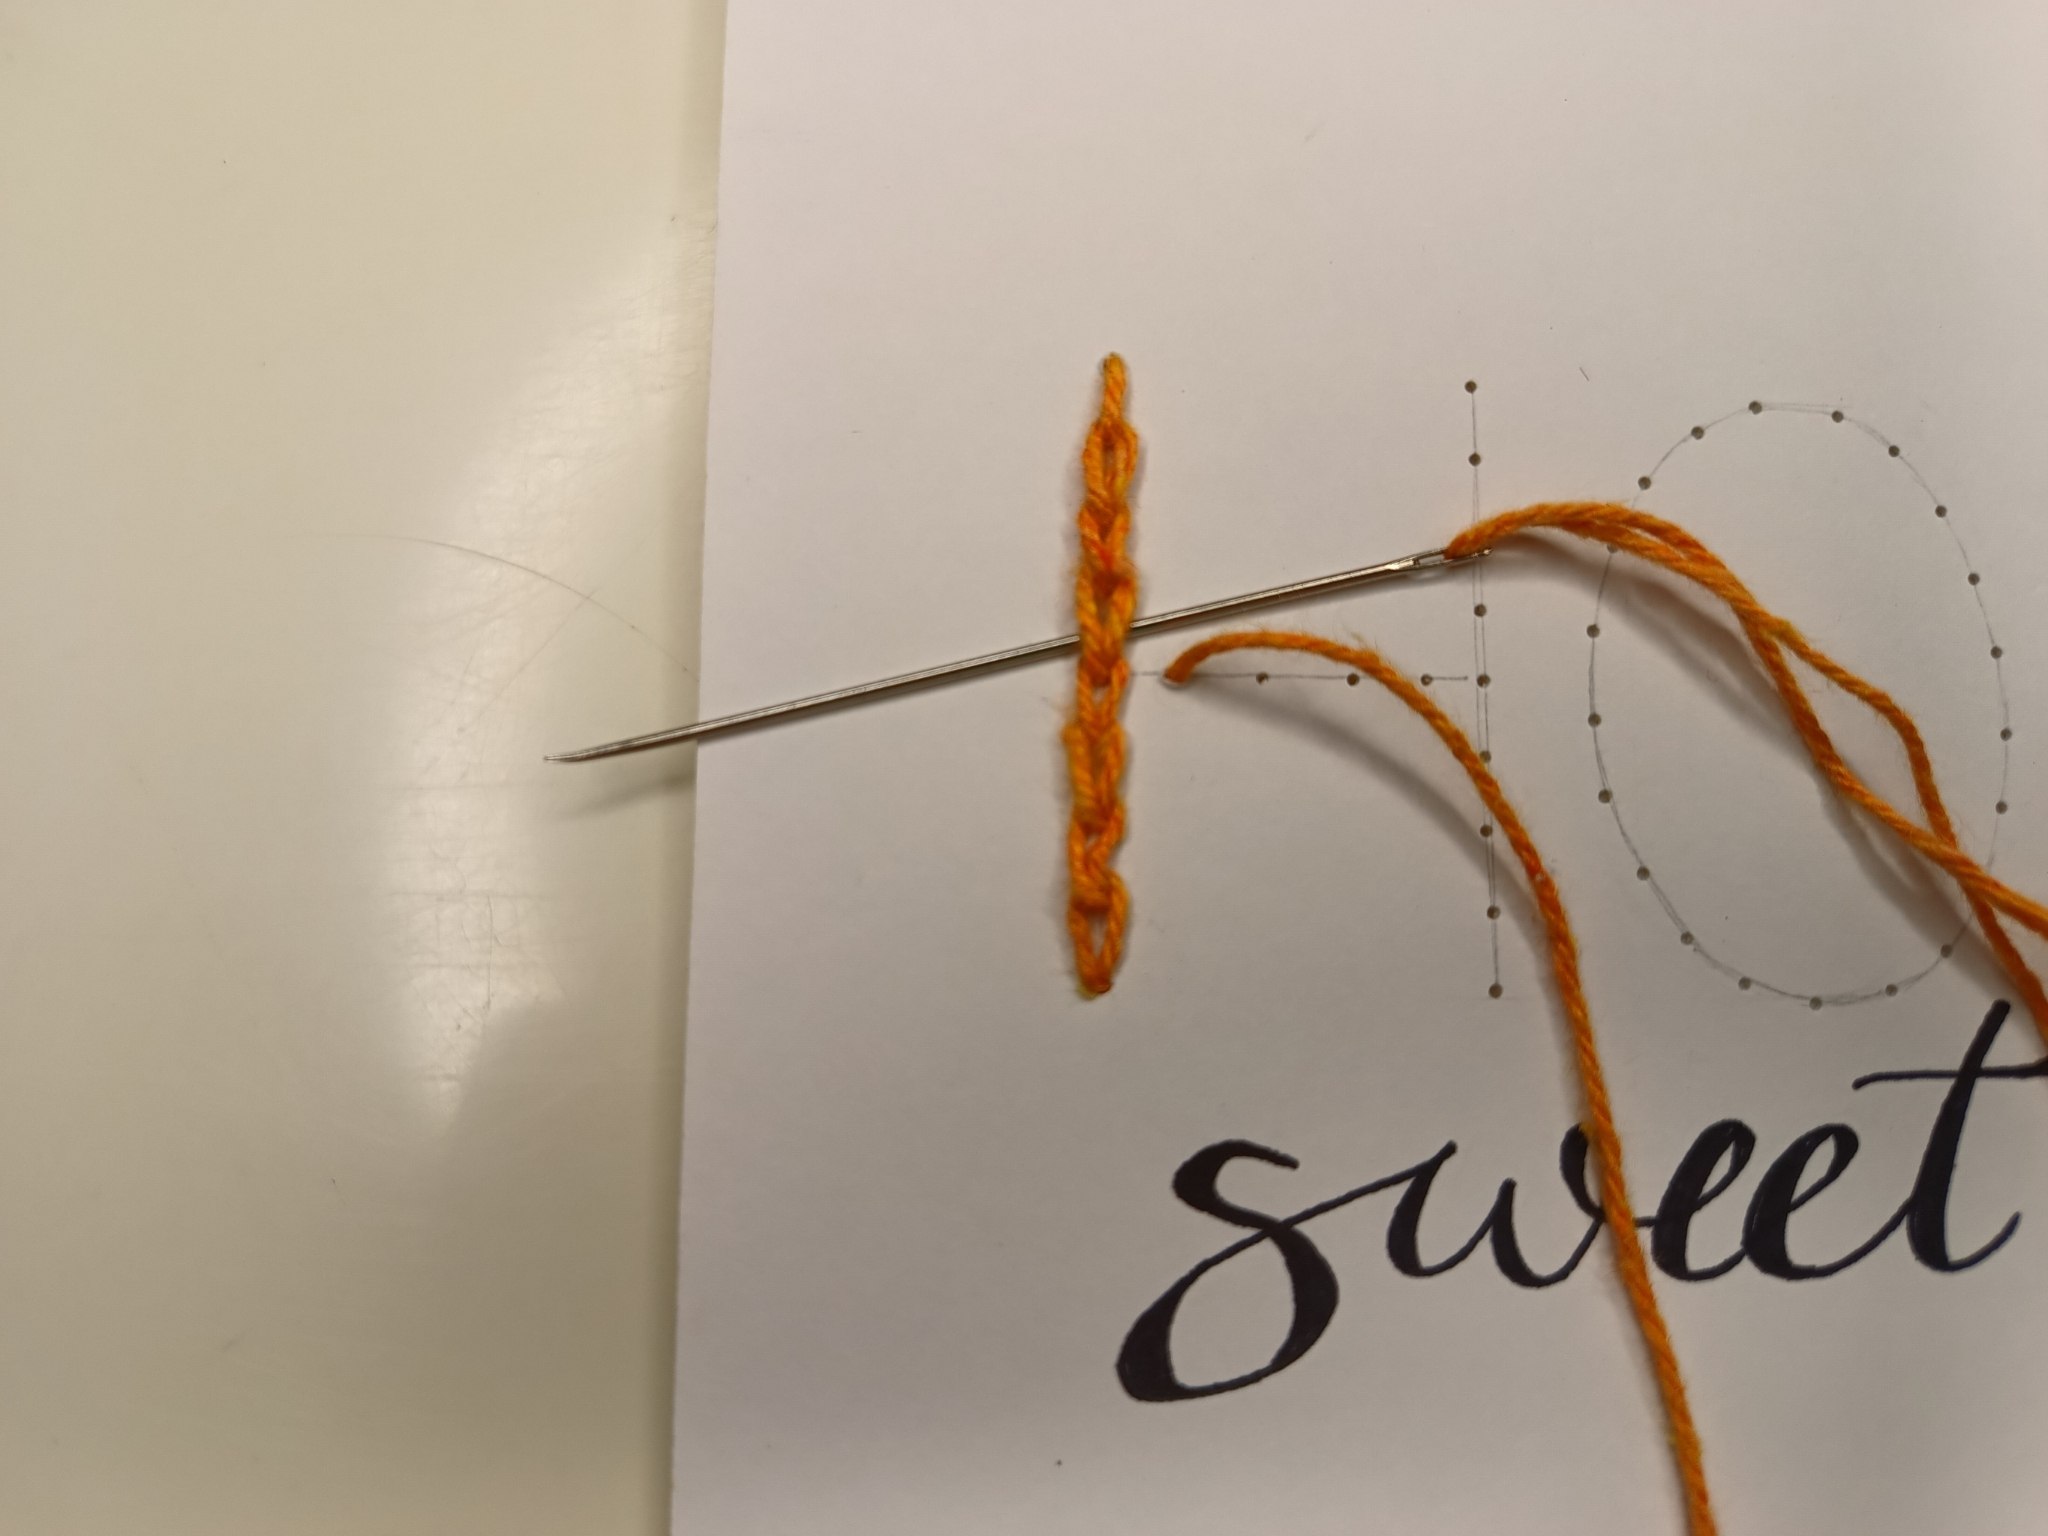
Ahora con la aguja pasaremos por debajo de la primera puntada y nuevamente por el agujero del que ya veníamos desde atrás, solo que ahora introducimos de adelante hacia atrás.
Now with the needle we pass under the first stitch and again through the hole we came from behind, only now we introduce the needle from front to back.
 |
 |
|---|---|
Puntada patrón / Pattern stitch
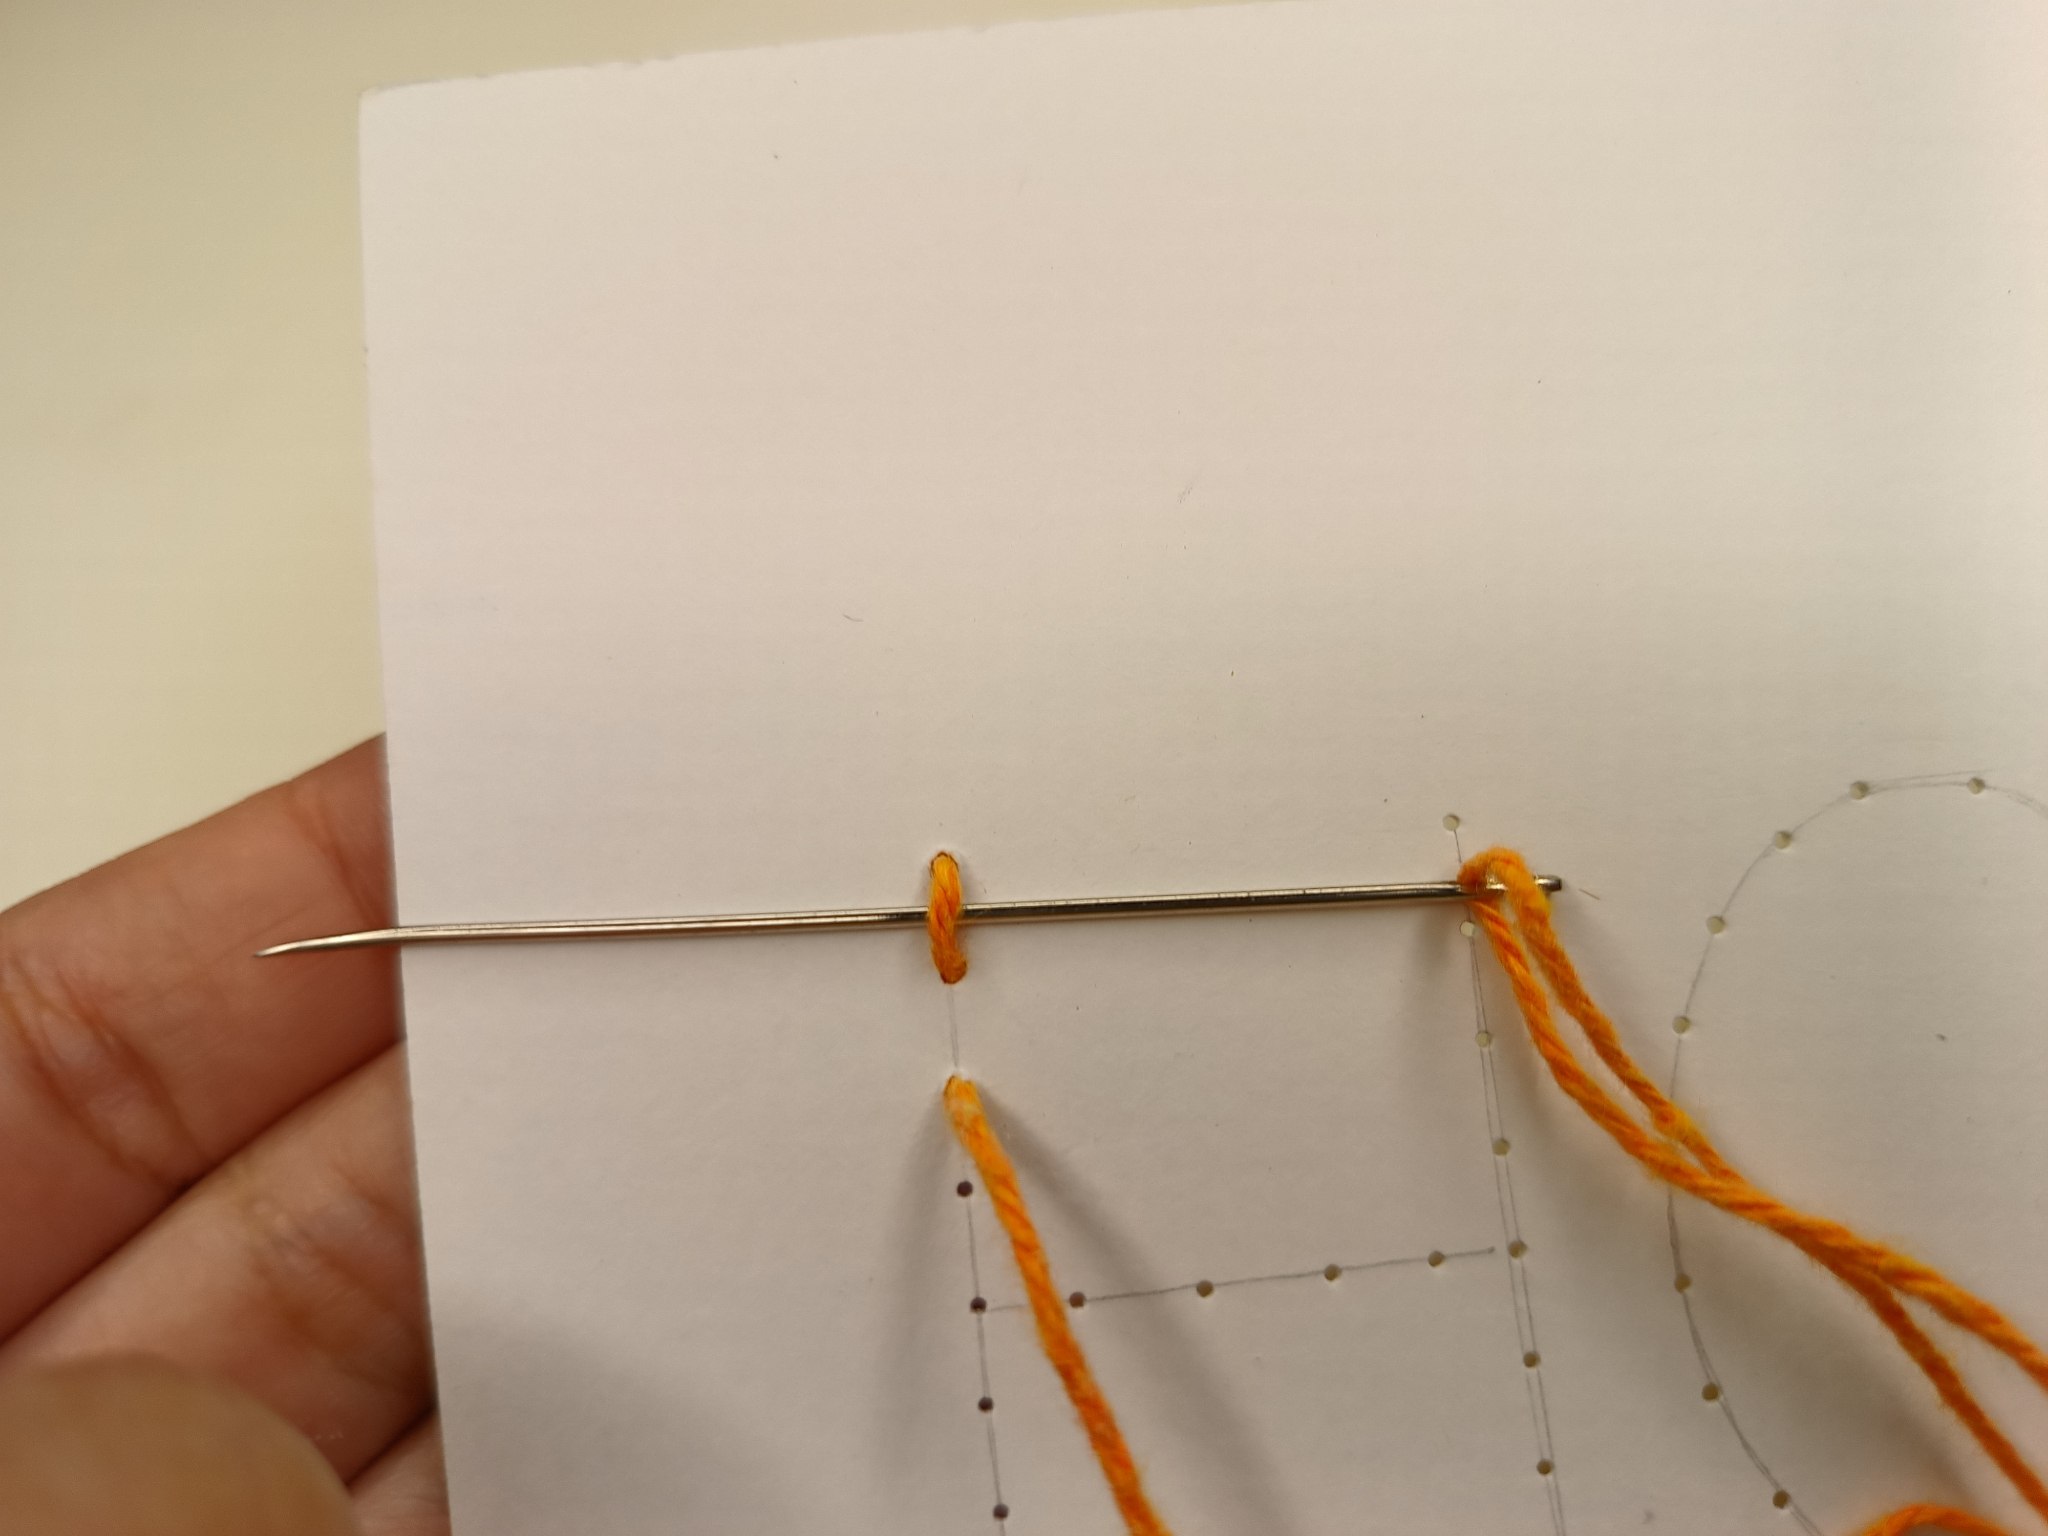
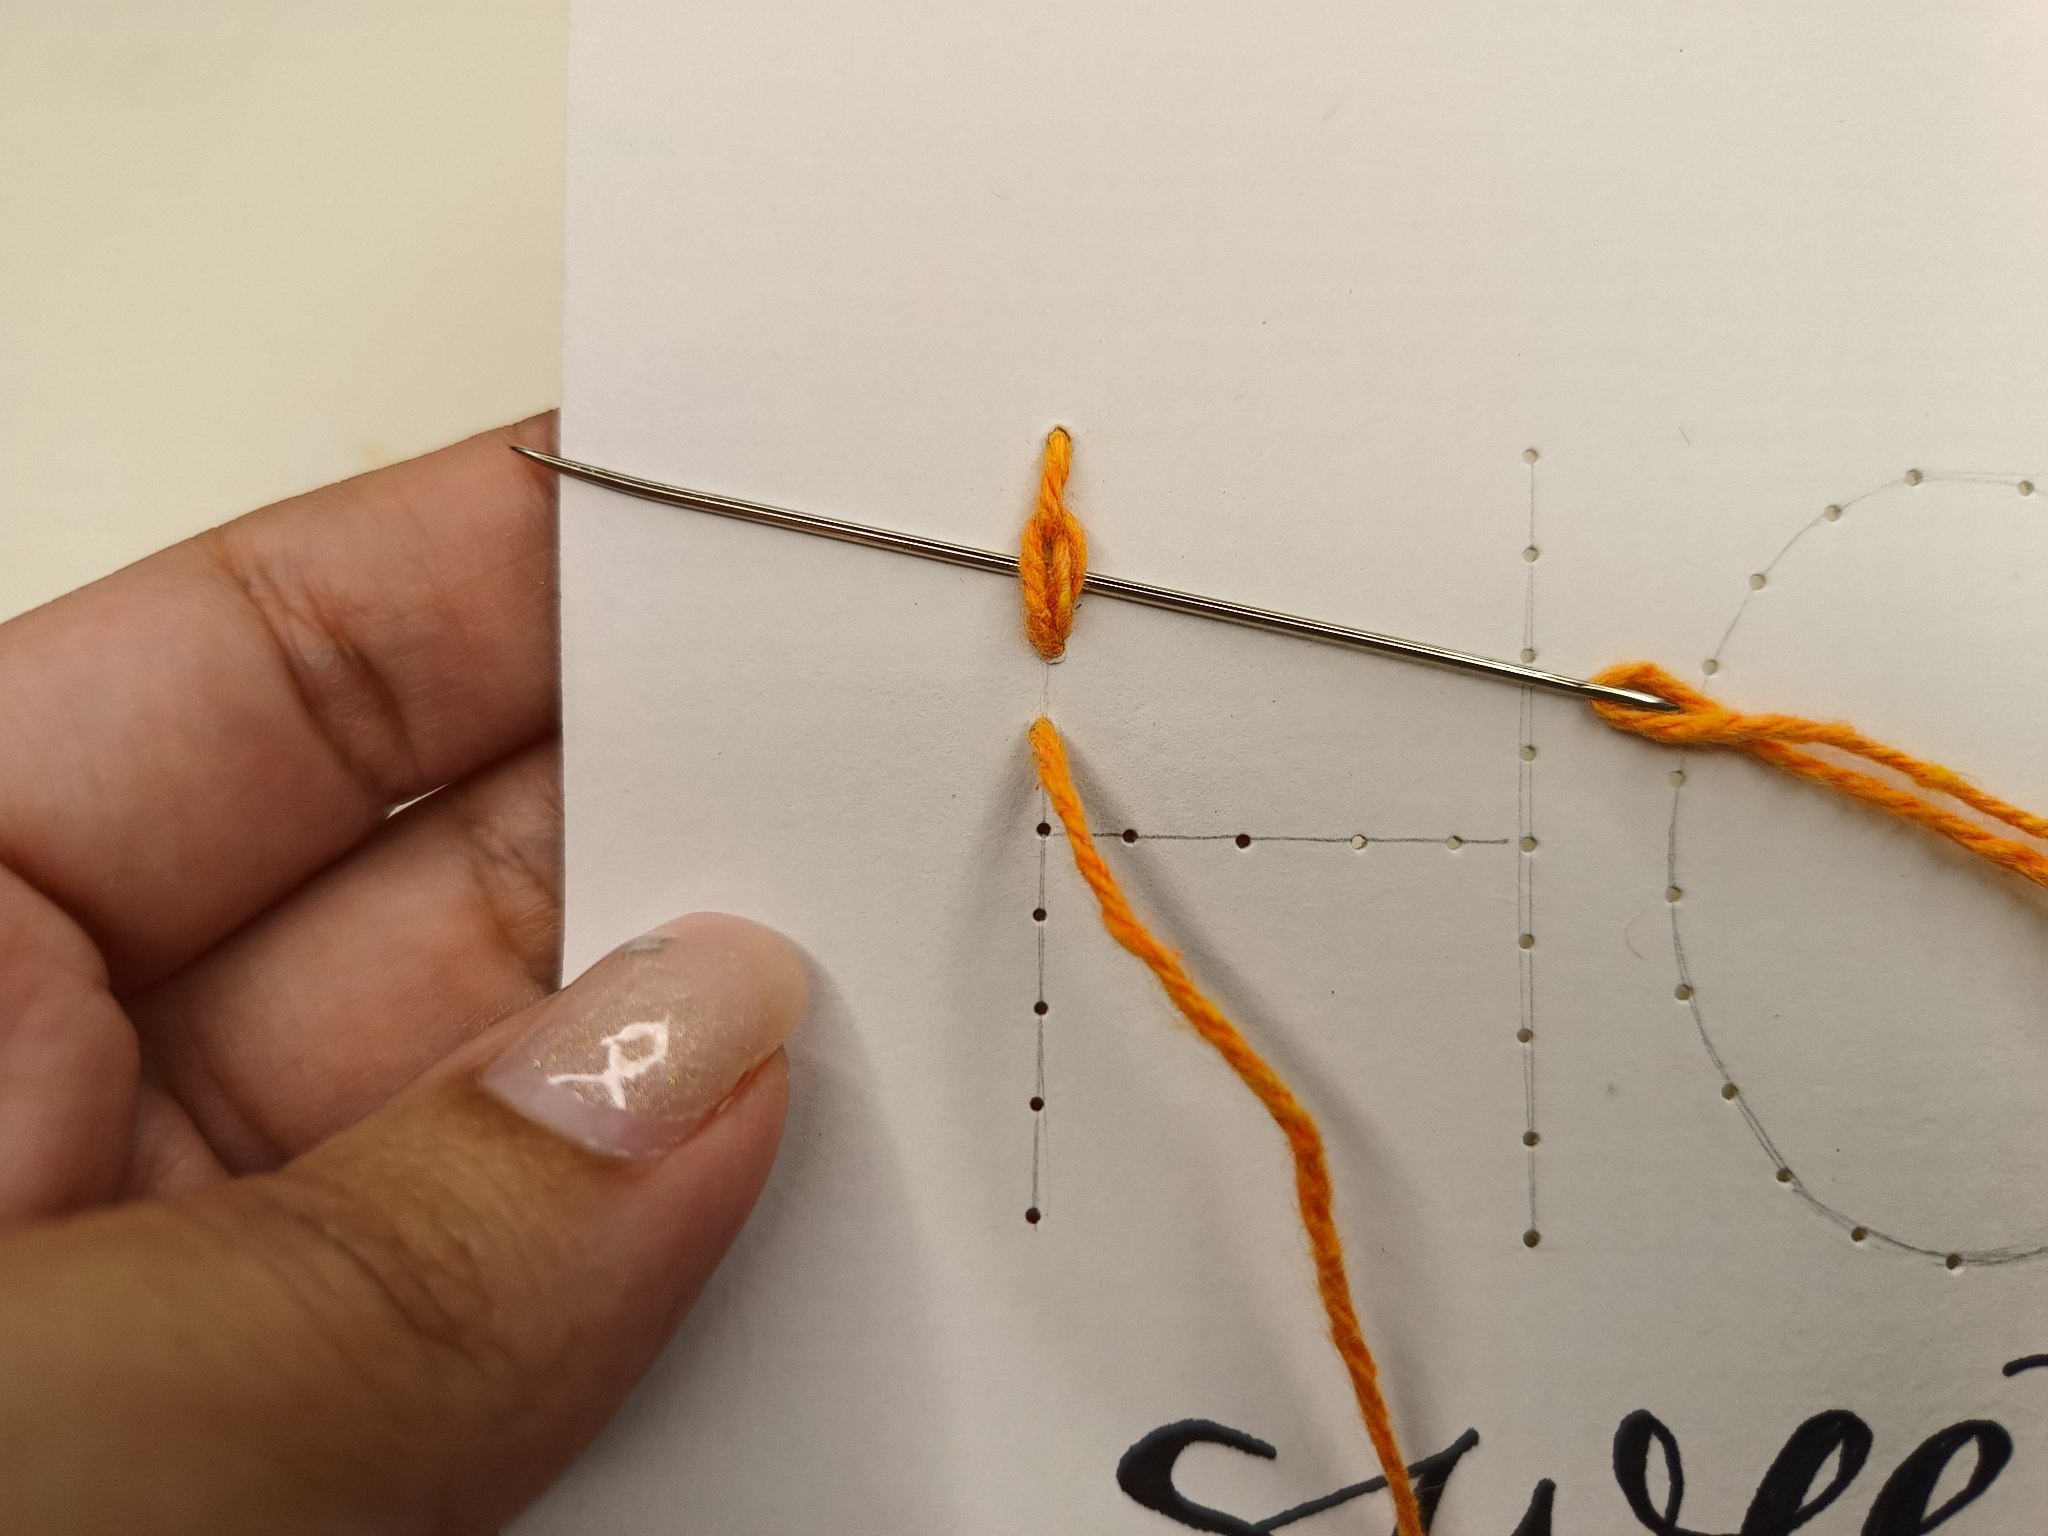
Una vez más sacamos la aguja por el siguiente orificio desde atrás y repetiremos el proceso pero usando la puntada inmediata anterior. Repetiremos esto hasta terminar con todas las letras.
Once again we pull the needle through the next hole from the back and repeat the process but using the stitch immediately before. Repeat this until all the letters are finished.
 |
 |
|---|---|
Continuamos tejiendo / We continue to weave
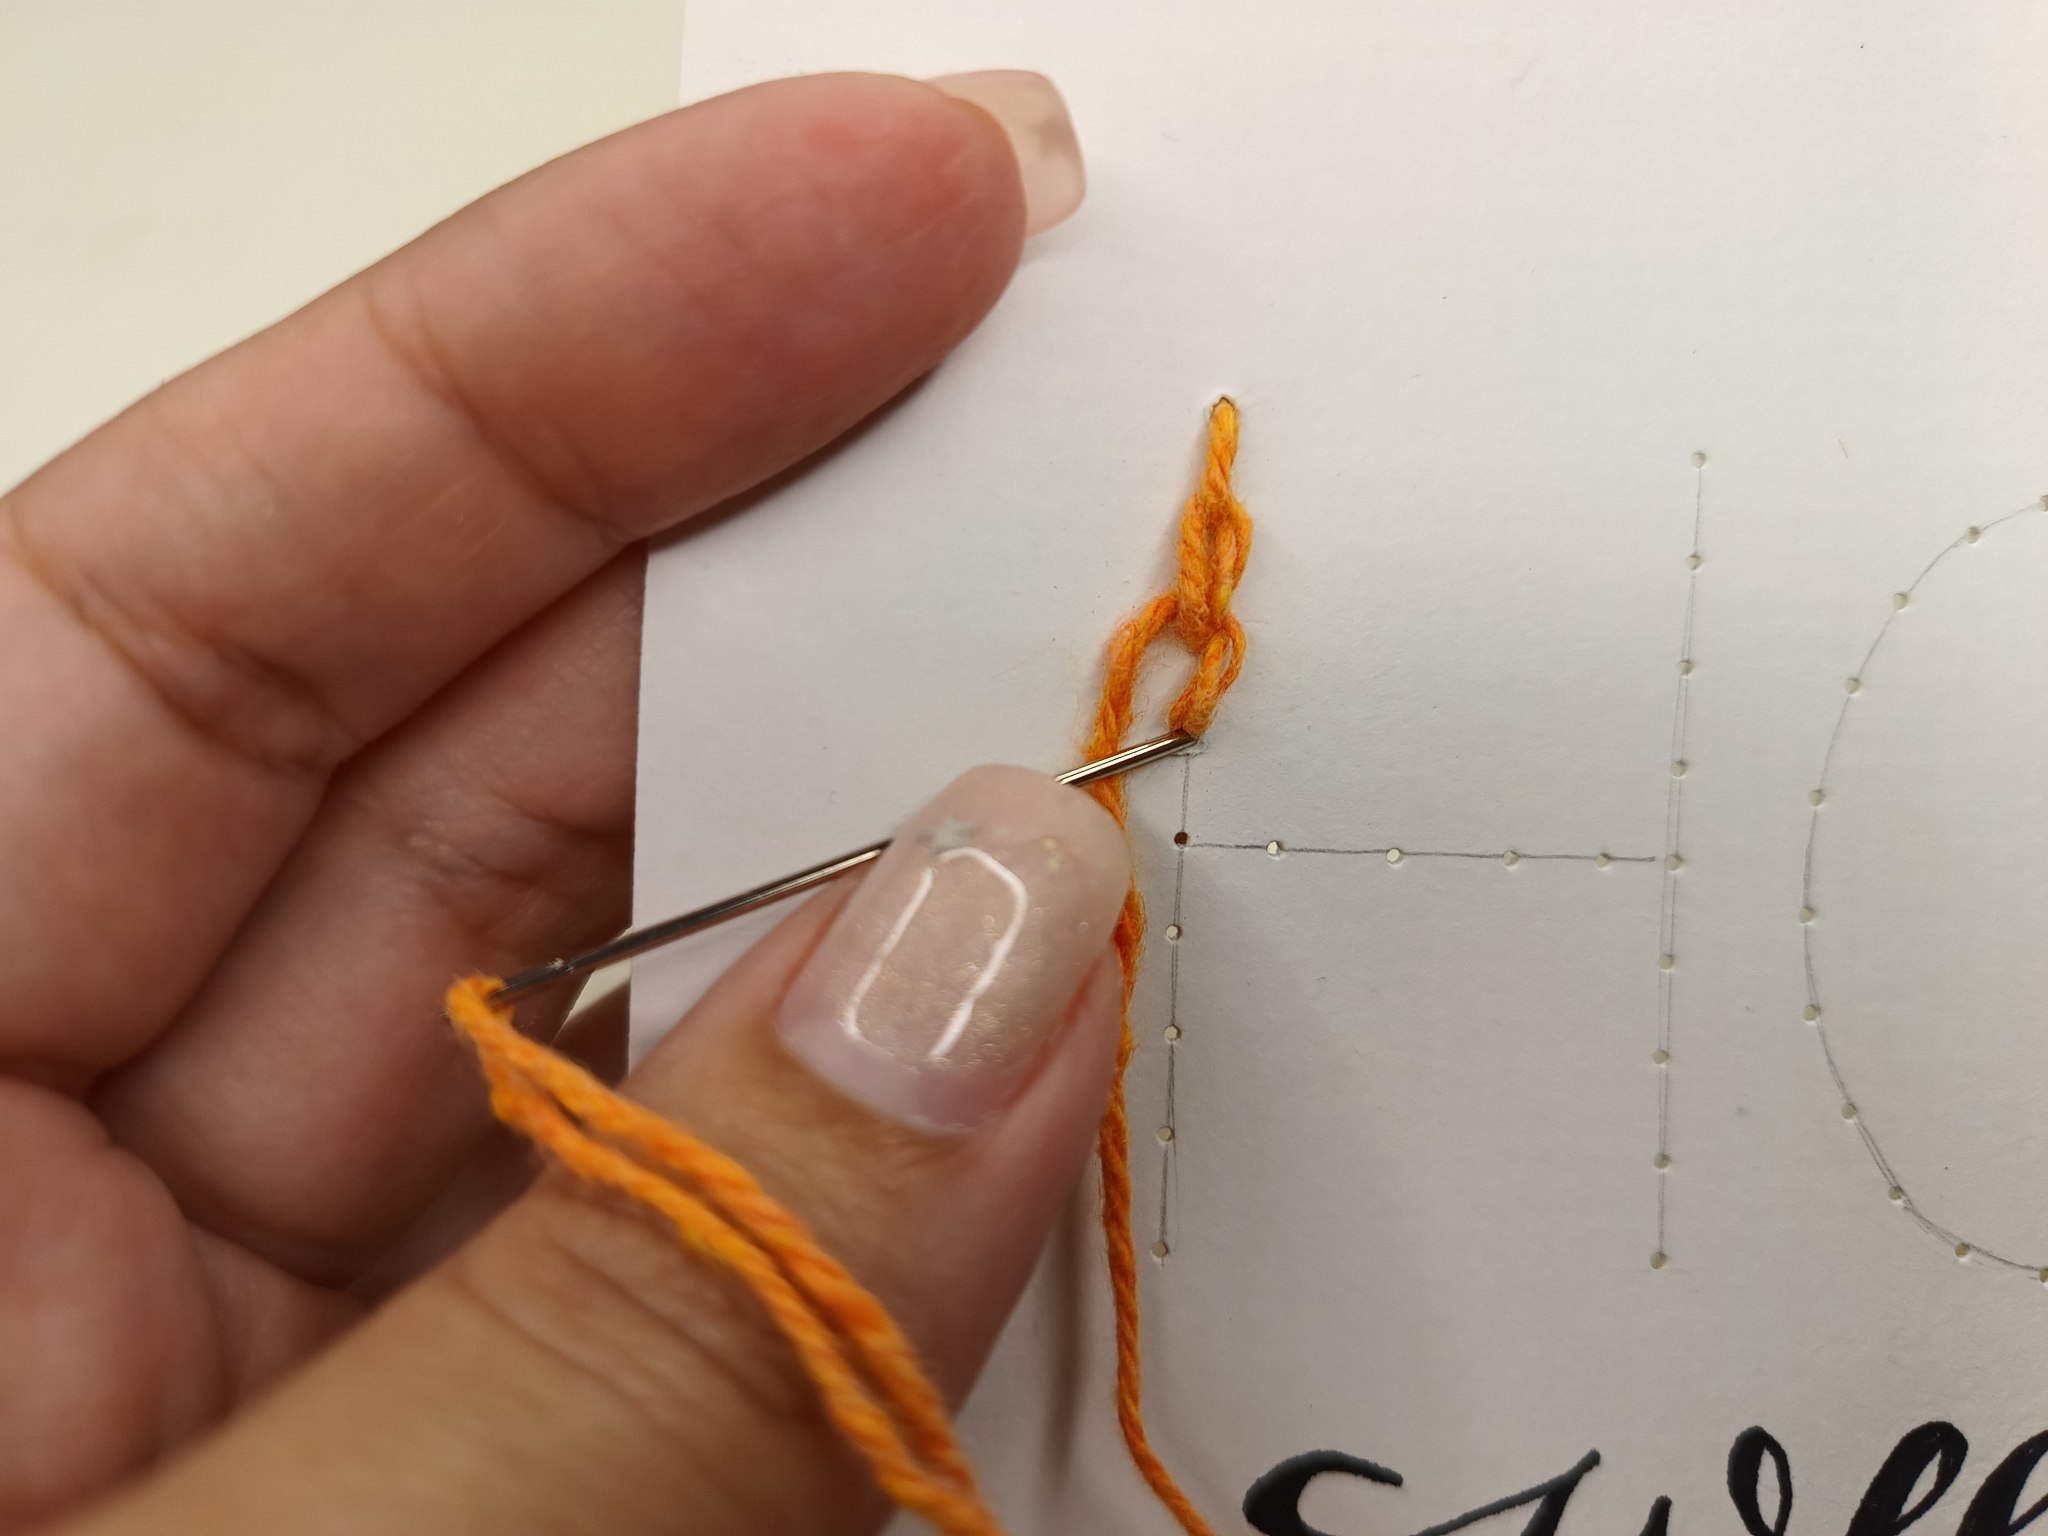
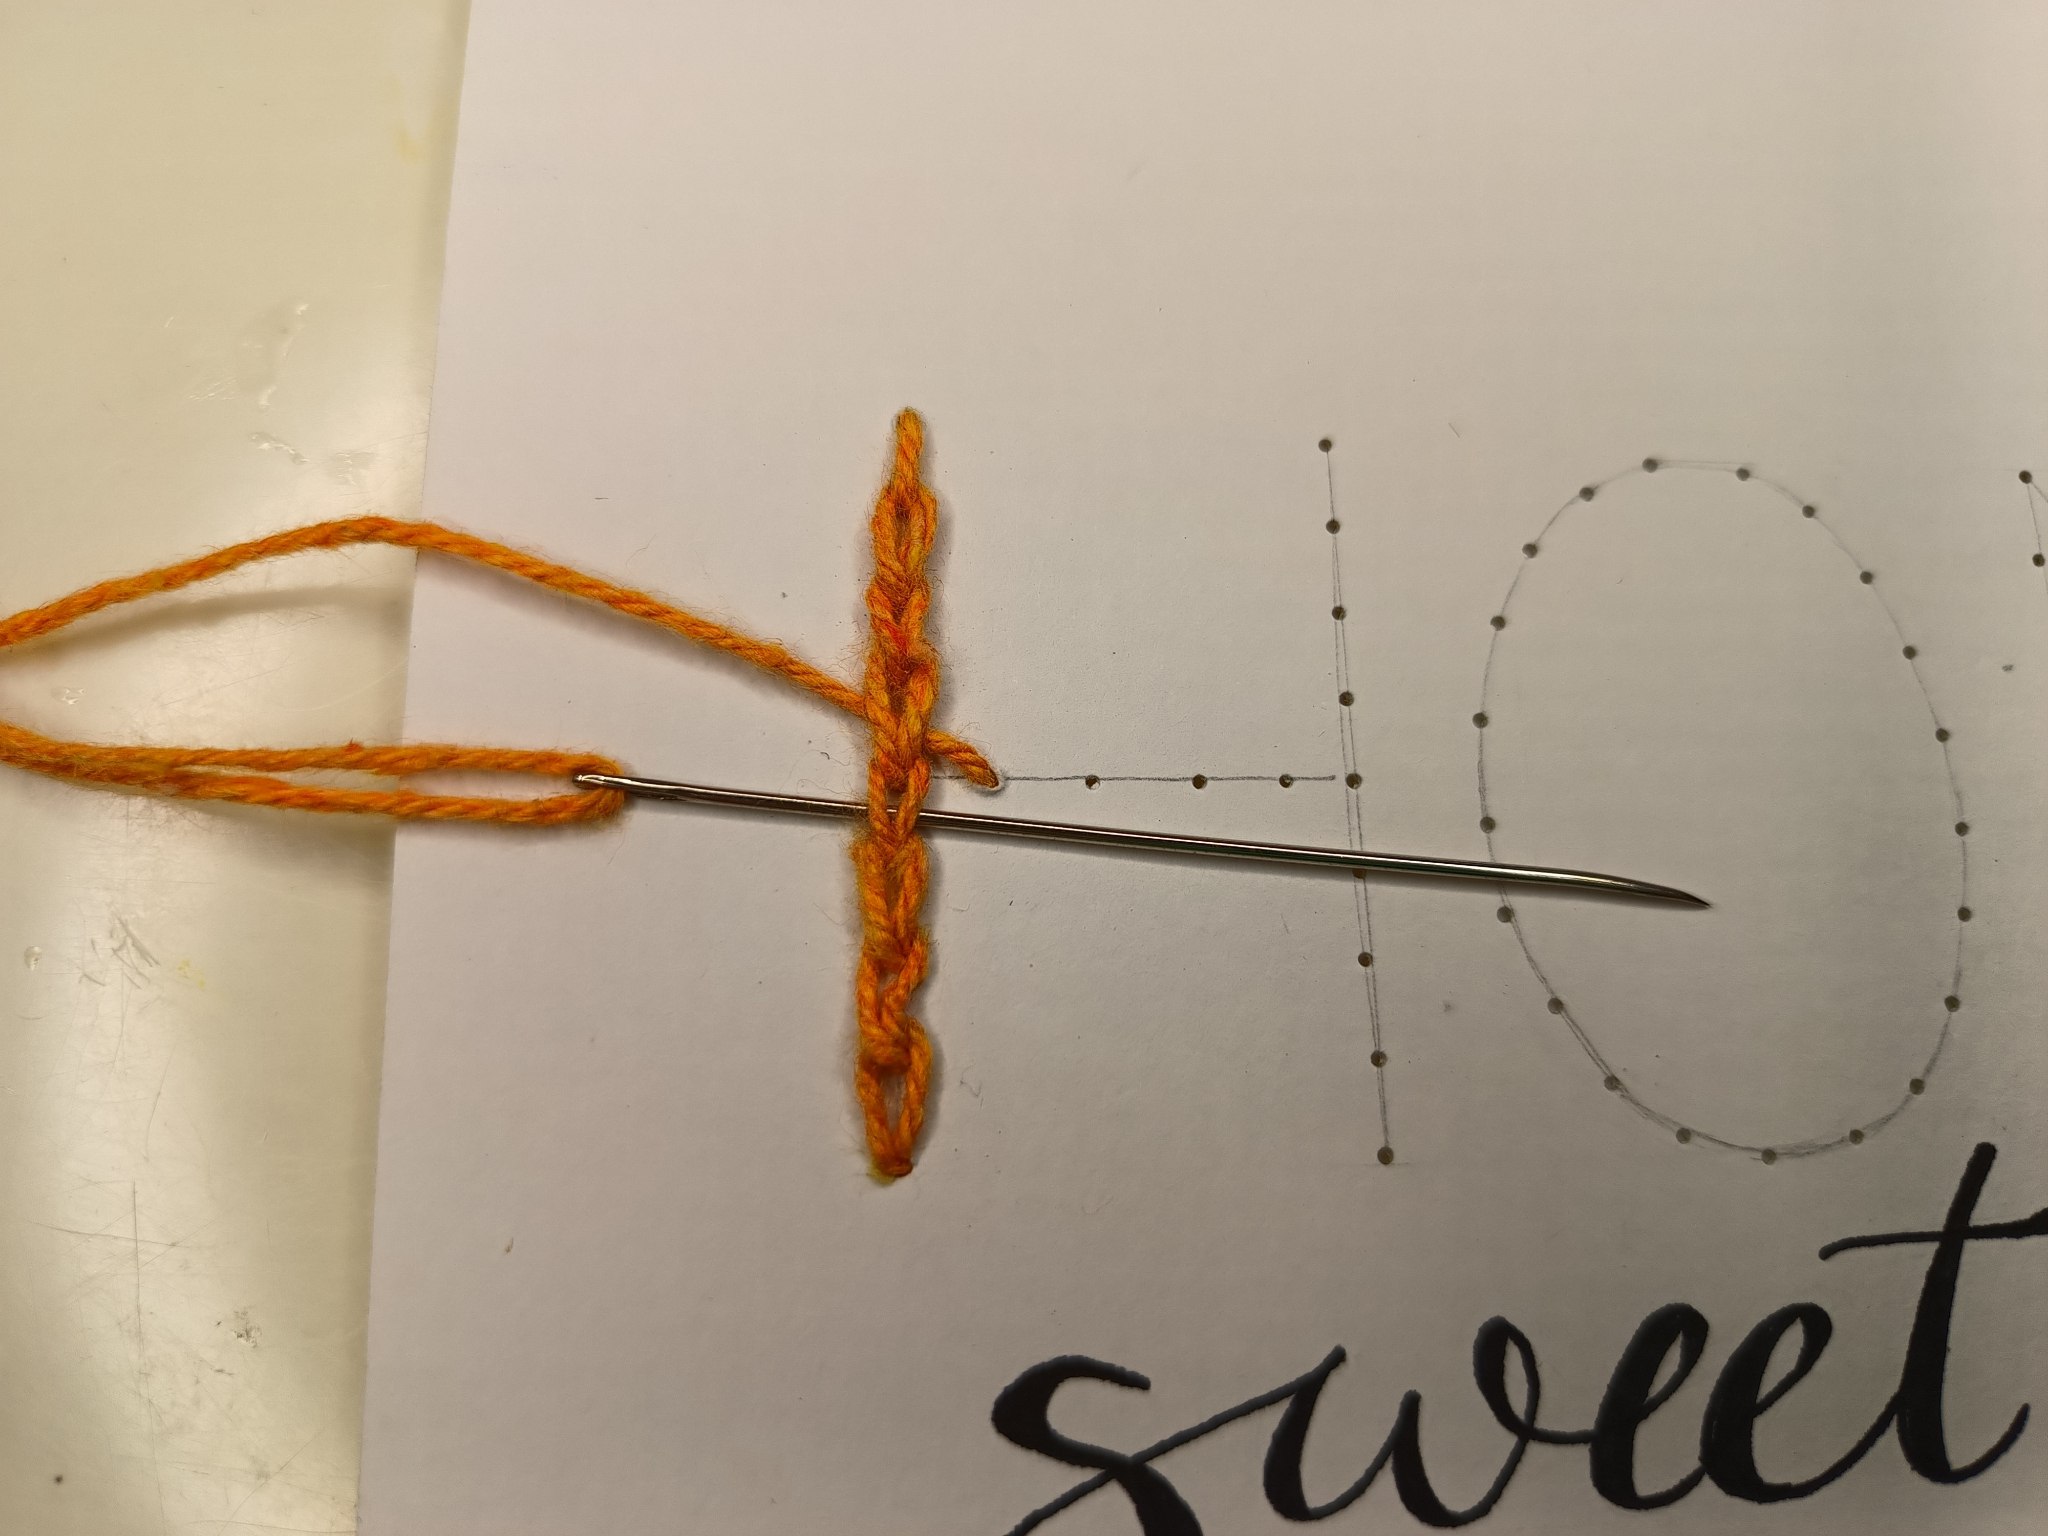
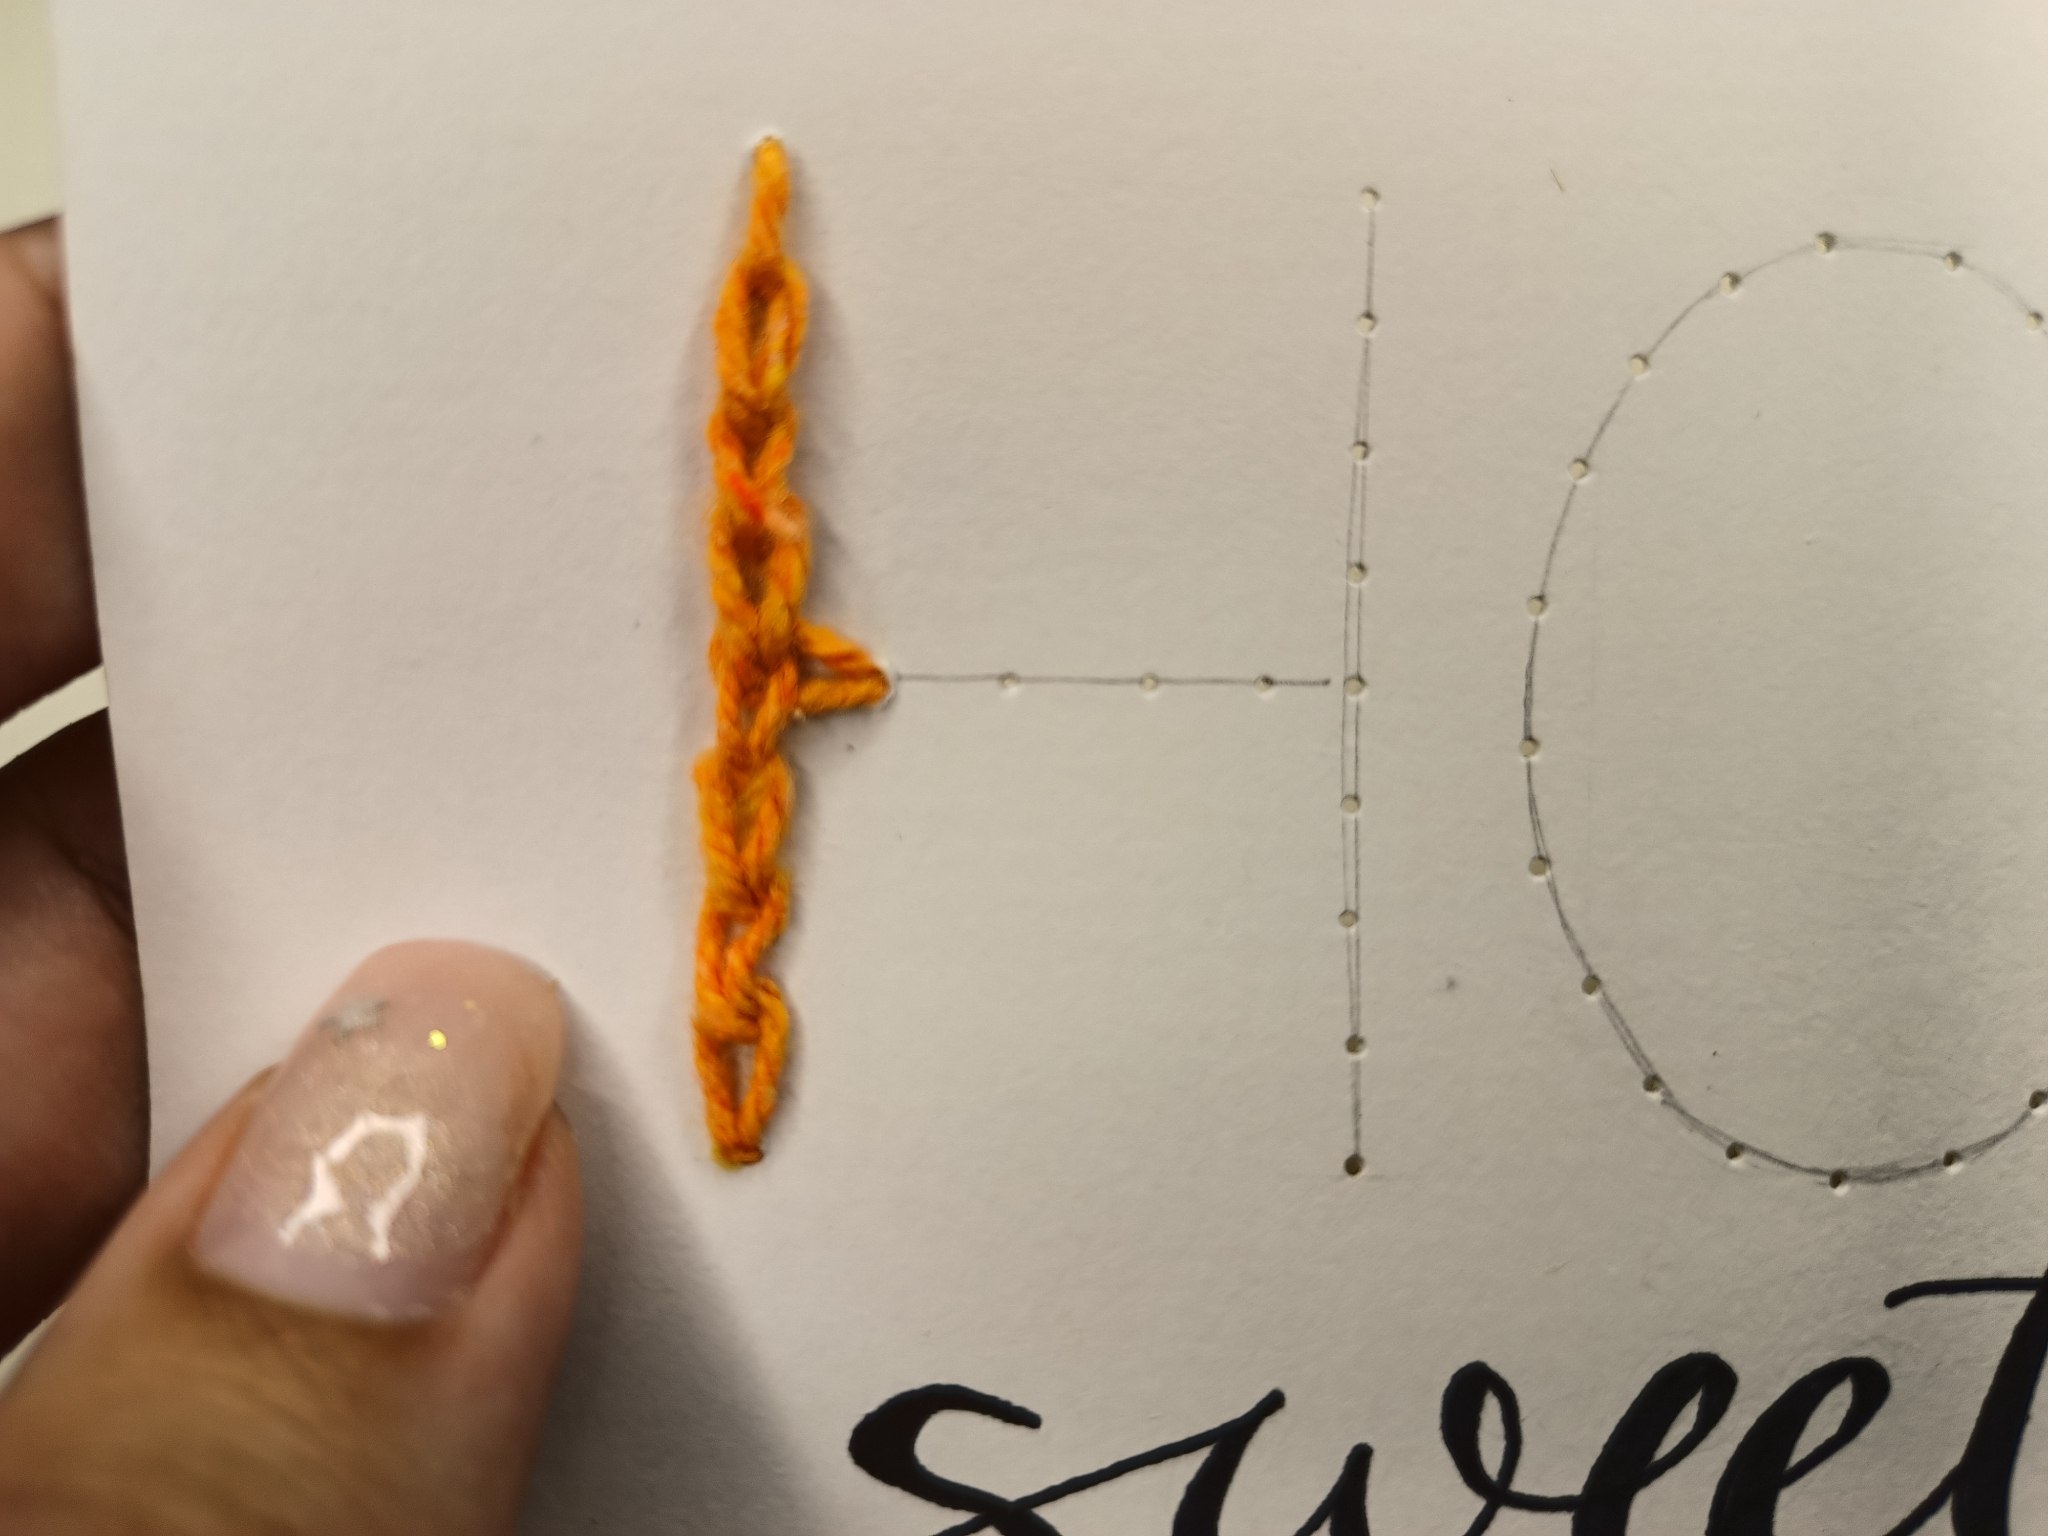
En el caso de la unión con la línea horizontal de la hache, es el mismo proceso, solo que esta vez la aguja en lugar de pasar por debajo de una puntada previa, pasará por dos de ellas.
In the case of the join with the horizontal line of the hache, it is the same process, only this time the needle instead of passing under a previous stitch, it will pass through two of them.
 |
 |
|---|---|
 |
 |
|---|---|
Tejido horizontal / Horizontal weaving
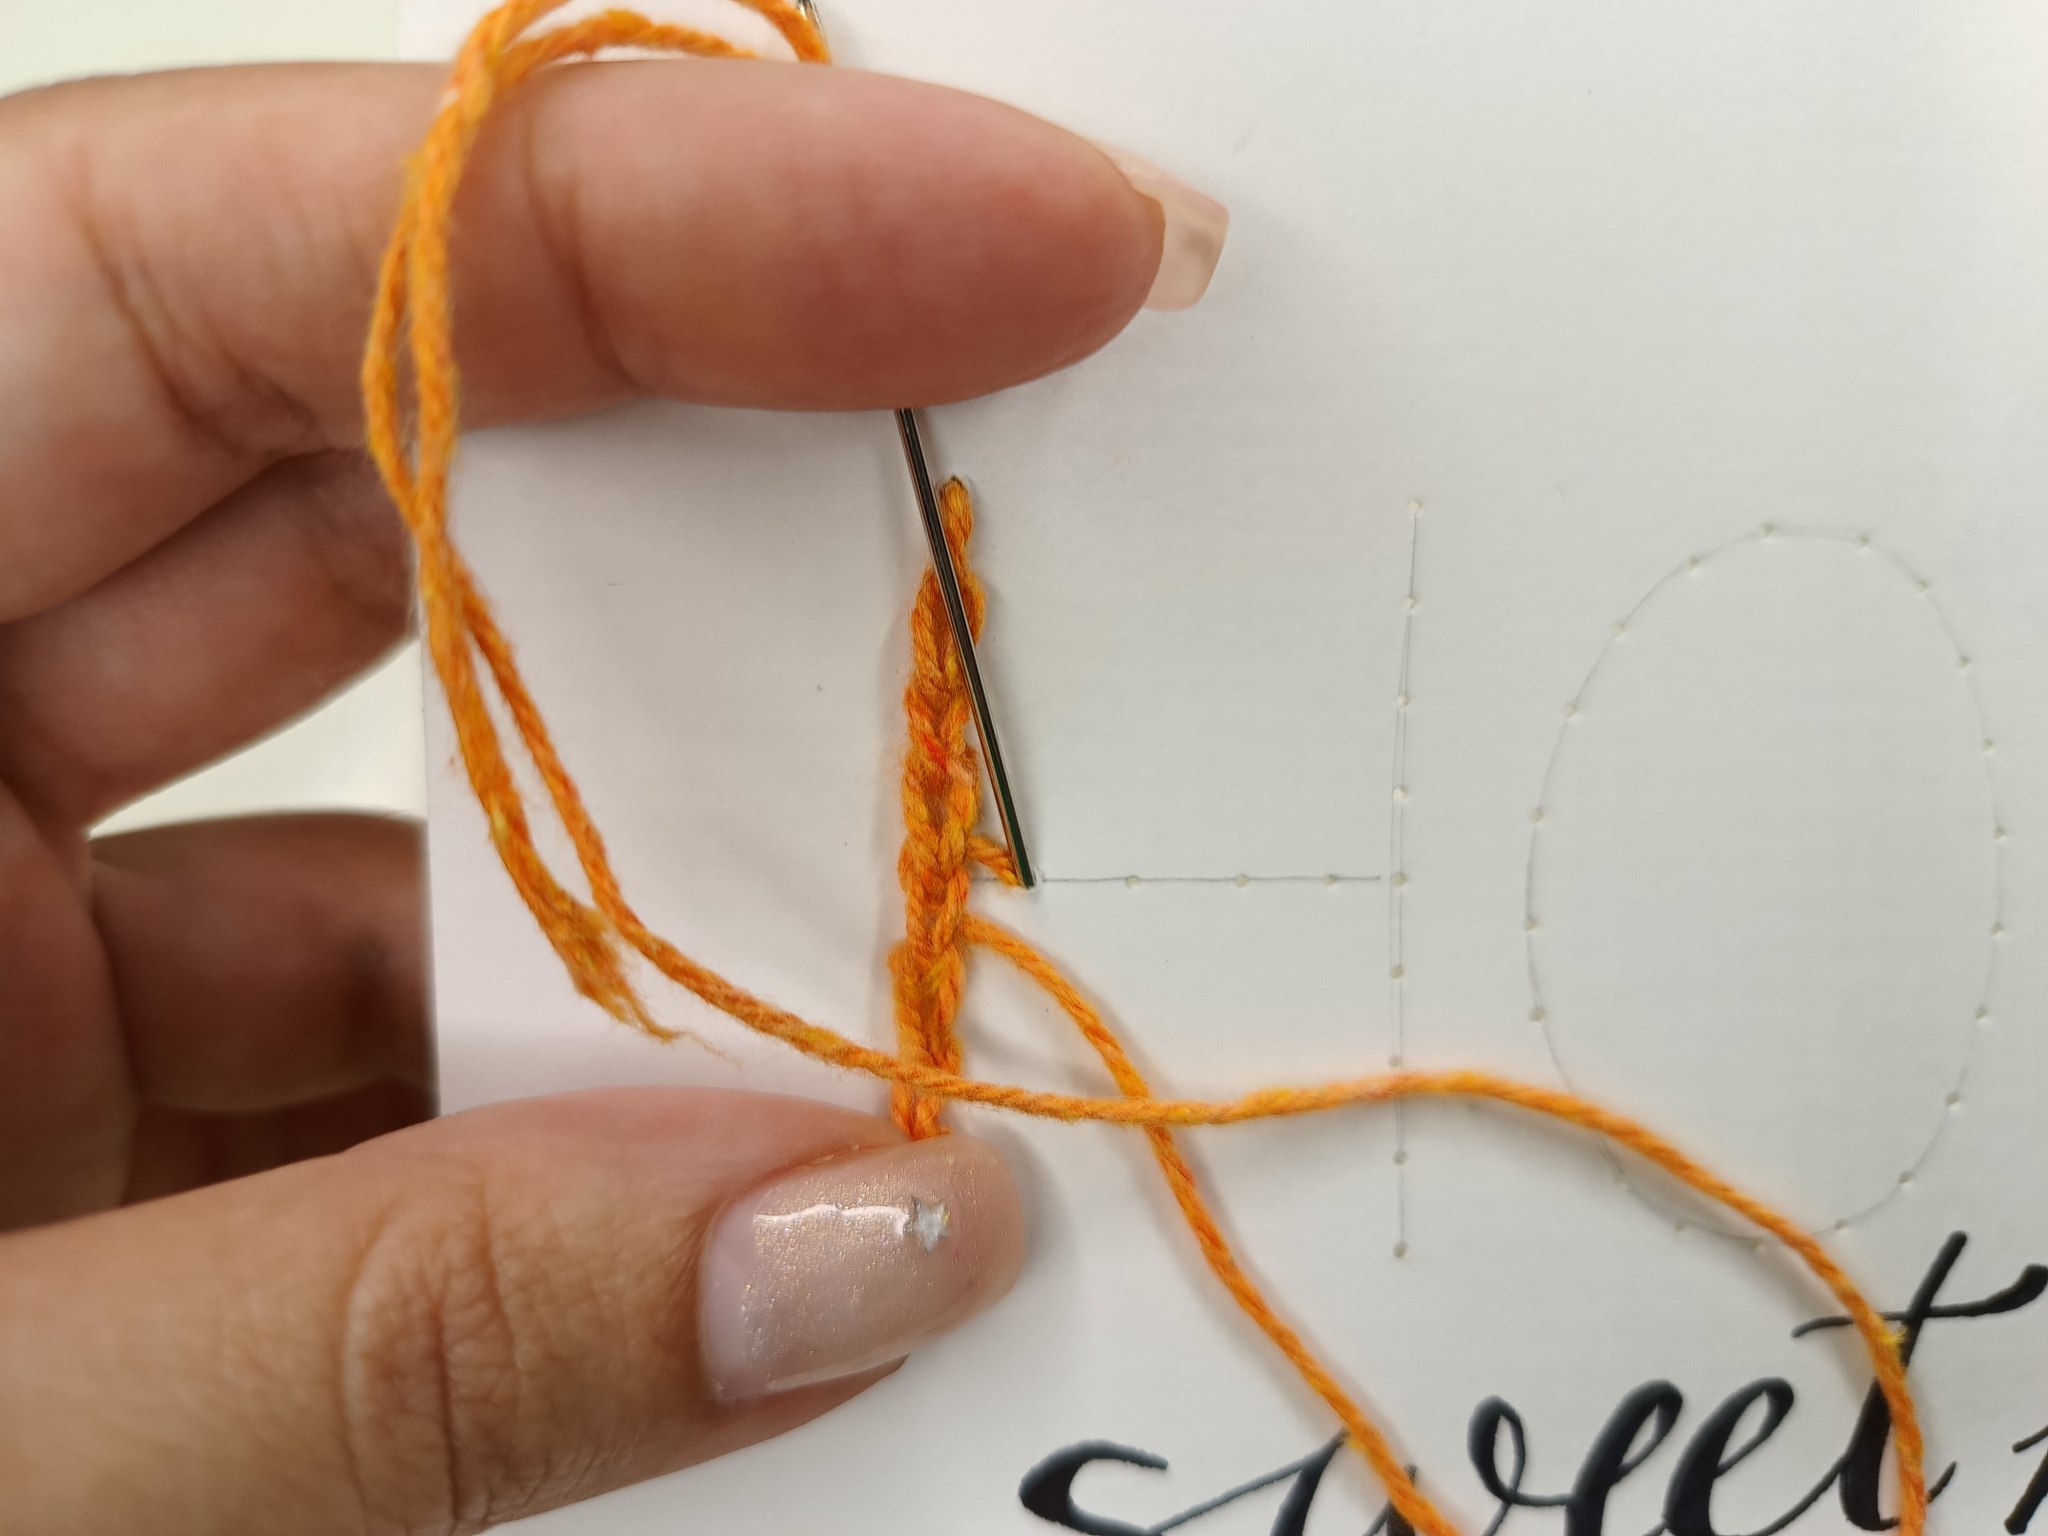
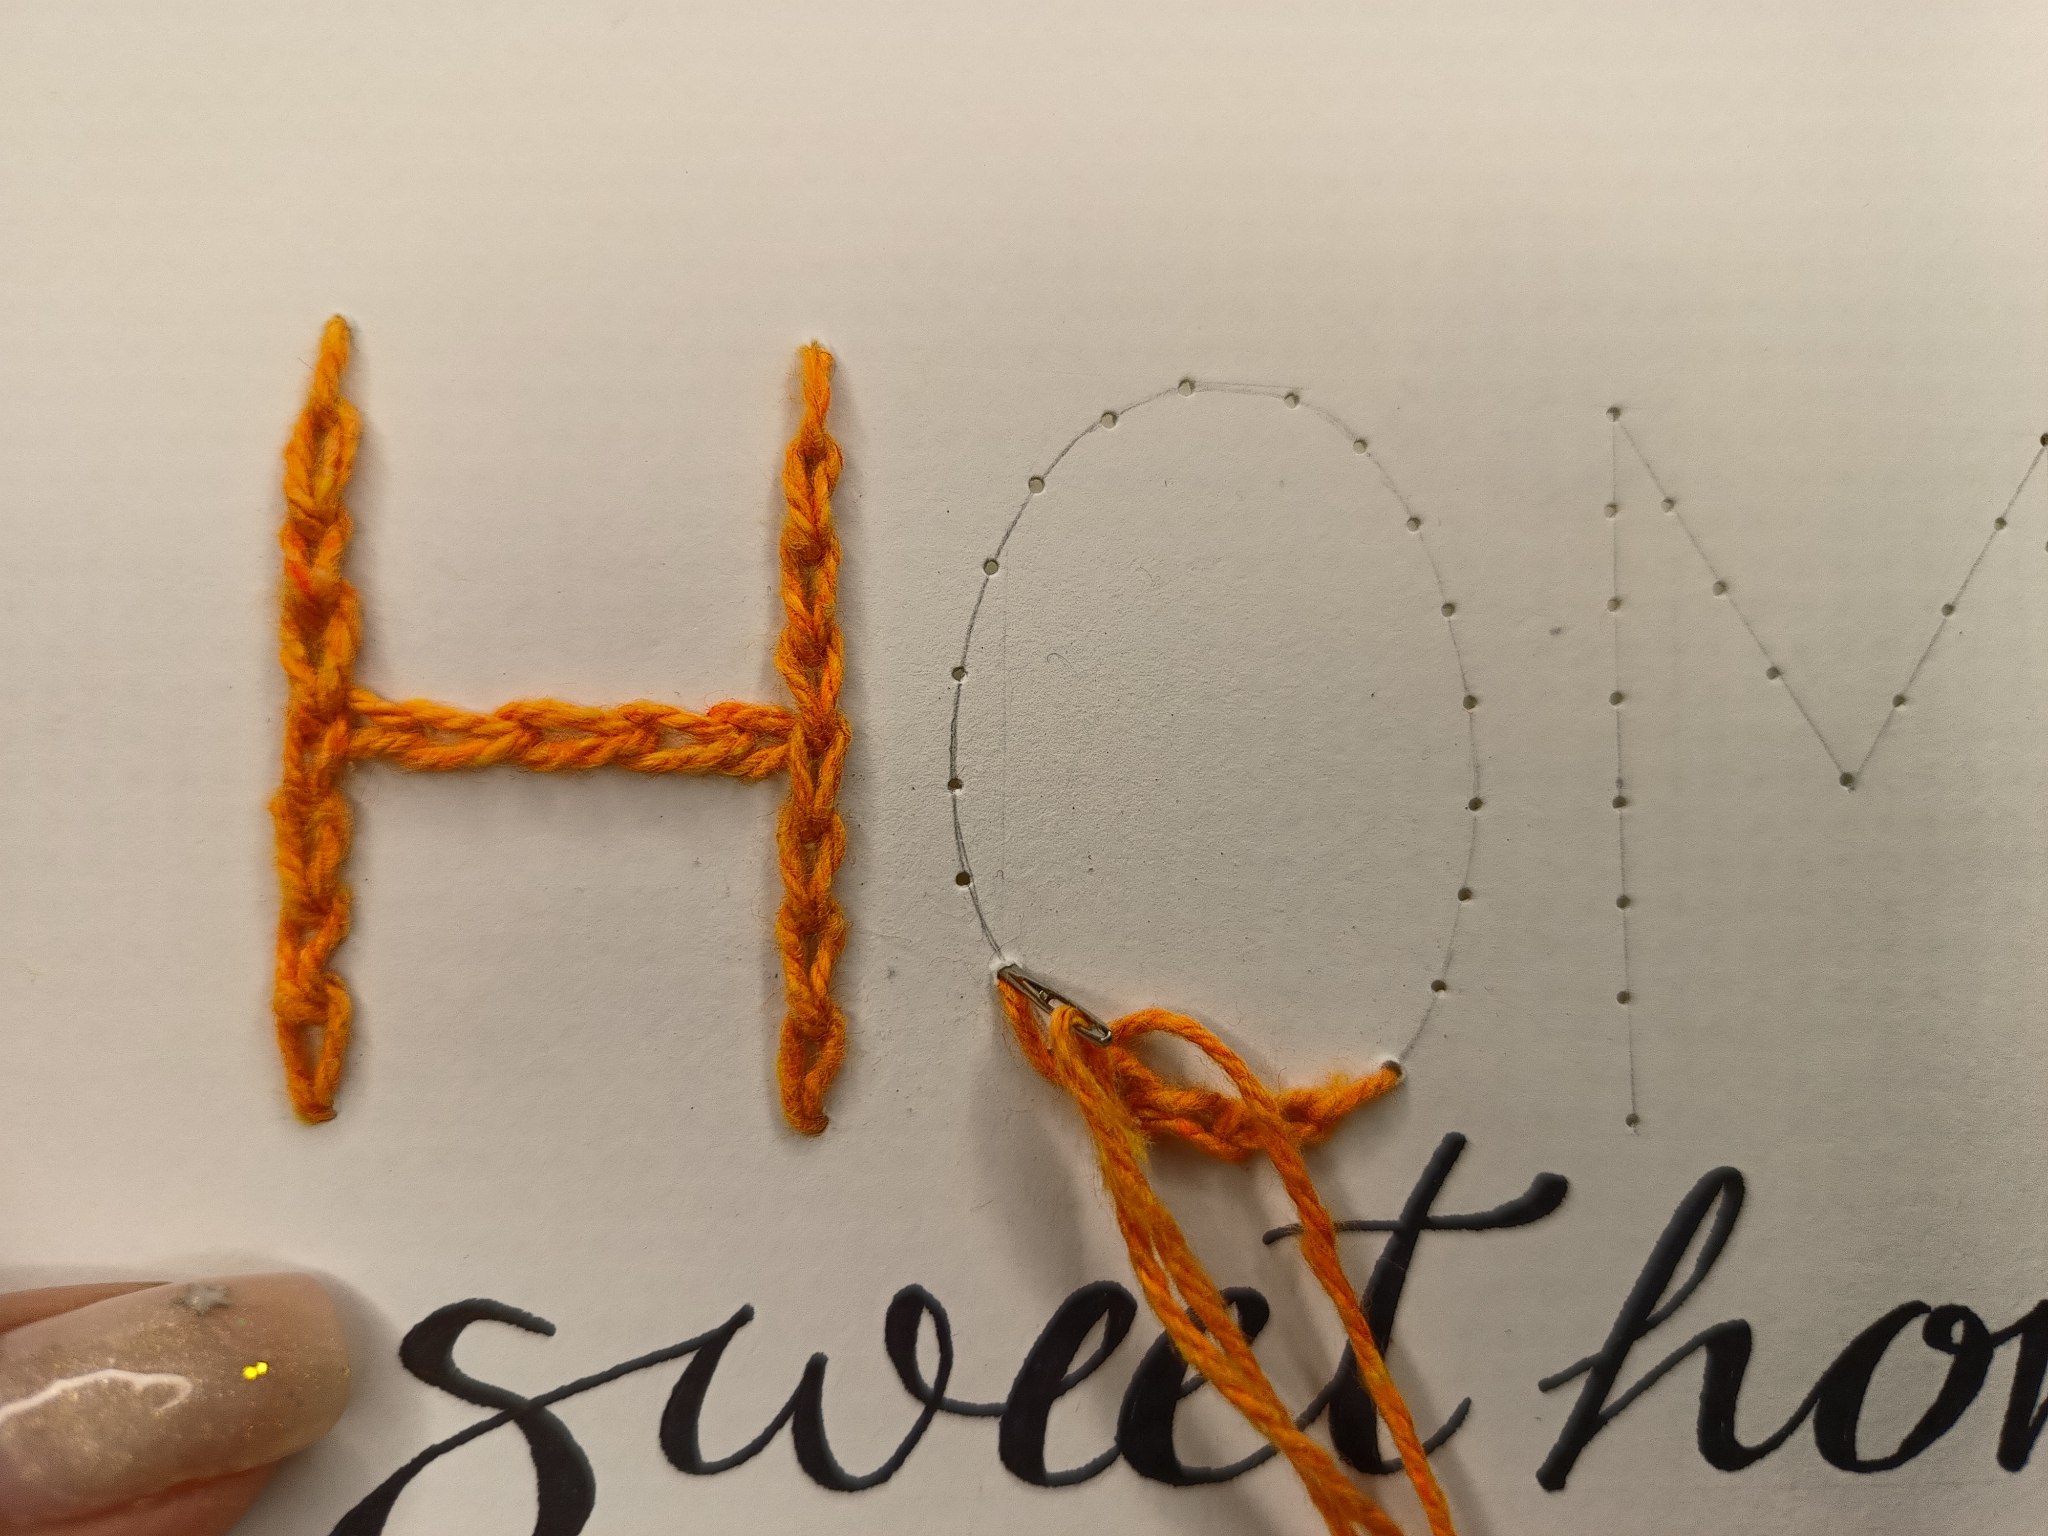
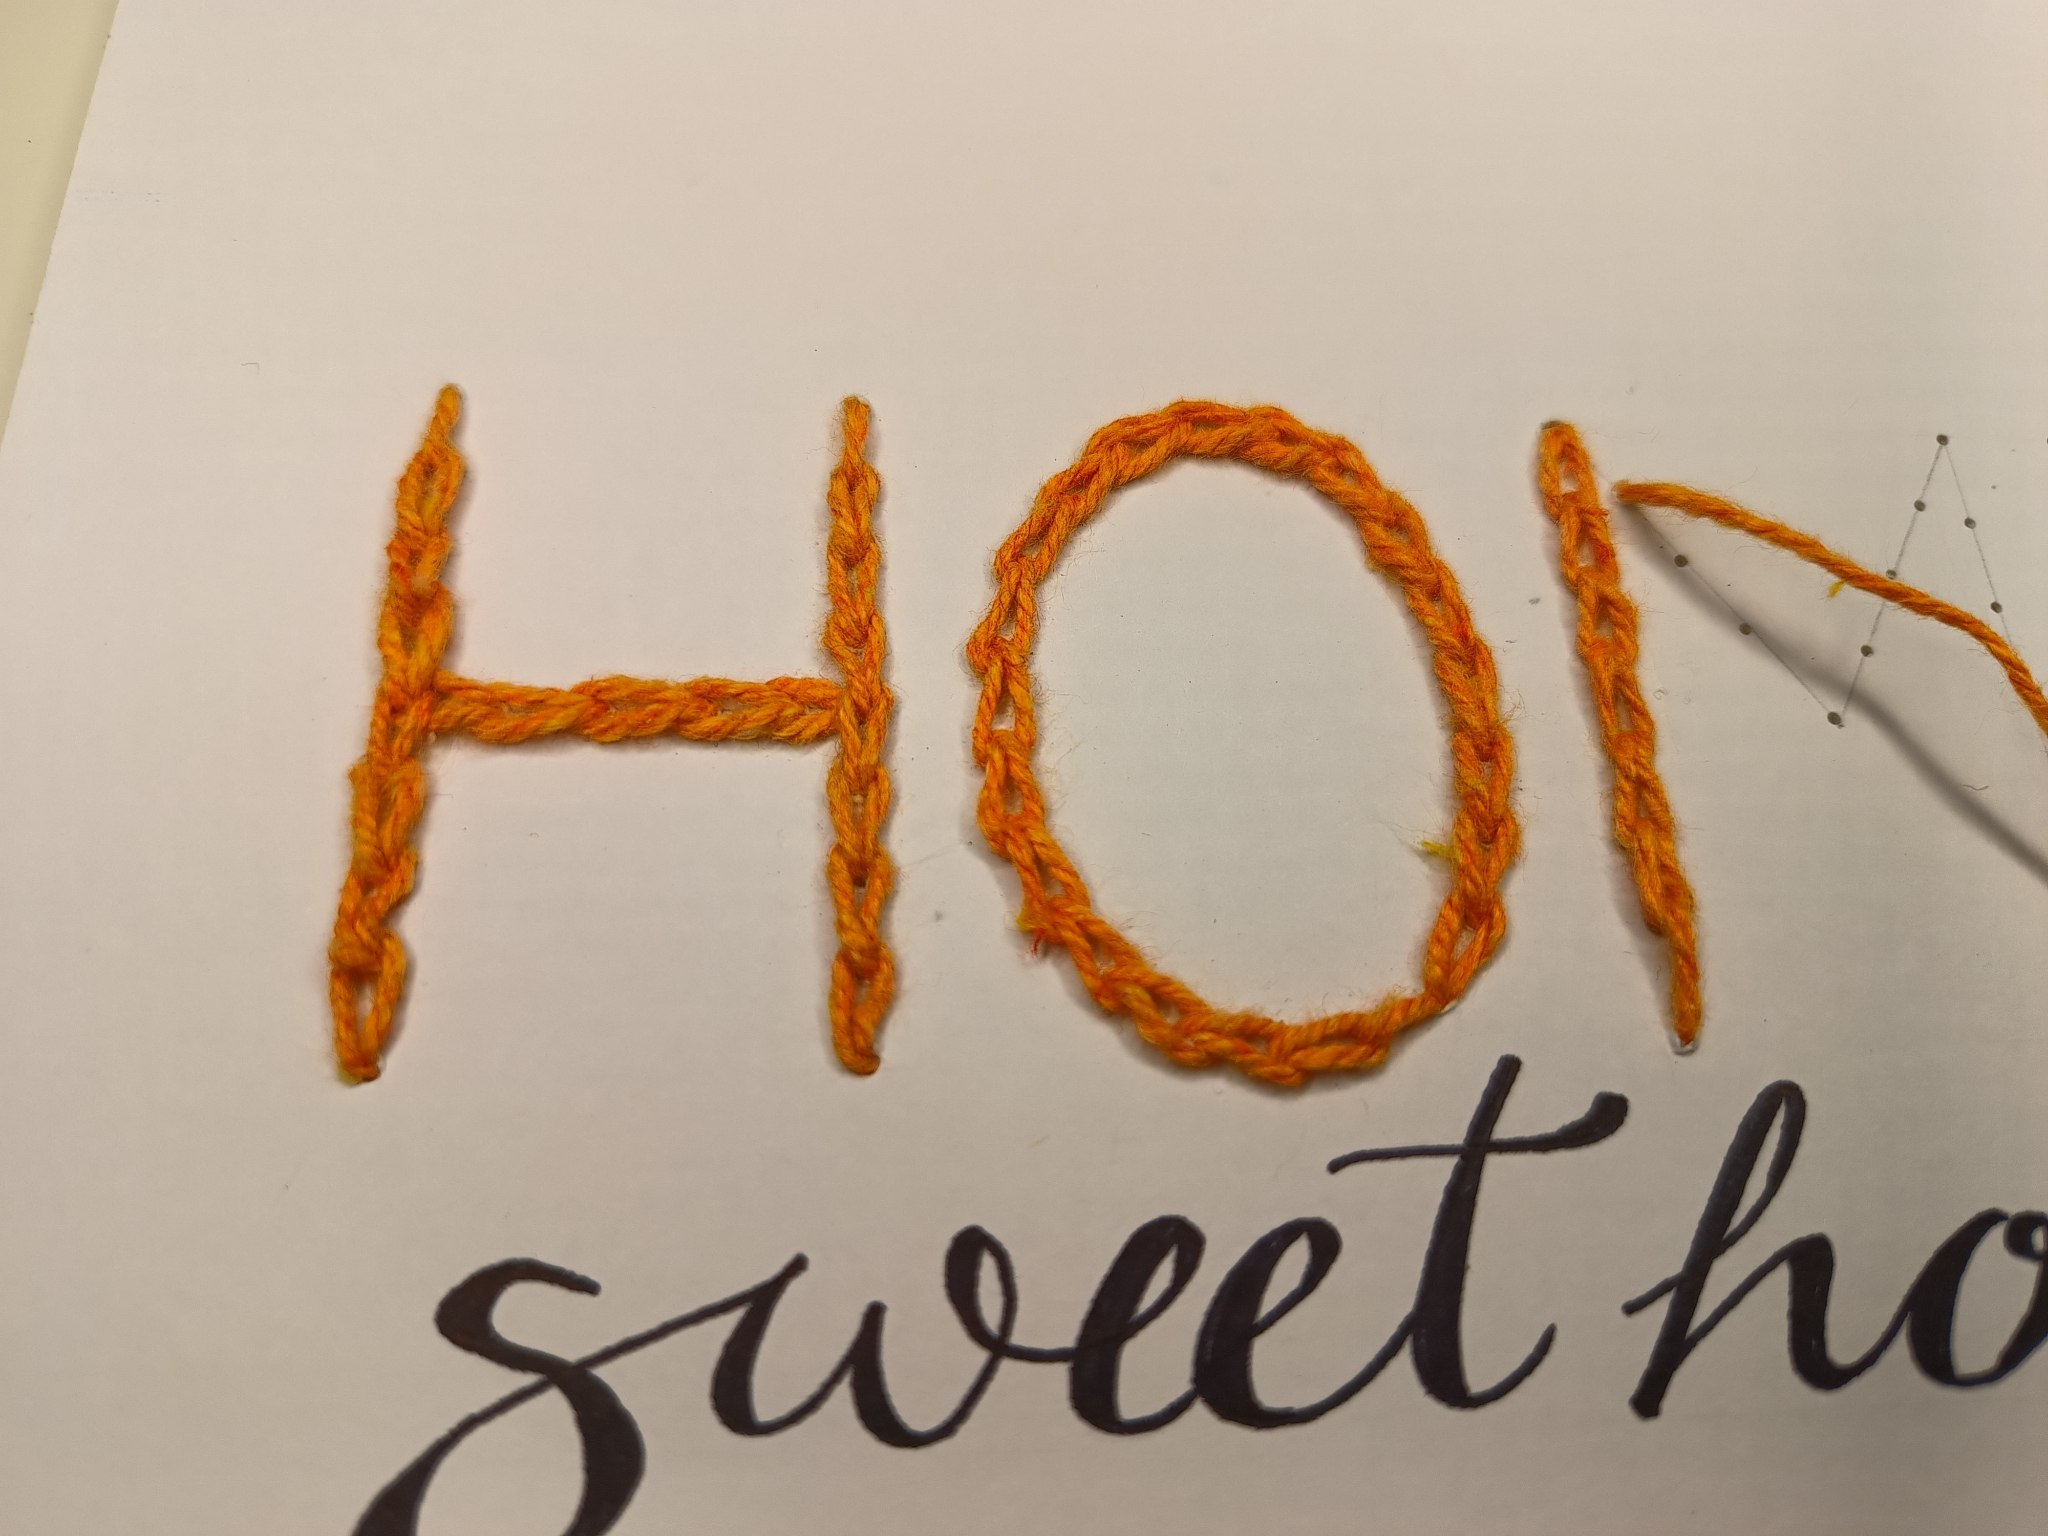
Por acá dejaré imágenes de los avances para que no pierdan detalle del proceso y también aprovecho para decirles que al terminar las costuras, anudamos en la parte de atrás y recortamos el excedente.
Here I will leave pictures of the progress so that you don't lose detail of the process and I also take this opportunity to tell you that when the seams are finished, we tie the knot at the back and trim the excess.
 |
 |
|---|---|
 |
 |
|---|---|
 |
 |
|---|---|
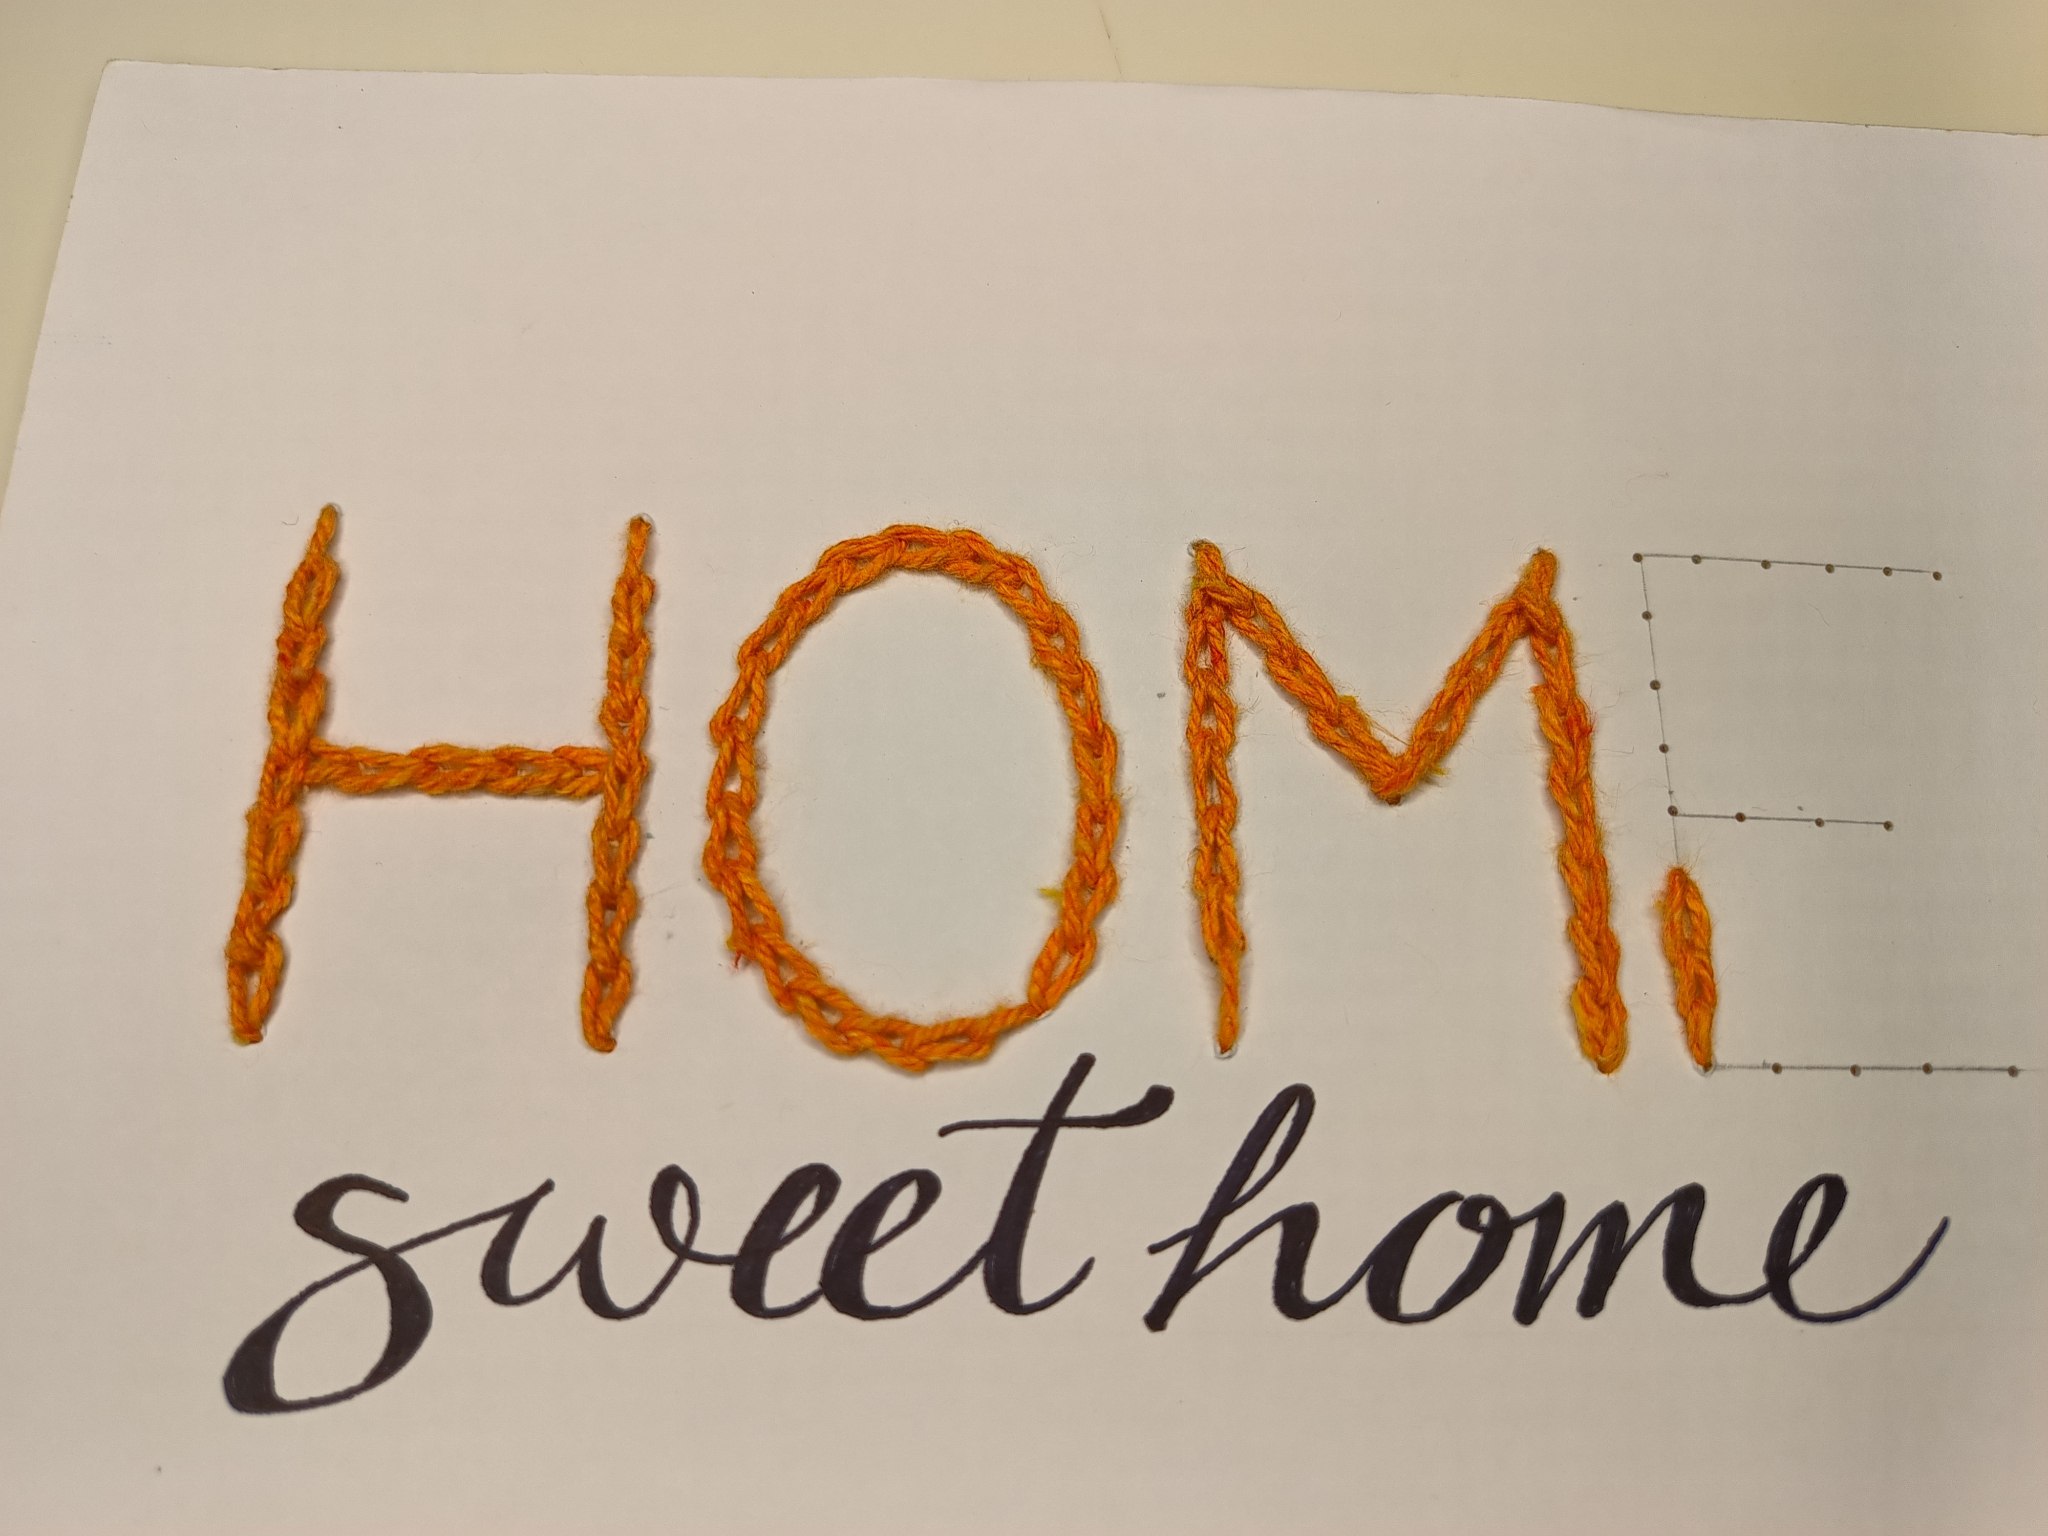
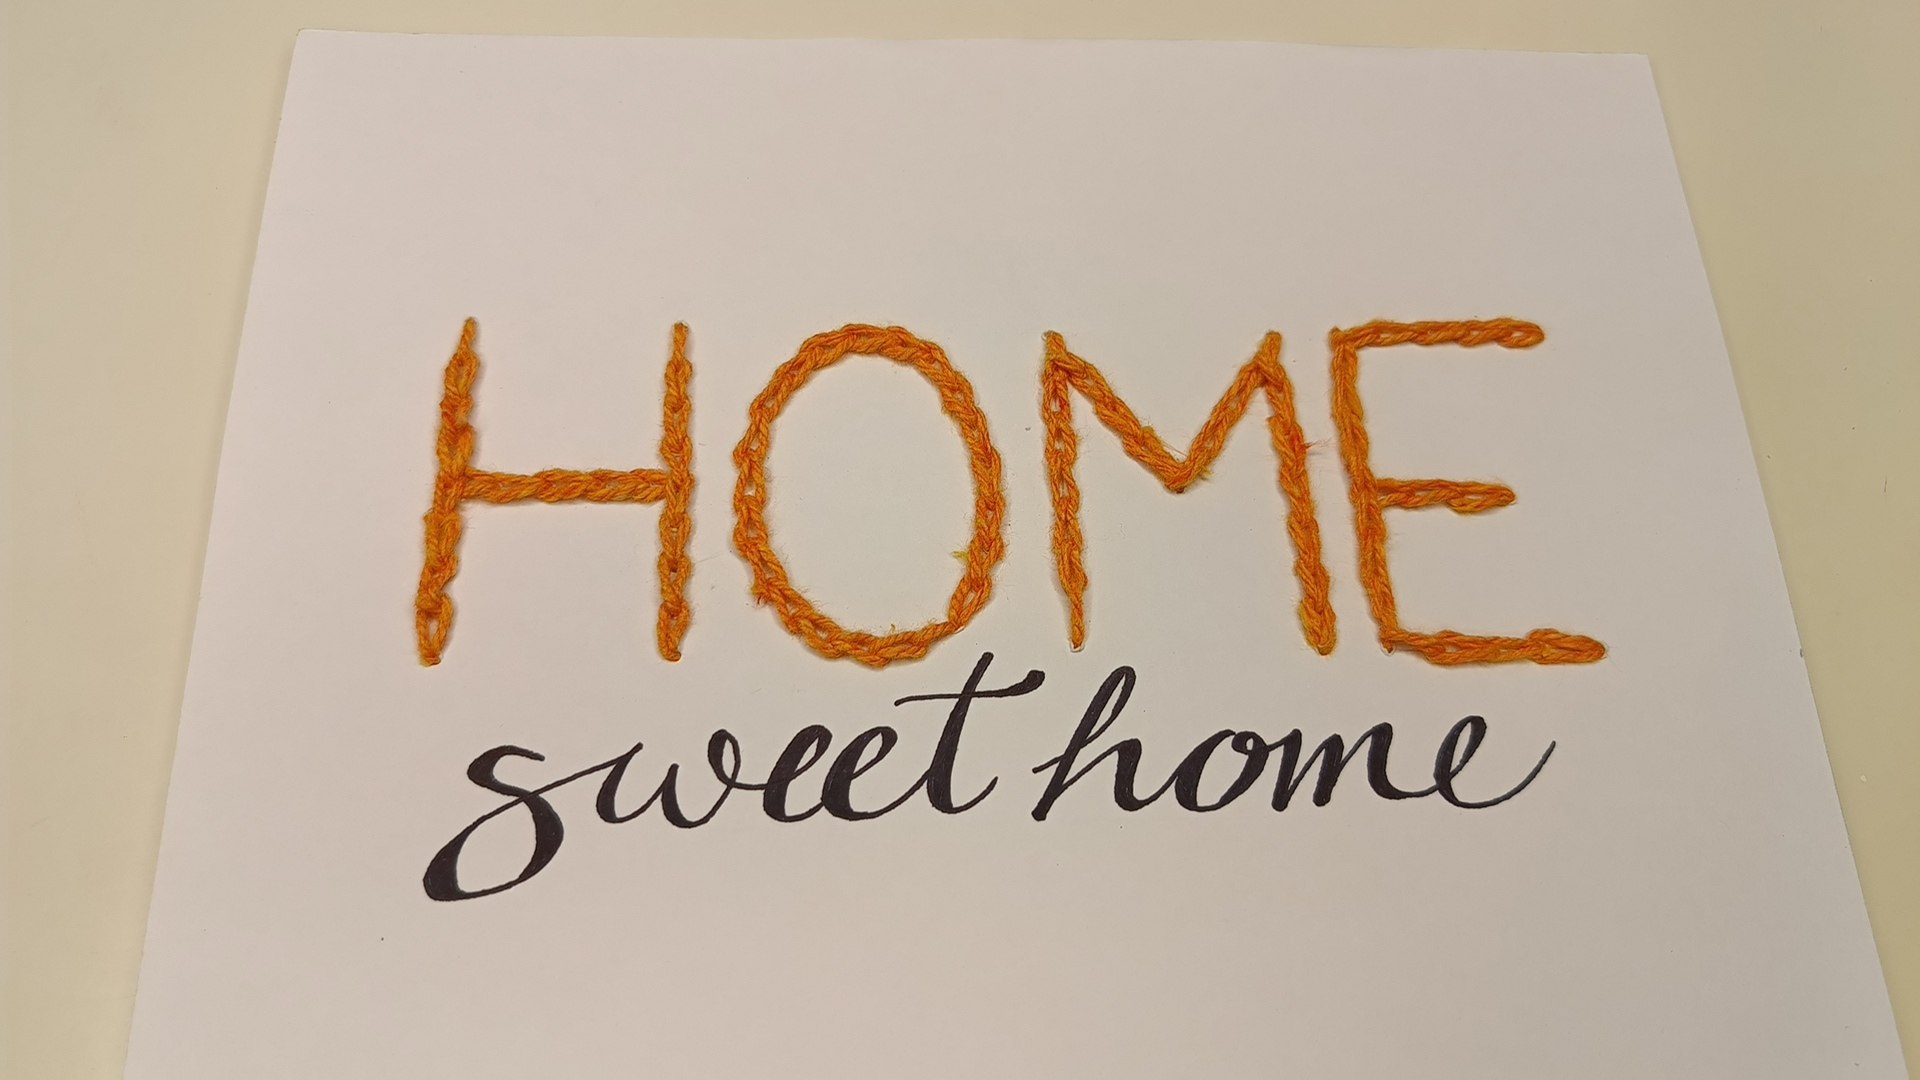
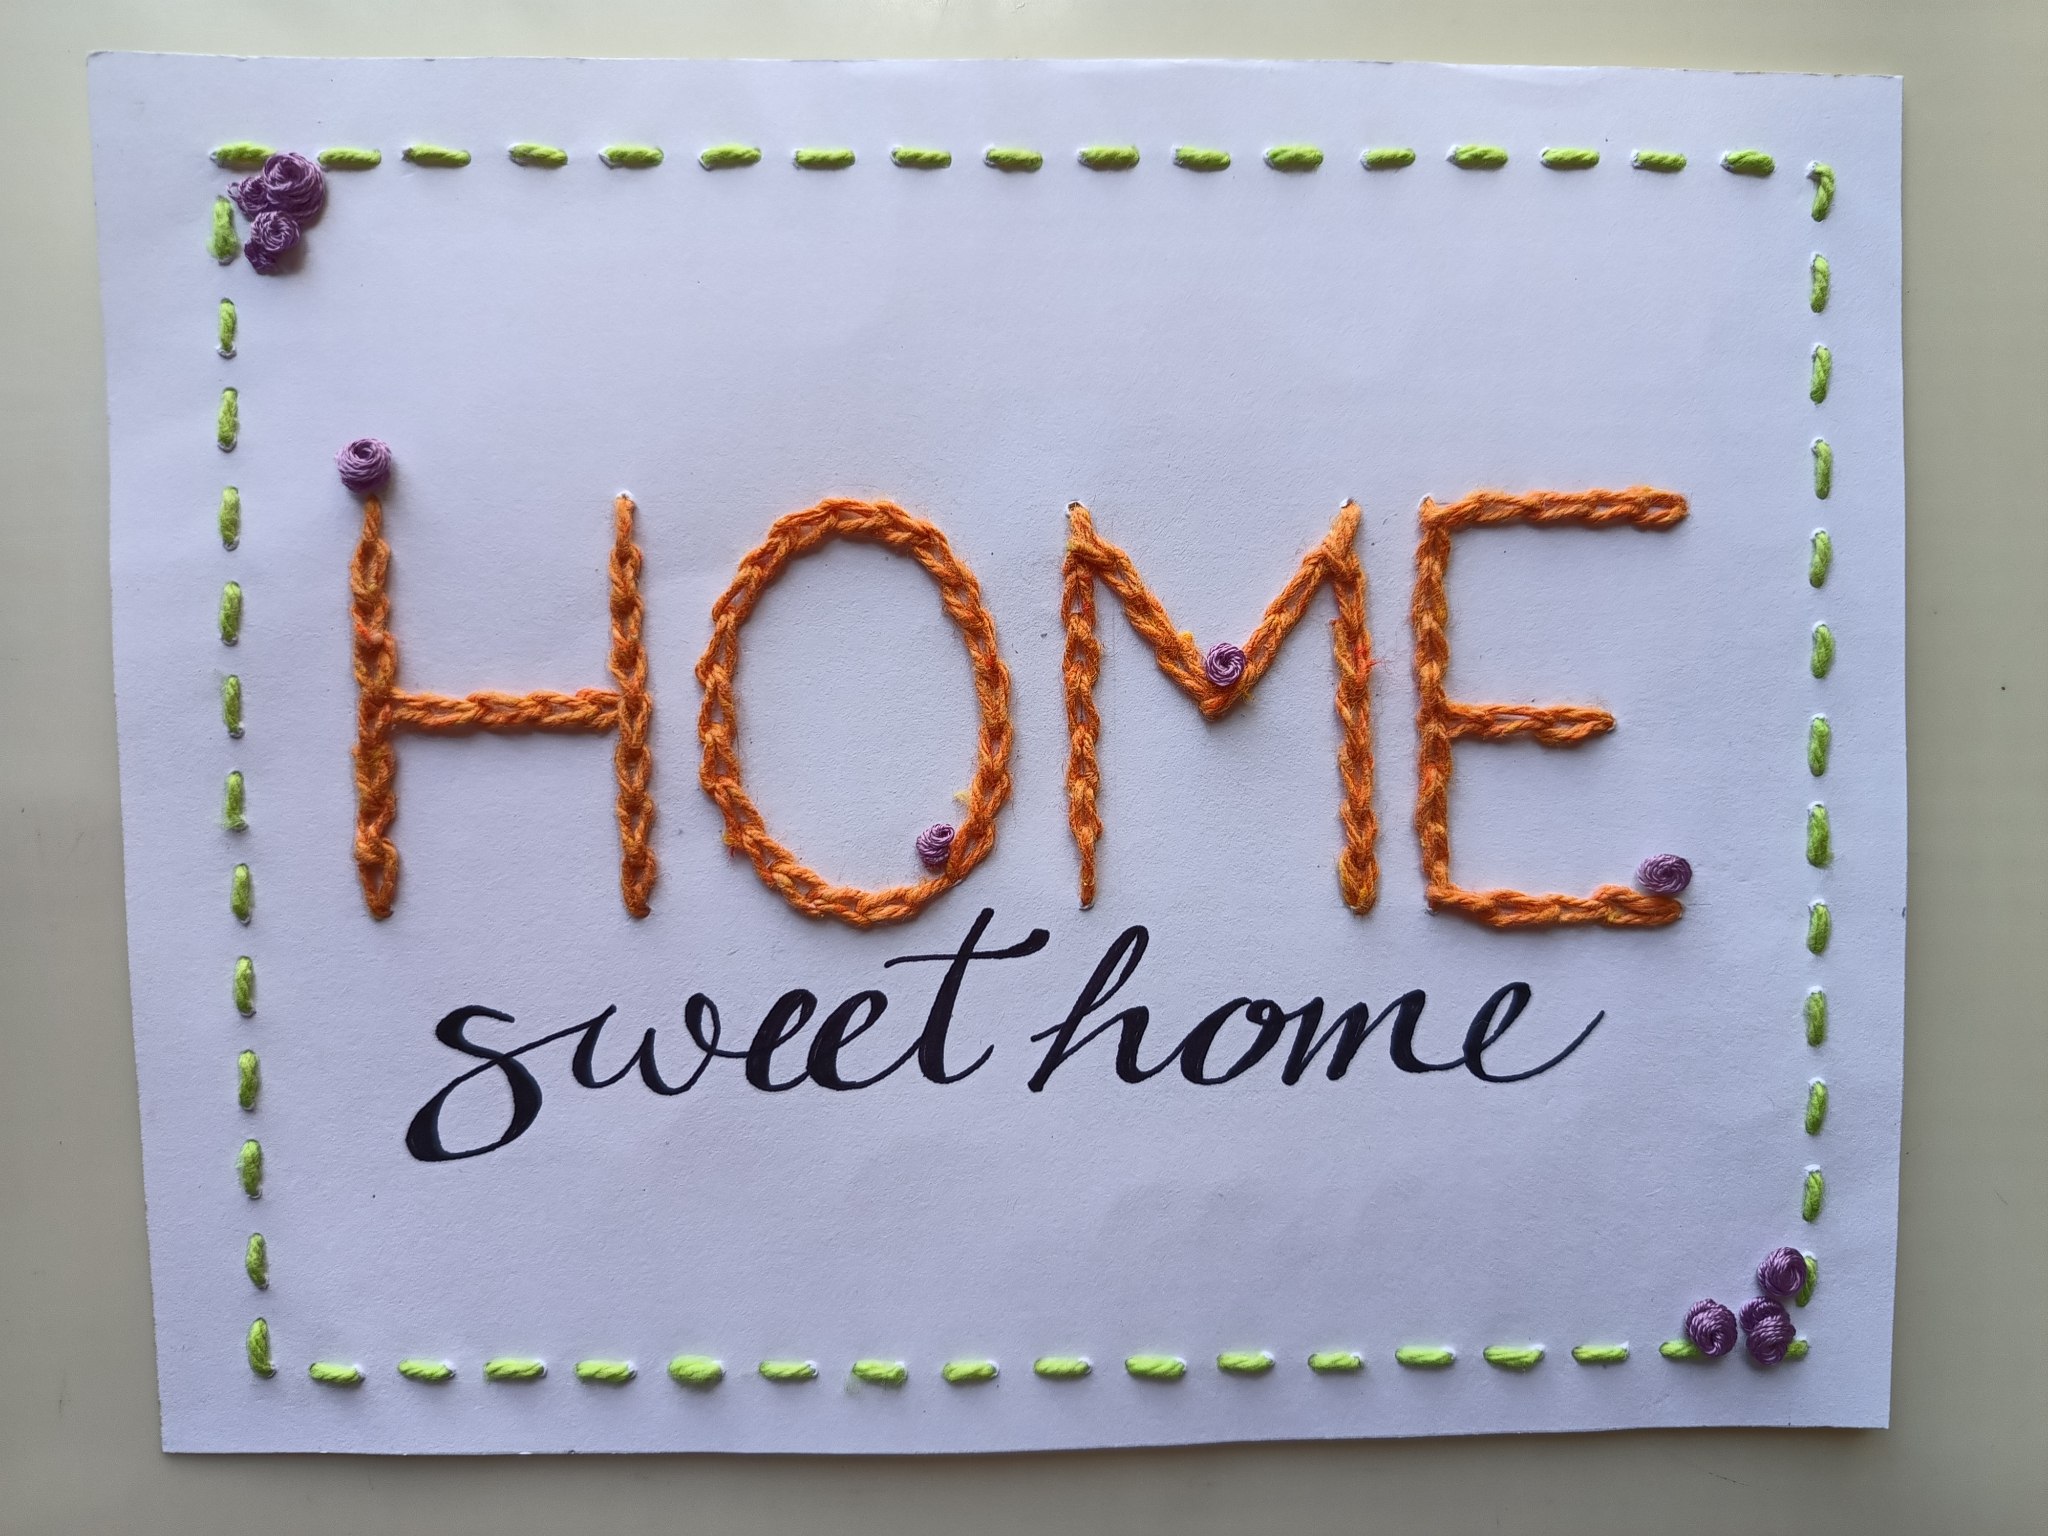
Listas las letras tejidas / Ready woven letters
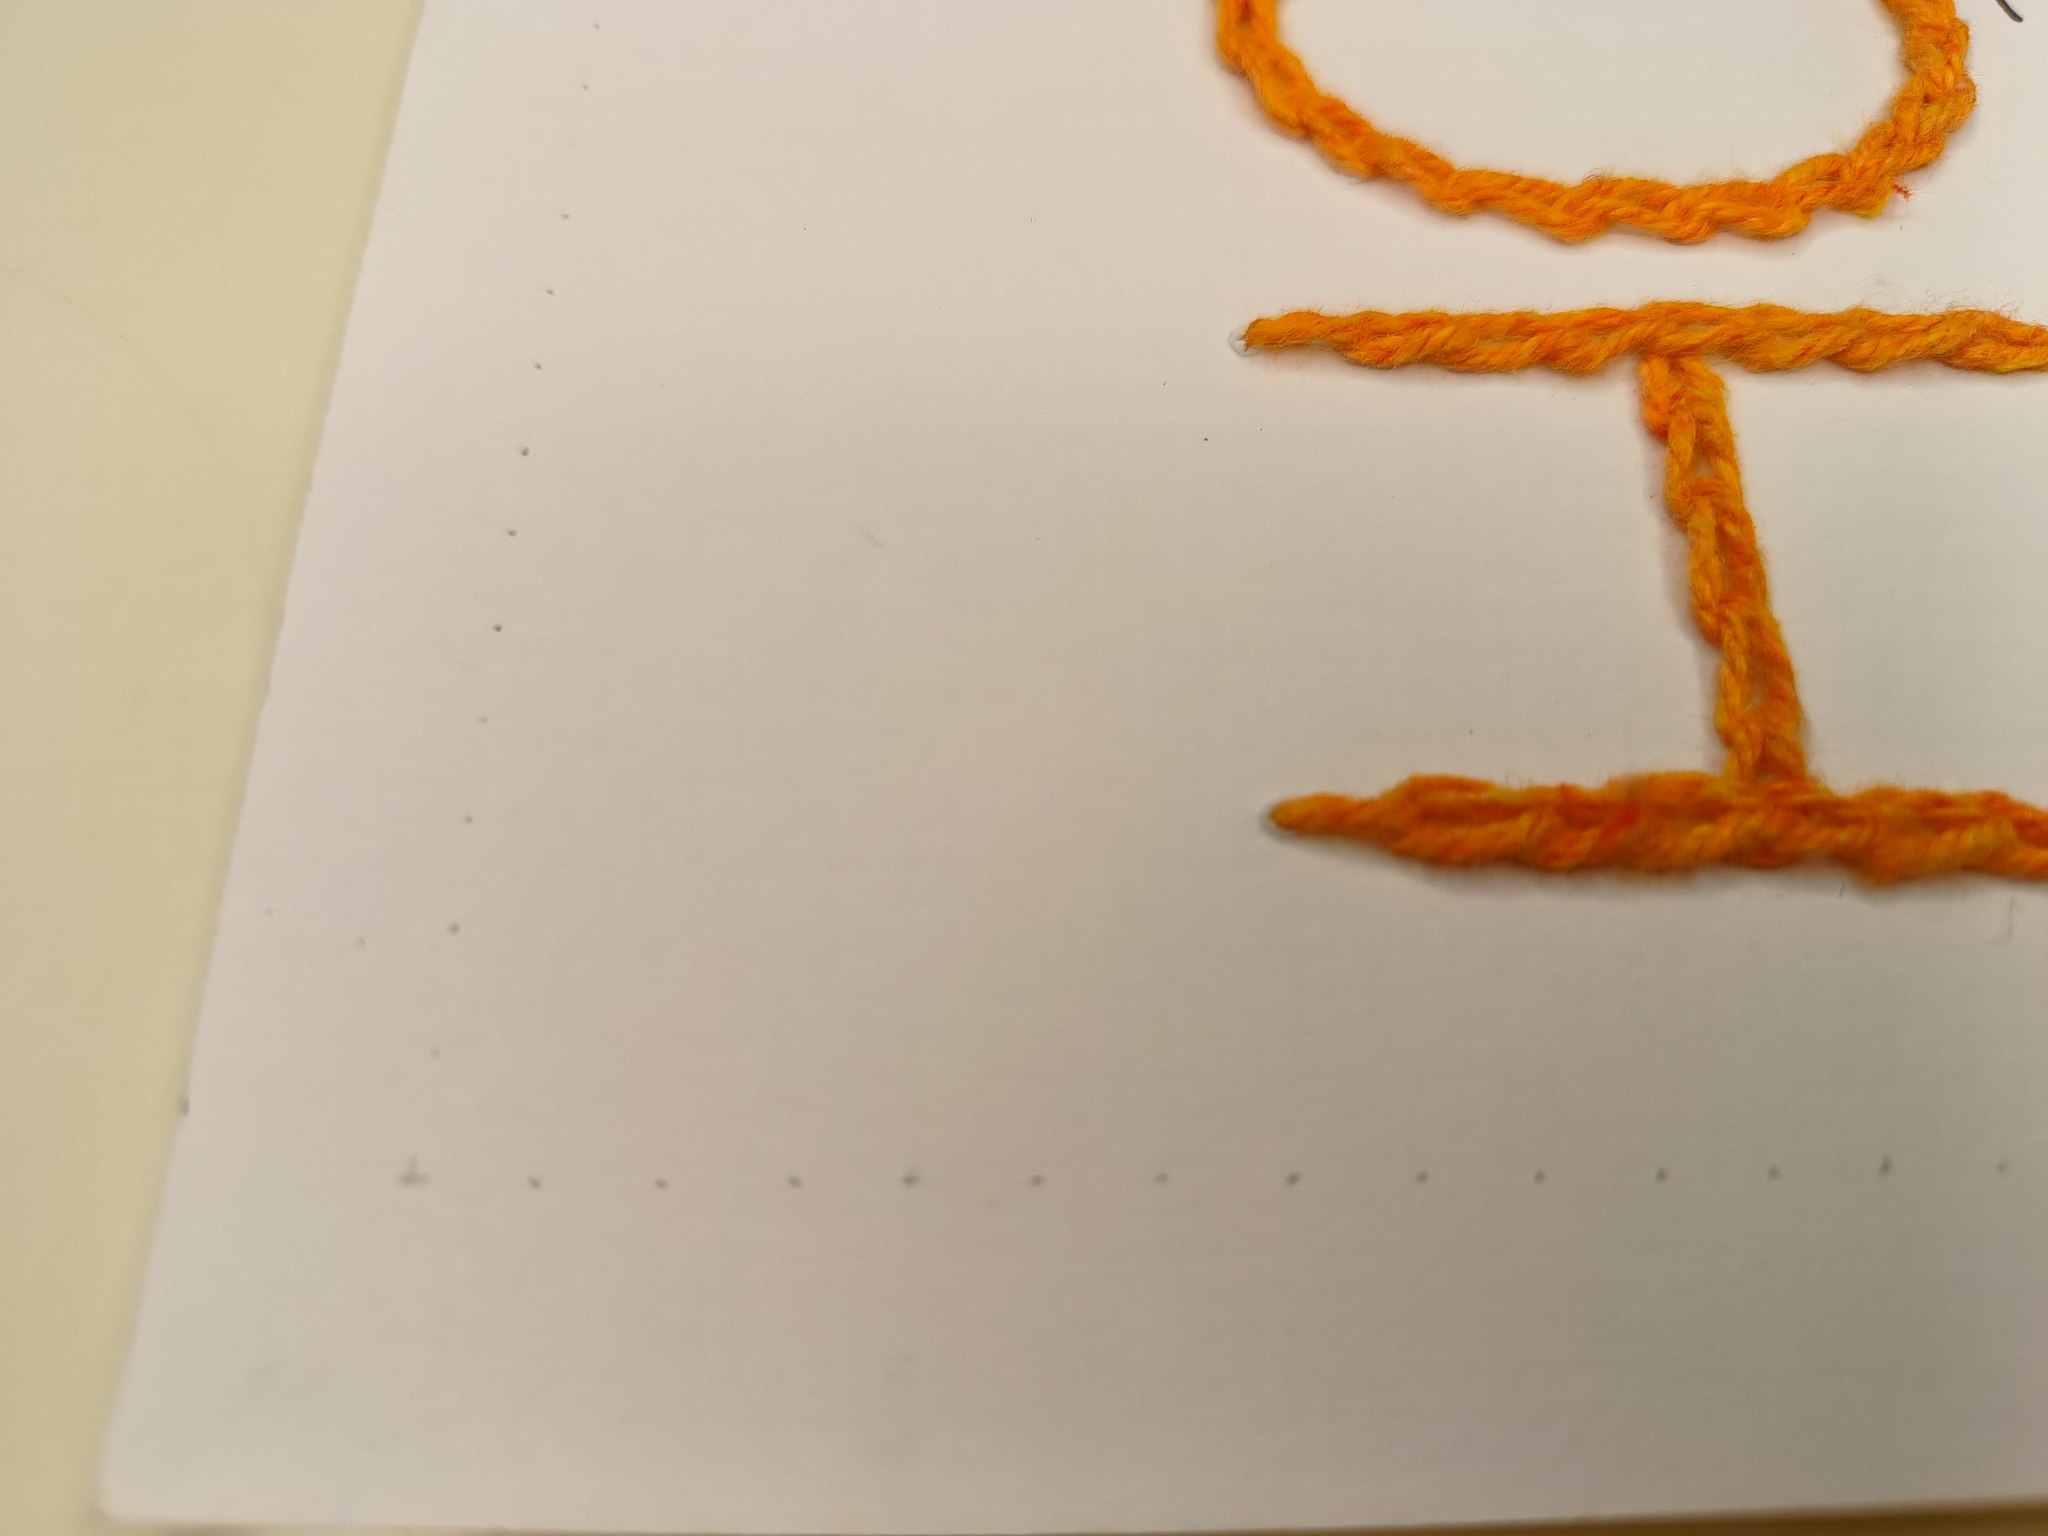
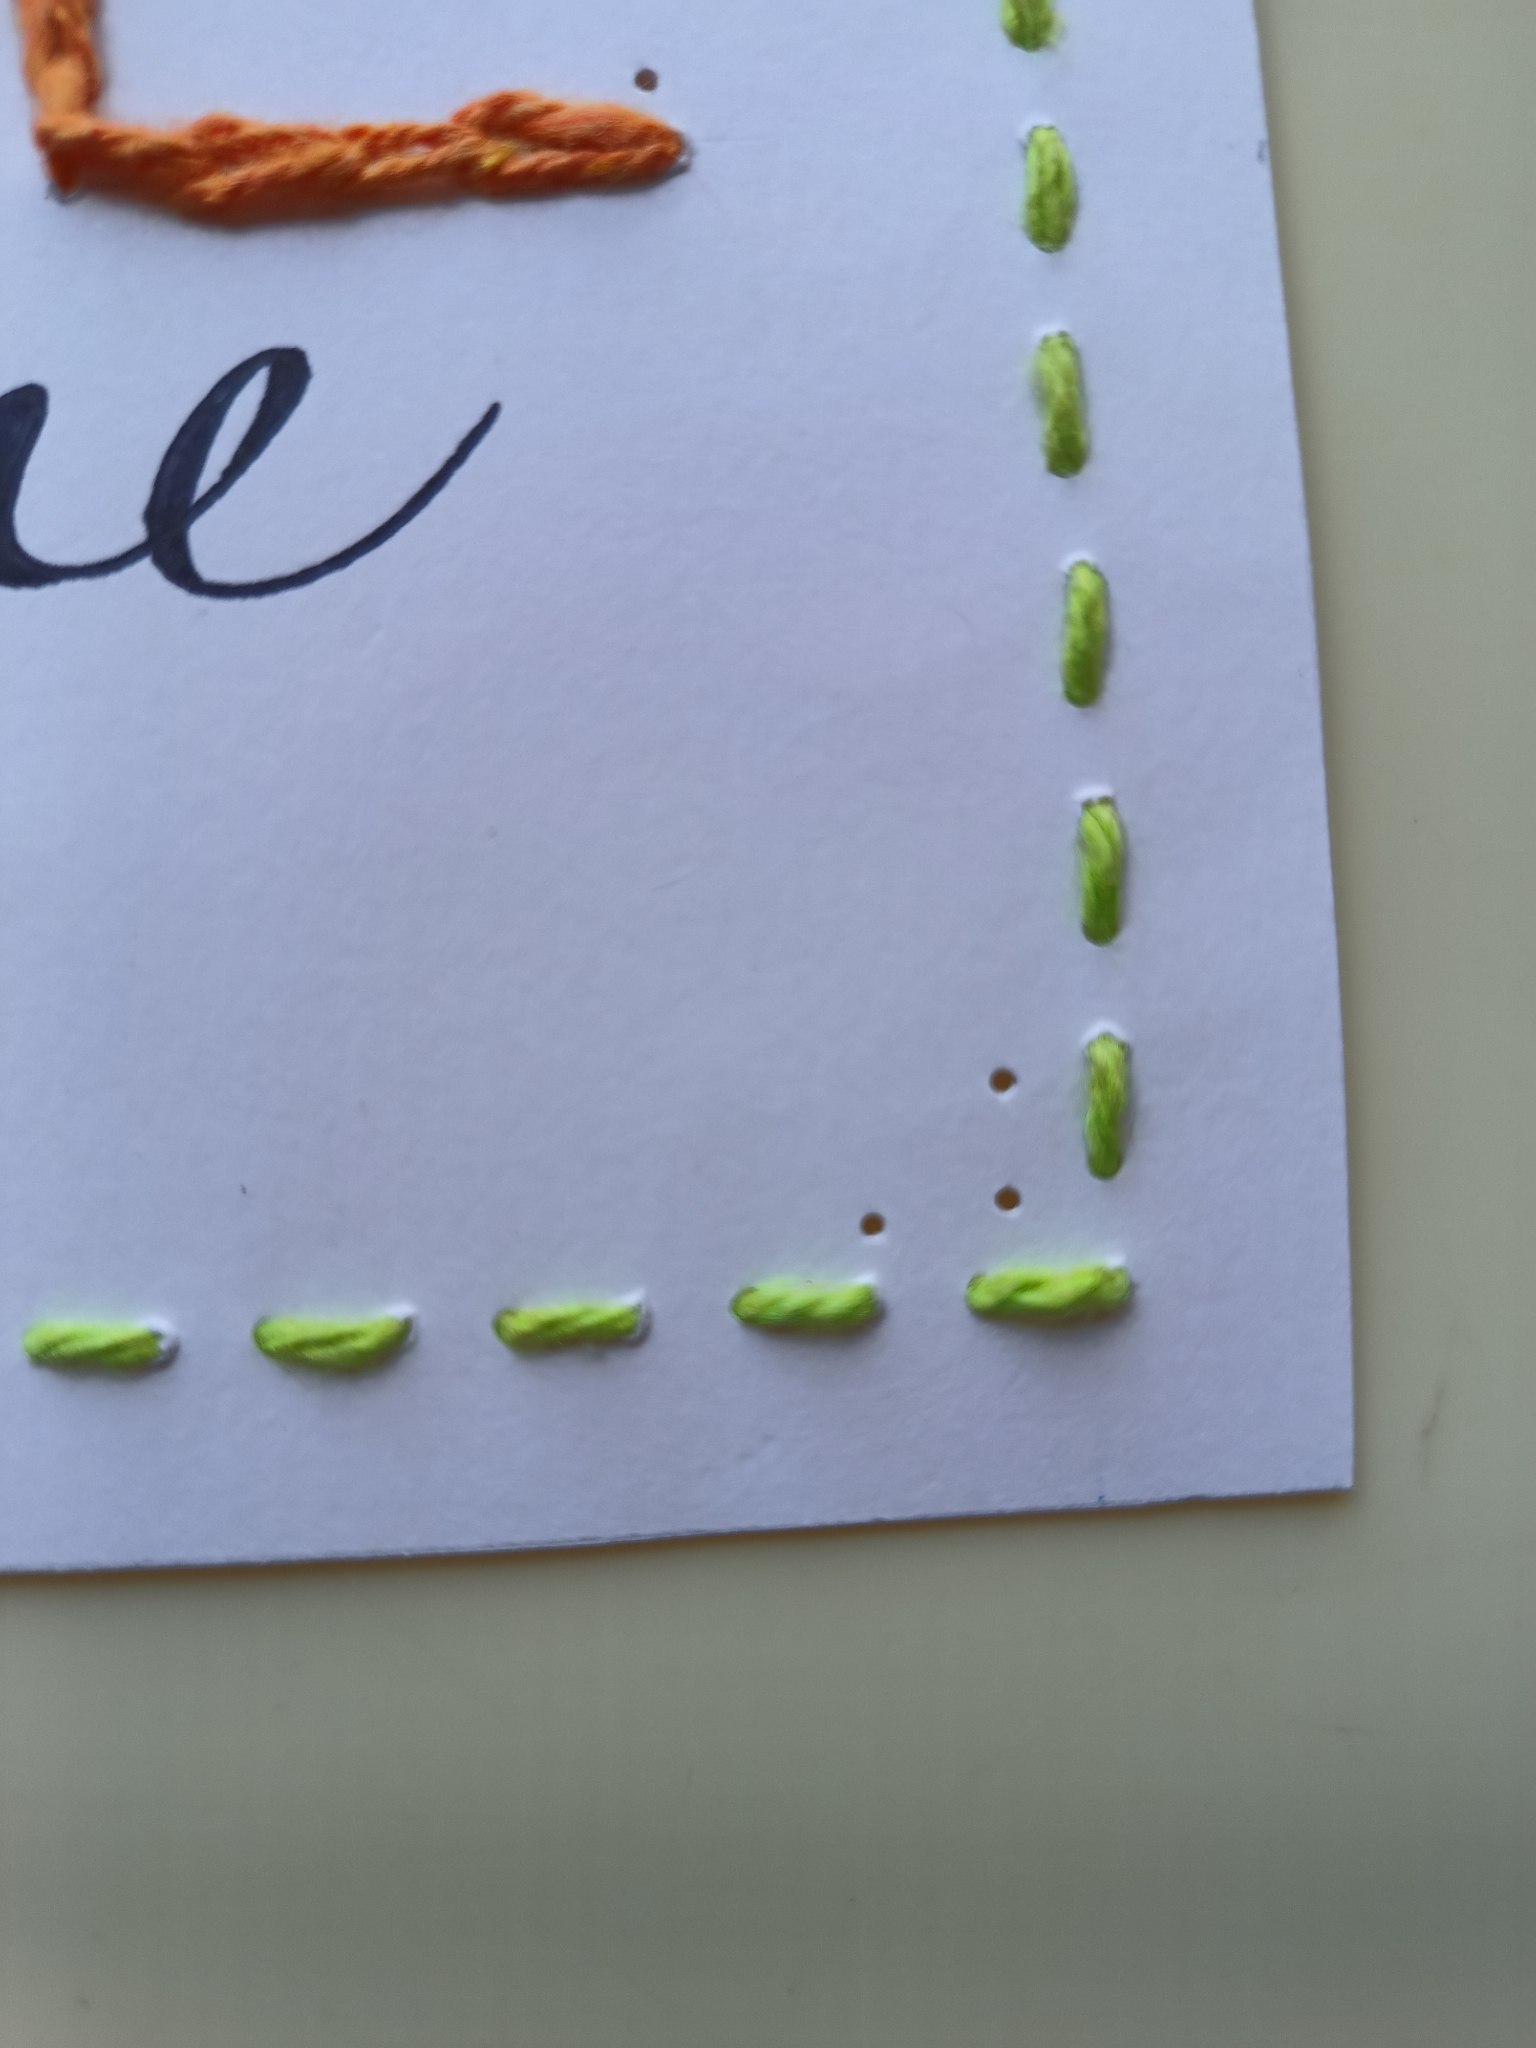
Para decorar los bordes del cartel, en línea recta, haremos orificios con la aguja cada medio centímetro.
To decorate the edges of the poster, in a straight line, we will make holes with the needle every half centimeter.
 |
 |
|---|---|
Orificios al margen / Holes in the margin
Con hilo verde haremos una costura sencilla por todo el borde, tal y como se ve en las imágenes:
With green thread we will make a simple seam all around the edge, as shown in the pictures:
 |
 |
|---|---|
Costura del borde / Edge stitching
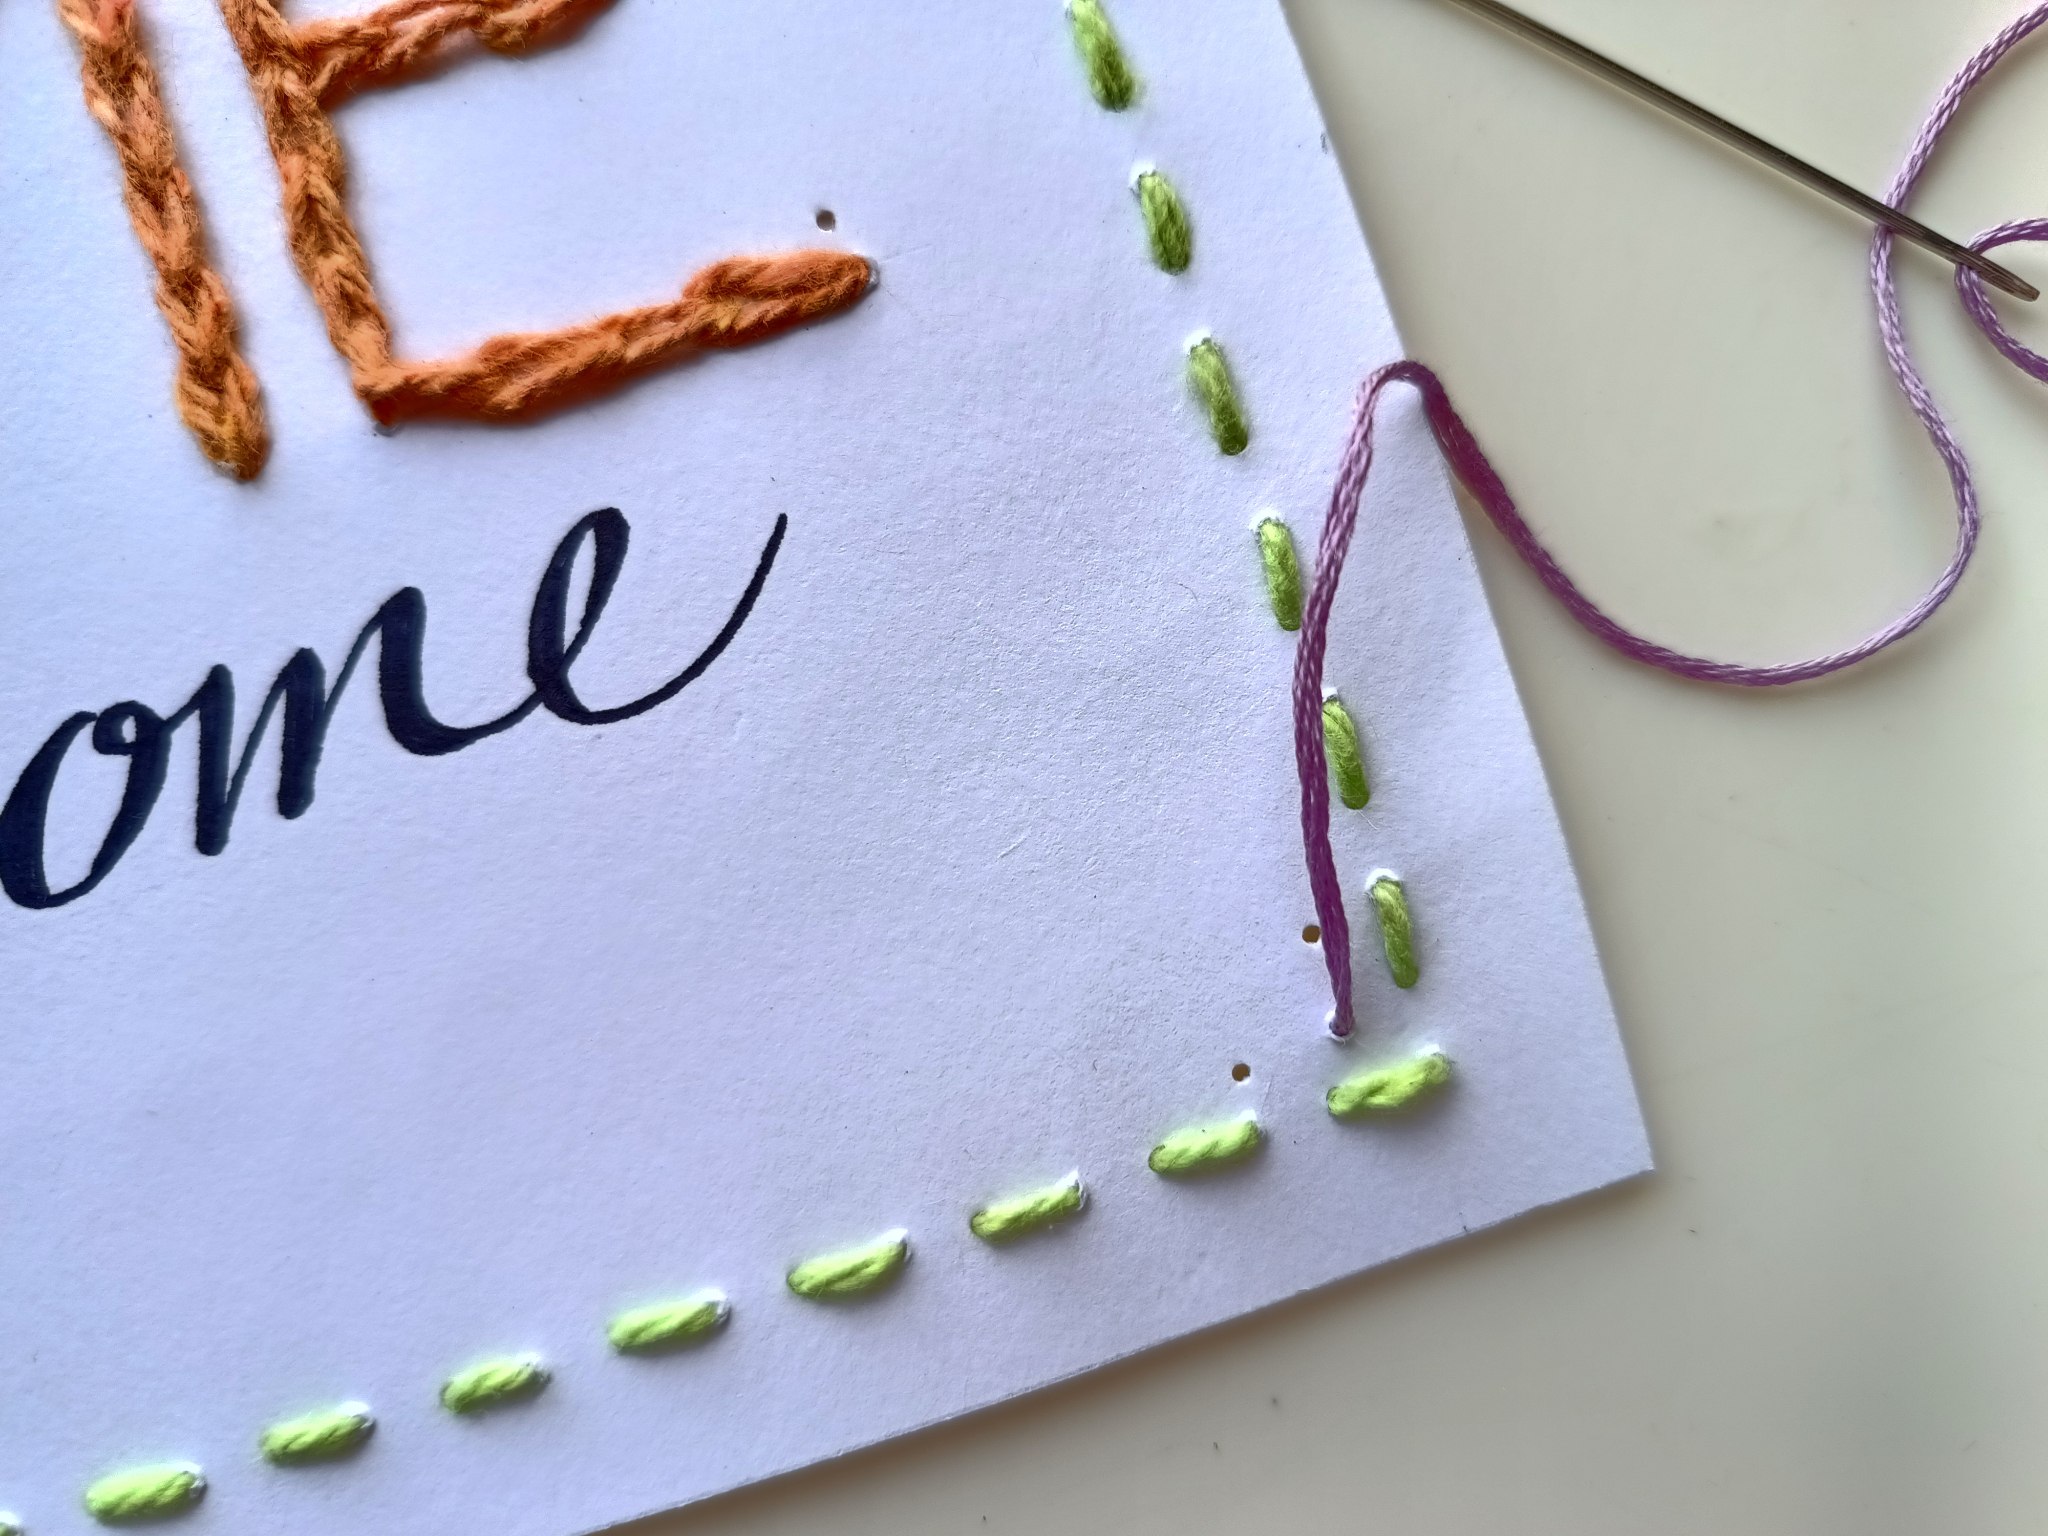
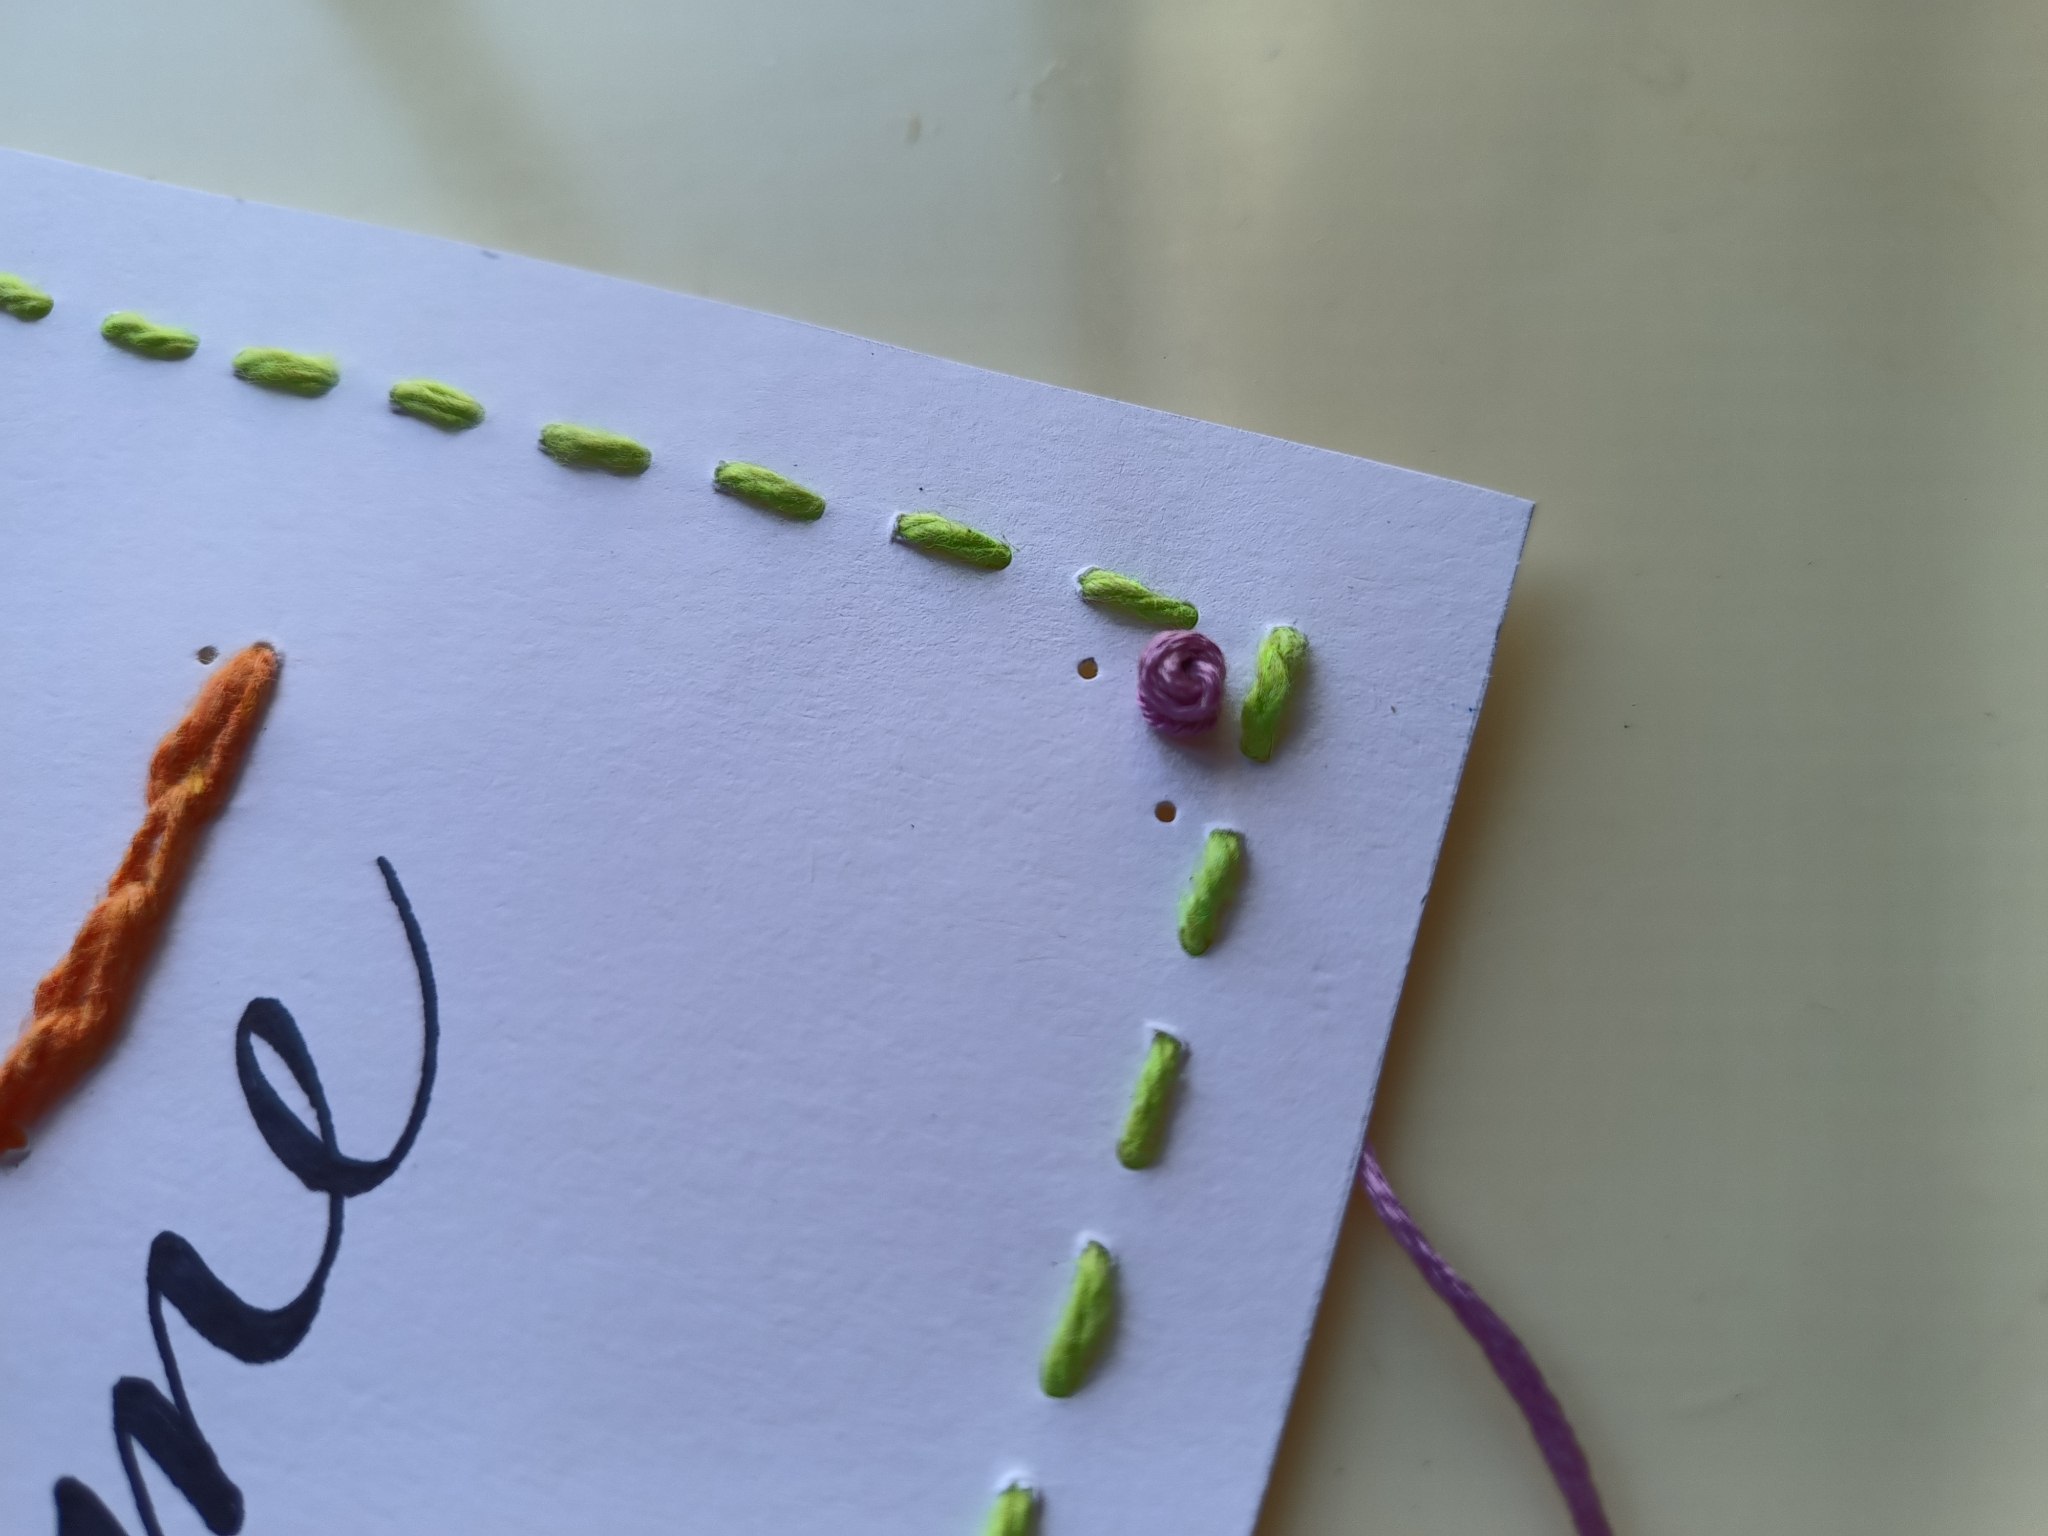
Para agregar unas pequeñas florecitas, hacemos unos agujeros más en sitios estratégicos.
To add some small flowers, we make a few more holes in strategic places.
Orificios para flores / Flower holes
Estas flores serán como botones de rosas, los haré con hilo morado, le hacemos un nudo en un extremo y en el otro colocamos la aguja, los pasamos por el orificio de atrás hacia adelante, enrollamos el hilo alrededor de la aguja unas siete veces aproximadamente e introducimos la aguja por el mismo orificio de vuelta, sosteniendo con el dedo las vueltas de hilo para que no se desbaraten en el proceso.
These flowers will be like rose buttons, I will make them with purple thread, we make a knot in one end and in the other we place the needle, we pass them through the hole from back to front, we wind the thread around the needle about seven times approximately and introduce the needle through the same hole back, holding with the finger the thread turns so that they do not fall apart in the process.
 |
 |
|---|---|
 |
 |
|---|---|
Flores / Flowers
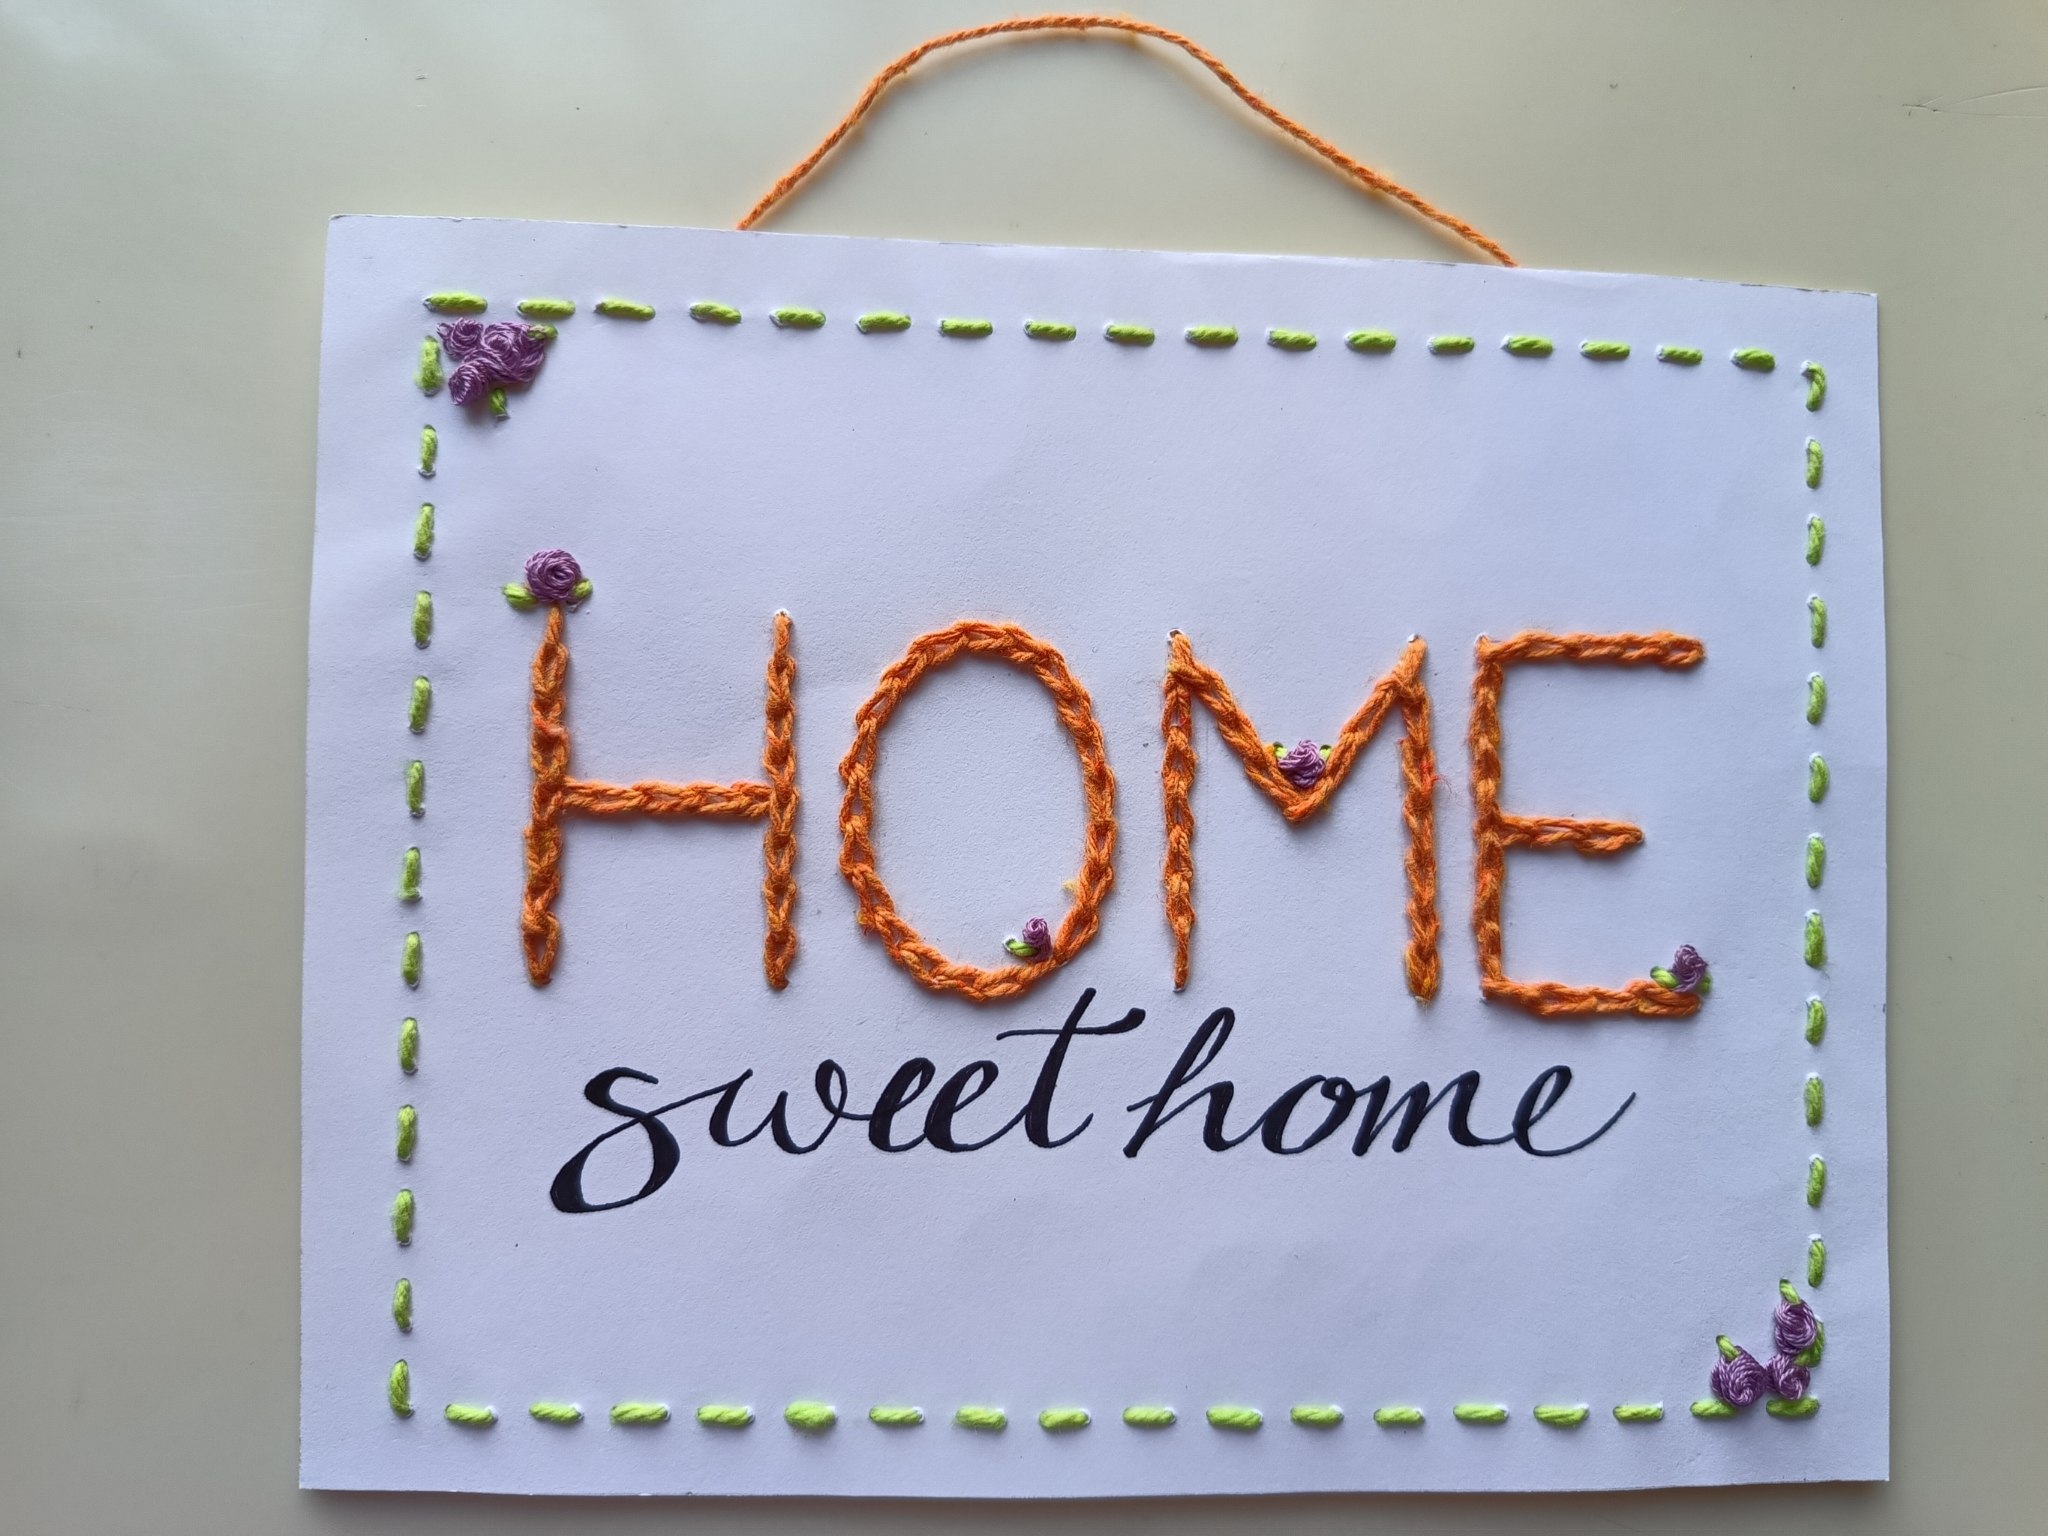
También les hice unas hojitas miniatura a las pequeñas flores con puntaditas sencillas con hilo verde y he agregado un hilo naranja arriba que he pegado por la parte de atrás con cinta adhesiva para poder colgar el cartel.
I also made miniature leaves for the little flowers with simple stitches with green thread and added an orange thread on top that I taped on the back with tape so I could hang the sign.
Hojitas y cordón / Leaves and cord
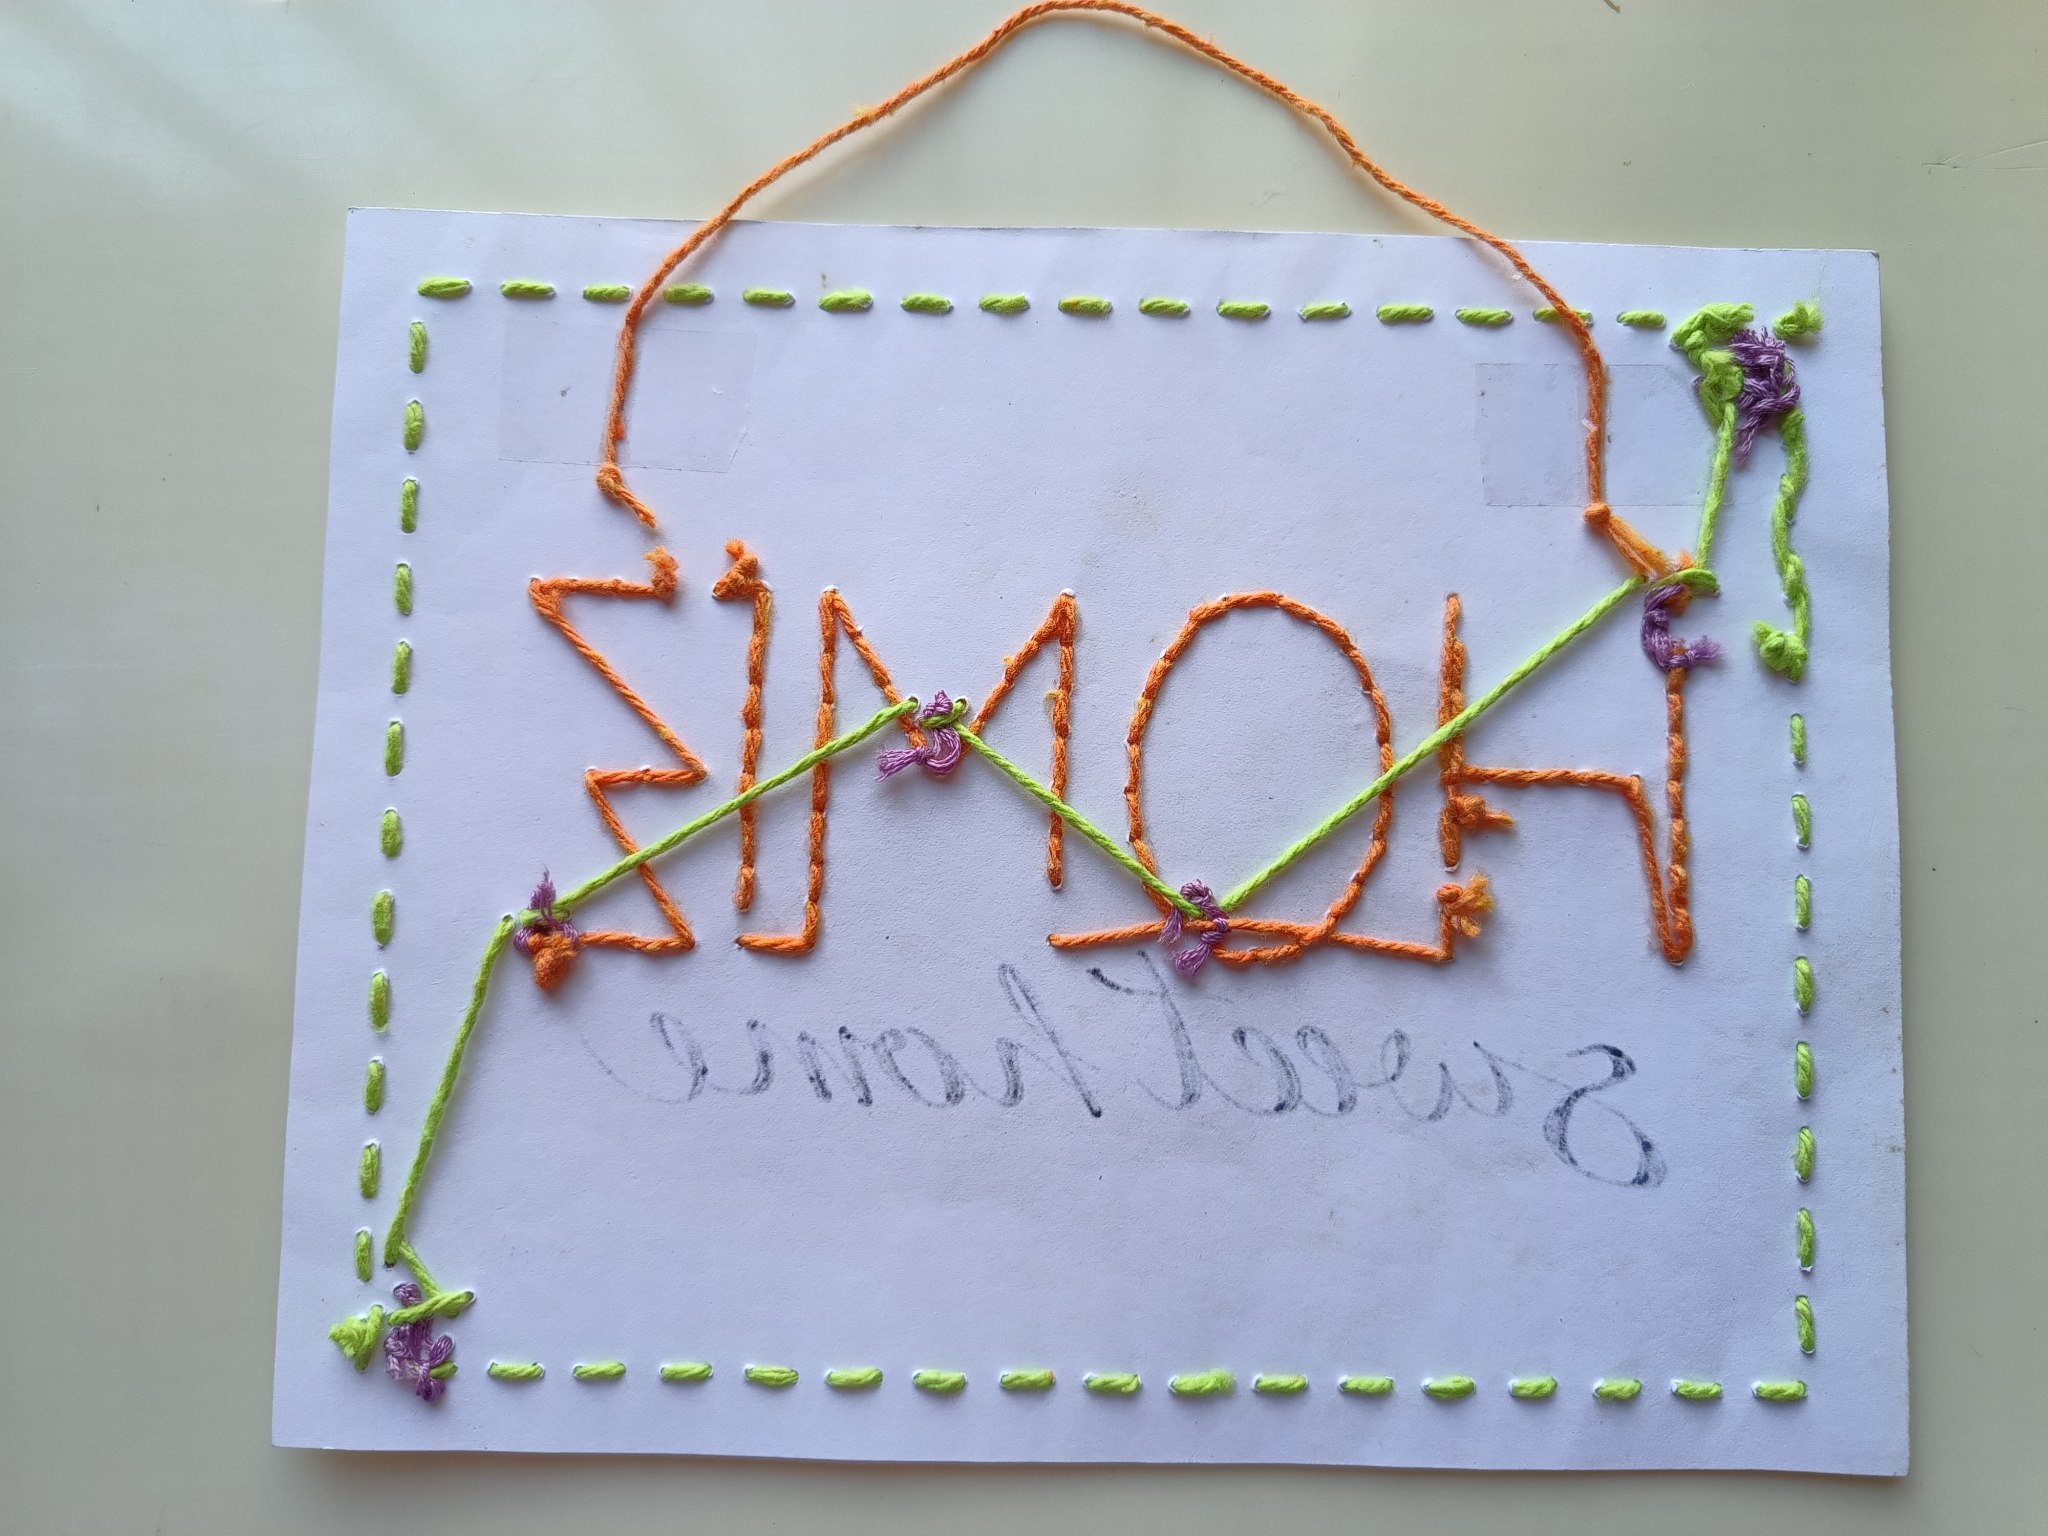
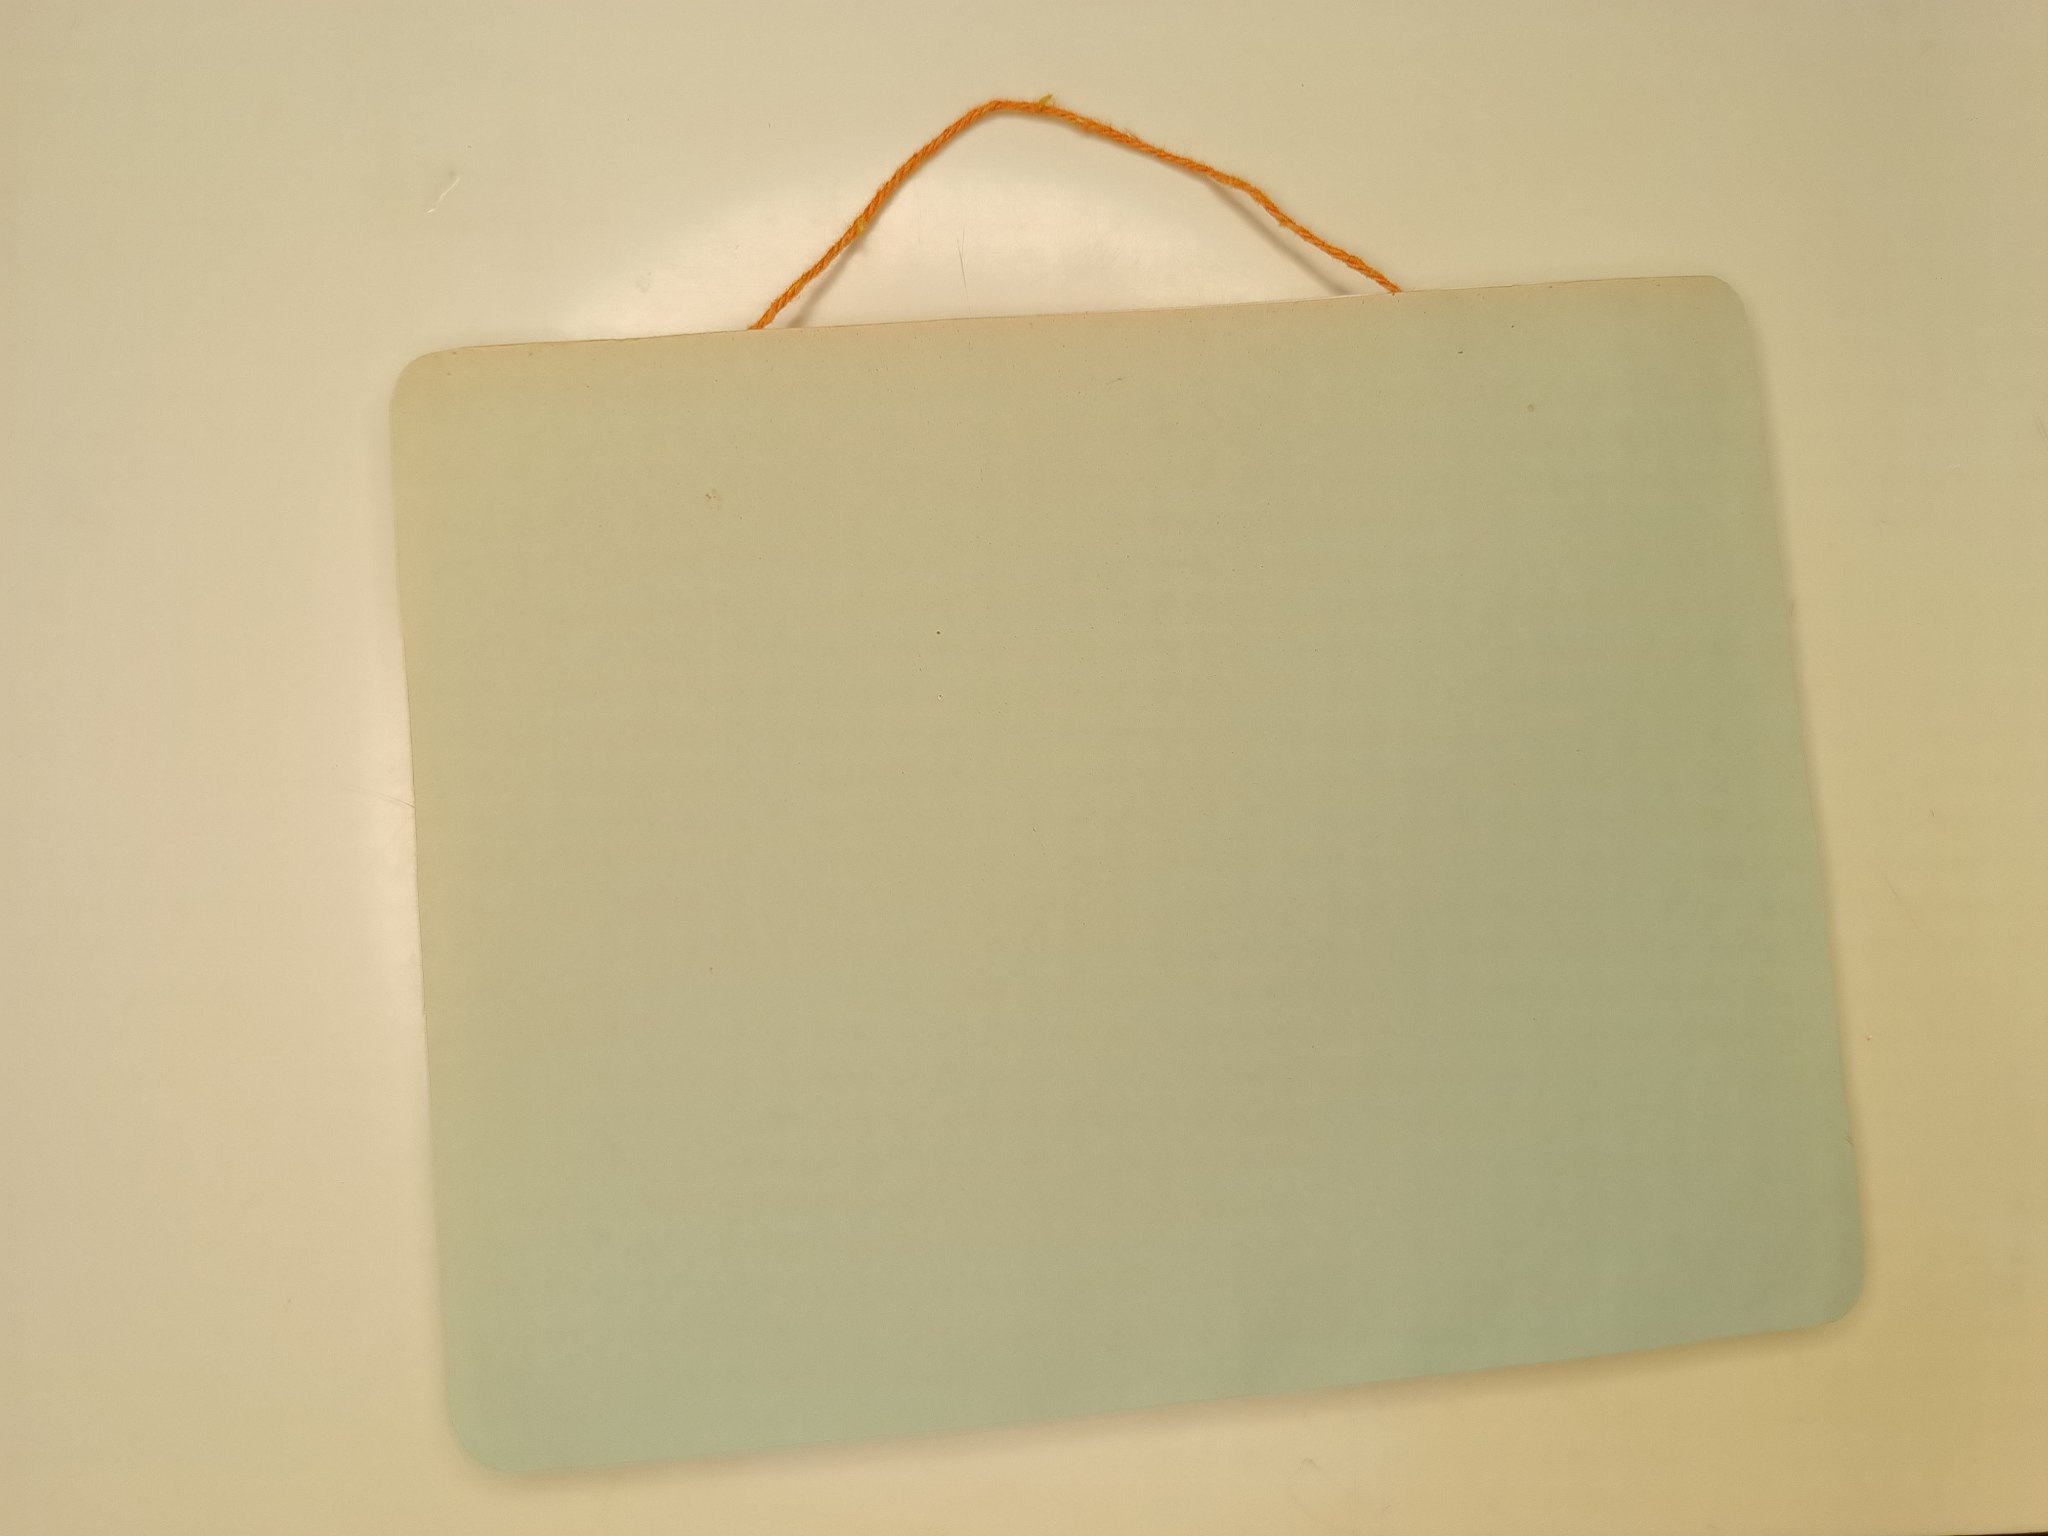
Para cubrir toda la parte de atrás, tanto por estética como para proteger las costuras, pegaremos una cartulina del mismo tamaño y forma con pegamento blanco y así queda:
To cover the entire back, both for aesthetics and to protect the seams, we will glue a cardboard of the same size and shape with white glue:
 |
 |
|---|---|
Parte trasera / Rear
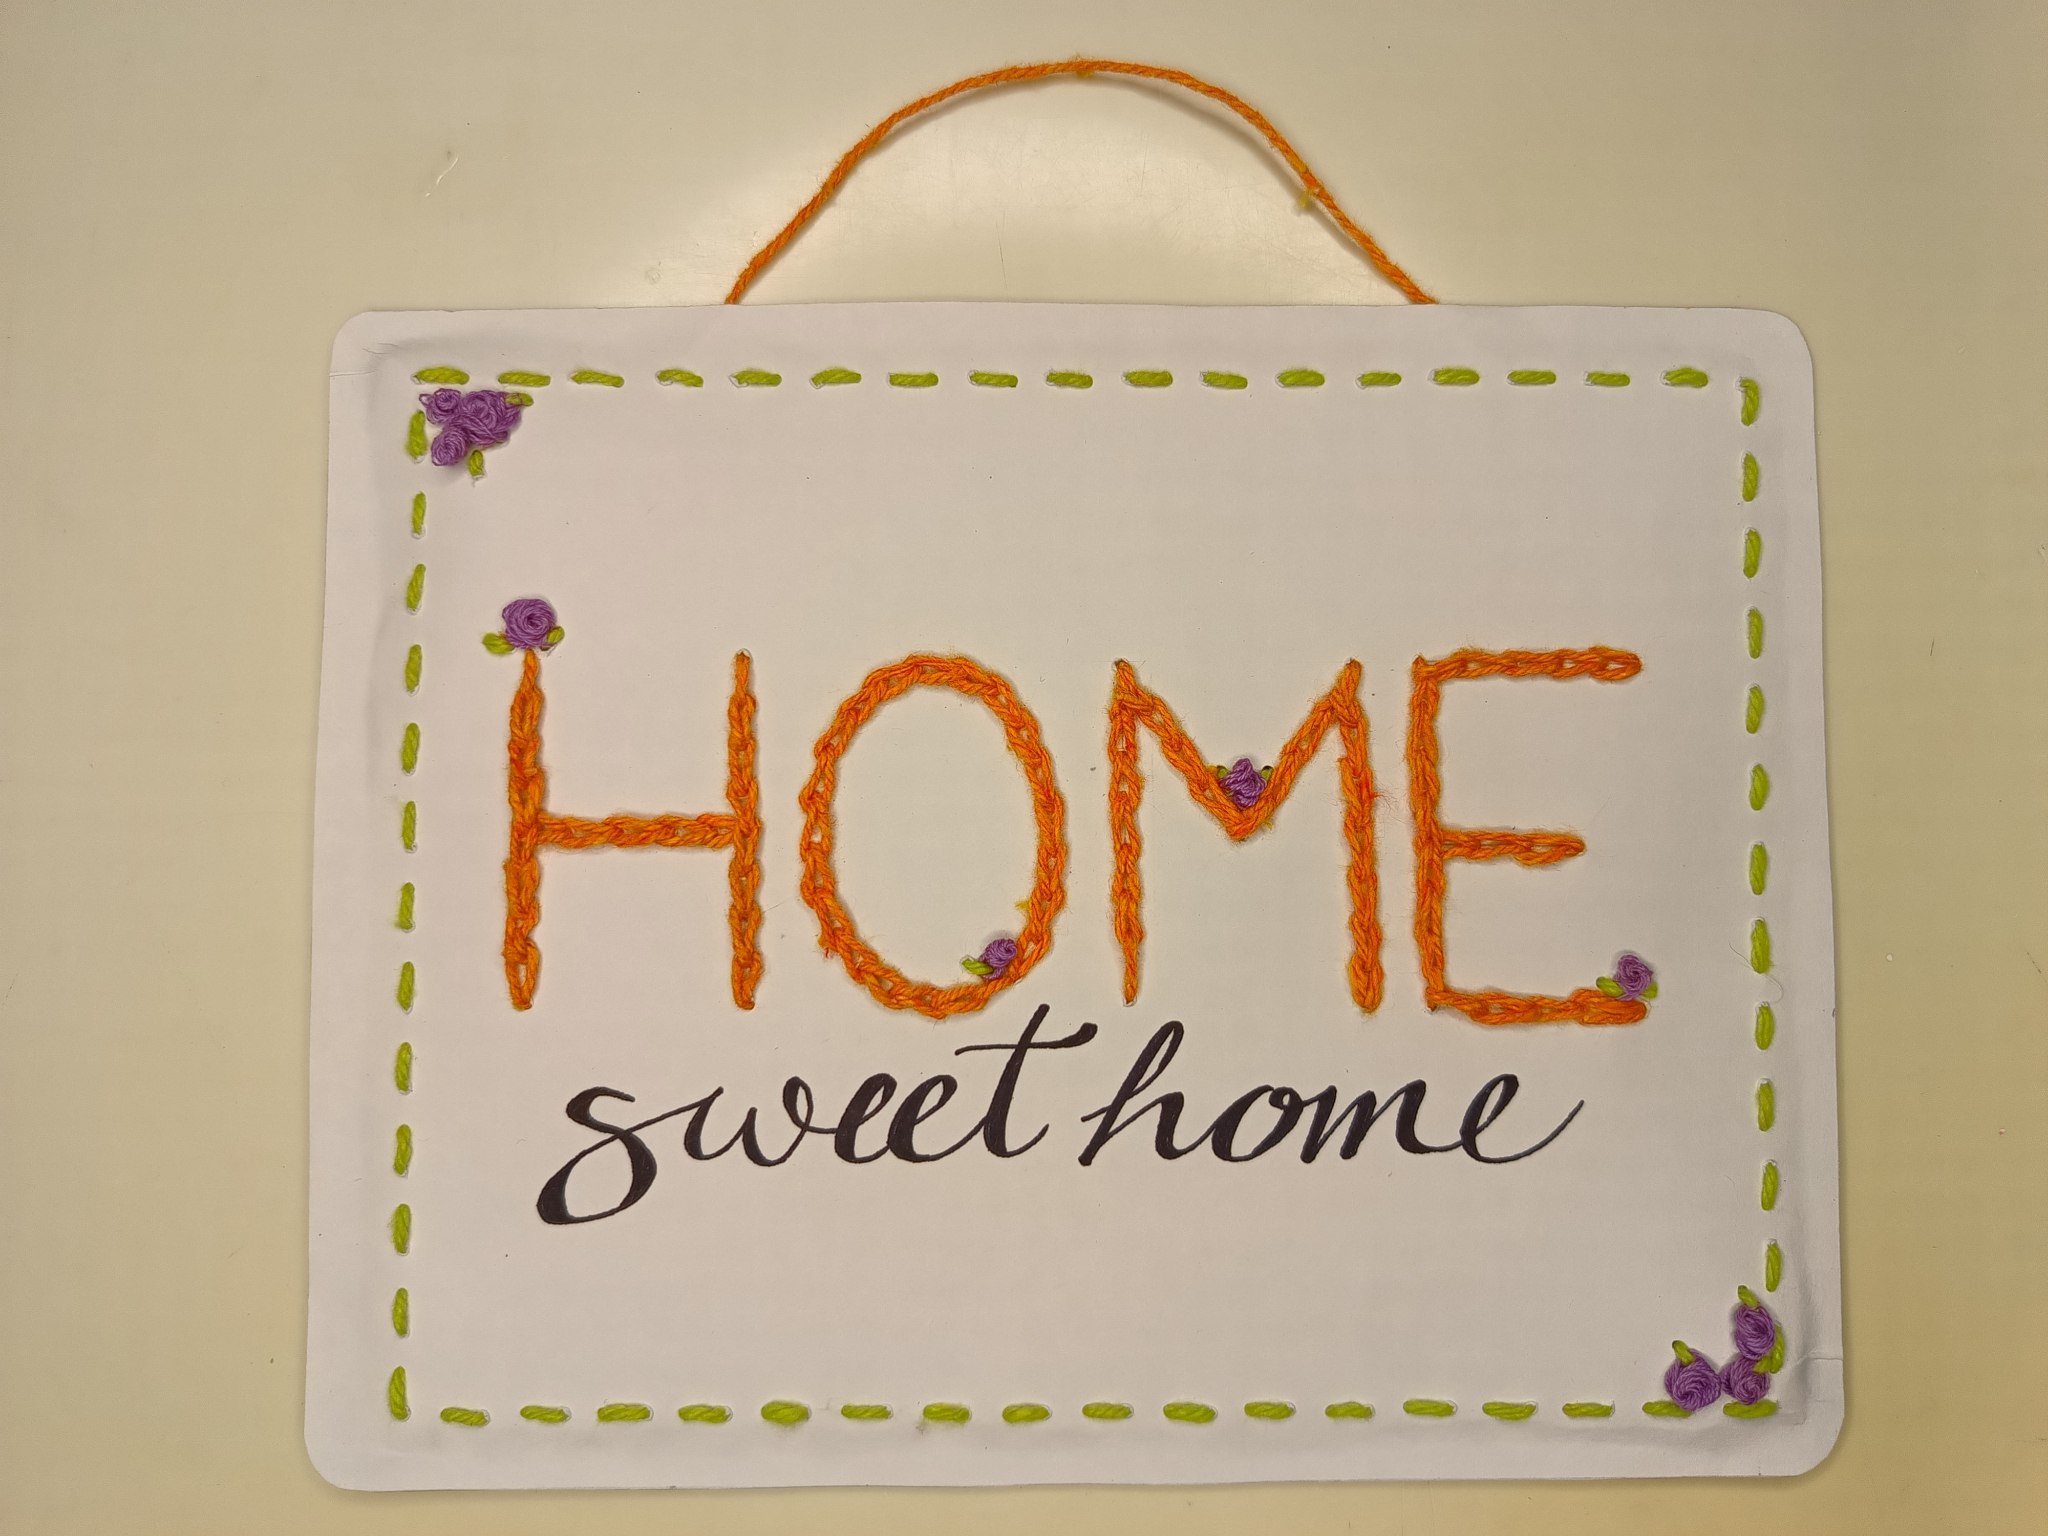
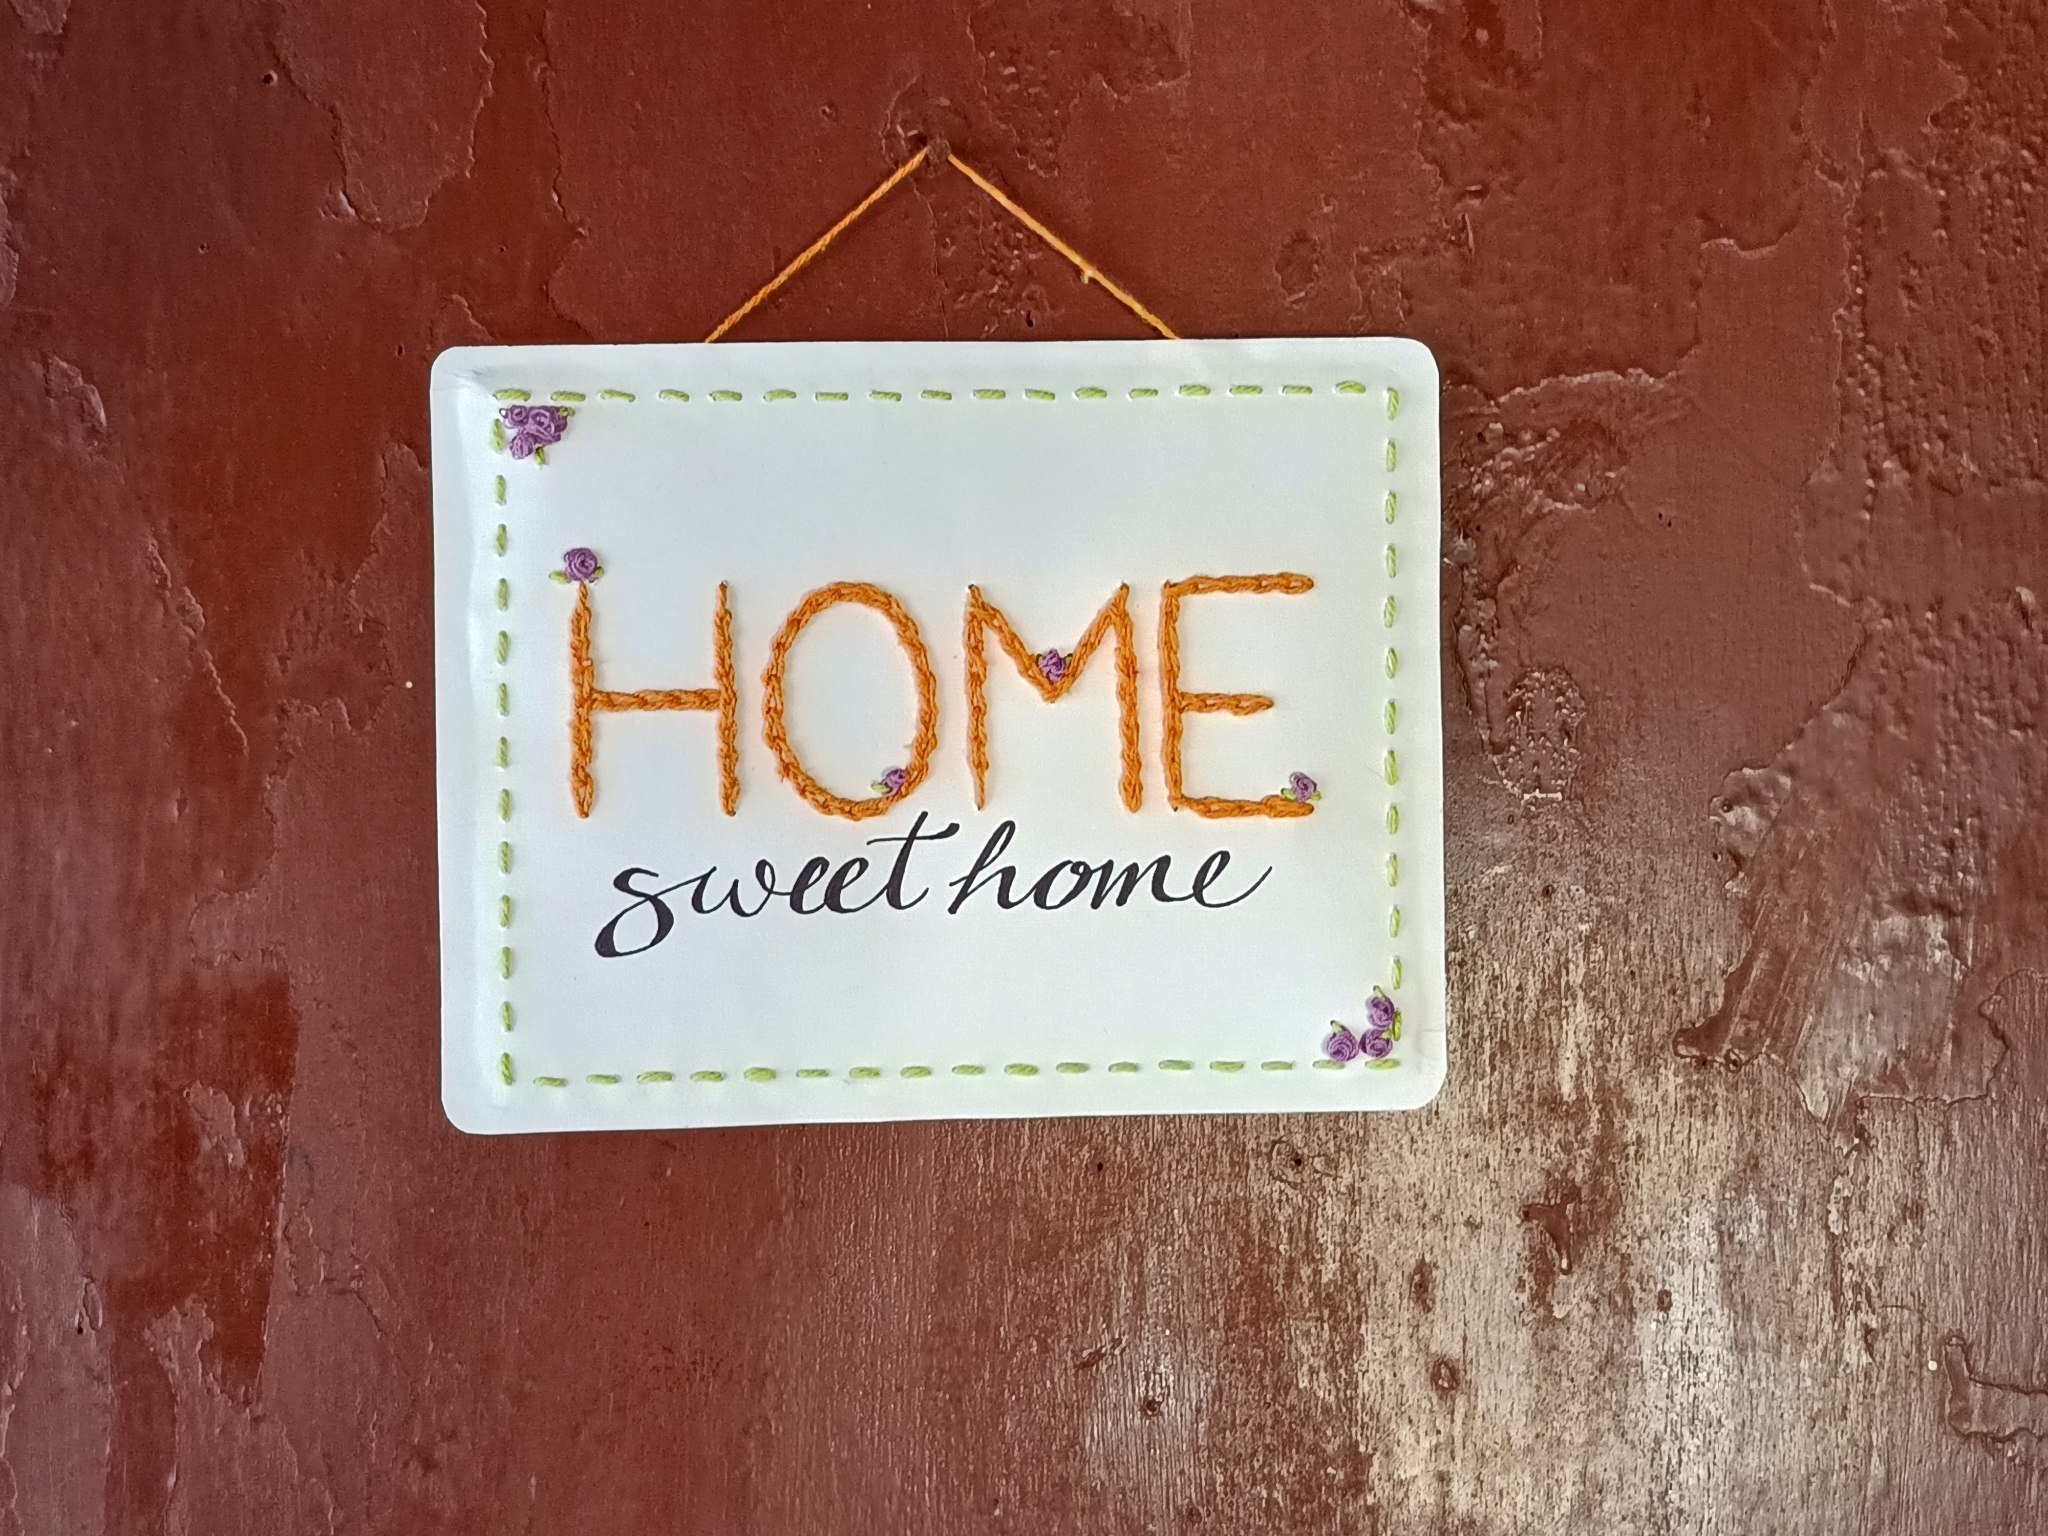
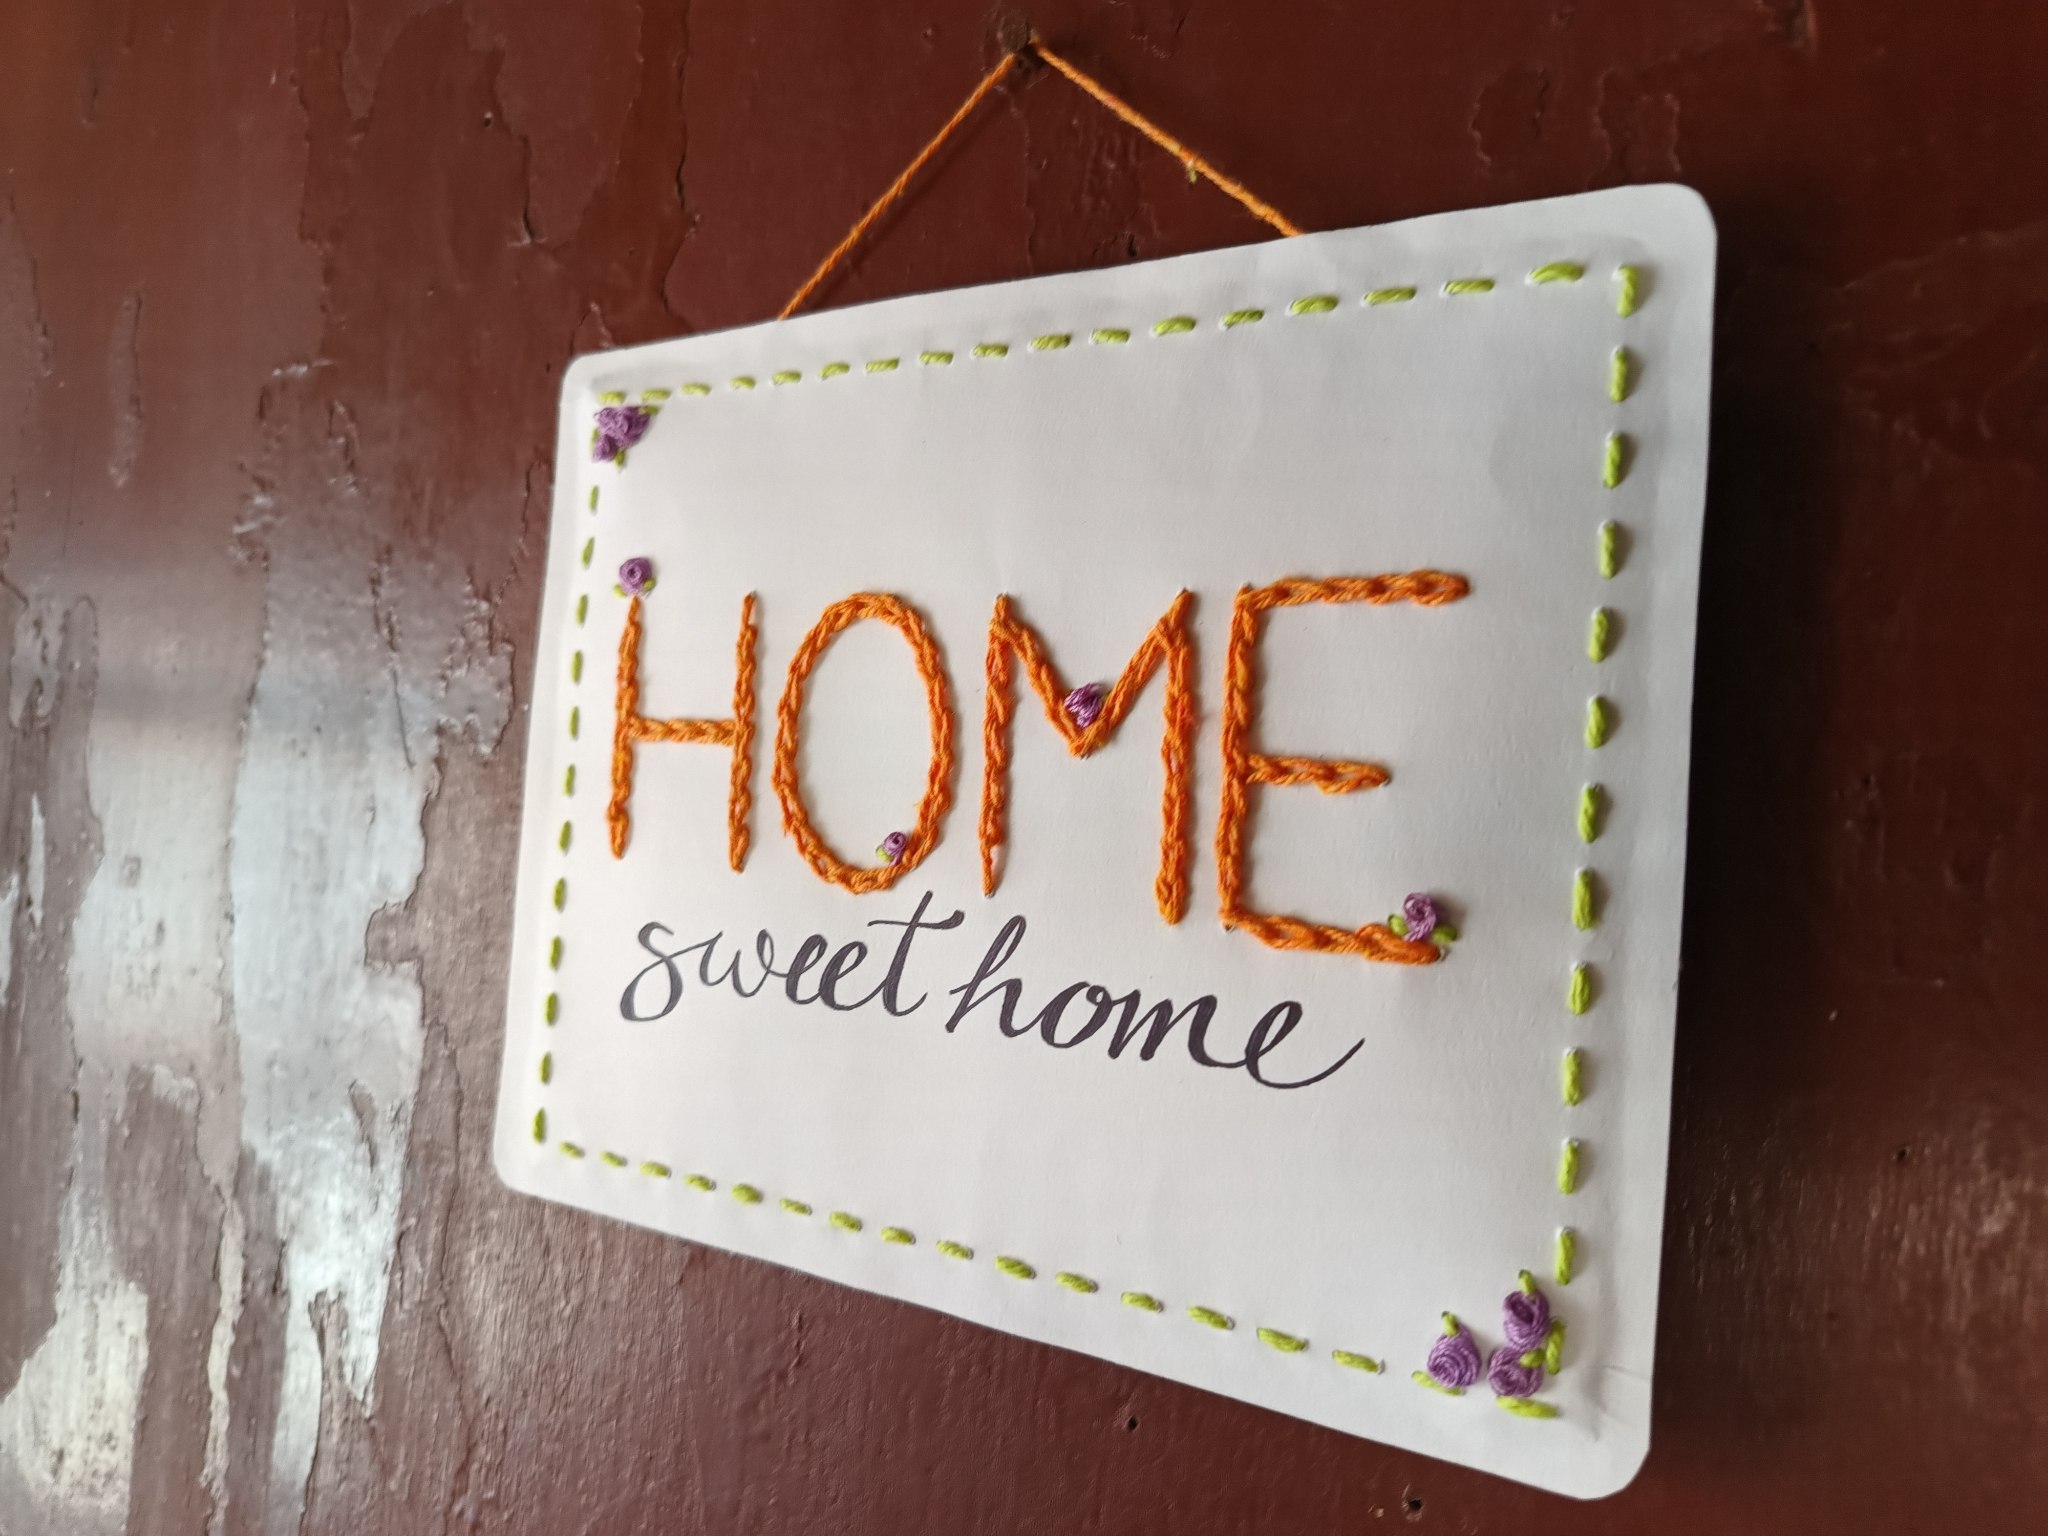
Y este sería el resultado final ya estando en uso:
And this would be the final result already in use:
 |
 |
|---|---|
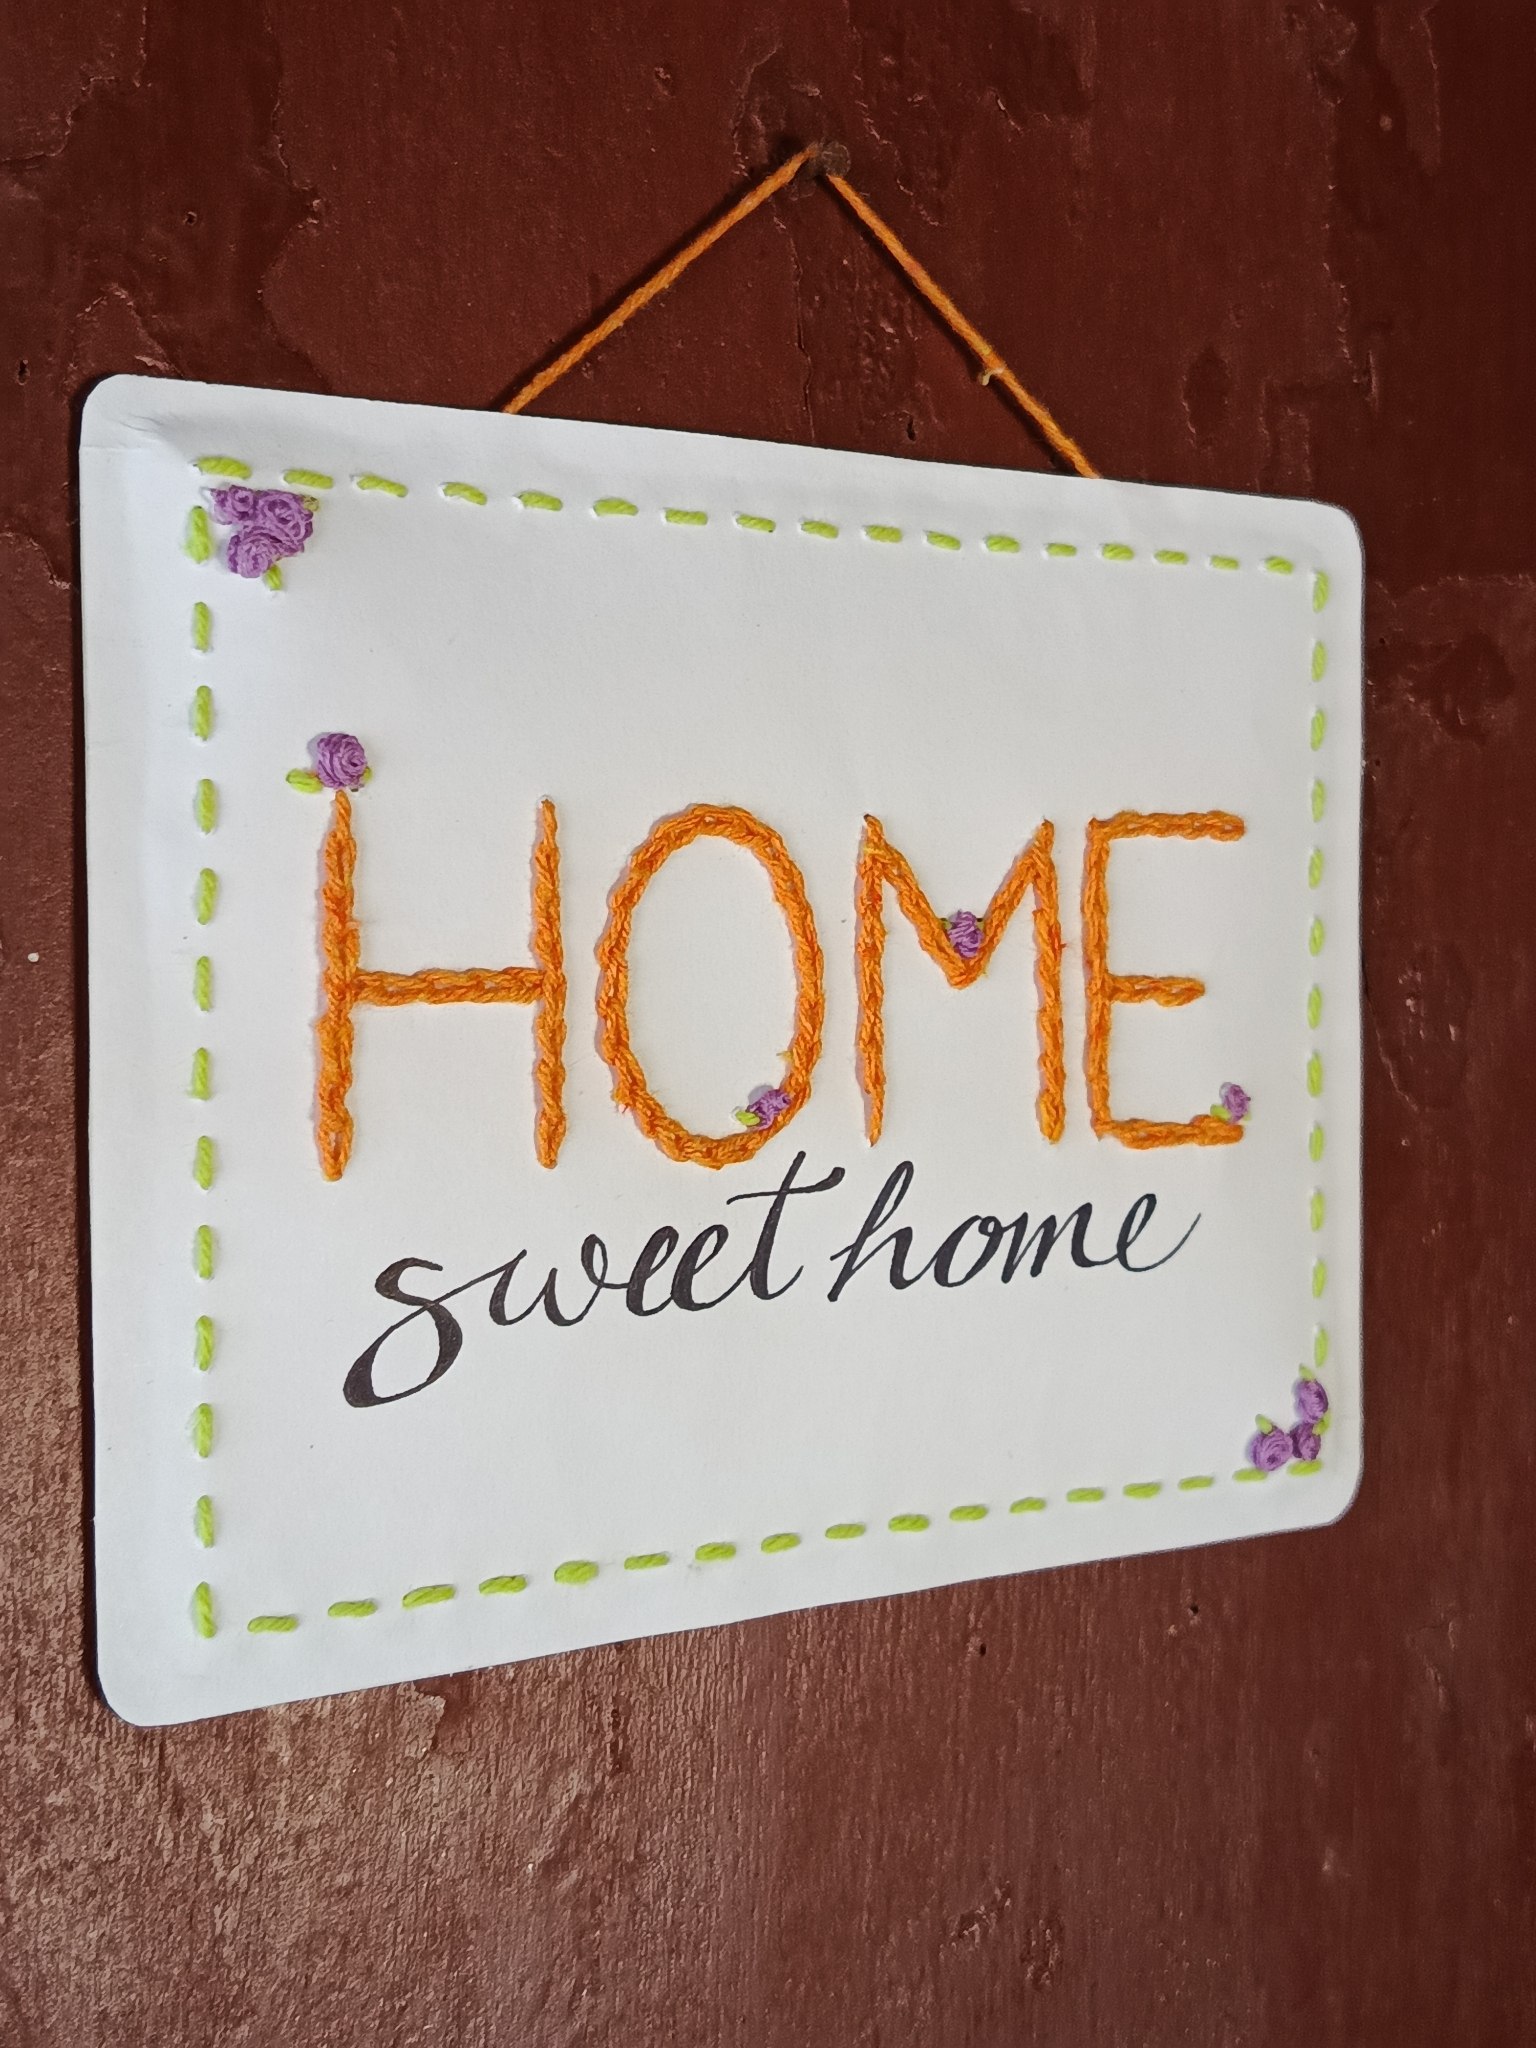
Resultado final / Final result
¡Muchas gracias por leerme! Thank you so much for reading me!
Fotografías propias, tomadas con mi Motorola g72. Traducido al inglés con DeepL.
Own photographs, taken with my Motorola g72. Translated to English with DeepL.

Posted Using INLEO