¡Hola mis queridos amigos Hivers! Hoy continuo con las ideas creativas de bordados en cartulina, en esta ocasión con un precioso marcalibros de rosas tejidas. Me parece que es una manualidad encantadora que le dará un toque muy personal y lleno de amor a tu lectura, así que sigue leyendo para que te inspires a hacer el tuyo con este paso a paso.
>Hello, my dear Hivers friends! Today I'm continuing with creative ideas for embroidery on cardstock, this time with a beautiful bookmark featuring woven roses. I think it's a charming craft that will add a very personal touch full of love to your reading, so keep reading to get inspired to make your own with this step-by-step guide.
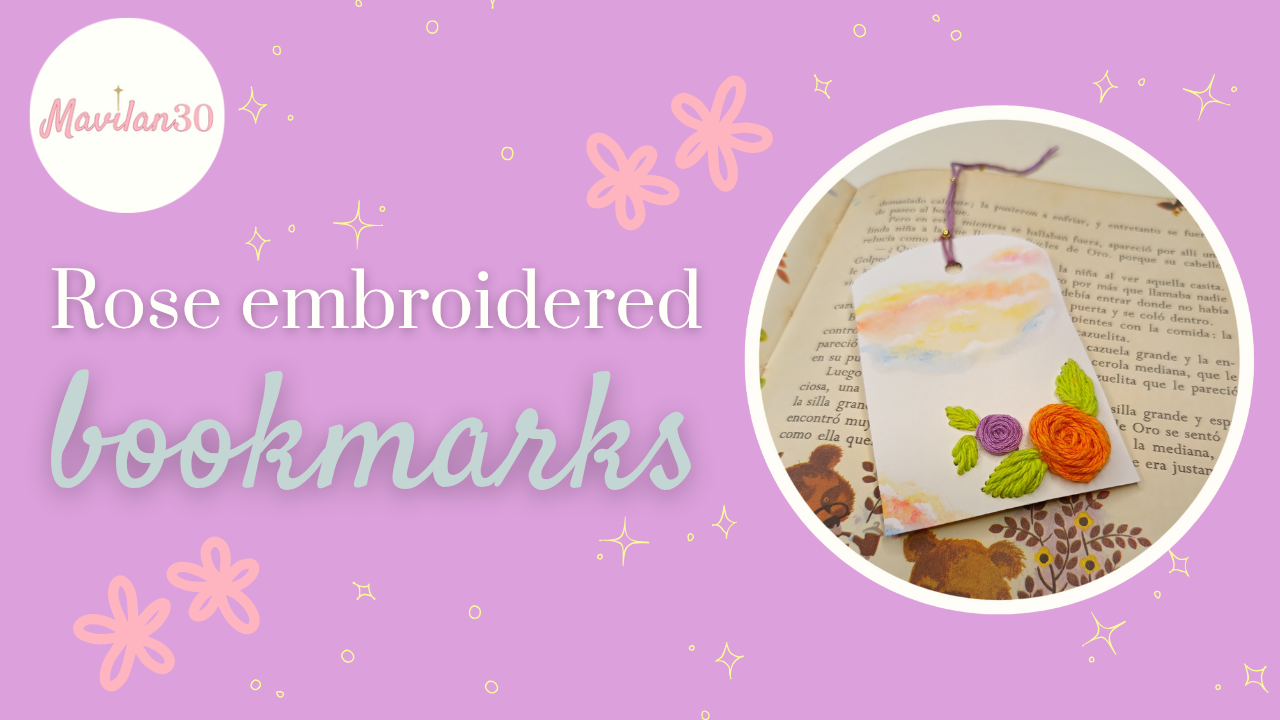
Imagen creada por mí en Canva / Image created by me in Canva
### Materiales:
* Cartulina
* Hilos
* Aguja
* Tijeras
* Pinturas al frío
* Pincel
* Frasco con agua
* Goma espuma/esponja/anime
* Lápiz
* Balines dorados
* Pegamento blanco
* Sacabocado
### Procedimiento:
Iniciamos con un rectángulo de cartulina blanca en el que dibujaremos el boceto para nuestras rosas tejidas, este consta de dos círculos (uno más grande y otro más pequeño) y las hojas respectivas para cada una.
>### Materials:
>
>* Cardboard
>* Threads
>* Needle
>* Scissors
>* Cold paints
>* Paintbrush
>* Jar of water
>* Foam rubber/sponge/anime
>* Pencil
>* Gold beads
>* White glue
>* Hole punch
>
>### Procedure:
>
>We start with a rectangle of white cardstock on which we will draw the sketch for our woven roses. This consists of two circles (one larger and one smaller) and the respective leaves for each one.
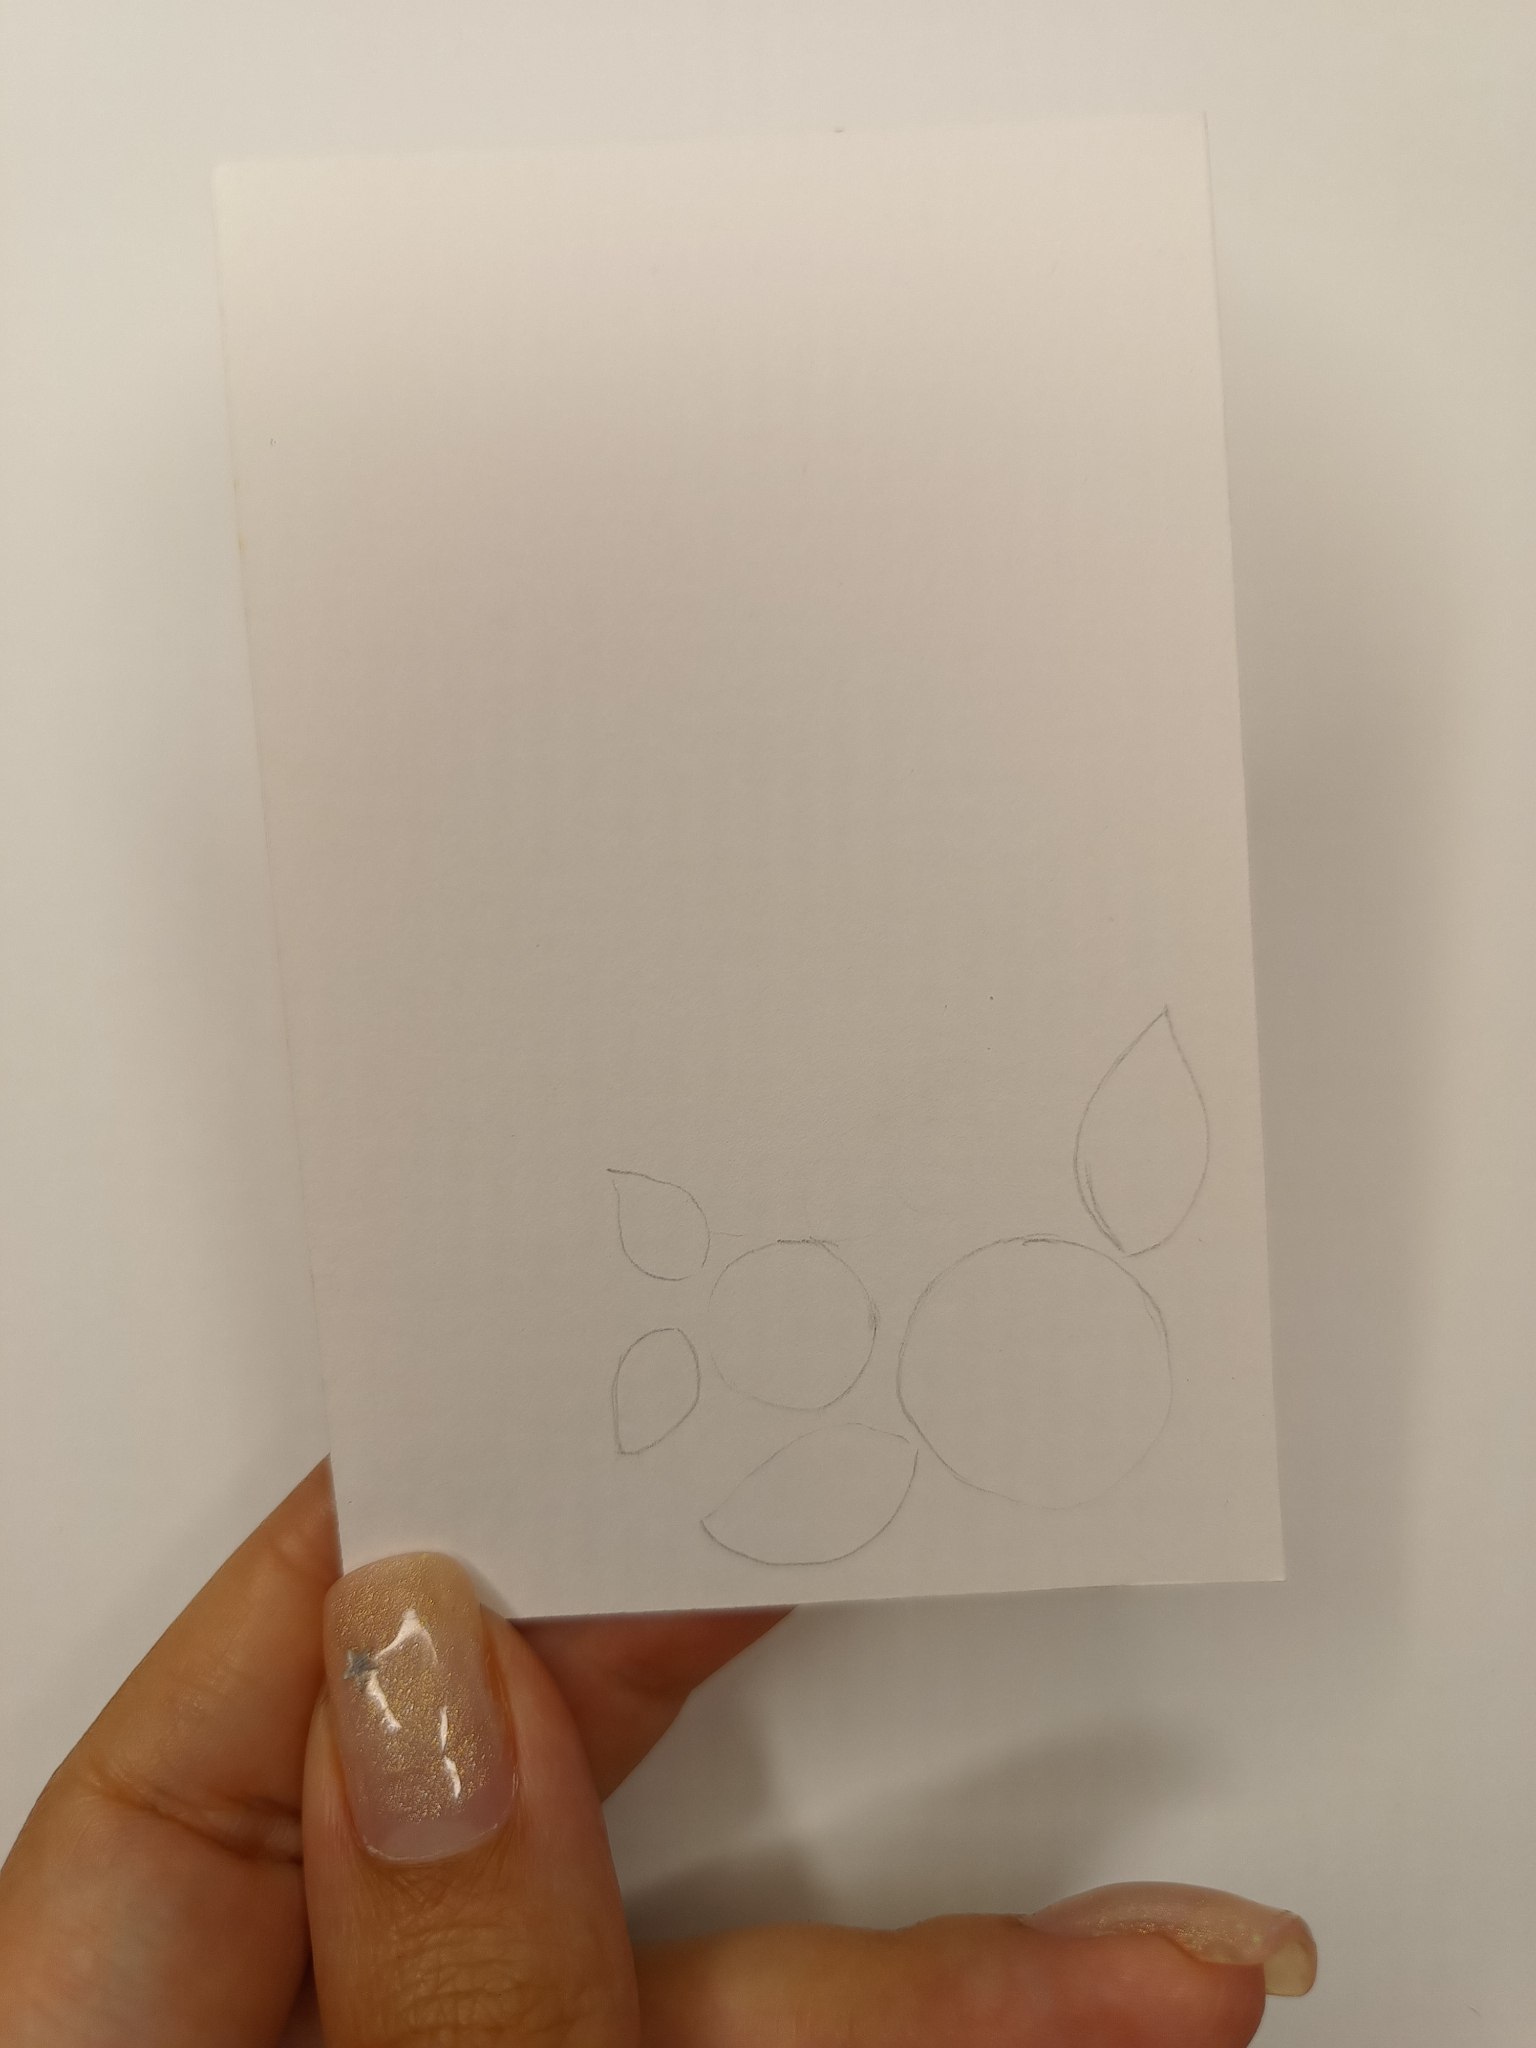
Boceto / Sketch
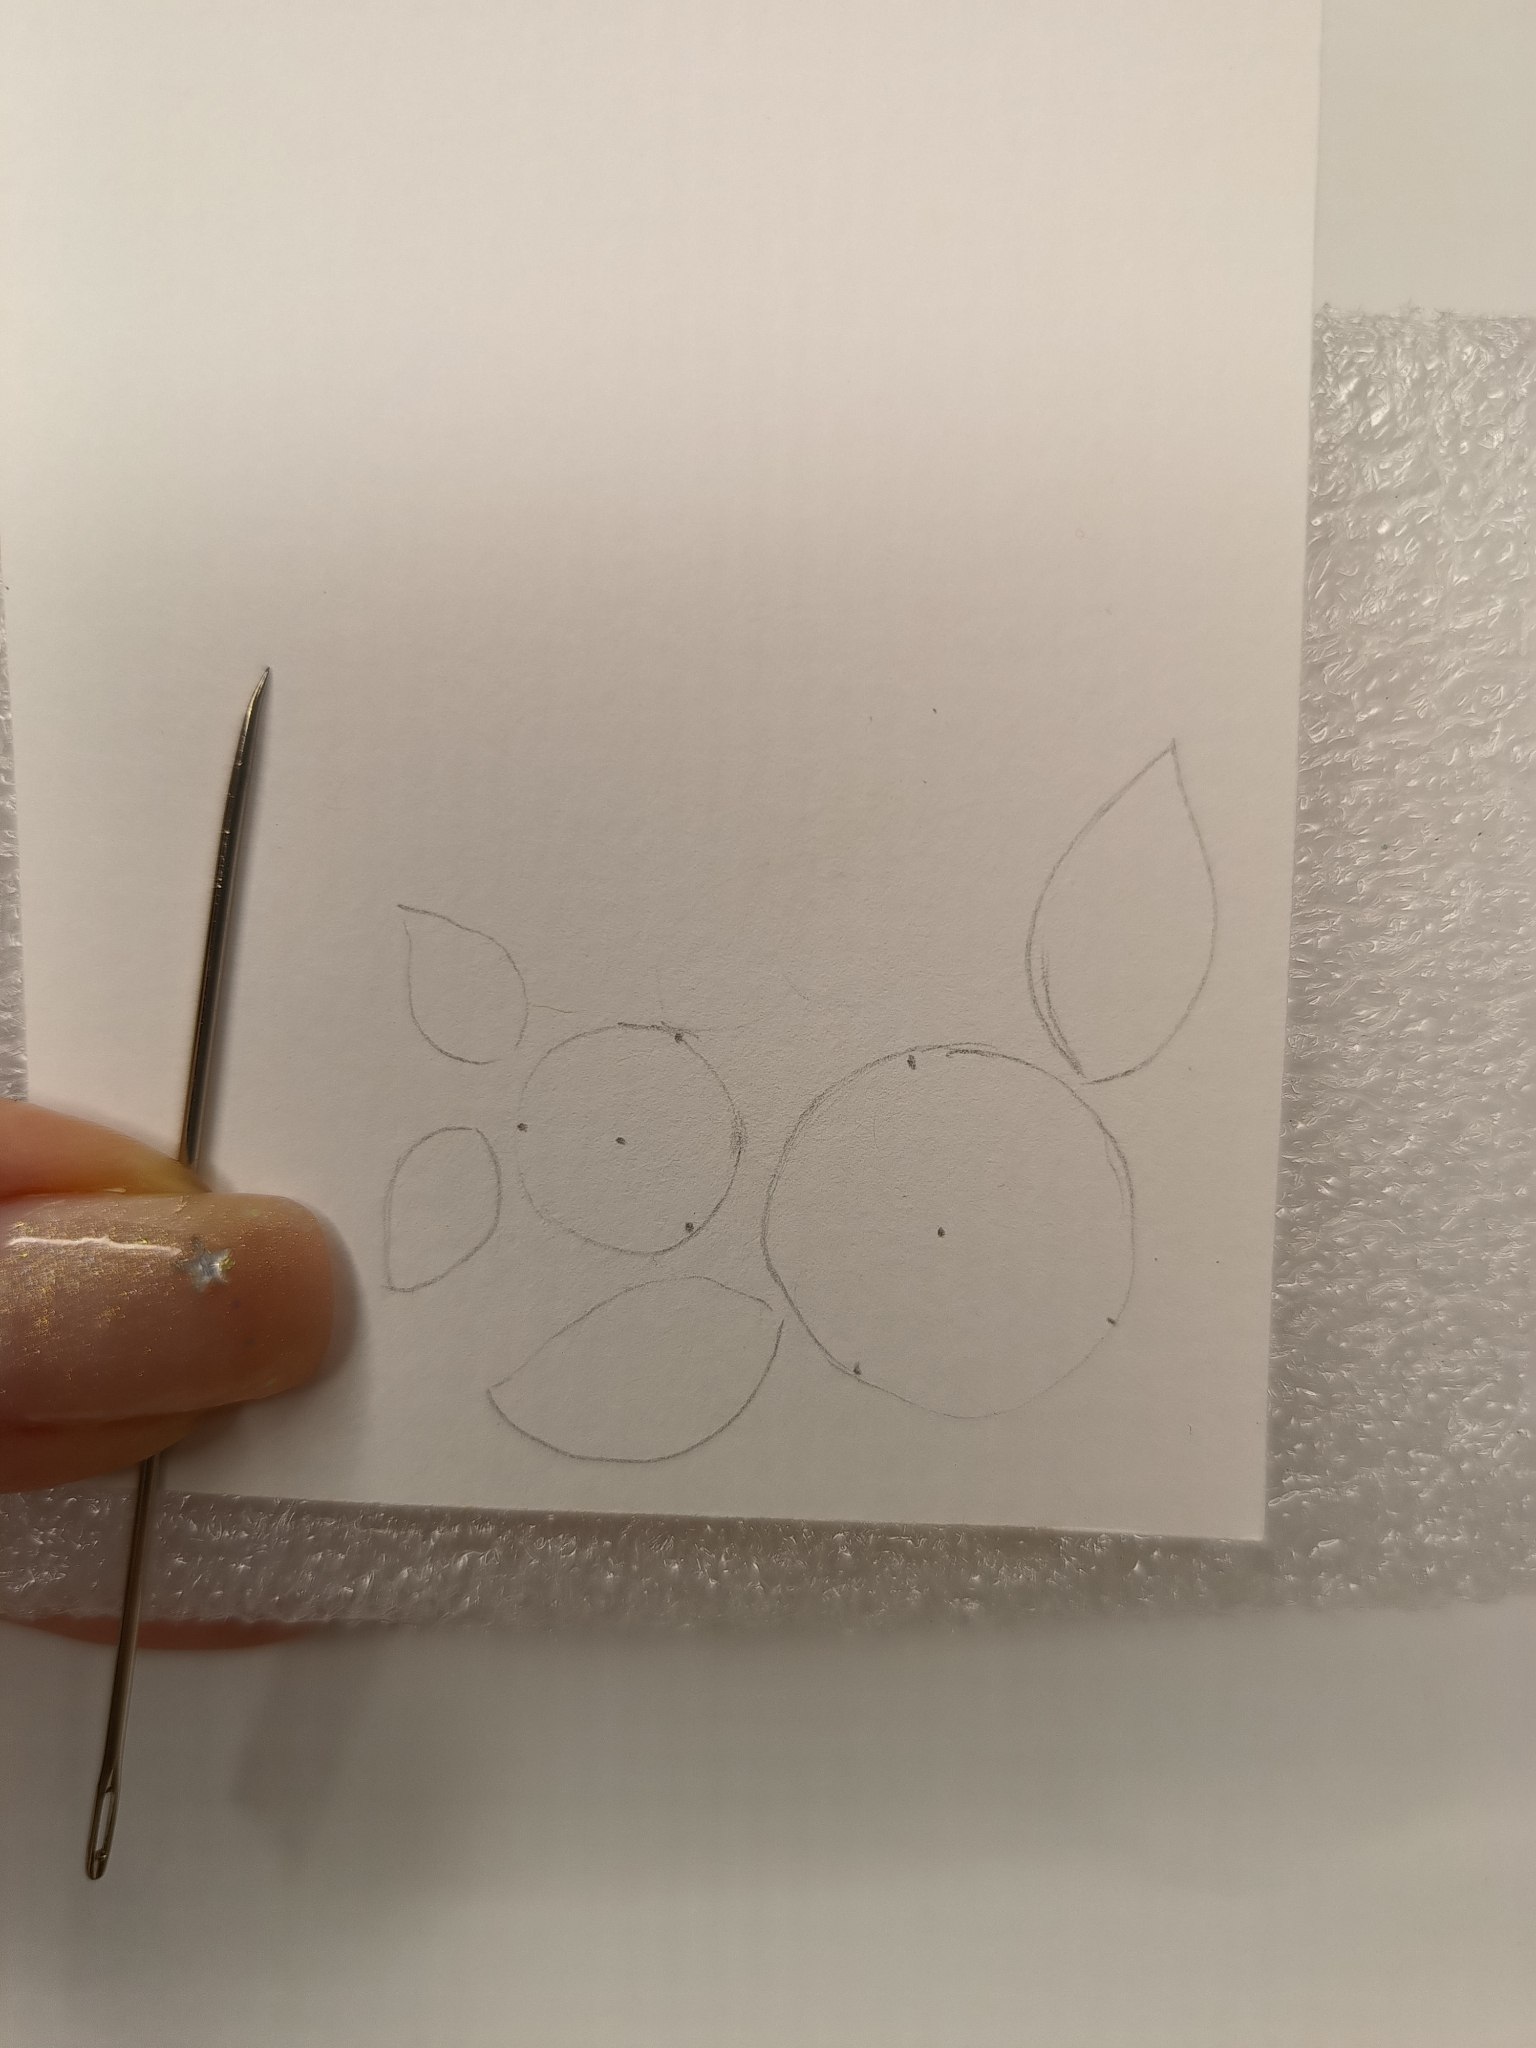
Luego, colocando la cartulina sobre una superficie que se pueda perforar fácilmente sin deformarla, como una goma espuma por ejemplo, procedemos a hacer pequeños agujeros estratégicos con la aguja por donde necesitaremos pasar el hilo.
> Then, placing the cardboard on a surface that can be easily pierced without deforming it, such as foam rubber, for example, we proceed to make small strategic holes with the needle where we will need to pass the thread.
 | 
--- | ---
Perforamos / We drill
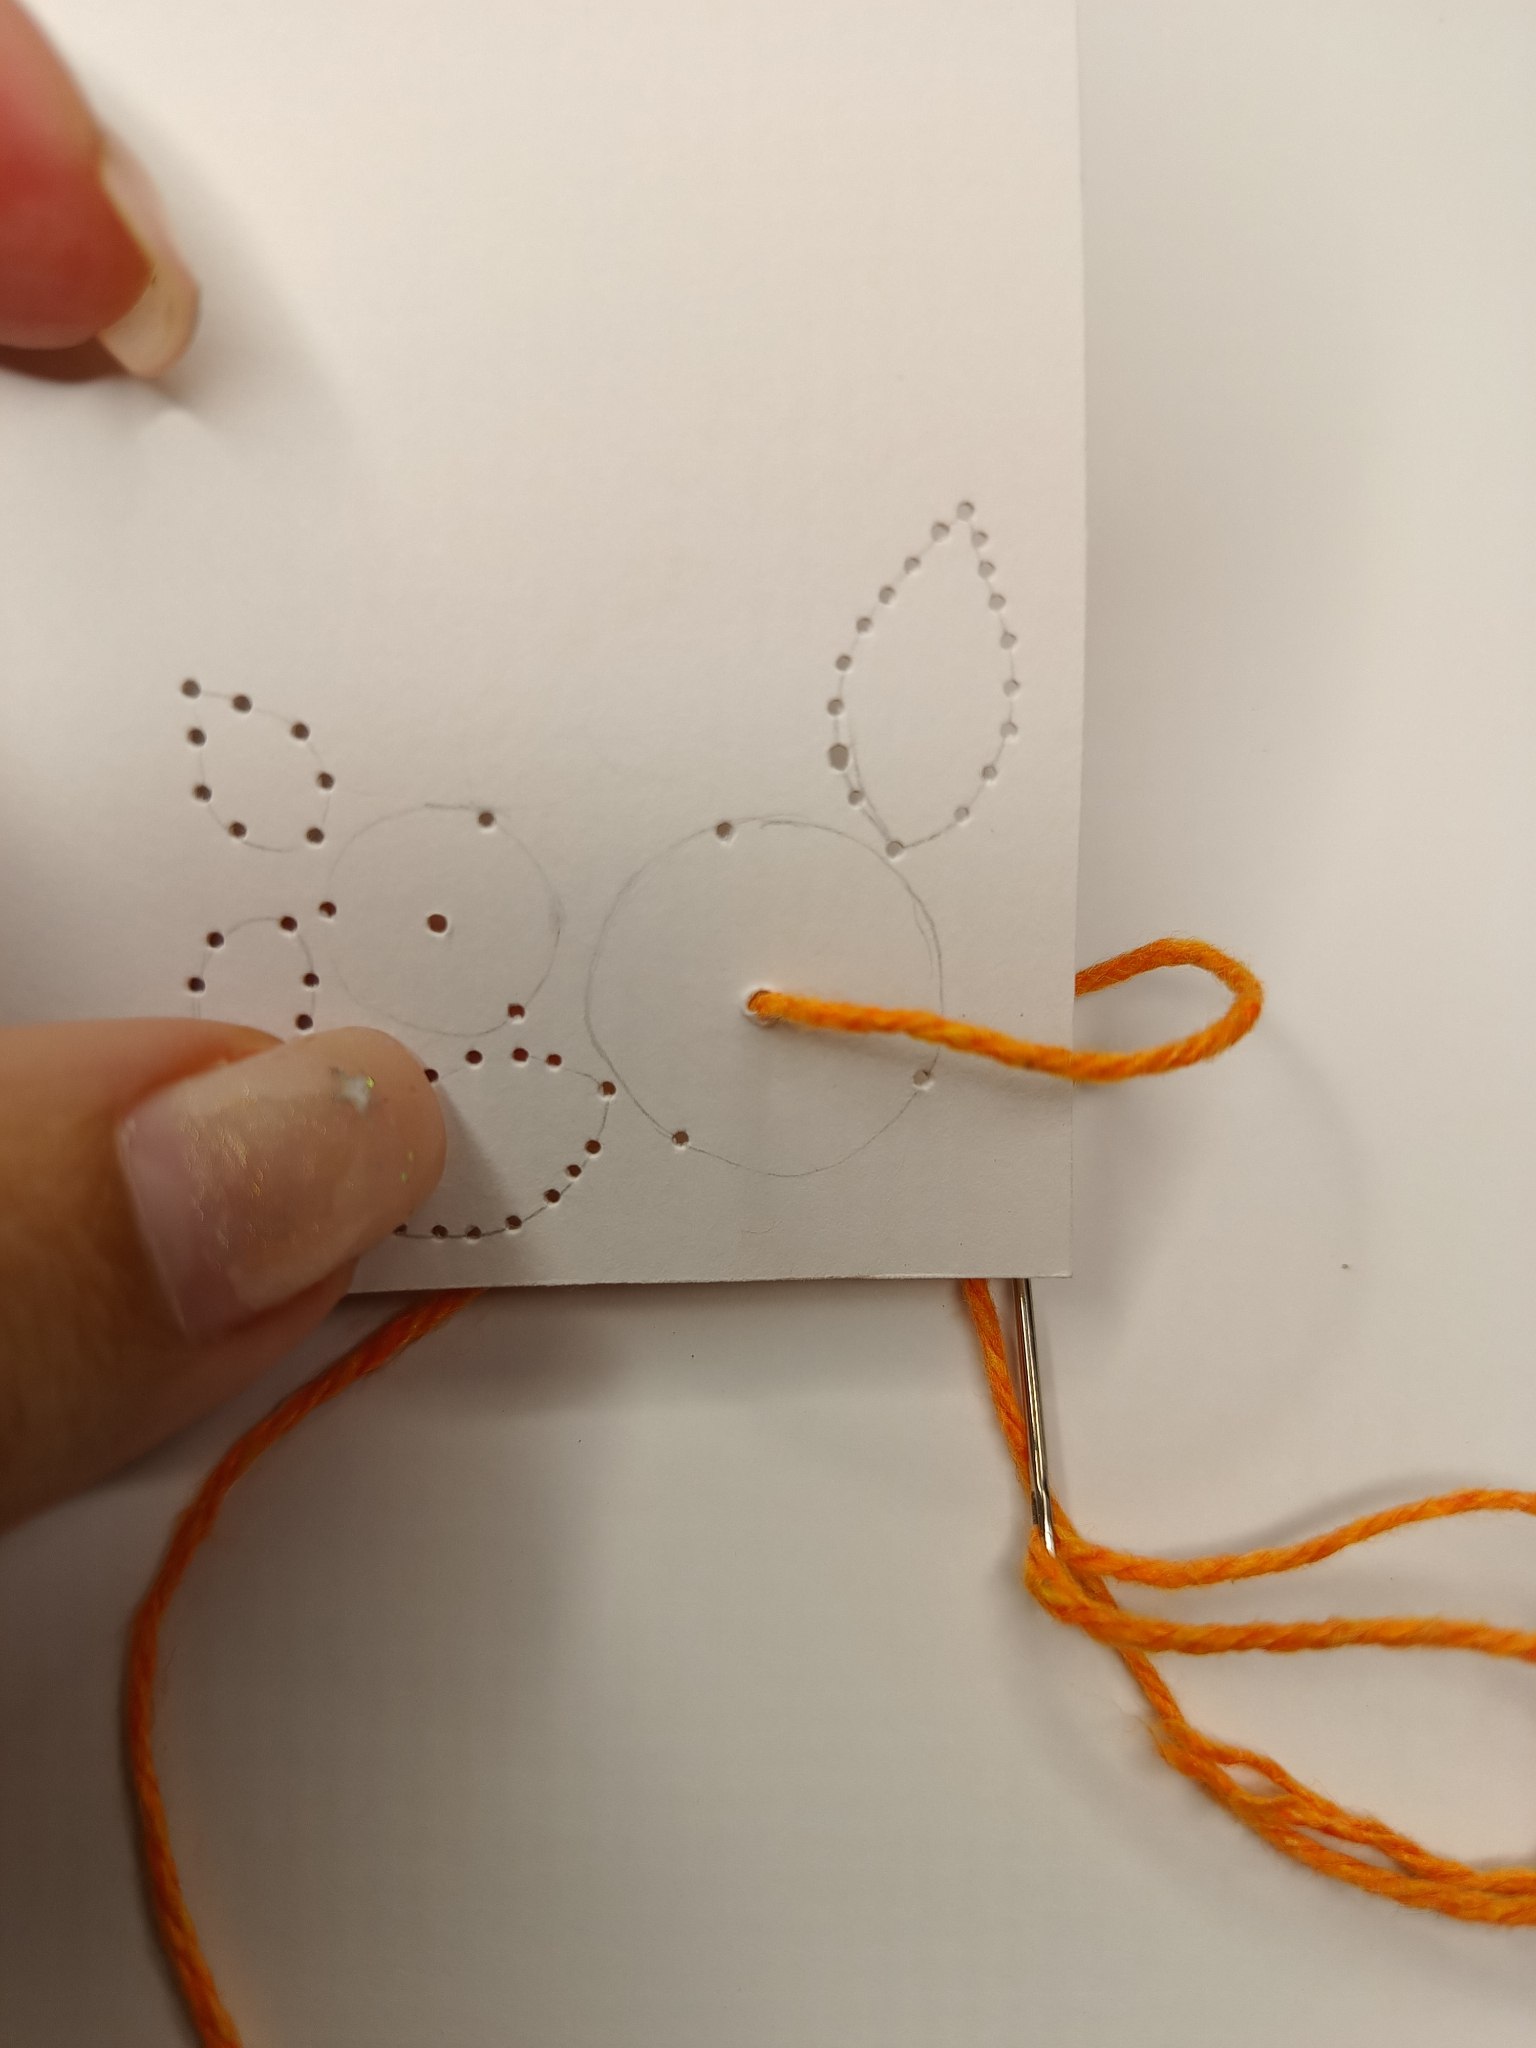
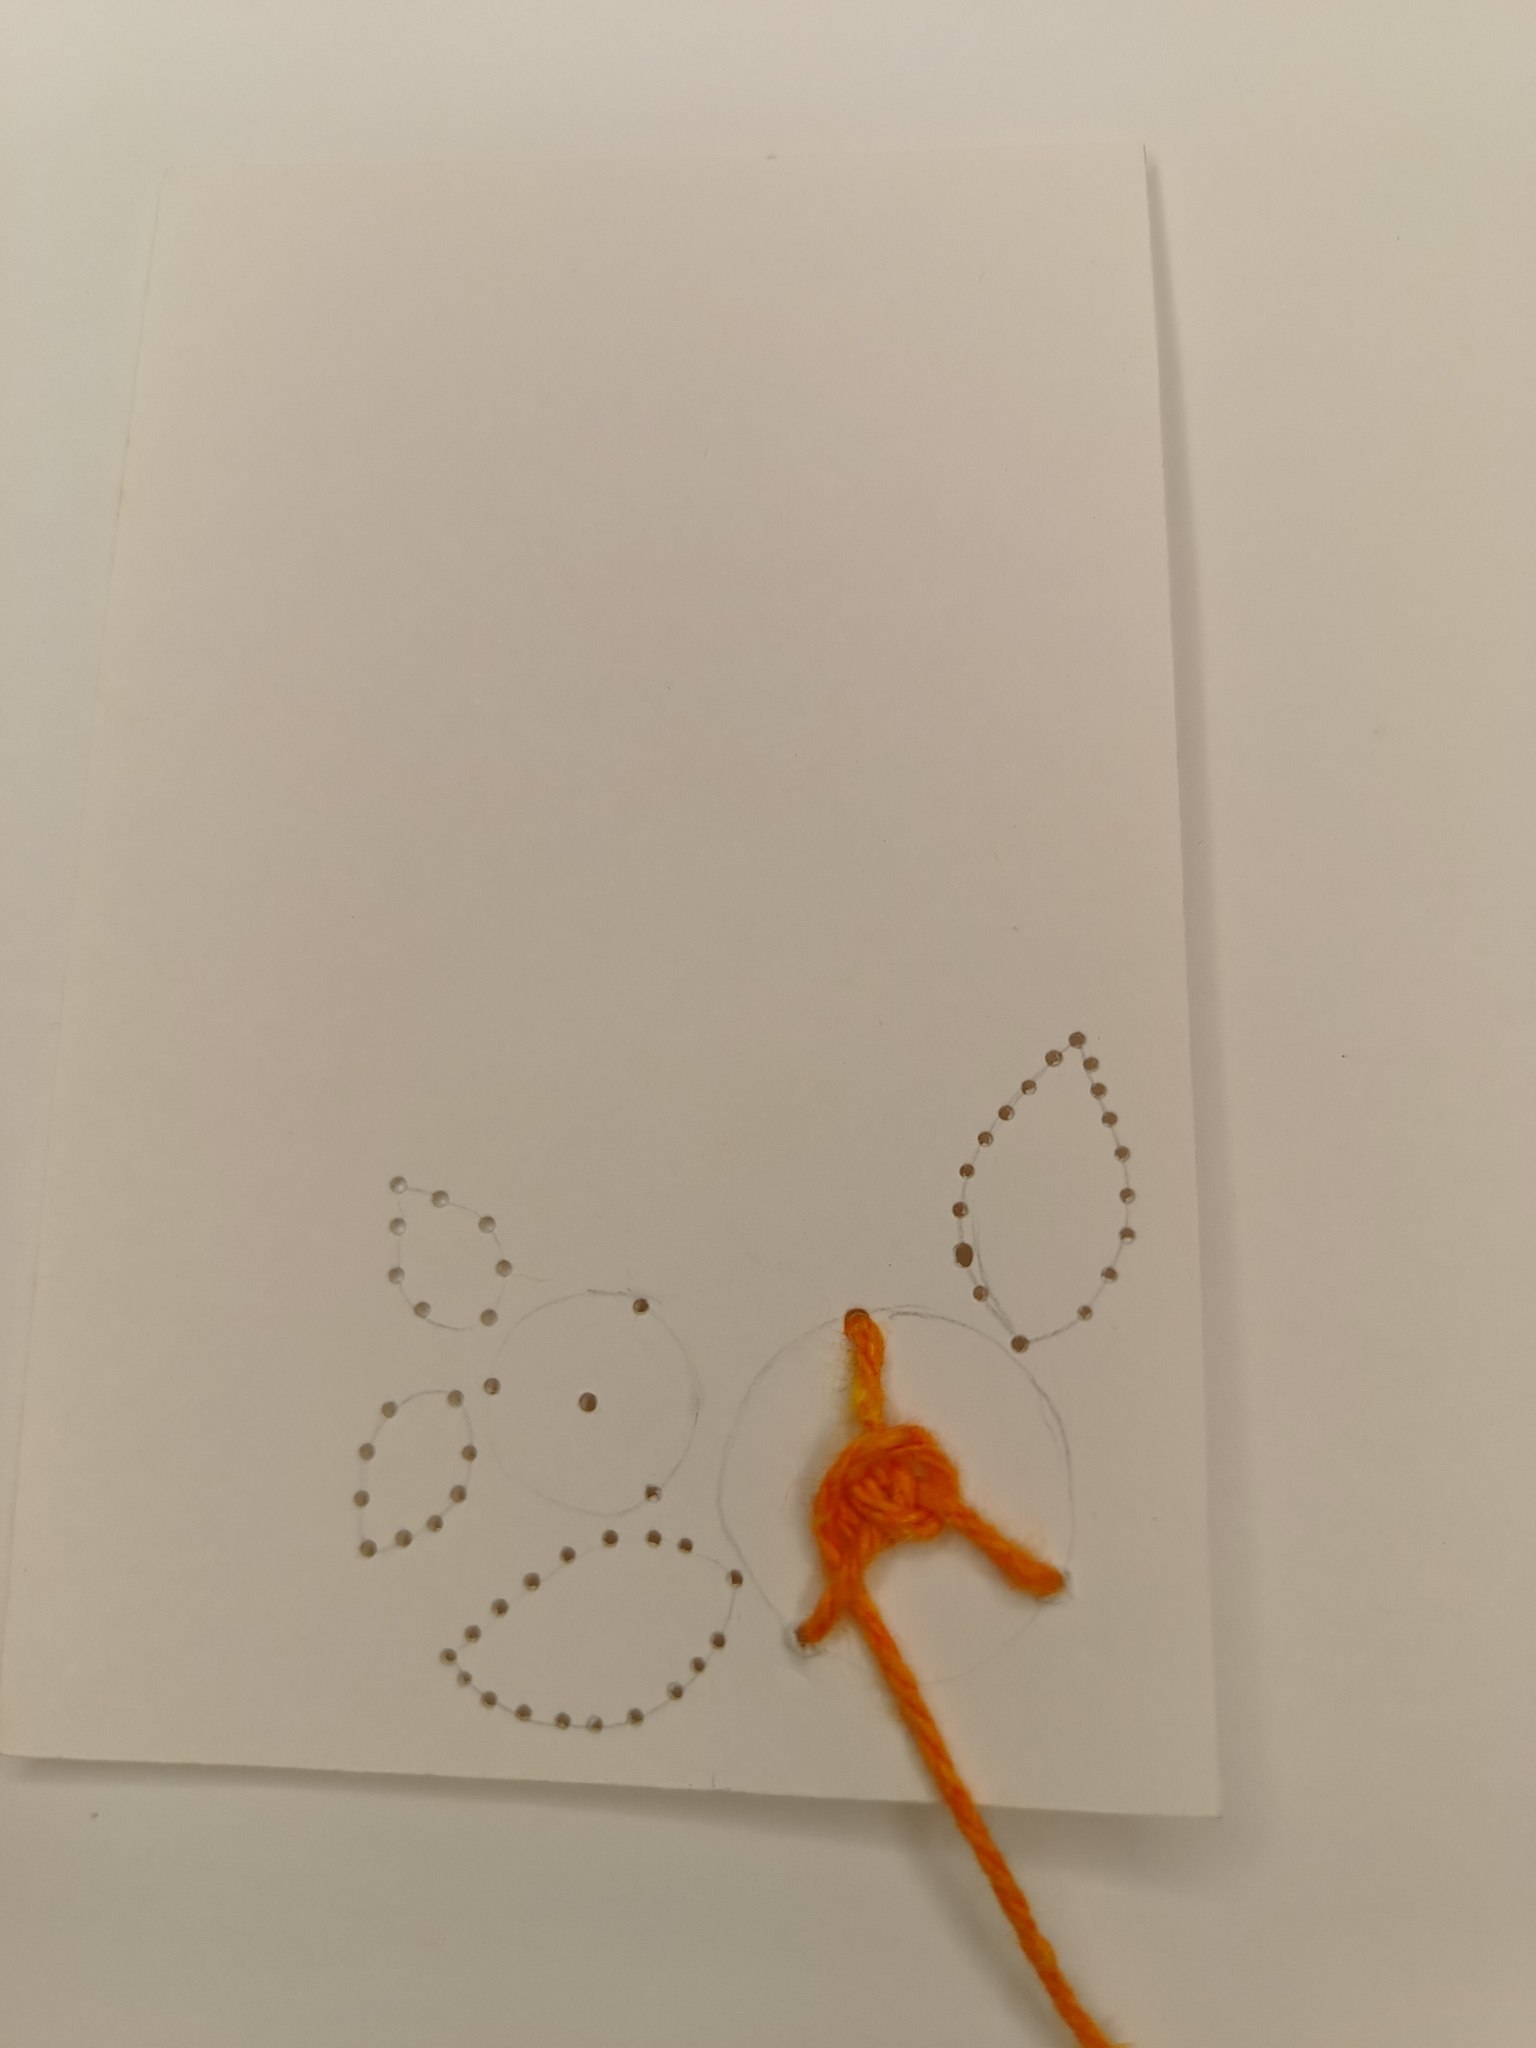
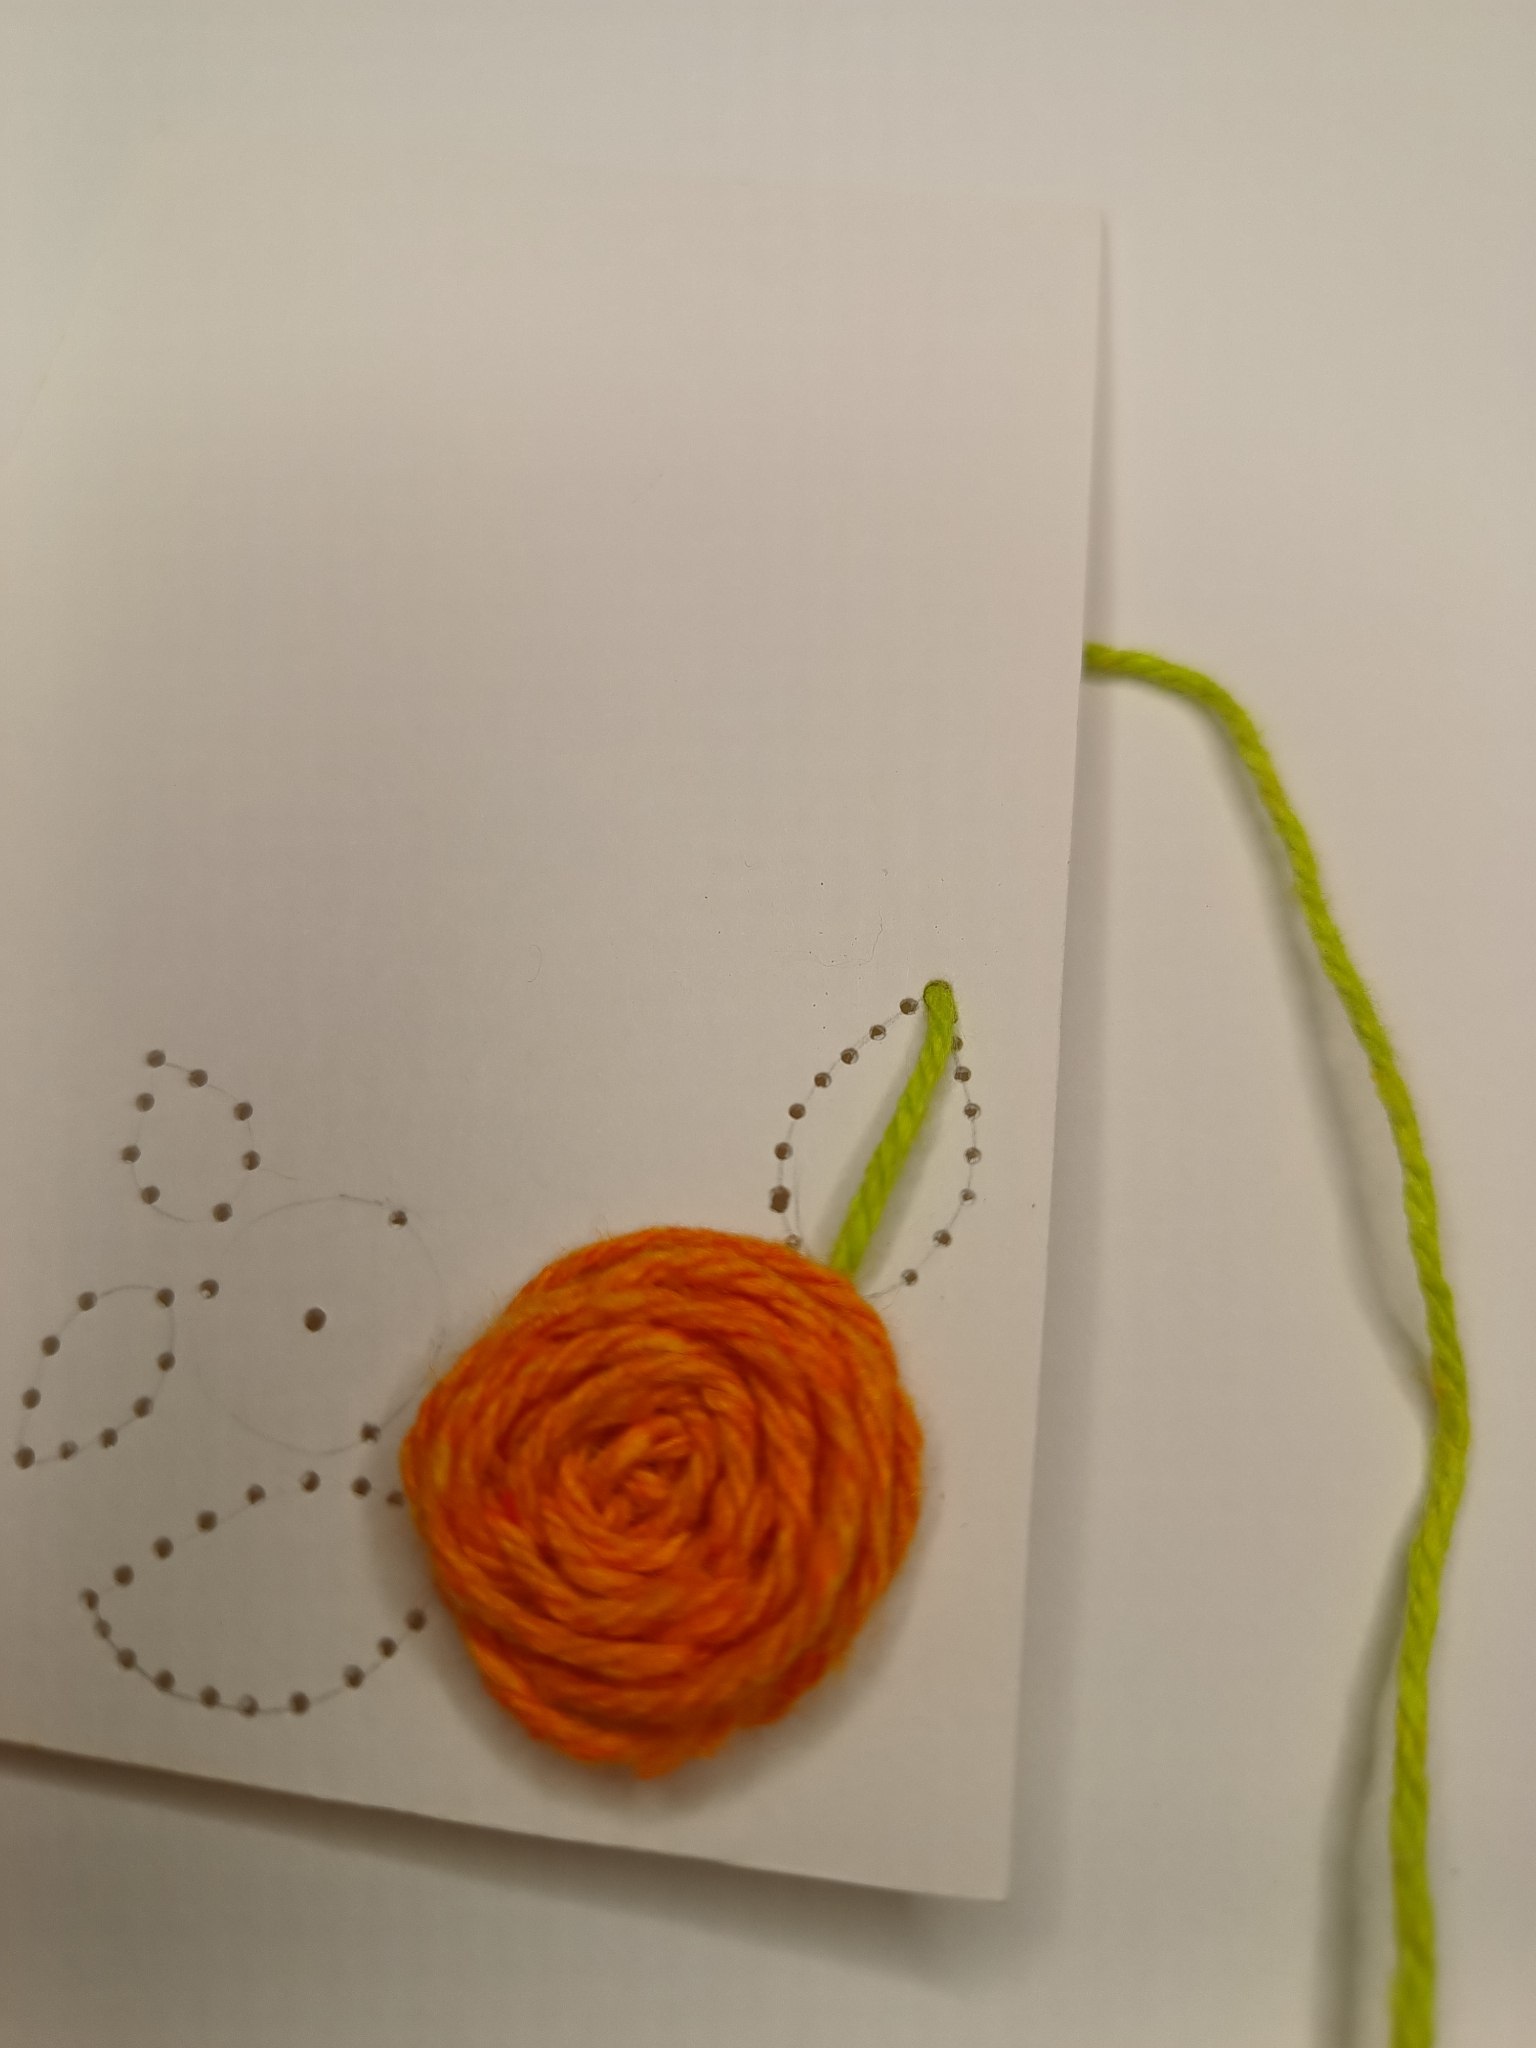
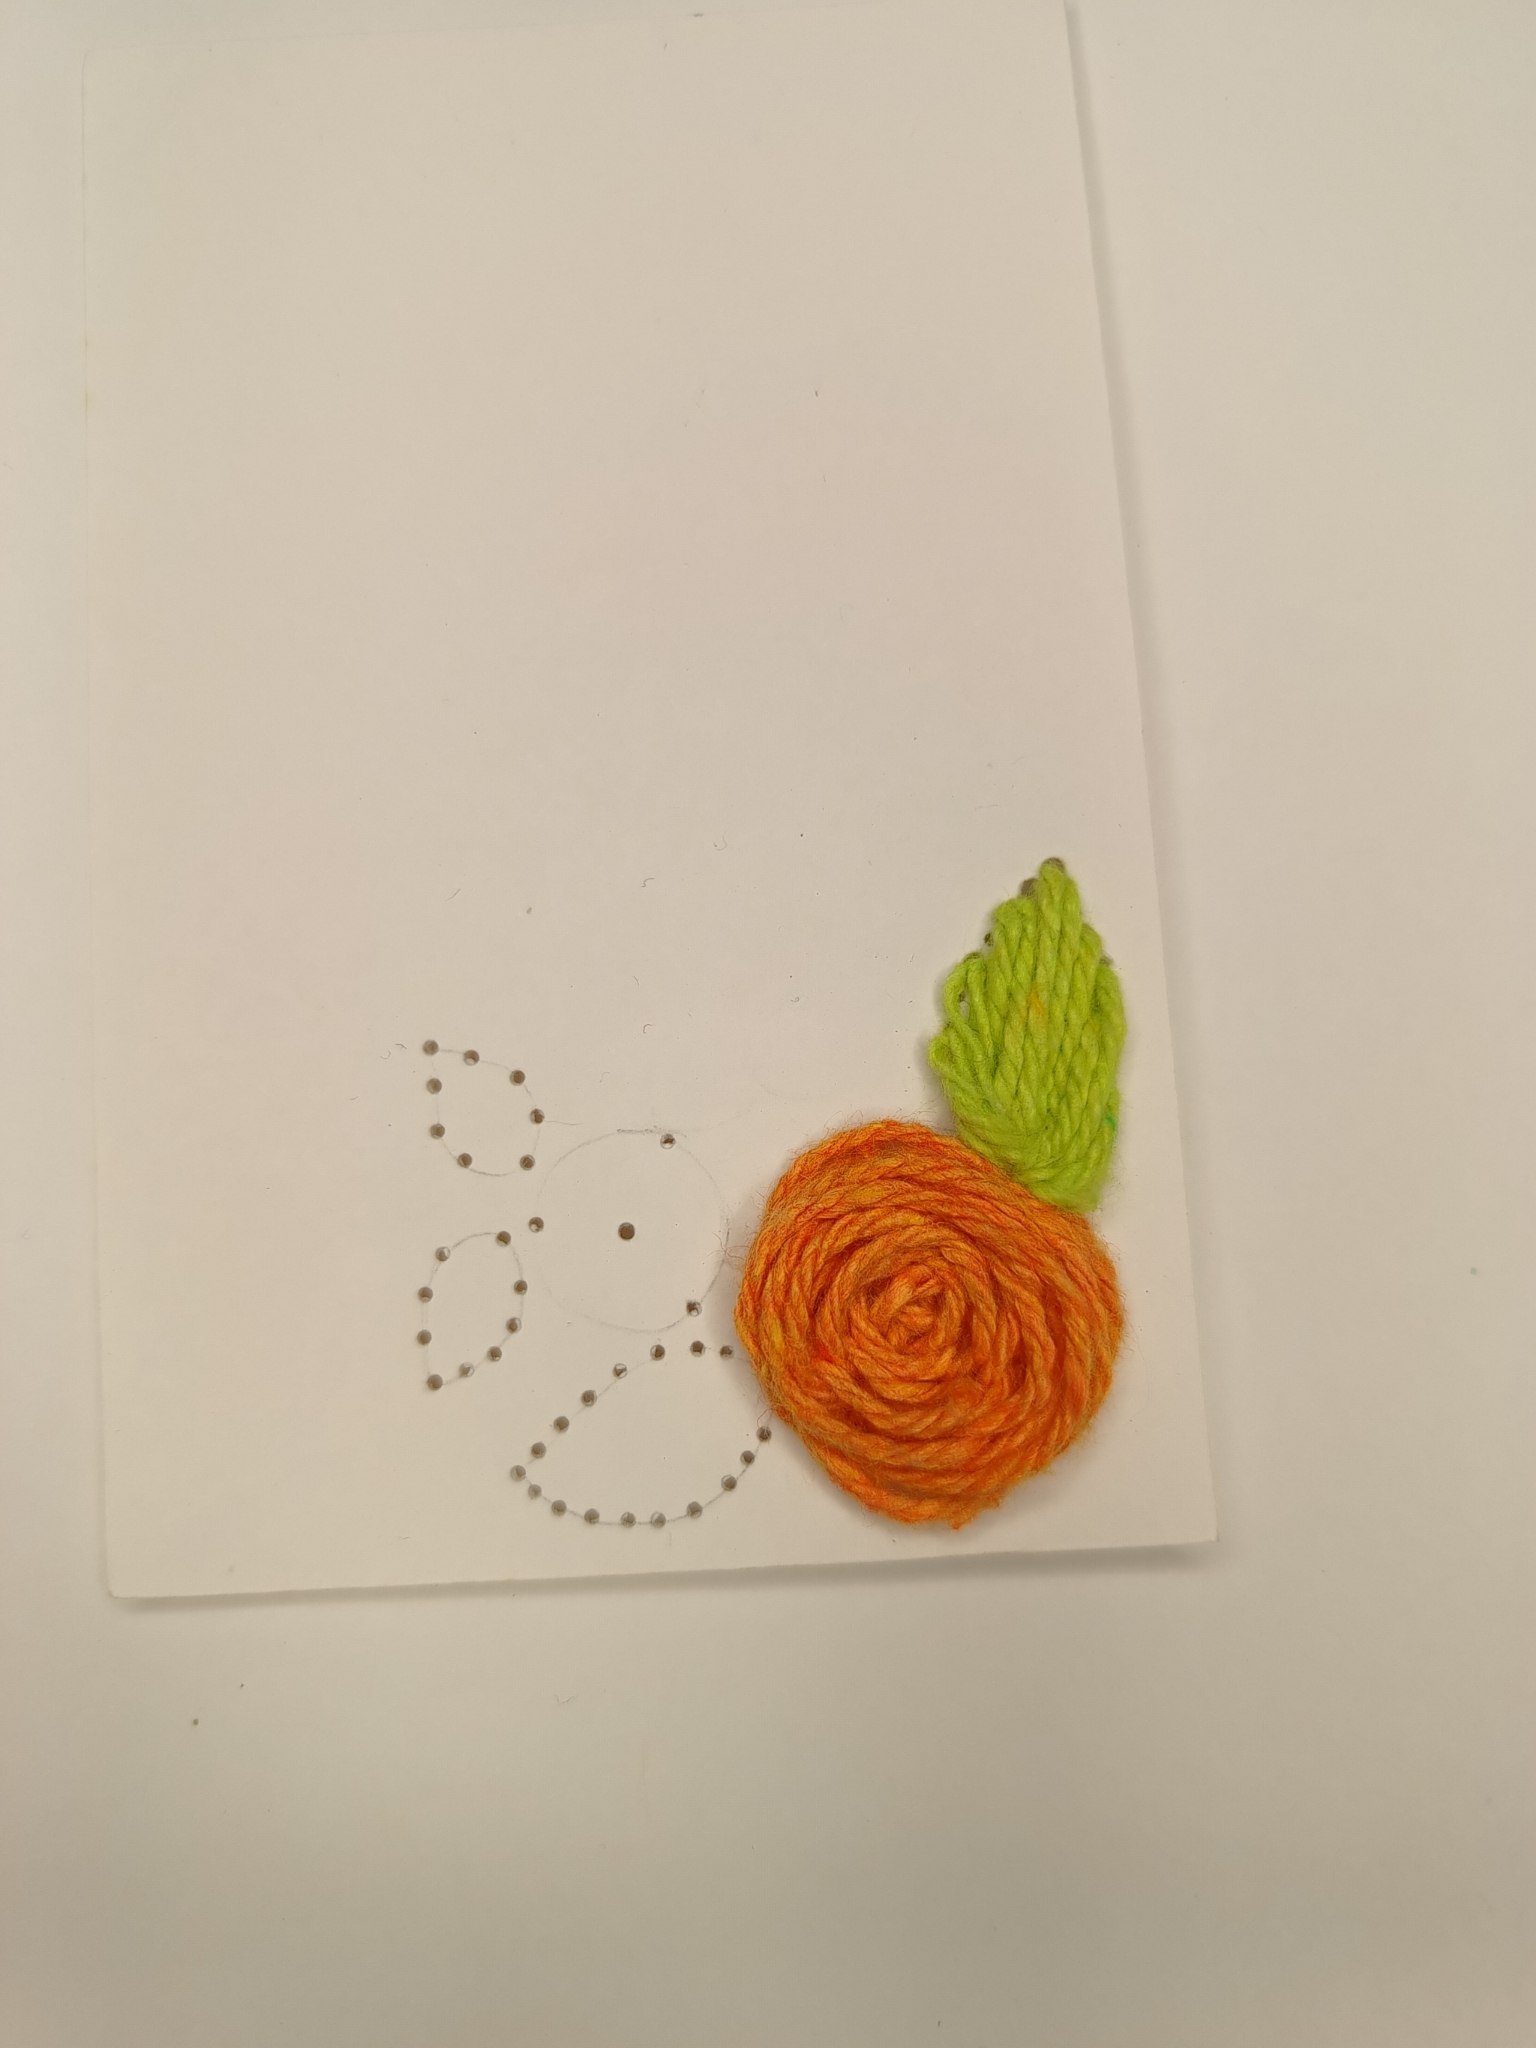
Es momento de empezar a bordar y yo elegí iniciar con la rosa grande, para ella tomé un hilo color naranja (tú puedes usar el que más te guste), un extremo pasará a través de la aguja y en el otro hacemos un nudo.
> It's time to start embroidering, and I chose to start with the large rose. For this, I took some orange yarn (you can use whichever color you like best), threaded one end through the needle, and tied a knot at the other end.
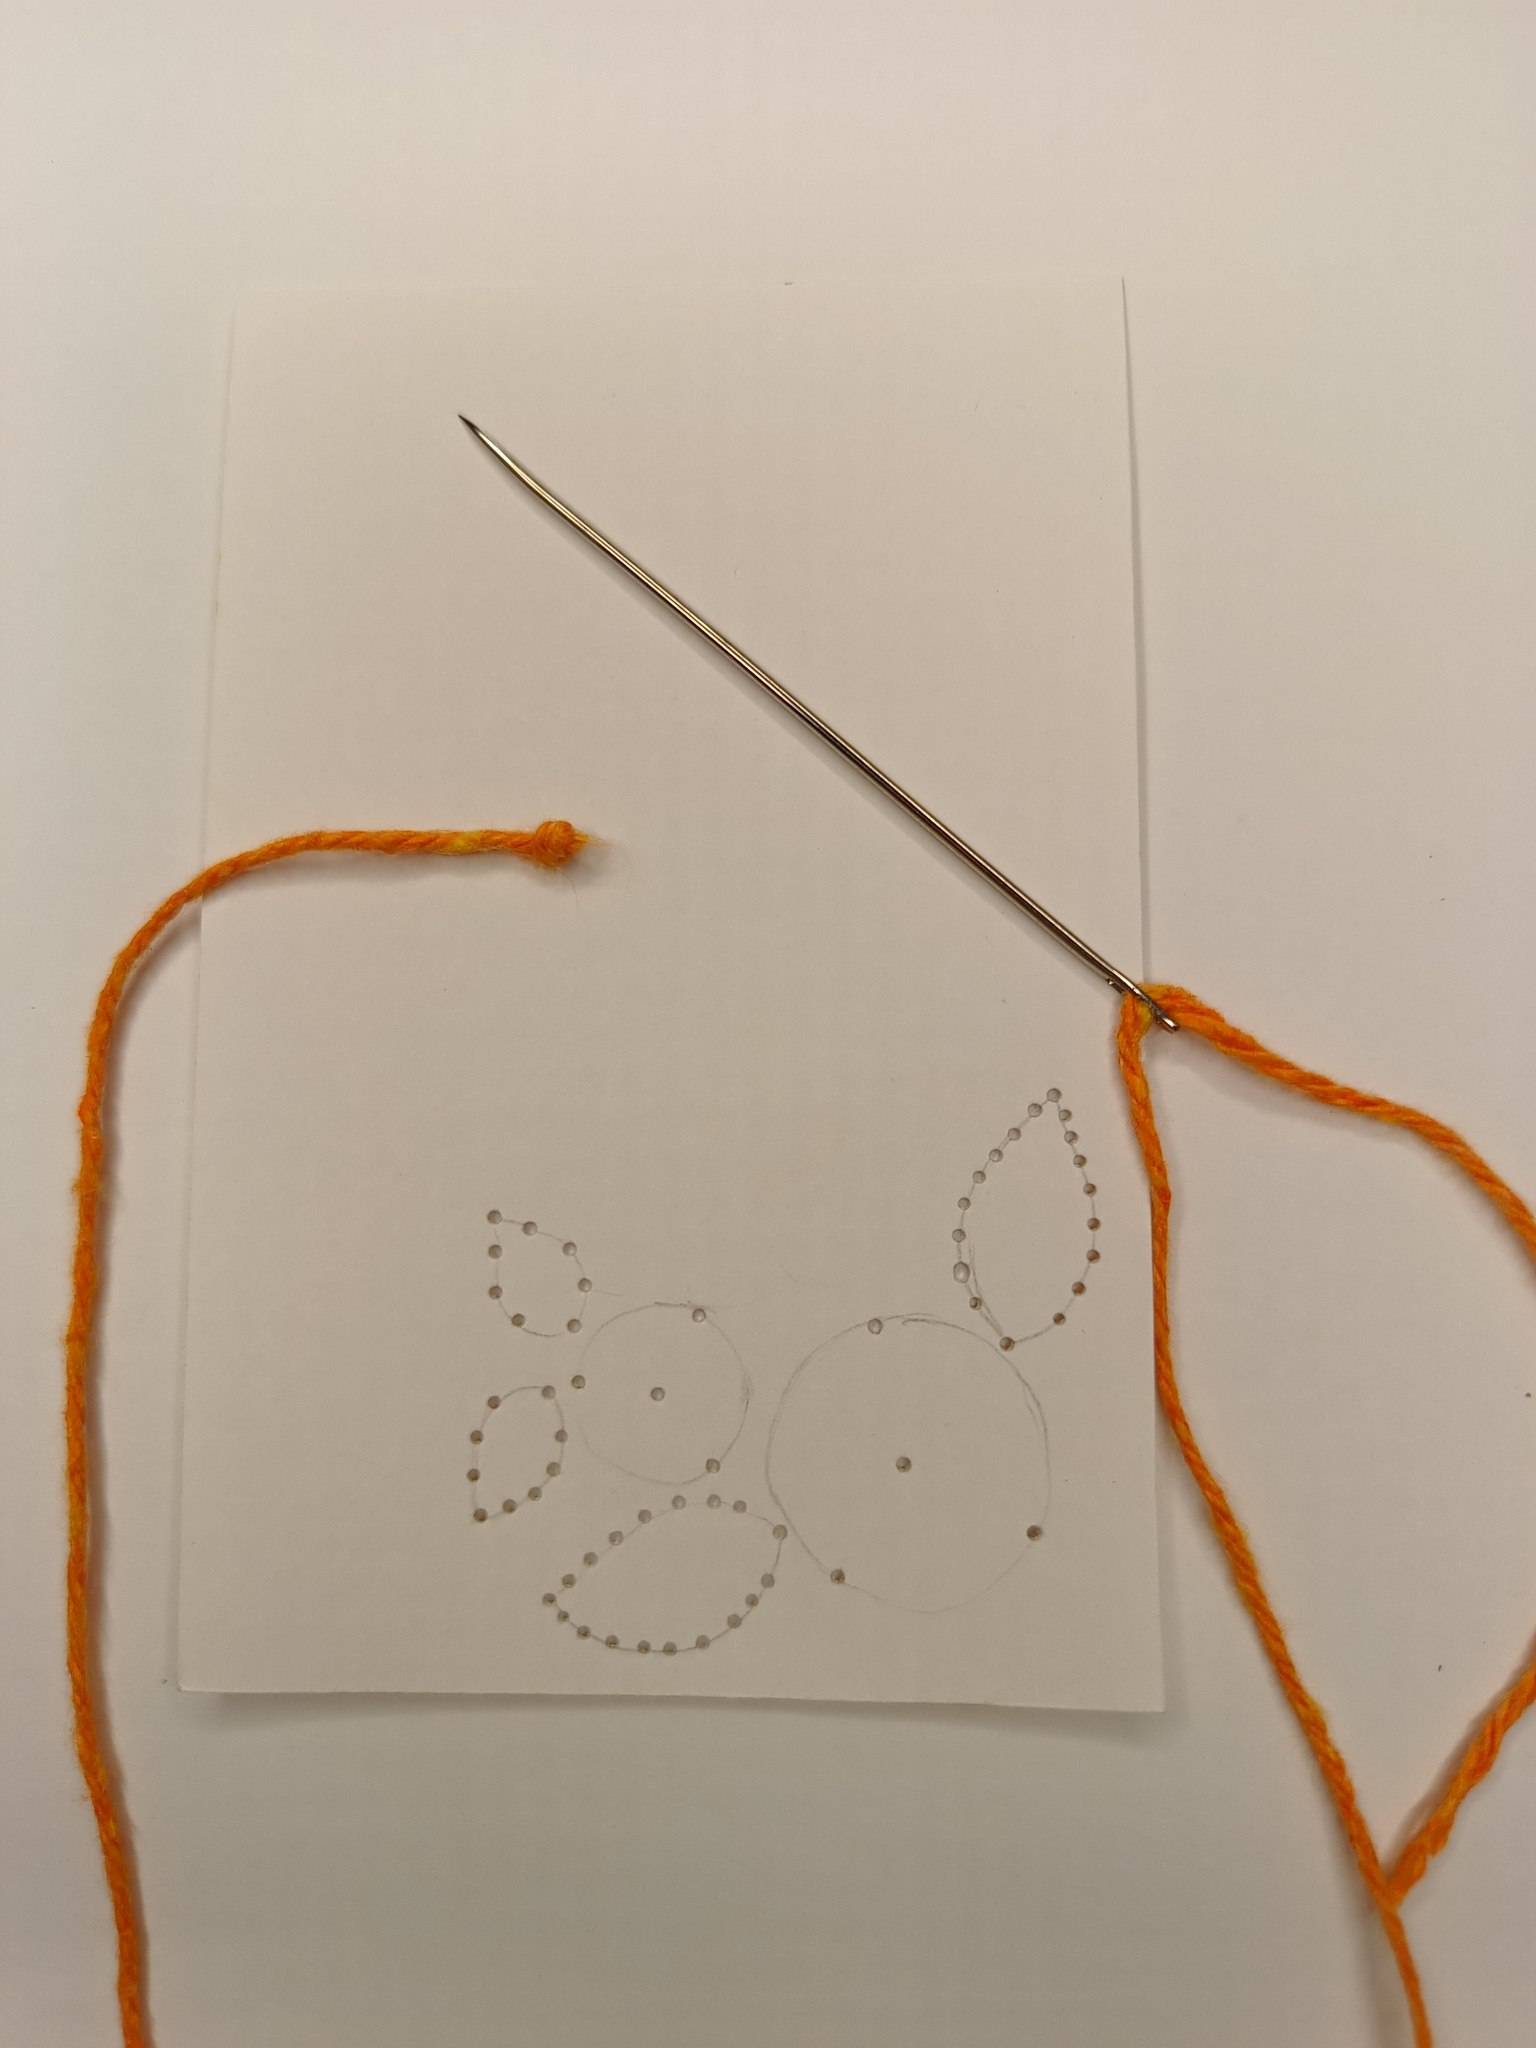
Hilo naranja / Orange thread
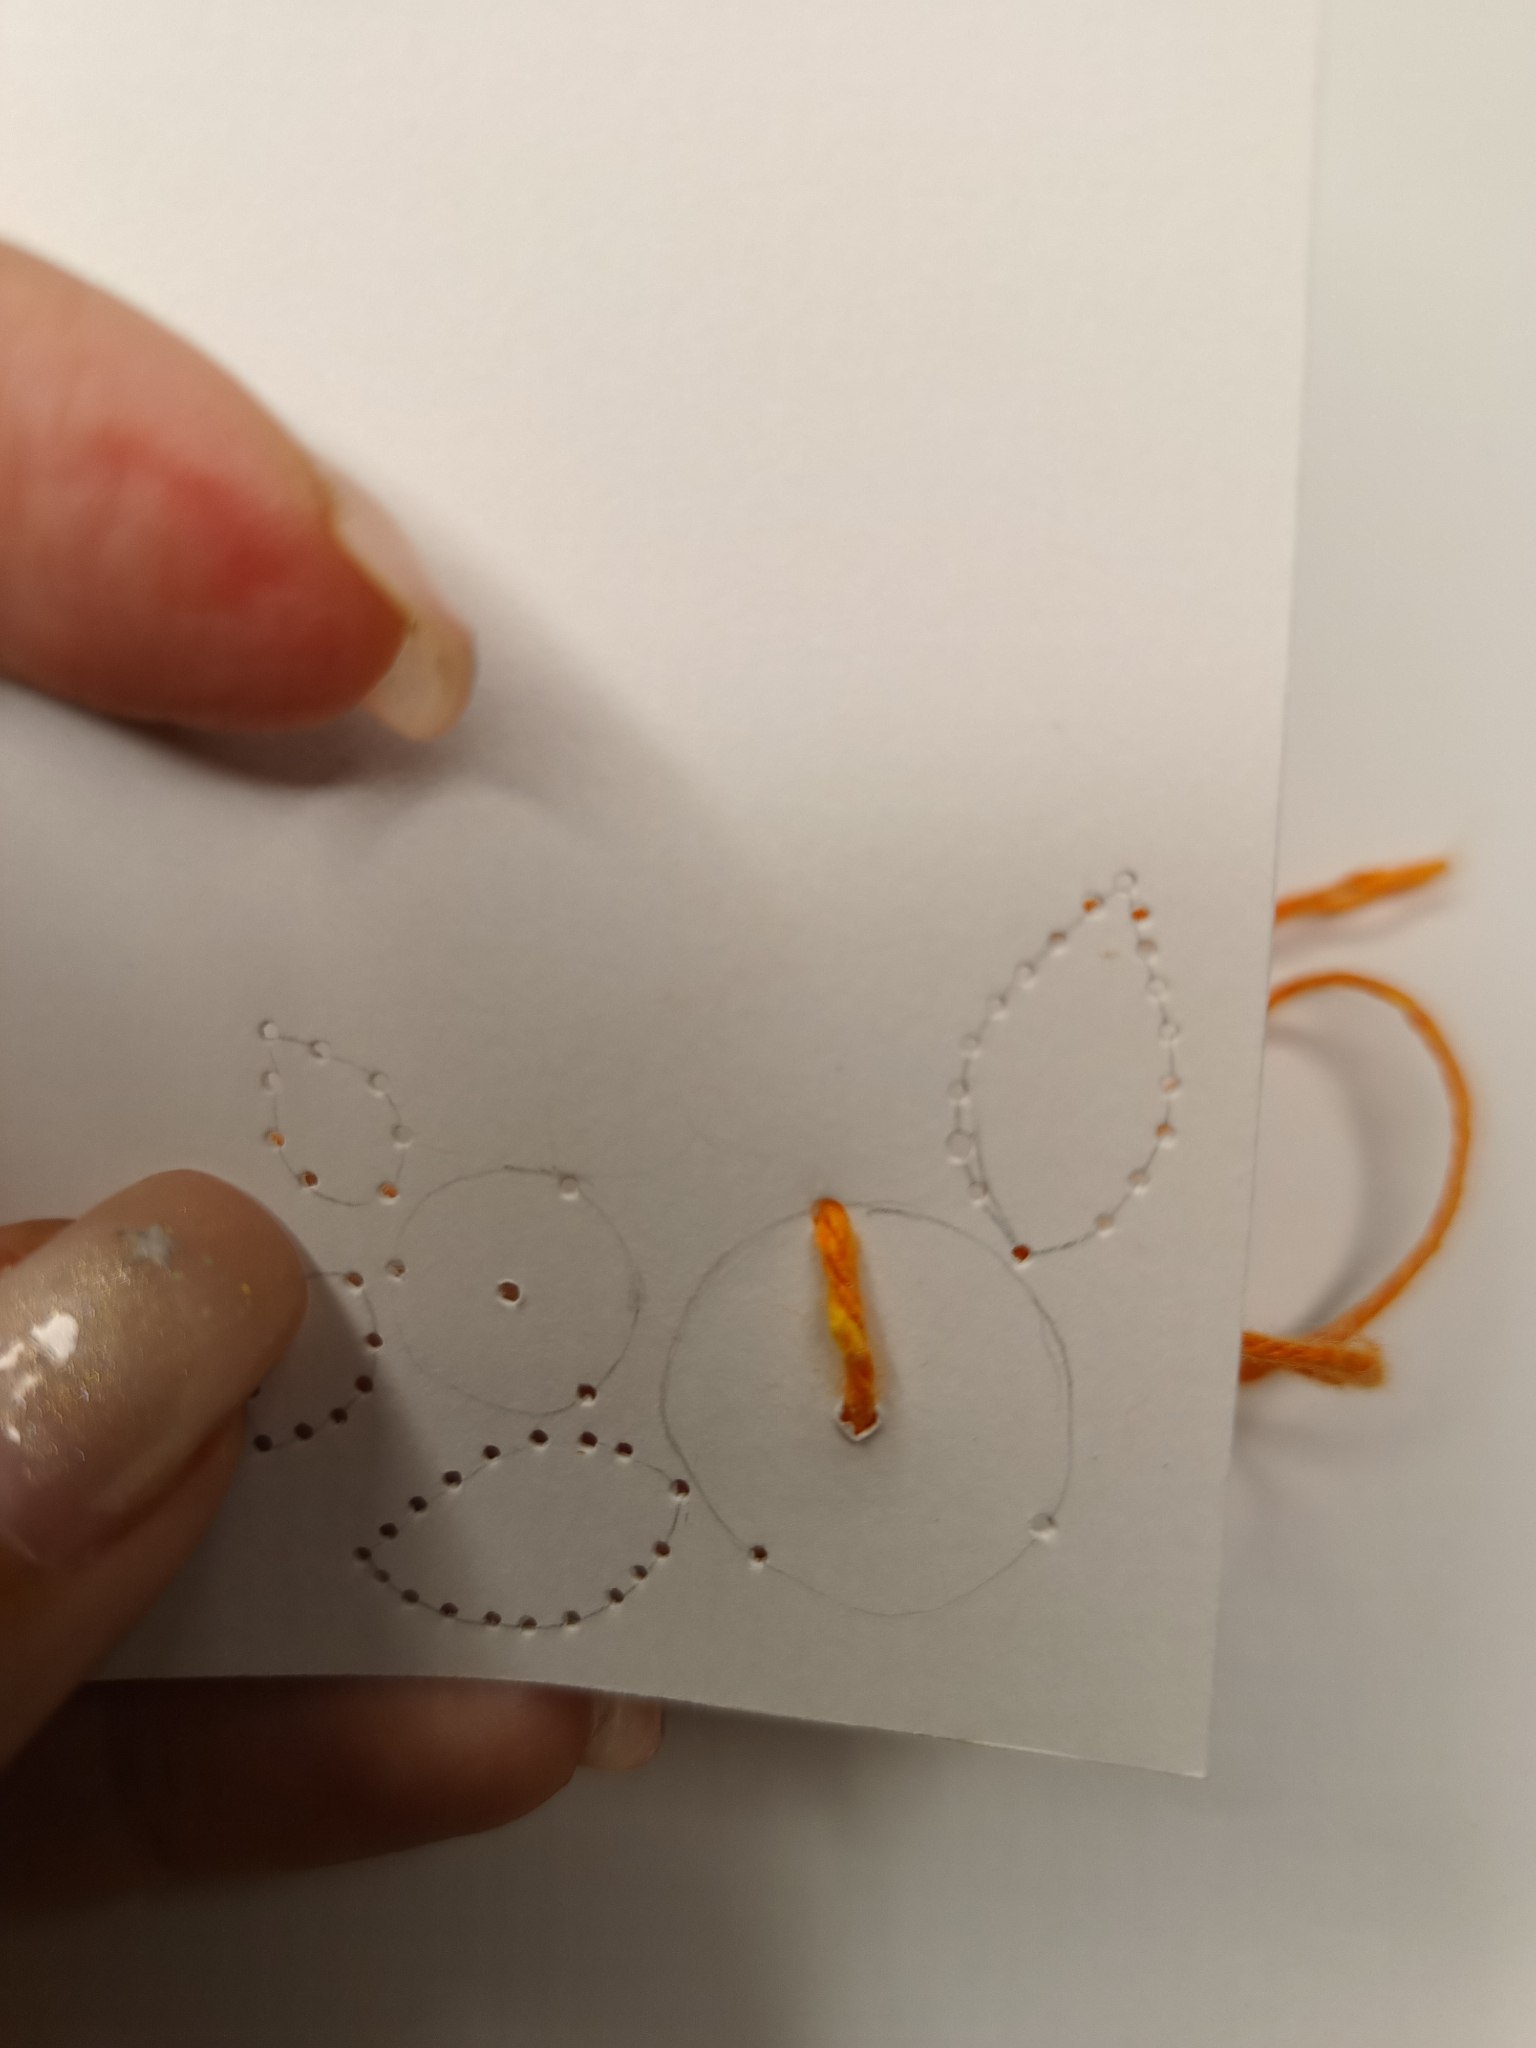
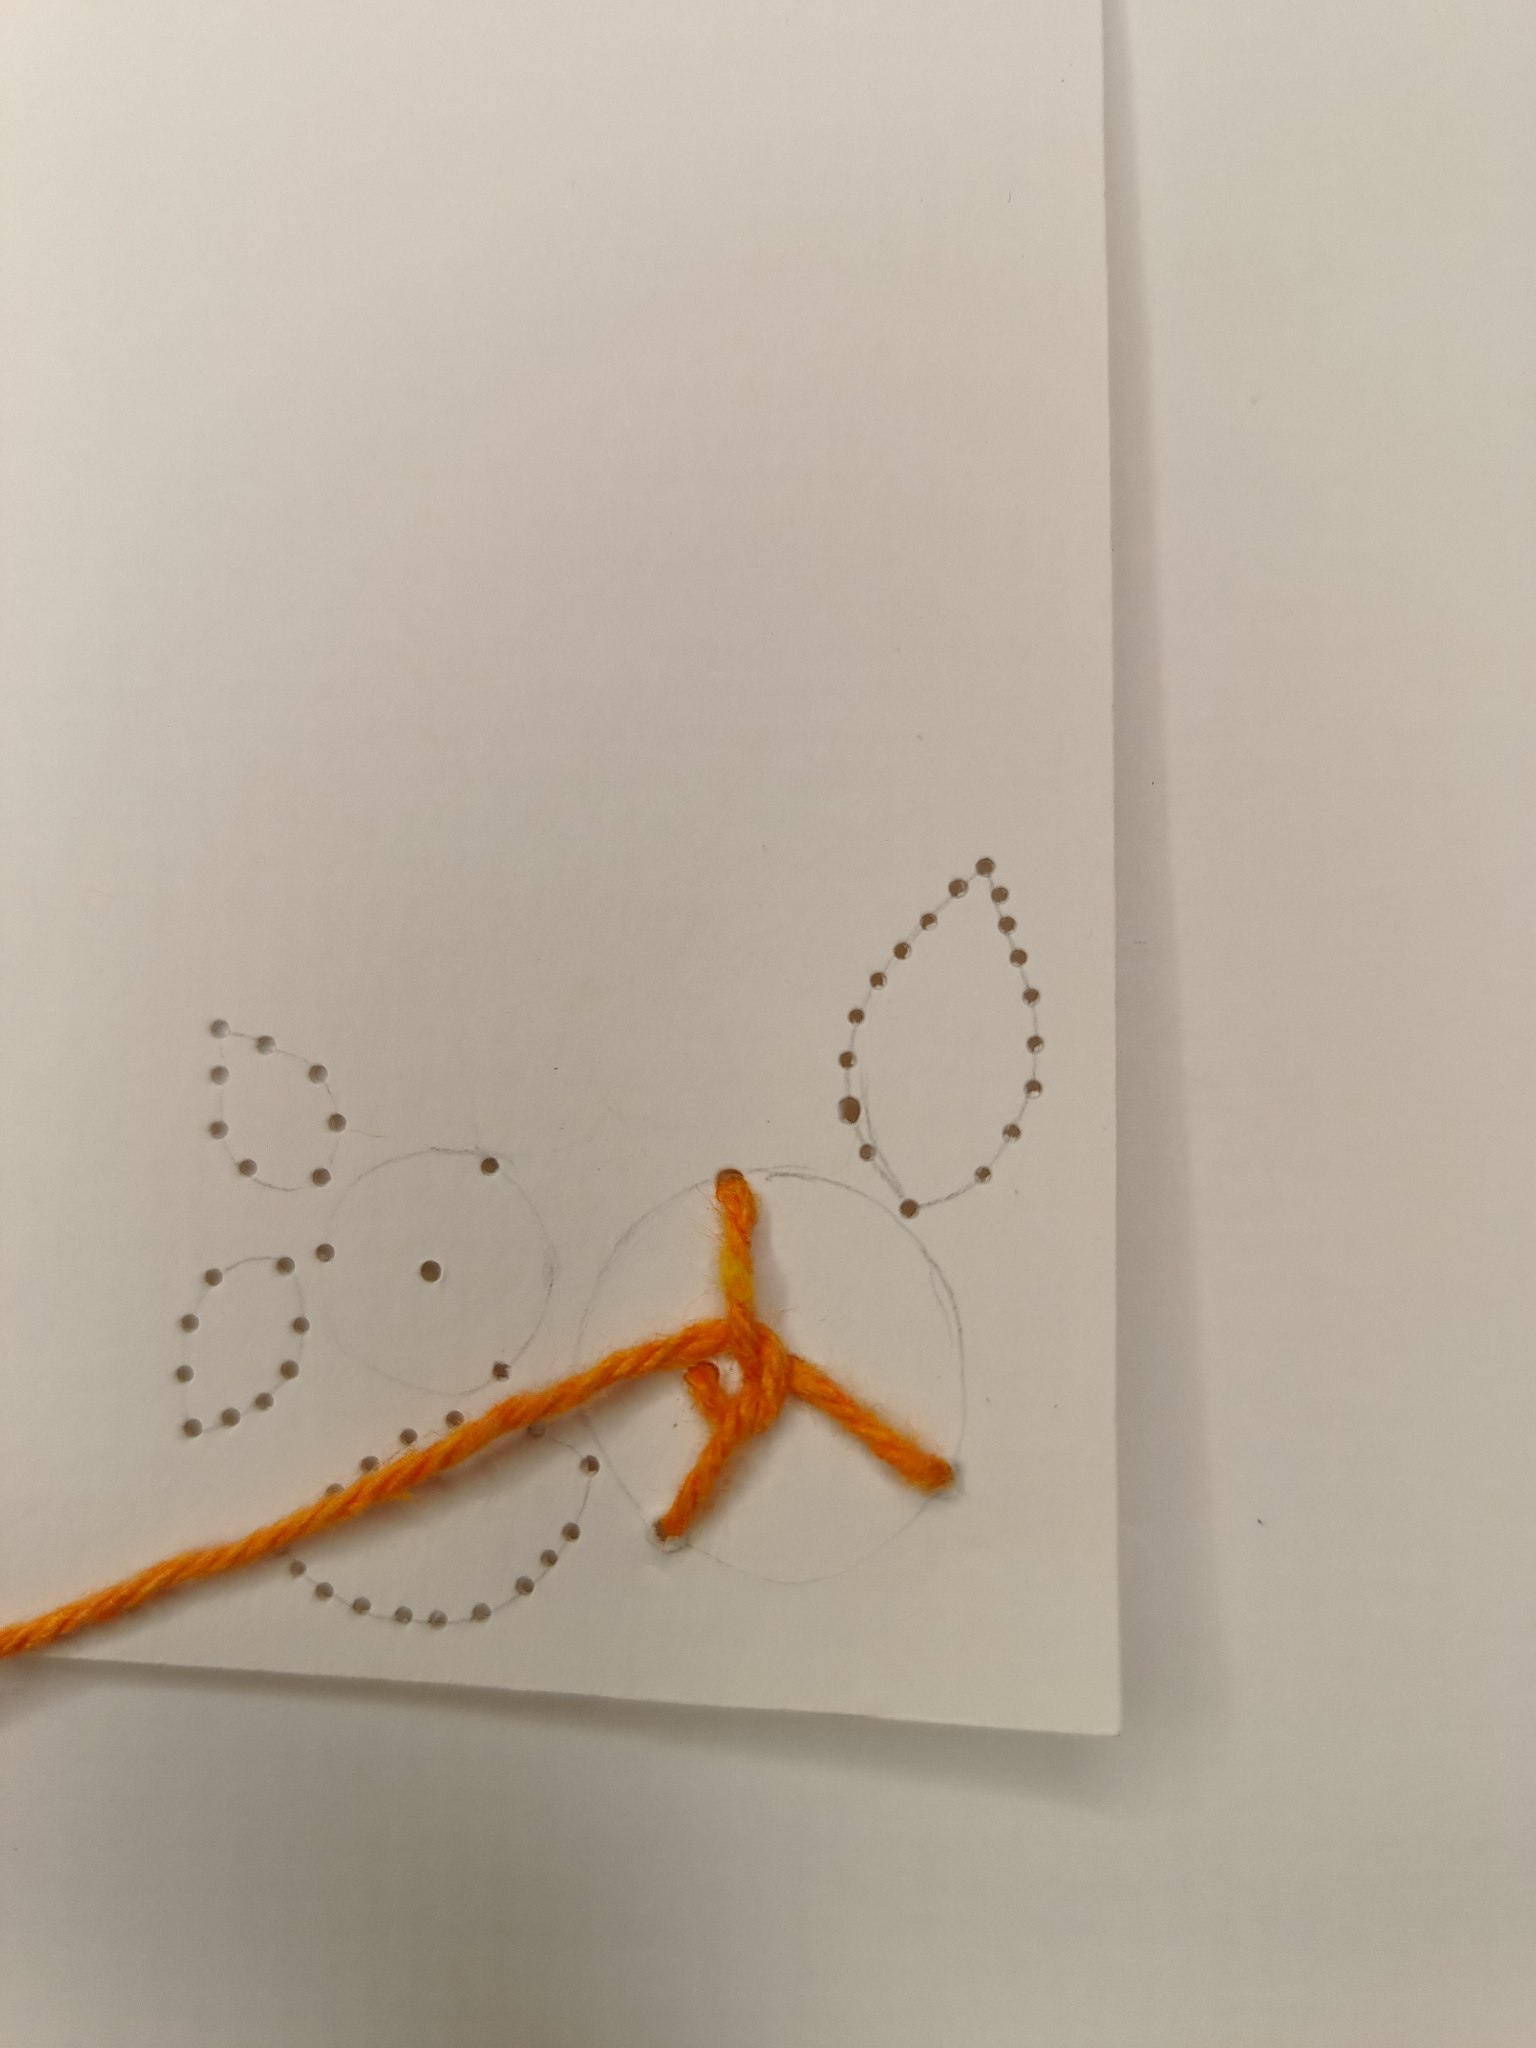
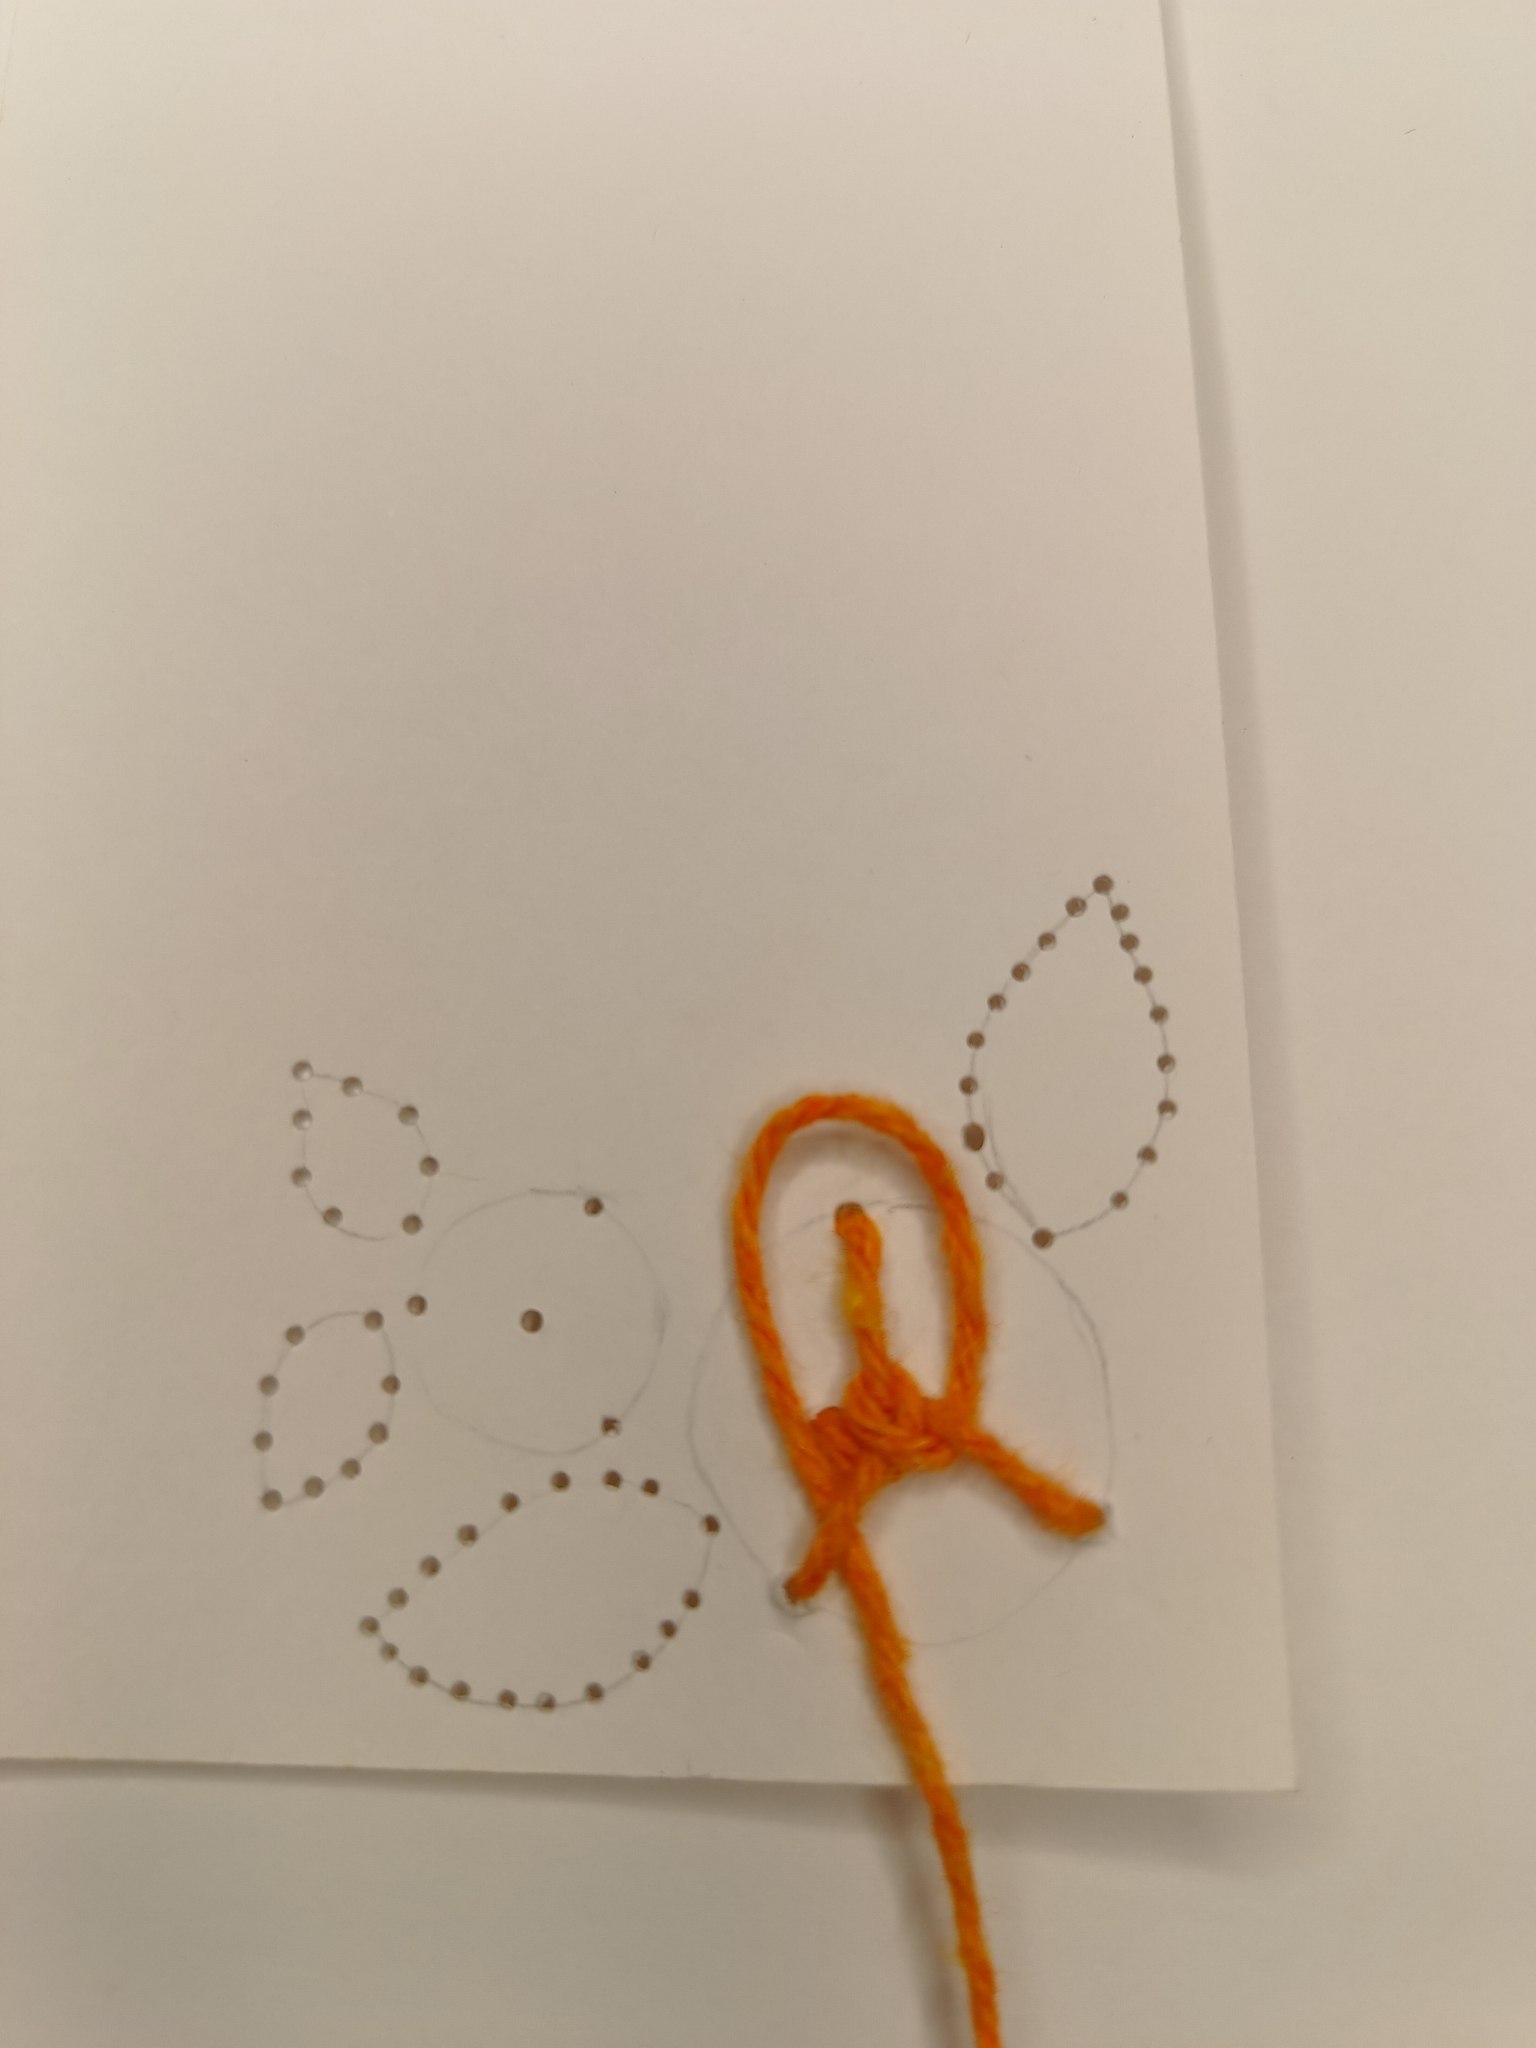
Comenzamos introduciendo la aguja desde atrás hacia adelante por el orificio central, para luego pasar la aguja devuelta por medio de alguno de los agujeros en el contorno del círculo y repetiremos esta acción para los dos orificios restantes en el contorno.
> We begin by inserting the needle from back to front through the central hole, then pass the needle back through one of the holes around the edge of the circle and repeat this action for the remaining two holes around the edge.
 |  | 
--- | --- | ---
Inicio del bordado / Start of embroidery
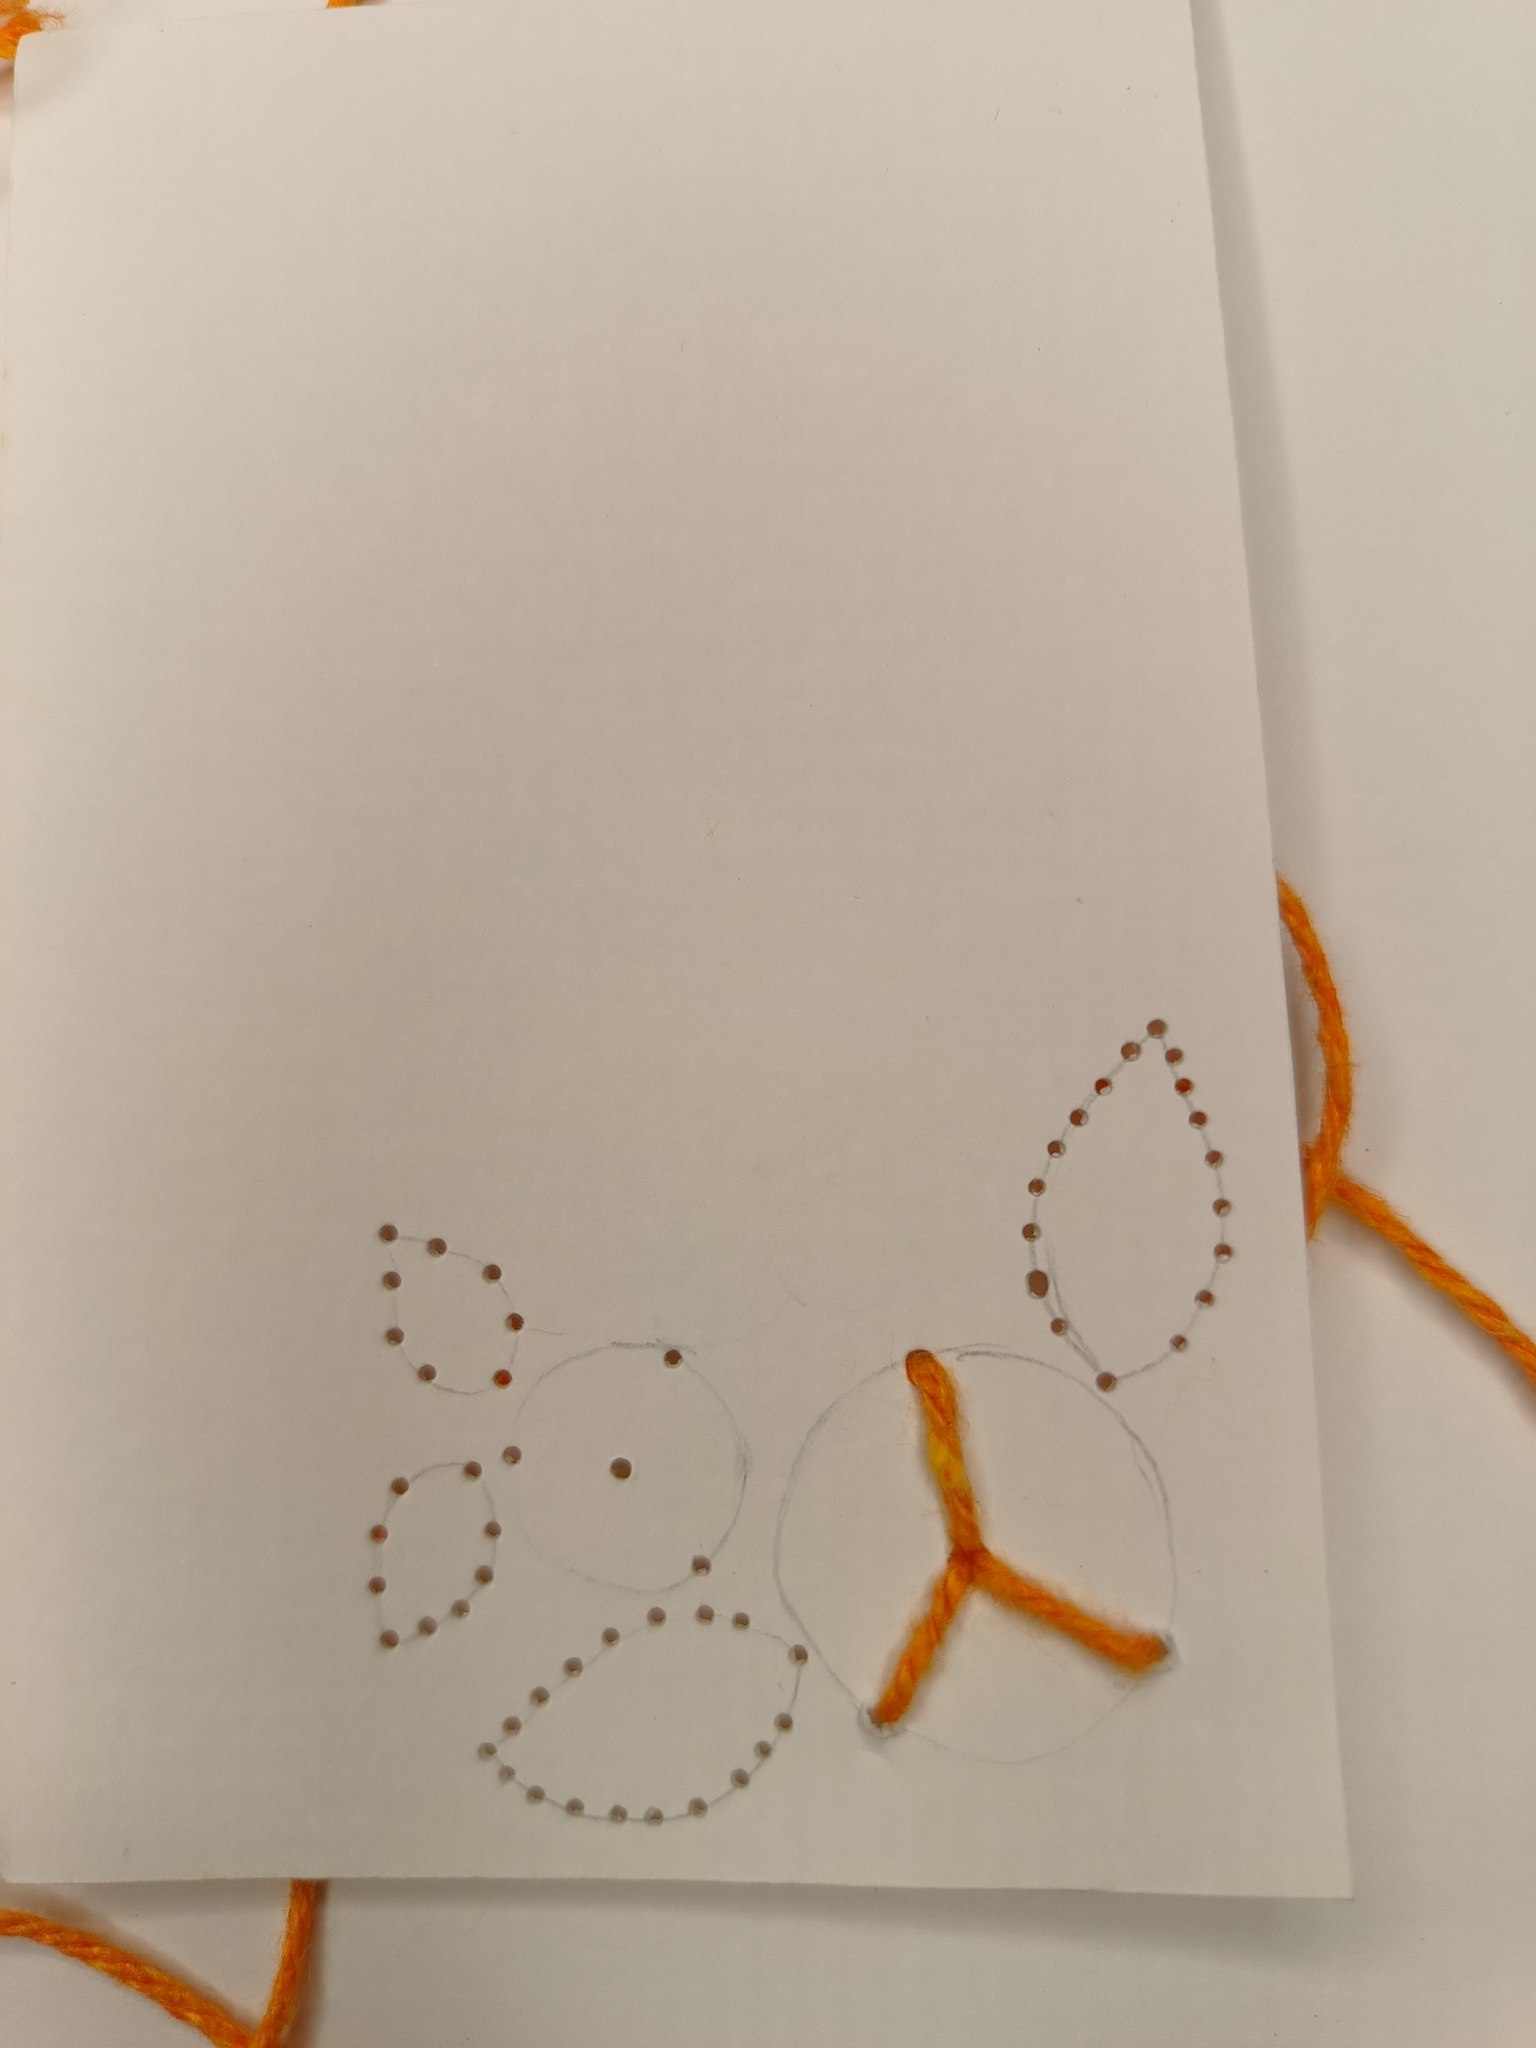
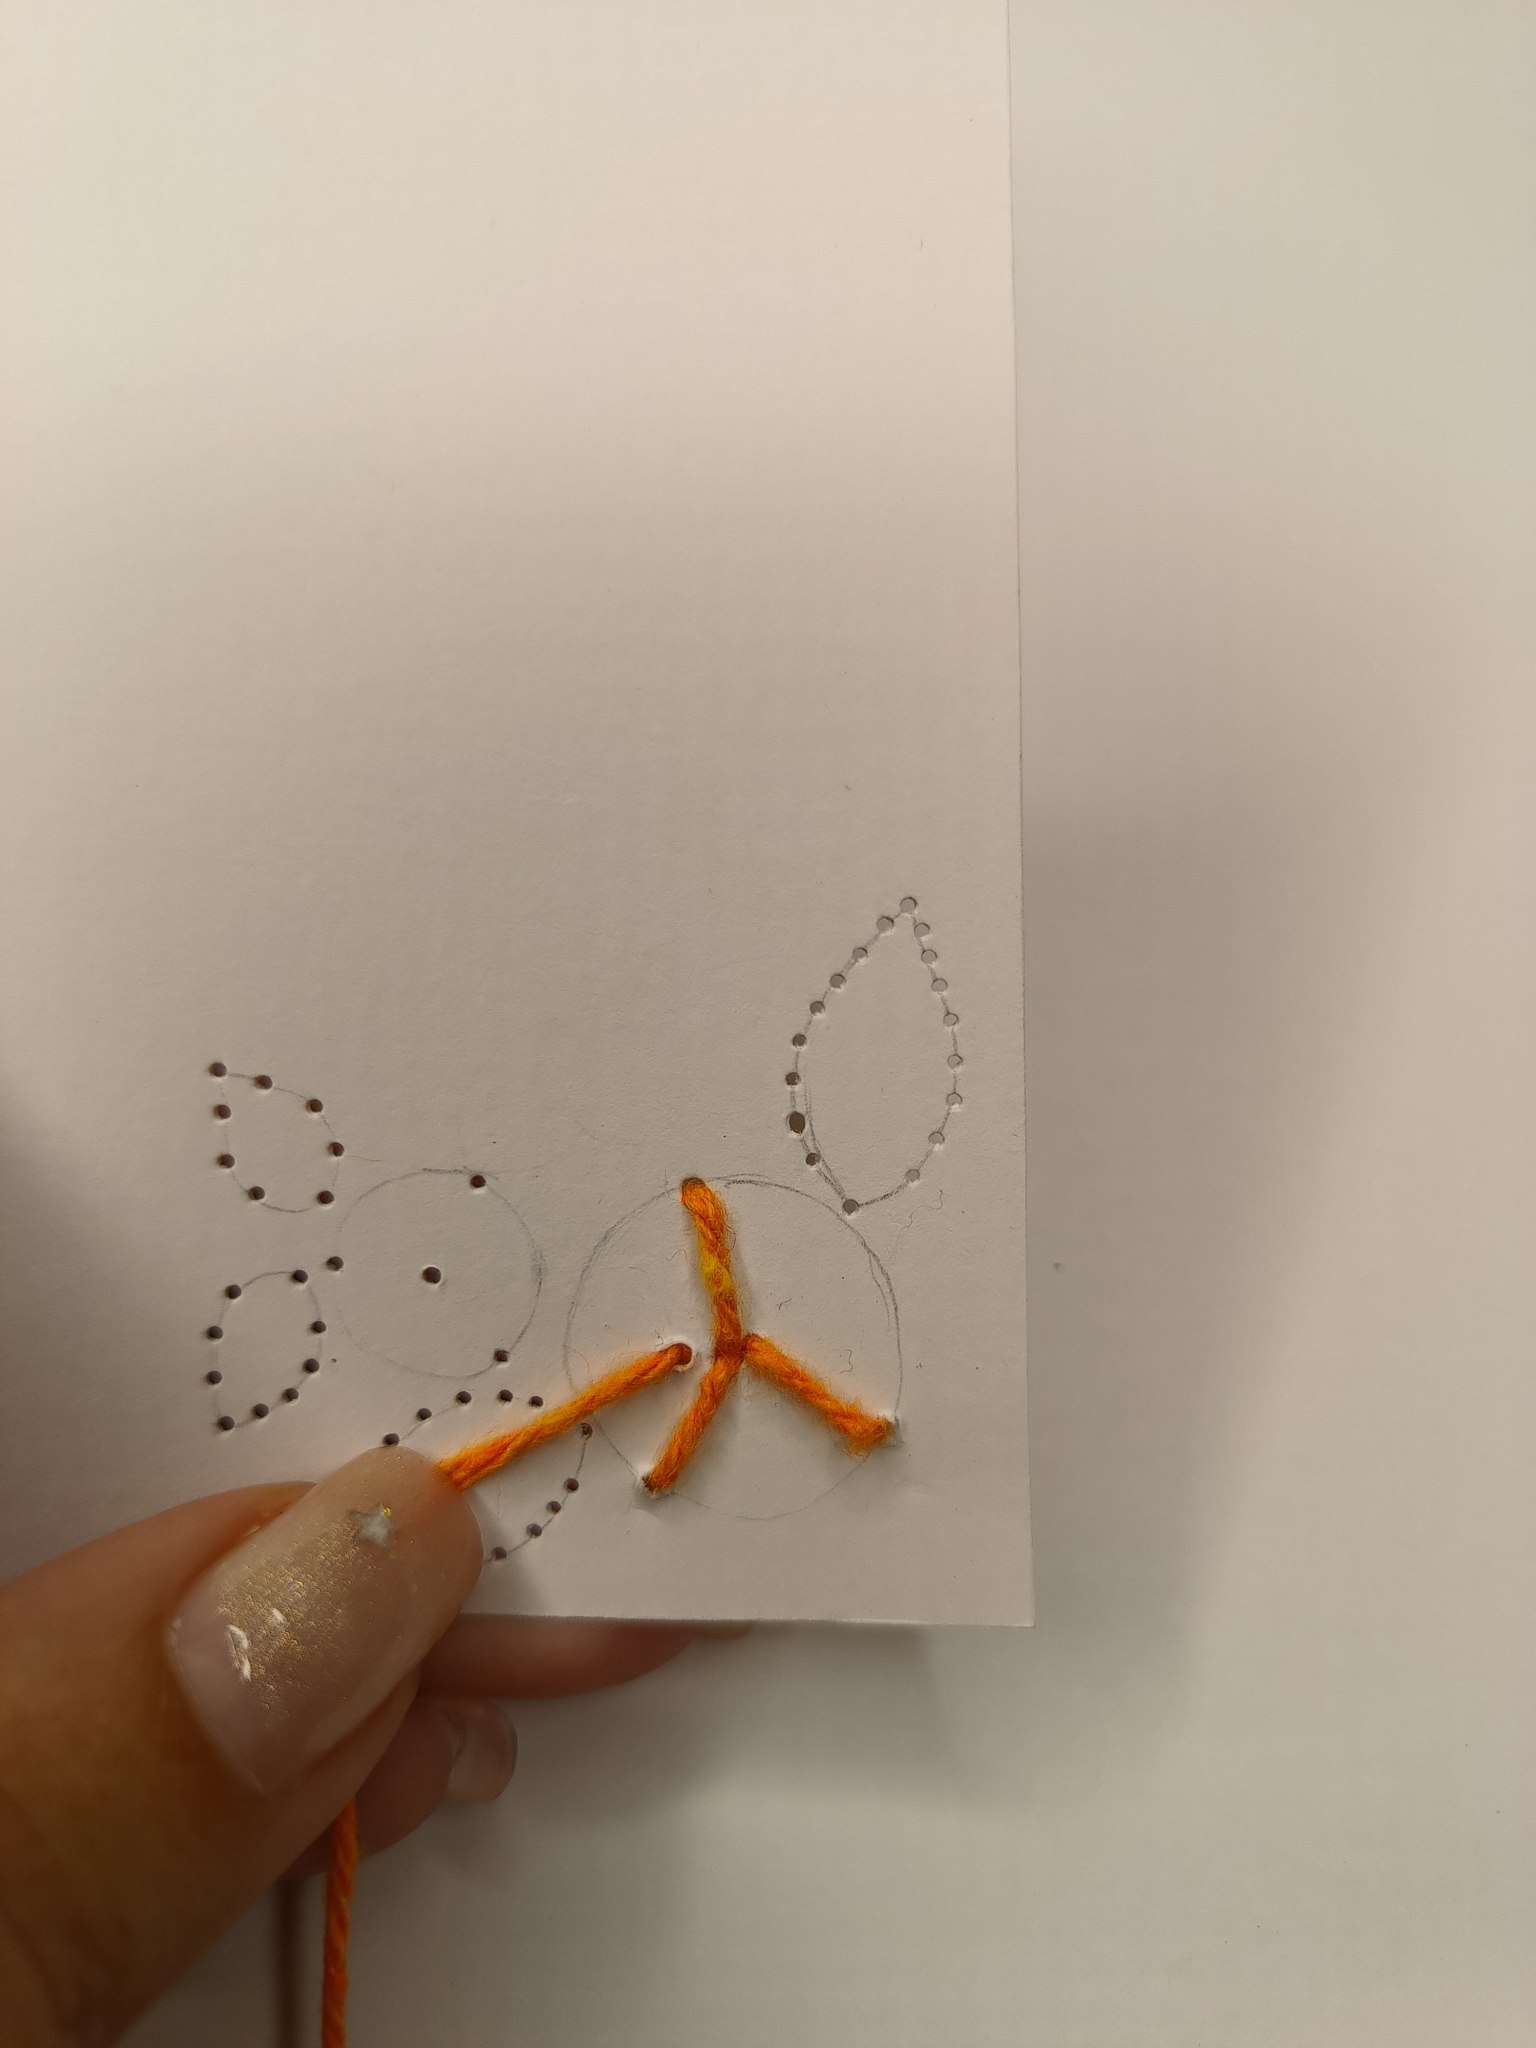
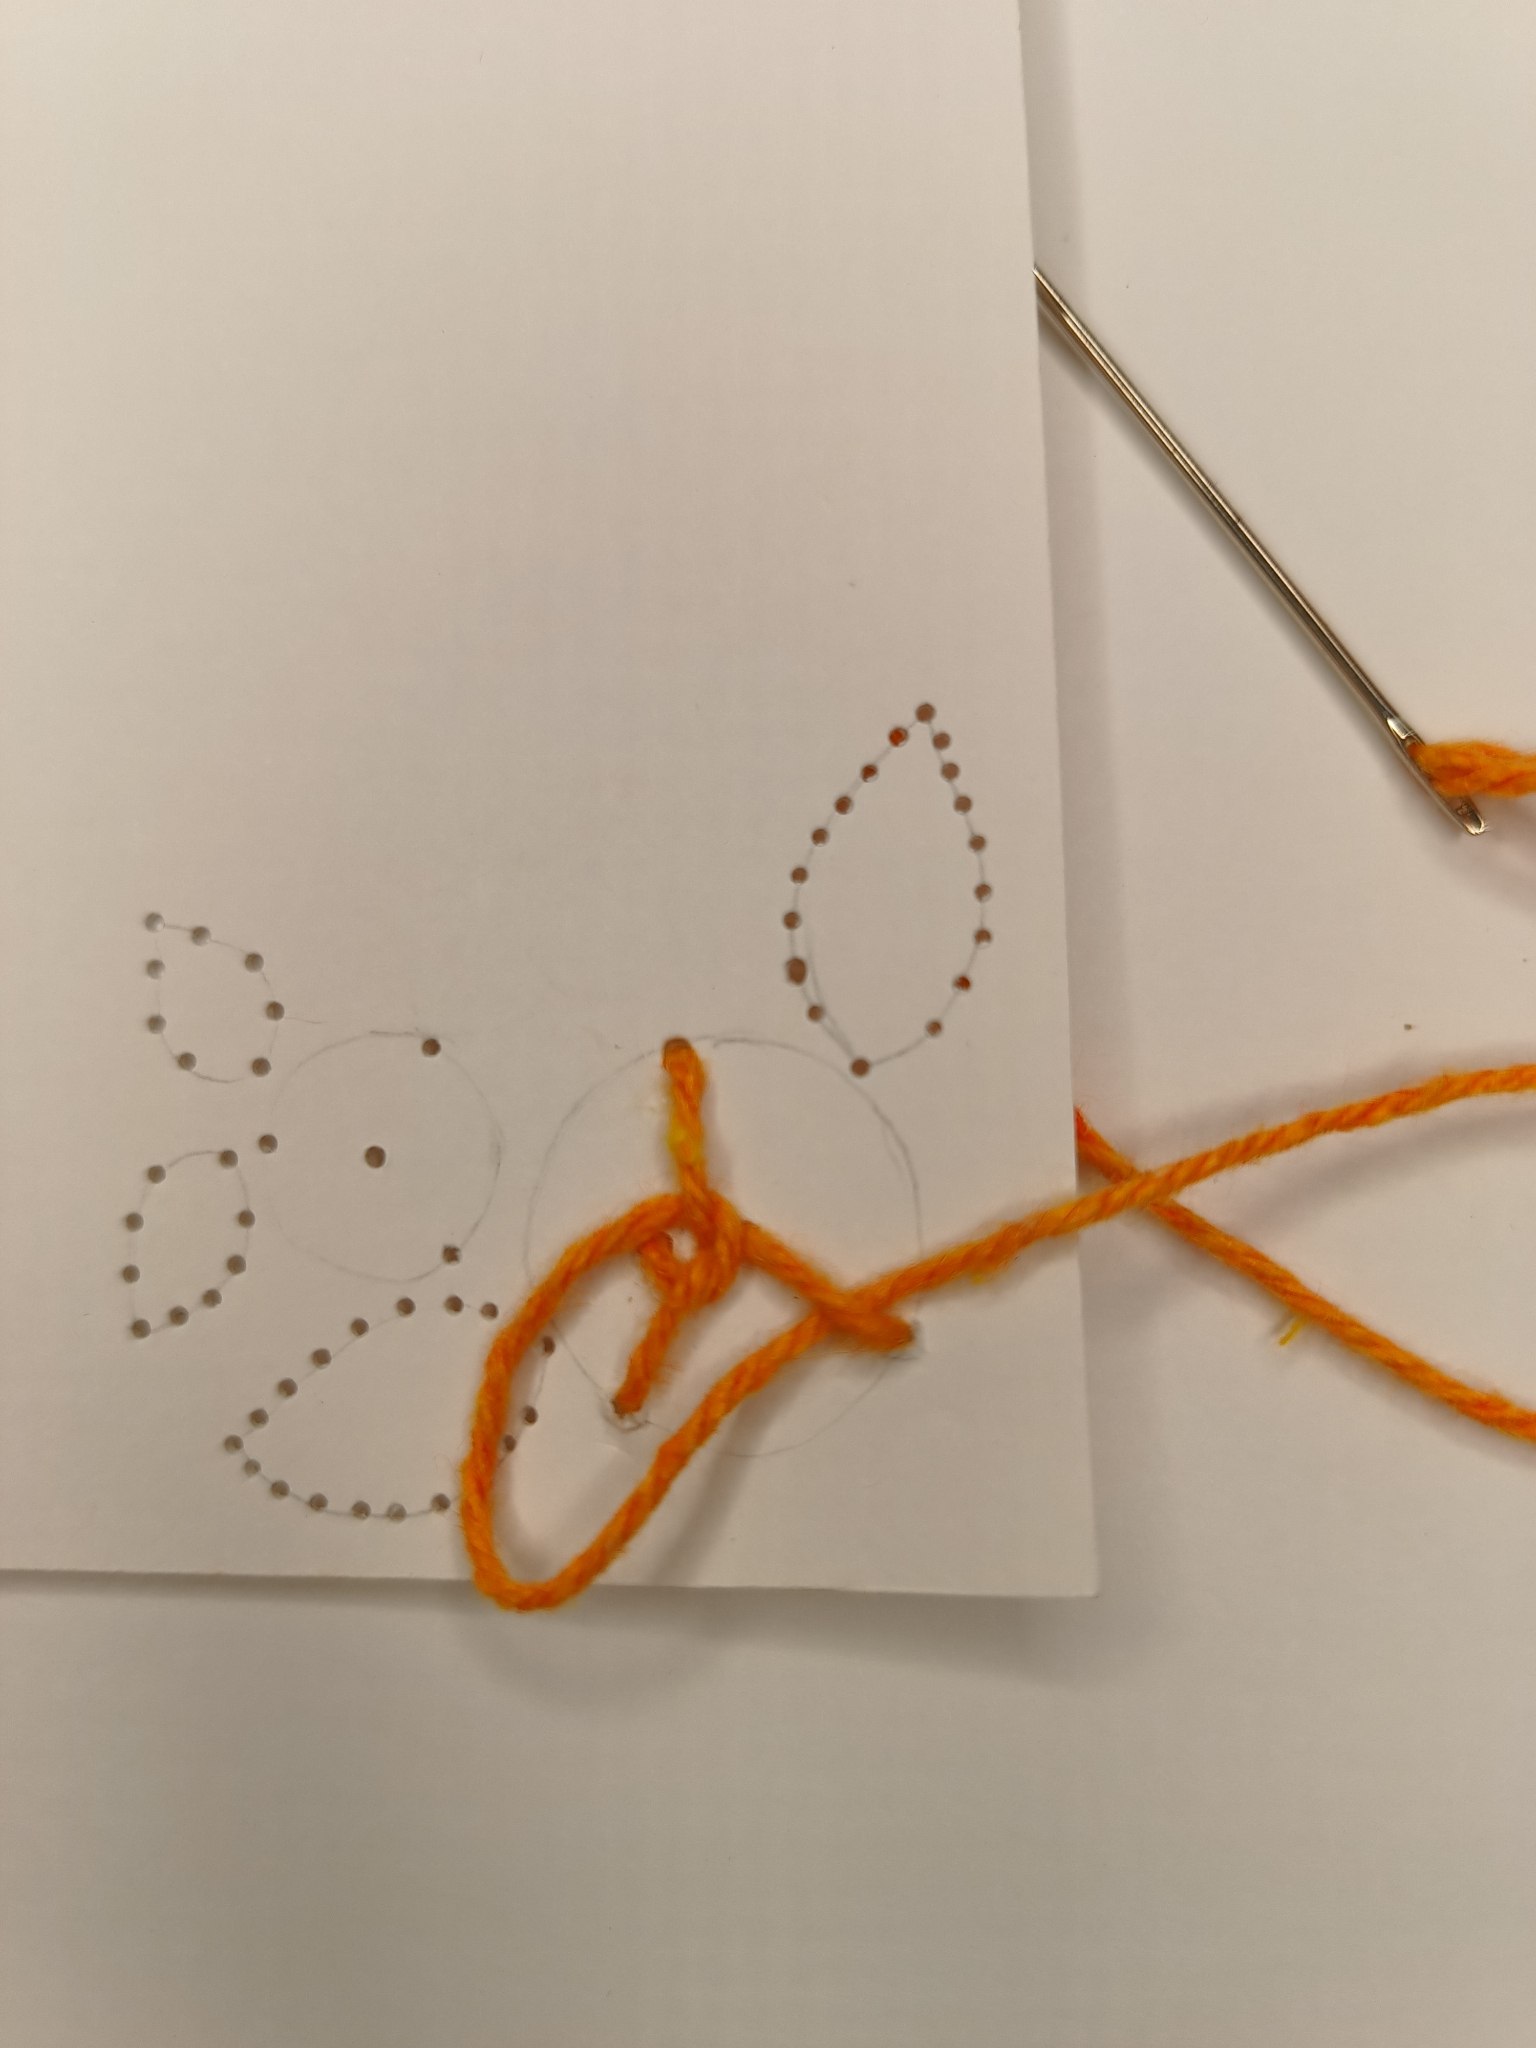
Hice una perforación más para poder pasar la aguja de atrás hacia adelante justo al lado del centro. Acto seguido, pasaremos por debajo de una de las puntadas que hicimos previamente, luego por encima de la siguiente inmediata y por debajo de la que resta luego de esa.
> I made another hole so that I could pass the needle from back to front right next to the center. Next, we will pass under one of the stitches we made previously, then over the next one, and under the one after that.
 | 
--- | ---
 | 
--- | ---
 | 
--- | ---
Patrón bordado de rosa / Embroidered rose pattern
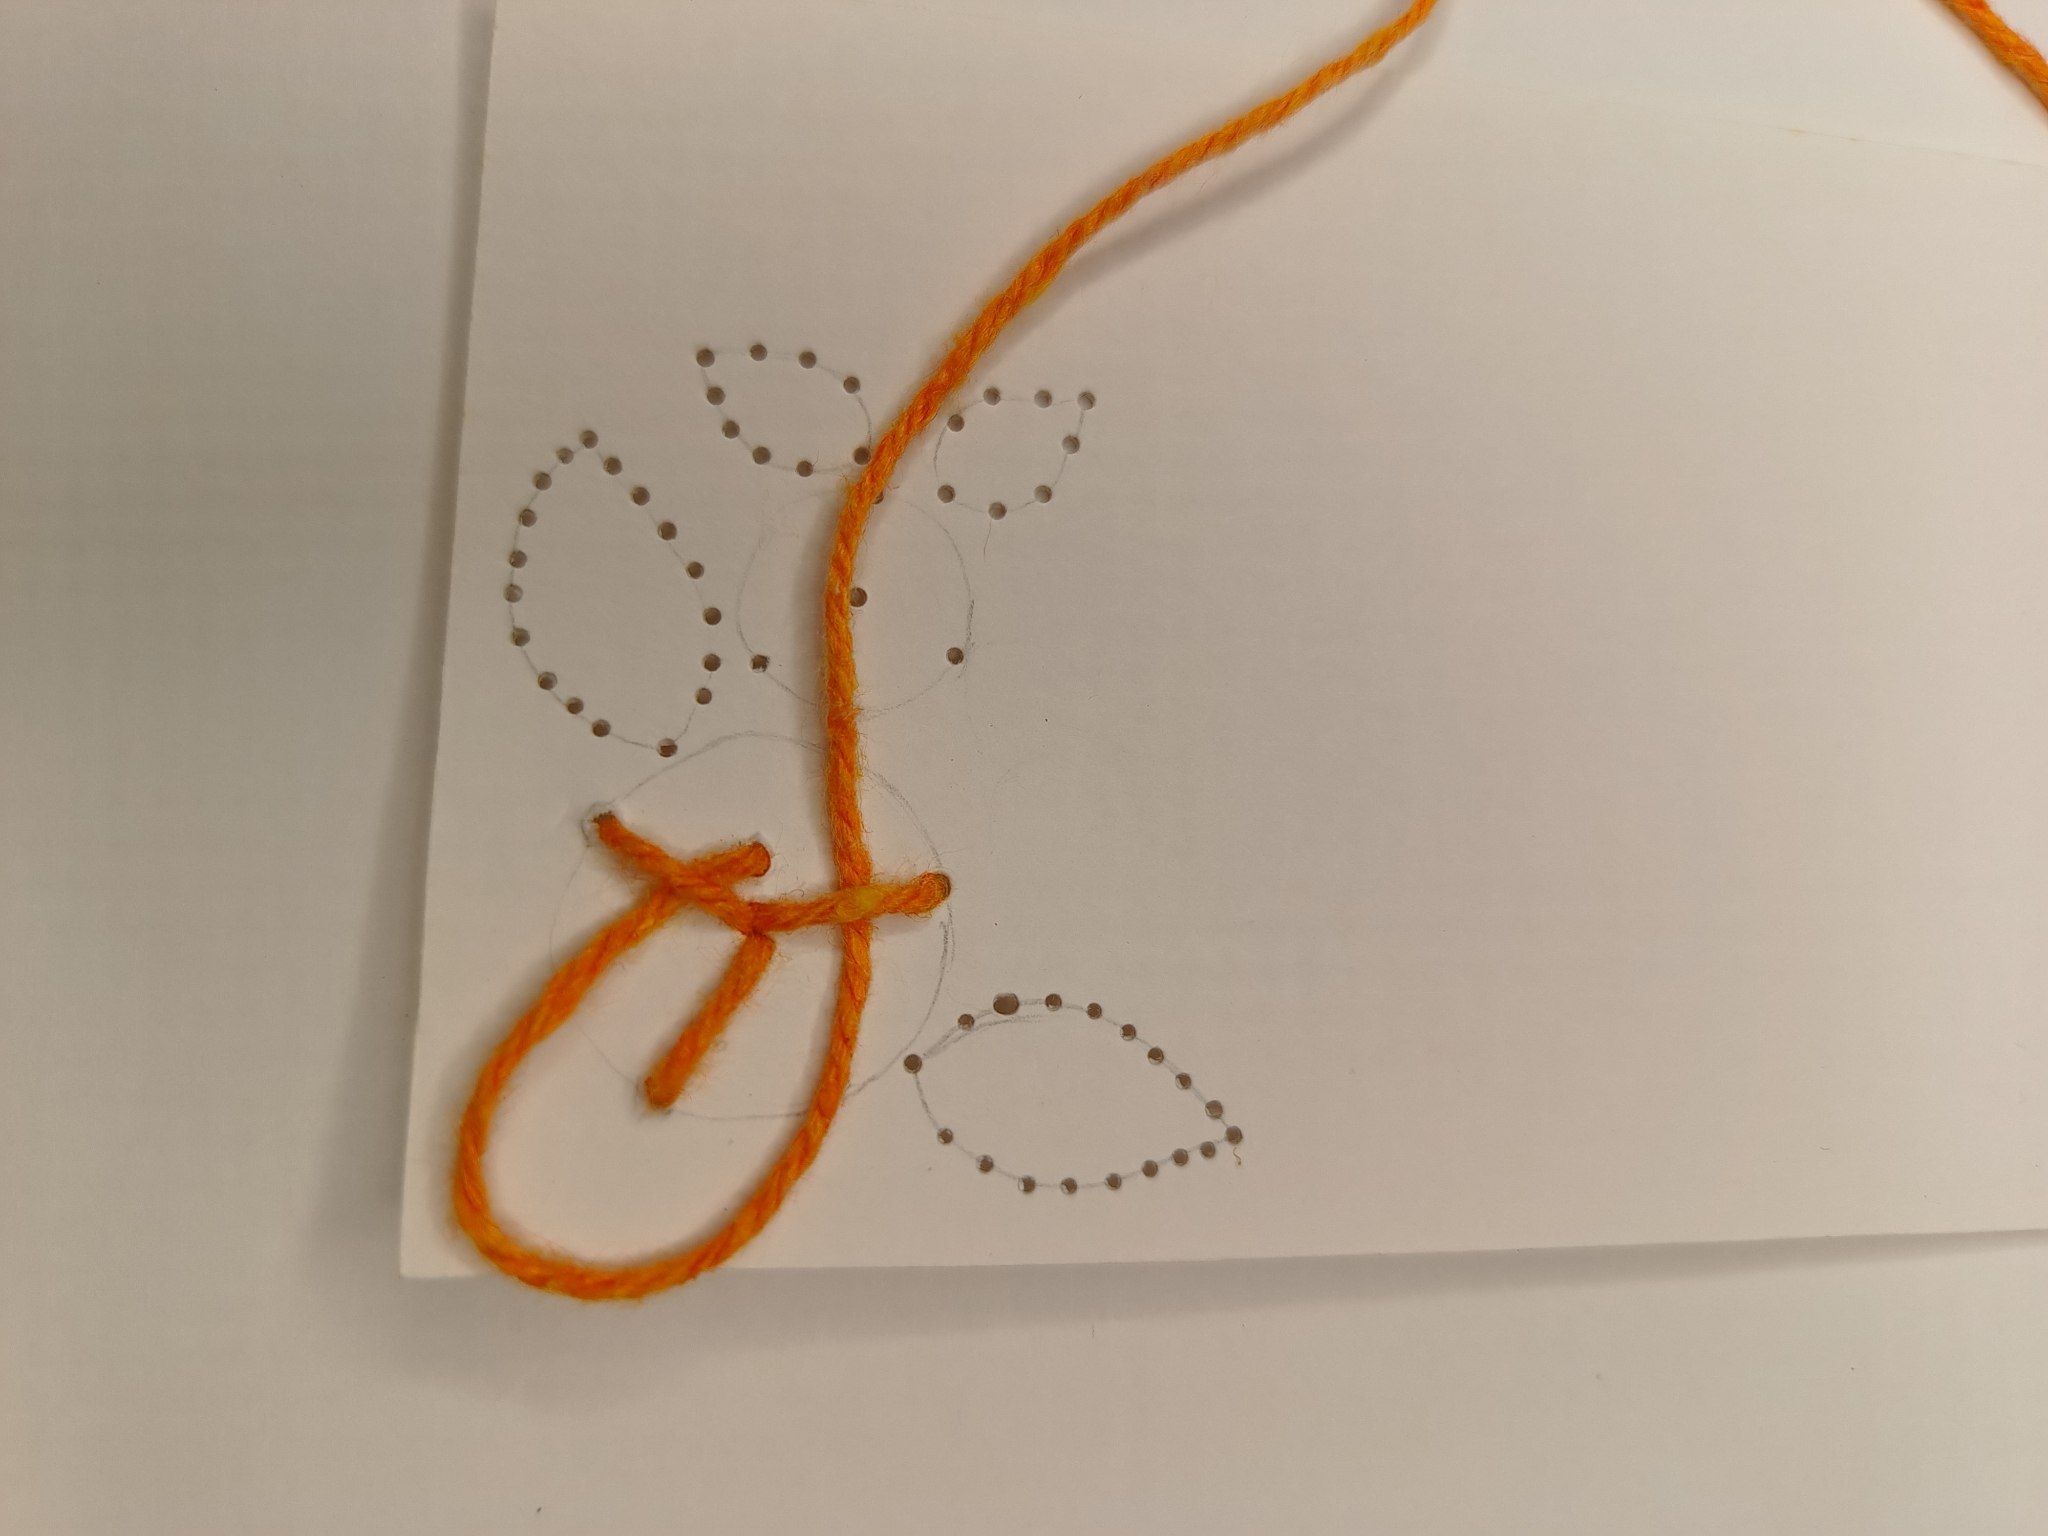
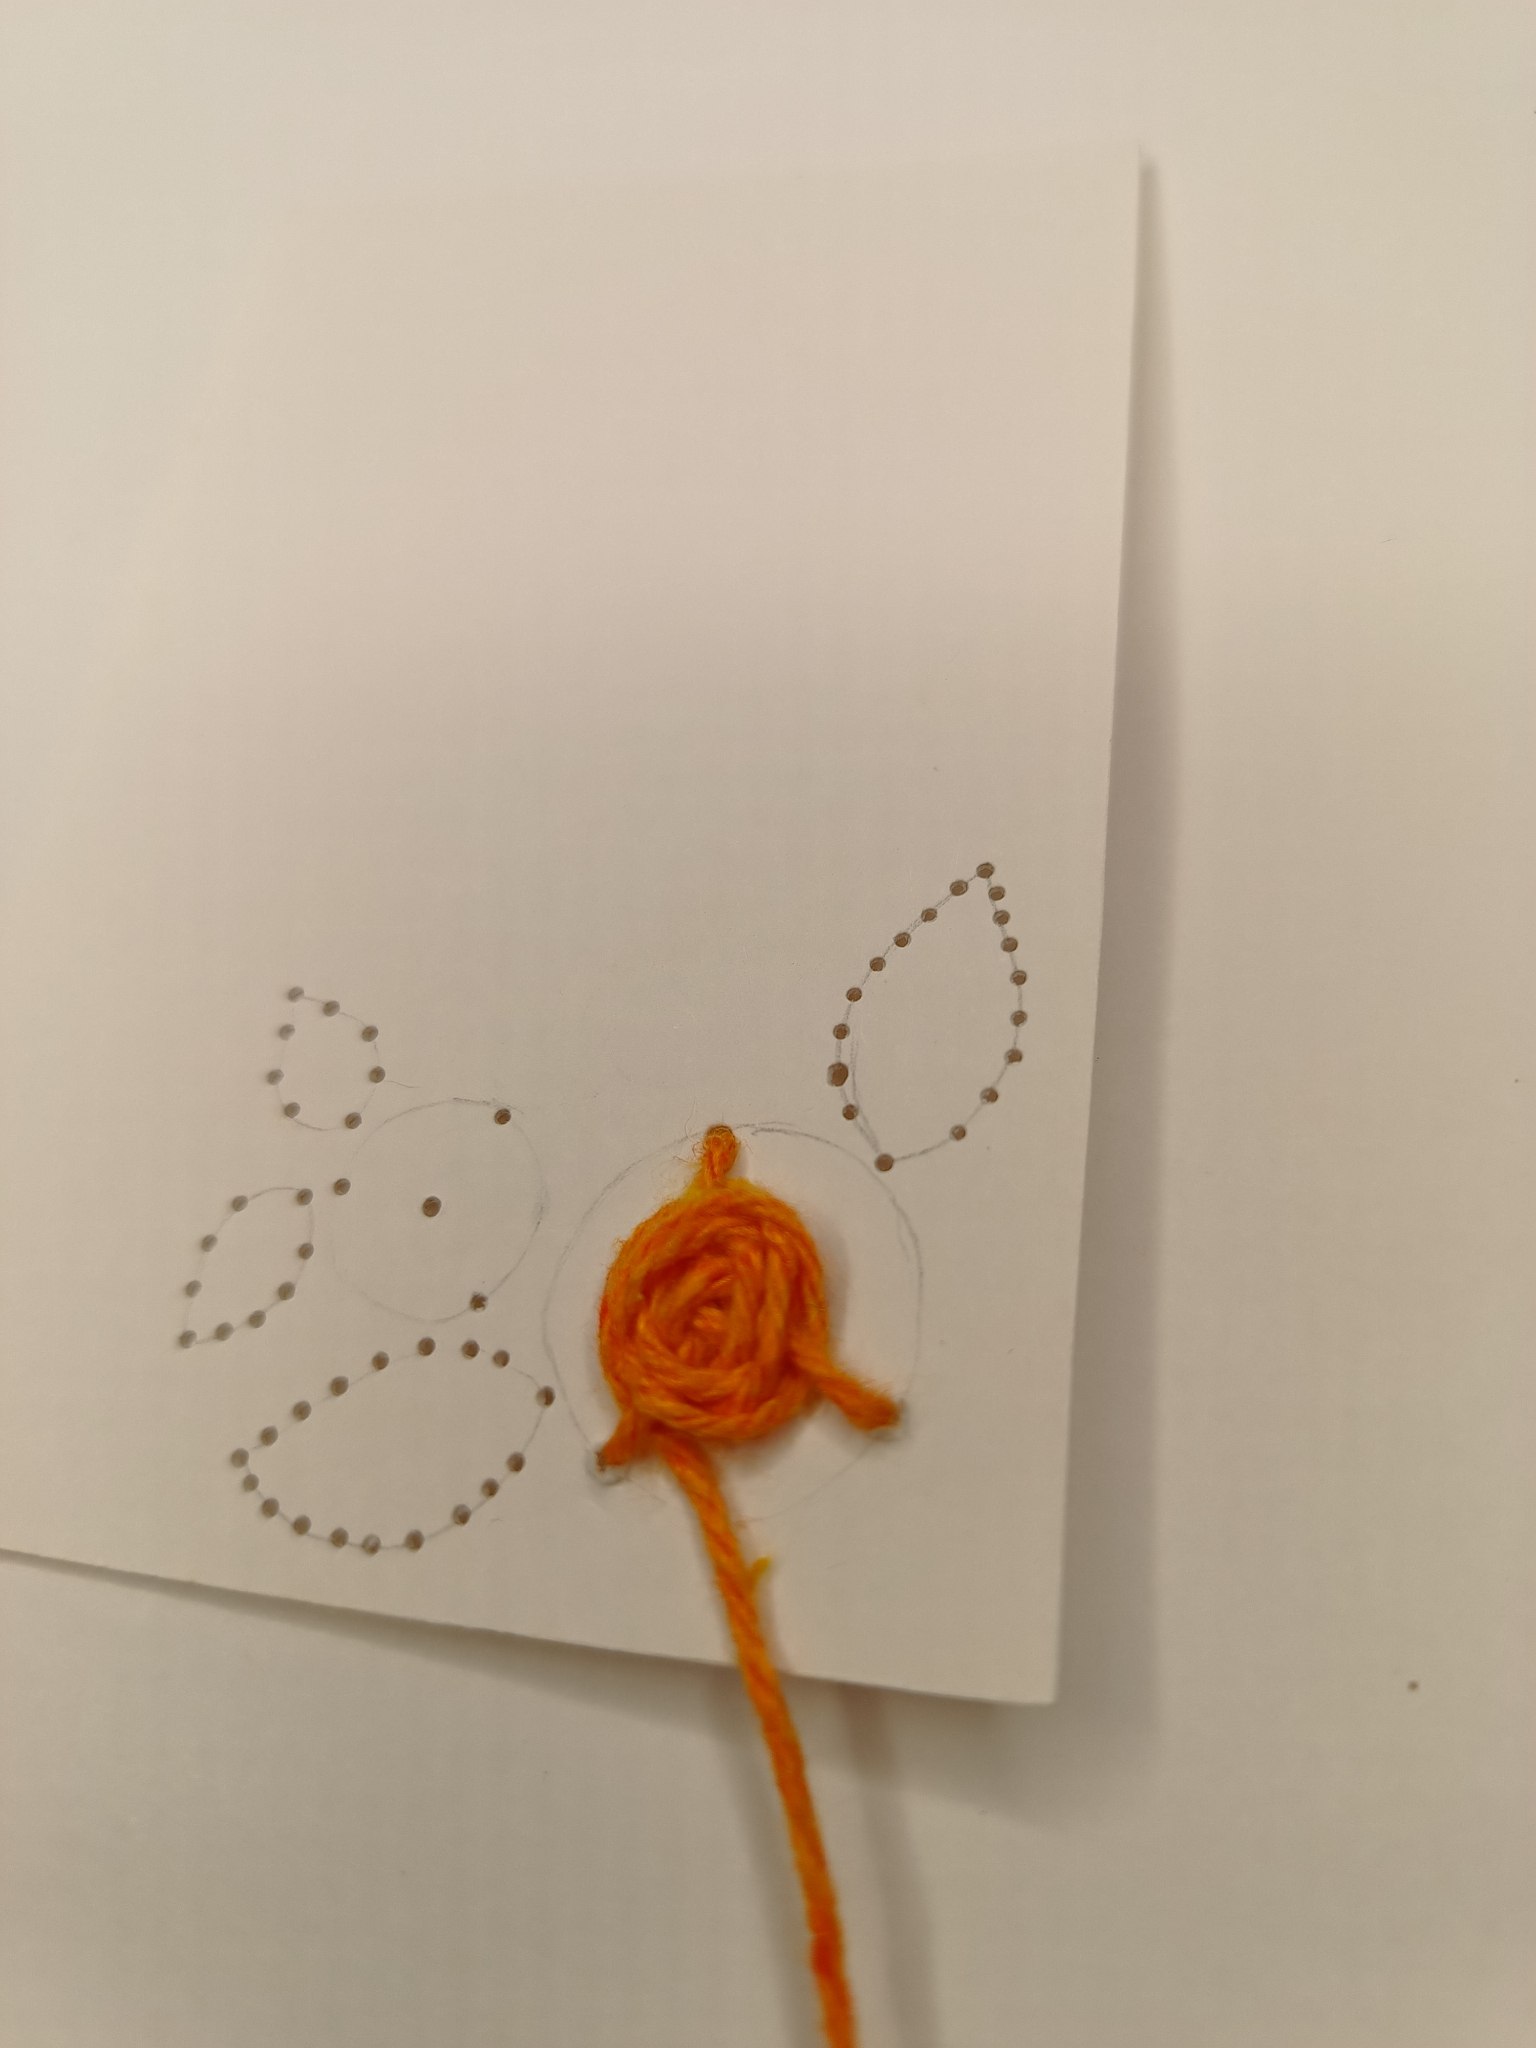
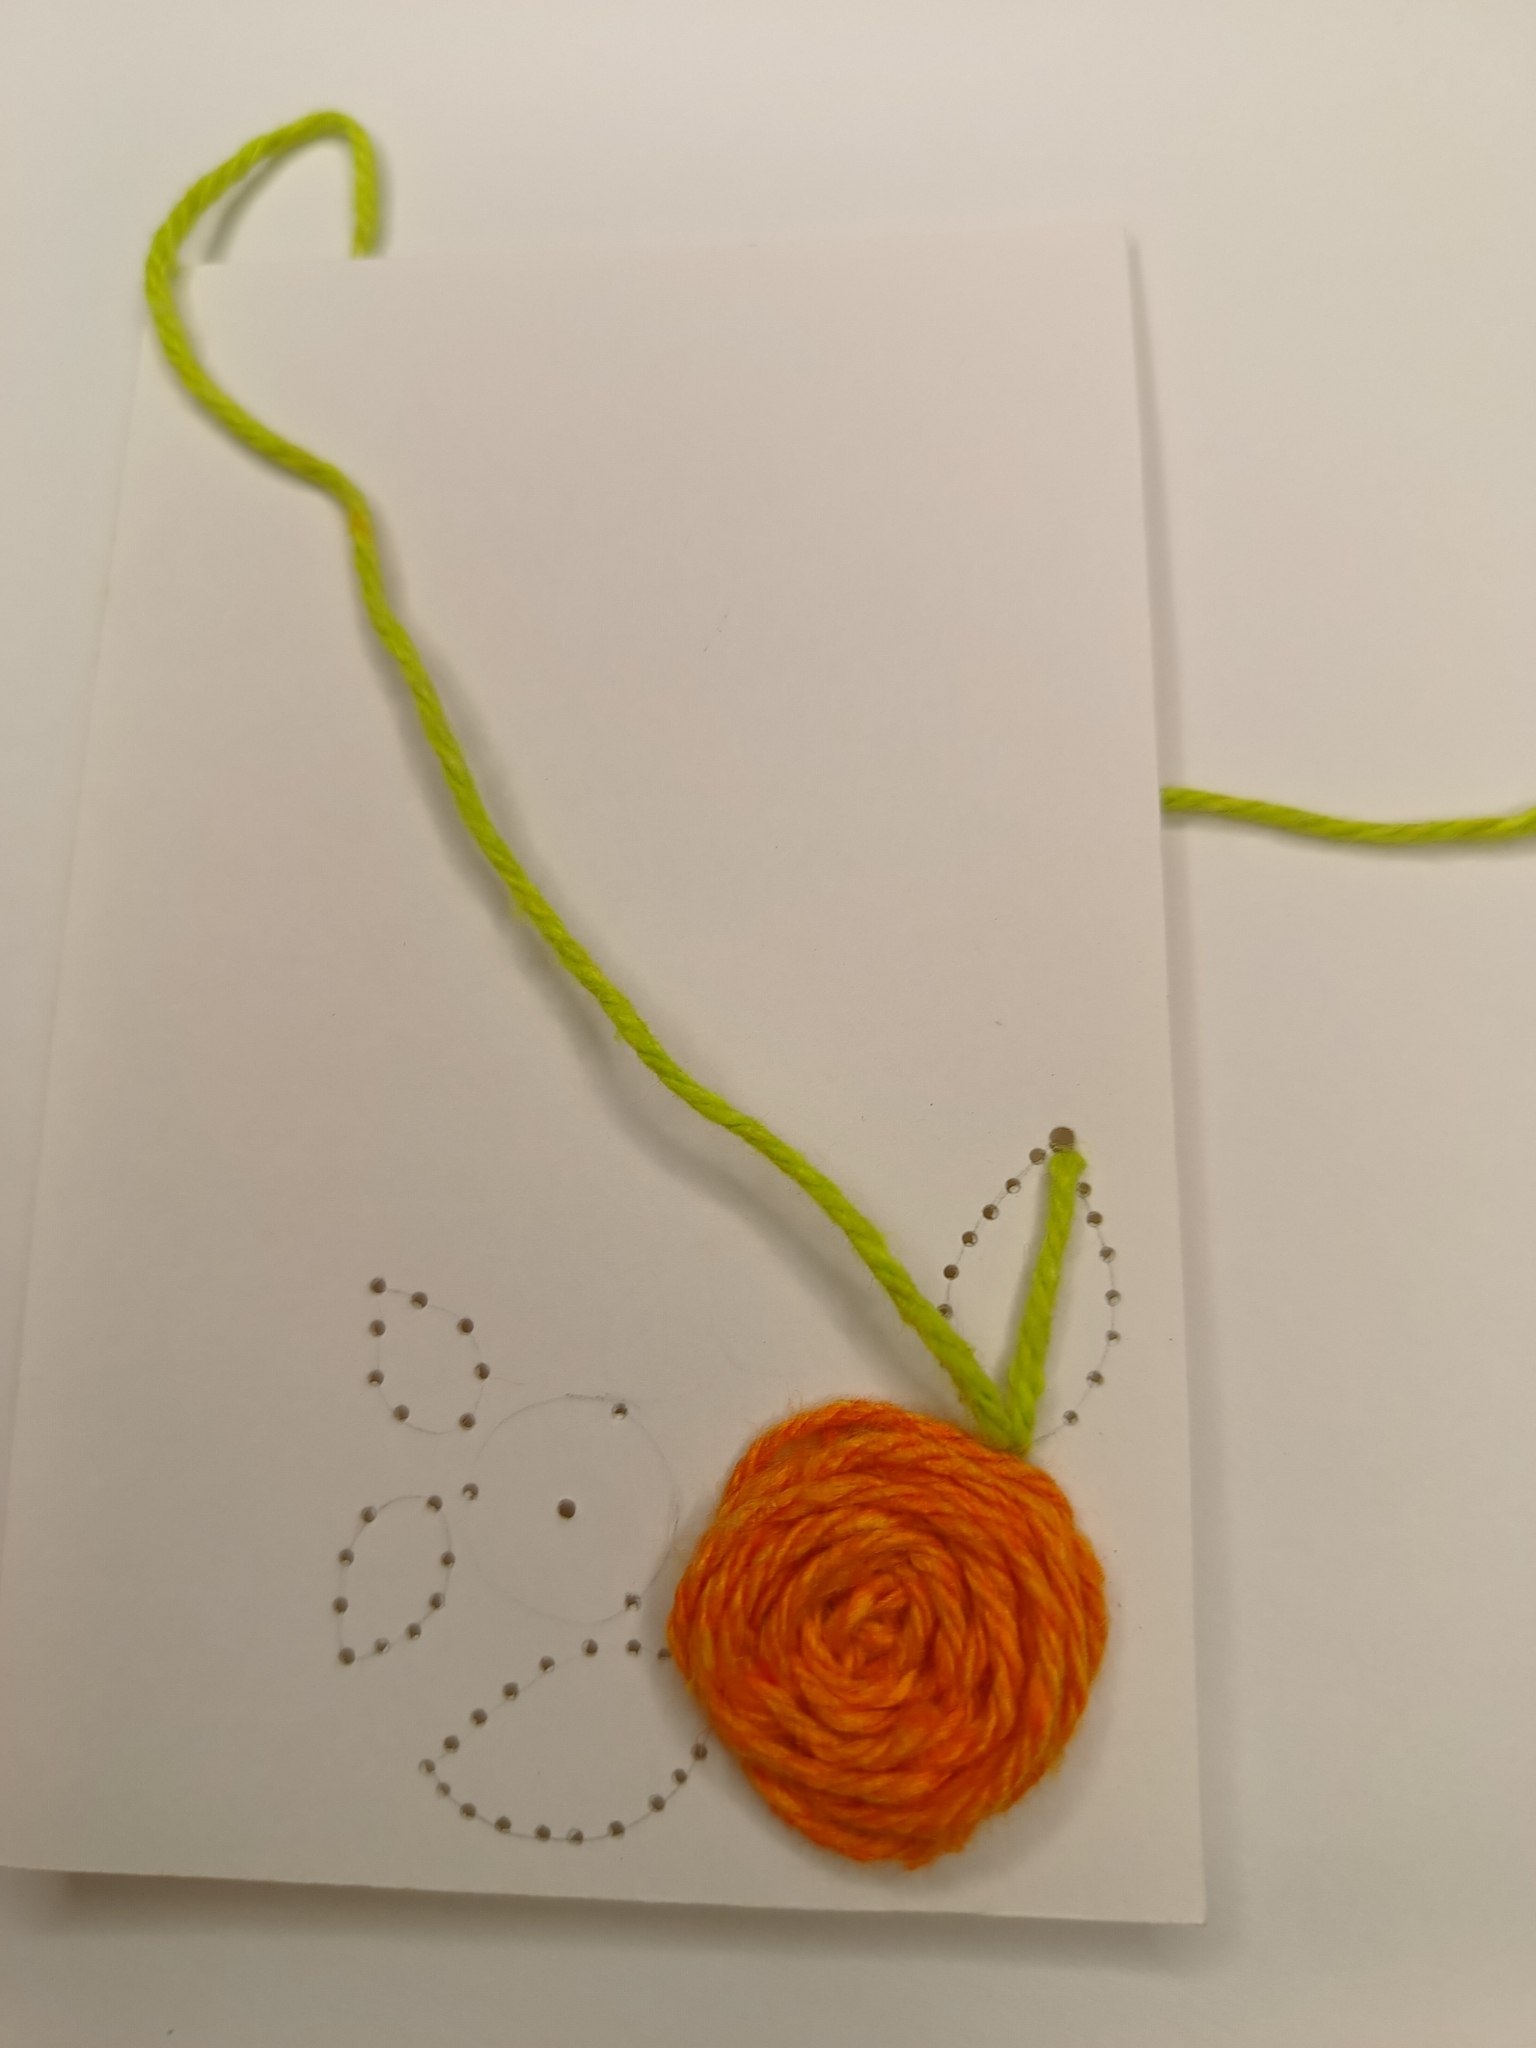
El paso anterior lo repetiremos, siempre alternado uno por encima y el siguiente por debajo hasta que ocupemos todo el espacio de la rosa que dibujamos en el boceto, al llegar a este punto, introducimos la aguja de adelante hacia atrás por el orificio del contorno más cercano y anudamos por la parte de atrás para asegurar el bordado.
> We will repeat the previous step, alternating between one above and the next below until we fill the entire space of the rose we drew in the sketch. At this point, we insert the needle from front to back through the nearest outline hole and knot it at the back to secure the embroidery.
 |  | 
--- | --- | ---
Rosa naranja terminada / Finished orange rose
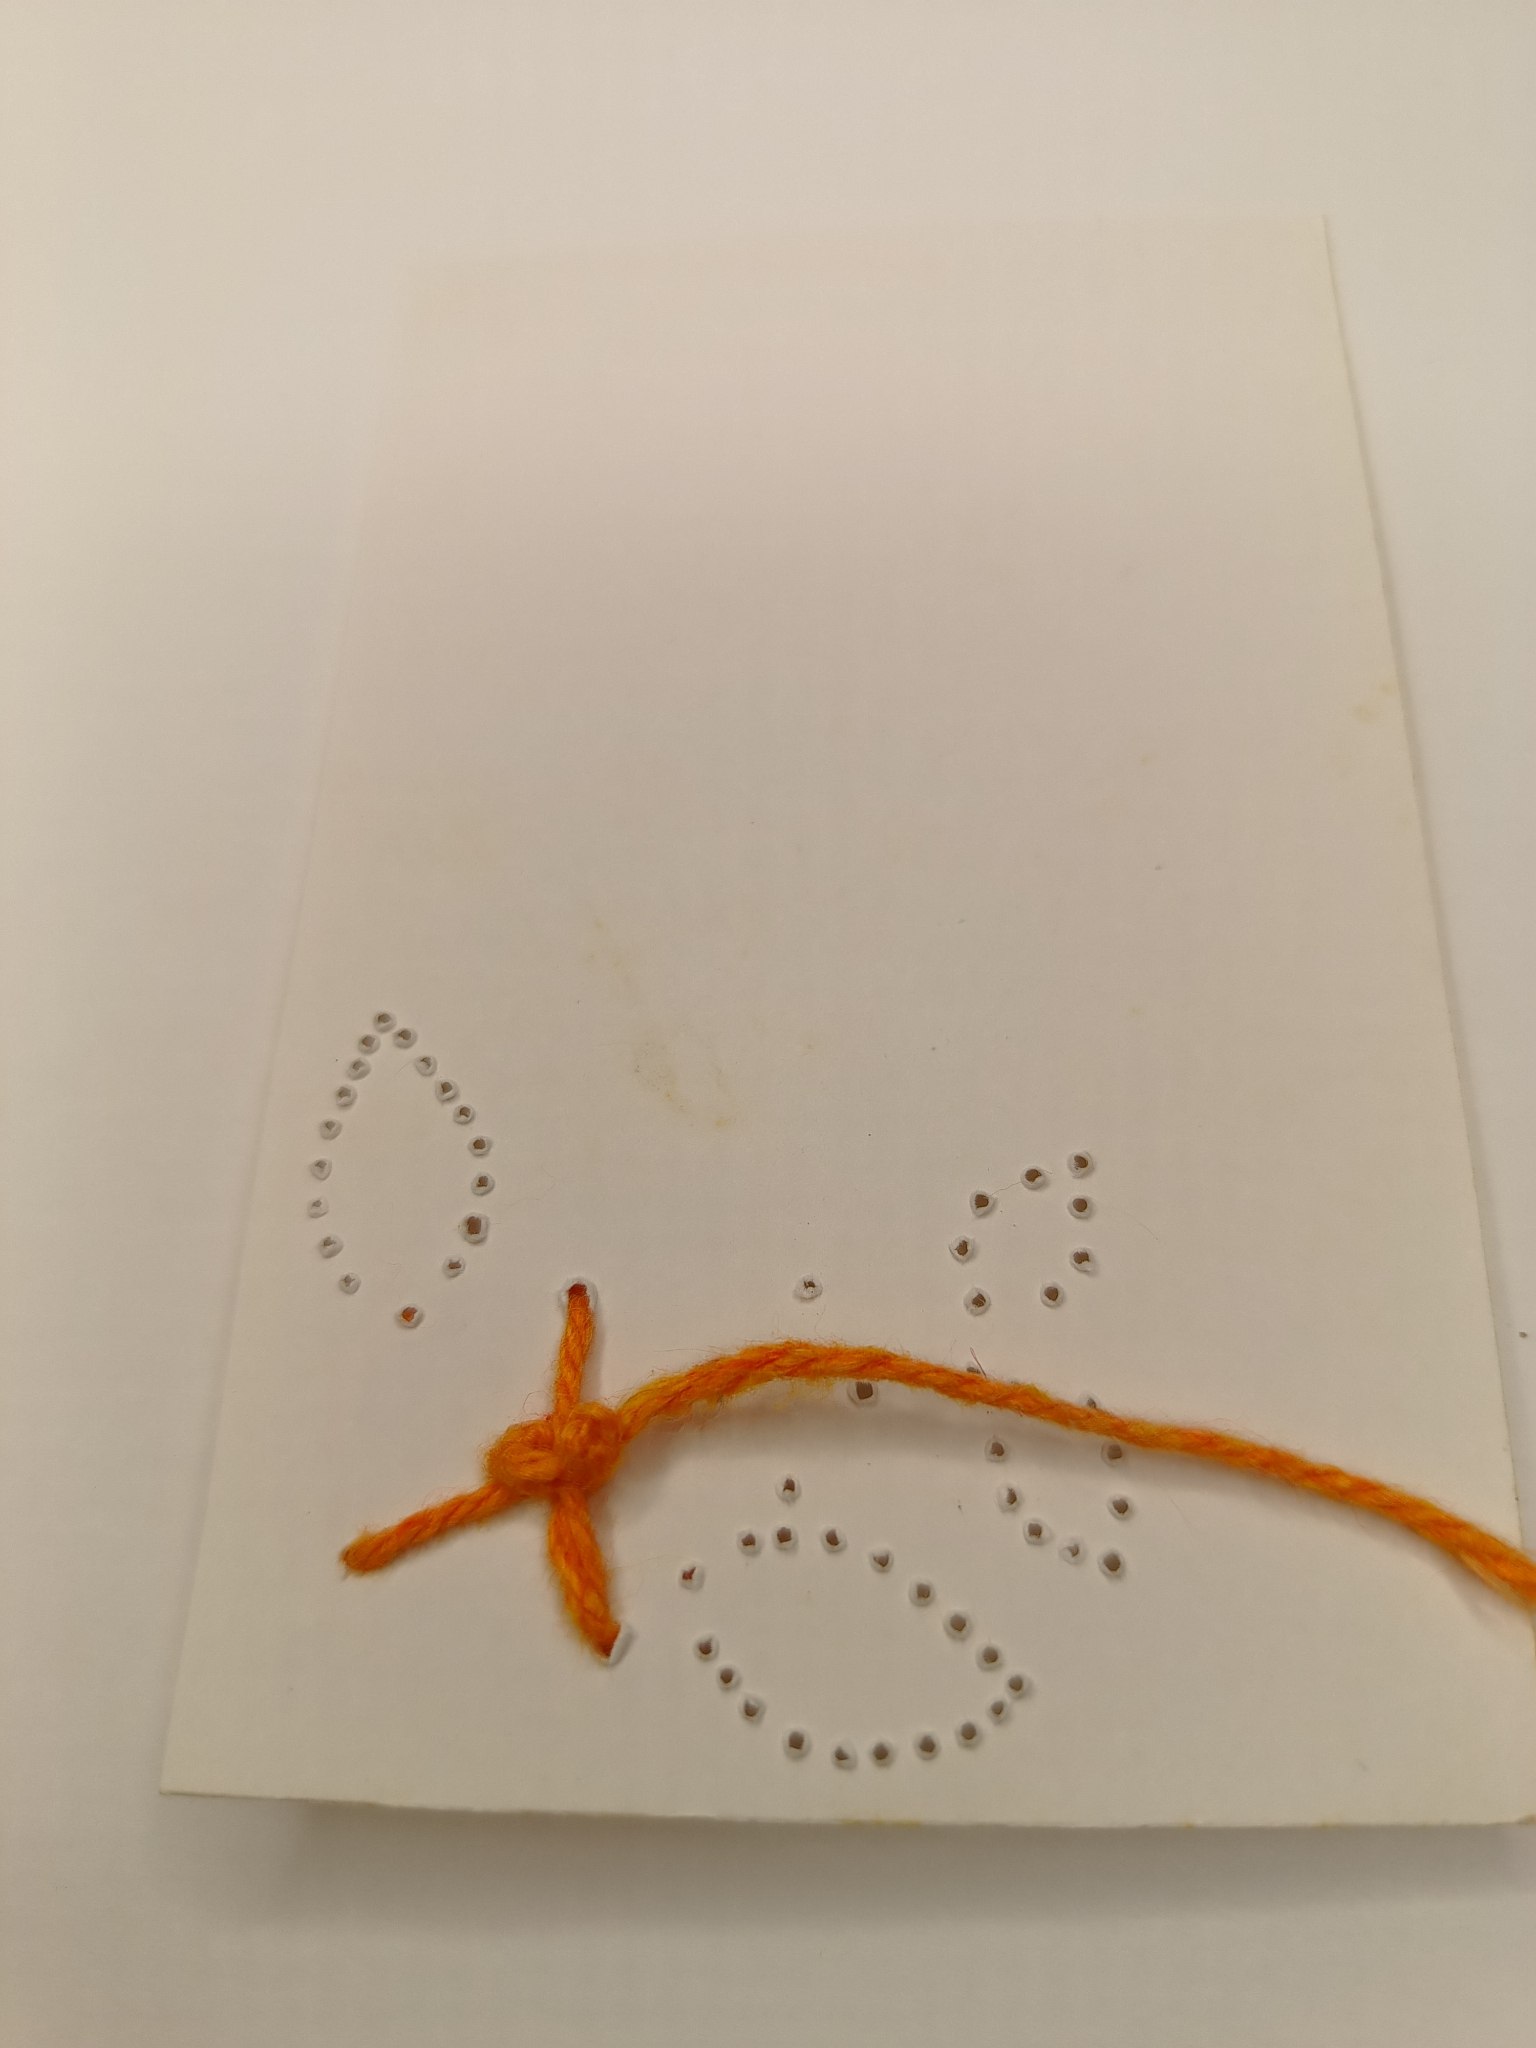
Para las hojas, tomaremos hilo color verde y lo colocaremos en la aguja anudando el otro extremo. Pasaremos la aguja de atrás hacia adelante en el orificio que se encuentra en la base de la hoja y ahora introducimos la aguja por el agujero en el extremo más lejano de la hoja justo al frente del primero.
> For the leaves, take green thread and place it in the needle, tying a knot at the other end. Pass the needle from back to front through the hole at the base of the leaf, and then insert the needle through the hole at the far end of the leaf, just in front of the first one.
 | 
--- | ---
Inicio bordado de hoja / Start leaf embroidery
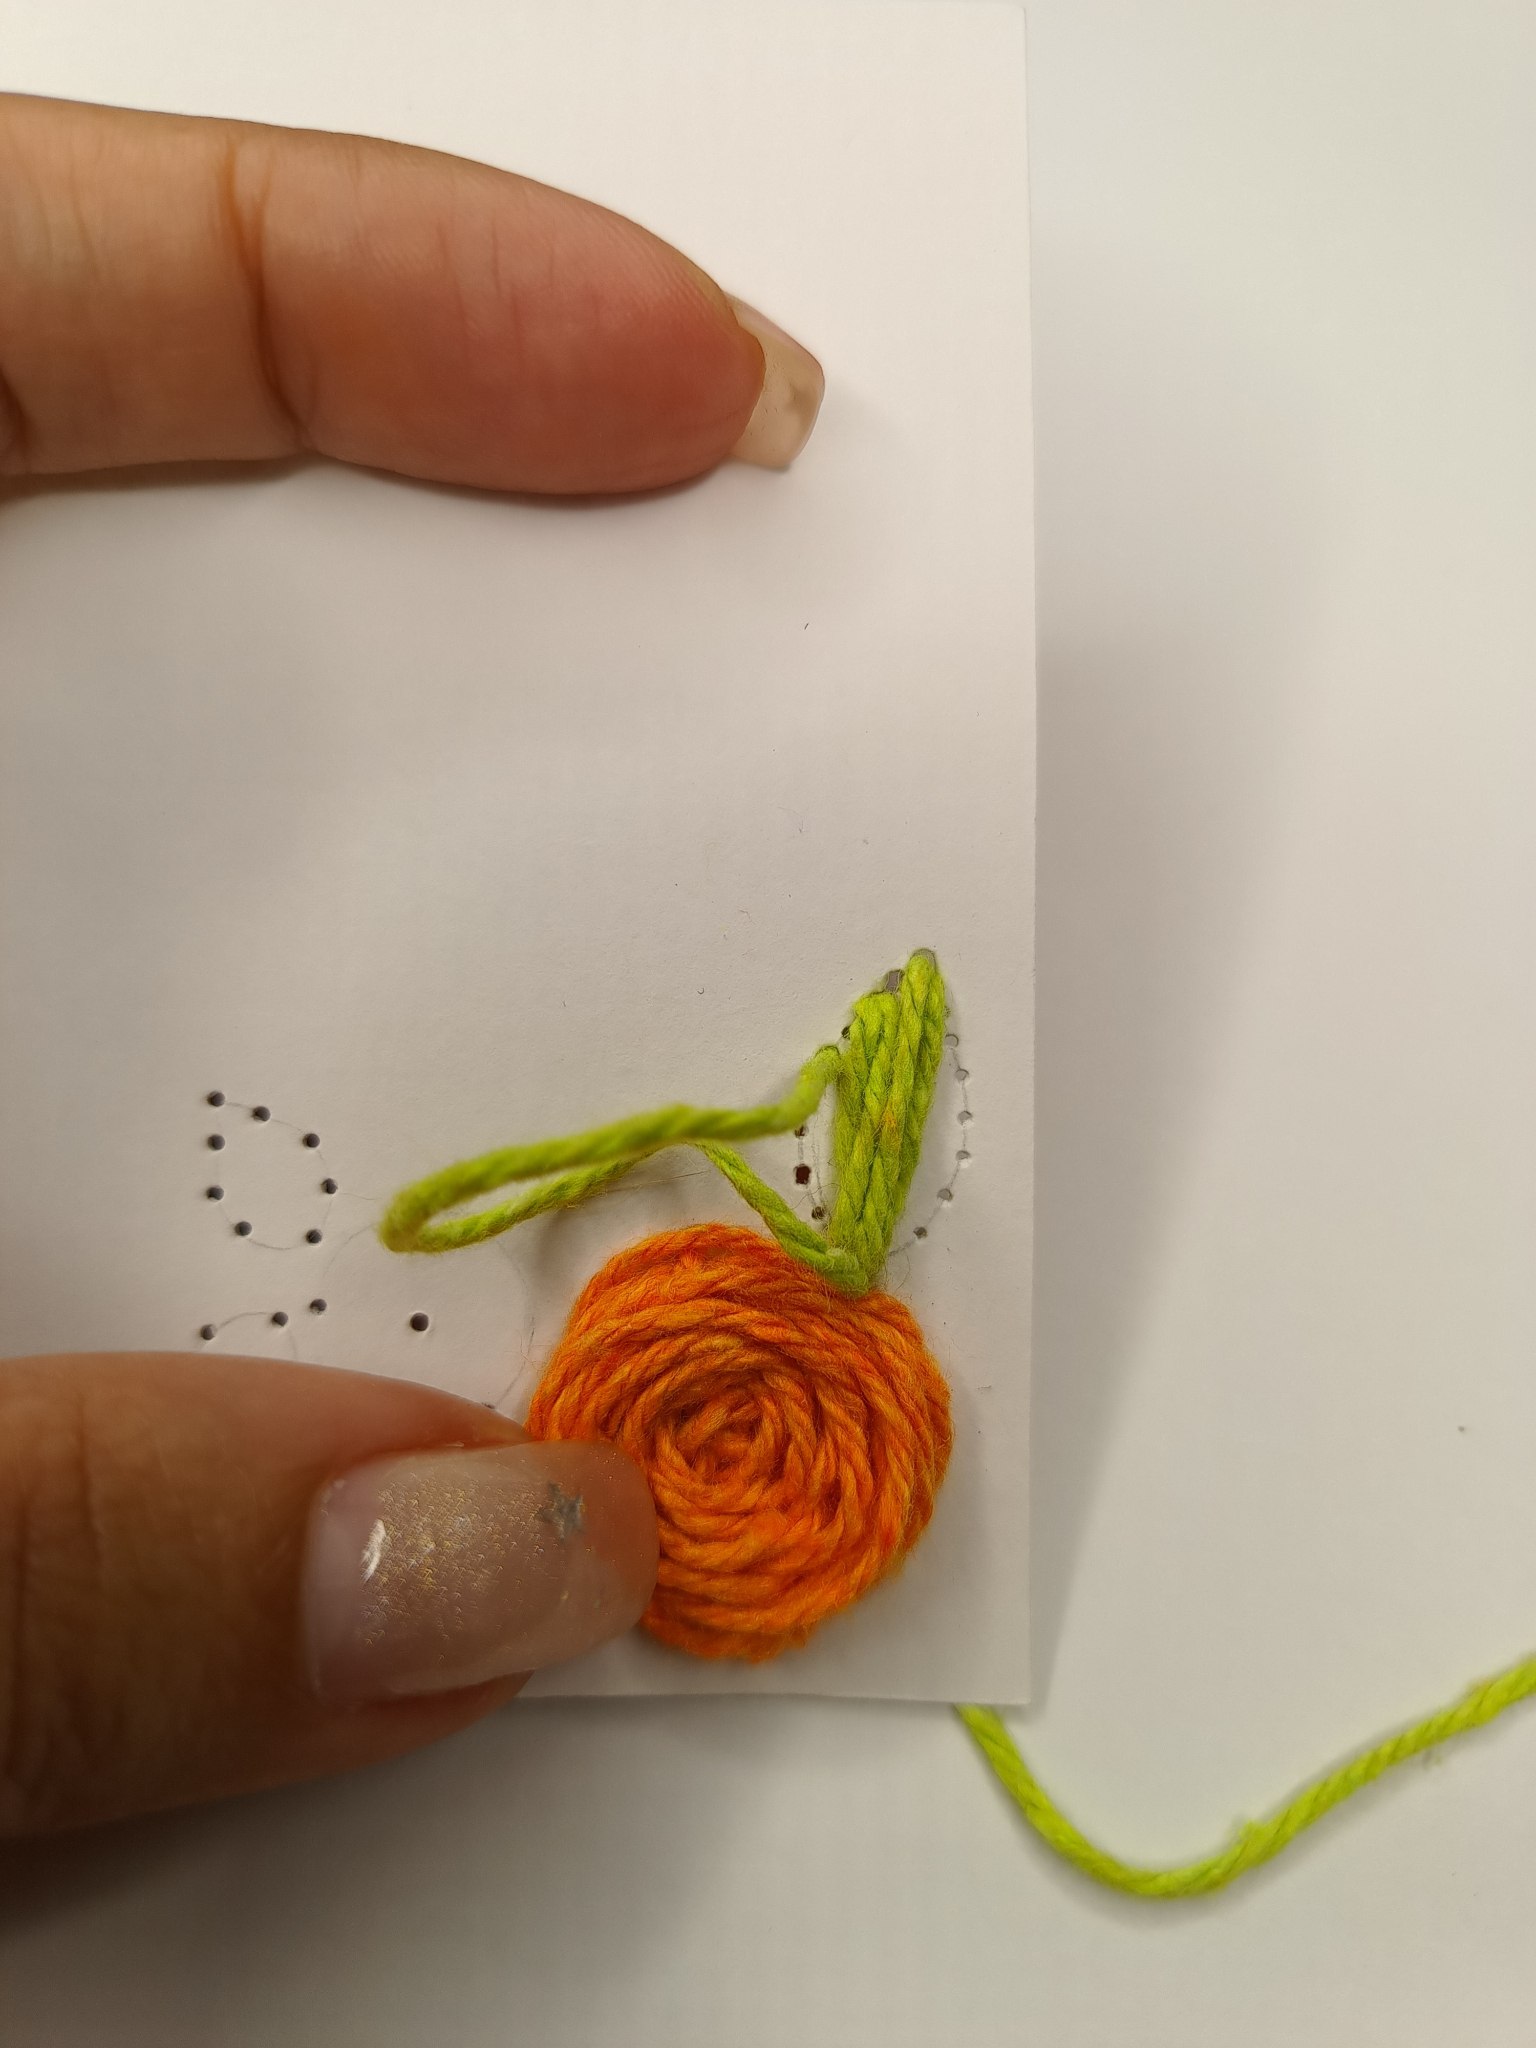
Una vez más pasaremos la aguja por el orificio inicial, solo que ahora la aguja irá devuelta por el agujero inmediato junto al central del frente. Repetiremos esto con cada agujero de un lado y luego con todos los de la otra mitad de la hoja y al terminar, anudamos en la parte trasera y recortamos el excedente.
> Once again, we will pass the needle through the initial hole, only now the needle will go back through the hole immediately next to the center hole at the front. We will repeat this with each hole on one side and then with all the holes on the other half of the sheet. When finished, we will tie a knot at the back and trim off the excess.
 | 
--- | ---
 | 
--- | ---
Hoja terminada / Completed sheet
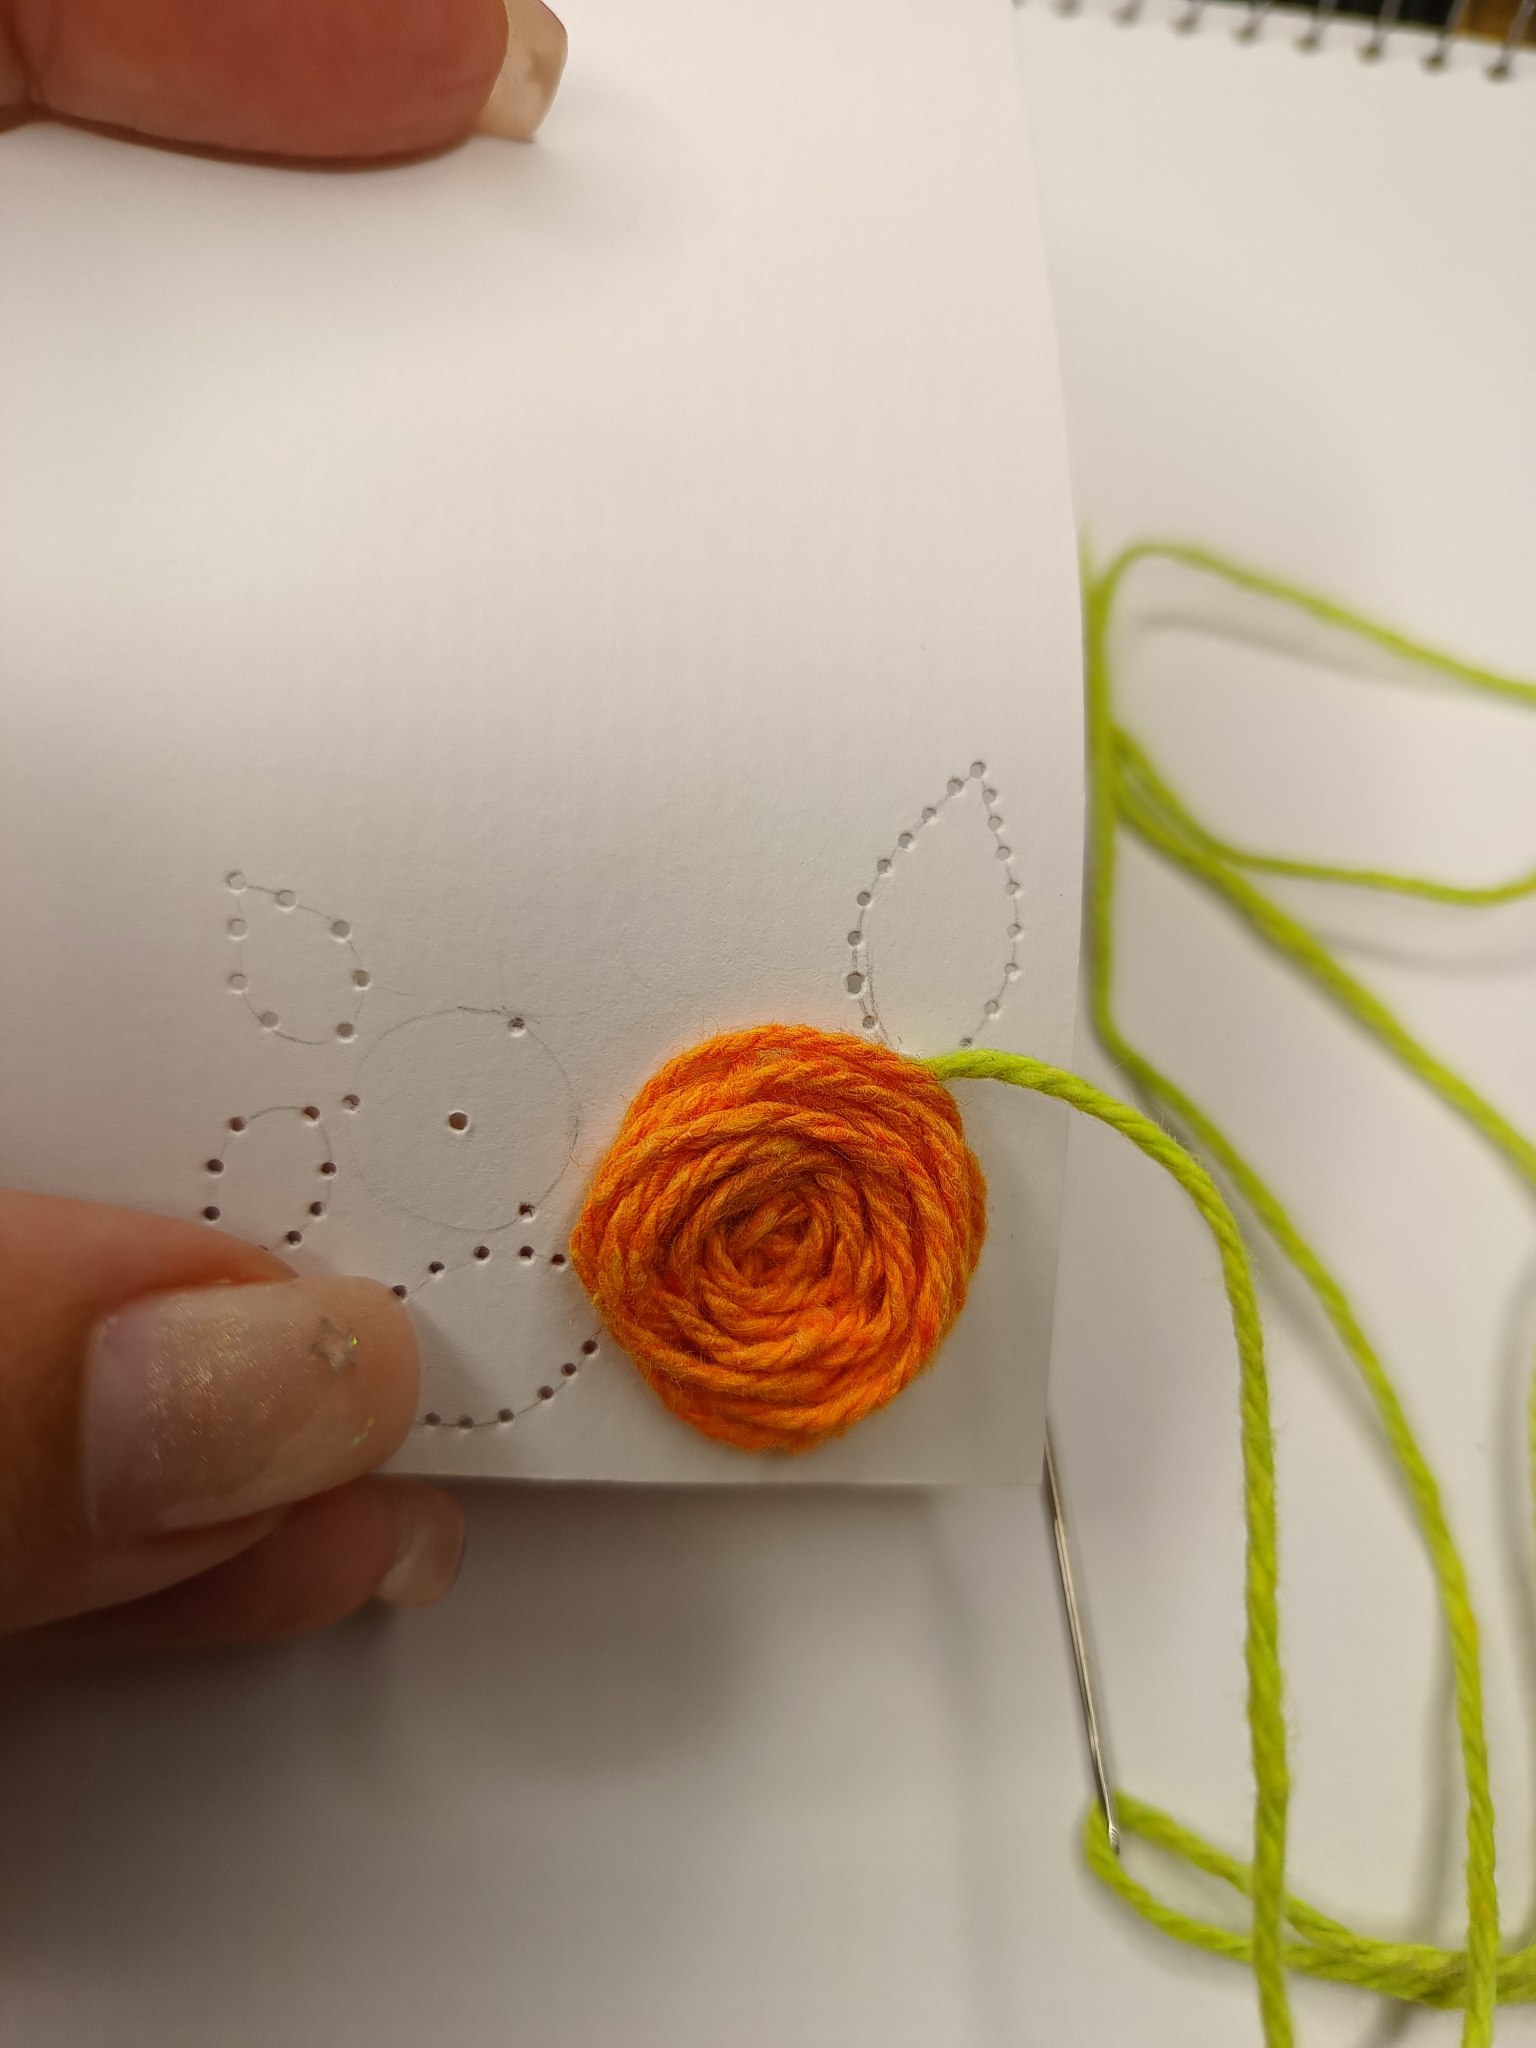
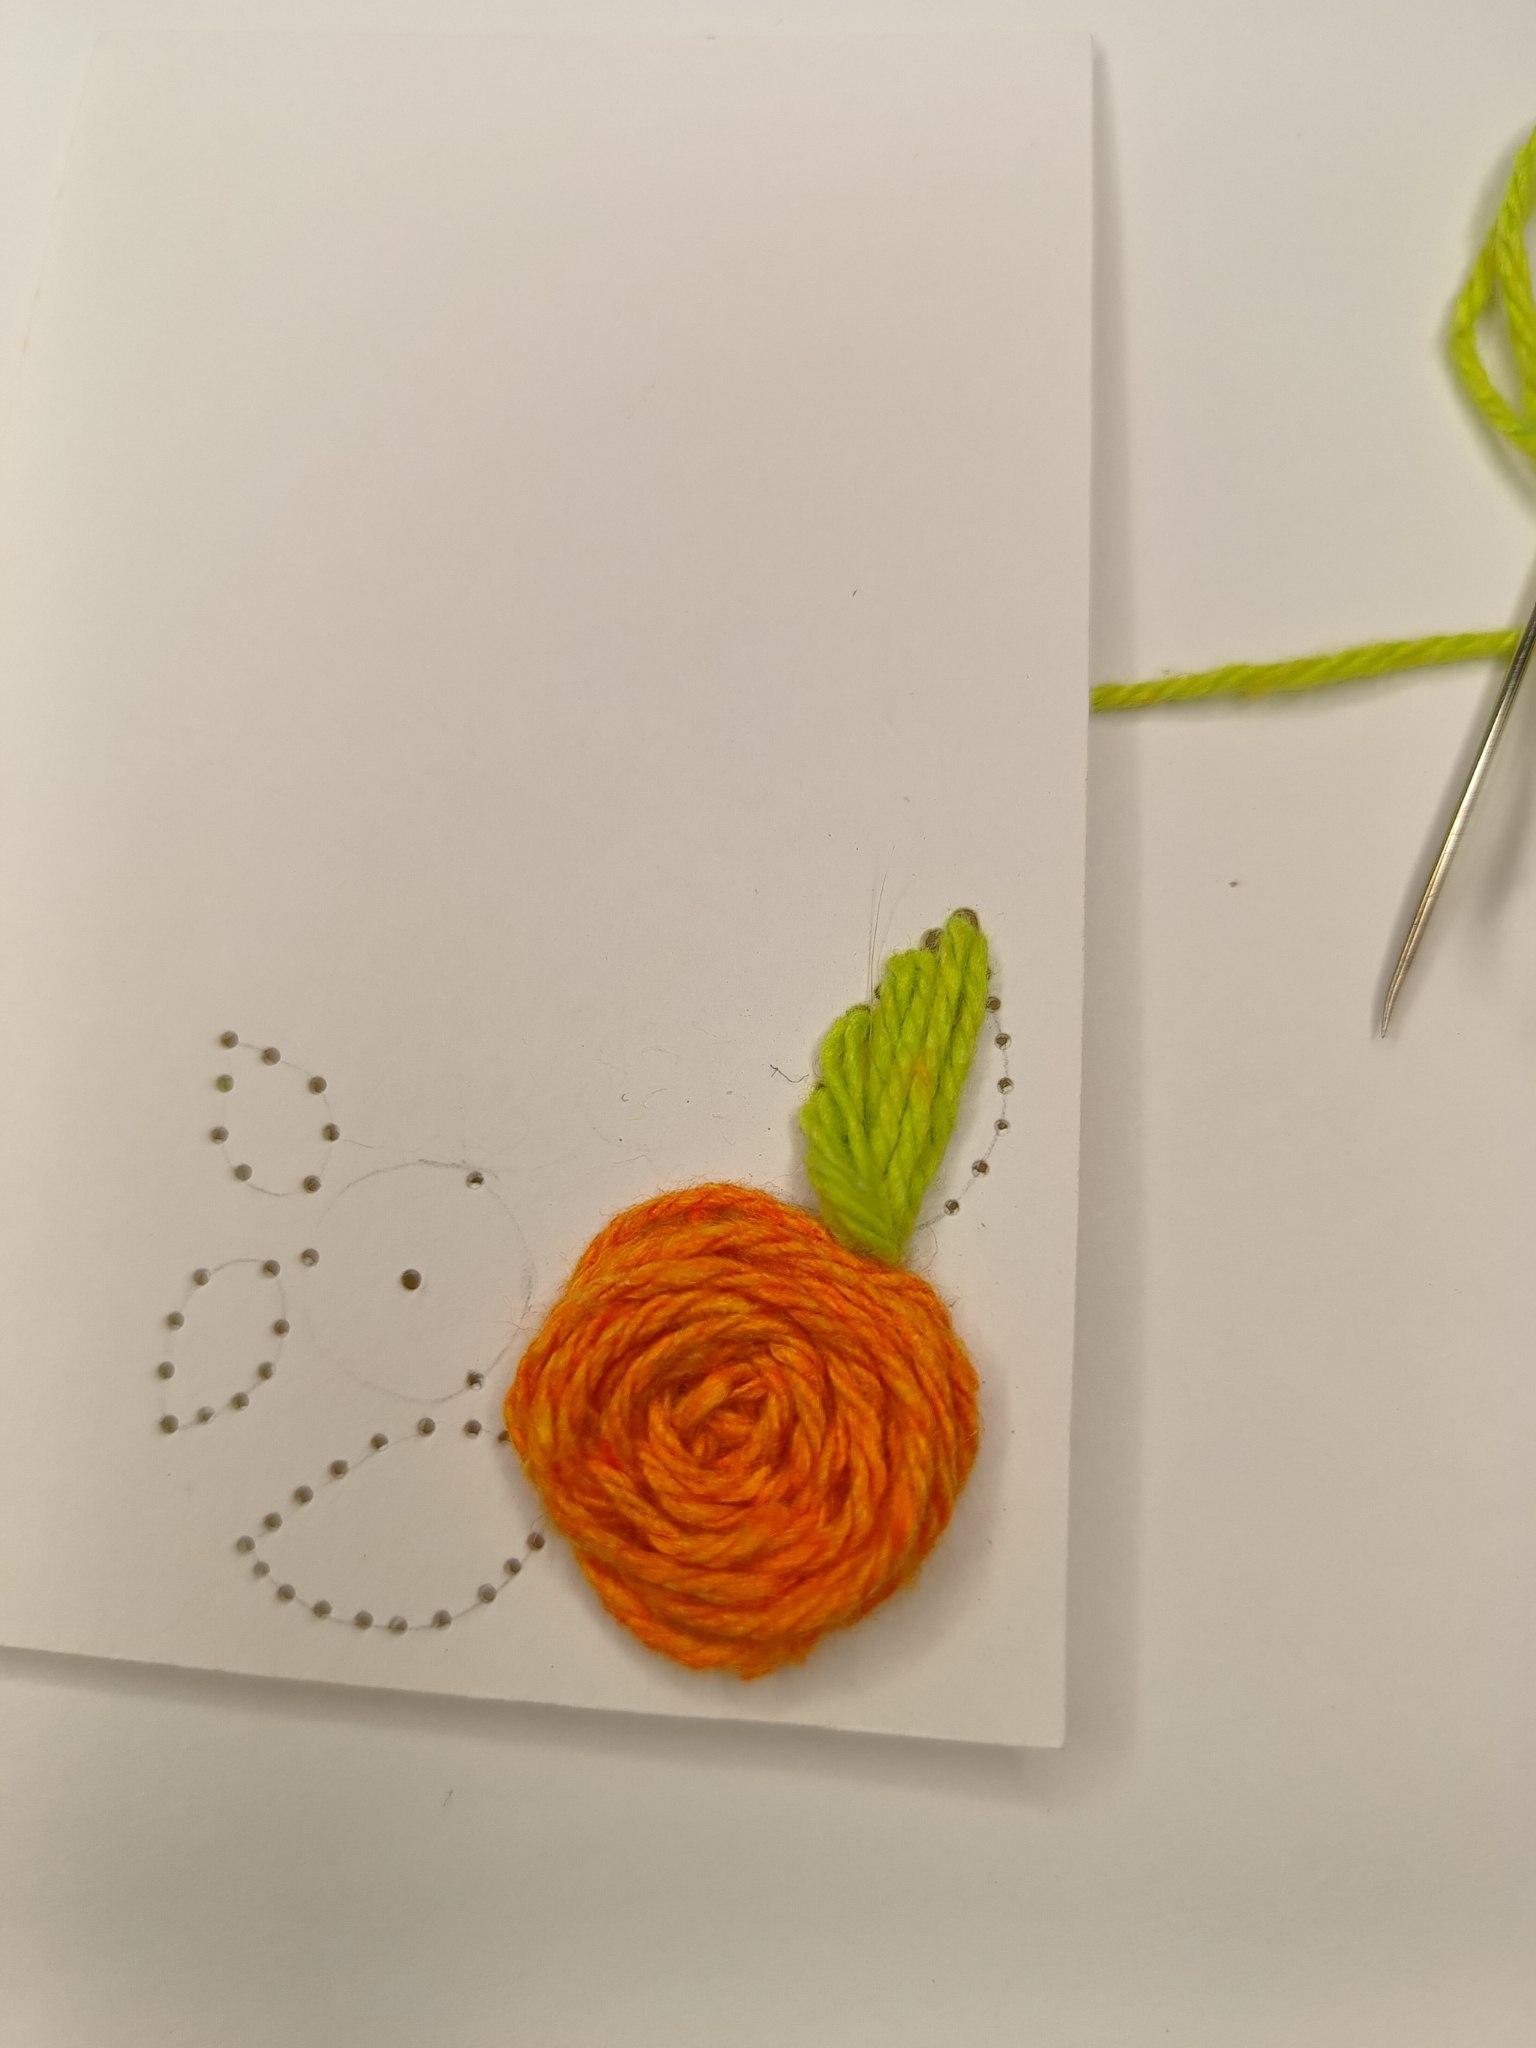
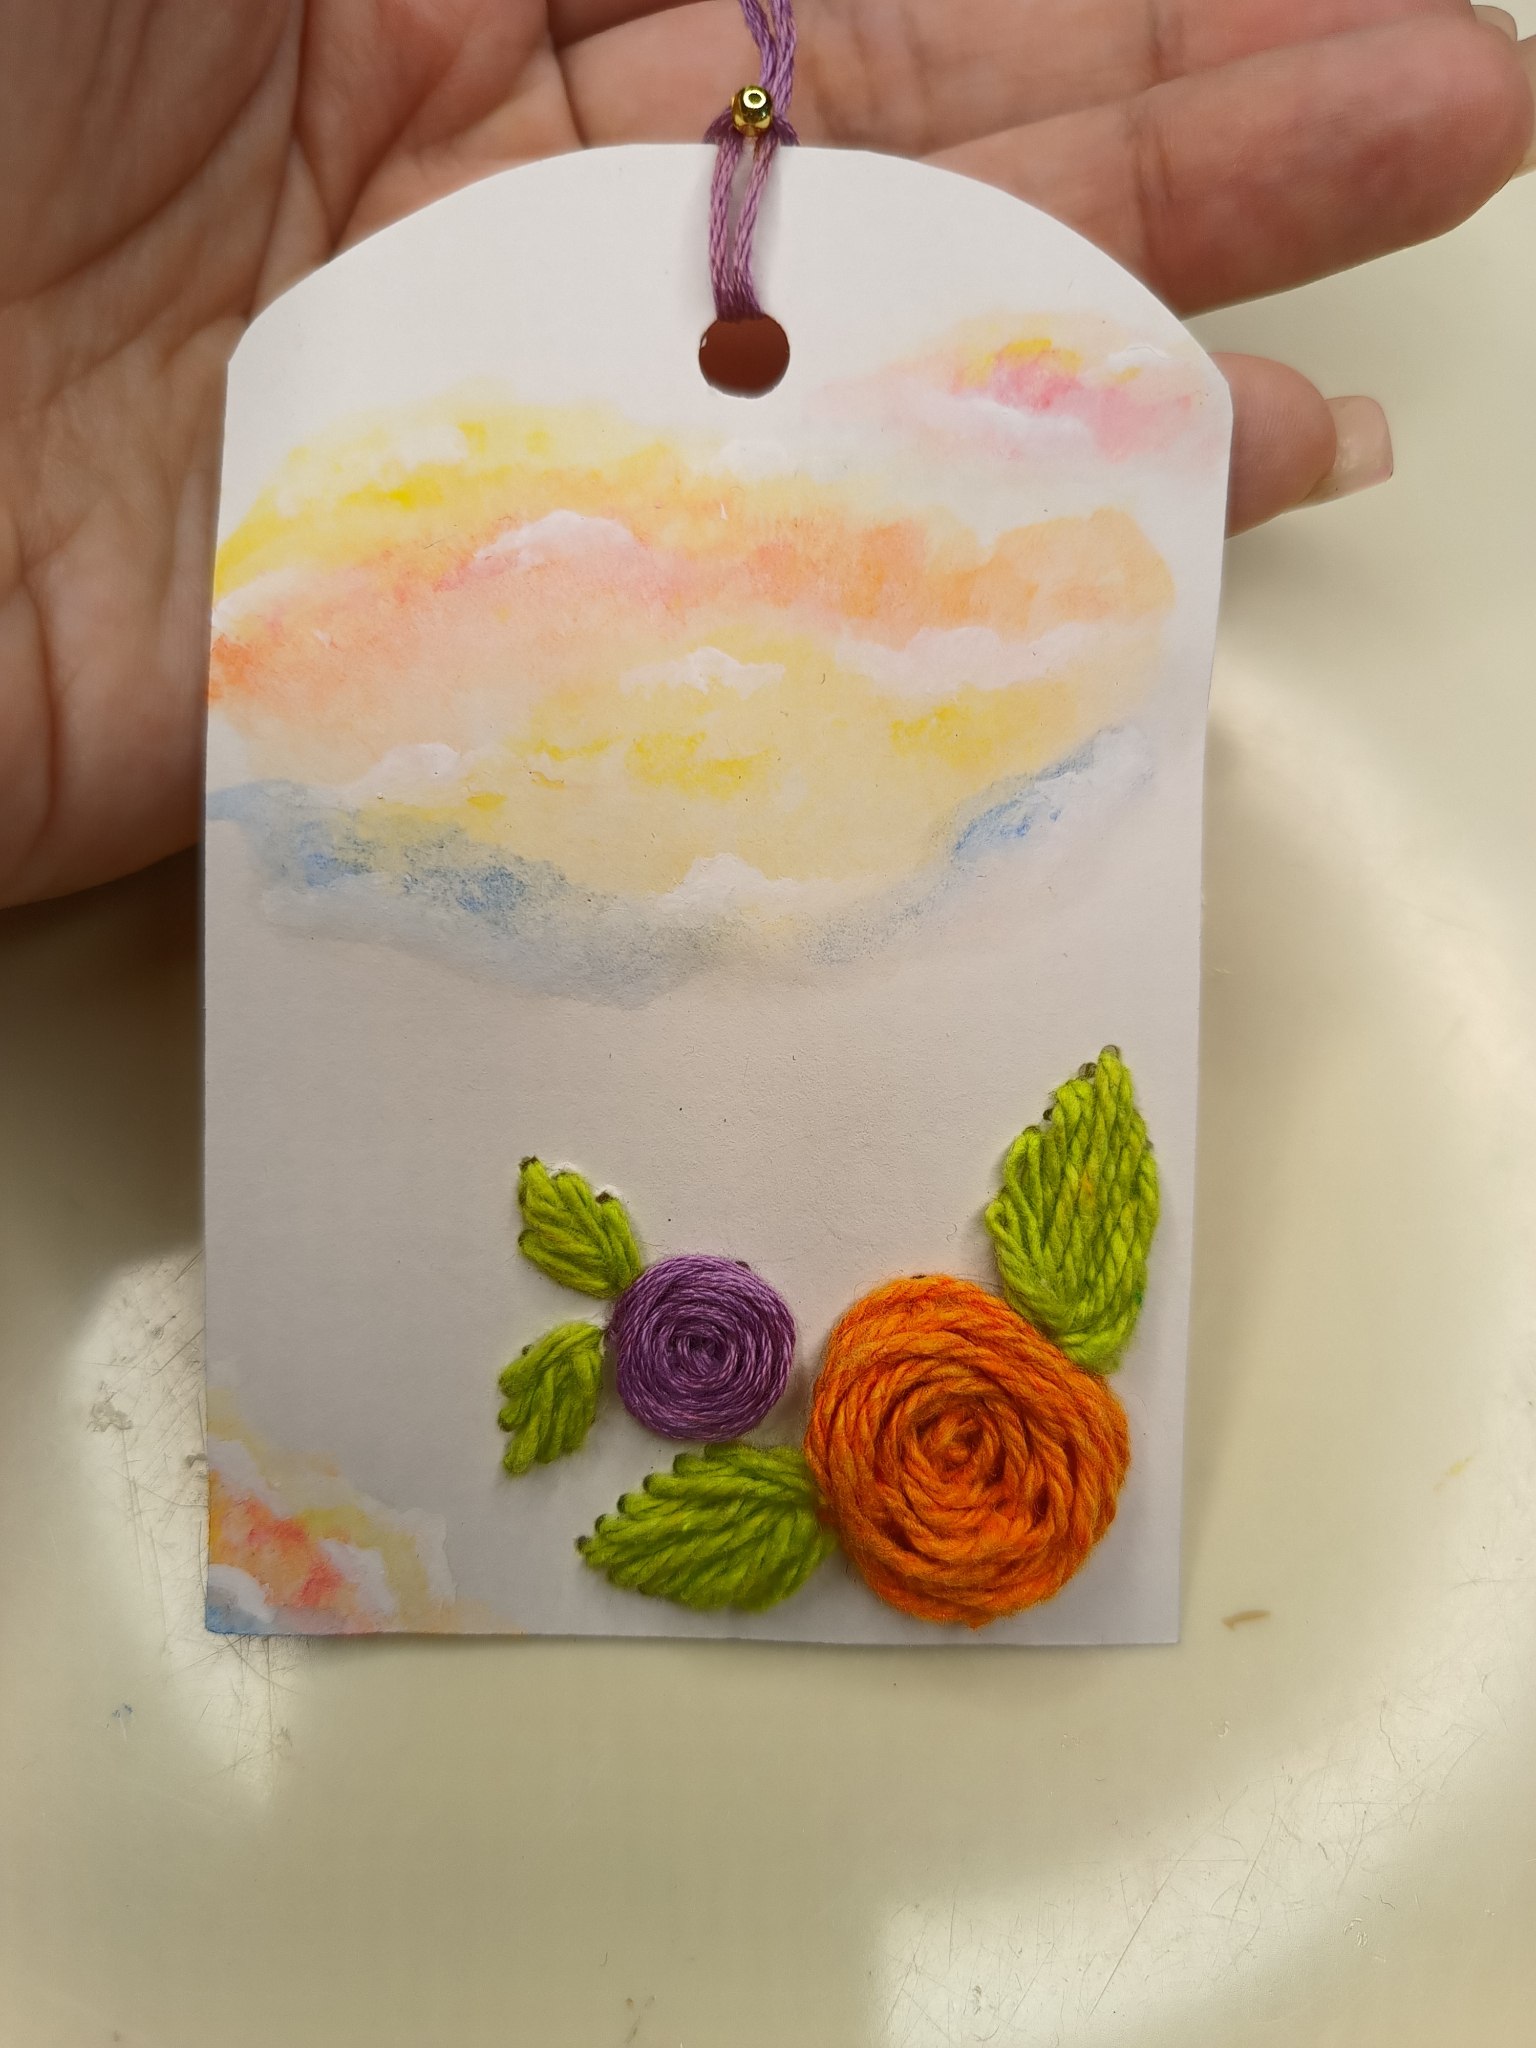
Los pasos previos los repetiremos para la rosa pequeña y el resto de las hojas, yo he usado color morado para el hilo de la rosa pequeña.
> We will repeat the previous steps for the small rose and the rest of the leaves. I used purple thread for the small rose.
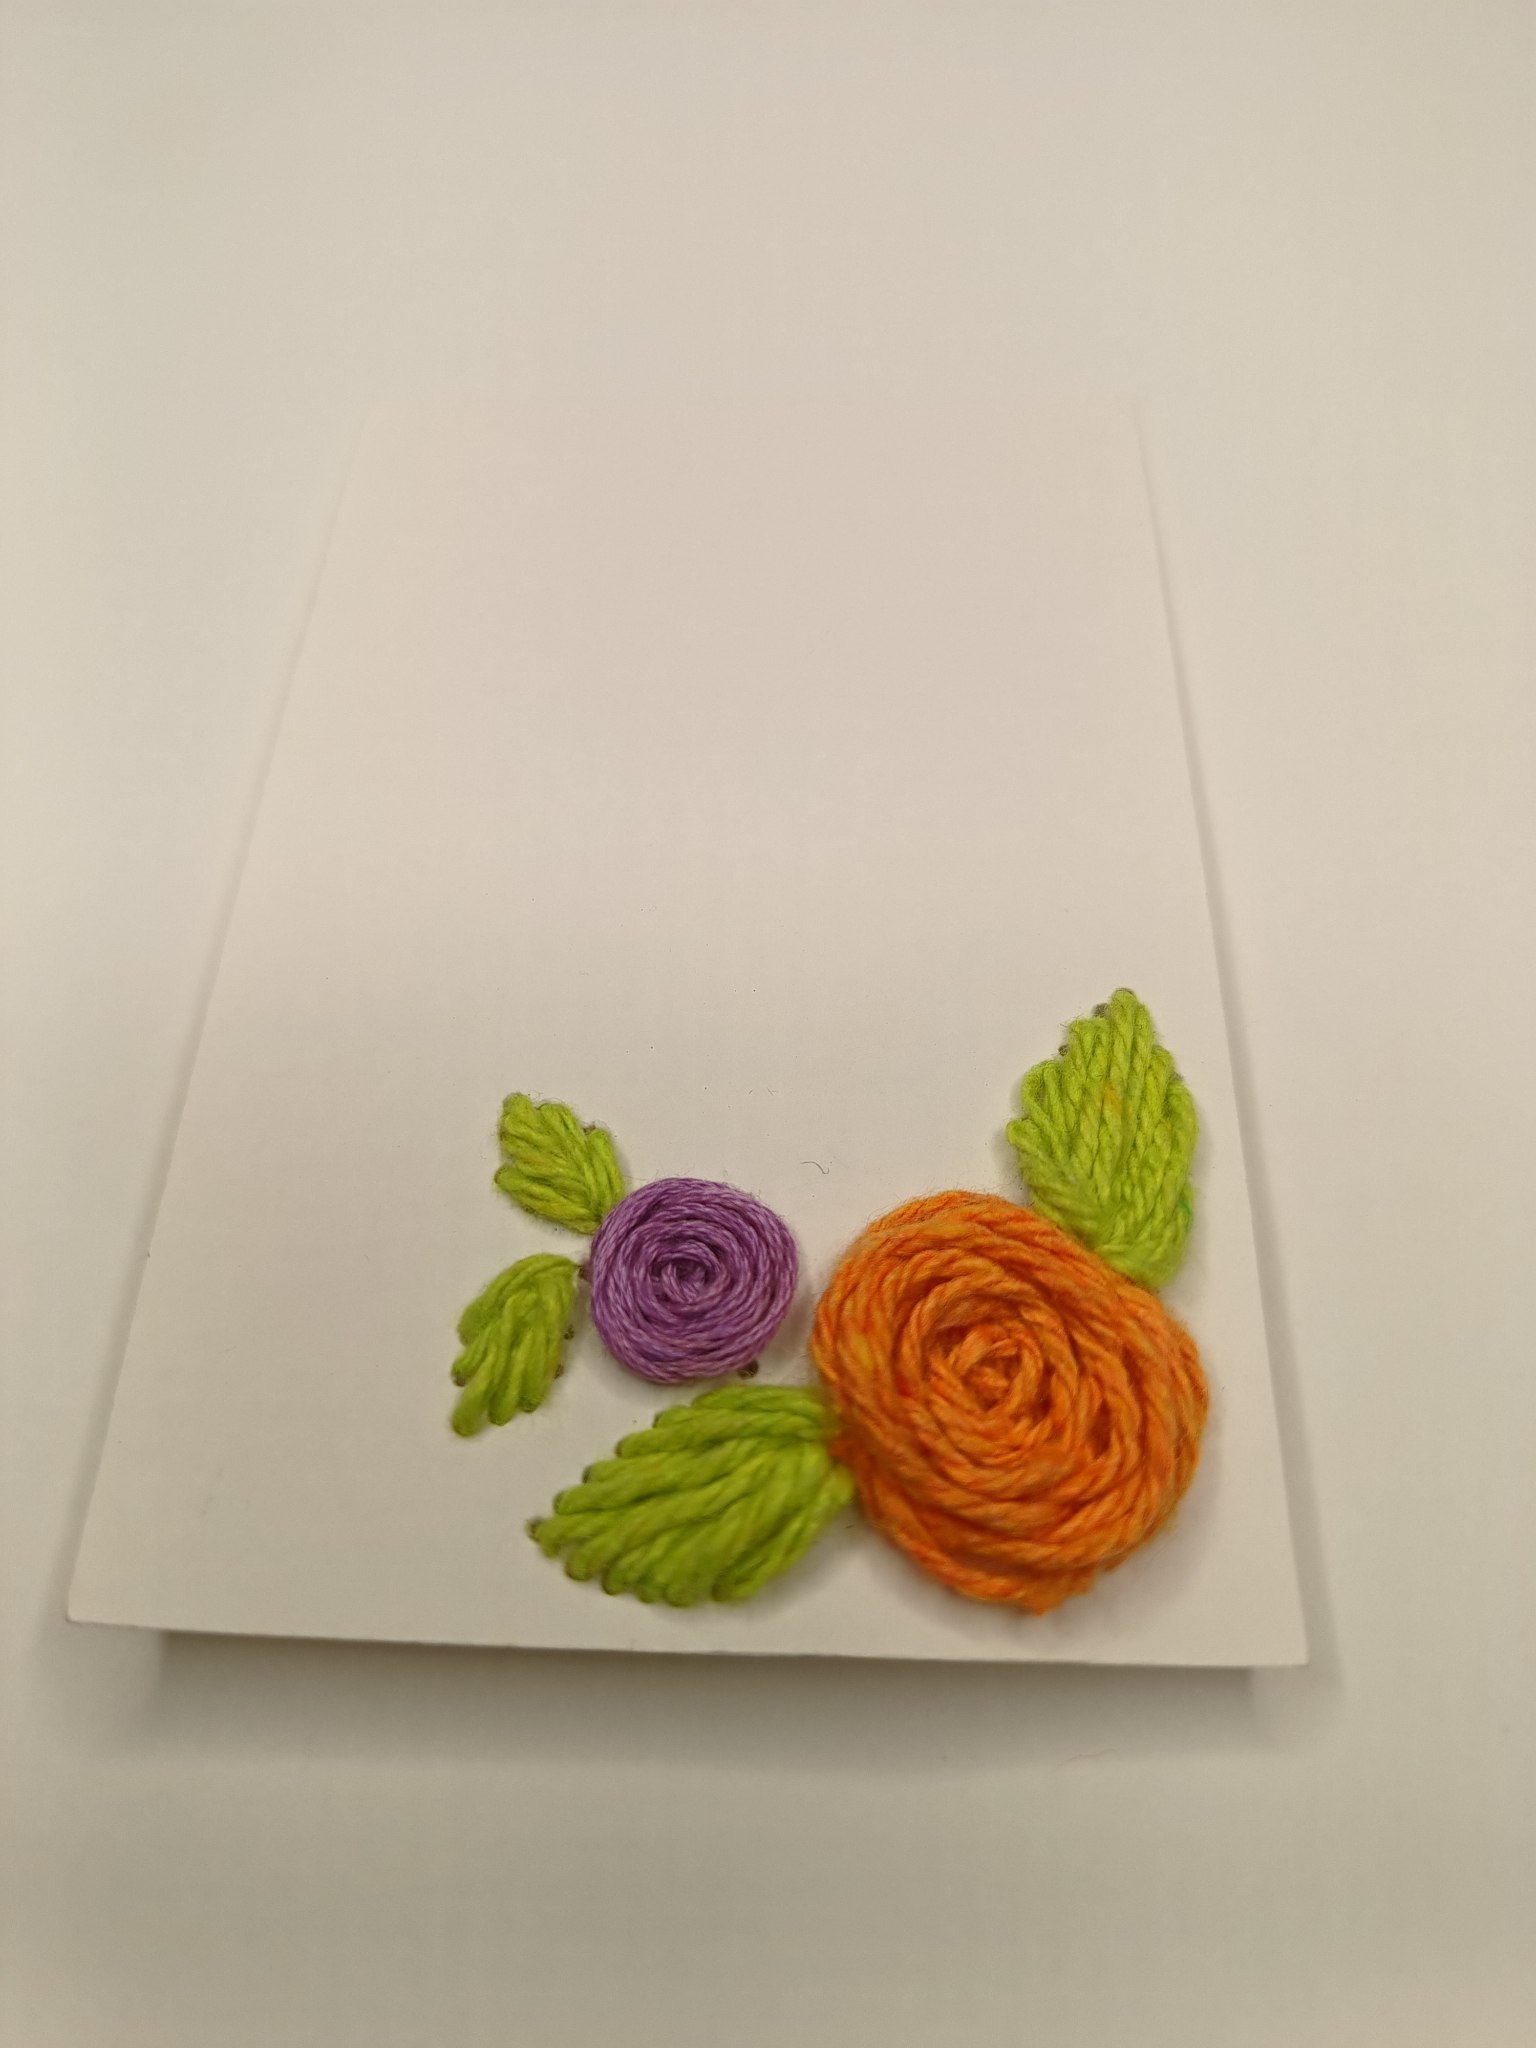
Bordado terminado / Finished embroidery
Además decidí darle una forma curva a la parte superior del marcalibros con ayuda de las tijeras, esta forma me gusta porque me da la sensación de ventana y los libros de alguna manera son eso, una ventana abierta a nuevos mundos y conocimientos.
> I also decided to give the top of the bookmark a curved shape using scissors. I like this shape because it gives me the feeling of a window, and books are, in a way, just that: a window open to new worlds and knowledge.
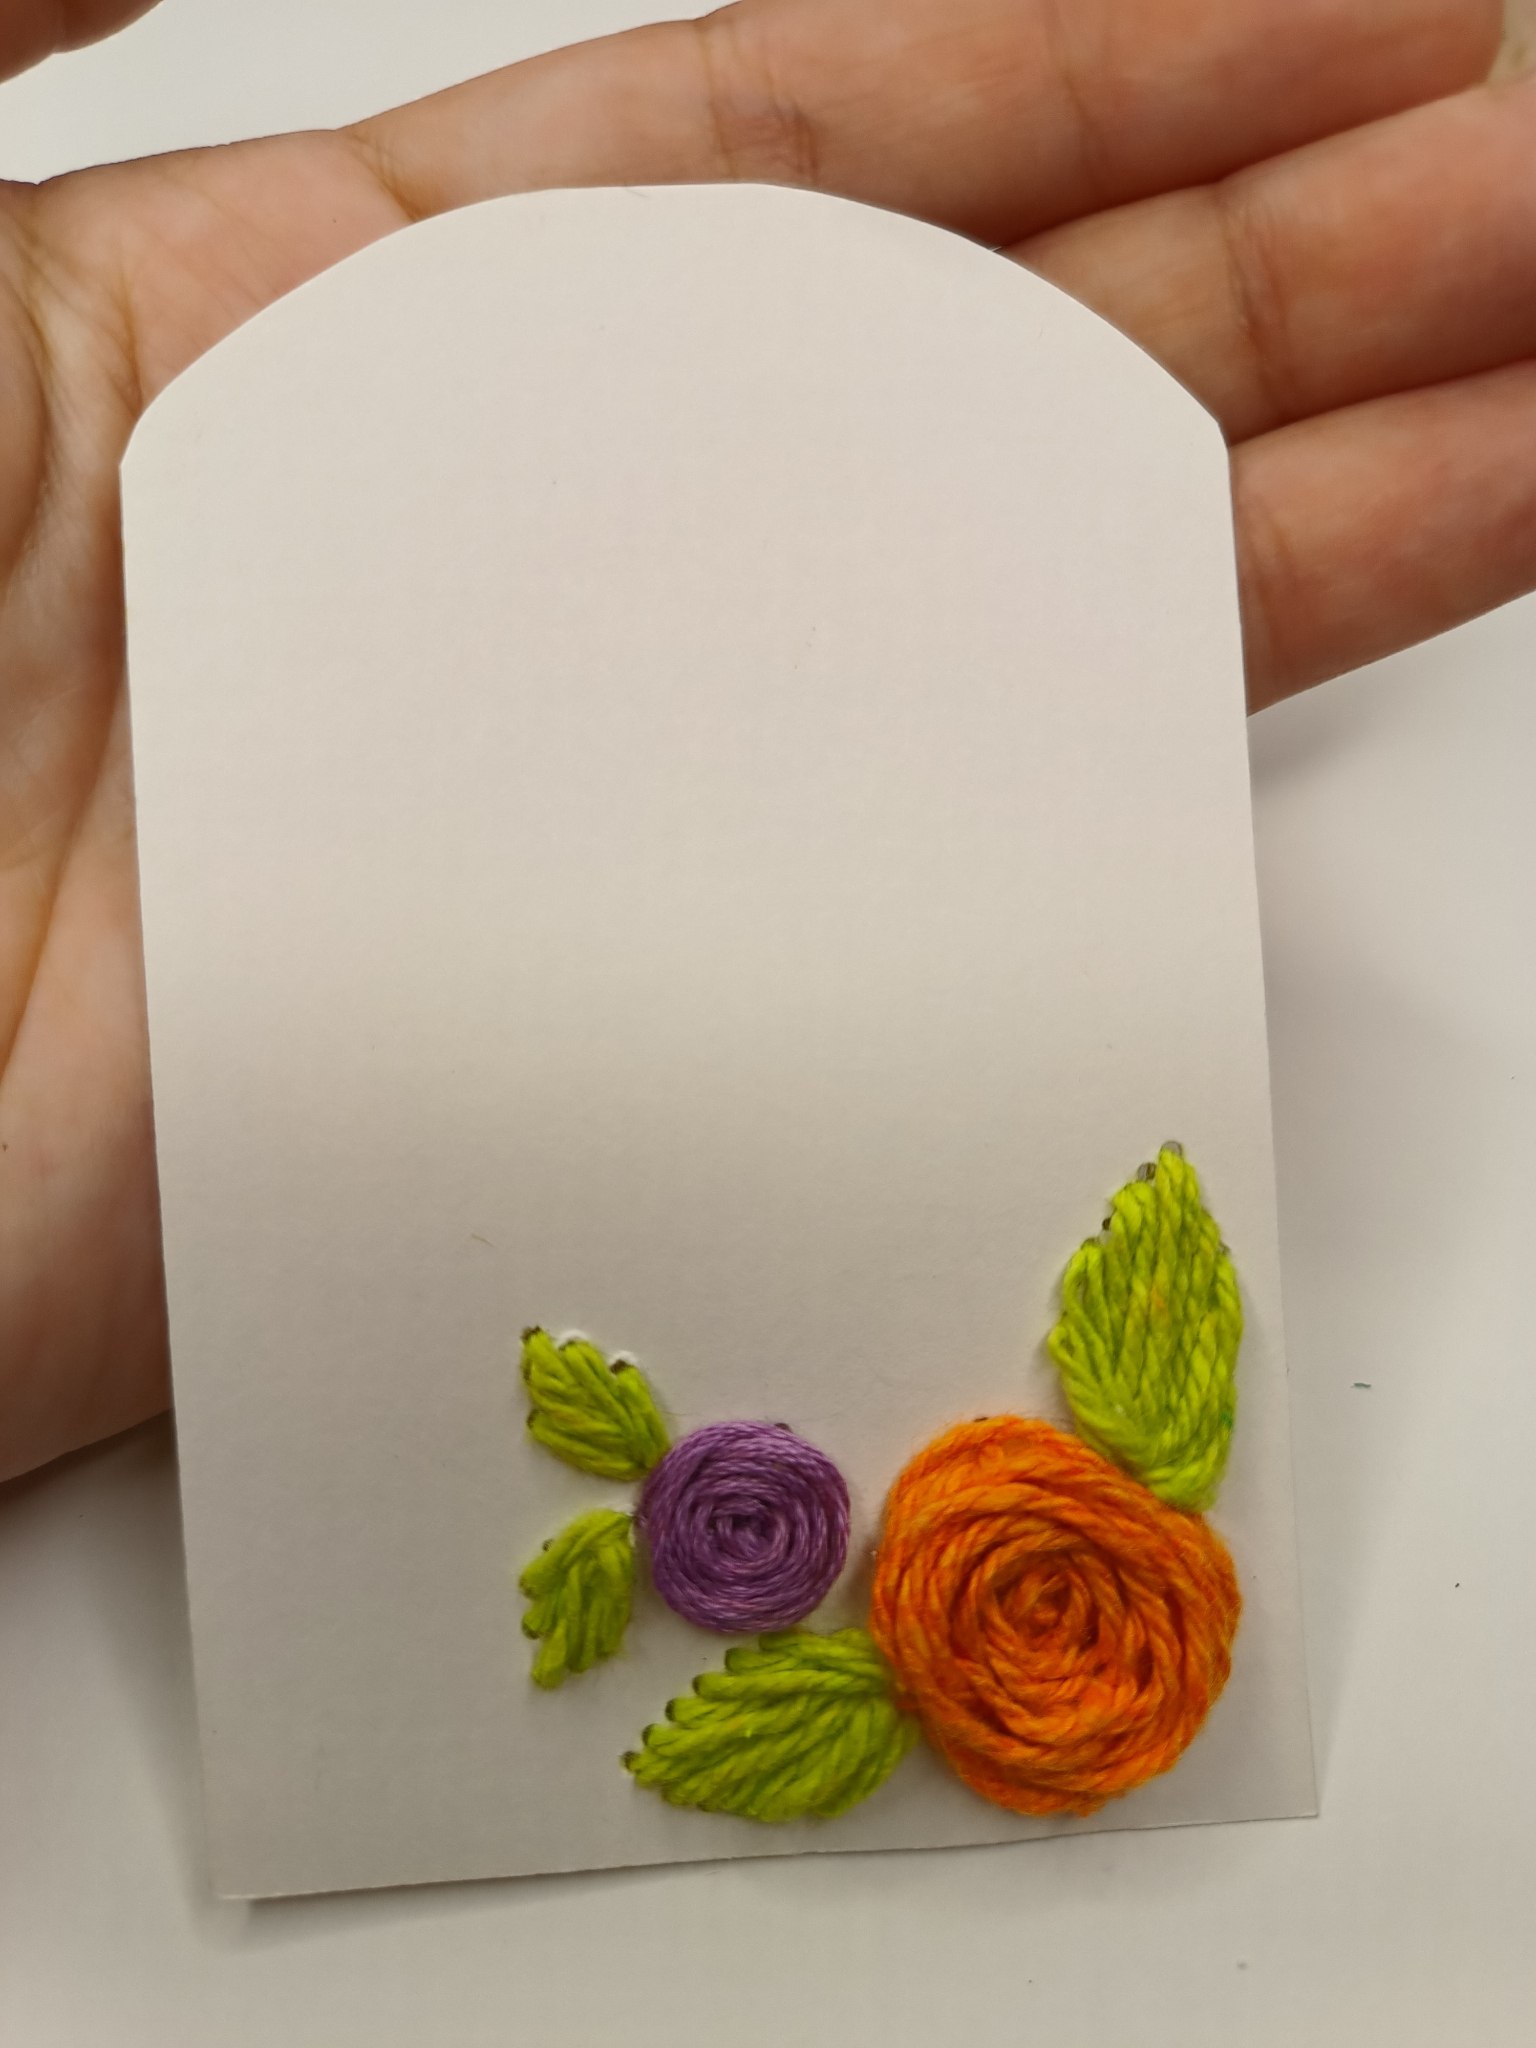
Forma de ventana / Window shape
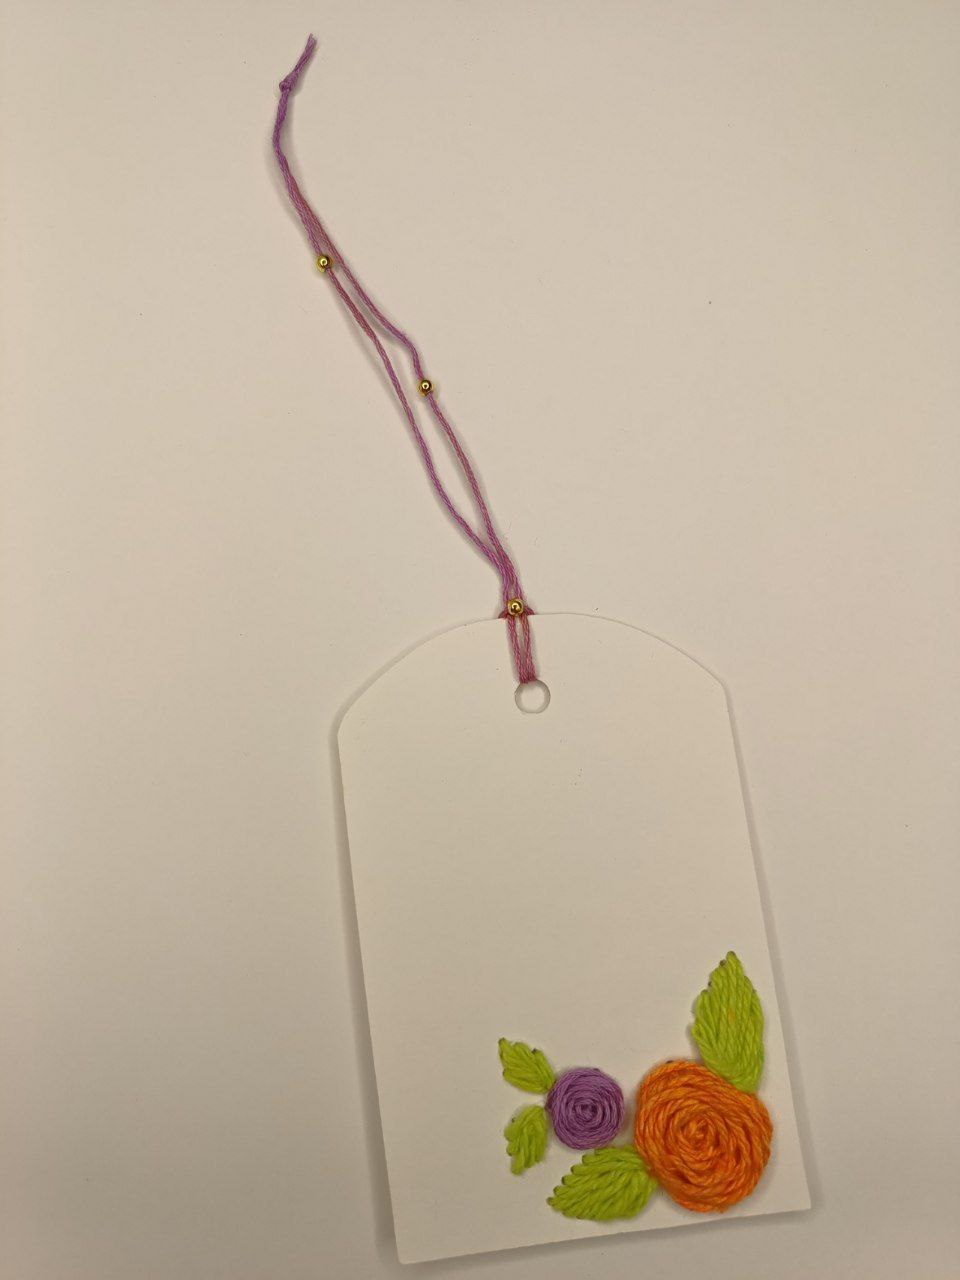
Con un sacabocado he abierto un agujero en lo alto de cartulina y por allí pasé un cordón morado que decoré con balines dorados.
> I used a hole punch to make a hole at the top of the card and threaded a purple cord through it, which I decorated with gold beads.
 | 
--- | ---
Cordón superior / Upper cord
Si desean que los balines se queden fijos en su posición, basta con añadir una gotita de pegamento blanco en el cordón y posicionar el balín de modo que la gotita quede dentro y ya no se moverá.
> If you want the beads to stay in place, simply add a drop of white glue to the cord and position the bead so that the drop is inside and it will no longer move.
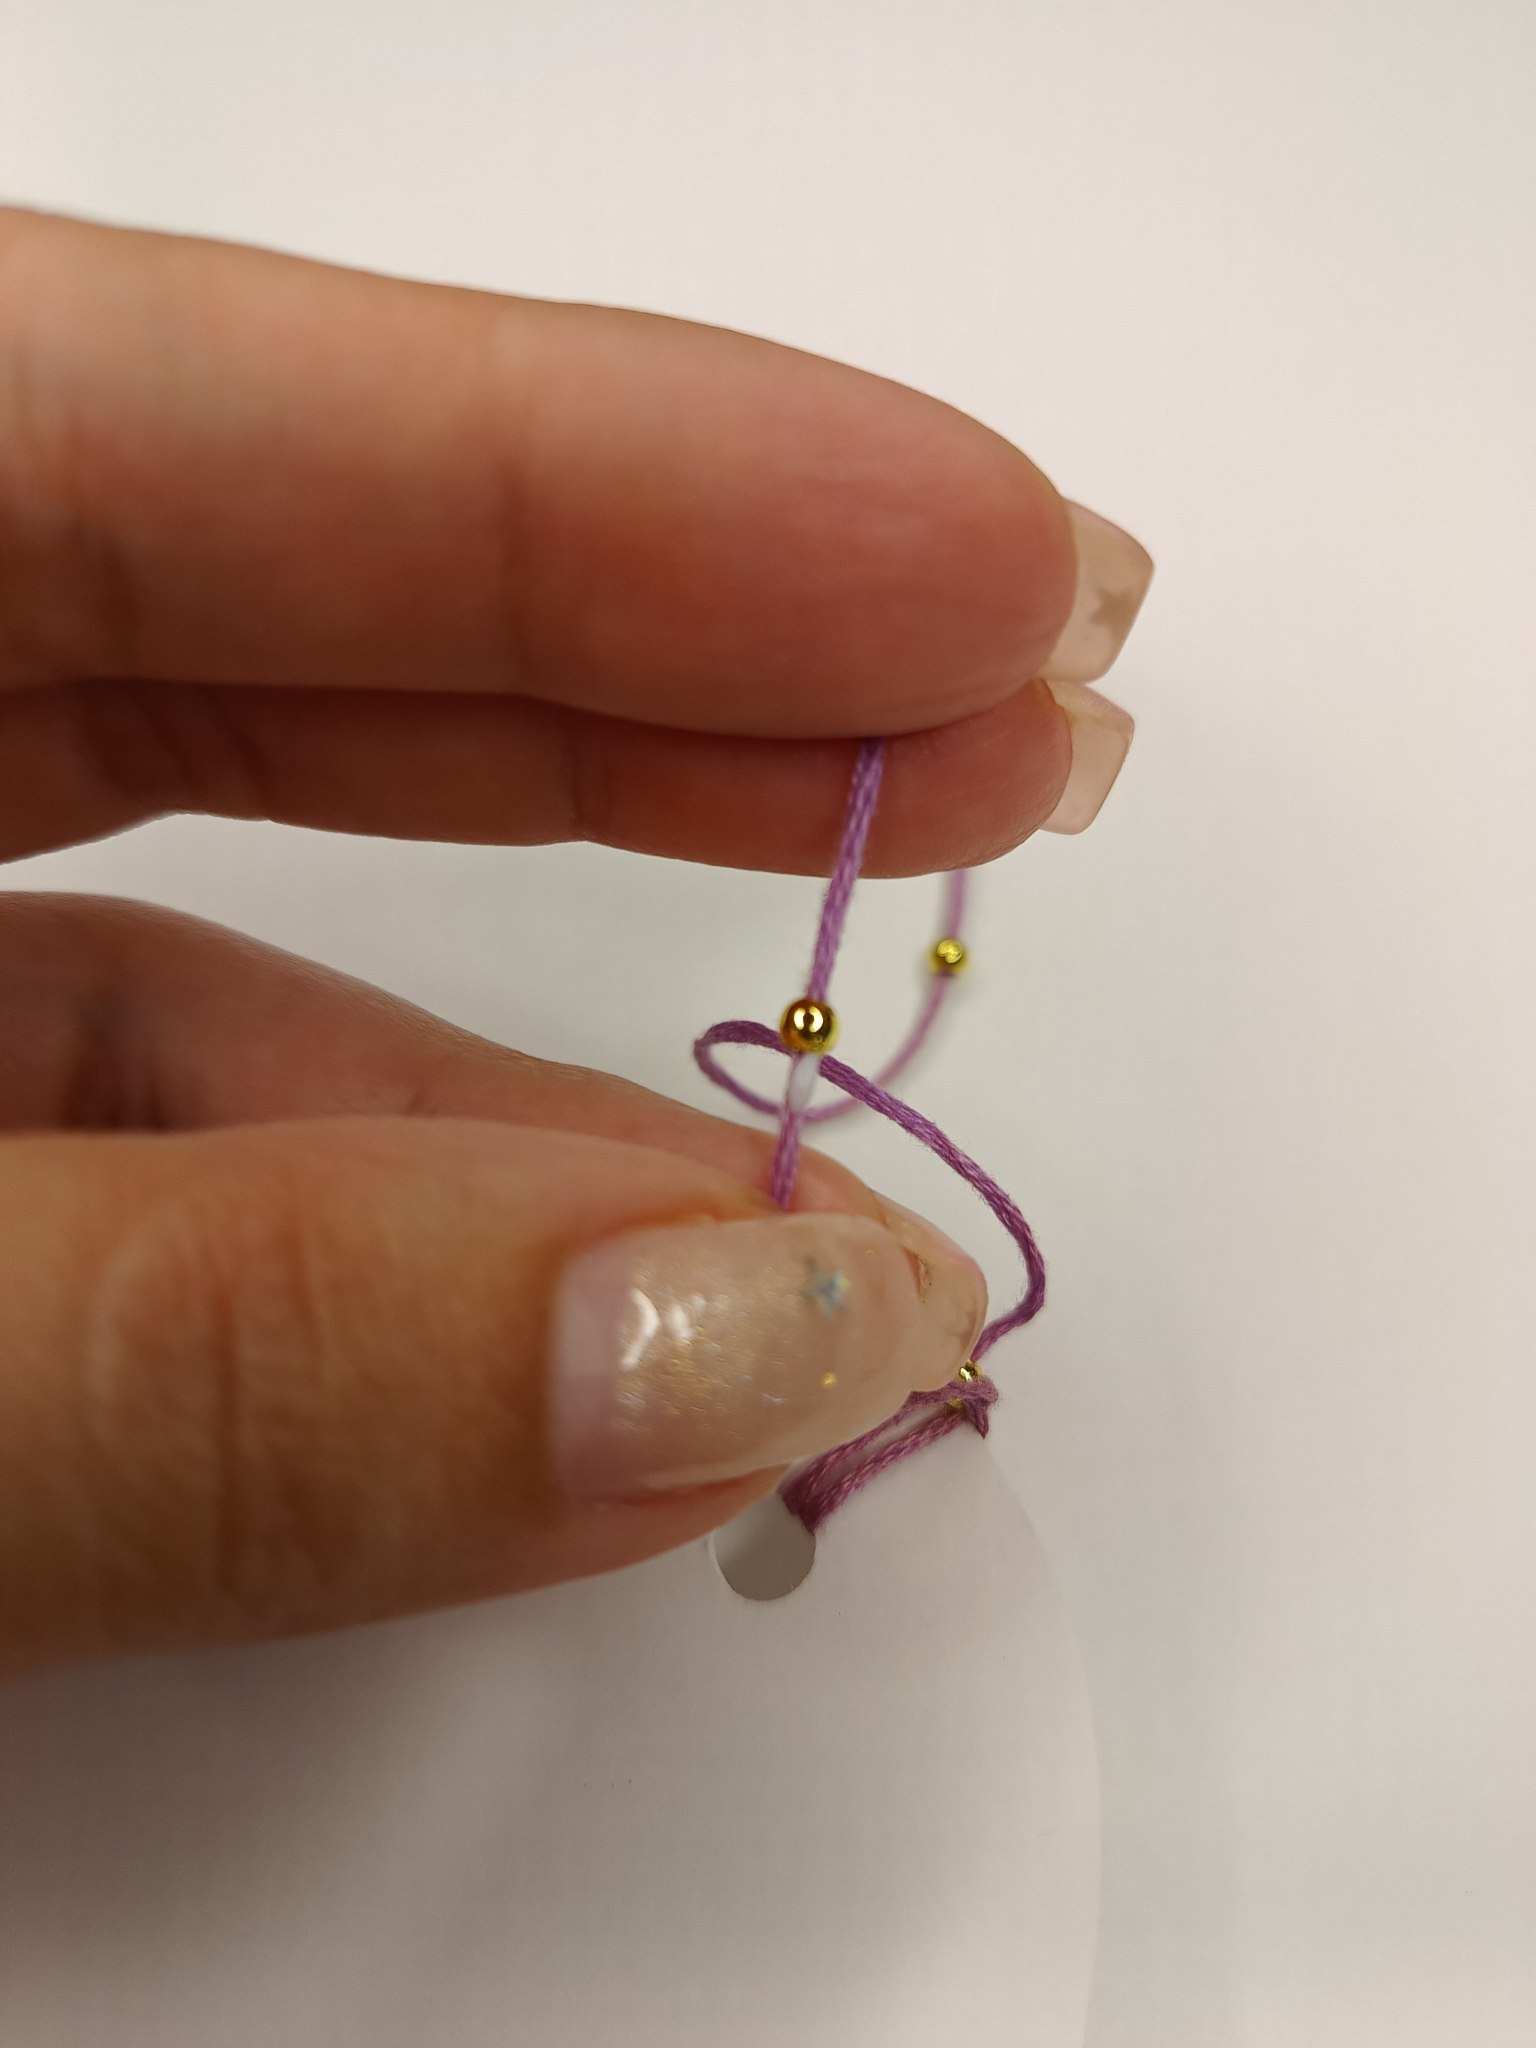
Balines fijos / Fixed pellets
Como sentía que había demasiado vacío dejando ese espacio blanco, decidí pintar un cielo crepuscular, para ello empleé pinturas al frío en muy poca cantidad y humedeciendo la cartulina para poder difuminar con el pincel fácilmente y que diera ese efecto acuarela tan bonito.
> As I felt that leaving that white space was too empty, I decided to paint a twilight sky. To do this, I used a very small amount of cold paints and moistened the cardboard so that I could easily blend the paint with the brush and achieve that beautiful watercolor effect.
 | 
--- | ---
Cielo pintado / Painted sky
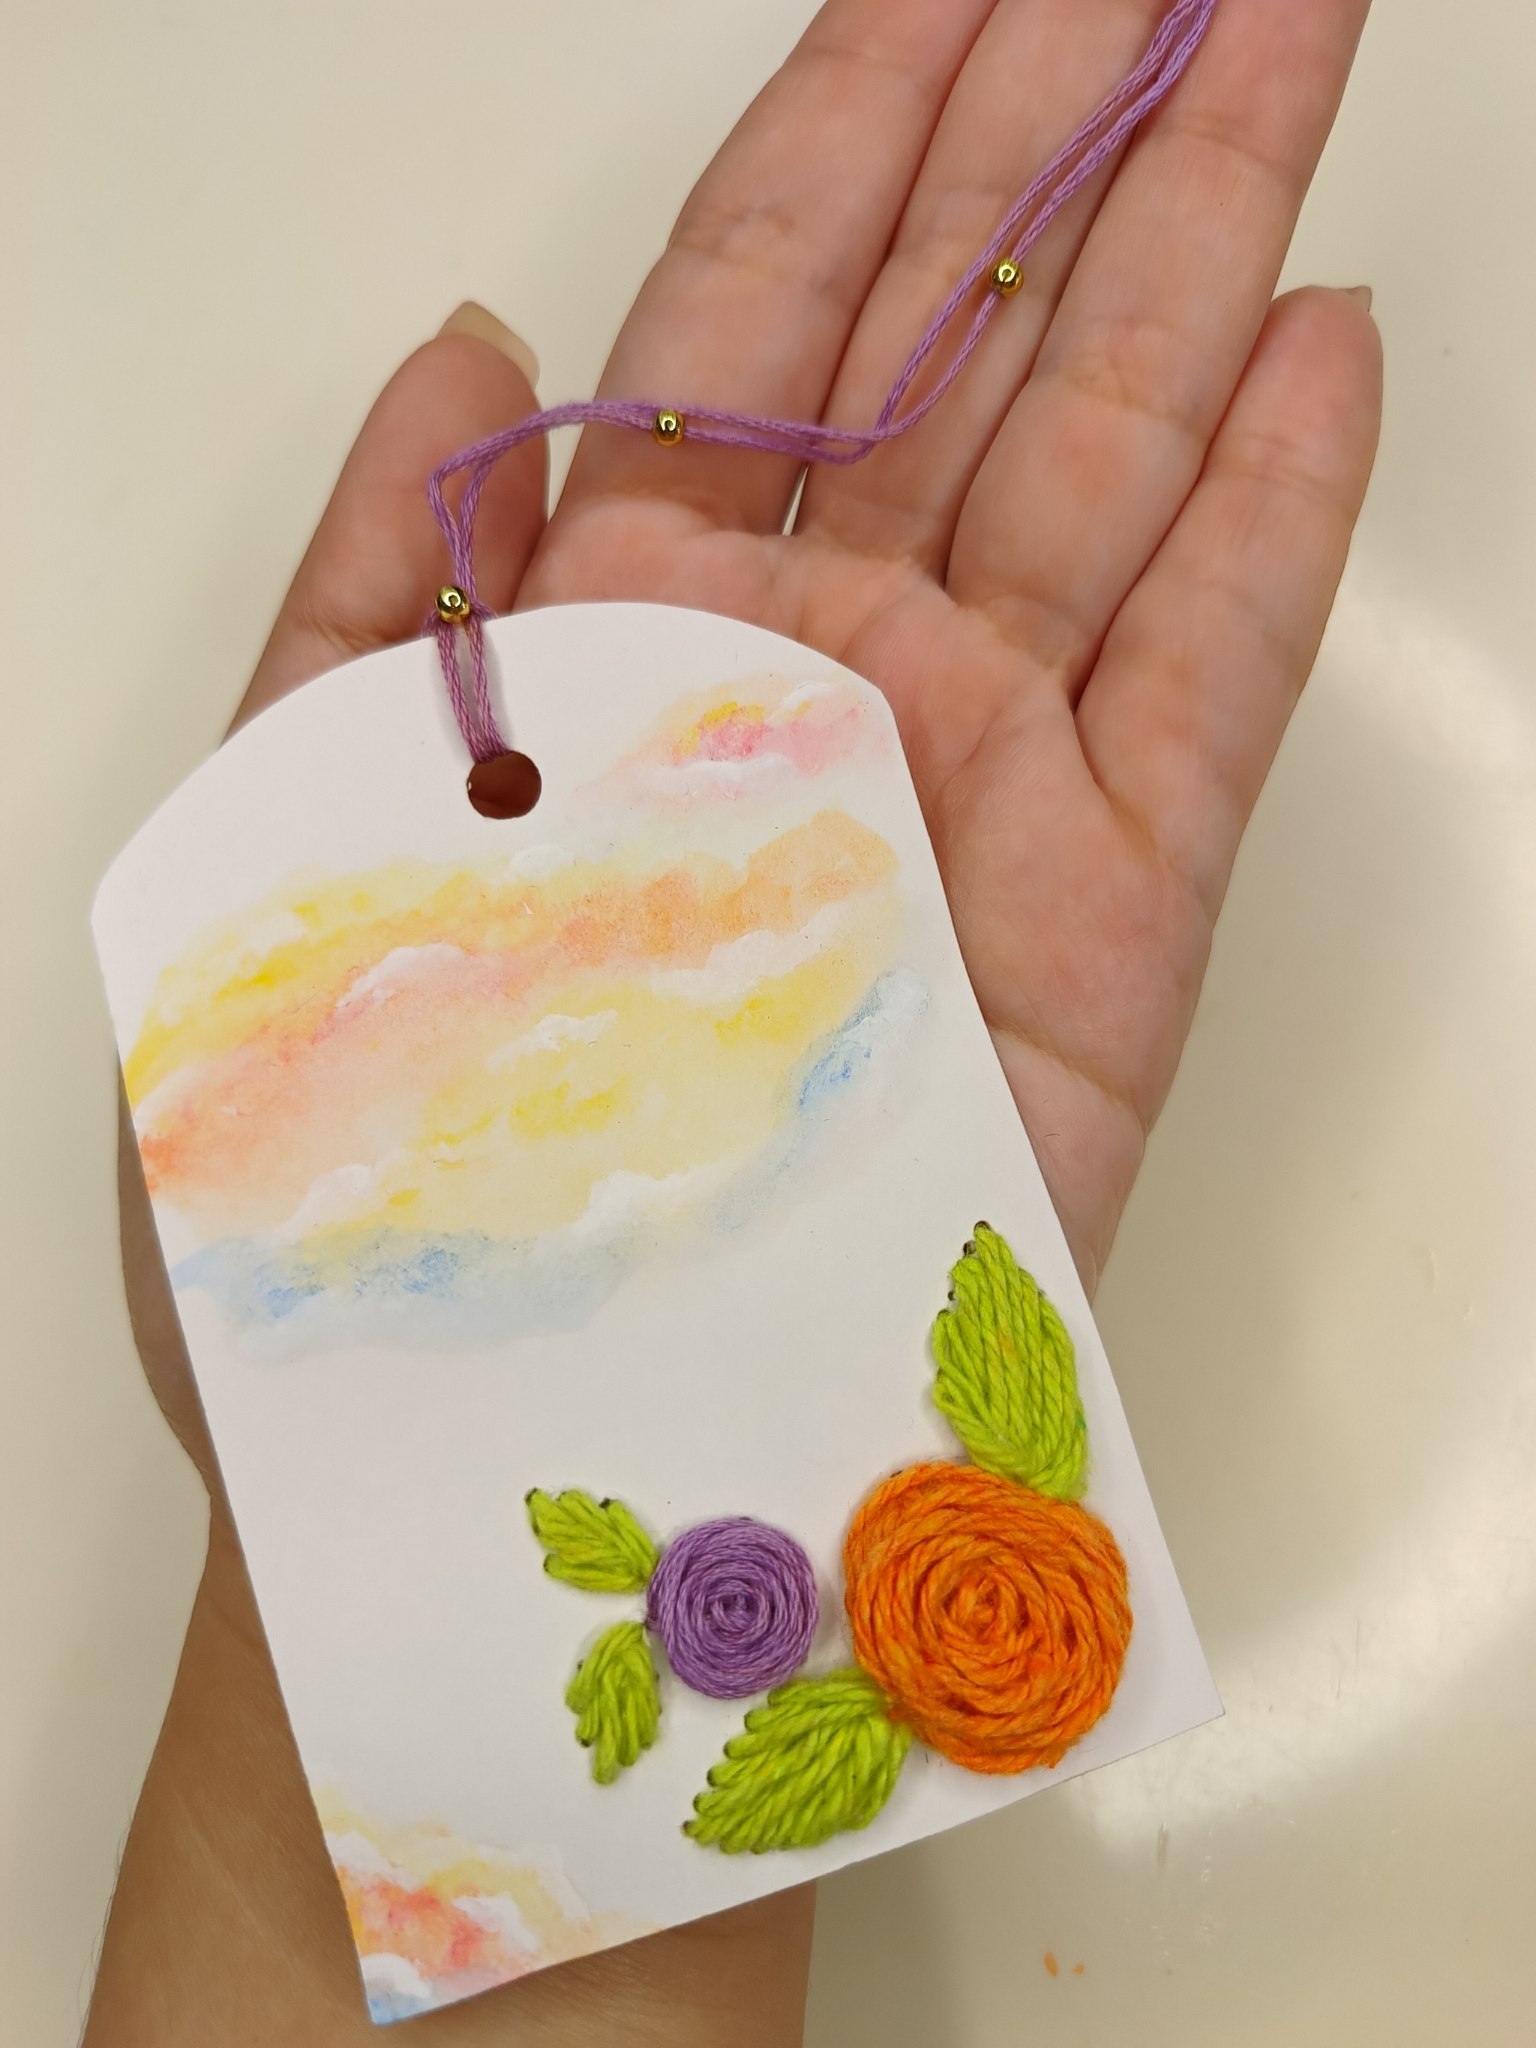
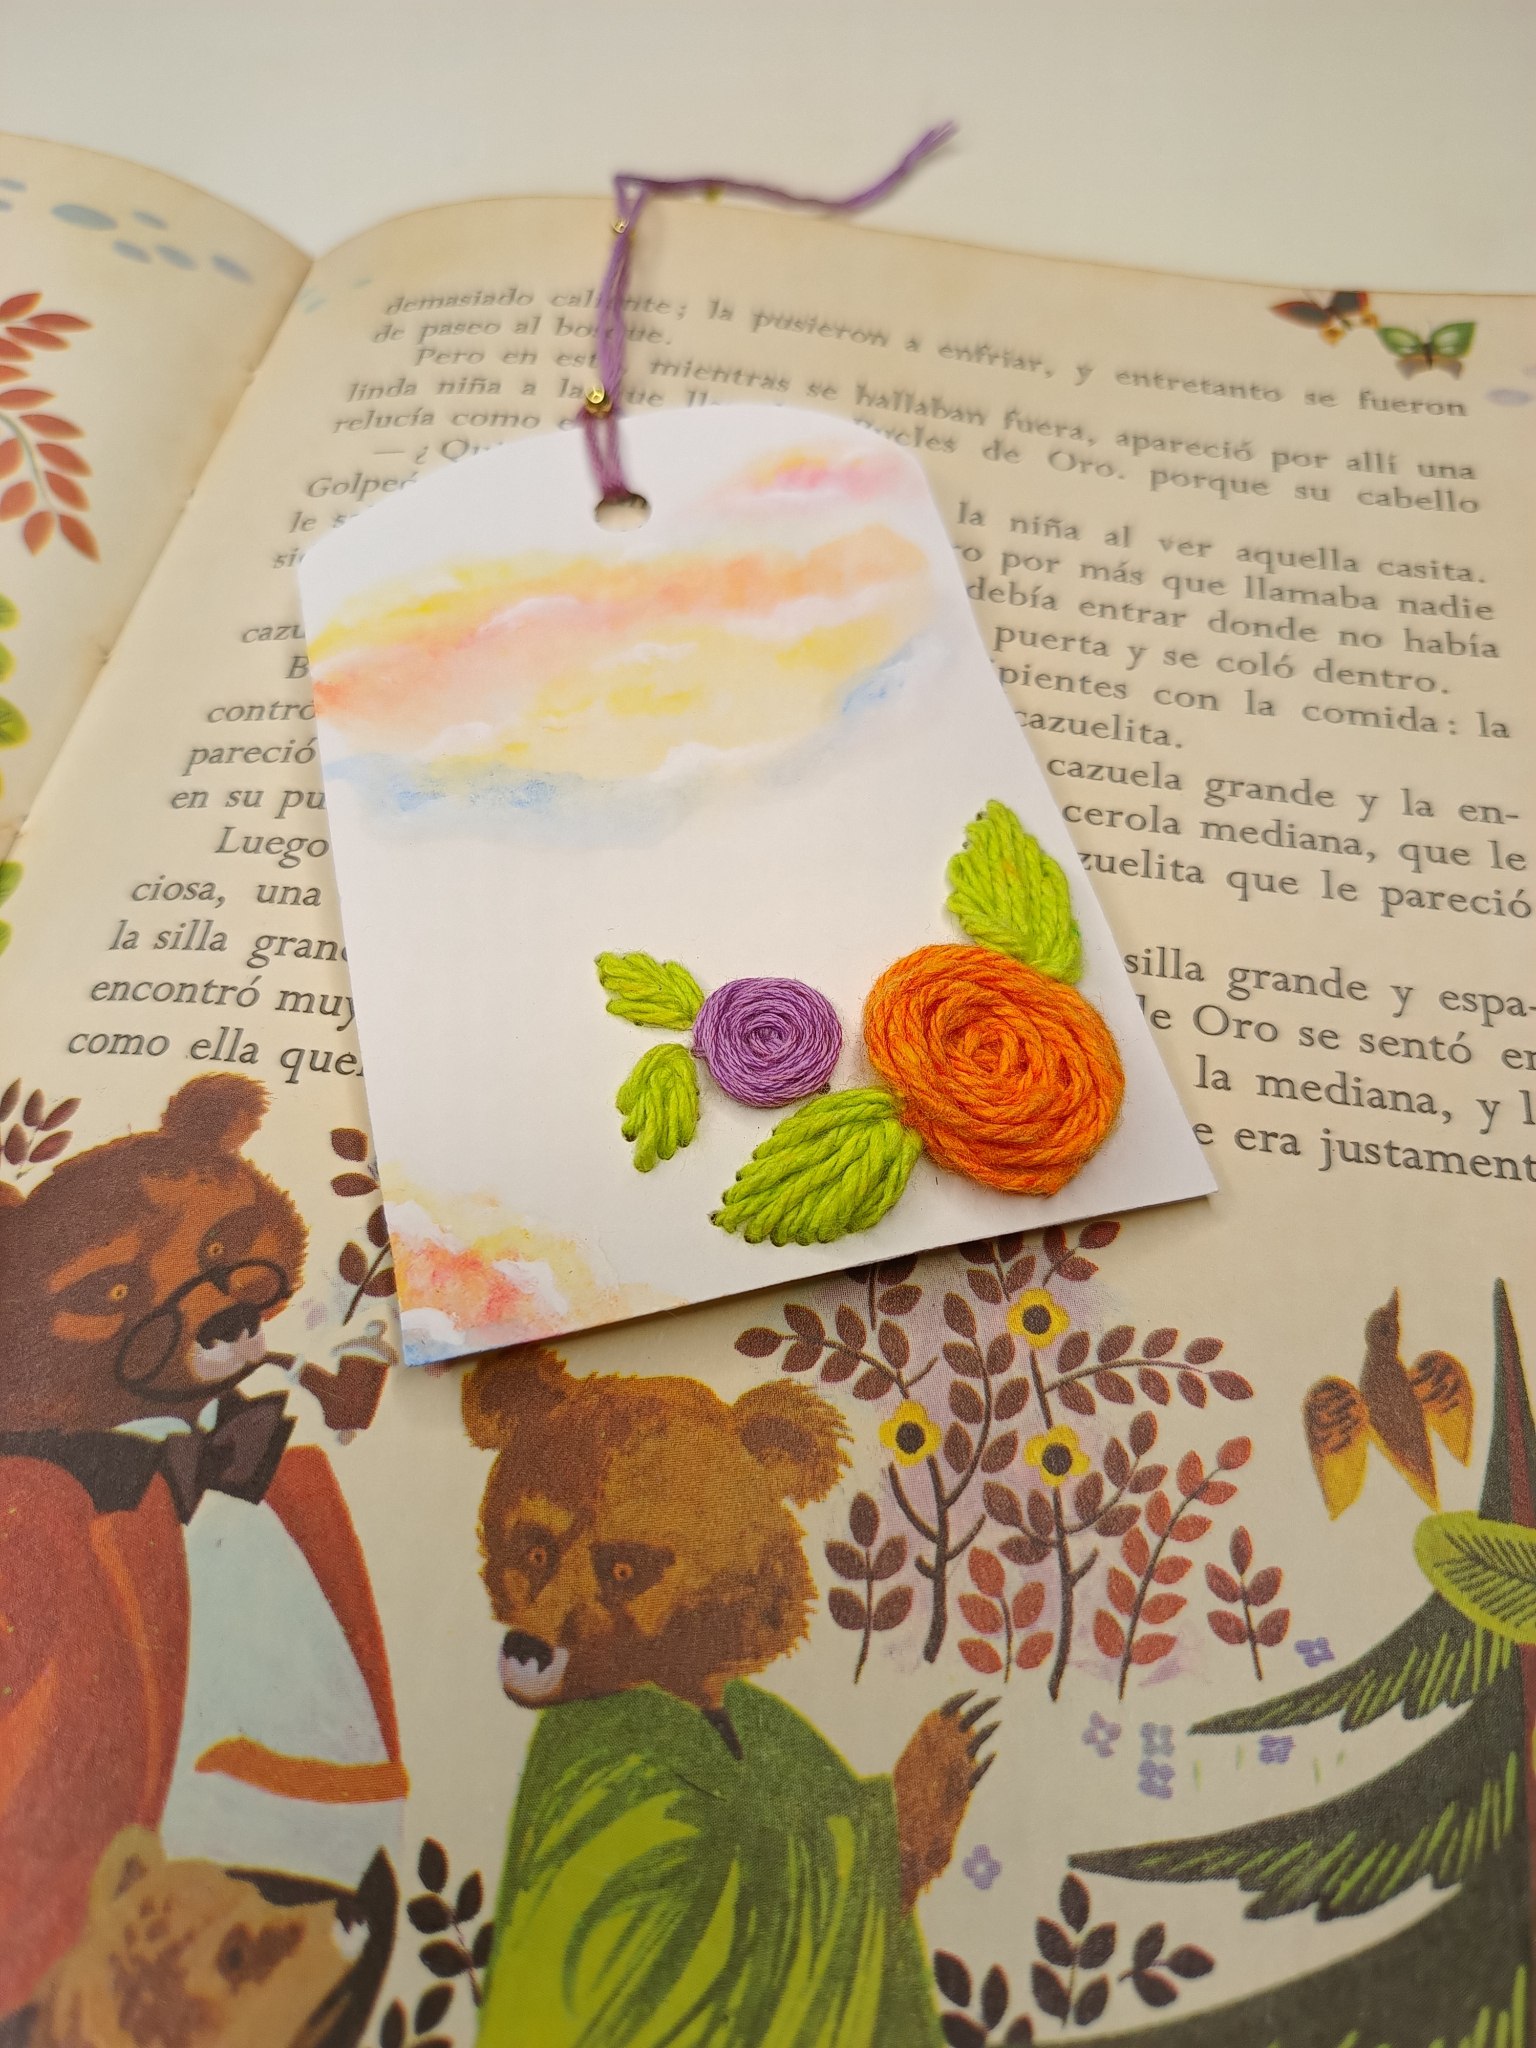
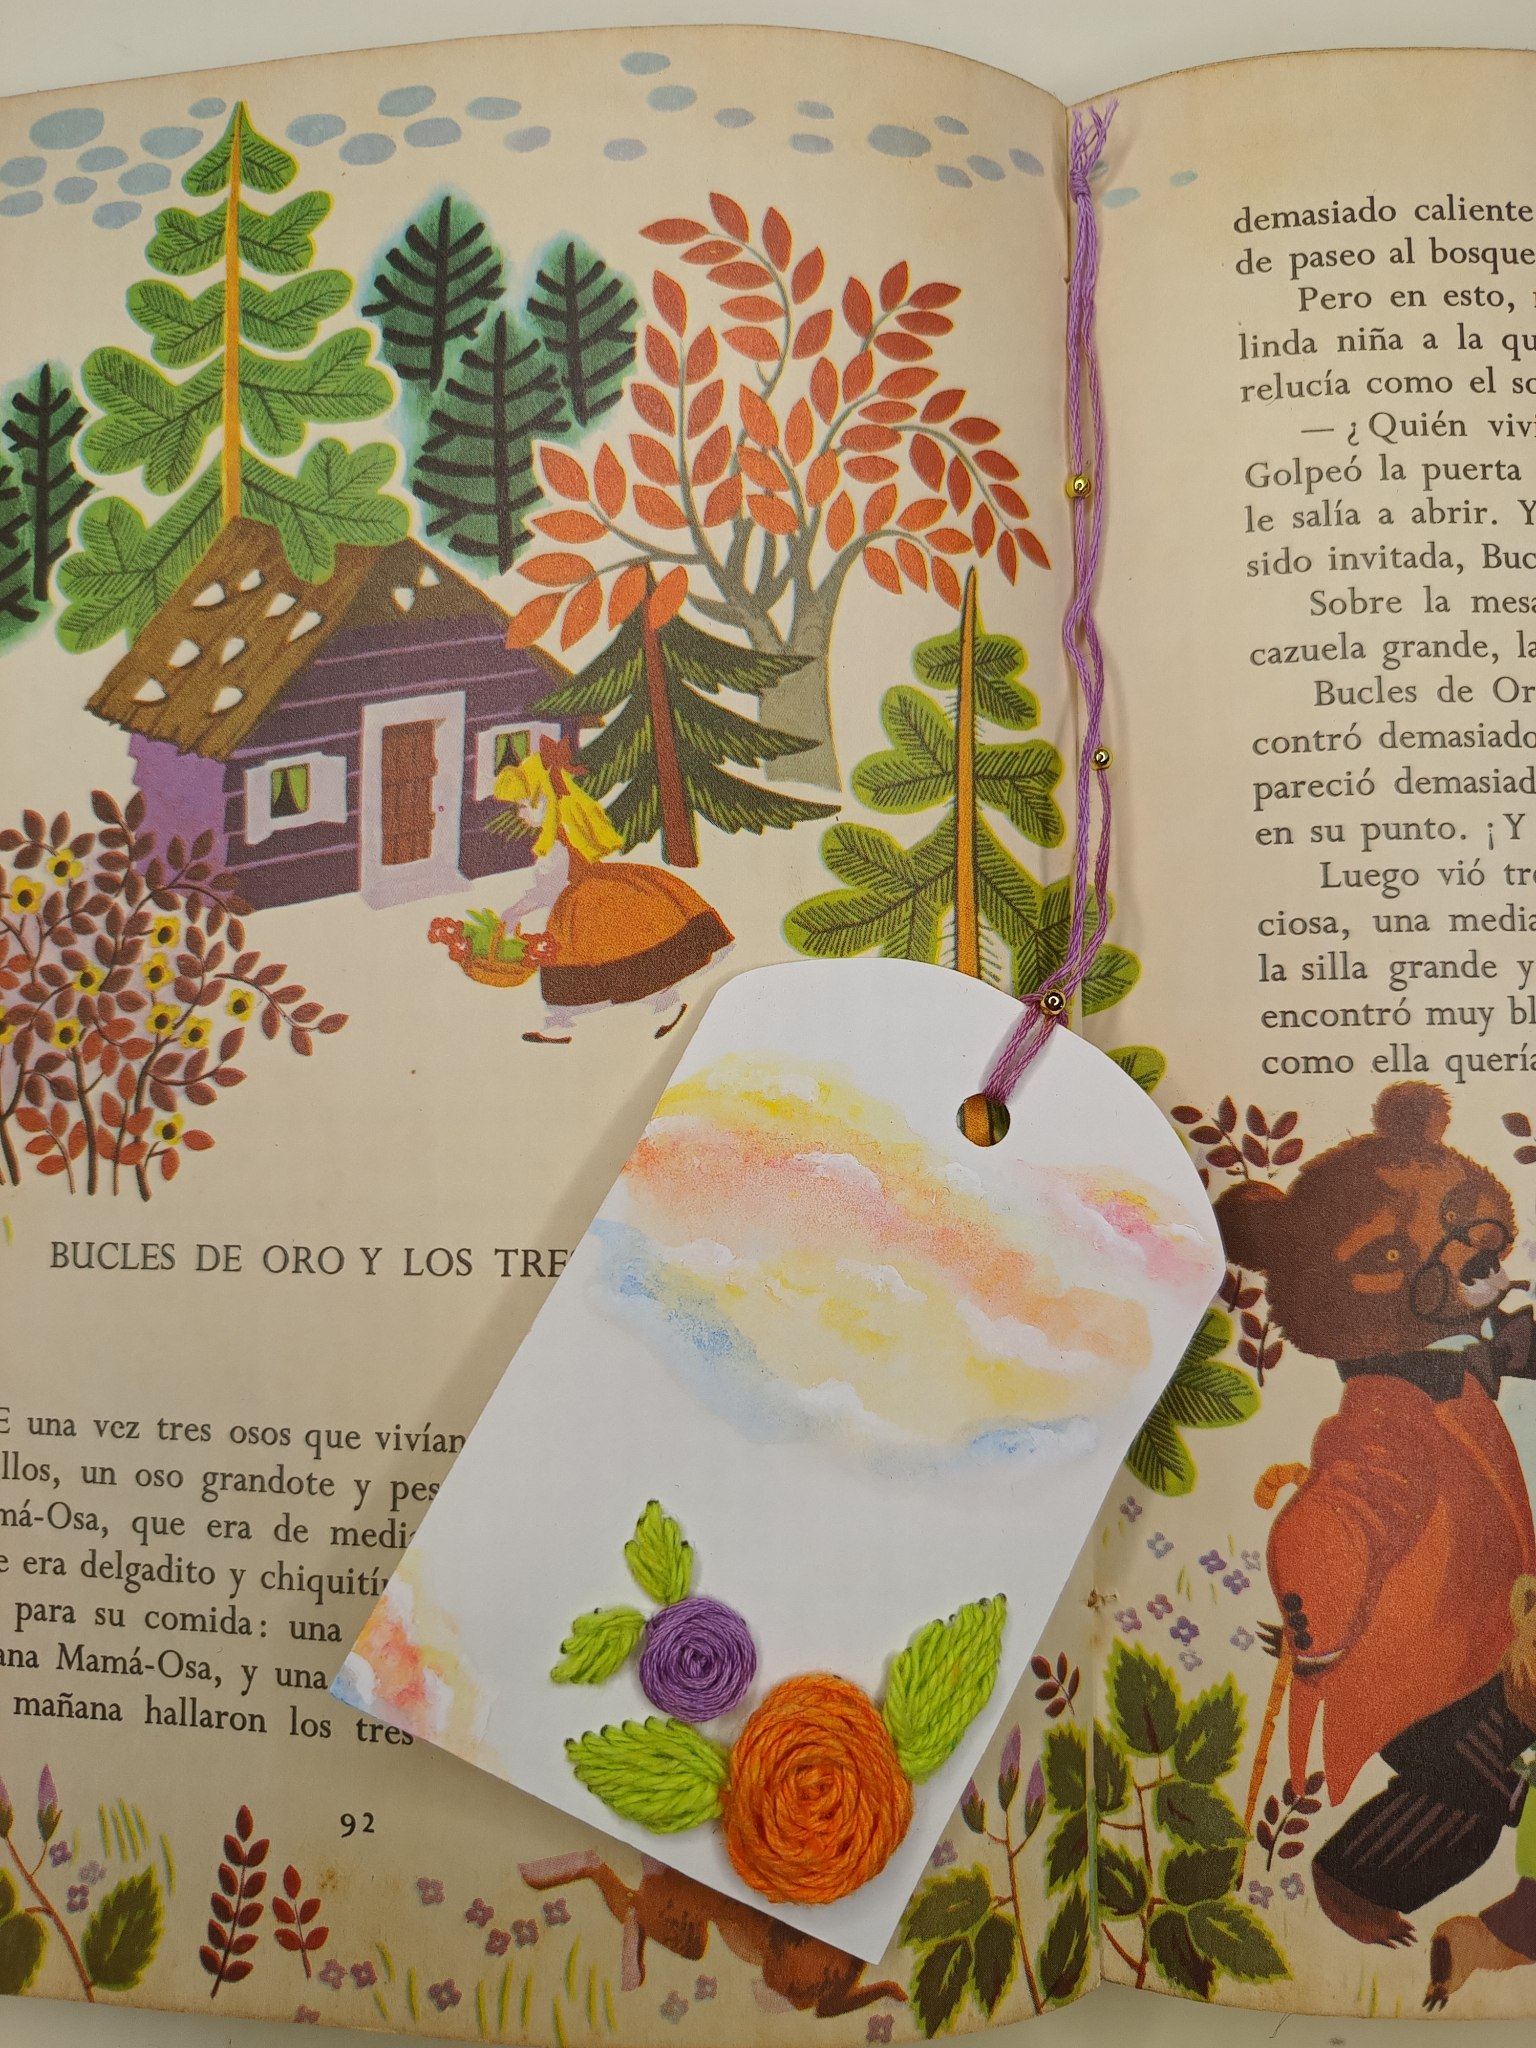
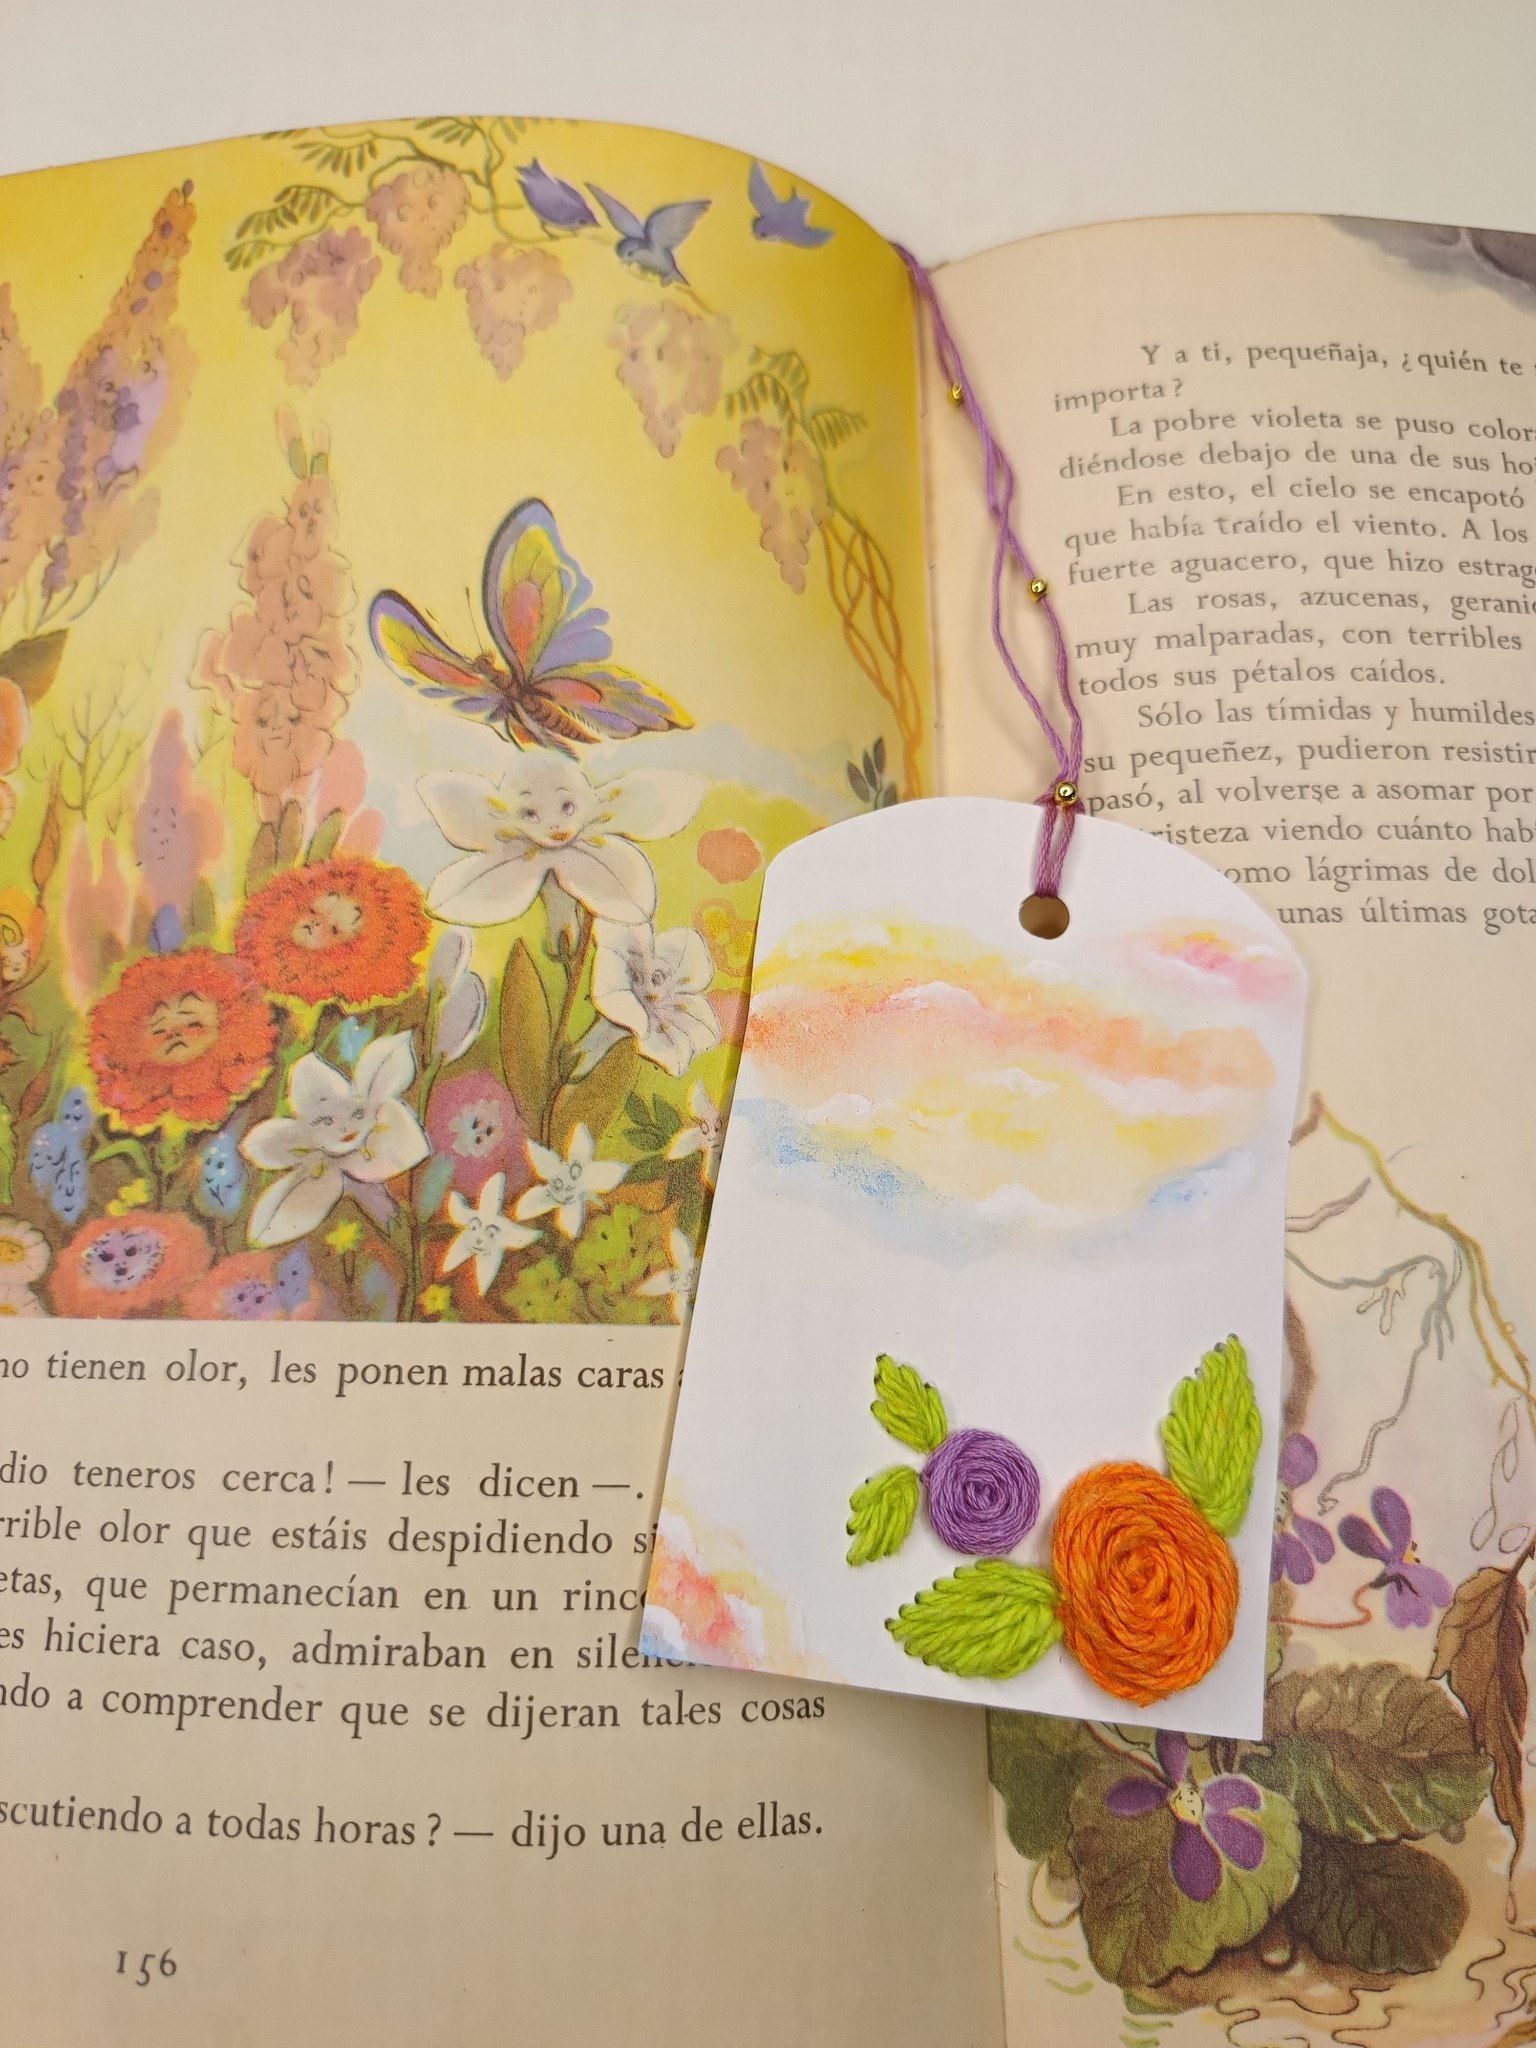
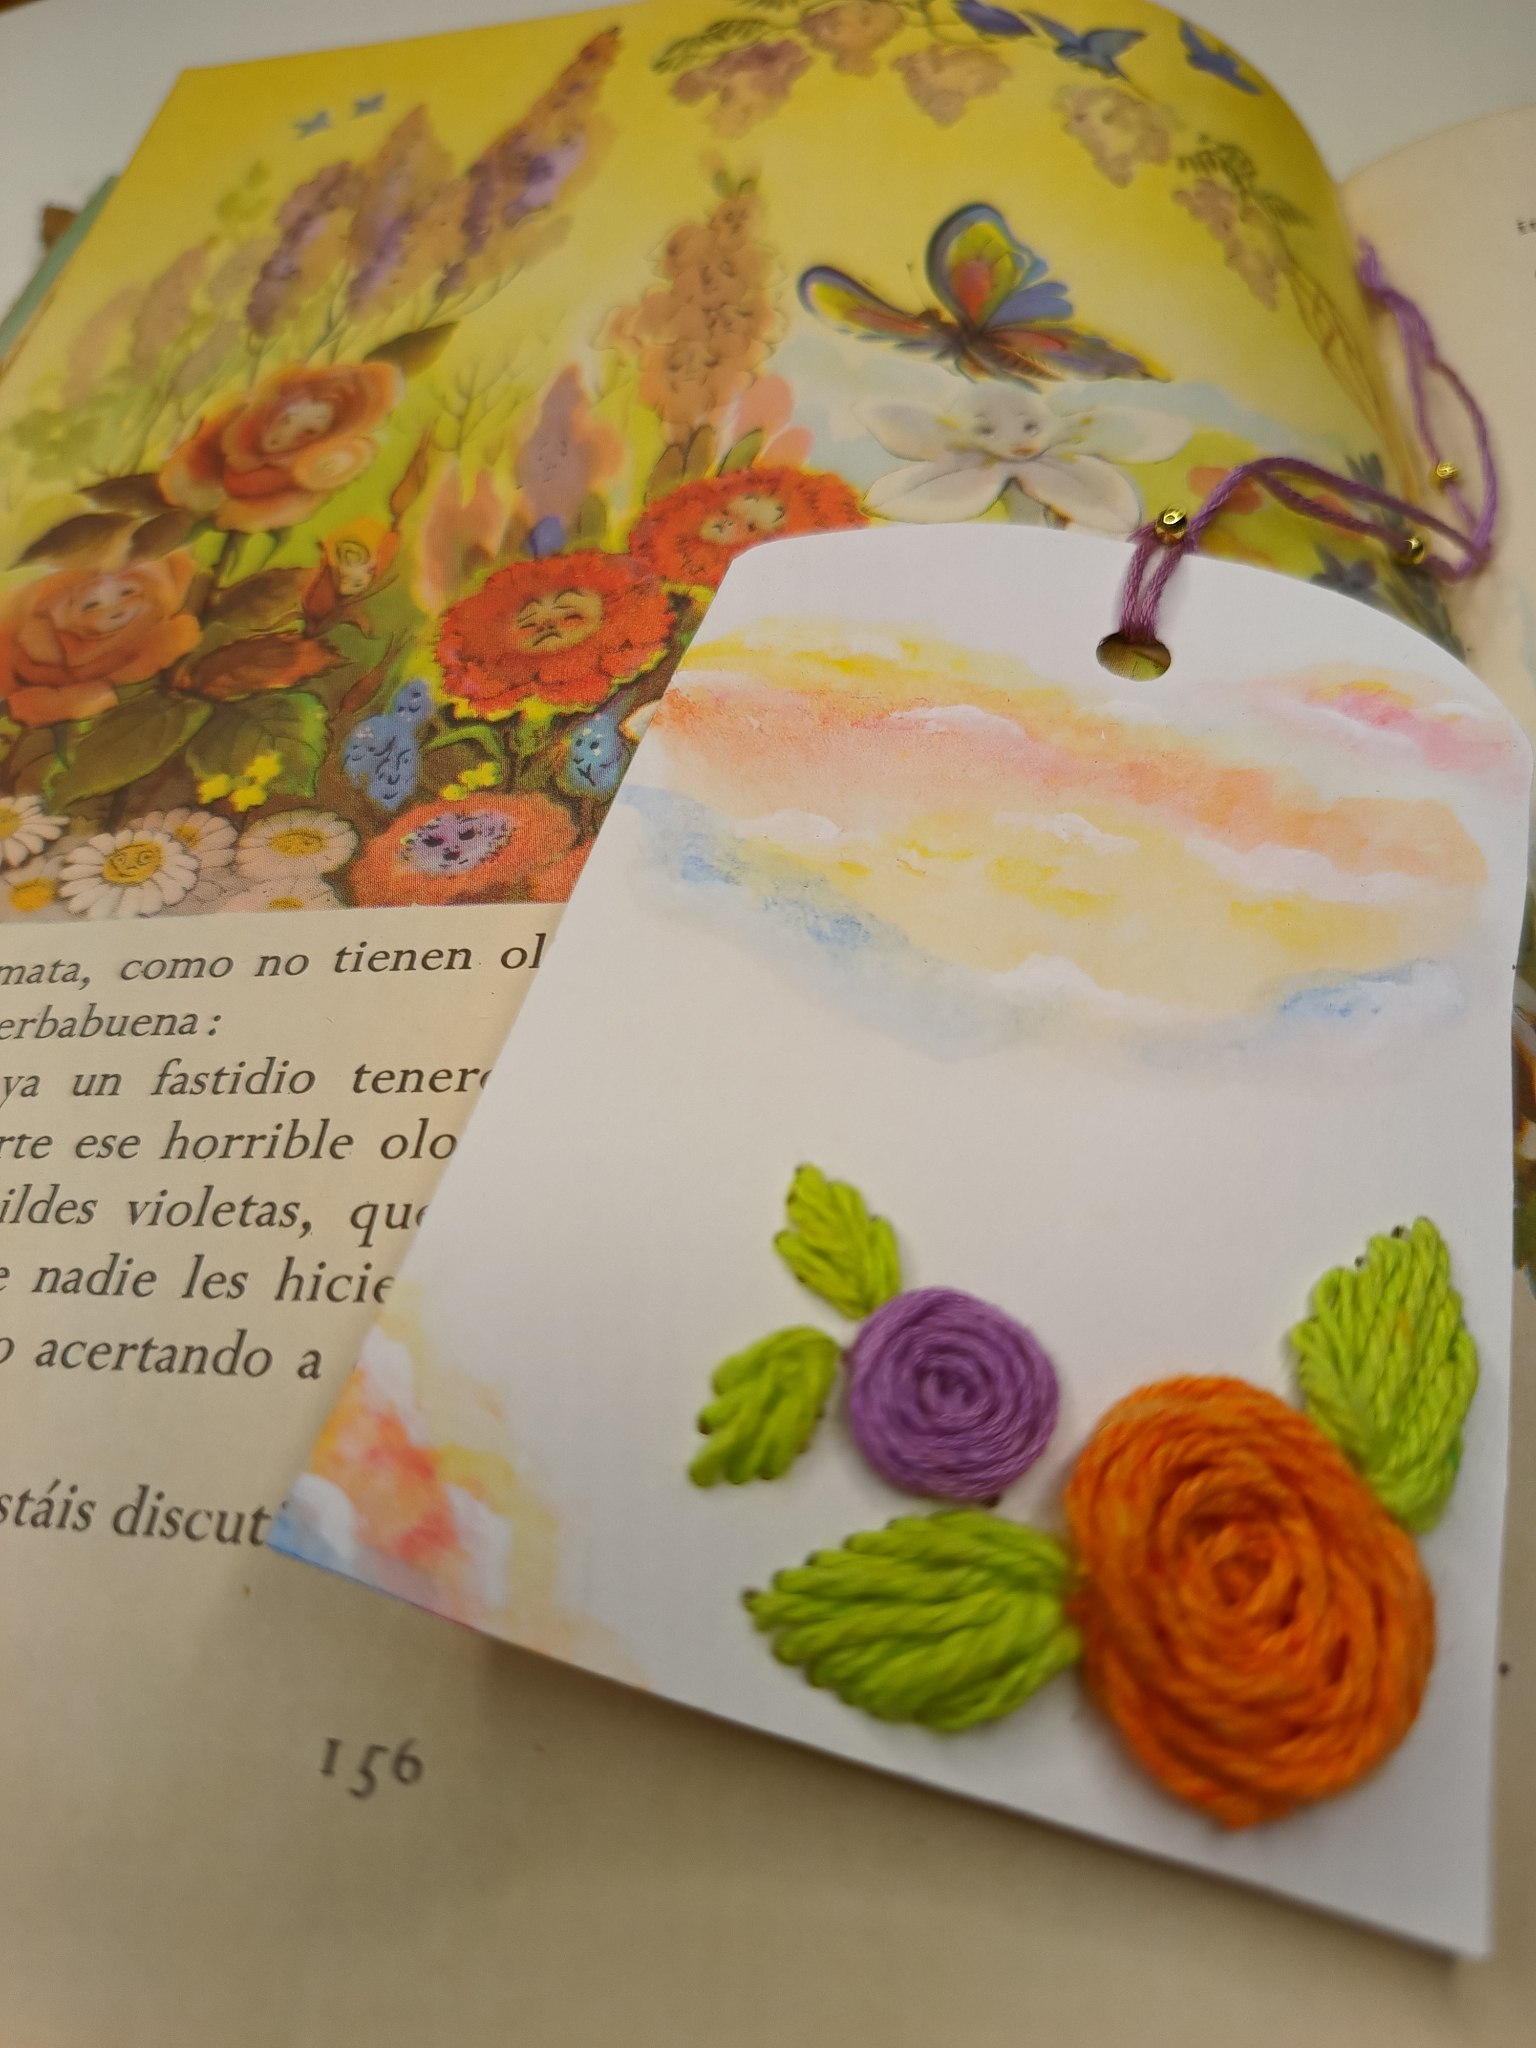
Ahora sí, el resultado final con el marcalibros en uso para que vean la preciosidad que es (¡lo estoy amando en serio!).
> Now, here's the final result with the bookmark in use so you can see how beautiful it is (I'm seriously loving it!).
 | 
--- | ---
 | 
--- | ---
Resultado final / Final result
¡Muchas gracias por leerme! Thank you so much for reading me!
Fotografías propias, tomadas con mi Motorola g72. Traducido al inglés con DeepL.
Own photographs, taken with my Motorola g72. Translated to English with DeepL.