🌹🥀🌹🥀🌹🥀🌹🥀🌹🥀🌹
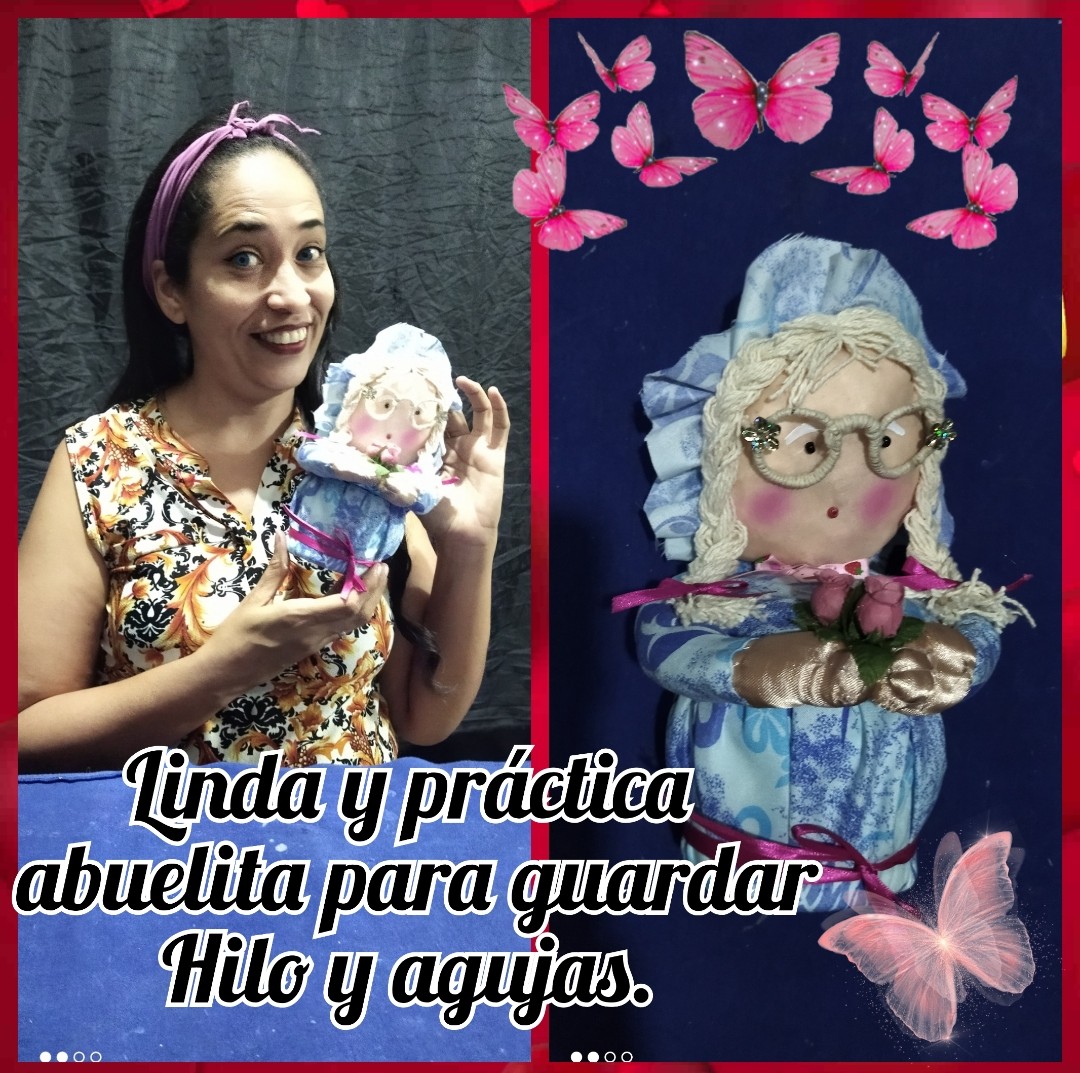
Greetings beautiful and wonderful people of hive I hope everyone is having a good time, today I return to this community that has opened its doors to me and in which I have felt at ease and like a fish in water, because here I can develop a little manual arts that I enjoy so much, a community where creativity is the order of the day.
Today I brought you a tutorial of the elaboration of a beautiful needle and thread holder, with a granny theme, that was beautiful, not to mention how tender it looks, and how relaxing it was, so without further ado my beautiful little bees here I leave you the step by step of the elaboration, I did it in a very explanatory and simple way, so without further ado, let's get to work.
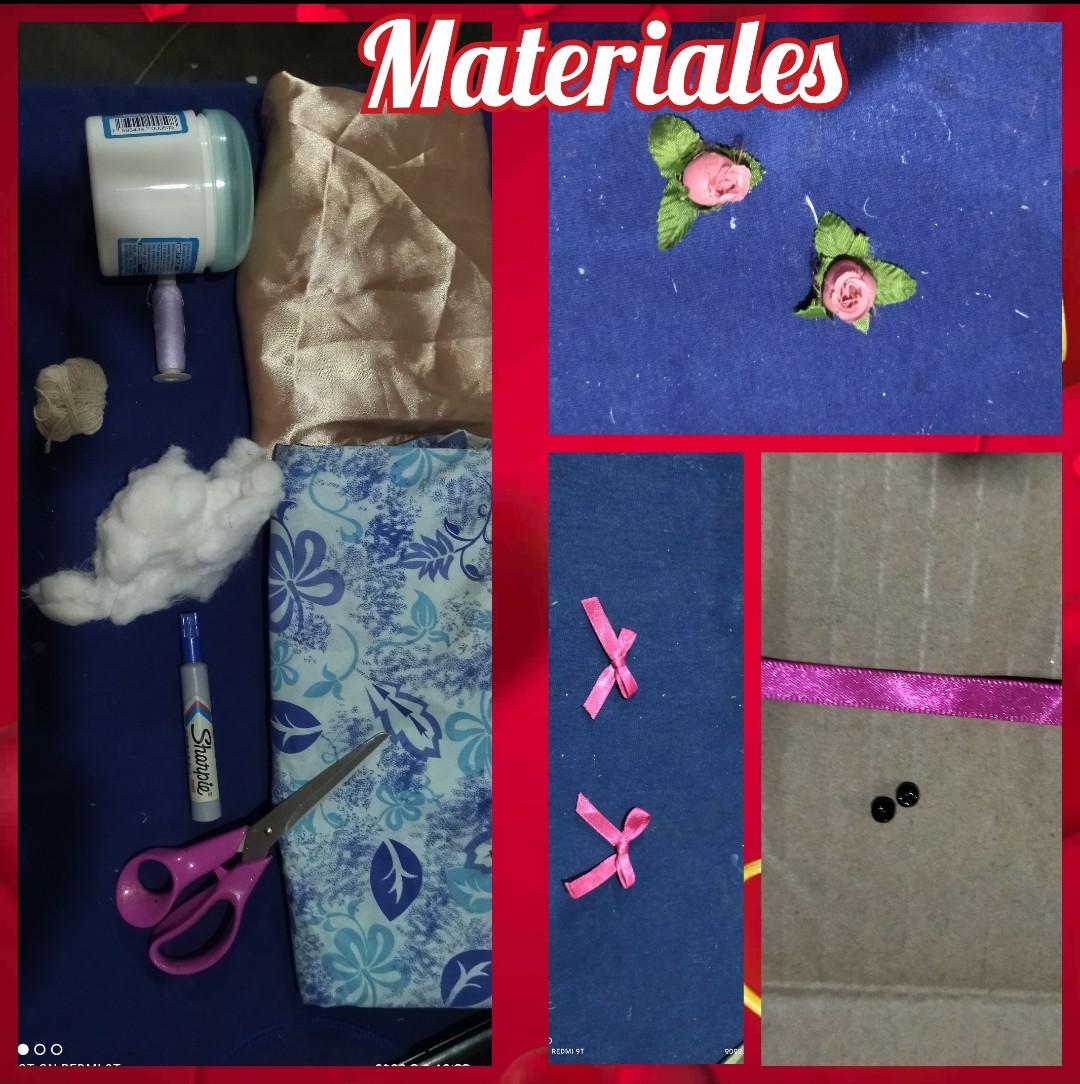
MATERIALES//MATERIALS.
🌹🥀🌹🥀🌹🥀🌹🥀🌹🥀🌹
🌹Tela color piel y tela de cualquier estampado.//Leather-colored fabric and fabric of any pattern.
🌹Relleno.//Filling.
🌹Tijera.//Scissors.
🌹 Aguja e hilo.//Needle and thread.
🌹 Silicón frío.//Cold silicone.
🌹 Mostacilla roja y negra.//Red and black mustard.
🌹Hilo pabilo.//Pabilo thread.
🌹 Marcador.//Marker.
🌹 Flores.//Flowers.
🌹 Lazos de cinta delgada.//Thin ribbon ties.
🌹Un embase plástico.//A plastic container.
🌹 Pintura blanca.//White paint.
🌹 Alambre.//Wire.
🌹🥀🌹🥀🌹🥀🌹🥀🌹🥀🌹
PASO A PASO // STEP BY STEP
🌹🥀🌹🥀🌹🥀🌹🥀🌹🥀🌹
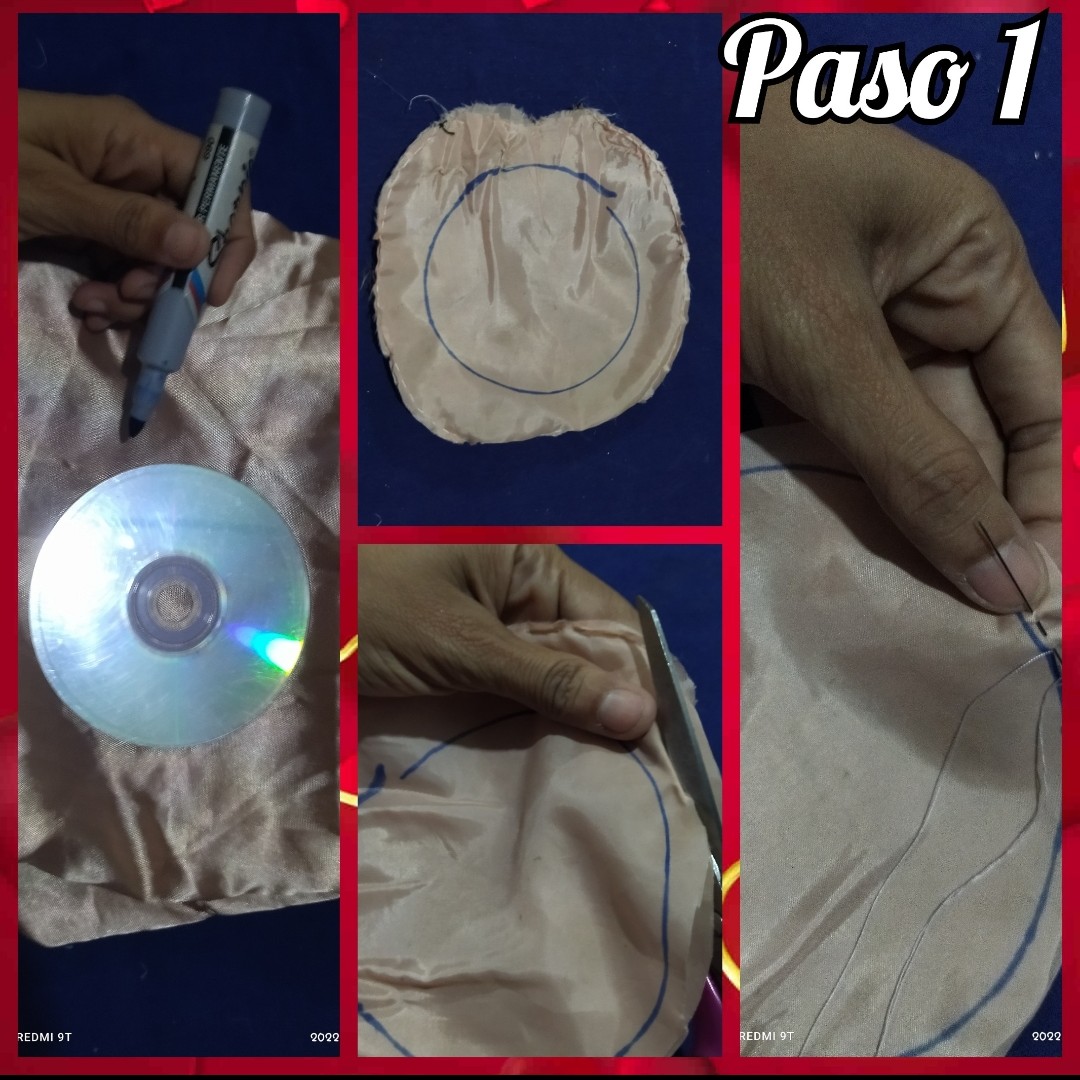
PASO 1// STEP 1
🌹🥀🌹🥀🌹🥀🌹🥀🌹🥀🌹
First we take the skin colored fabric and with the help of an old CD and the marker, we draw what will be the face of Grandma Cruz, we must leave a small distance in case the fabric is spun on its edges, but if the fabric has no problem we cut where it was initially marked, remember there are two pieces that we are going to cut.
The size of the face, i.e. the circle, depends on the size of the container we have.
🌹🥀🌹🥀🌹🥀🌹🥀🌹🥀🌹
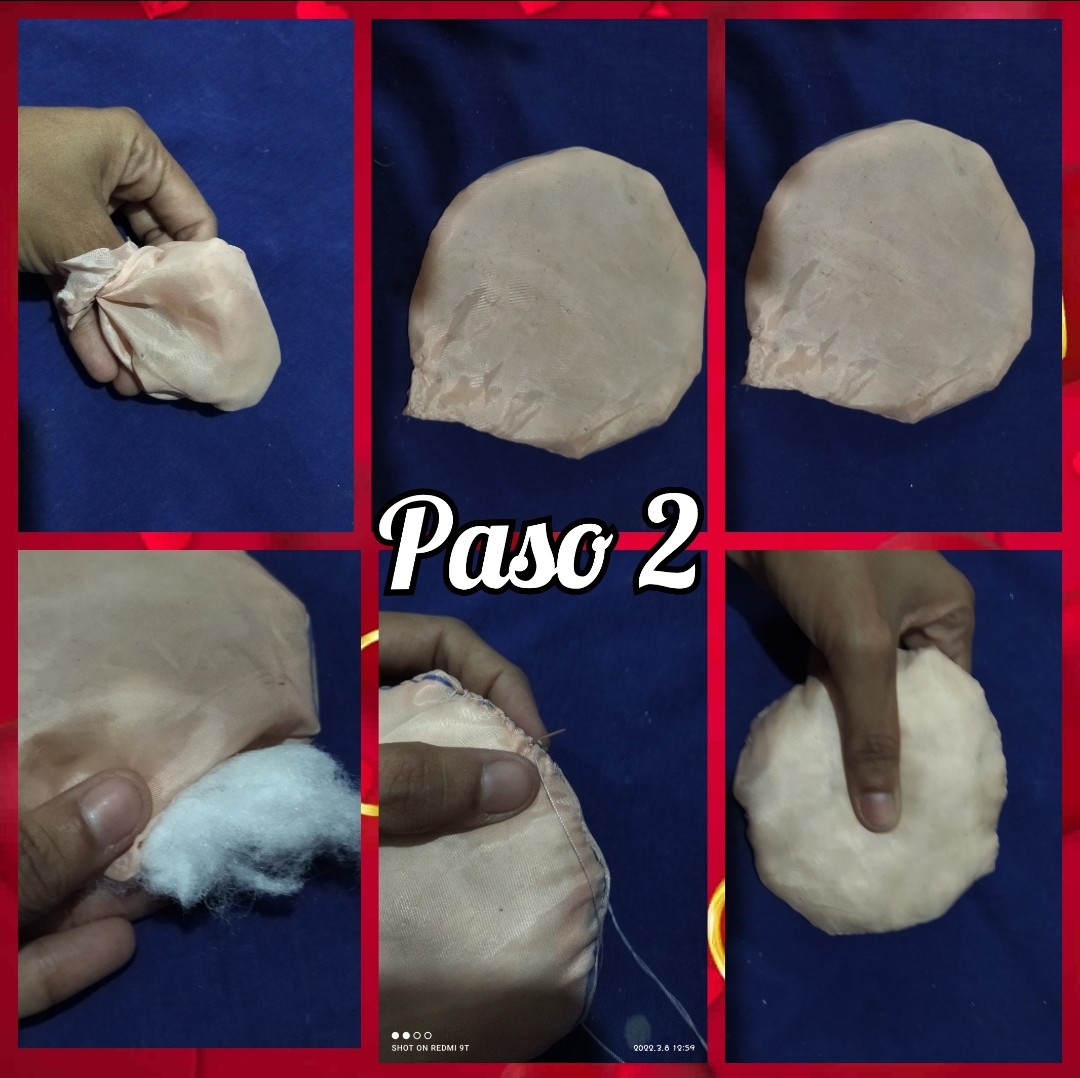
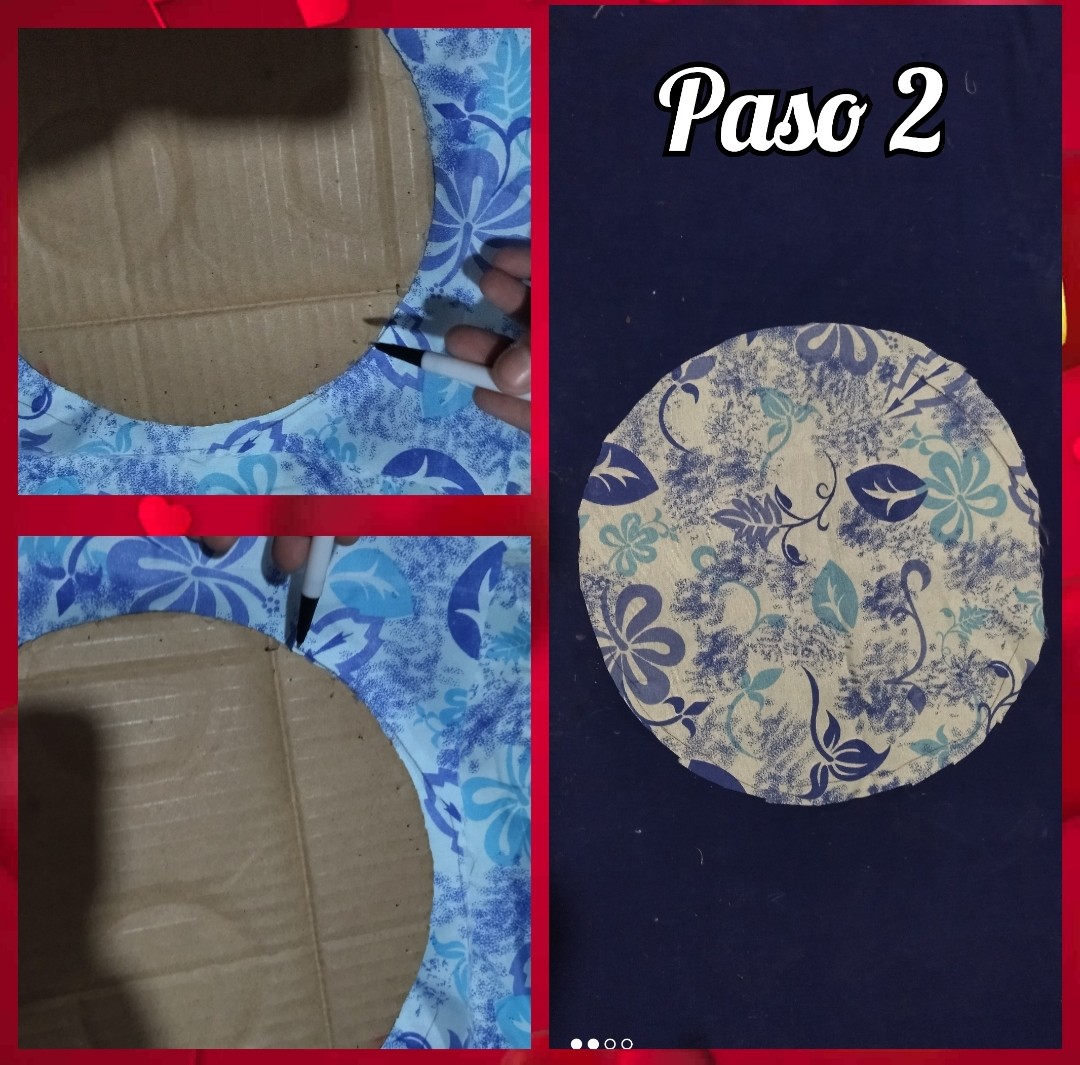
PASO 2 // STEP 2
🌹🥀🌹🥀🌹🥀🌹🥀🌹🥀🌹
With the needle and thread we sew all around the edge trying to get the round shape of the face, when we finish sewing we leave an open space, where we are going to turn the piece.
Once turned over we will take the filling and begin to put it through the hole, making sure it is well compacted so that there are no lumps that will damage the work, remember that it is the face and should be very nice, when we finish filling we close the hole with a small seam.
🌹🥀🌹🥀🌹🥀🌹🥀🌹🥀🌹
Then on the other fabric we have we mark a large circle big enough to cover our container as well as the lid, so we will get three pieces of the same size, which we will use later.
🌹🥀🌹🥀🌹🥀🌹🥀🌹🥀🌹
PASO 3 // STEP 3
🌹🥀🌹🥀🌹🥀🌹🥀🌹🥀🌹
Then we take needle and thread and we sew the edge and what is left is to ruffle it, when we finish doing it we put the container in and adjust it well, then we secure it with a very small seam.
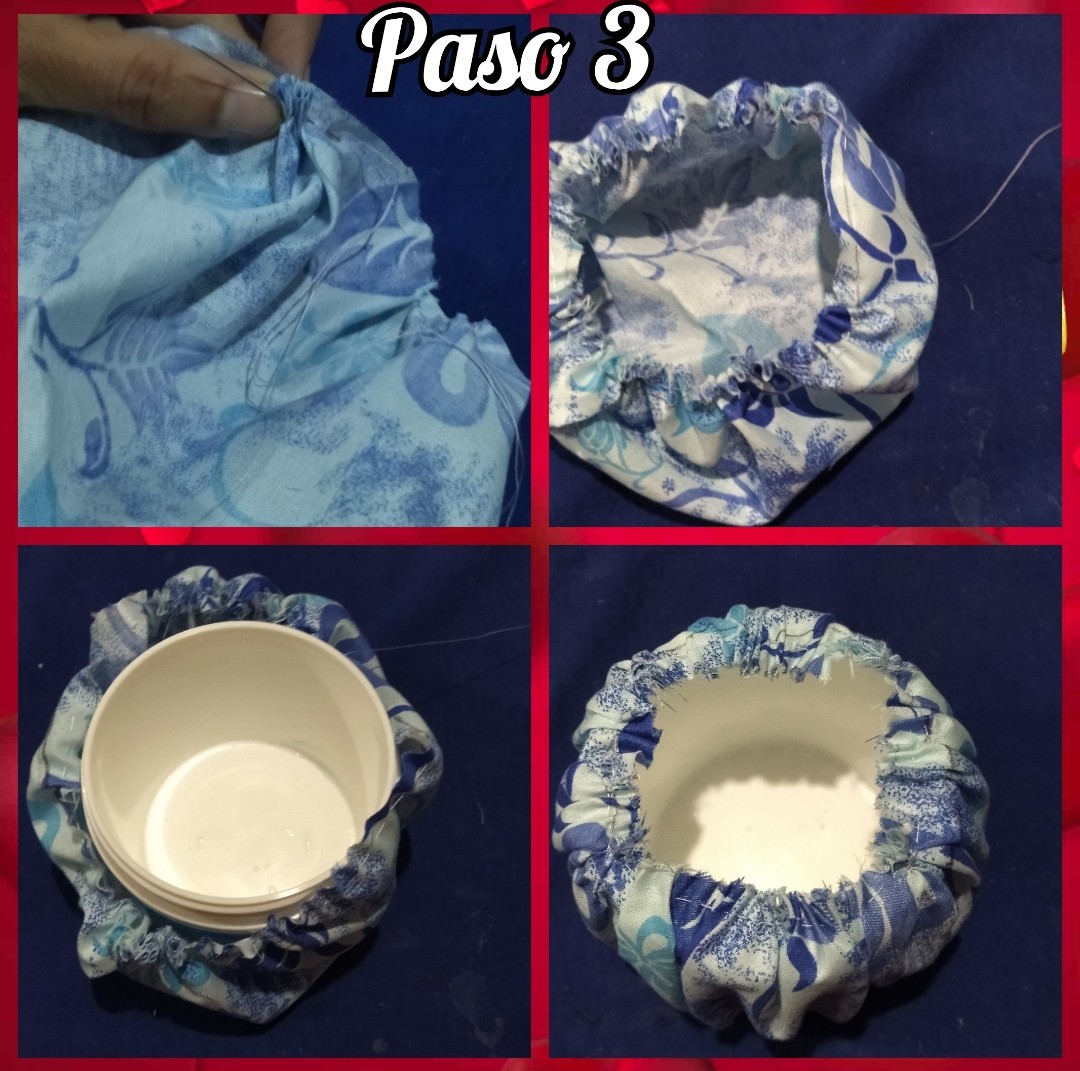
🌹🥀🌹🥀🌹🥀🌹🥀🌹🥀🌹
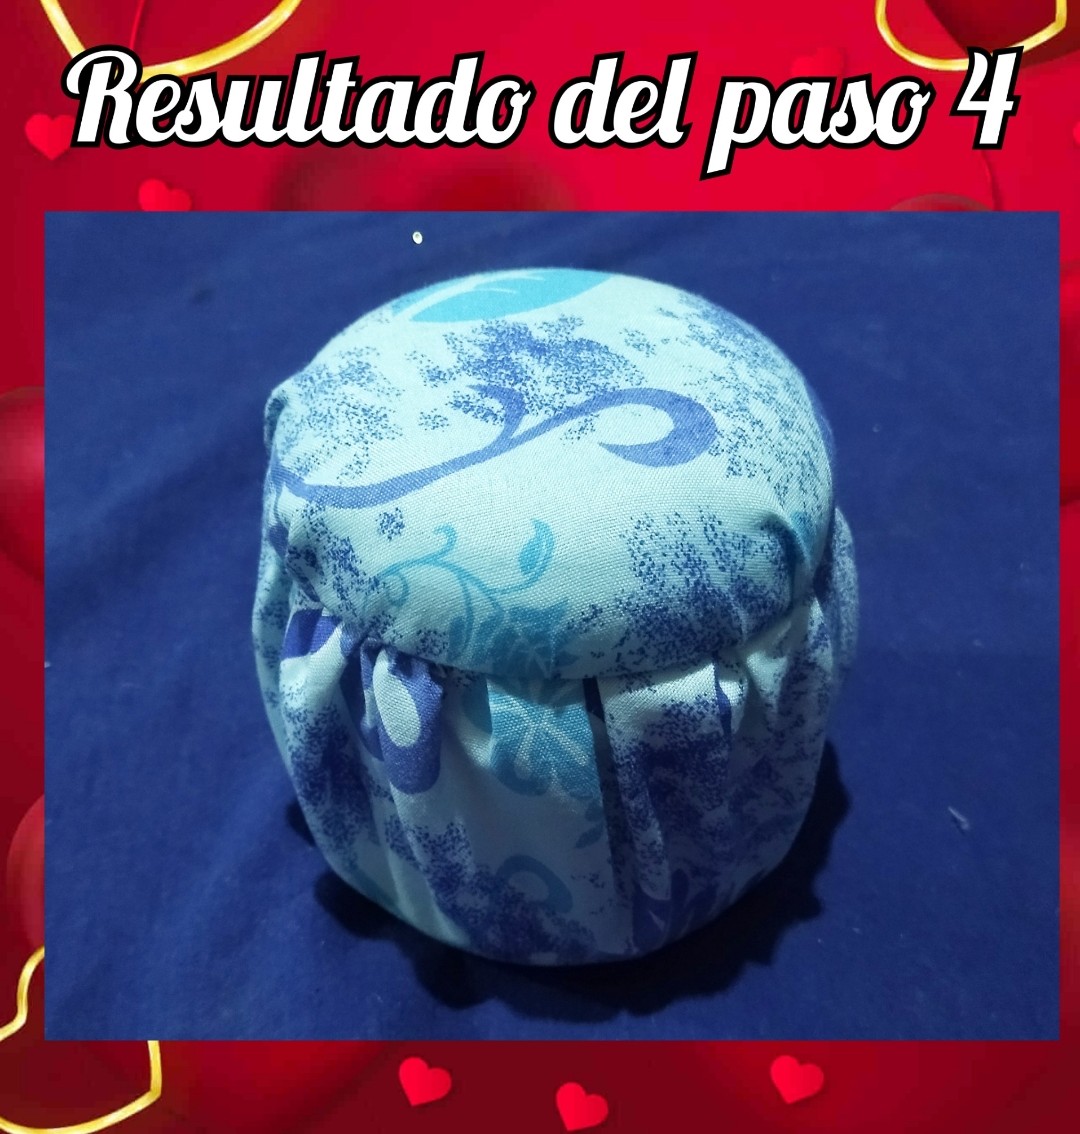
PASO 4 // STEP 4
🌹🥀🌹🥀🌹🥀🌹🥀🌹🥀🌹
Here in this step I did exactly the last of the previous step, I made a seam all around the edge of the fabric, we introduce the cover and then we adjust it.
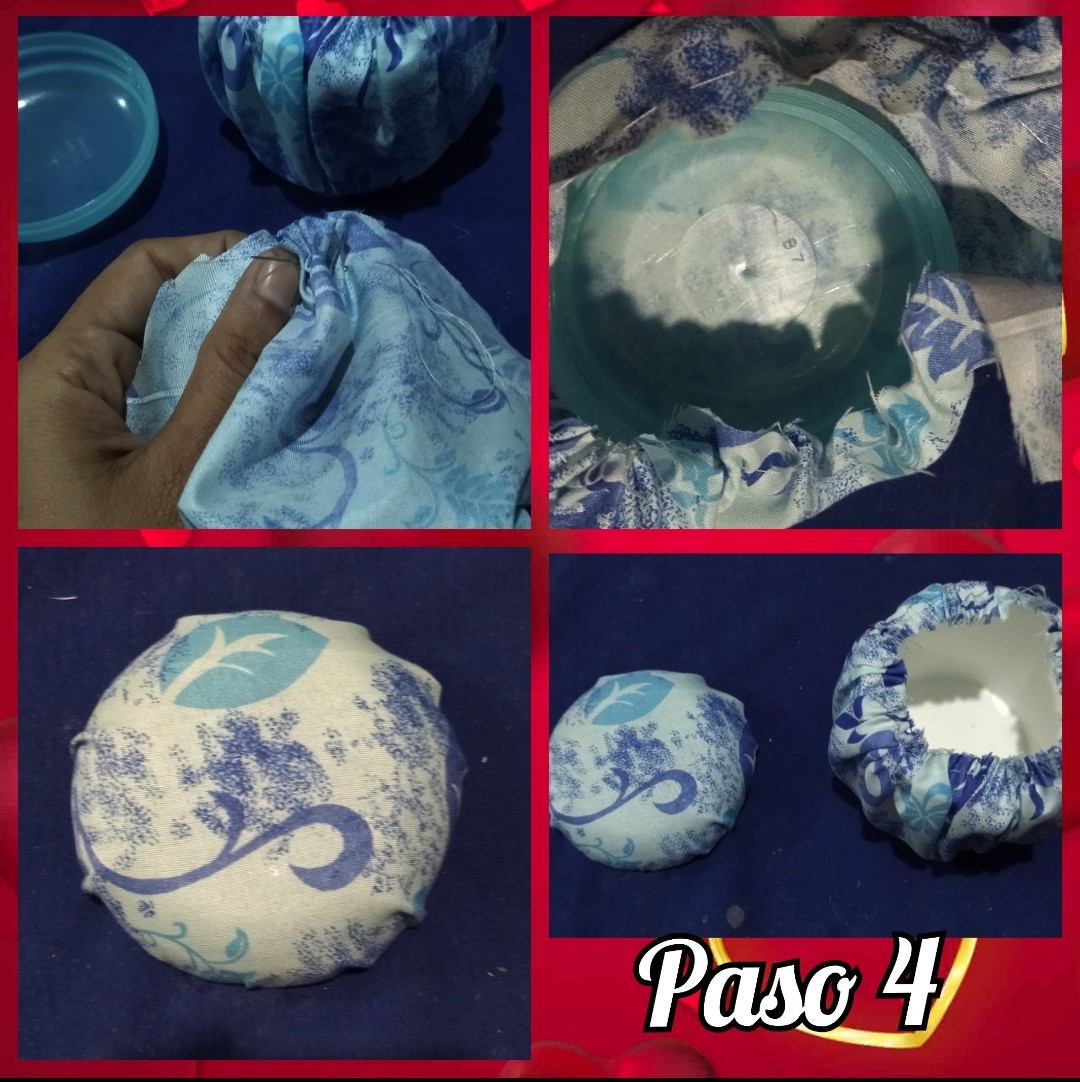
🌹🥀🌹🥀🌹🥀🌹🥀🌹🥀🌹
🌹🥀🌹🥀🌹🥀🌹🥀🌹🥀🌹
PASO 5 // STEP 5
🌹🥀🌹🥀🌹🥀🌹🥀🌹🥀🌹
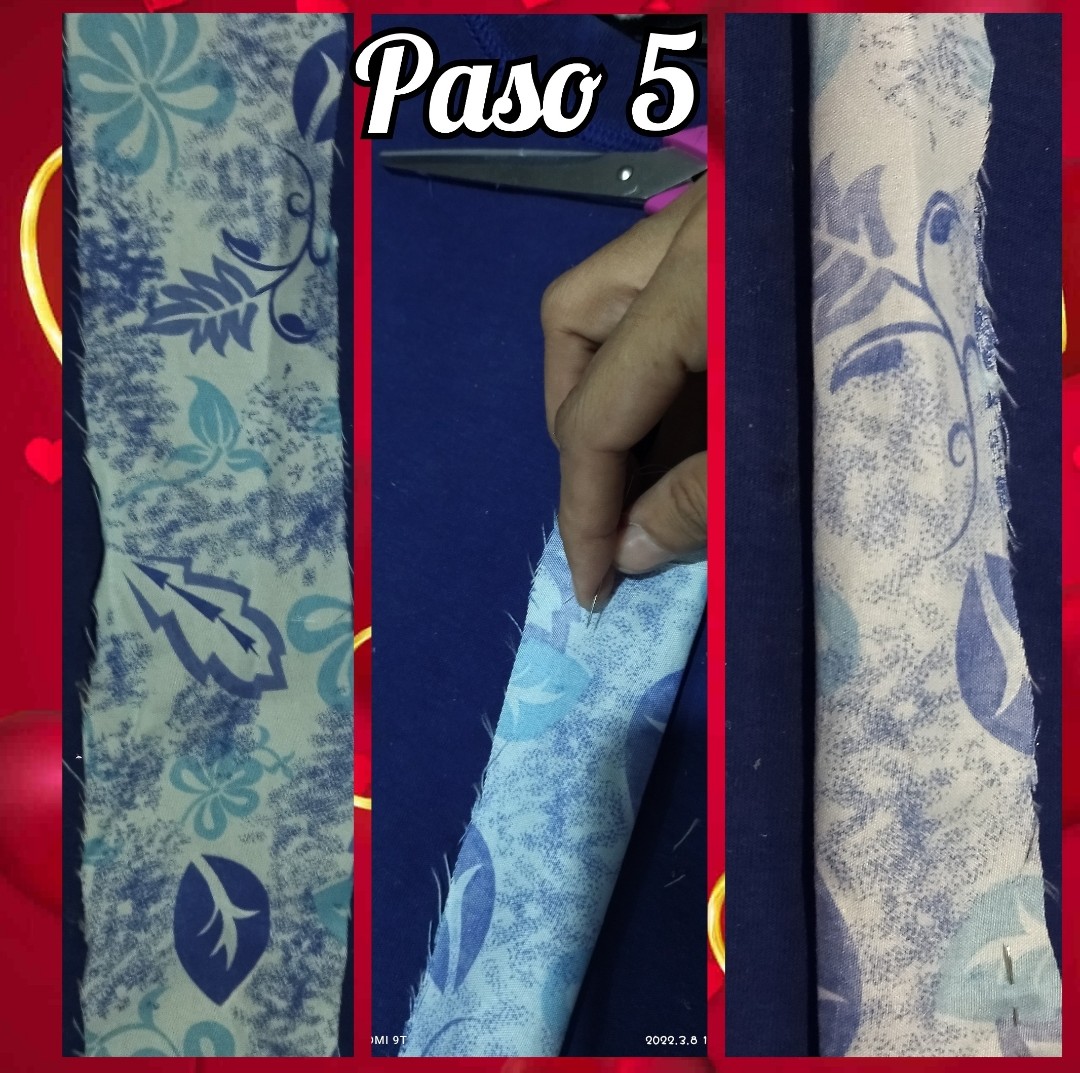
We take a strip of approximately 10 cm wide and the length we take it by measuring around the container we use, we cut it and cook along the edge without closing the ends, when we finish we turn it over.
🌹🥀🌹🥀🌹🥀🌹🥀🌹🥀🌹
PASO 6 // STEP 6
🌹🥀🌹🥀🌹🥀🌹🥀🌹🥀🌹
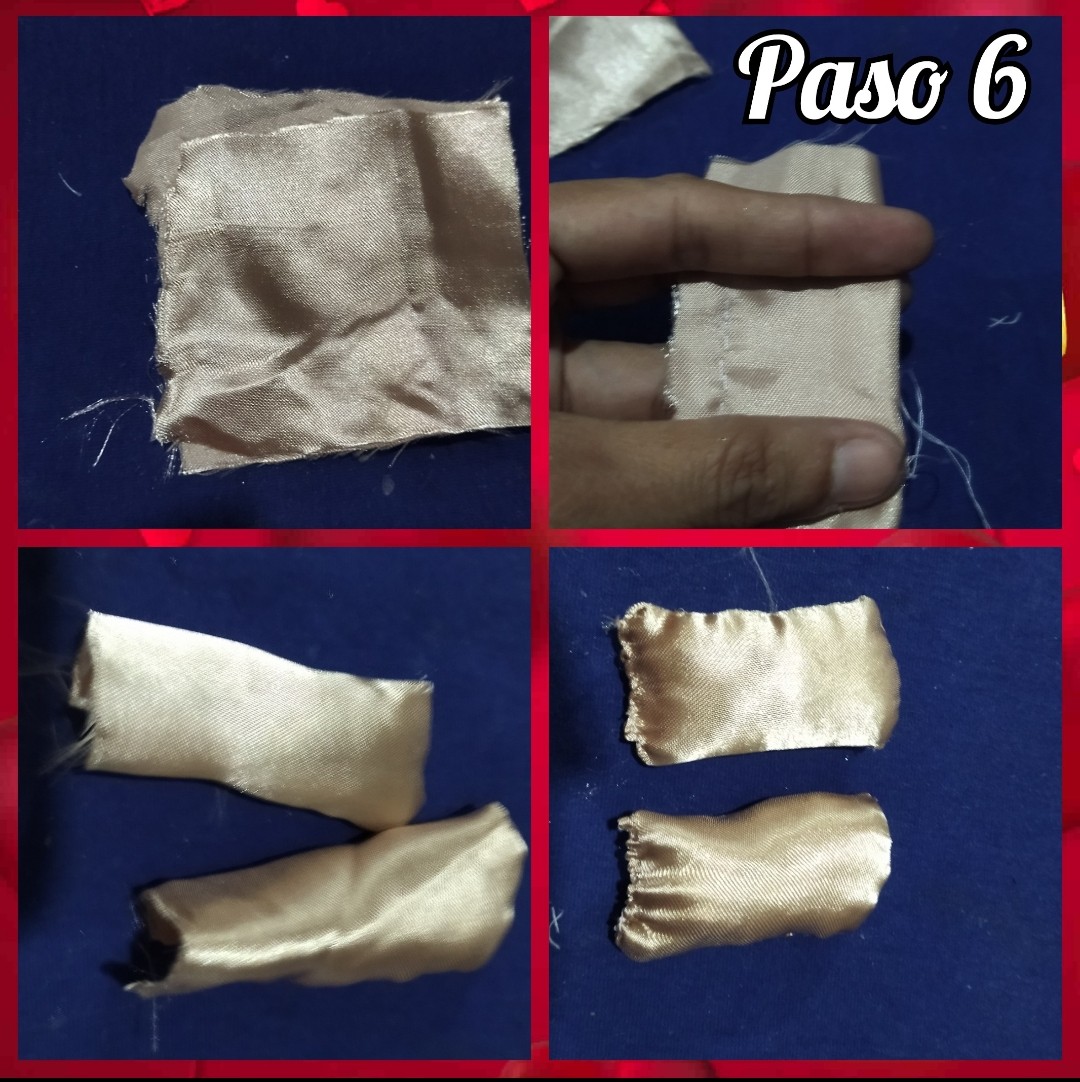
Then we take two squares of skin-colored fabric of approximately 7 cm long and 7 cm wide, we bake the same on the edge but we will try to give it a round shape at the tip since we are going to use it as the little hands of Grandma Cruz.
At the end of sewing we turn over and stuff with cotton stuffing and seal.
🌹🥀🌹🥀🌹🥀🌹🥀🌹🥀🌹
PASO 7 // STEP 7
🌹🥀🌹🥀🌹🥀🌹🥀🌹🥀🌹
We take the strip that we previously cooked and fill it with cotton, leaving a space where we will put the skin-colored square to form the arms and hands of the grandmother.

🌹🥀🌹🥀🌹🥀🌹🥀🌹🥀🌹
PASO 8 // STEP 8
🌹🥀🌹🥀🌹🥀🌹🥀🌹🥀🌹
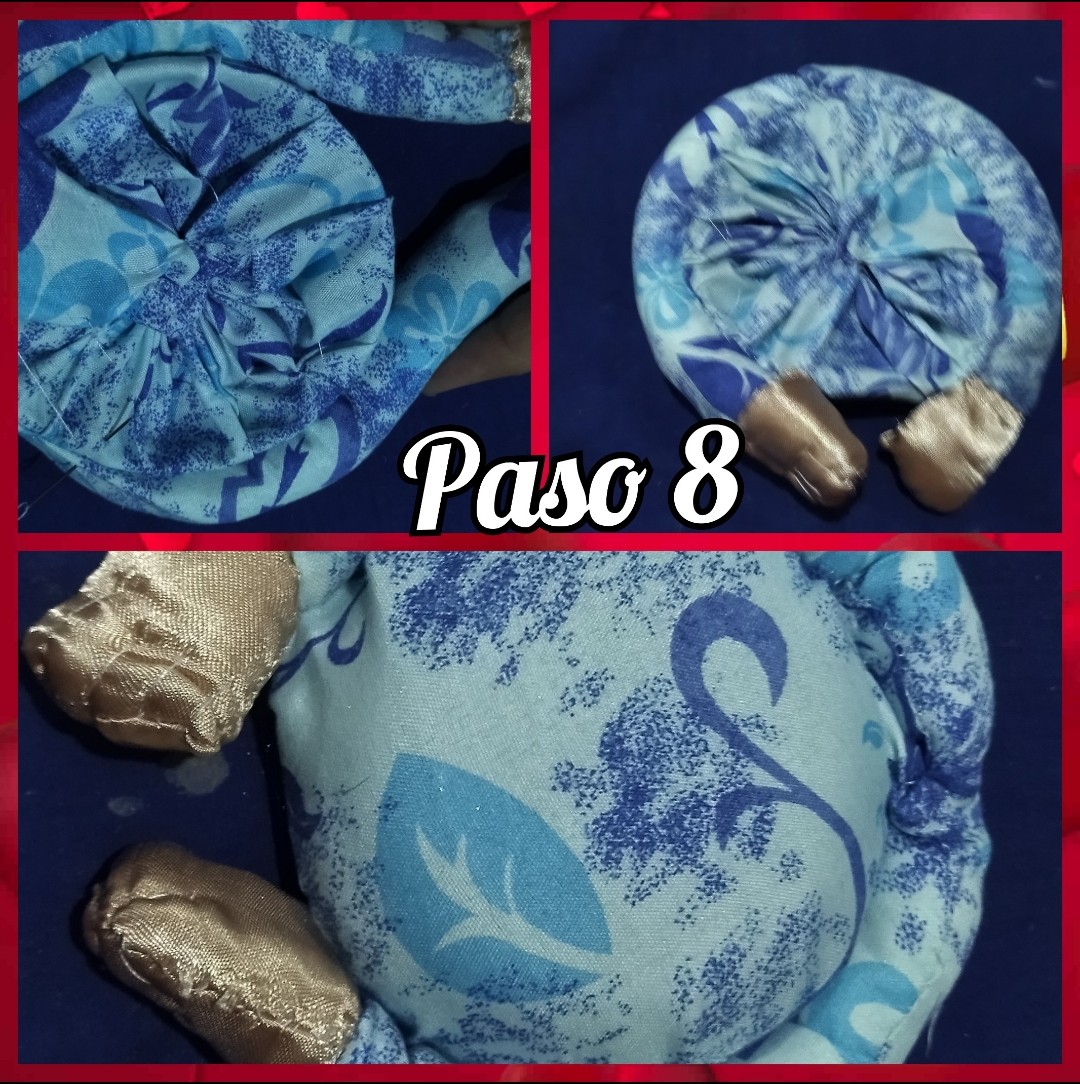
Once the grandmother's arms are formed with her little hands, we are going to glue it to the lid, some people do it with silicone but I don't like it very much because sometimes it can stain and affect the work, instead I like to work with needle and thread, this way it works better and cleaner.
🌹🥀🌹🥀🌹🥀🌹🥀🌹🥀🌹
PASO 9 // STEP 9
🌹🥀🌹🥀🌹🥀🌹🥀🌹🥀🌹
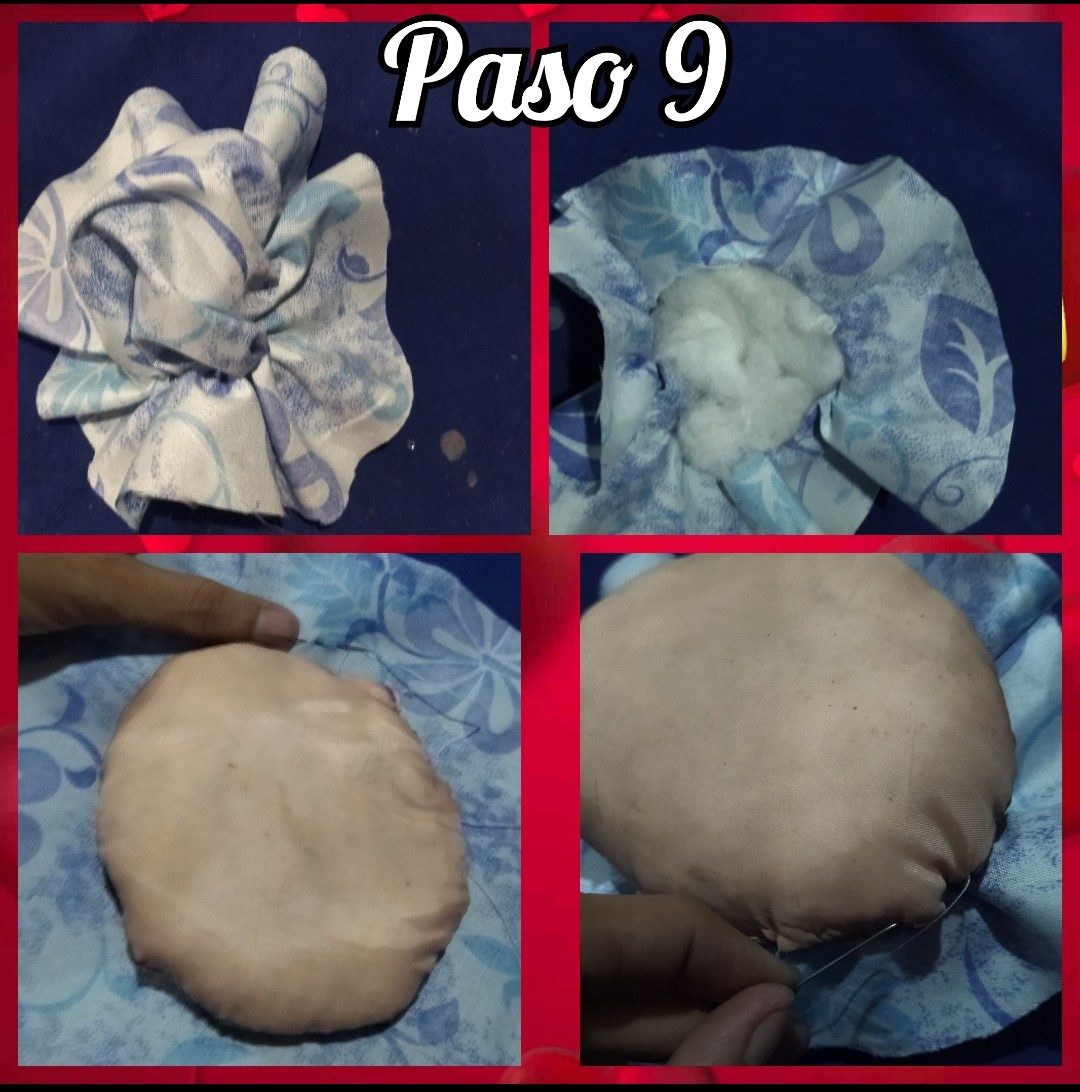
We are going to take one of the three circles of fabric that we took out in step number 2, but we are going to make the seam in the center, we must form a small circle which we are going to fill with a little cotton stuffing and then we are going to glue the face of the fabric which is going to be the grandmother's hat.
🌹🥀🌹🥀🌹🥀🌹🥀🌹🥀🌹
PASO 10 // STEP 10
🌹🥀🌹🥀🌹🥀🌹🥀🌹🥀🌹
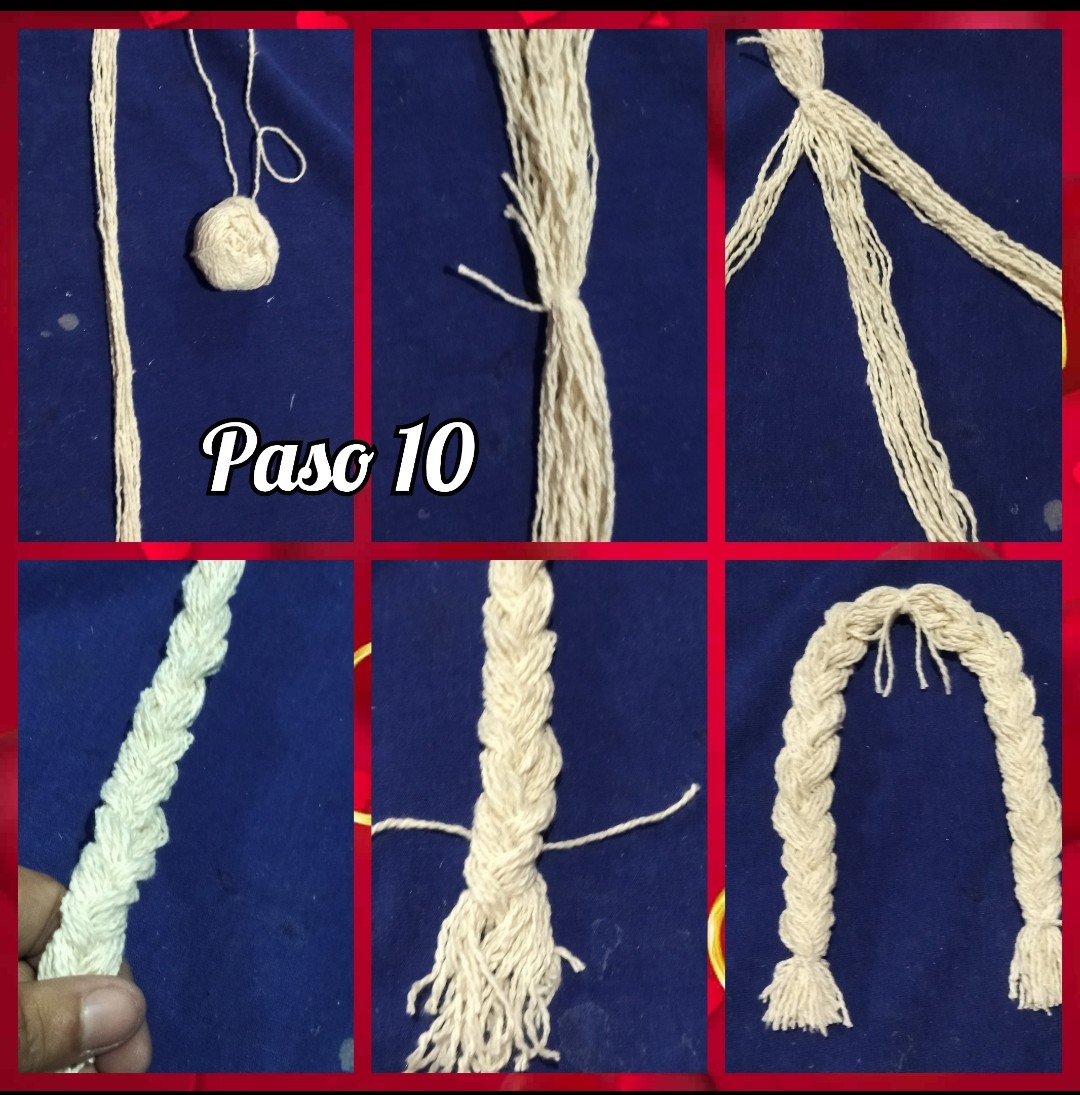
In this step we are going to take the wick thread and measure on the grandmother's face the length that we are going to make the little bows, once measured we are going to place many rows until we form a thick group, which we are going to divide in two and tie in the center.
When it is already tied, we take the scissors and cut the ends, then we weave on both sides, in this way we are making the hair of Grandma Cruz.
🌹🥀🌹🥀🌹🥀🌹🥀🌹🥀🌹
PASO 11// STEP 11
🌹🥀🌹🥀🌹🥀🌹🥀🌹🥀🌹
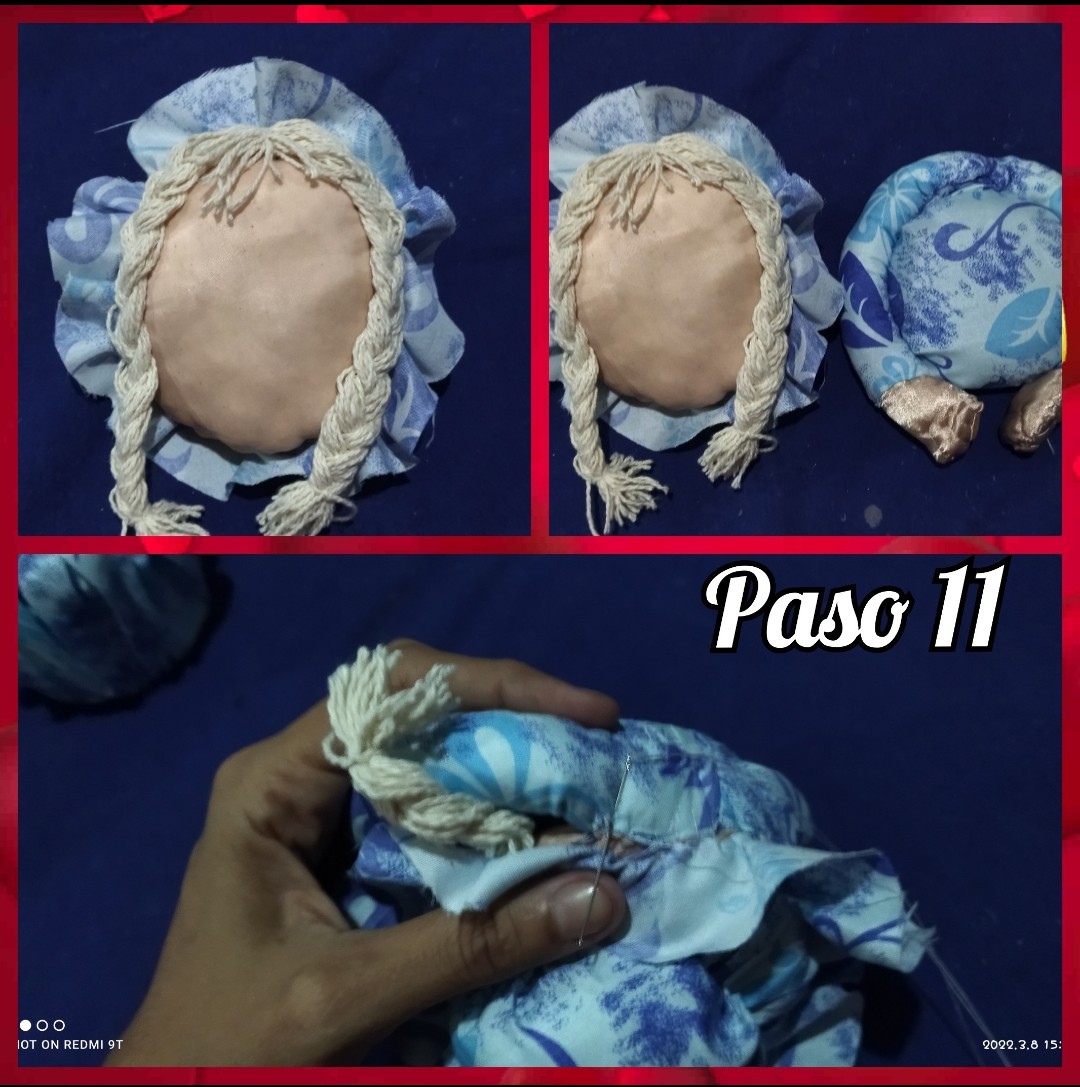
We put the hair on the grandmother's face and we are going to glue it little by little, making sure that it is well fixed. In this step you can use Silicone, I also used needle and thread to glue it.
🌹🥀🌹🥀🌹🥀🌹🥀🌹🥀🌹

🌹🥀🌹🥀🌹🥀🌹🥀🌹🥀🌹
PASO 12 // STEP 12
🌹🥀🌹🥀🌹🥀🌹🥀🌹🥀🌹
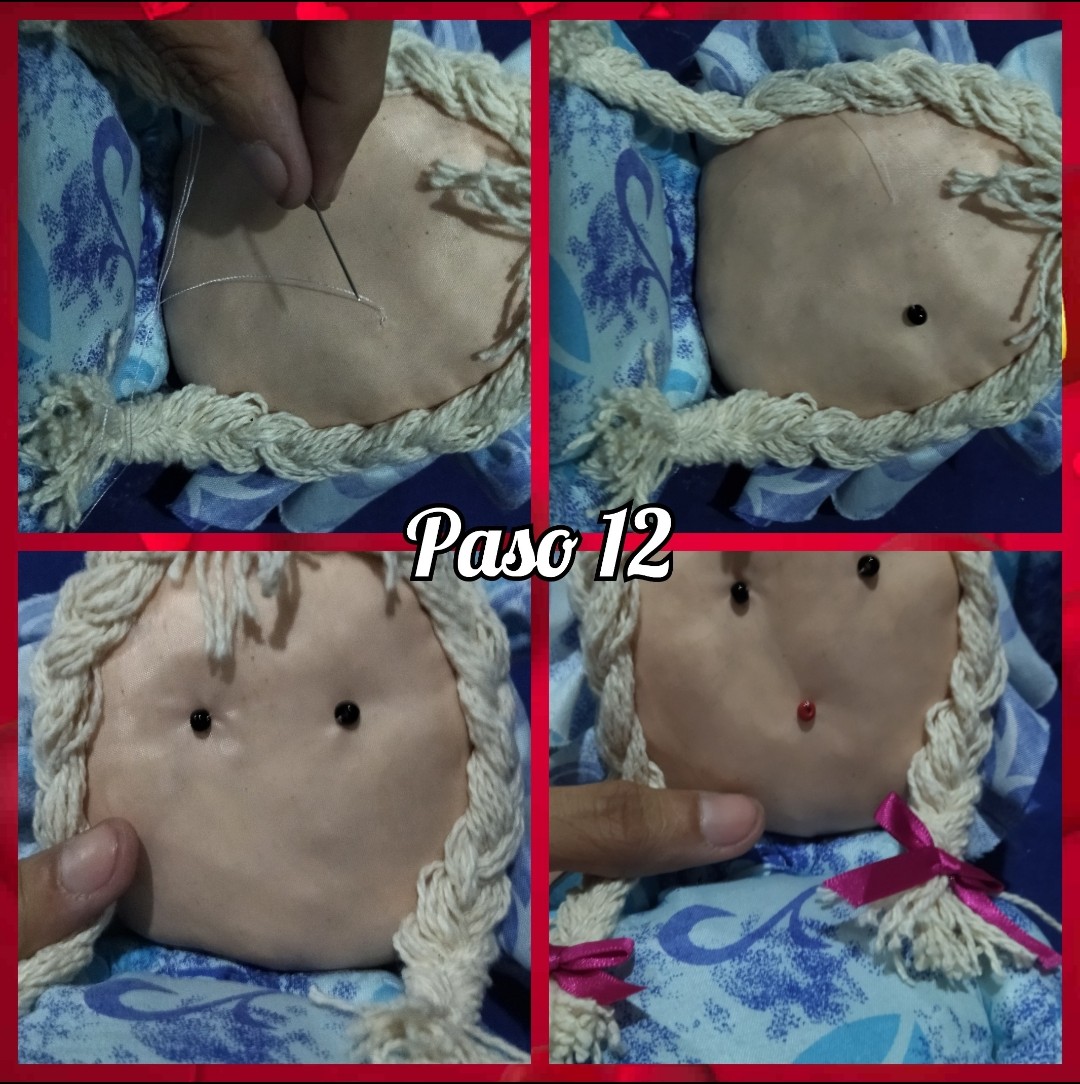
Here we are going to start shaping the doll's face, so we are going to take the black beads and place them as if they were the doll's eyes, and then we take the red beads and place them as the grandmother's mouth, it is very easy to do this step.
🌹🥀🌹🥀🌹🥀🌹🥀🌹🥀🌹
PASO 13 // STEP 13
🌹🥀🌹🥀🌹🥀🌹🥀🌹🥀🌹
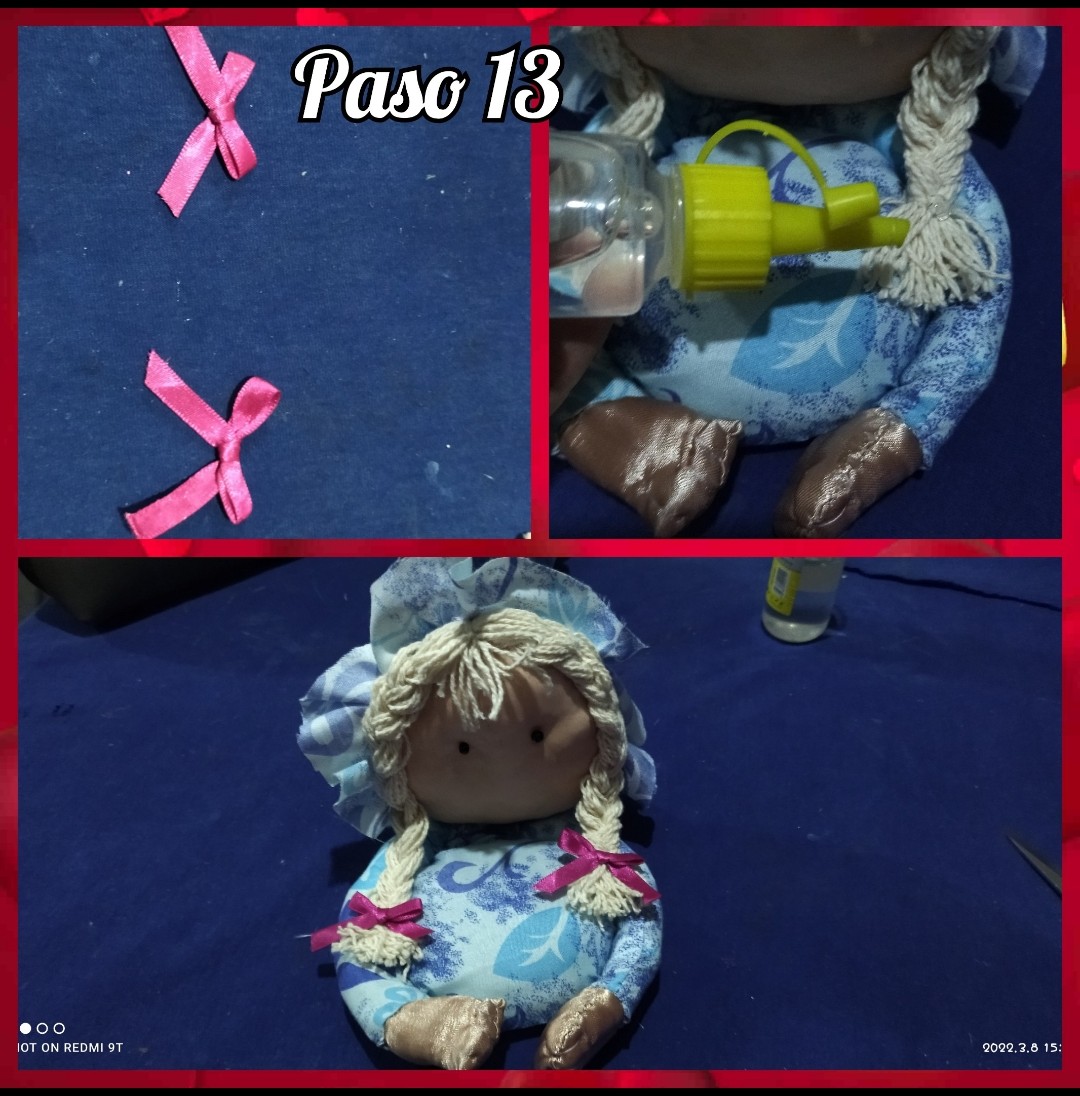
Since we already have some bows that we made previously, we are going to place them at the ends of the bows, so we put a little bit of silicone and glue the ribbons.
🌹🥀🌹🥀🌹🥀🌹🥀🌹🥀🌹
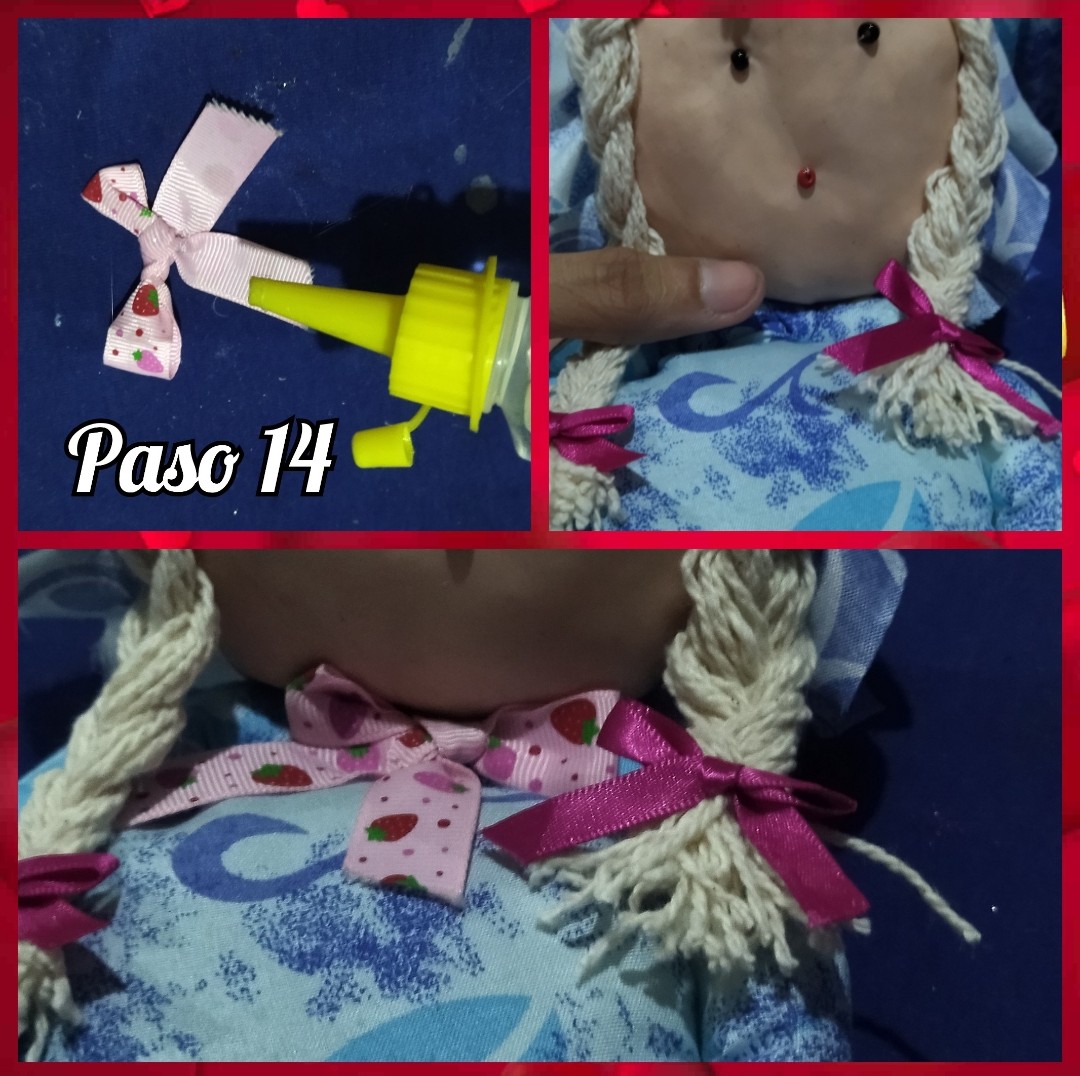
PASO 14 // STEP 14
🌹🥀🌹🥀🌹🥀🌹🥀🌹🥀🌹
As I like to take care of all the details, I took another bow and with some cold silicone I glued it on the neck of the doll, in this way we are giving shape to the work.
🌹🥀🌹🥀🌹🥀🌹🥀🌹🥀🌹
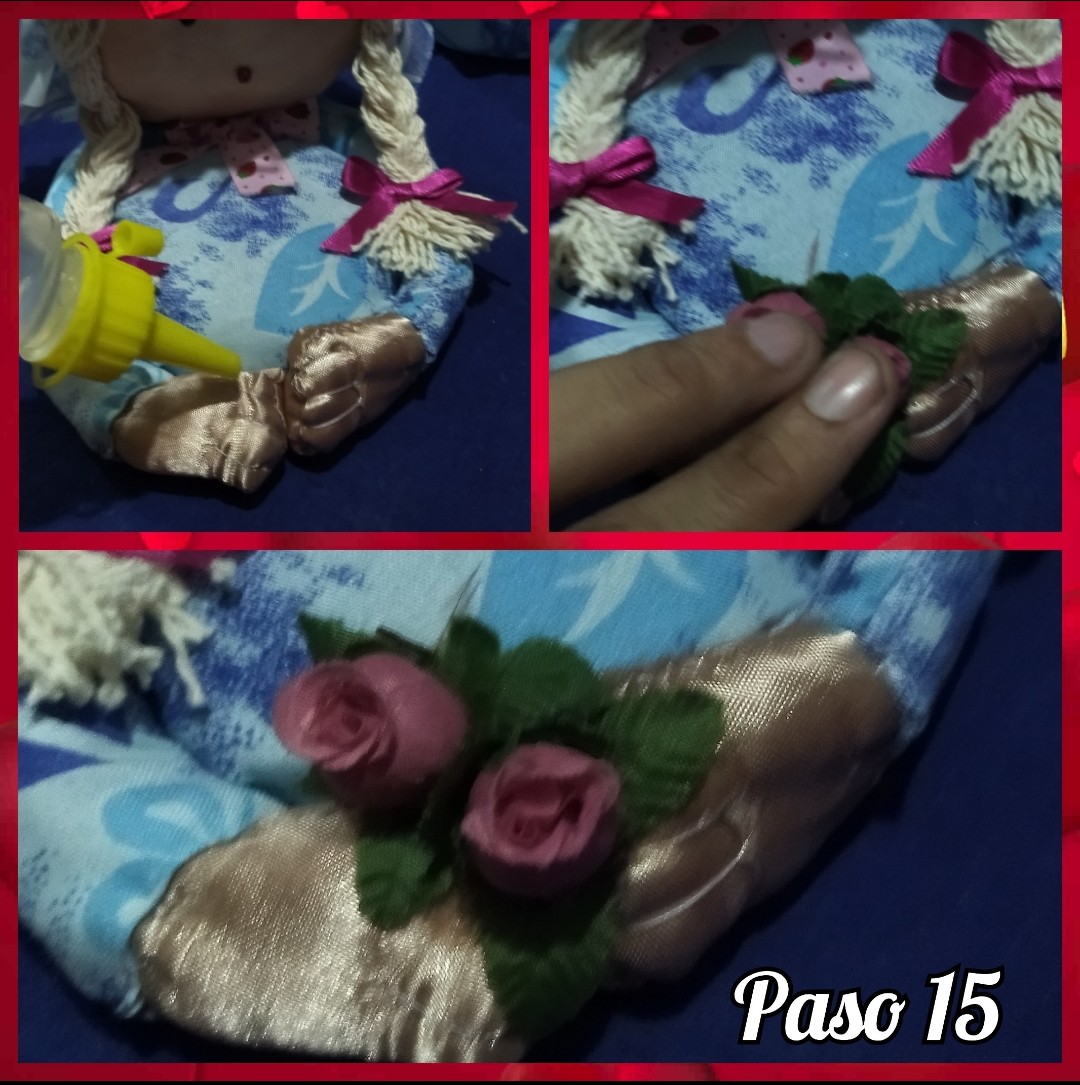
PASO 15 // STEP 15
🌹🥀🌹🥀🌹🥀🌹🥀🌹🥀🌹
In the hands of the grandmother I applied a little cold silicone and glued two flowers, this will give a nice touch to our work, now if we do not have flowers we can place what we consider a decorative element as long as it is nice and flashy.
🌹🥀🌹🥀🌹🥀🌹🥀🌹🥀🌹
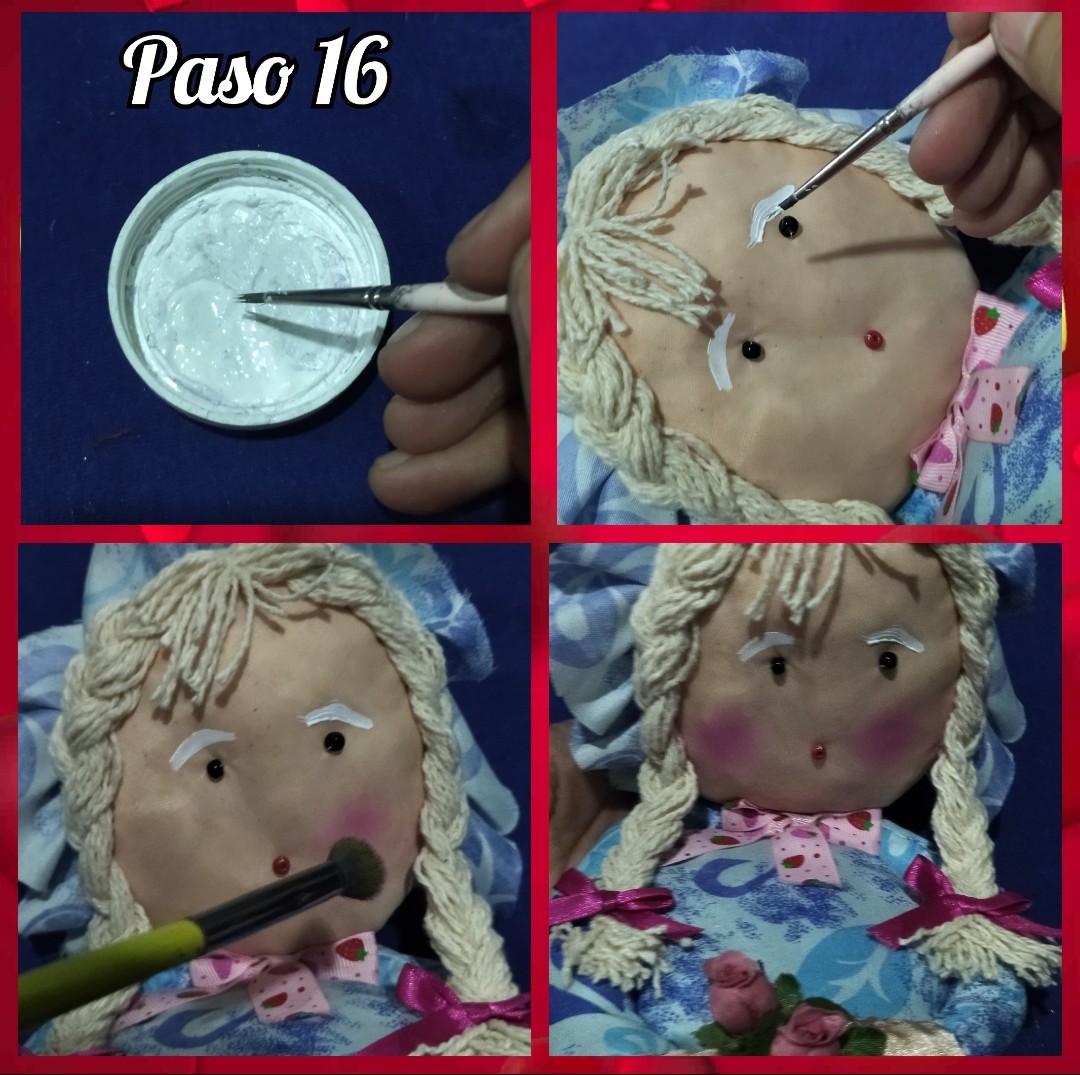
PASO 16 // STEP 16
🌹🥀🌹🥀🌹🥀🌹🥀🌹🥀🌹
Then take some white paint and draw the eyebrows to the grandmother, we will try to make them a little thick but not so thick of course, we just need them to be visible.
<