Imagen editada en Canva / Image edited in Canva
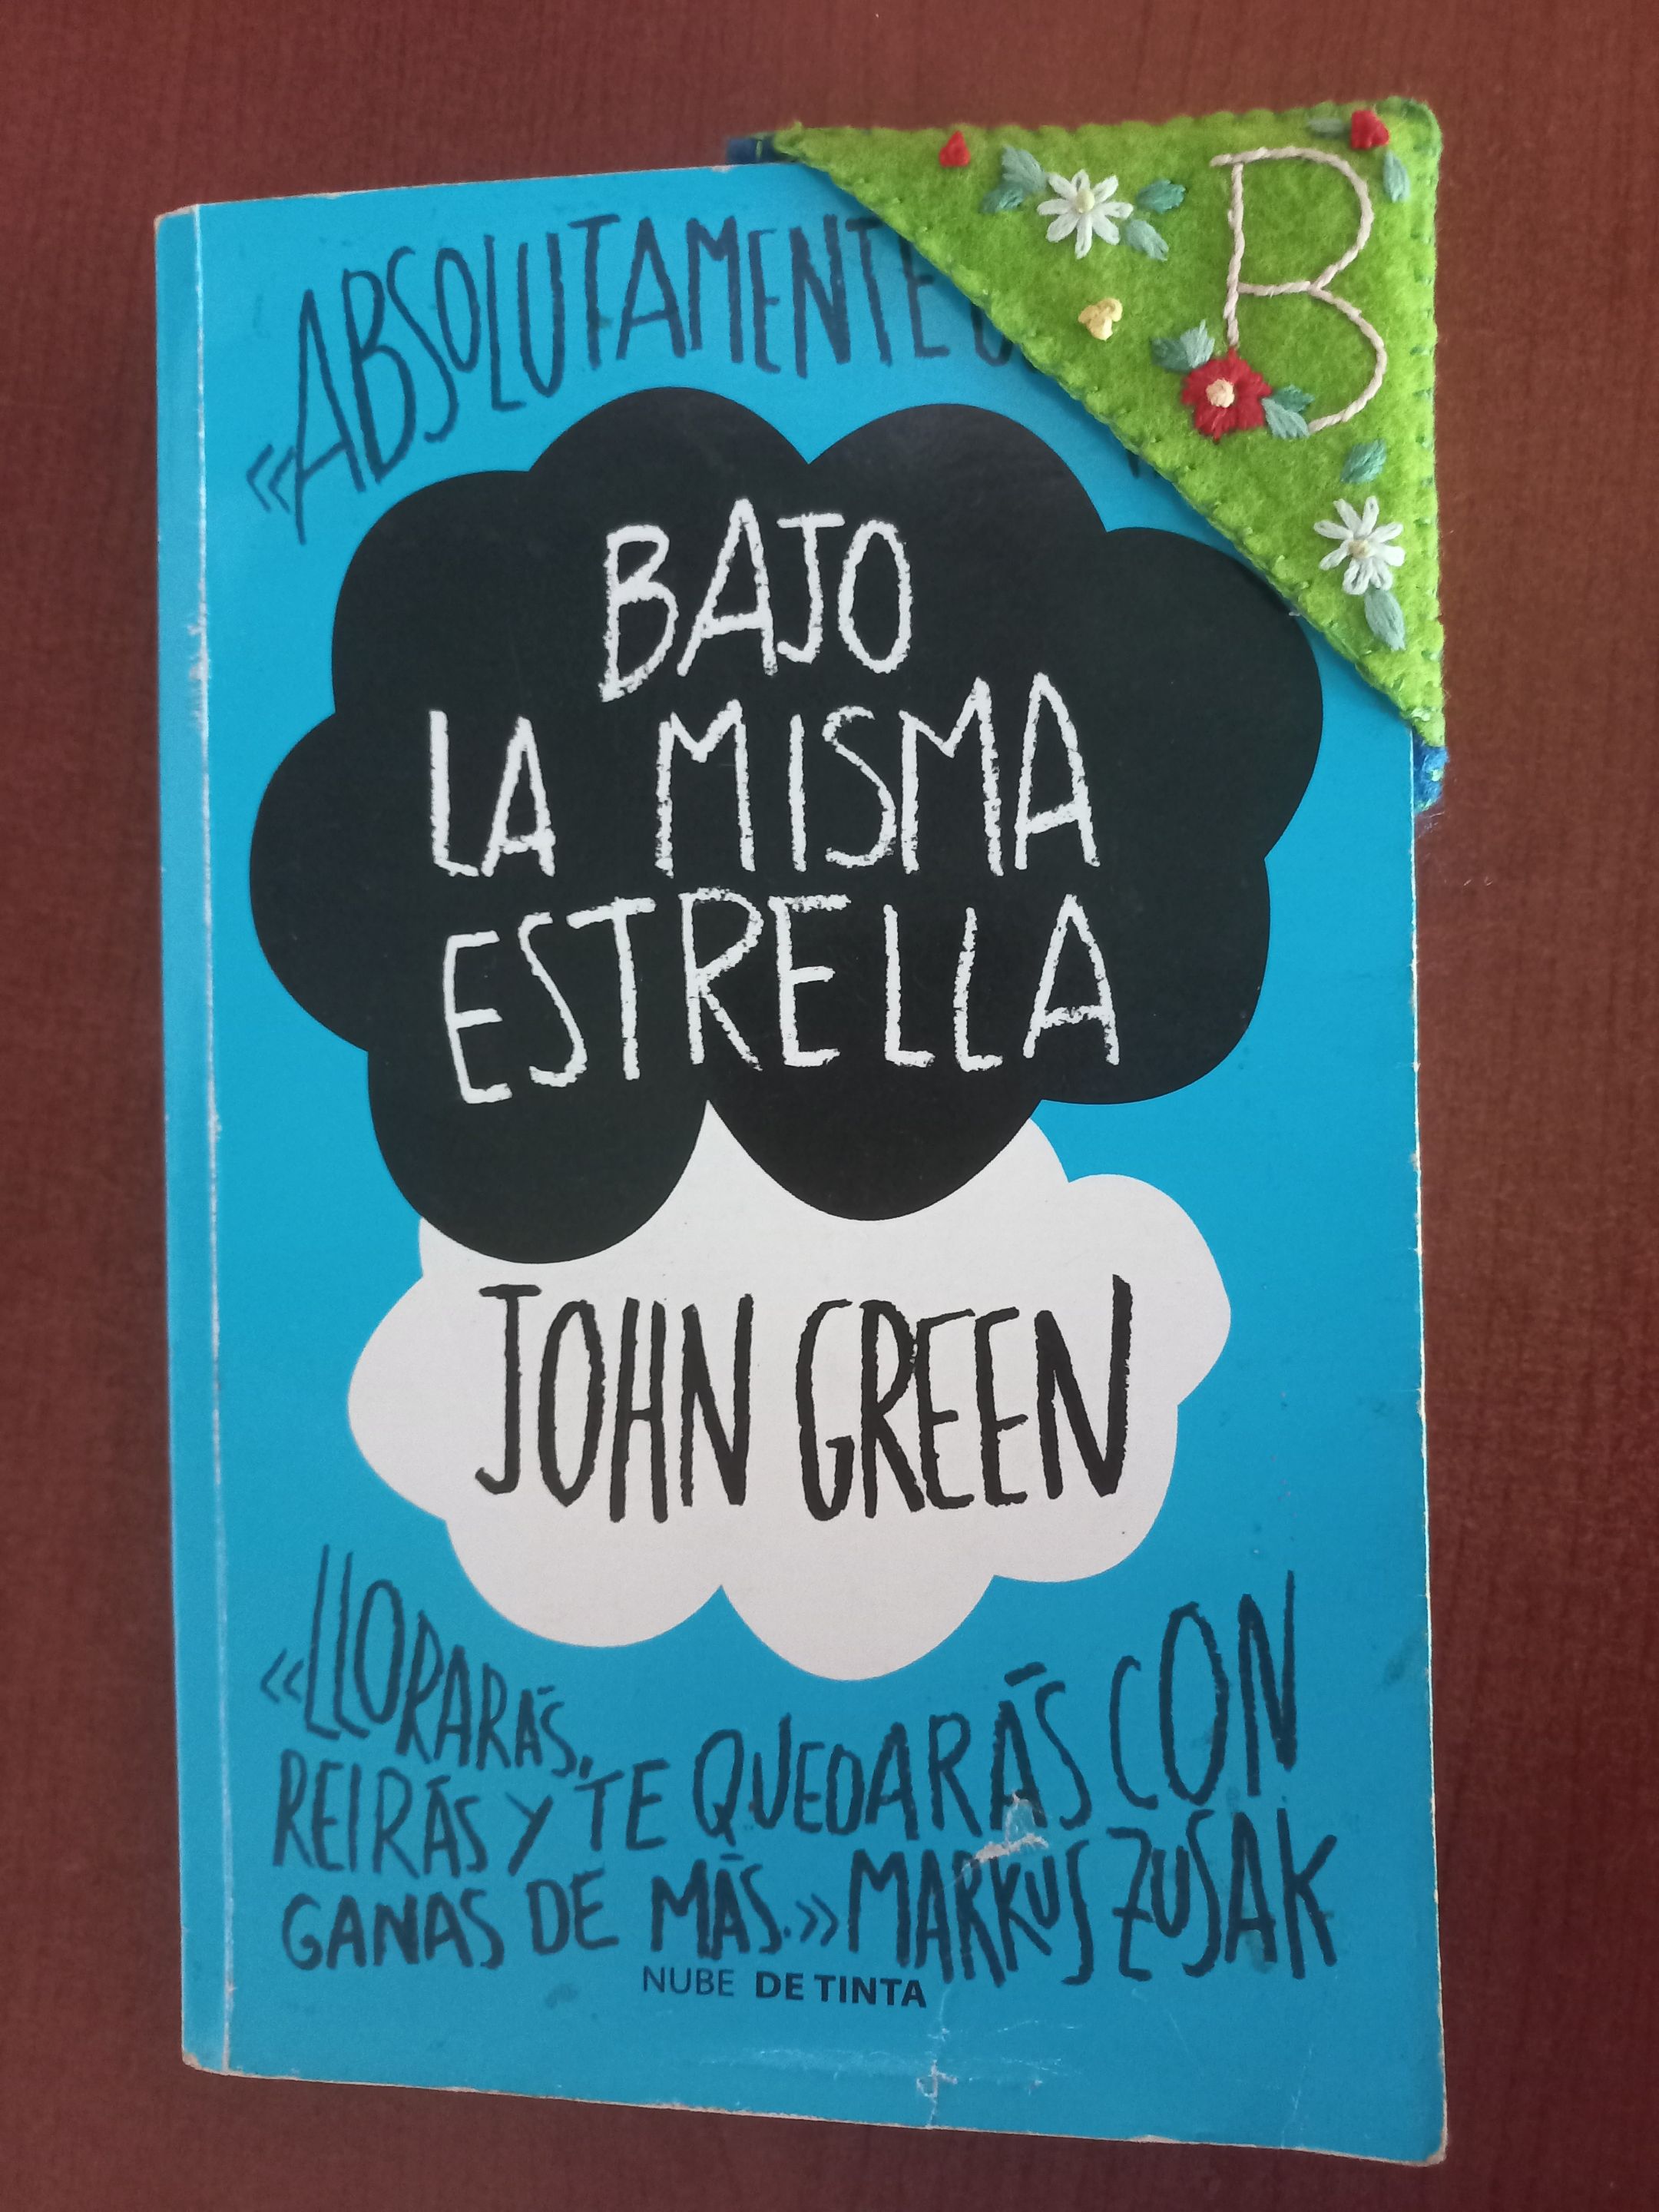
Hello my NeedleWorkMonday friends, receive a big digital hug. Today I want to share with you the making of a simple and beautiful, bookmark or page divider, whatever you like to call it. But first let me share with you the story behind this project. There are books that come into our hands in a special way, and in this case, it is one of them. It was given to me as a gift from a friend who is very dear to me. My friend knows that I love reading and she also knew that I had been looking for this book for a long time.
He told me that the book was second hand, although for me, that doesn't represent any problem, what I really value in a book is its content, no matter how many hands have held it before. I had been wanting to read it for some time, but I could never find it in the bookstore I usually visit.
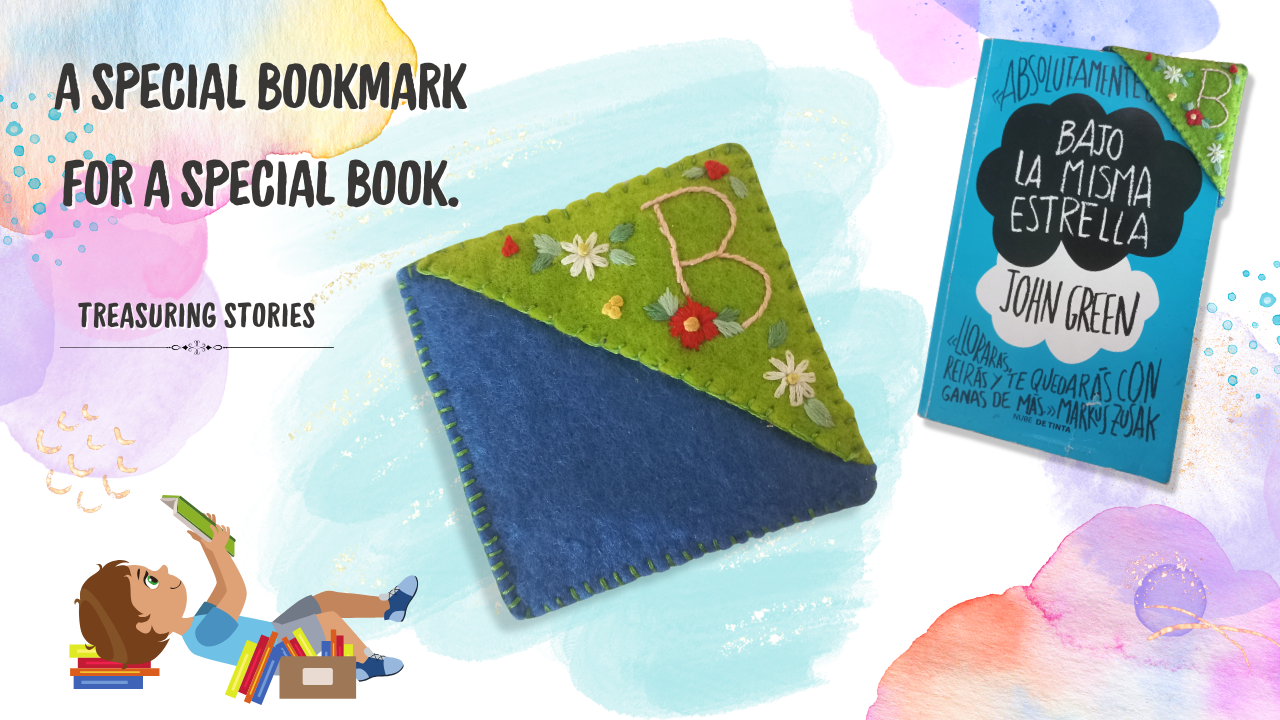
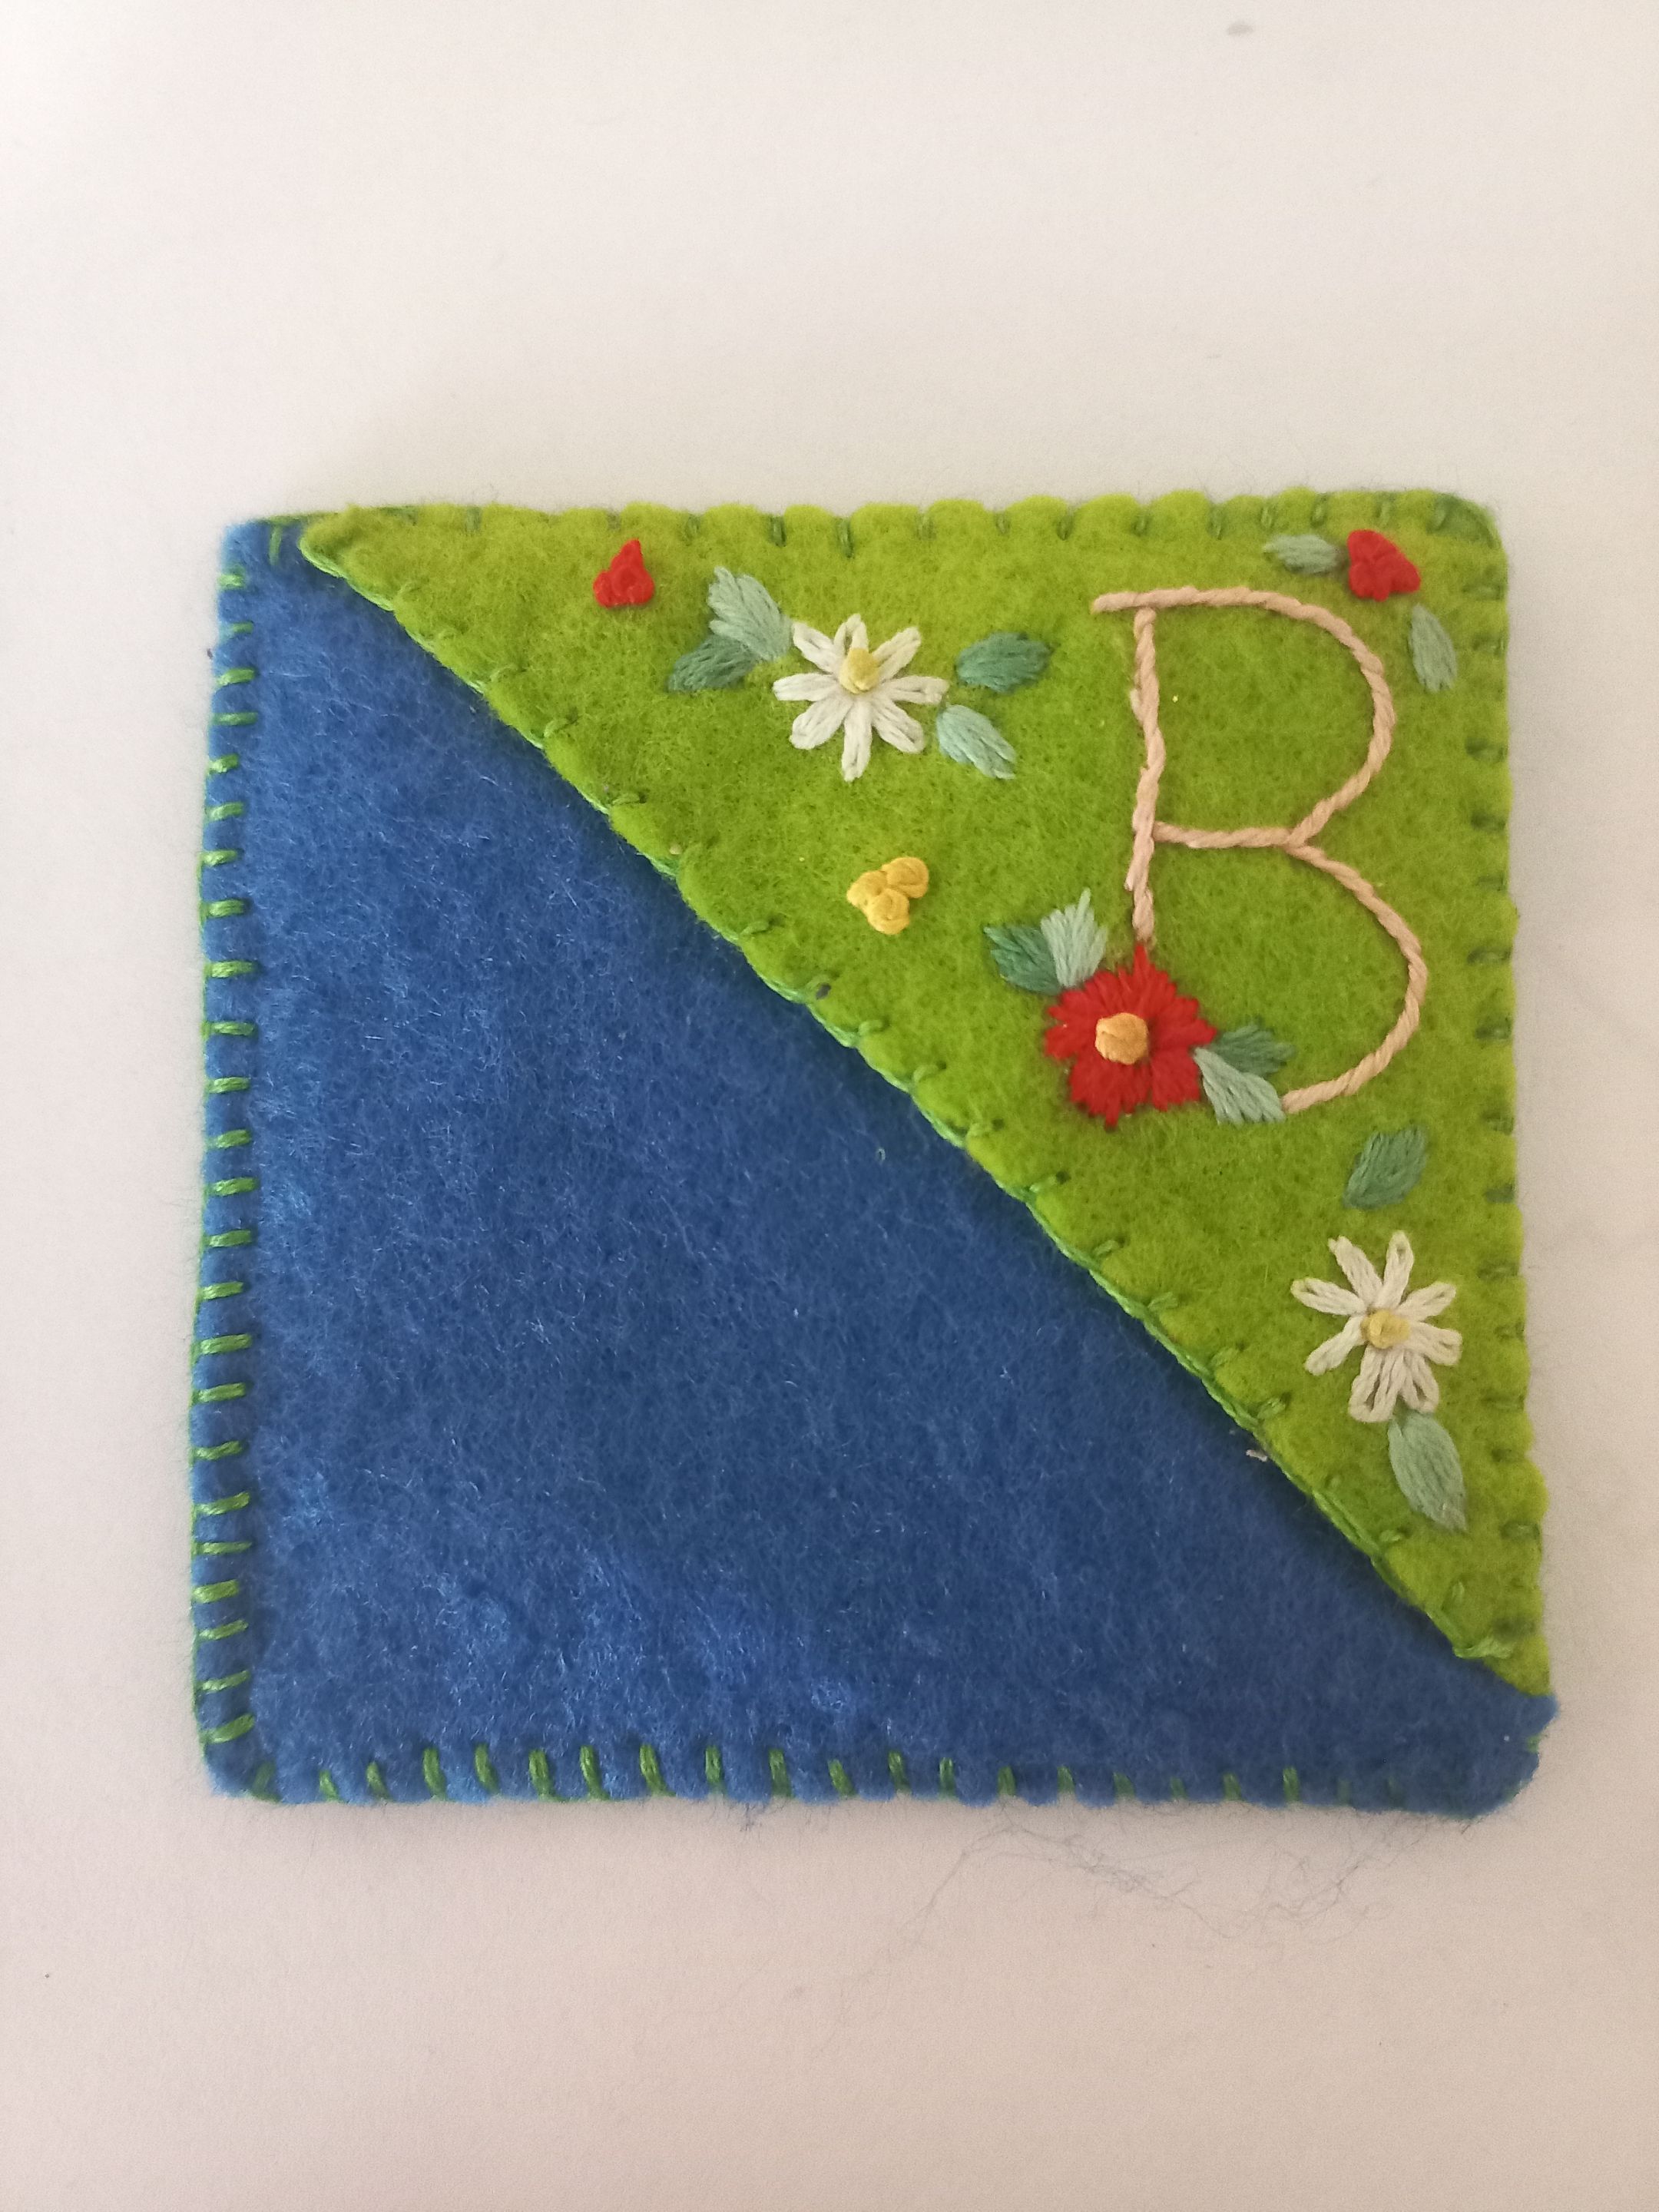
Now that it is in my hands, I want to accompany it with a bookmark that reflects all the affection I feel for reading and for the person who gave it to me. The model, I took it from Pinterest, but the design is entirely my own, I made it with felt for its softness. I wanted it to convey the same cozy feeling I get when I touch it as when I read a book.
Here I share with you how I did it, in the hope that someday you will also mark the pages of a special book for yourselves..
He told me that the book was second hand, although for me, that doesn't represent any problem, what I really value in a book is its content, no matter how many hands have held it before. I had been wanting to read it for some time, but I could never find it in the bookstore I usually visit.
Now that it is in my hands, I want to accompany it with a bookmark that reflects all the affection I feel for reading and for the person who gave it to me. The model, I took it from Pinterest, but the design is entirely my own, I made it with felt for its softness. I wanted it to convey the same cozy feeling I get when I touch it as when I read a book.
Here I share with you how I did it, in the hope that someday you will also mark the pages of a special book for yourselves..
Hola mis amigos de NeedleWorkMonday, reciban un fuerte abrazo digital. Hoy quiero compartirles la elaboración de un sencillo y hermoso, marcador de libro o separador de páginas, como gusten llamarlo. Pero antes permítanme compartir con ustedes la historia detrás de este proyecto. Hay libros que llegan a nuestras manos de una forma especial, y en este caso, es una de ellas. Me lo obsequió una amiga que es muy querida para mí. Mi amiga sabe que soy amante de la lectura y aunado a eso también sabía que tenía muchísimo tiempo buscando ese libro.
Me dijo que el libro era de segunda mano, aunque para mí, eso no representa ningún problema, lo que realmente valoro en un libro es su contenido, sin importar cuántas manos lo hayan sostenido antes. Desde hace algún tiempo quería leerlo, pero nunca lo encontraba en la librería que suelo visitar.
Ahora, que él ya está en mis manos, quiero acompañarlo con un marcador de páginas que refleje todo el cariño que siento por la lectura y por quien me lo regaló. El modelo, lo tomé de Pinterest, pero el diseño es completamente mío, lo hice con fieltro por su suavidad. Quería que, al tocarlo transmitiera la misma sensación acogedora que siento cuando leo un libro.
Aquí les comparto cómo lo hice, con la esperanza de que algún día también marquen las páginas de un libro especial para ustedes.
Materials:
1. Felt (in my case blue and green).
2. Matching embroidery thread (according to design).
3. Piece of soft cardboard (cereal or medicine box).
4. Needle.
5. Scissors.
6. Pencil.
7. Design (the initial letter “B” of my first name).
Note: Embroidery stitches used. Cordoncillo, festoon, daisy, French knot, short and long..
Materiales:
1. Fieltro (en mi caso azul y verde).
2. Hilo de bordar acorde (según el diseño).
3. Trozo de cartón blando (de caja de cereal o medicamentos).
4. Aguja.
5. Tijera.
6. Lápiz.
7. Diseño (la letra “B” inicial de mi primer nombre).
Nota: Puntos de bordados empleados. Cordoncillo, festón, margarita, nudo francés, corto y largo.

| https://files.peakd.com/file/peakd-hive/mily0202/23vsQY3vNBu2NDqos3HL3cT1QMawAXnrcHEWDamdFypCdxrcFtzTAjXZaLc493STaZdfg.jpg | https://files.peakd.com/file/peakd-hive/mily0202/23vsYmnVrogDpFgMaLHLudnKhwVmVE6ZCzn5JtLaH5wJAY3f31yJJvU7rPCiuD6ivQwSk.jpg |
|---|---|
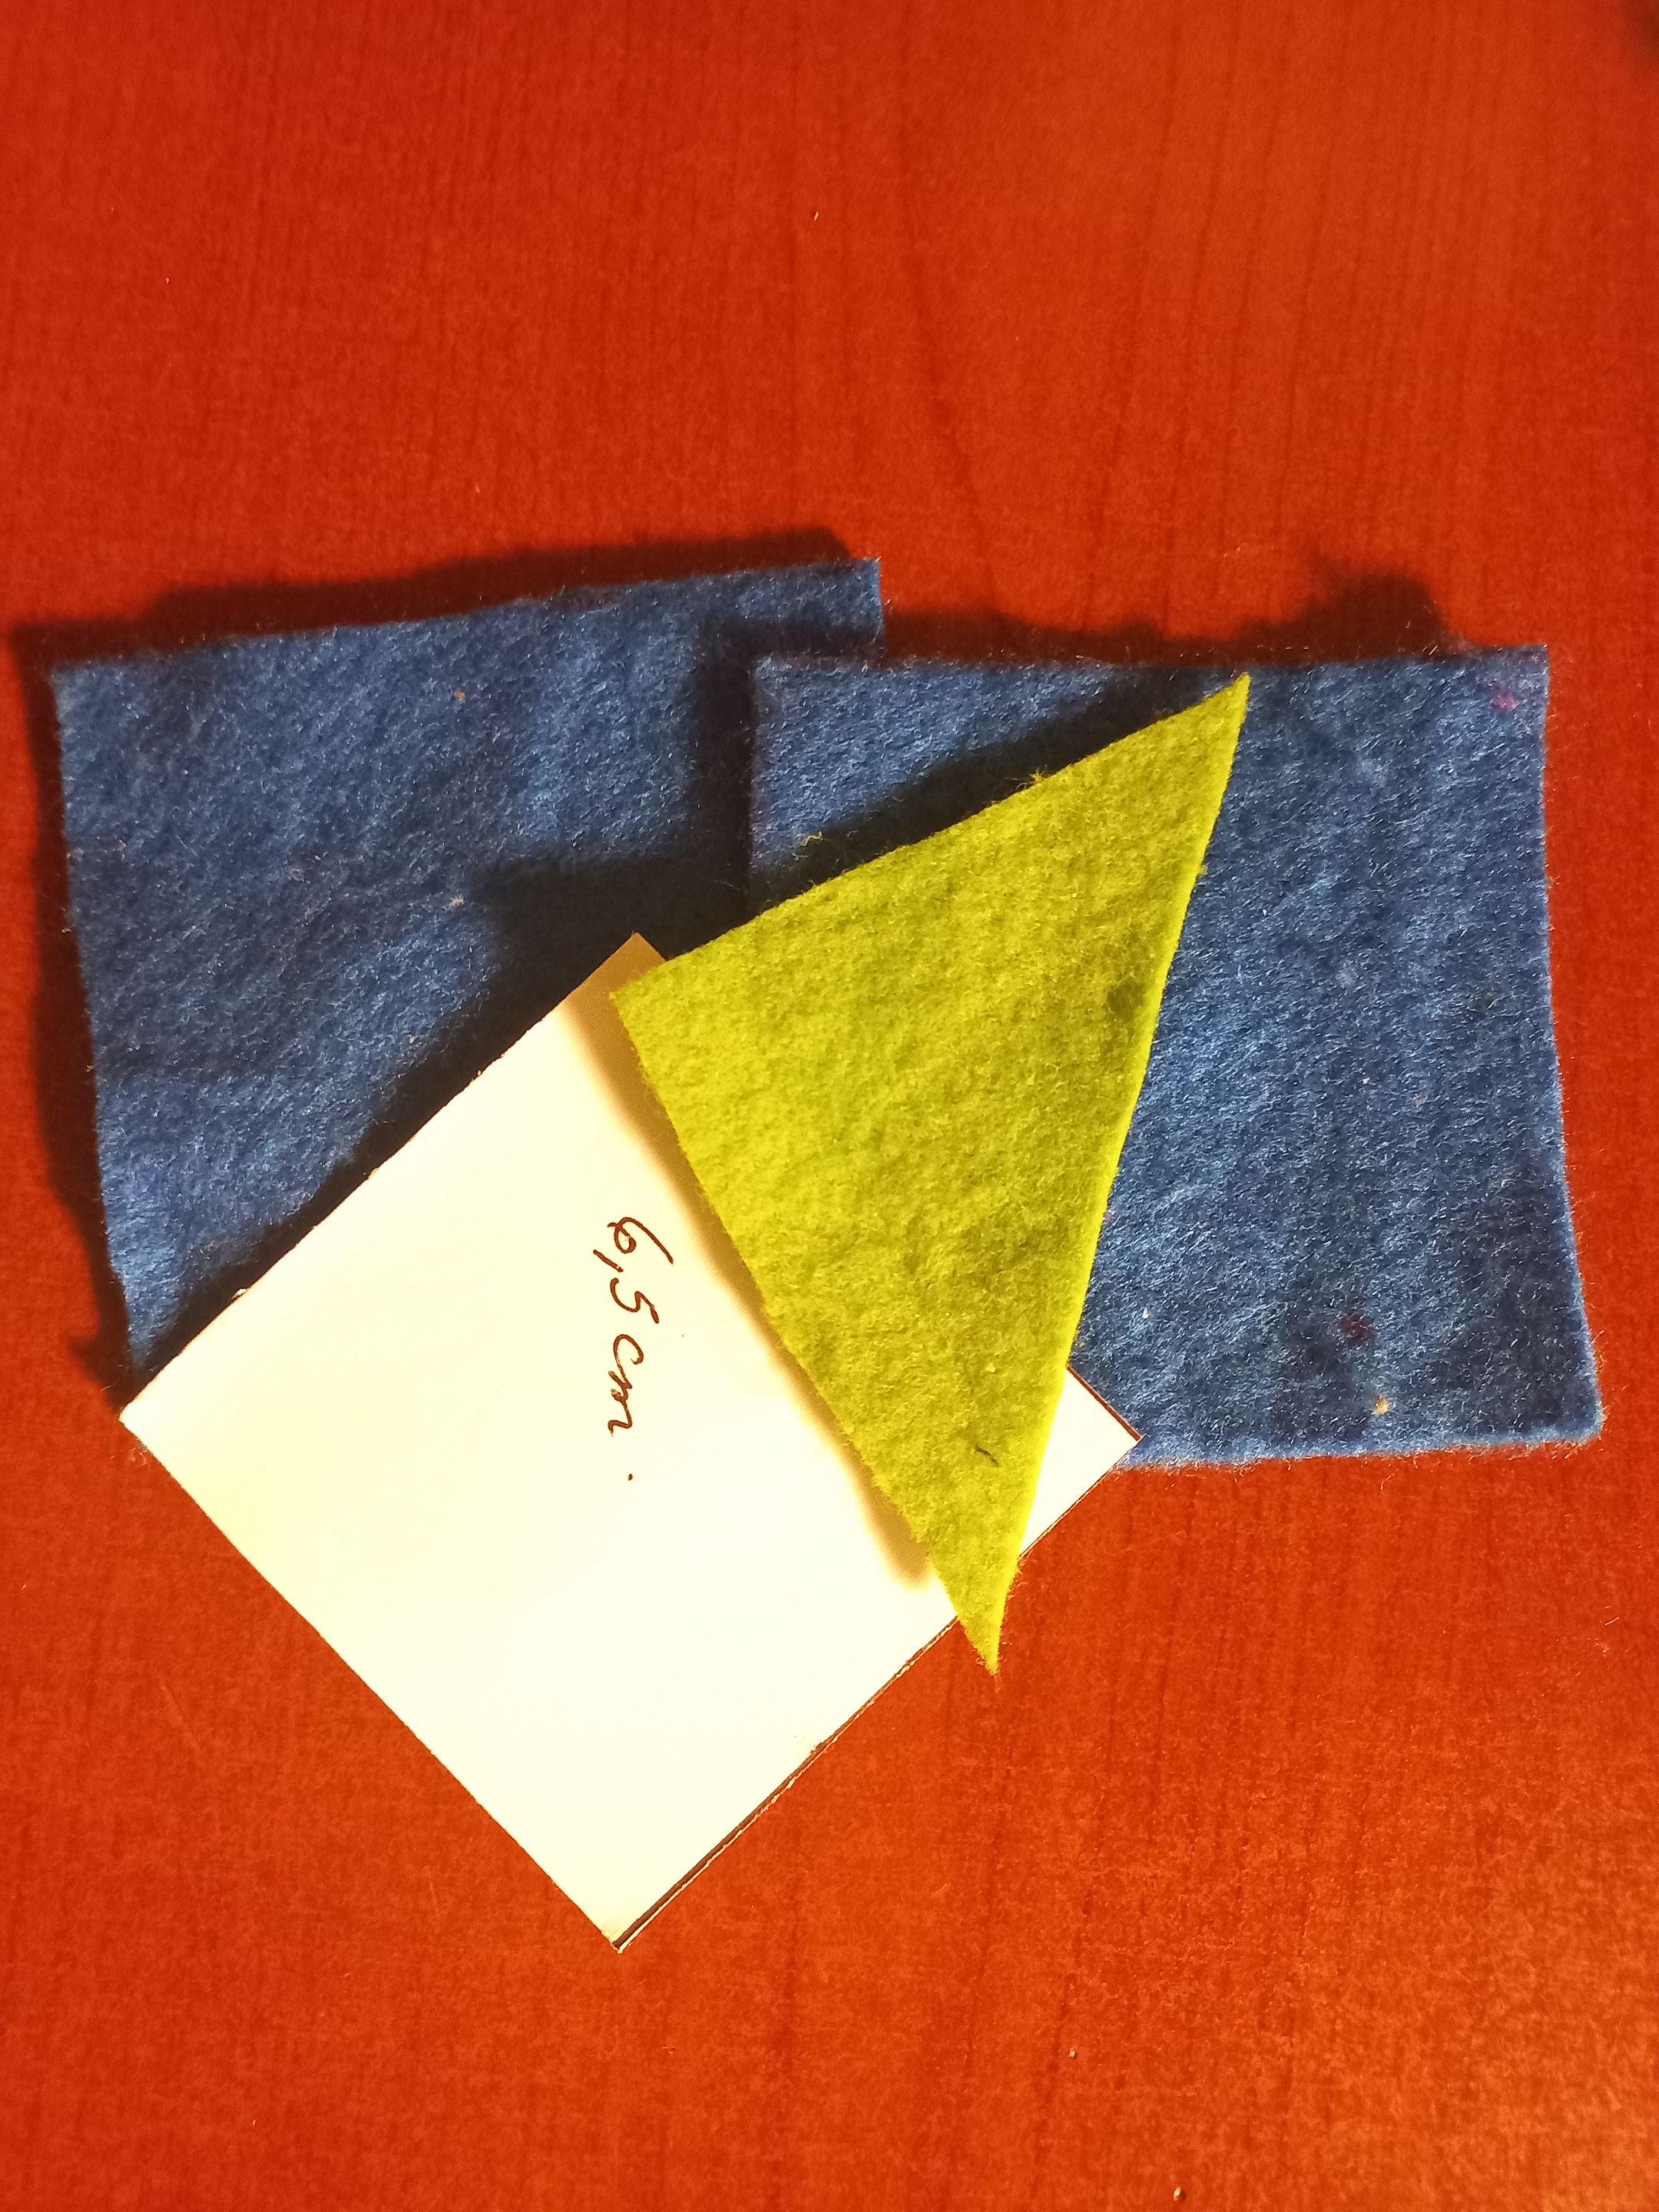
Start by cutting out two squares of 7.5 cm per side in blue felt. Then, cut a triangle with sides of 7.5 cm and a base of 10 cm out of green felt. To make the marker sturdy, also cut a 6.5 cm square out of cardboard.
Comienzo recortando dos cuadrados de 7,5 cm por lado en fieltro azul. Luego, corte un triángulo con lados de 7,5 cm y una base de 10 cm en fieltro verde. Para darle firmeza al marcador, también corte un cuadrado de cartón de 6,5 cm.
Now, I put the two felt squares together and, right in the center, I place the cardboard piece to give it structure. With green embroidery thread, I begin to make the L-shaped seam, using the scallop stitch to join the pieces together. And the first piece is ready.
Ahora, junto los dos cuadrados de fieltro y, justo en el centro, coloco la pieza de cartón para darle estructura. Con hilo de bordar verde, comienzo a realizar la costura en forma de L, usando el punto festón para así unir las piezas. Y lista la primera pieza.
| https://files.peakd.com/file/peakd-hive/mily0202/242NoKX8YRPQYjKCTdf7dJwfnv3J6SKiu8L9uVW17ruPyoHKRYuh5xq1HR2Bdd2Mpjzuf.jpg | https://files.peakd.com/file/peakd-hive/mily0202/23z7BcfPYkGBvqDSauW6gxpujLQGSCNt3f2CLAE6Xcr9AMWhtLKF1T8TraJUAJKrz8hx7.jpg | https://files.peakd.com/file/peakd-hive/mily0202/242hYmu9g8bDkSX6GKW5eoiSne8JeyXScGi6tmsvF12gkswJrfnRGfm12zGykJzWiKZVW.jpg |
|---|---|---|
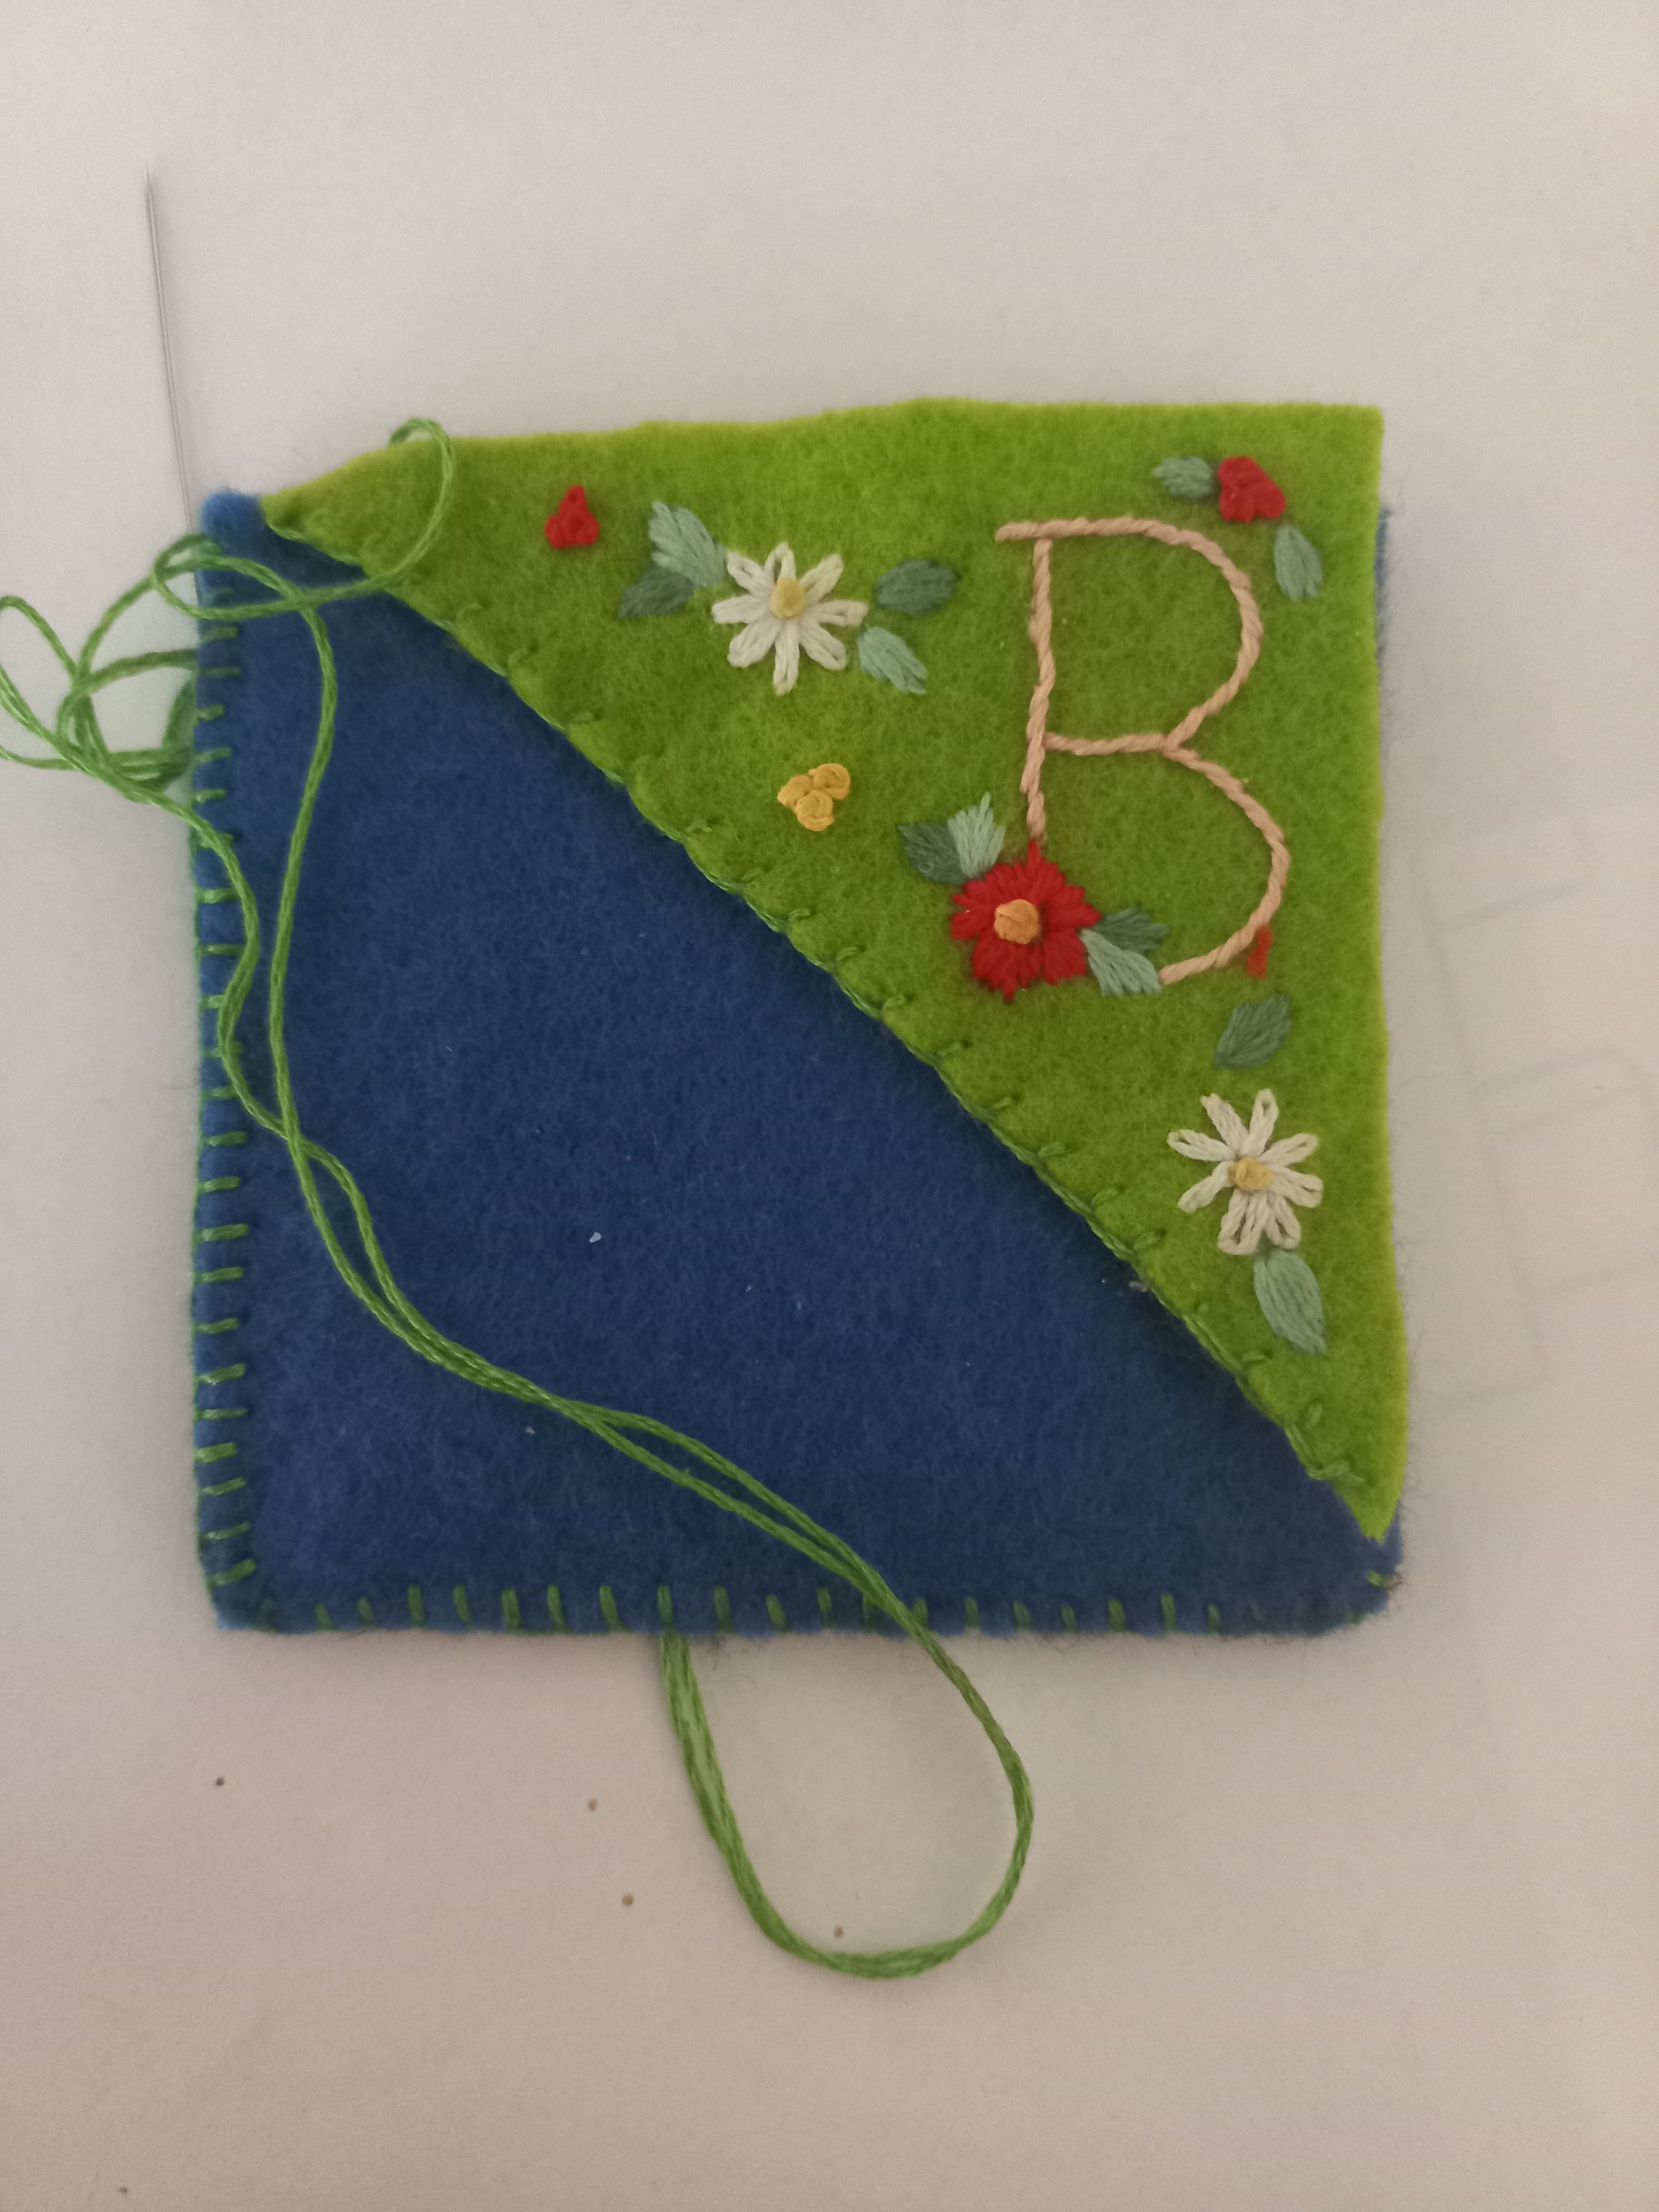
This is where I give personality to the marker. It's time to work with the most elaborate piece, which in this case is the one in the shape of a triangle. To do this I transfer what will be the focus of the design, the letter “B”. I use the cord stitch to highlight it. Phrase knot stitches, long and short for the flower detail. The thread colors are our choice.
Aquí es donde le doy personalidad al marcador. Toca trabajar con la pieza mas elaborada, que en este caso es la que tiene forma de triangulo. Para ello trasfiero lo que será el foco de atención del diseño, la letra “B”. Utilizo el punto cordoncillo para resaltarla. Puntos de nudo frases, largo y corto para el detalle de la flor. Los colores del hilo son a nuestra elección.
| https://files.peakd.com/file/peakd-hive/mily0202/23uFPgK5EA3NTLkmwx29jNGv1pA15LbvHcHUPPxbd1sAMPL3SZM7VXiZReVmjnbAxvUvH.jpg | https://files.peakd.com/file/peakd-hive/mily0202/23tvcDqc9CiGdPMMQ8s1ctW8vzGD3SEx59RGZukGeaGWdJo1s3fFtAJzsQc1G7DhYq5BW.jpg | https://files.peakd.com/file/peakd-hive/mily0202/23uFW7xd7zhGgF2jBTikMBKt83Foonziiogpyqt3pnmkTmLQdWeQQP7VKUvkU6MJUkALP.jpg |
|---|---|---|
| https://files.peakd.com/file/peakd-hive/mily0202/23uFTyZ7pcCw2zYhztq7iuKstp7TZAudzEjNmiqTzUMJfXQsLDQcuFBL7SwGdNxMV9jt4.jpg | https://files.peakd.com/file/peakd-hive/mily0202/23w2nypLM4ThKH4fnKsJR4kk5aqwXYaasWHAJViBFmmk1ChnBoCkH3RnKDsvrbRsXD5po.jpg |
|---|---|
Once the main design is finished, the only thing left to do is to fill in the small spaces. In my case, I decided to use small flowers and leaves by applying the daisy stitch, phrase knot, short and long, but you can let your creativity come out and place whatever you like. Finally I finished off the base with the scalloped stitch.
Ya terminado el diseño principal, solo queda rellenar los pequeños espacios. En mi caso, me decidí por pequeñas flores y hojas aplicando el punto margarita, nudo frases, corto y largo, pero ustedes pueden dejar salir su creatividad y colocarle lo que mas les gusté. Ya para finalizar remate la parte de la base con el punto festón.
| https://files.peakd.com/file/peakd-hive/mily0202/23tvg5W4DAfMR4Udr53ZfwzMV1zXiHDirMGj1ySfVQyGbQ6GrDycEFcuGYbQEnLDDexUQ.jpg | https://files.peakd.com/file/peakd-hive/mily0202/23vsNg1EvvPstA1Axt5hKi3do1QdUVK3br1YQFXf4y3jk9Y6LpcvLkdWbVfp8S5sduMVU.jpg |
|---|---|
| https://files.peakd.com/file/peakd-hive/mily0202/23uQnVp7tmrrMFCufQEH2ZzHrvBKBPiRodR8nSNFPkvGyW7wU3h1NafLGbcbFqvnGWxxj.jpg | https://files.peakd.com/file/peakd-hive/mily0202/EoGxSUuFJdSX3zHdFxTK6YedwTn6AfTQc4zE8aiqCCPzzzL2efdkYabFmWFCaXyDRgY.jpg |
|---|---|
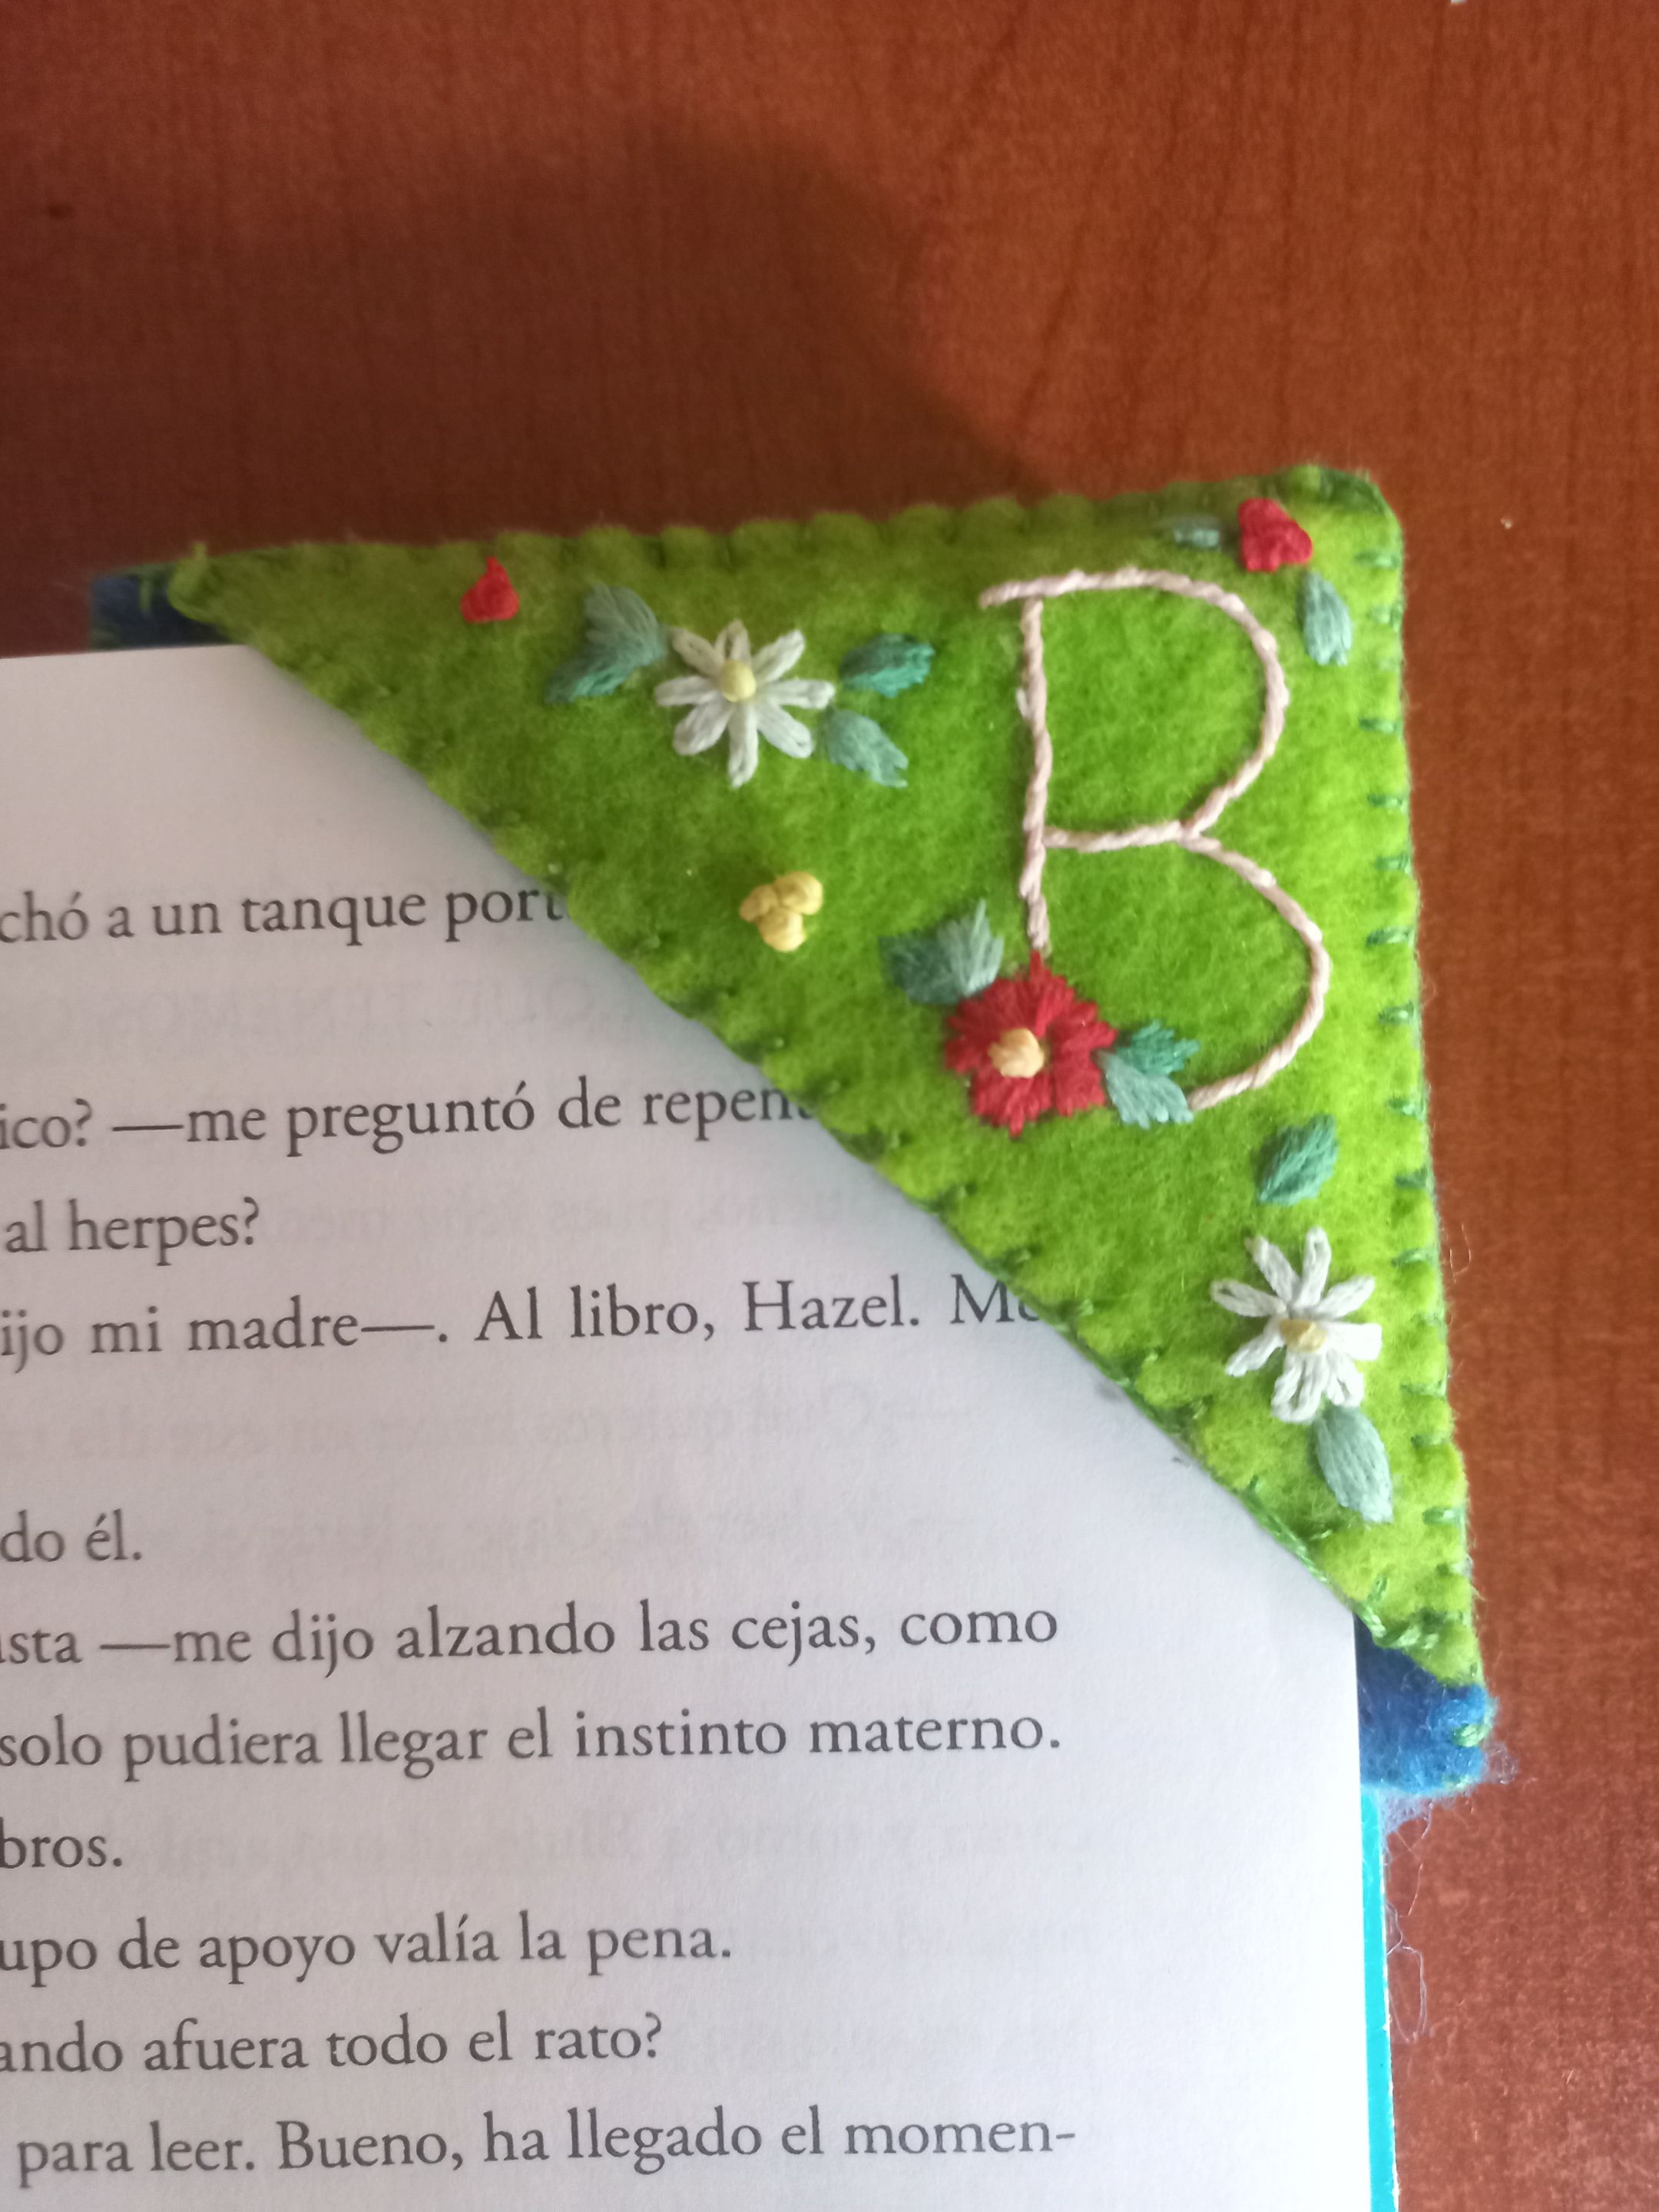
Now it's time to join the pieces together. I take the triangle-shaped piece and place it crosswise over the square piece in the seamless part. Once aligned I join them with the scallop stitch.
Es el momento de unir las piezas. Tomo la pieza en forma de triangulo y la coloco de manera transversal sobre la pieza cuadrada en la parte que no tiene costura. Una vez alineadas las uno con el punto festón.
And ready my beautiful and personalized bookmark.
Y listo mi hermoso y personalizado marcador de libro.
This bookmark will not only accompany my reading, but will also carry with it the affection of the one who gave me the book.
Thank you very much for making it this far.
Thank you very much for making it this far.
Este marcador no solo acompañará mi lectura, sino que también llevará consigo el cariño de quien me regaló el libro.
Muchas gracias por llegar hasta aquí.
Foto de mi autoría / Photo by me
Traducción: DeepL Translate versión gratuita. / Translation: DeepL Translate Free version.
Traducción: DeepL Translate versión gratuita. / Translation: DeepL Translate Free version.