Hola, colonias digitales que conforman el universo de Hive. Reciban un fuerte abrazo.
Espero que estén bien desde el otro lado de la pantalla.
Hello, digital colonies that make up the Hive universe. Receive a big hug.
I hope you're doing well from the other side of the screen.
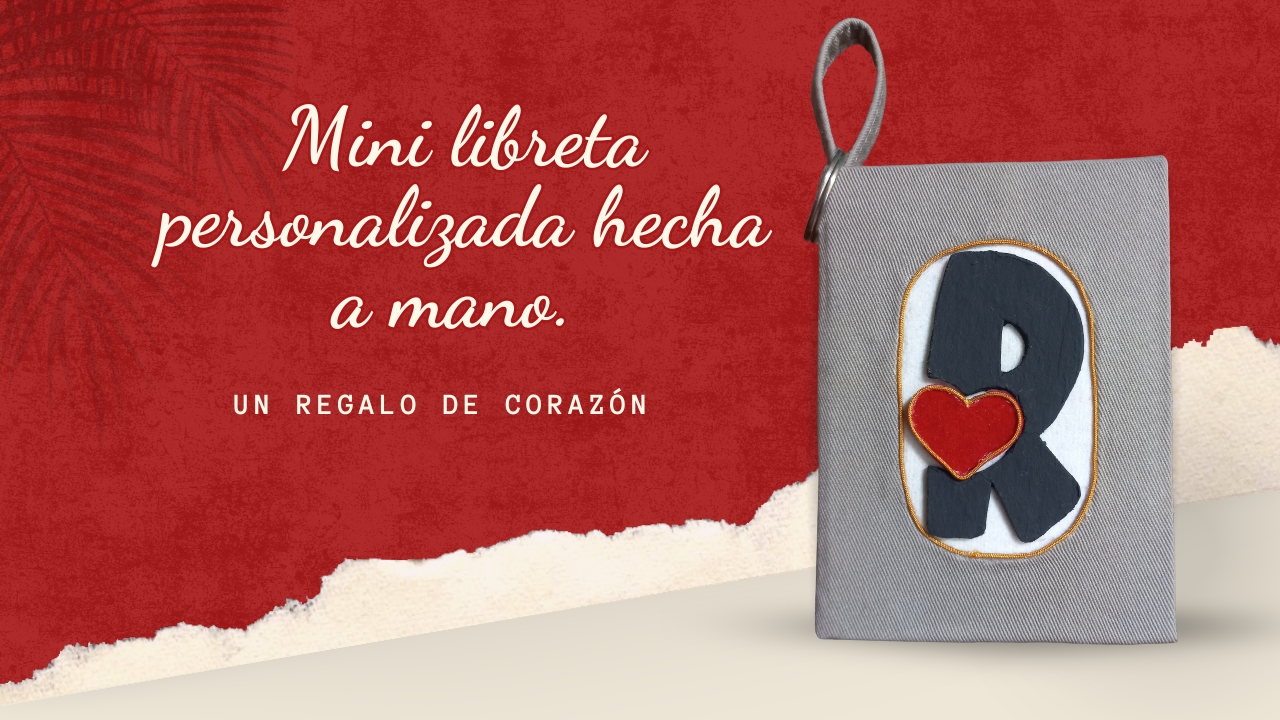
Imagen editada en Canva / Image edited in Canva
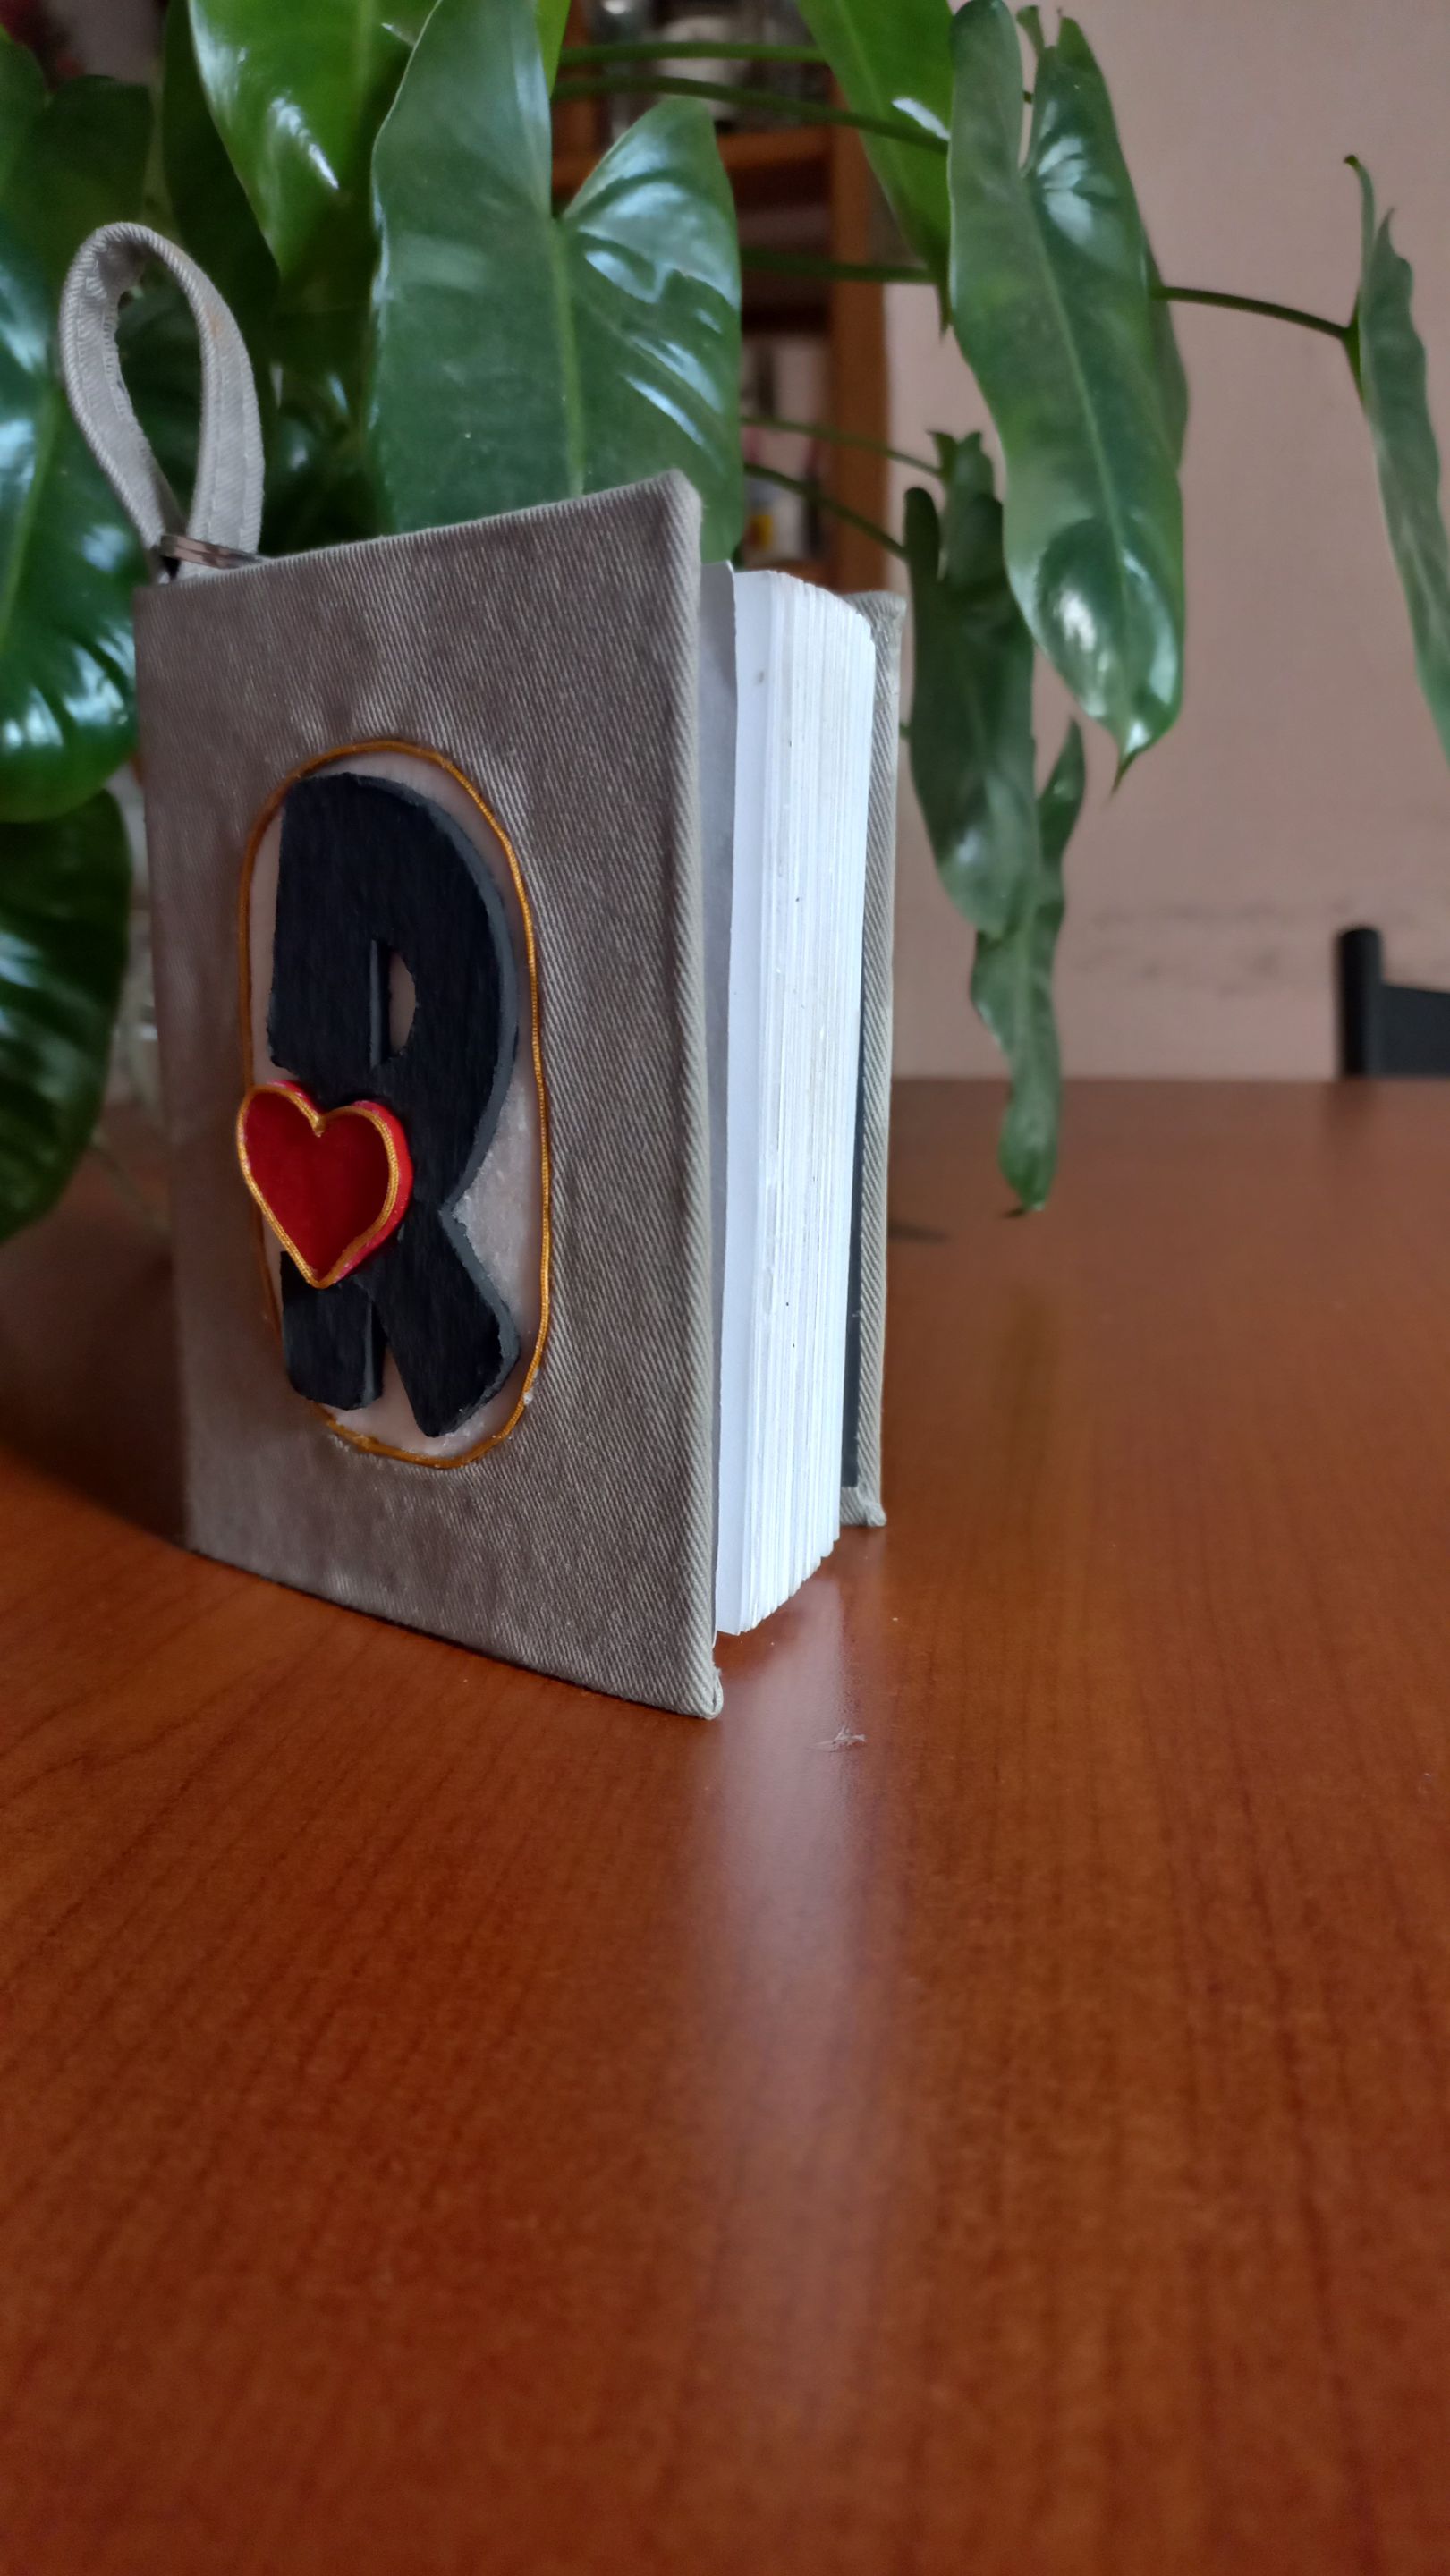
Hola, comunidad creativa de HIVE DIY. Hoy les traigo un proyecto que nació entre risas y una amistad que adora los recordatorios.
Les cuento, tengo una amiga que es la reina de las notas y los recordatorios. Siempre la veo con una libreta en la mano, anotando hasta el último detalle. Hace poco la vi buscando una mini libreta para su bolso, y me di cuenta de que era la oportunidad perfecta para hacerle un regalo único, que ella pueda llevar a todas partes.
Así que, inspirada en su pasión por la organización y mi amor por el reciclaje, decidí crear una mini libreta de notas y personalizarla con la inicial de su nombre. Está hecha con cartón reciclado y retazos de tela que tenía guardaba desde hace tiempo. Siento que es una forma de regalarle organización con estilo.
Espero que les guste este proyecto. Vamos a darle vida a esta mini libreta personalizada.
Hello, creative community of HIVE DIY. Today I bring you a project that was born out of laughter and a friendship that loves reminders.
Let me tell you, I have a friend who is the queen of notes and reminders. I always see her with a notebook in her hand, writing down every last detail. Recently, I saw her looking for a mini notebook for her bag, and I realized it was the perfect opportunity to give her a unique gift that she could take everywhere.
So, inspired by her passion for organization and my love of recycling, I decided to create a mini notebook and personalize it with the initial of her name. It is made from recycled cardboard and fabric scraps that I had been saving for a long time. I feel like it's a way to give her organization with style.
I hope you like this project. Let's bring this personalized mini notebook to life.
Materiales:
1. Cartón compacto.
2. Hoja de papel negra (tipo cartulina).
3. Hojas de tacos para notas.
4. Retazos de tela (preferiblemente resistente).
5. Trocito de tela guata fina.
6. Cordón fino.
7. Tijera.
8. Cúter.
9. Silicon líquido.
10. Regla.
11. Lápiz.
12. Pintura acrílica negra.
13. Pinceles.
14. Aro metálico (tipo llavero).
15. Pinzas.
16. Palillo.
17. Diseño.
Materials: |https://files.peakd.com/file/peakd-hive/mily0202/23xp8qp3MzhfKabpmZoiKCUnfFdY2q4QiwCmN7qbccf5FzuMxHJFXFAdyTybSj7VN59KL.jpg|https://files.peakd.com/file/peakd-hive/mily0202/23uQyCH8RKkReZ7iuELpNz2Ci36pqhSmZPJNyBpuebMKXmjNnG57hk4CfnDTMx49JykPV.jpg| |-|-| ---
1. Compact cardboard.
2. Black sheet of paper (cardstock type).
3. Notepad sheets.
4. Scraps of fabric (preferably sturdy).
5. Piece of thin batting fabric.
6. Thin cord.
7. Scissors.
8. Cutter.
9. Liquid silicon.
10. Rule.
11. Pencil.
12. Black acrylic paint.
13. Brushes.
14. Metal ring (keyring type).
15. Tweezers.
16. Toothpick.
17. Design.
Iniciare el proyecto cortando dos rectángulos de cartón compacto de 11,2 cm de alto por 8,2 cm de ancho. Estas piezas serán la base de la libreta: una para la portada y otra para la contraportada. Y adicionalmente otra pieza de 11,2 cm de alto por 1cm de ancho, que servirá como lomo de la libreta.
Les doy un dato importante a tener en cuenta y es que las medidas pueden variar según el tamaño de las hojas que usamos como páginas. En mi caso, el papel que elegí es de 10,5 cm de alto por 7,5 cm de ancho, así que ajusté el tamaño del cartón para que las hojas queden bien protegidas.
Ahora viene el detalle especial: en el centro de una de las piezas, diseño y corto un óvalo de 7,5 cm de alto por 4,7 cm de ancho. Esta será la portada, y ese óvalo será el marco donde luego colocaré la inicial de mi amiga.

|https://files.peakd.com/file/peakd-hive/mily0202/23uQjyFedxCQKbJvJLFRYDouy5fX1ZKuzMFN99emnmSTUAtS5wuHPbRthtAKyEsSuy27H.jpg|https://files.peakd.com/file/peakd-hive/mily0202/23w2nyU2rq63xYega5gzXipug9rxkepdRGbd14WY3ShAq34iMk3xkJ4xruoHHMqSM21KS.jpg|
|-|-|

|https://files.peakd.com/file/peakd-hive/mily0202/23tvgSm95ZyZJQB21DszHiryQV5Lq4pvHwmP3Qjbq9ZUEmaEQgvo9V3jWMkexL6iWABPy.jpg|https://files.peakd.com/file/peakd-hive/mily0202/23tSSMwvnqTyFarhdfUYMGtkfubGD9vWVzLDzjmQE5uwpKbRDSZ4f5kBhWKr8ziiTeqRy.jpg|
|-|-|
---
Les doy un dato importante a tener en cuenta y es que las medidas pueden variar según el tamaño de las hojas que usamos como páginas. En mi caso, el papel que elegí es de 10,5 cm de alto por 7,5 cm de ancho, así que ajusté el tamaño del cartón para que las hojas queden bien protegidas.
Ahora viene el detalle especial: en el centro de una de las piezas, diseño y corto un óvalo de 7,5 cm de alto por 4,7 cm de ancho. Esta será la portada, y ese óvalo será el marco donde luego colocaré la inicial de mi amiga.
I will start the project by cutting two rectangles out of compact cardboard measuring 11.2 cm high by 8.2 cm wide. These pieces will form the basis of the notebook: one for the front cover and one for the back cover. I will also cut another piece measuring 11.2 cm high by 1 cm wide, which will serve as the spine of the notebook.
Here's an important tip to keep in mind: the measurements may vary depending on the size of the sheets we use as pages. In my case, I chose paper that is 10.5 cm high by 7.5 cm wide, so I adjusted the size of the cardboard to ensure that the sheets are well protected.
Now comes the special detail: in the center of one of the pieces, I design and cut an oval measuring 7.5 cm high by 4.7 cm wide. This will be the cover, and that oval will be the frame where I will later place my friend's initial.
Para el segundo paso, corto un retazo de tela de 12,4 cm de alto por 18 cm de ancho. Este trozo será el forro final que cubrirá toda la libreta, aportándole ese toque, resistente y visualmente encantador.
---
For the second step, I cut a piece of fabric measuring 12.4 cm high by 18 cm wide. This piece will be the final lining that will cover the entire notebook, giving it that durable and visually appealing touch.
Paso 3: Ahora que ya tengo el cartón y la tela listos, es el momento de unirlos para formar el cuerpo de la libreta. Ubico las piezas sobre el retazo de tela, dejando en el centro la que funcionará como lomo. Entre cada pieza principal y el lomo dejo un espacio de 0,3 mm, lo justo para que la libreta pueda abrir y cerrar con comodidad sin que la tela se tense.
Una vez alineadas, las pego con cuidado, asegurándome de que todo quede bien centrado. Luego, corto las puntas de la tela en forma de triángulo para facilitar el doblado en las esquinas. También aprovecho para darle forma al óvalo, marcando bien los bordes.

|https://files.peakd.com/file/peakd-hive/mily0202/23tvnpQVkFj5FFc69HnHj7oS7mdsf3HRFZd2pGSo6n116vSkXymT2w9vBDYP8C7hEDdxq.jpg|https://files.peakd.com/file/peakd-hive/mily0202/23tbyR922PPq71m3wzXUB8bZaomHMQ3TLG7kzAu2JnpuYXZYmSY45sHopPMHavHmPggKm.jpg|
|-|-|
---
Una vez alineadas, las pego con cuidado, asegurándome de que todo quede bien centrado. Luego, corto las puntas de la tela en forma de triángulo para facilitar el doblado en las esquinas. También aprovecho para darle forma al óvalo, marcando bien los bordes.
Step 3: Now that I have the cardboard and fabric ready, it's time to join them together to form the body of the notebook. I place the pieces on the fabric remnant, leaving the one that will serve as the spine in the center. I leave a 0.3 mm gap between each main piece and the spine, just enough so that the notebook can open and close comfortably without the fabric becoming taut.
Once aligned, I carefully glue them down, making sure everything is centered. Then, I cut the corners of the fabric into triangles to make it easier to fold the corners. I also take this opportunity to shape the oval, marking the edges clearly.
Paso 4: Es el turno de trabajar el interior de la libreta, para ello empiezo cortando un retazo de tela y un trozo de cartón con las medidas del óvalo que tiene la portada. Es muy importante que encaje perfectamente. Luego corto una tira de 9 cm de largo por 1 cm de ancho, la doblo a la mitad y la pego justo en la pieza del lomo. Esta tira será el agarradero de la libreta.
Y para finalizar con el interior corto un trozo del papel negro de 10,2 cm de alto por 17 cm de ancho. El cual cubrirá todo el interior y le dará un acabado limpio. Con la ayuda de un palillo, hago pequeñas hendiduras, en las separaciones a cada lado del lomo: este es el secreto para que la libreta se abra y cierre sin dificultad, manteniendo su forma y resistencia.

|https://files.peakd.com/file/peakd-hive/mily0202/23vsJEE3y5VKM4y7tu6MjsaTpQuPnoRy458oPab4LPmFPAqc4EF6mpkepqyLtaG8bmaNr.jpg|https://files.peakd.com/file/peakd-hive/mily0202/23vhz1Gv4n98LEGWH818iZePdrswk32XjV8f9UKXfmamNnGiyb8uUXx3XQD9T256B5JvX.jpg|
|-|-|

|https://files.peakd.com/file/peakd-hive/mily0202/23wCBV7XUn4KCUj9kFsShqUdu3PquGN46kMB8nRypPSxFGPhDx5PS9j288h3qZtEeMXta.jpg|https://files.peakd.com/file/peakd-hive/mily0202/23yTjcokn2Me8GLaySyCAWKSaApJuiNC3hbi7Rhnzmt8qDsr3ZKyq1Gdz55Ah8q3JizEy.jpg|
|-|-|
---
Y para finalizar con el interior corto un trozo del papel negro de 10,2 cm de alto por 17 cm de ancho. El cual cubrirá todo el interior y le dará un acabado limpio. Con la ayuda de un palillo, hago pequeñas hendiduras, en las separaciones a cada lado del lomo: este es el secreto para que la libreta se abra y cierre sin dificultad, manteniendo su forma y resistencia.
Step 4: Now it's time to work on the inside of the notebook. To do this, I start by cutting a piece of fabric and a piece of cardboard to the same size as the oval on the cover. It's very important that they fit perfectly. Then I cut a strip 9 cm long by 1 cm wide, fold it in half, and glue it right onto the spine. This strip will be the notebook's handle.
And to finish off the inside, cut a piece of black paper measuring 10.2 cm high by 17 cm wide. This will cover the entire inside and give it a clean finish. Using a toothpick, make small slits in the separations on each side of the spine: this is the secret to ensuring that the notebook opens and closes easily, while maintaining its shape and strength.
Llegó el momento de colocar las páginas. Tomo la cantidad necesaria hasta alcanzar un grosor de 1 cm, lo justo para que la libreta sea cómoda. Las alineo bien y las sujeto firmemente con la ayuda de las pinzas. Luego aplico abundante pegamento en el lomo de las hojas y pego un trozo de guata fina que cubra todo el grosor. Este procedimiento es la clave que ayuda a que las hojas queden bien sujetas. Una vez que todo está seco, pego el bloque de páginas justo en el centro del interior de la libreta, y me aseguro que todo esté bien alineado.
Aprovecho, también para darle el toque final al óvalo de la portada. Pego el cordón fino por todo el contorno.

|https://files.peakd.com/file/peakd-hive/mily0202/23y8uegzM9AmVemX3GHnLEo8kebjN9wkeTvqx9hDSitM49NUJgH8rPs3TJXaZ7QfkrzRT.jpg|https://files.peakd.com/file/peakd-hive/mily0202/23wC5V49gY8XZXf9vBH75fWw7274PBoHjDgonPbzRoEB71Uz8AxkbCfnex96MLLZDqdfA.jpg|
|-|-|

|https://files.peakd.com/file/peakd-hive/mily0202/23ynNWD4qiFX6hSkHWdTyS47Y8z6tK8BqtYxpkmxqiddKNZ56HKaS94riBs8wtsCiq4ps.jpg|https://files.peakd.com/file/peakd-hive/mily0202/23wC9dZfoDb98LYR8BLdK4cyb7i69yBMAgzv8Er6v7yon7D9vpkKjebLyfawToa4XQe2m.jpg|
|-|-|
---
Aprovecho, también para darle el toque final al óvalo de la portada. Pego el cordón fino por todo el contorno.
It's time to insert the pages. I take the necessary amount to reach a thickness of 1 cm, just enough to make the notebook comfortable to use. I line them up neatly and hold them firmly in place with the help of the clips. Then I apply plenty of glue to the spine of the pages and stick a piece of thin wadding over the entire thickness. This procedure is key to helping the pages stay in place. Once everything is dry, I glue the block of pages right in the center of the inside of the notebook, making sure everything is properly aligned.
I also take this opportunity to add the finishing touch to the oval on the cover. I glue the thin cord around the entire outline.
Ya casi llegando a la meta, solo queda el detalle más especial: el diseño de la inicial. Comienzo transfiriendo el diseño al cortón, Lo recorto y pinto de negro con pintura acrílica, la pieza más grande. Para la pieza mas pequeña que en mi caso es un corazón lo aforrare de tela en color rojo y le hare un borde con el cordón fino. Una vez listas ambas piezas, solo queda pegarla en el centro del ovalo.

|https://files.peakd.com/file/peakd-hive/mily0202/23xpCrGmTYmYAzTv7KQGSna7wSat8vDnjrLqmRTUtVzXNx5AdvCeF93BQwwCTYpNYDtNU.jpg|https://files.peakd.com/file/peakd-hive/mily0202/23wCEJ1Vz7gosDR6UjTsR7TA67g2vjLdQVrLwkE1jB4sbM7FBhPnbeqwiufwWMPig7uwi.jpg|
|-|-|

|https://files.peakd.com/file/peakd-hive/mily0202/23tmJ948cnx4su2fPPdMcNRKn5RTYqN8RFdGar6pFRVMtydxLVrY18iaz3Q9PJD6gVdMj.jpg|https://files.peakd.com/file/peakd-hive/mily0202/23w2uUrTUX2RH8XcbuAAB4vw2QngRrModQnsYgjHRdepmQXVtY3aeAjQBAc8cyd1o683X.jpg|https://files.peakd.com/file/peakd-hive/mily0202/23xejfd6UAZviWEujqStDZGboFhYriewR1DiDchSGZjnLSv1akpcZD2JRhuCB79PfS11i.jpg|
|-|-|-|
---
Almost at the finish line, only the most special detail remains: the design of the initial. I start by transferring the design to the cutout. I cut it out and paint the largest piece black with acrylic paint. For the smaller piece, which in my case is a heart, I will cover it with red fabric and make a border with thin cord. Once both pieces are ready, all that remains is to glue them in the center of the oval.
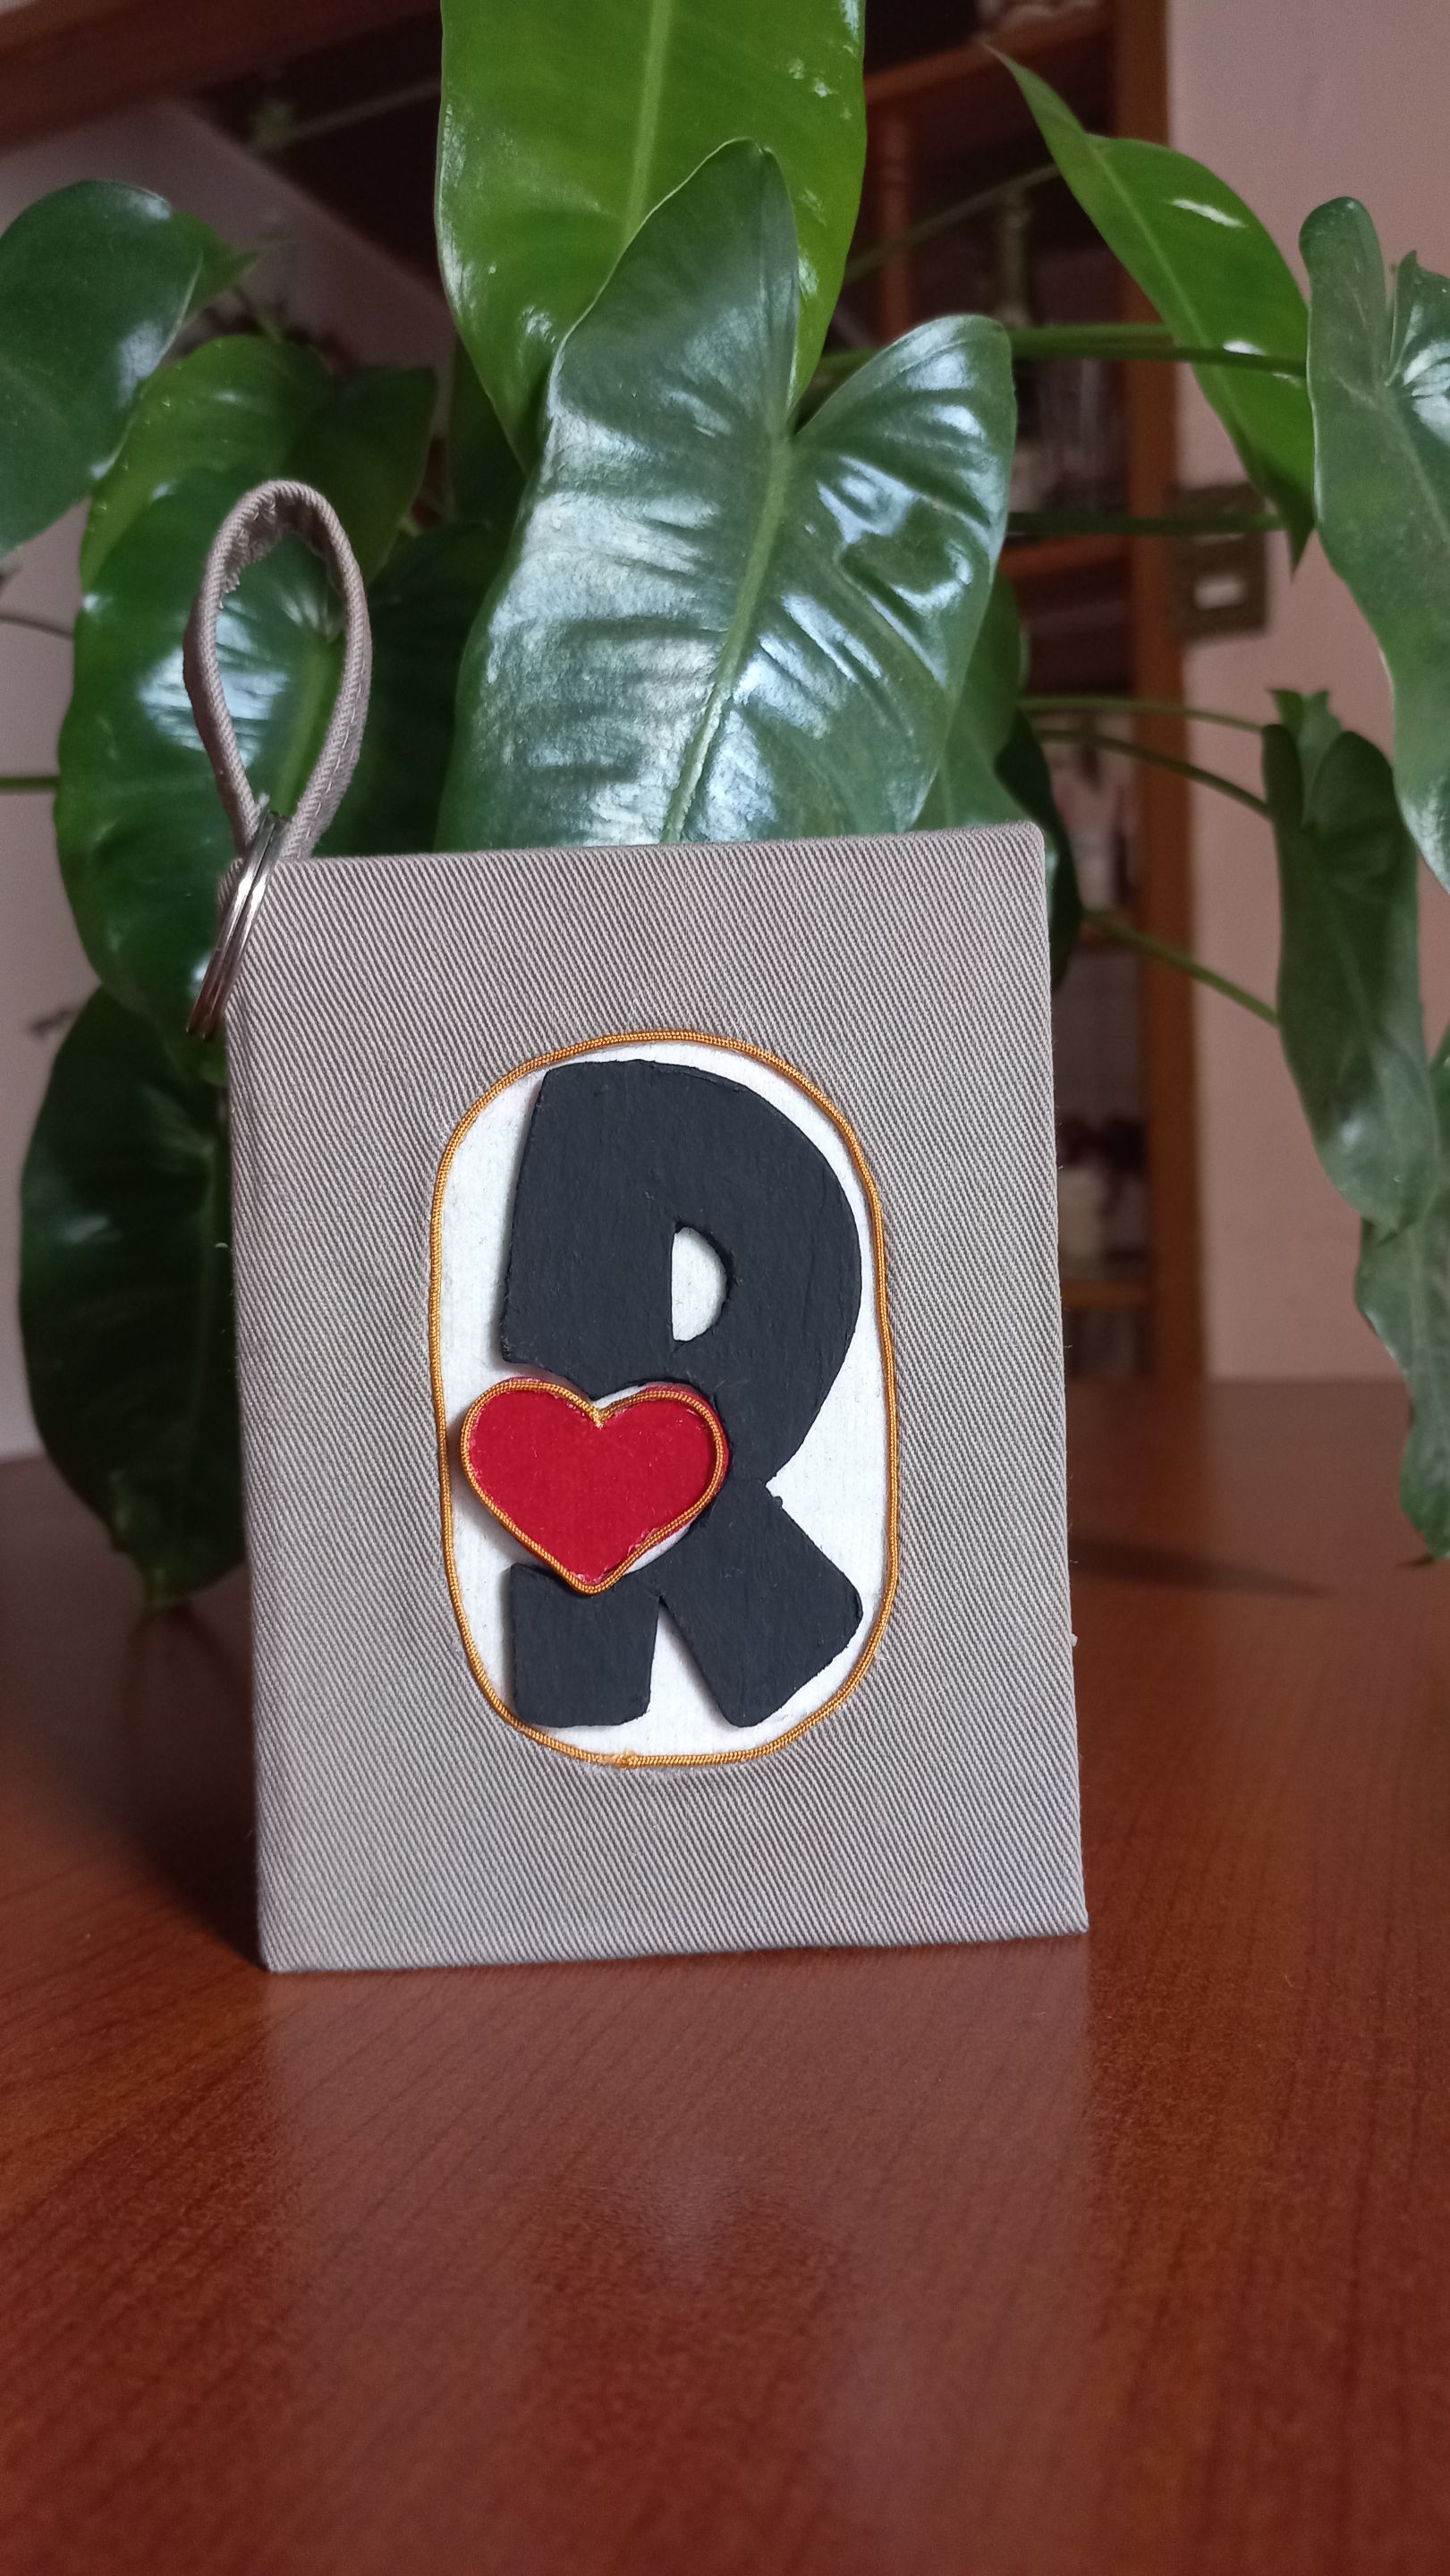
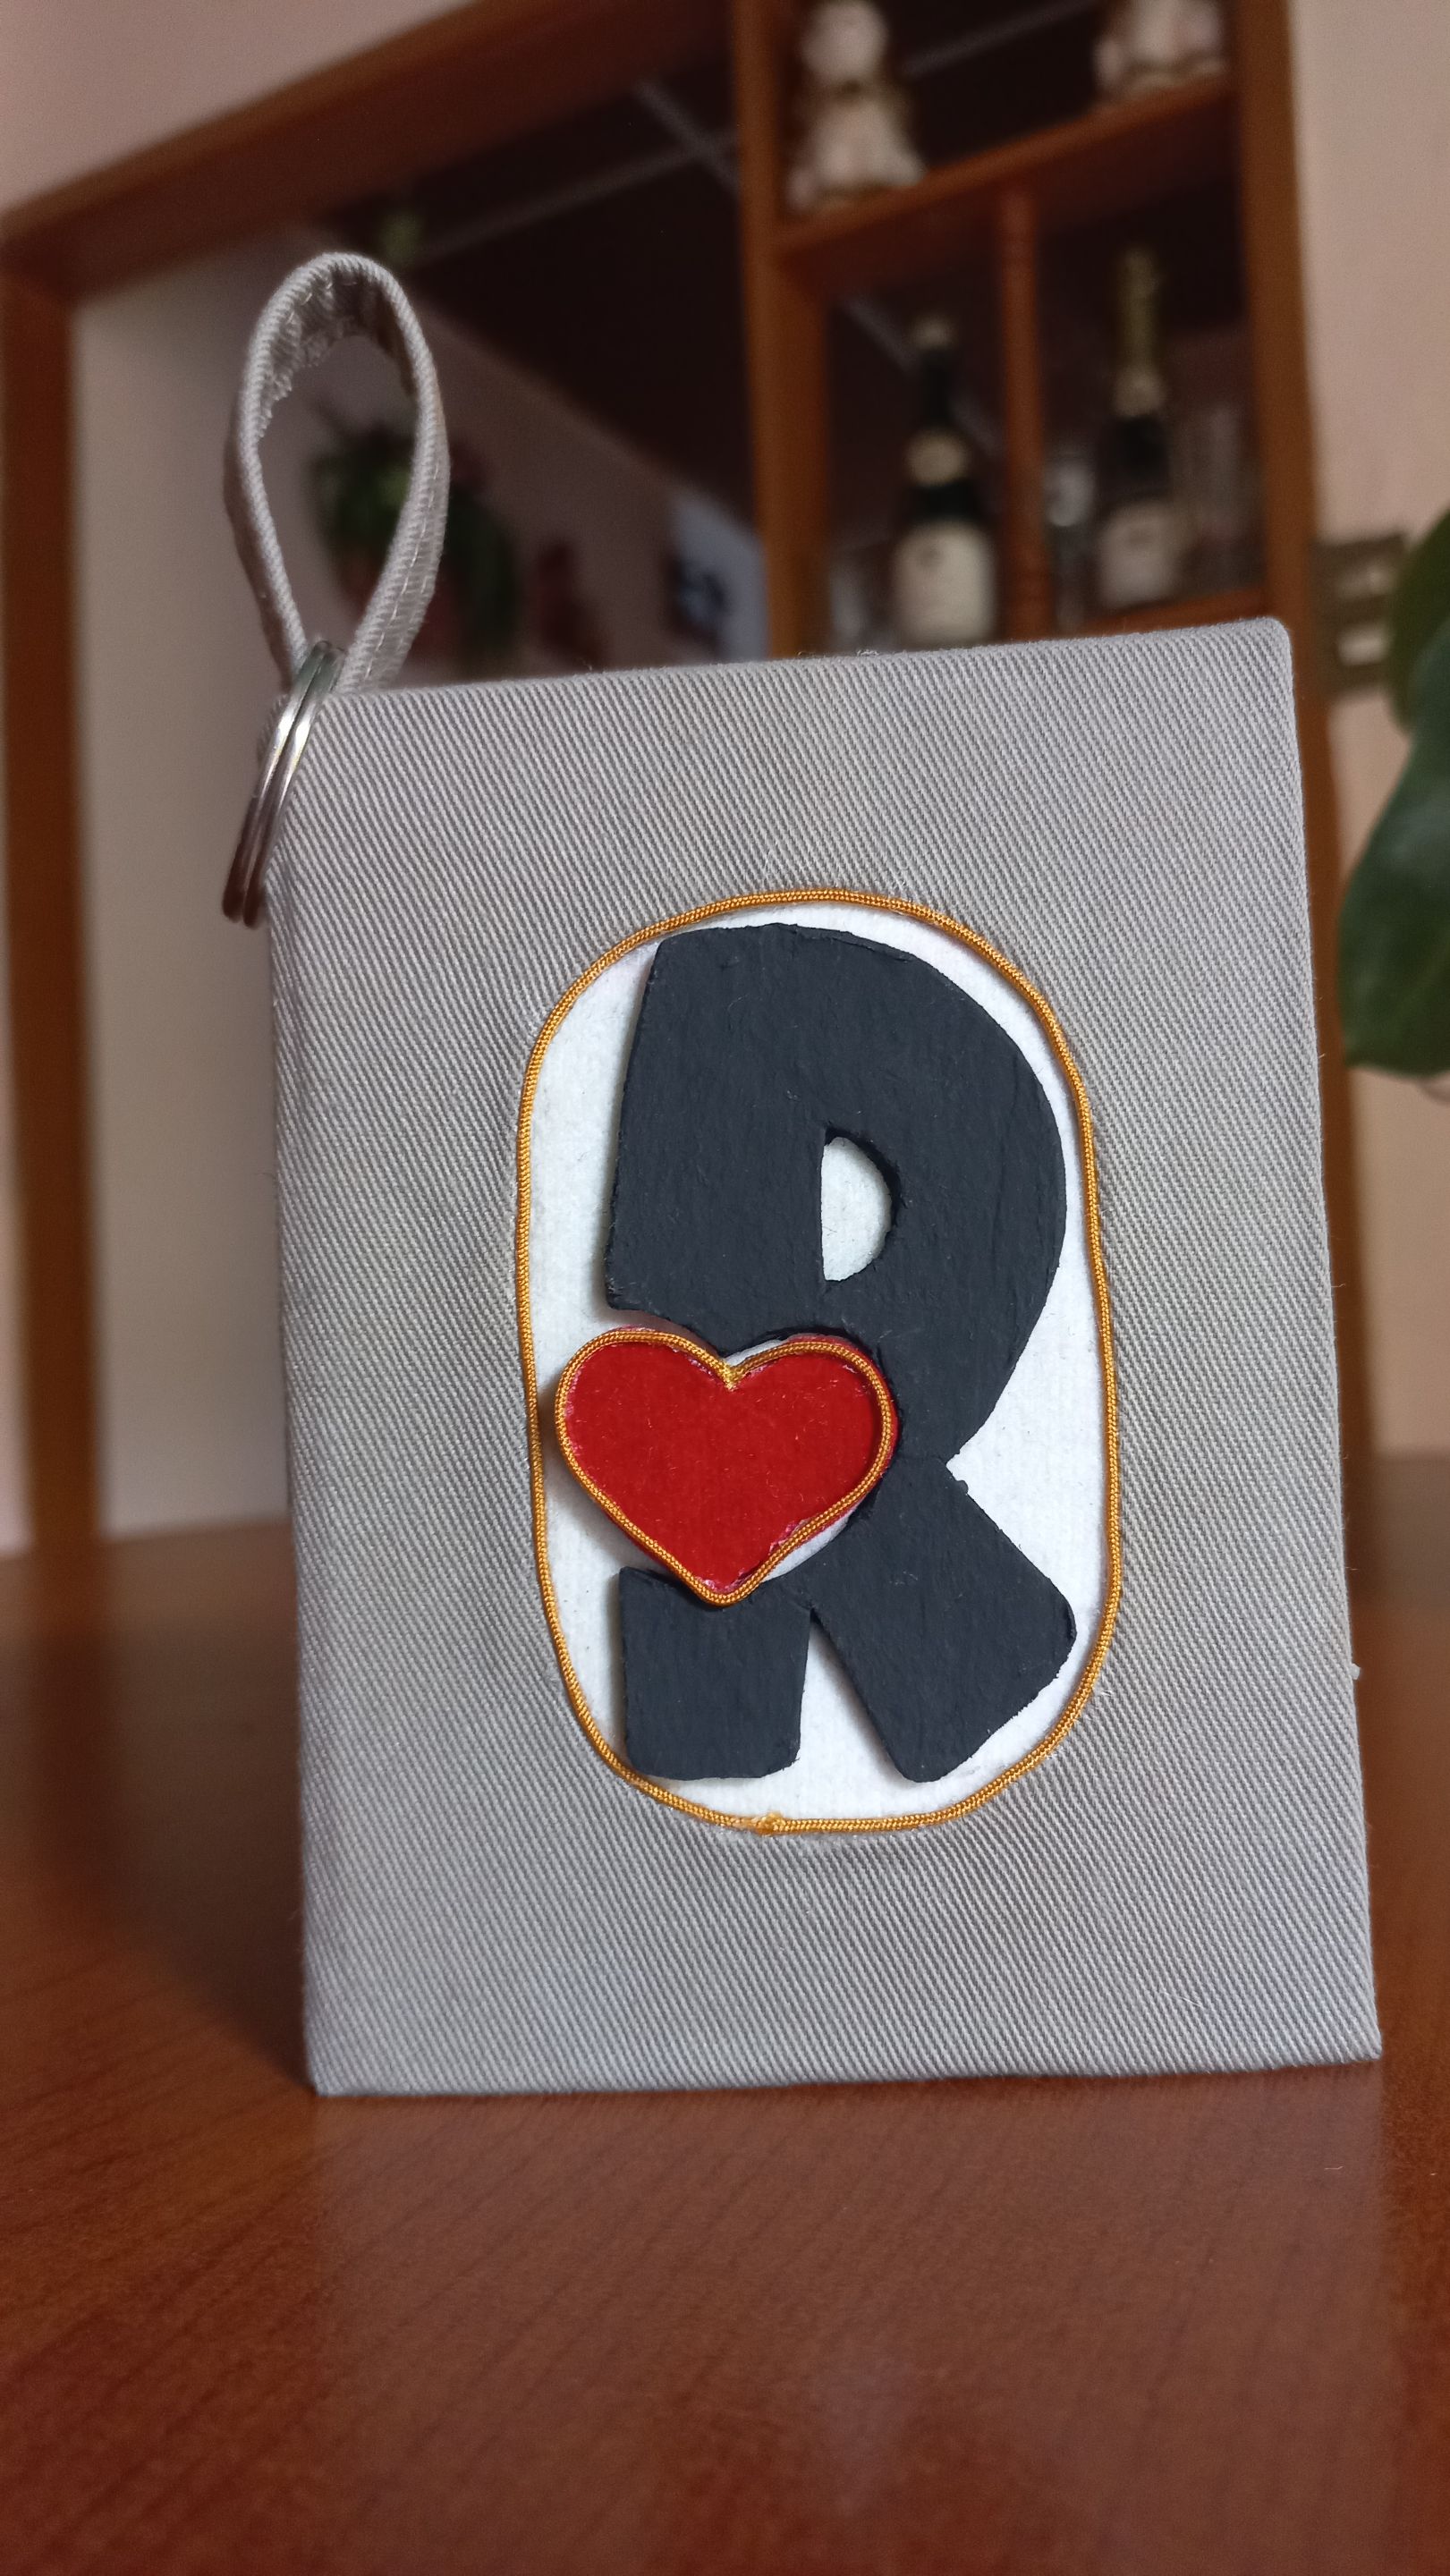
Y para finalizar coloco la argolla en la agarradera. Lista la mini libreta.
Gracias por acompañarme en cada paso de esta mini libreta hecha con retazos, cartón y mucho corazón. Saludos.
---
Gracias por acompañarme en cada paso de esta mini libreta hecha con retazos, cartón y mucho corazón. Saludos.
And finally, I place the ring on the handle. The mini notebook is ready.
Thank you for accompanying me every step of the way with this mini notebook made from scraps, cardboard, and a lot of love. greetings
Foto de mi autoría / Photo by me
Traducción: DeepL Translate versión gratuita. / Translation: DeepL Translate Free version.
---
Traducción: DeepL Translate versión gratuita. / Translation: DeepL Translate Free version.