English Version
💕✨💕✨💕✨💕✨💕✨💕✨💕✨💕✨💕✨💕✨ **Hi crafty friends and craft lovers, here I'm sharing my very late Mother's Day post. I couldn't participate in this month's initiative due to lack of time, but now I'm sharing it here with more time. The project I chose to do is an arrangement with a round box and eternal roses, a nice gift to give on Mother's Day or on a birthday 🎂 to a special person. They're very easy to make and look very attractive and elegant depending on the materials you use. They'll get you out of a bind if you're looking for a more traditional arrangement to give as a gift. Below are the images and steps.**
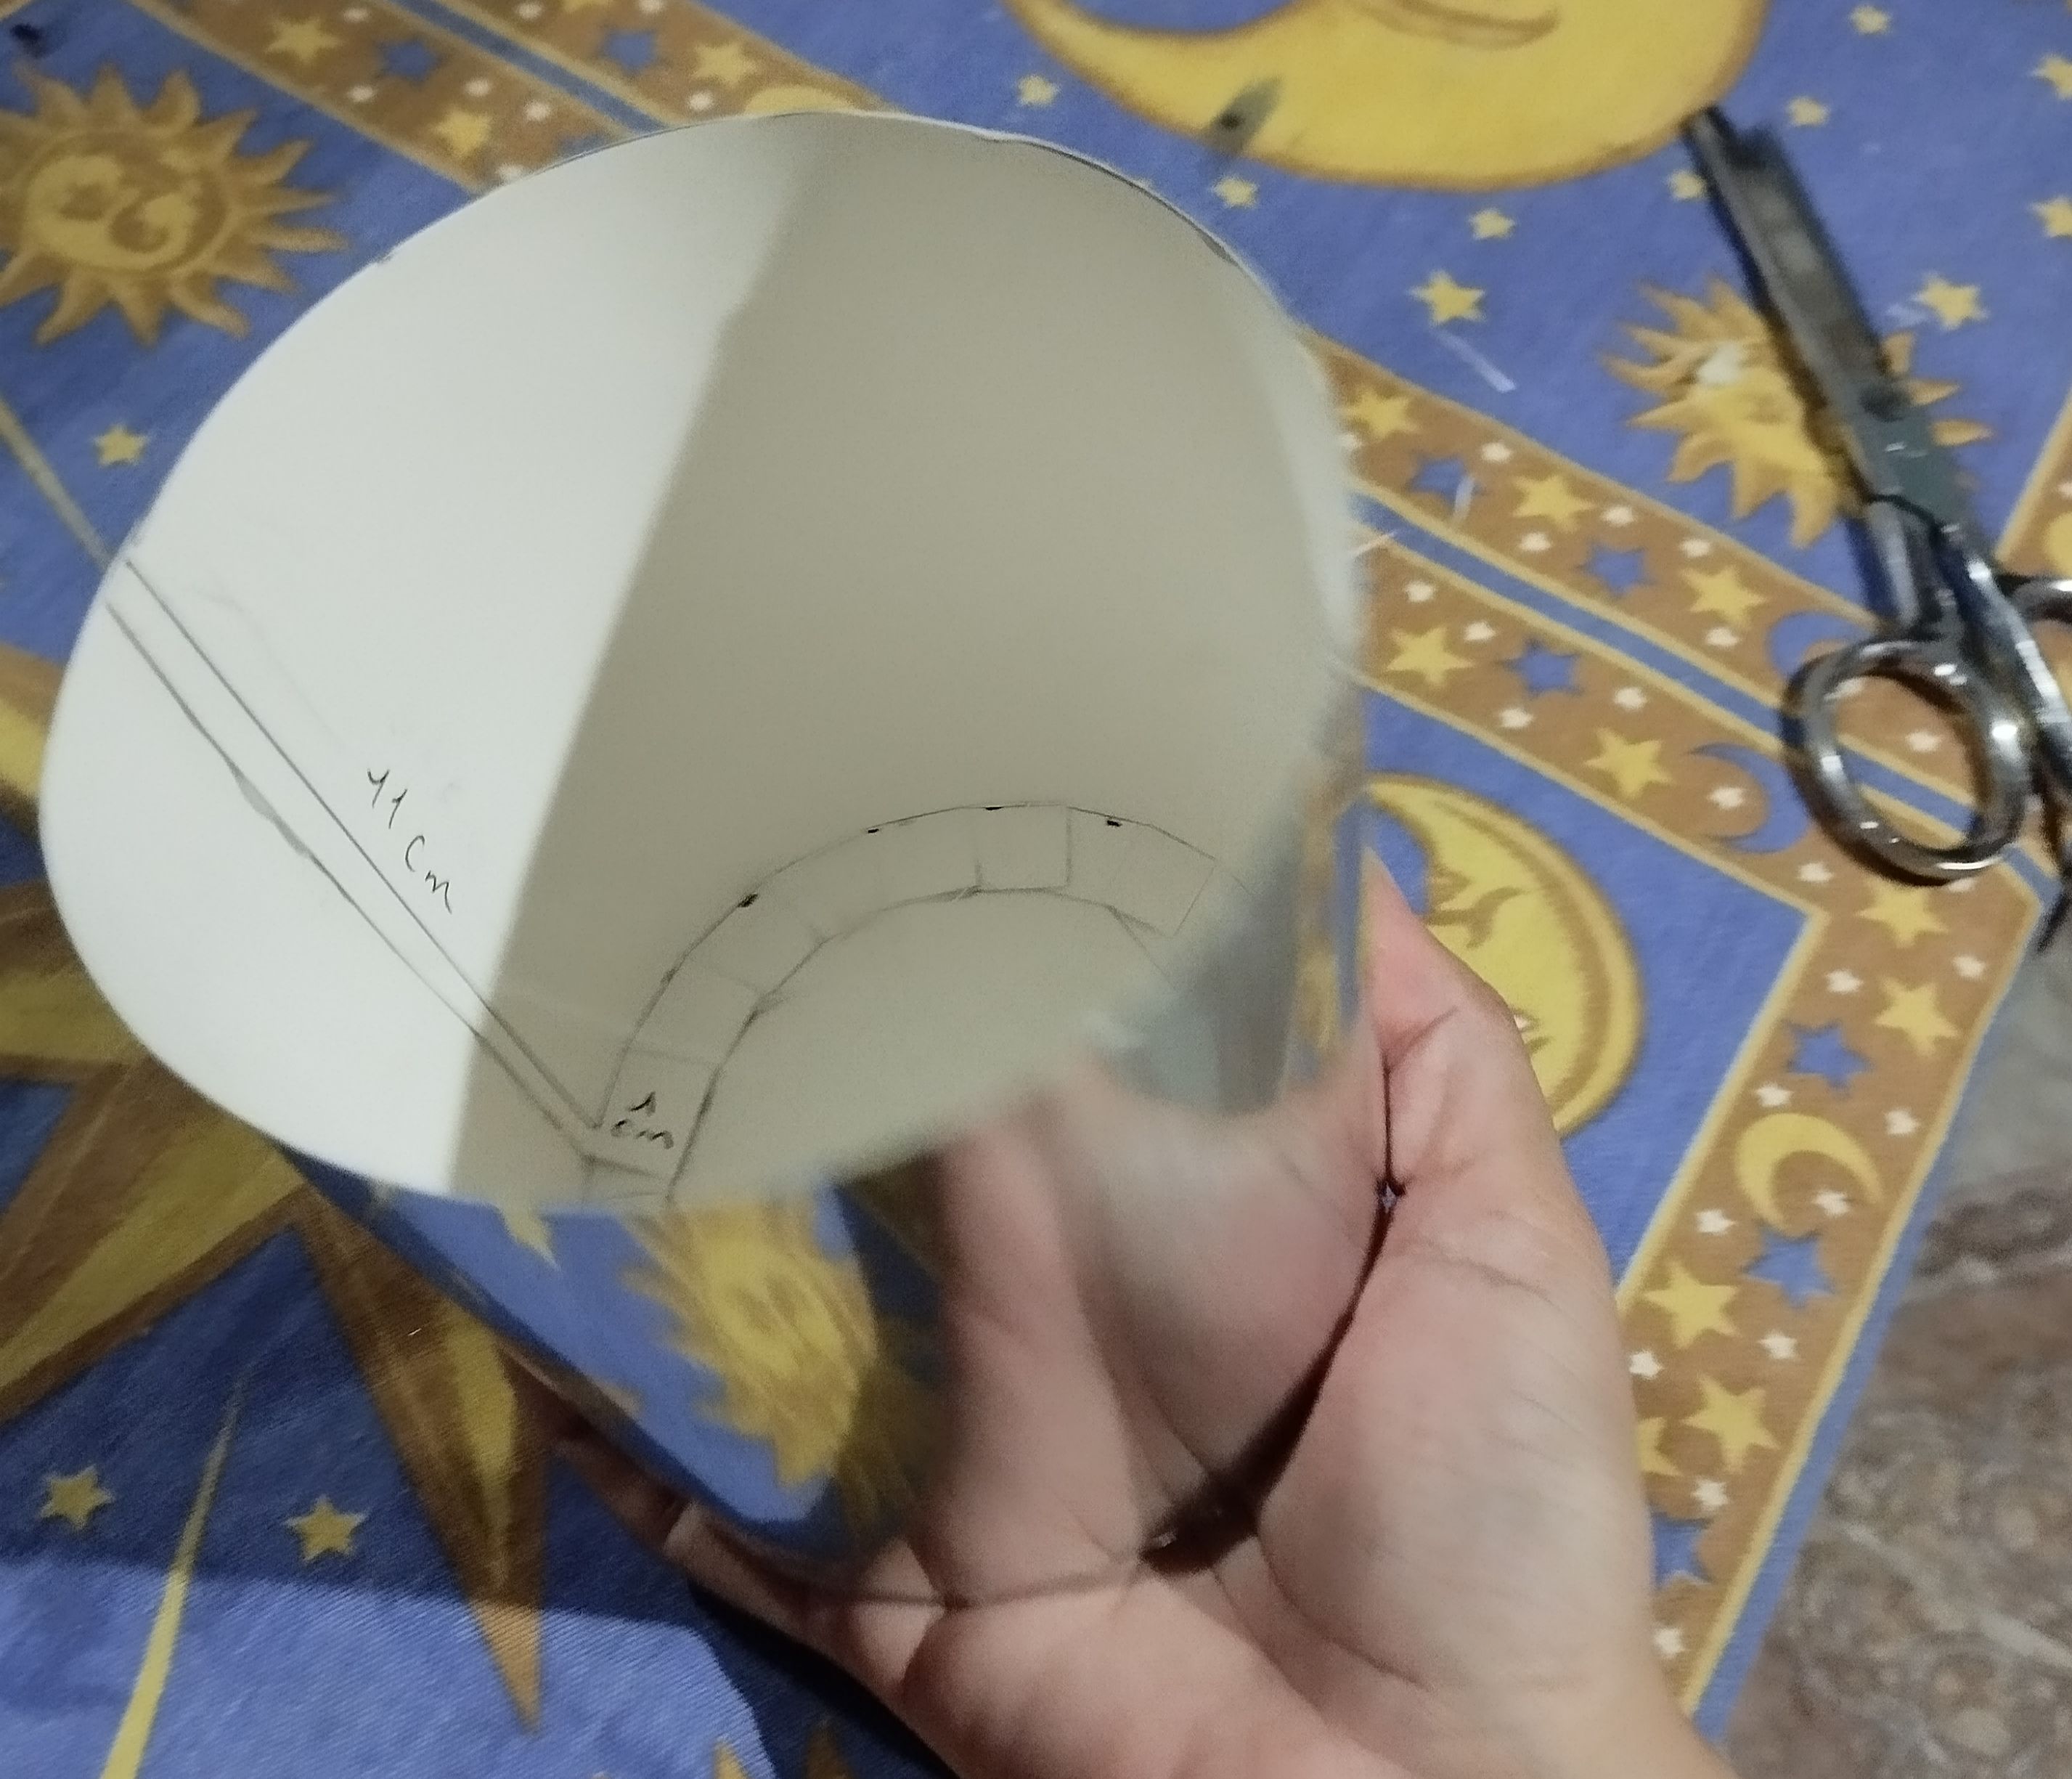
|||| |---|---|---| |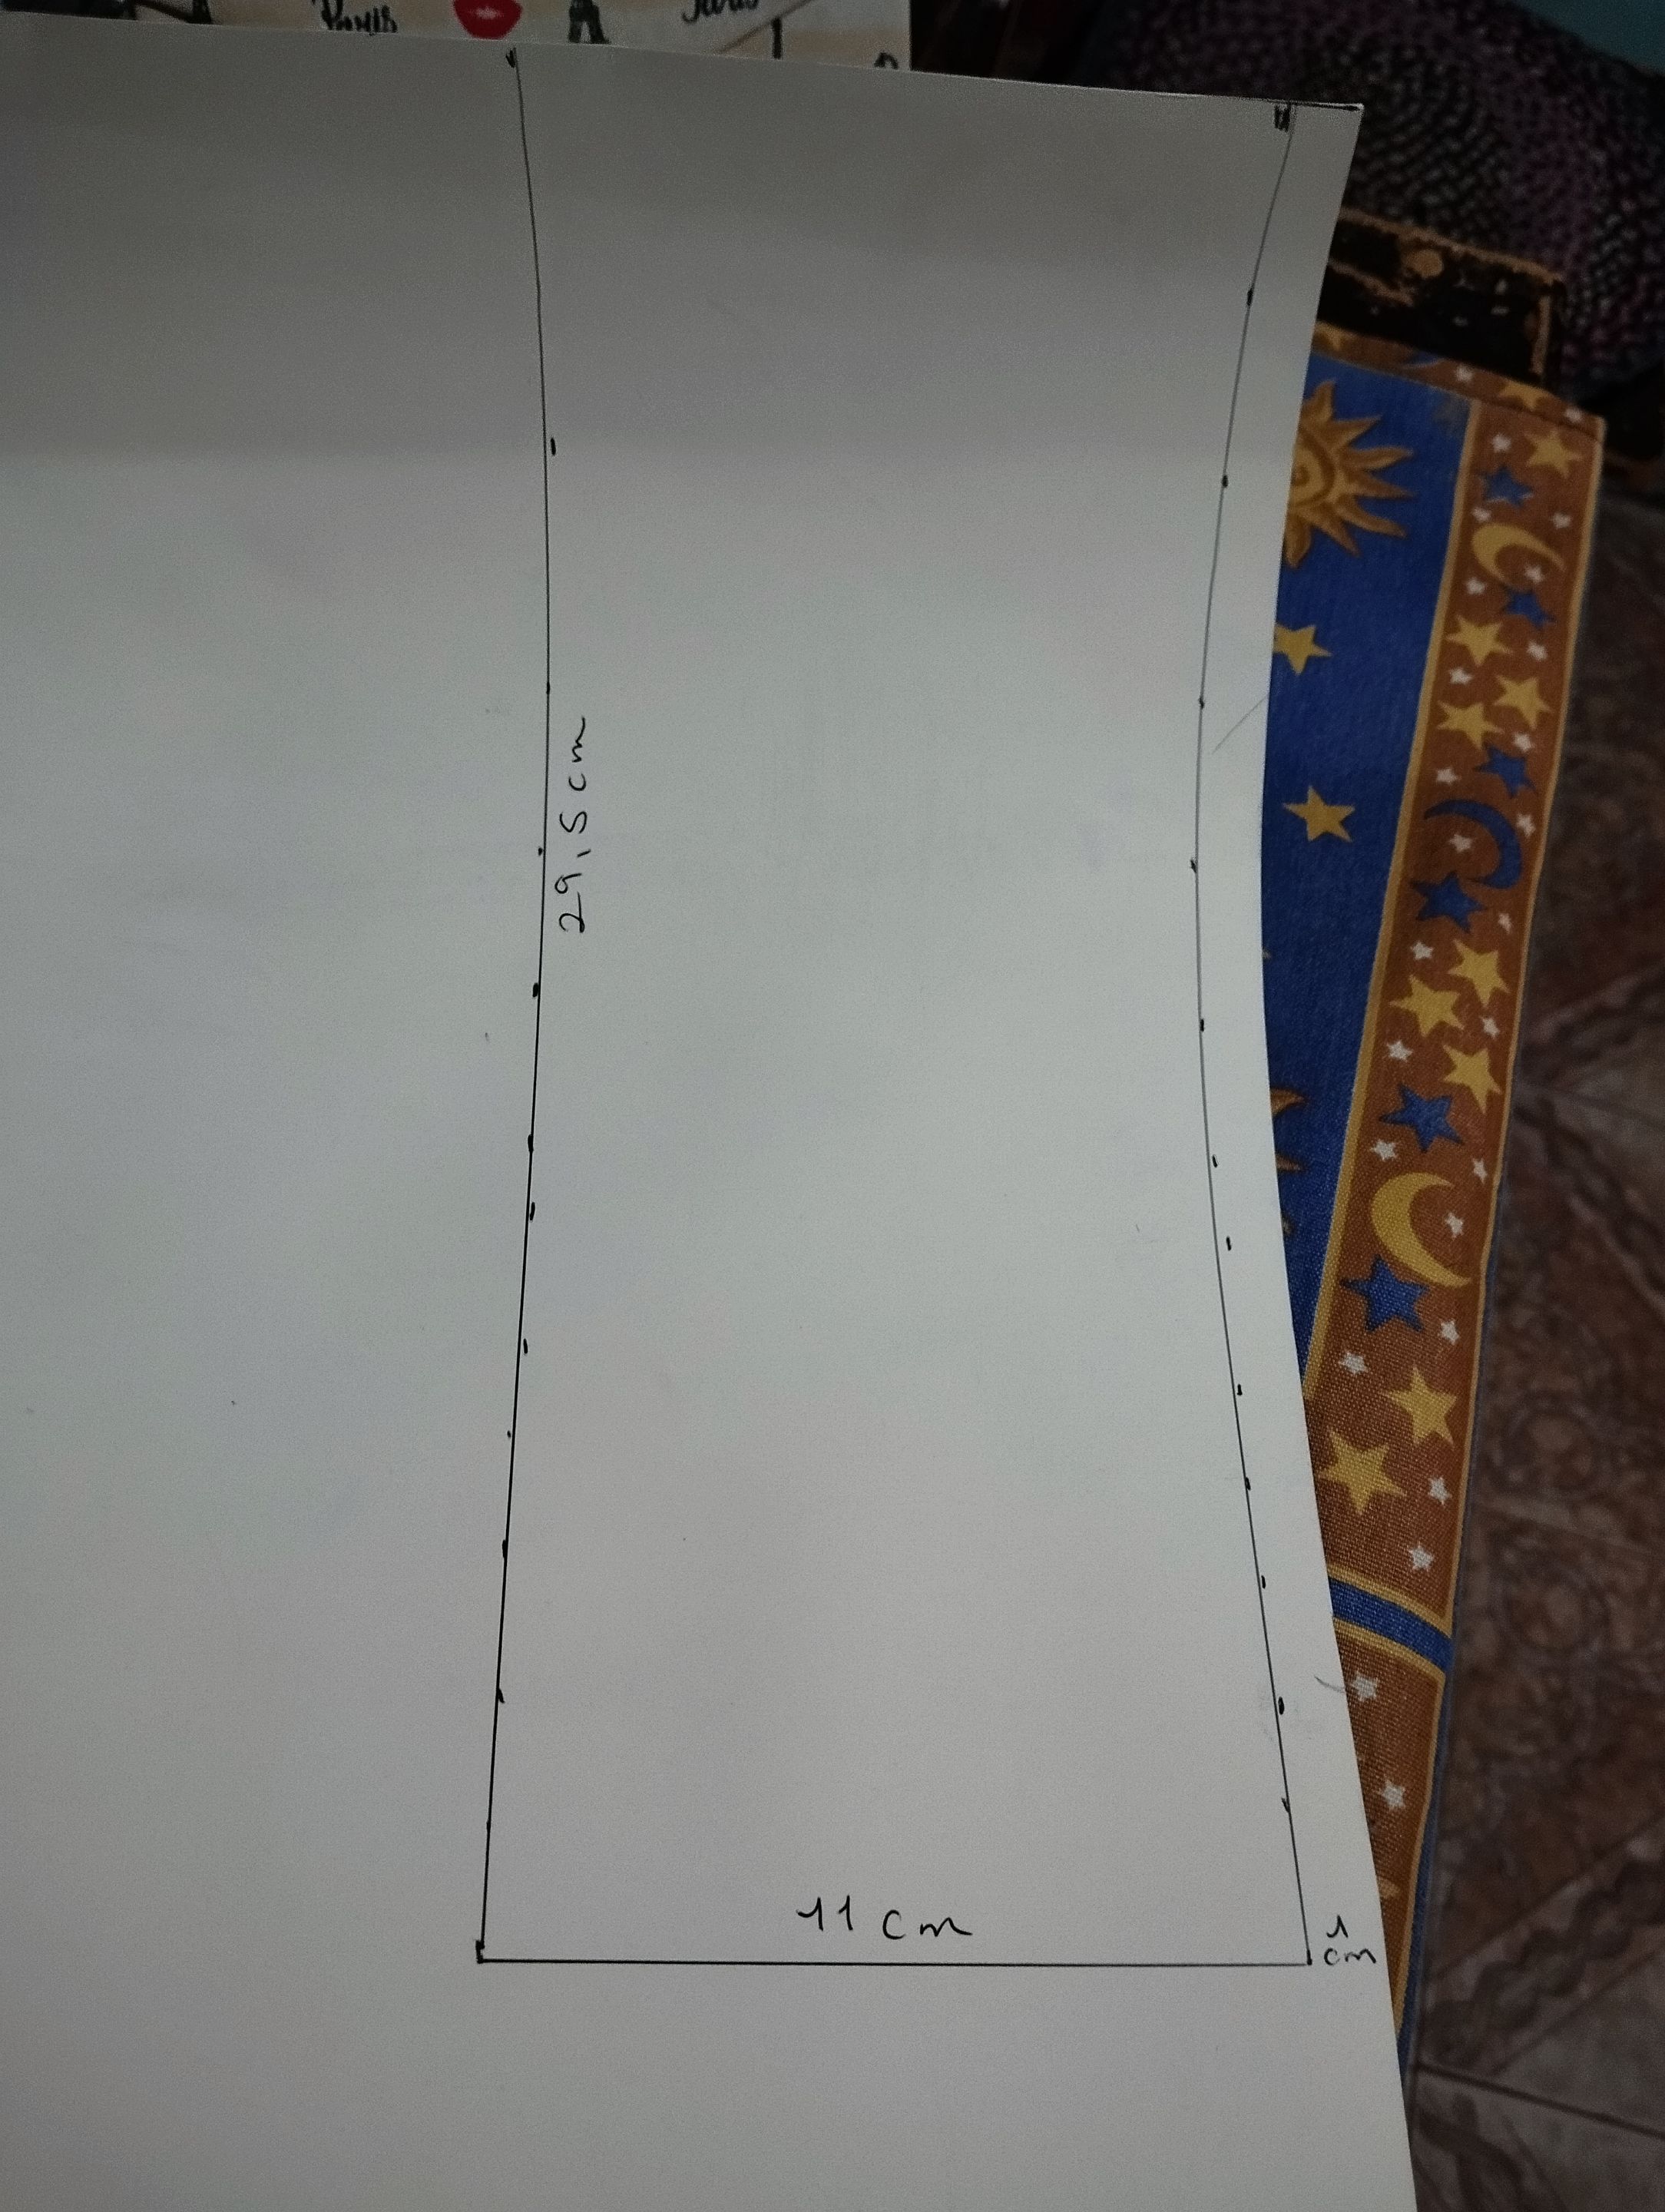|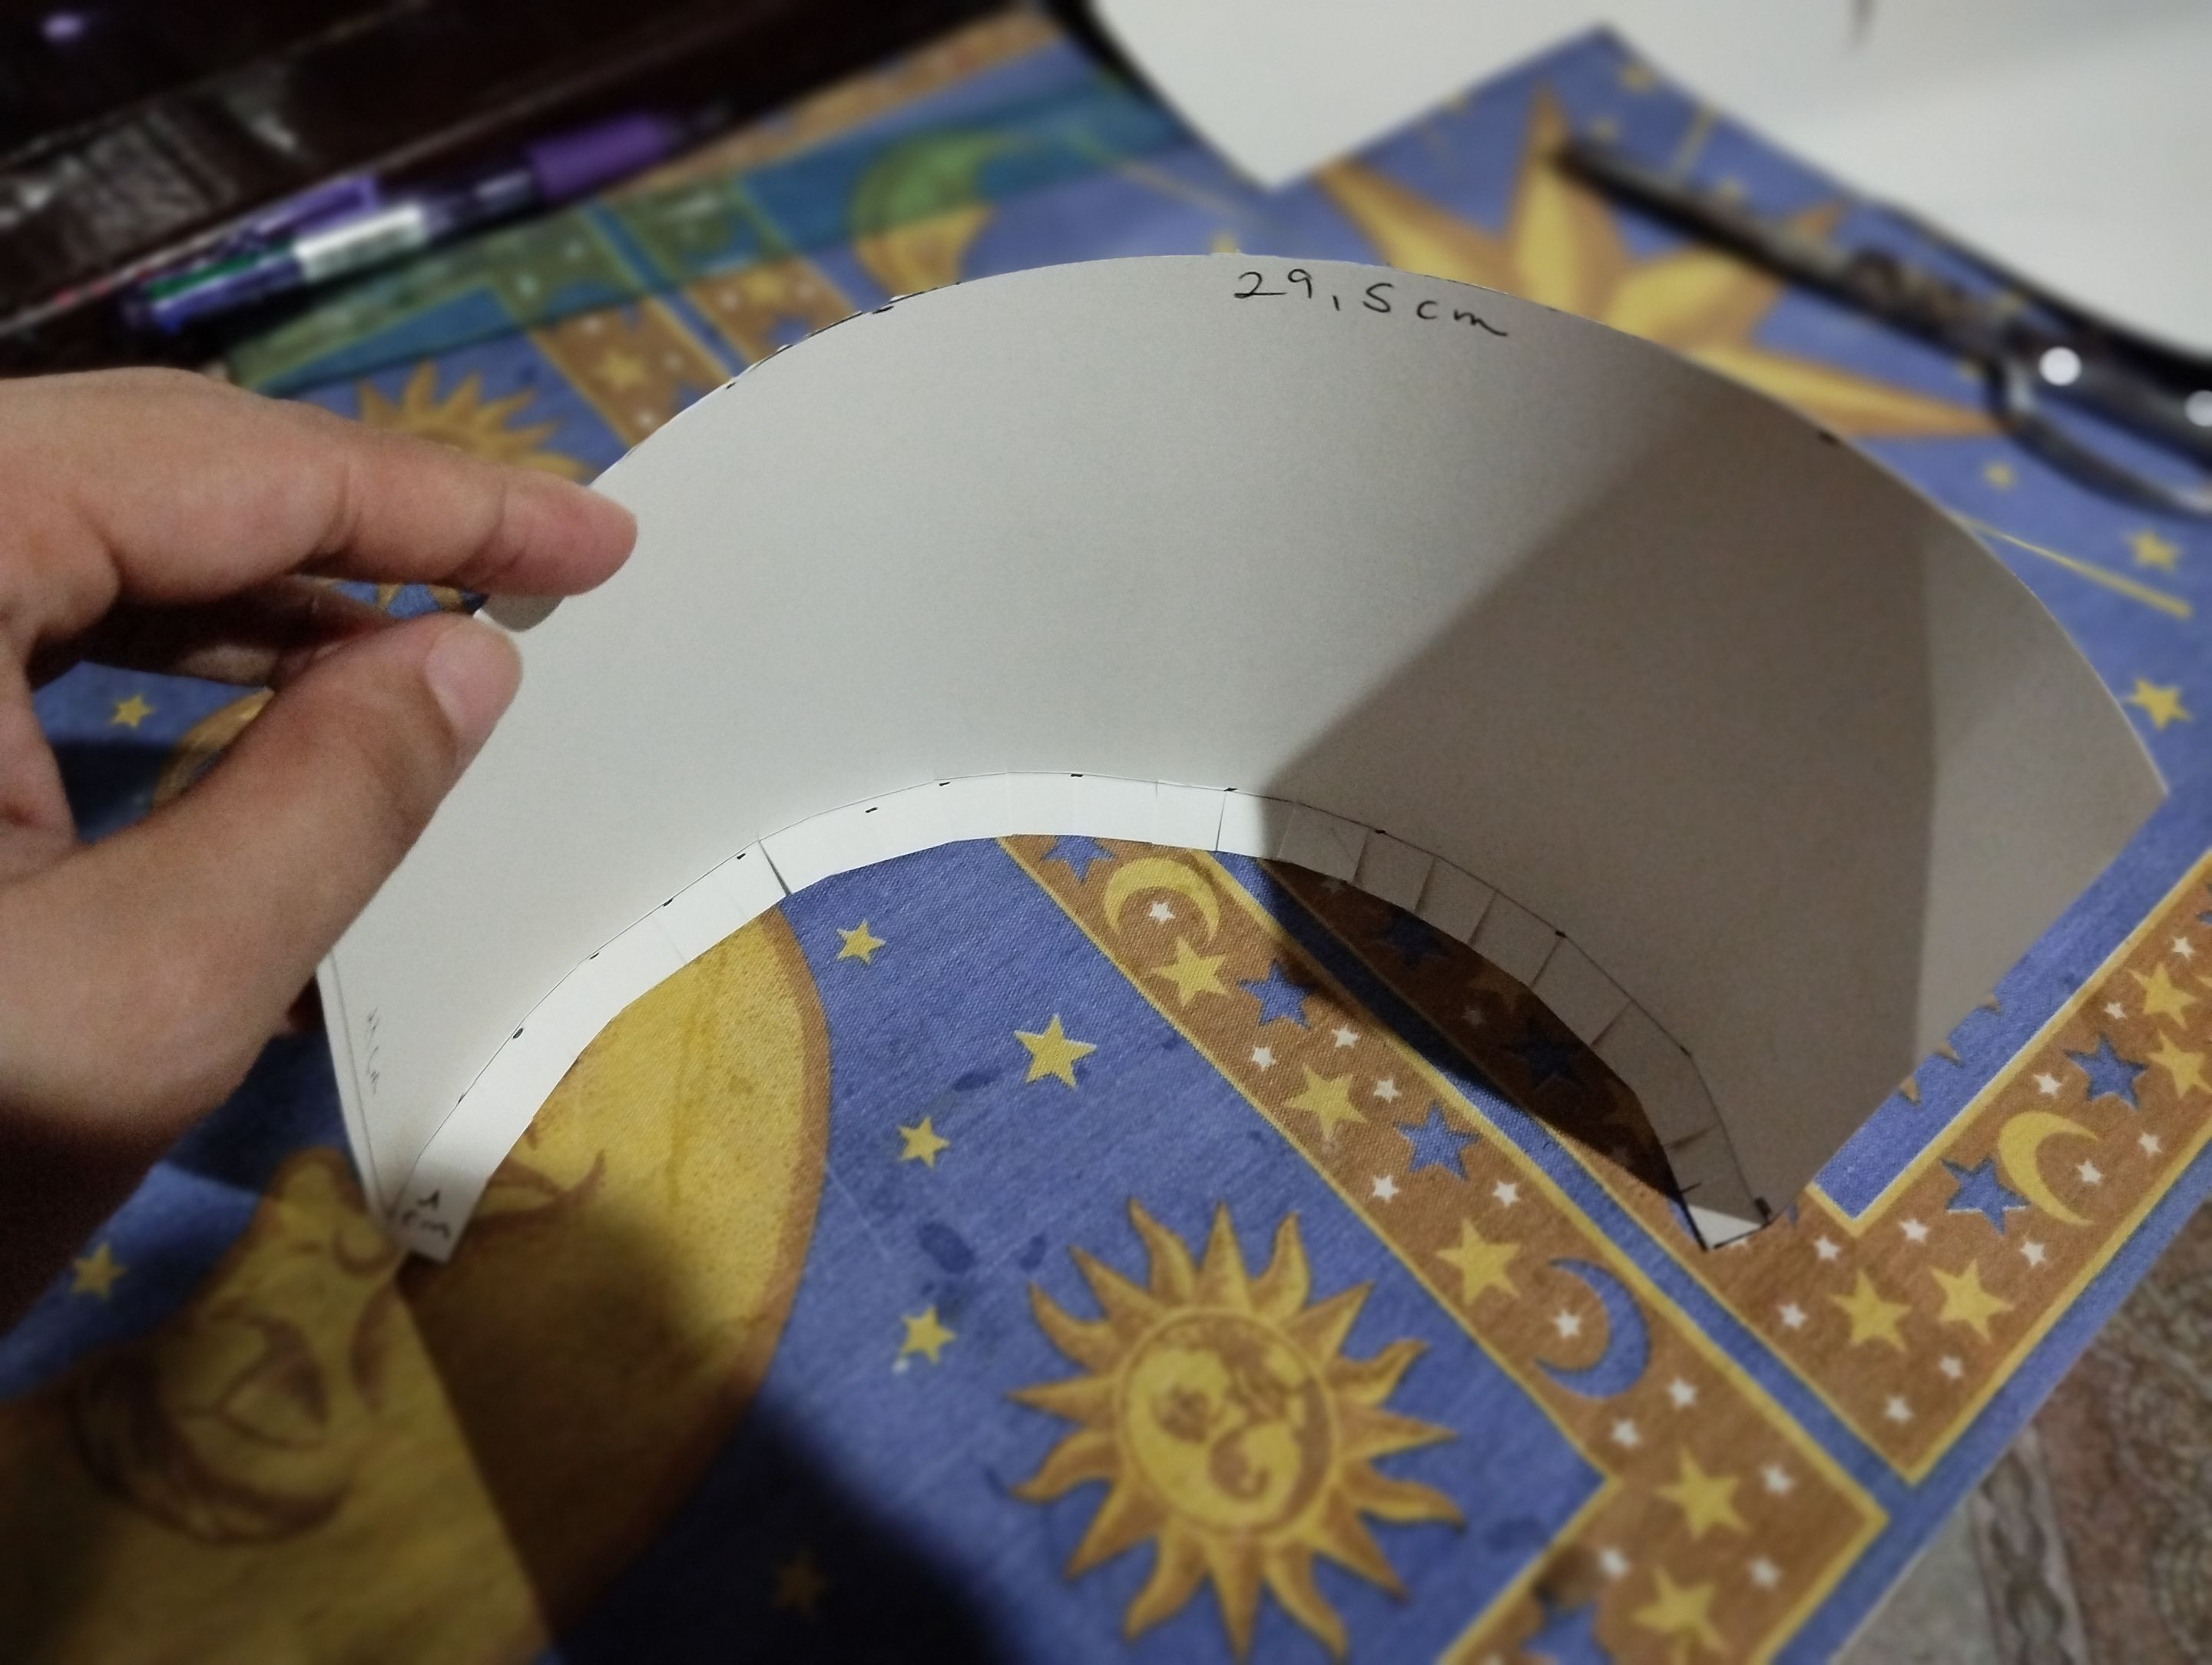|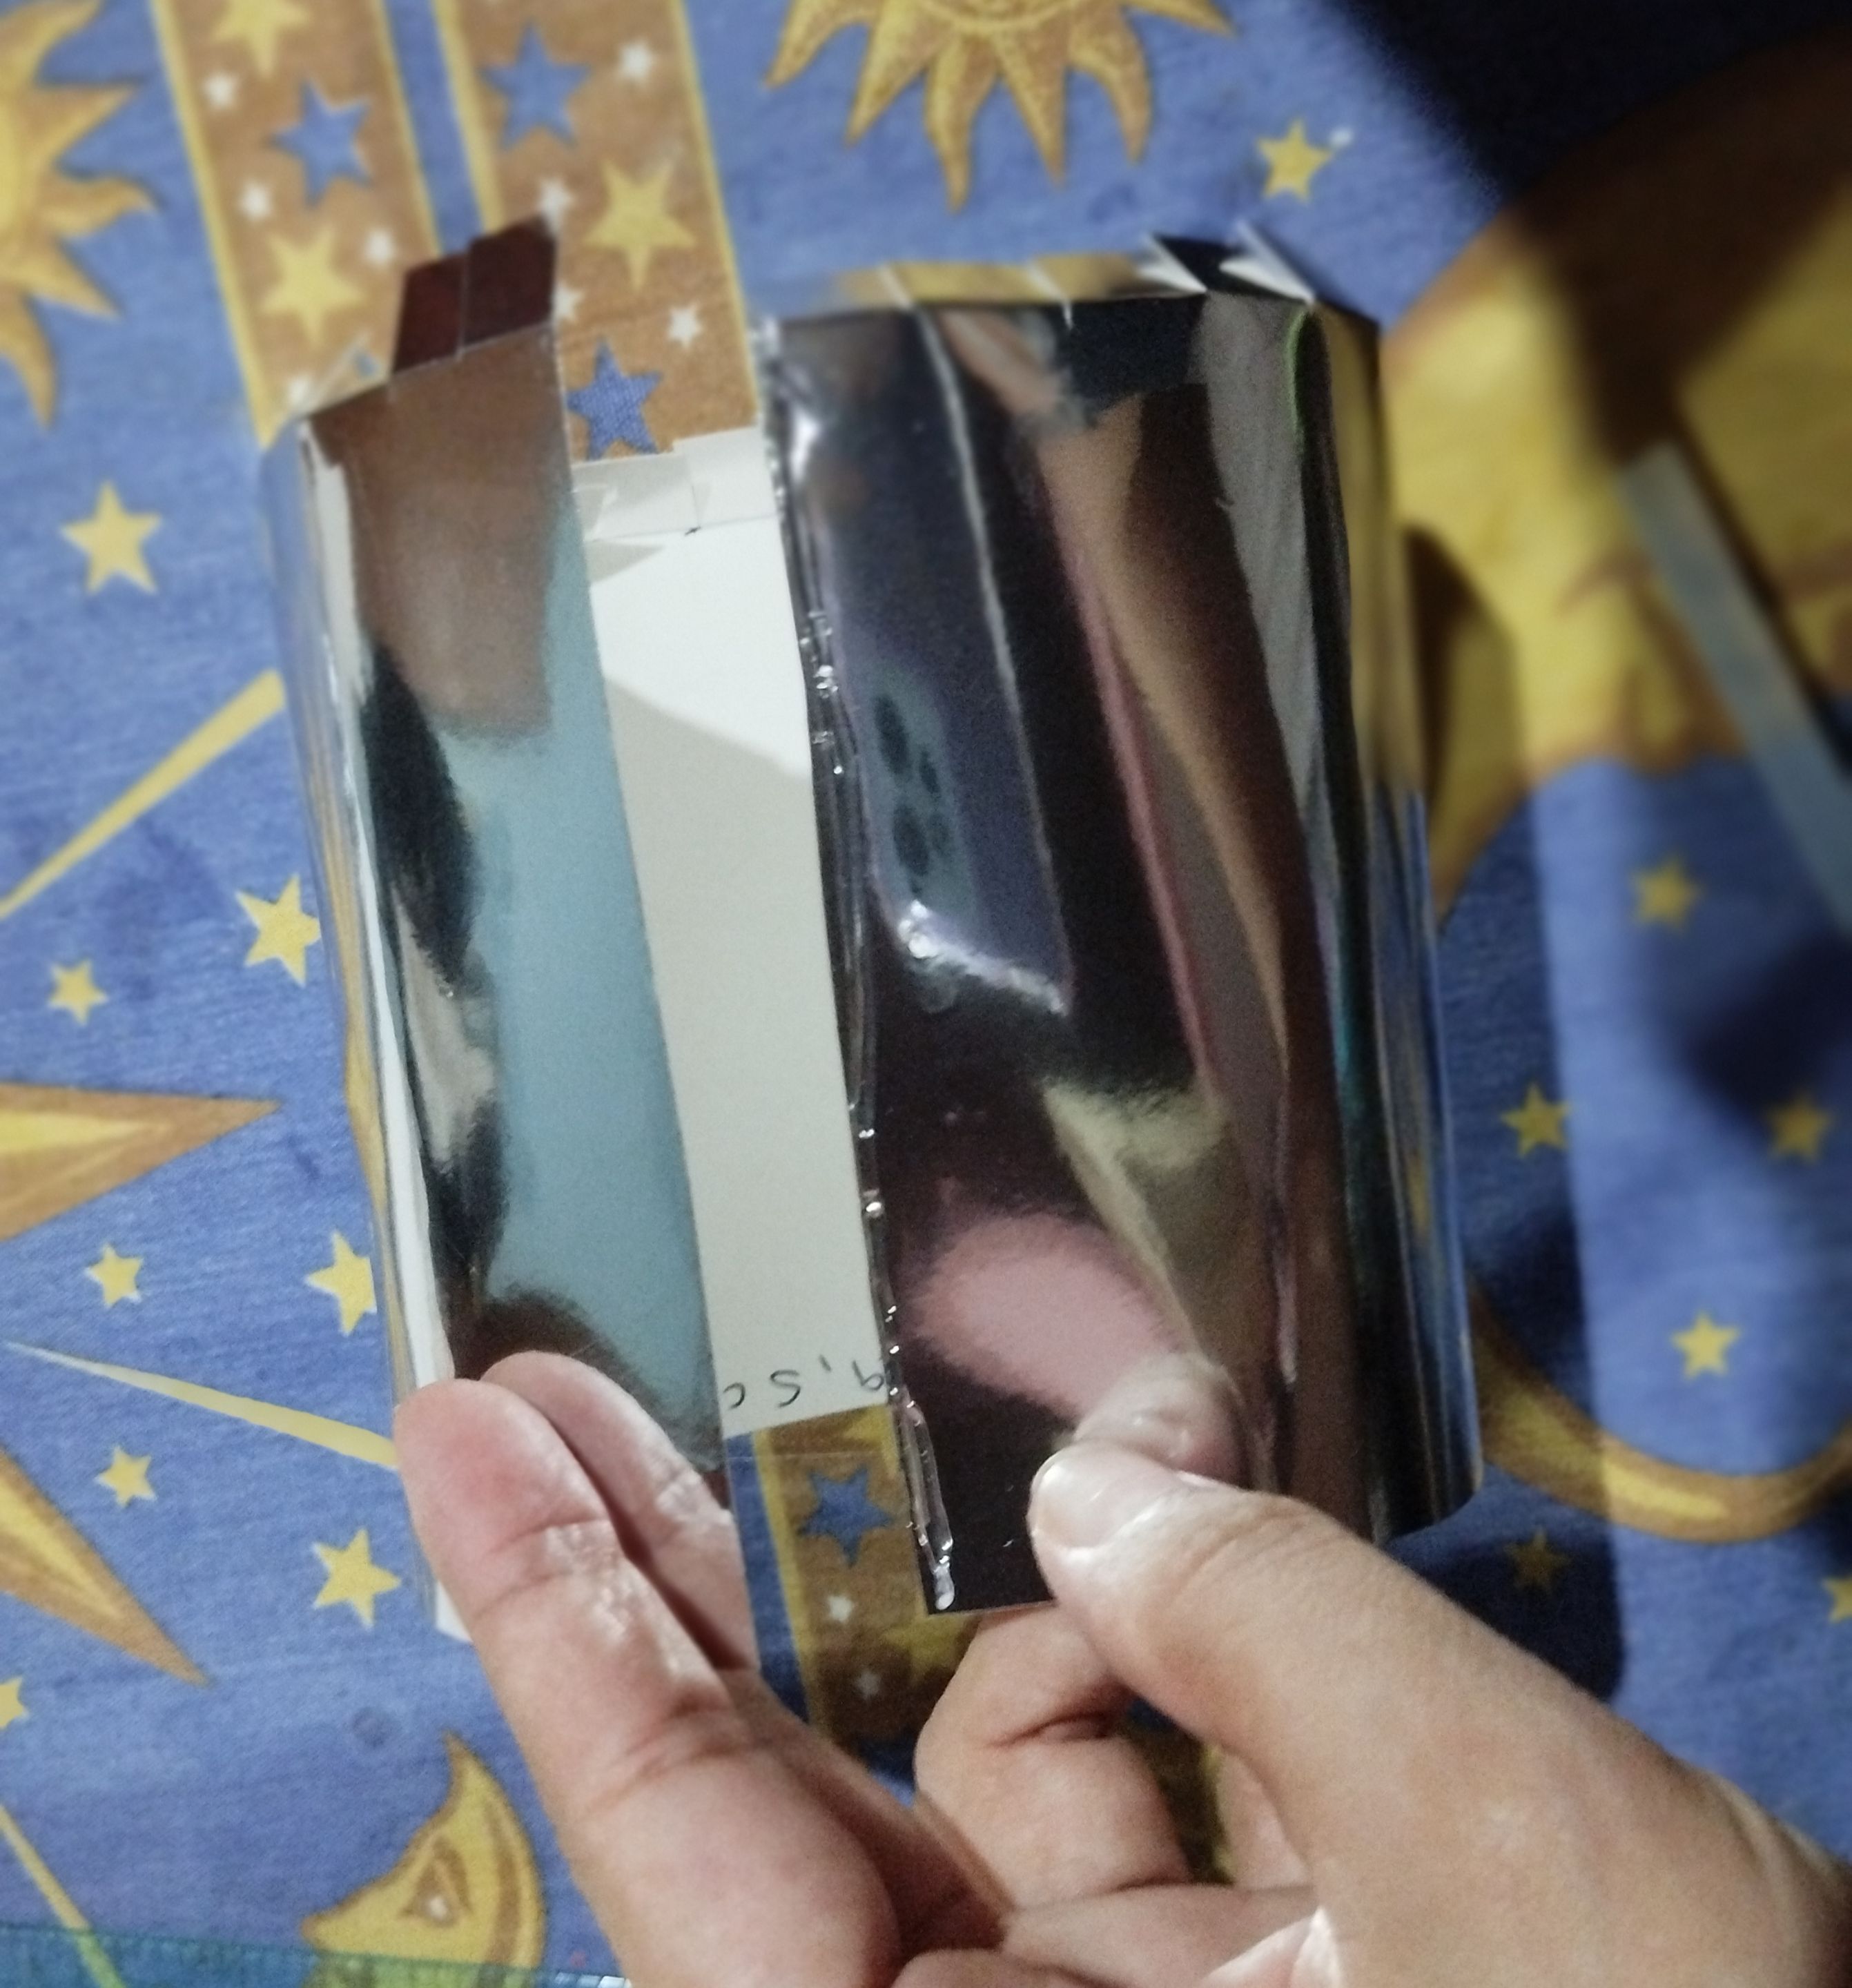| **#1 Para la parte de la caja tedonde usaremos un rectángulo de cartulina plateada tipo espejo,con las medidas de 29,5 cm de largo x 12 cm , y dentro de esos 12 marqué el 1 cm para crear un pestaña que doblaremos en la parte inferior, a esta pestaña le haremos pequeños cortes para que sea más fácil armar la caja redonda y no se deforme al armar, luego con silicón caliente pegué los extremos del rectángulo para armar el cilindro**
English Version
**#1 For the part of the box where we will use a rectangle of silver mirror-type cardboard, with the measurements of 29.5 cm long x 12 cm, and within those 12 I marked 1 cm to create a tab that we will fold at the bottom, we will make small cuts to this tab so that it is easier to assemble the round box and does not deform when assembled, then with hot silicone I glued the ends of the rectangle to assemble the cylinder.**
||||| |---|---|---|---| ||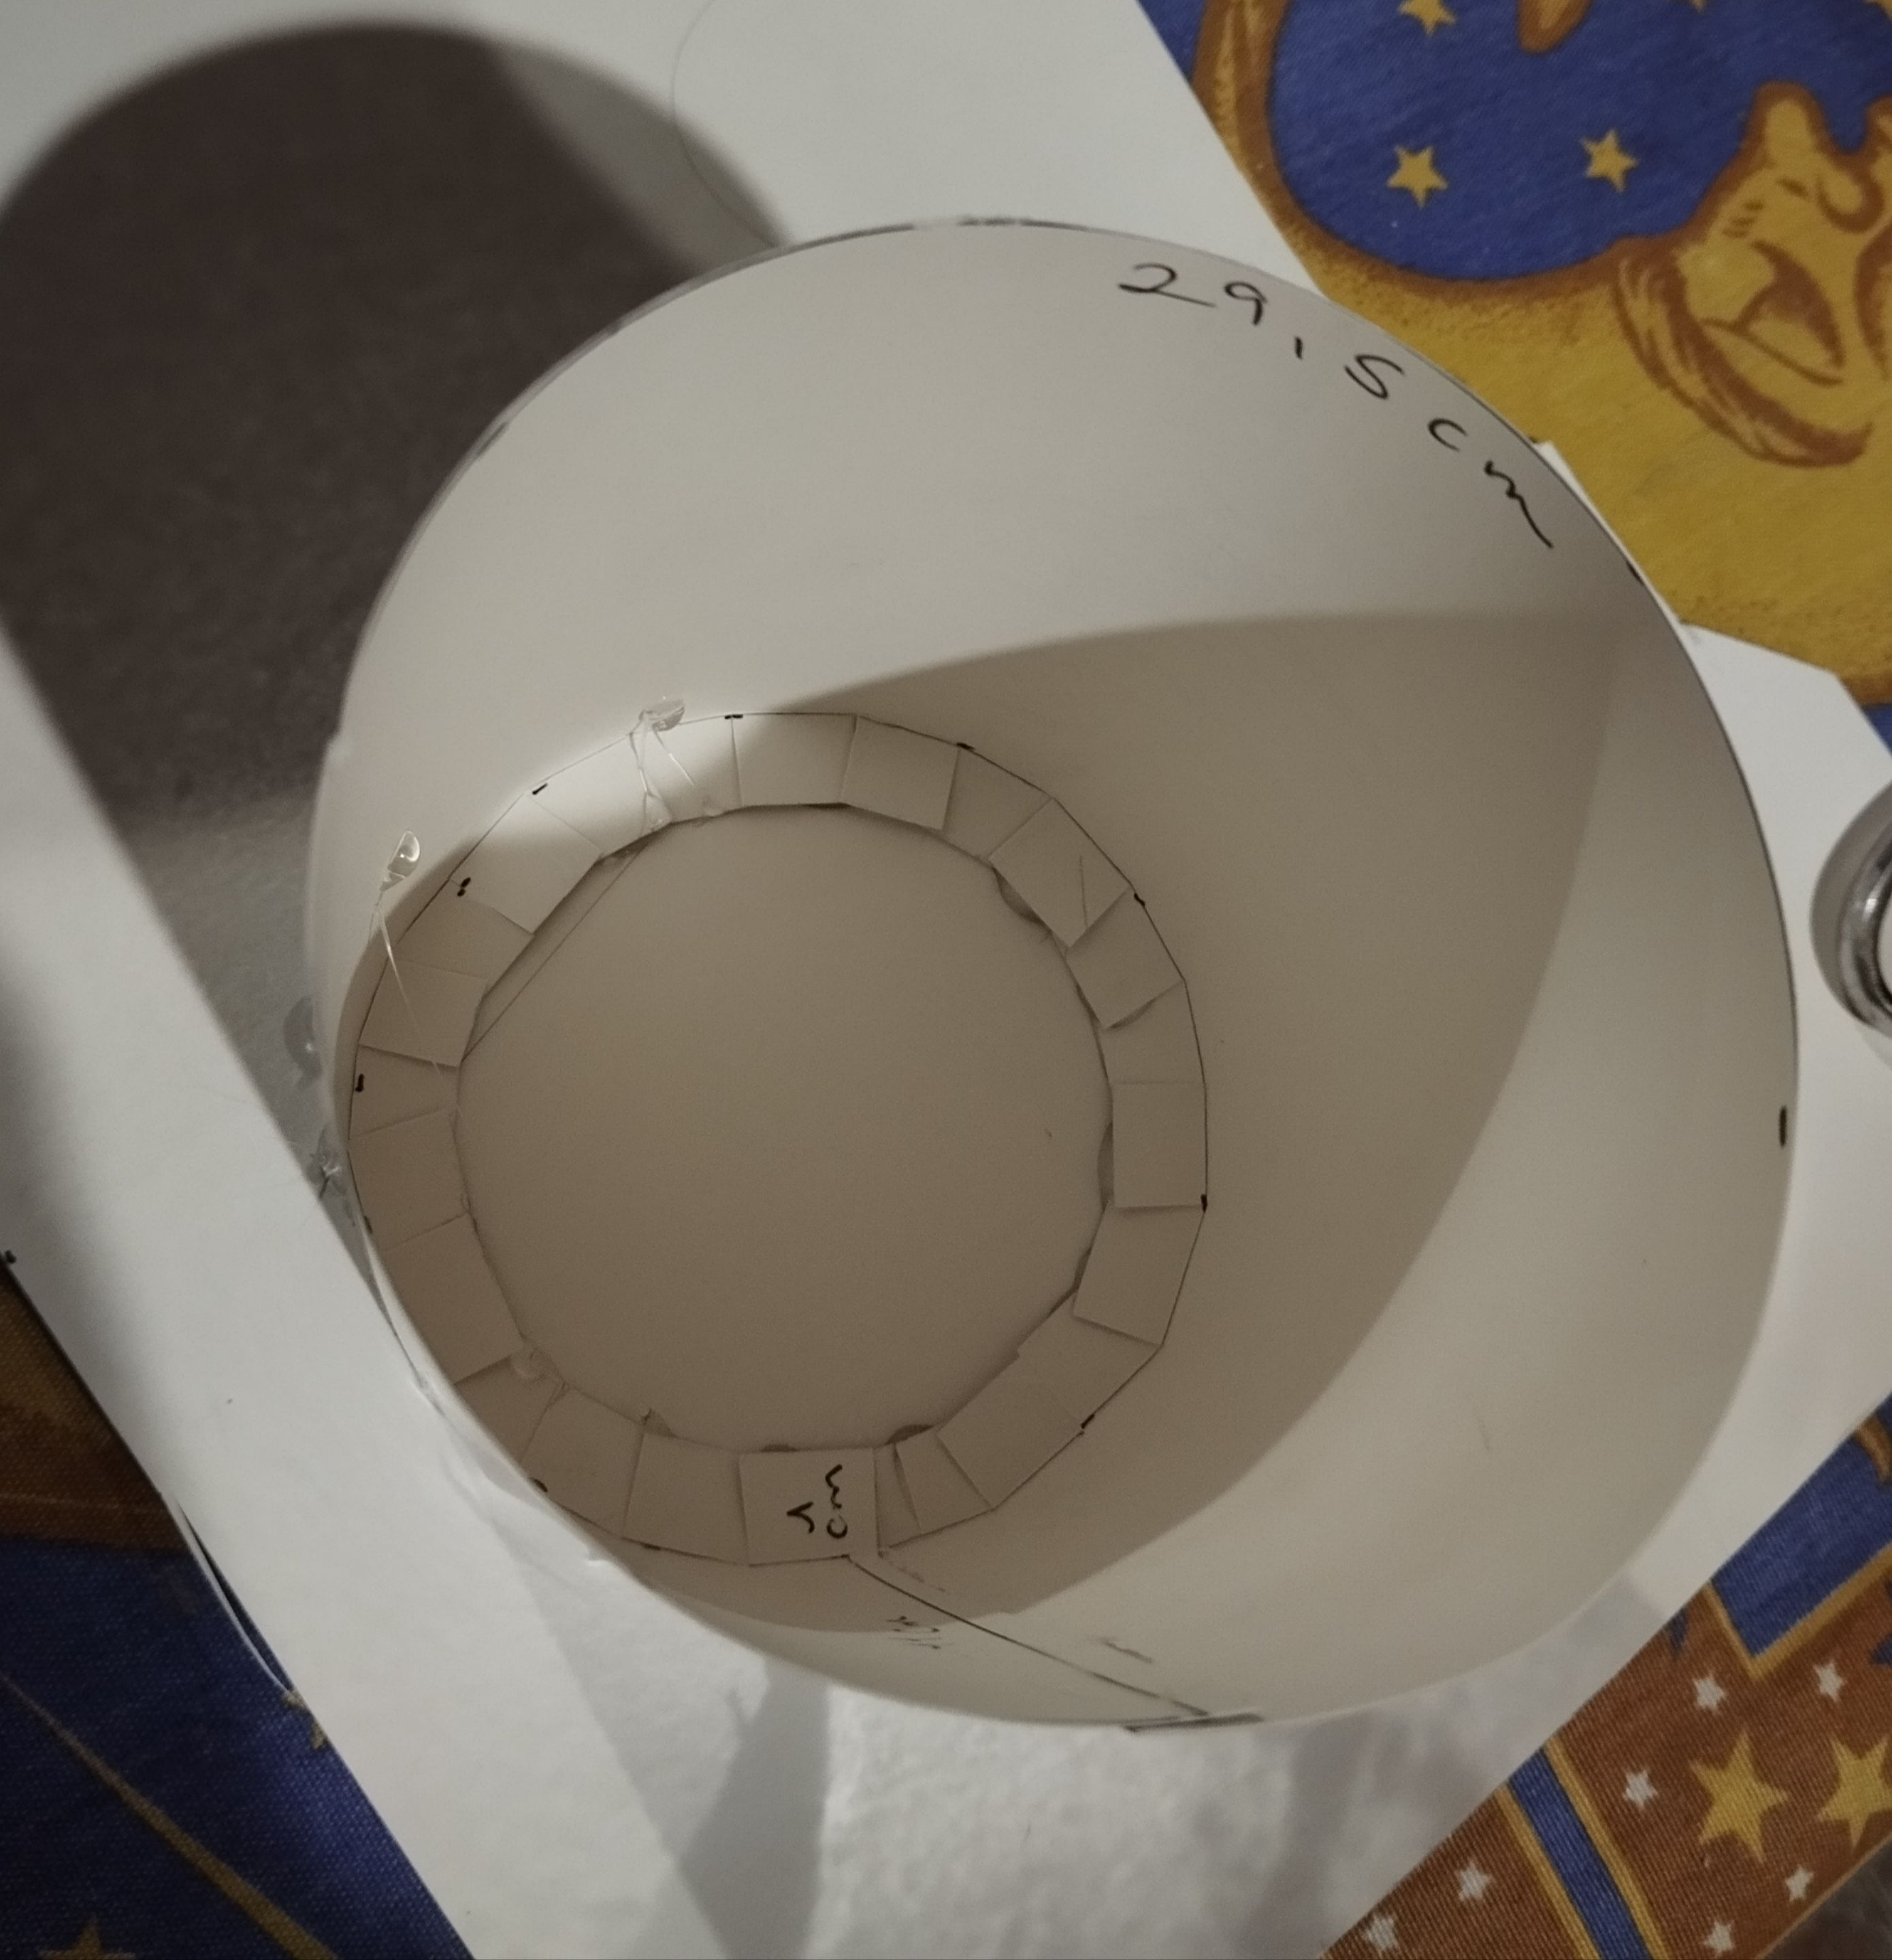|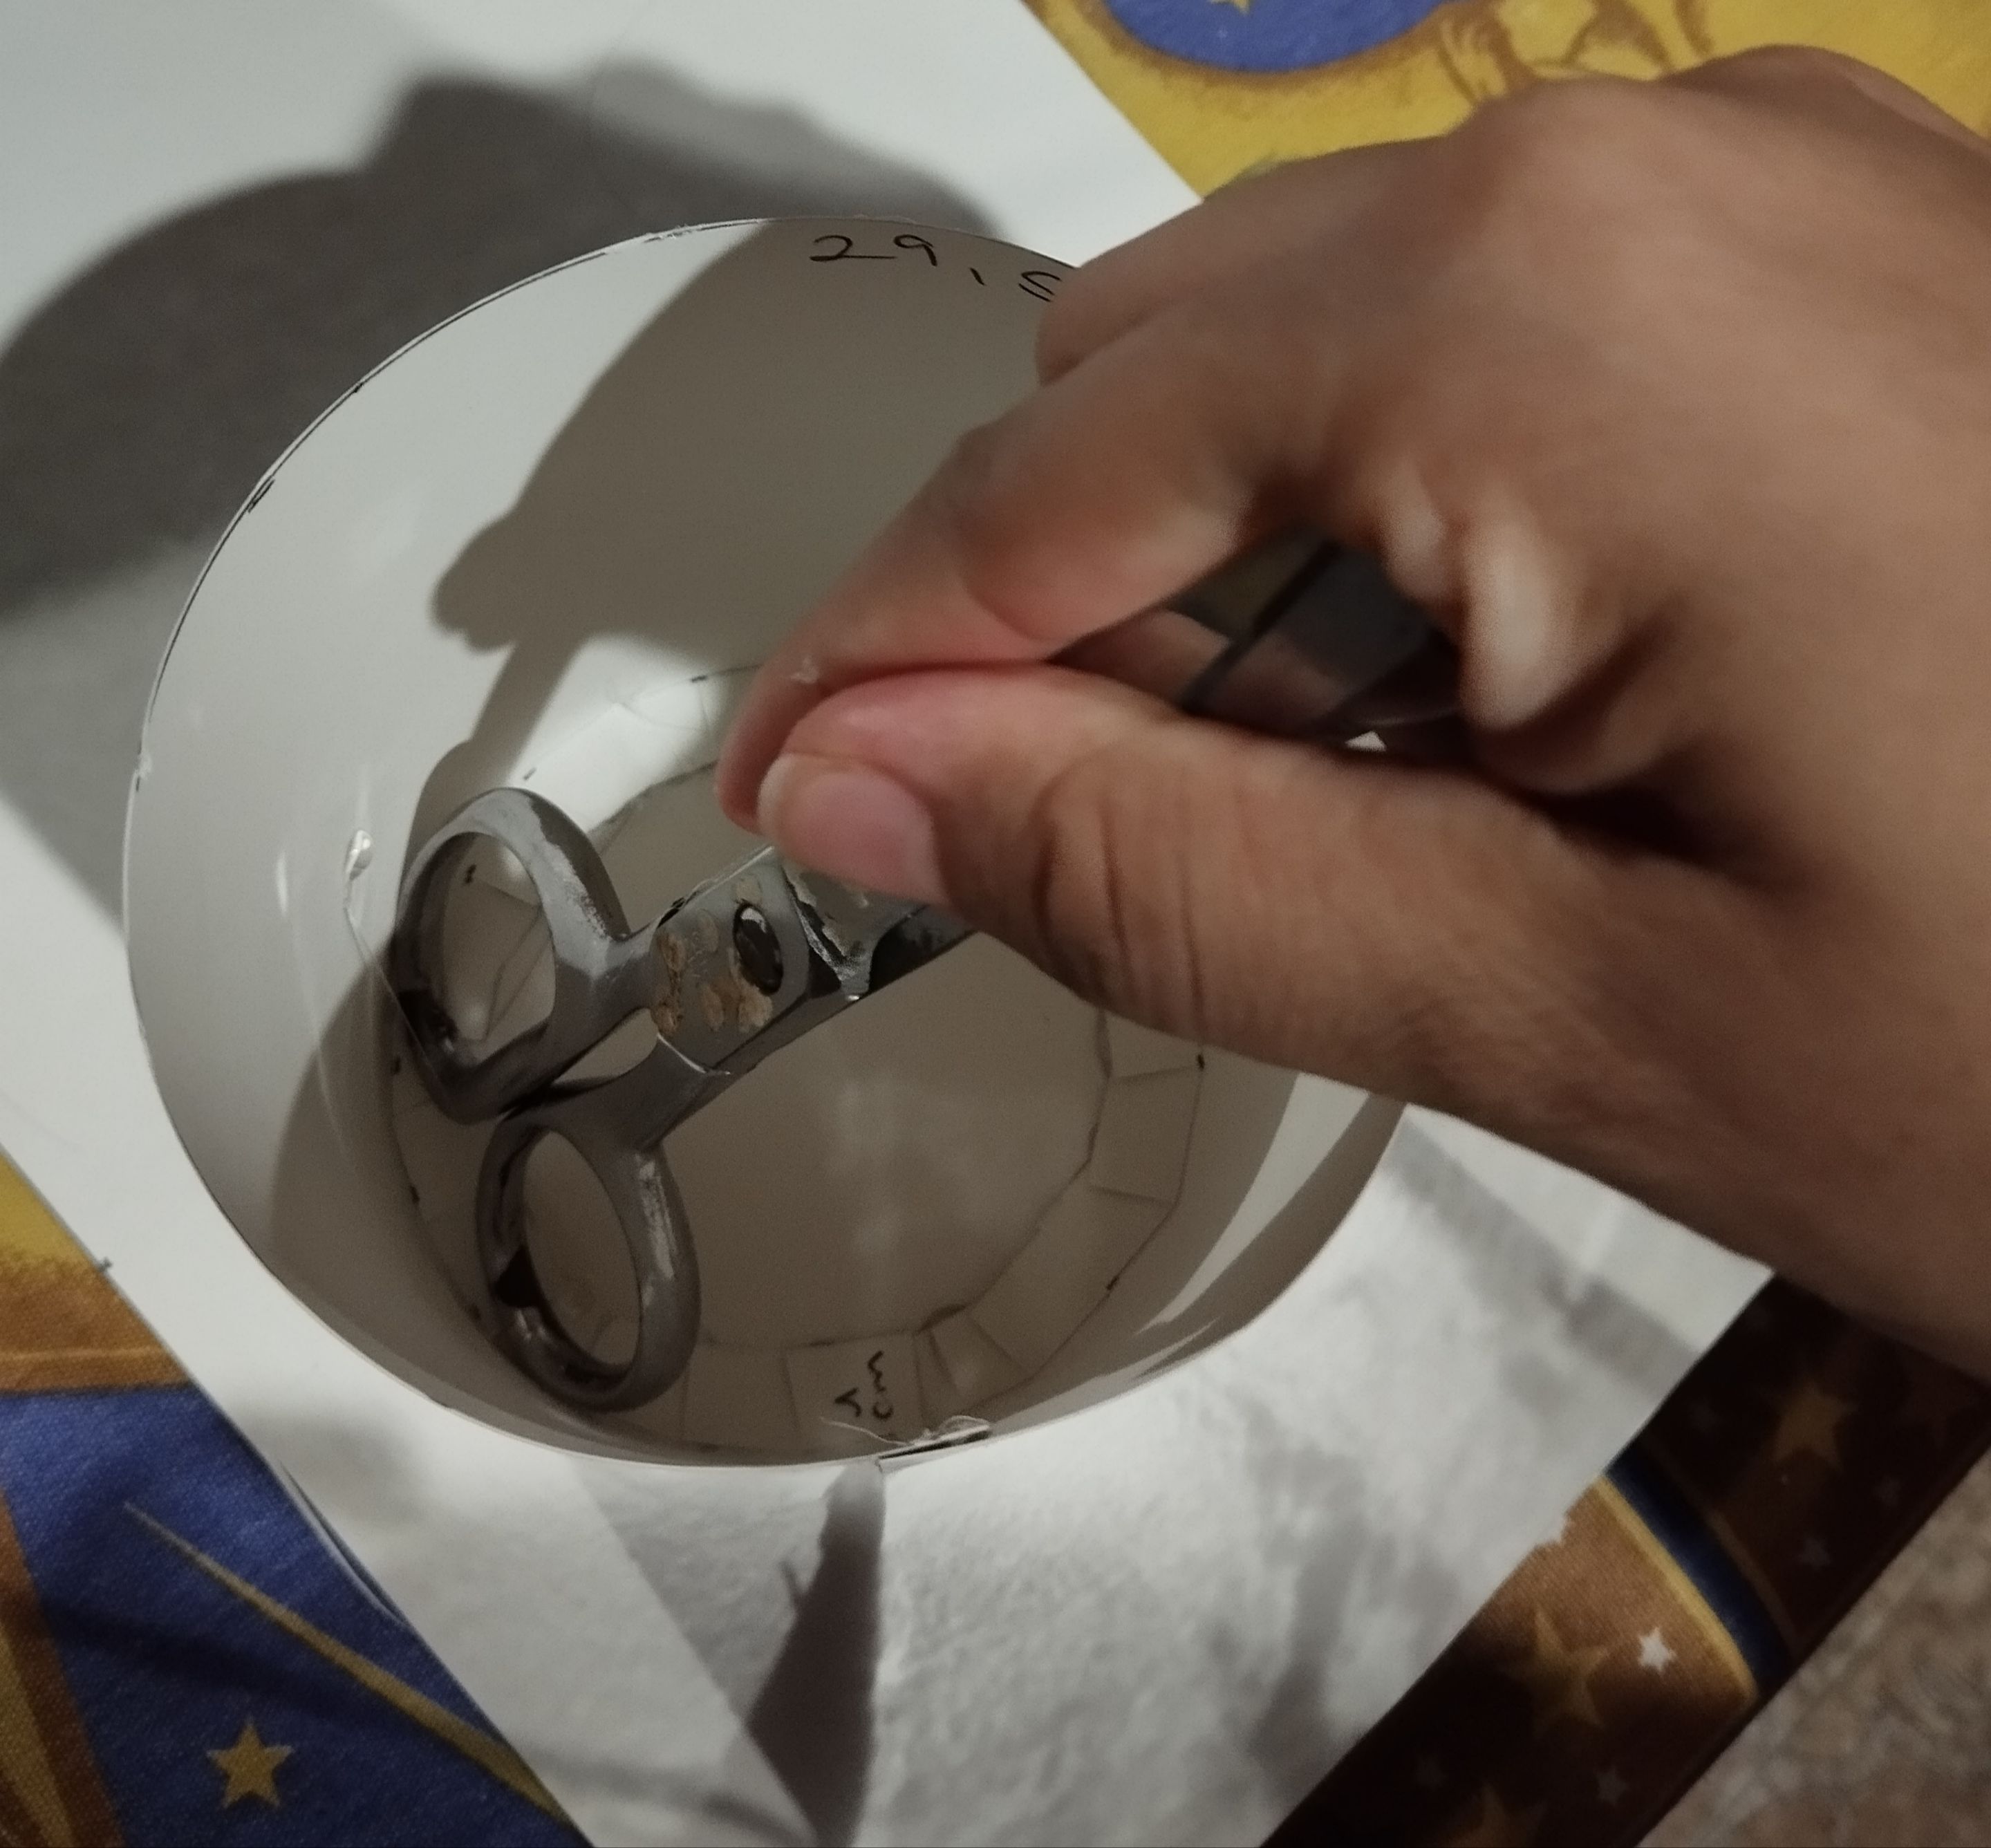|| **#2 Luego de armar el cilindro y doblar las ranuras inferiores, les puse silicón caliente y las pegué a una base de cartulina para hacer el fondo, para asegurarme que quede bien adherido usé el mango de la tijera para hacer presión, luego corté el exceso que salía del borde del cilindro.**
English Version
**#2 After assembling the cylinder and folding the bottom slots, I applied hot silicone and glued them to a cardboard base to make the bottom. To make sure it adhered well, I used the handle of the scissors to apply pressure, then I cut off the excess that came out from the edge of the cylinder.**
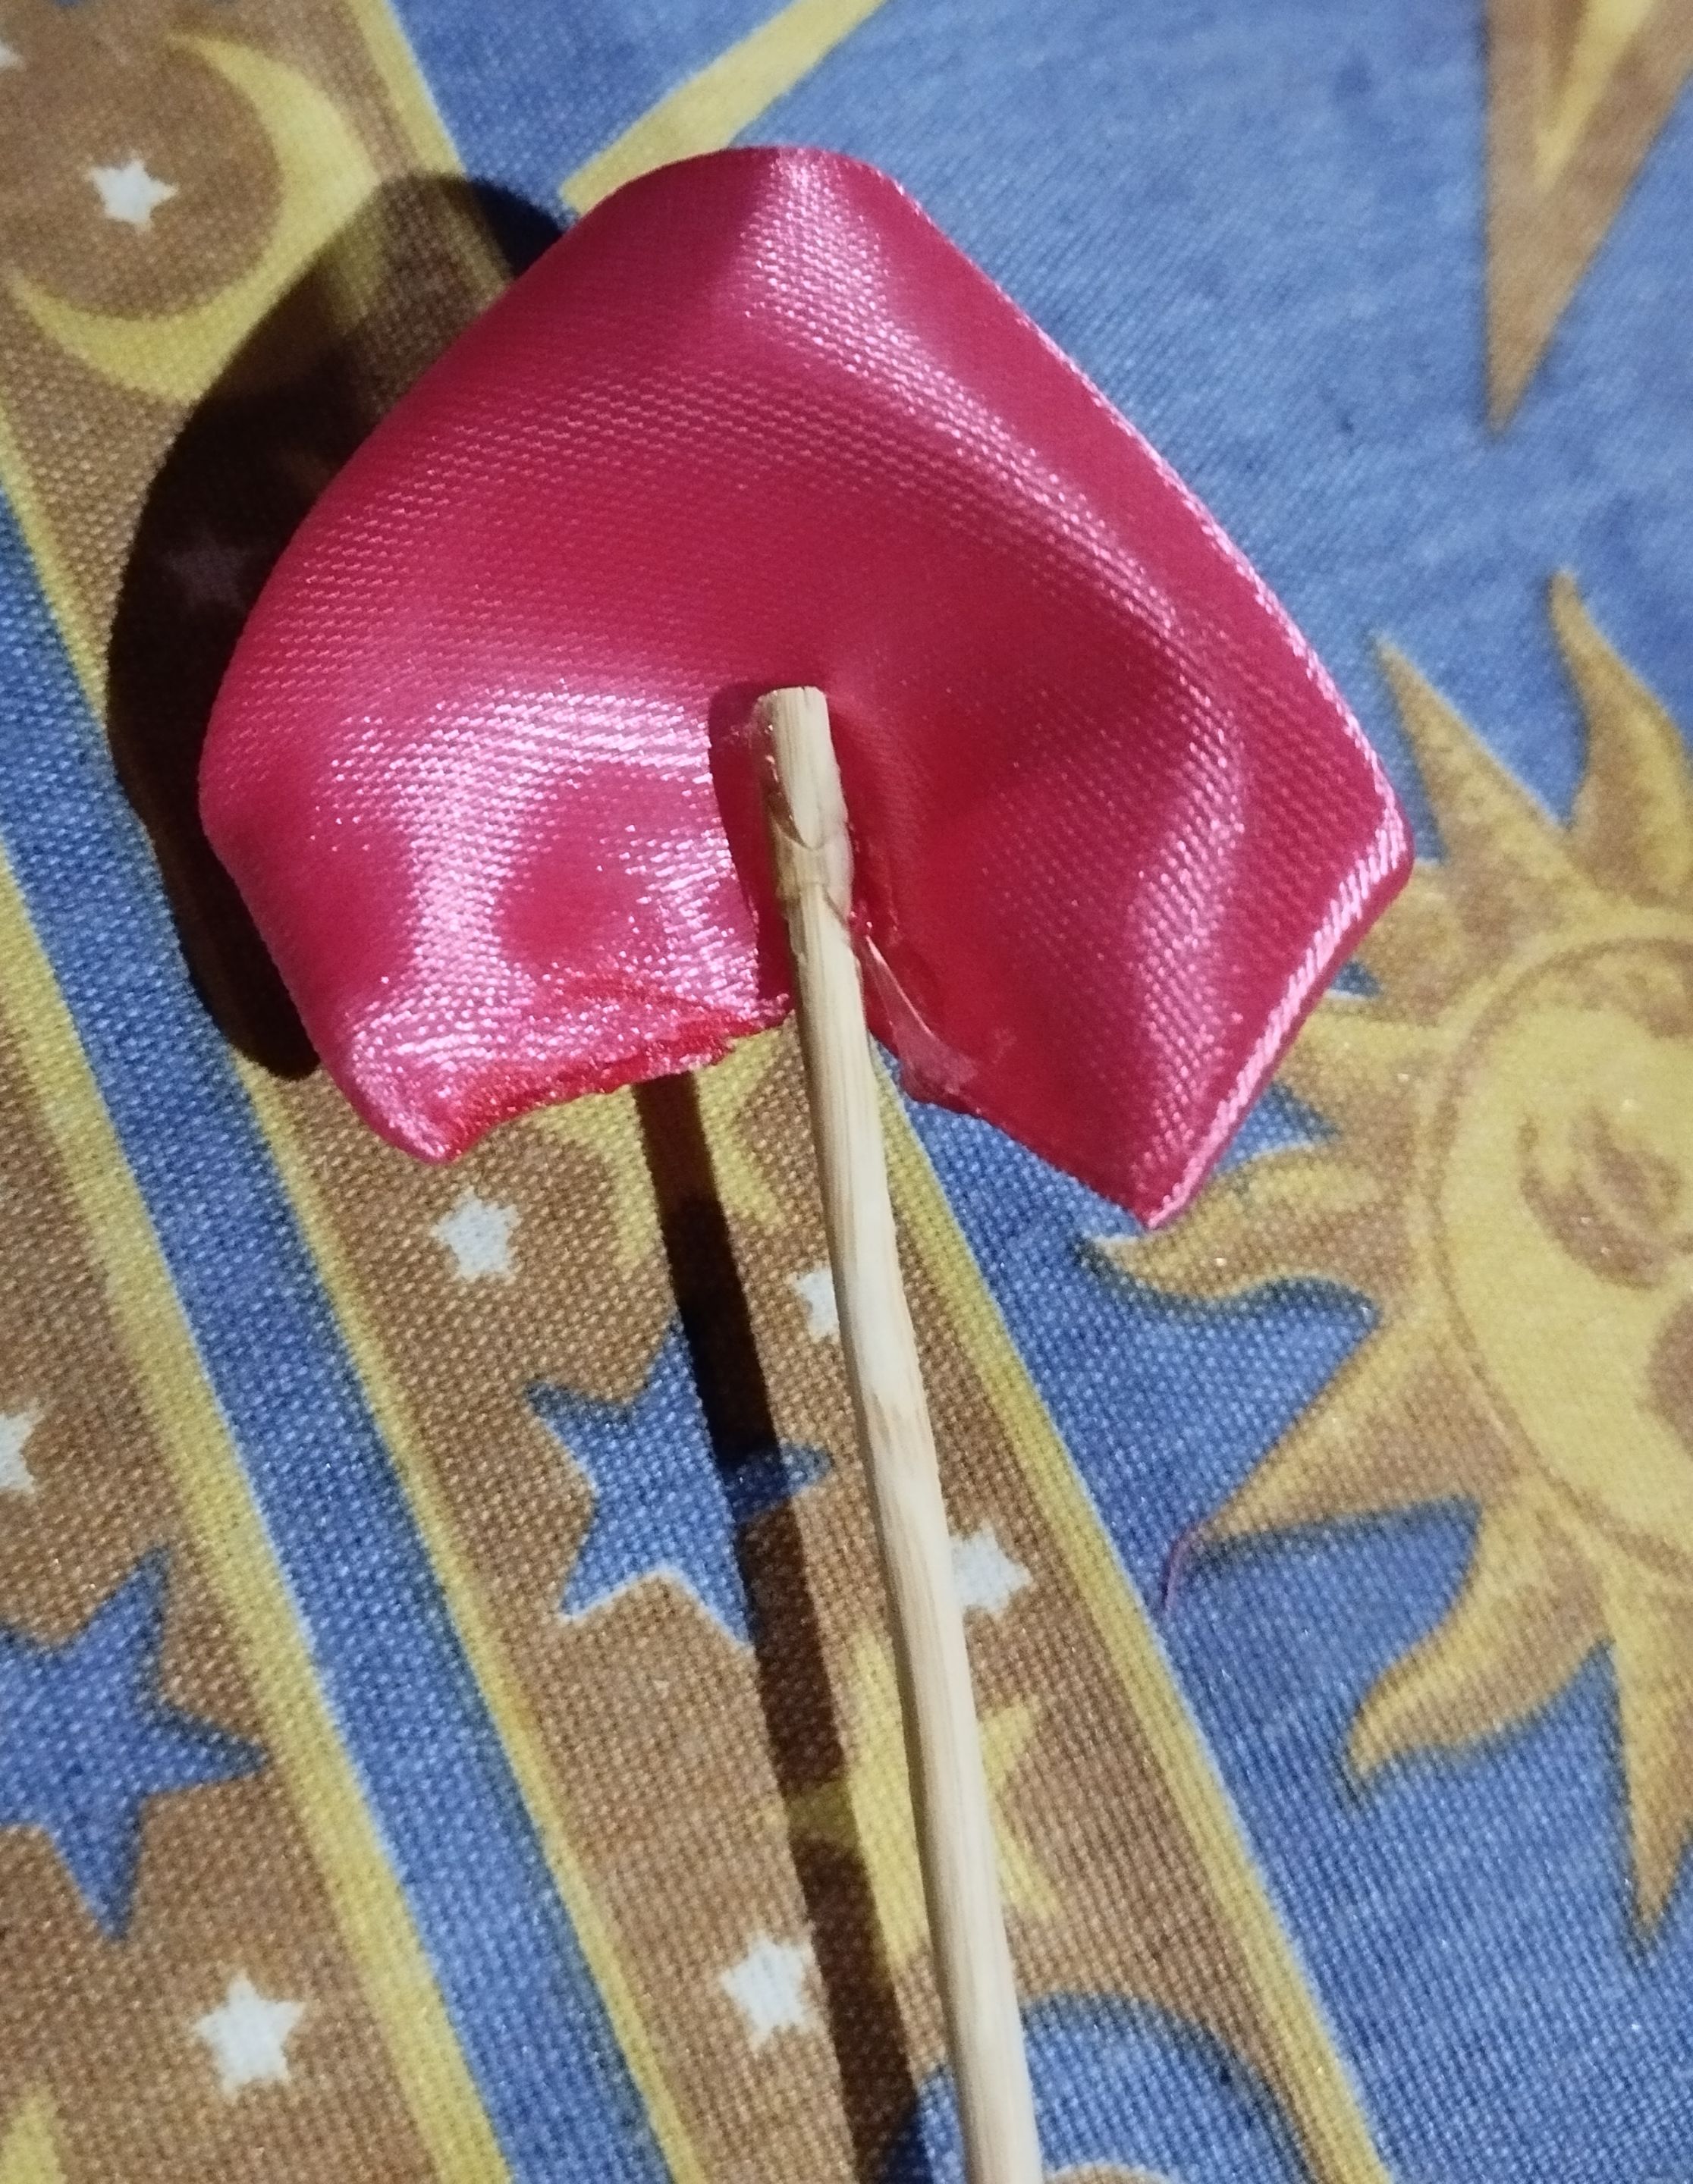
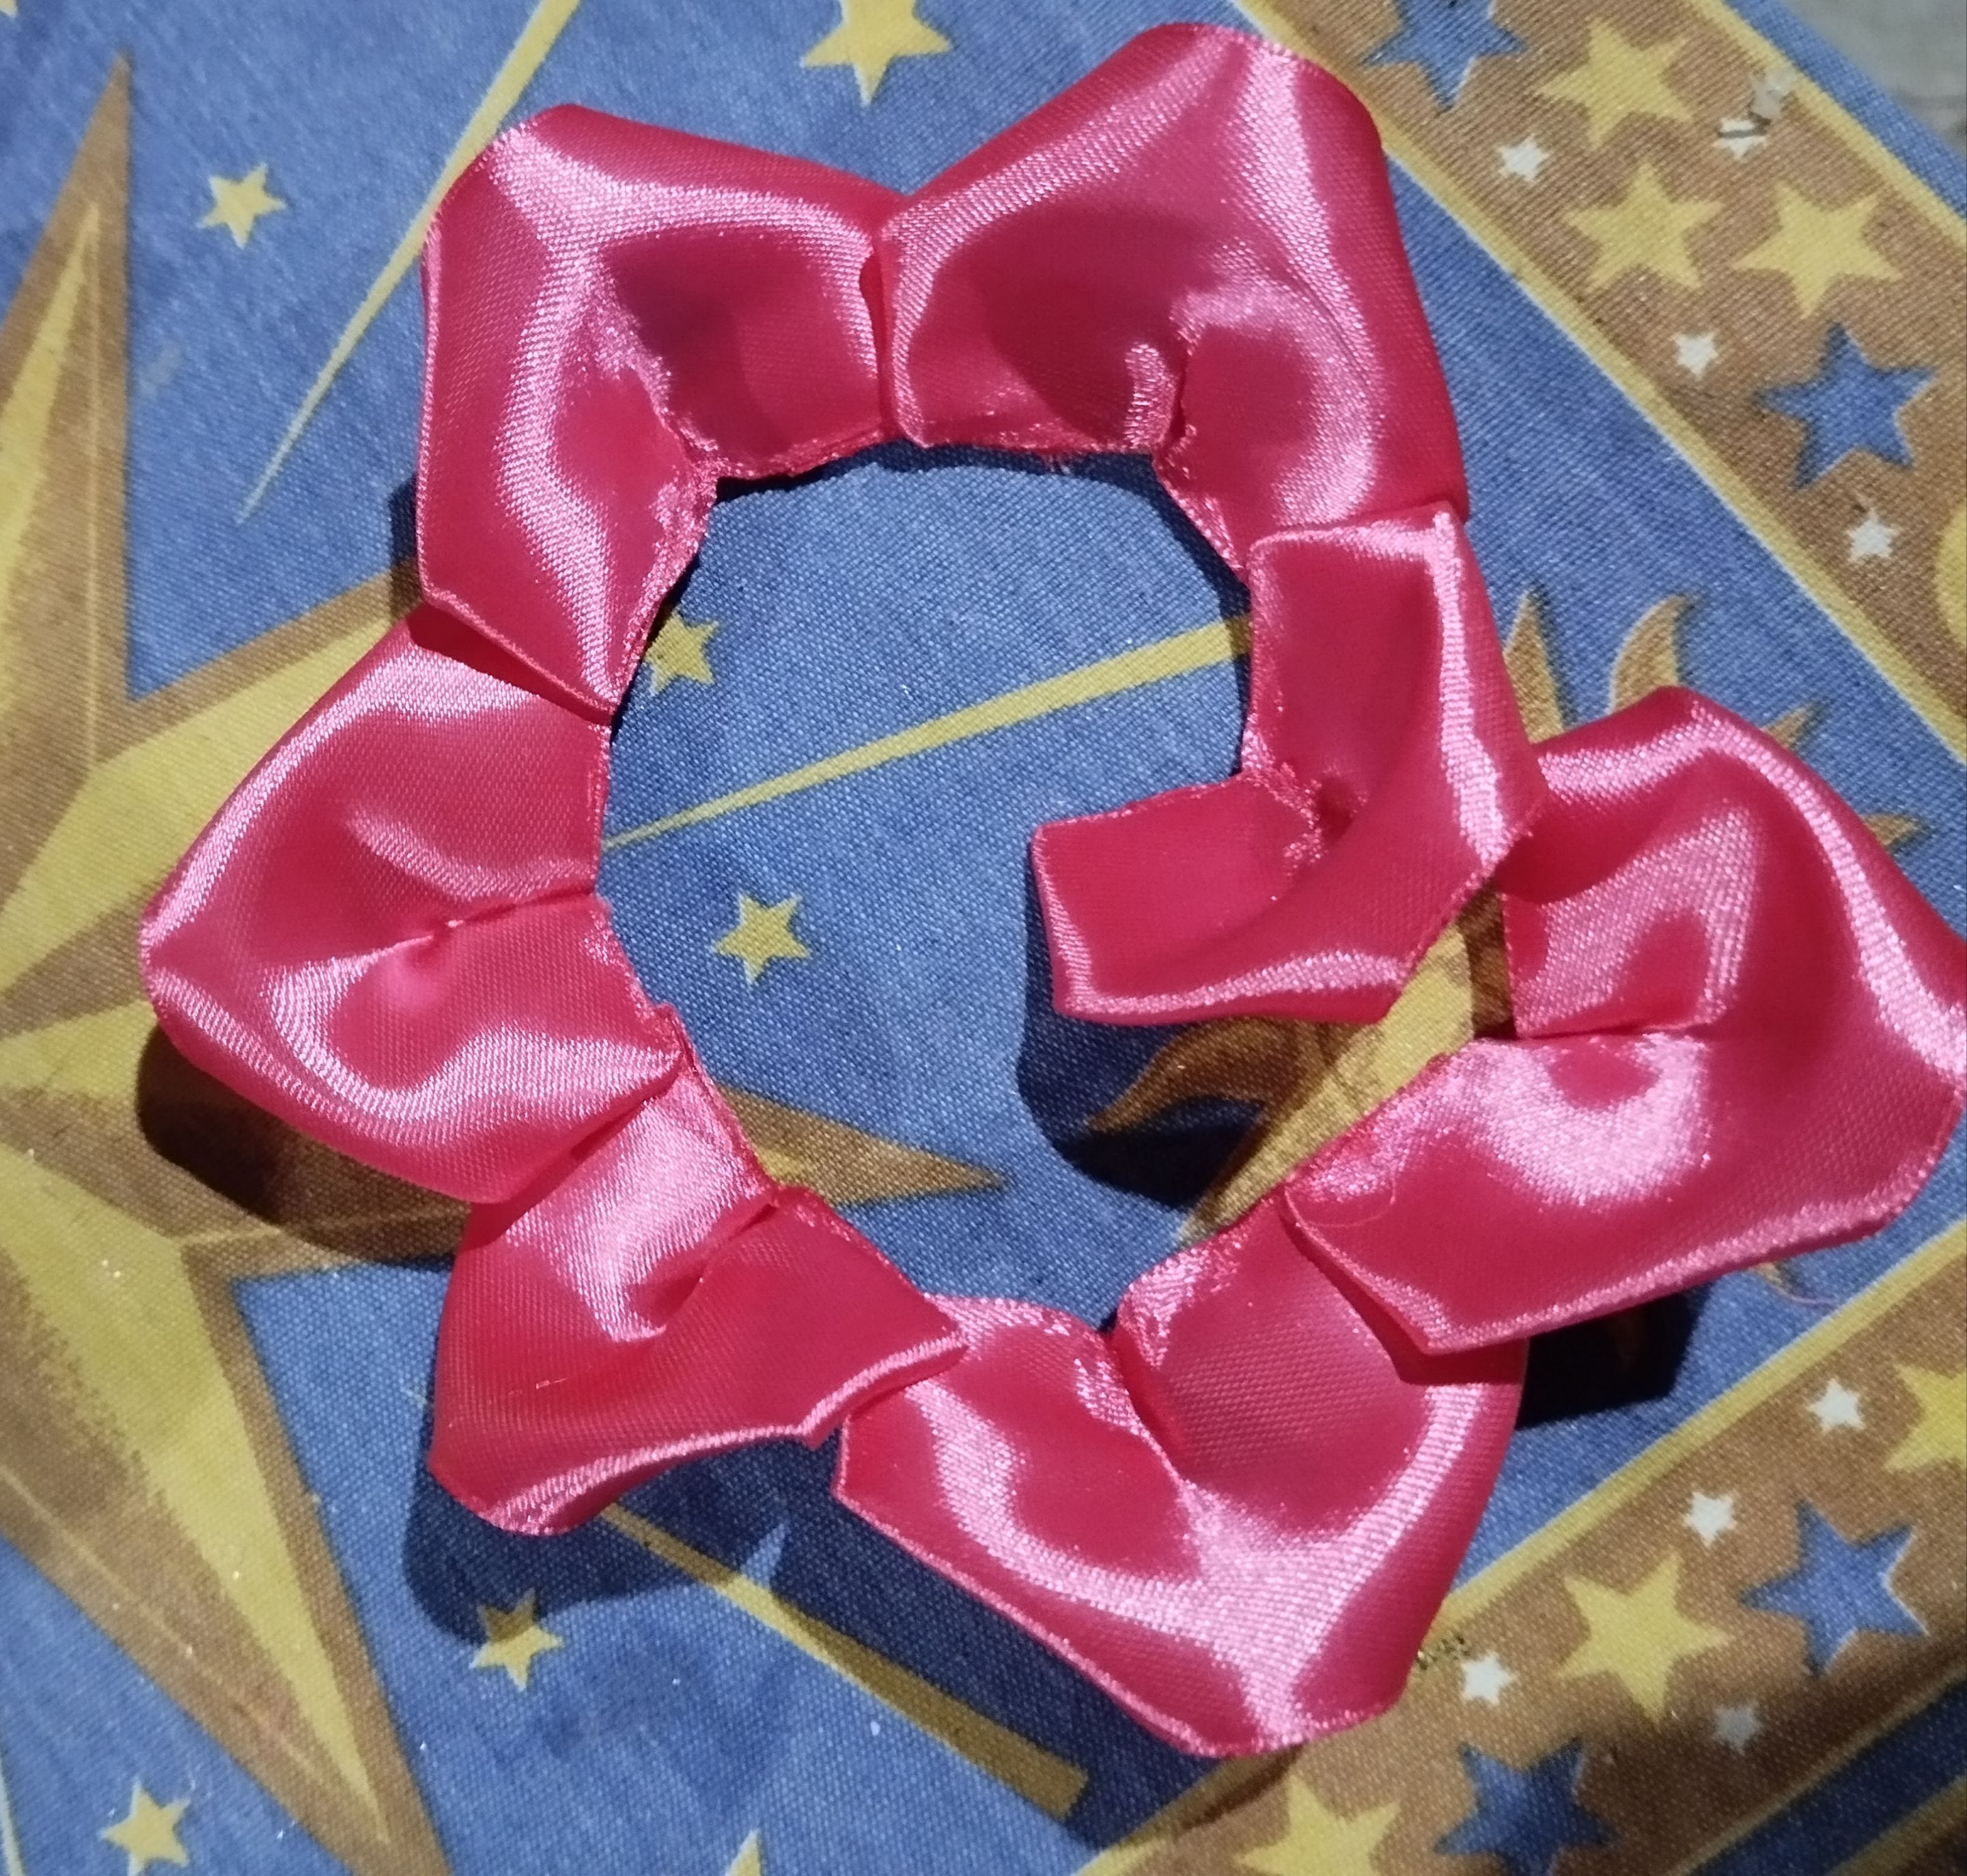
|||| |---|---|---| |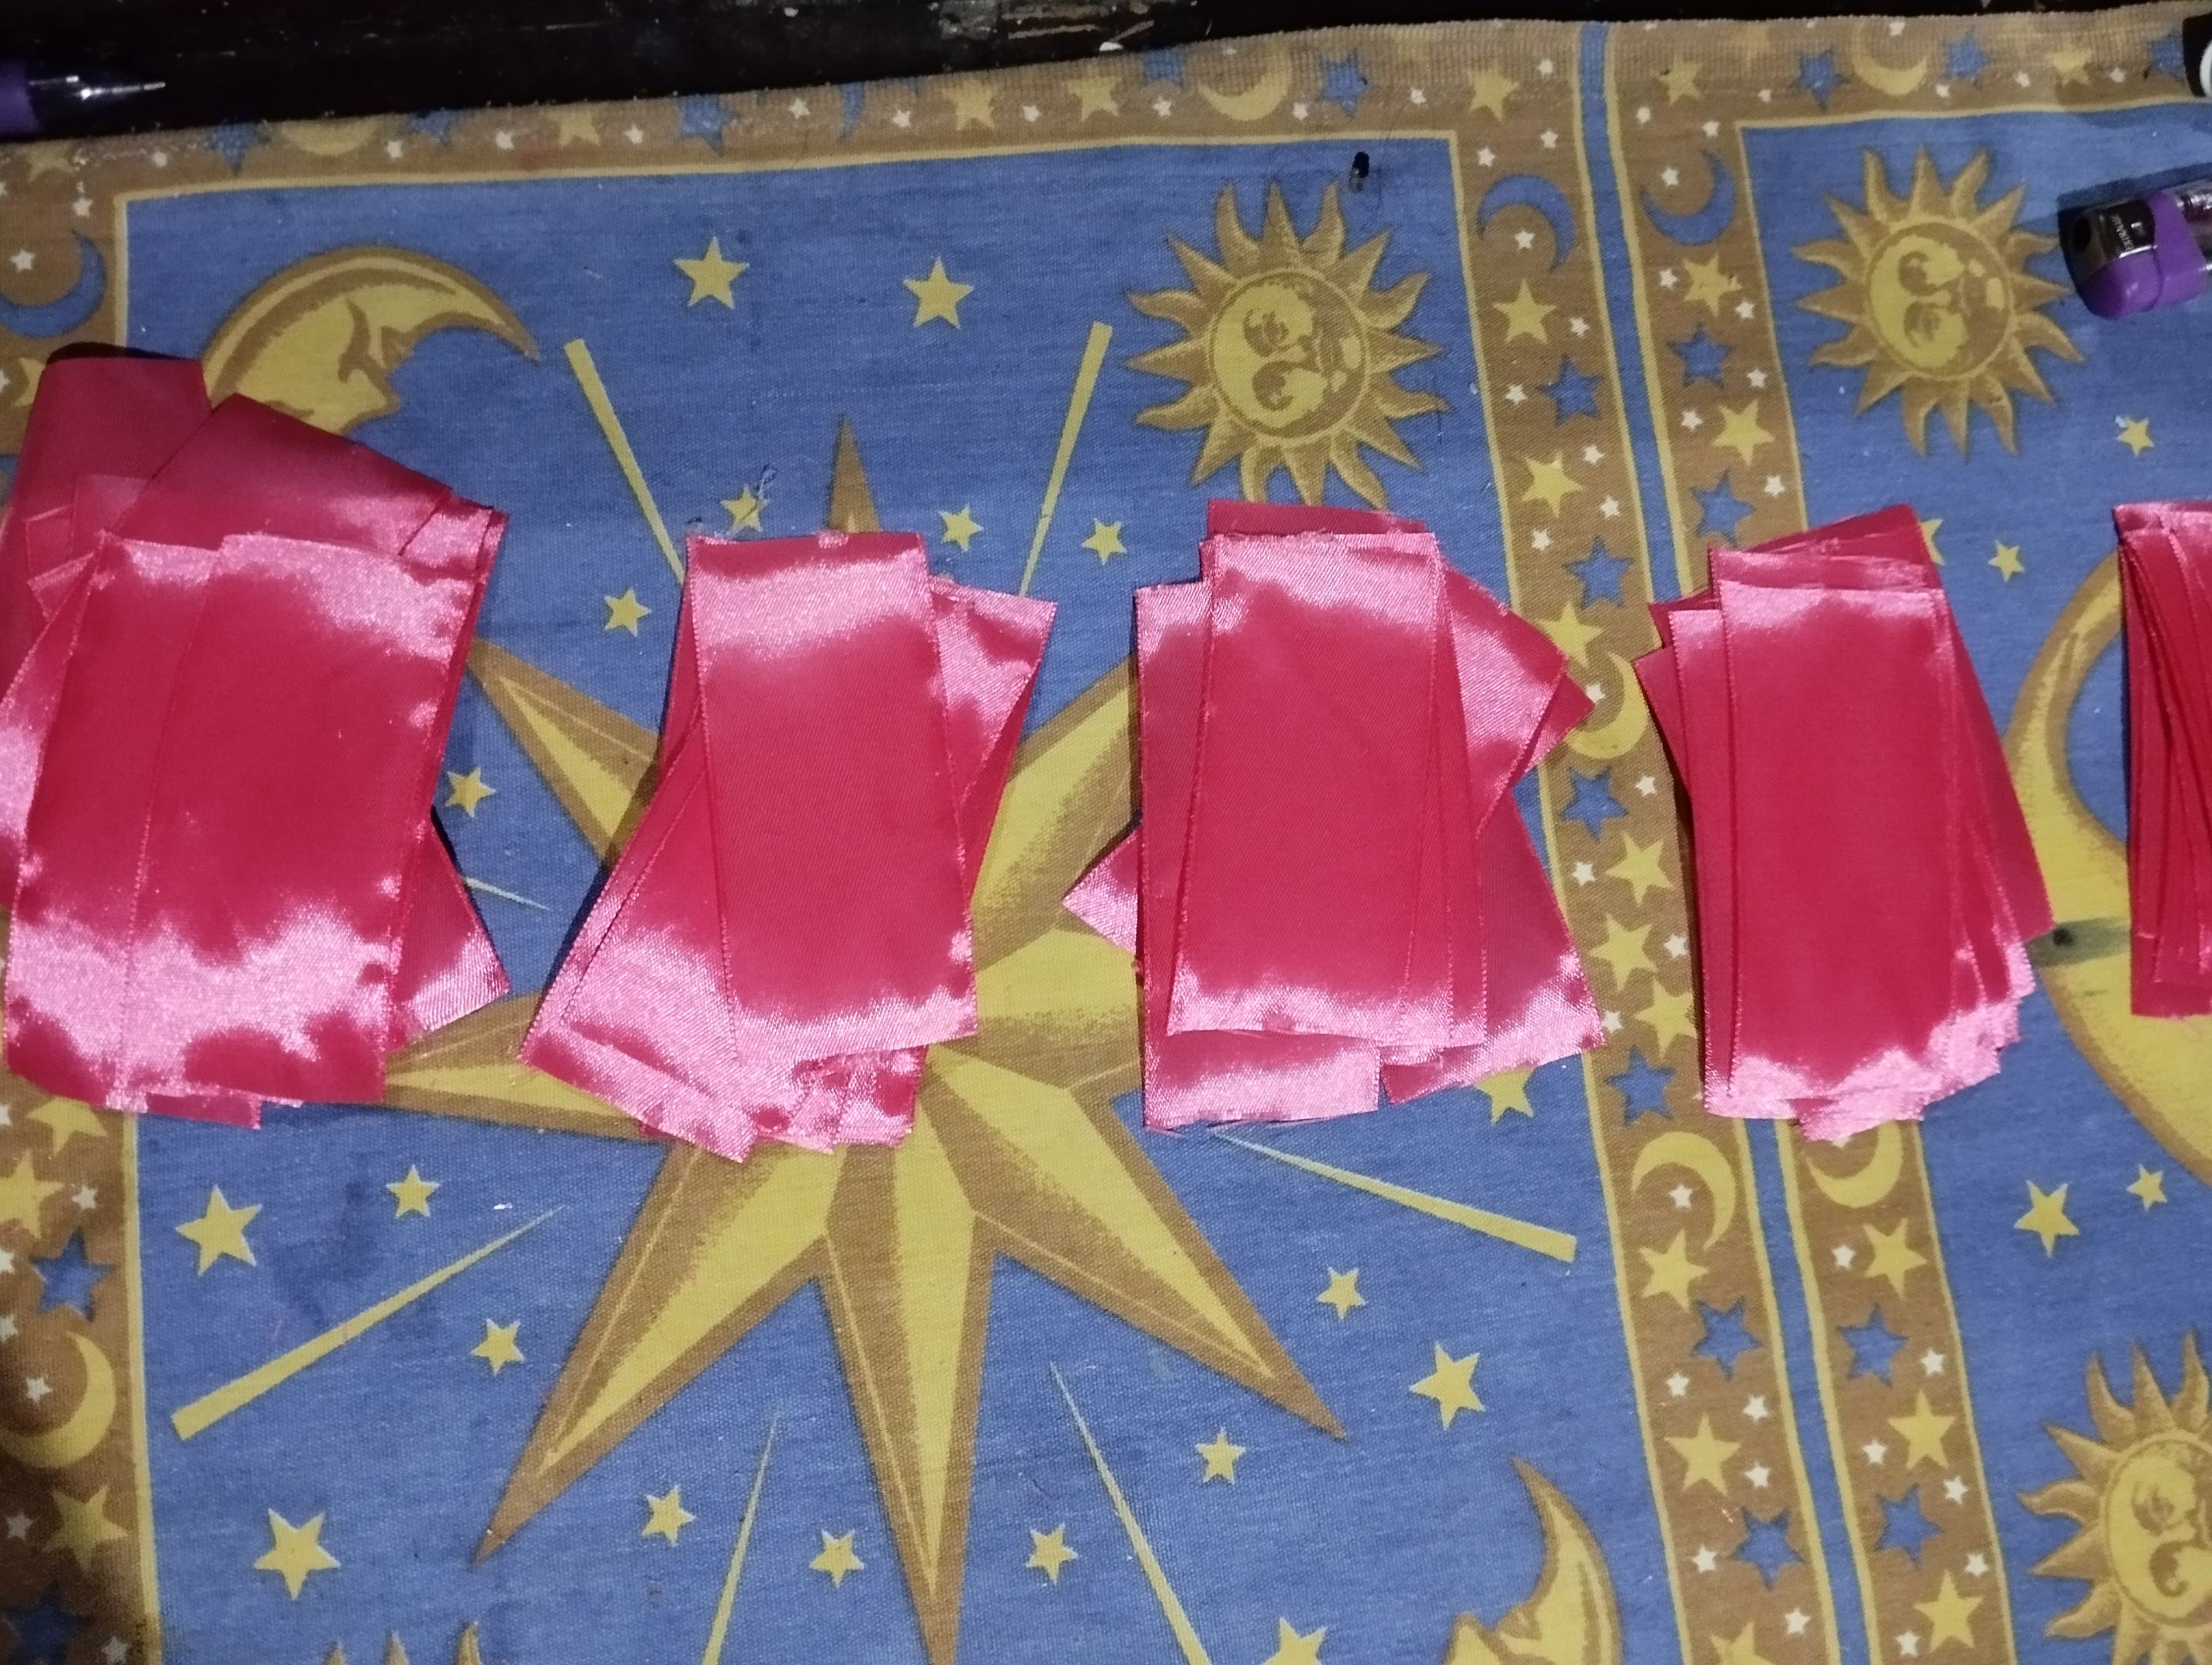|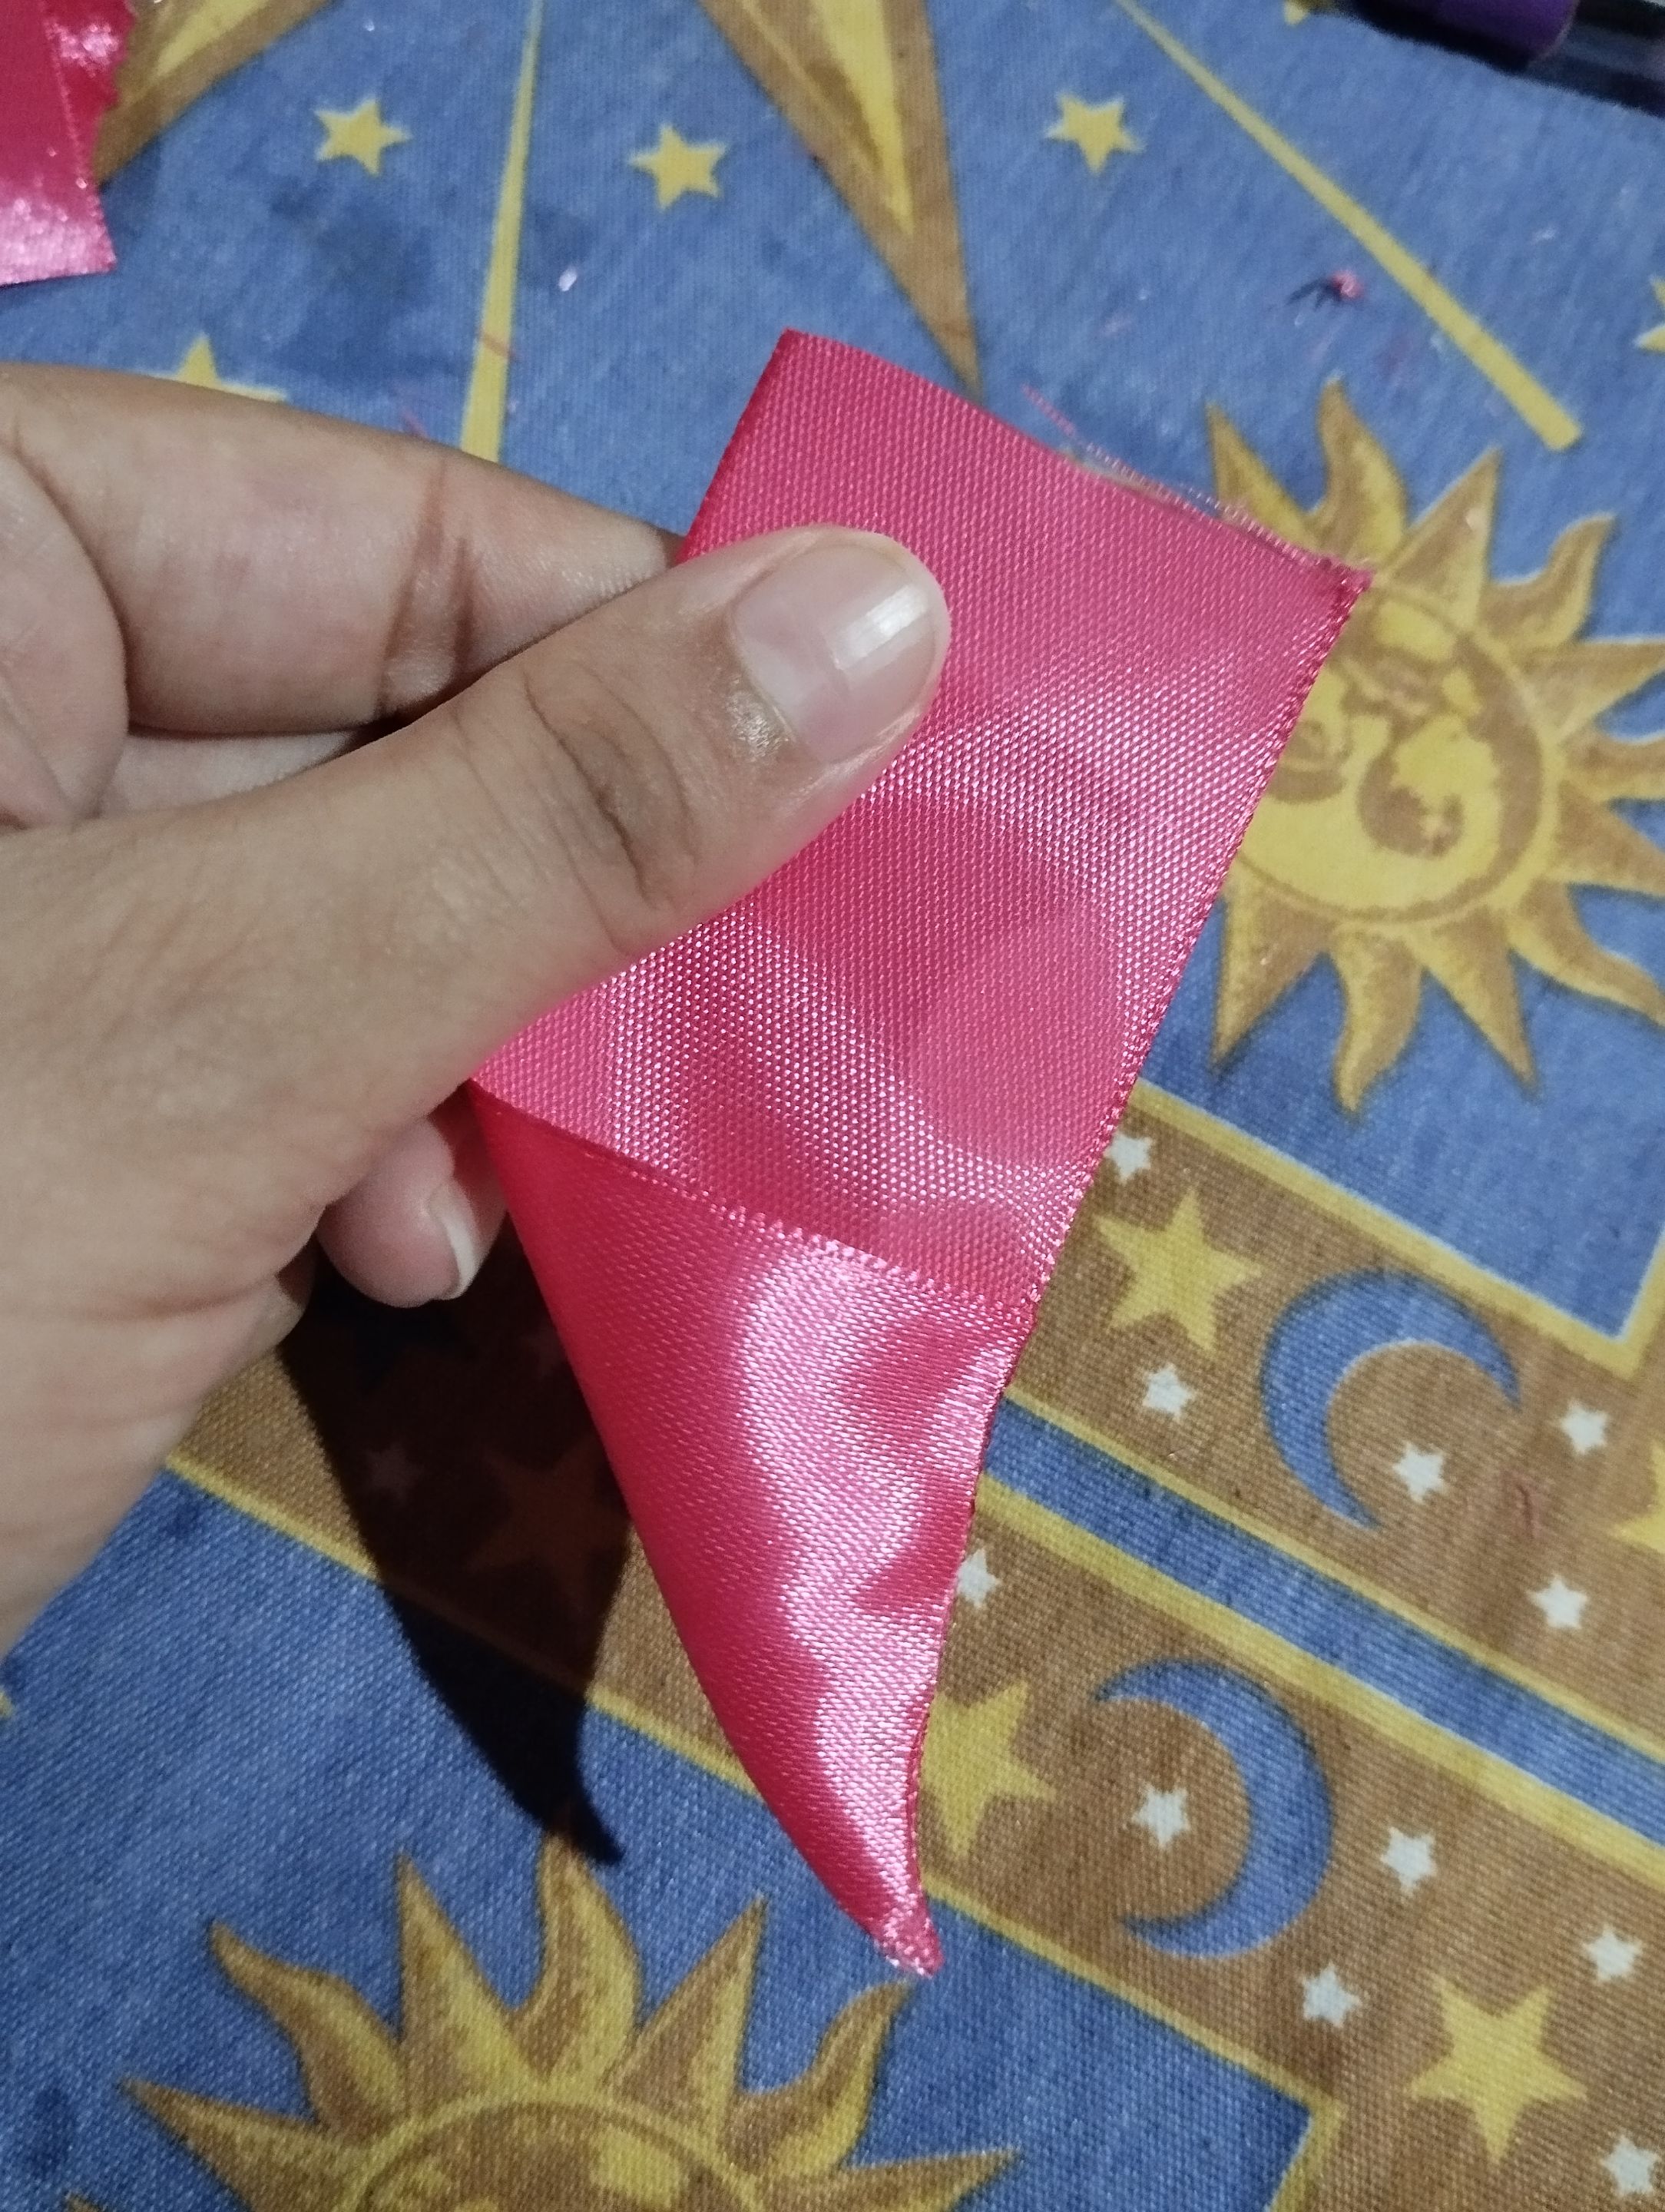|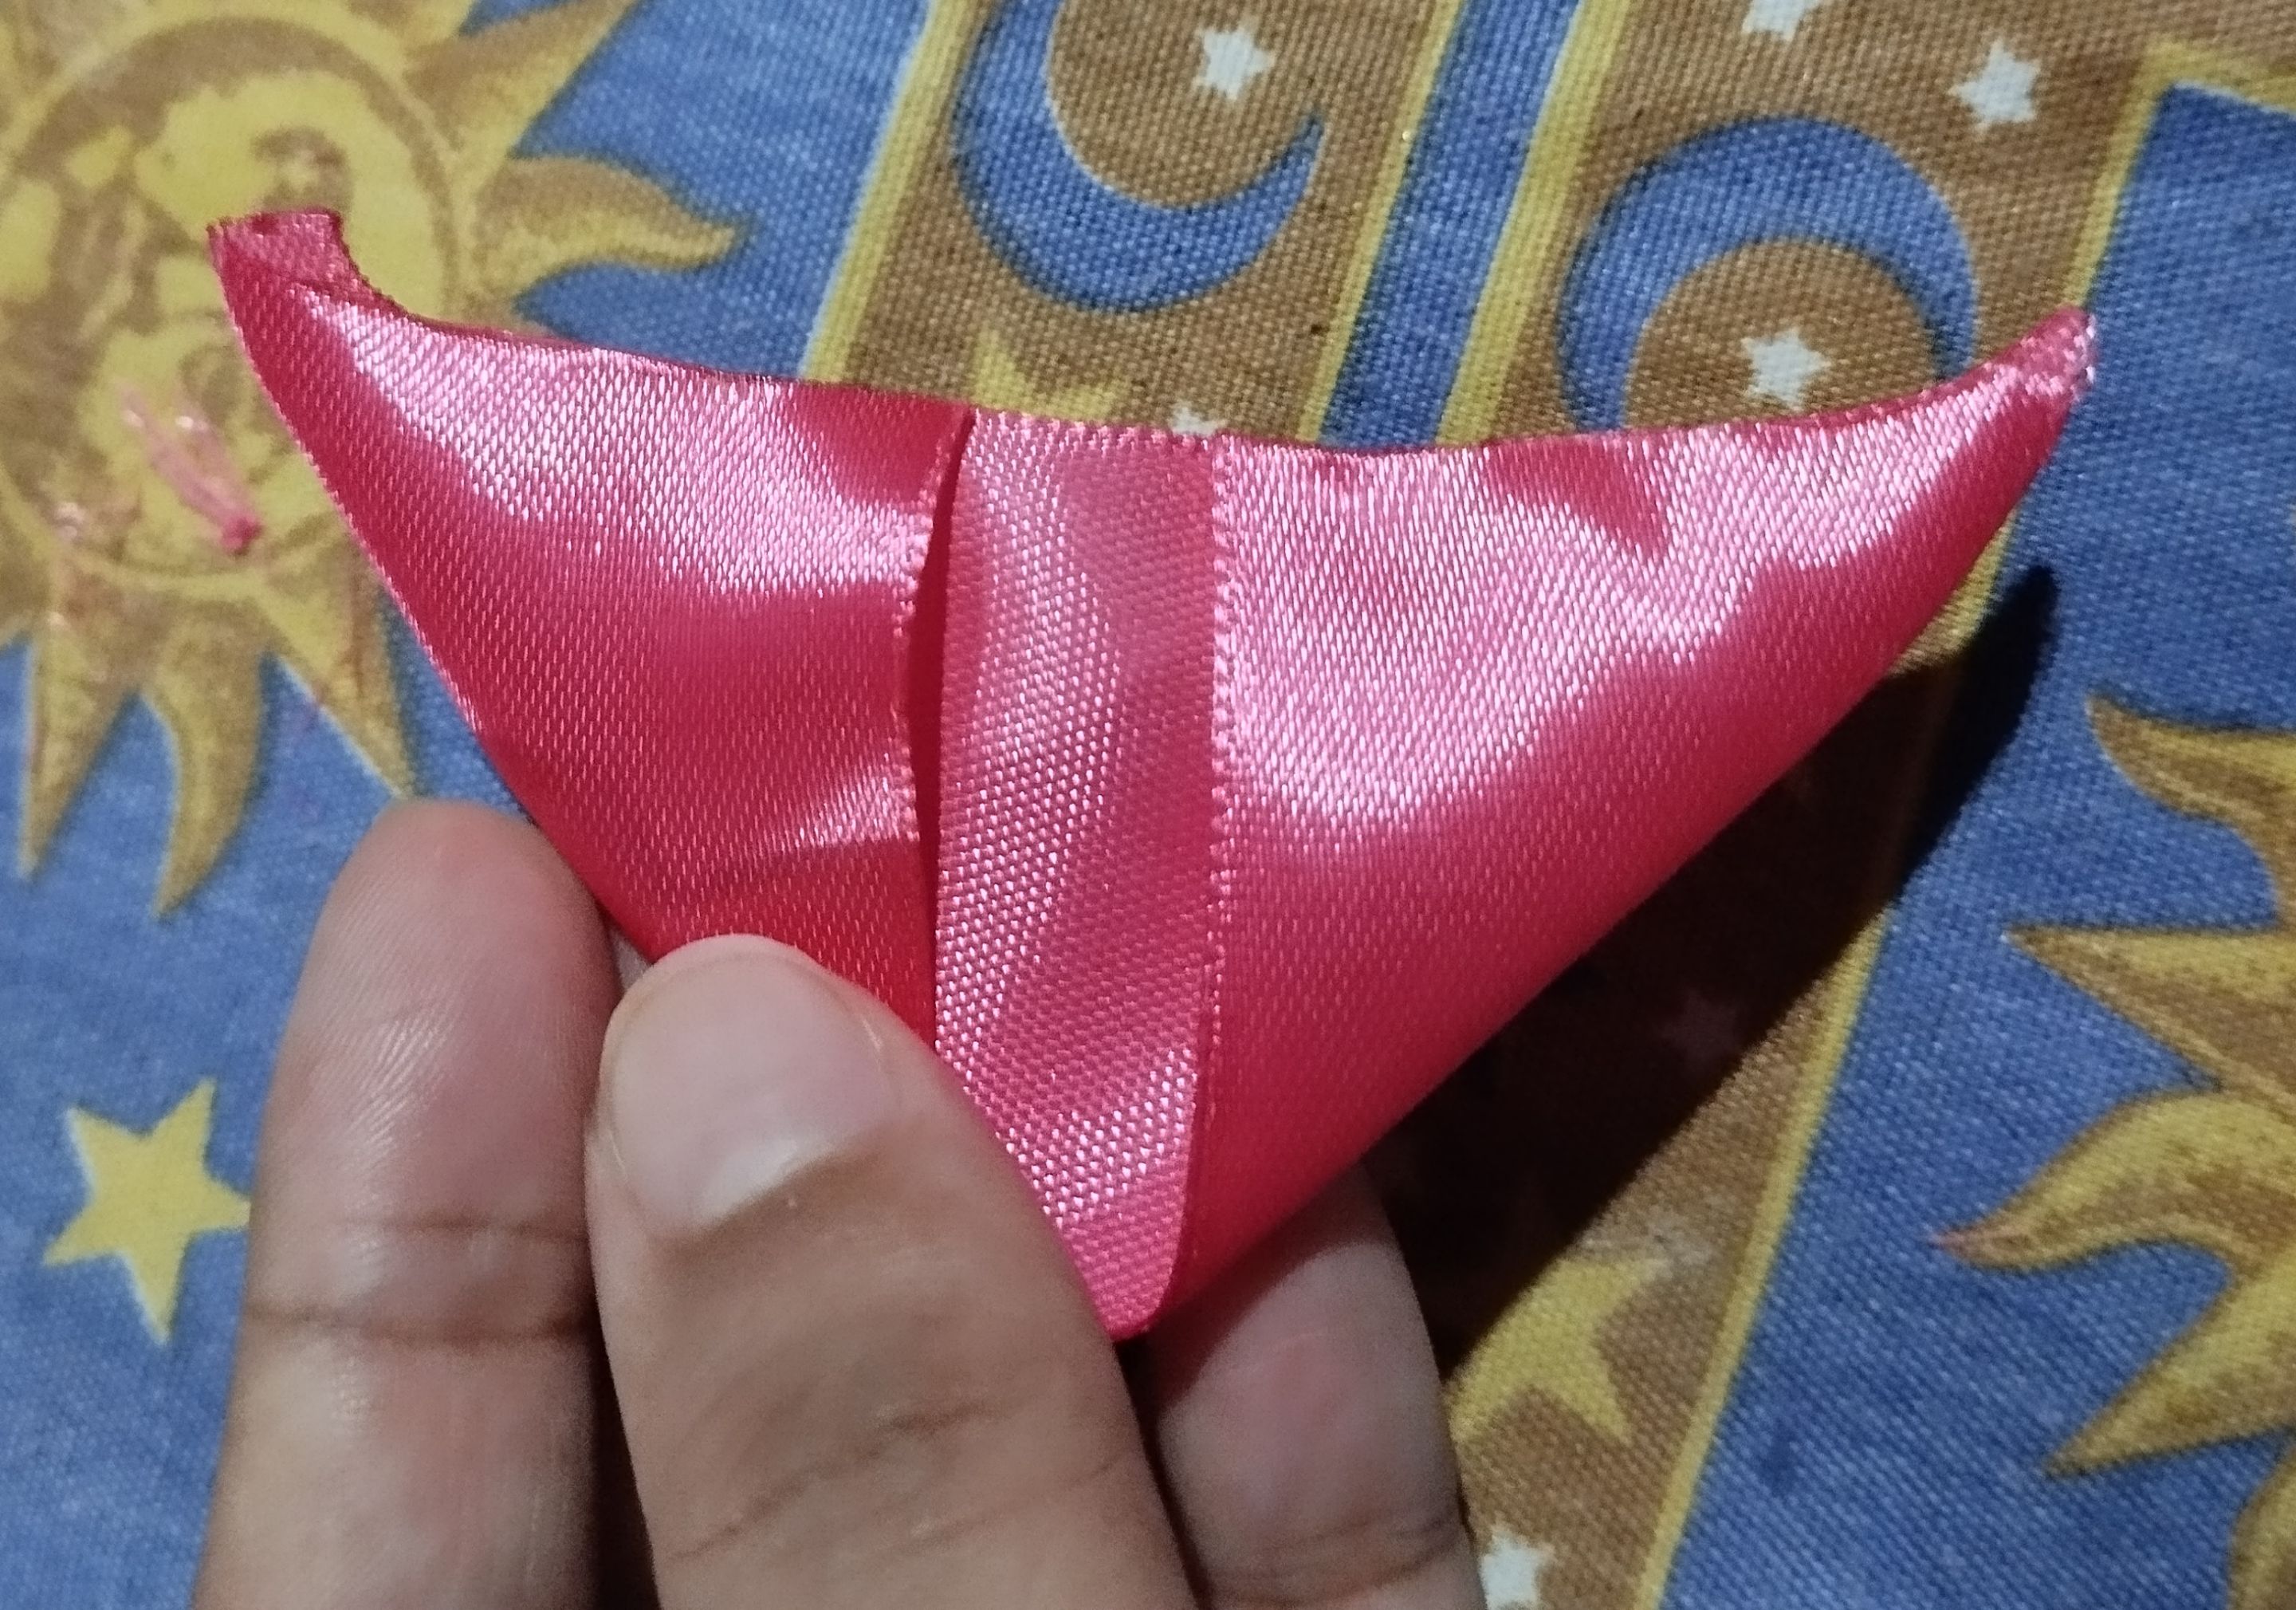| |||| |---|---|---| |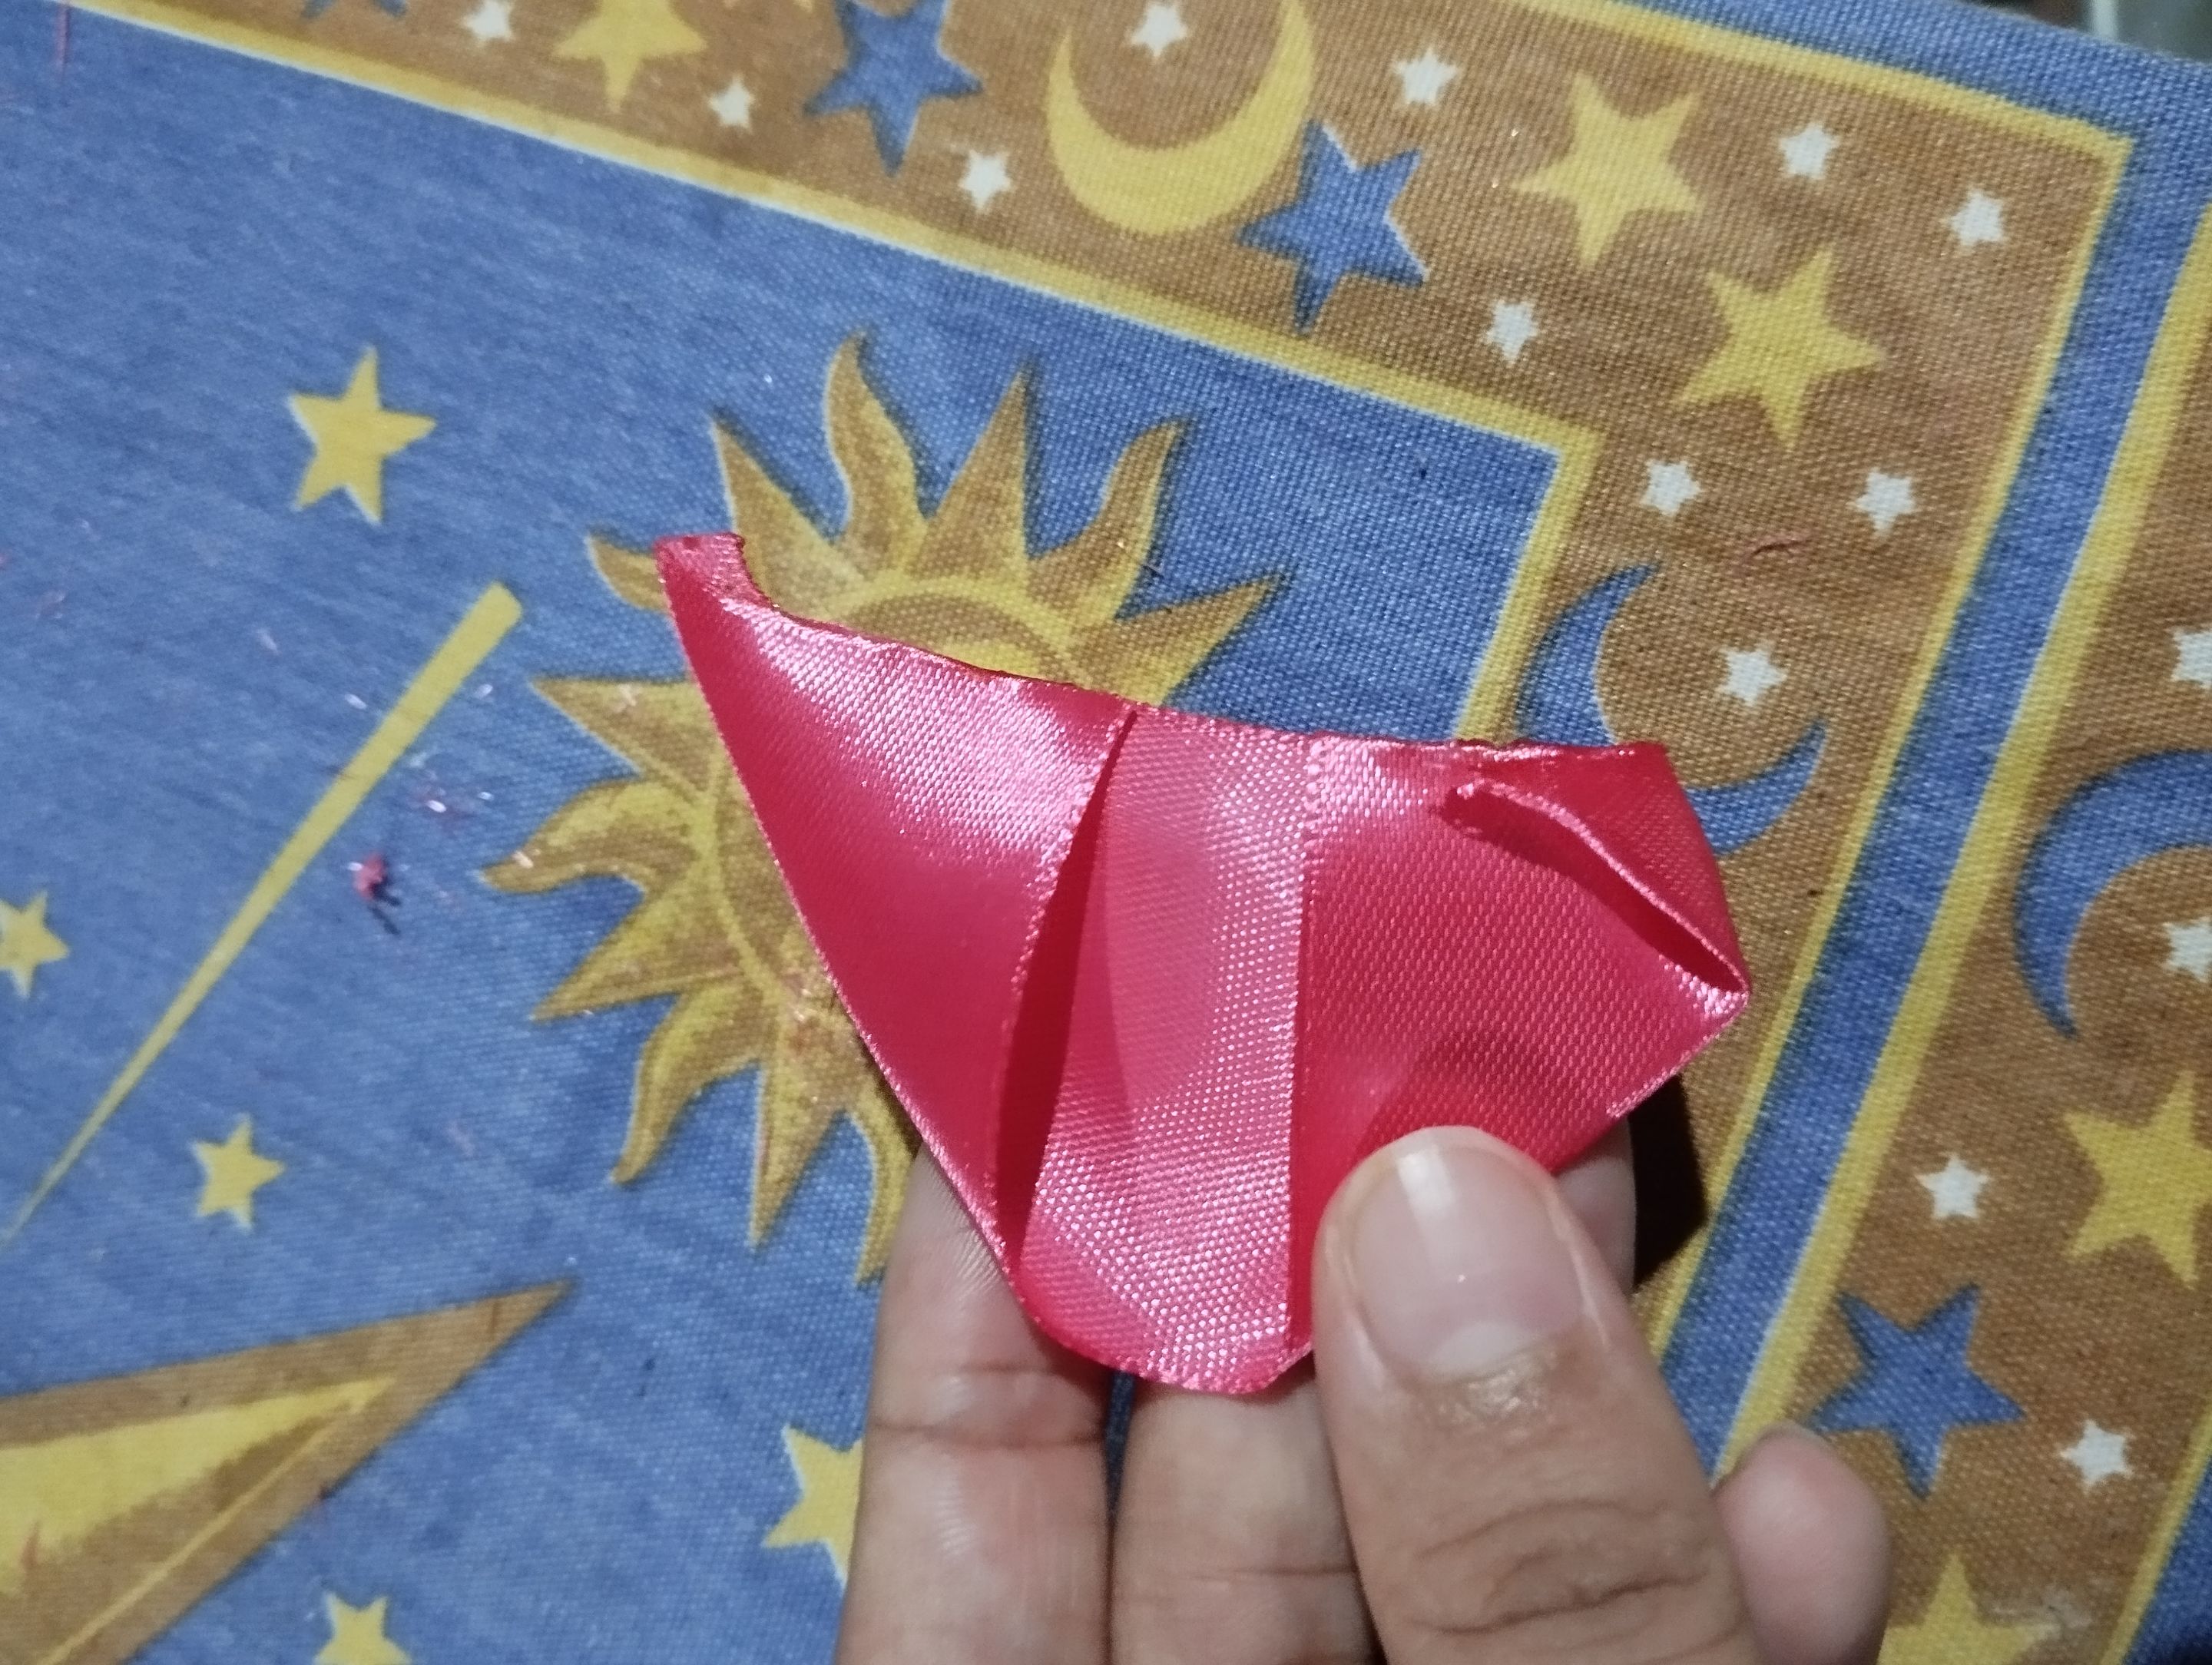||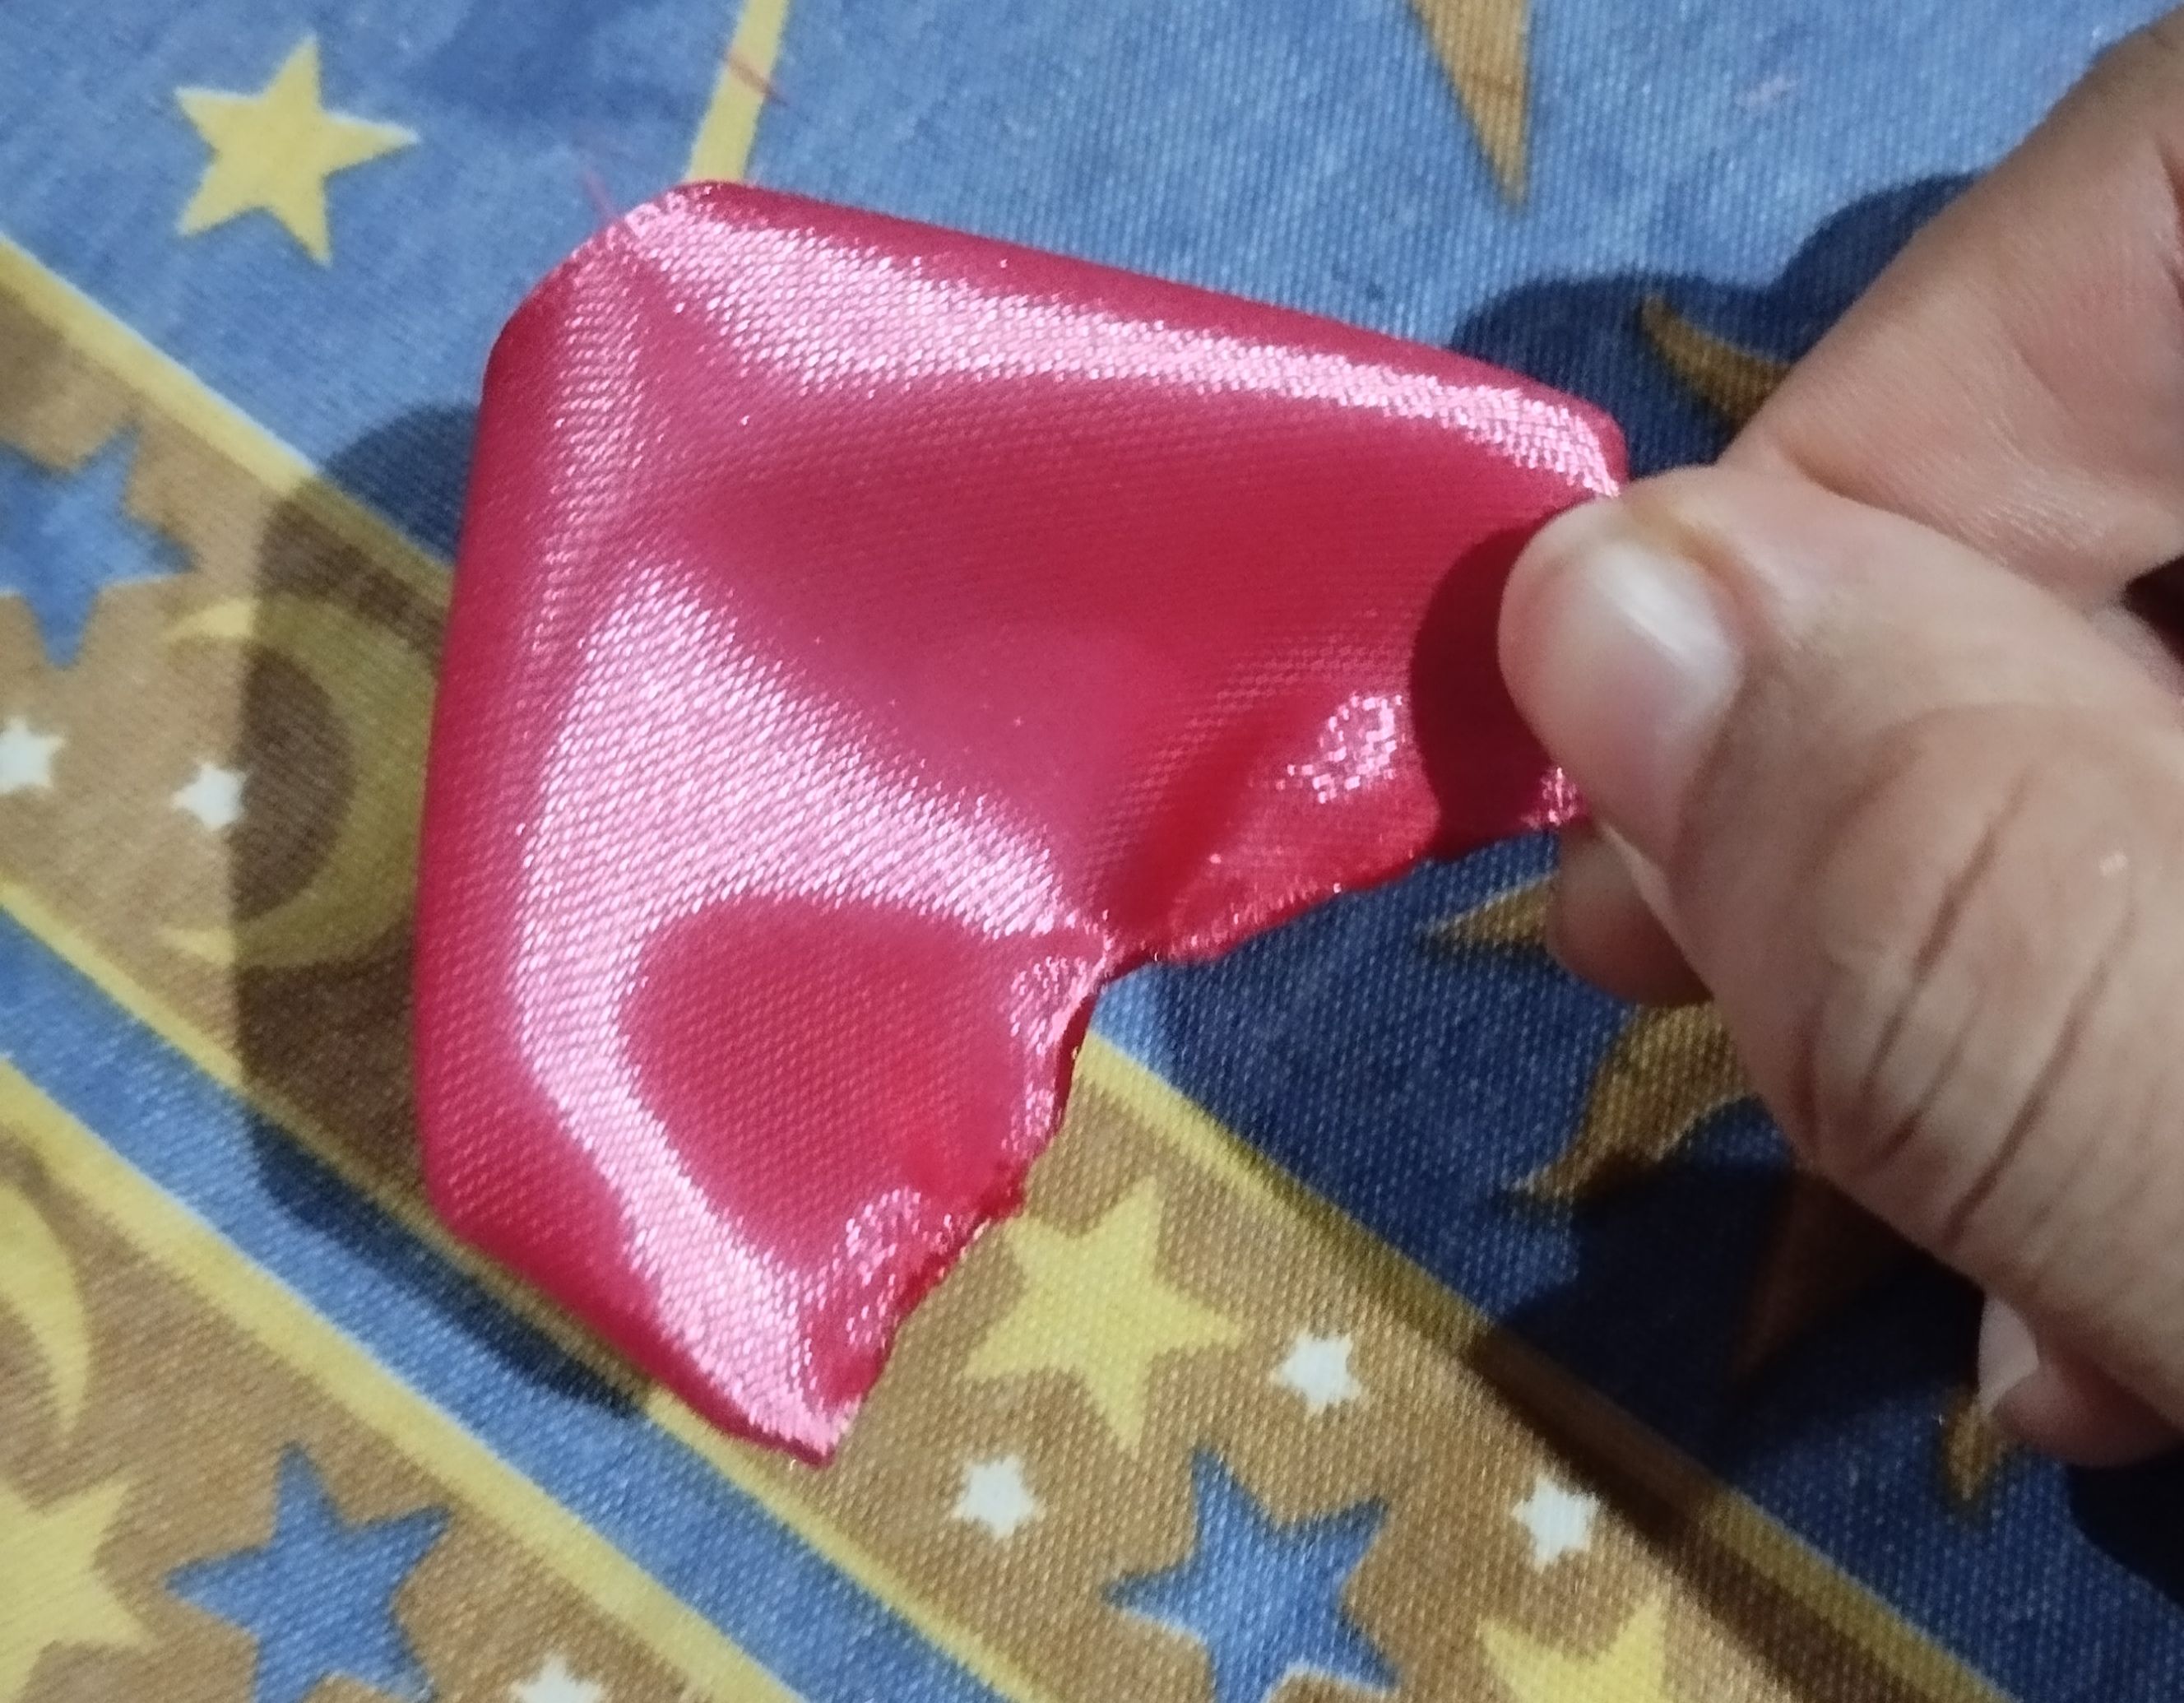| **#3 Para armar los pétalos de la rosa,usé una cinta de raso #9 y de unos 9 cm de largo o del aproximado del largo de una tarjeta 💳 , corté nueve tiras de estas para hacer los nueve pétalos para cada flor, aquí se hace el pétalo de forma tradicional, primero doble el extremo de la cinta hacia adentro hasta formar un triángulo , y lo sellé con un yesquero, luego hice lo mismo con el otro extremo ,para doblar y formar un triángulo y sellar con calor, de forma que quedarían la cinta como un triángulo doblar sus esquinas hacia adentro también y quemando con yesquero, esto nos dará una especie de semi forma de hexagono, la parte delantera (sería la que no queda con dobleces) podemos agregar algo de calor en la parte inferior del medio del pétalo y hacer un pliegue para darle tridimensionalidad.**
English Version
**#3 To assemble the rose petals, I used a #9 satin ribbon and it was about 9 cm long or approximately the length of a card 💳 , I cut nine strips of these to make the nine petals for each flower, here the petal is made in the traditional way, first fold the end of the ribbon inwards to form a triangle, and sealed it with a tinderbox, then I did the same with the other end, to fold and form a triangle and seal with heat, so that the ribbon would look like a triangle, fold its corners inwards as well and burn with a tinderbox, this will give us a kind of semi-hexagon shape, the front part (it would be the one that does not have folds) we can add some heat to the bottom of the middle of the petal and make a fold to give it three-dimensionality.**
|||| |---|---|---| |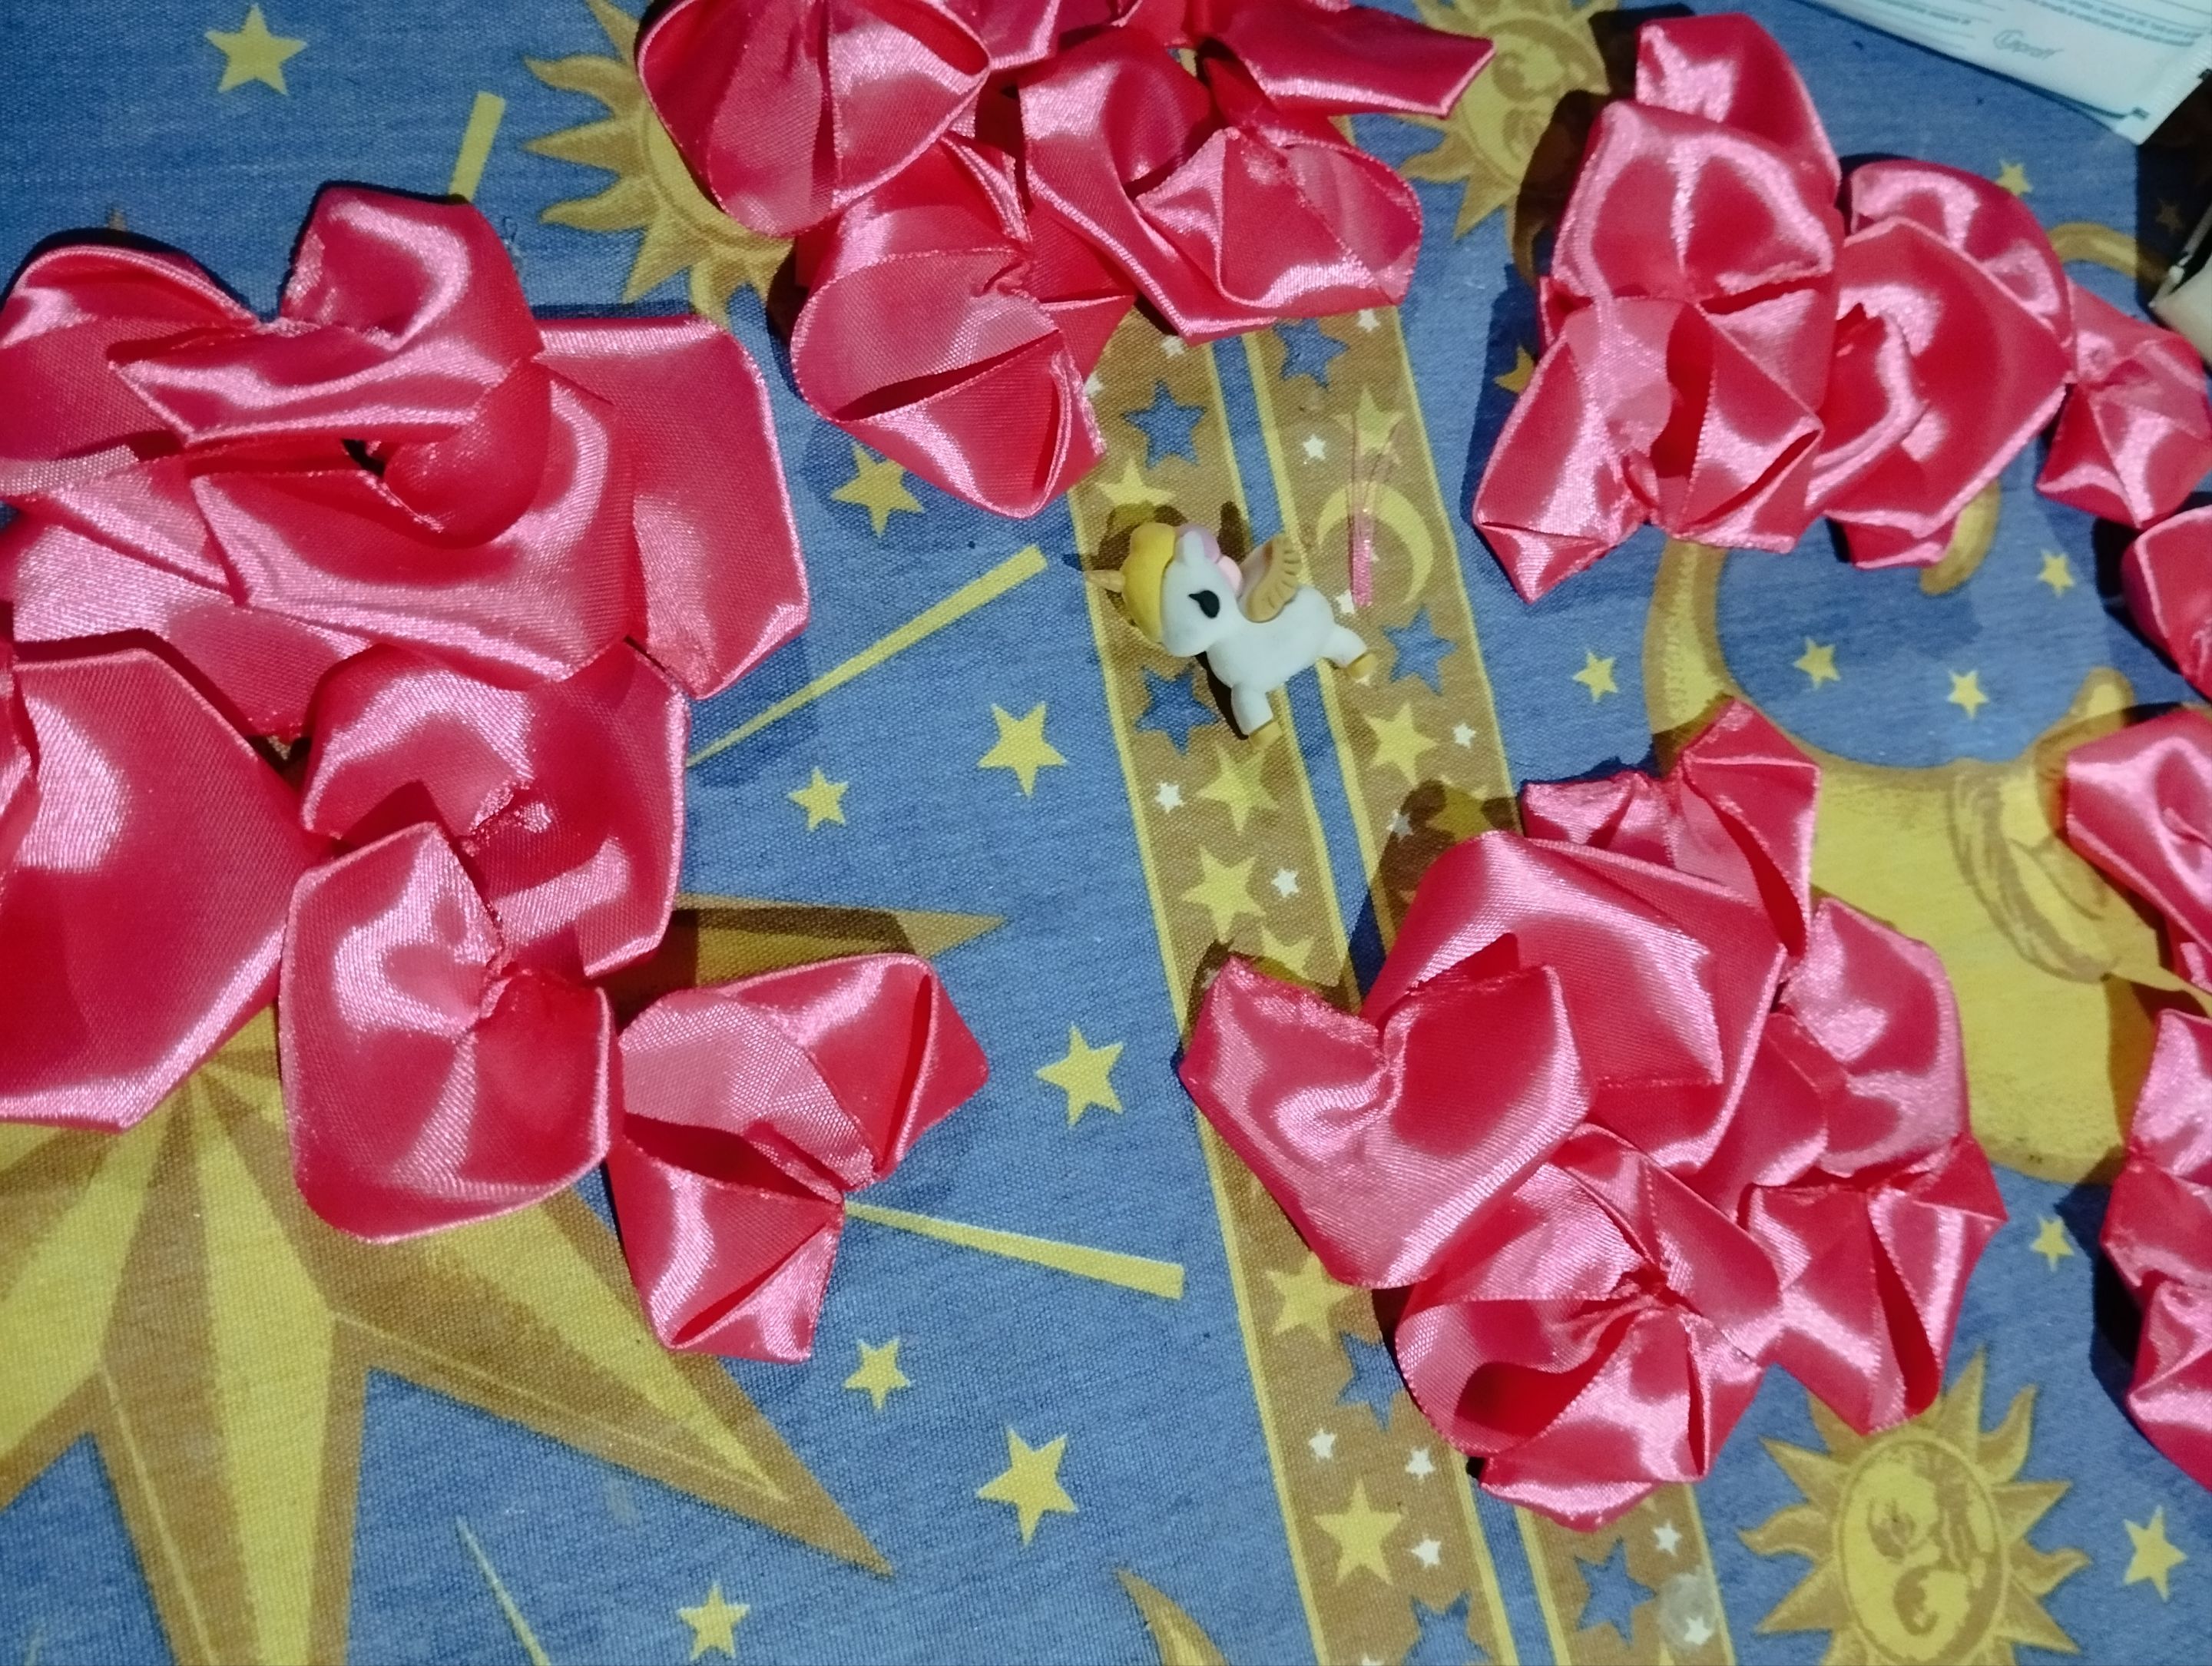||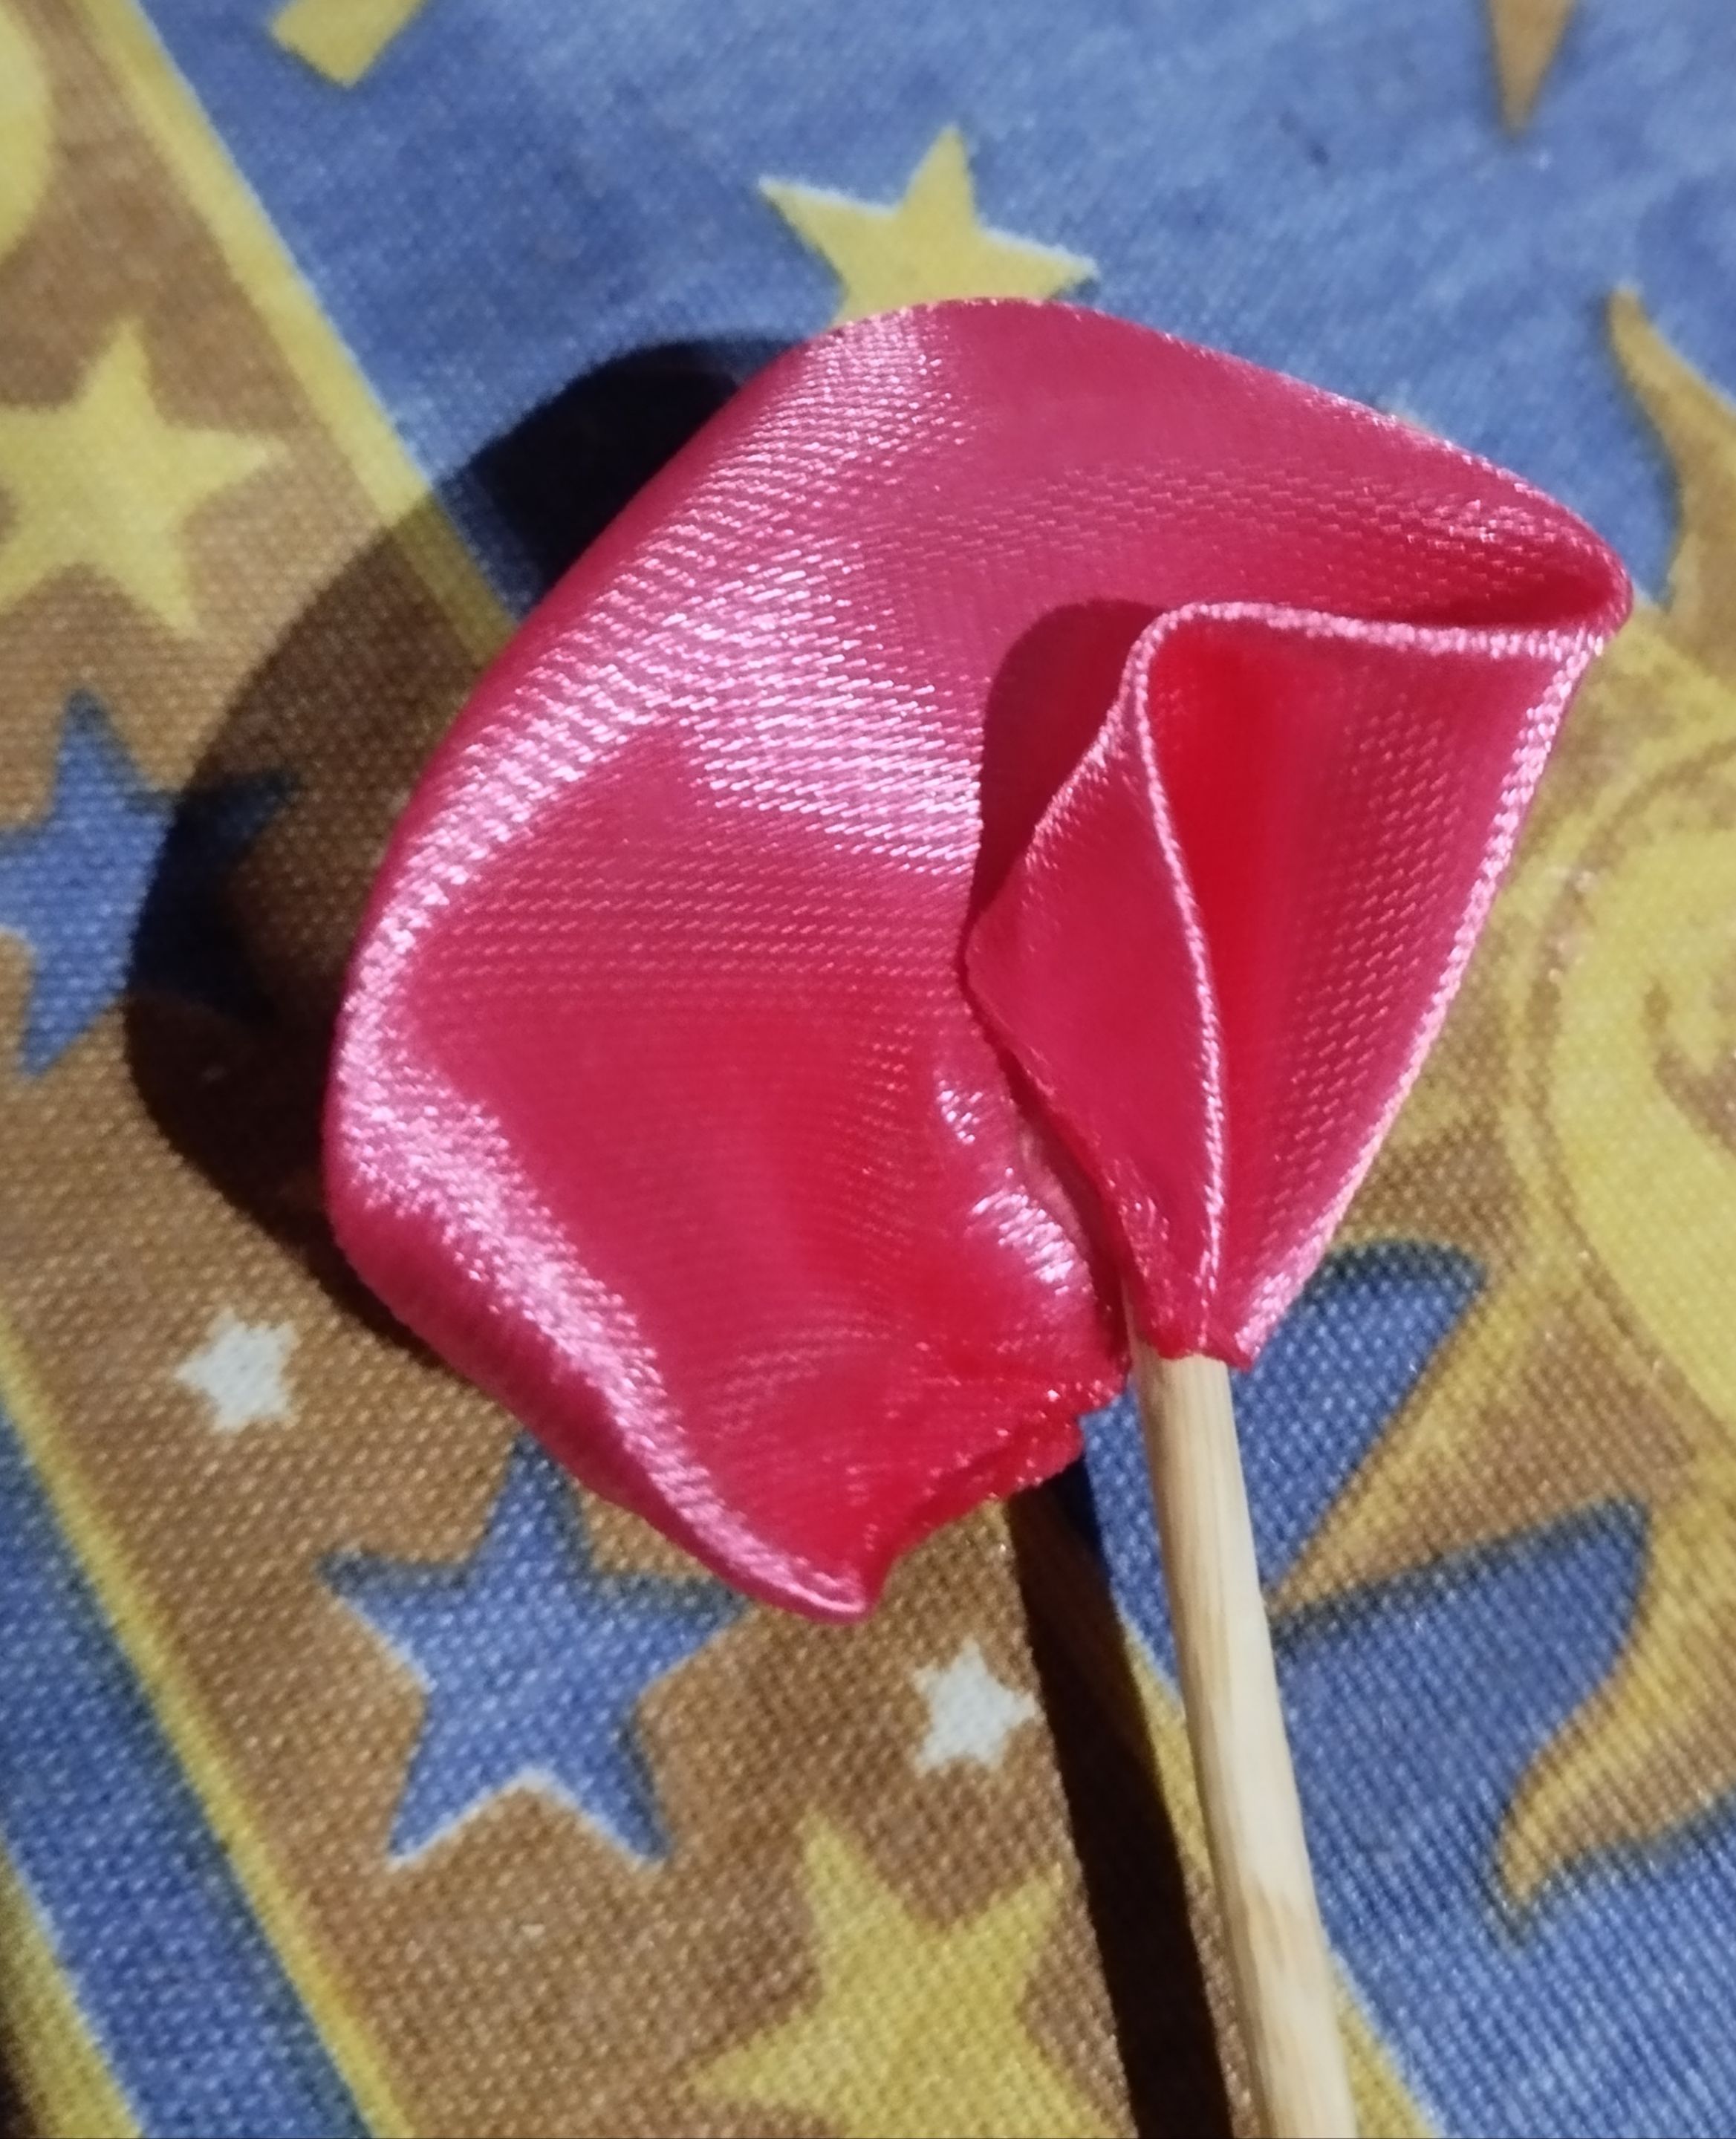| |||| |---|---|---| |||| **#4 hice 5 grupos de 9 pétalos para hacer cada rosa, esos serían unos 45 pétalos, luego usé un palito de altura, pegué un punto de silicón en medio de un pétalo y puse el palito de altura en el medio, luego doble un de los extremos hacia adentro, y el otro también de manera que formen el centro de la rosa, un capullo, luego tome un segundo pétalo y lo pegué envolviendo al capullo del centro, de esta manera tendremos nuestro centro de la rosa con dos pétalos.**
English Version
**#4 I made 5 groups of 9 petals to make each rose, that would be about 45 petals, then I used a stick, glued a silicone dot in the middle of a petal and put the stick in the middle, then I bent one of the ends inwards, and the other one too so that they form the center of the rose, a bud, then I took a second petal and glued it wrapping it around the bud in the center, this way we will have our center of the rose with two petals.**
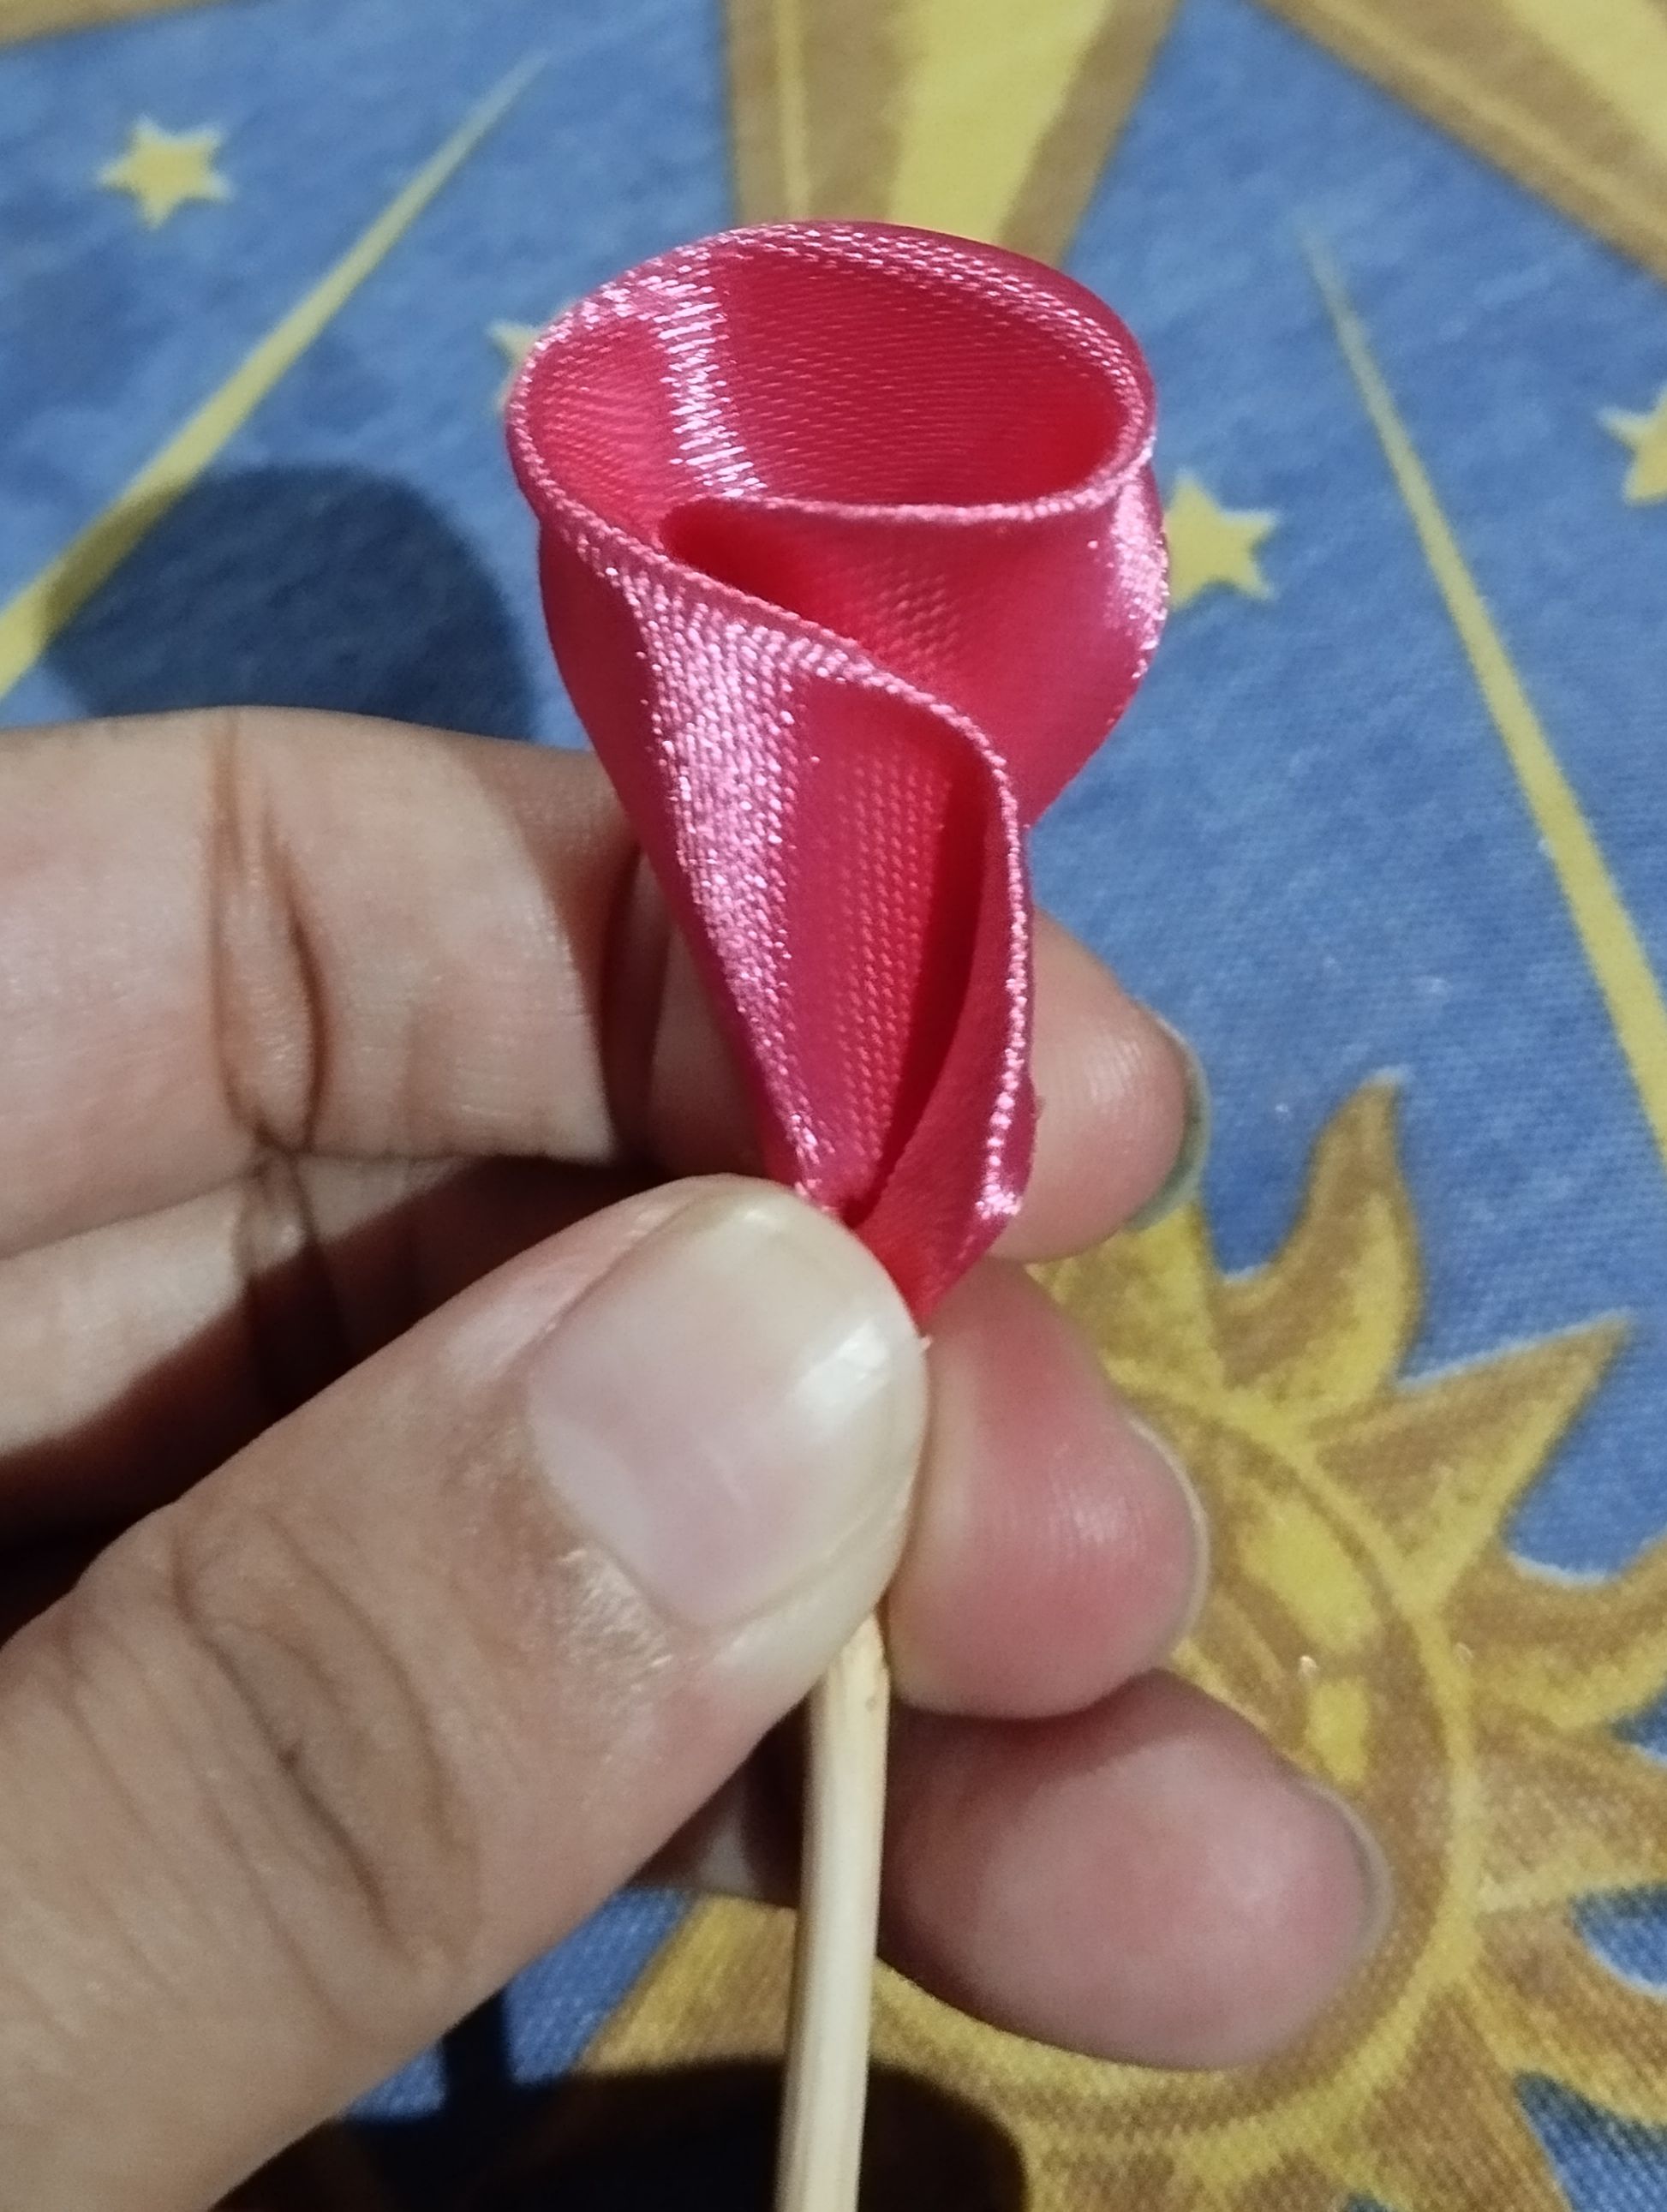
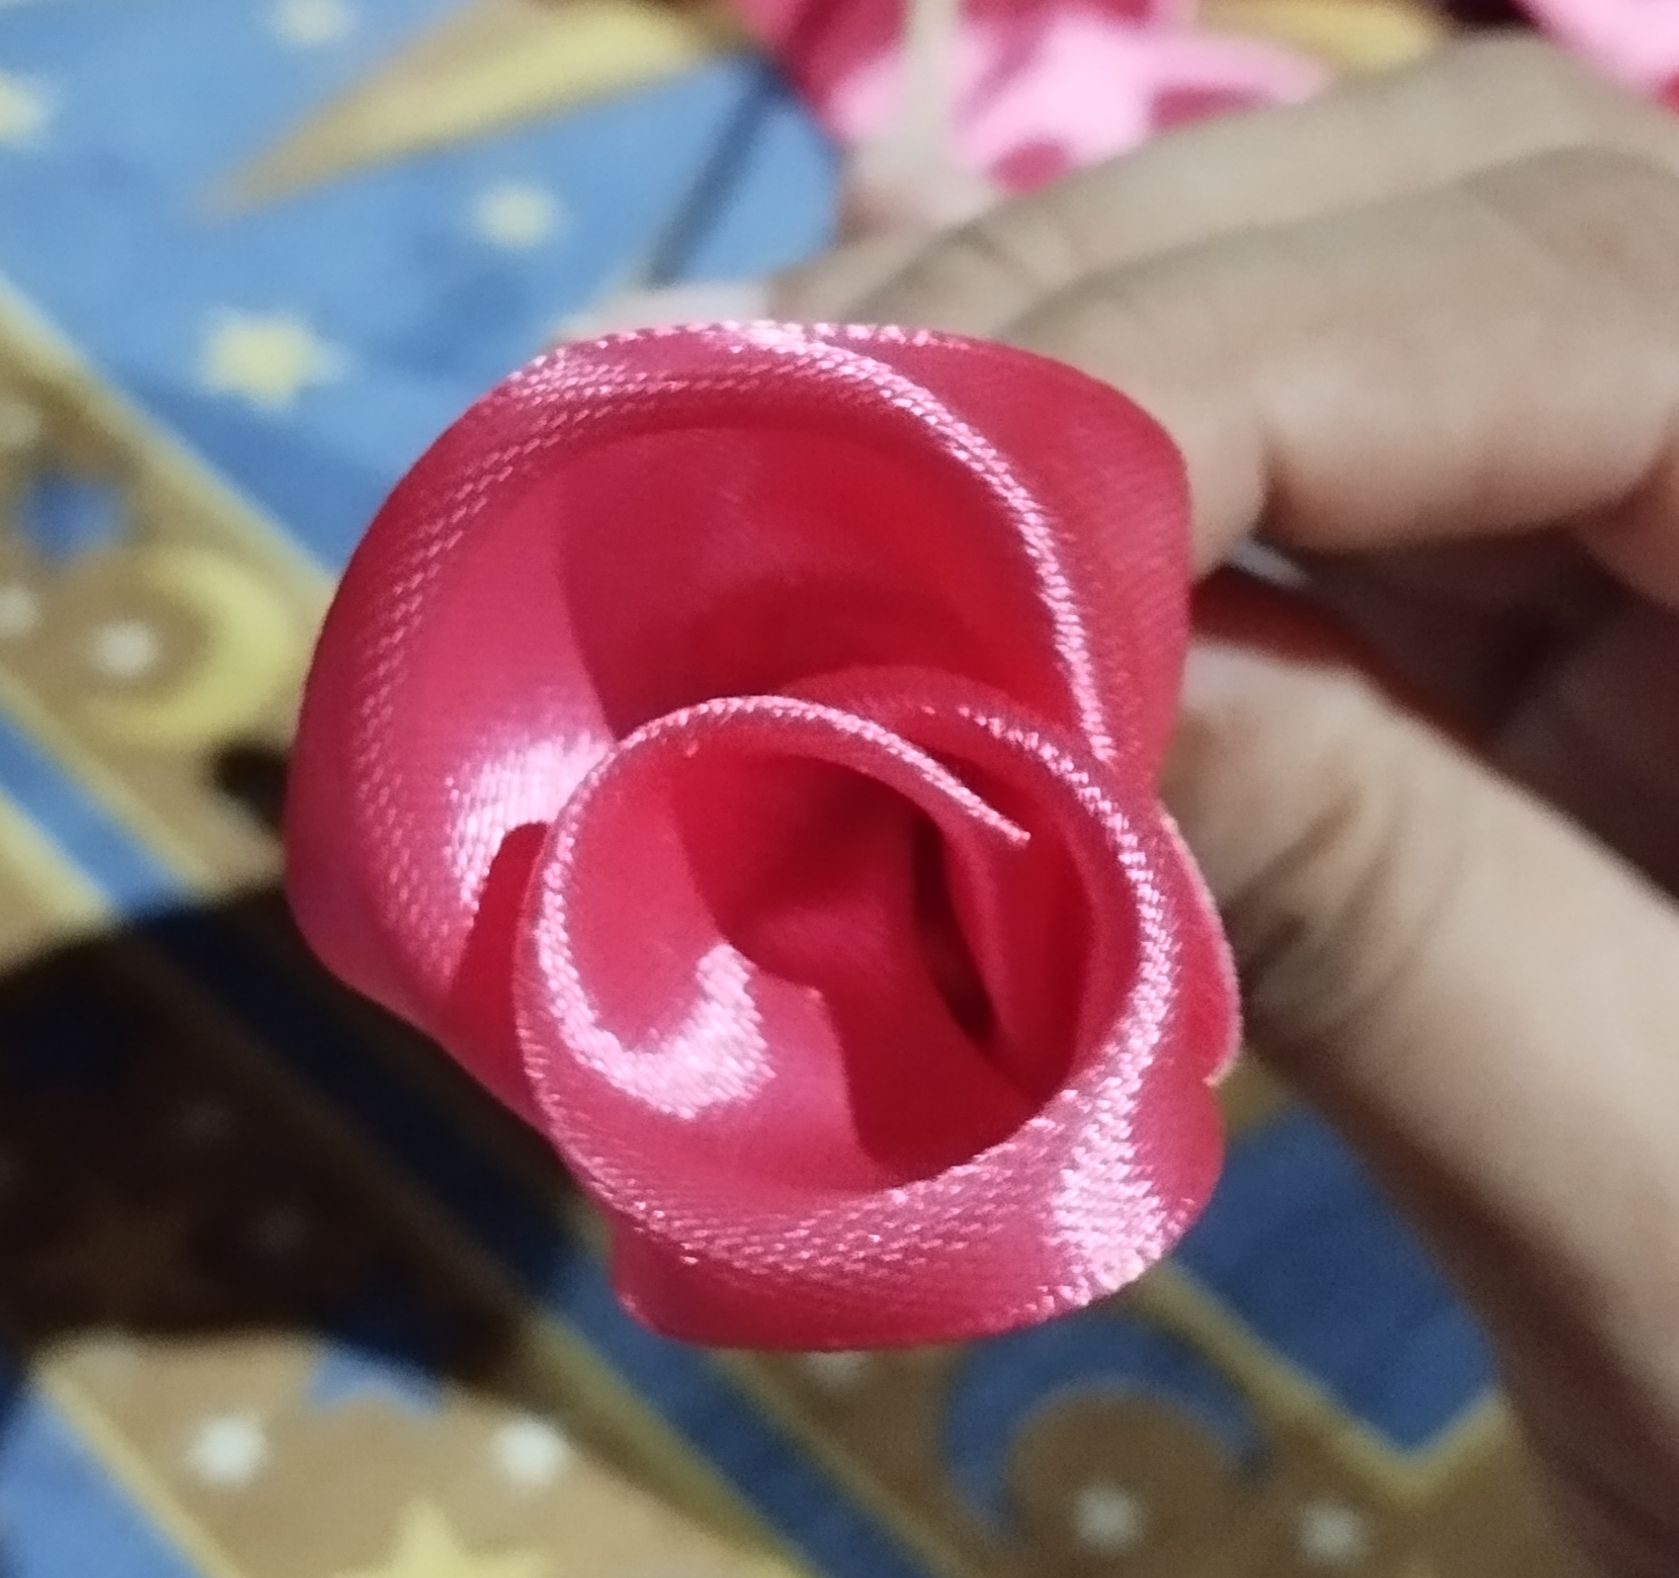
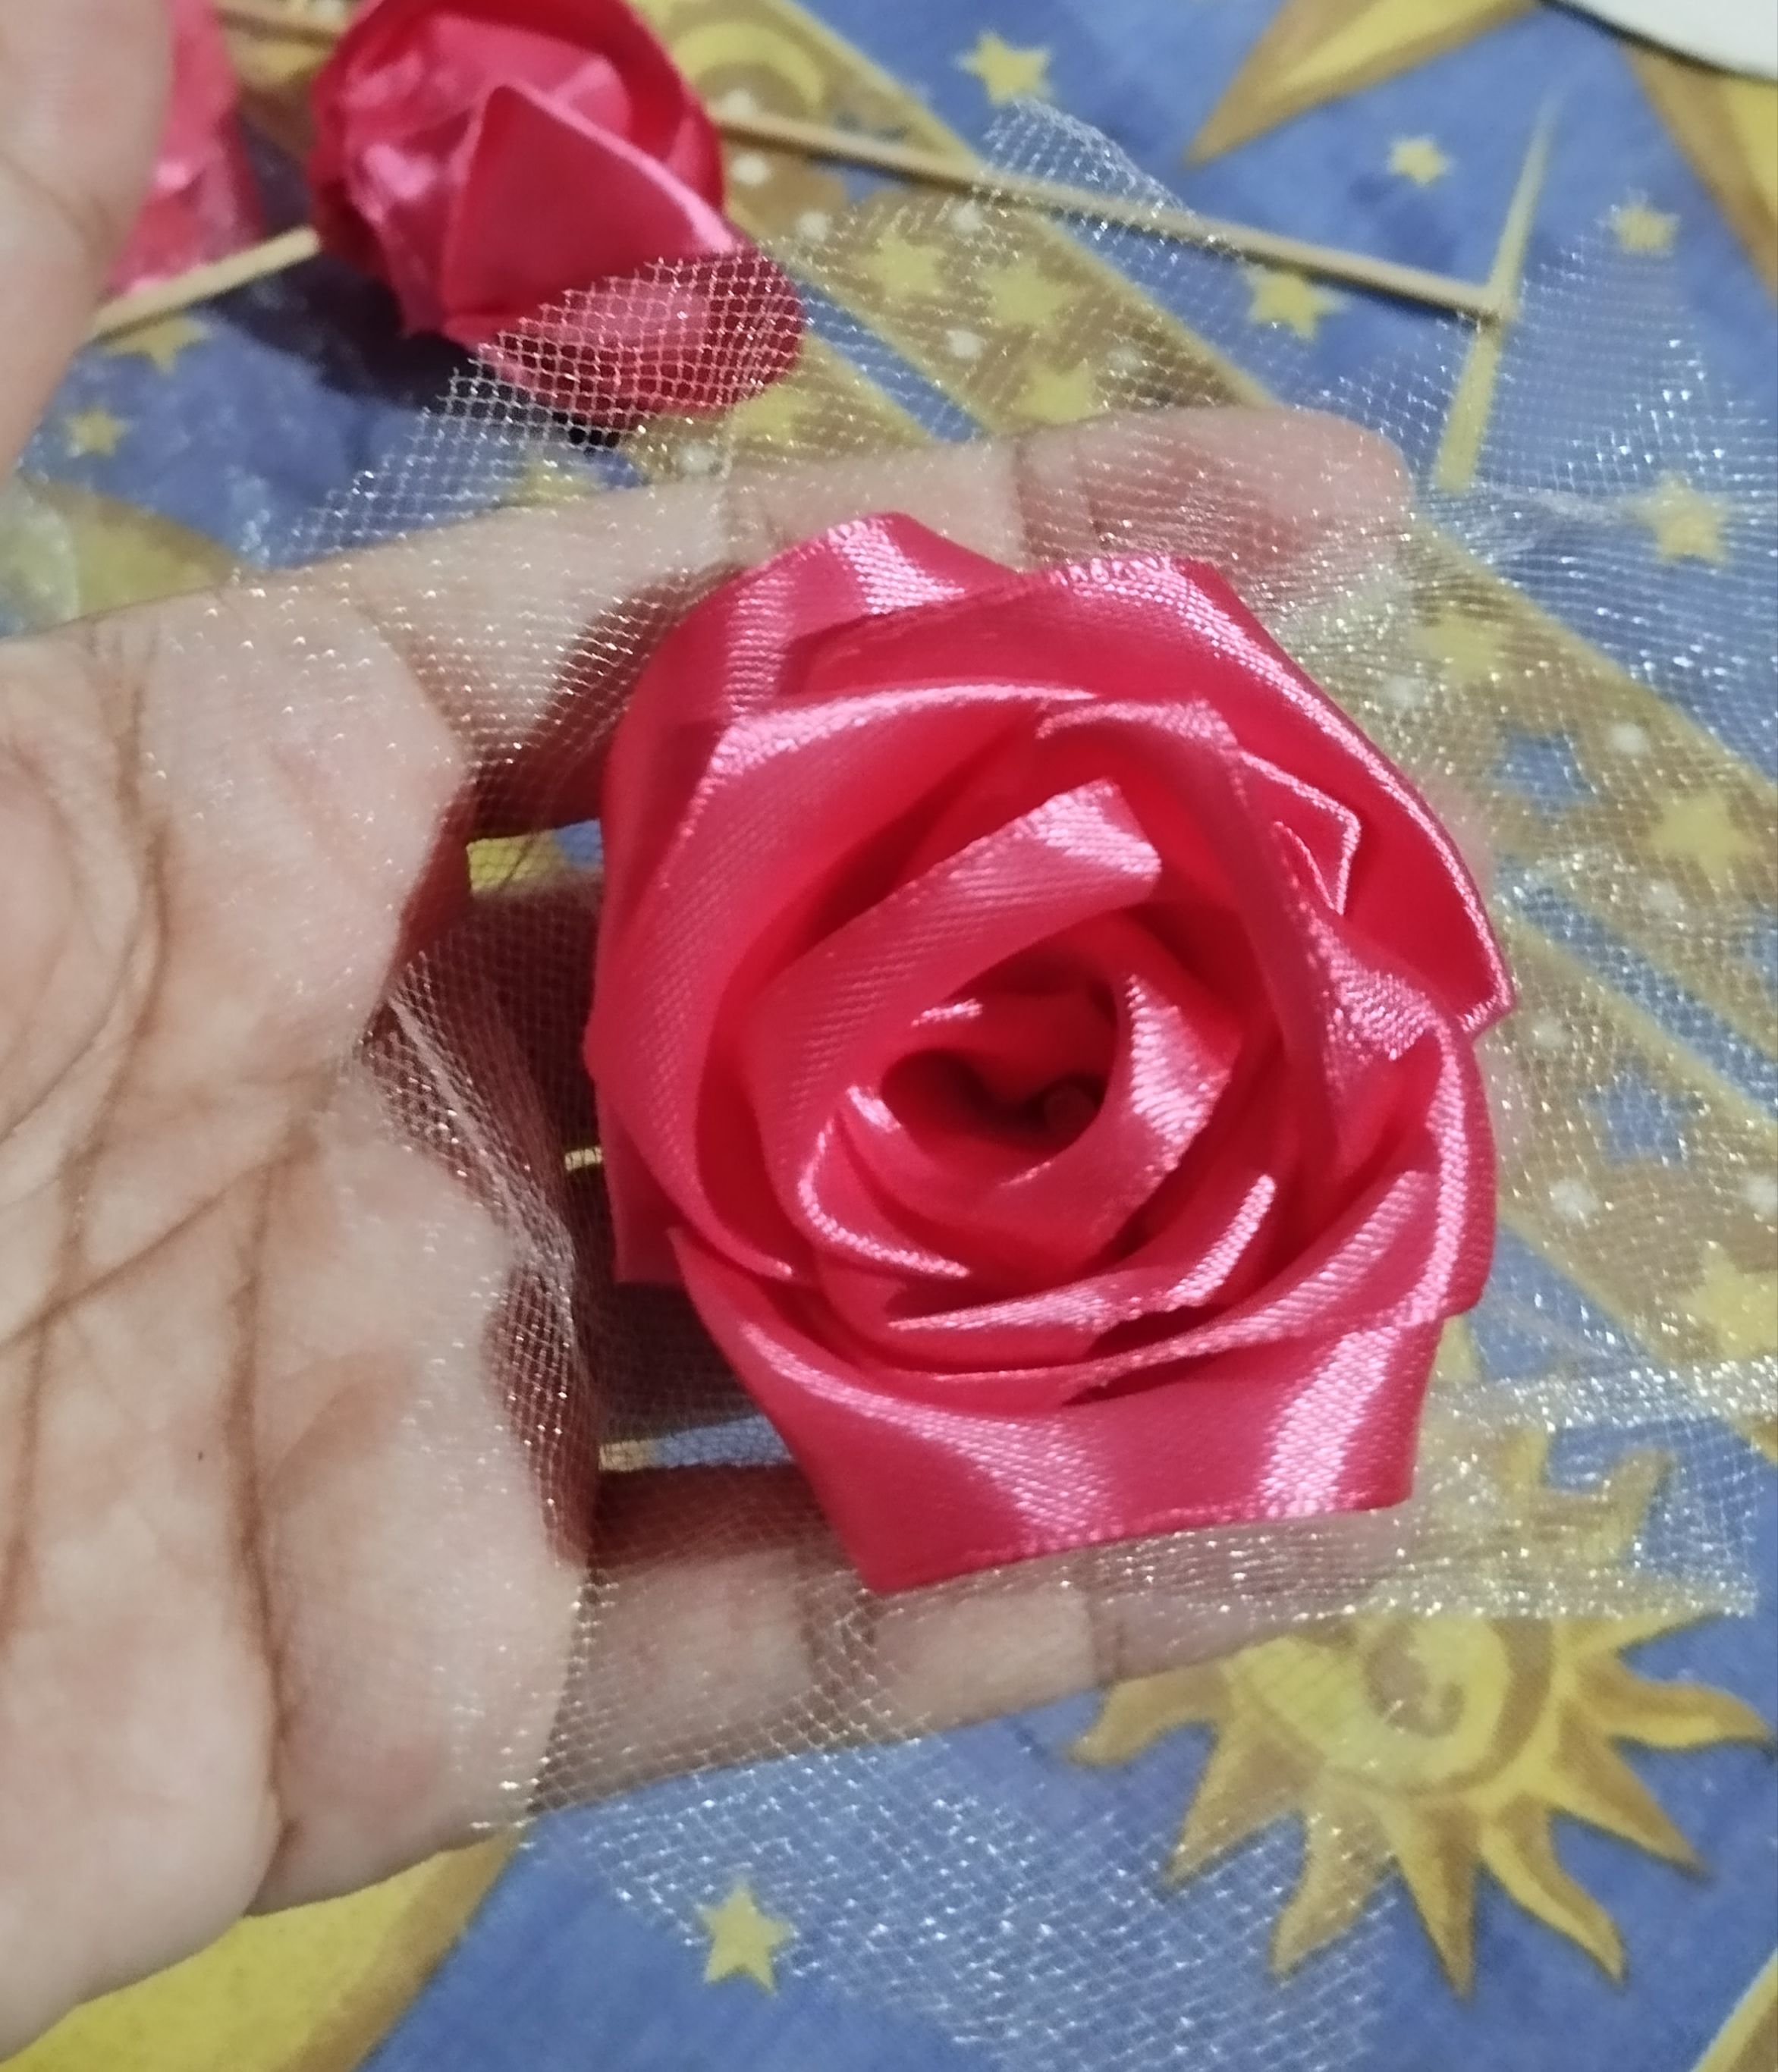
||| |---|---| ||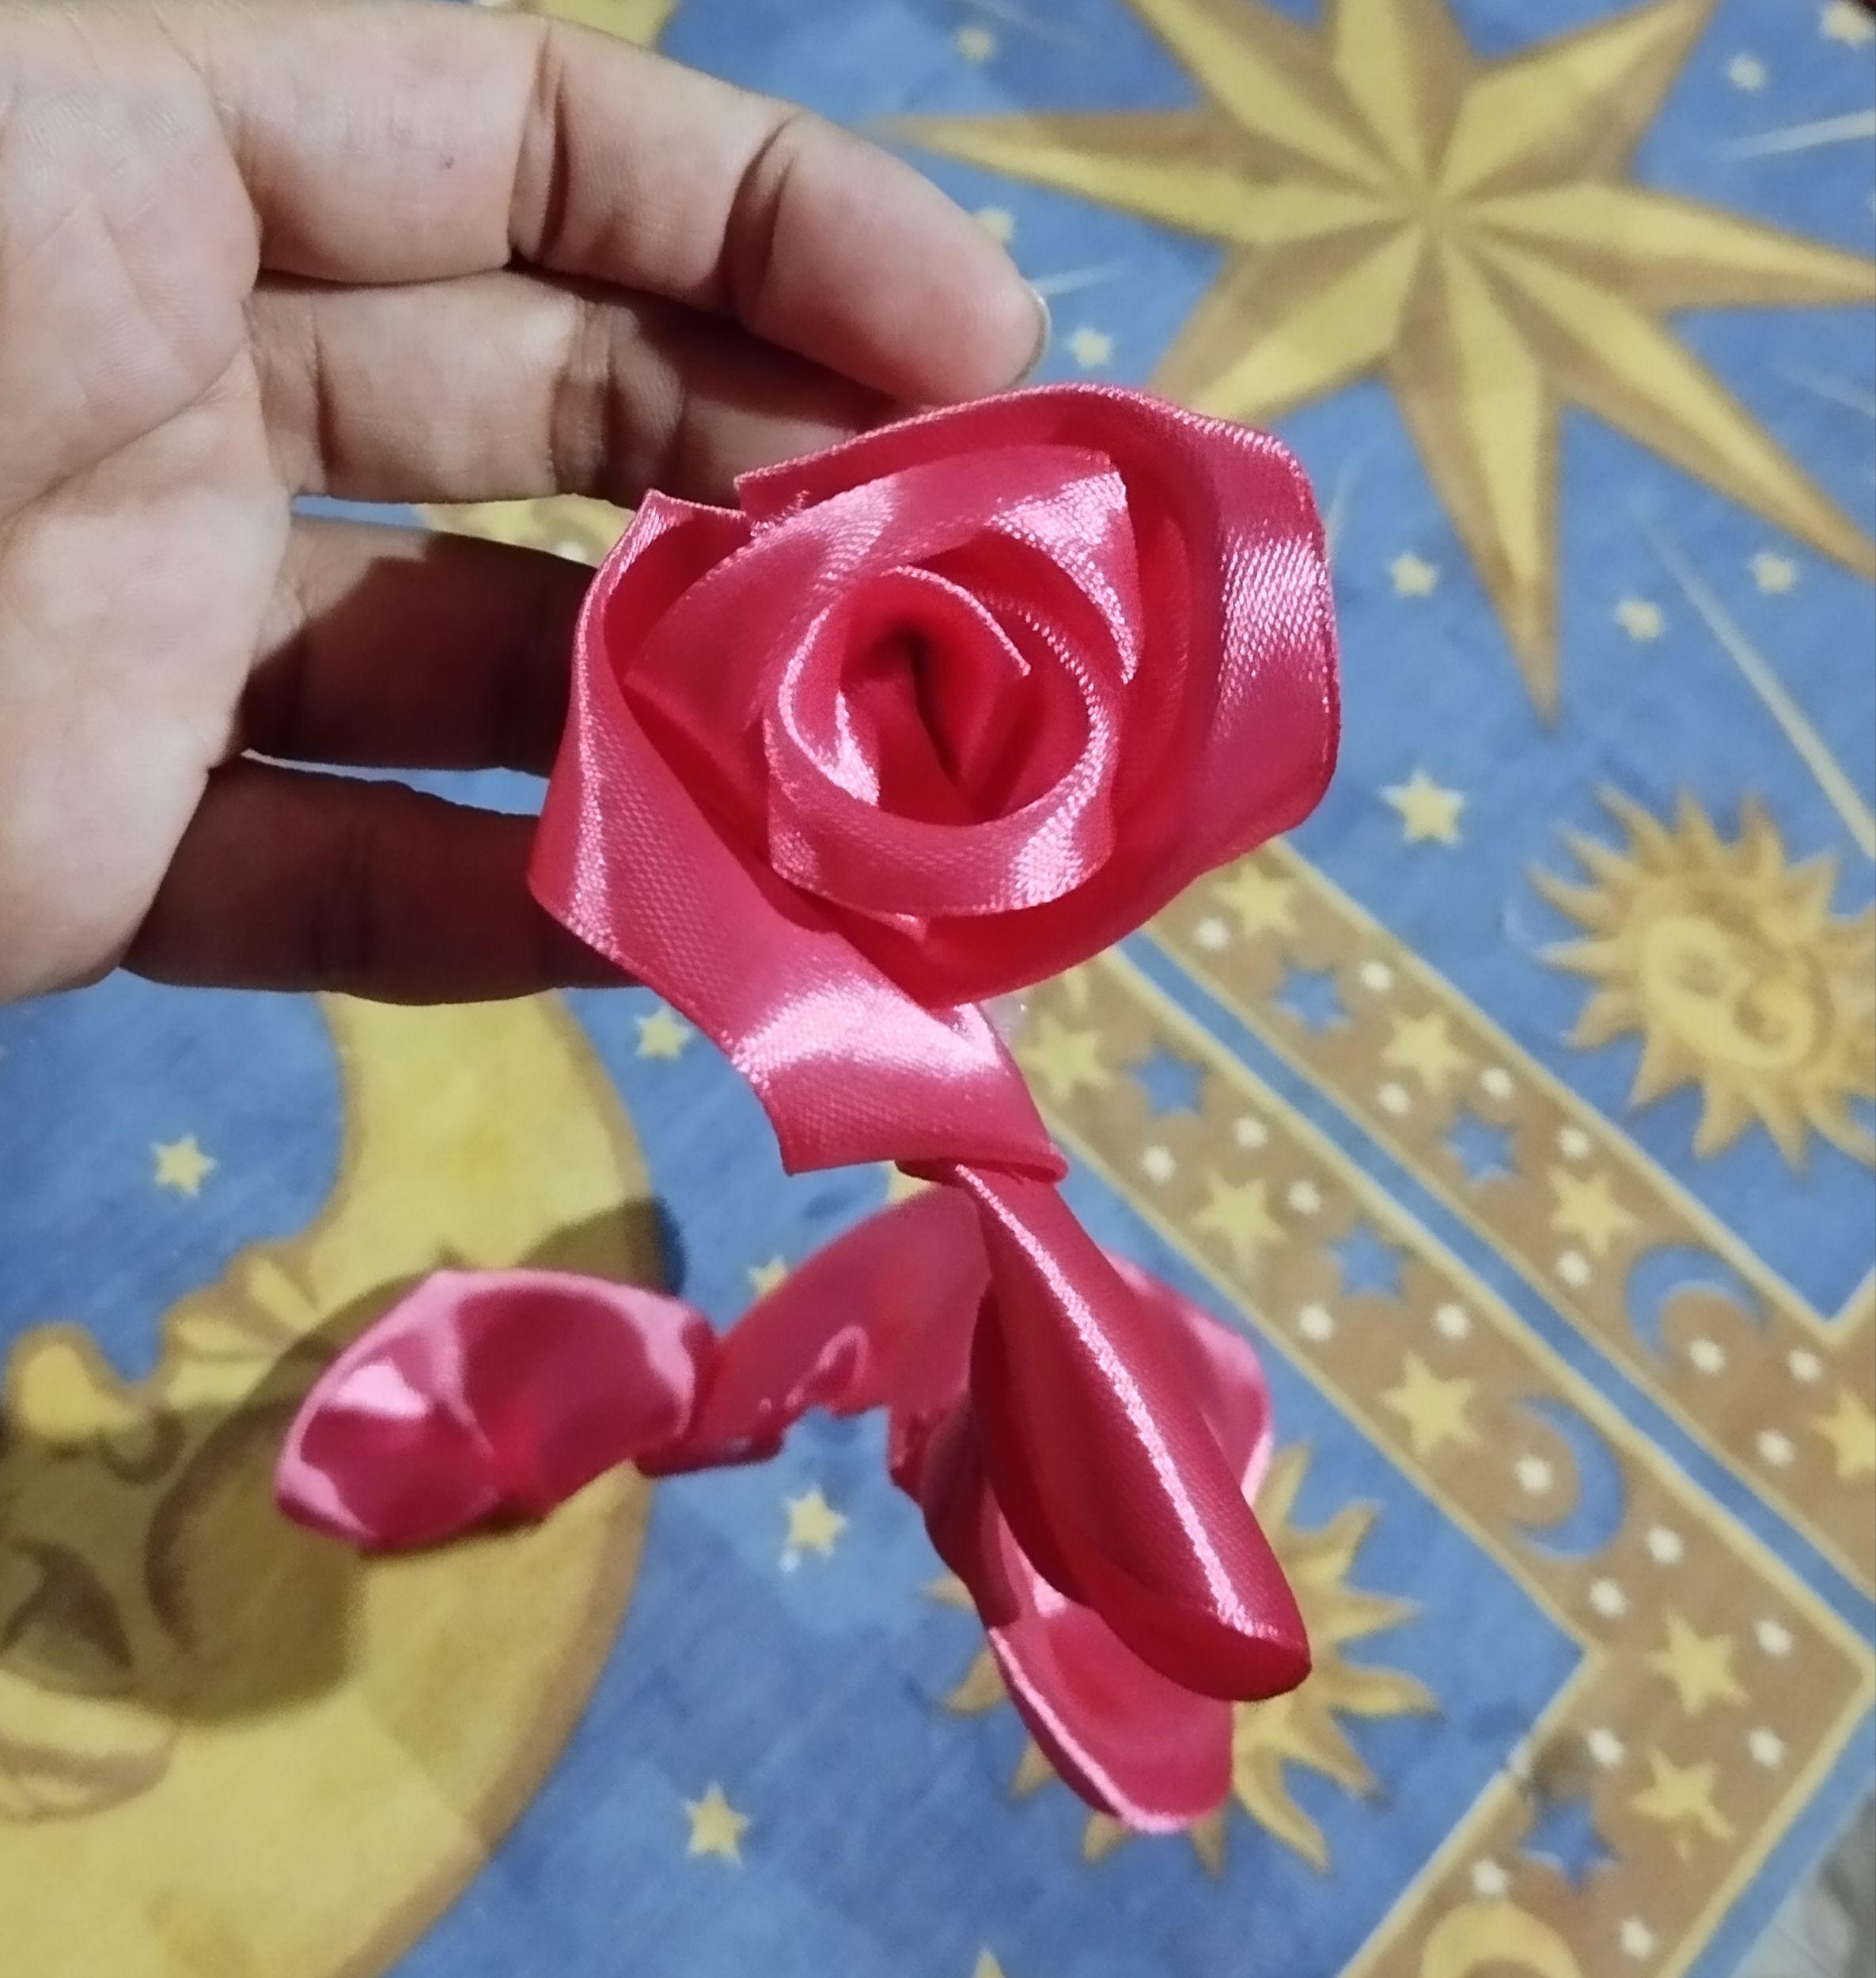|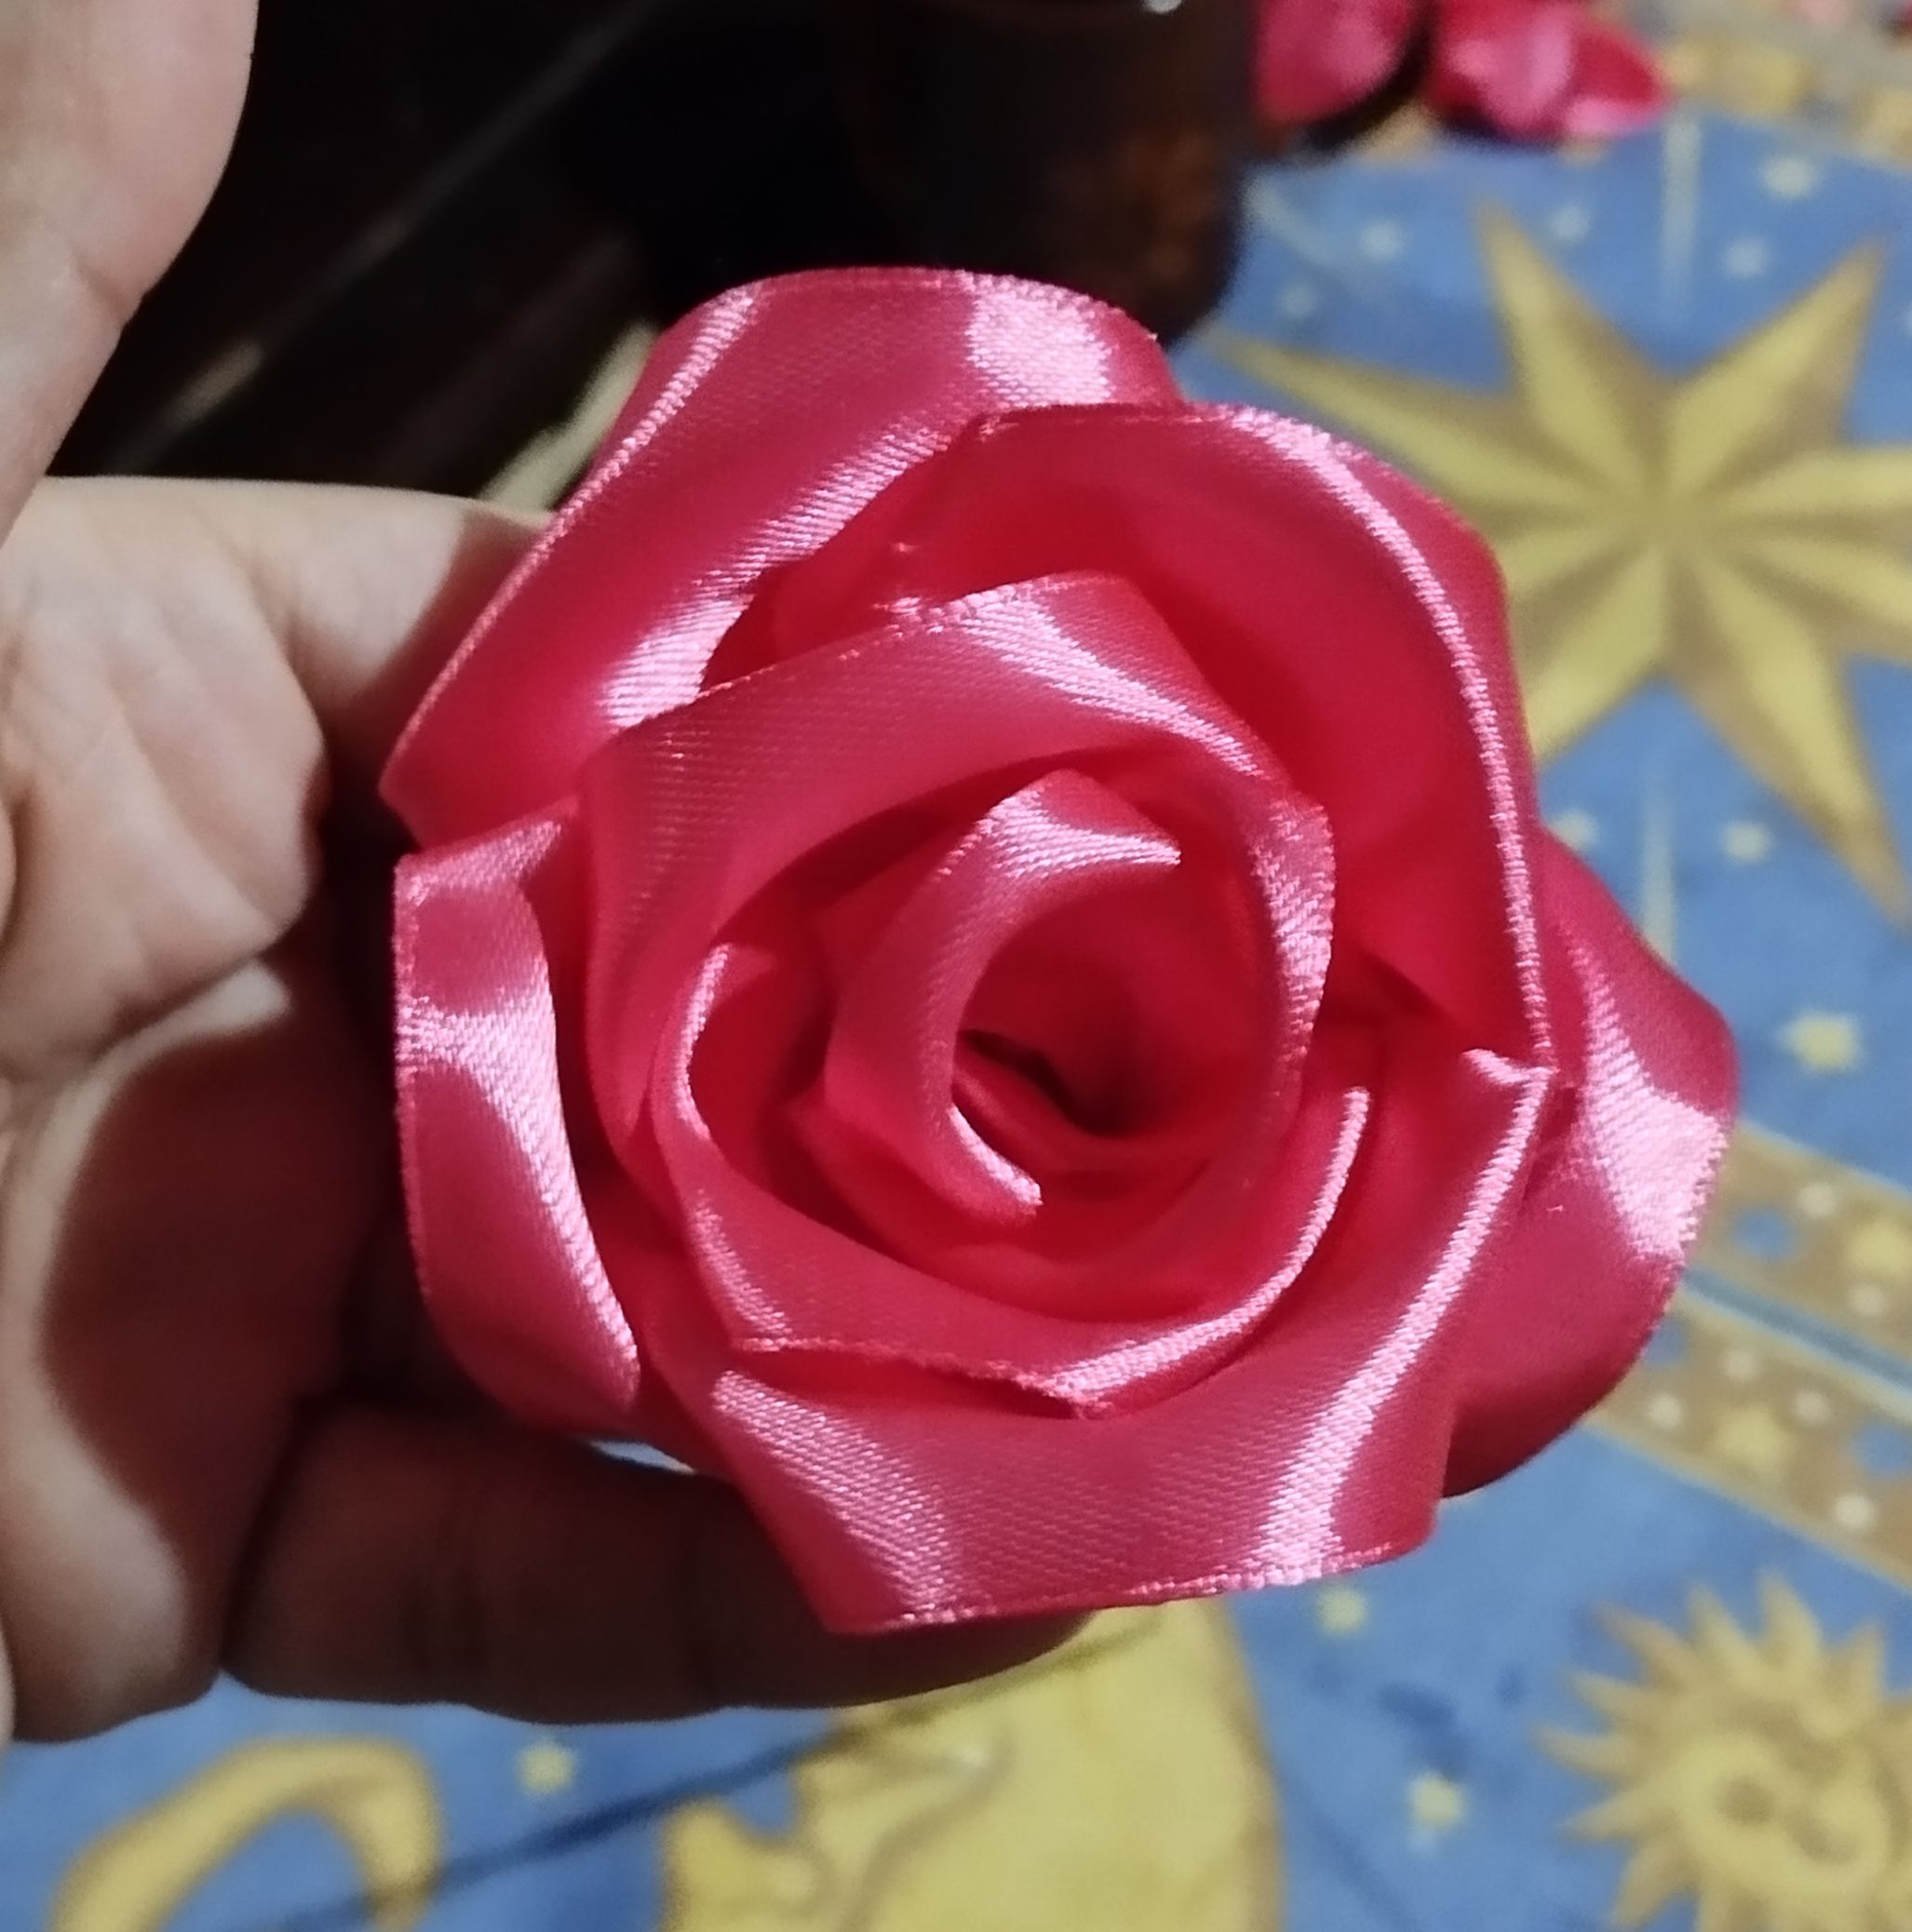| ||| |---|---| ||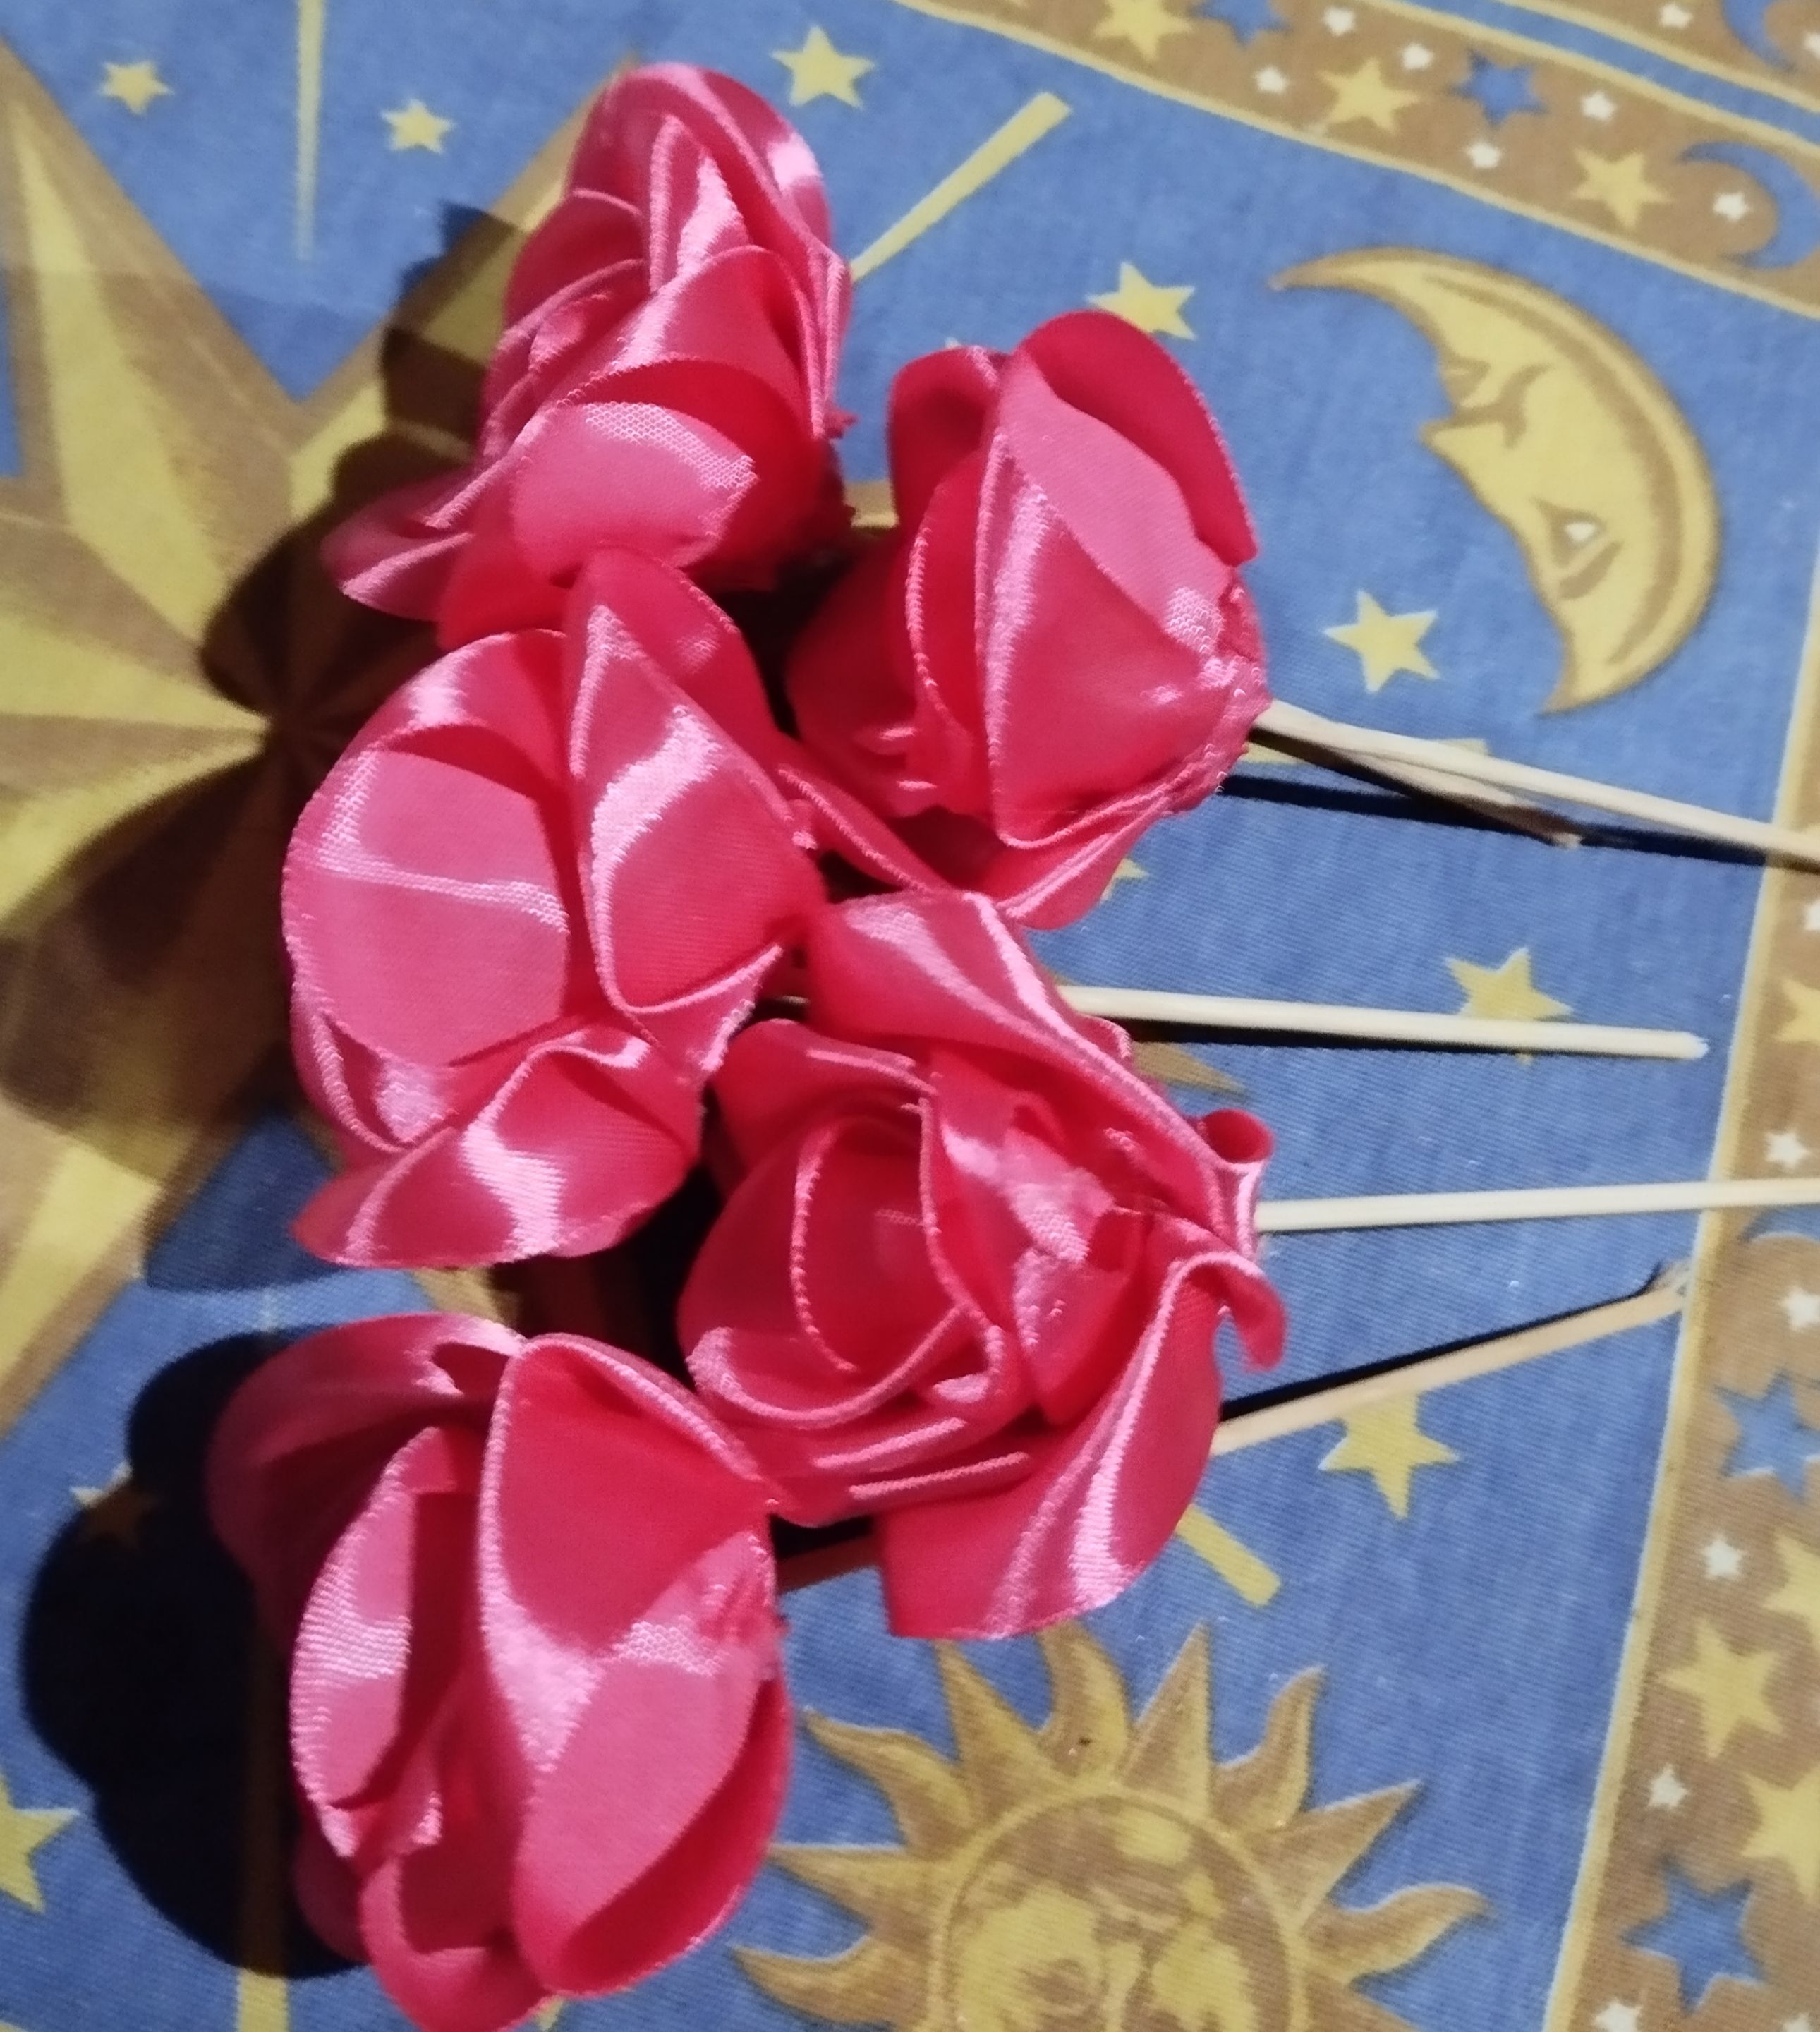| **#5 Para hacer las rosas de una forma más rápida, hice una tira de 7 pétalos pegando con silicón sus extremos, luego procedí a pegar la tira del pétalo a los pétalos del centro ,agregando suficiente silicón y haciendo presión para que queden bien firmes, la idea es ir envolviendo la tira de pétalos para ir armando la rosa, una vez pegadas y seco el silicón , acomode los pétalos abriendolos un poco. Luego medí los palitos de altura con la medida de la caja y los corte para que fueran del mismo tamaño.**
English Version
**#5 To make the roses more quickly, I made a strip of 7 petals by gluing their ends with silicone, then I proceeded to glue the petal strip to the center petals, adding enough silicone and applying pressure so that they are firm, the idea is to wrap the strip of petals to assemble the rose, once glued and the silicone dry, I arranged the petals by opening them a little. Then I measured the height of the sticks with the measurement of the box and cut them so that they were the same size.**
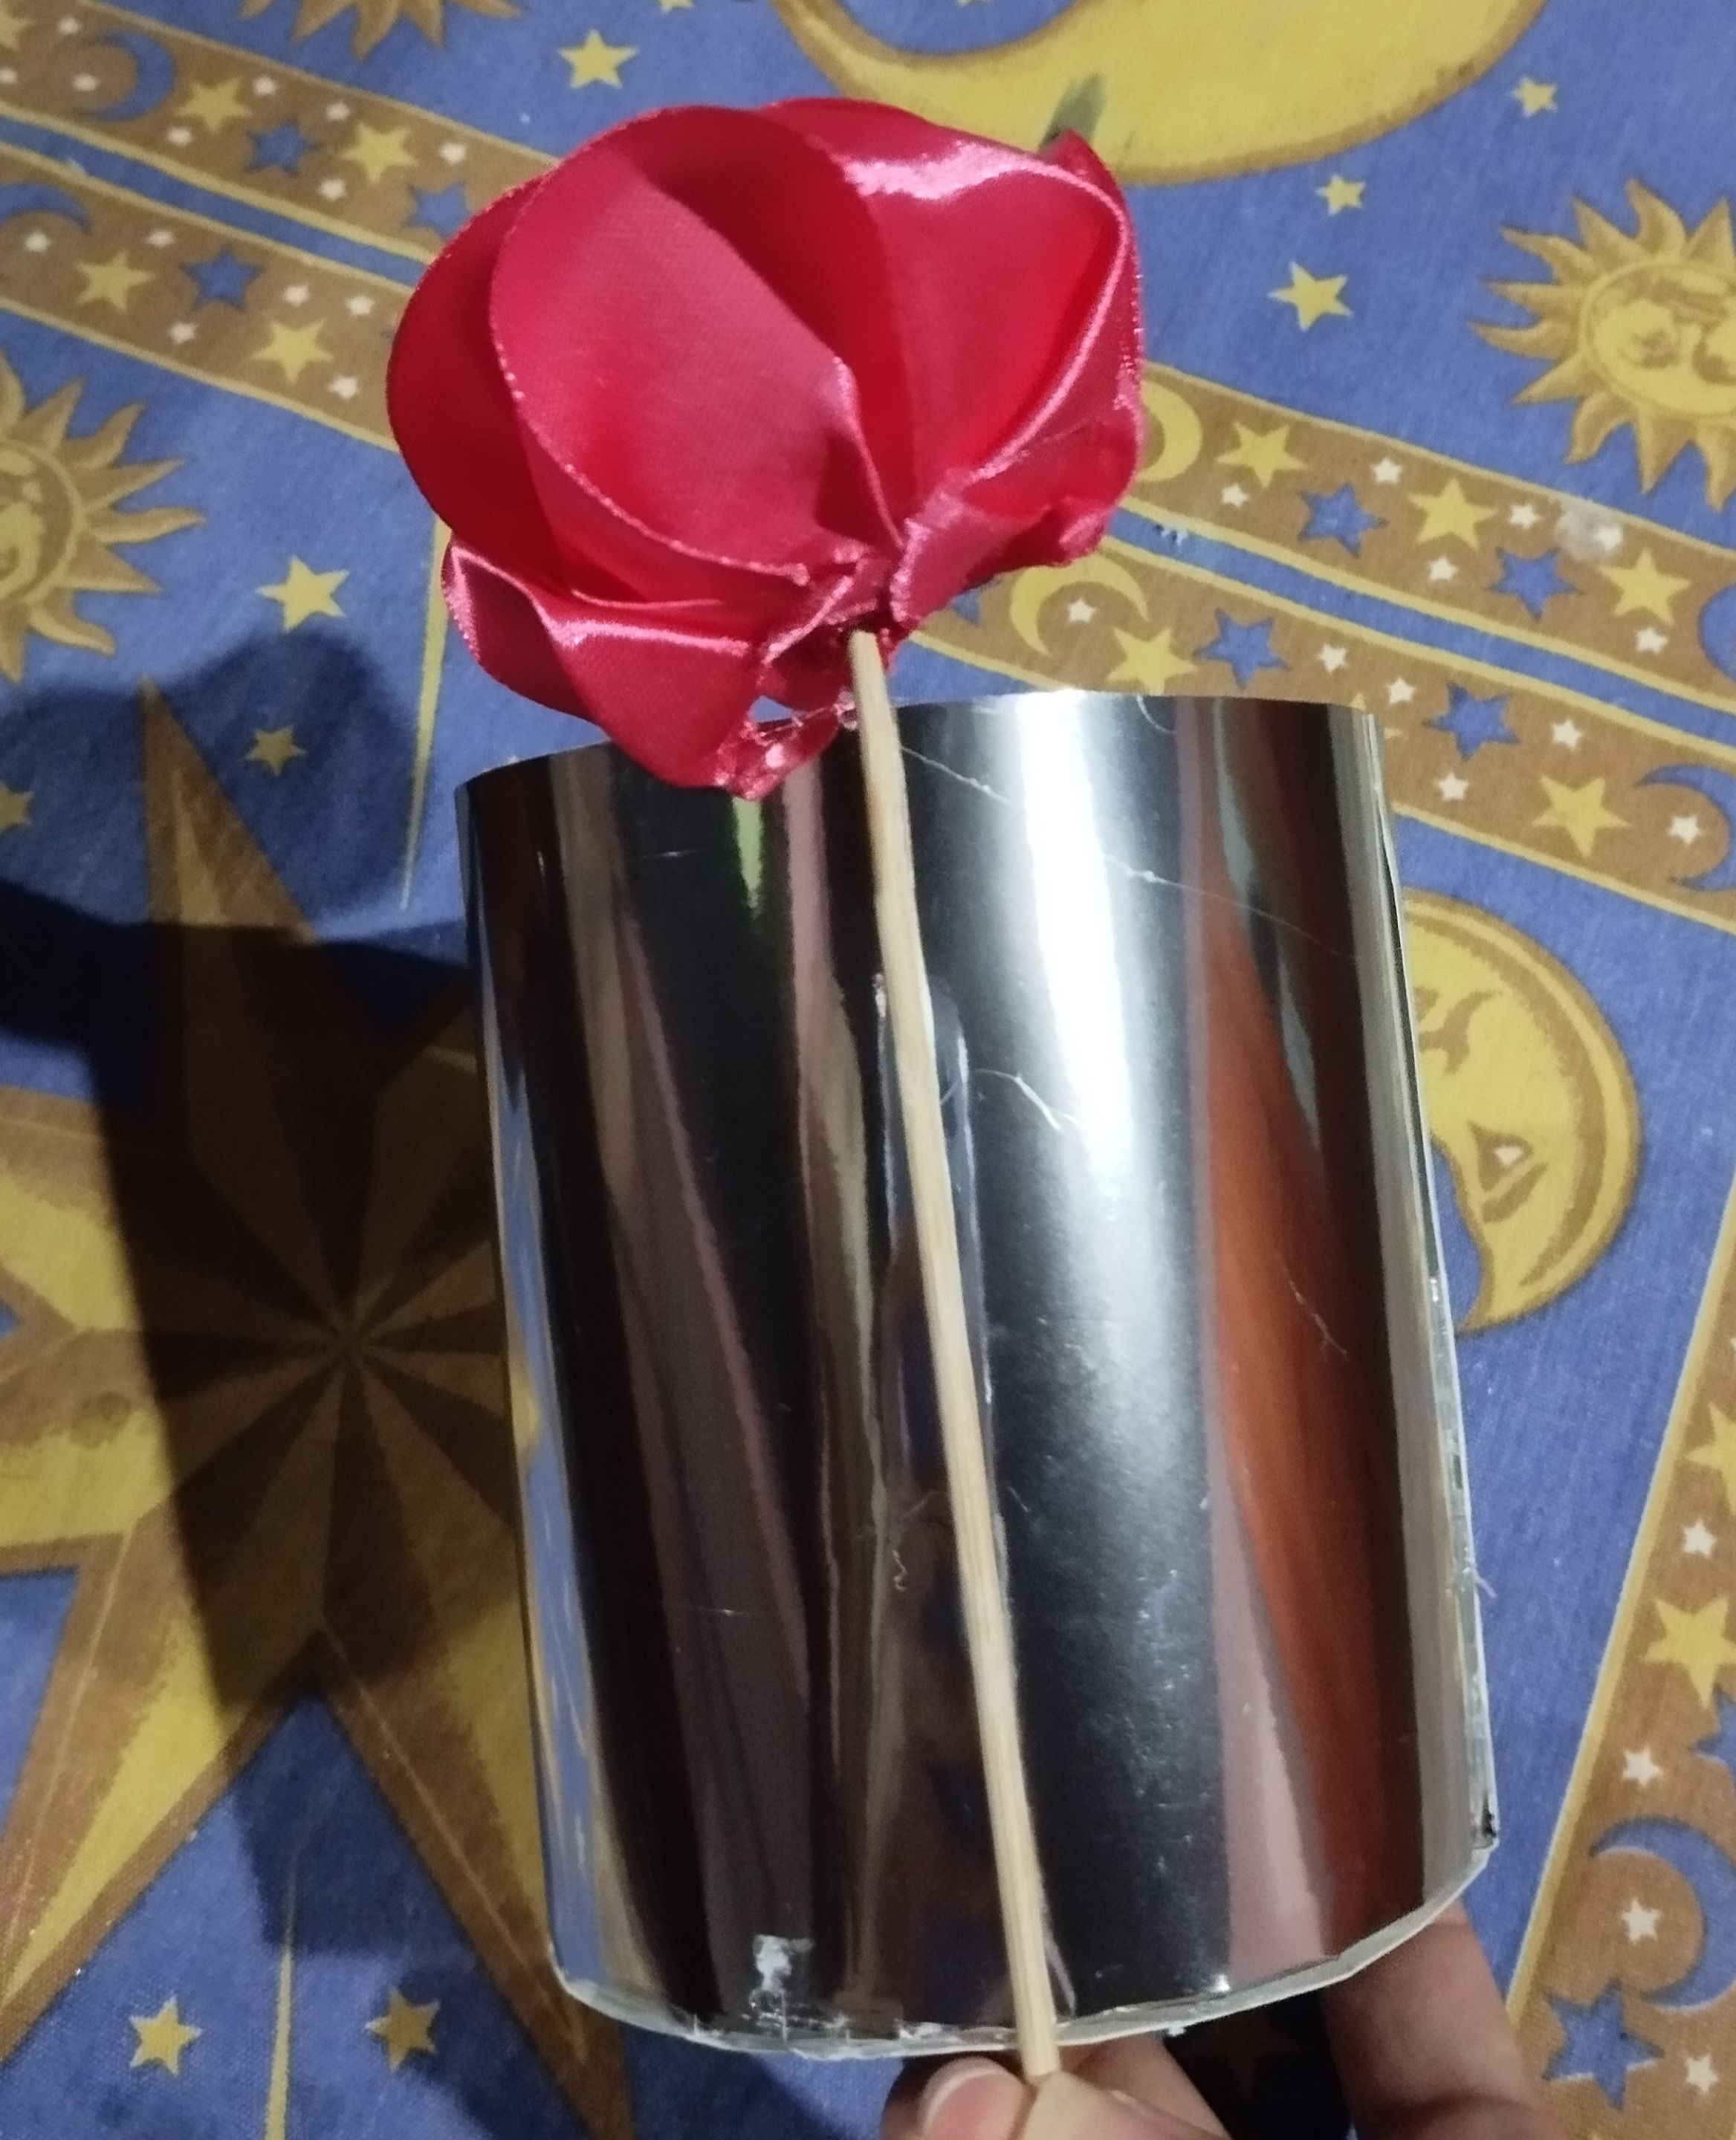
|||| |---|---|---| ||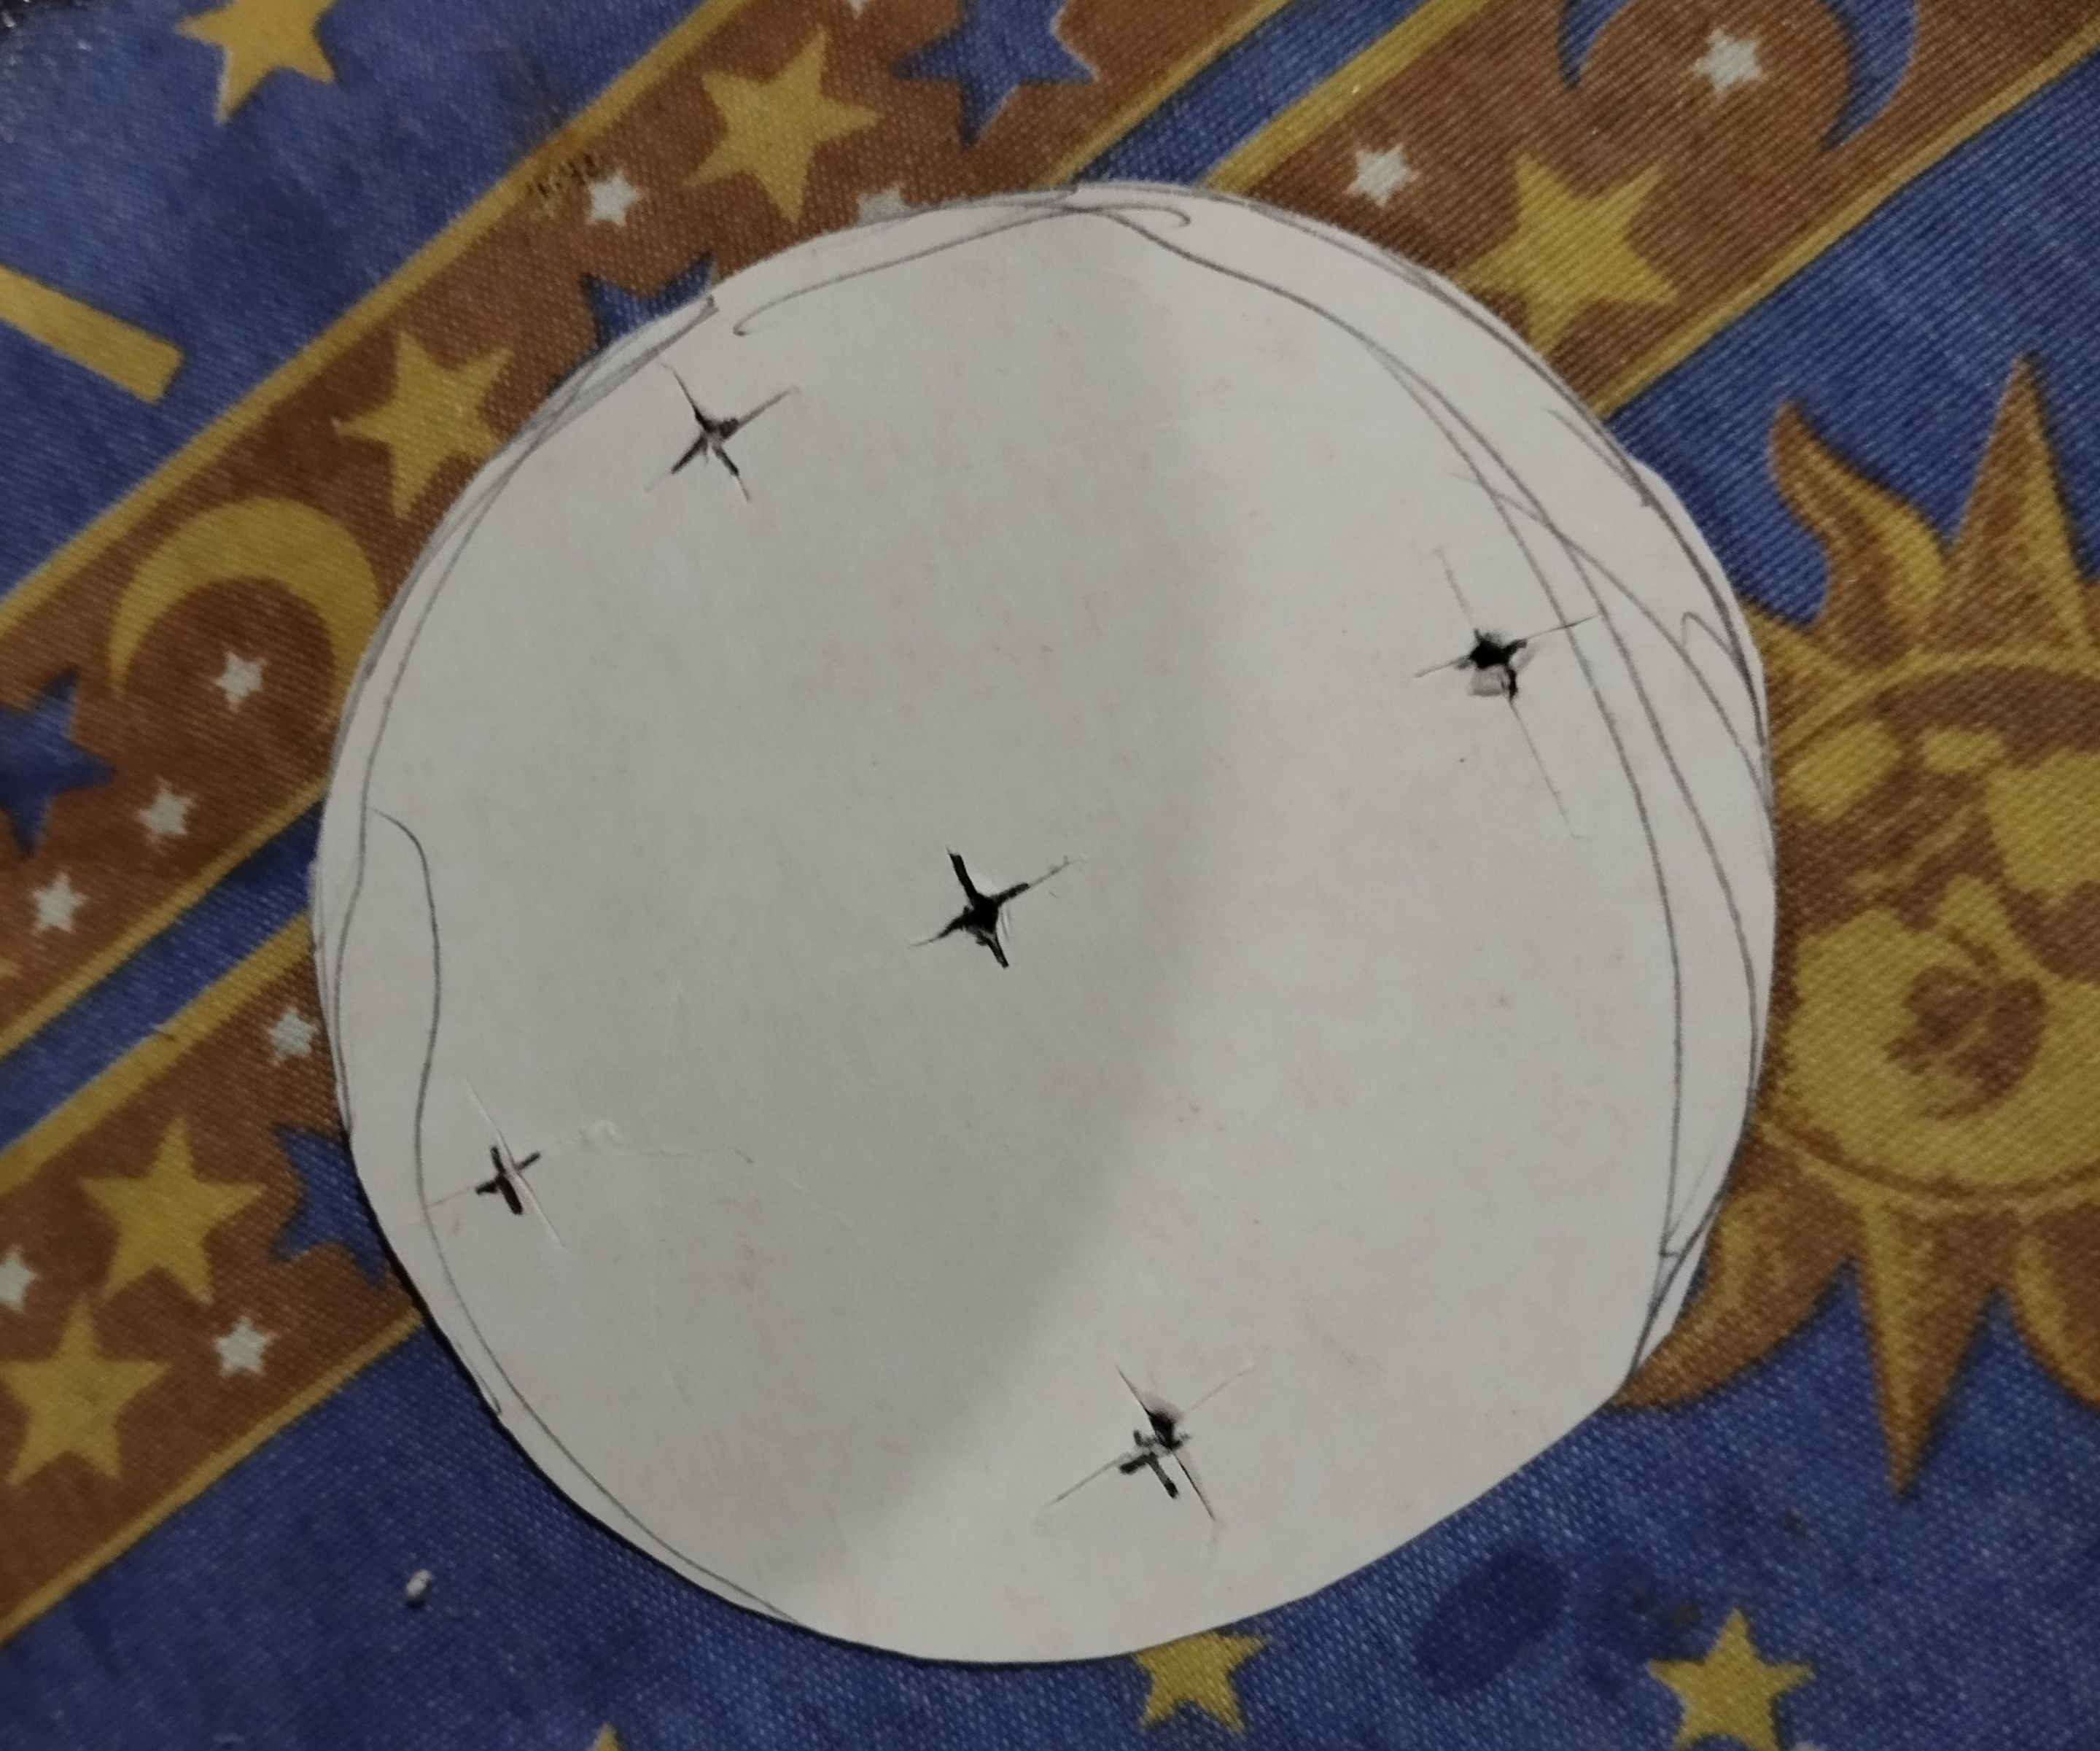|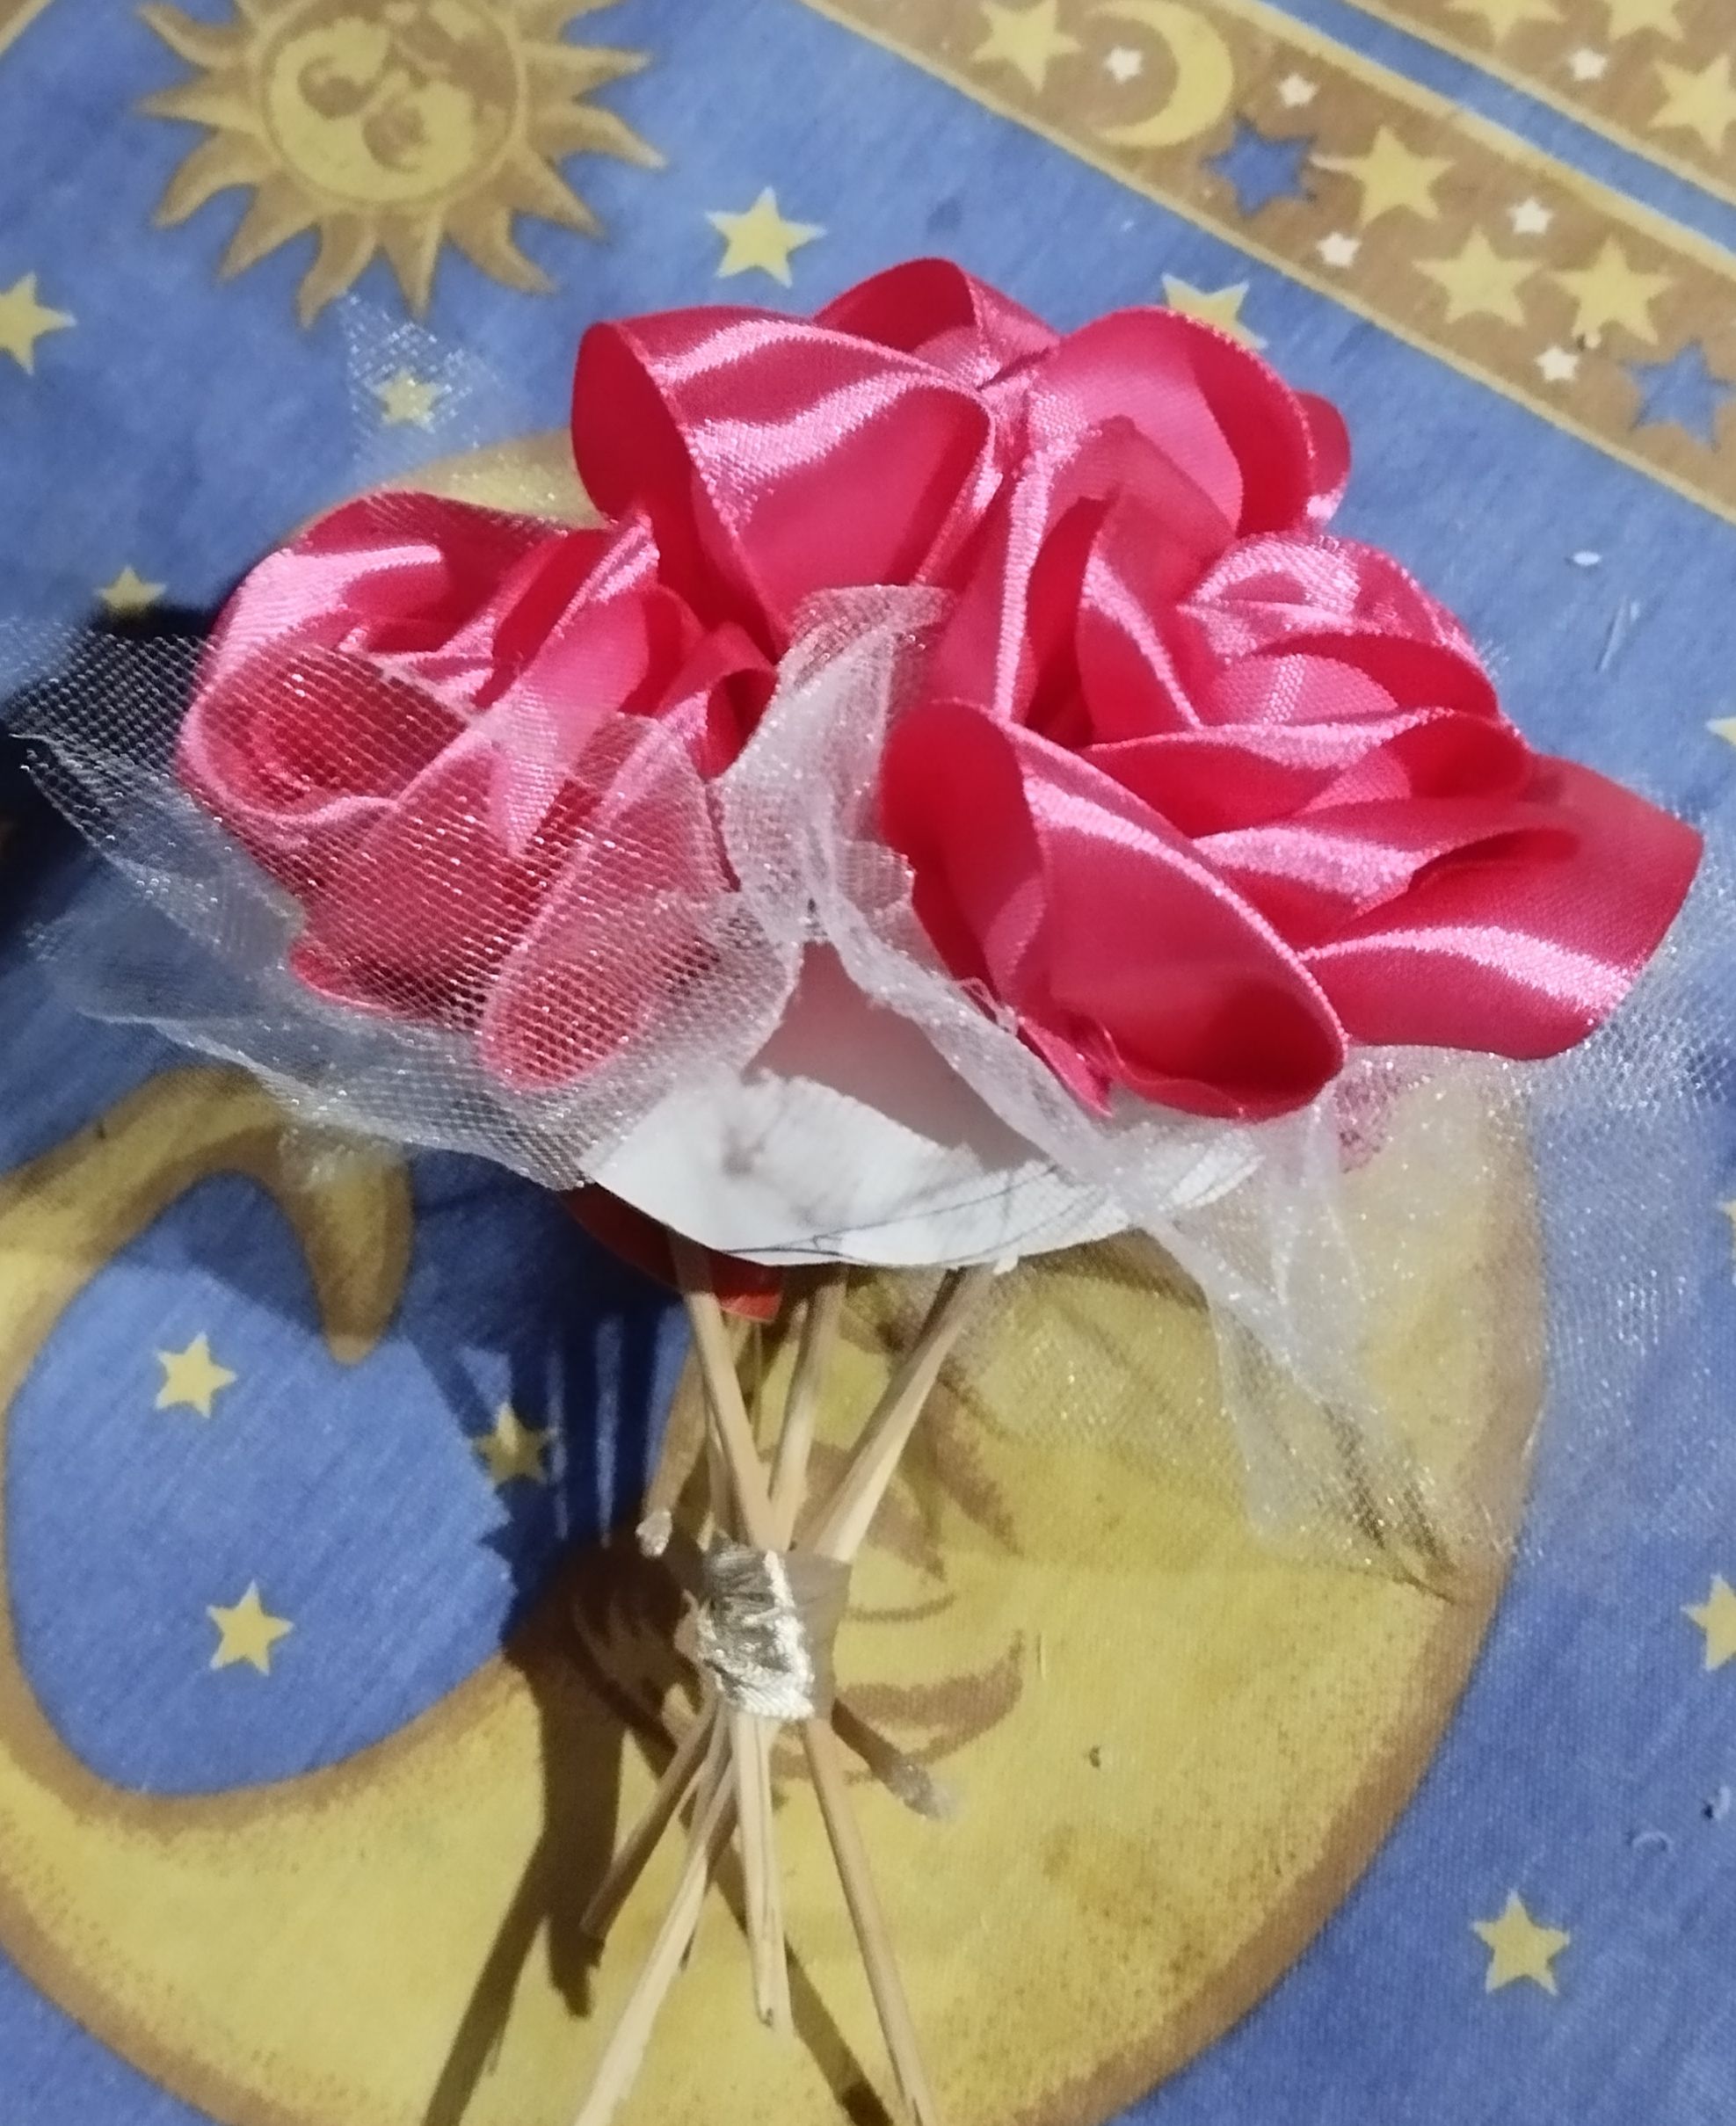| |||| |---|---|---| |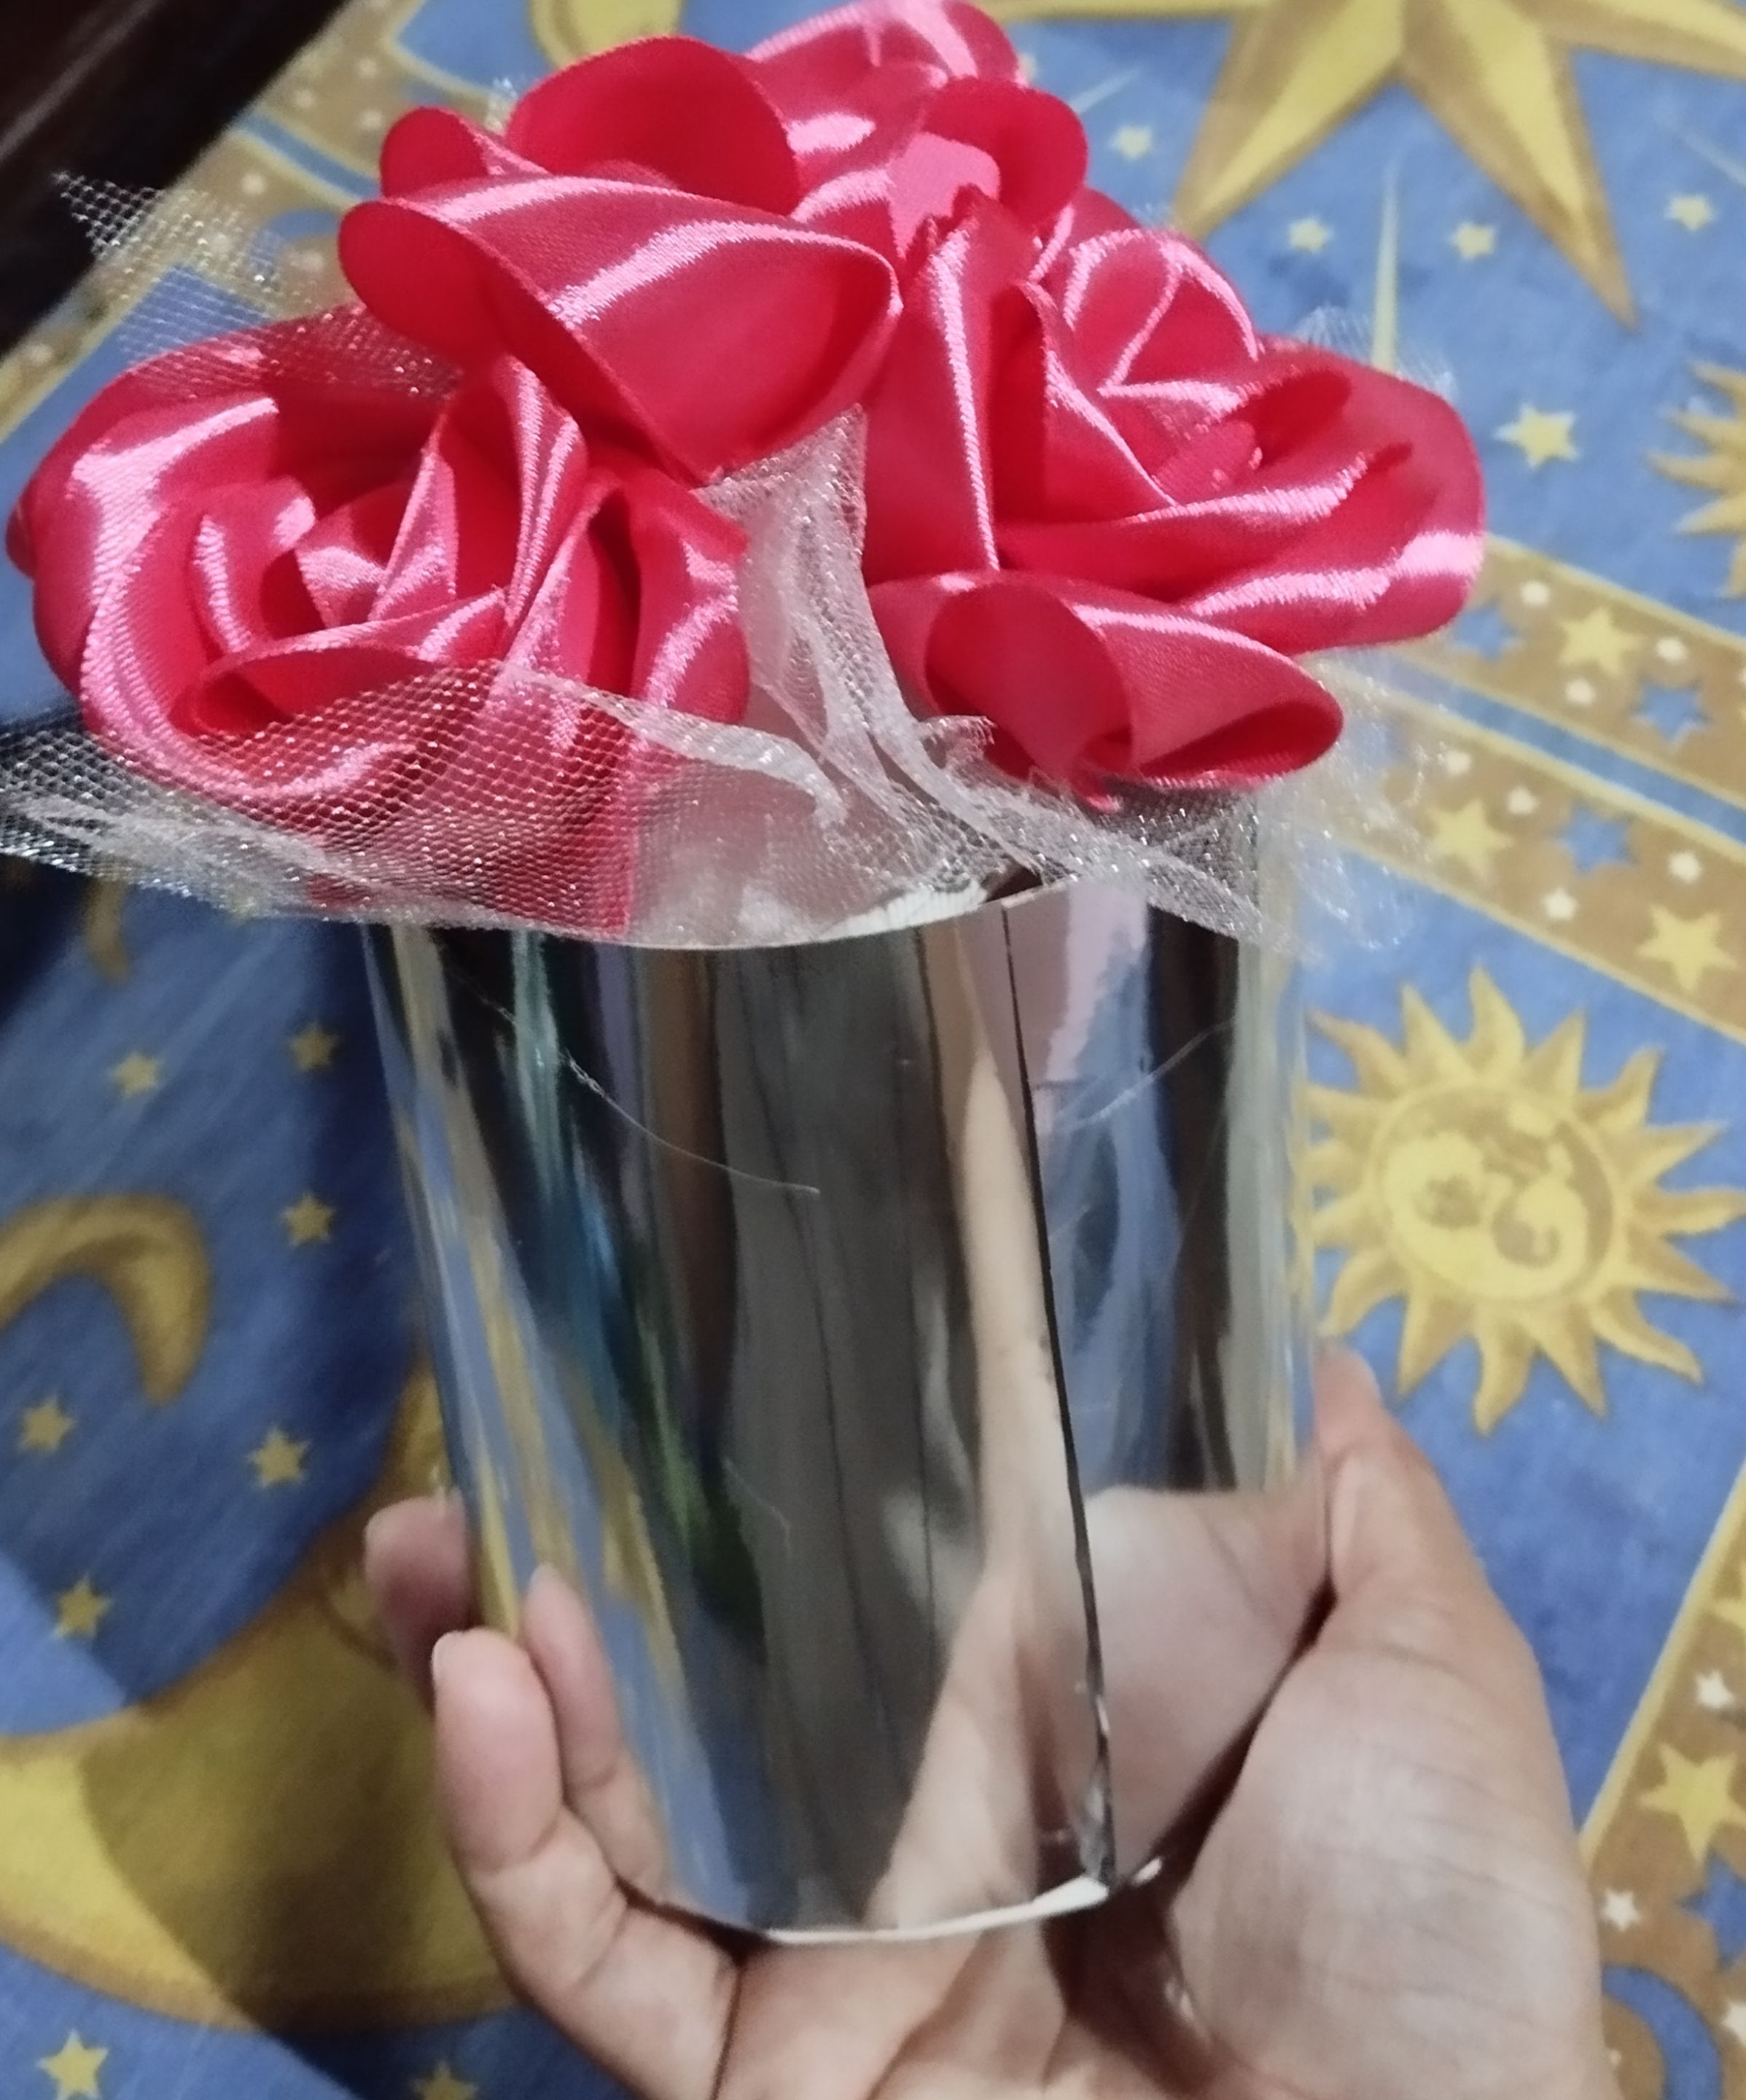||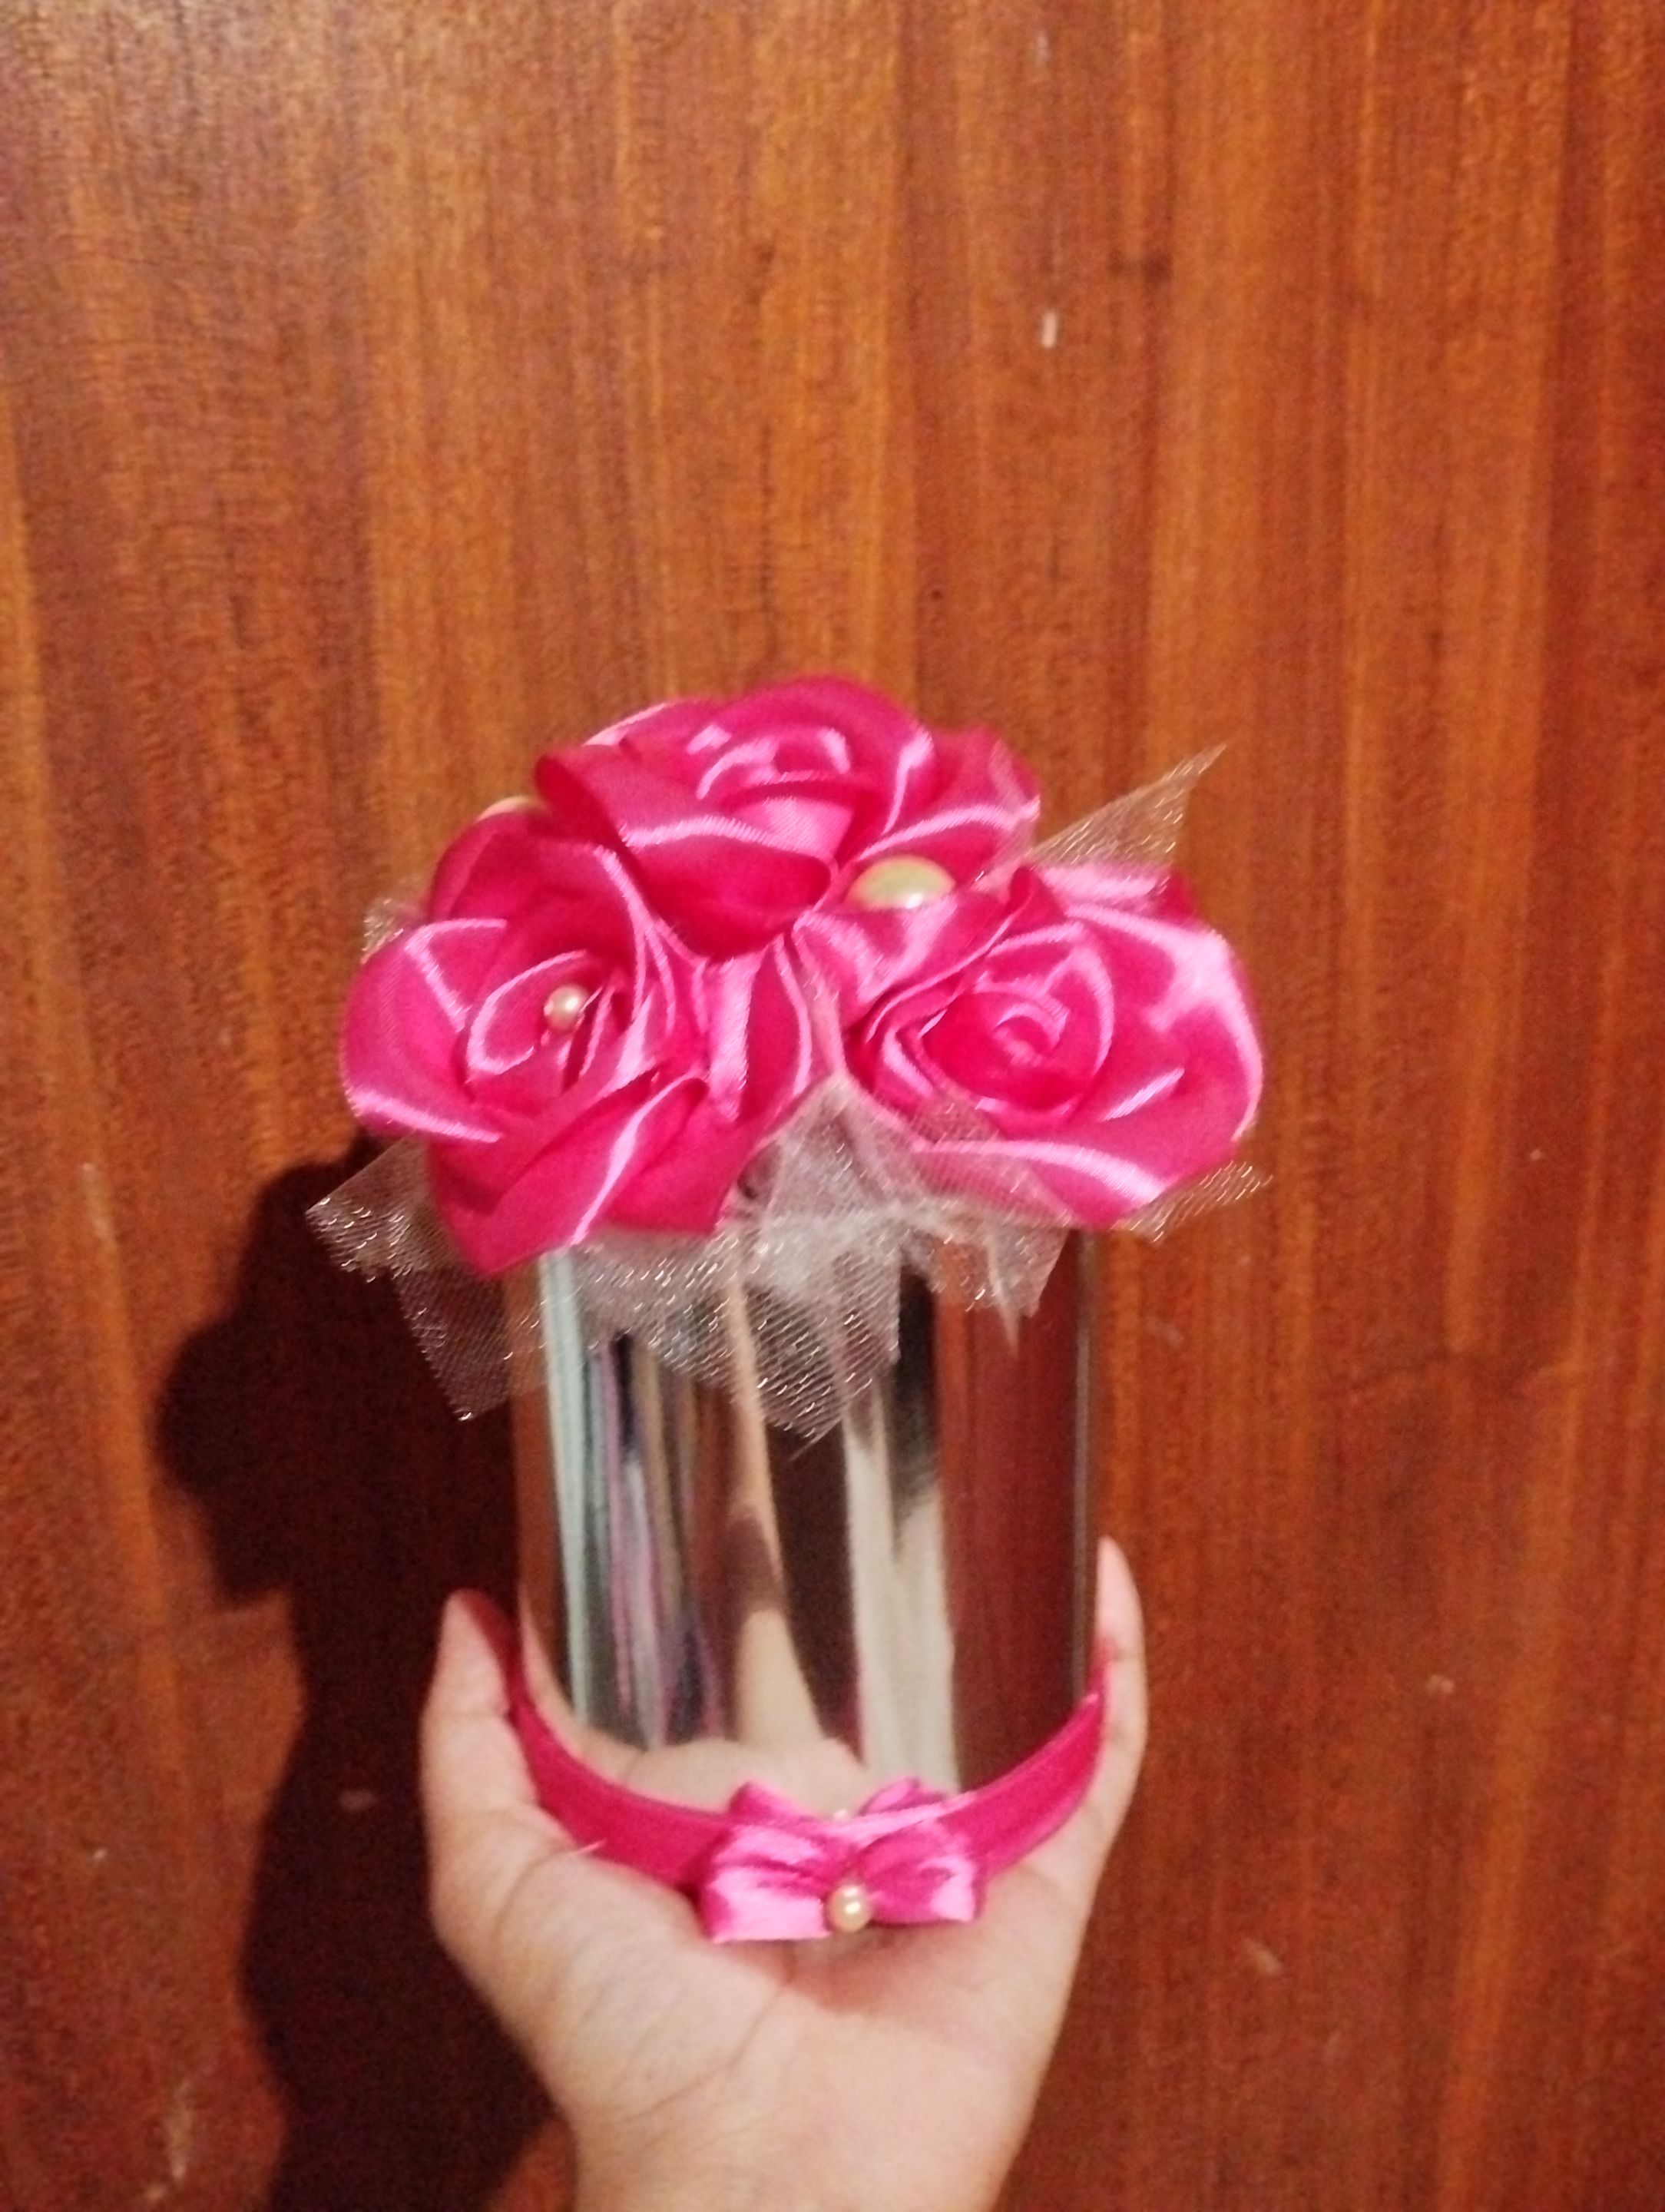| **#6 Recorte unos cuadrados de tul y los puse en la parte de abajo de las rosas, le agregué unos puntitos de silicón caliente al tul para crear más pliegues y fijar bien la tela, luego recorté un círculo en dónde marqué 5 puntos en dónde van a ir las flores insertadas, introduje las rosas en el círculo de cartulina , a los extremos de los palillos de altura los asegure con una tira para que no se movieran, le puse silicón caliente al borde del círculo de cartulina para asegurar la pieza de las rosas dentro del cilindro plateado. Acomode un poco las rosas abriendo los pétalos para darle más vistosidad, y para decorar le pegue 3 perlas grandes , y en el centro de cada rosa un perla pequeña blanca.Por último para tapar el borde inferior del cilindro plateado ,le pegue una cinta del mismo tono que las rosas y le hice un pequeño lacito con una perla en el medio para decorar.**
English Version
**#6 Cut out some squares of tulle and placed them on the bottom of the roses, I added some hot glue dots to the tulle to create more folds and hold the fabric in place, then I cut out a circle where I marked 5 points where the inserted flowers will go, I inserted the roses into the cardboard circle, at the ends of the height sticks I secured them with a strip so they wouldn't move, I put hot glue on the edge of the cardboard circle to secure the rose piece inside the silver cylinder. I arranged the roses a bit by opening the petals to make it more attractive, and to decorate I glued 3 large pearls, and in the center of each rose a small white pearl. Finally, to cover the bottom edge of the silver cylinder, I glued a ribbon of the same shade as the roses and made a small bow with a pearl in the middle to decorate.**
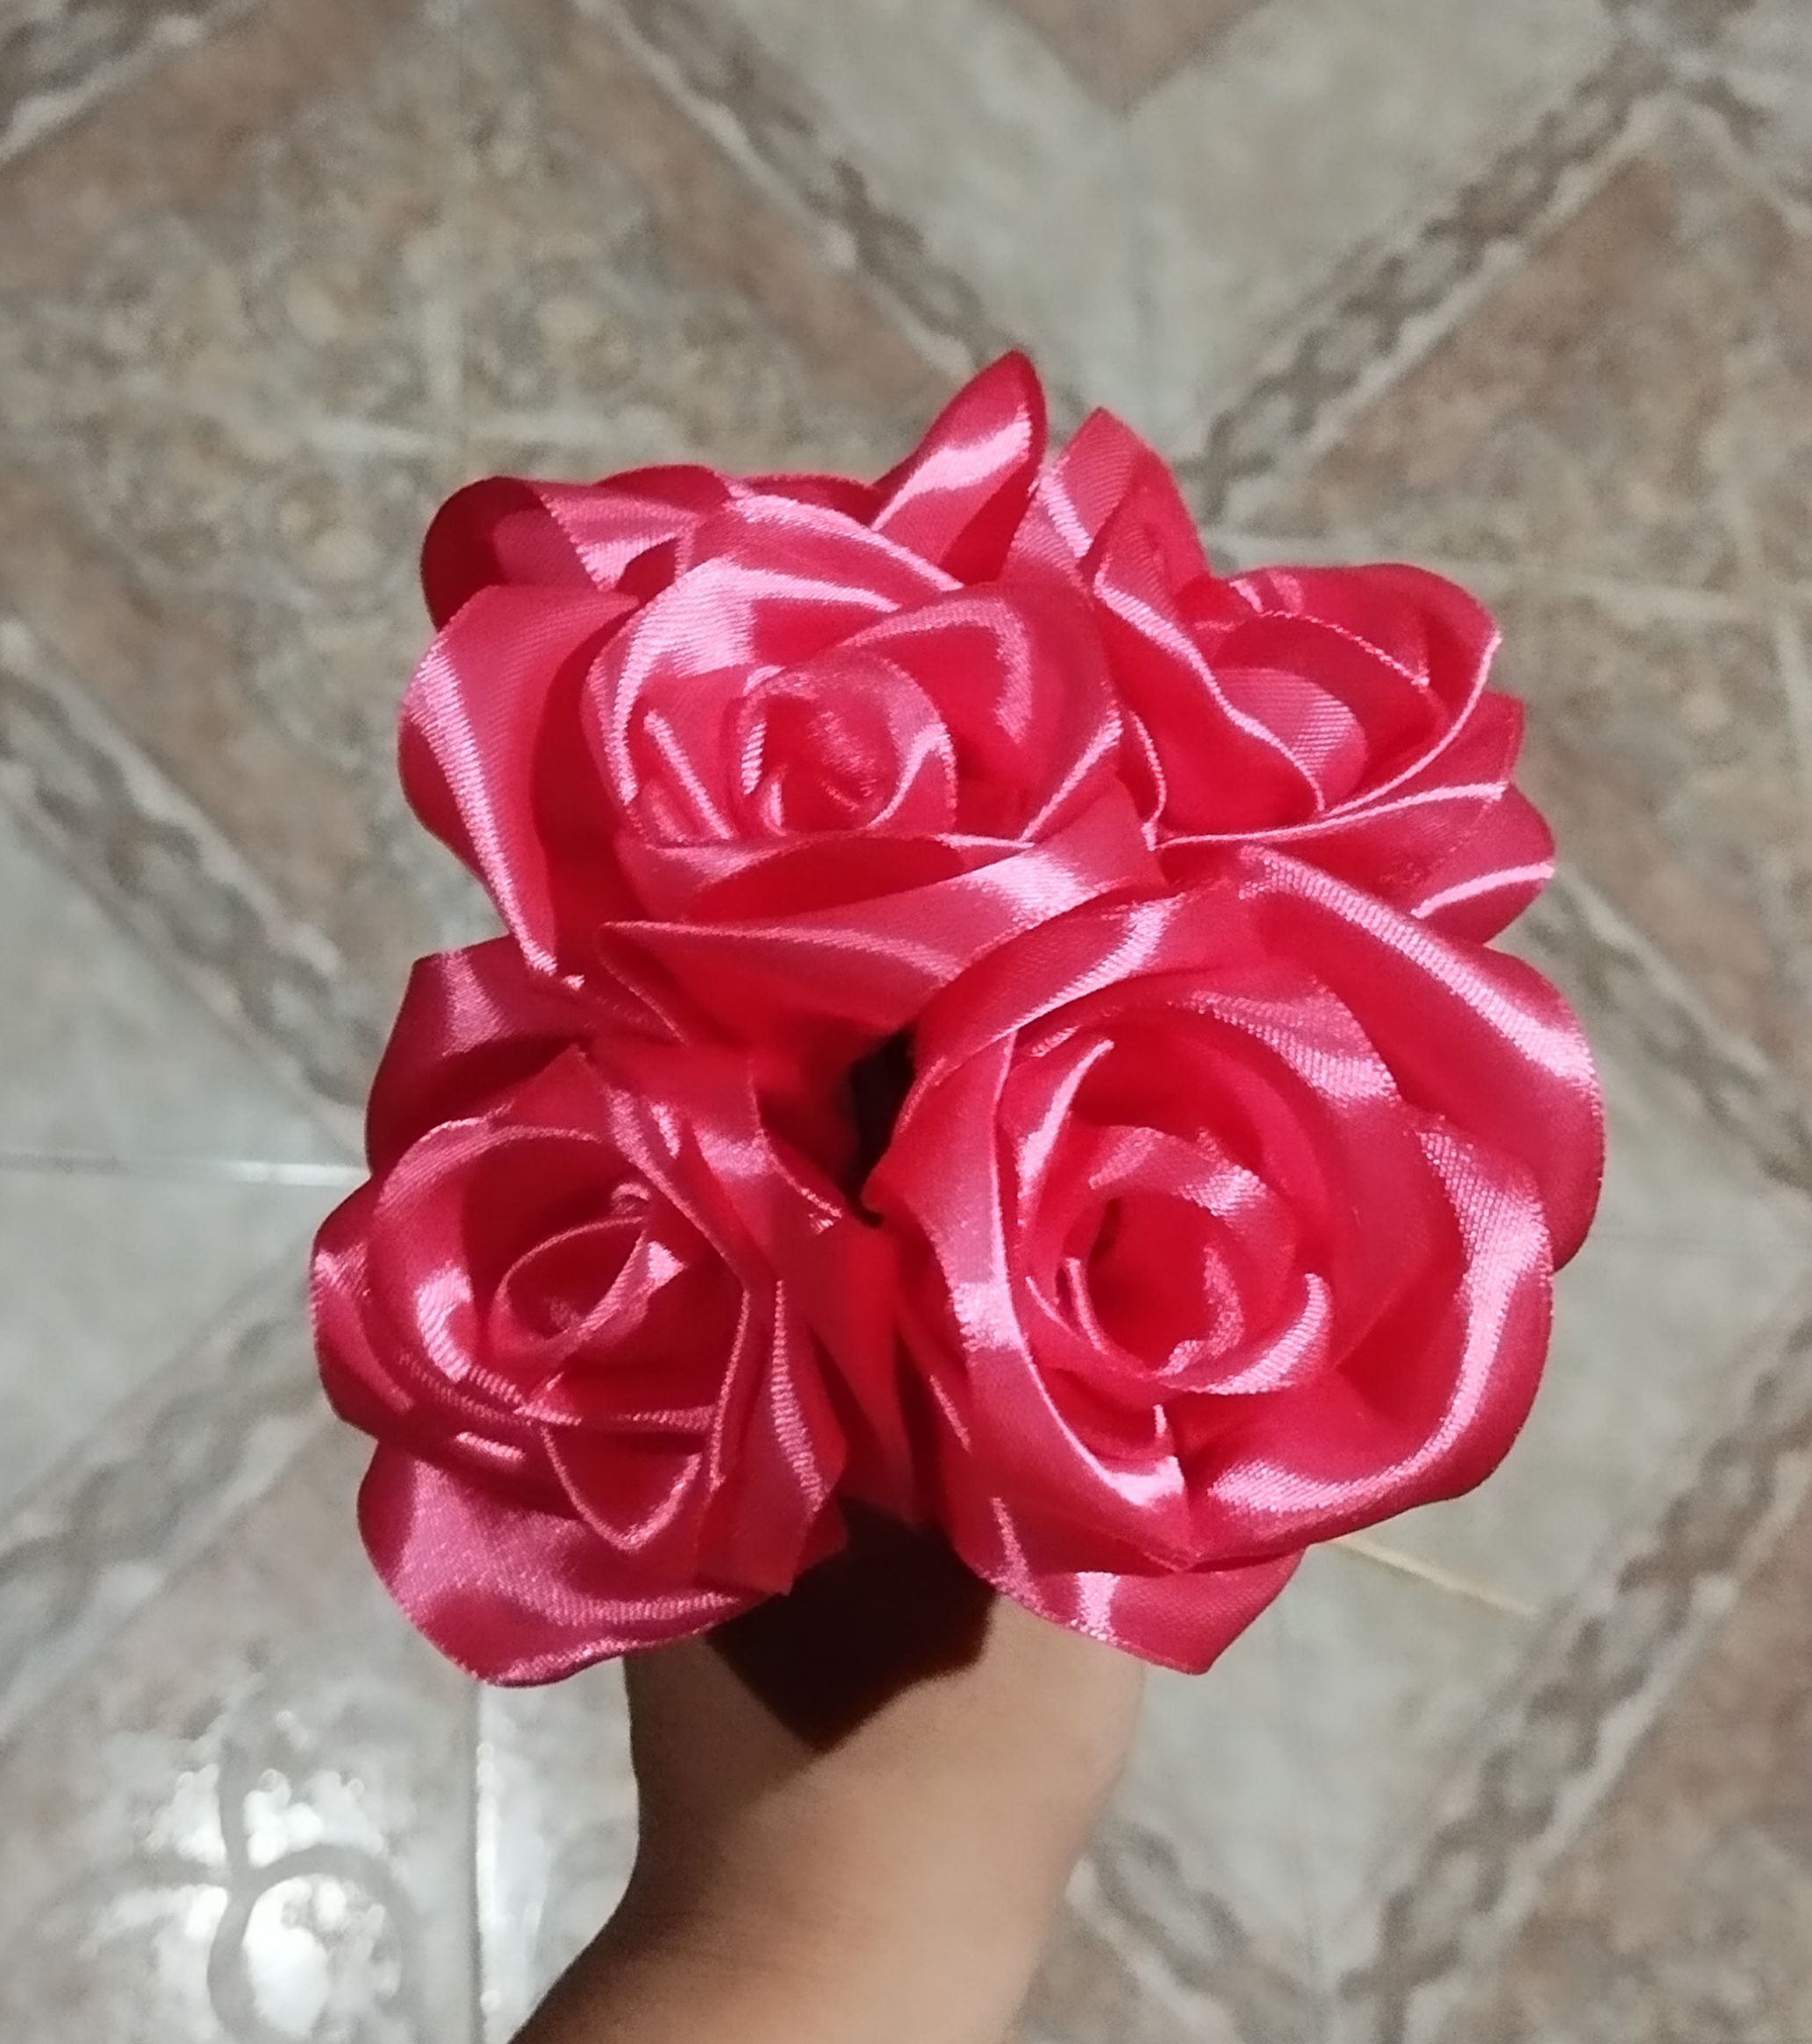
|||| |---|---|---| |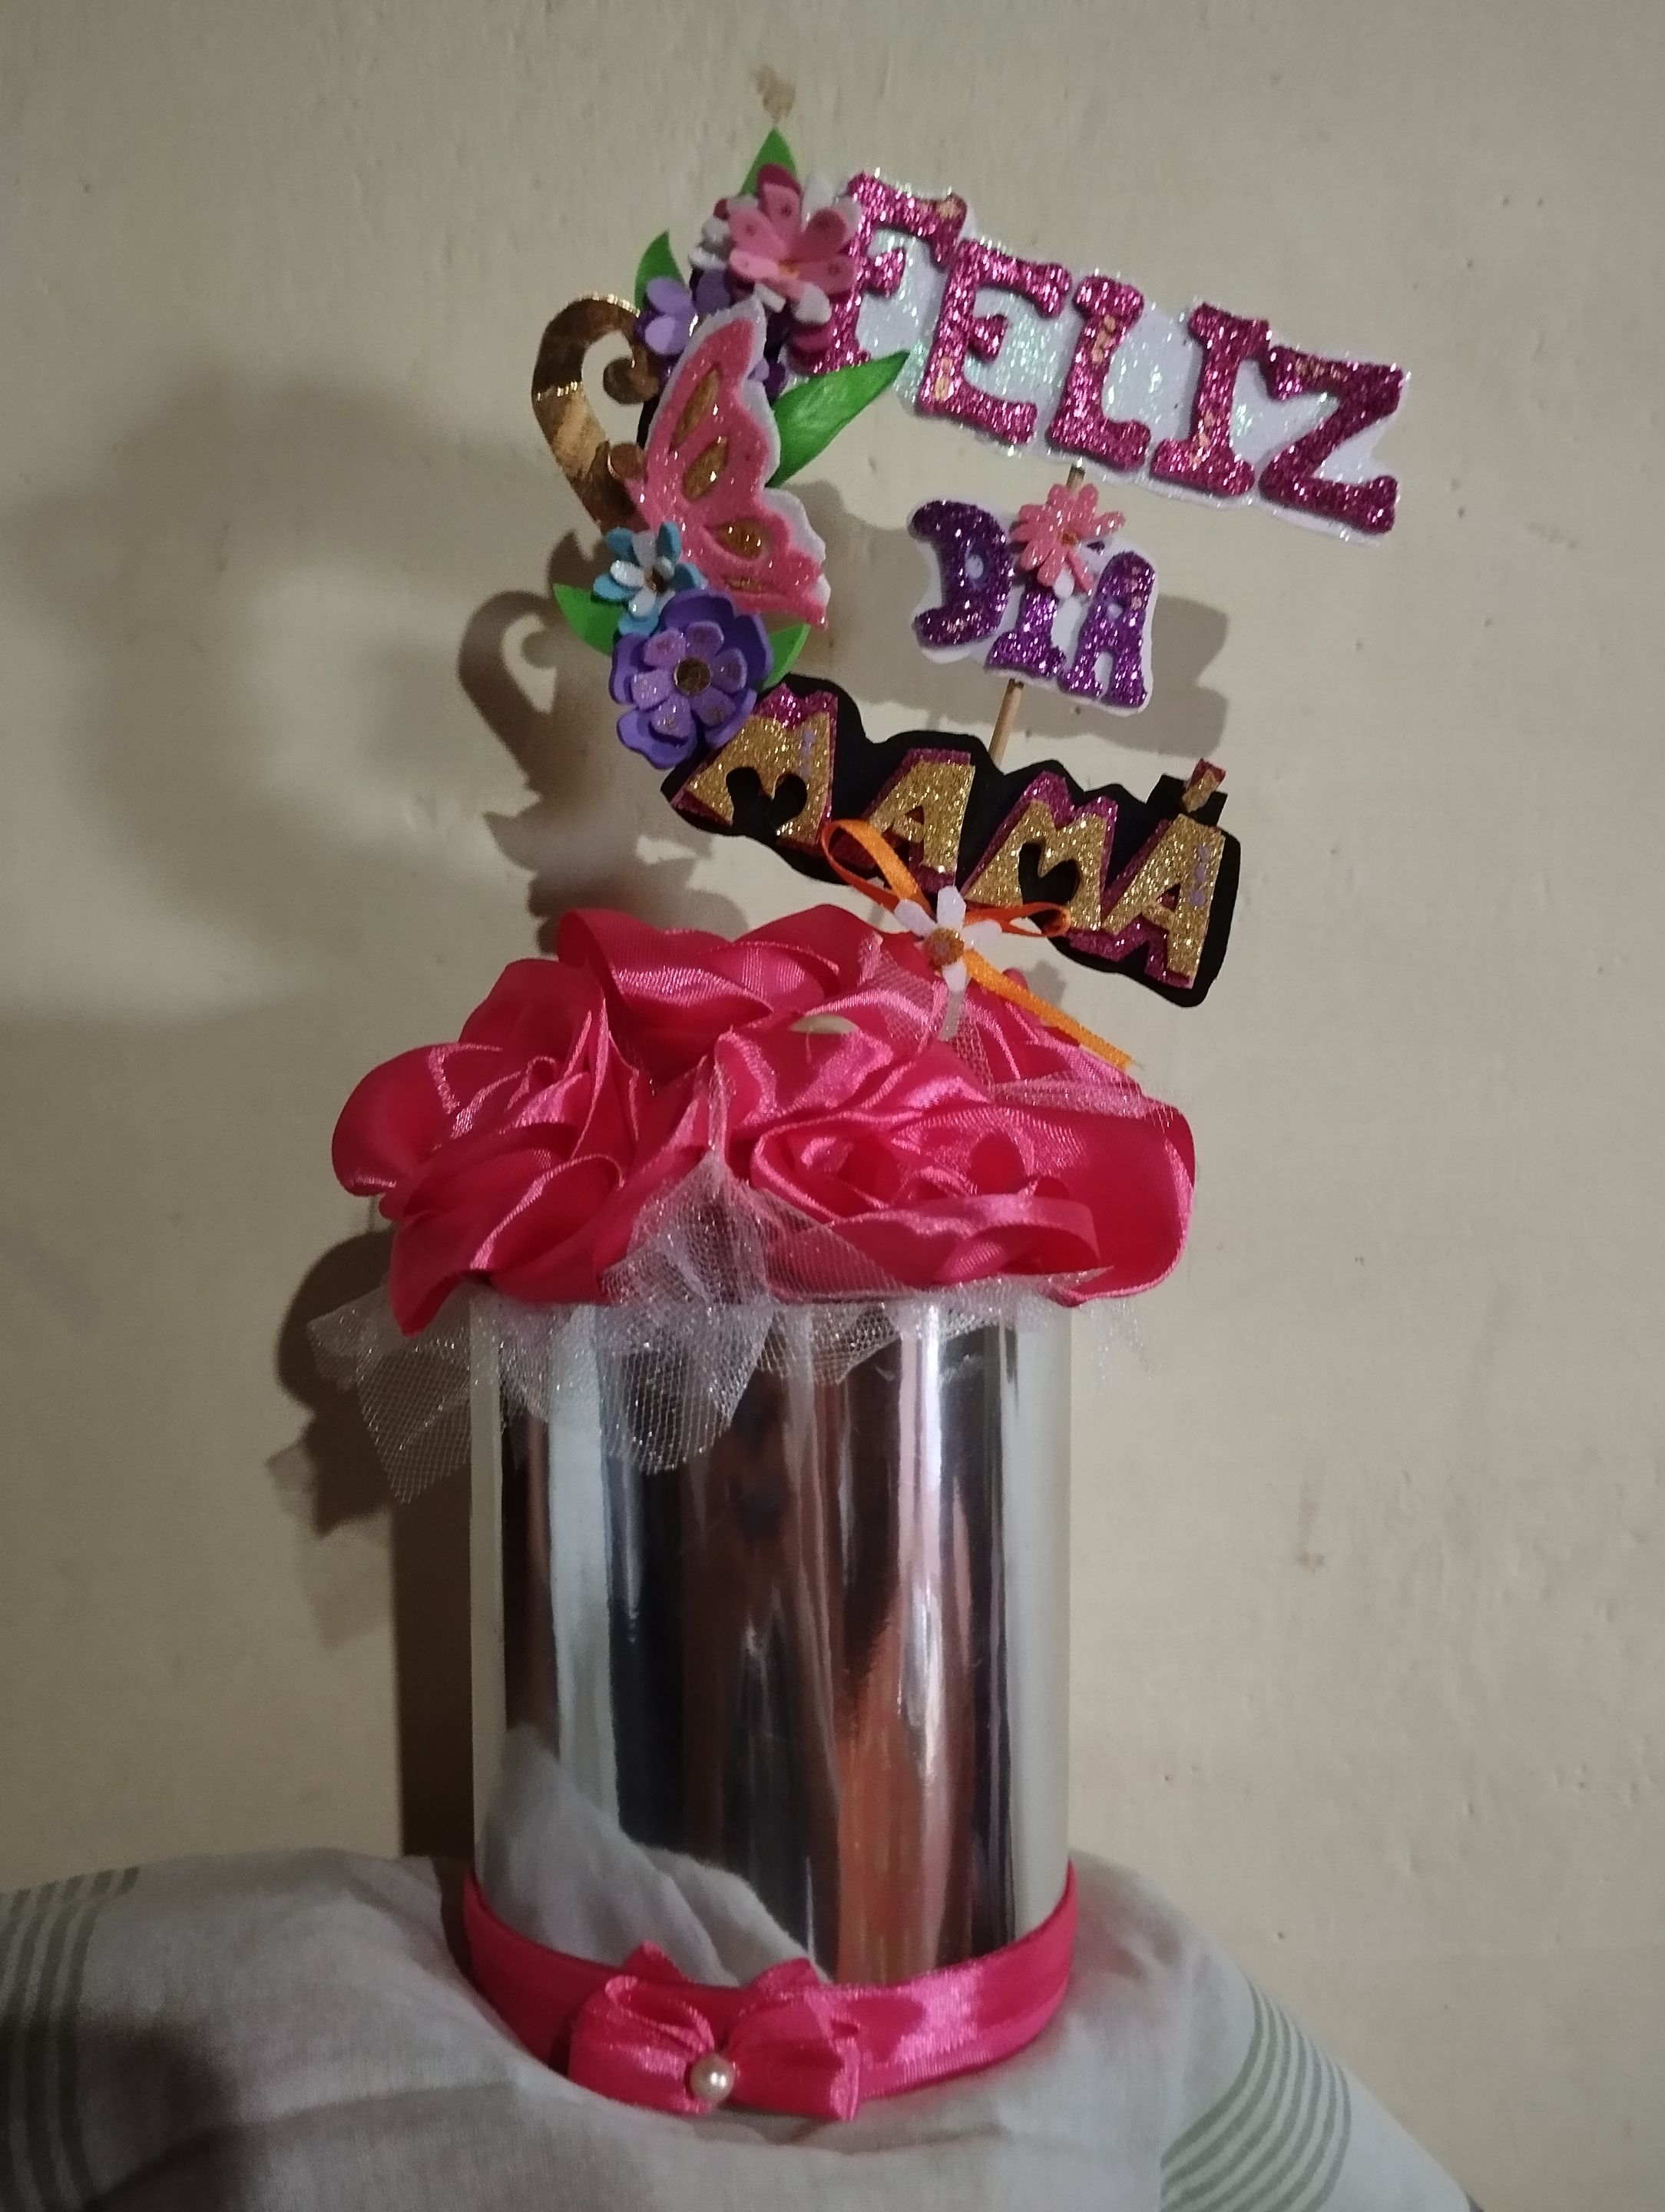|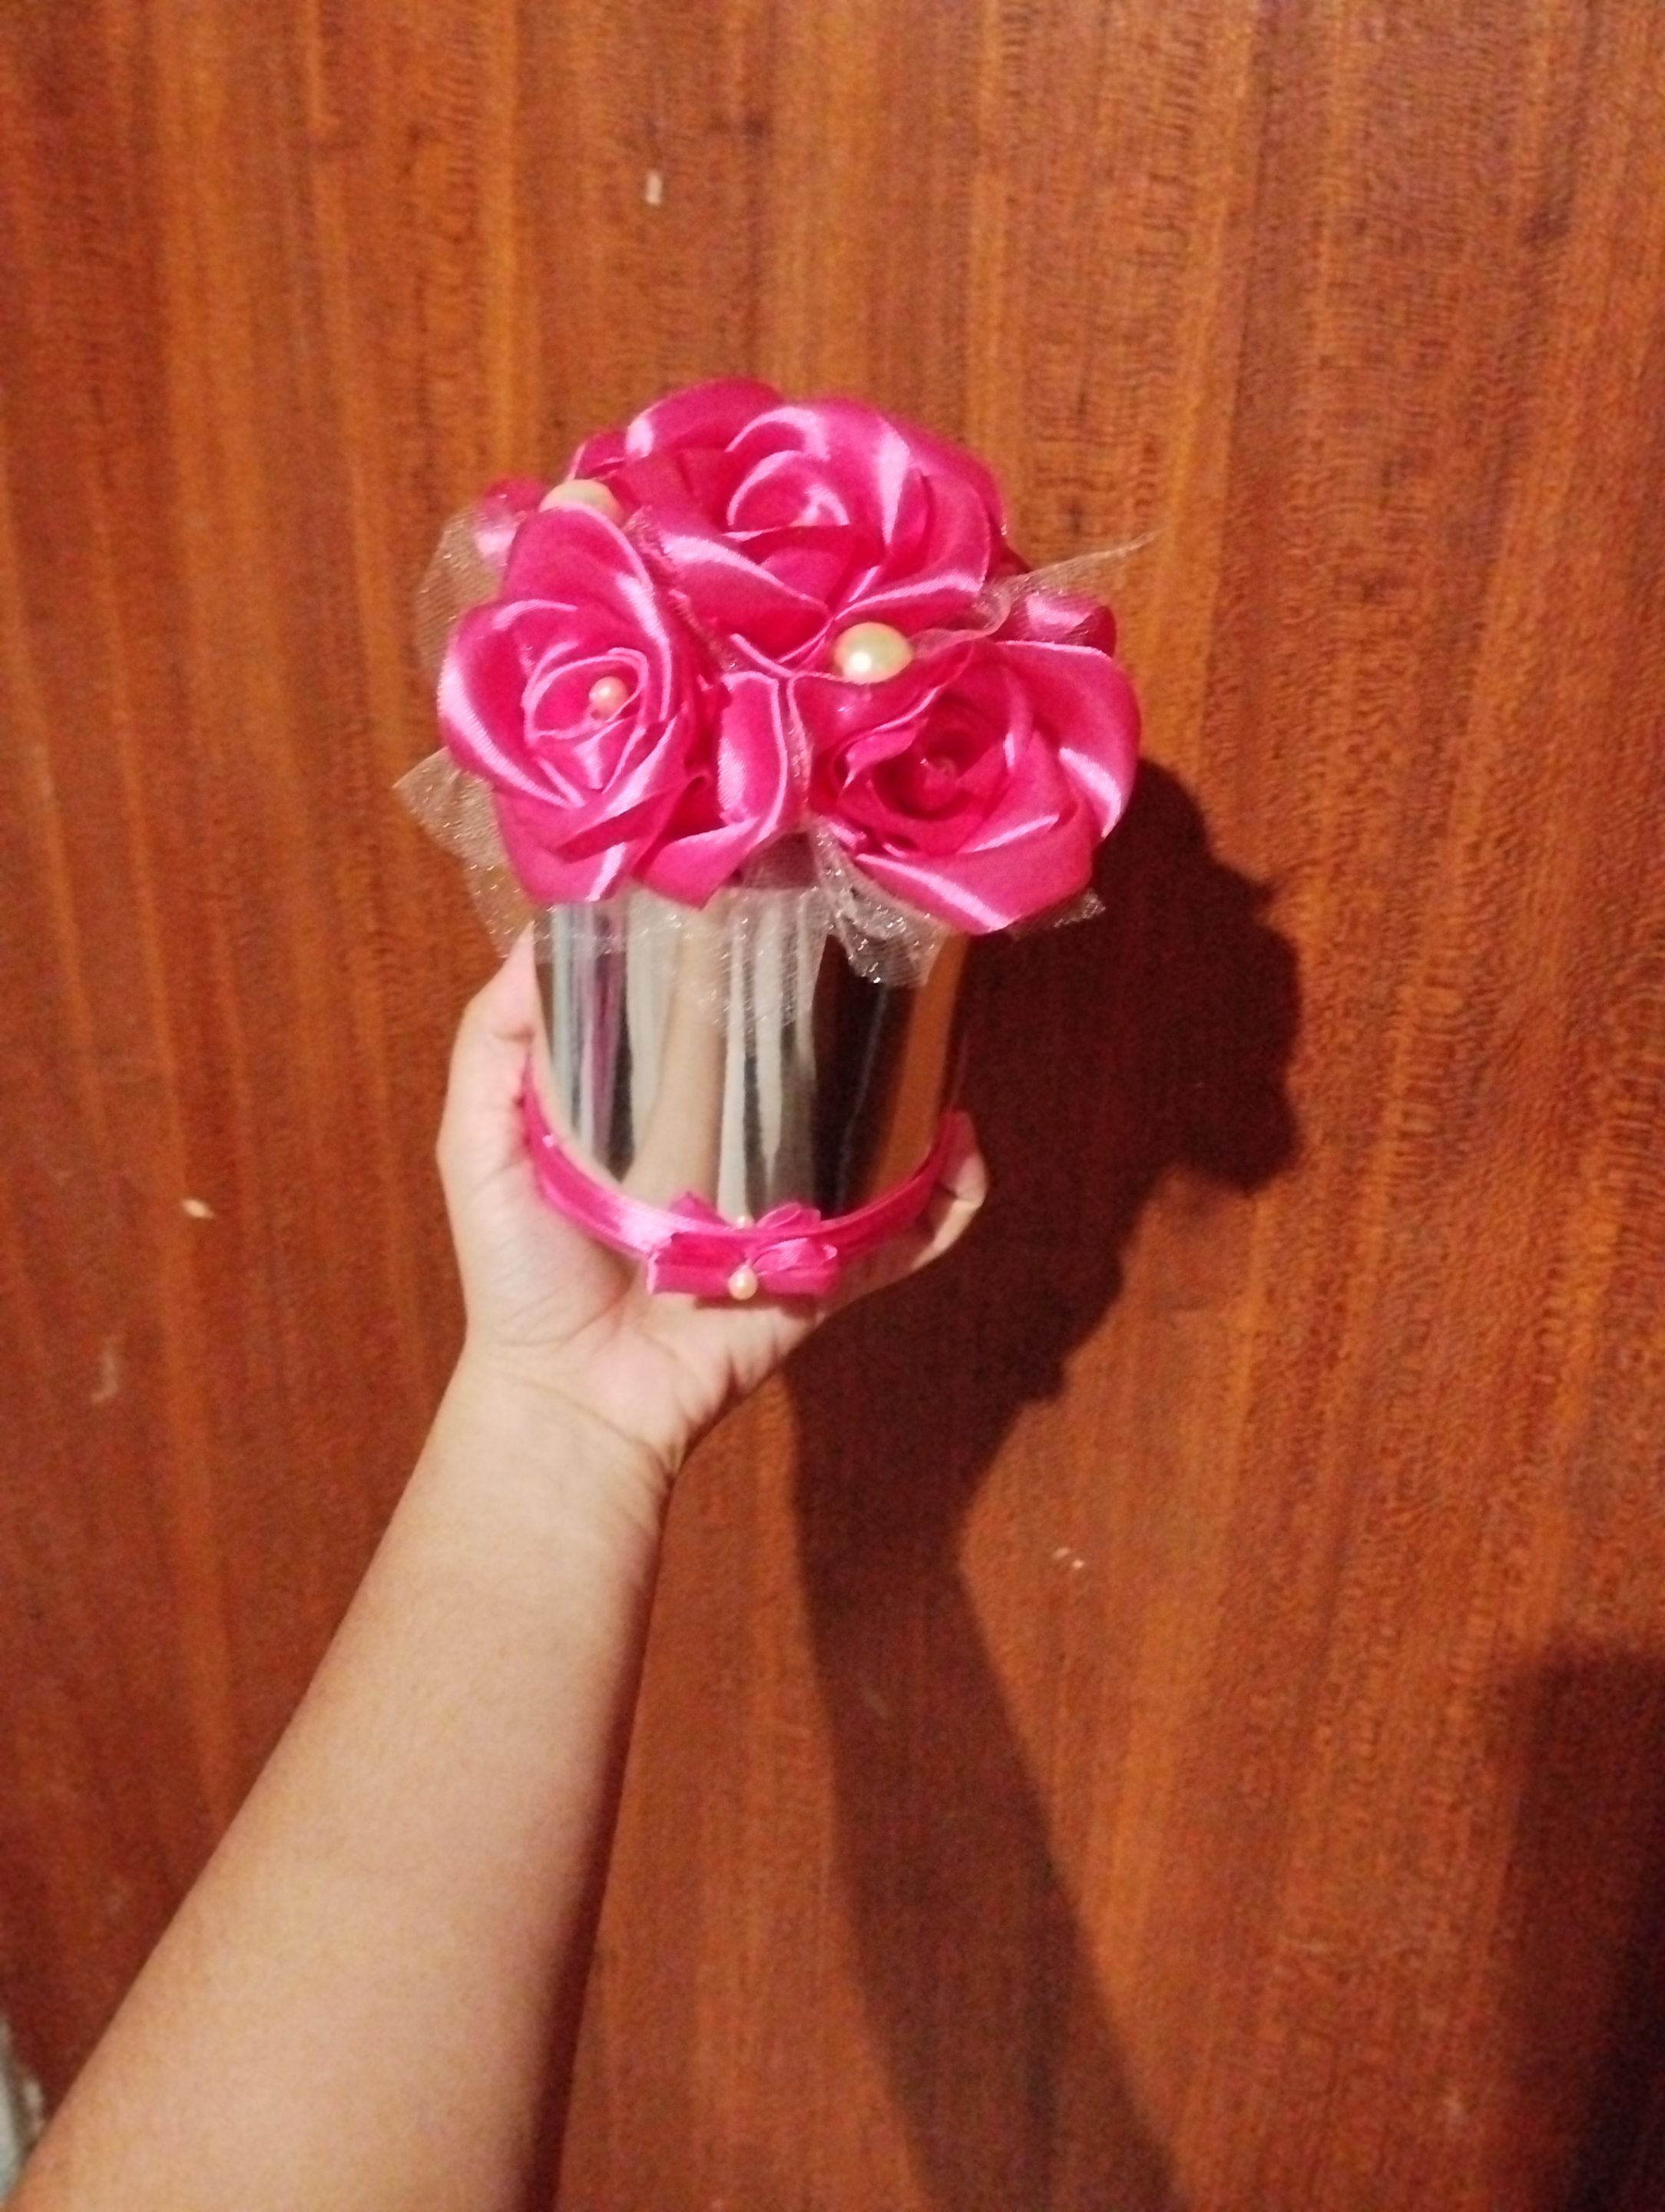|| **Y listo! Este sería el resultado ! Es un lindo arreglo de rosas eternas, lo que más lleva tiempo es hacer los pétalos de las rosas pero se pueden hacer por tandas y se arman las rosas bastante rápido una vez que tengan los pétalos, para completar el arreglo le agregué un Topper de decoración hecho en foami Alusivo al día de la madre ,que hace que el arreglo luzca aún más lindo 💕✨.** **Muchas gracias por leerme !un feliz día de las madres tardío para todas las madrecitas hermosas que conforman está bella comunidad de hive , espero que la hayan pasado muy bien.🤭💜✨ Espero que les haya gustado el post!** **Fotos tomadas por mí en mi equipo Redmi note 12 editadas en Pics art y gif realizado en app creador de GIFs texto traducido en Google traductor.**
English Version
**And that's it! This is the result! It's a beautiful arrangement of eternal roses. The longest part is making the rose petals, but you can do them in batches, and the roses come together pretty quickly once you have the petals. To complete the arrangement, I added a decorative topper made of foam alluding to Mother's Day, which makes the arrangement look even prettier 💕✨.** **Thank you so much for reading! A belated Happy Mother's Day to all the beautiful mothers who make up this beautiful hive community. I hope you had a great time. 🤭💜✨ I hope you liked the post!** **Photos taken by me on my Redmi note 12 device edited in Pics art and gif made in the GIF creator app, text translated in Google translator.**
💜✨💜