Hola muy buenas noches tengan todos los amigos de la comunidad, un abrazo fraternal desde la distancia , en la noche de hoy , les traigo como realizar un Perchero ,este lo realicé para mi casco y los de mi familia, con la finalidad de tenerlos en un lugar seguro y lo más importante de todo mantener el orden en el hogar , de esta manera no andarán rodando y tendrán más protección , es un proceso sumamente sencillo y fácil de realizar, lo mejor con poco material
Good evening, everyone in the community. A warm hug from afar. Tonight, I'm going to show you how to make a coat rack. I made this one for my helmet and my family's helmets, so we can keep them in a safe place and, most importantly, keep our home tidy. so they won't be rolling around and will be better protected. It's an extremely simple and easy process, and best of all, it requires very few materials.

Materiales para realizar un Perchero : -Tabla de madera -Palo de cepillo reciclado -Clavos de una pulgada y media -Martillo -Serrucho -Pincel -Pinturas
Materials needed to make a coat rack: -Wooden board -Recycled brush stick -1.5-inch nails -Hammer -Handsaw -Pencil -Painting

Pasos para realizar nuestro Perchero : Paso número 1 : en nuestro primer paso vamos a comenzar tomando la tabla de madera , vamos a medir para saber que largo o tamaño deseamos que tenga nuestro Perchero , en lo personal elegí un metro y marqué el largo de un metro en la tabla, así existiría distancia entre ambos cascos
Steps to make our coat rack: Step 1: In our first step, we will start by taking the wooden board and measuring it to determine the length or size we want our coat rack to be. Personally, I chose one meter and marked the length of one meter on the board, so there would be distance between both helmets.
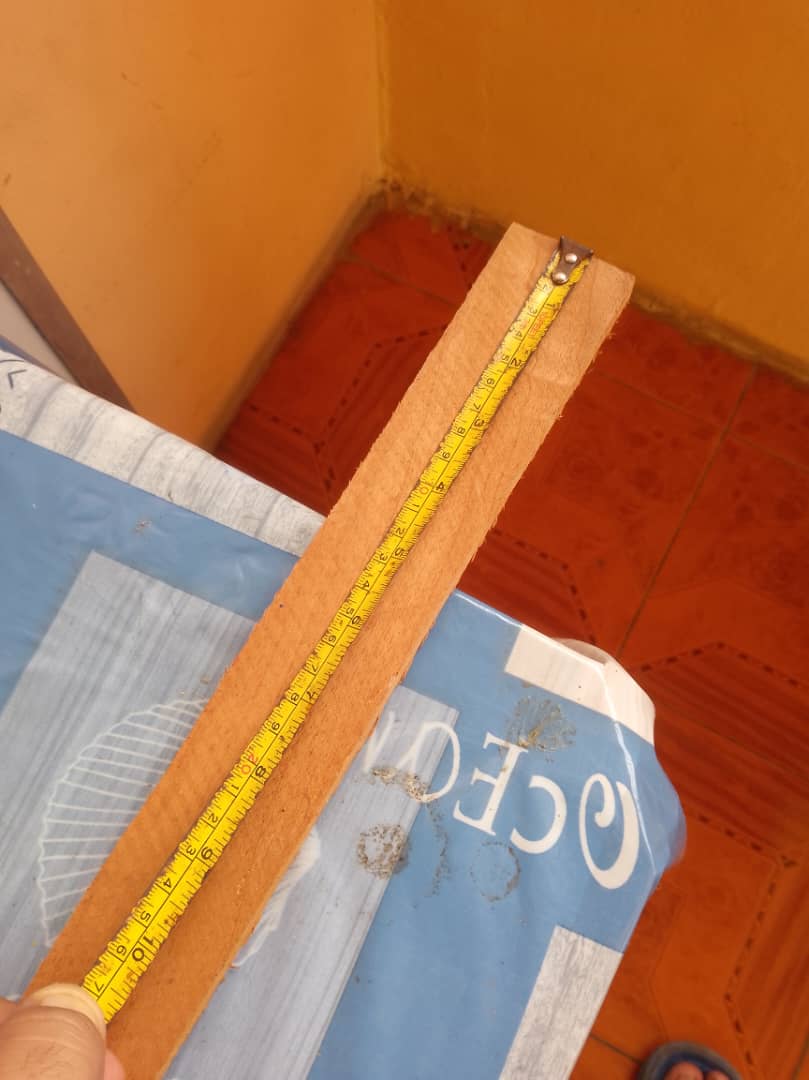
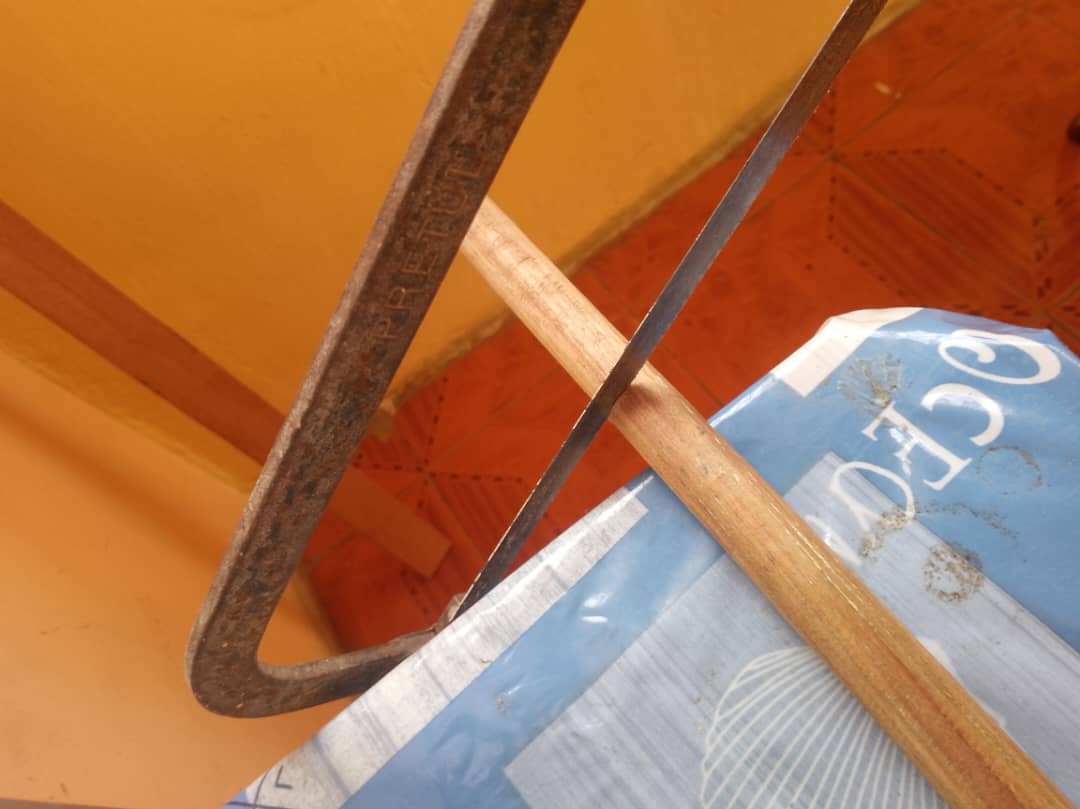
Paso número 2: luego en nuestro segundo paso vamos a continuar tomando nuestro serrucho y cortando por las medidas que marcamos en el paso anterior, dejando la tabla de madera con la medida o largo de un metro
Step 2: Next, we will take our handsaw and cut along the measurements we marked in the previous step, leaving the wooden board with a length of one meter.
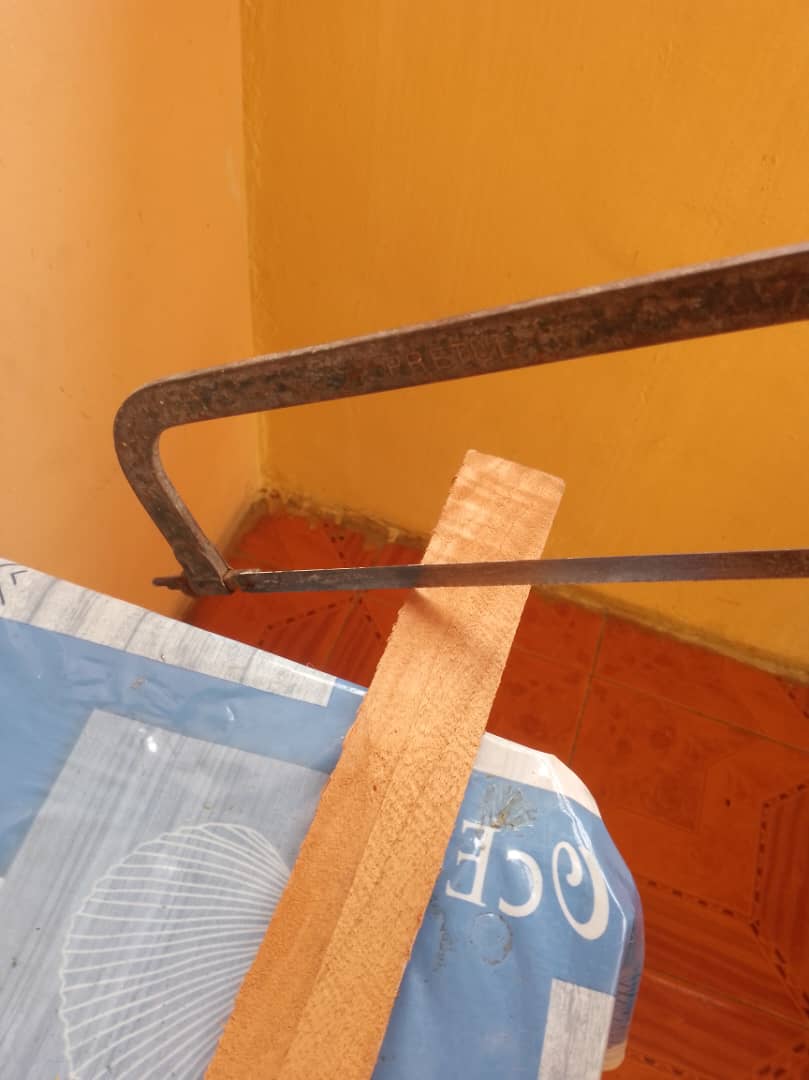
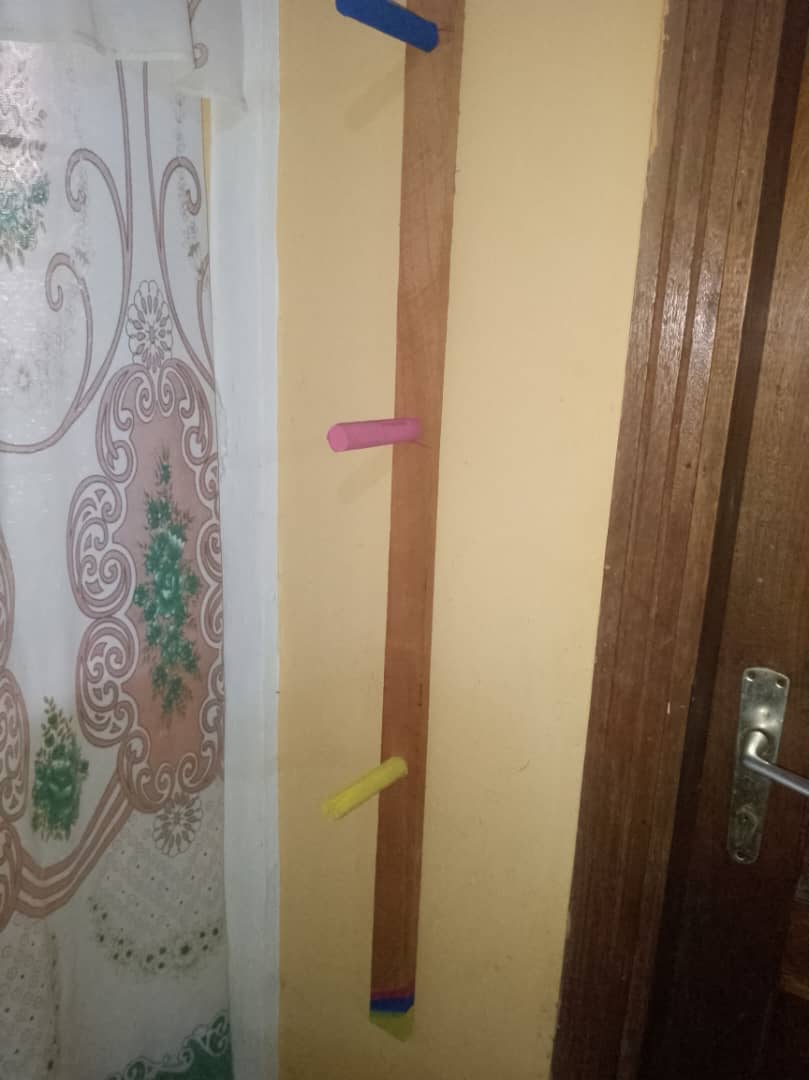
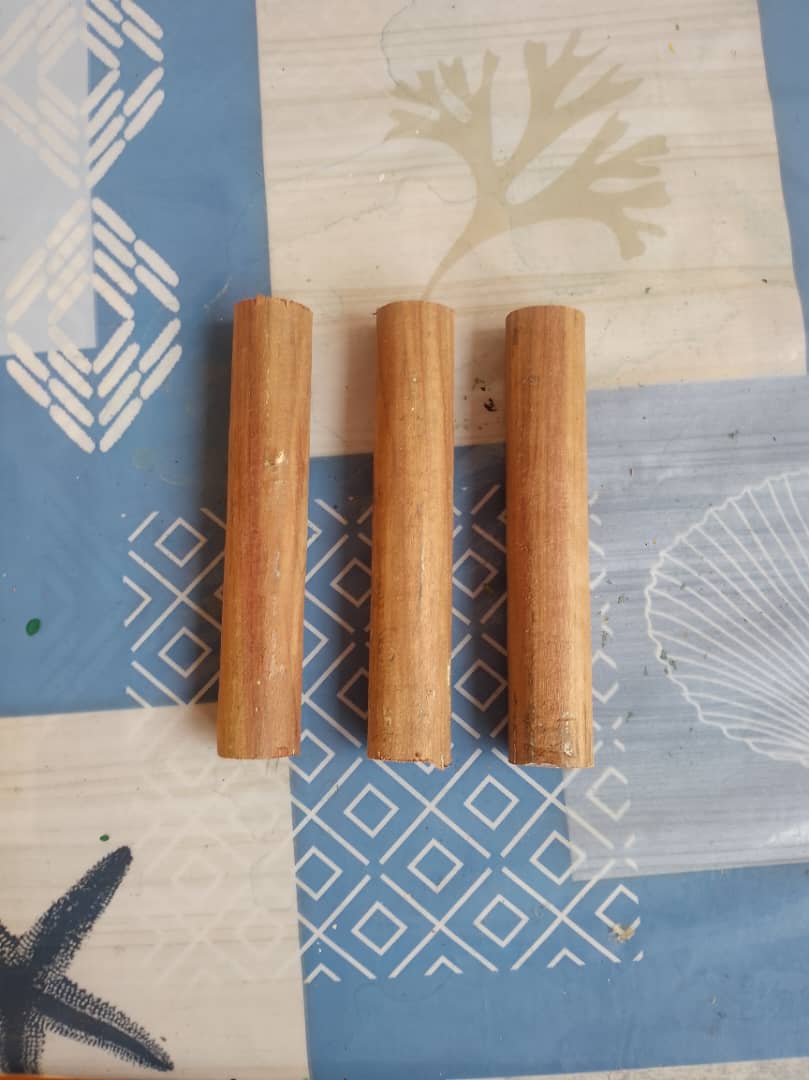
Paso número 3: seguidamente vamos a continuar en nuestro tercer paso recortando el palo de cepillo de barrer ,reciclado del mismo material de madera y haremos las piezas dónde irán guindados los cascos , estas las corté de 7 centímetros de largo cada una , utilicé 3 piezas ya que son 3 cascos
Step 3: Next, in our third step, we will continue by cutting the broomstick, recycled from the same wood material, and we will make the pieces where the helmets will be hung. I cut these to 7 centimeters long each. I used 3 pieces since there are 3 helmets.
Paso número 4: así mismo quedarán nuestras 3 piezas , del mismo tamaño y del mismo grosor utilizando un palo de cepillo de barrer
Step 4: This will give us three pieces of the same size and thickness, using a broomstick.
Paso número 5: luego continúe en nuestro quinto paso colocando las piezas de madera donde irán ubicados los cascos de forma separada en la tabla de un metro , con un clavo de una pulgada y media y el apoyo de un martillo ,los martillamos de forma separadas como lo mencioné , uno arriba , en el centro y abajo , así los cascos quedarán separados con suficiente espacio
Step 5: Then continue to our fifth step by placing the pieces of wood where the helmets will be located separately on the one-meter board, with a one-and-a-half-inch nail and the help of a hammer. Hammer them separately as I mentioned, one at the top, one in the center, and one at the bottom, so that the helmets will be separated with enough space.

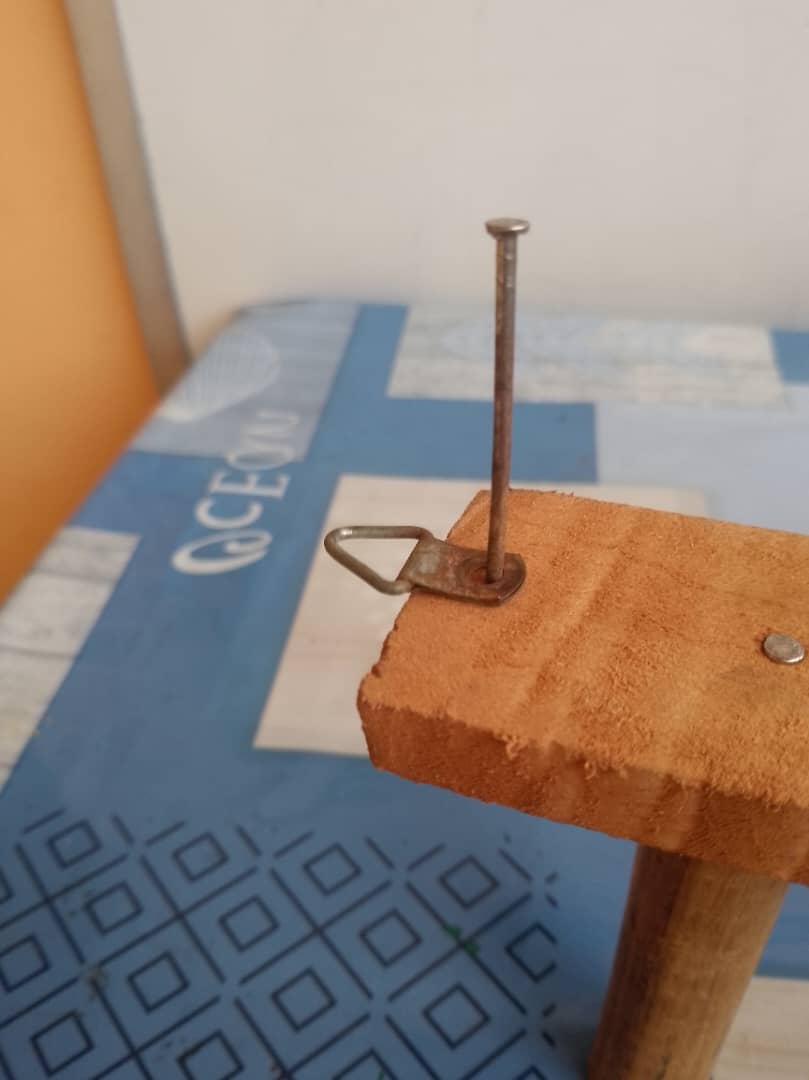
Paso número 6: una vez listo vamos a continuar en nuestro sexto paso colocando en la parte de arriba , en la parte de atrás exactamente, colocando un soporte para poder guindarlo en nuestra sala o espacio que deseamos
Step 6: Once ready, we will continue with our sixth step by placing a support at the top, at the back exactly, so that we can hang it in our living room or wherever we want.
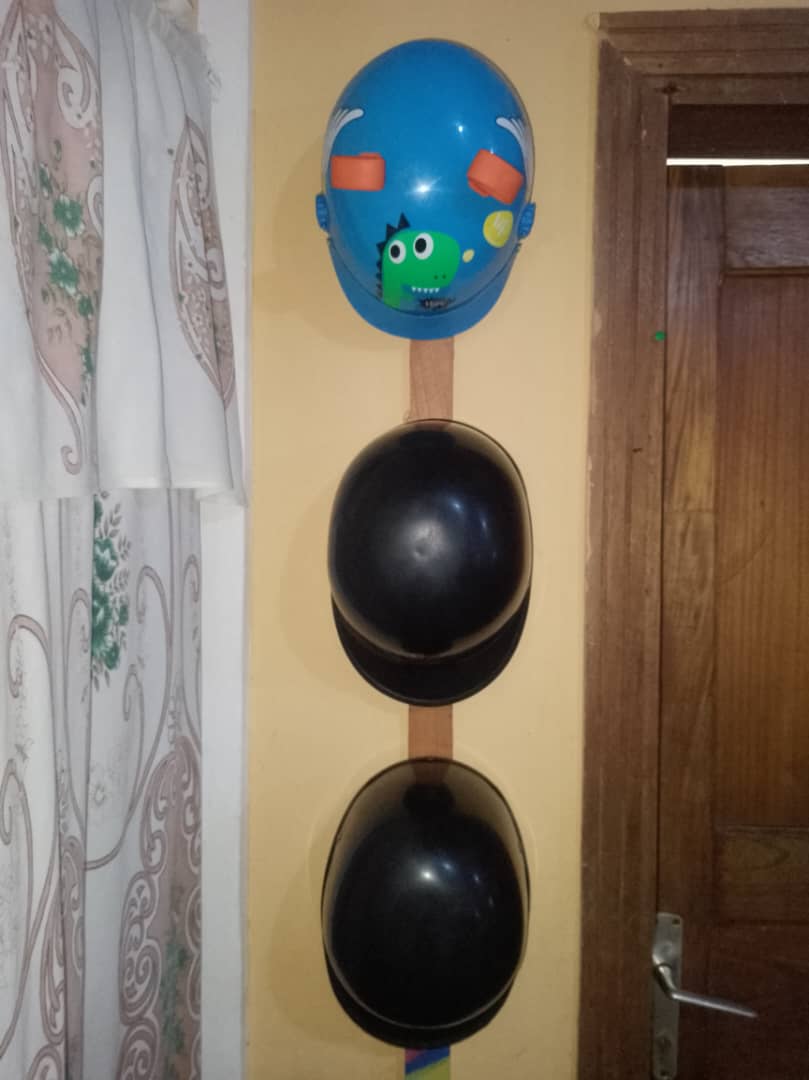
Paso número 7: por último en nuestro séptimo paso vamos a continuar tomando un pincel y pintamos las piezas dónde irán ubicados nuestros cascos para darle un lindo toque , culminando así nuestro perchero
Step 7: Finally, in our seventh step, we will continue by taking a paintbrush and painting the pieces where our helmets will be located to give it a nice touch, thus completing our coat rack.

Así fue como realicé el Perchero de madera para cascos y tenerlo en un lugar seguro y no de forma desordenada en el hogar, espero les guste está idea y le sea de utilidad amigos , hasta la próxima
That's how I made the wooden helmet rack to keep them in a safe place and not scattered around the house. I hope you like this idea and find it useful, friends. See you next time.