***
***
¡Hola, comunidad creativa de #hivediy! 🌟 Espero que todos estén disfrutando de una excelente salud se encuentre alegres 😘❤️
Es un verdadero placer volver a compartir mis ideas manualistas con ustedes. Con el inicio de un nuevo año escolar y varios encargos para un preescolar, he estado trabajando en un proyecto muy especial: un pequeño delantal reciclado que he transformado en un simpático perrito. ¡Les cuento cómo lo hice! Acompáñame y los disfrutaras.

### Materiales que utilicé:
- **Pierna de un pantalón blue jeans**: Perfecto para darle un toque rústico y resistente.
- **Tijeras**: Para dar forma a nuestro proyecto.
- **Agujas e hilo**: Herramientas esenciales para la costura.
- **Regla**: Para medir con precisión.
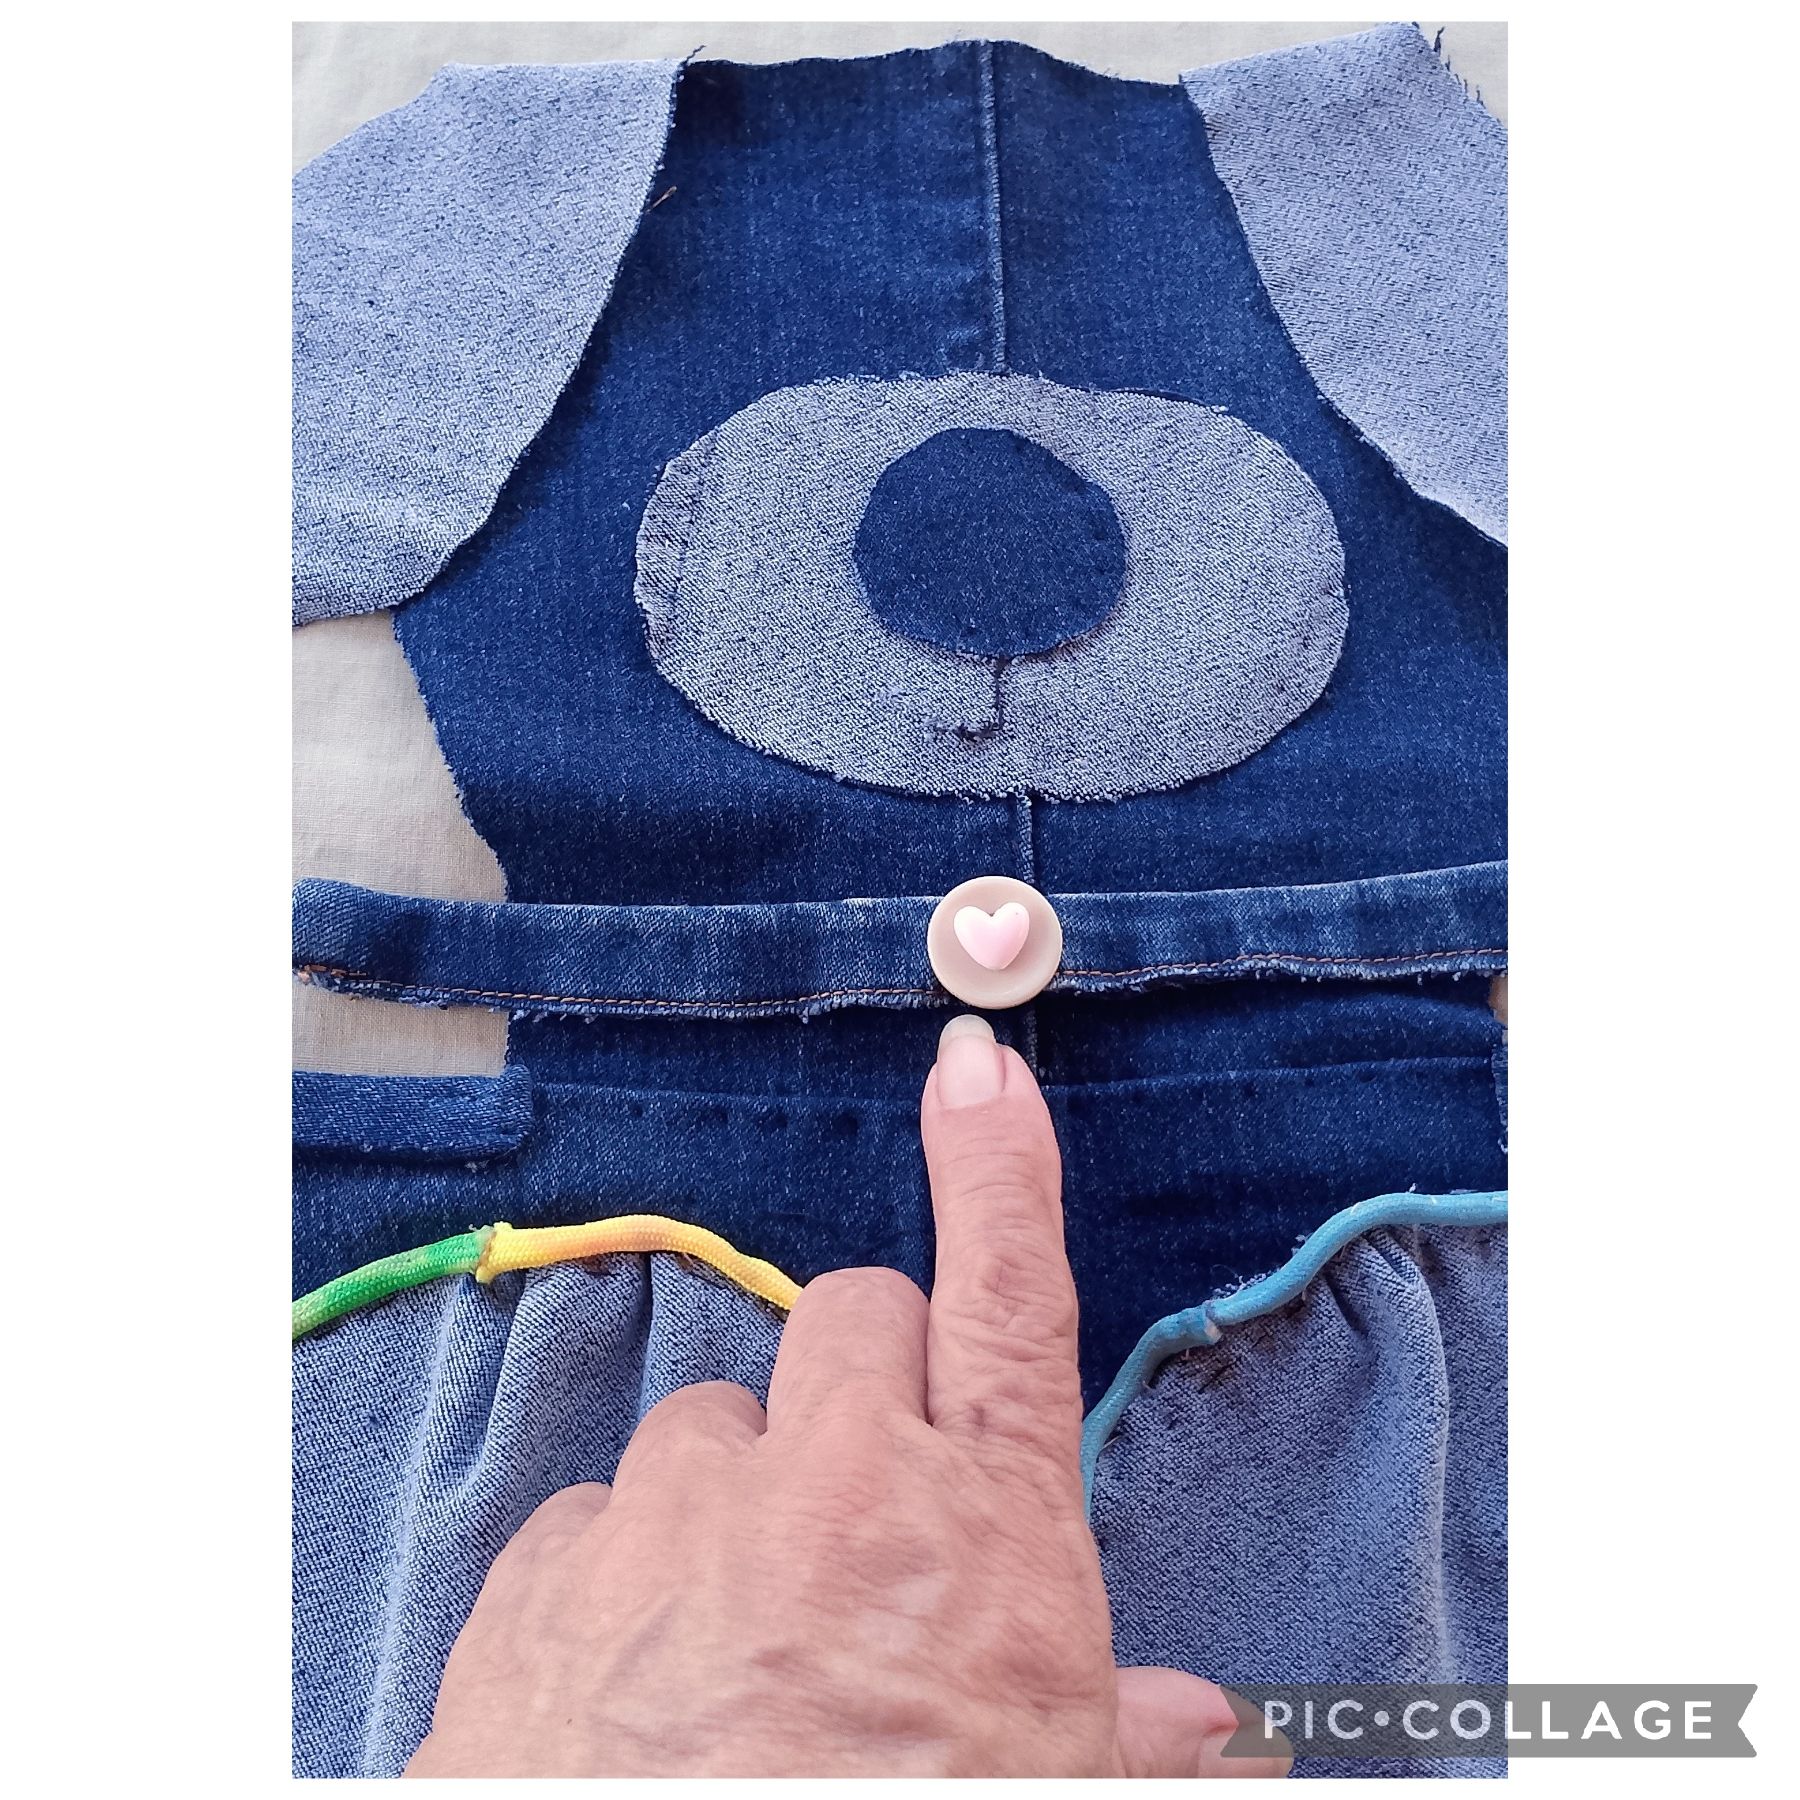
- **Un botón**: ¡El detalle que le dará vida al collar!
- **Un metro de cordón paracord multicolor**: Para un toque divertido y colorido.
- **Un par de ojos sintéticos**: Para que nuestro perrito tenga esa mirada encantadora.
- **Un corazón de plástico**: ¡Porque todo perrito necesita un collar especial!

### Pasos para la realización:
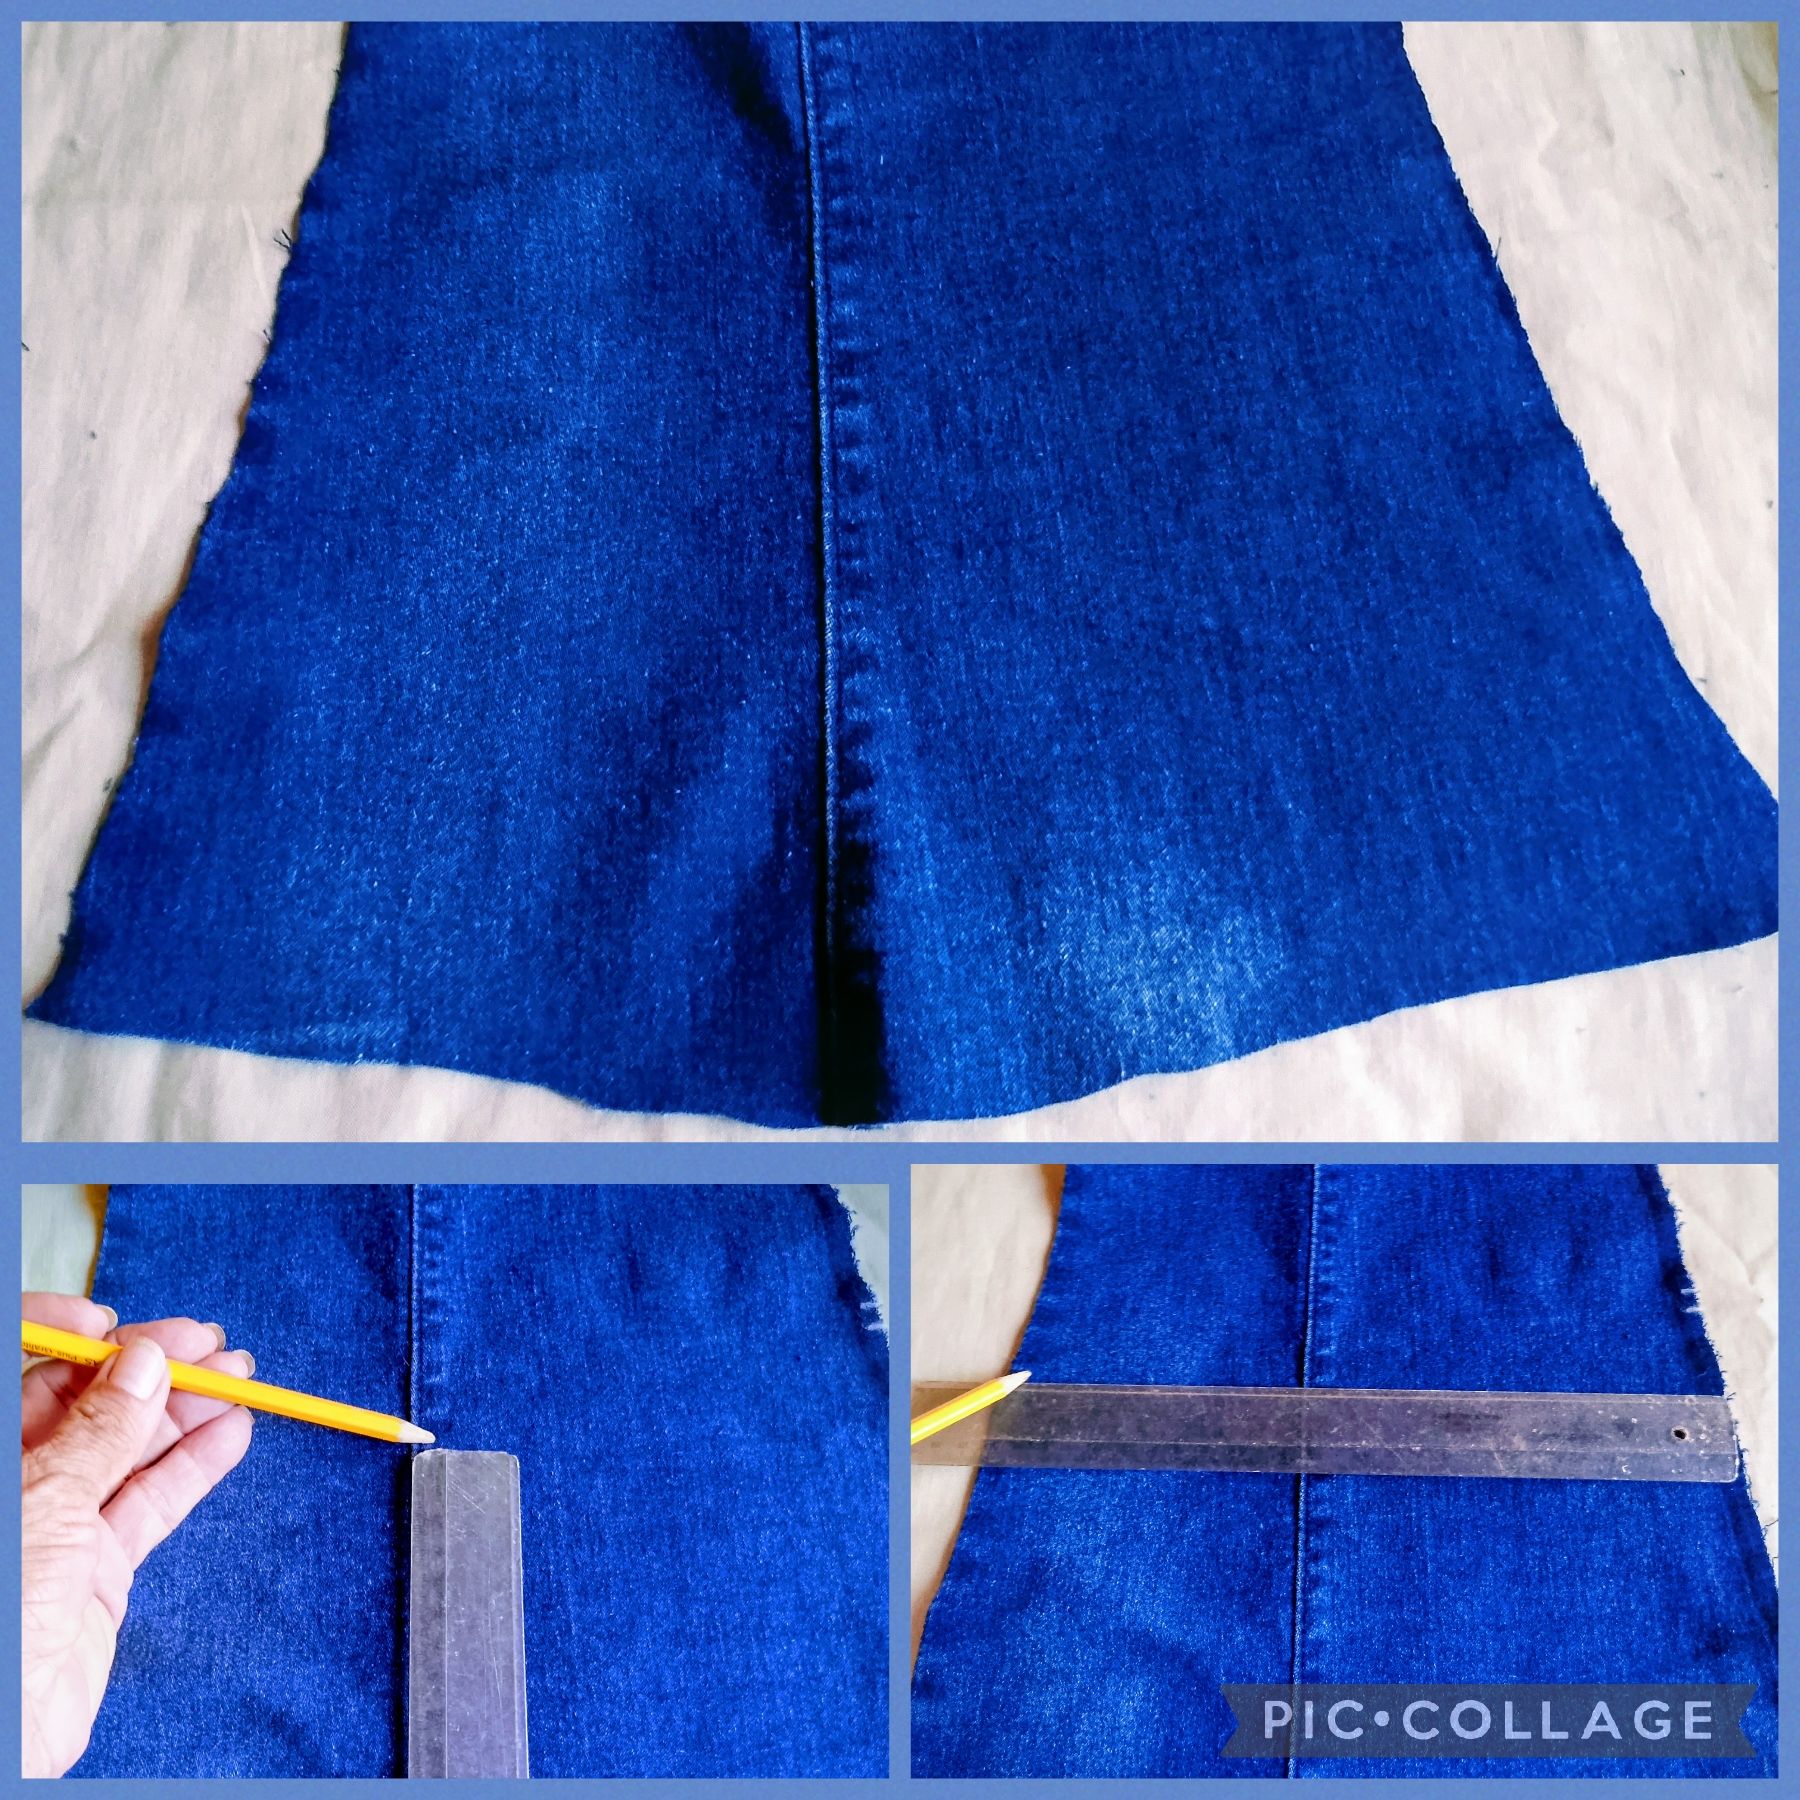
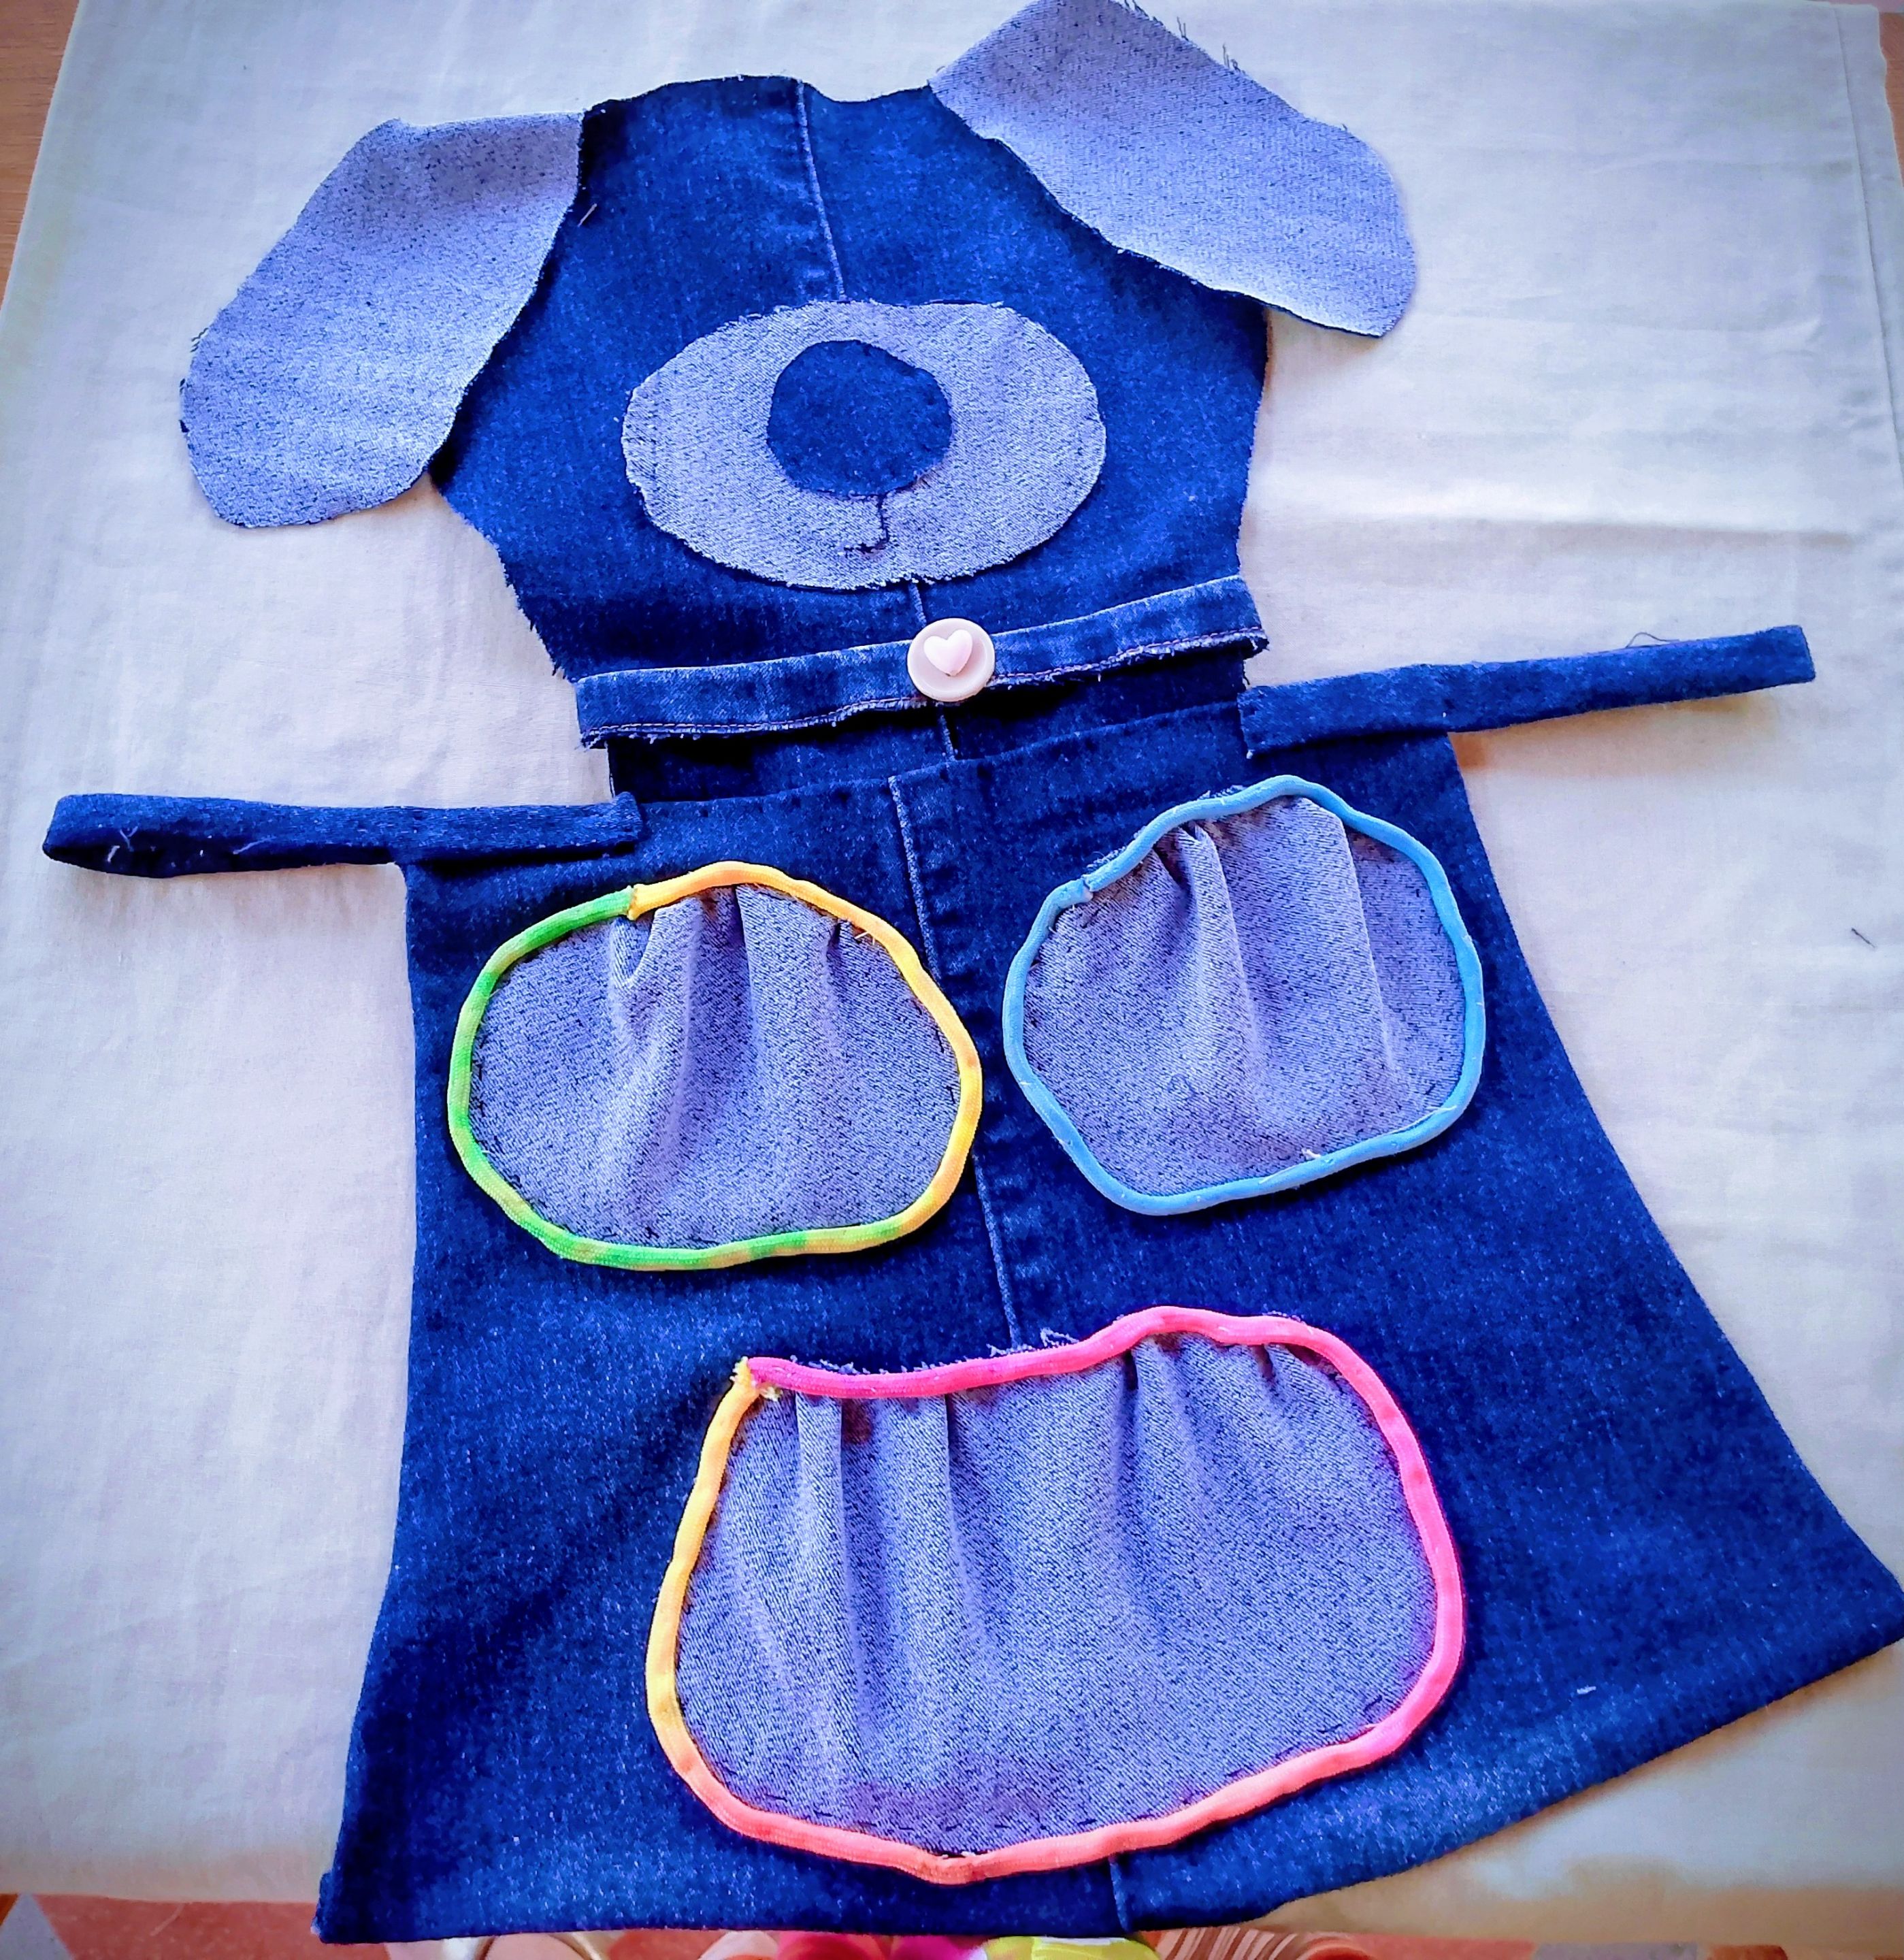
1. **Preparar la tela**: Comienzo abriendo la pierna del pantalón y doblándola a la mitad. Con la regla, mido 30 centímetros de largo y 26 centímetros para la cintura, luego corto para crear la falda del delantal.
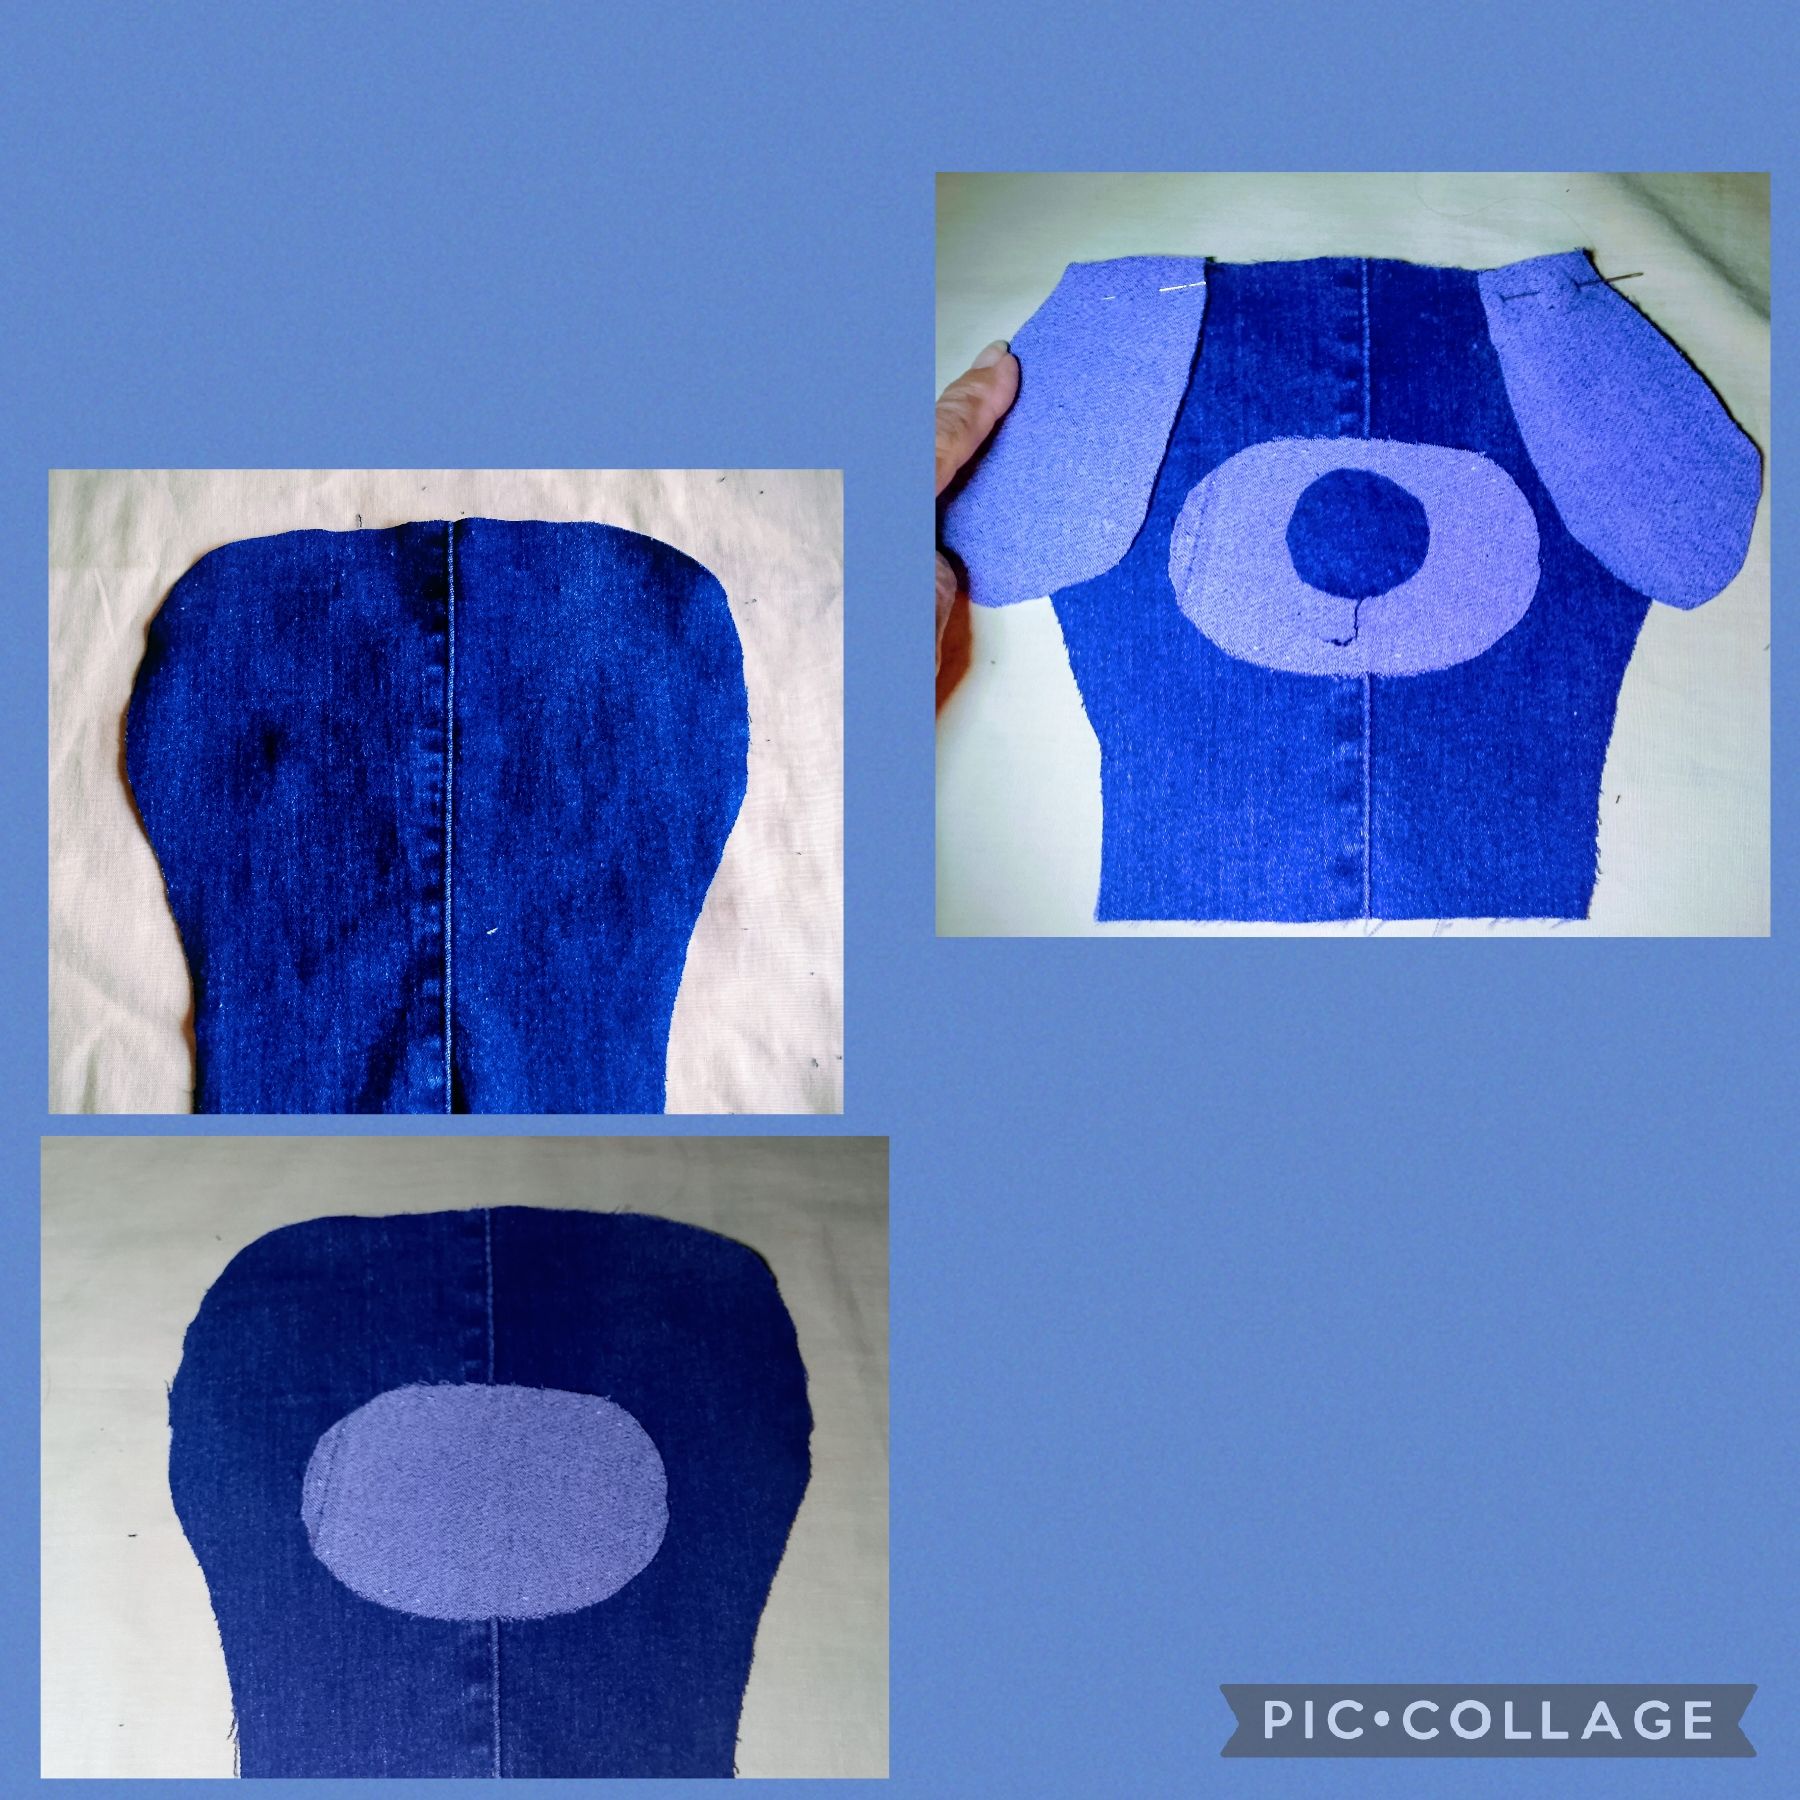
2. **Cortar los moldes**: A continuación, corto las piezas que formarán los bolsillos, la cabeza, la cara y las orejas. Cada detalle cuenta para que nuestro perrito sea único.

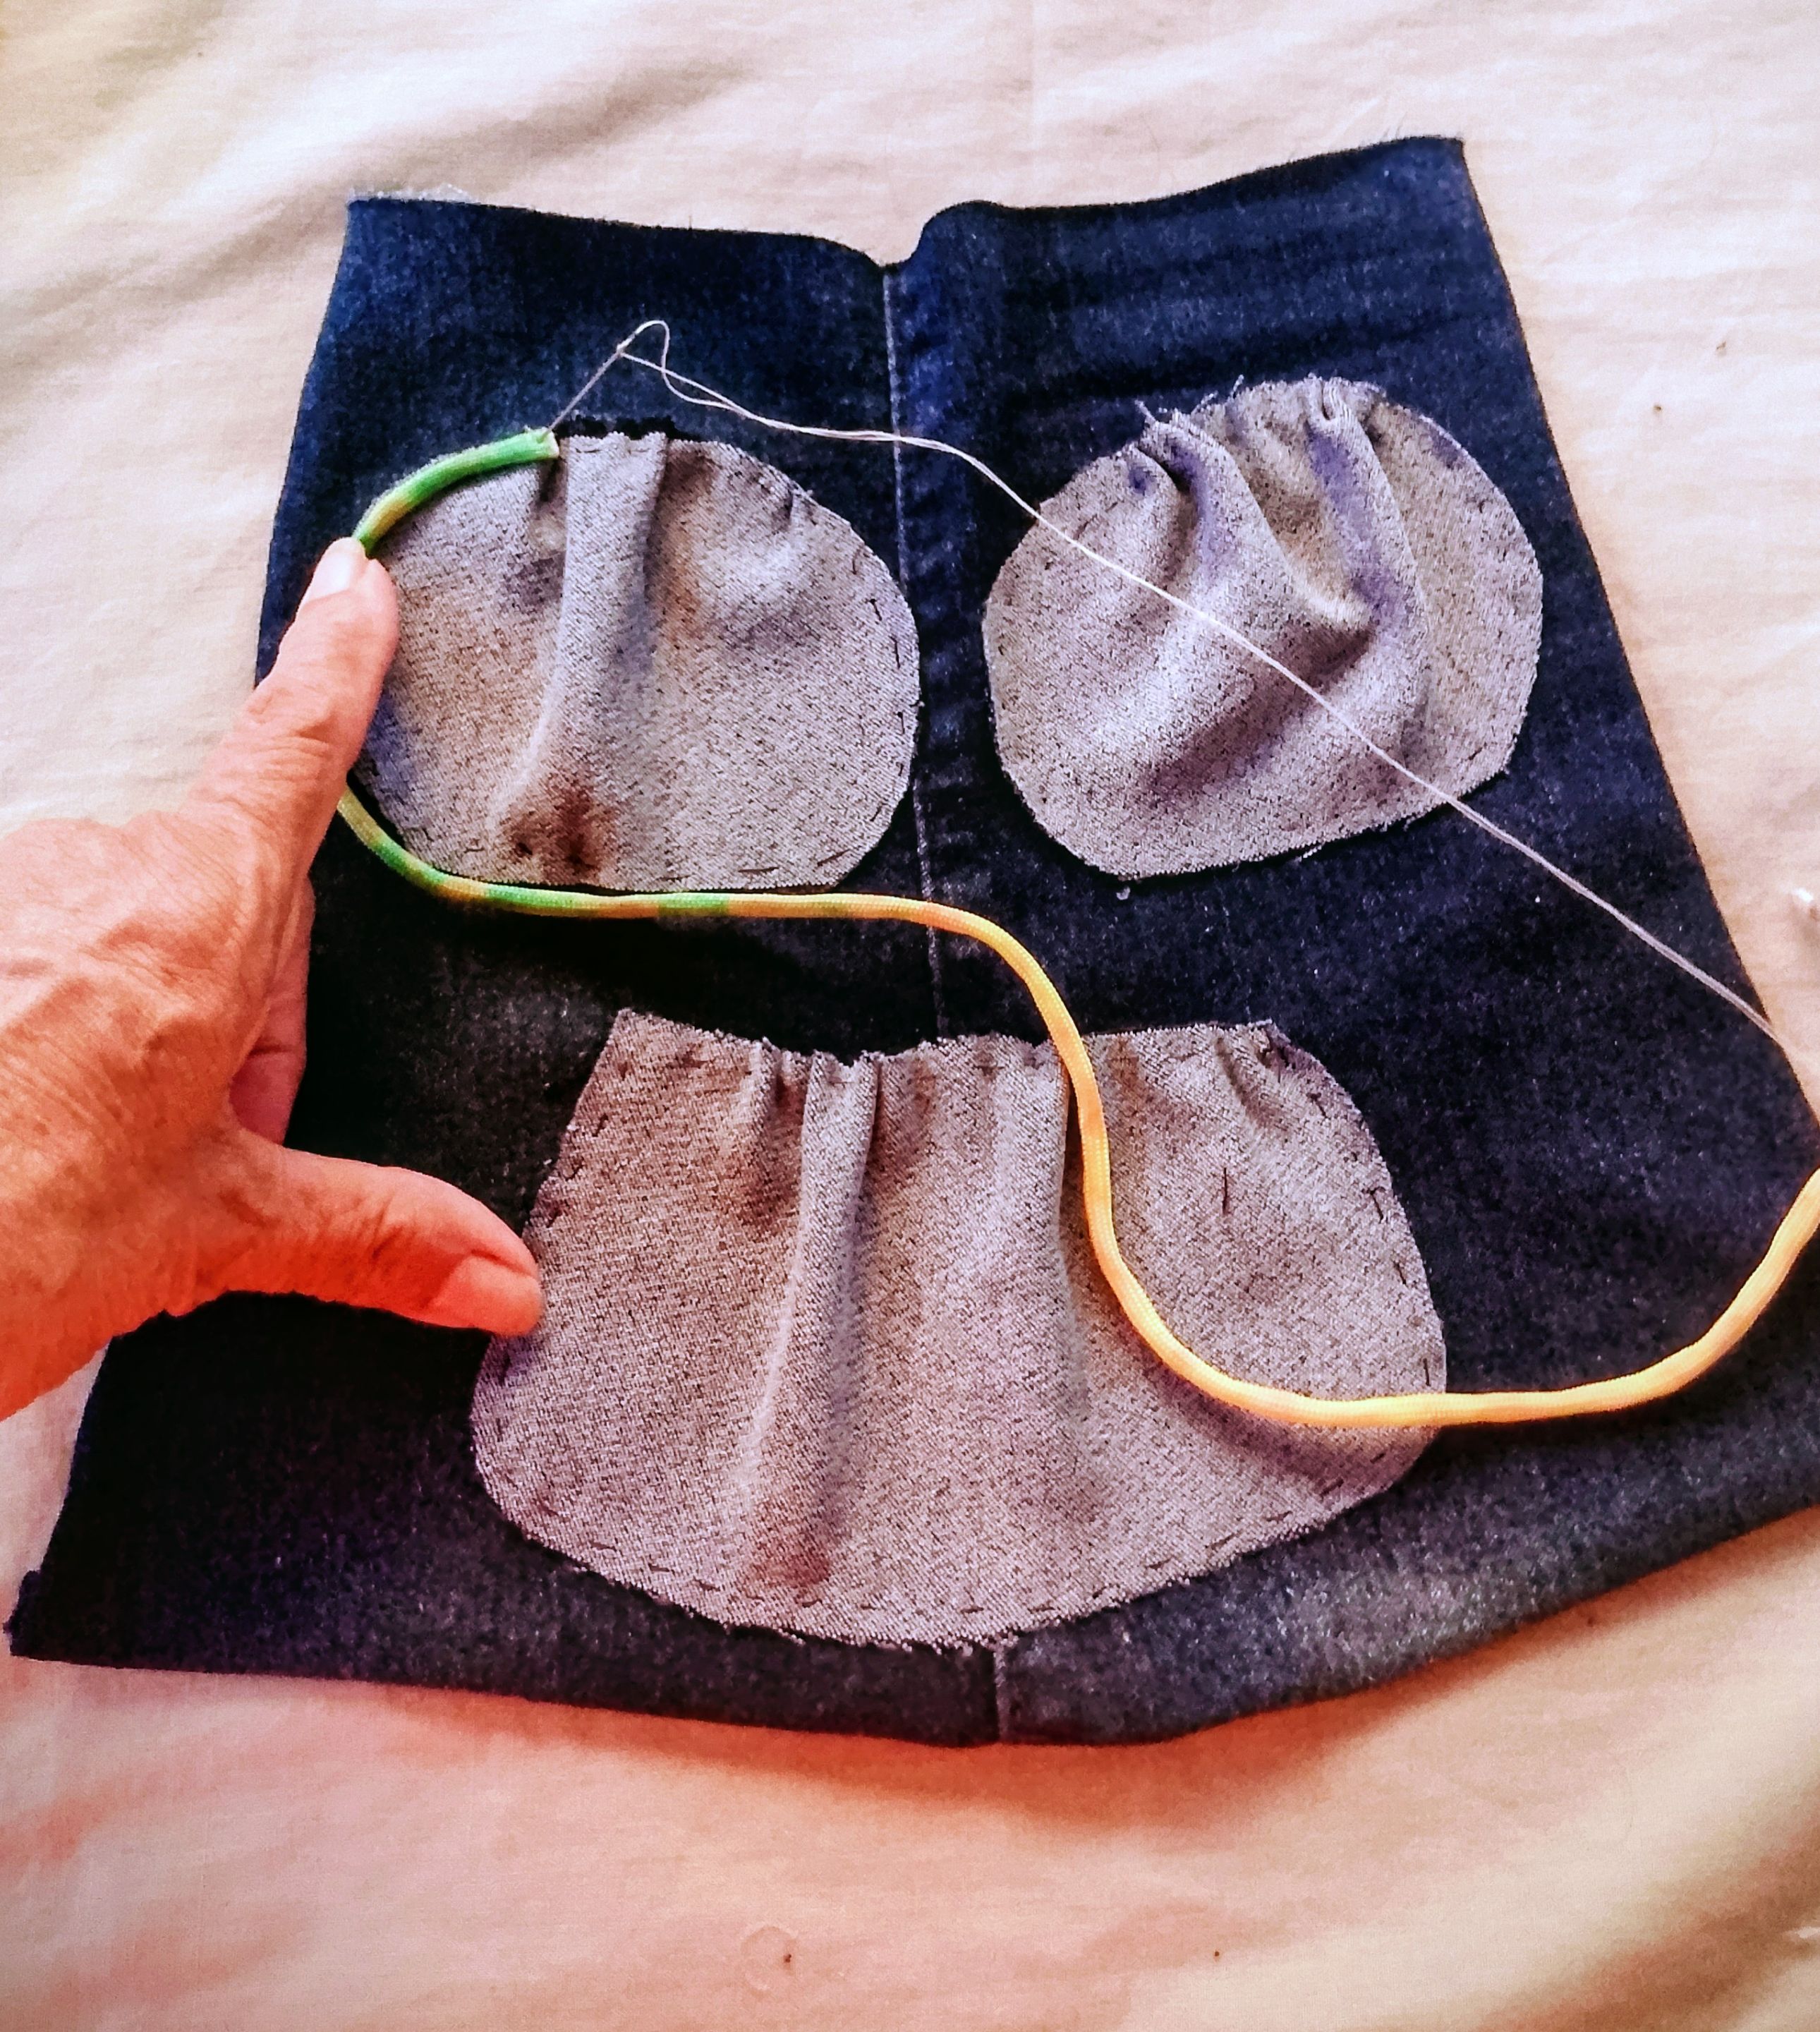
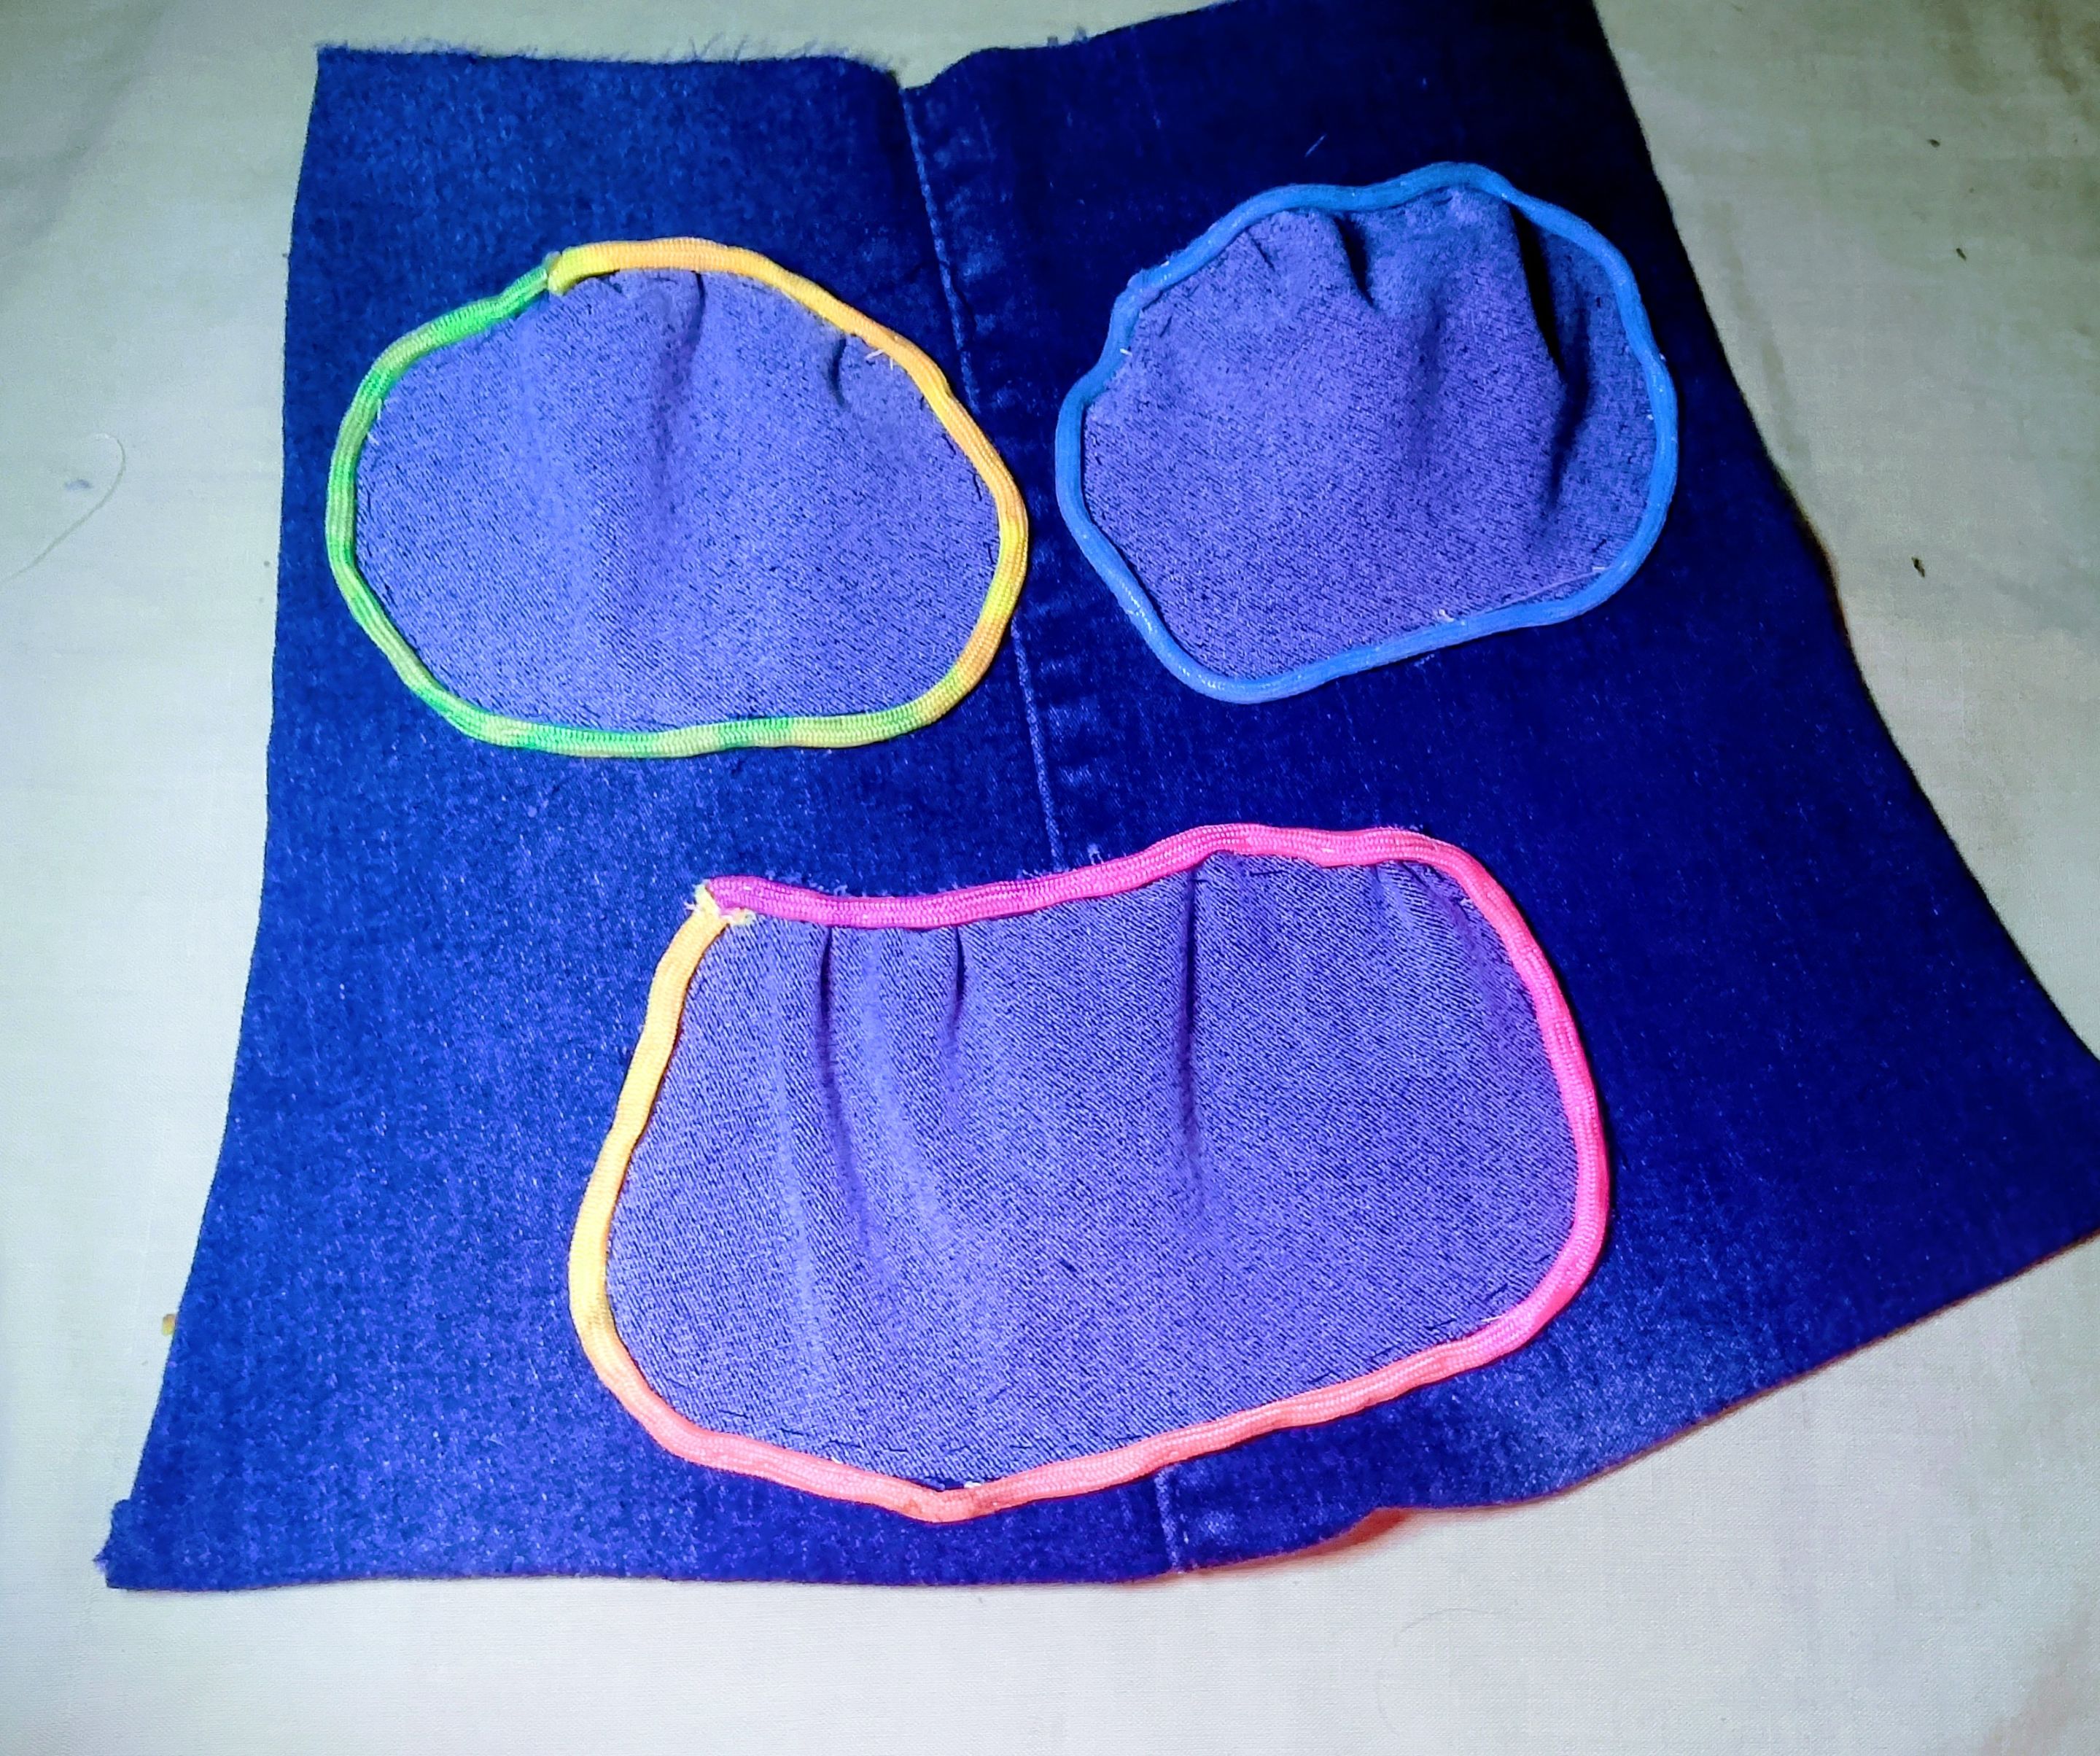
3. **Decoración de la falda**: Con la aguja e hilo, hago tres nubecitas que coloco y pego sobre la falda, decorándolas con el cordón paracord multicolor. ¡Así le damos un toque alegre!
4. **Armar la cabeza**: Corto la forma de la cabeza siguiendo el patrón. Utilizo el lado revés de la tela para darle un acabado diferente a la cara. Coloco la nariz y bordo la boca con hilo negro. Las orejas las coloco en la parte superior, usando la misma técnica.
5. **Detalles finales**: Para que se vea más coqueto, le añado un botón en el medio del collar junto con un corazón rosa que será su bonito accesorio. Este pequeño detalle le da un toque especial.
6. **Ajustes finales**: Por último, coloco hilos a cada lado para ajustar en la cintura y un cordón para fijar en el cuello. ¡Listo!
¿Qué les parece este adorable perrito como delantal? Espero que les guste tanto como a mí, porque la modelo se ve realmente simpática. 💖
Los animo a que realicen su propia versión, dándole su toque personal. Siempre es un placer compartir ideas y ver cómo cada uno puede aportar su creatividad. ¡Feliz tarde y bendiciones para todos! Nos vemos en la próxima manualidad. ¡Bye bye! 👋✨
Espero que este proyecto sea de inspiración para otros. Si te gustó esta idea, no dudes en compartirla con tus amigos y familiares. ¡La creatividad se multiplica cuando se comparte!
Las imágenes y redacción de este tutorial son de mi exclusiva propiedad las fotos fueron tomadas con mi teléfono celular Tecno Spark Go 20 y las edite con una aplicación gratis del mismo.
Para traducir texto use Google traductor en su versión gratuita.
English Version
Hello, #hivediy creative community! 🌟 I hope everyone is enjoying excellent health and staying happy 😘❤️
It's a real pleasure to share my crafty ideas with you again. With the start of a new school year and several orders for a preschool, I've been working on a very special project: a small recycled apron that I transformed into a cute little dog. I'll tell you how I made it! Join me and you'll enjoy it.
### Materials I used:
- **Blue jean leg**: Perfect for adding a rustic and sturdy touch.
- **Scissors**: To shape our project.
- **Needles and thread**: Essential sewing tools.
- **Ruler**: For precise measurements.
- **A button**: The detail that will bring the necklace to life!
- **One meter of multicolored paracord**: For a fun and colorful touch.
- **A pair of synthetic eyes**: So our dog has that adorable look.
- **A plastic heart**: Because every dog needs a special collar!
### Steps to make it:
1. **Prepare the fabric**: I start by opening the pant leg and folding it in half. Using a ruler, I measure 30 centimeters long and 26 centimeters for the waist, then cut to create the apron skirt.
2. **Cut the patterns**: Next, I cut the pieces that will form the pockets, head, face, and ears. Every detail counts to make our dog unique.
3. **Decorate the skirt**: With a needle and thread, I make three little clouds that I place and glue onto the skirt, decorating them with the multicolored paracord. This gives it a cheerful touch!
4. **Assemble the head**: I cut the head shape following the pattern. I use the wrong side of the fabric to give the face a different finish. I add the nose and embroider the mouth with black thread. I place the ears on top, using the same technique.
5. **Final Details**: To make it look more flirty, I add a button in the middle of the hem along with a pink heart that will be its pretty collar. This little detail gives it a special touch.
6. **Final Adjustments**: Finally, I add threads on each side to adjust the waist and a cord to secure it around the neck. Done!
What do you think of this adorable puppy as an apron? I hope you like it as much as I do, because the model looks really cute. 💖
I encourage you to make your own version, adding your personal touch. It's always a pleasure to share ideas and see how everyone can contribute their creativity. Have a great afternoon and blessings to all! See you at the next craft. Bye bye! 👋✨
I hope this project inspires others. If you liked this idea, feel free to share it with your friends and family. Creativity grows when shared!
The images and writing in this tutorial are my exclusive property. The photos were taken with my Tecno Spark Go 20 cell phone and edited with a free app.
To translate text, use the free version of Google Translate.