Saluditos mis queridos Artistas Creativos de las Manualidades y la Joyería, como siempre mis deseos porque se encuentren rebosantes de salud y derrochando alegría, que el fin de semana lo hayan disfrutado al máximo aprovechando las vacaciones escolares y así como en esta casa estén un poquitito mas livianos de tanto corri y corrí que nos produce el ajetreo de los muchachos en el colegio.
Les comento que estoy verdaderamente en shock mirando como ayer era enero y hoy estamos en agosto, como diría una amiga " pá coge palco" pero bueno así estamos. Hoy les voy a compartir la elaboración de una delicada pero muy linda Pulsera realizada con unos anillos de cuarzo en dos tonos de azules que hice con un particular fin, el color azul es el favorito de mi hija y para Ella elaboré la pulsera, su cumpleaños es el 13 de septiembre y ustedes estarán pensando: pero si estamos en agosto; Ah! pero es que el 13 de este mes se celebra el Día Internacional Del Zurdo y Ella tiene esa especial condición, que según estudios en el mundo solo el 10% de la población pertenece a ese gremio🫣; y es que en la actualidad ya no hay diferencias entre zurdos y derechos es muy común ver a los zurdos en cualquier posición sin que se note, allí están: Robert de Niro, Príncipe William de Inglaterra, Charles Chaplin, Leonel Messi, Justin Bieber, Lady Gaga y mi hija @lorennys Morales entre otros 🤣🤣y todos super eficientes en sus deberes.
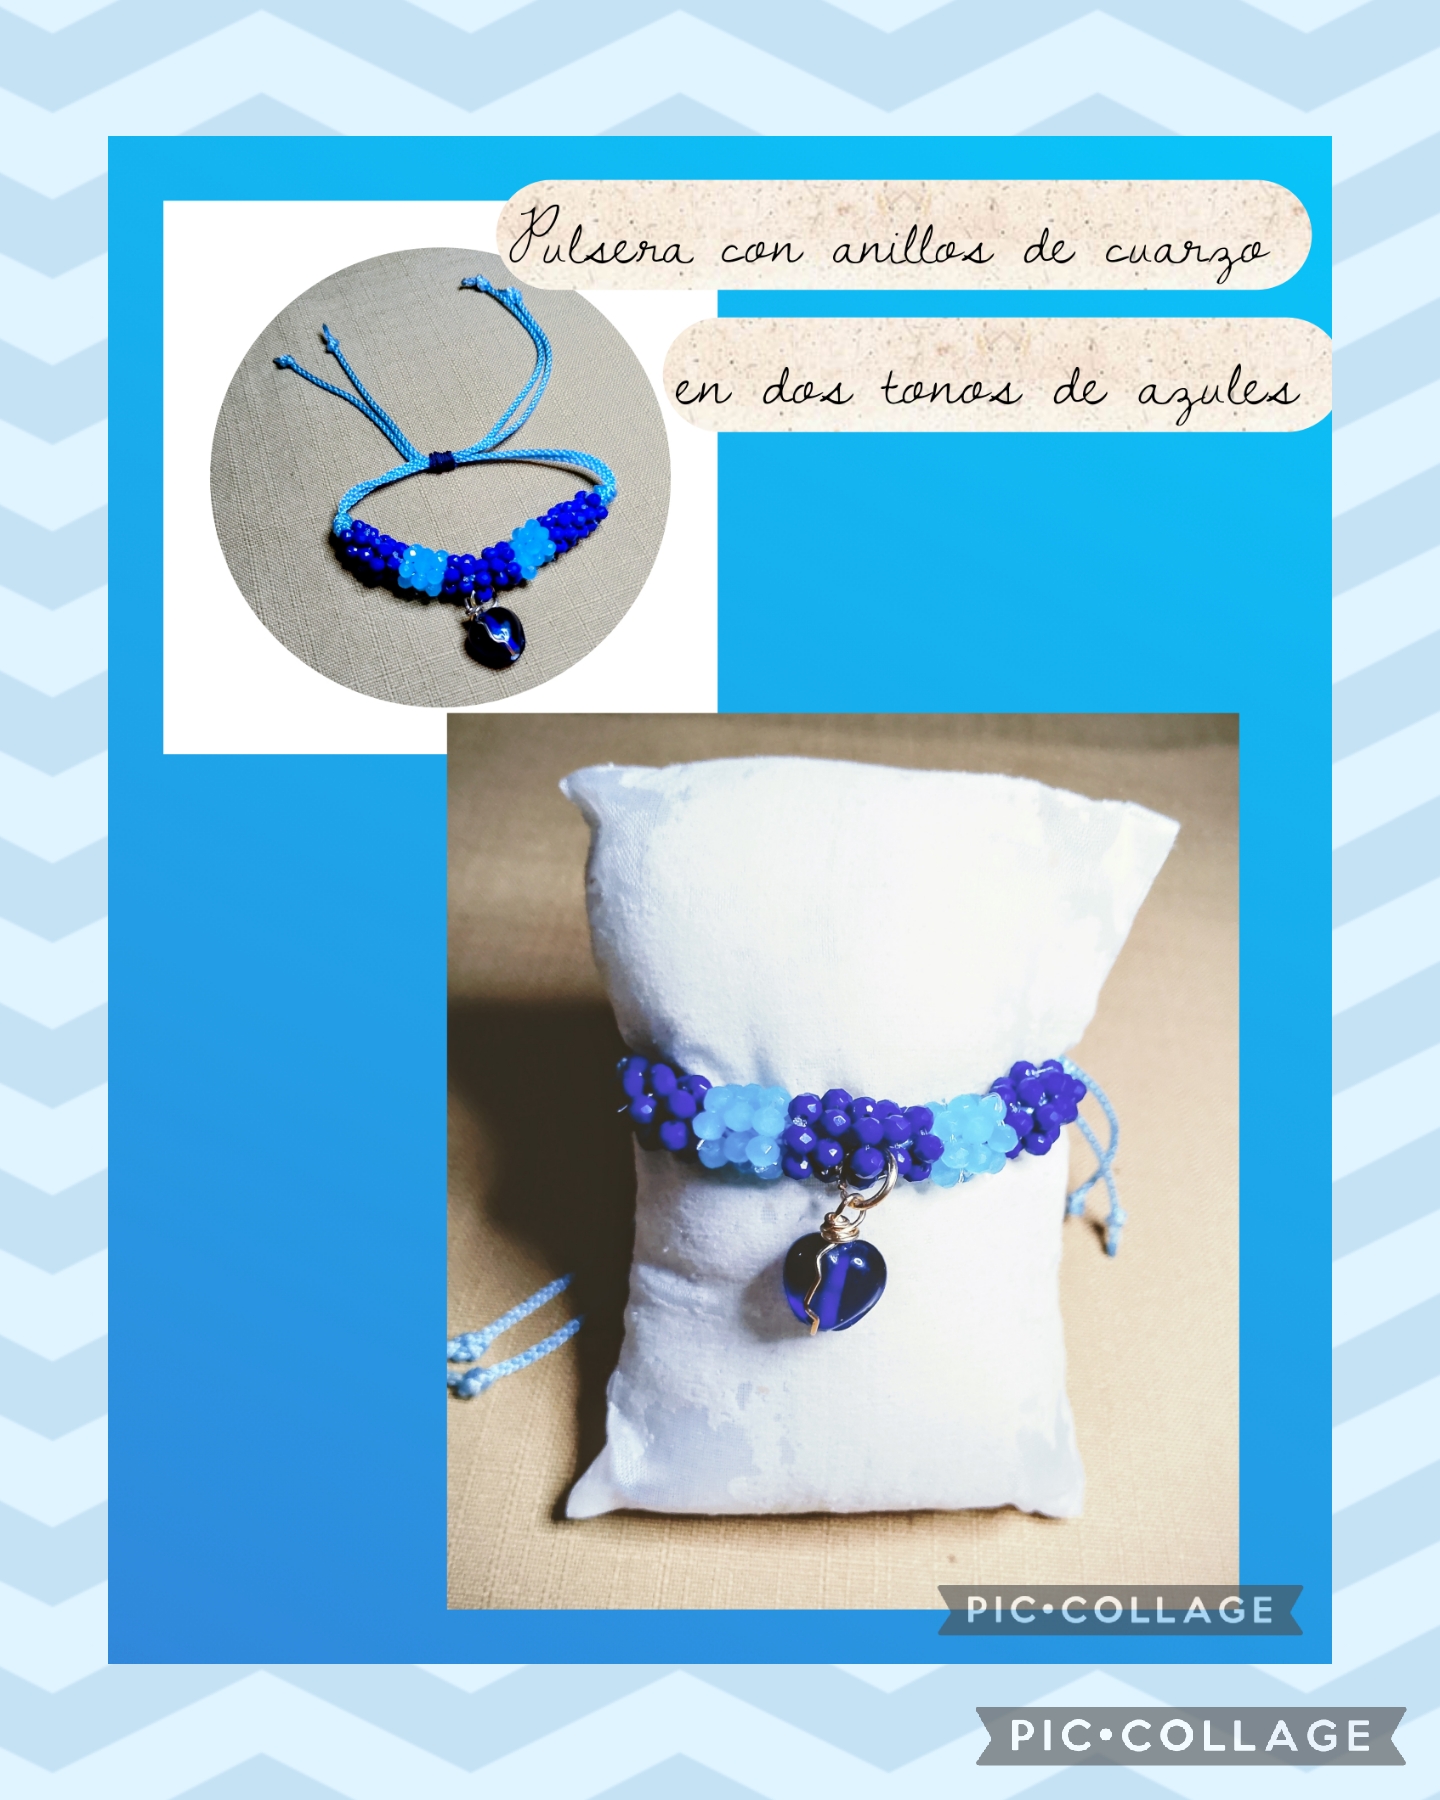
Pero bueno para sorprenderla ese día le hice está delicada prenda para que la use en su muñeca izquierda, y a ustedes los invito a seguir leyendo el paso a paso para que vean cómo la hice:
>Greetings, my dear Creative Artists of Crafts and Jewelry, as always, I wish you all the health and joy you deserve. I hope you enjoyed the weekend to the fullest, taking advantage of the school holidays, and that you're a little lighter in this house from all the running around caused by the kids' busy schedule at school.
I want to tell you that I'm truly in shock, seeing how yesterday was January and today is August. As a friend would say, "get a seat!" But oh well, here we are. Today, I'm going to share with you the creation of a delicate but very pretty bracelet made with quartz rings in two shades of blue that I made for a particular purpose. Blue is my daughter's favorite color, and I made the bracelet for her. Her birthday is September 13th, and you're probably thinking, "But it's August!" Ah! But the 13th of this month is International Left-Handers Day, and she has that special condition. According to studies worldwide, only 10% of the population belongs to that group. These days, there's no longer a difference between left-handed and right-handed people. It's very common to see left-handed people in any position without it being noticeable. They include: Robert de Niro, Prince William of England, Charles Chaplin, Lionel Messi, Justin Bieber, Lady Gaga, and my daughter @lorennys Morales, among others. 🤣🤣 And all of them are super efficient in their duties.
But anyway, to surprise her that day, I made her this delicate piece of clothing to wear on her left wrist. I invite you to continue reading the step-by-step instructions to see how I made it:
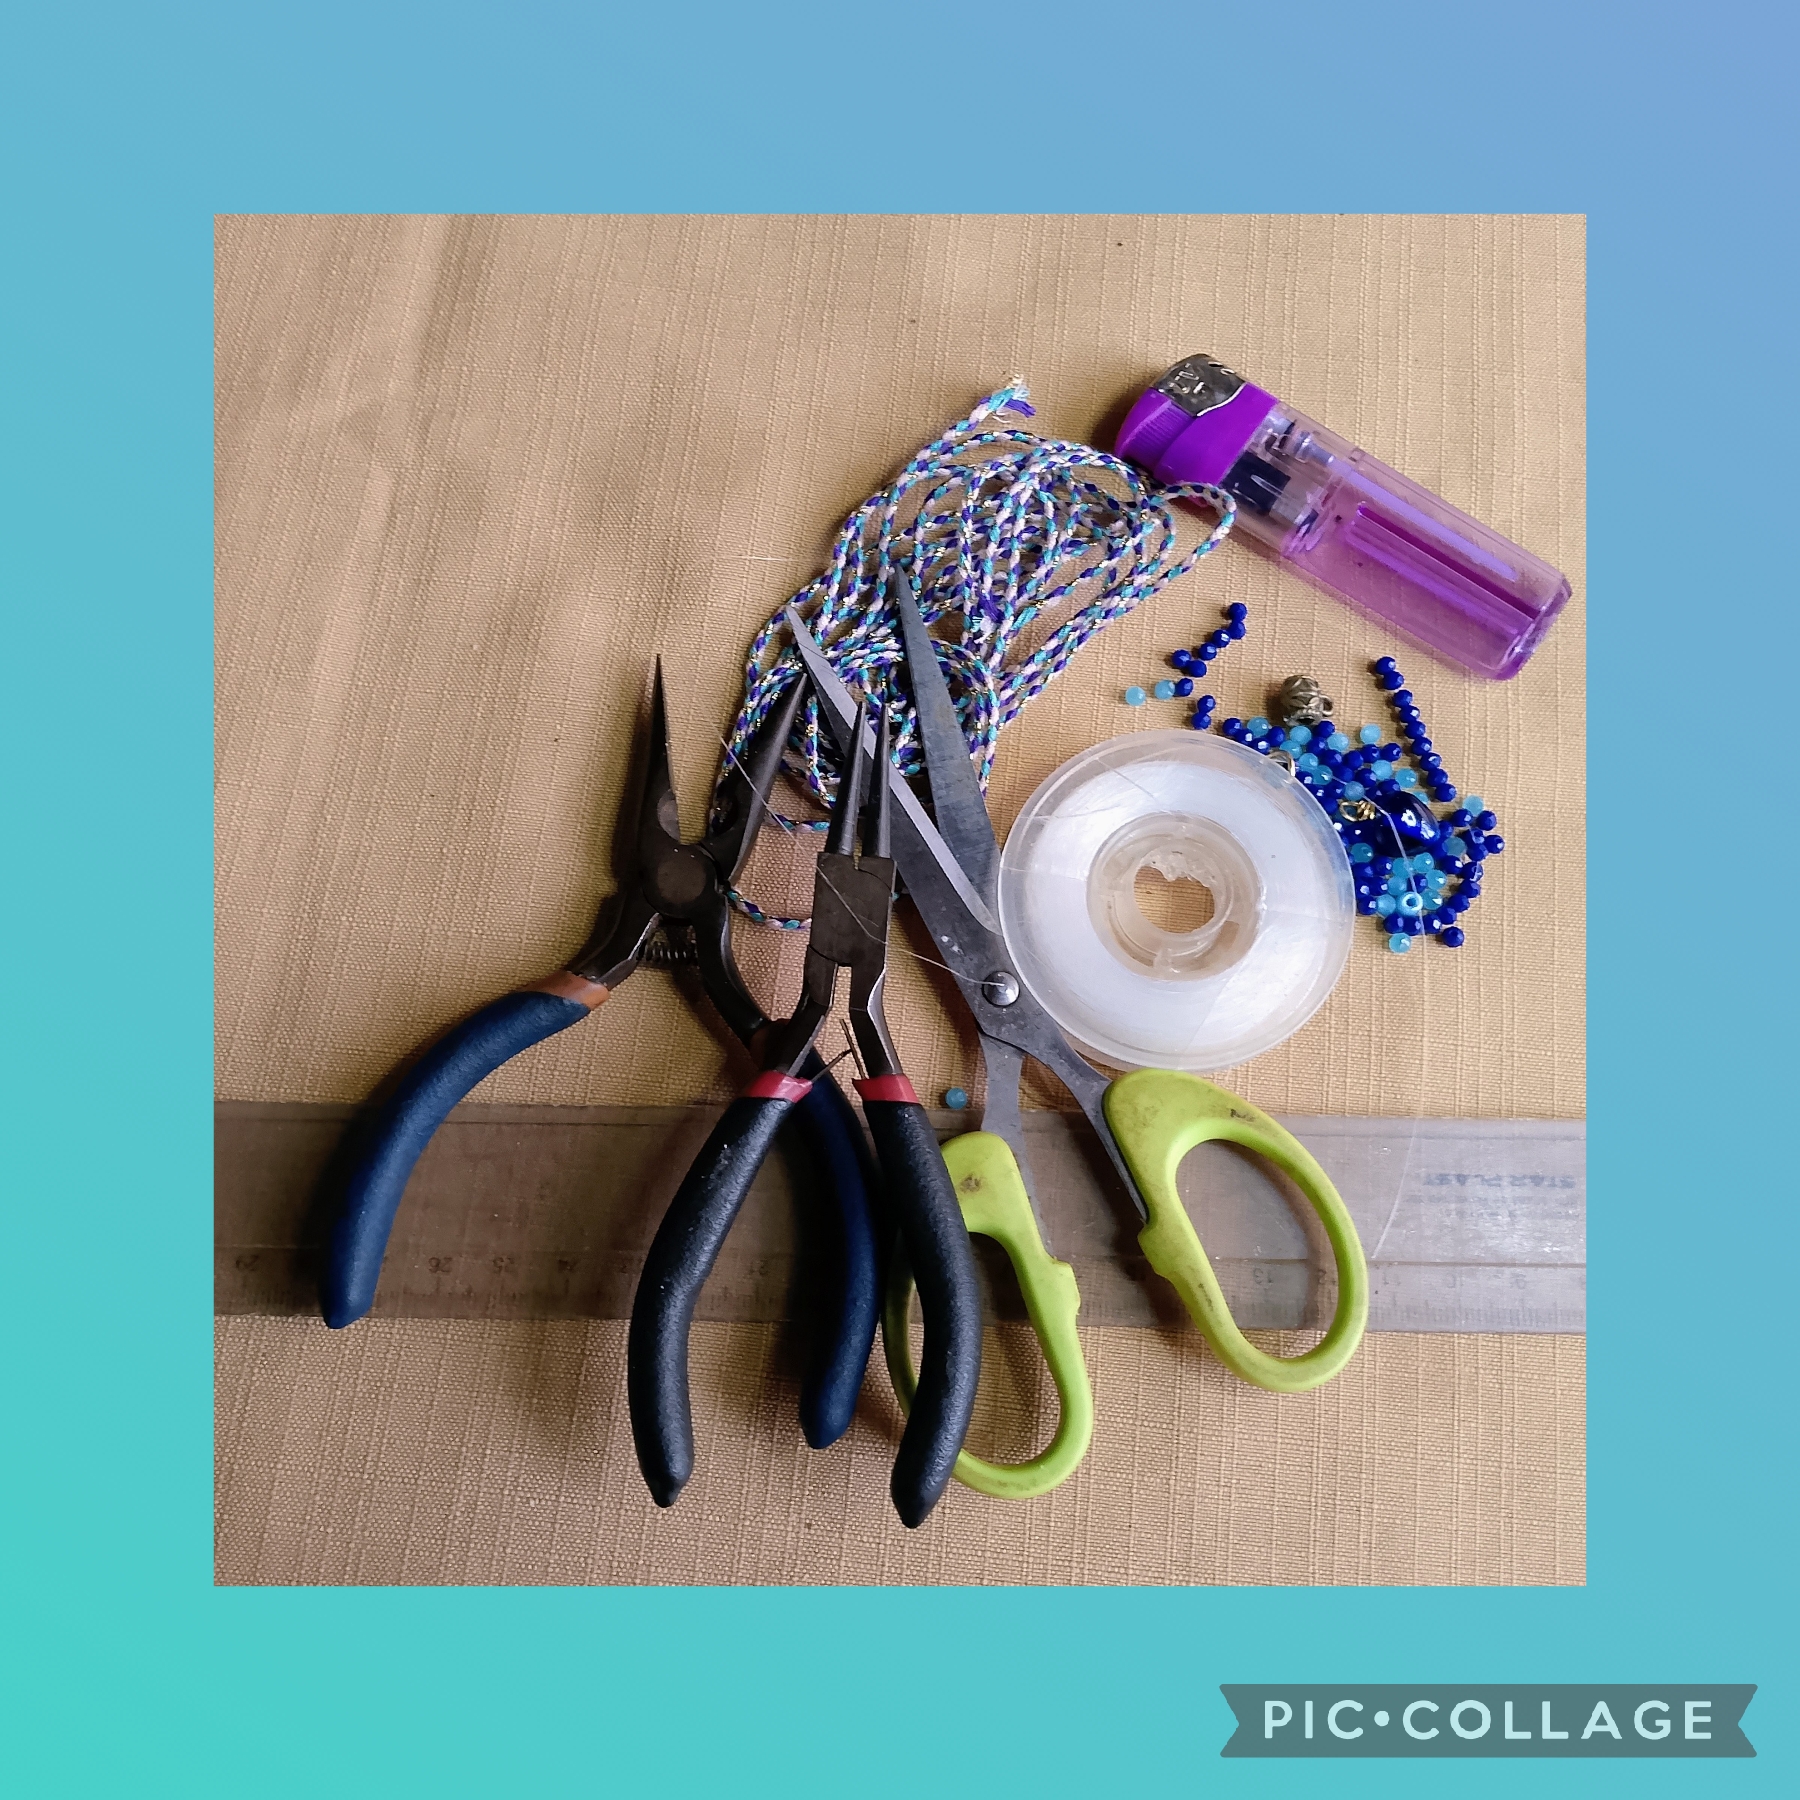
MATERIALES QUE UTILICÉ PARA ELABORAR ESTA LINDA PULSERA:
✓ Piedras pequeñas de cuarzo azul marino.
✓ Piedras pequeñas de cuarzo azul celeste.
✓ Un metro de hilo terlenca color azul celeste.
✓ Una piedra de vidrio color azul marino.
✓ Un trozo de alambre dorado de 0,05 mm.
✓ Una argolla dorada mediana.
✓ Pinzas.
✓ Encendedor.
✓ Tijeras.
✓ Regla.
✓ Nylon.
✓ Un trozo de hilo chino azul marino de 0,08 mm.
>MATERIALS I USED TO MAKE THIS BEAUTIFUL BRACELET:
✓ Small navy blue quartz stones.
✓ Small sky blue quartz stones.
✓ One meter of sky blue terlenca thread.
✓ One navy blue glass stone.
✓ One piece of 0.05 mm gold wire.
✓ One medium gold jump ring.
✓ Tweezers.
✓ Lighter.
✓ Scissors.
✓ Ruler.
✓ Nylon.
✓ One piece of 0.08 mm navy blue Chinese thread.
CON ESTOS SENCILLOS PASOS ELABORE MI PROYECTO.
PRIMER PASO:
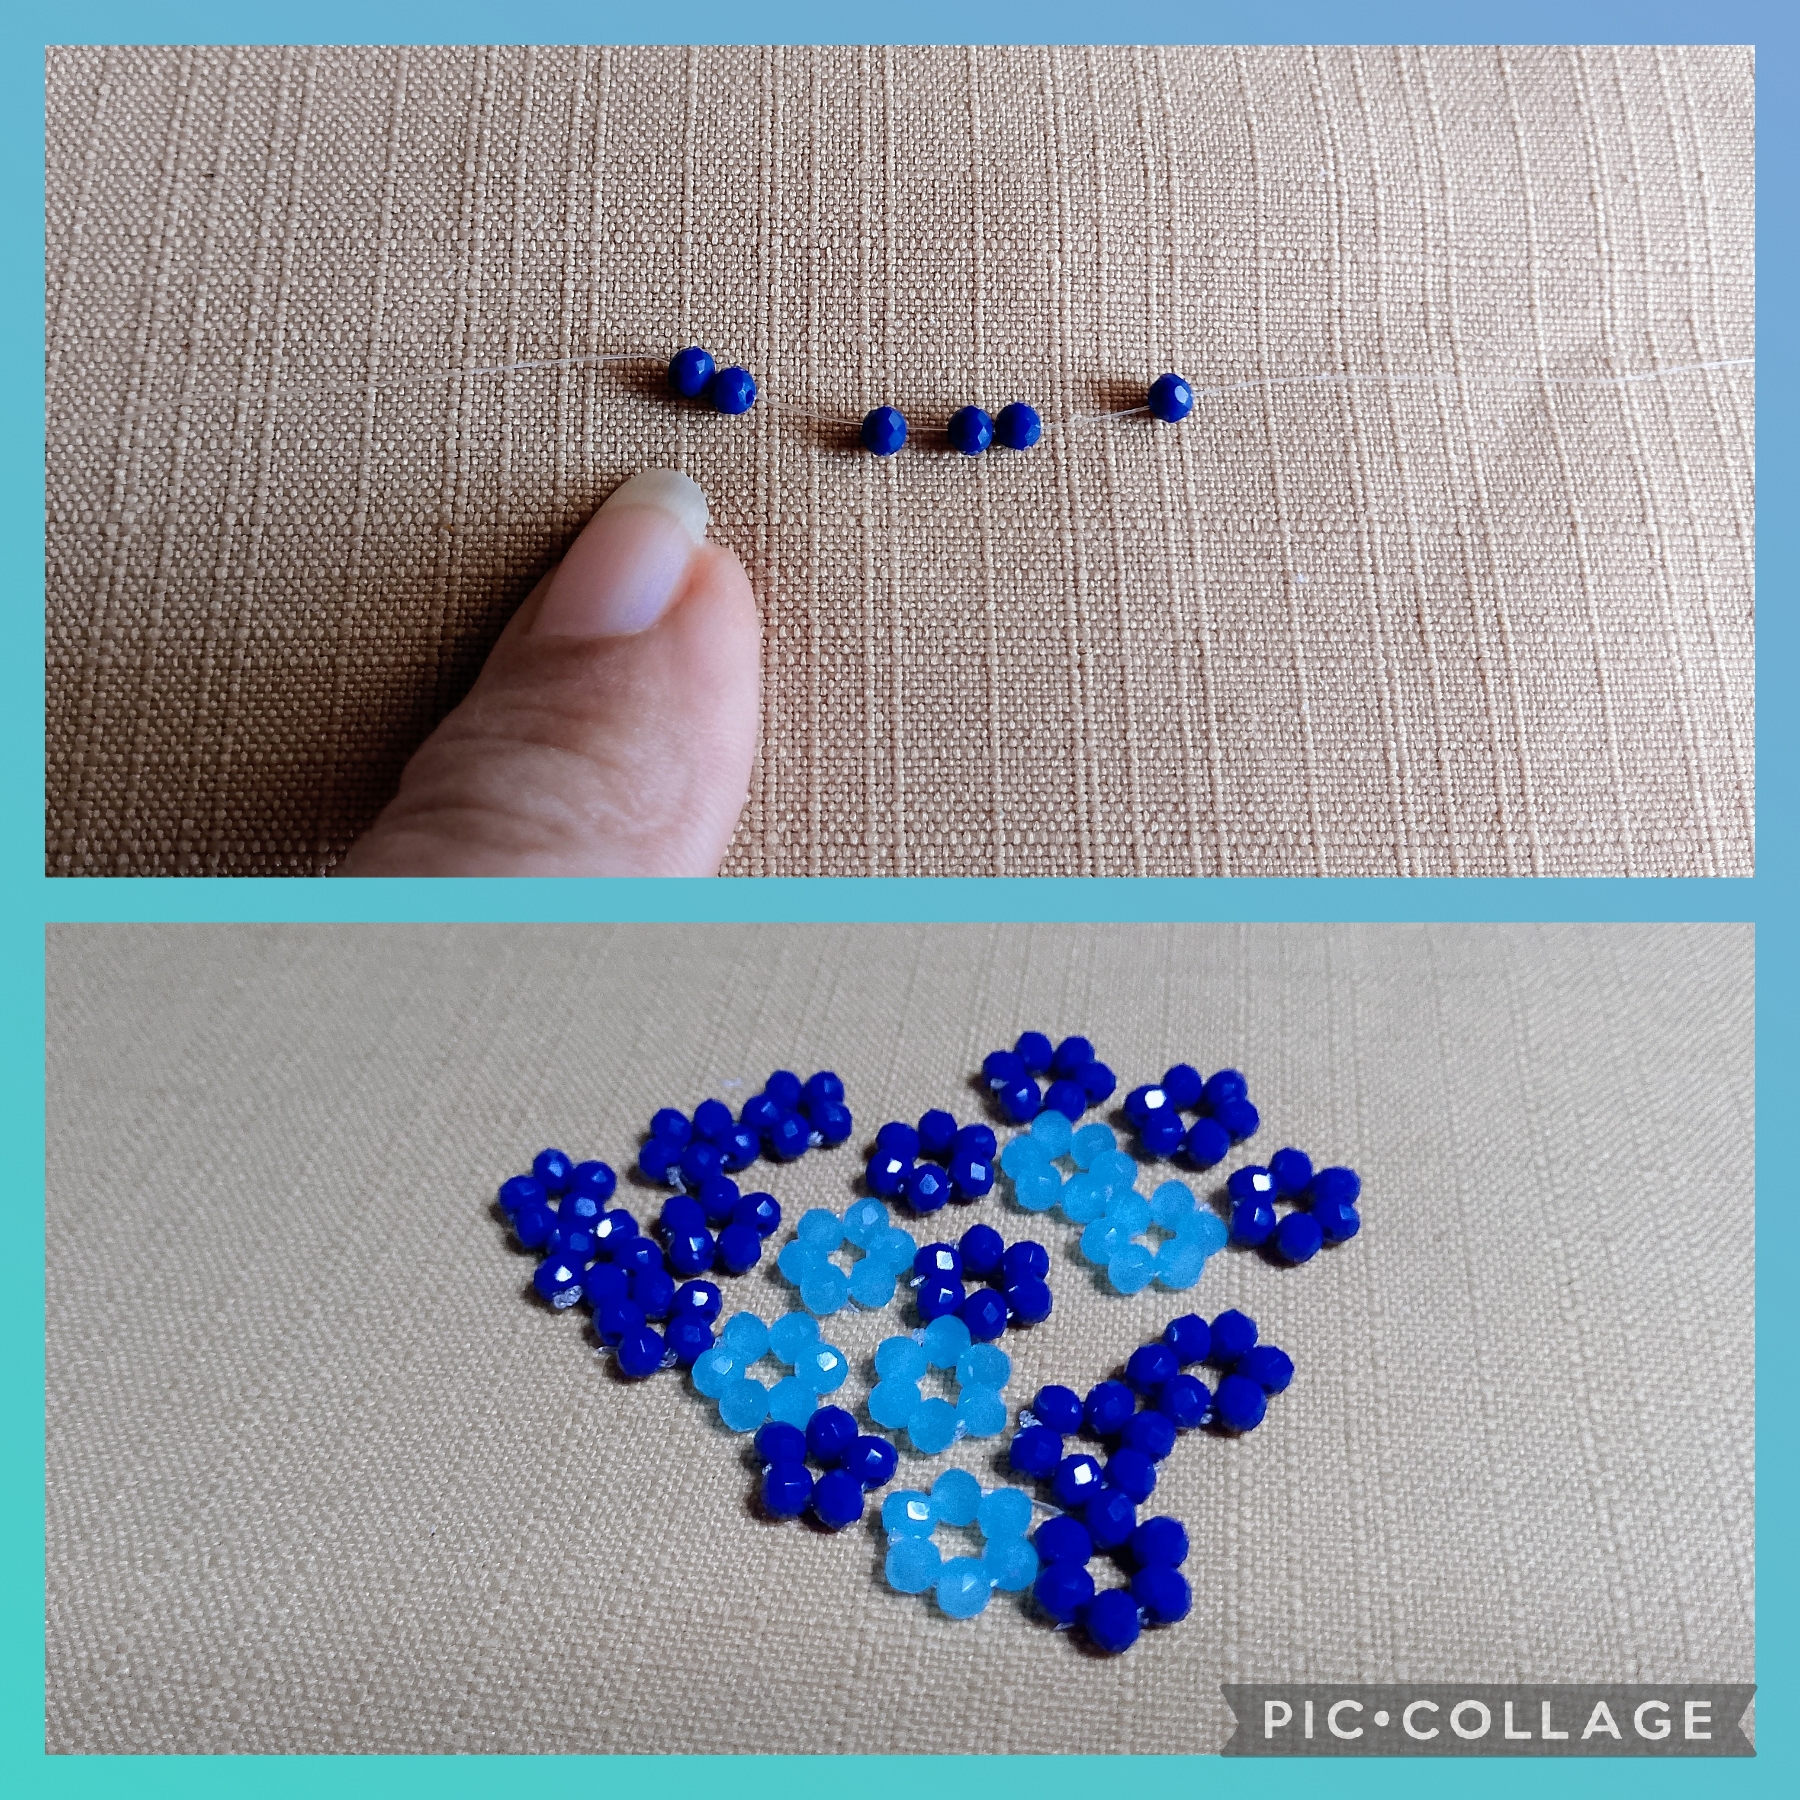
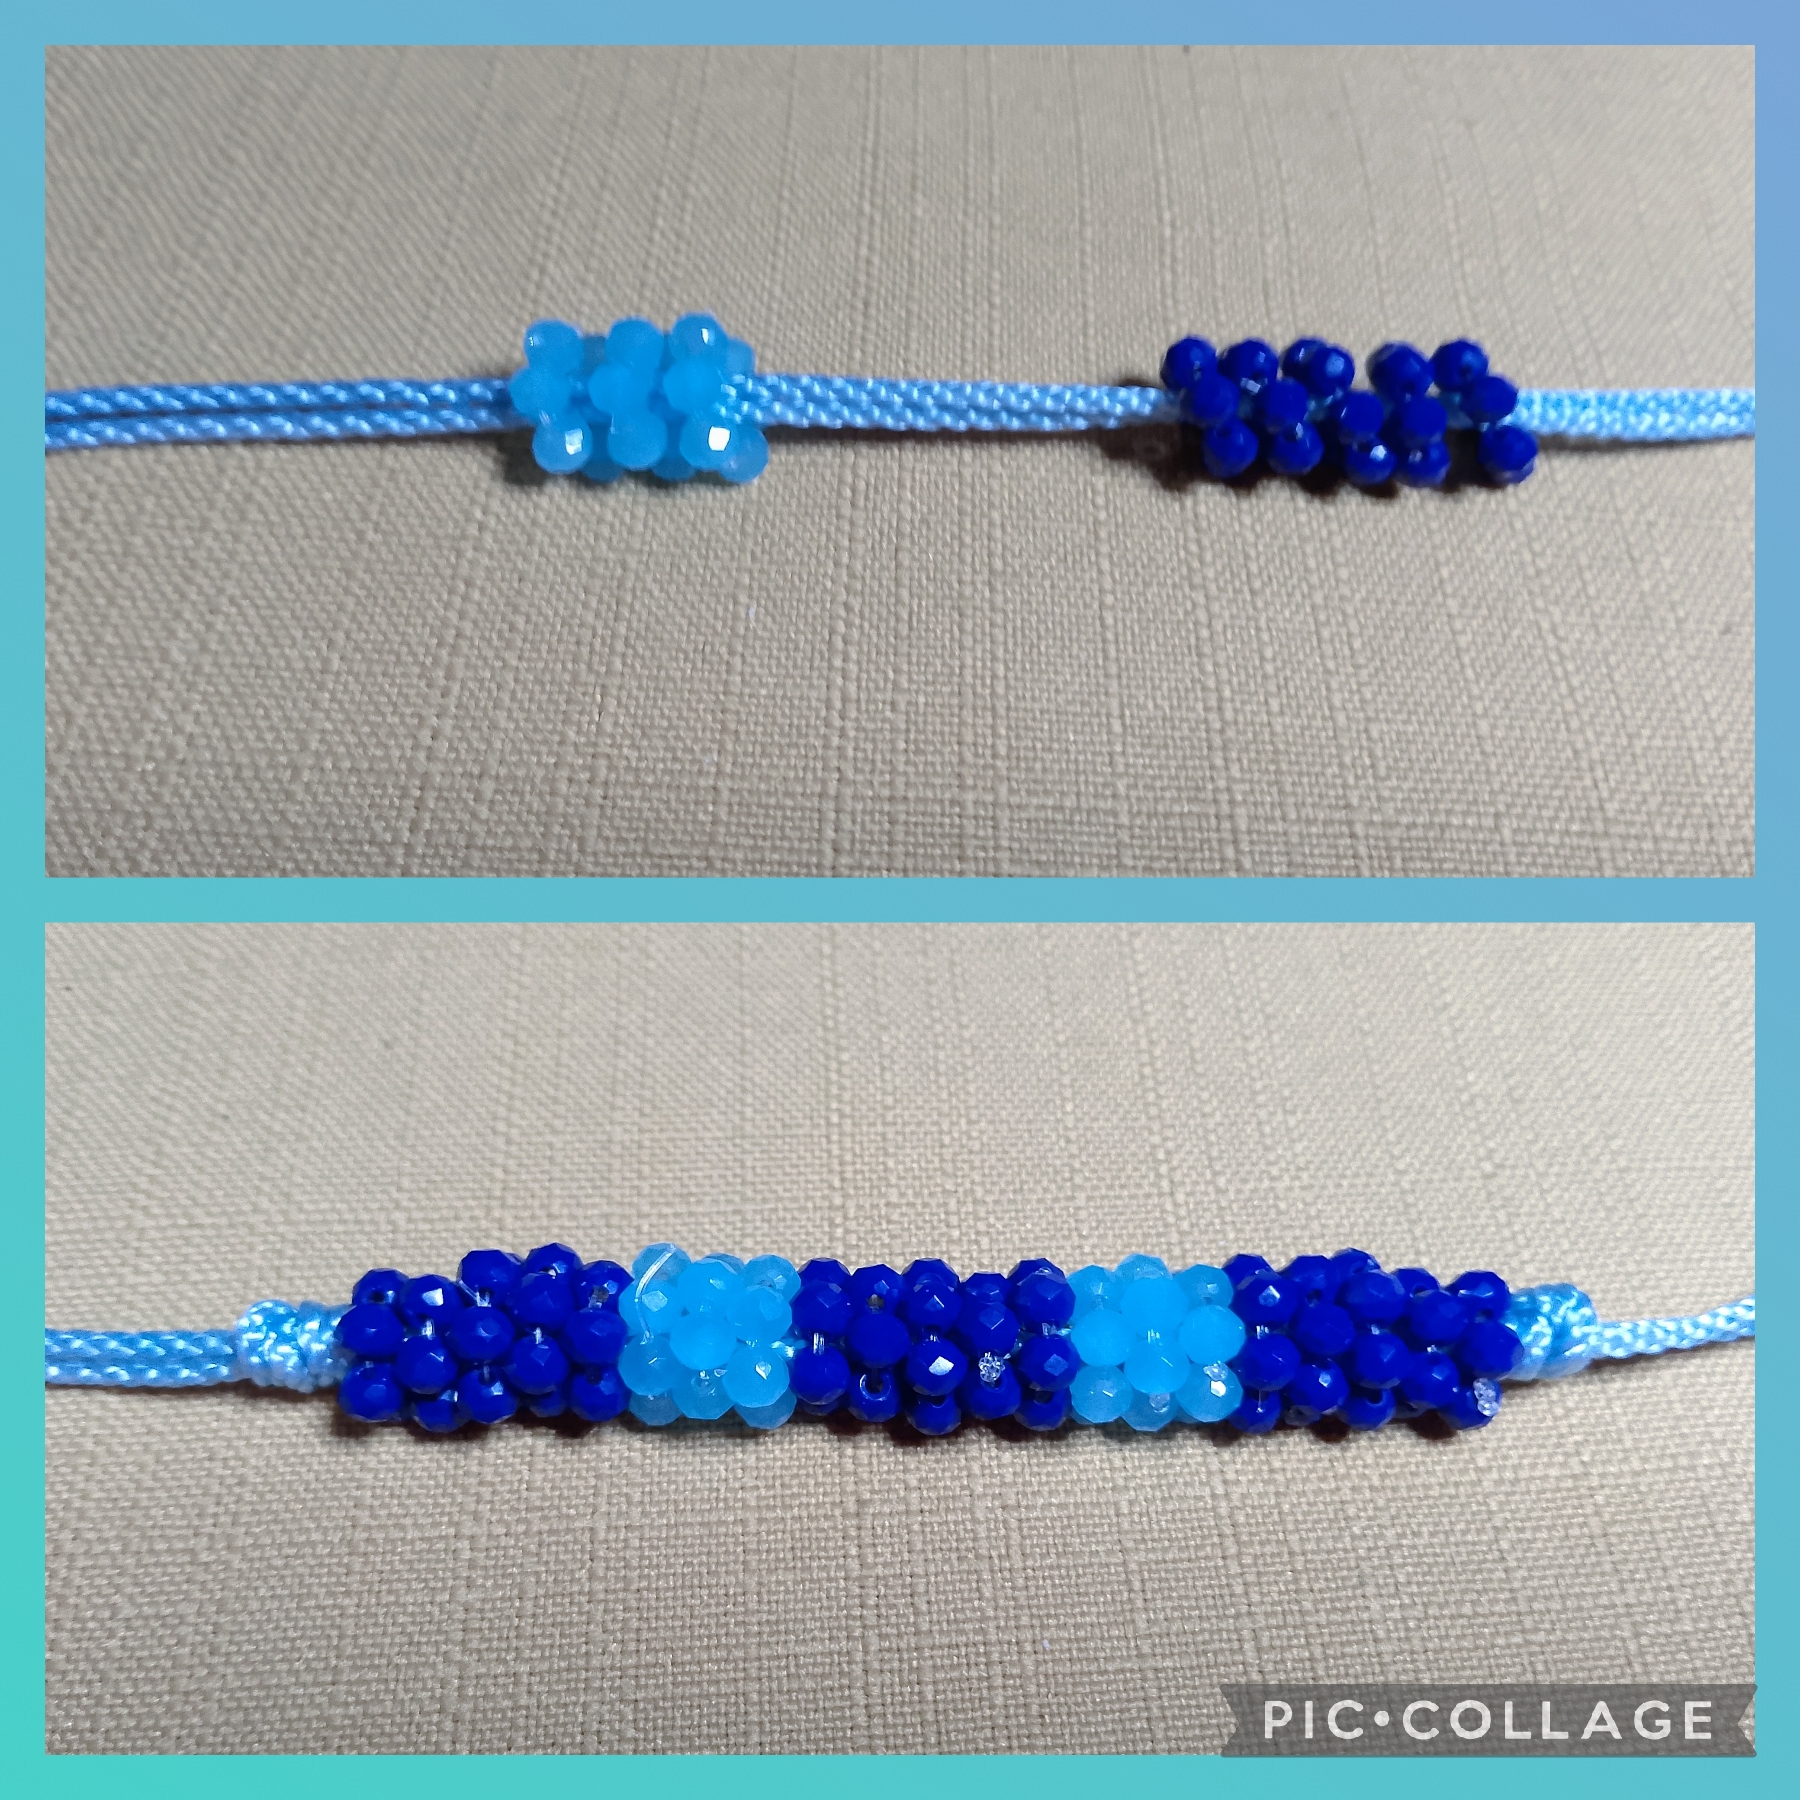
Voy a comenzar cortando un trozo de naylon para elaborar los anillos con las piedras de cuarzo, inserto por un extremo del naylon seis piedras empezando por las de color azul marino y las cierro en forma de anillo, paso de nuevo el naylon por las seis piedras y hago un nudo simple halo bien para asegurar y escondo, ahora uso las tijeras y corto los excedentes, quedando como muestra la imagen, de esta misma forma realizo seis anillos de color azul celeste para darle color a mi diseño.
>WITH THESE SIMPLE STEPS I CREATED MY PROJECT.
STEP ONE:
I'll start by cutting a piece of nylon to make the rings with the quartz stones. I insert six stones, starting with the navy blue ones, into one end of the nylon and close them in the shape of a ring. I thread the nylon through the six stones again and tie a simple knot, pulling it tight to secure and hide it. Now I use scissors and cut off the excess, leaving it as shown in the image. In this same way, I make six light blue rings to add color to my design.
SEGUNDO PASO:
Una vez que tengo realizado un total de veintiun anillos que será el total para formar la pulsera, tomo el metro del hilo terlenca color azul celeste y lo doblo a la mitad; comienzo por uno de los extremos y voy a insertar cinco anillos de color azul marino , luego paso por la misma punta tres anillos azul celeste, paso de nuevo cinco azul marino, tres azul celeste, cinco azul marino y de esta manera voy haciendo mi diseño.
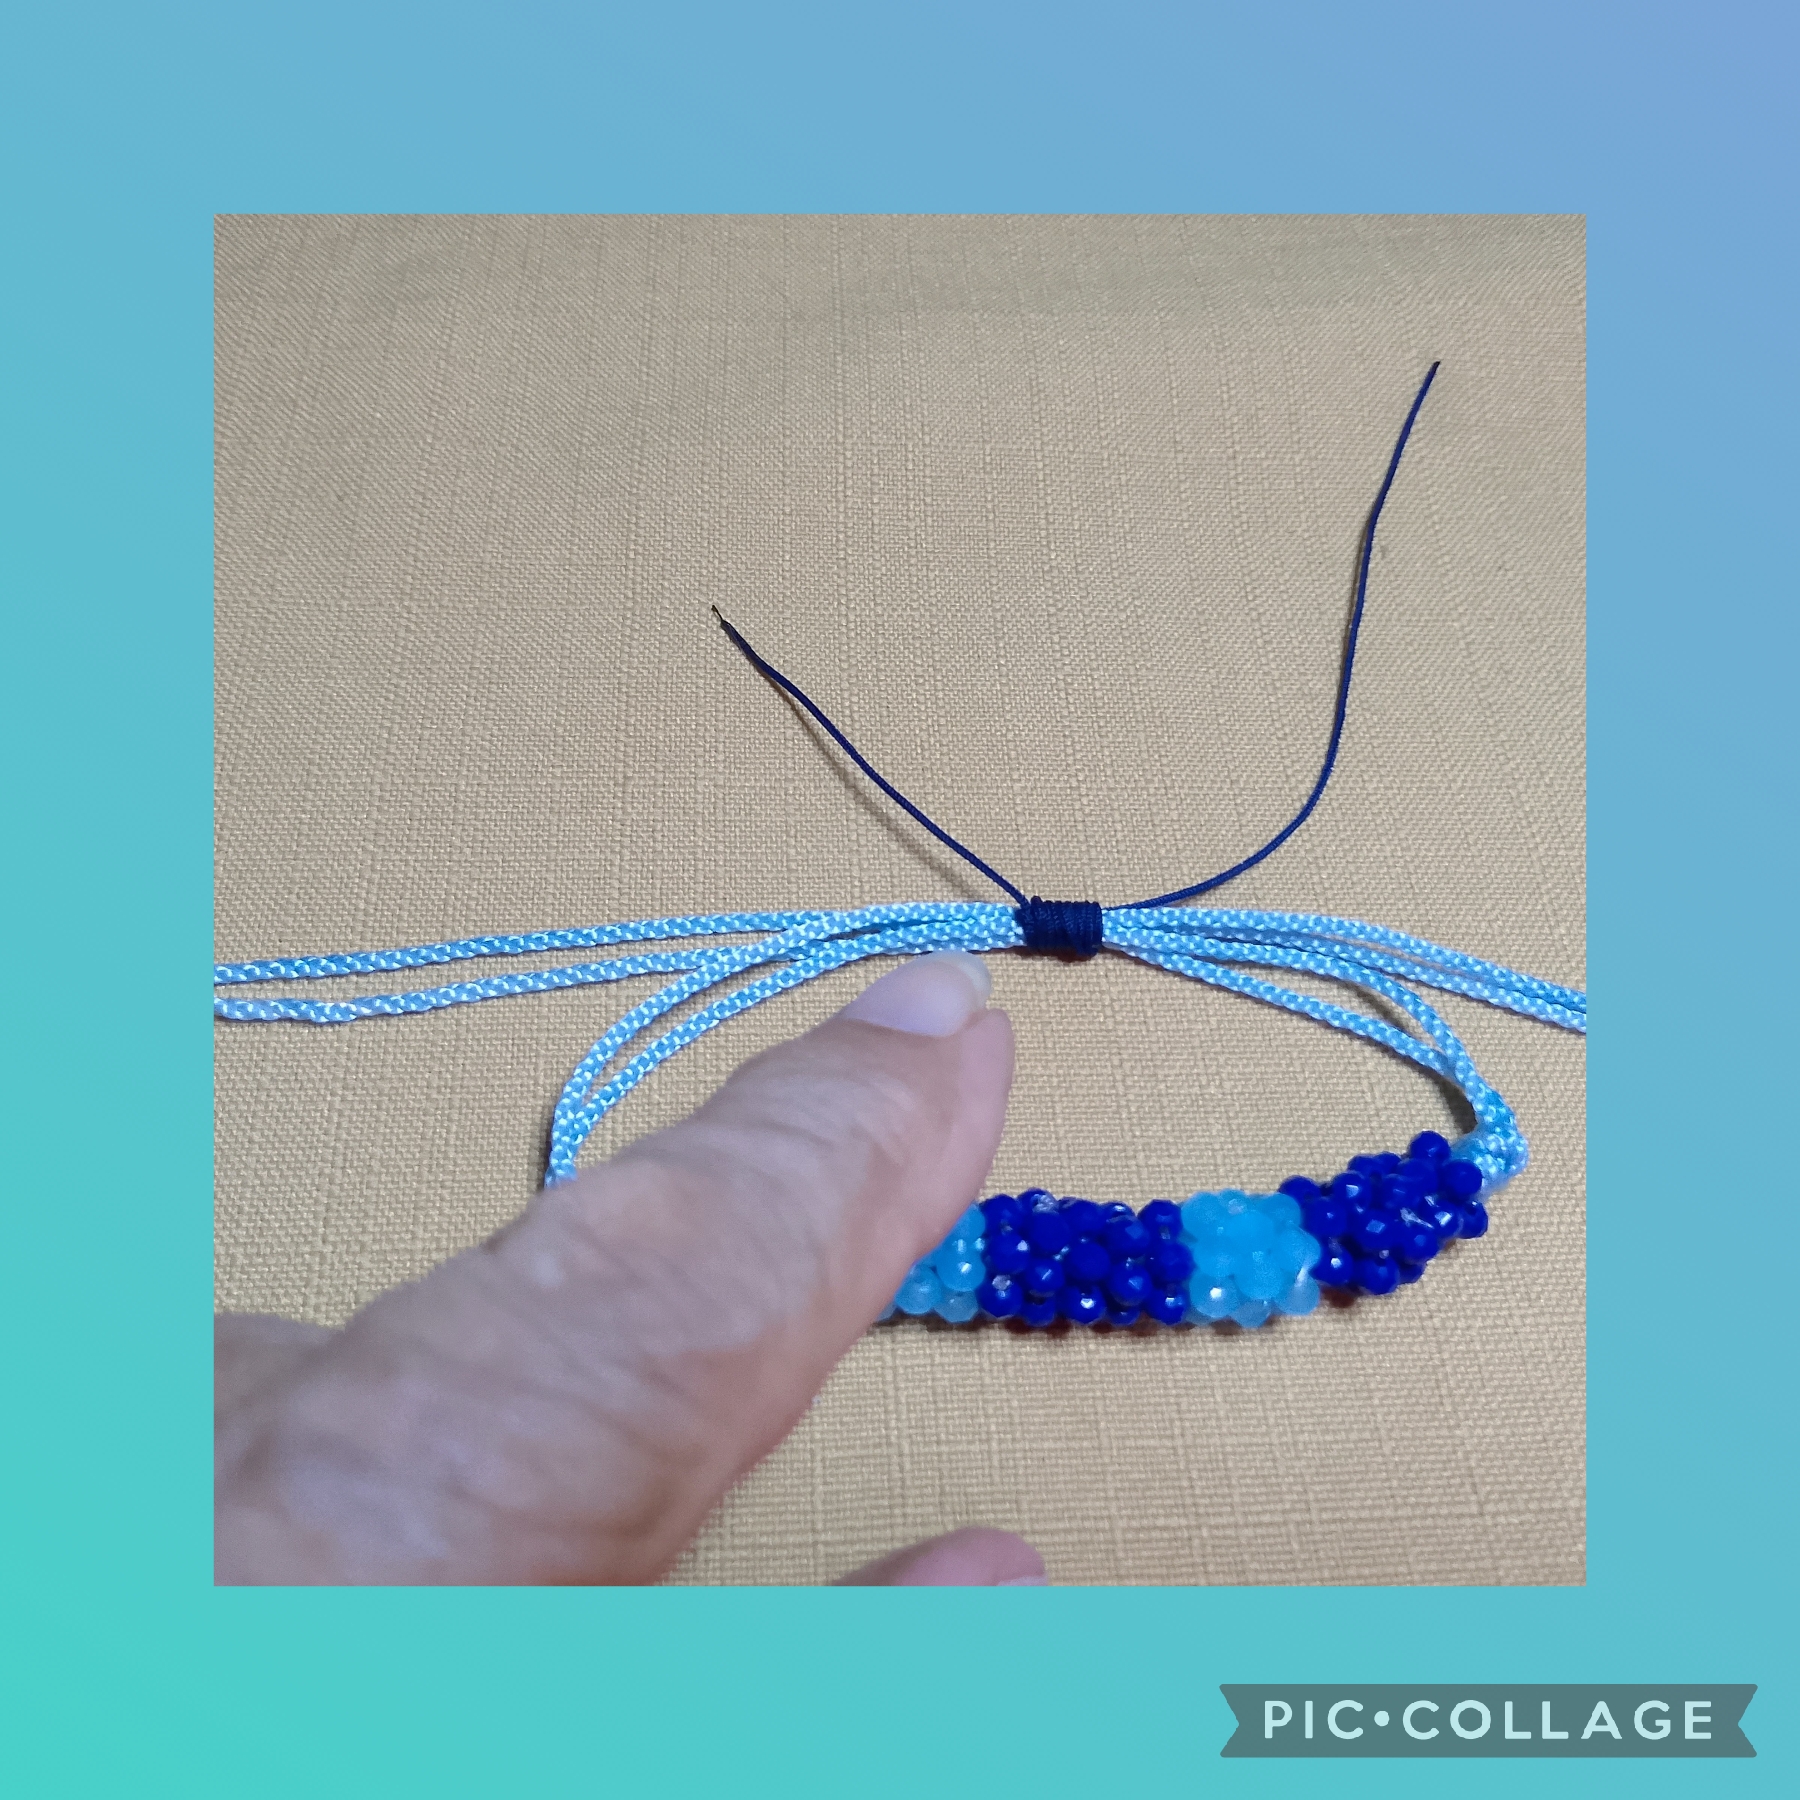
Ahora uno las puntas para verificar que las medidas sean iguales y realizo un nudo franciscano de forma que quede bien pegadito al anillo como se ve en la imagen, realizó otro nudo franciscano en el otro lado y así va quedando.
>STEP TWO:
Once I've made a total of twenty-one rings, which will be the total for the bracelet, I take the meter of sky blue terlenca thread and fold it in half. Starting at one end, I'll insert five navy blue rings. Then, I thread three sky blue rings through the same end, then five navy blue rings, three sky blue rings, and five navy blue rings. This is how I create my design.
Now, I join the ends together to make sure the measurements are equal and tie a Franciscan knot so that it fits snugly against the ring, as seen in the image. I tie another Franciscan knot on the other side, and that's how it looks.
TERCER PASO:
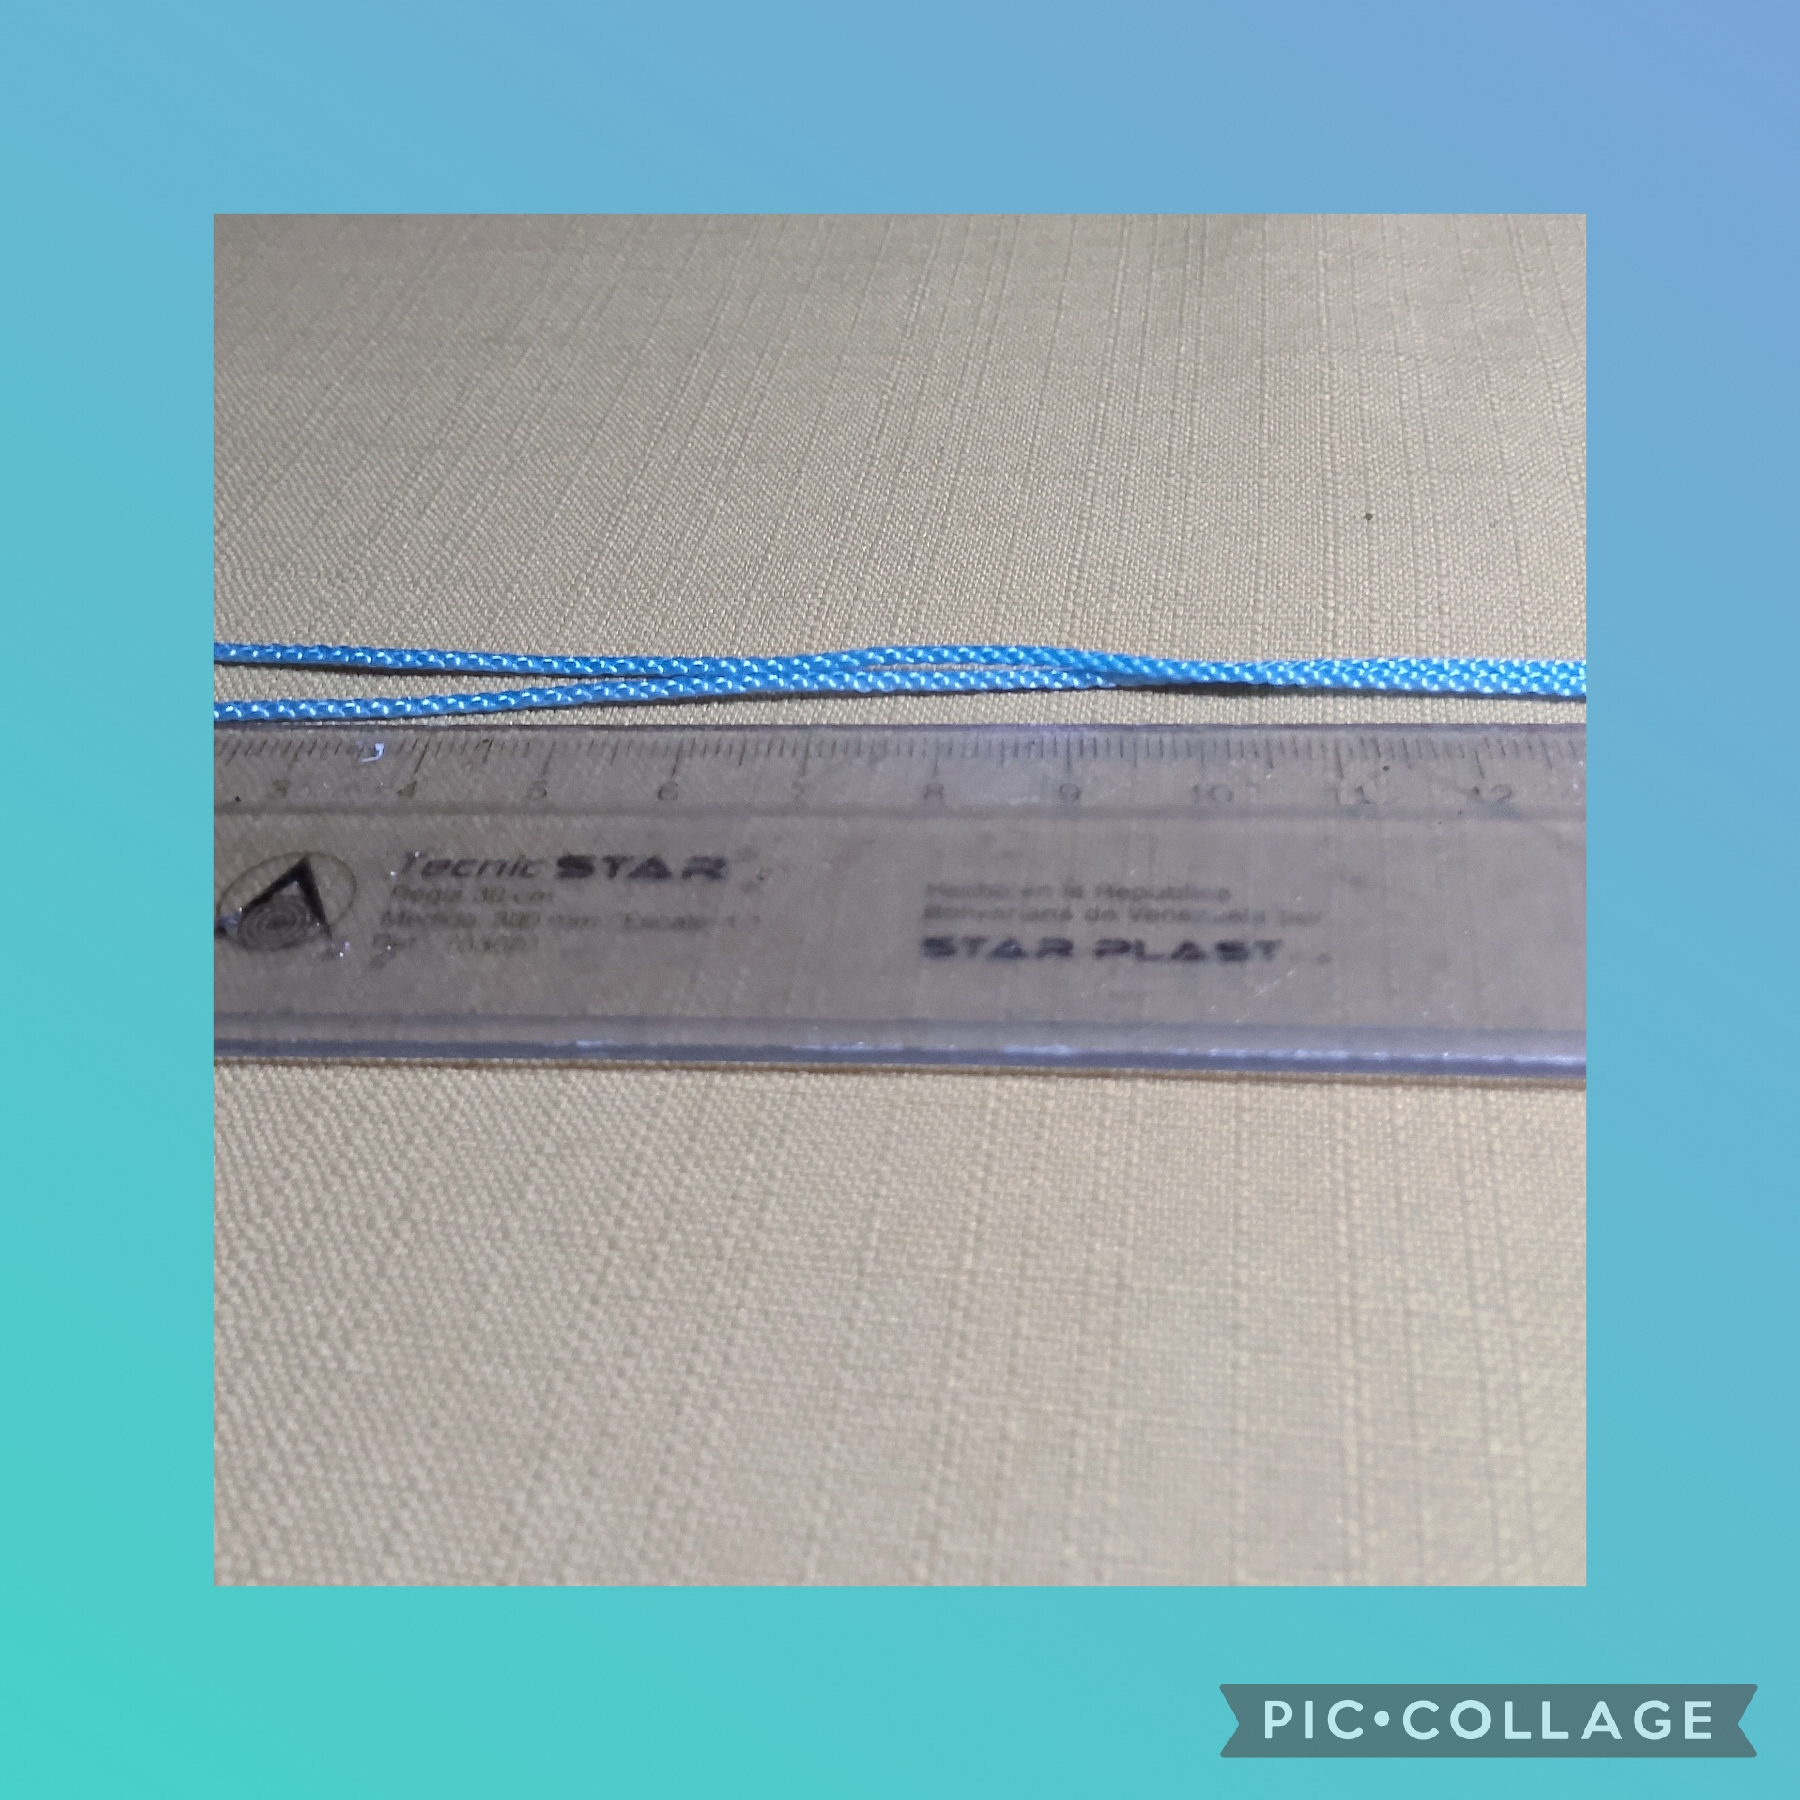
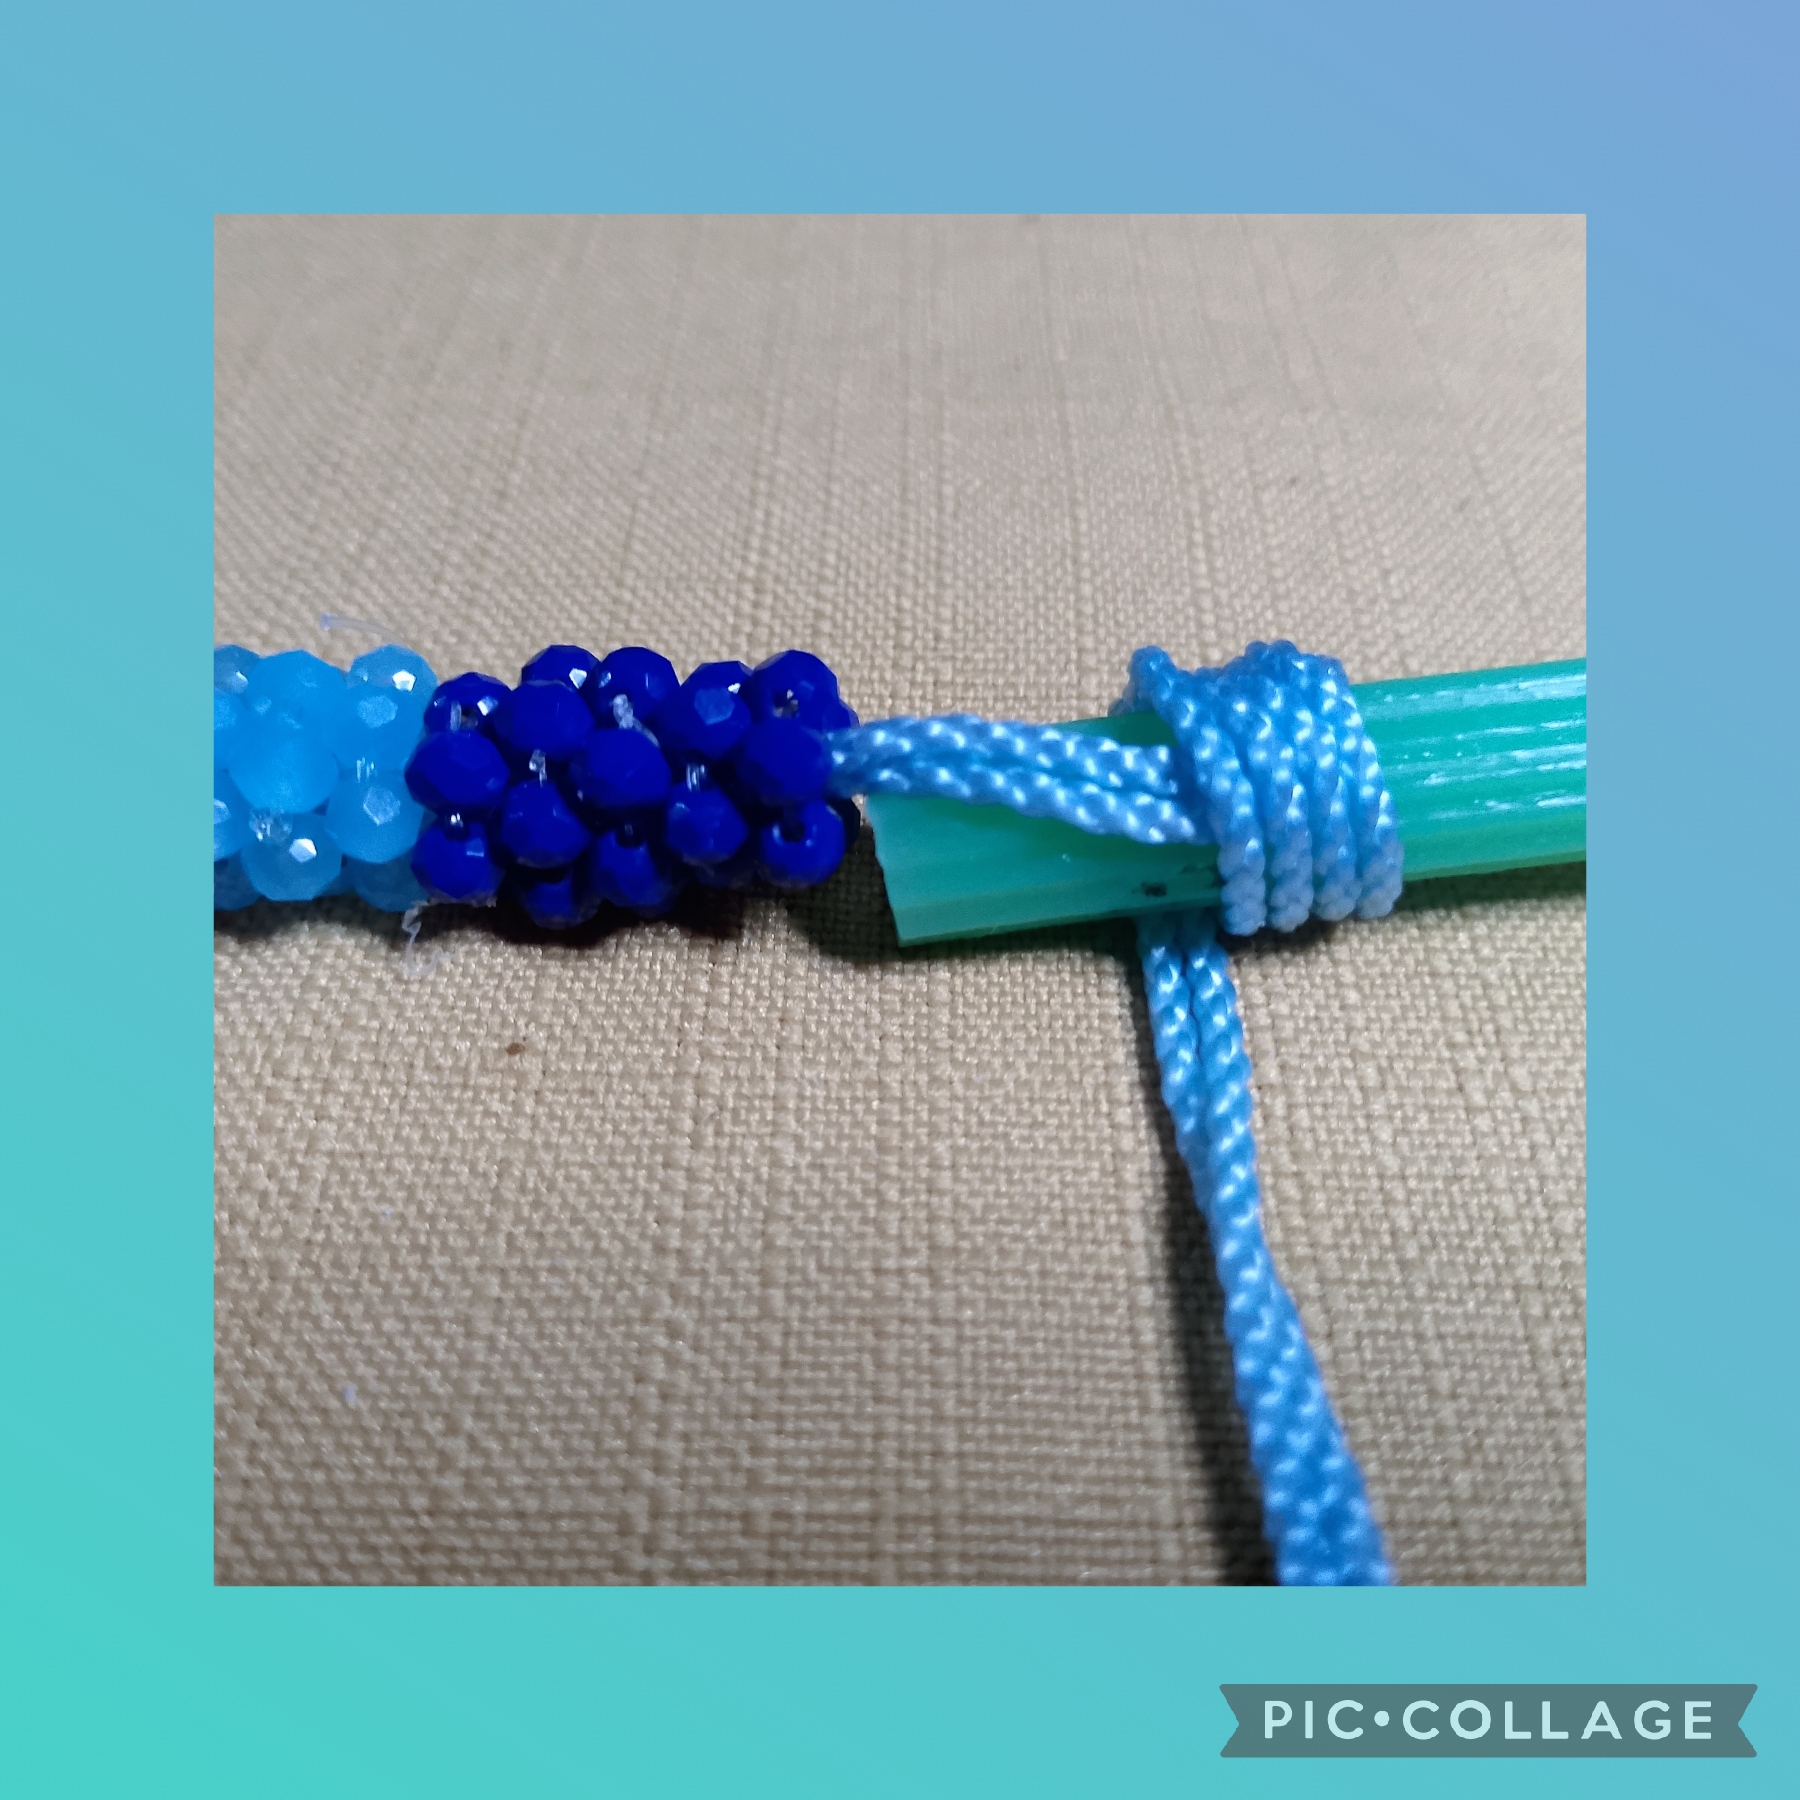
En este paso de nuevo uno las puntas y verifico que las medidas están iguales, mido una distancia de seis centímetros entre los lados y procedo a elaborar un nudo franciscano para el cierre; corto un trozo de diez centímetros de hilo chino color azul marino y lo doblo haciendo una especie de ojal dejando una punta más larga que la otra, así la coloco en la mitad de los hilos de la pulsera y con la punta más larga enrollo cinco veces, ahora paso la punta por dentro del ojal y halo las dos puntas asegurando el nudo, corto los excedentes y sello con el encendedor.
>STEP THREE:
In this step, I join the ends again and verify that the measurements are equal. I measure a distance of six centimeters between the sides and proceed to tie a Franciscan knot for the closure. I cut a ten-centimeter piece of navy blue Chinese thread and fold it into a sort of eyelet, leaving one end longer than the other. I place it in the middle of the bracelet threads and wrap the longer end five times. Now, I pass the end through the eyelet and pull the two ends together, securing the knot. I cut off the excess and seal it with the lighter.
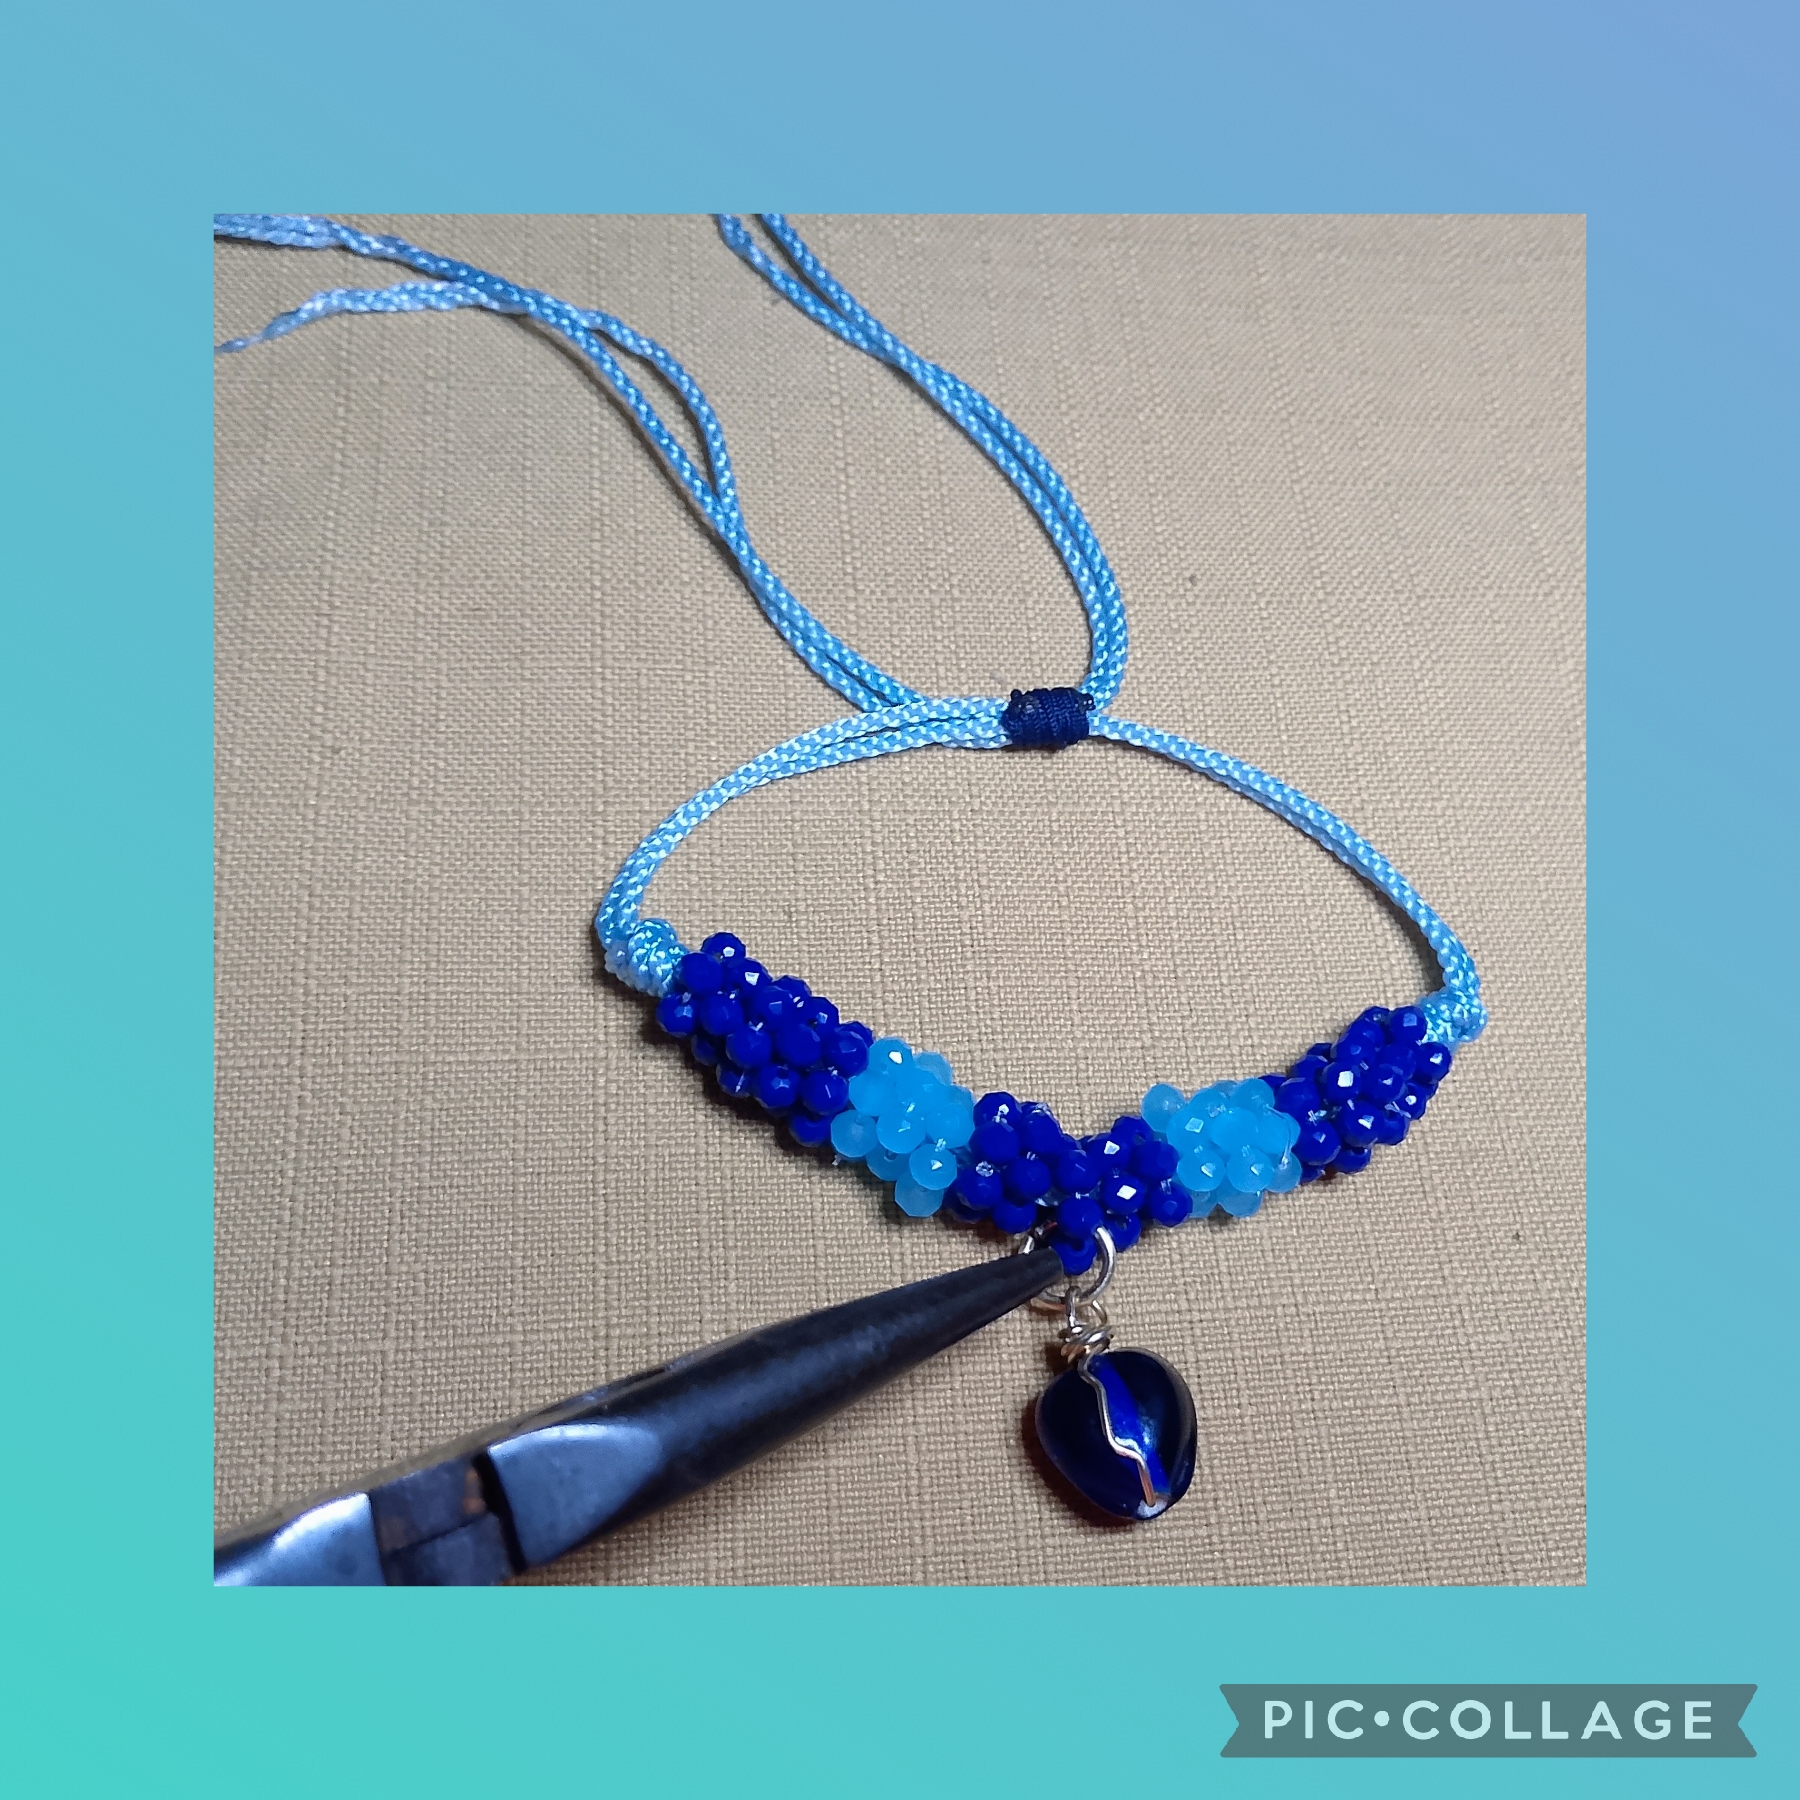
CUARTO PASO:
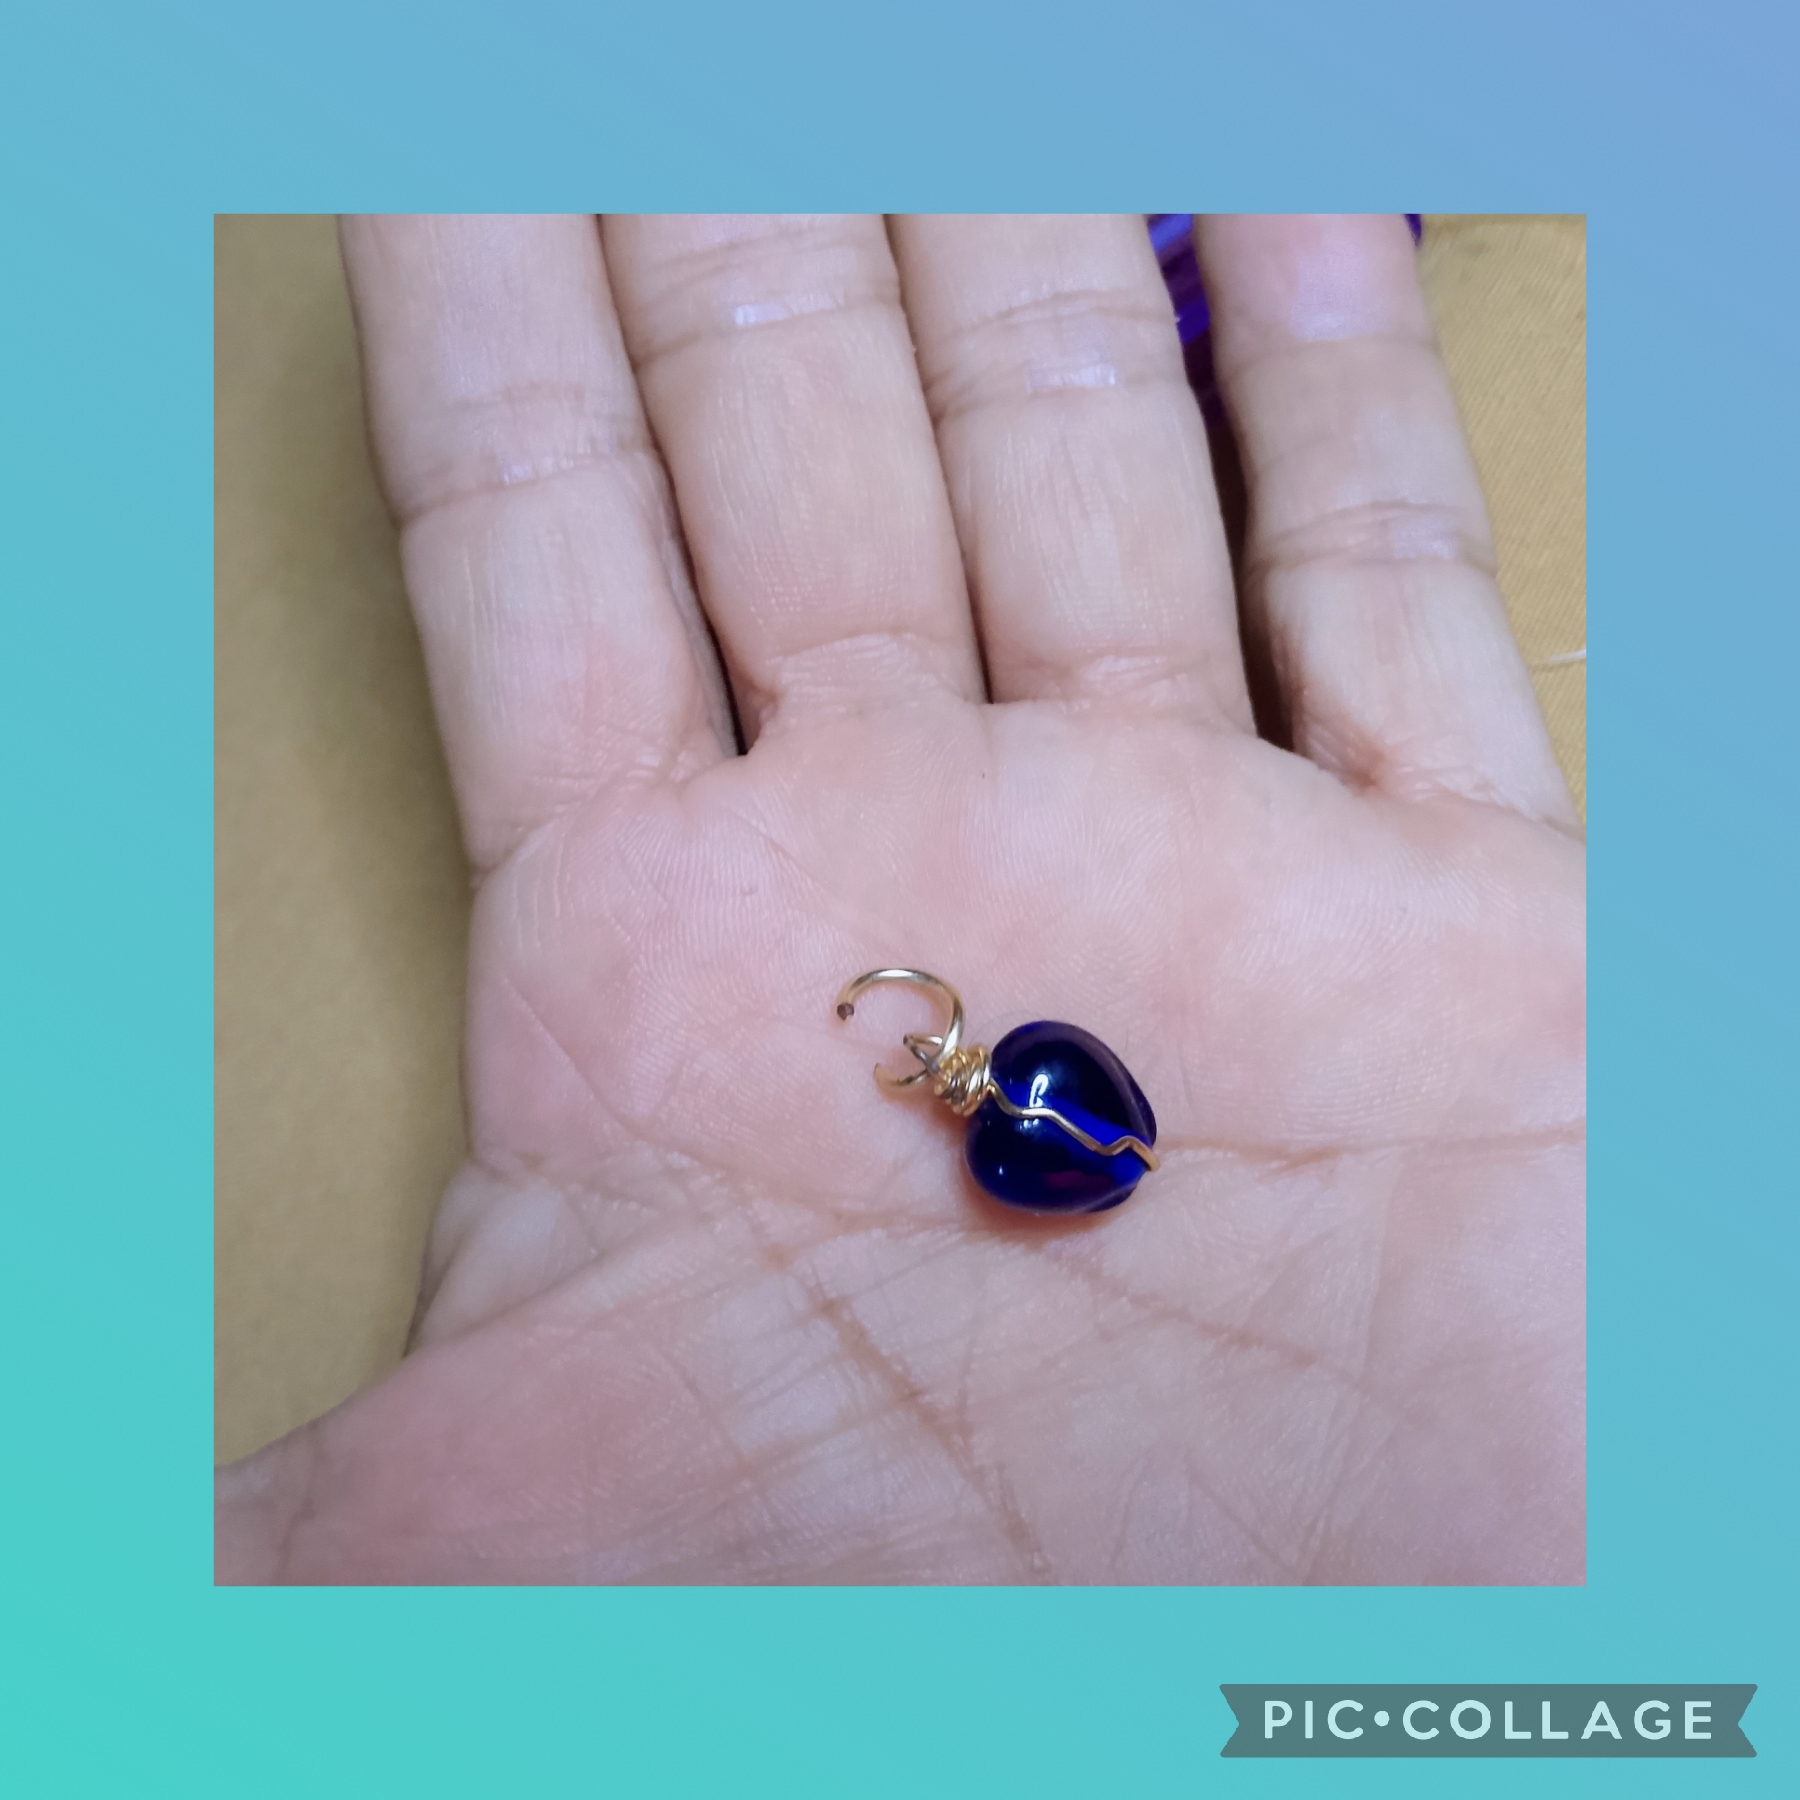
Ahora en este paso voy a colocar en el centro de la pulsera un dije en forma de corazón que realicé con anterioridad, me ayudo con las pinzas para dejarlo muy seguro, después hago en las puntas nudos simples que uso las tijeras para cortar y sello los excedentes con el encendedor para terminar.
>STEP FOUR:
Now in this step, I'm going to place a heart-shaped charm I made earlier in the center of the bracelet. I use pliers to secure it. Then, I tie simple knots at the ends, cutting them with scissors, and seal the excess with a lighter to finish.
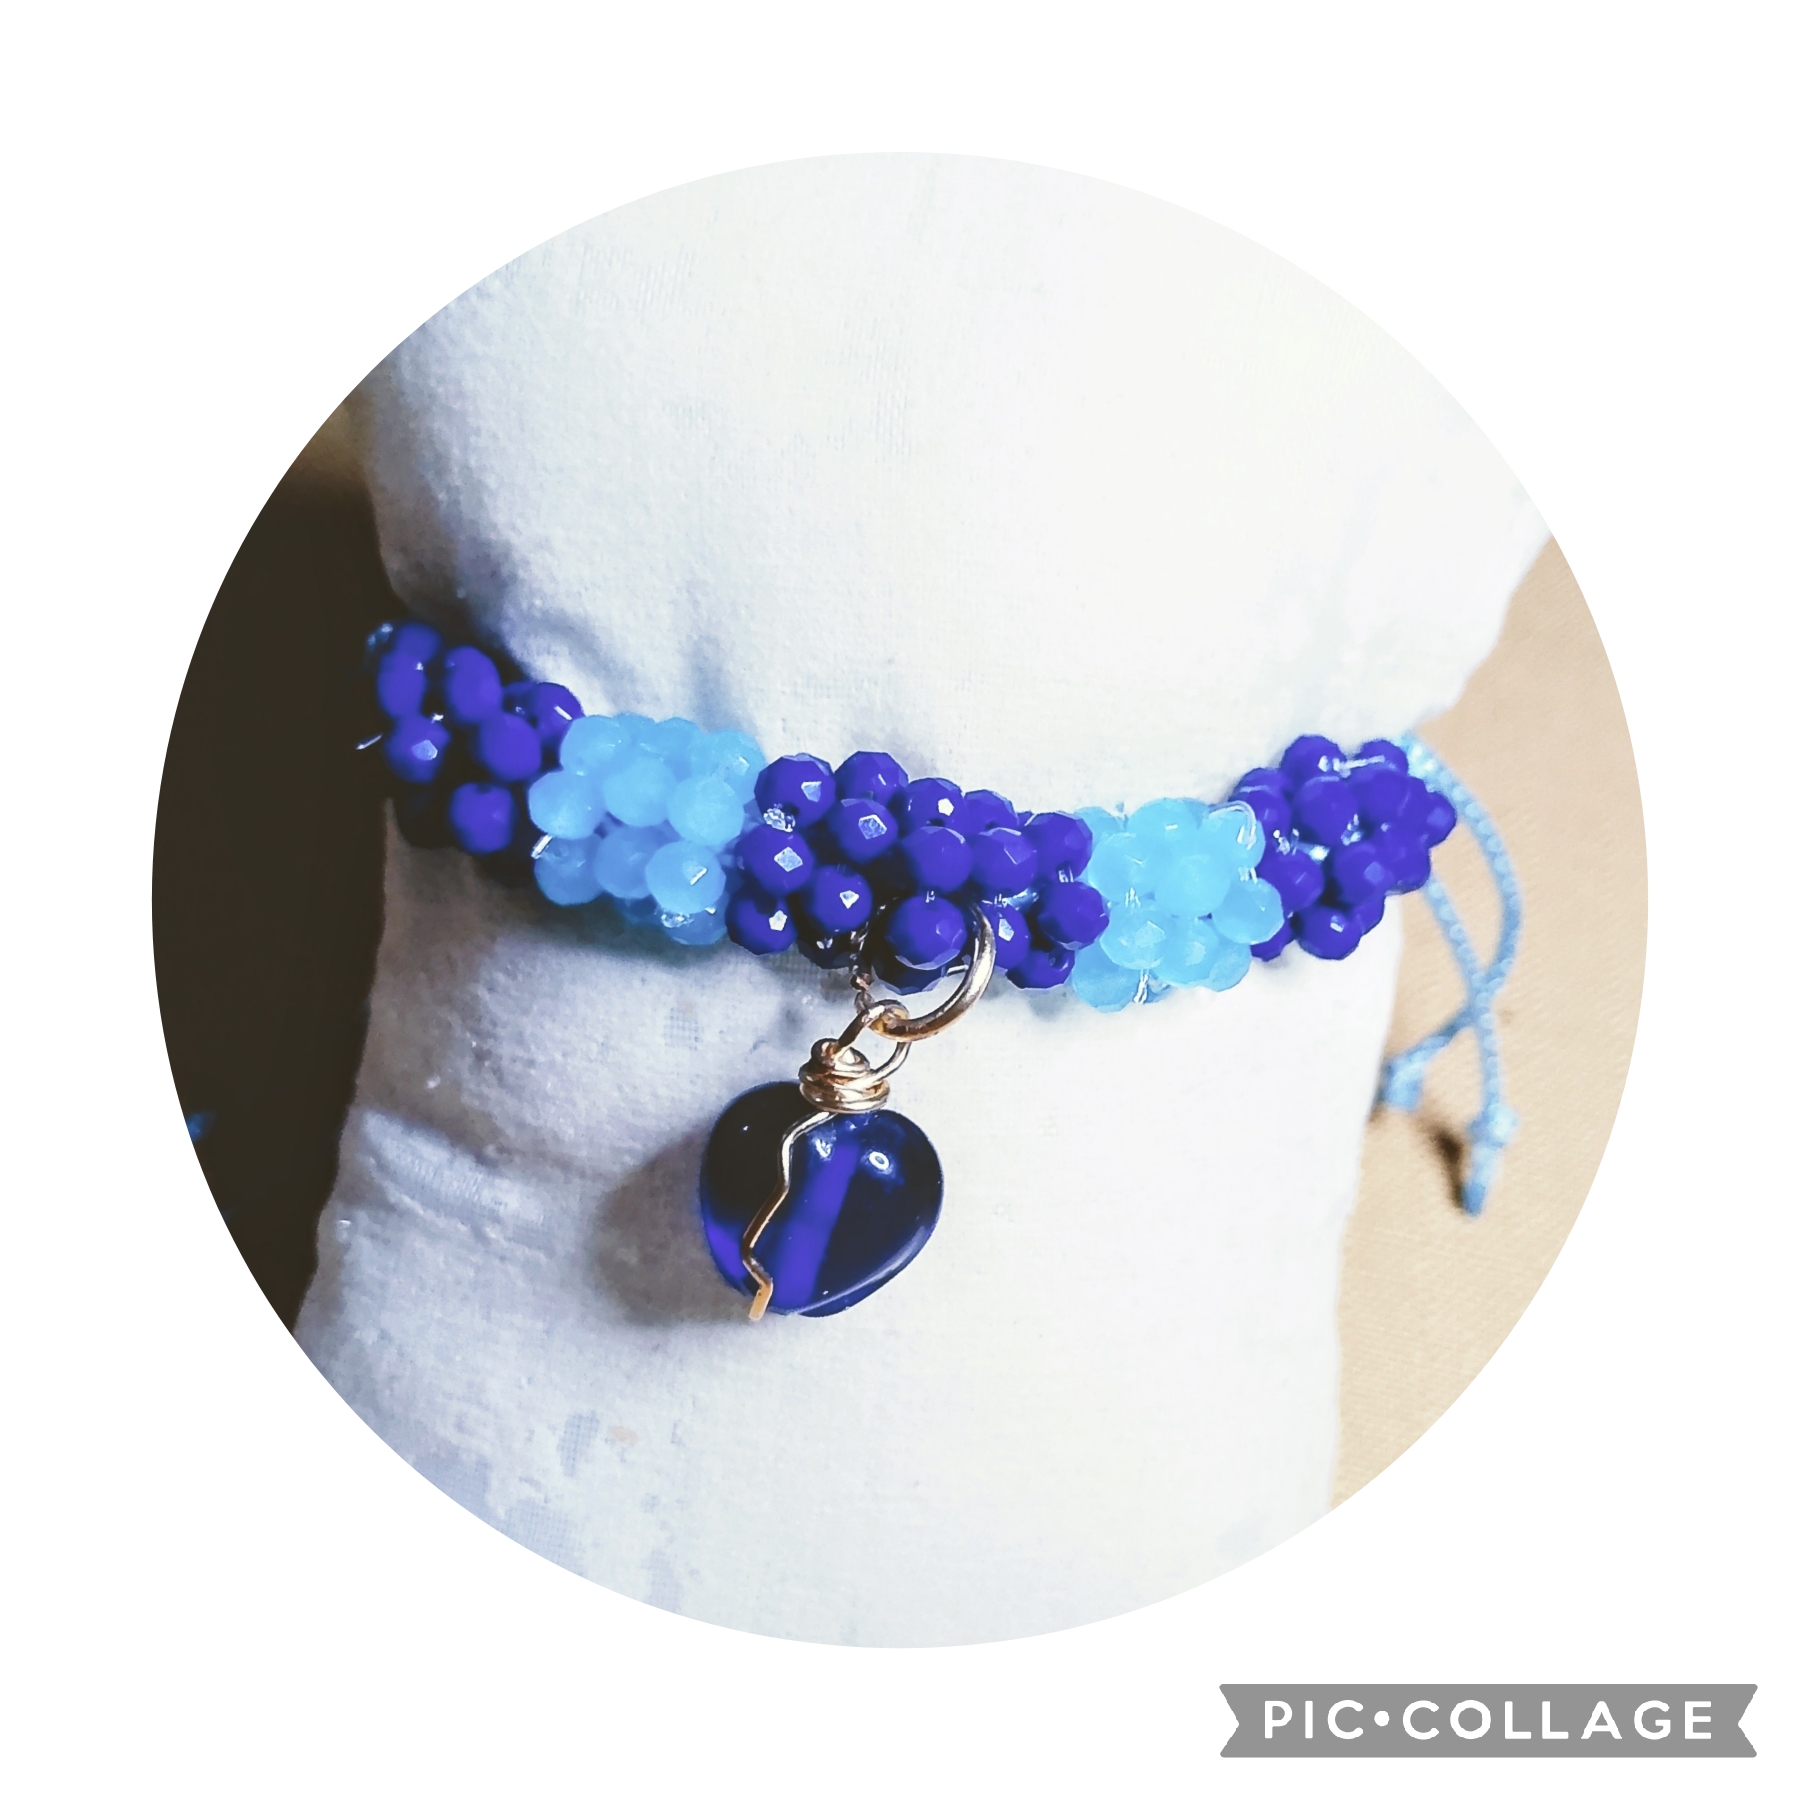
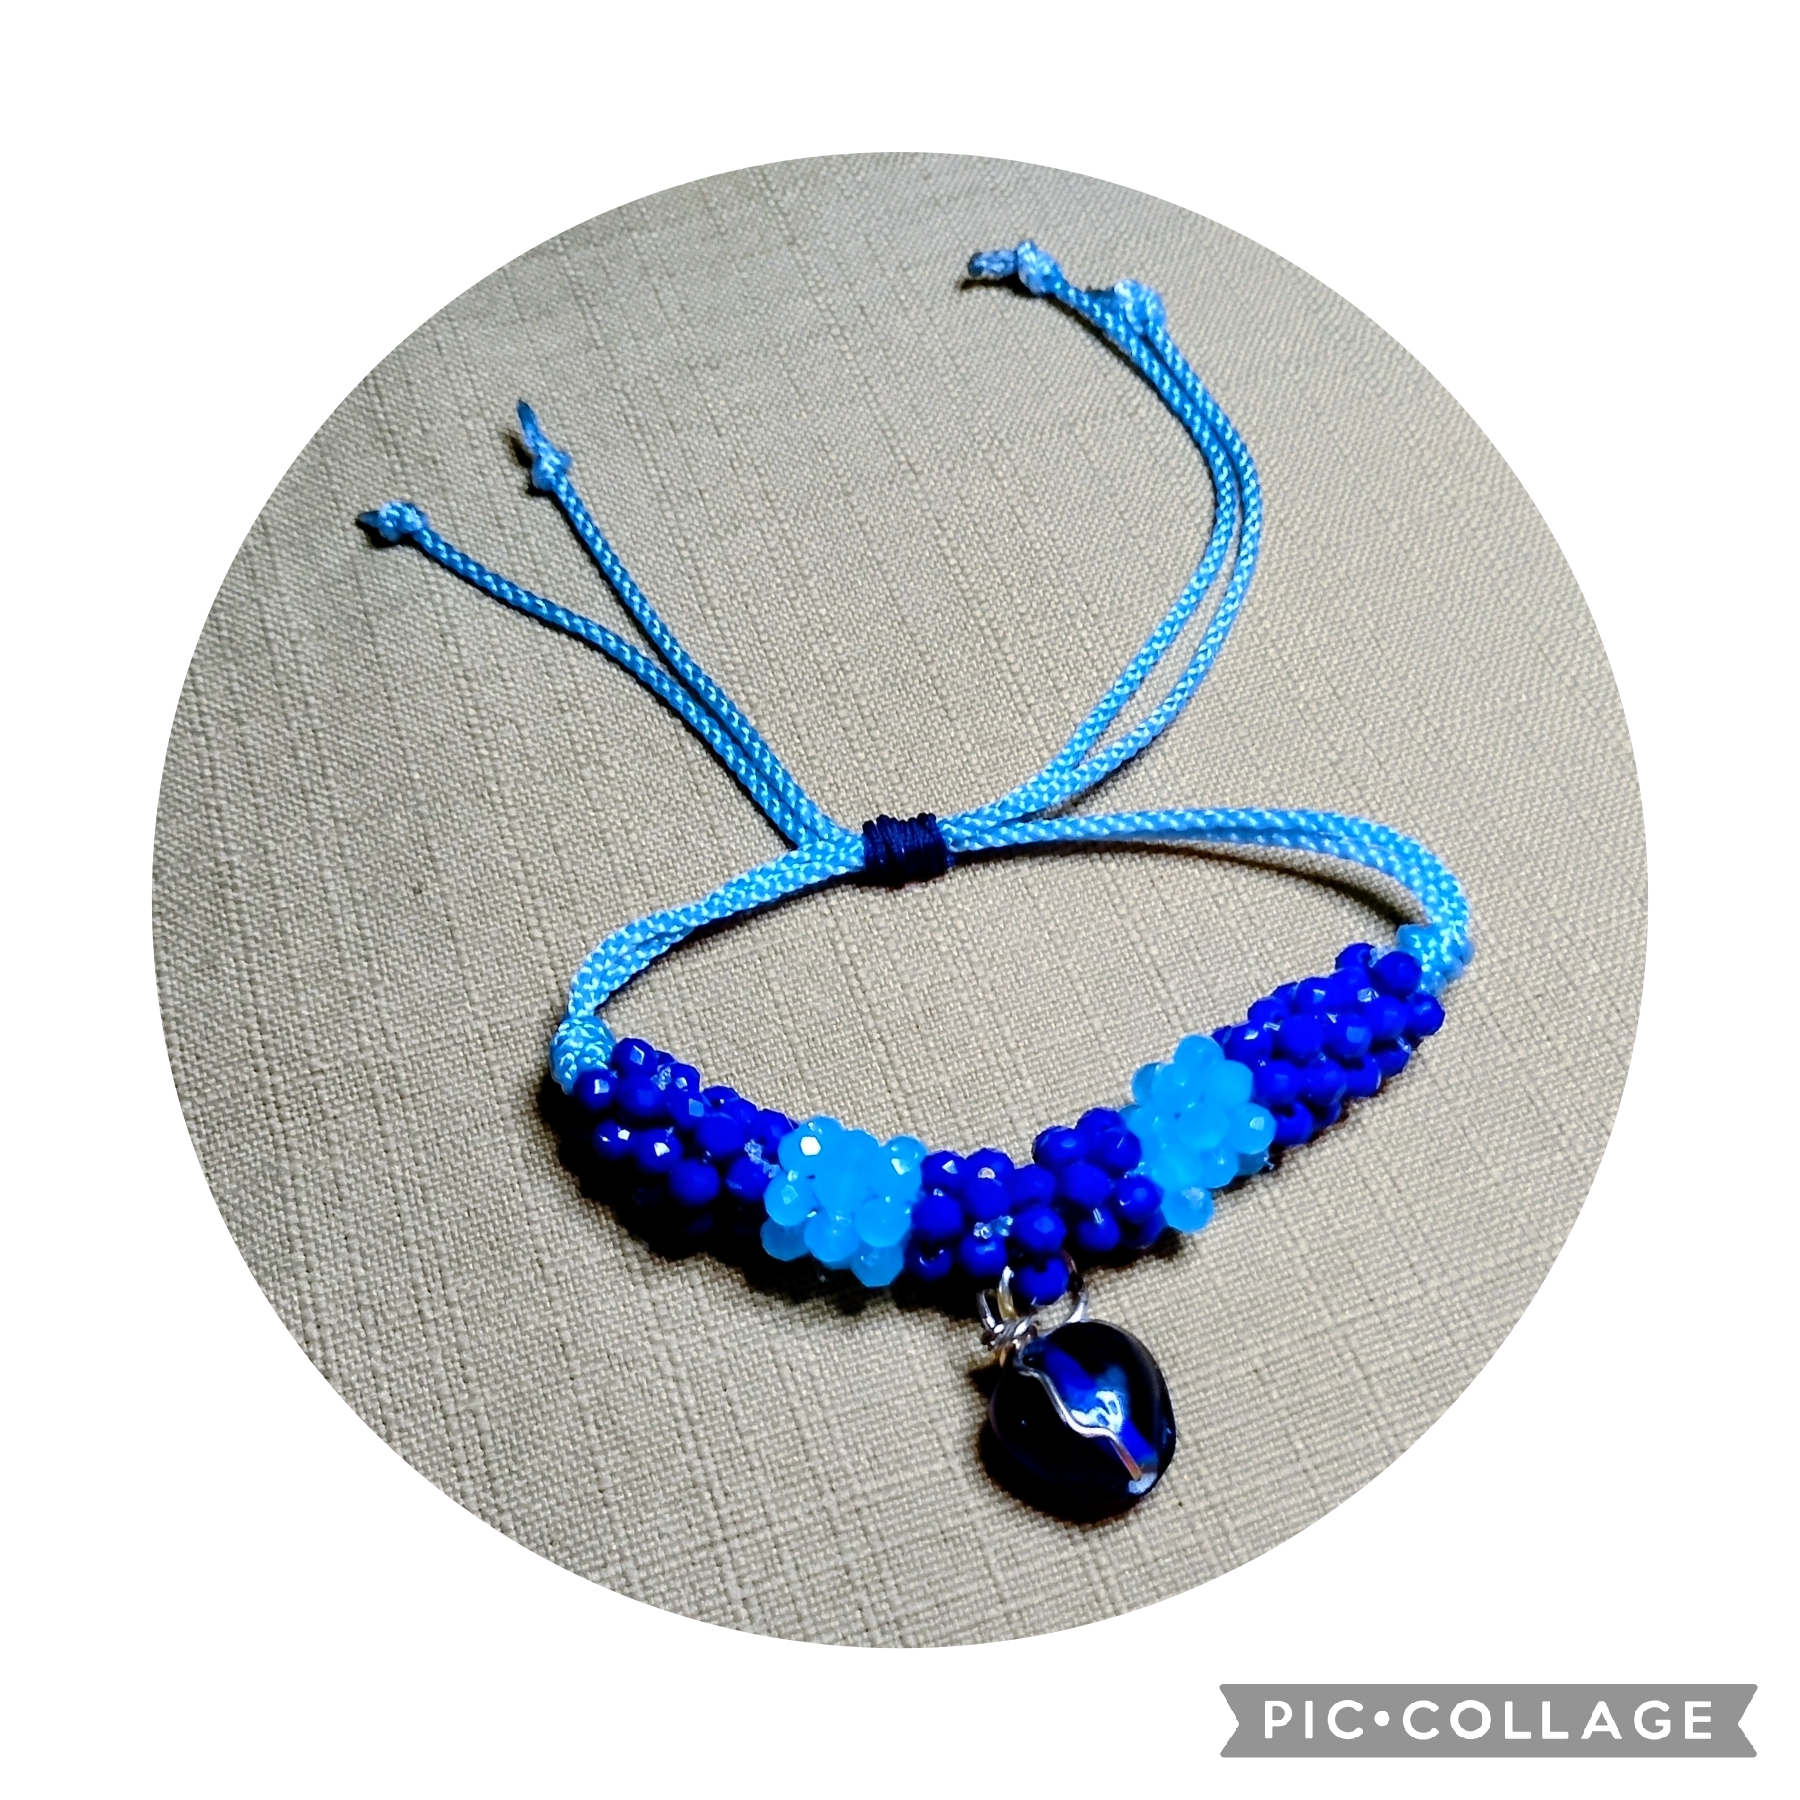
Artistas Creativos de las Manualidades y la Joyería, este es el resultado final de mi manualidad, espero que les guste está idea y desarrollen sus creaciones poniendo su toque personal , como les comenté al inicio espero sorprender a mi hija el próximo 13 y luego les cuento, como siempre agradecida con todos los que leen, ven mis publicaciones y me dan su apoyo con sus valiosos comentarios; que tengan un excelente inicio de semana y nos vemos en la próxima manualidad, bye bye
>Creative Artists of Crafts and Jewelry, this is the final result of my craft, I hope you like this idea and develop your creations adding your personal touch, as I told you at the beginning I hope to surprise my daughter next 13th and then I will tell you, as always grateful to all who read, see my publications and give me their support with their valuable comments; have an excellent start to the week and see you in the next craft, bye bye
Las imágenes y redacción de este tutorial son de mi exclusiva propiedad, las fotos fueron tomadas con mi teléfono celular Tecno Spark Go 20 y las edite con una aplicación gratis del mismo.
Para traducir texto use Google traductor.
>The images and writing in this tutorial are my exclusive property. The photos were taken with my Tecno Spark Go 20 cell phone and edited with a free app.
Use Google Translate to translate the text.
Delicate Bracelet Made with Two-Tone Blue Quartz Rings.// [Esp-Eng]
@nhaydu
· 2025-08-10 04:51
· Jewelry
#jewerly
#spanish
#ocd
#ecency
#diyhub
#neoxian
#manualidades
Payout: 0.000 HBD
Votes: 277
More interactions (upvote, reblog, reply) coming soon.