It’s time to share those epic mmoments like those when strategy, timing, and deck choices align to snatch victory from the jaws of defeat.
Whether it’s a cheeky health-reduction trick, an underdog card carrying the squad, or a last-second comeback, we want to see it.
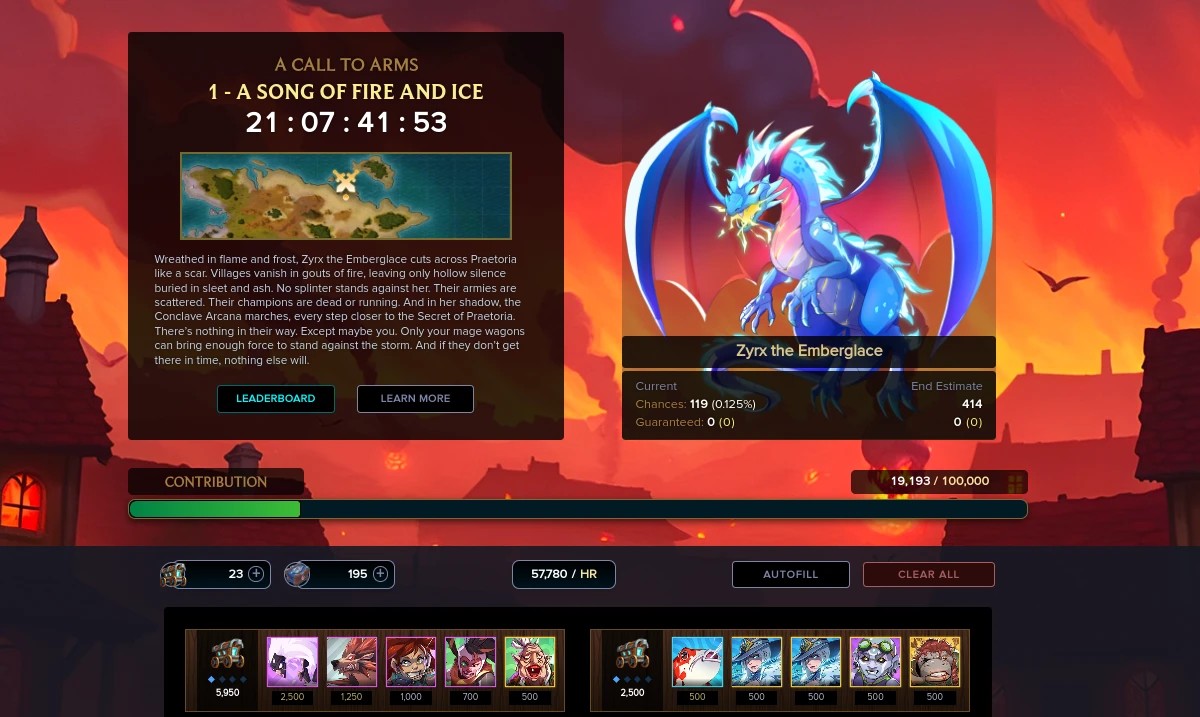
The heat is on in Splinterlands as a brand new season storms in — packed with fresh storylines, epic player conflicts, and golden chances to climb the ranks. An arcane storm brews across the realm, and it’s adding a dramatic flair...
That’s right battle mages! The conflicts are live again, reigniting the battlefield as guilds and solo warriors go head-to-head for glory, loot, and bragging rights. Time to fire up those War Wagons and get staking!
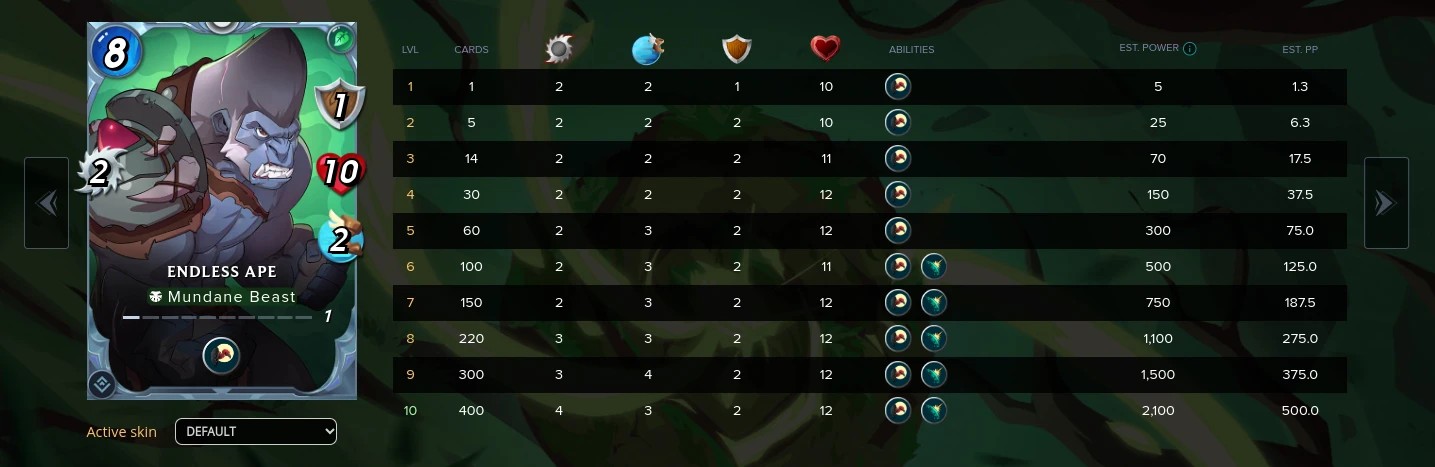
But until Zyrx the Emberglace will cut through Praetoria, leaving only ash and silence, I will train my Endless Ape for an epic encounter. Will be like King Kong v Godzilla, with an ape and a dragon fighting for survival!
My Endless Ape is not that mundane at level three, getting into fights with an extra health point and one extra armor point! You make think eight mana is too much, but the Scavenger ability turns this ape into King Kong!
The apes of the Endless Valley in Praetoria’s Great Lowlands are renowned for their raw strength and fiercely territorial nature. Under the command of the awakened gorilla Lobb Lowland, these primal warriors have perfected the brutal art of bare‑knuckled combat.
Though they lack the power of speech, their fists speak volumes. Feared and respected in equal measure, the apes of the Endless Valley rule their jungles through sheer, undeniable dominance.
The odds were stacked against me thanks to a brutal trio of battle rules that completely changed the game. Fog of War cut off all sneak, snipe, and opportunity attacks, forcing every fighter into a straight-up brawl with no clever backline picks.
Then came Born Again, giving every monster an extra life and dragging the fights out longer than usual. Just when you thought it couldn’t get worse, Earthquake joined the party, hammering every non-flying unit with damage at the end of each round.
No cheap tricks and no shortcuts today.... just a grueling war of attrition where only the most durable or airborne could hope to survive. The tactic had to make a difference!
Summoner: +1 Ranged Attack & Flying to all + boosts
Grimbardun Fighter: Melee with Shield & Corrosive Ward
Endless Ape: Melee with Scavenger
Gramel The Hunger: Triple Attack with Charge and Scattershot
Rune Arcanist: Caster with Weaken
Satha Toledo: Ranged with Heal
Meriput Mossmender: Caster with Dodge and Repair

Gramel the Hunger was boosted with Taunt and Redemption by the summoner, taking some pressure off the tank! The enemy went for the Endless Ape as well, but I hid my one in the second position... a tactic that changed the course of the battle!
The repair and heal kept the Grimbardun Fighter fit for the battle, but Gramel wasn't so fortunate! However... dying twice triggered the redemption at double power... hitting all the opponents with two true damage!
All my units were flying, being safe from the earthquake! When the earth trembled... it hit hard on the enemies! The Archon Bolter got revived but my Endless Ape was adding health with each fallen warrior!
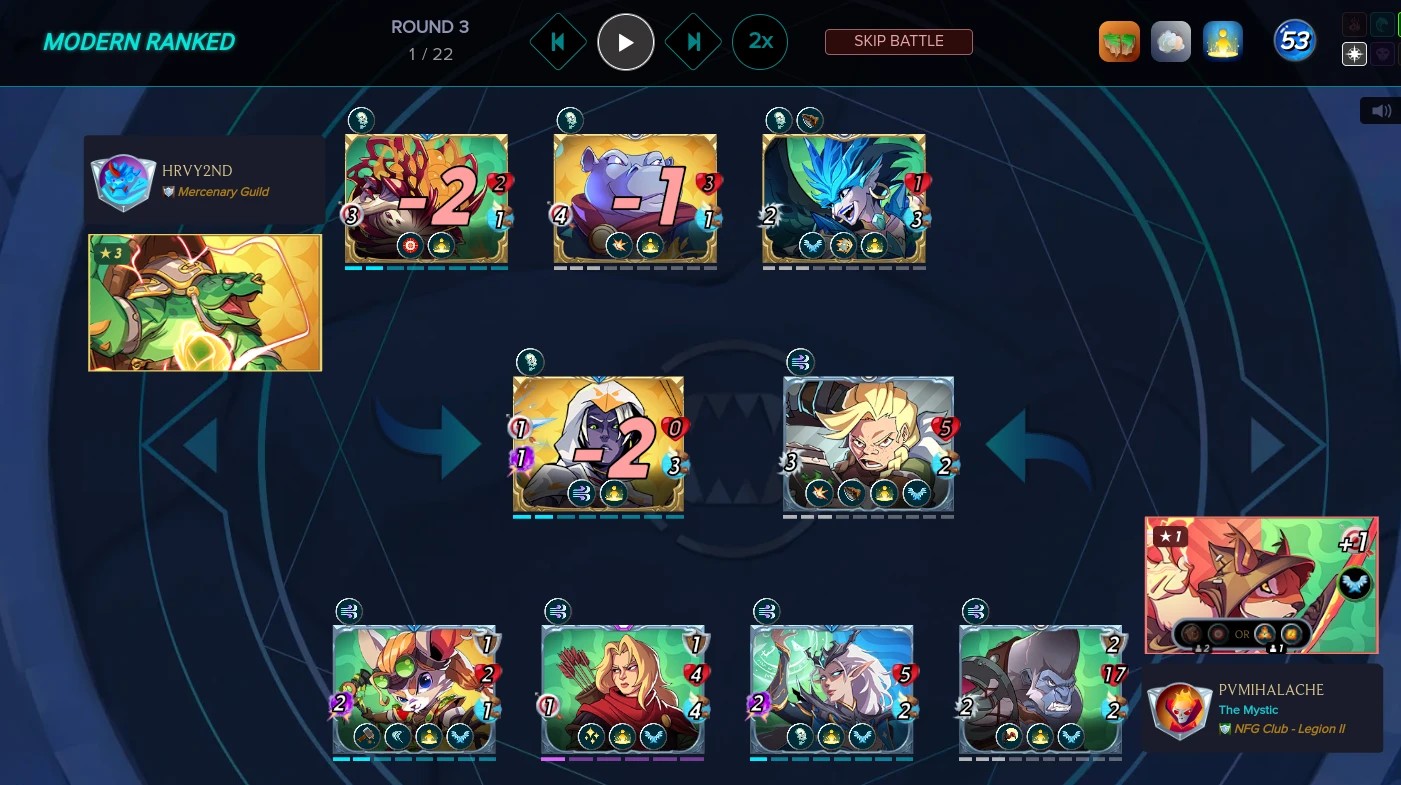
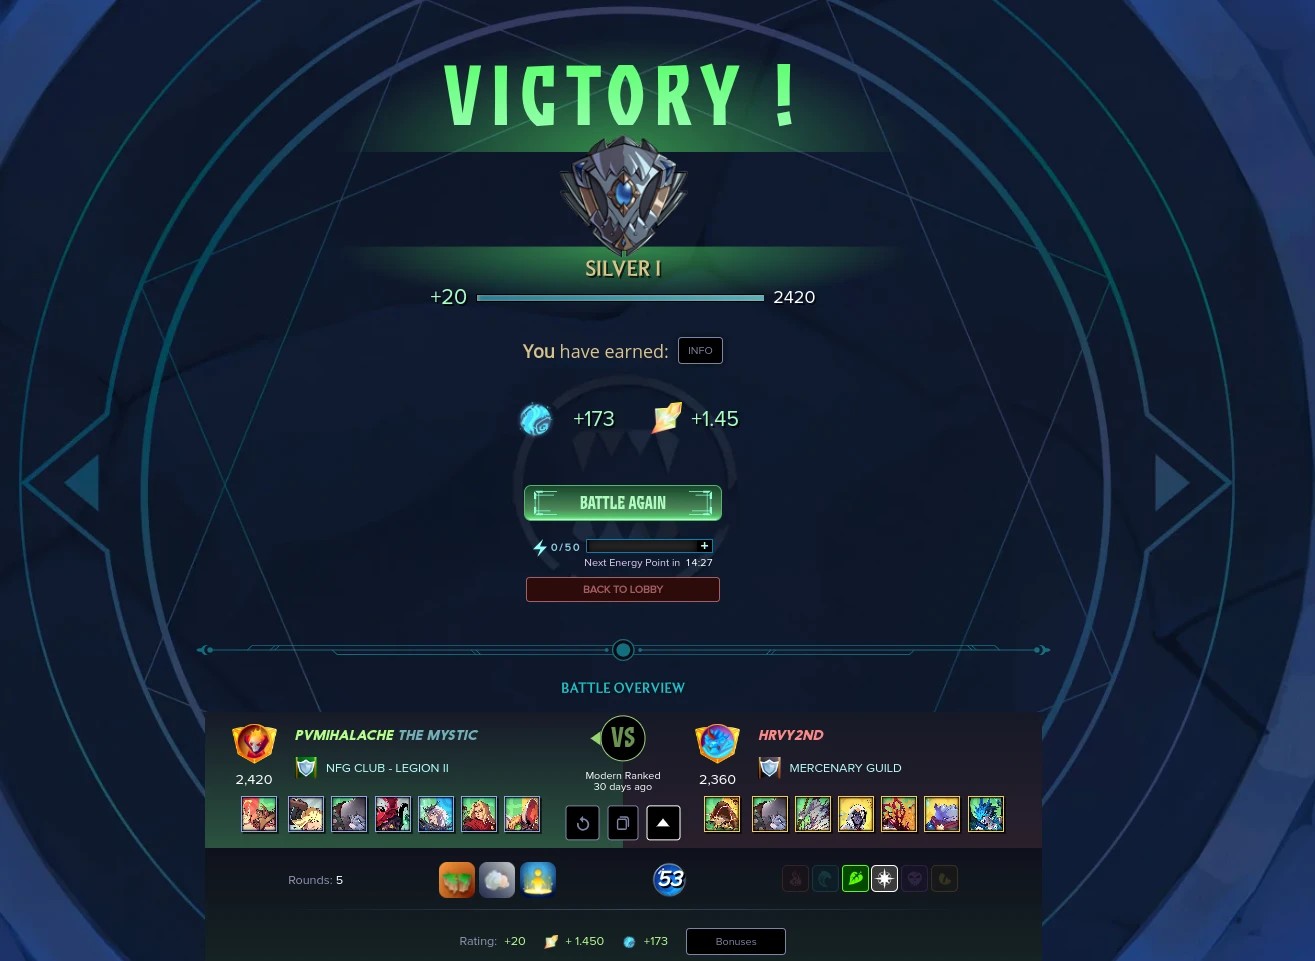
It was a test of endurance... for them! My tank was kept unharmed by the Meriput armor repair and Satha's heal! One puny harpy couldn't do much against my army! See the full battle here!
The Endless Ape reached a max health of 25, something that I rarely seen in Splinterlands! The Born Again battle rule helped me on this, but the fight wasn't that challanging! Didn't lose a health point ..

This battle was all about surviving a brutal combo of Fog of War, Born Again, and Earthquake. I fielded a full flying squad to dodge Earthquake damage, with Grimbardun Fighter tanking, Gramel the Hunger drawing fire with Taunt, and Meriput and Satha keeping the front line healed and repaired.
Hiding my Endless Ape in the second position was the game-changer, letting it steadily build health to an insane 25 max health points! This was possible thanks to Scavenger and Born Again revives.
Gramel’s double Redemption wiped chunks of the enemy team, and the constant Earthquake damage finished off what was left. In the end, my army didn’t even lose a single health point. Flawless Victory!
Now let's have a quick dive into the Conflicts! Legendary and Gold Foils thrive here, and lore synergy can pay off big. Get your Battle Wagons rolling fast; the first days decide the leaderboard. Focus on a few strong wagons and go all‑in.
Every 100,000 points scores you an entry into the Conflict airdrop, with each entry giving a 0.125% chance at snagging a Conflict card—or a guaranteed drop after 800 entries. Even sweeter: for every 25 cards pulled in one drop, you’re locked in for a Gold Foil.
I’m off to a solid start in the Zyrx conflict but I went in modest at the start! Added 22 War Wagons and 195 packs, hitting about 55,000 points per hour. Not bad, but not enough. I’m riding this emberstorm all the way.
War Wagons are pricey at $6, so I focused on levelling cards instead. Two hours and $20 in DEC later, I got a 1,165 HR bump—boosting chances from 395 to 407. Twelve more chances for all that hustle? Insane.
Maybe buying three more wagons with next-in-line cards would’ve been smarter. Strategy tweaks needed... hitting 800 chances feels tough. I grabbed another War Wagon and loaded up the best cards left. Now I’m at 414 chances, over 50% of the way there. Let’s see if this play pays off. Vonak!
Residual Income:
Claim your Zerion XP!
Sonium: Sake Fi / Kyo / Arkada / Algem / Untitled Bank
AI Agents & Mindshare: Kaito / Theoriq / FantasyTop
Play2Earn: Splinterlands & Holozing