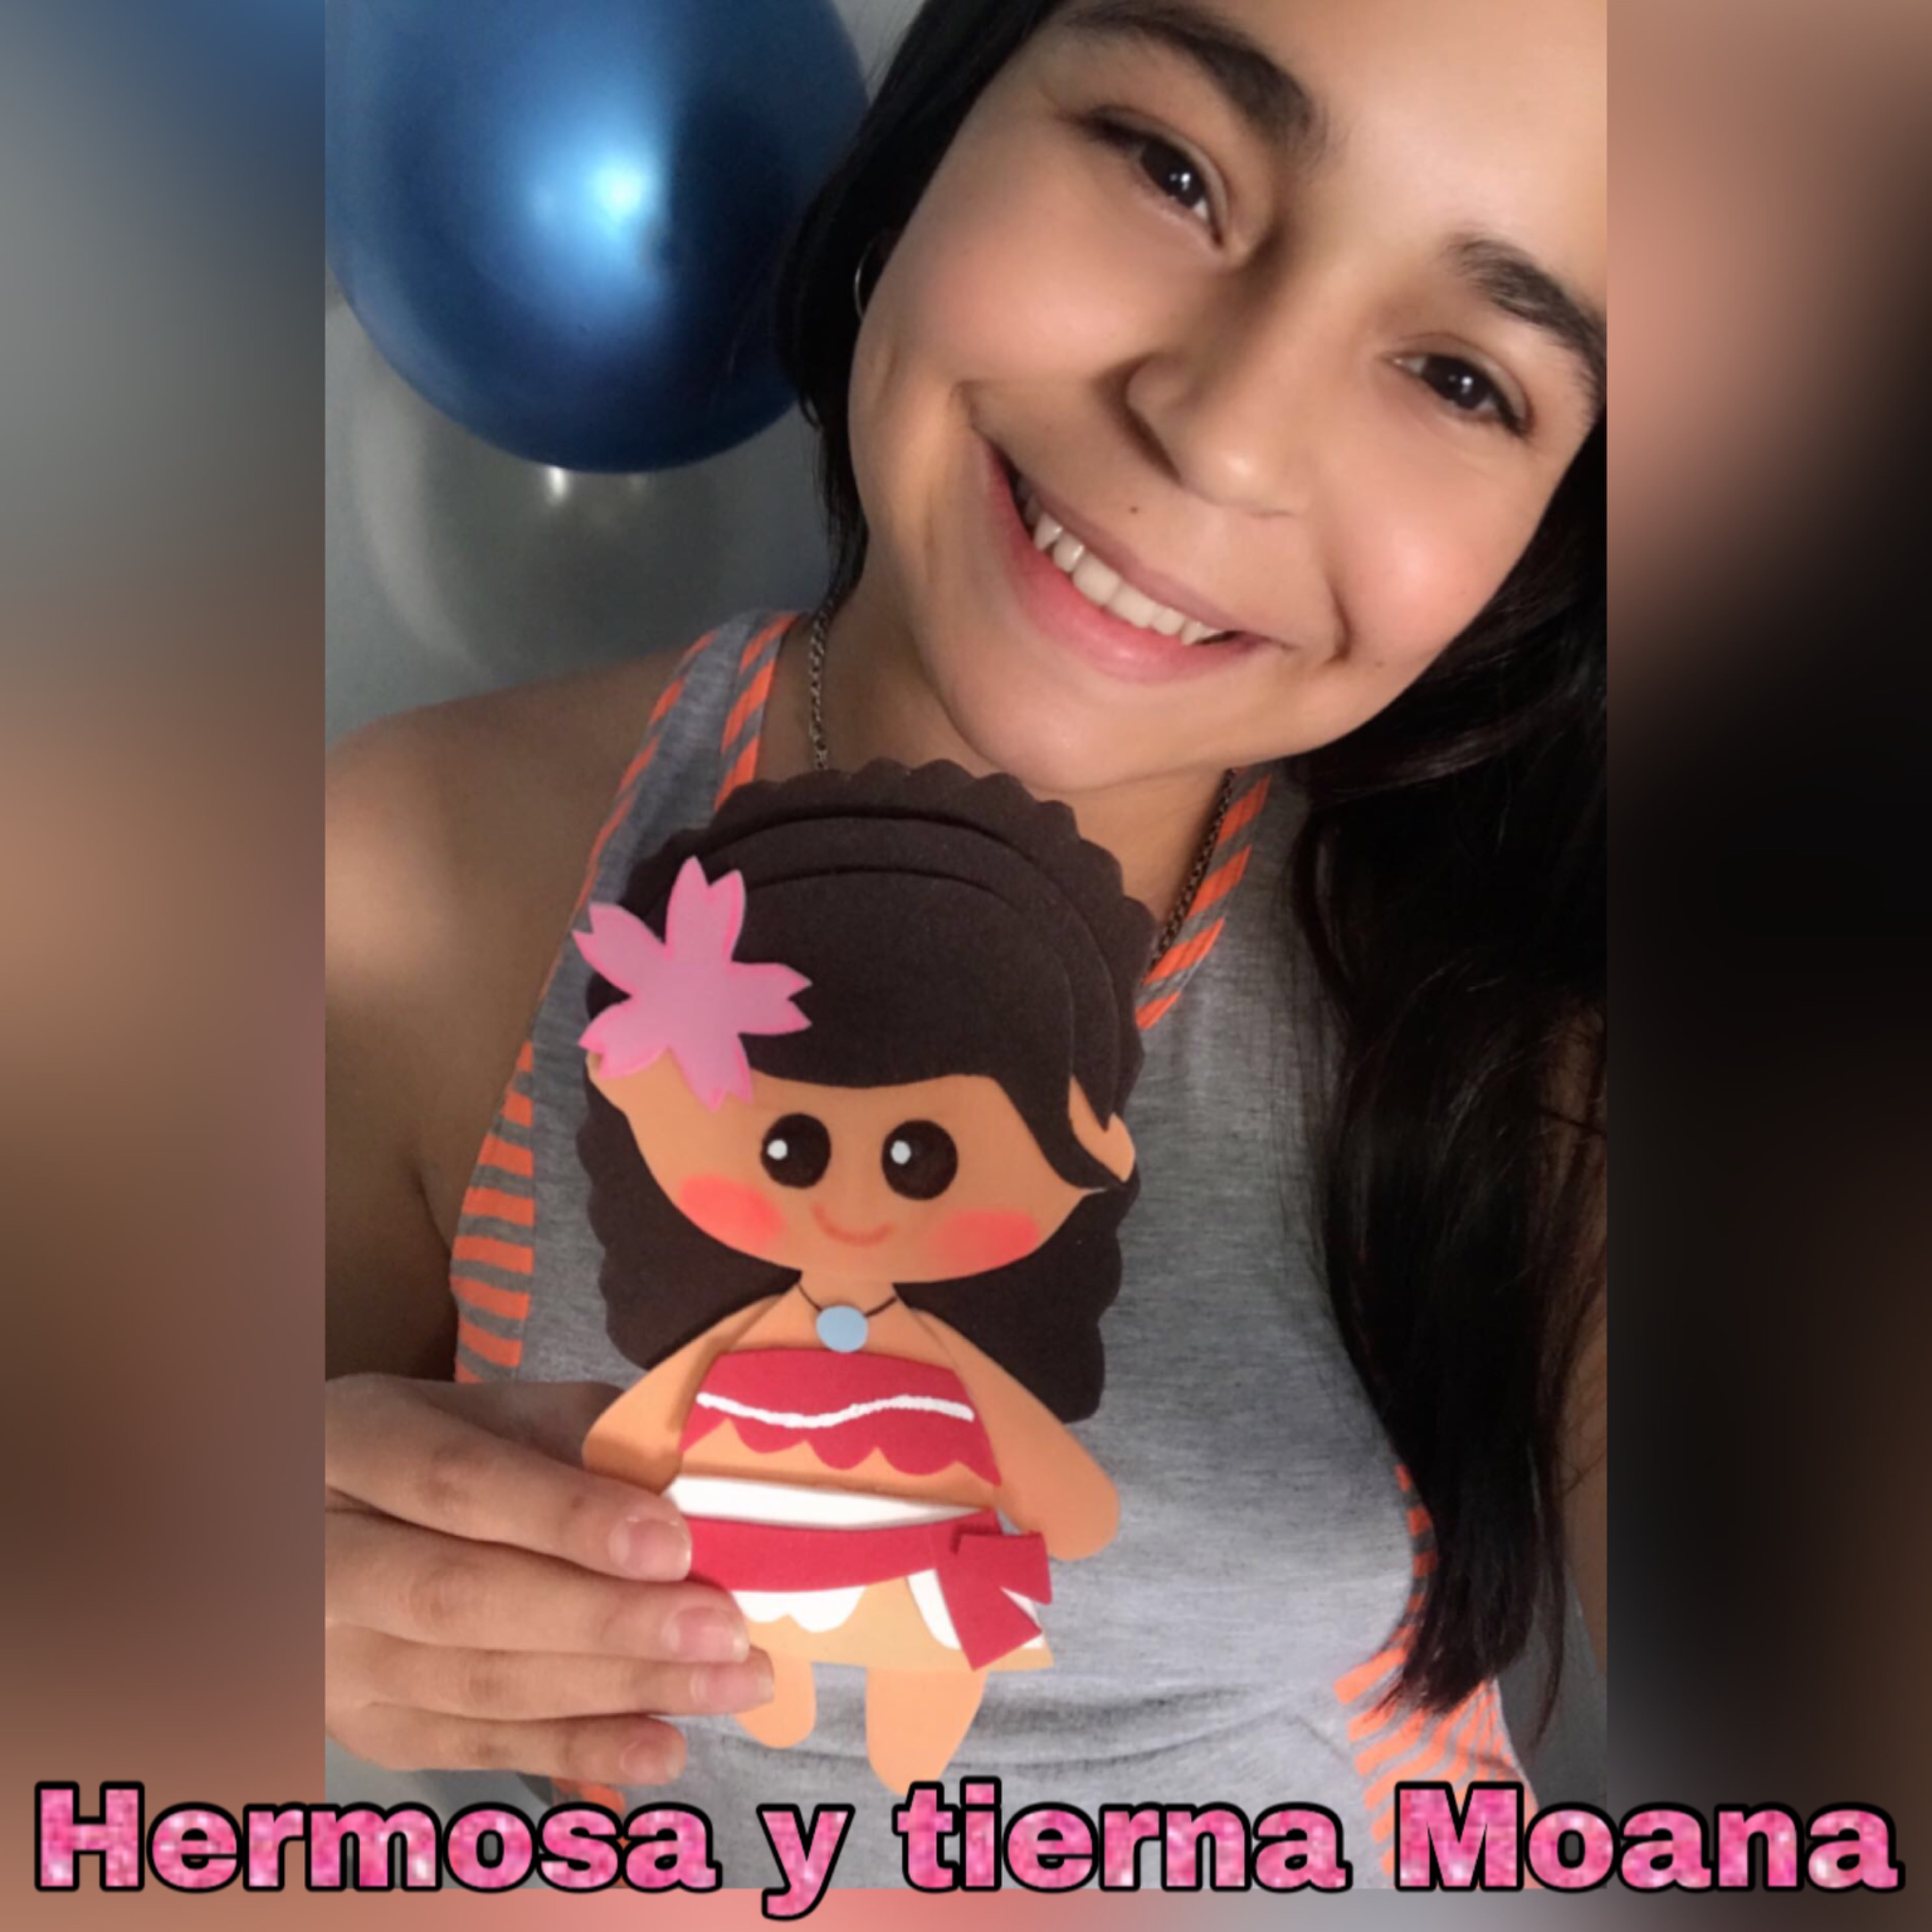
Un cordial saludo a todos los integrantes de esta hermosa comunidad de HIVE DIY hoy me encuentro con ustedes amigos para mostrarle la elaboración de una hermosa y tierna Moana ideal para decorar nuestros cuartos y cuadernos espero y les guste amigos les invito a ver el paso a paso
> A cordial greeting to all the members of this beautiful community of HIVE DIY today I meet with you friends to show you the elaboration of a beautiful and tender Moana ideal for decorating our rooms and notebooks I hope you like it friends I invite you to see the step by step
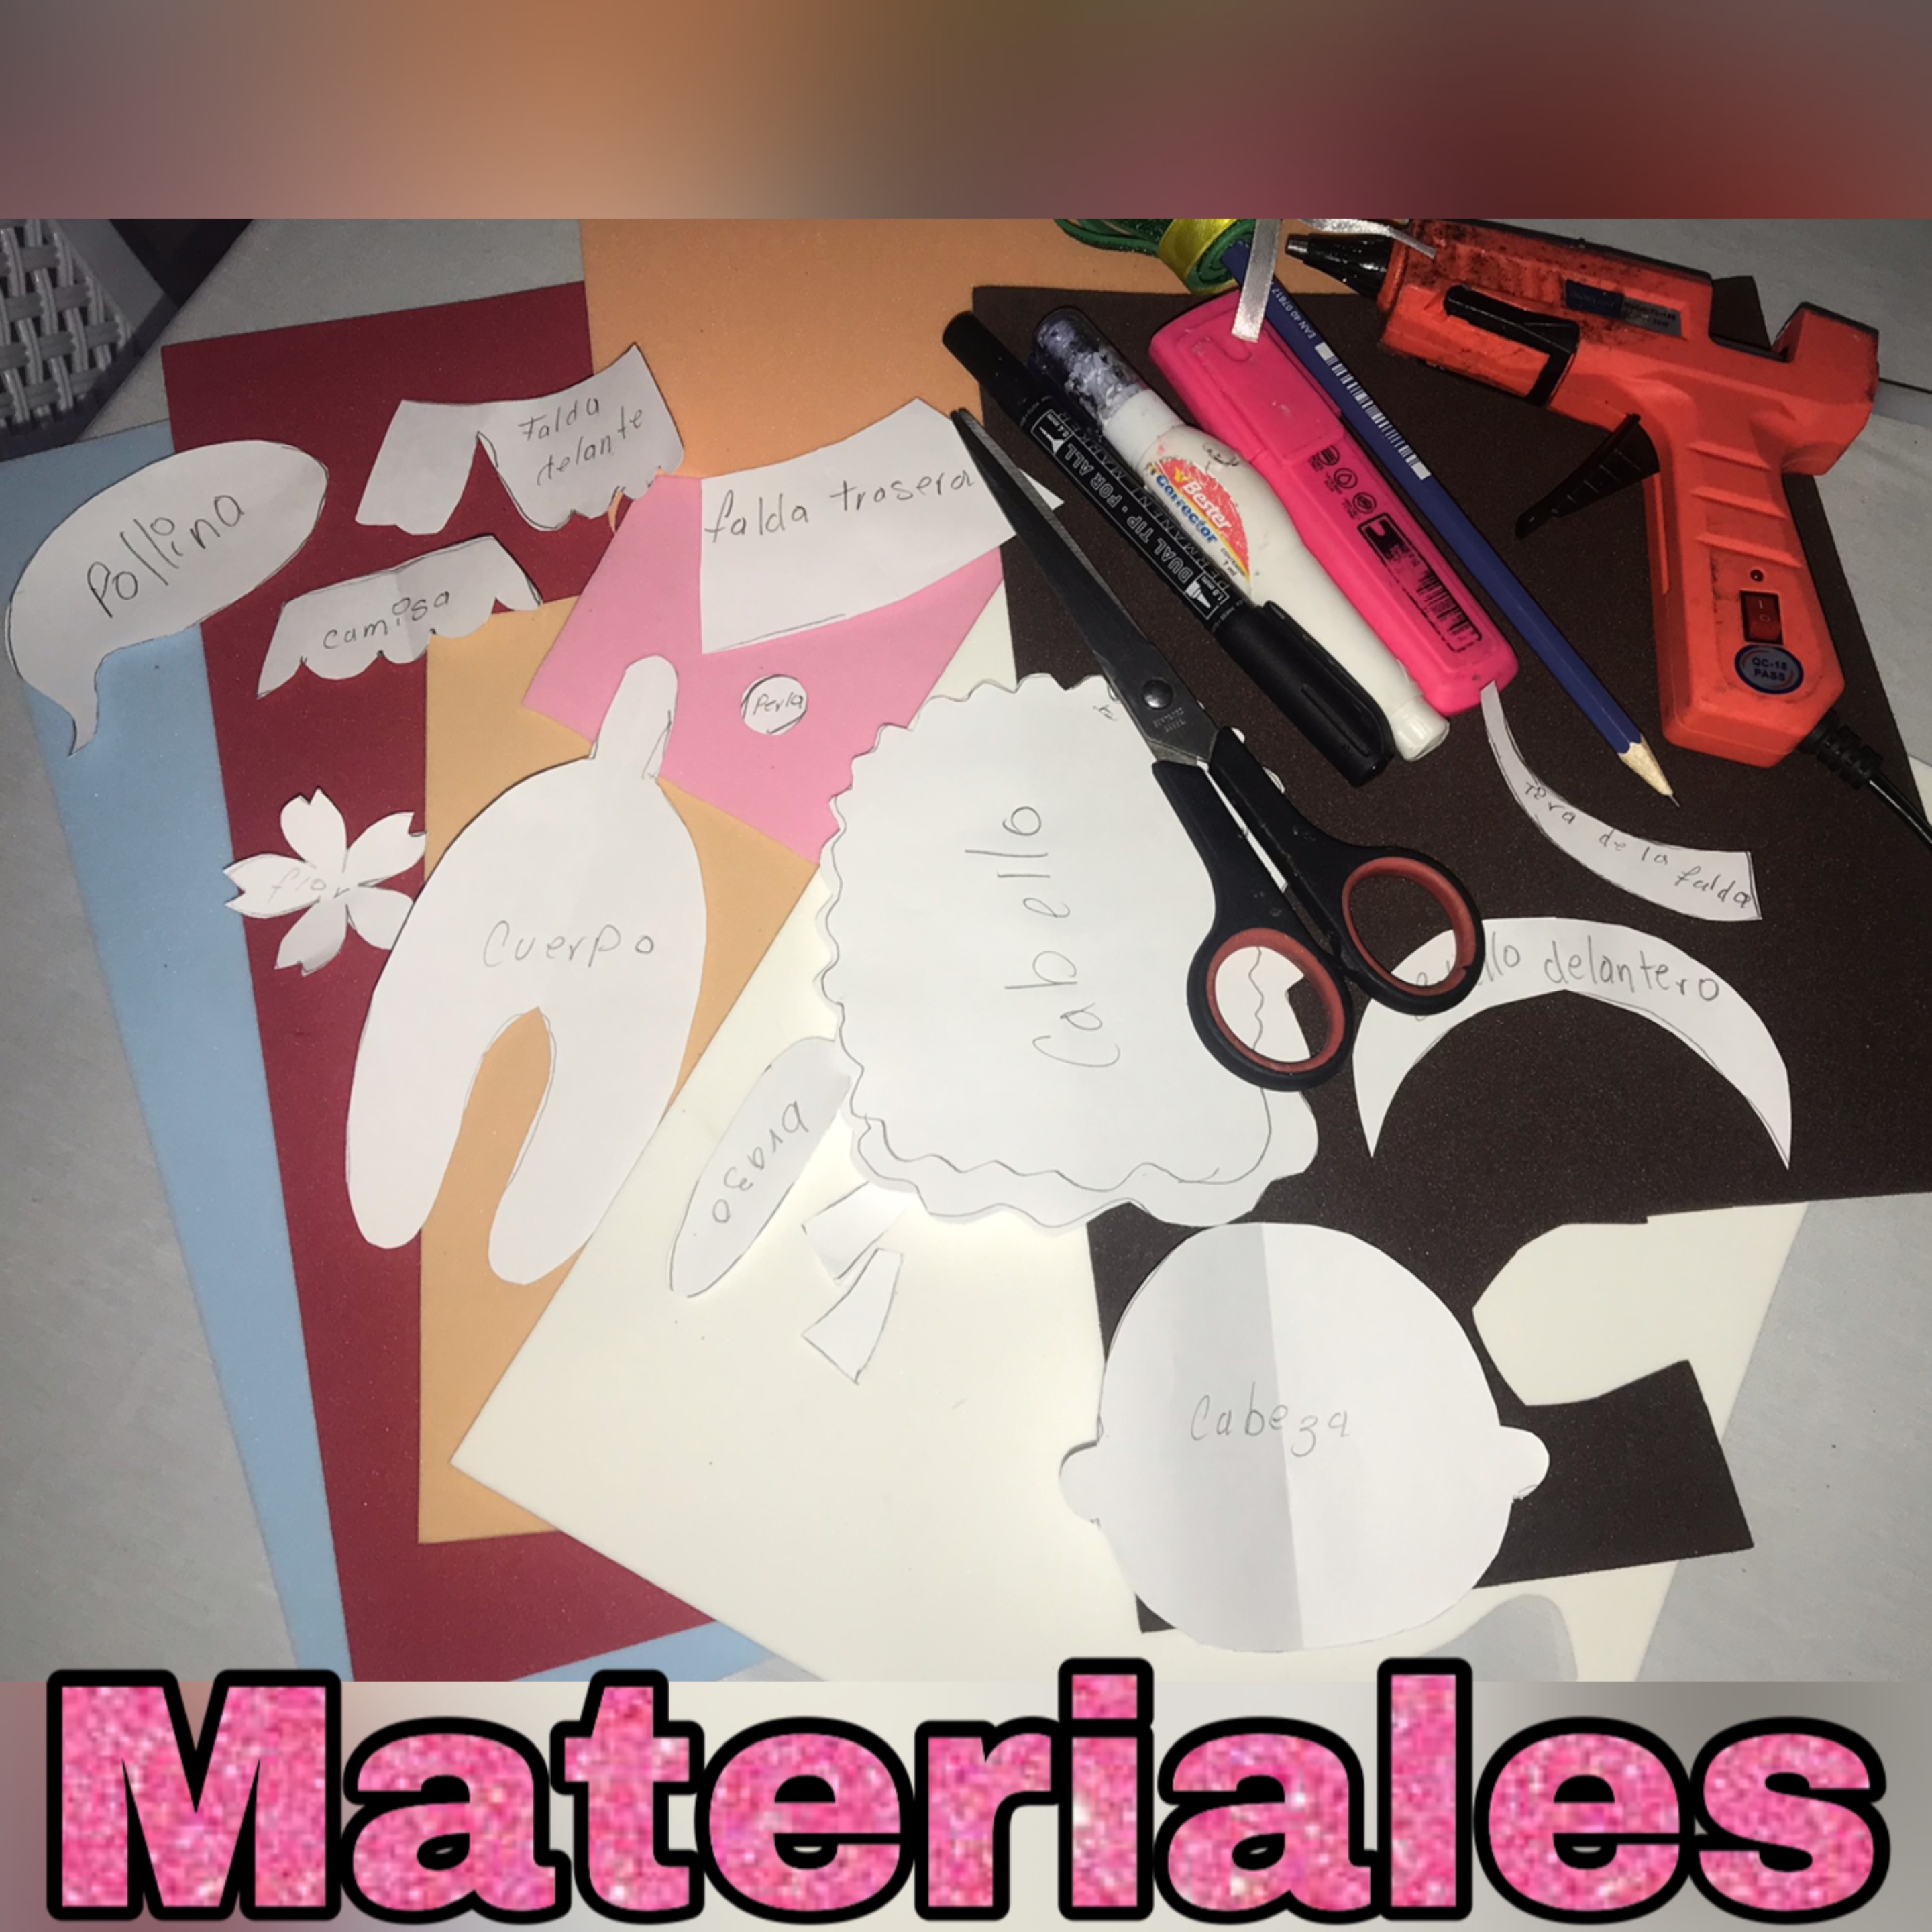
MATERIALES
• foami color carne, rojo, rosado, azul, marrón, blanco y color carne oscuro
• tijera
• lápiz
• pistola de silicon
• marcador negro y rojo
• resaltador fucsia
• corrector
• patrones de la Moana (cabeza, cuerpo, brazos, cabello trasero, cabello delante, pollina, flor, perla del collar, camisa, falda trasera, falda delantera, faralao y líneas de faralao)
MATERIALS
- flesh-colored, red, pink, blue, brown, white and dark flesh-colored foami
- scissors
- pencil
- silicone gun
- black and red marker
- fuchsia highlighter
- concealer
- Moana patterns (head, body, arms, back hair, front hair, pollina, flower, necklace pearl, shirt, back skirt, front skirt, faralao and faralao lines)
AHORA SI MANOS A LA OBRA AMIGOS
NOW LET'S GET DOWN TO WORK, FRIENDS

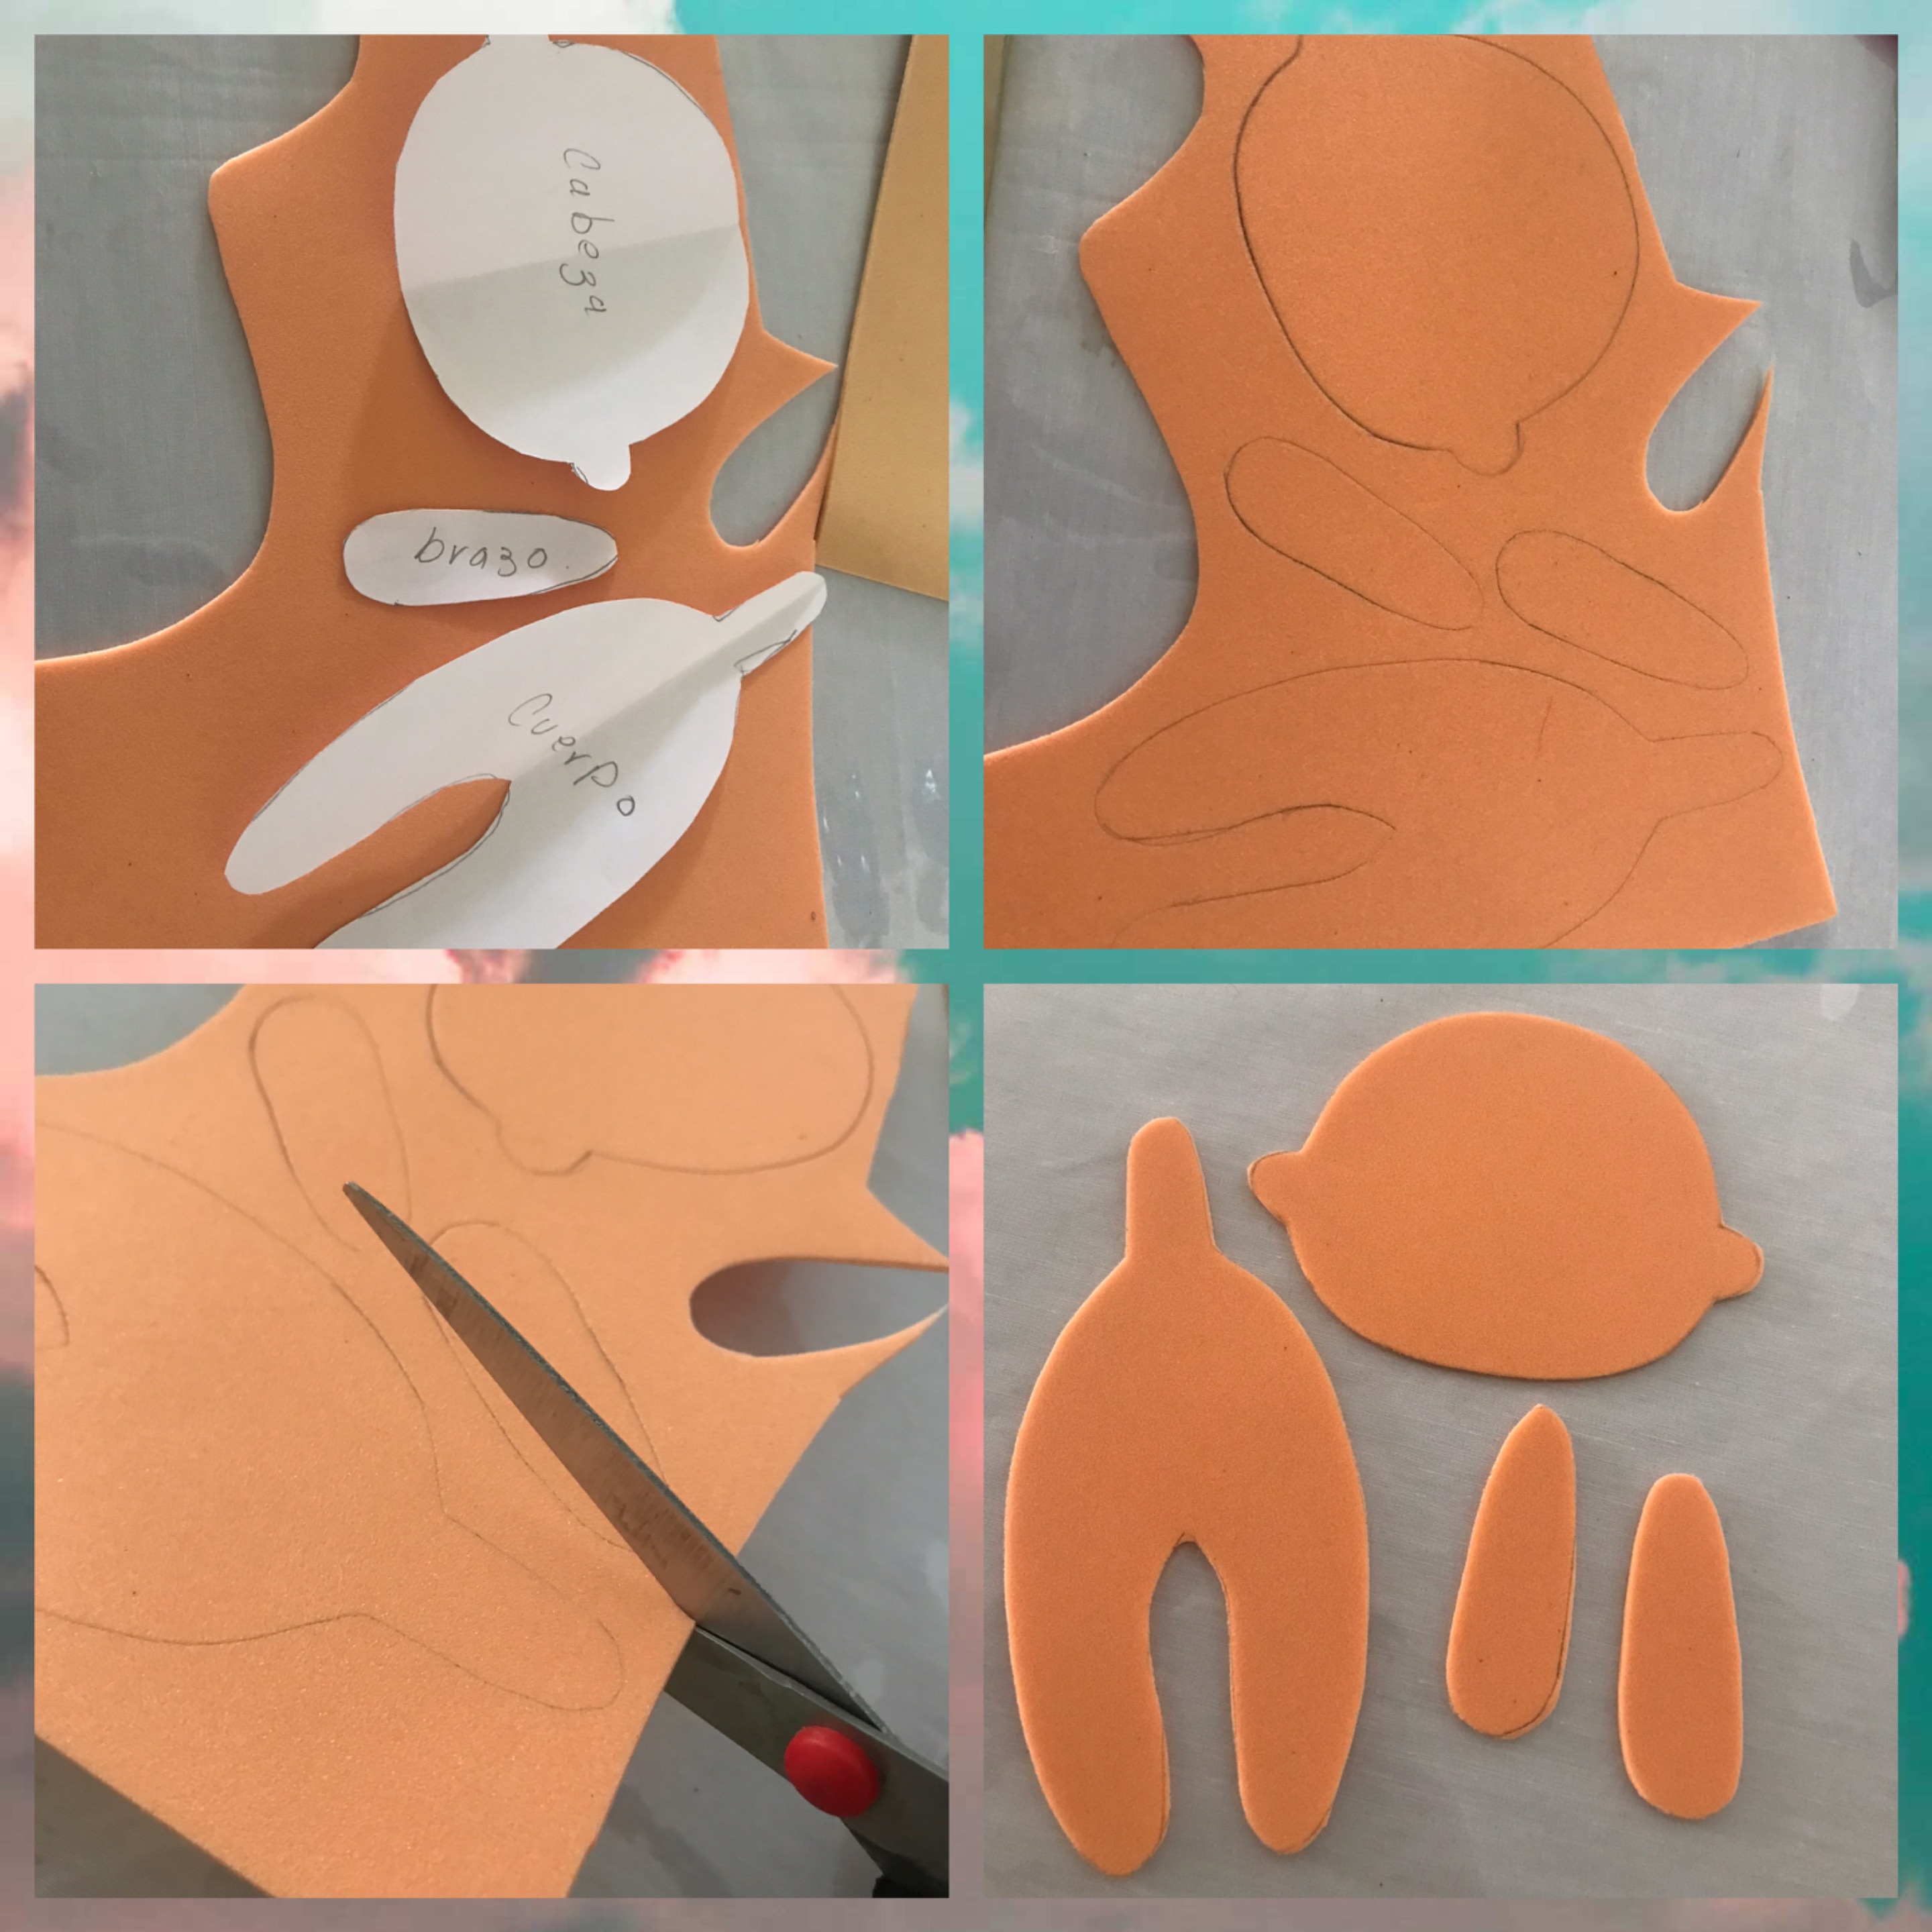
Primero marcamos y recortamos en el foami color carne la cabeza, cuerpo y brazos
> First we mark and cut out the head, body and arms on the flesh-colored foami
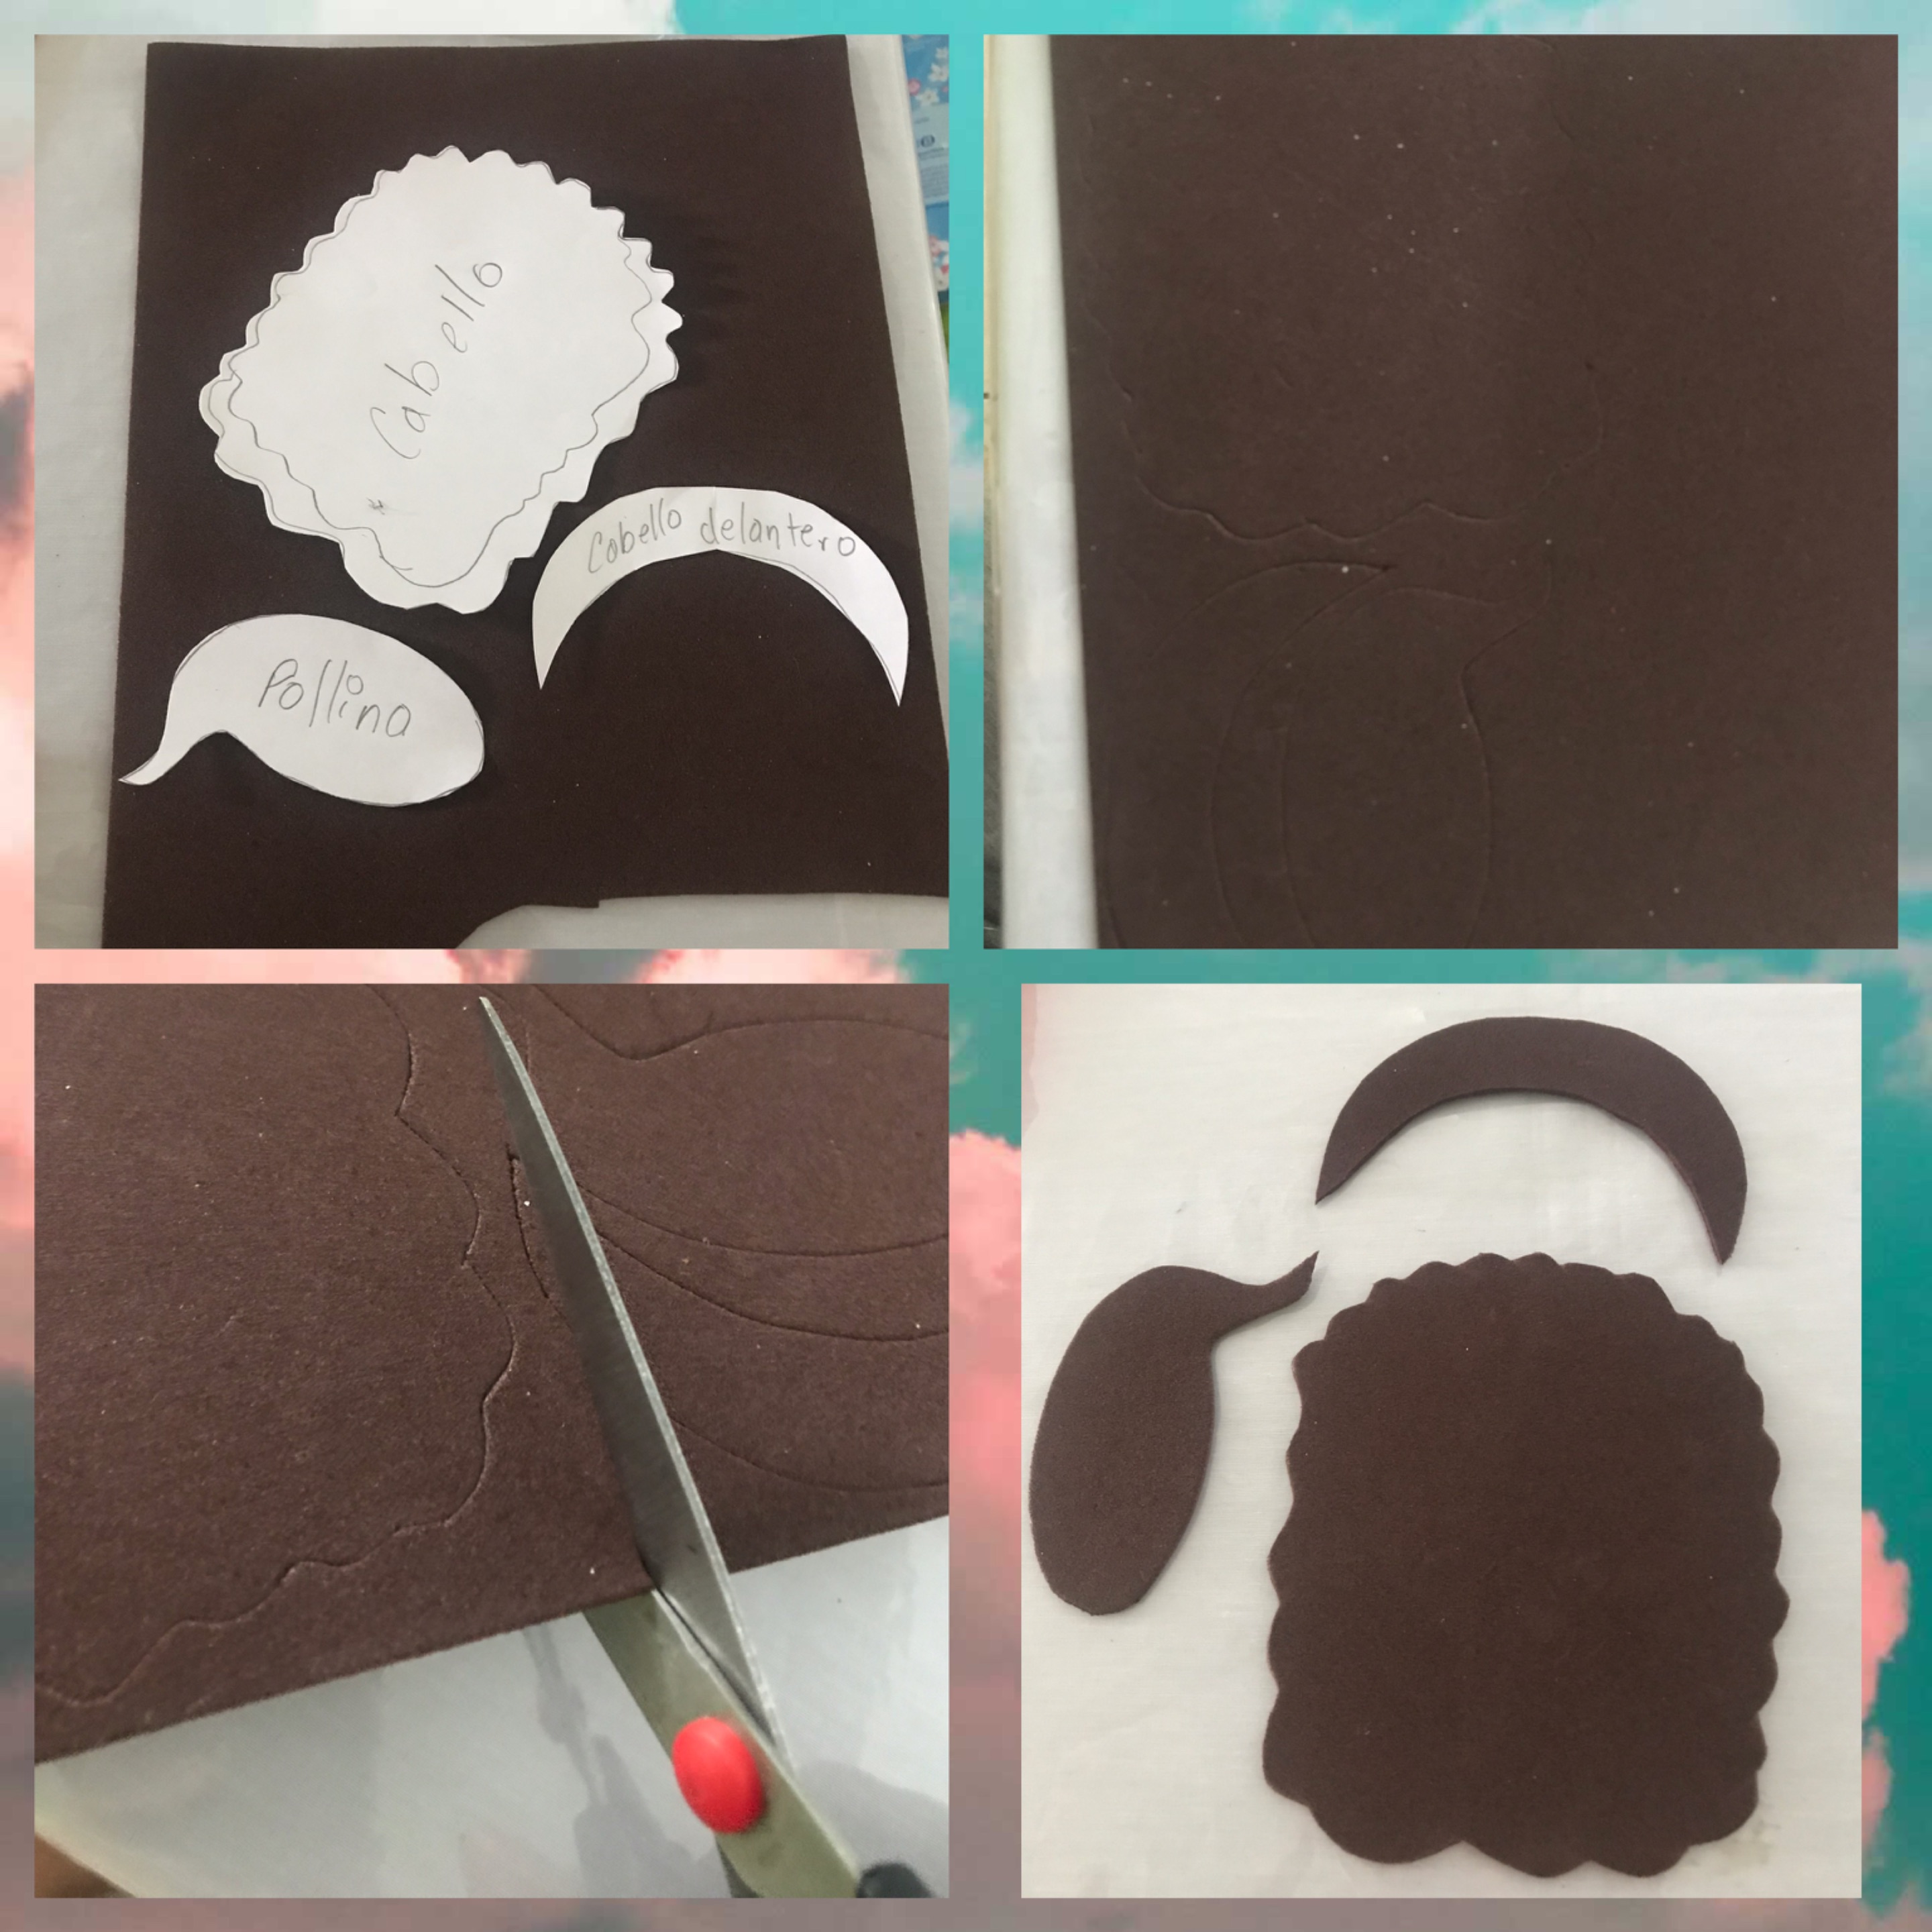
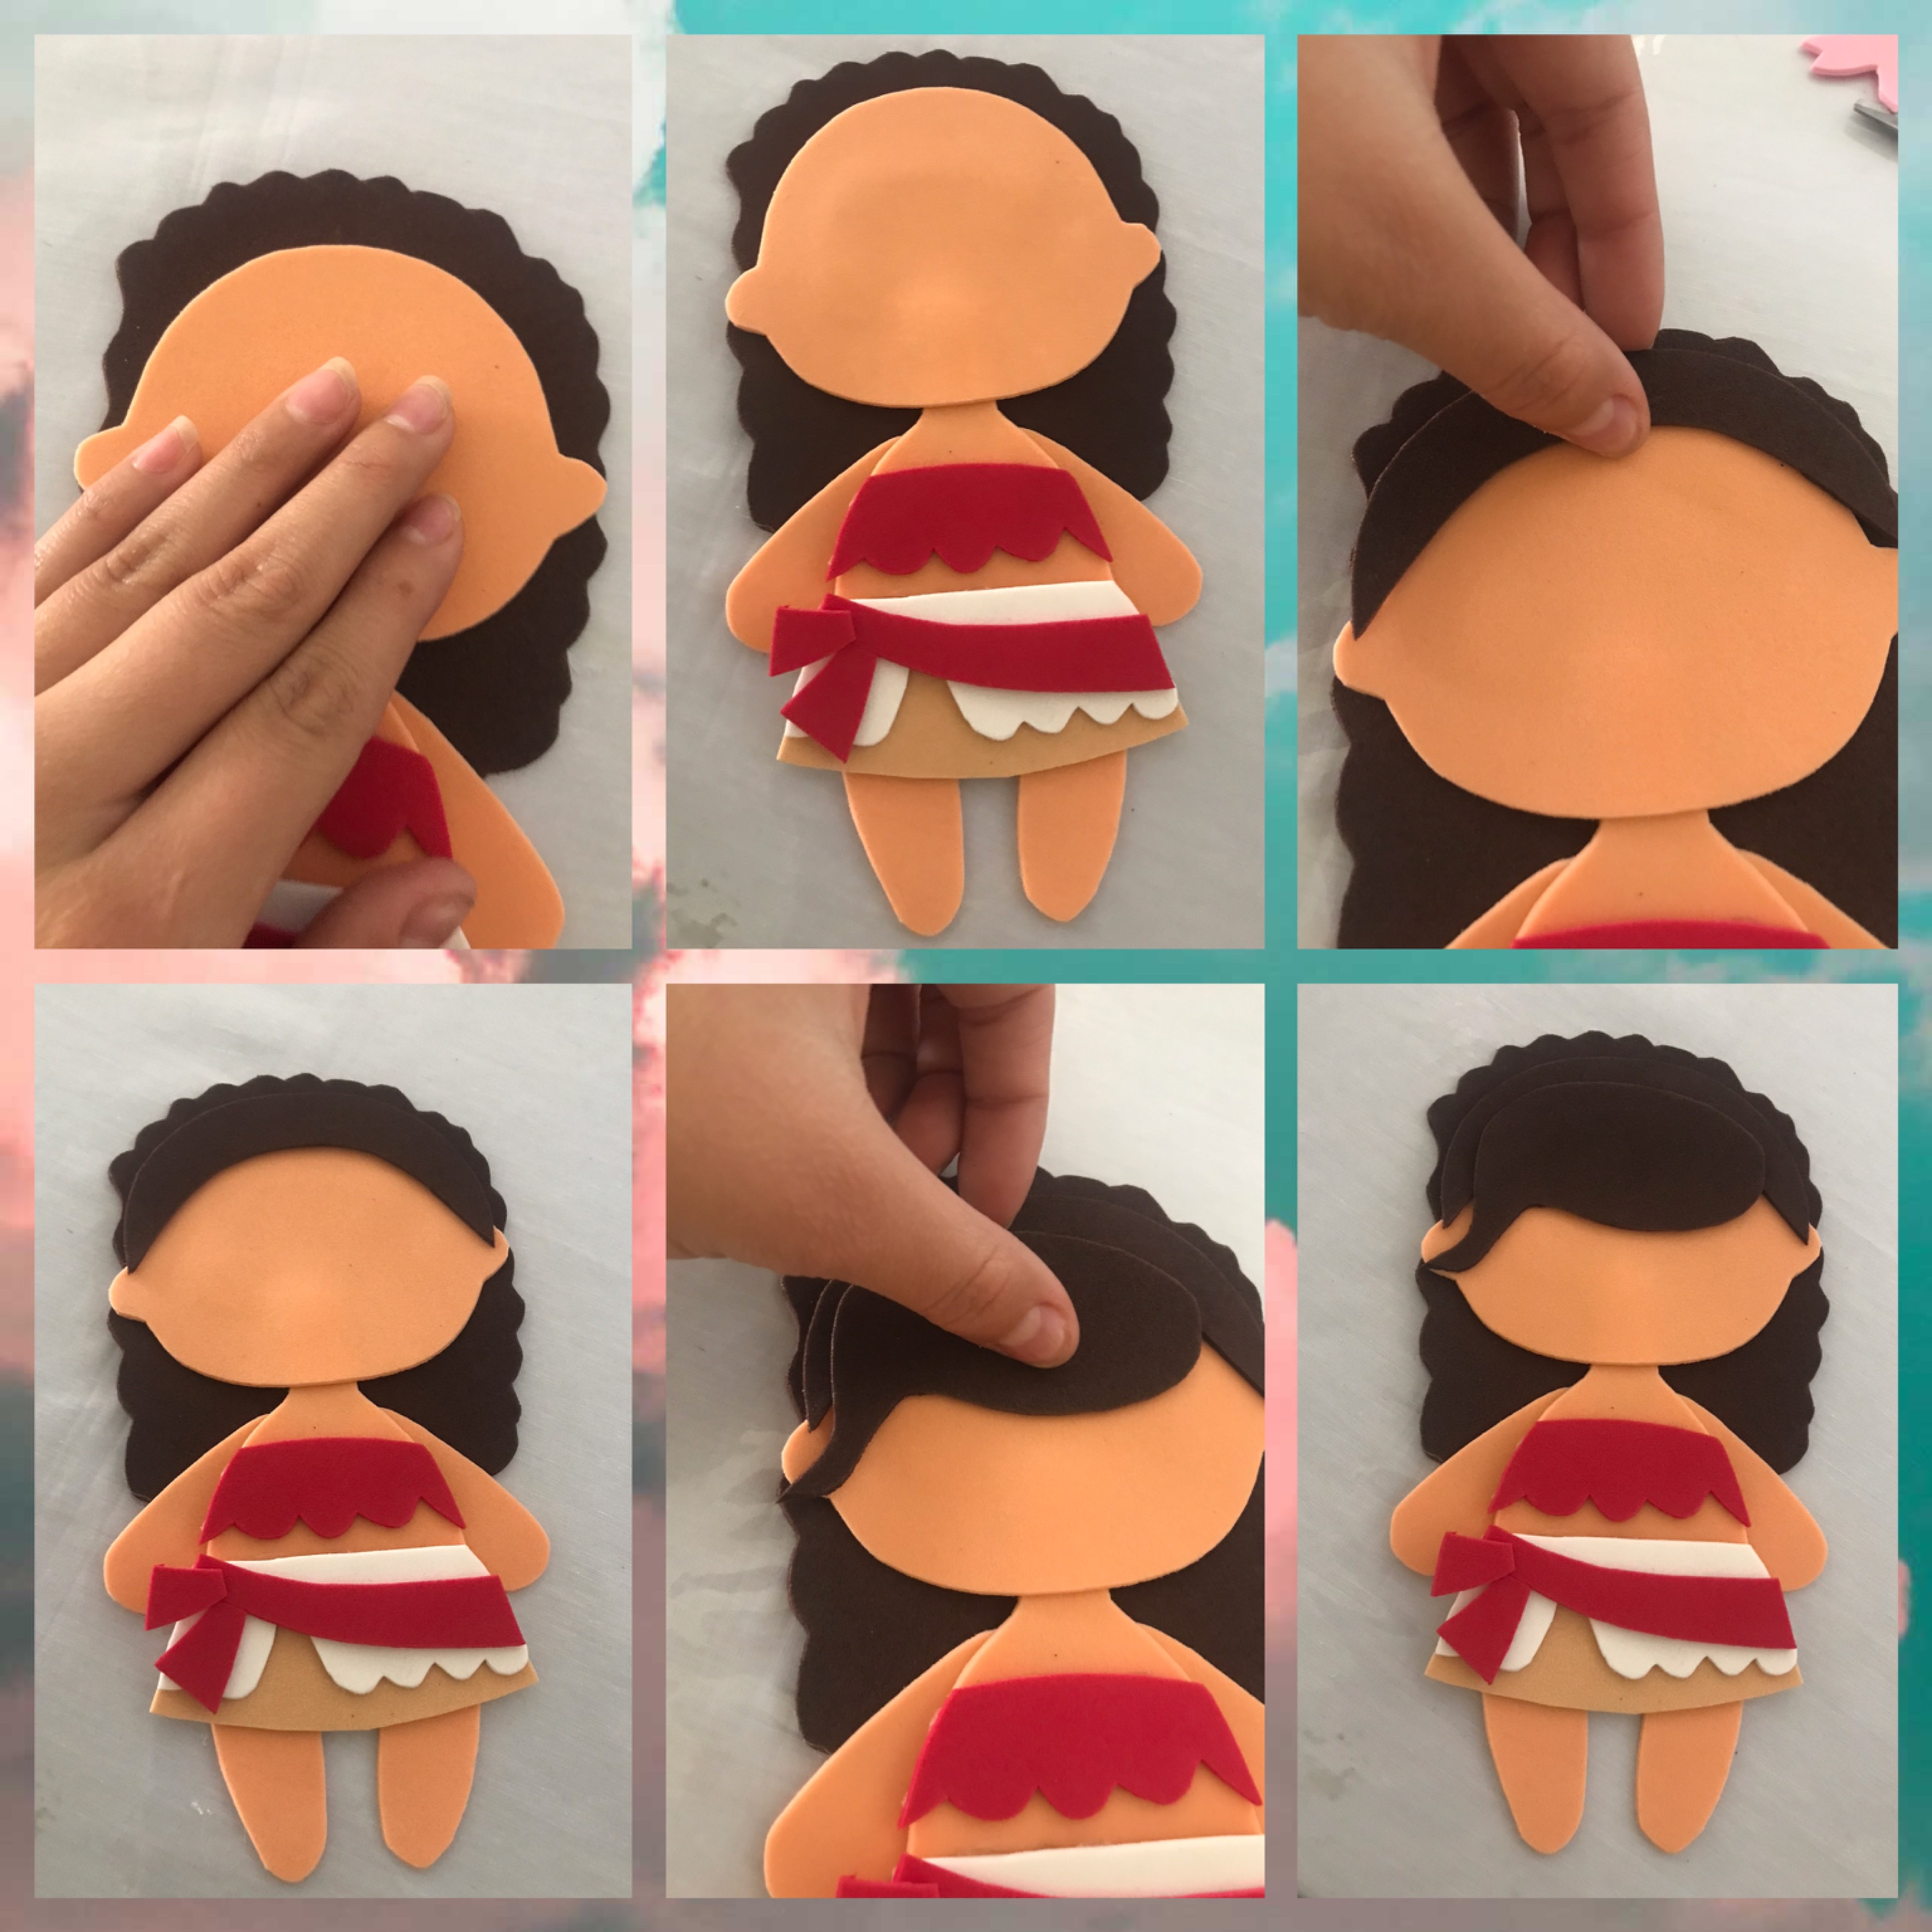
Marcamos y recortamos en el foami marrón el cabello de la parte trasera, pelo de la parte delantera y la pollina
> We mark and cut out on the brown foami the hair at the back, the hair at the front, and the pullet
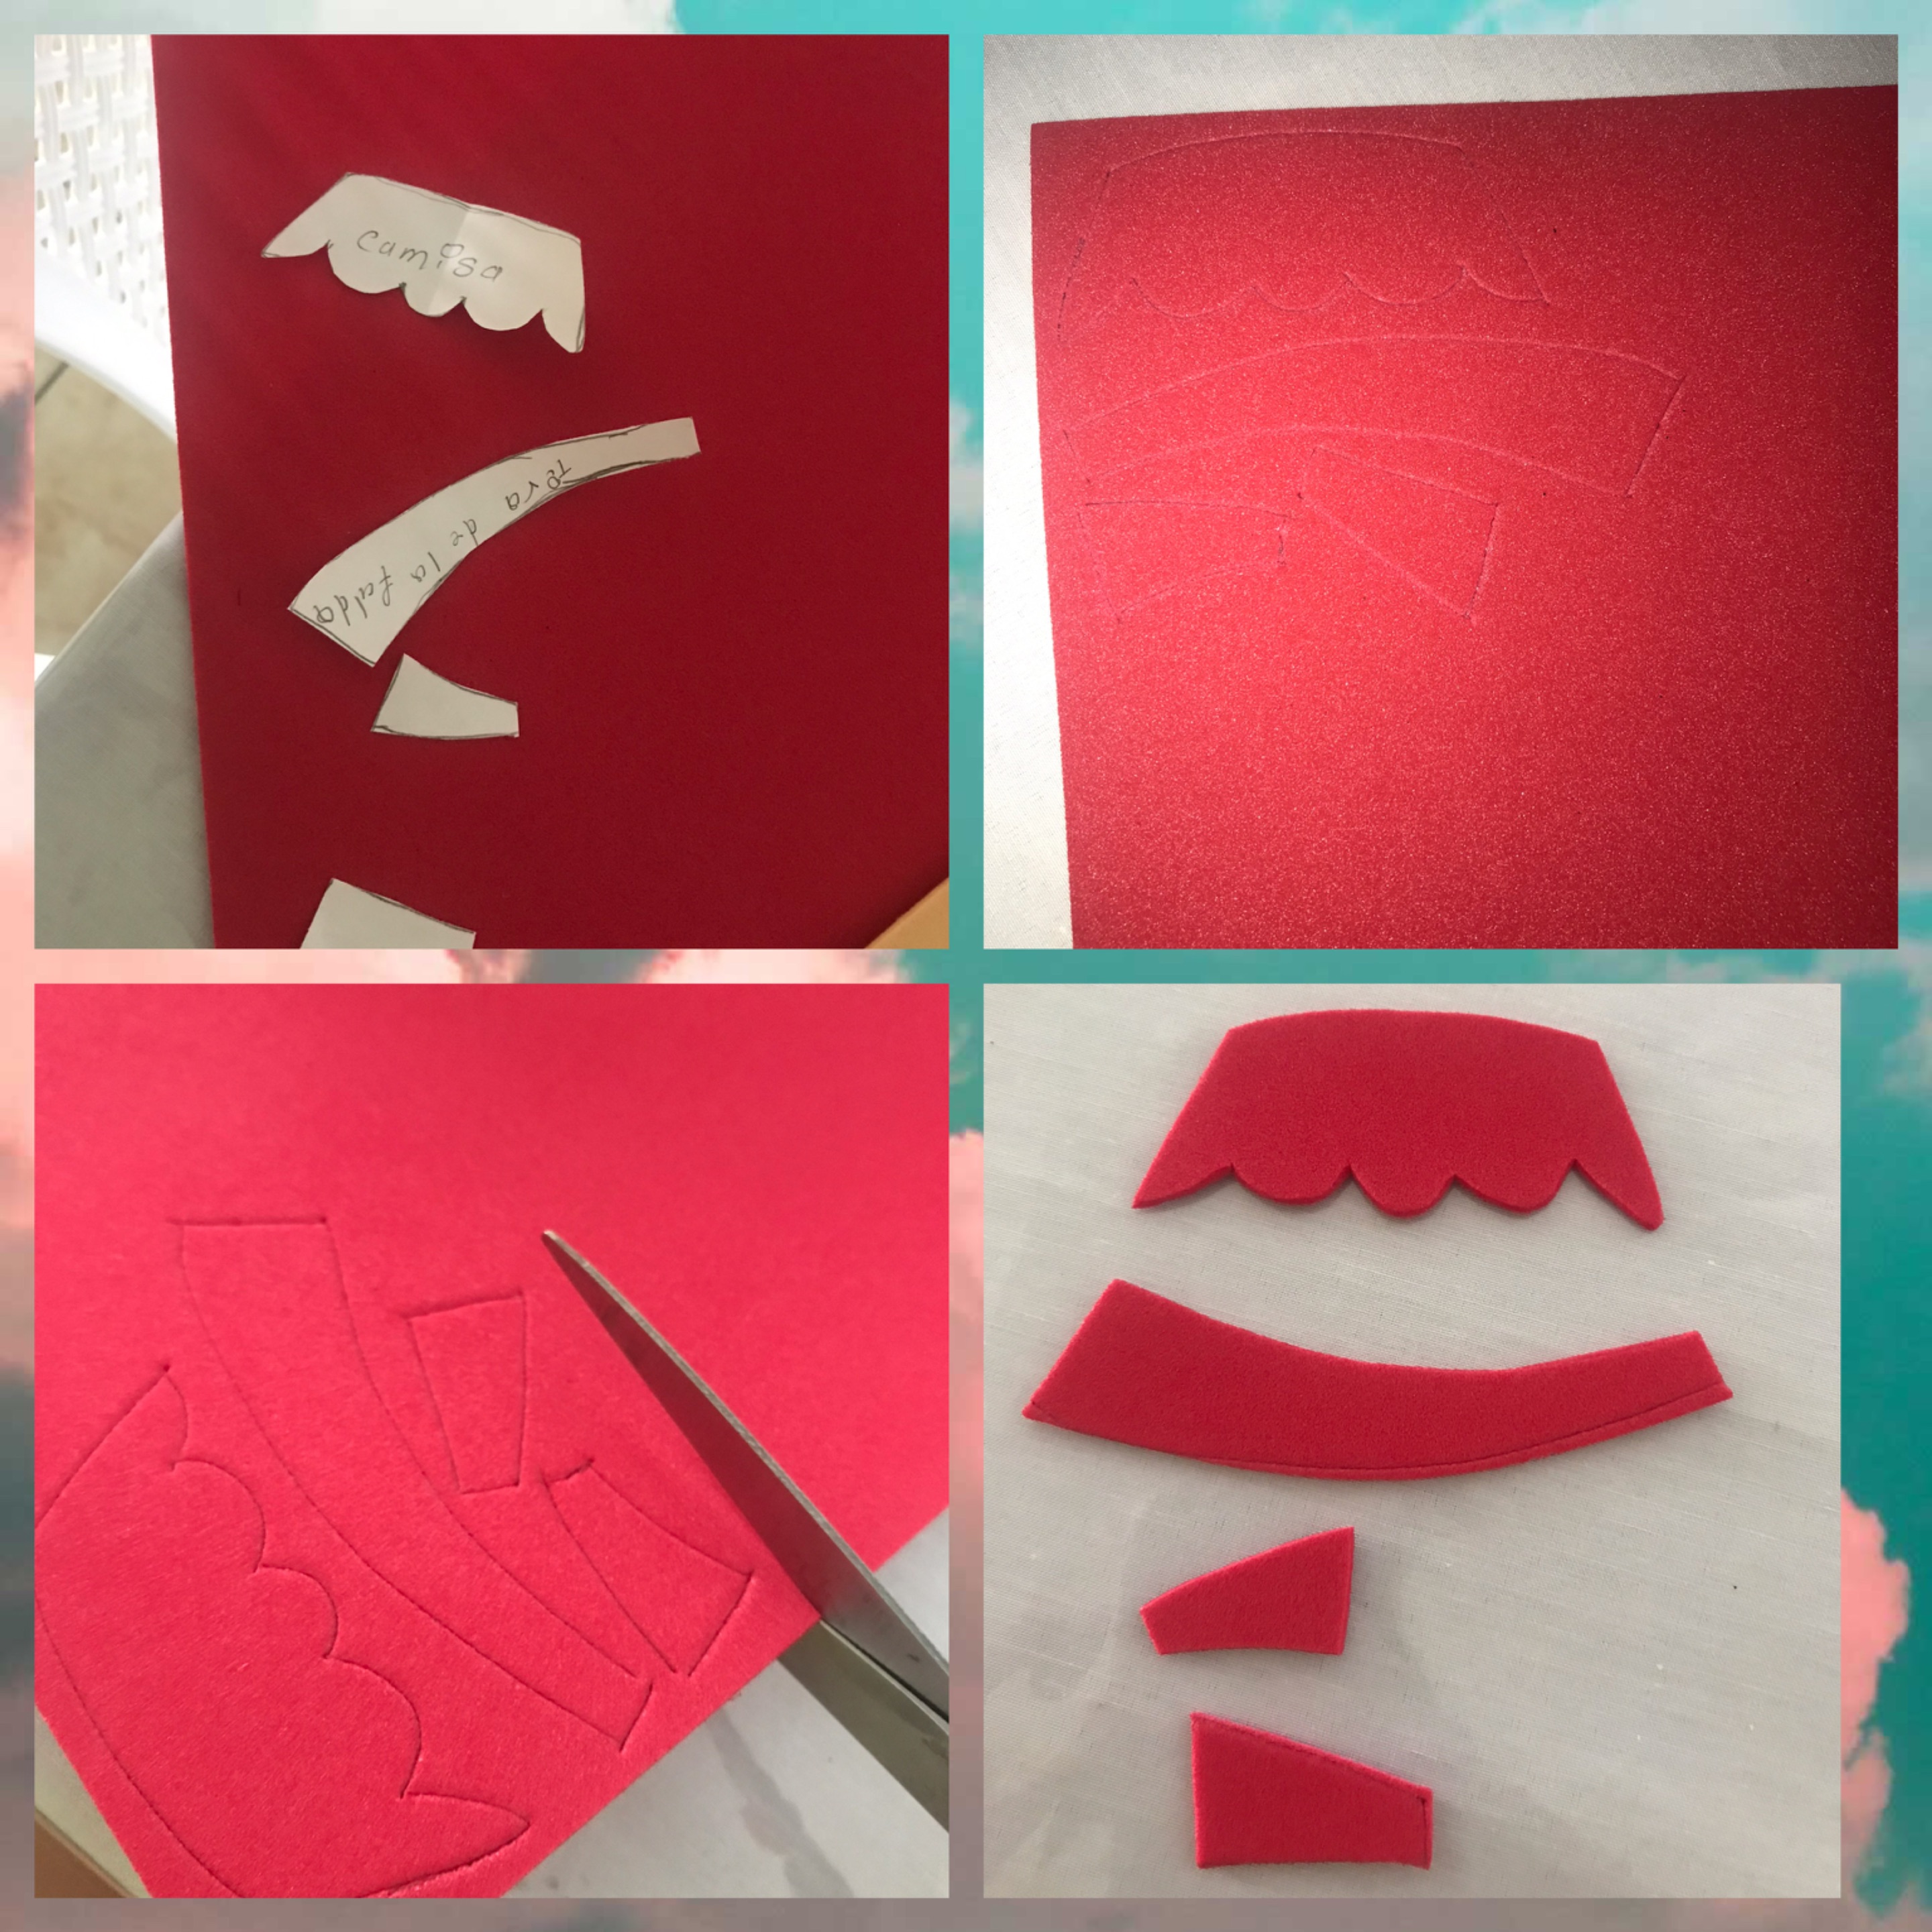
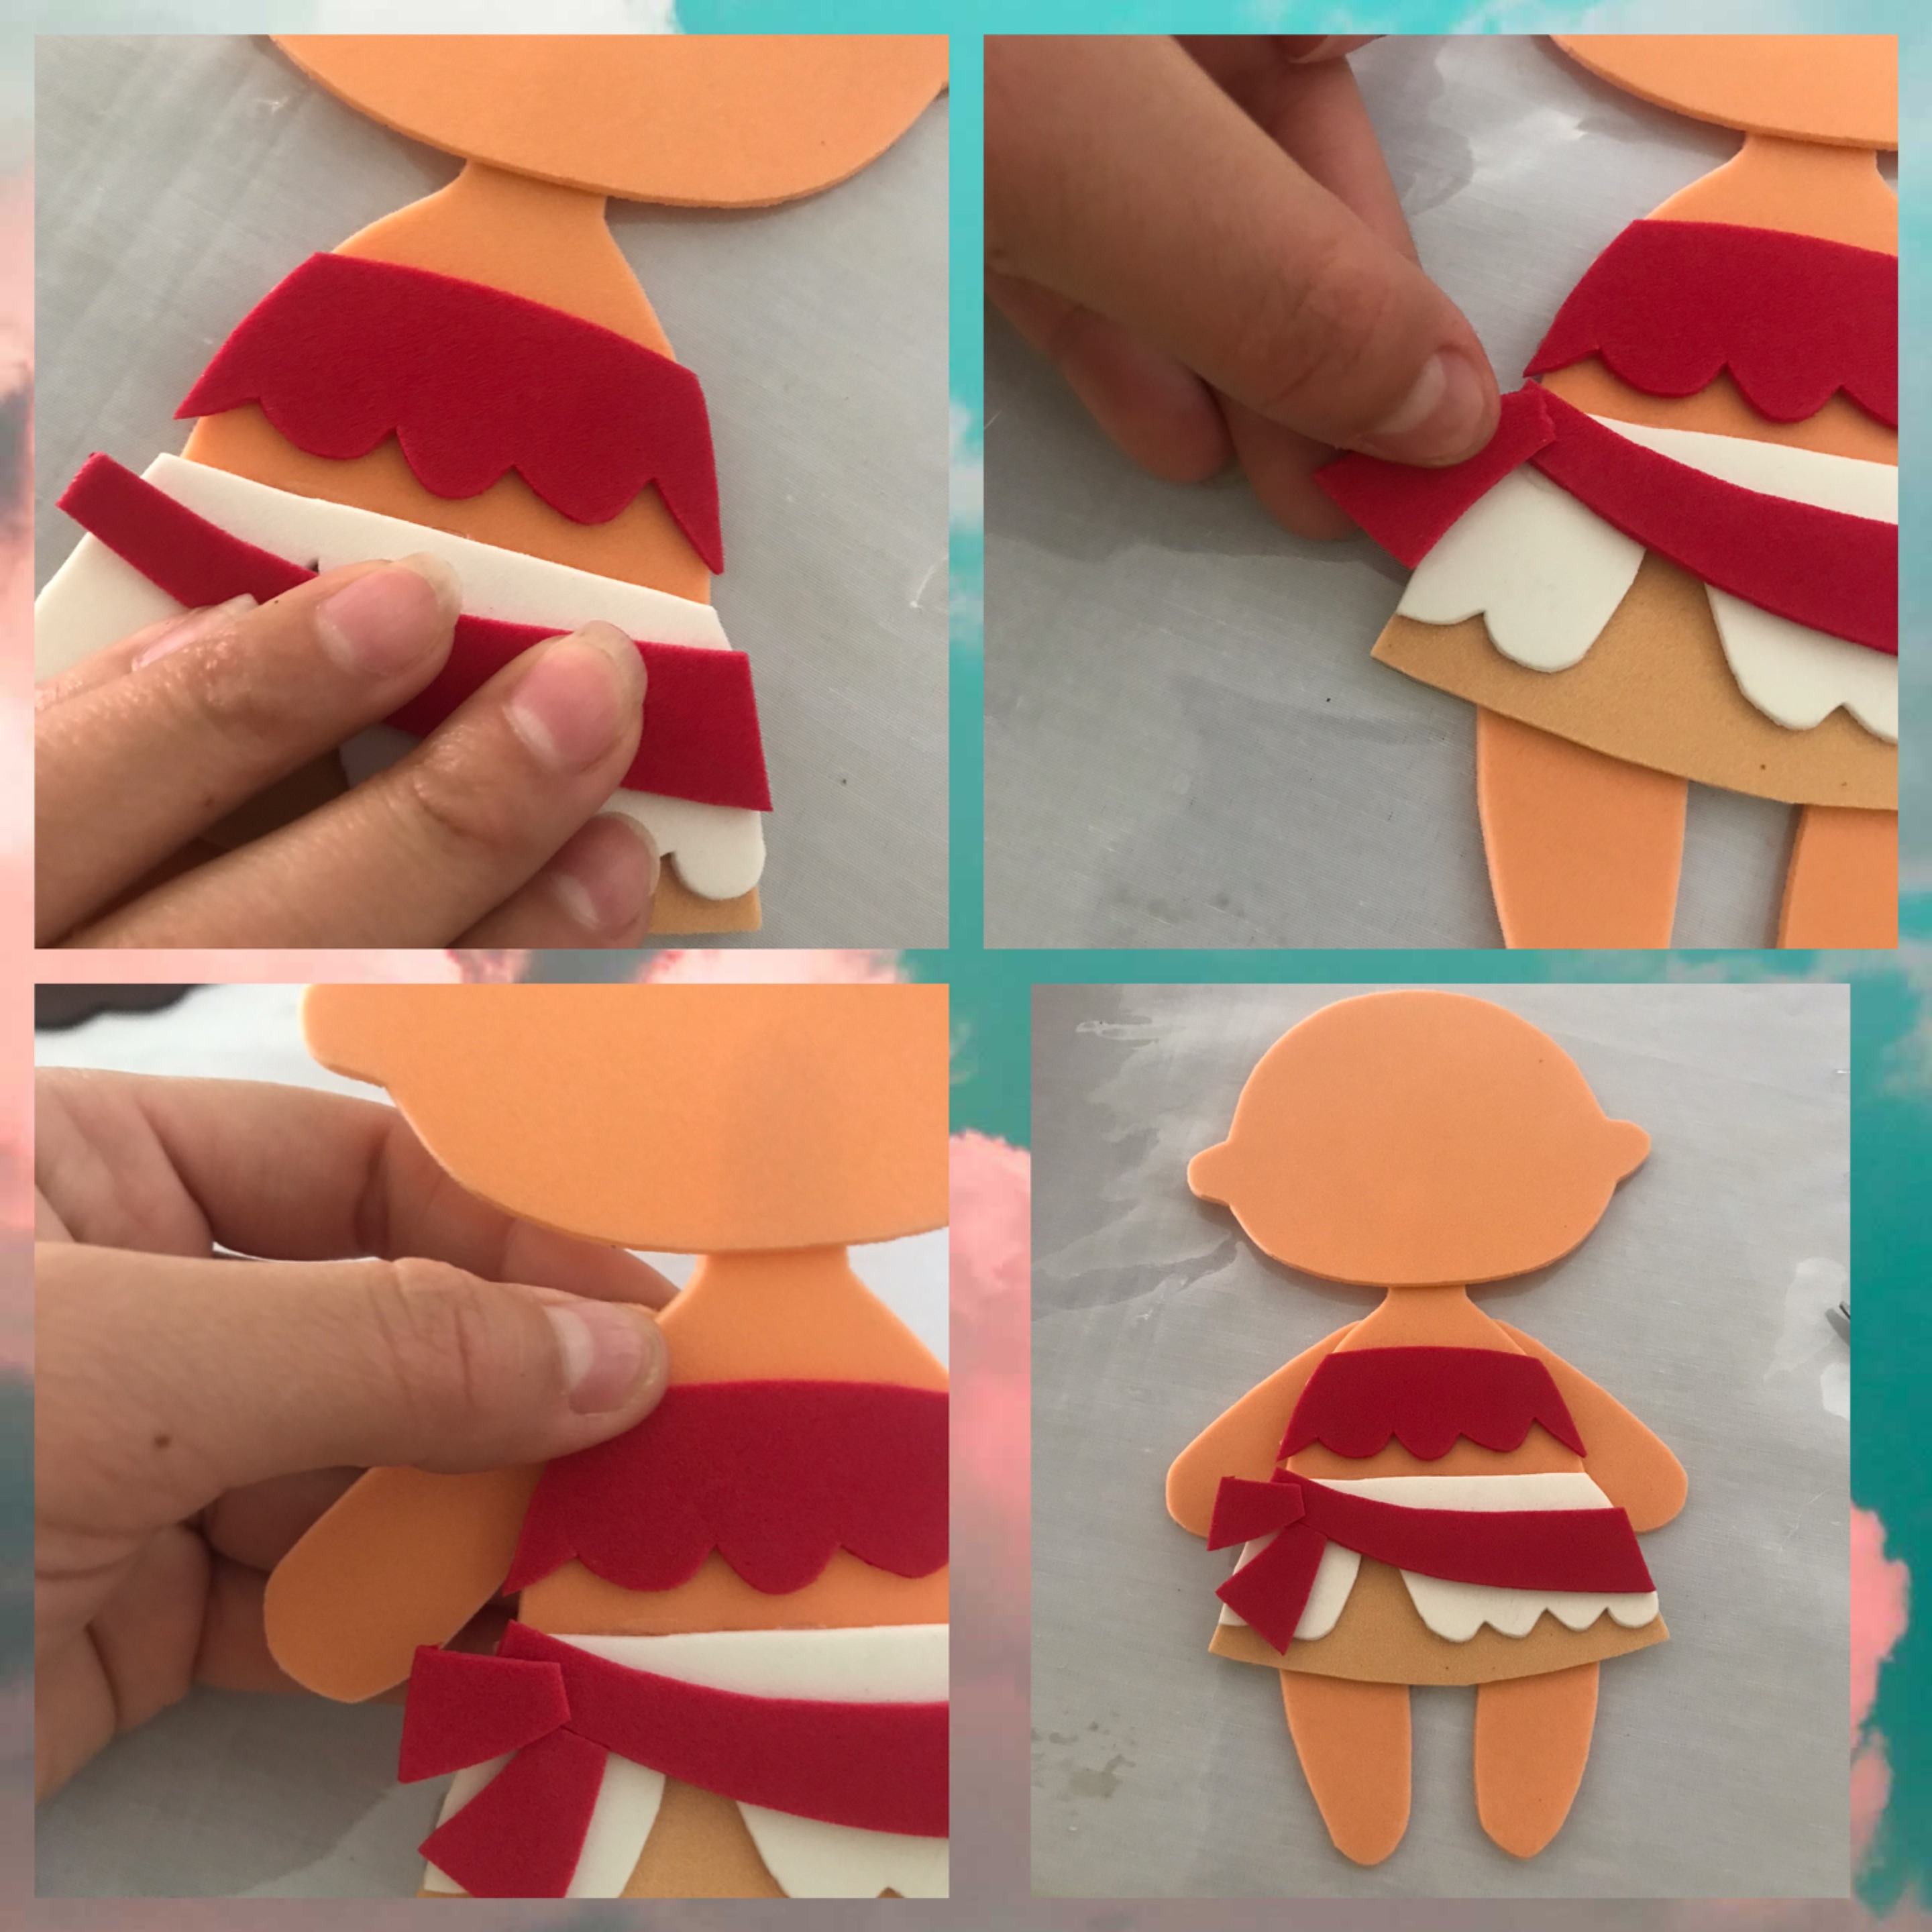
Marcamos y recortamos en el foami rojo la camisa, faralao y las líneas del faralao
> We mark and cut out the shirt, faralao and the faralao lines on the red foami
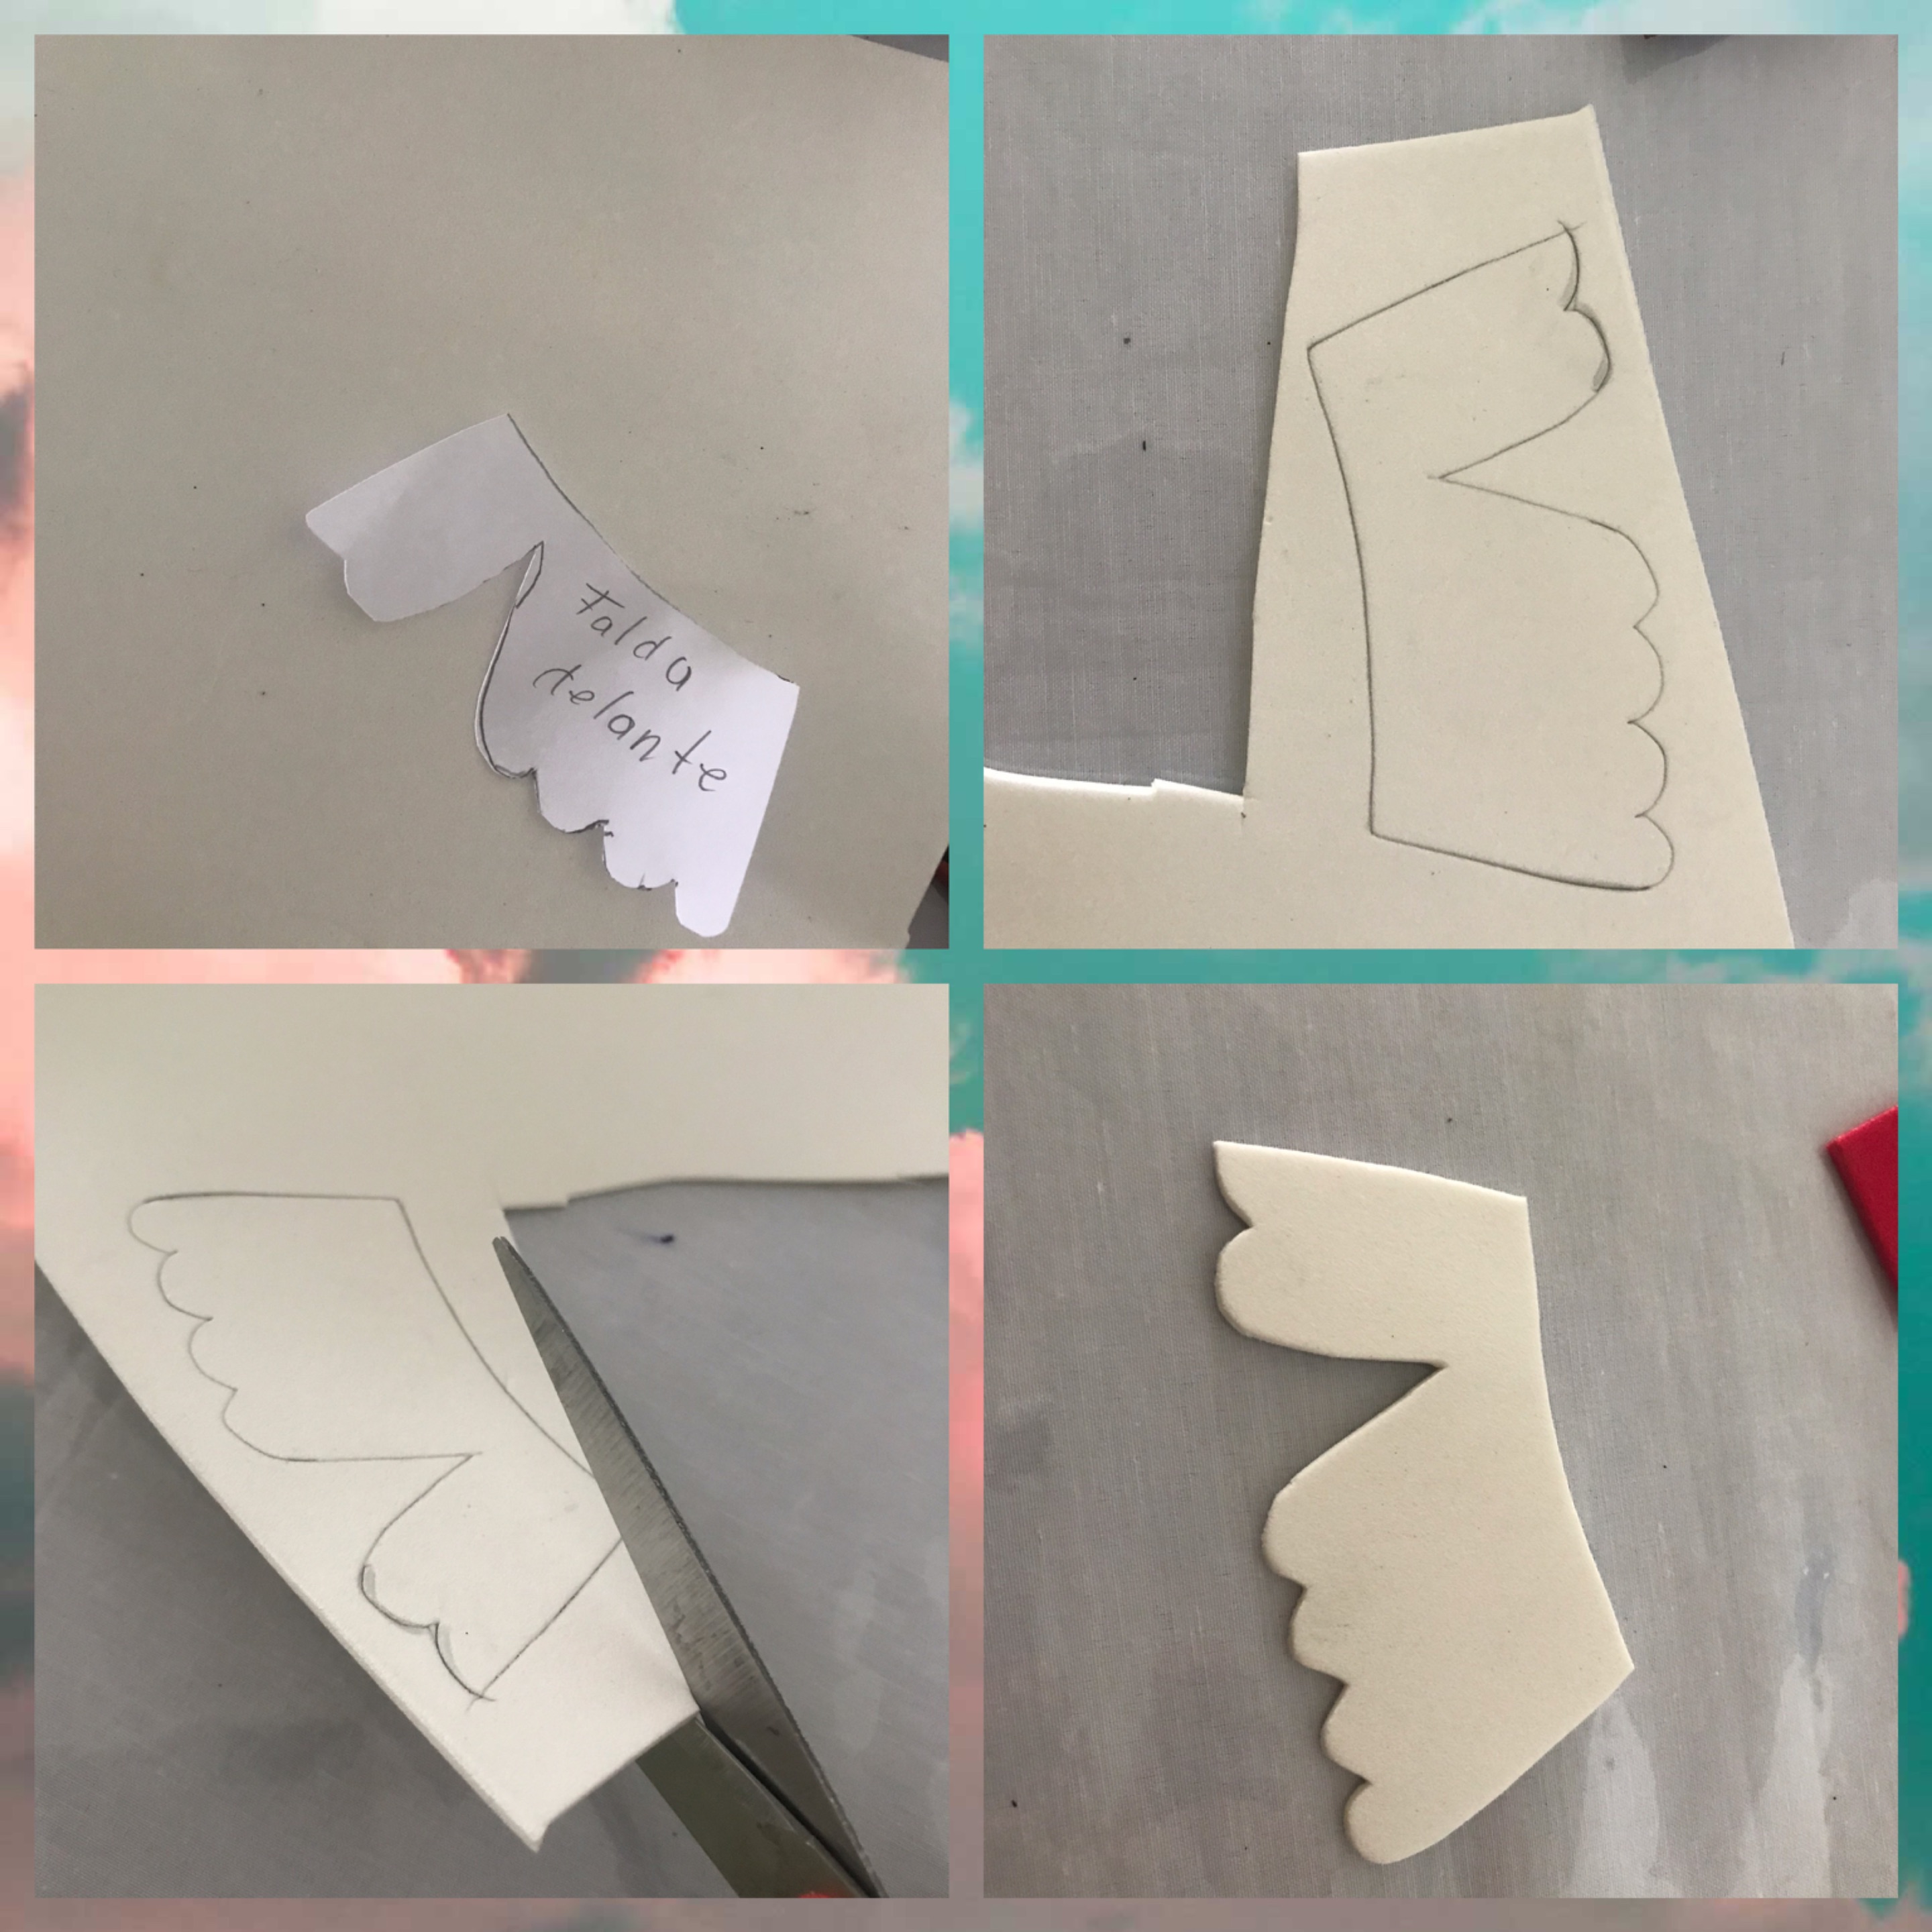
Marcamos y recortamos en el foami blanco la falda delantera de la Moana
> We mark and cut out the front skirt of the Moana on the white foami
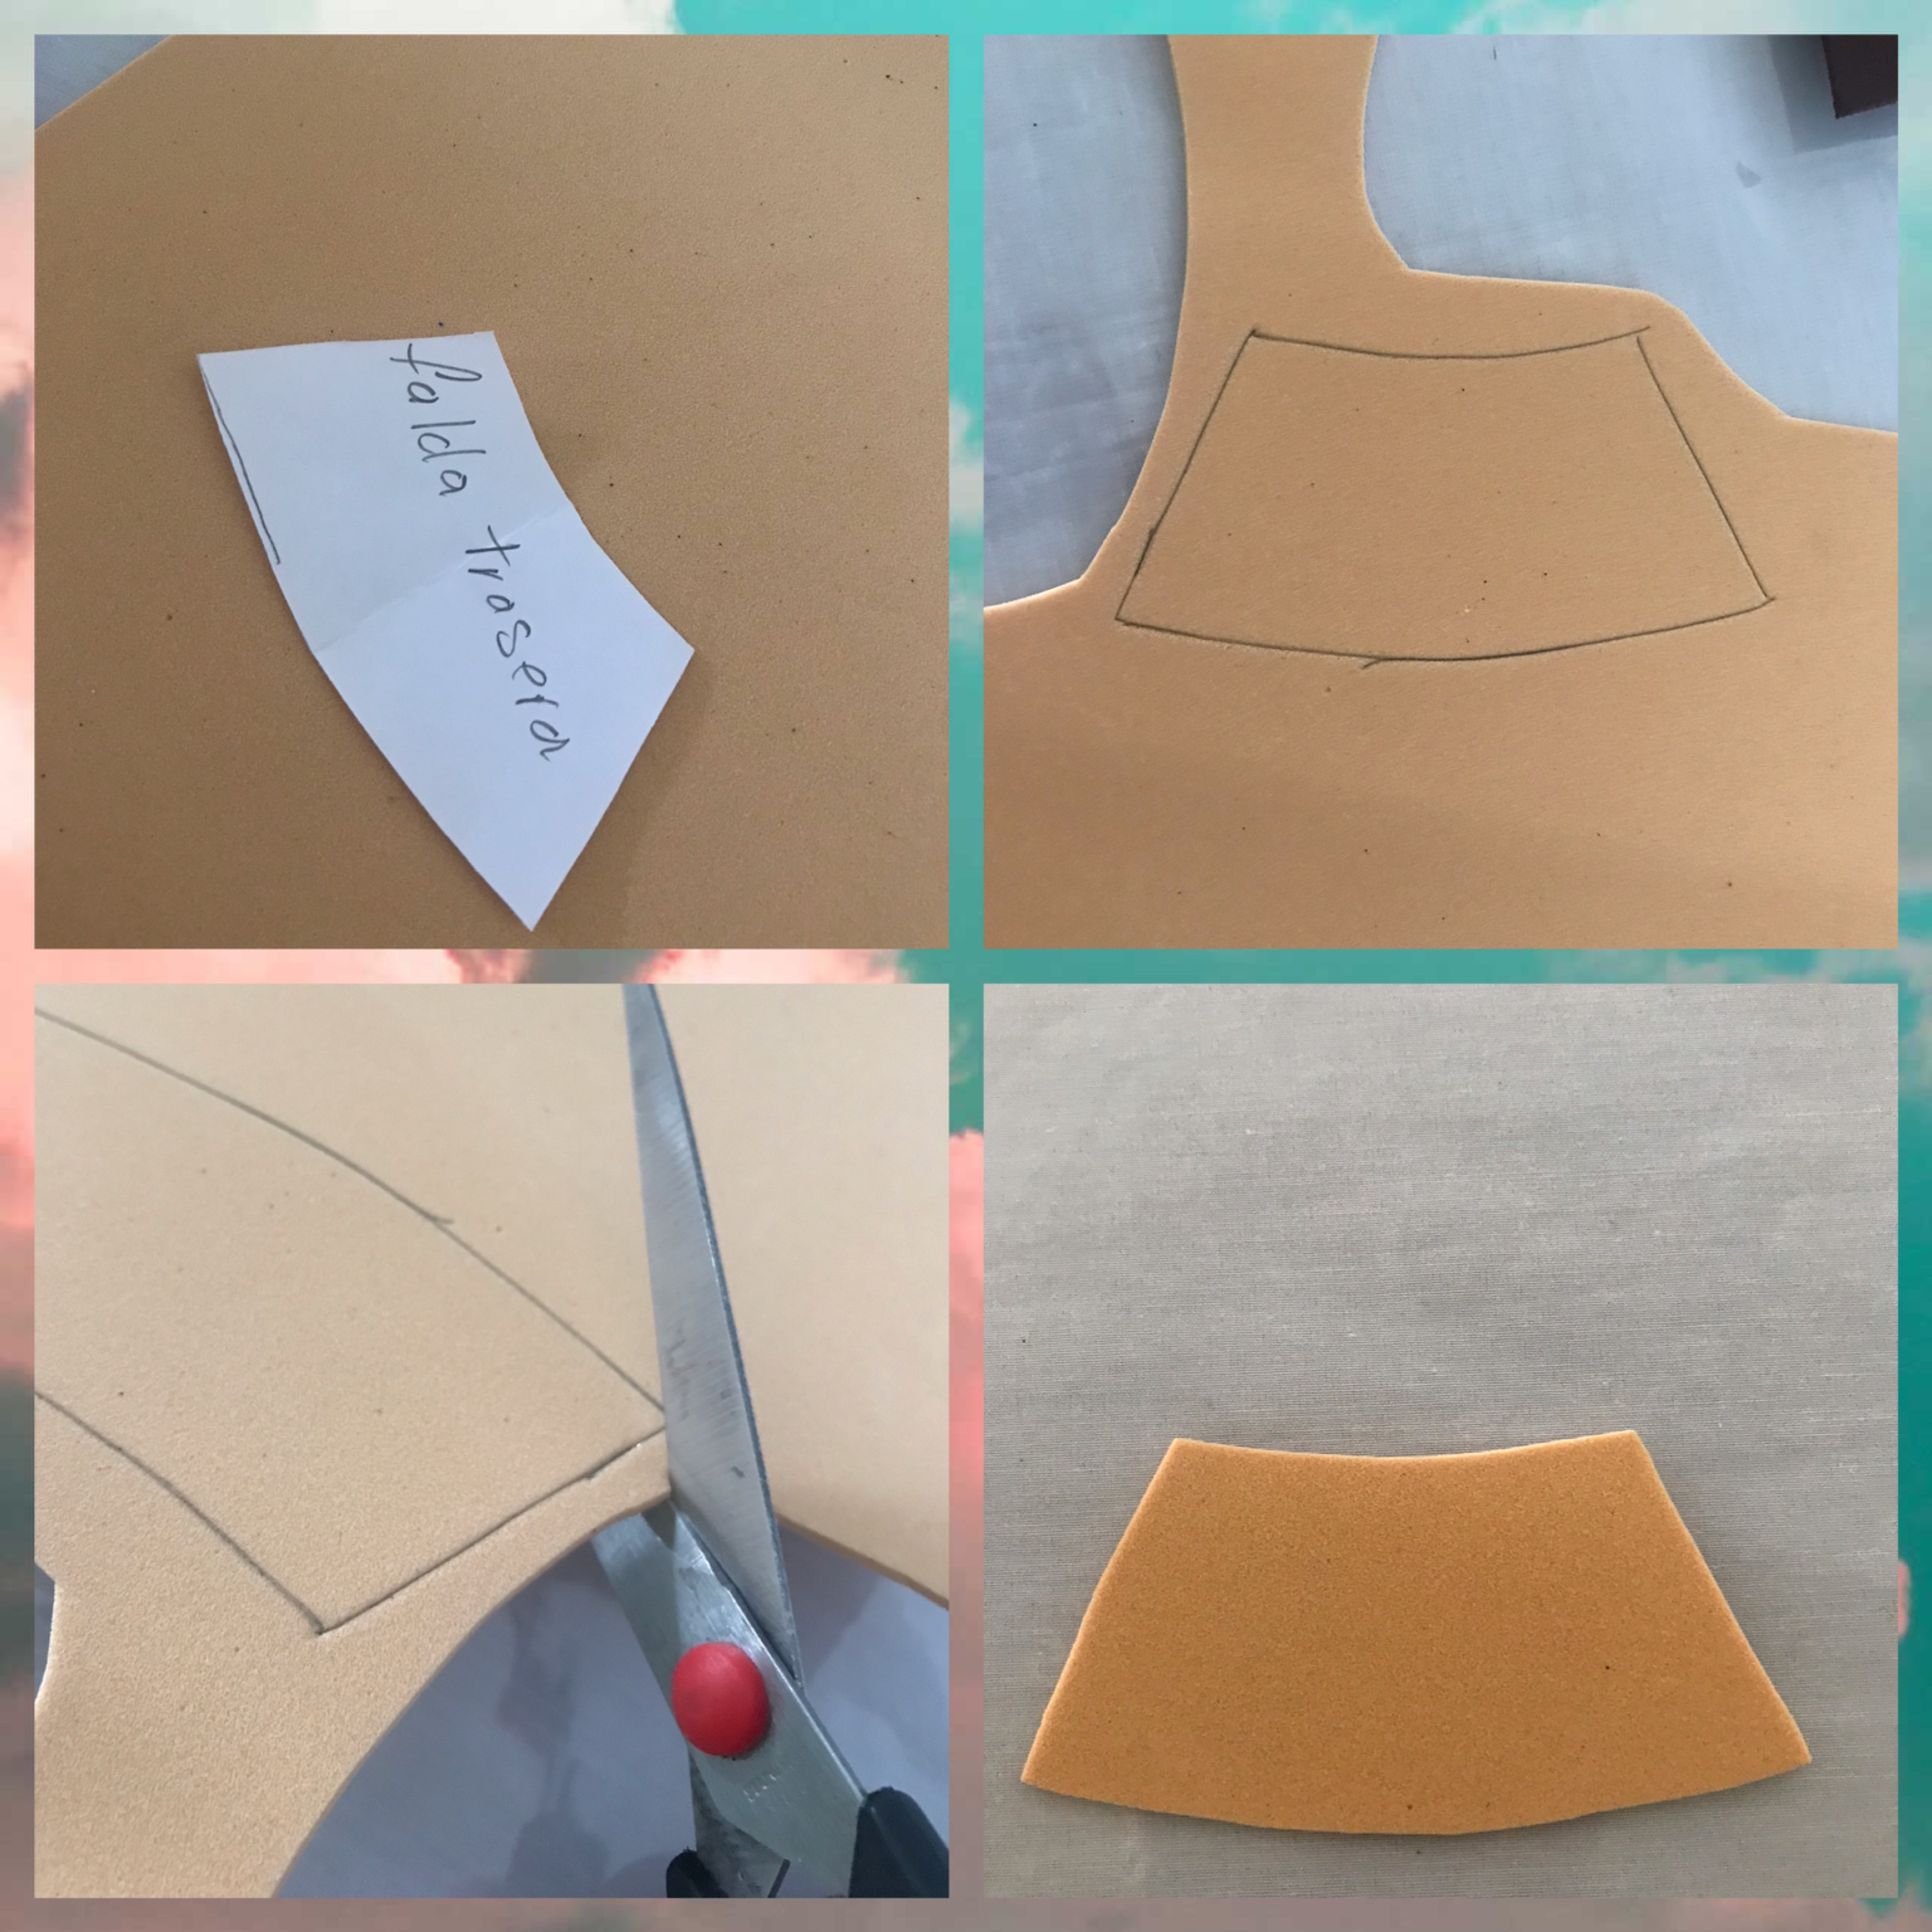
Marcamos y recortamos en el foami color carne oscuro la falda trasera
> We mark and cut out the back skirt on the dark flesh-colored foami
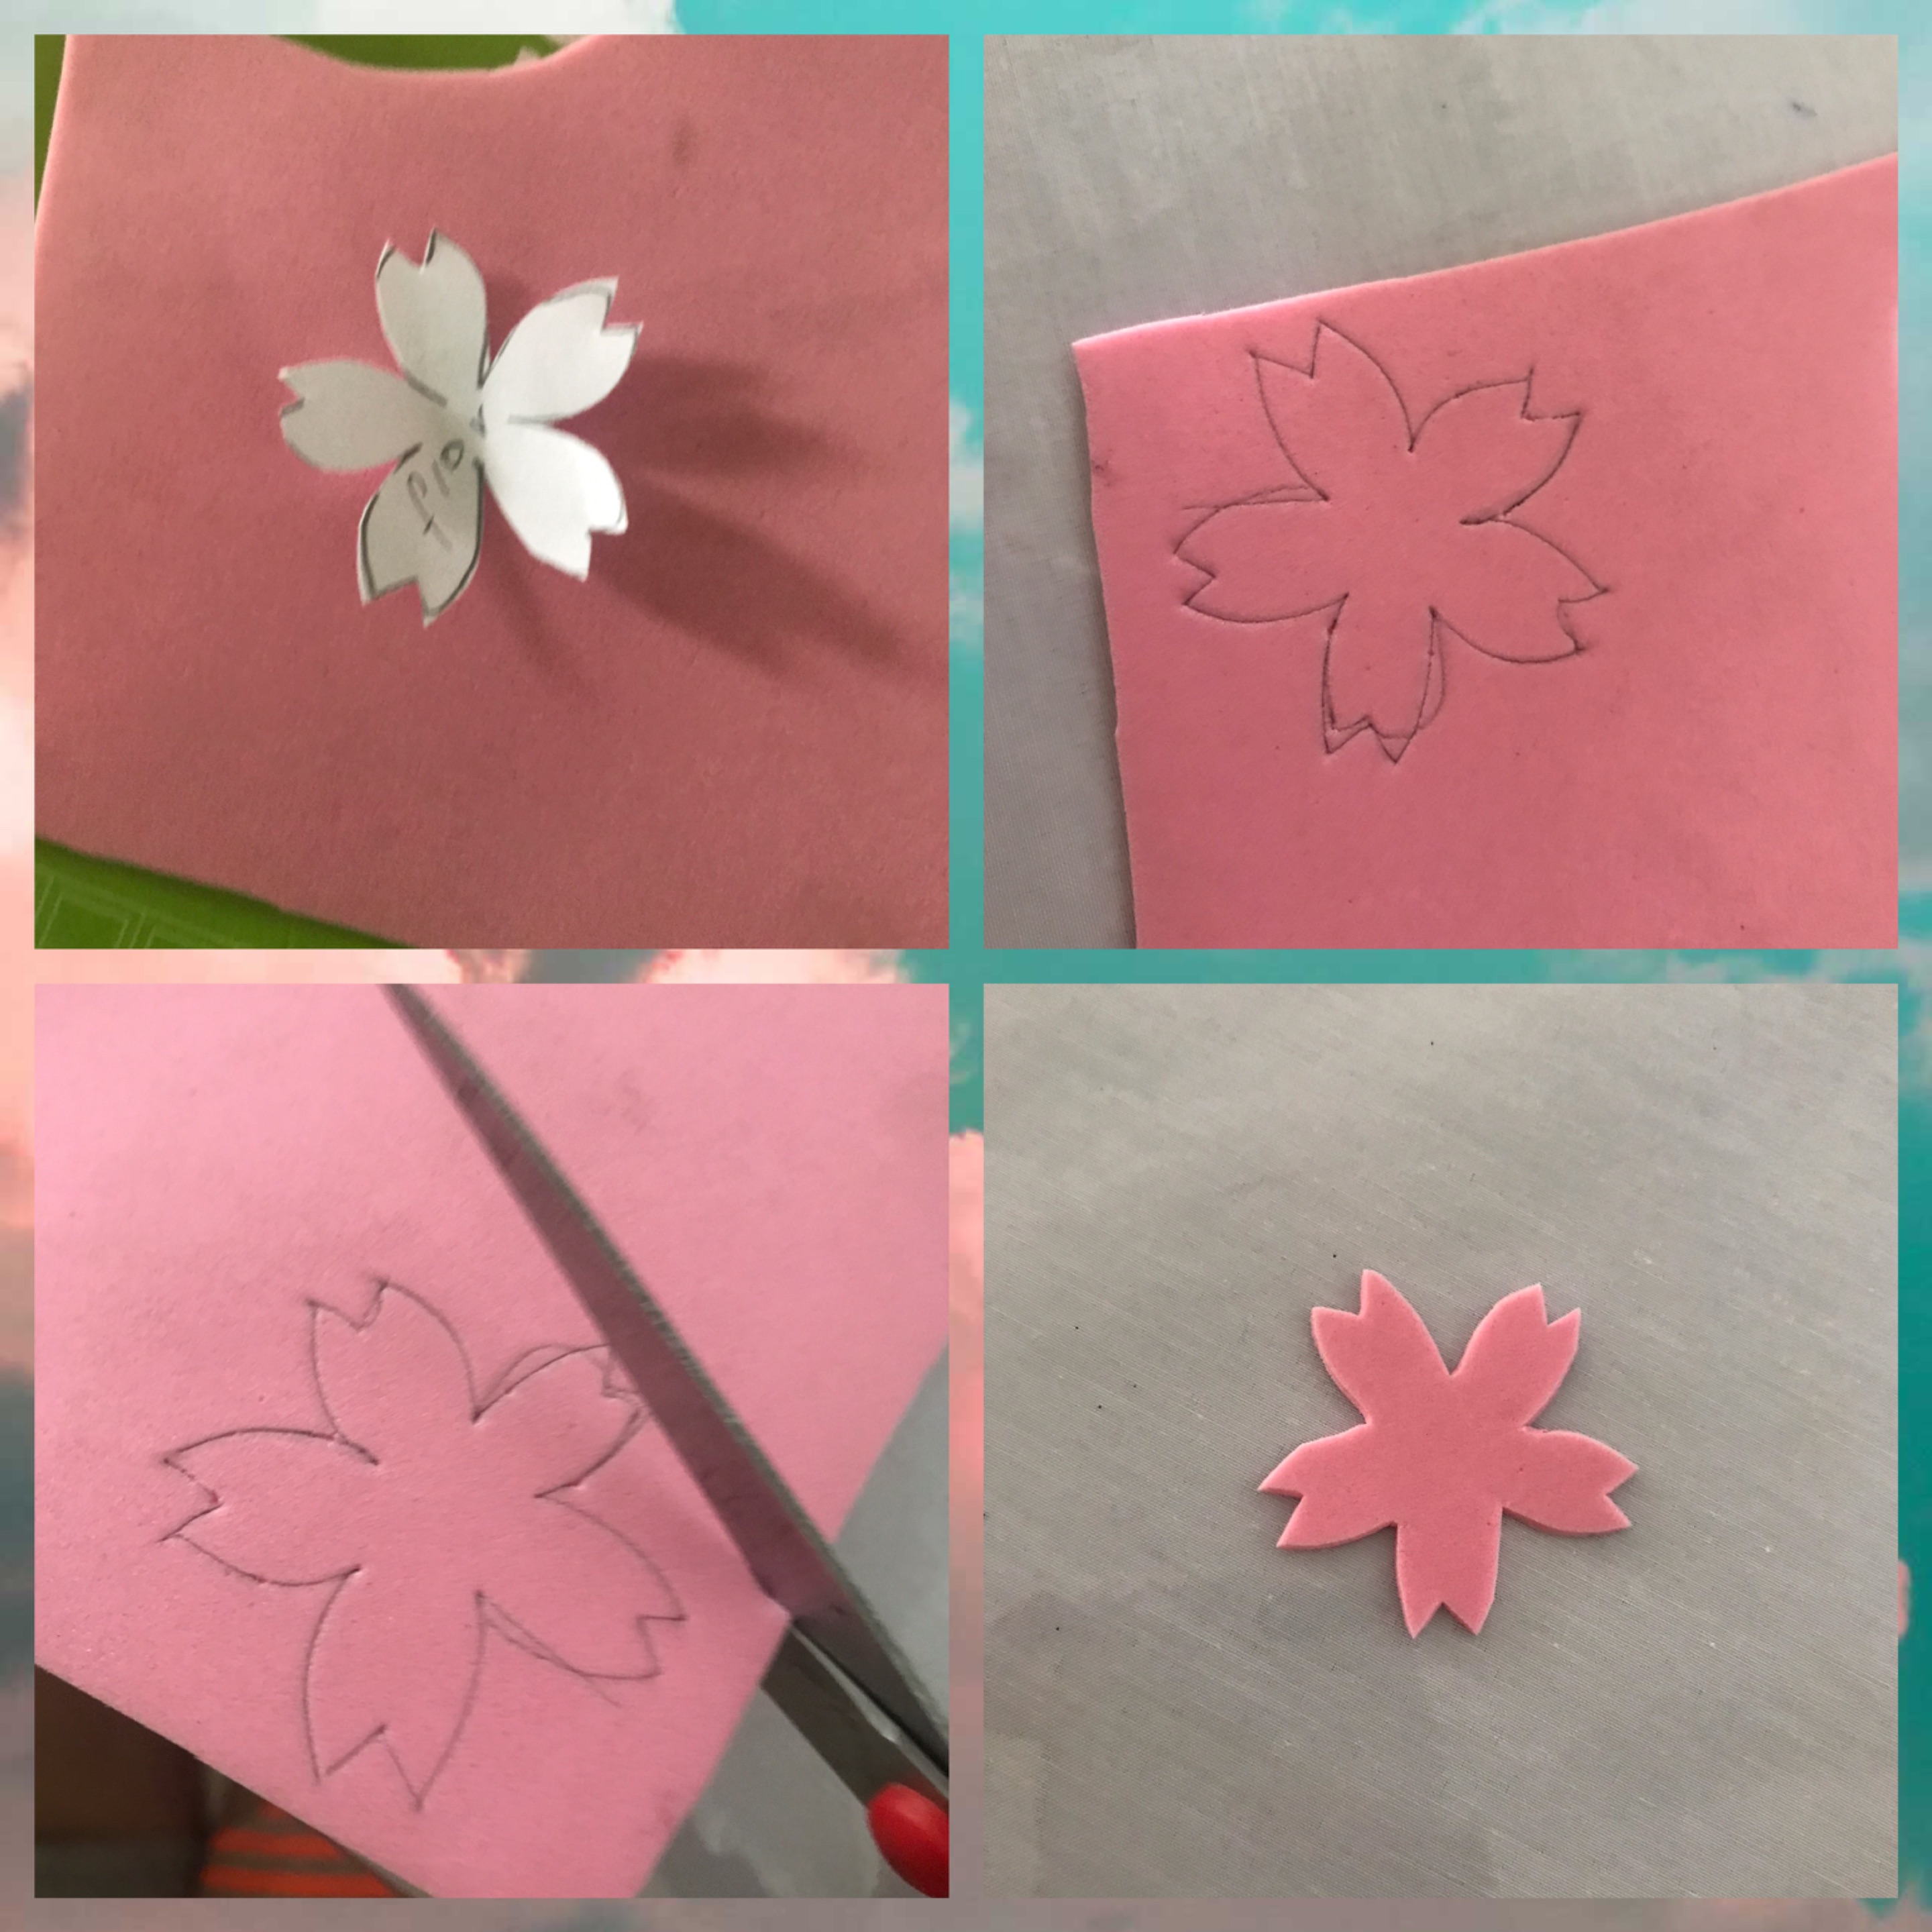
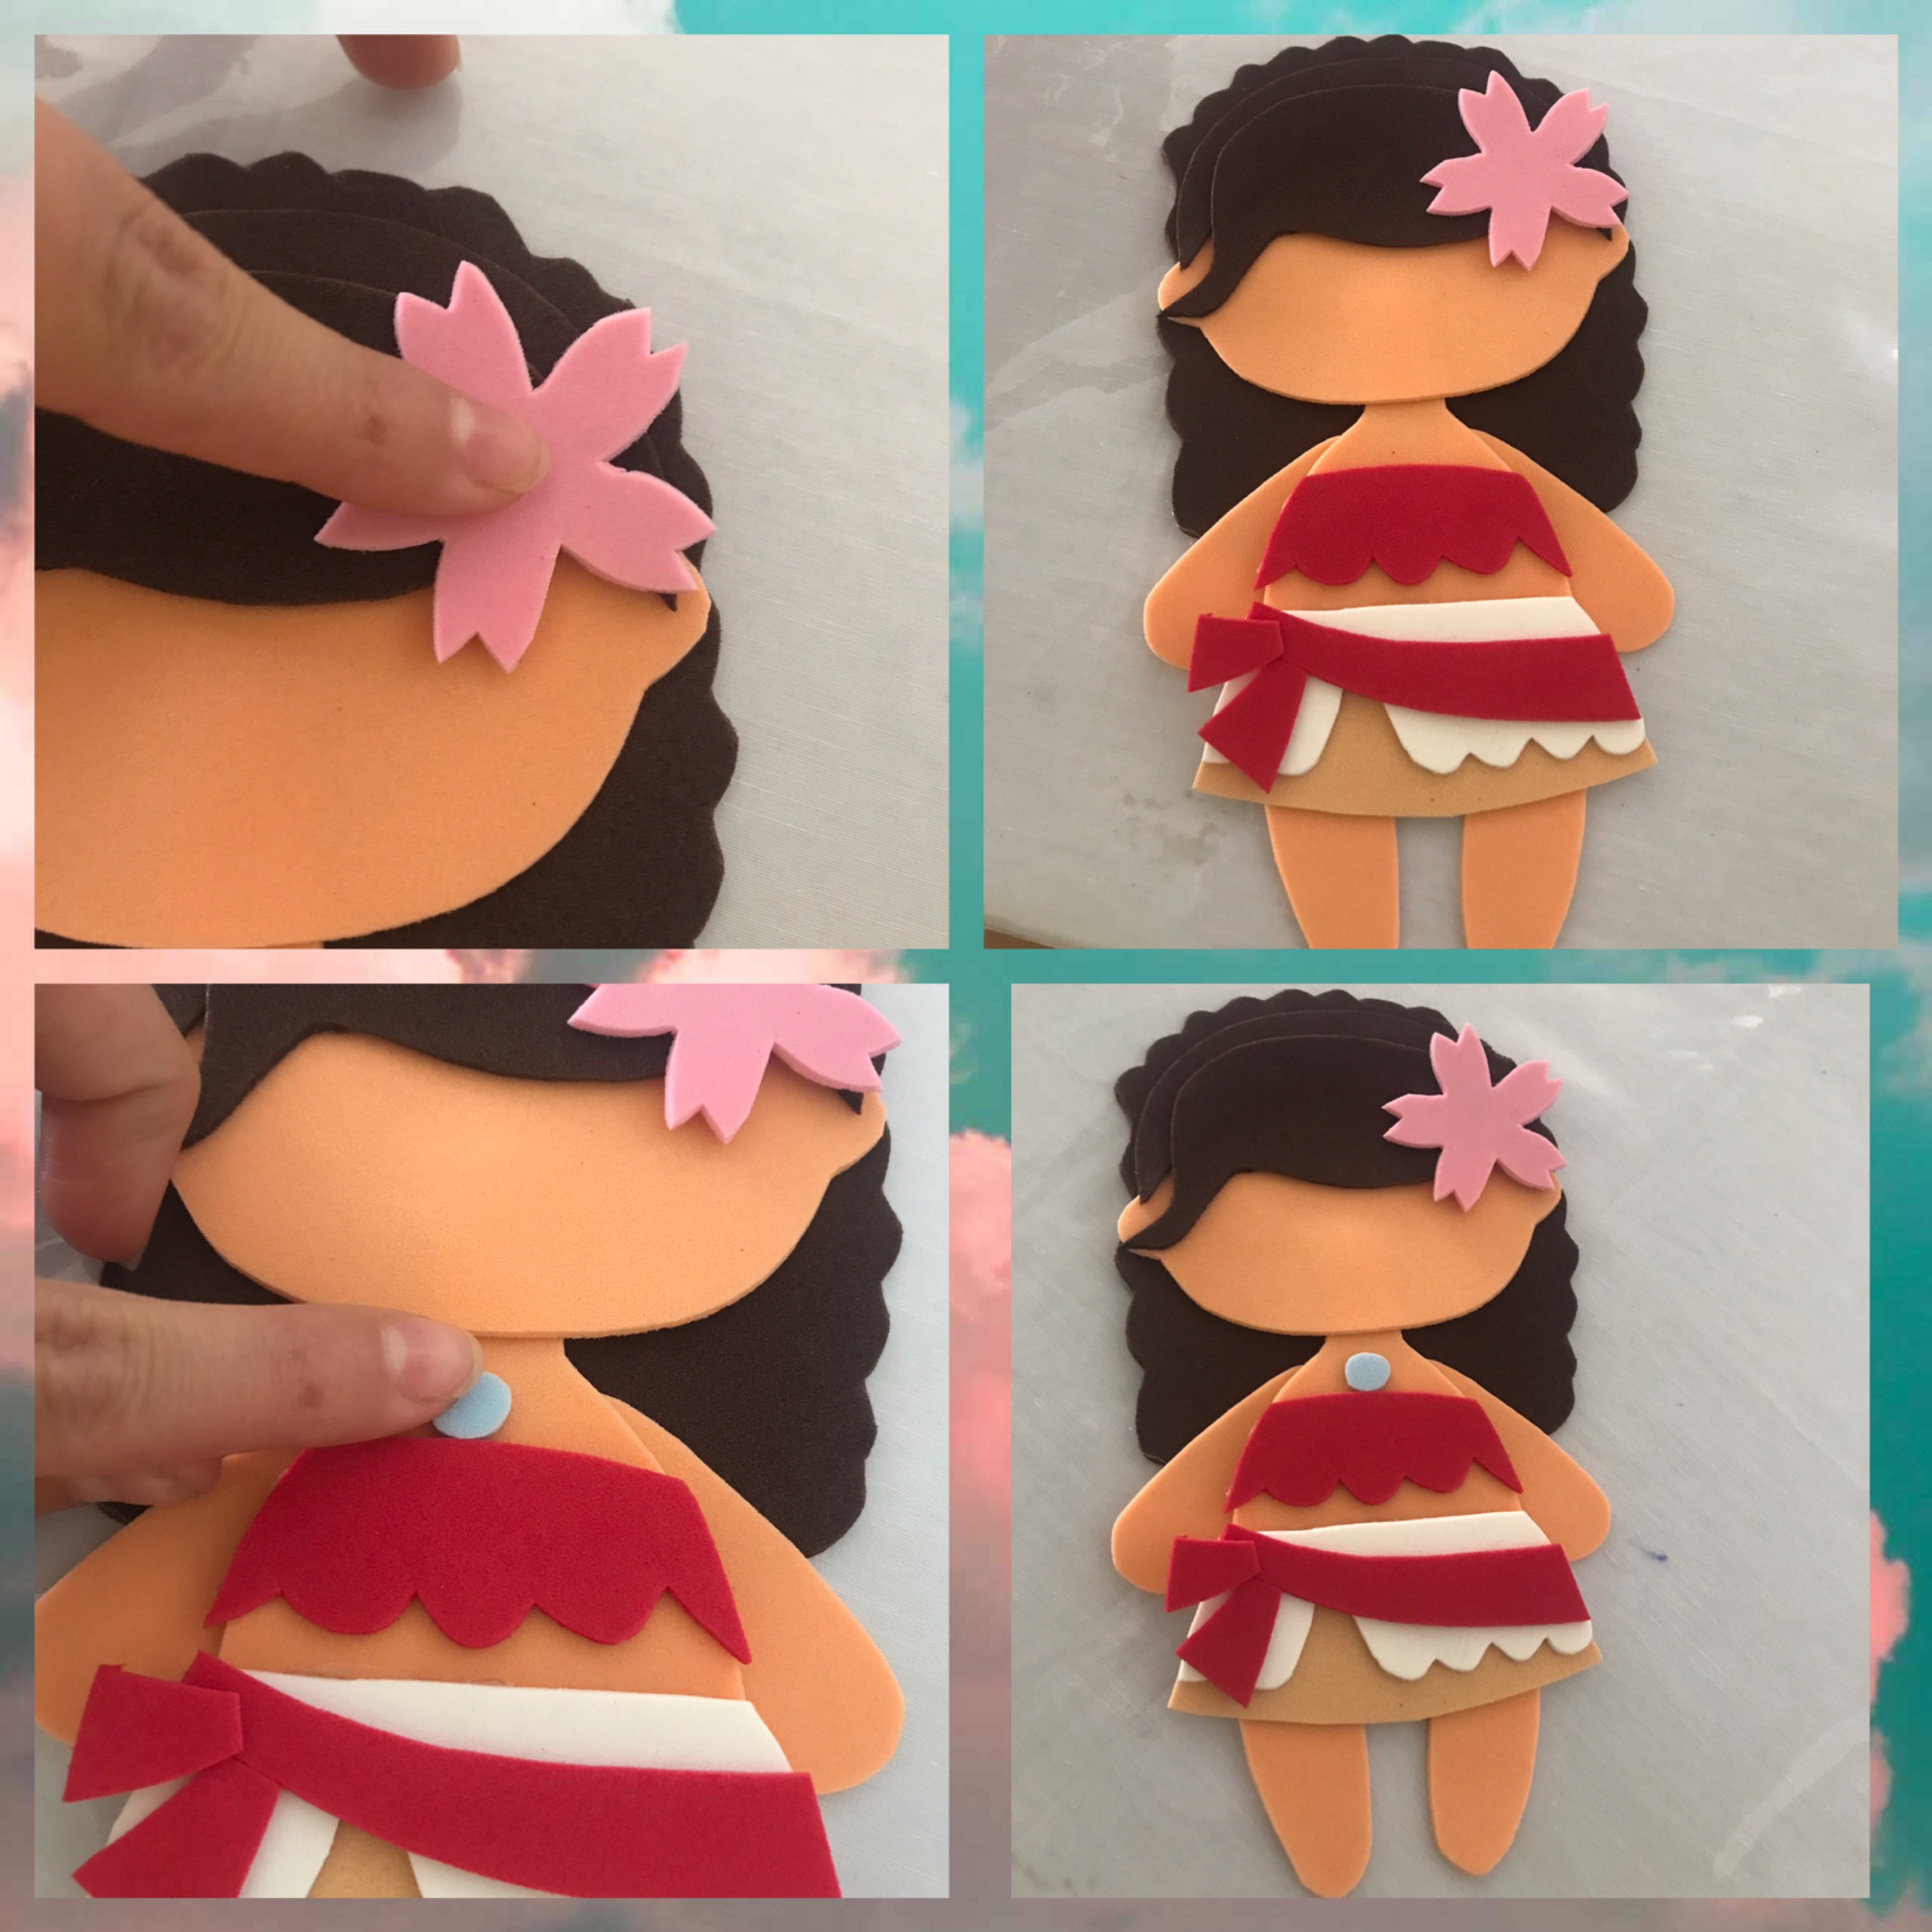
Marcamos y recortamos en el foami rosado la flor de la cabeza de la Moana
> We mark and cut out the flower of the Moana's head on the pink foami
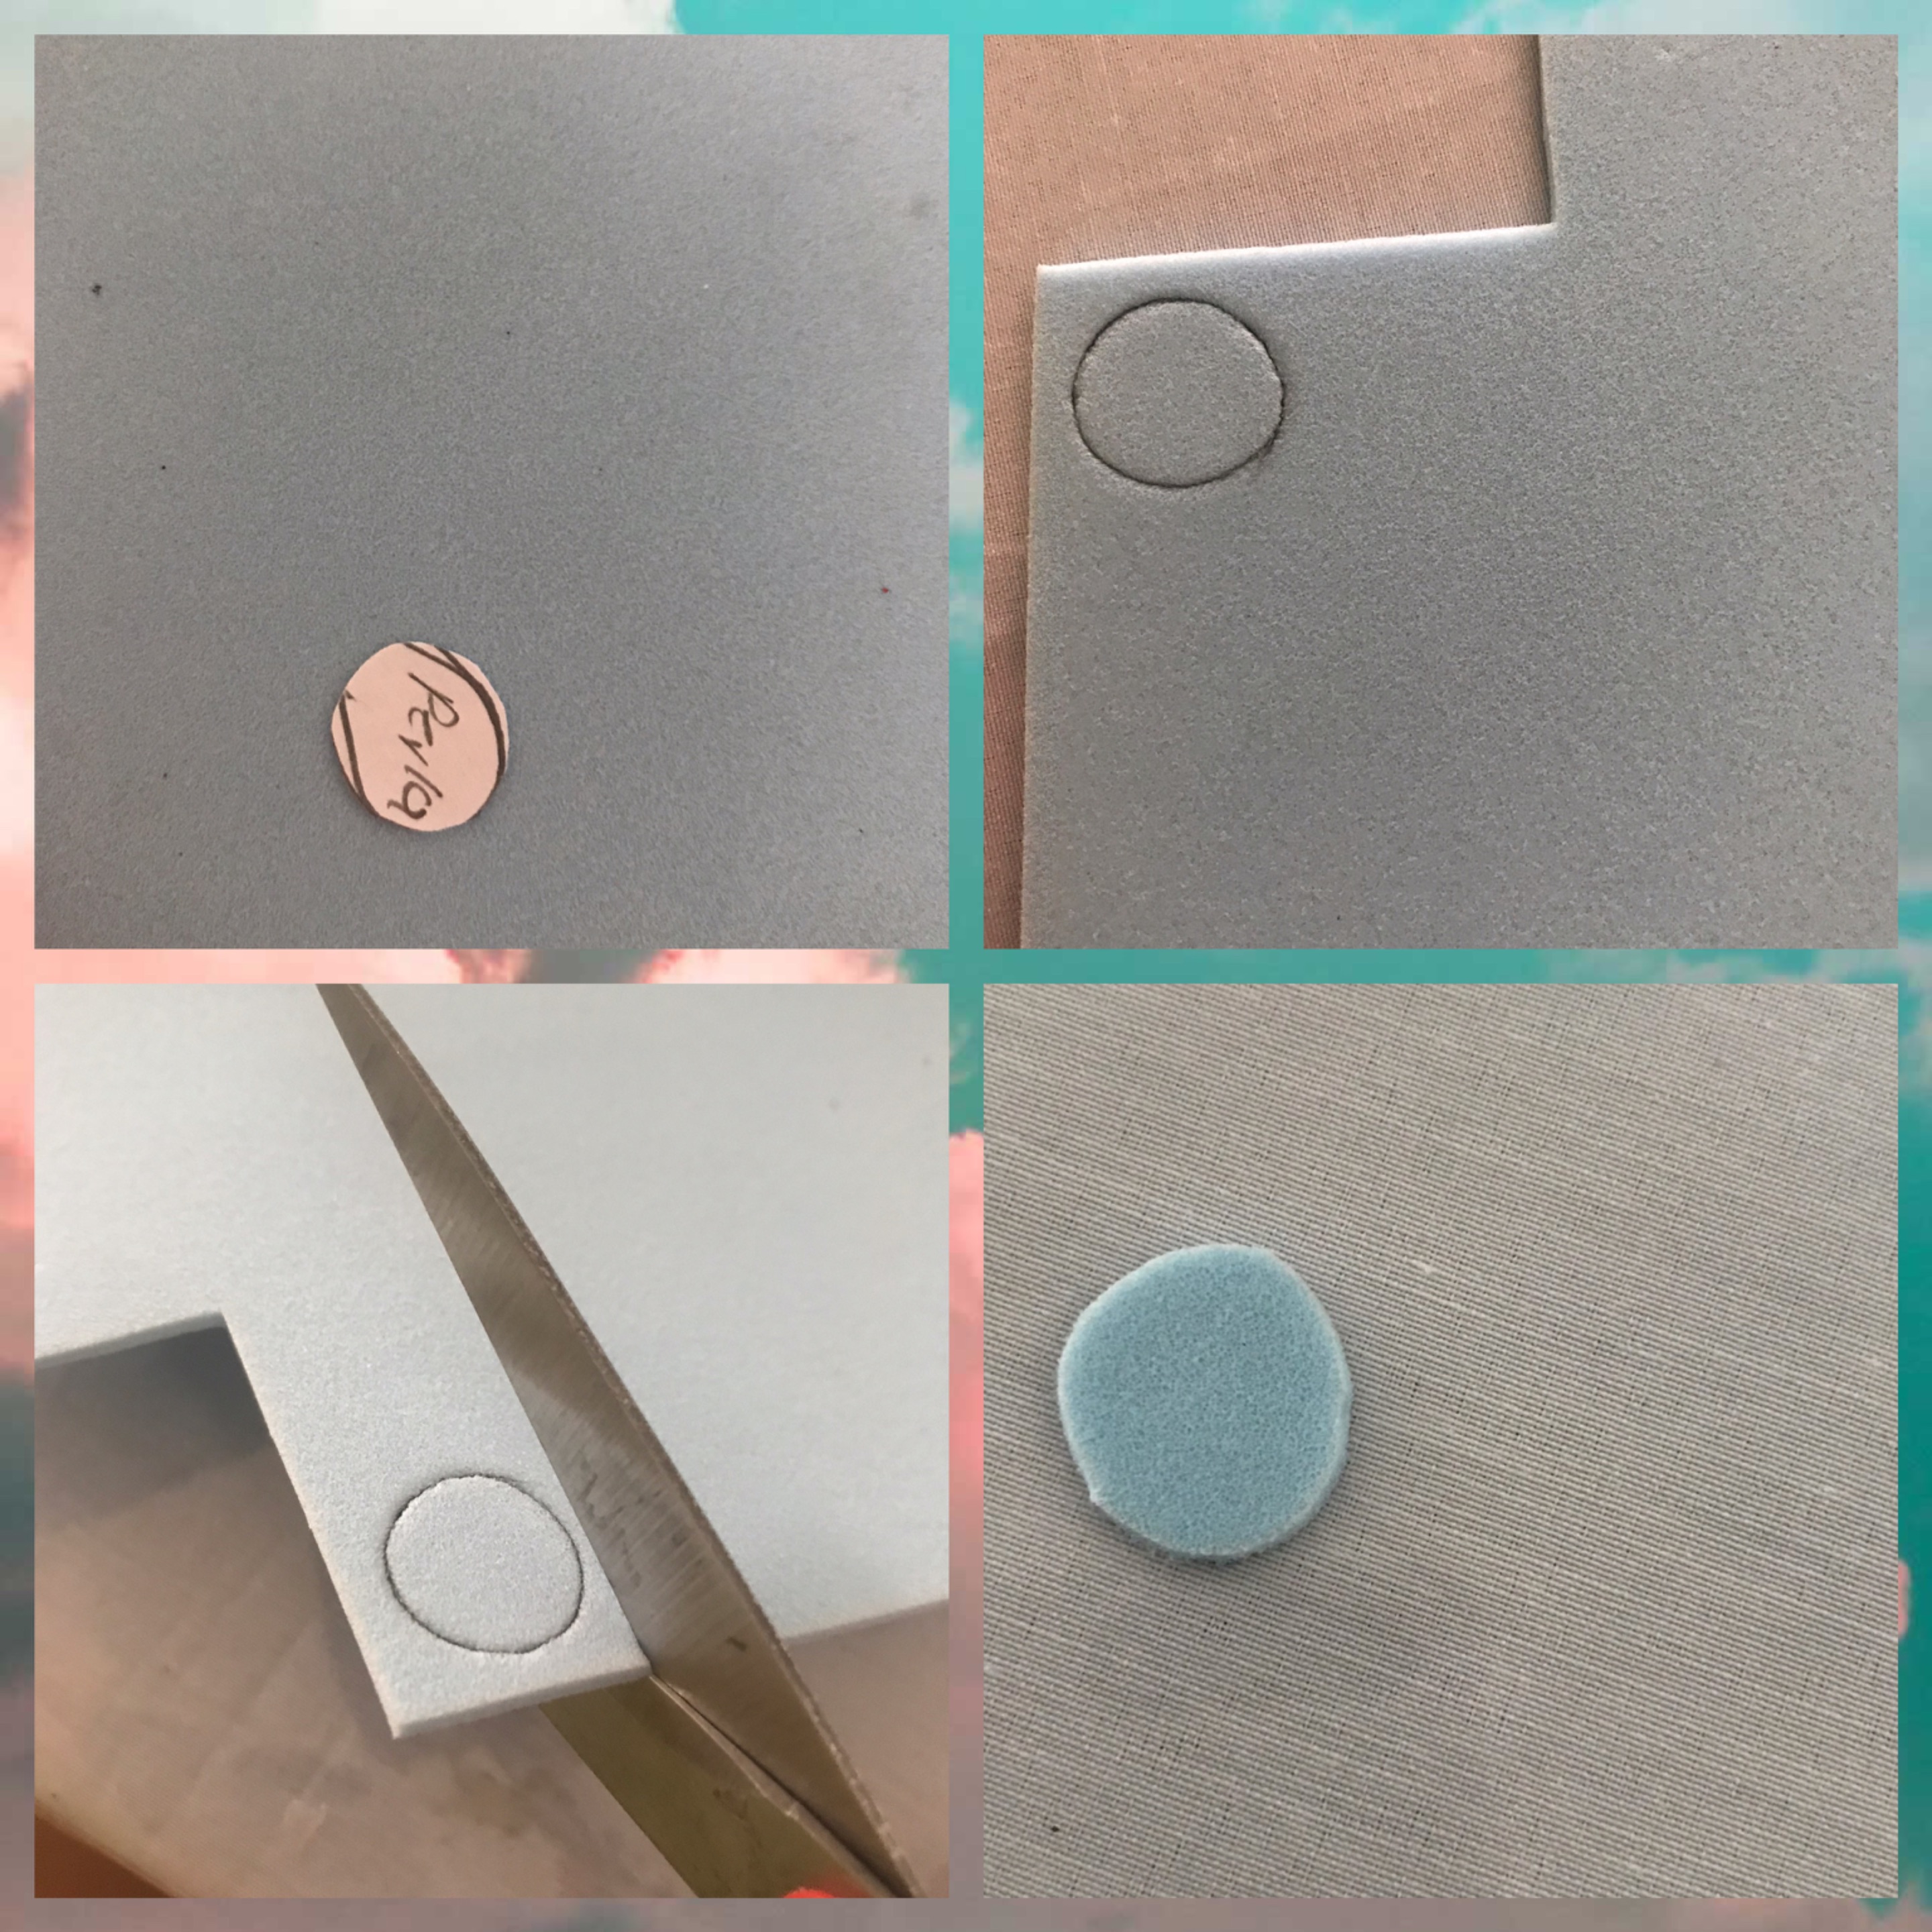
Marcamos y recortamos en el foami azul la perla del collar
> We mark and cut out the pearl of the necklace on the blue foami
Ya que estén cortados todos los patrones empezamos a pegar la cabeza del cuerpo y luego pegamos la camisa al cuerpo
> Once all the patterns are cut, we start gluing the head to the body and then we glue the shirt to the body
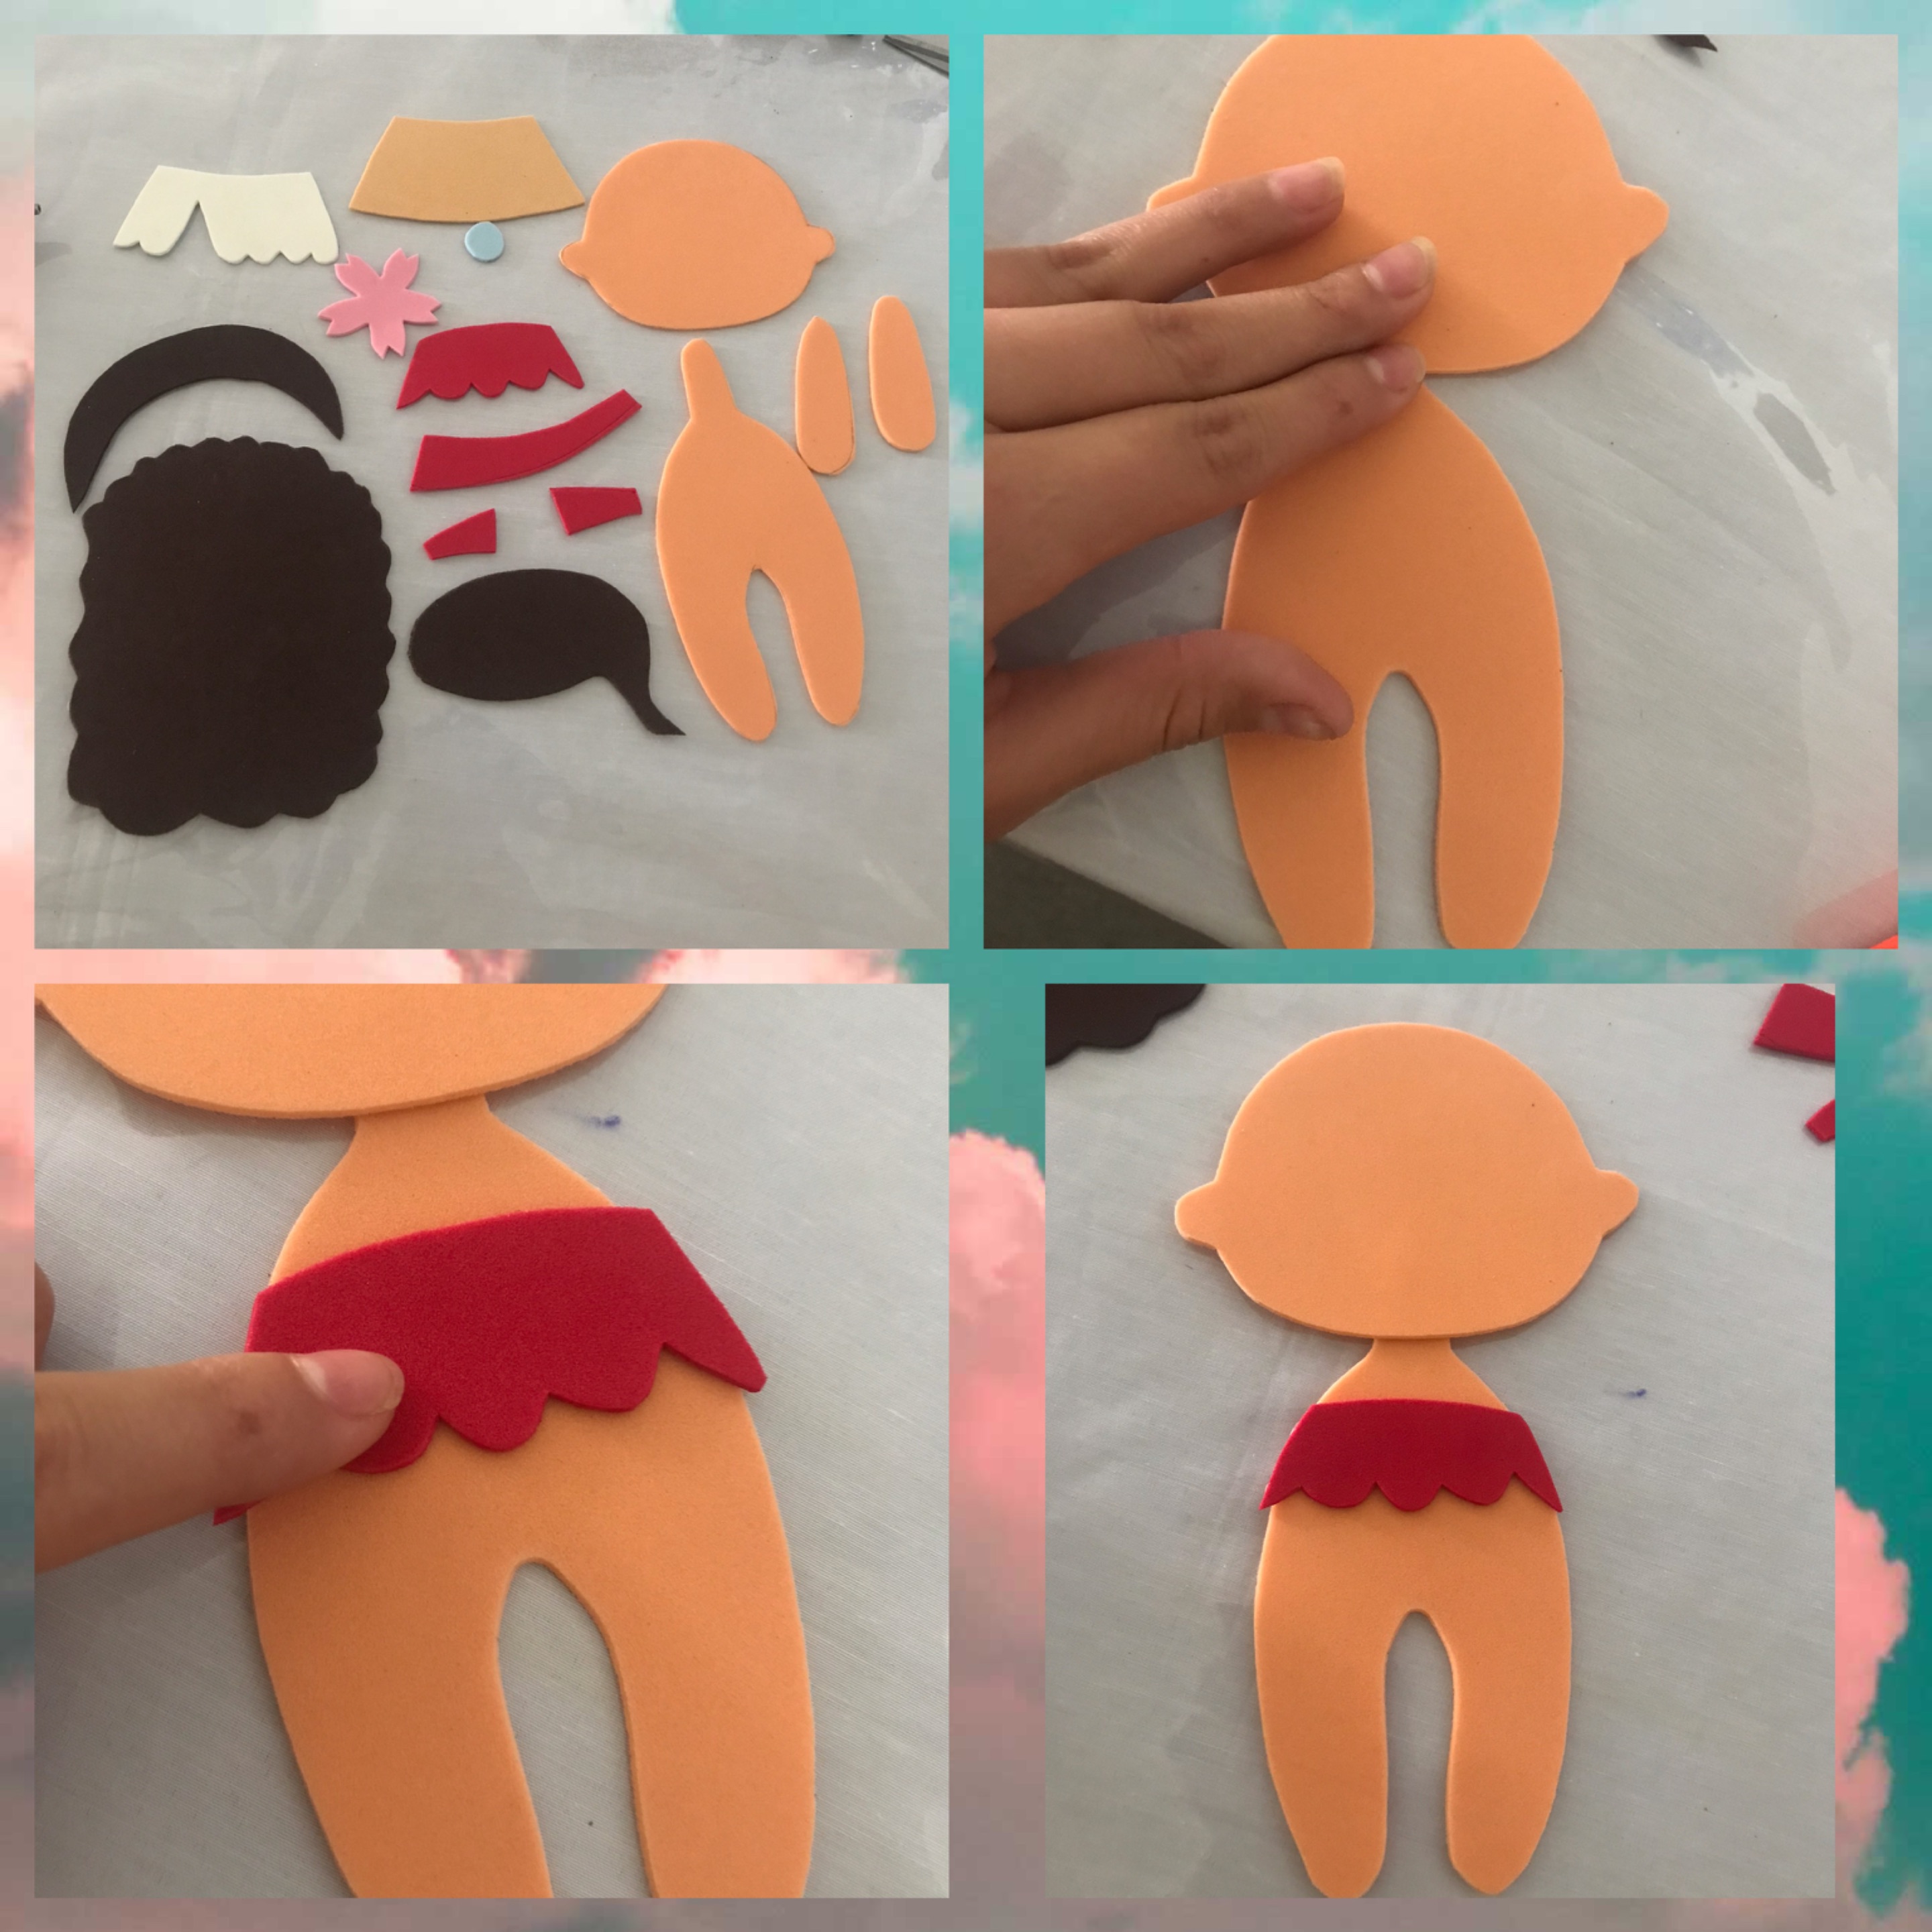
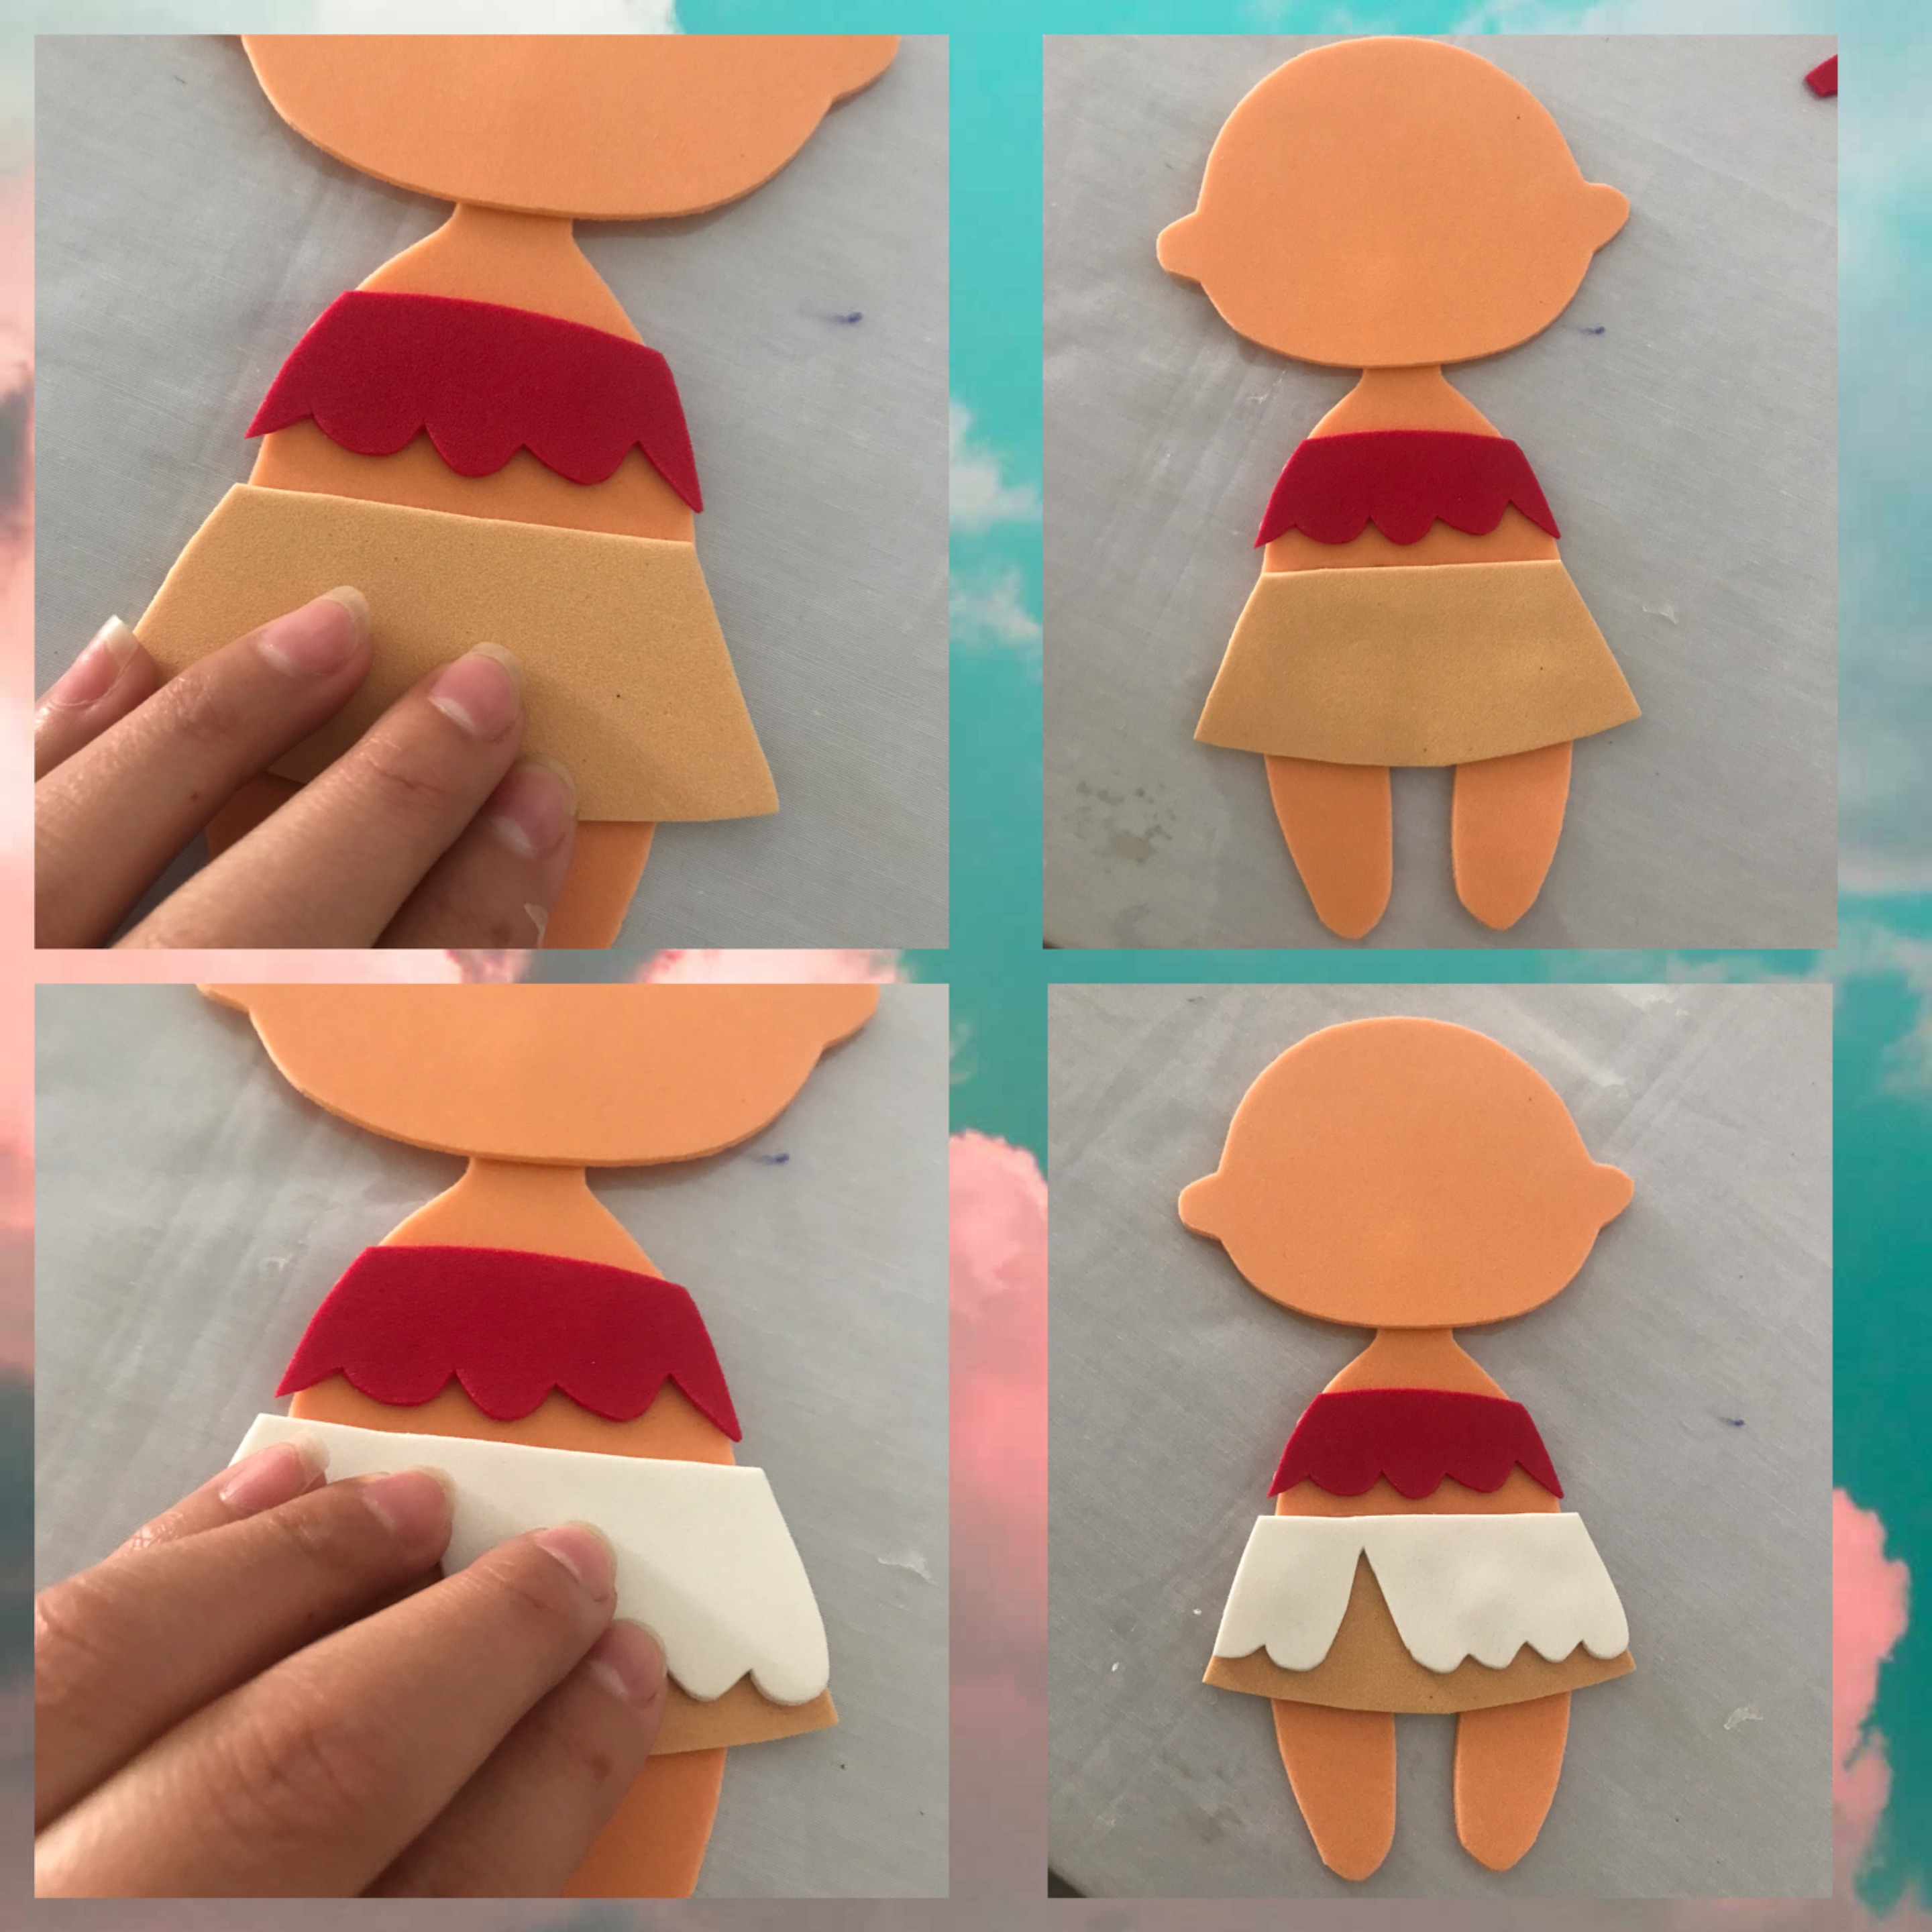
Ahora pegamos la falda trasera en el cuerpo, pegamos arriba la parte delantera de la falda
> Now we glue the back skirt on the body, glue the front part of the skirt on top
Pegamos el faralao y las líneas del faralao y pegamos los brazos al cuerpo
> We glue the faralao and the faralao lines and glue the arms to the body
Pegamos el cabello trasero, el cabello delantero y la pollina en la cabeza
> Glue the back hair, the front hair, and the skirt to the head
Pegamos la flor en la cabeza y pegamos la perla en el cuello de la Moana
> Glue the flower on the head and glue the pearl on the Moana's neck
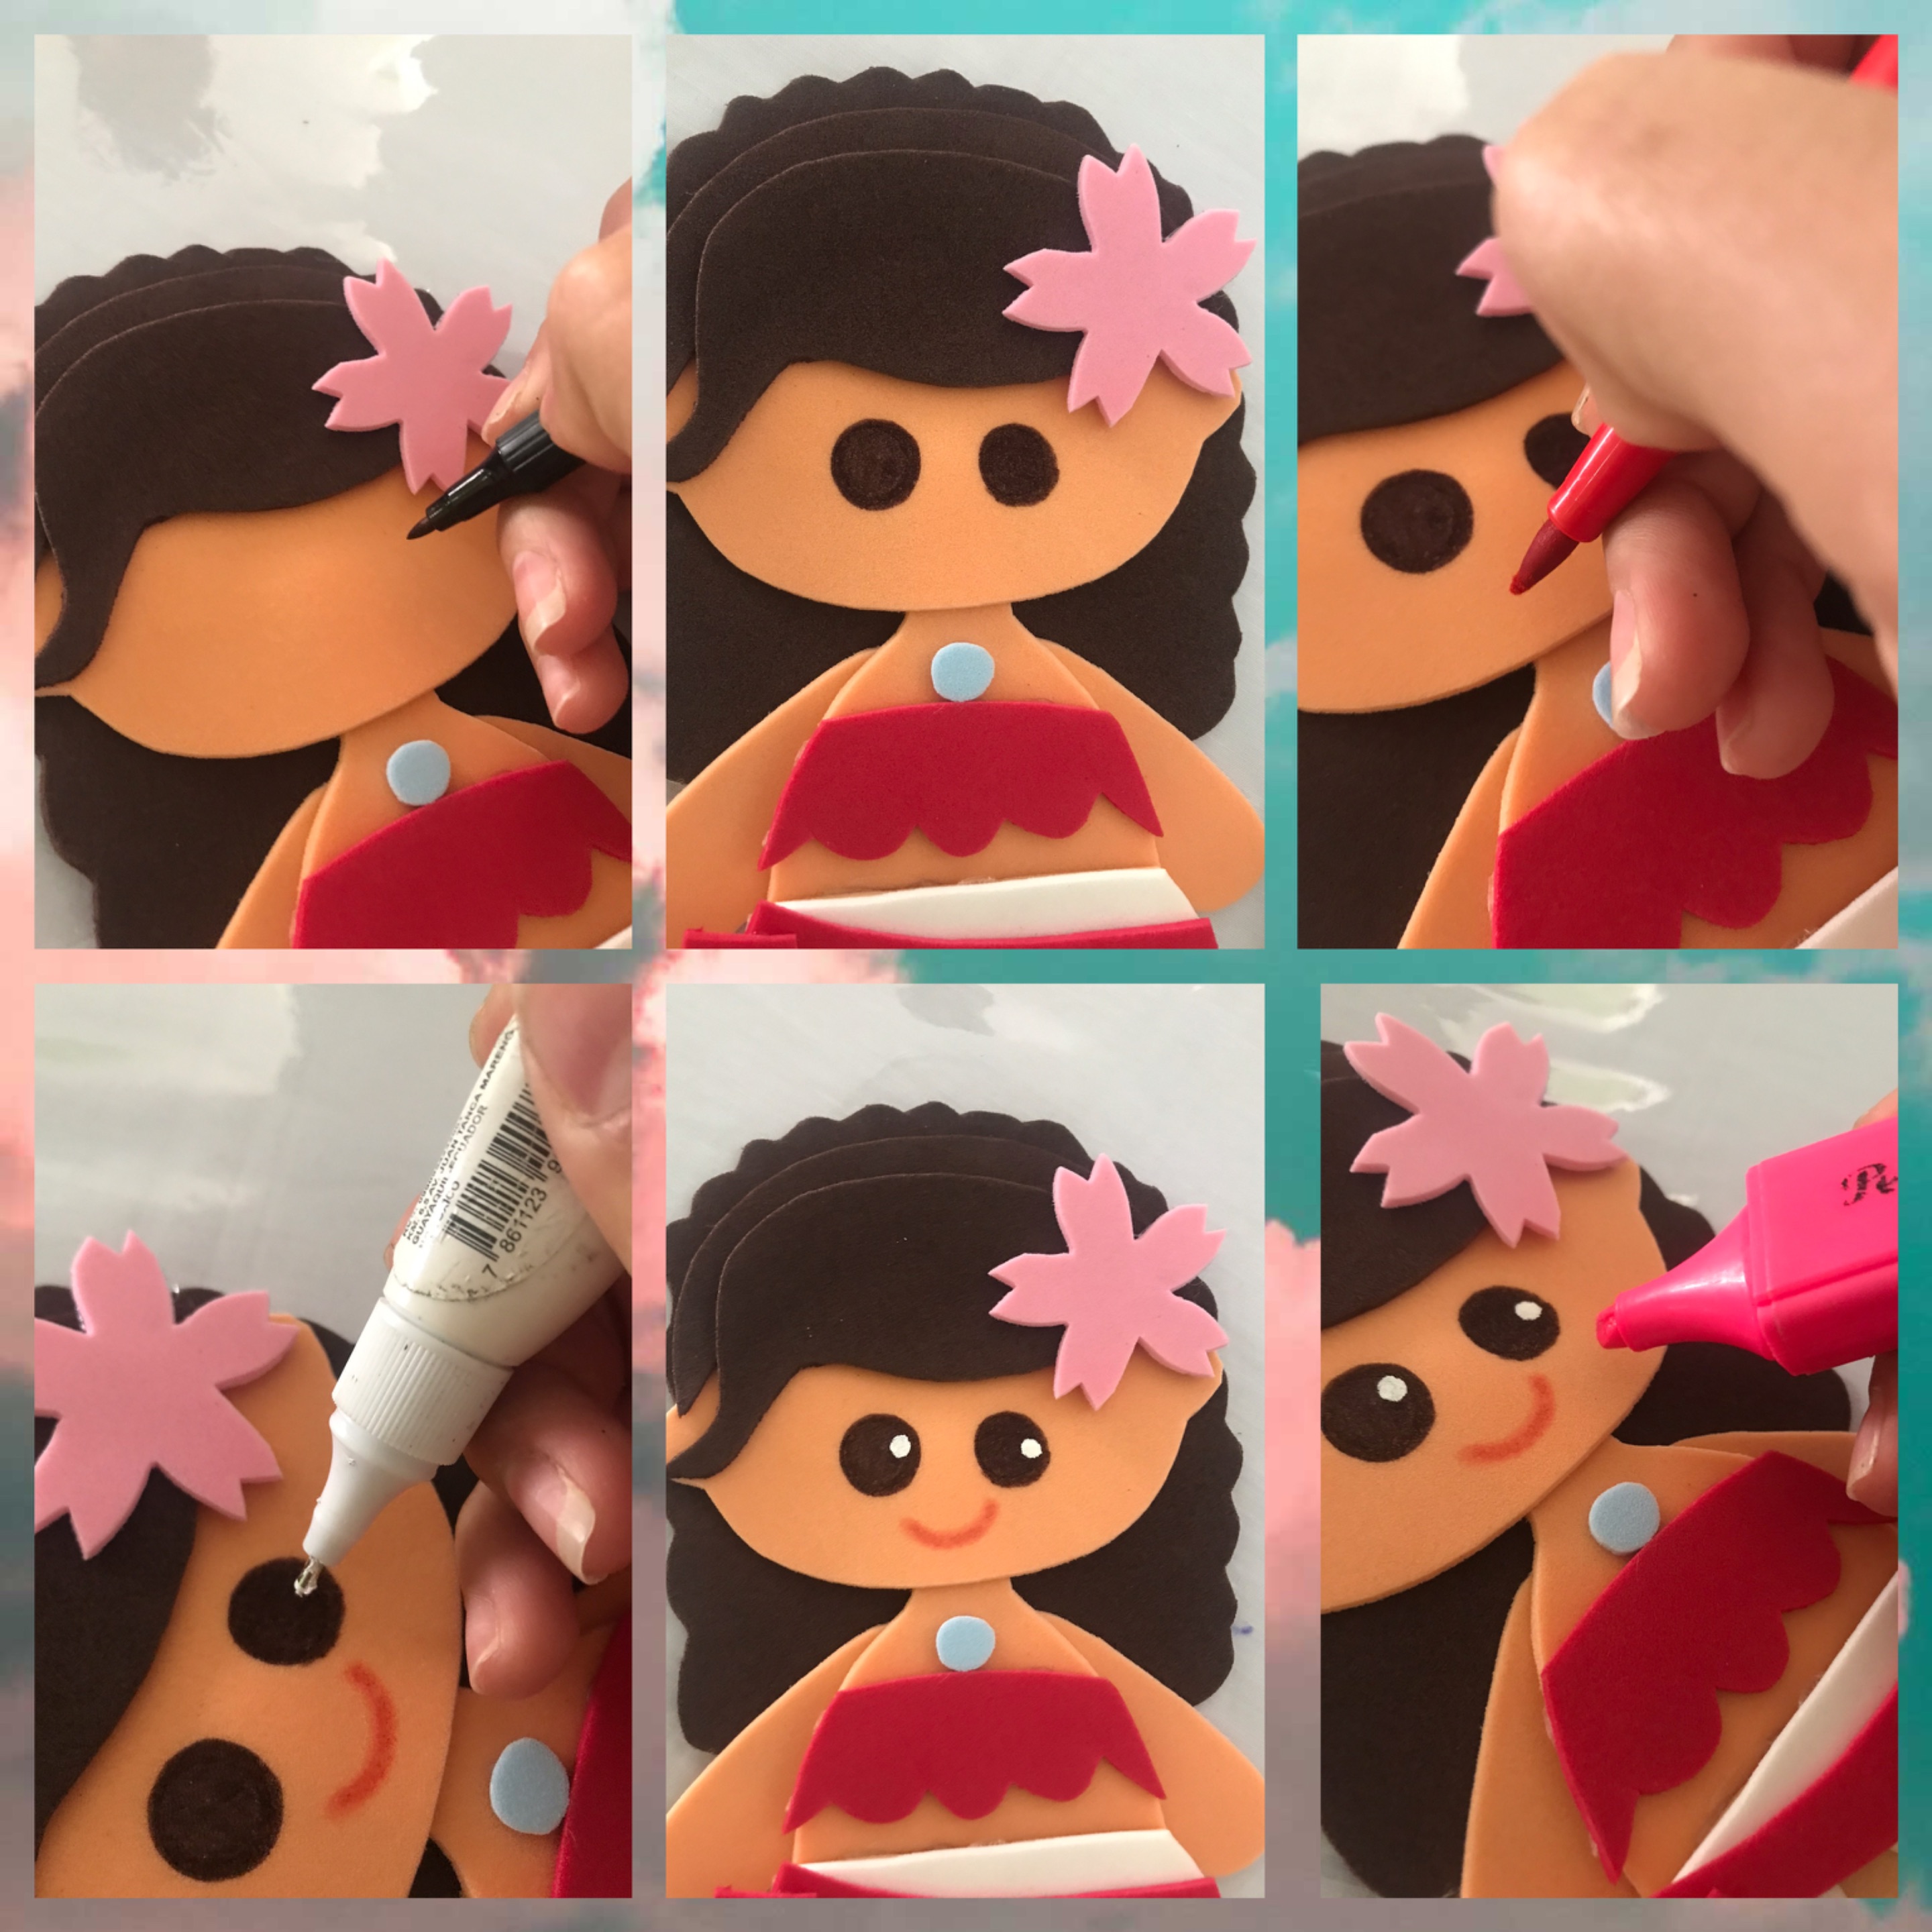
Ya que esté bien armada la Moana, para finalizar aremos los ojos con el marcador negro, la boca con el marcador rojo, con el corrector le aremos unos puntos blancos a los ojos y con el resaltador fucsia aremos las mejillas, y le damos los últimos retoques a la Moana
> Once the Moana is well assembled, to finish we will make the eyes with the black marker, the mouth with the red marker, with the concealer we will make some white dots in the eyes and with the fuchsia highlighter we will make the cheeks, and we will give the last touches to the Moana
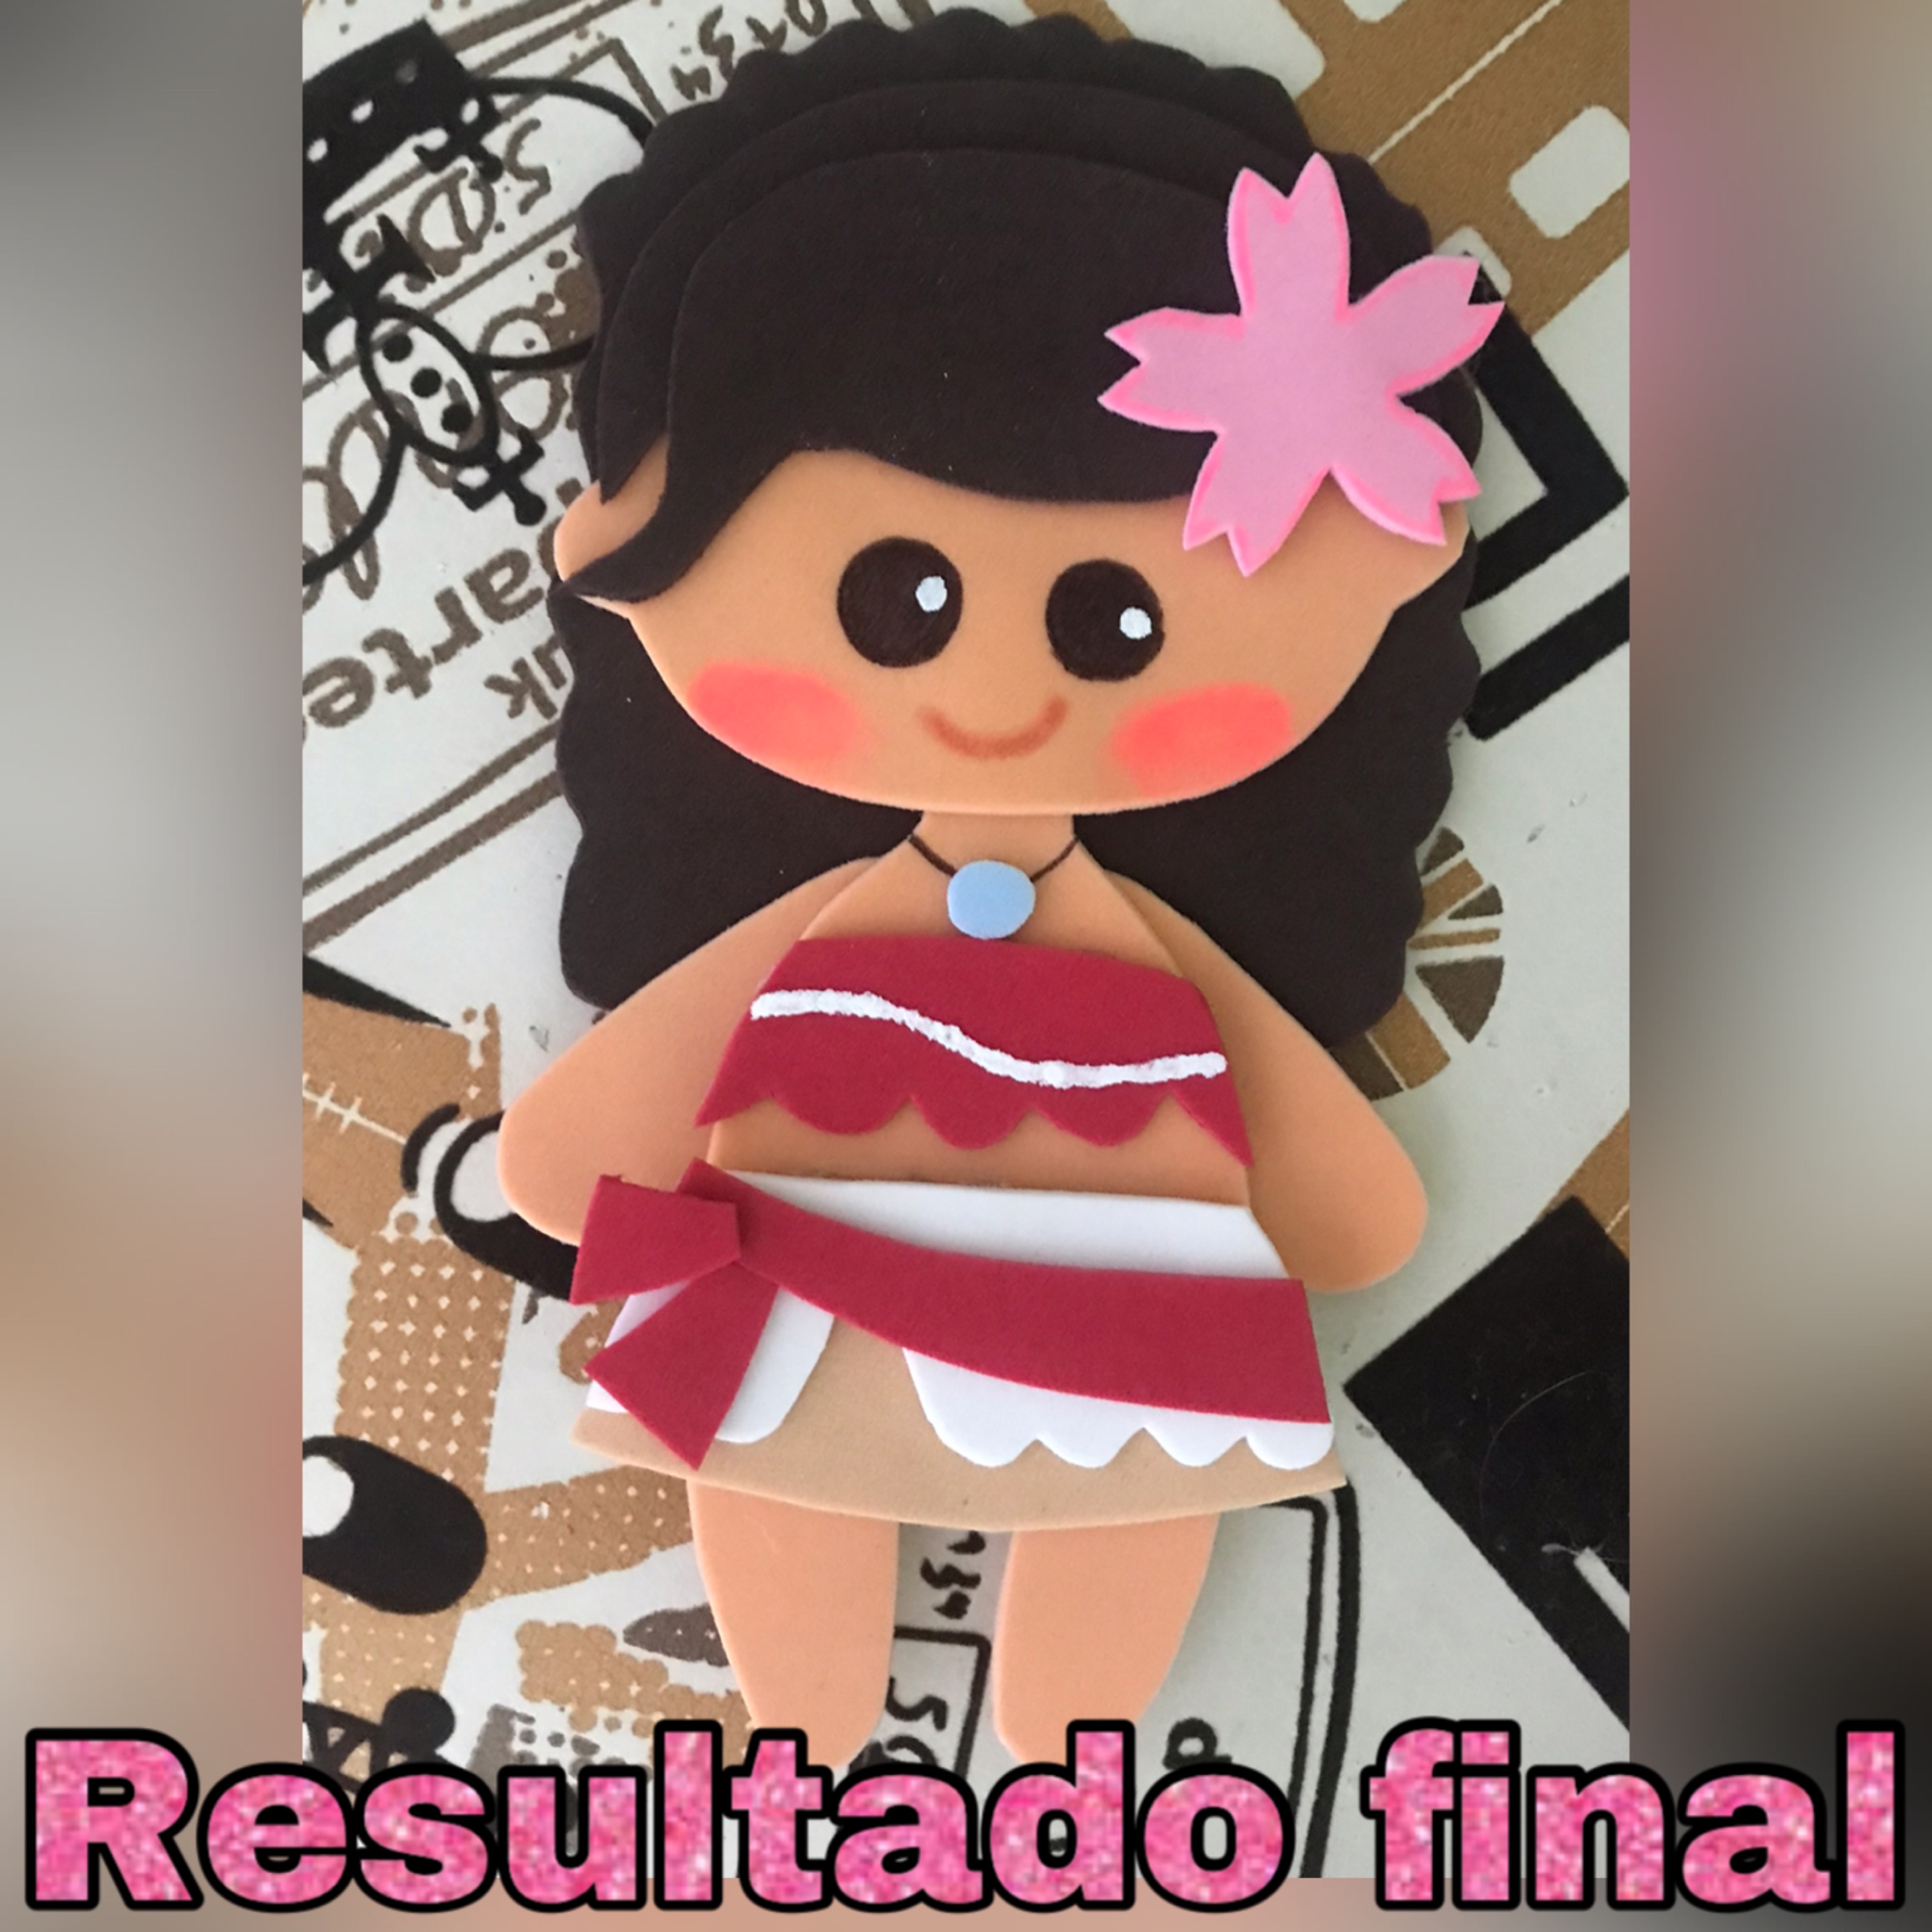
RESULTADO FINAL
FINAL RESULT