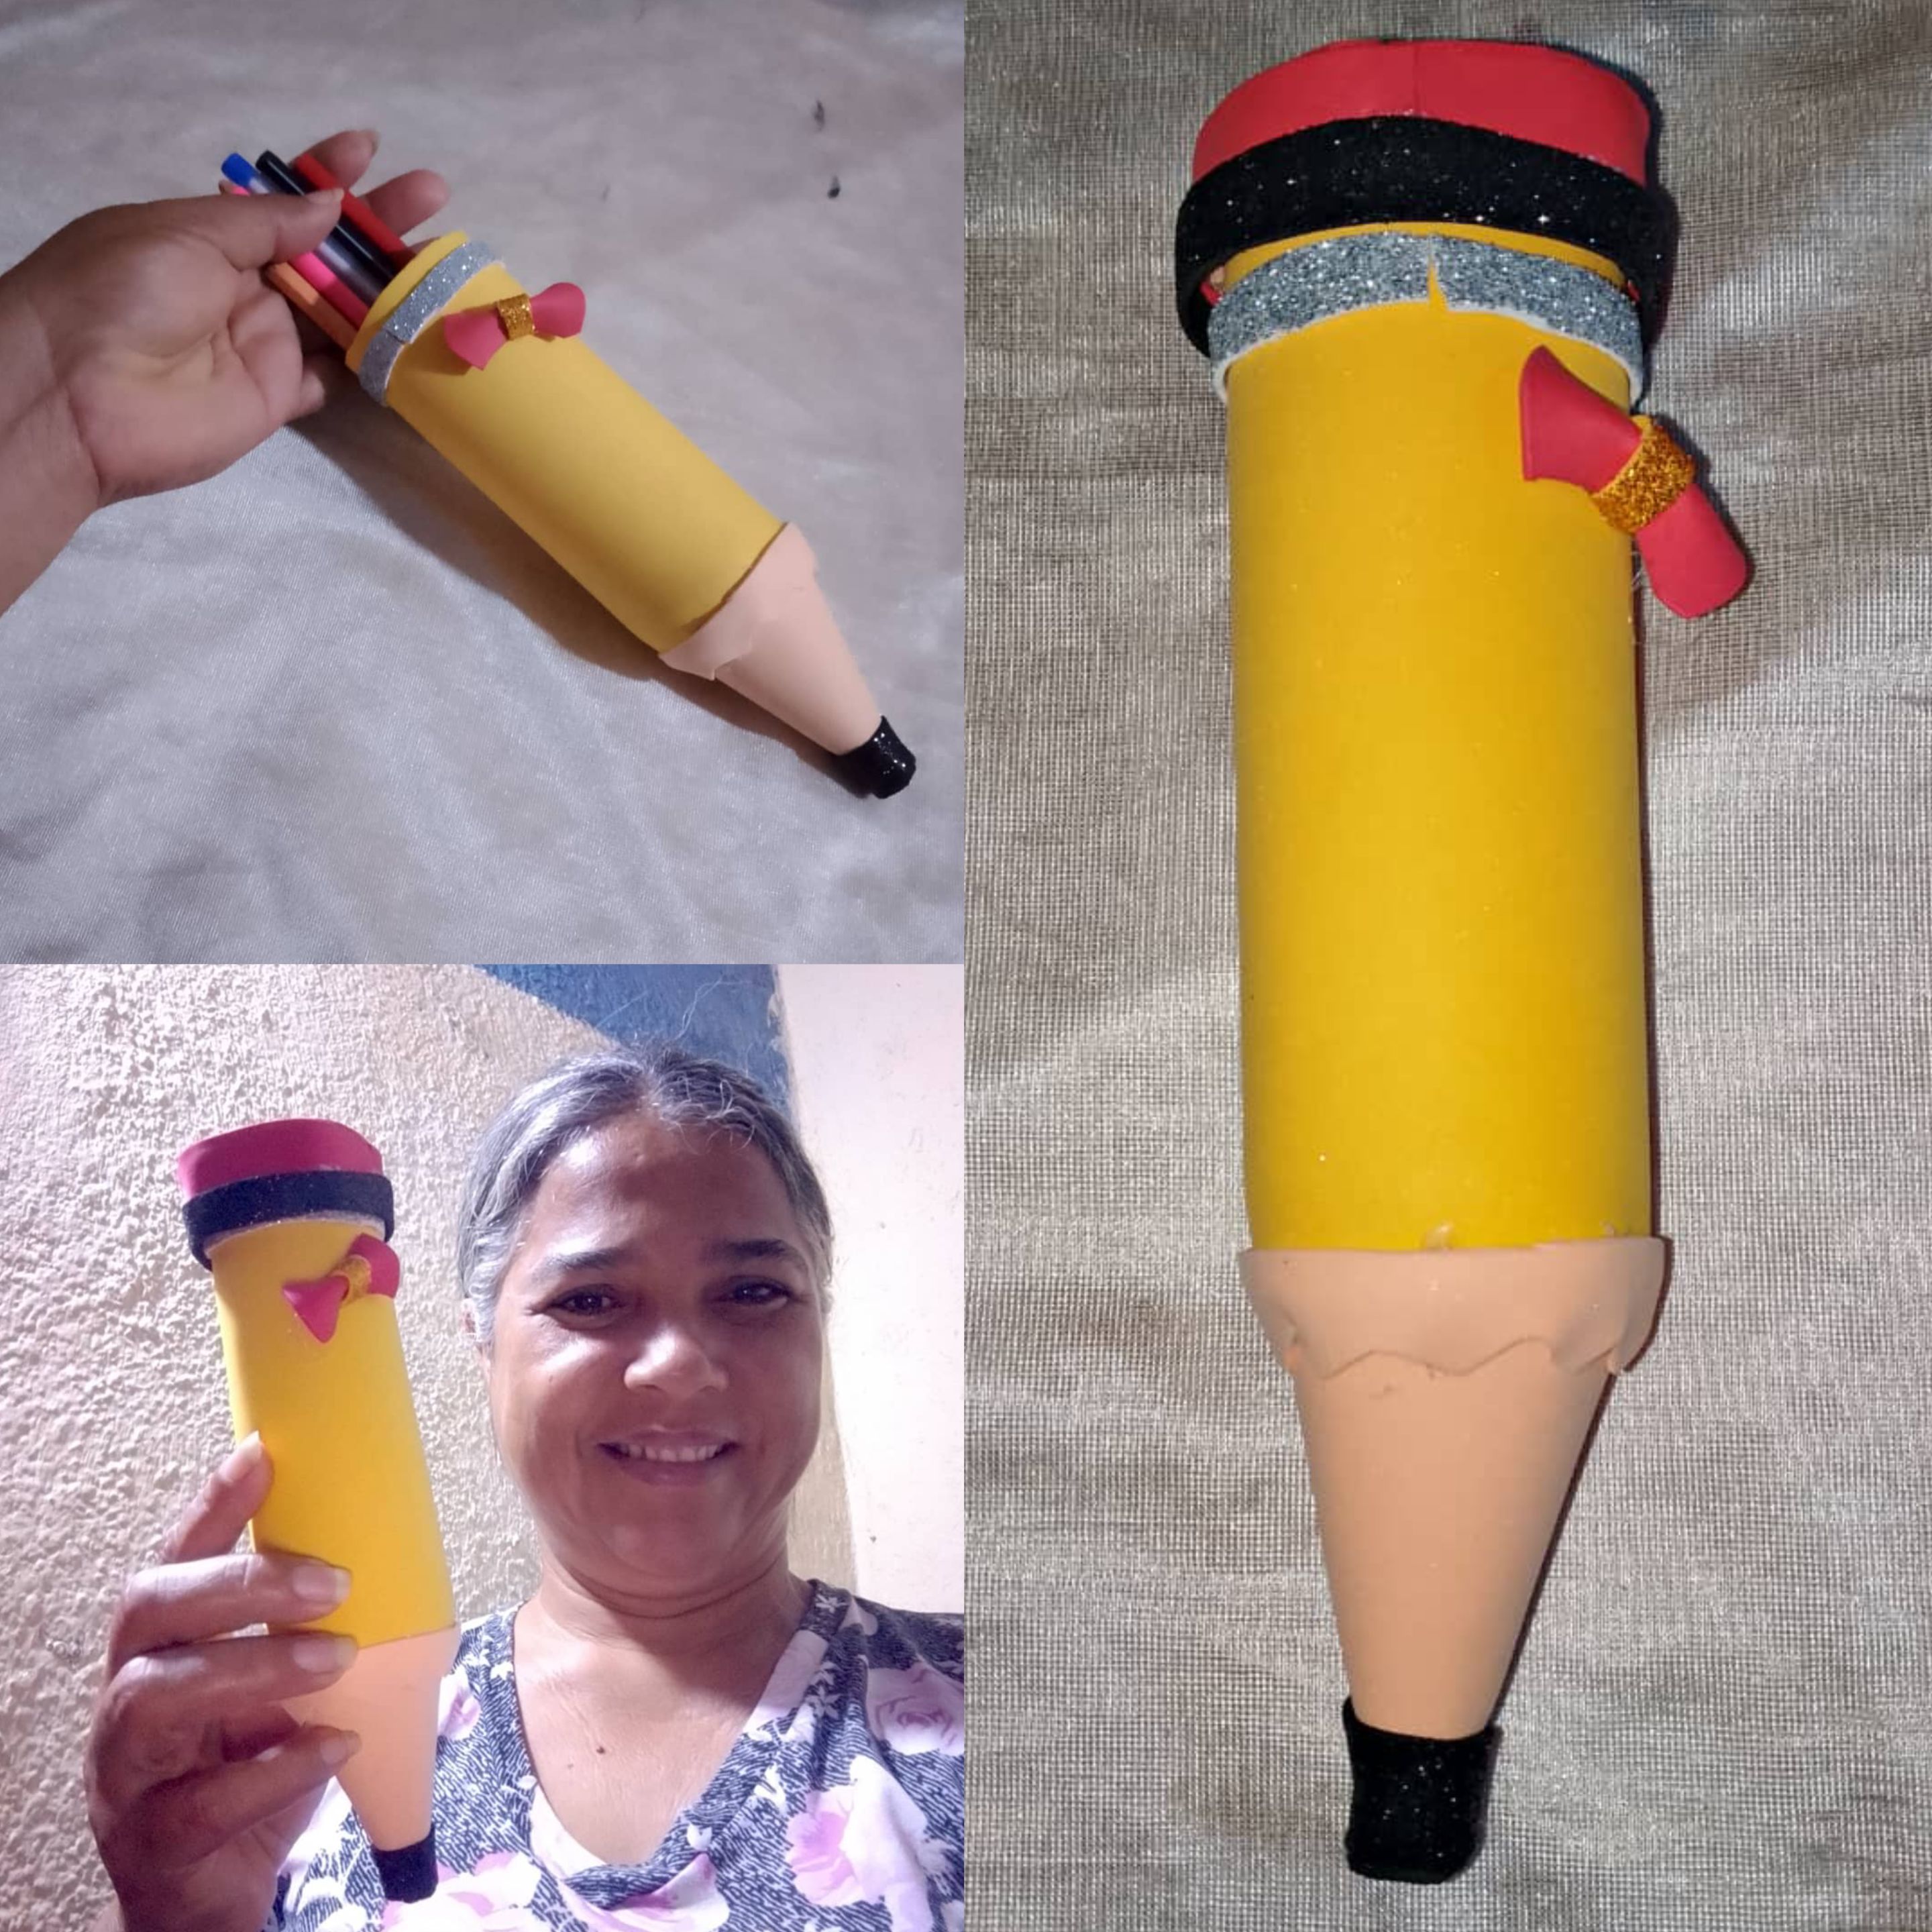
Hola buenas noches tengan todos mis amigos , espero que se encuentren bien , Dios les bendiga a todos , les quiero compartir una cartuchera que realicé para mi nieta que se encuentra cursando prescolar la primera etapa y va de color amarillo , por ello me inspire en un lápiz , así podrá guardar sus lápices y tener una cartuchera nueva
Good evening, my friends. I hope you are all well. God bless you all. I want to share with you a pencil case I made for my granddaughter, who is in her first year of preschool and loves the color yellow. That's why I was inspired by a pencil, so she can store her pencils and have a new pencil case.
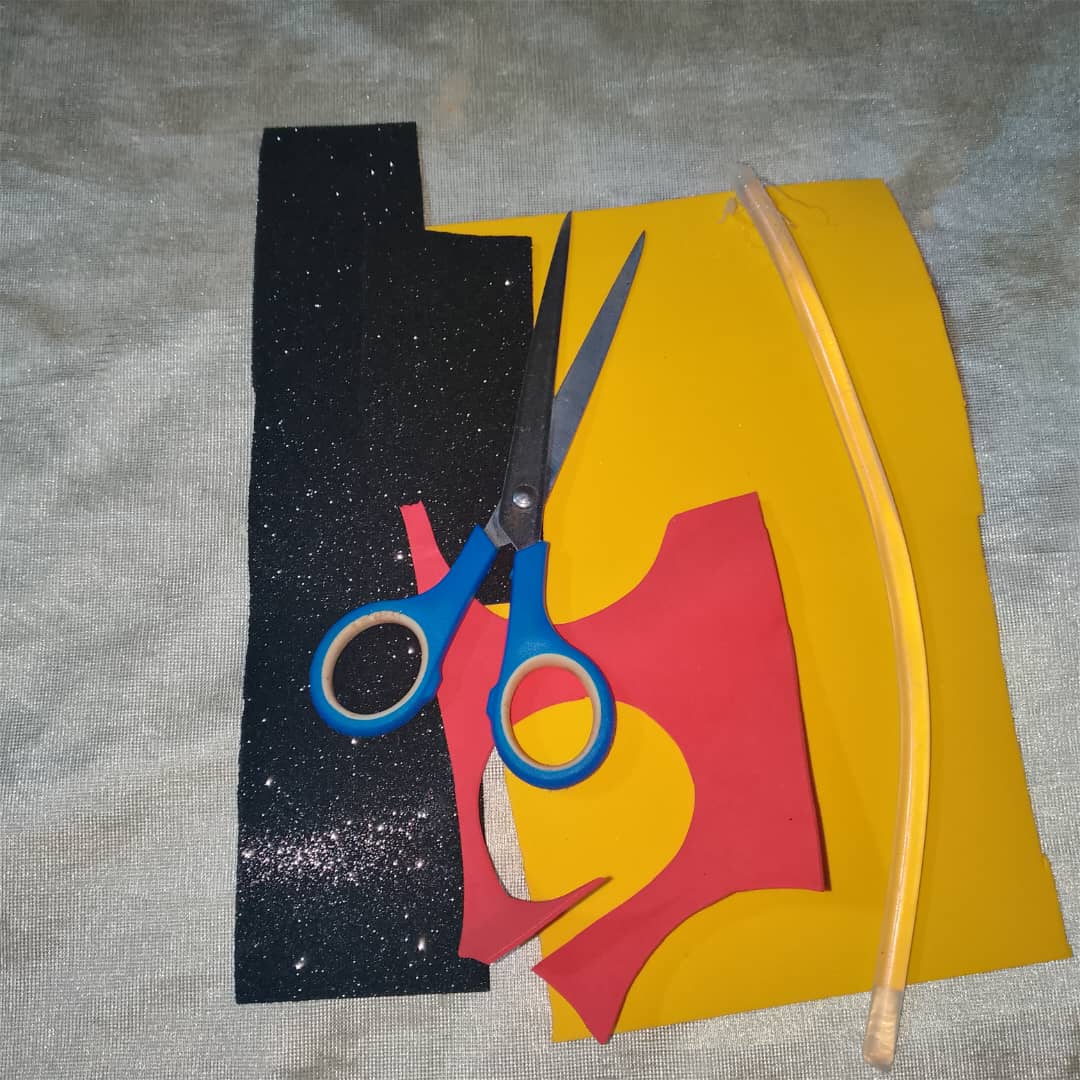
Materiales para realizar la cartuchera:
-Foamis
-Tijera
-Silicon
Materials needed to make the pencil case: -Foam
-Scissors -Silicone
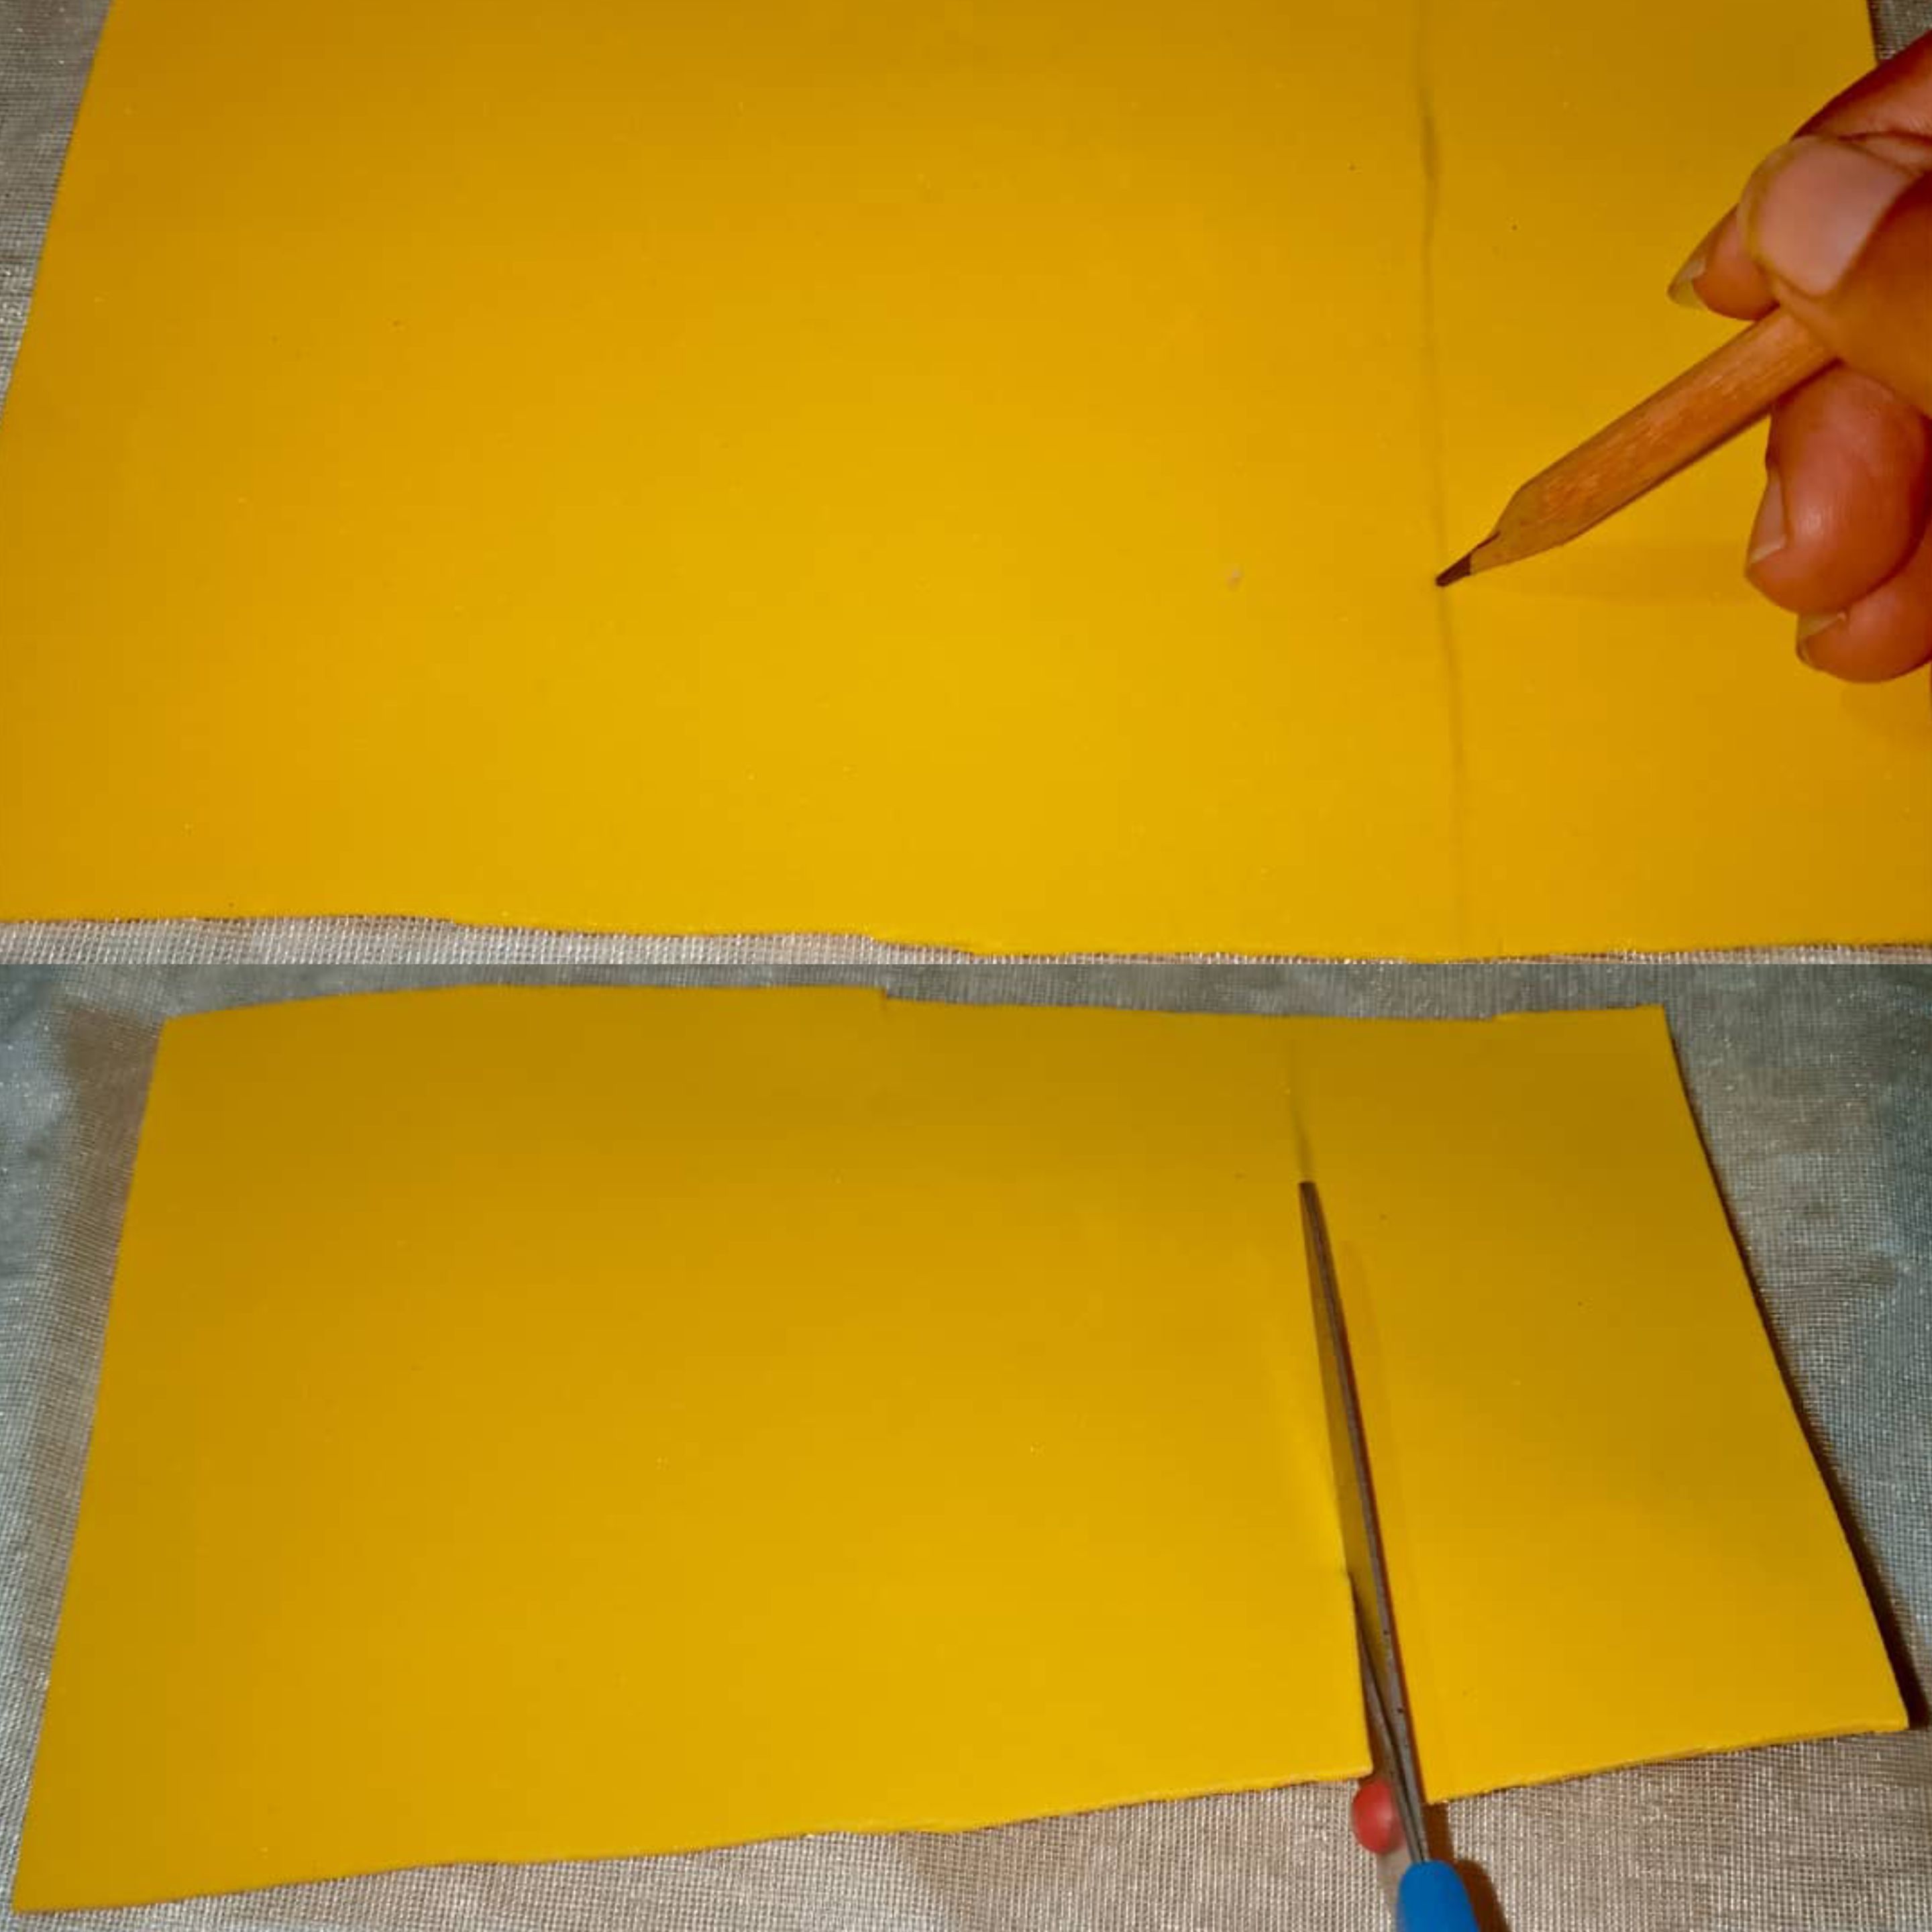
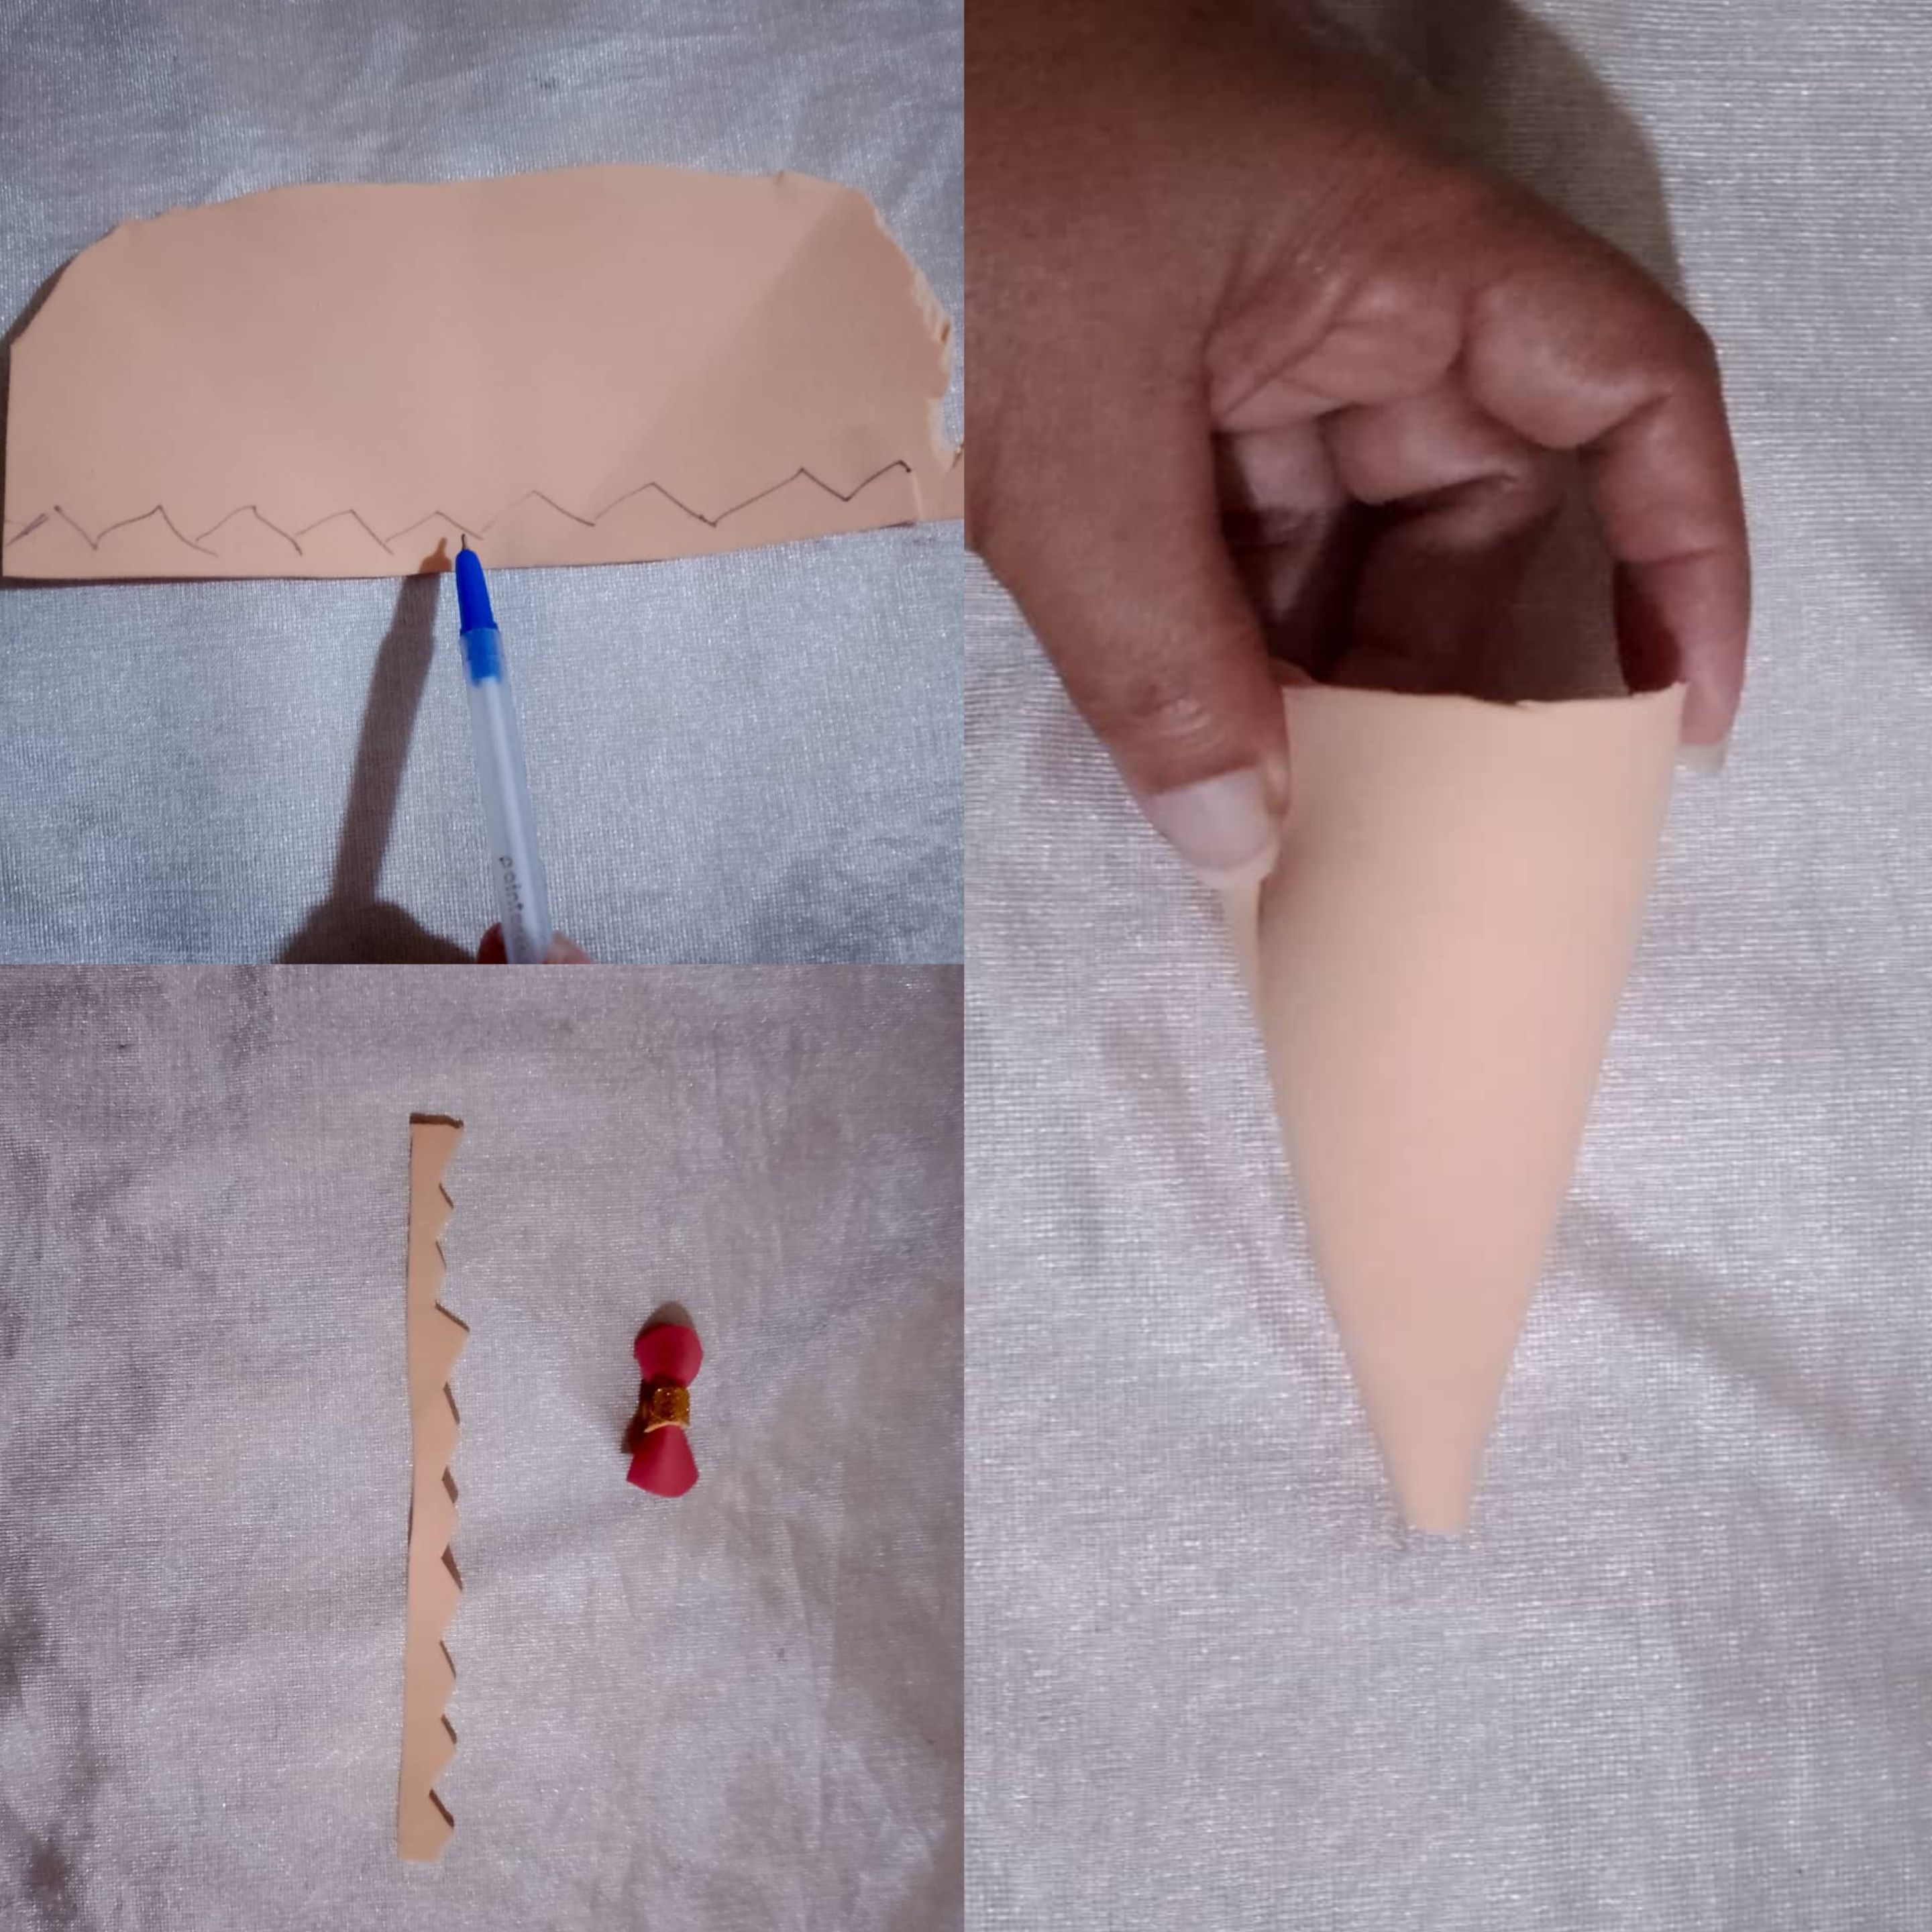
Pasos para elaborar nuestra cartuchera: Primer paso : comenzaremos primeramente recortando una medida para formar el cuerpo del lápiz o el cuerpo de la cartuchera, utilicé una medida de unos lápices de colores nuevos 2 centímetros más grandes de modo que los lápices queden bien y no apretados para que no se rompan, recortamos nuestra pieza con mucho cuidado
Steps to make our pencil case: First step: we will start by cutting out a piece to form the body of the pencil or the body of the pencil case. I used a piece of new colored pencils that was 2 centimeters larger so that the pencils would fit well and not be too tight so they wouldn't break. We cut out our piece very carefully.
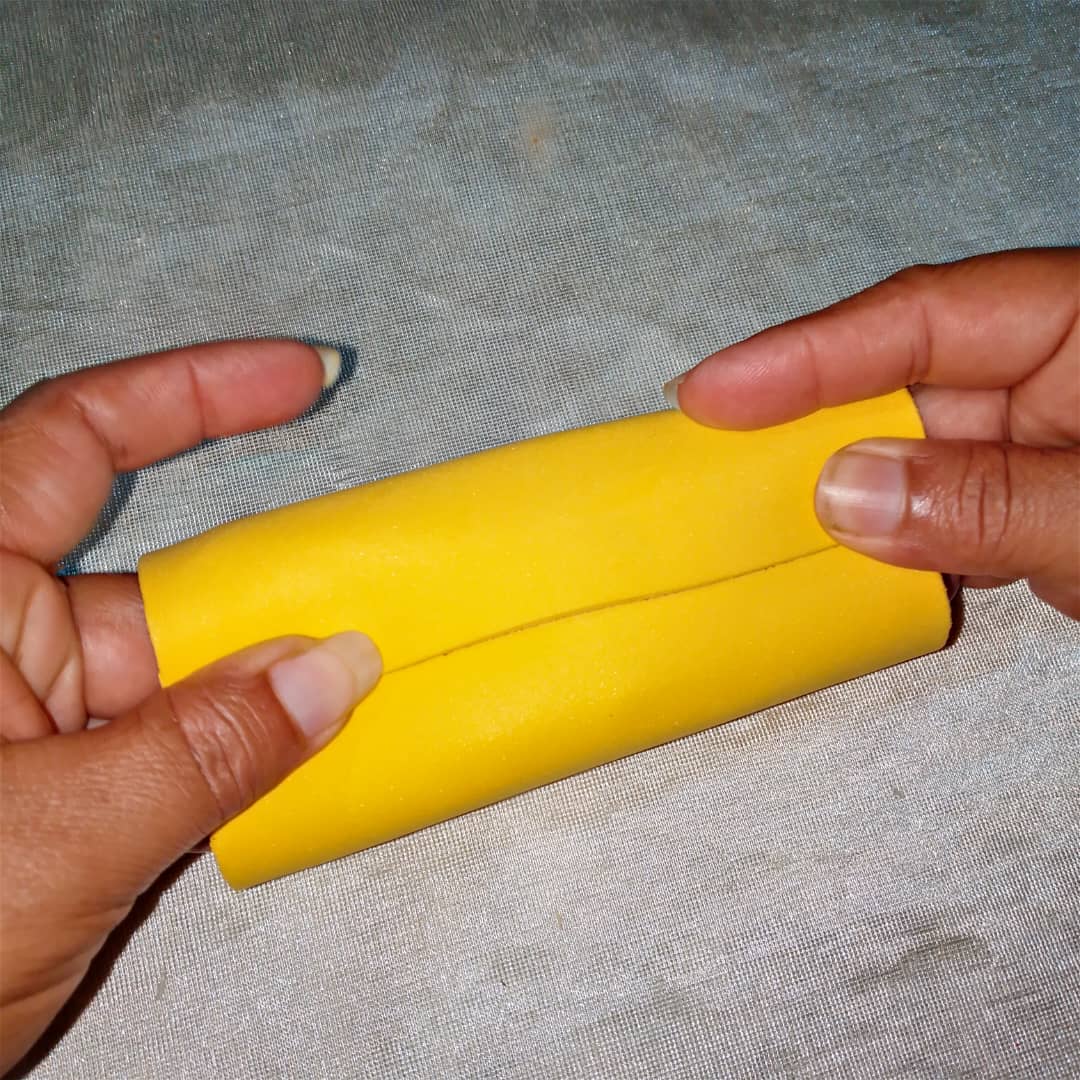
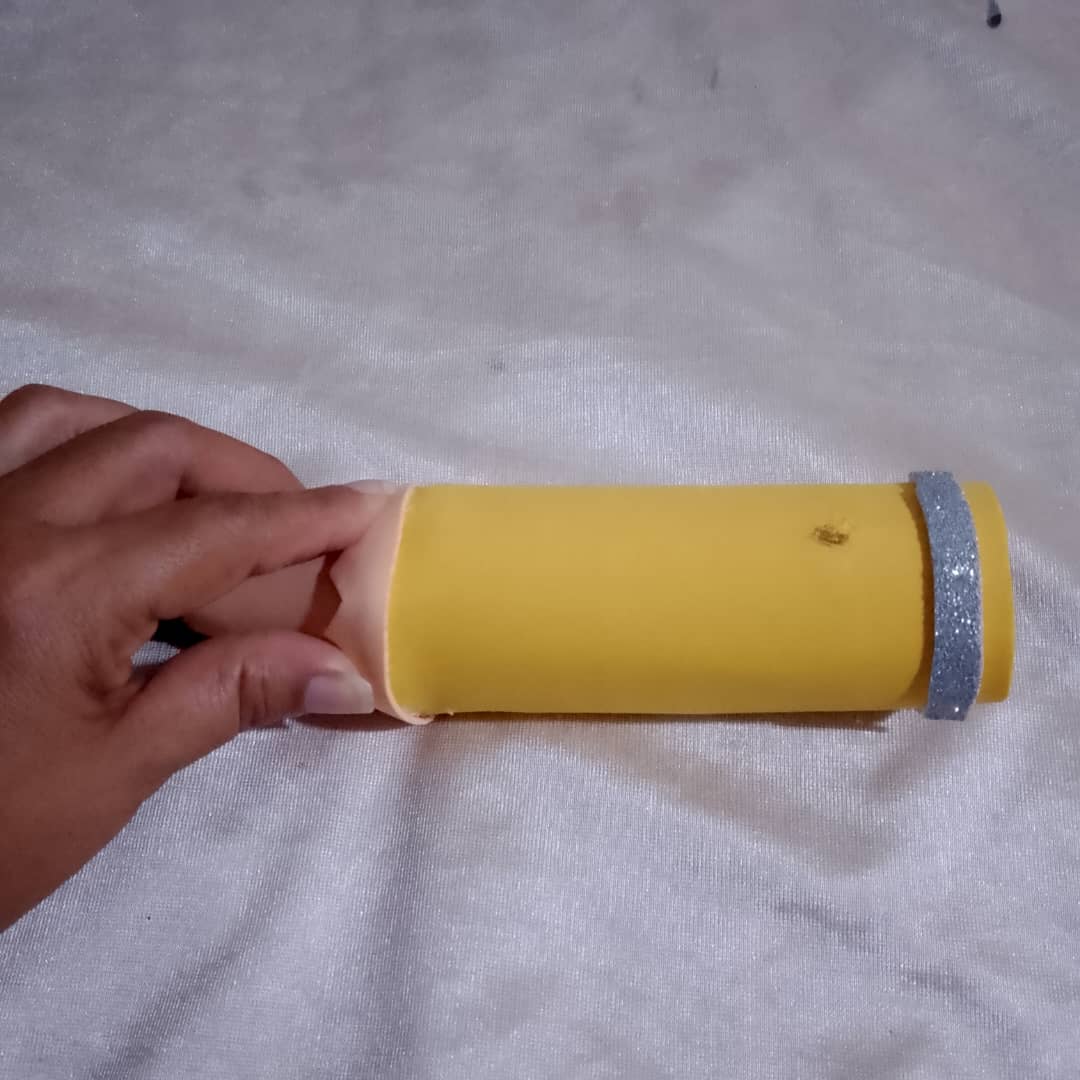
Segundo paso: una vez que tengamos nuestra pieza vamos a continuar tomando borde con borde , añadimos silicón y pegamos formando una pieza similar a un cilindro
Second step: Once we have our piece, we will continue by taking edge to edge, adding silicone, and gluing it together to form a cylinder-like piece.
Tercer paso: luego vamos a continuar recortando una pieza para formar la parte de abajo del lápiz la punta y unas tiras para adornar
Third step: Next, we will continue by cutting out a piece to form the bottom of the pencil, the tip, and some strips for decoration.
Cuarto paso: en nuestro cuarto paso vamos a continuar pegando la punta del lápiz en la parte de abajo
Fourth step: In our fourth step, we will continue by gluing the tip of the pencil to the bottom.
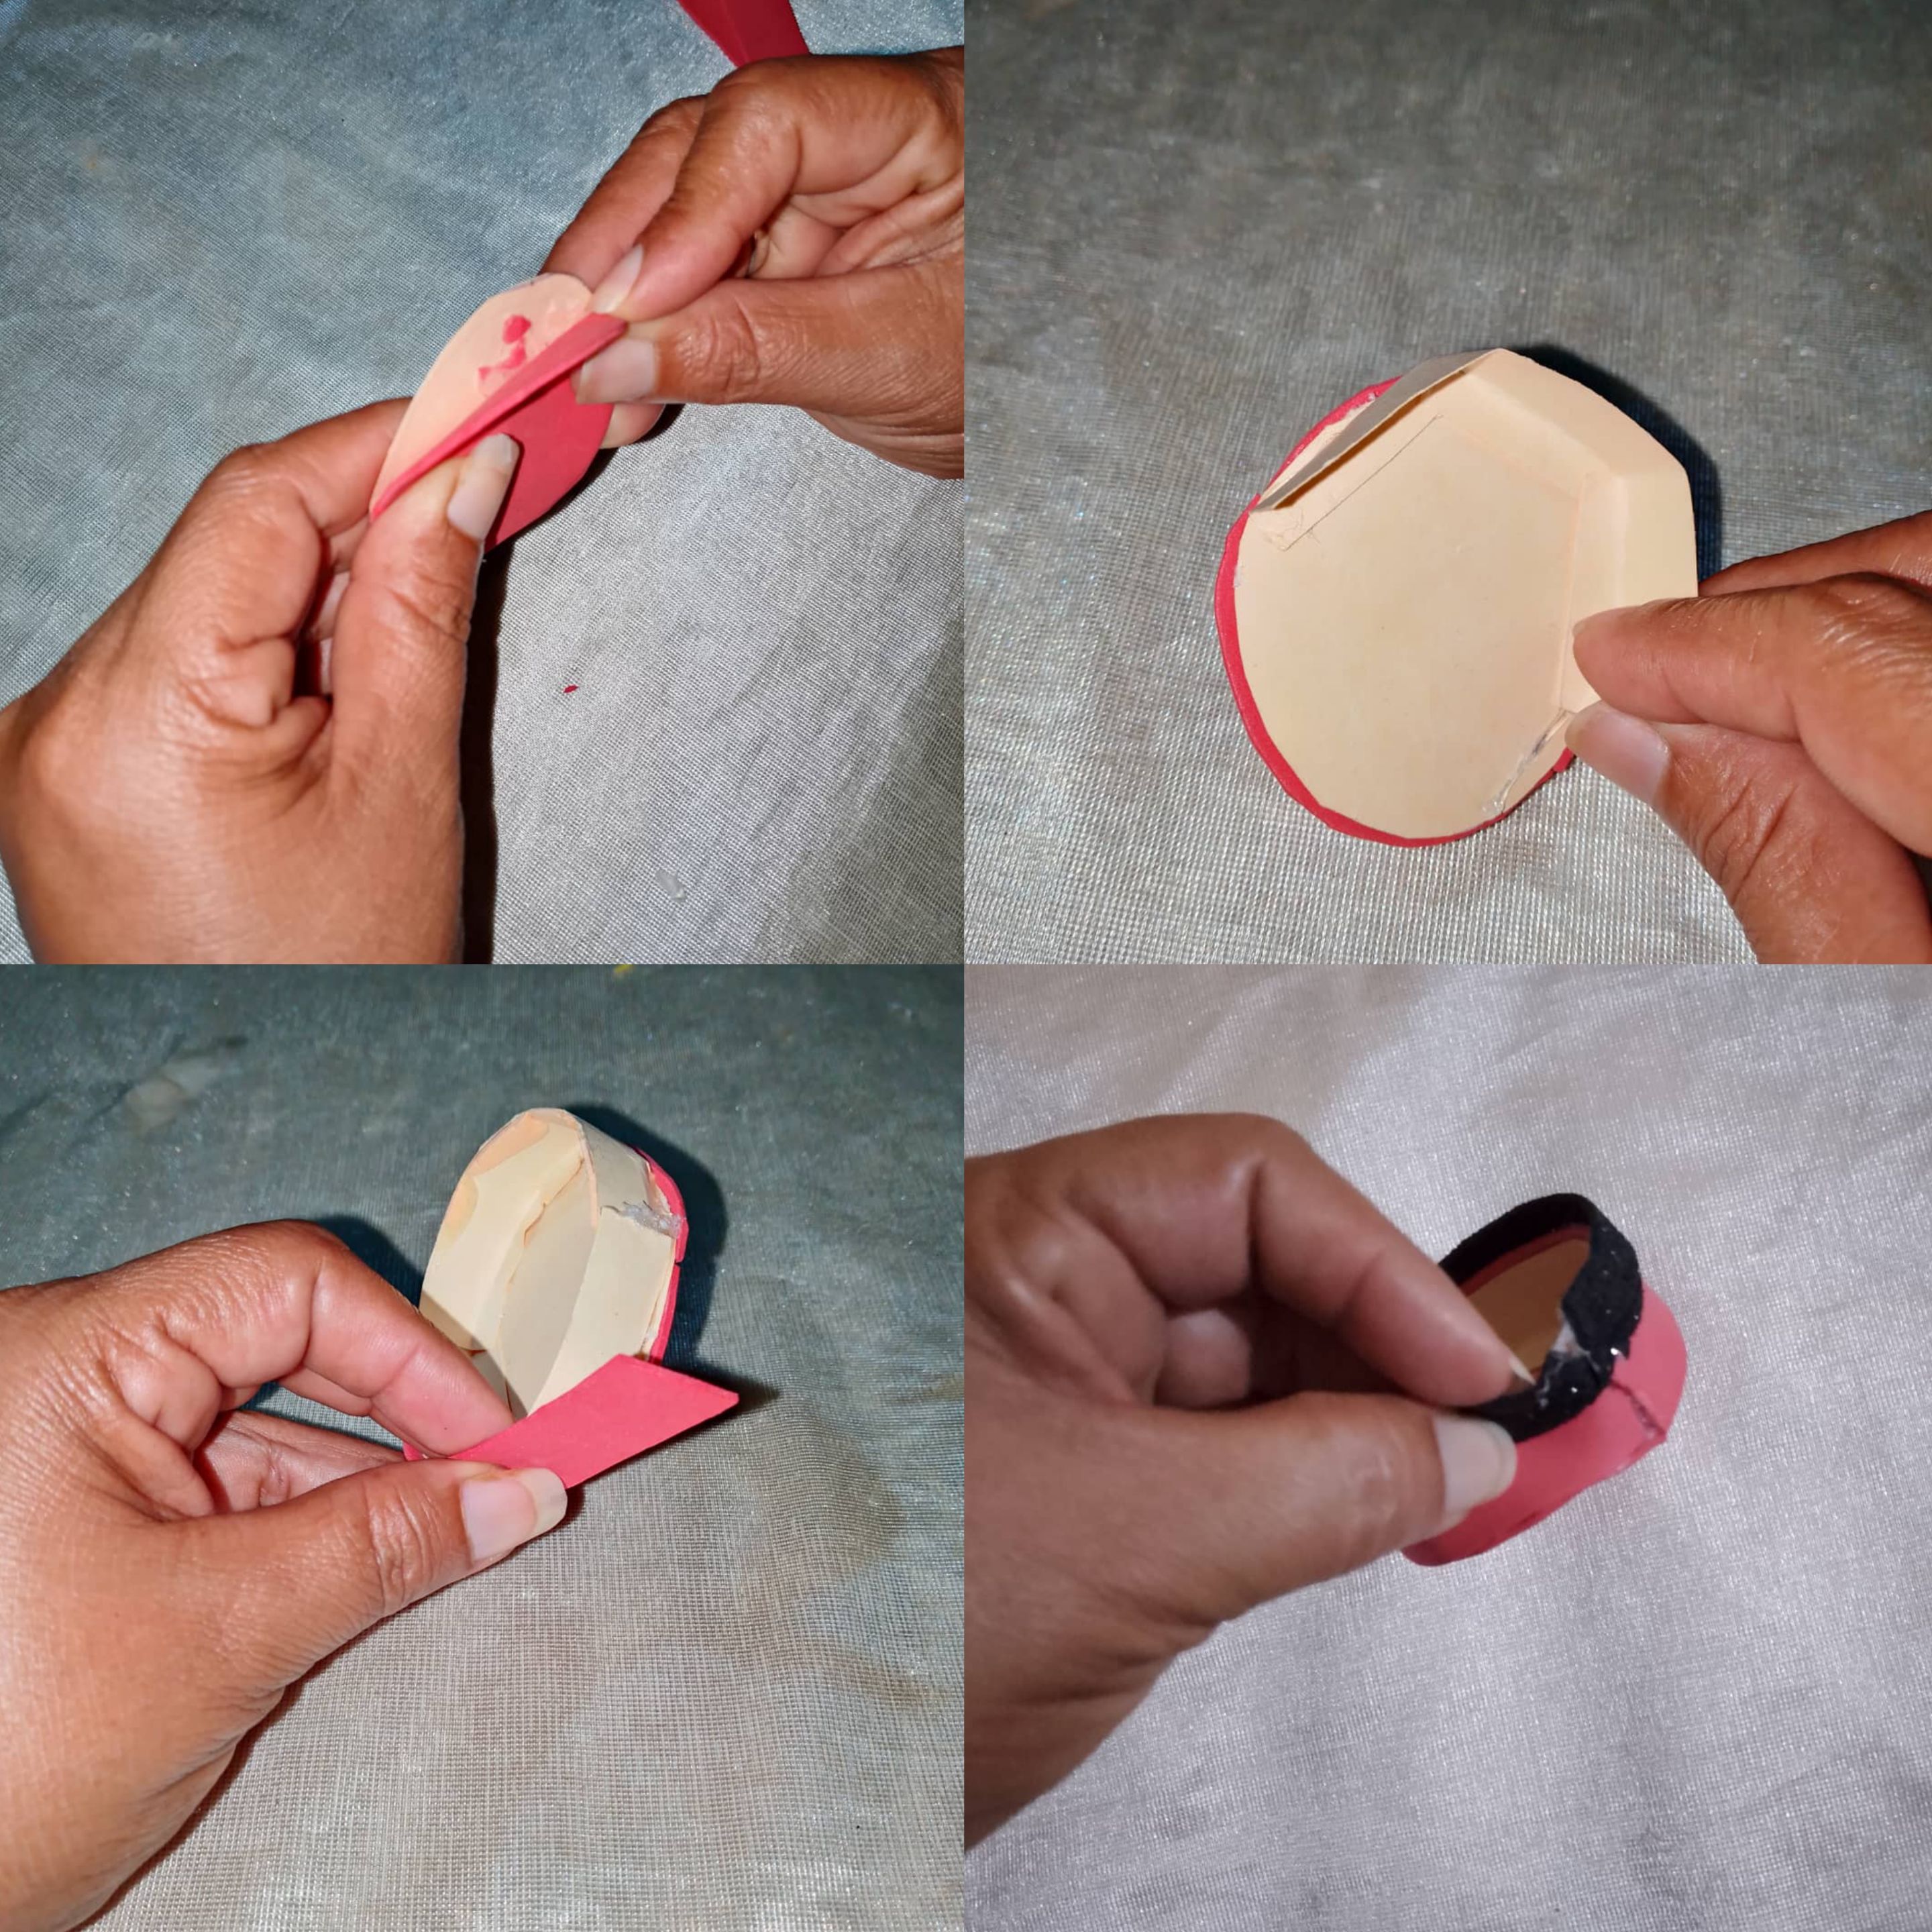
Quinto paso : en este siguiente paso continúe recortando un círculo color rojo y uno de cartulina para pegarlo en la parte de abajo y reforzar, luego alrededor continúe pegando una tira para formar la tapa de la cartuchera, está debe ser un poco más grandecito, finalizando así nuestra creación
Fifth step: in this next step, continue cutting out a red circle and one out of cardboard to glue it to the bottom and reinforce it, then continue gluing a strip around it to form the top of the pencil case. This should be a little bigger, thus completing our creation
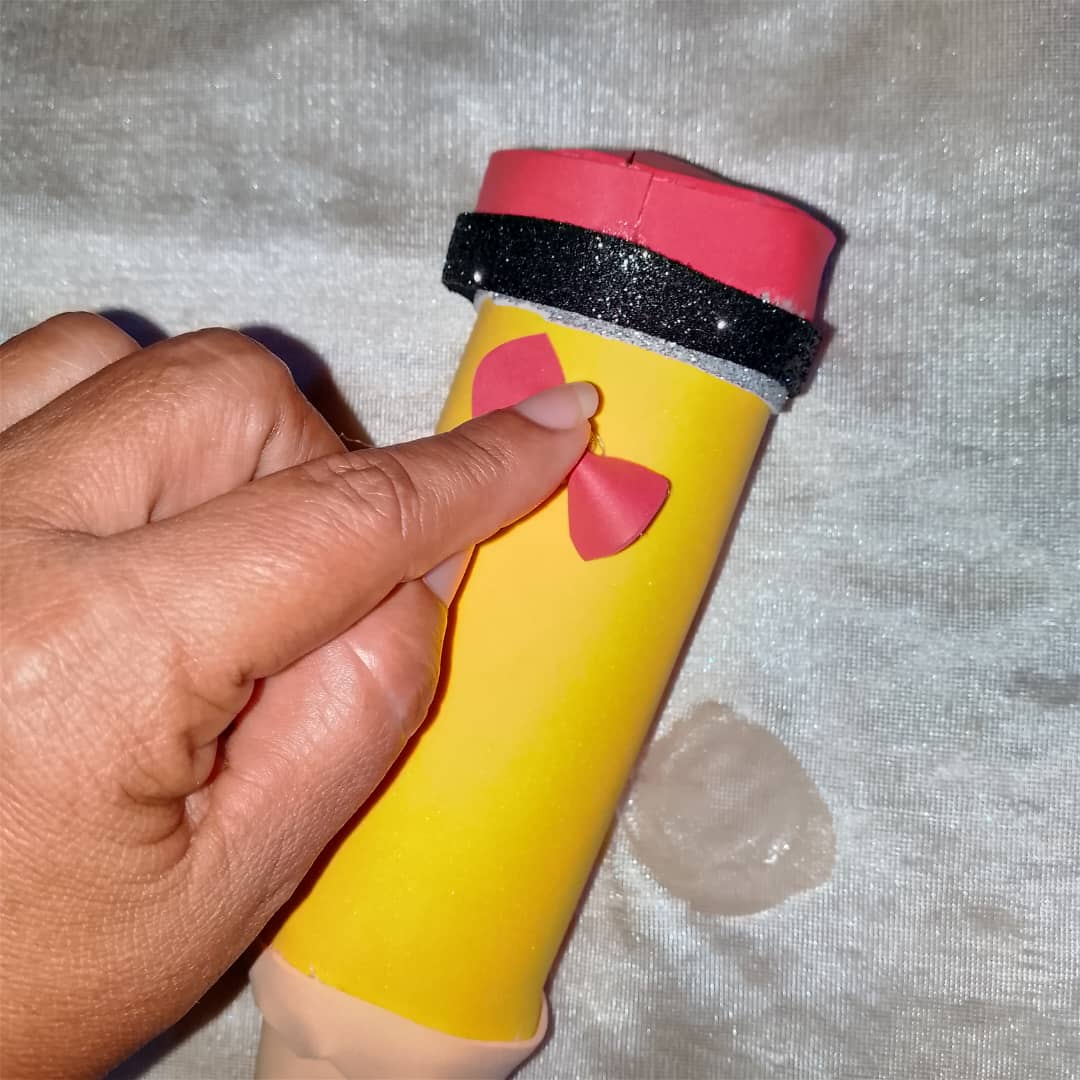
De esta manera realicé la cartuchera a mi nieta que se encuentra en primer nivel y le combine con su uniforme amigos ,que pasen una agradable noche
Cartuchera de primer nivel en preescolar
This is how I made the pencil case for my granddaughter, who is in first grade, and I matched it with her uniform. Friends, have a nice evening.
First-grade pencil case for preschool.
