Buenas tardes mi estimada comunidad de costura!! Bienvenidos a un nuevo tutorial de corte y costura en esta ocasión para niñas.
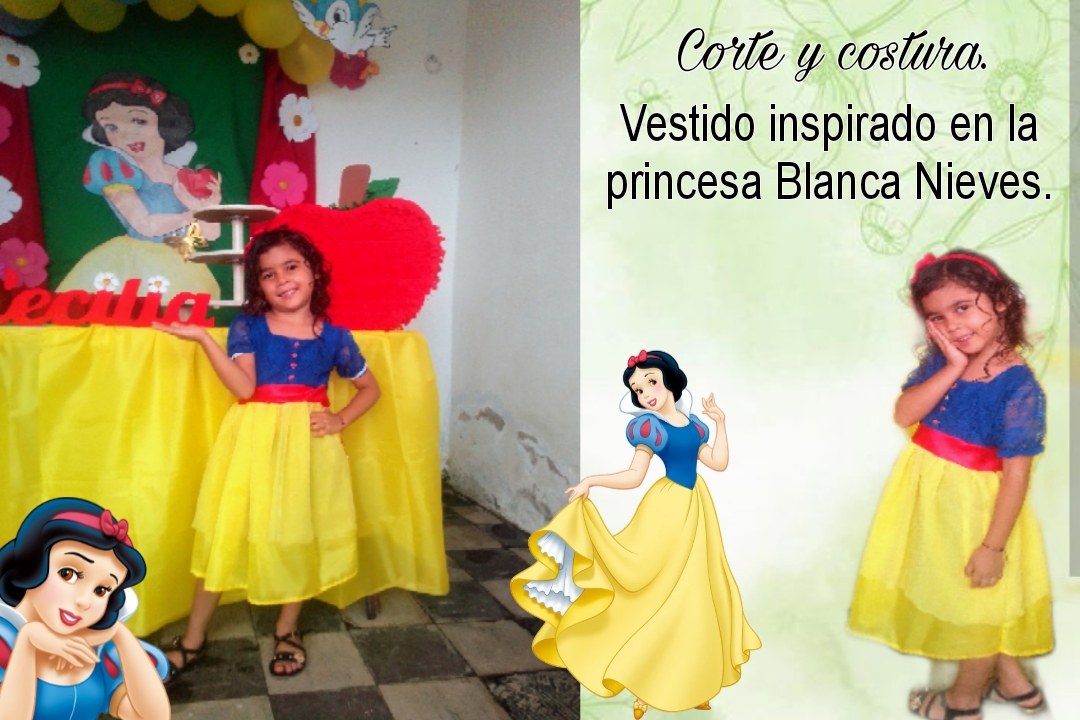
¡La emblemática Blanca Nieves!, un personaje icónico que sin duda sigue siendo de gran agrado para nuestras niñas; su cautivante historia de princesa de cuento no hace mas que encantar a nuestras niñas queriendo ser un princesa como ella.. Así sucedió con mi niña, cuando por primera vez vio esta historia animada y desde entonces decidió que su próximo cumpleaños sería de esta princesa.. Yo siempre intento complacerla, así que comencé preparativos y entre ellos estaba confeccionarle porsupuesto su traje relativo a esta hermosa princesa... Hoy quiero invitarte a ver está confeccion de un coqueto vestido tricolor inspirado en la bella princesa Blanca Nieves, un diseño muy sencillo de hacer y que hará sentir a tu niña como toda una princesa.
Good afternoon, my dear sewing community! Welcome to a new cutting and sewing tutorial, this time for girls.The emblematic Snow White! An iconic character who undoubtedly continues to be a great favorite with our little girls; her captivating fairytale princess story only enchants our little girls, who want to be a princess like her. This is what happened to my little girl when she first saw this animated story and decided that her next birthday would be this princess's. I always try to please her, so I started preparing, and among them, of course, was making her an outfit related to this beautiful princess. Today, I want to invite you to see this creation of a flirty tricolor dress inspired by the beautiful princess Snow White. A very simple design that will make your little girl feel like a princess.

***Materiales que necesitas:***
***Materials you need:***
- Tela color rojo, amarillo y azul.
- Tela blonda zul.
- Pedrería roja.
- Elástica finita.
- Hilo y aguja.
- Tijeras.
- Red, yellow, and blue fabric.
- Blue lace fabric.
- Red rhinestones.
- Fine elastic.
- Thread and needle.
- Scissors.
***PROCEDIMIENTO***
Procedure
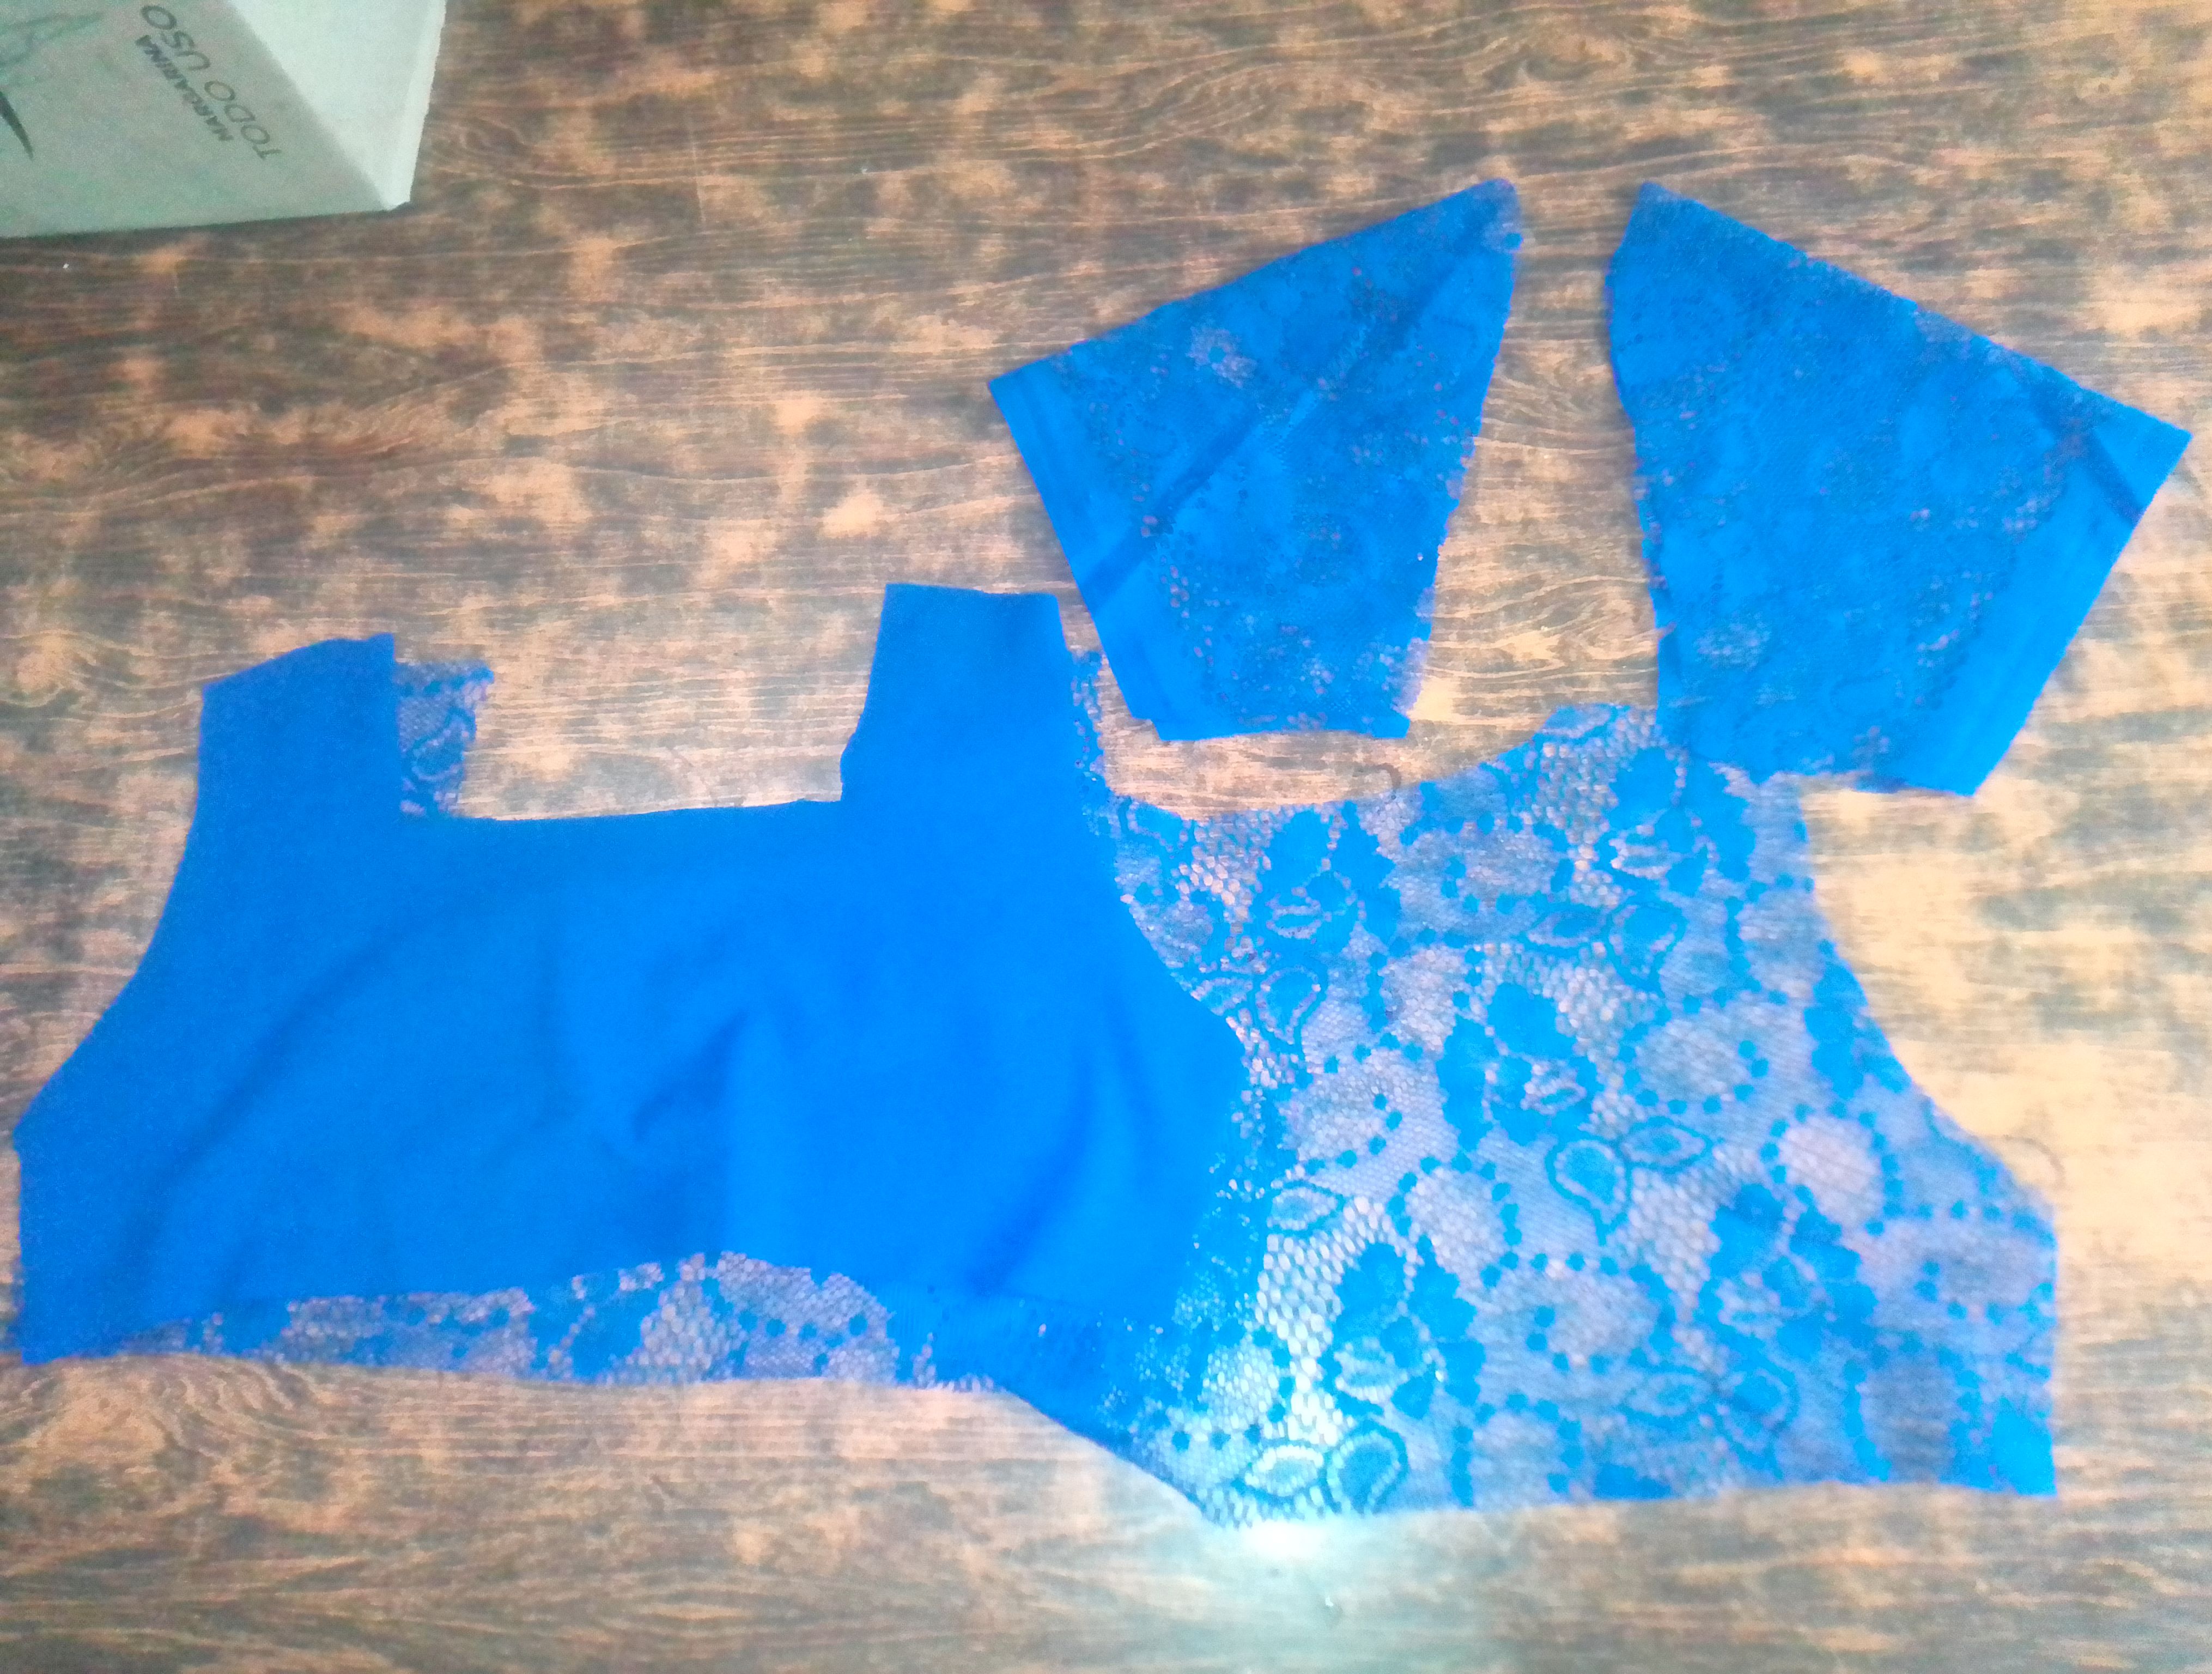
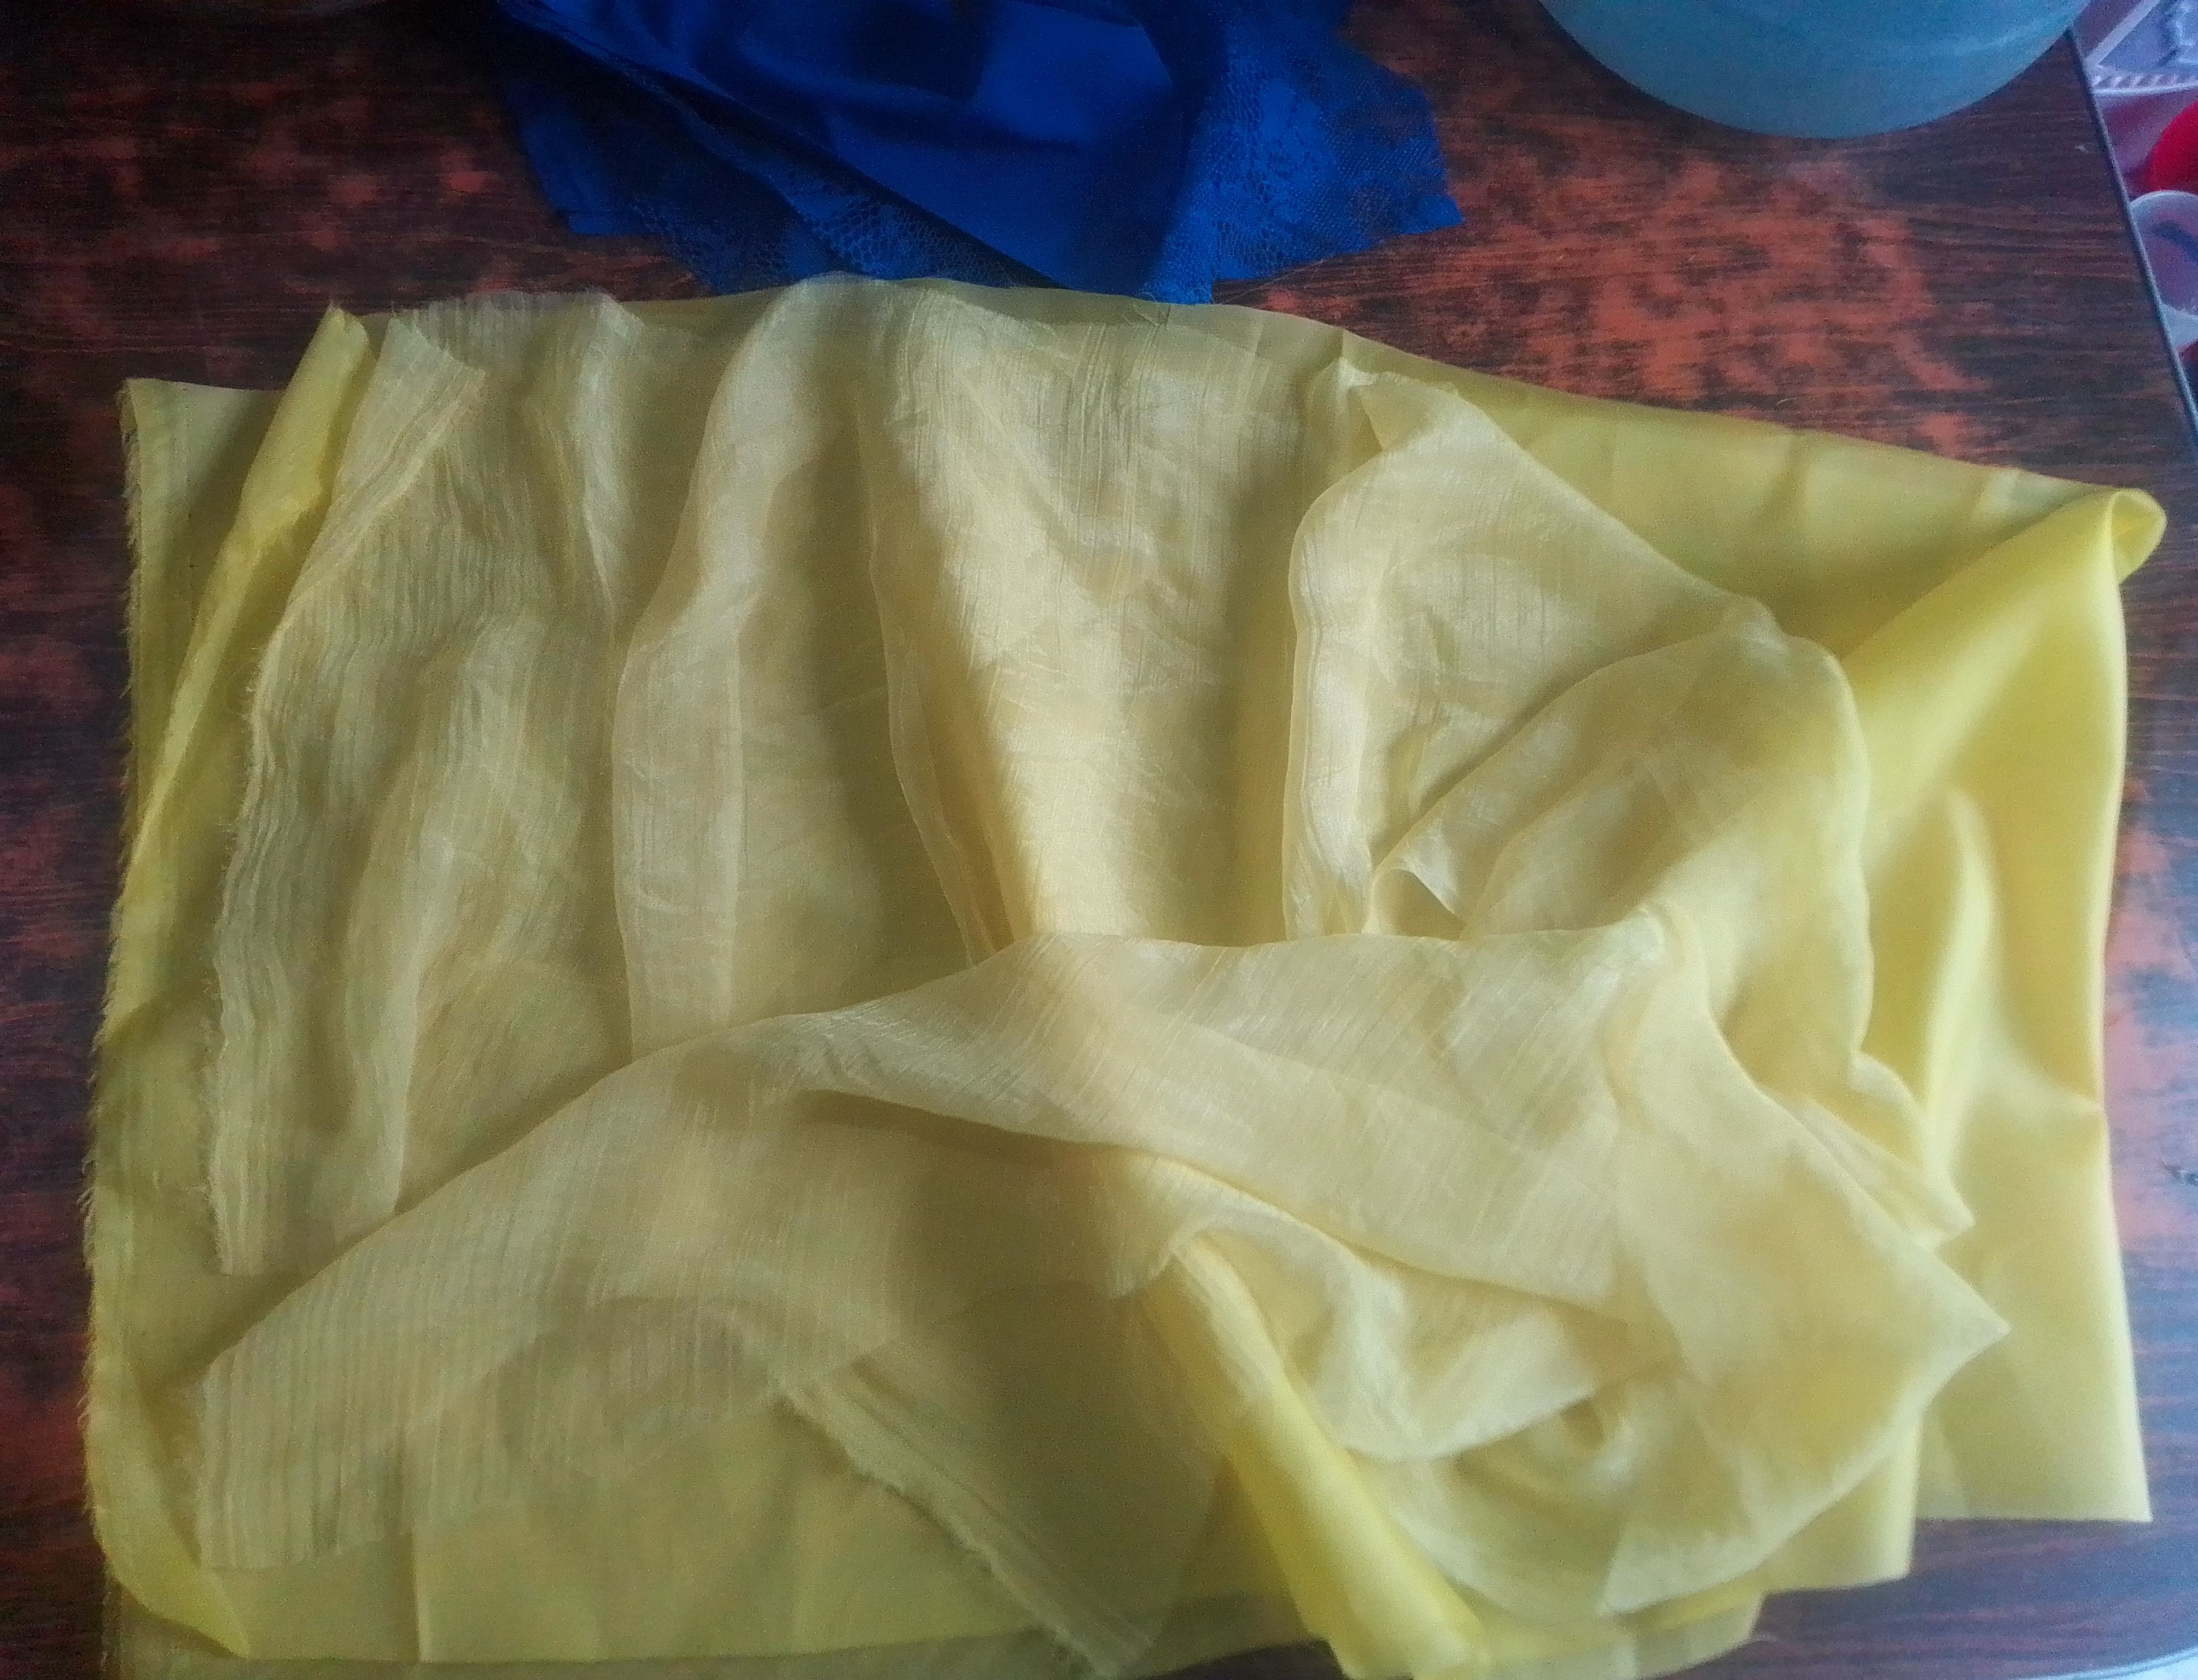
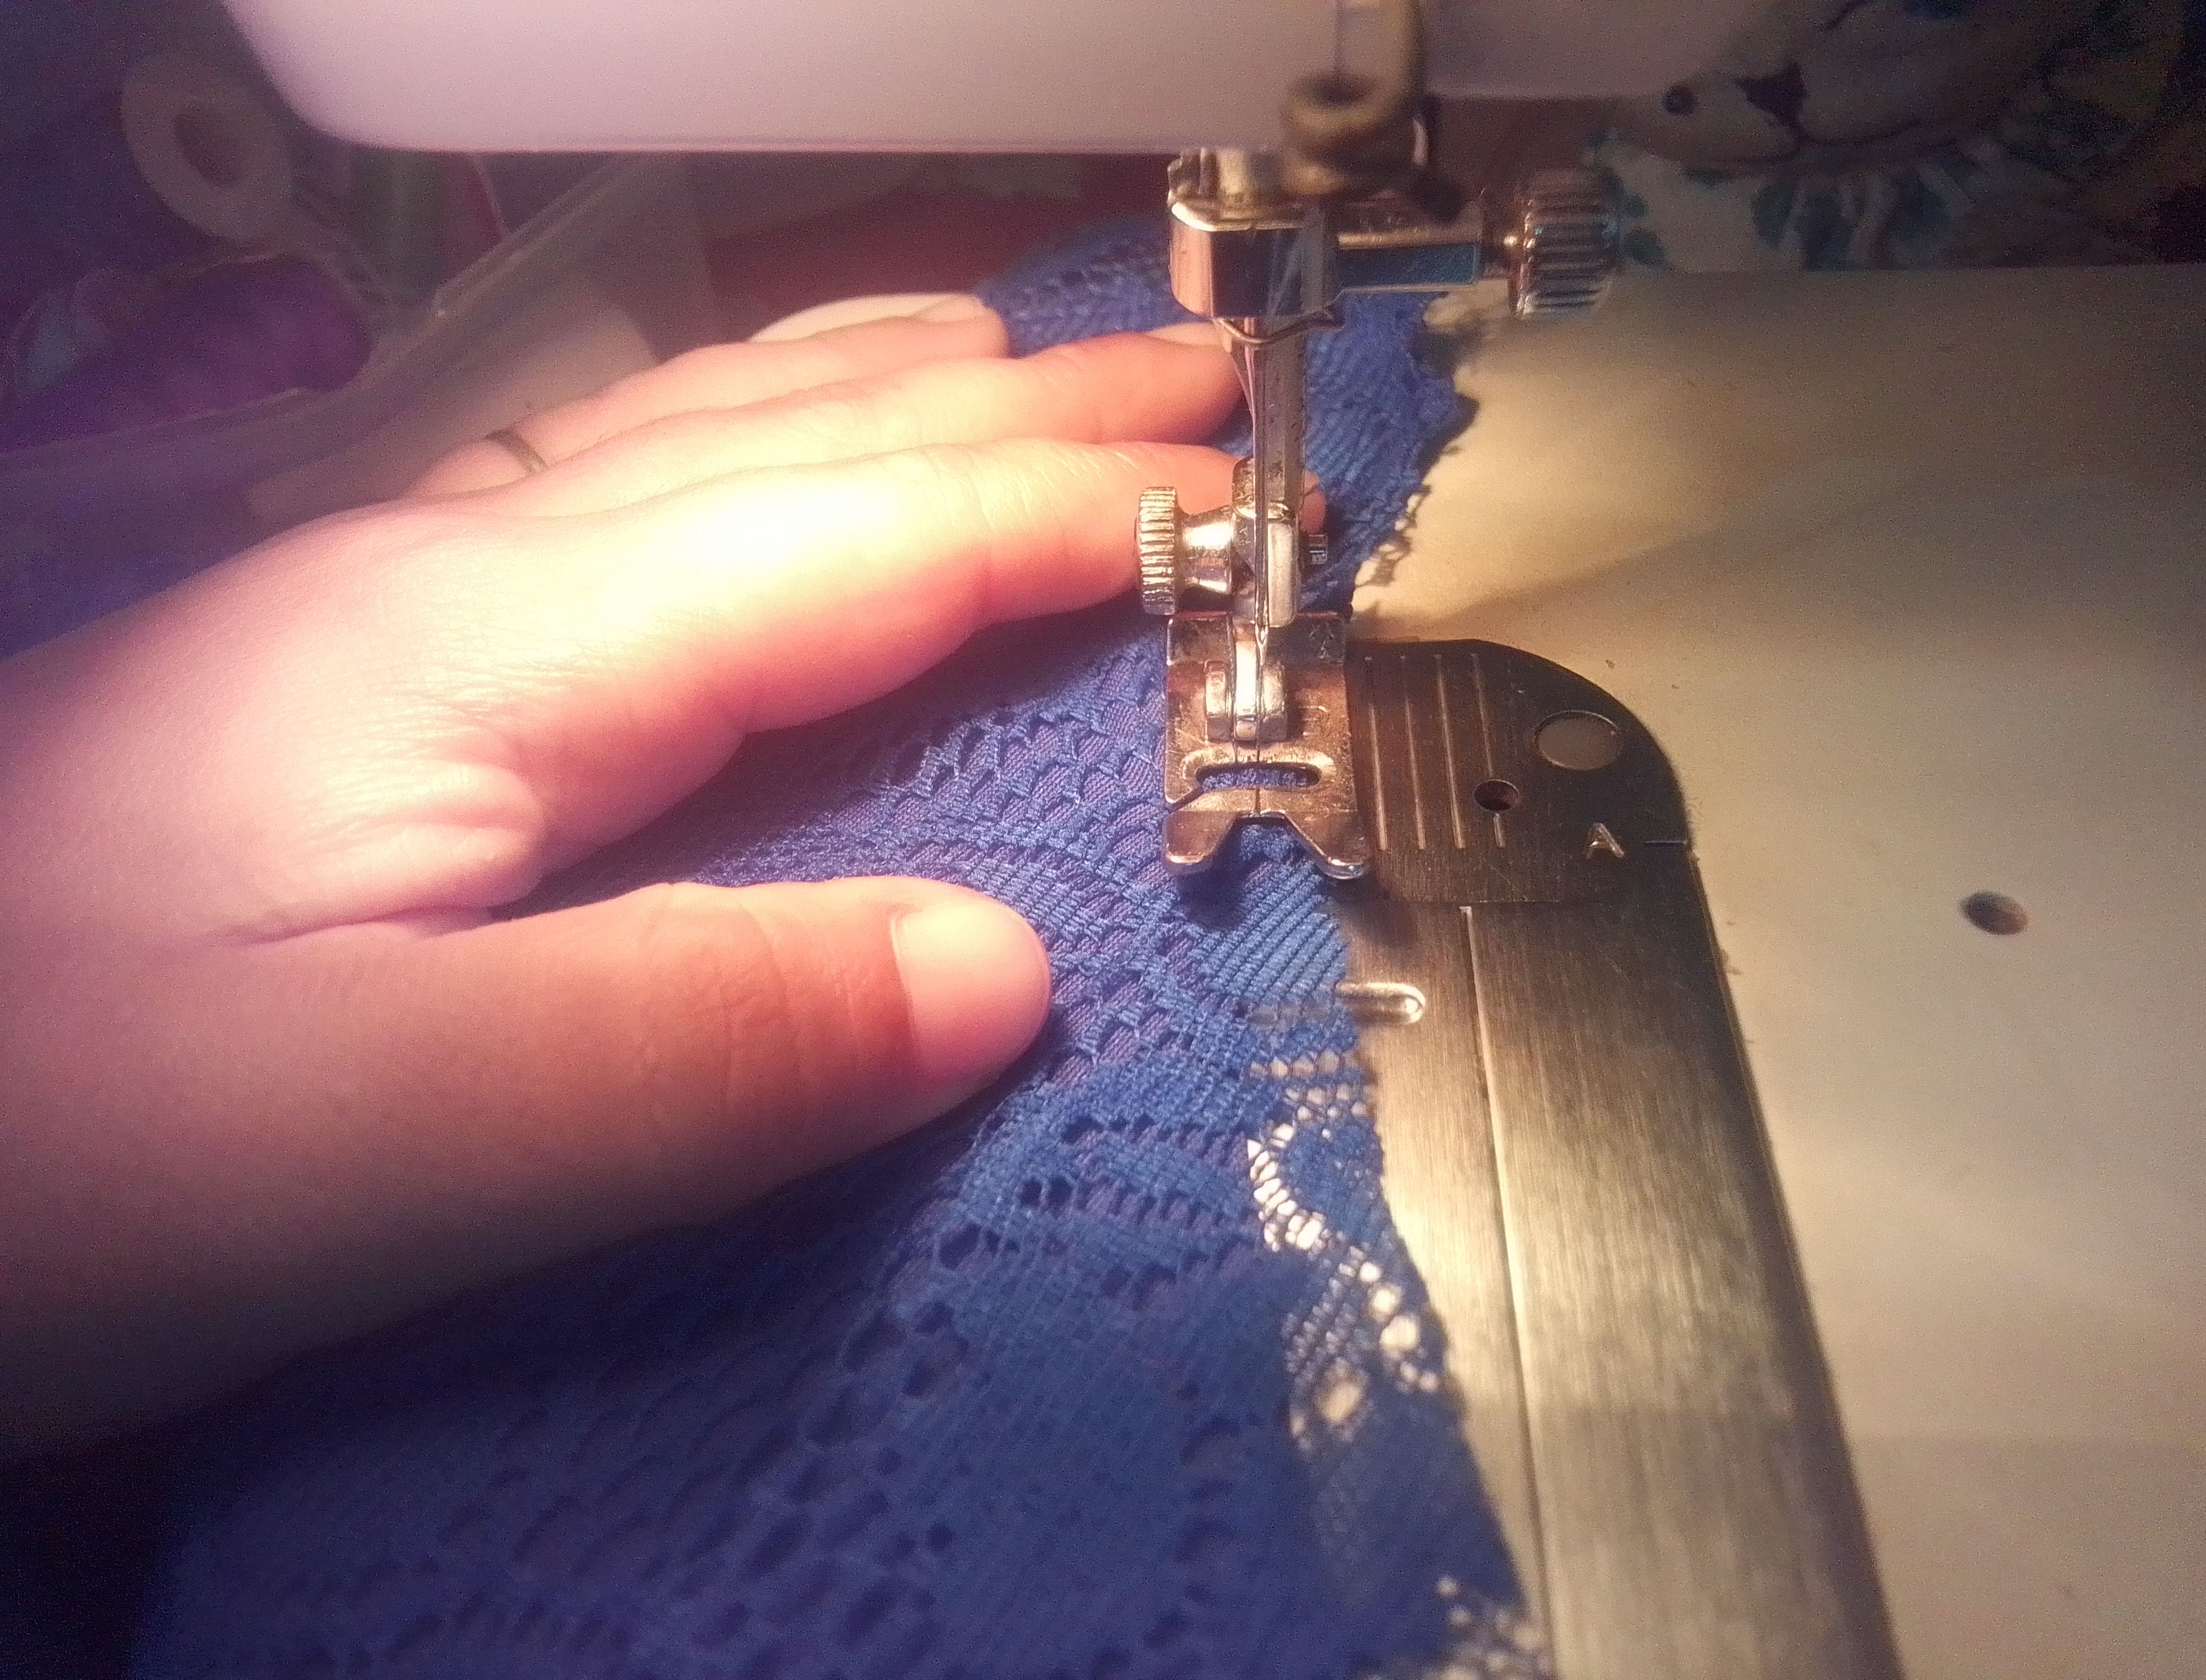
🌟Paso 01
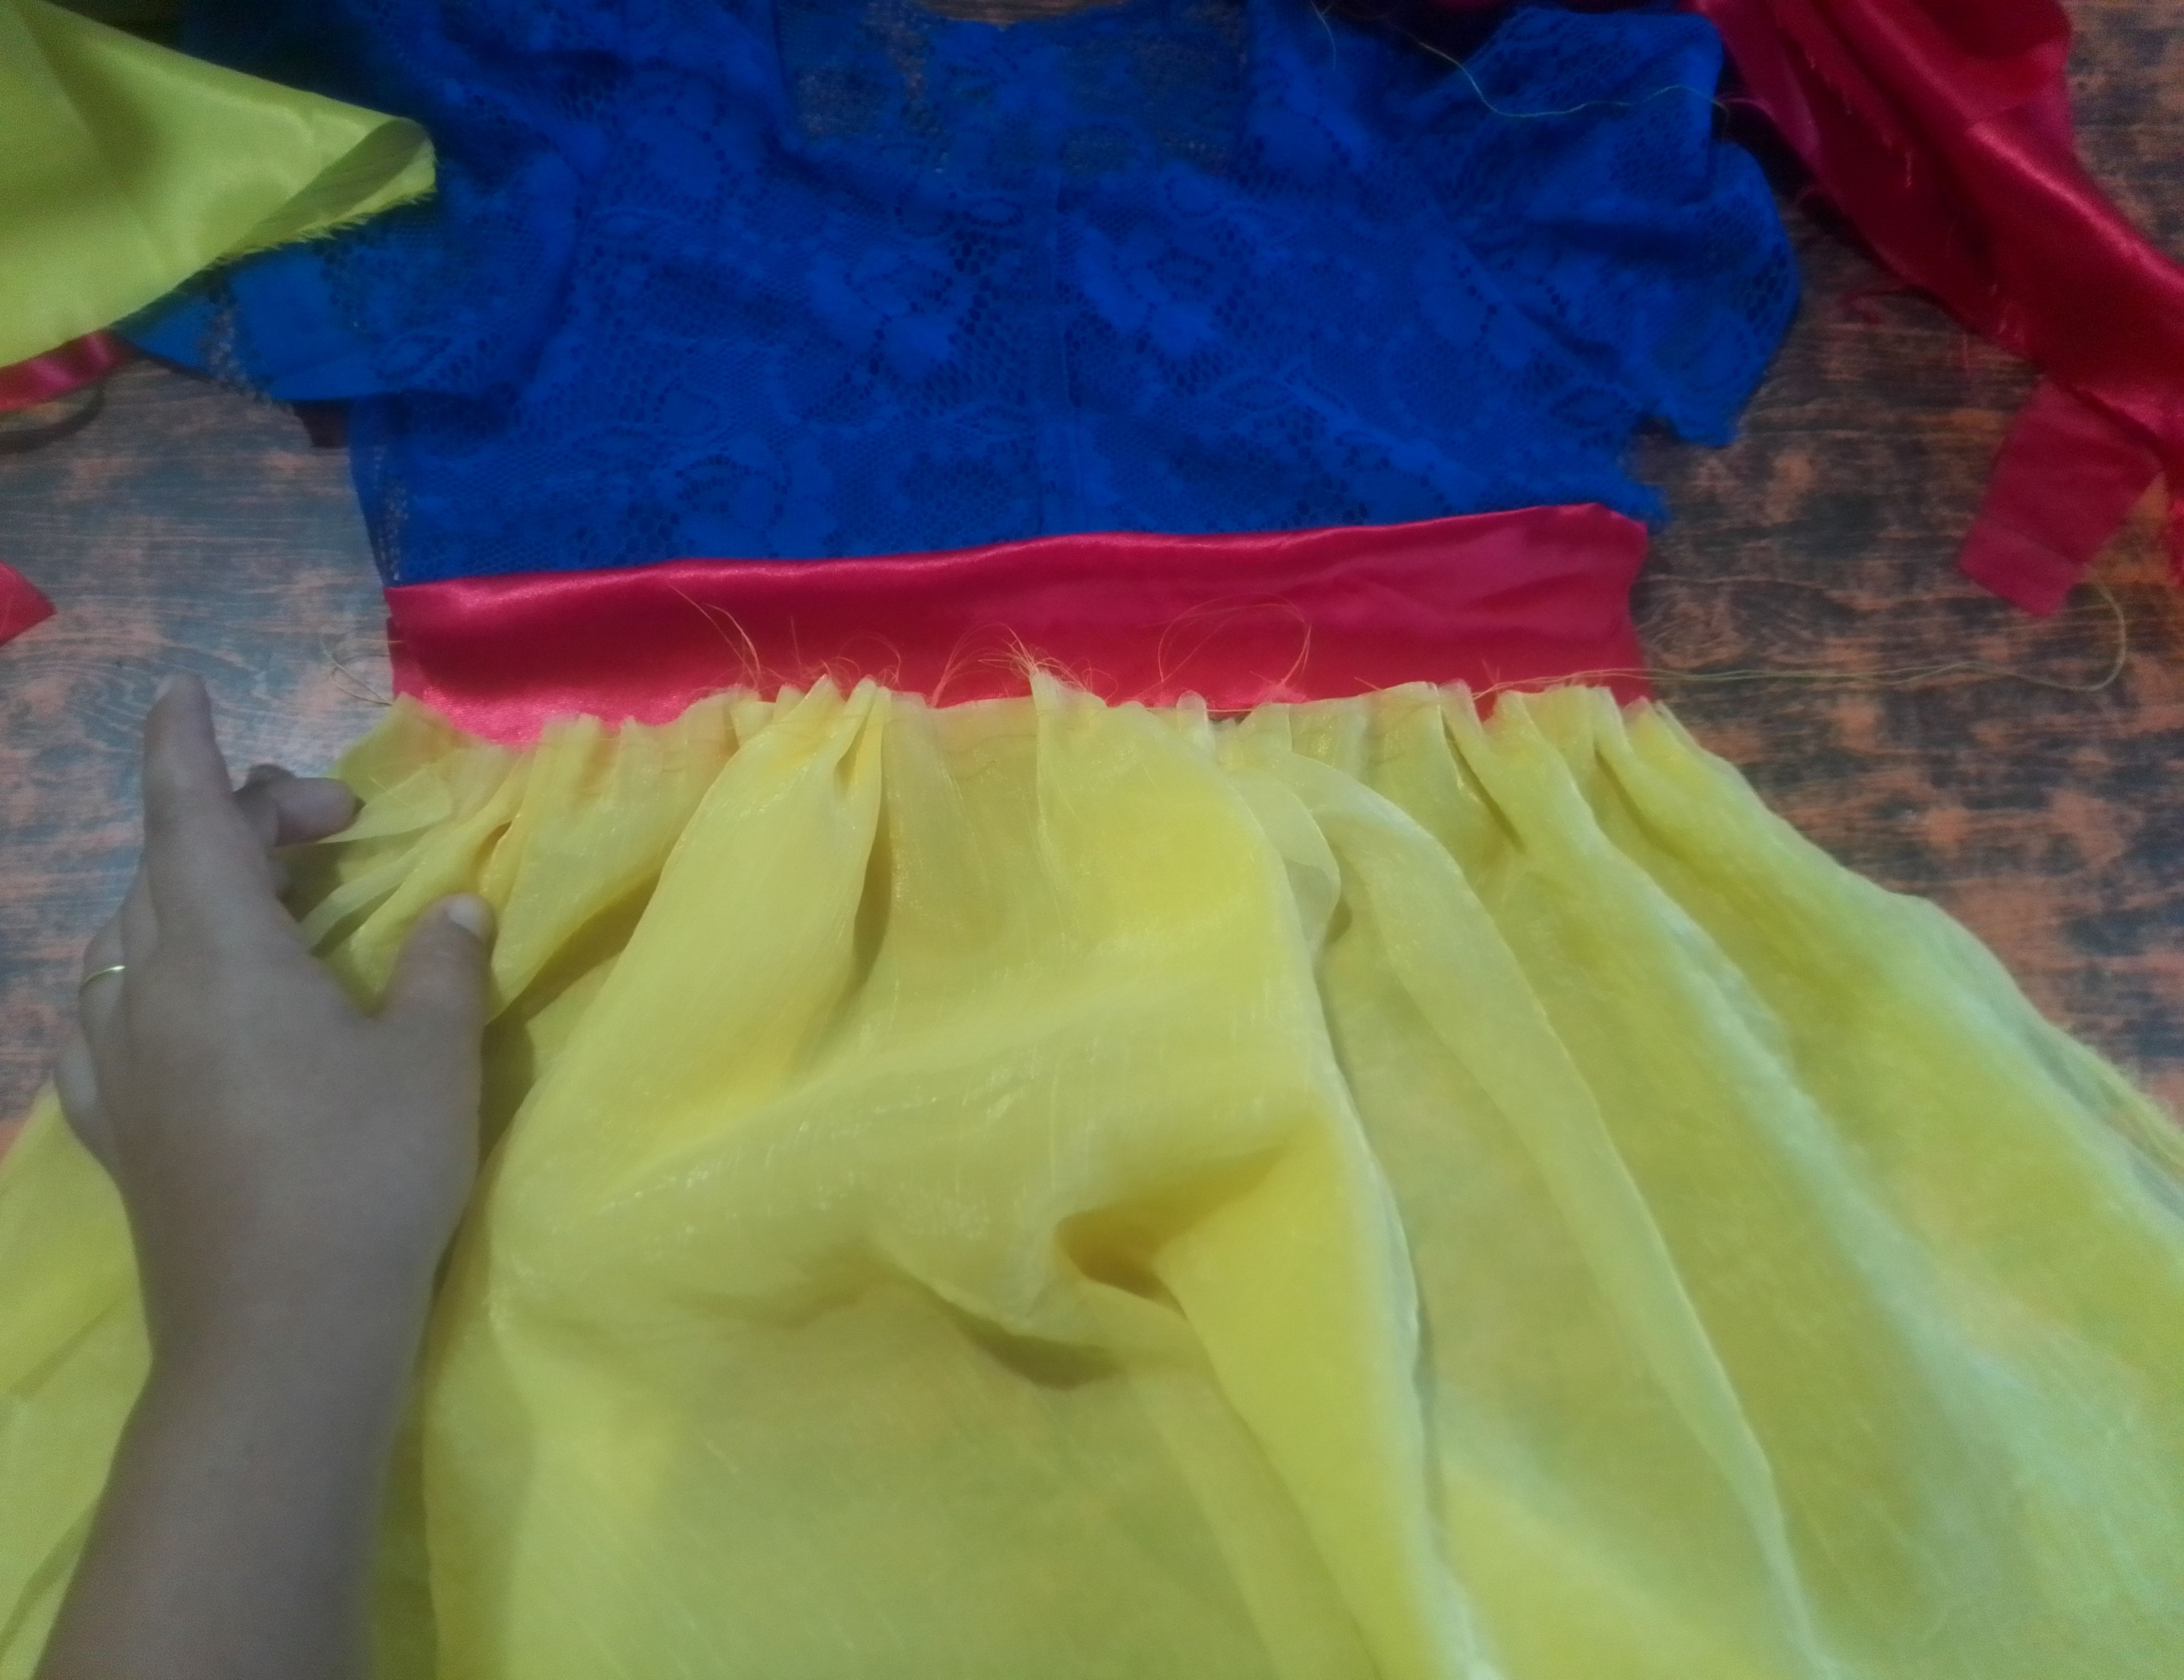
Comienzo cortando todas piezas del vestido, una parte delantera y una trasera, junto a ellas un duplicado de cada pieza en tela blonda. También voy a cortar unas mangas con corte alto en la zona del hombro para hacer unas mangas bombachas y una tira en el color de tela roja al ancho de toda la cintura del vestido. Medio metro de tela amarilla, voy solo a doblar a separar con un corte por la mitad. También voy a cortar una segunda capa con el mismo ancho y color de tela pero con 30cm de largo.
🌟Step 01
I'll start by cutting all the pieces of the dress, a front and a back, along with a duplicate of each piece in lace fabric. I'm also going to cut some sleeves with a high cut at the shoulder area to make puff sleeves and a strip of red fabric the width of the entire waist of the dress. Half a meter of yellow fabric, I'm just going to fold it apart with a cut in half. I'm also going to cut a second layer with the same width and color of fabric but 30 cm long.
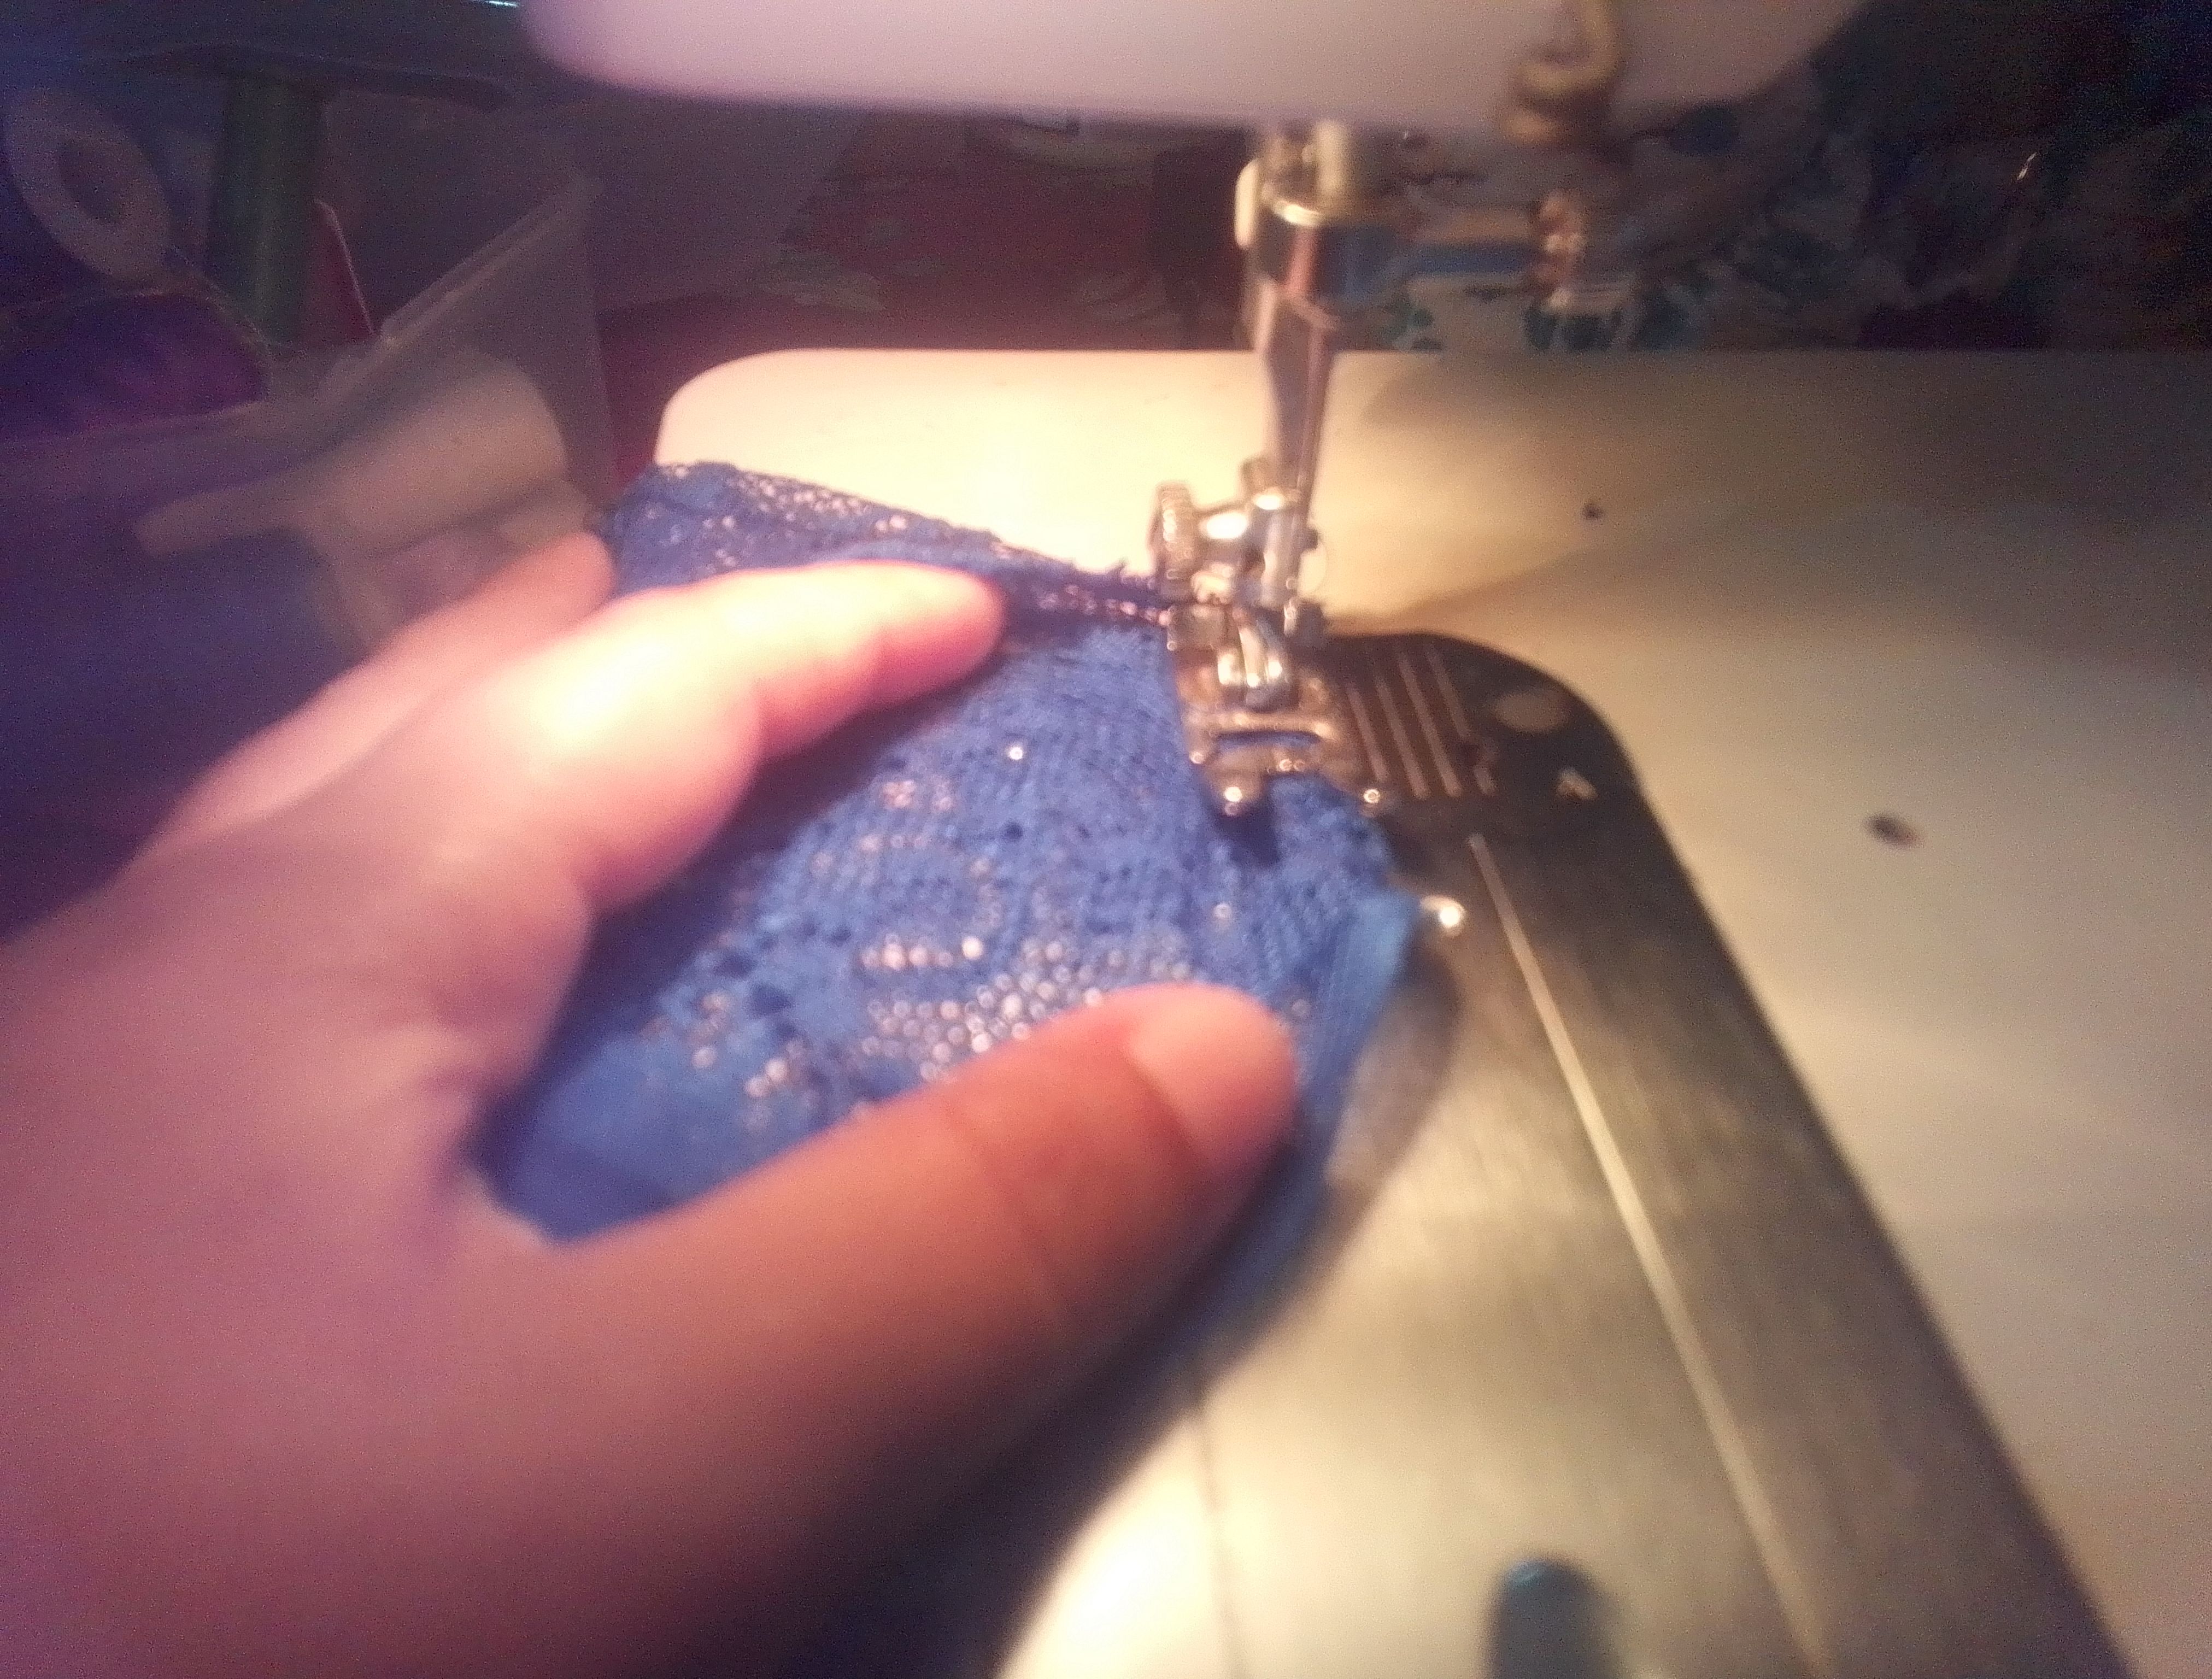
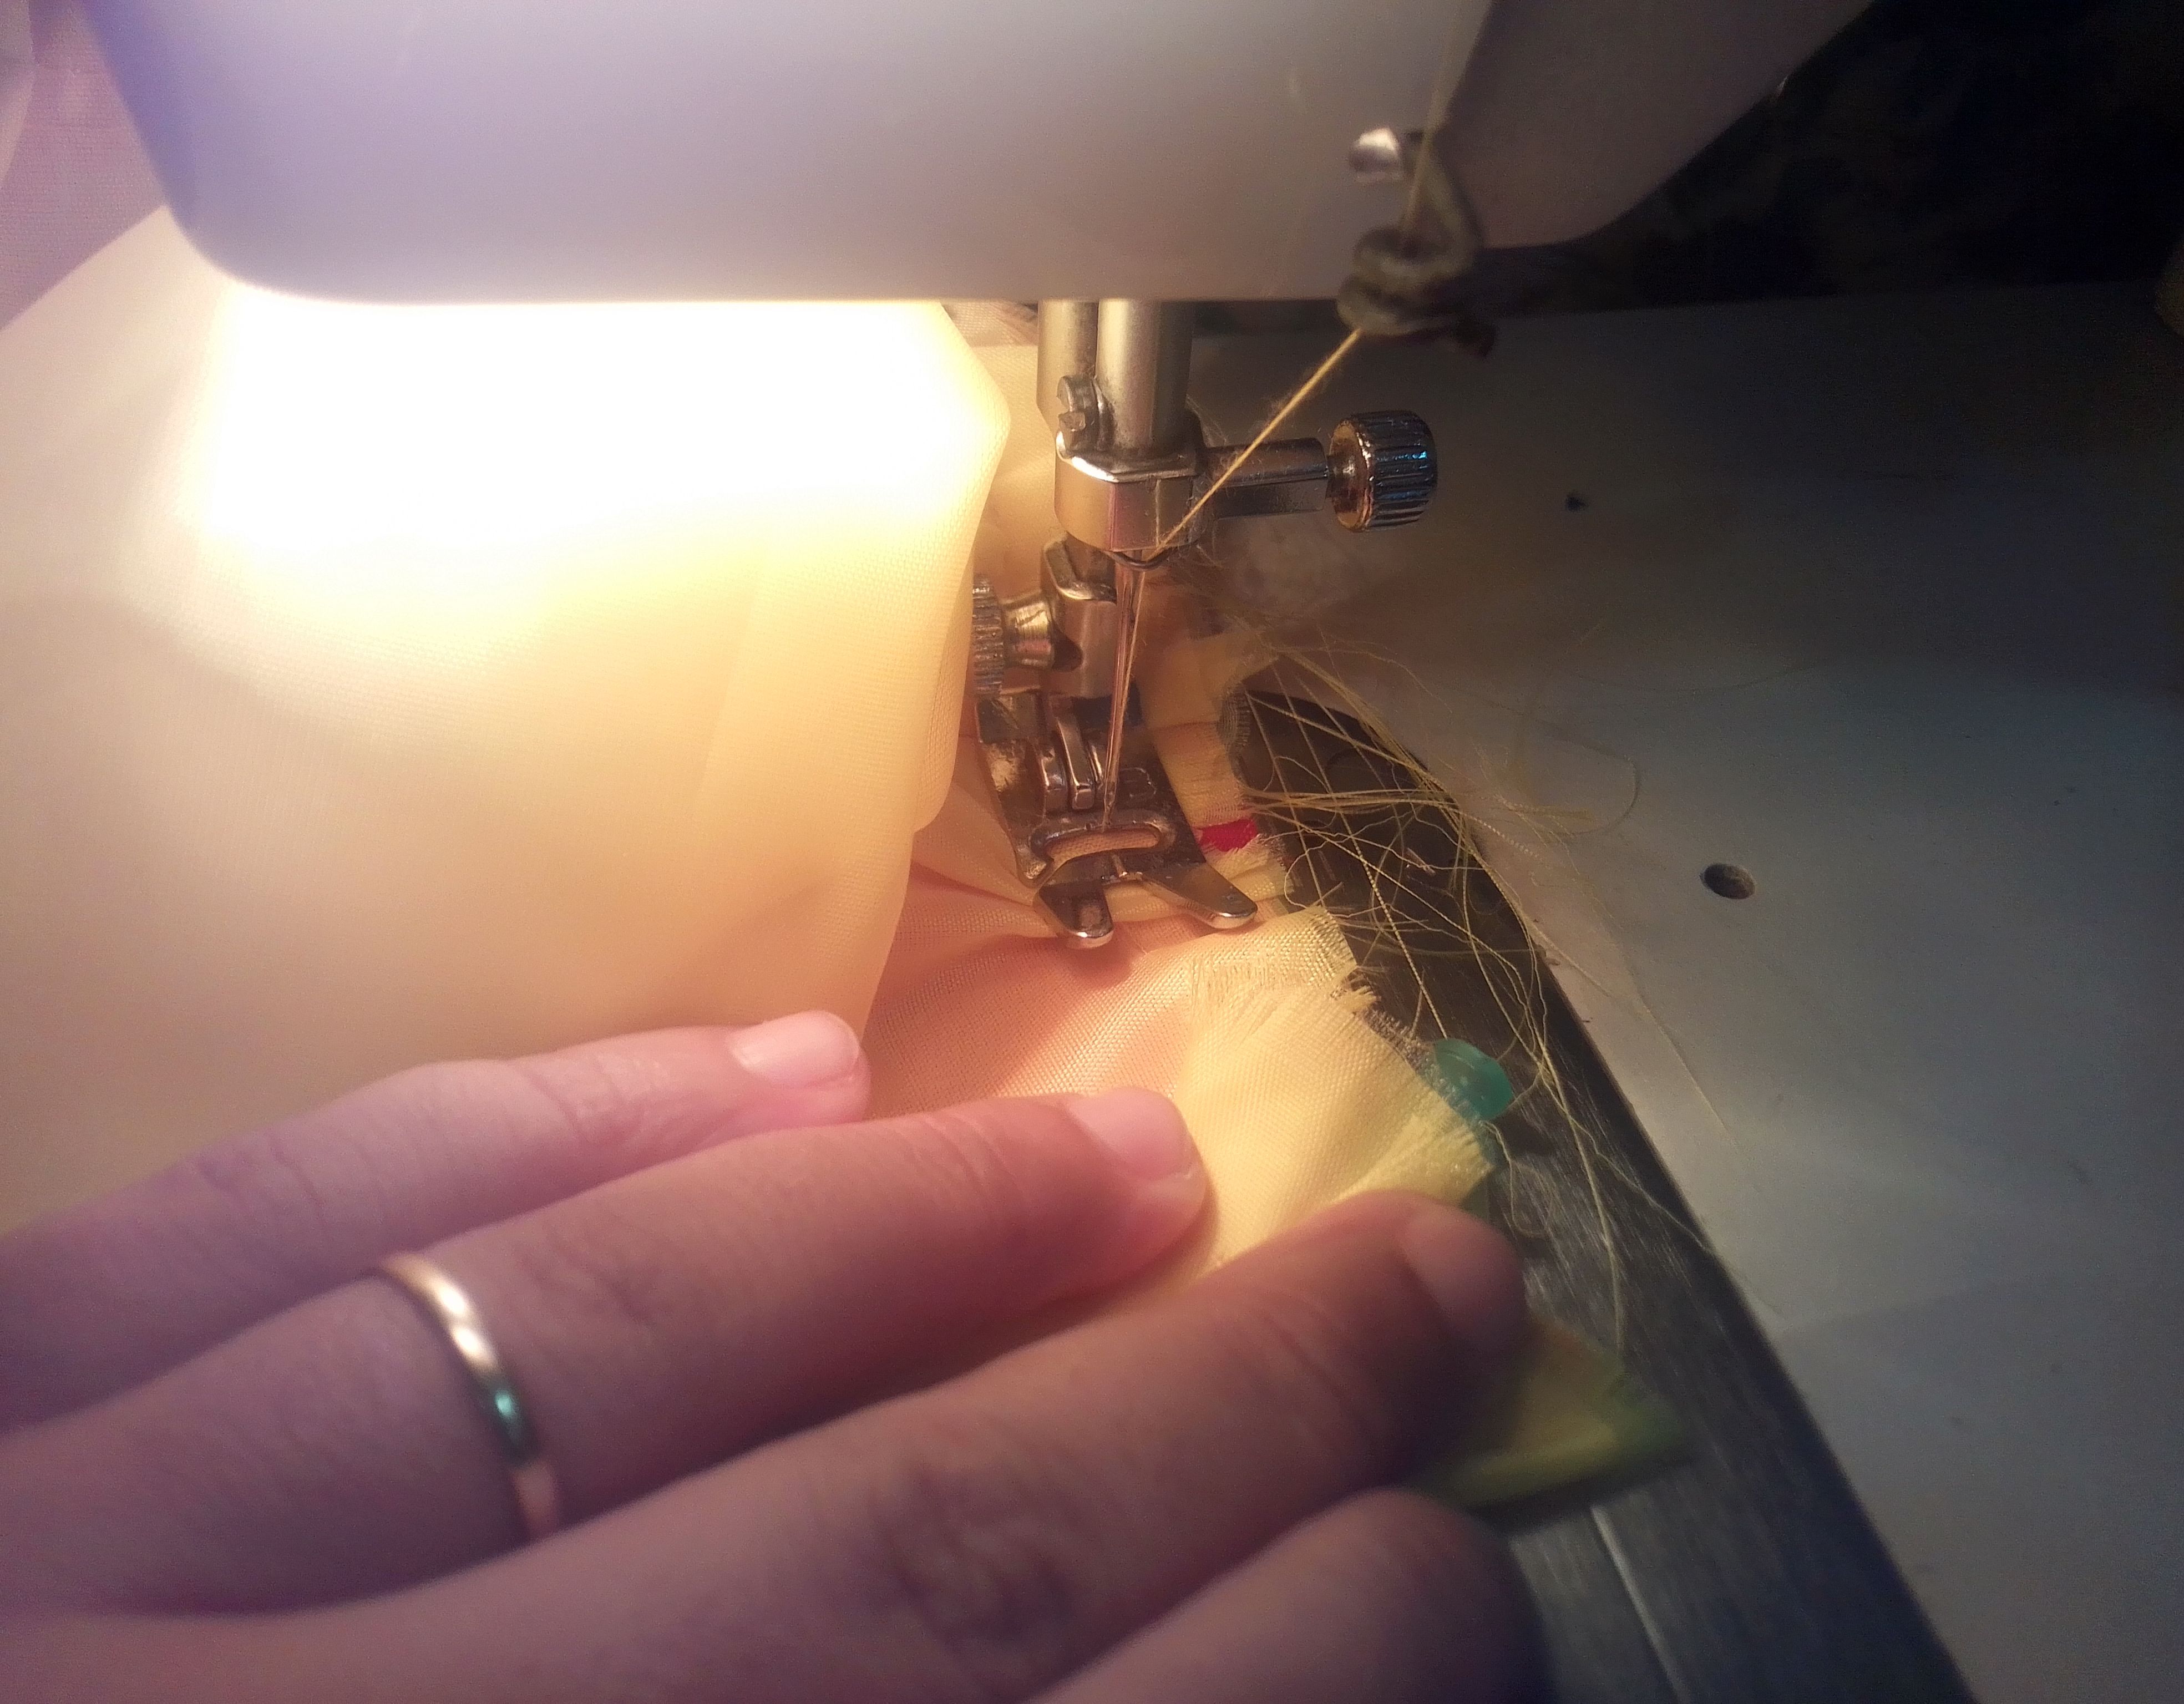
🌟Paso 02
Al tener todas las partes, comienzo a unir con costura de puntada recta colocando la pieza de blonda y la de fondo y cosemos el cuello de la parte trasera y delantera, luego los hombros y las mangas. Al final de cada manga voy a coser una goma finita para ajustar y que quede más bombacha. Por último volteamos y cerramos laterales. Continuamos con la pieza roja del centro y está la unimos al ancho te tengamos de la cintura.
🌟Step 02
Once I have all the parts, I start joining them with a straight stitch, placing the lace and background pieces. We sew the necklines of the back and front, then the shoulders and sleeves. At the end of each sleeve, I'm going to sew a thin elastic band to adjust it and make it look fuller. Finally, we turn and sew the sides. We continue with the red piece in the center and join it to the width you need for the waist.
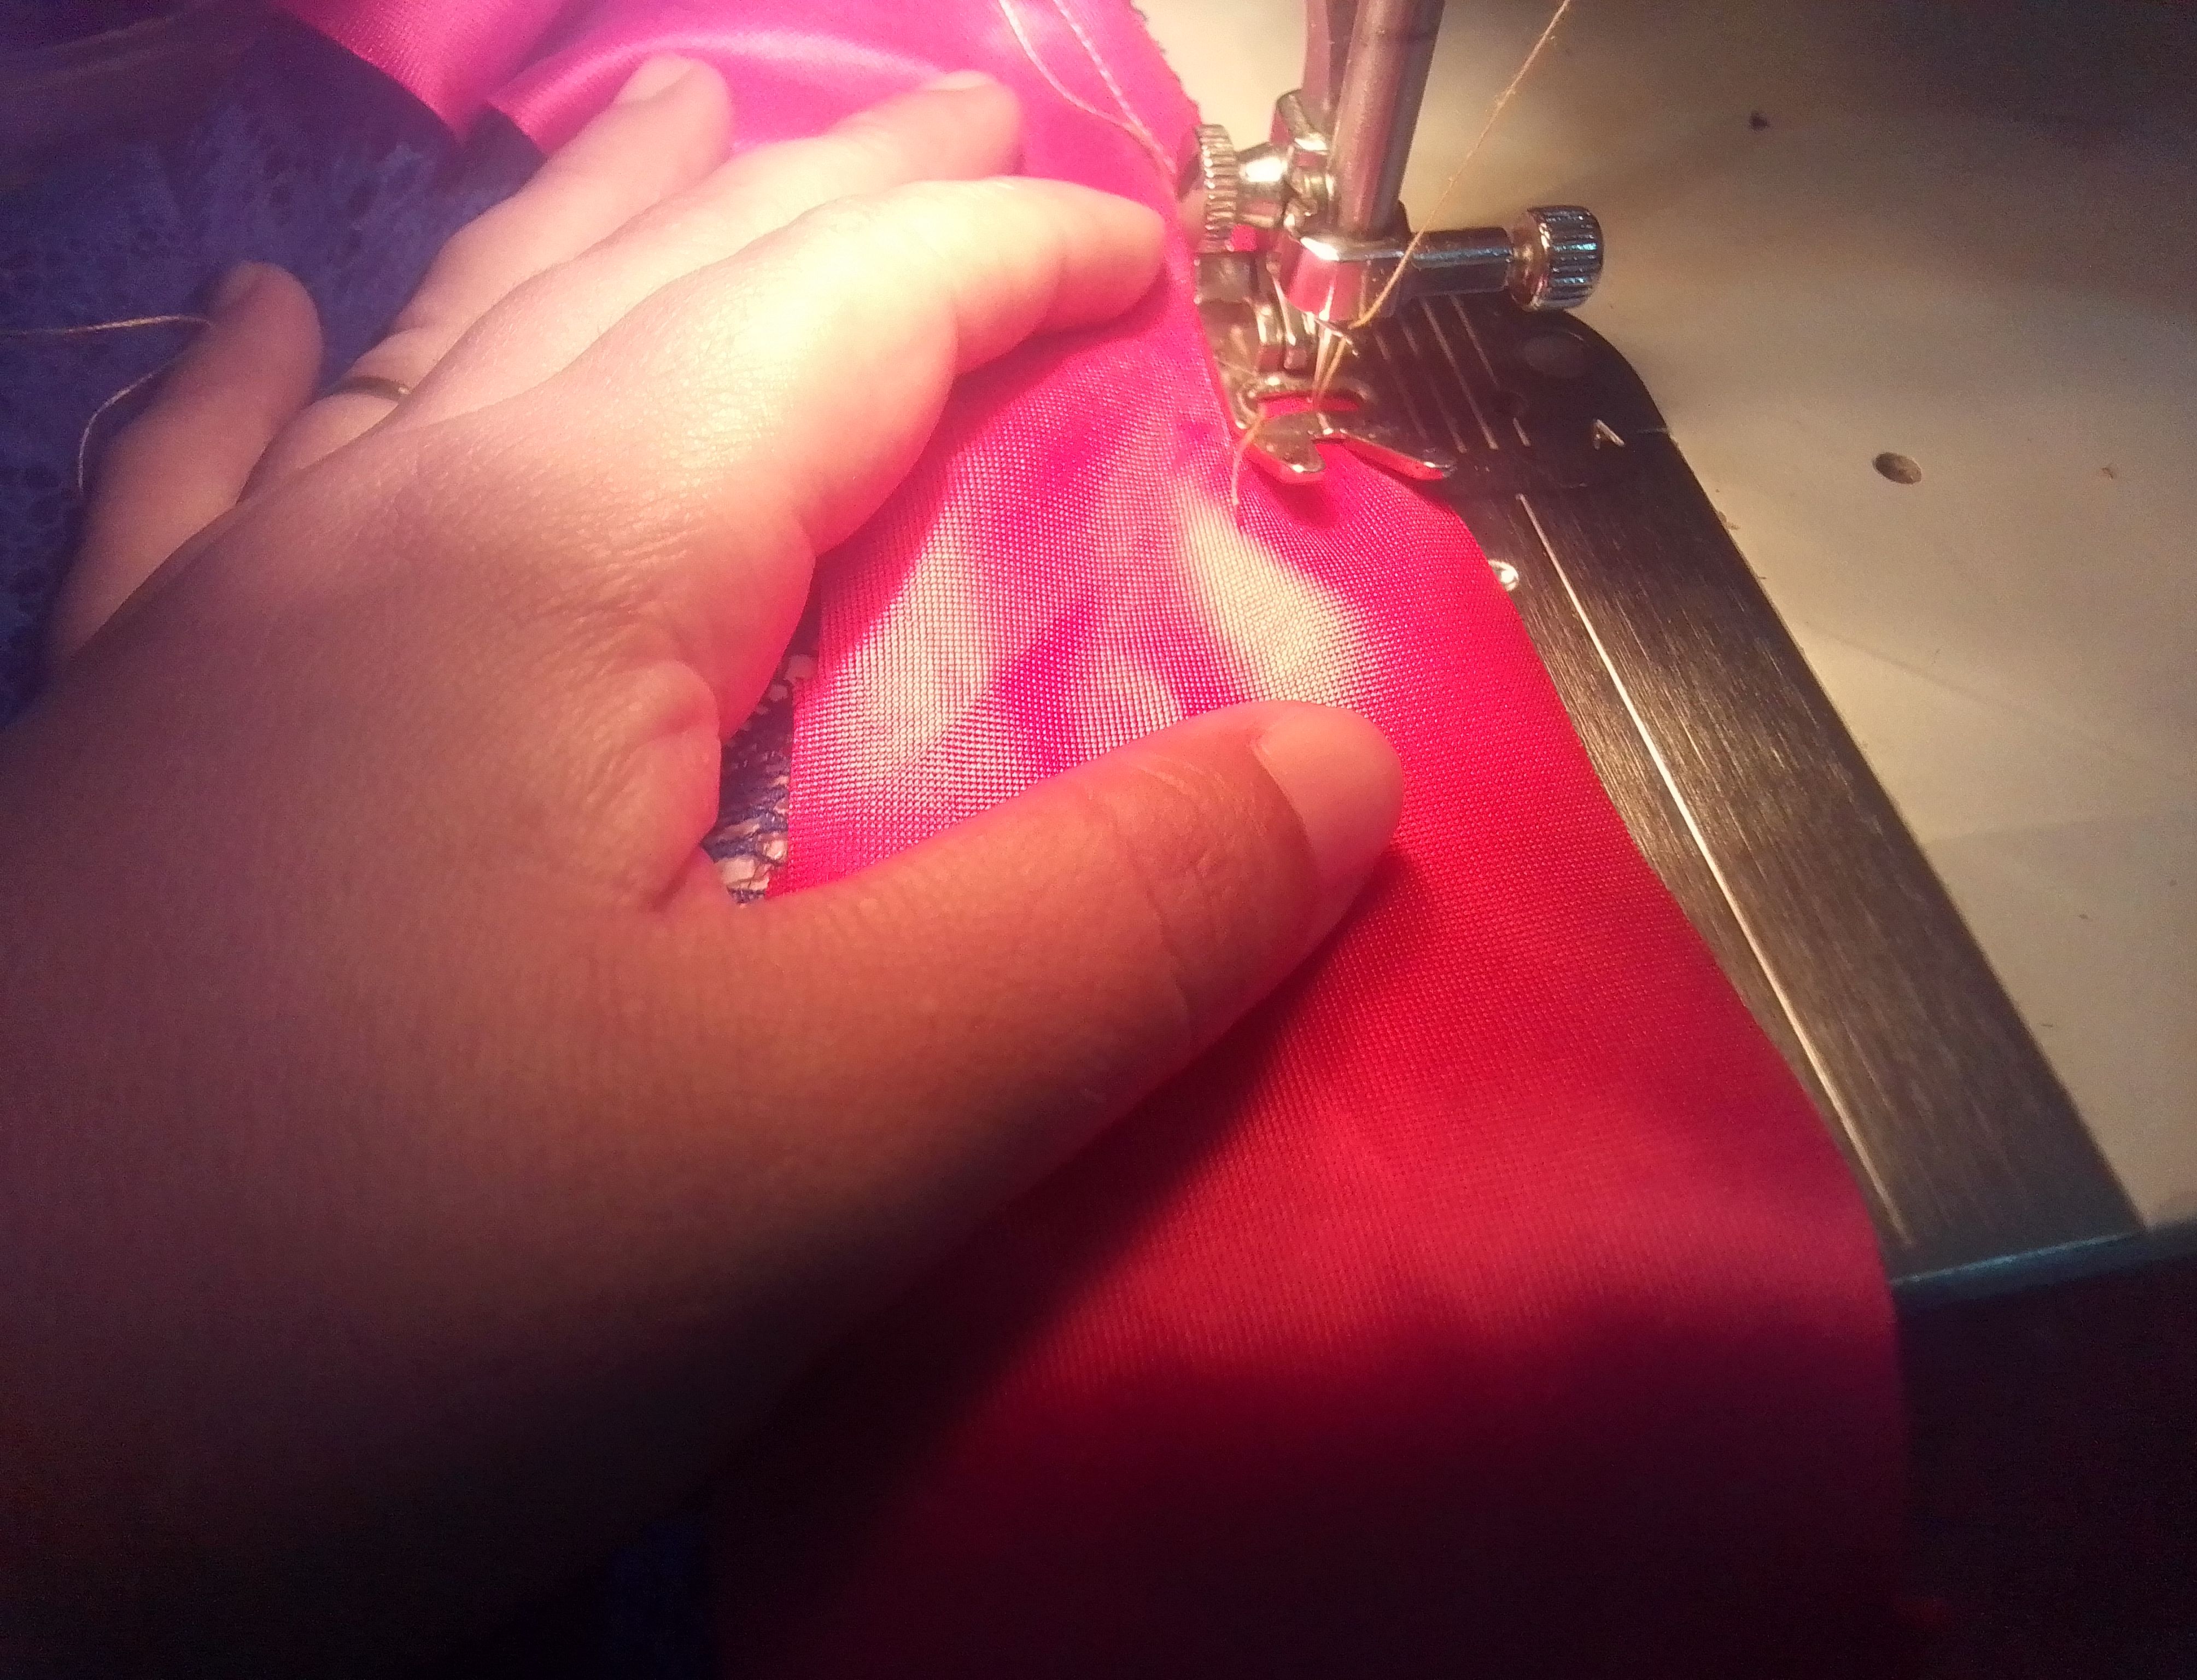
🌟Paso 03
Ahora voy a fruncir ambas capaz de la falda ancha de la de la tela. Voy a coser a la cintura de las piezas anteriores y luego cerramos laterales. Culmino con el dobladillo inferior de toda la falda.
🌟Step 3
Now I'm going to gather both layers of the wide skirt from the fabric. I'm going to sew to the waistband of the previous pieces and then sew the sides together. I'll finish with the bottom hem of the entire skirt.
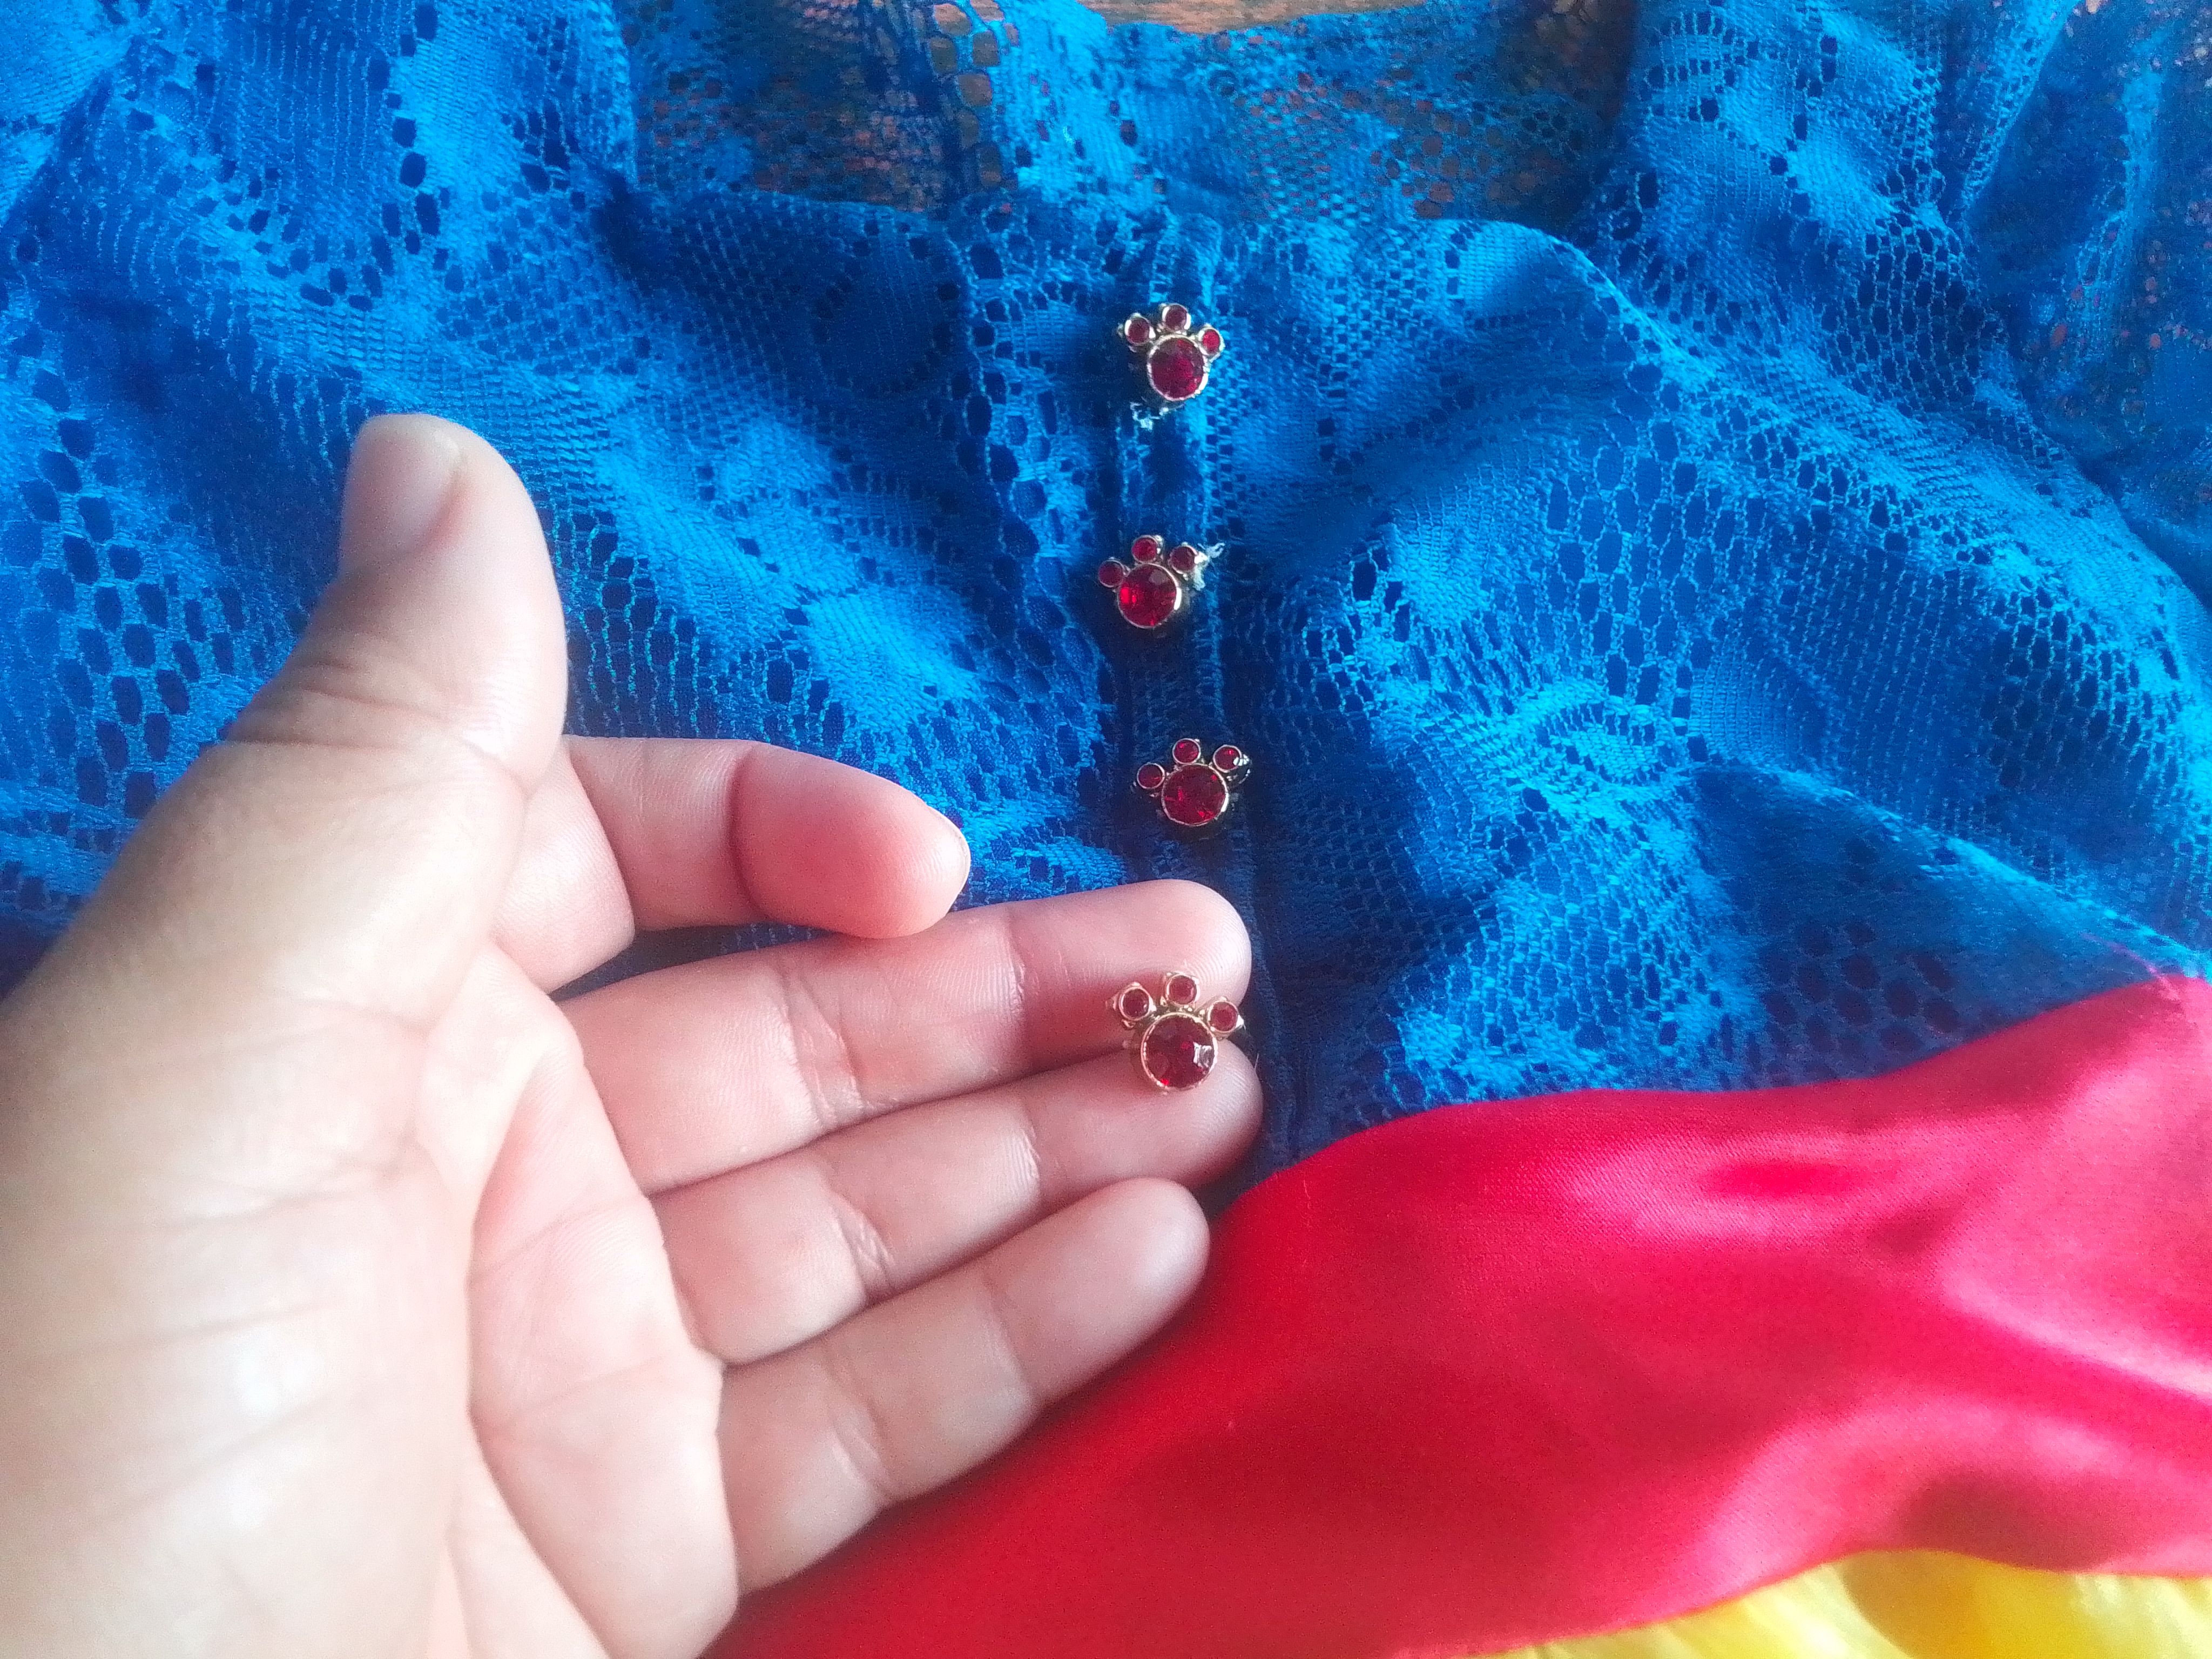
🌟Paso 04
Para la decoración voy a coser unos pequeños botones color rojo en su parte frontal y haré un coqueto lazo para la zona trasera de la cintura.
🌟Step 04
For decoration, I'm going to sew some small red buttons on the front and make a cute bow for the back of the waist.

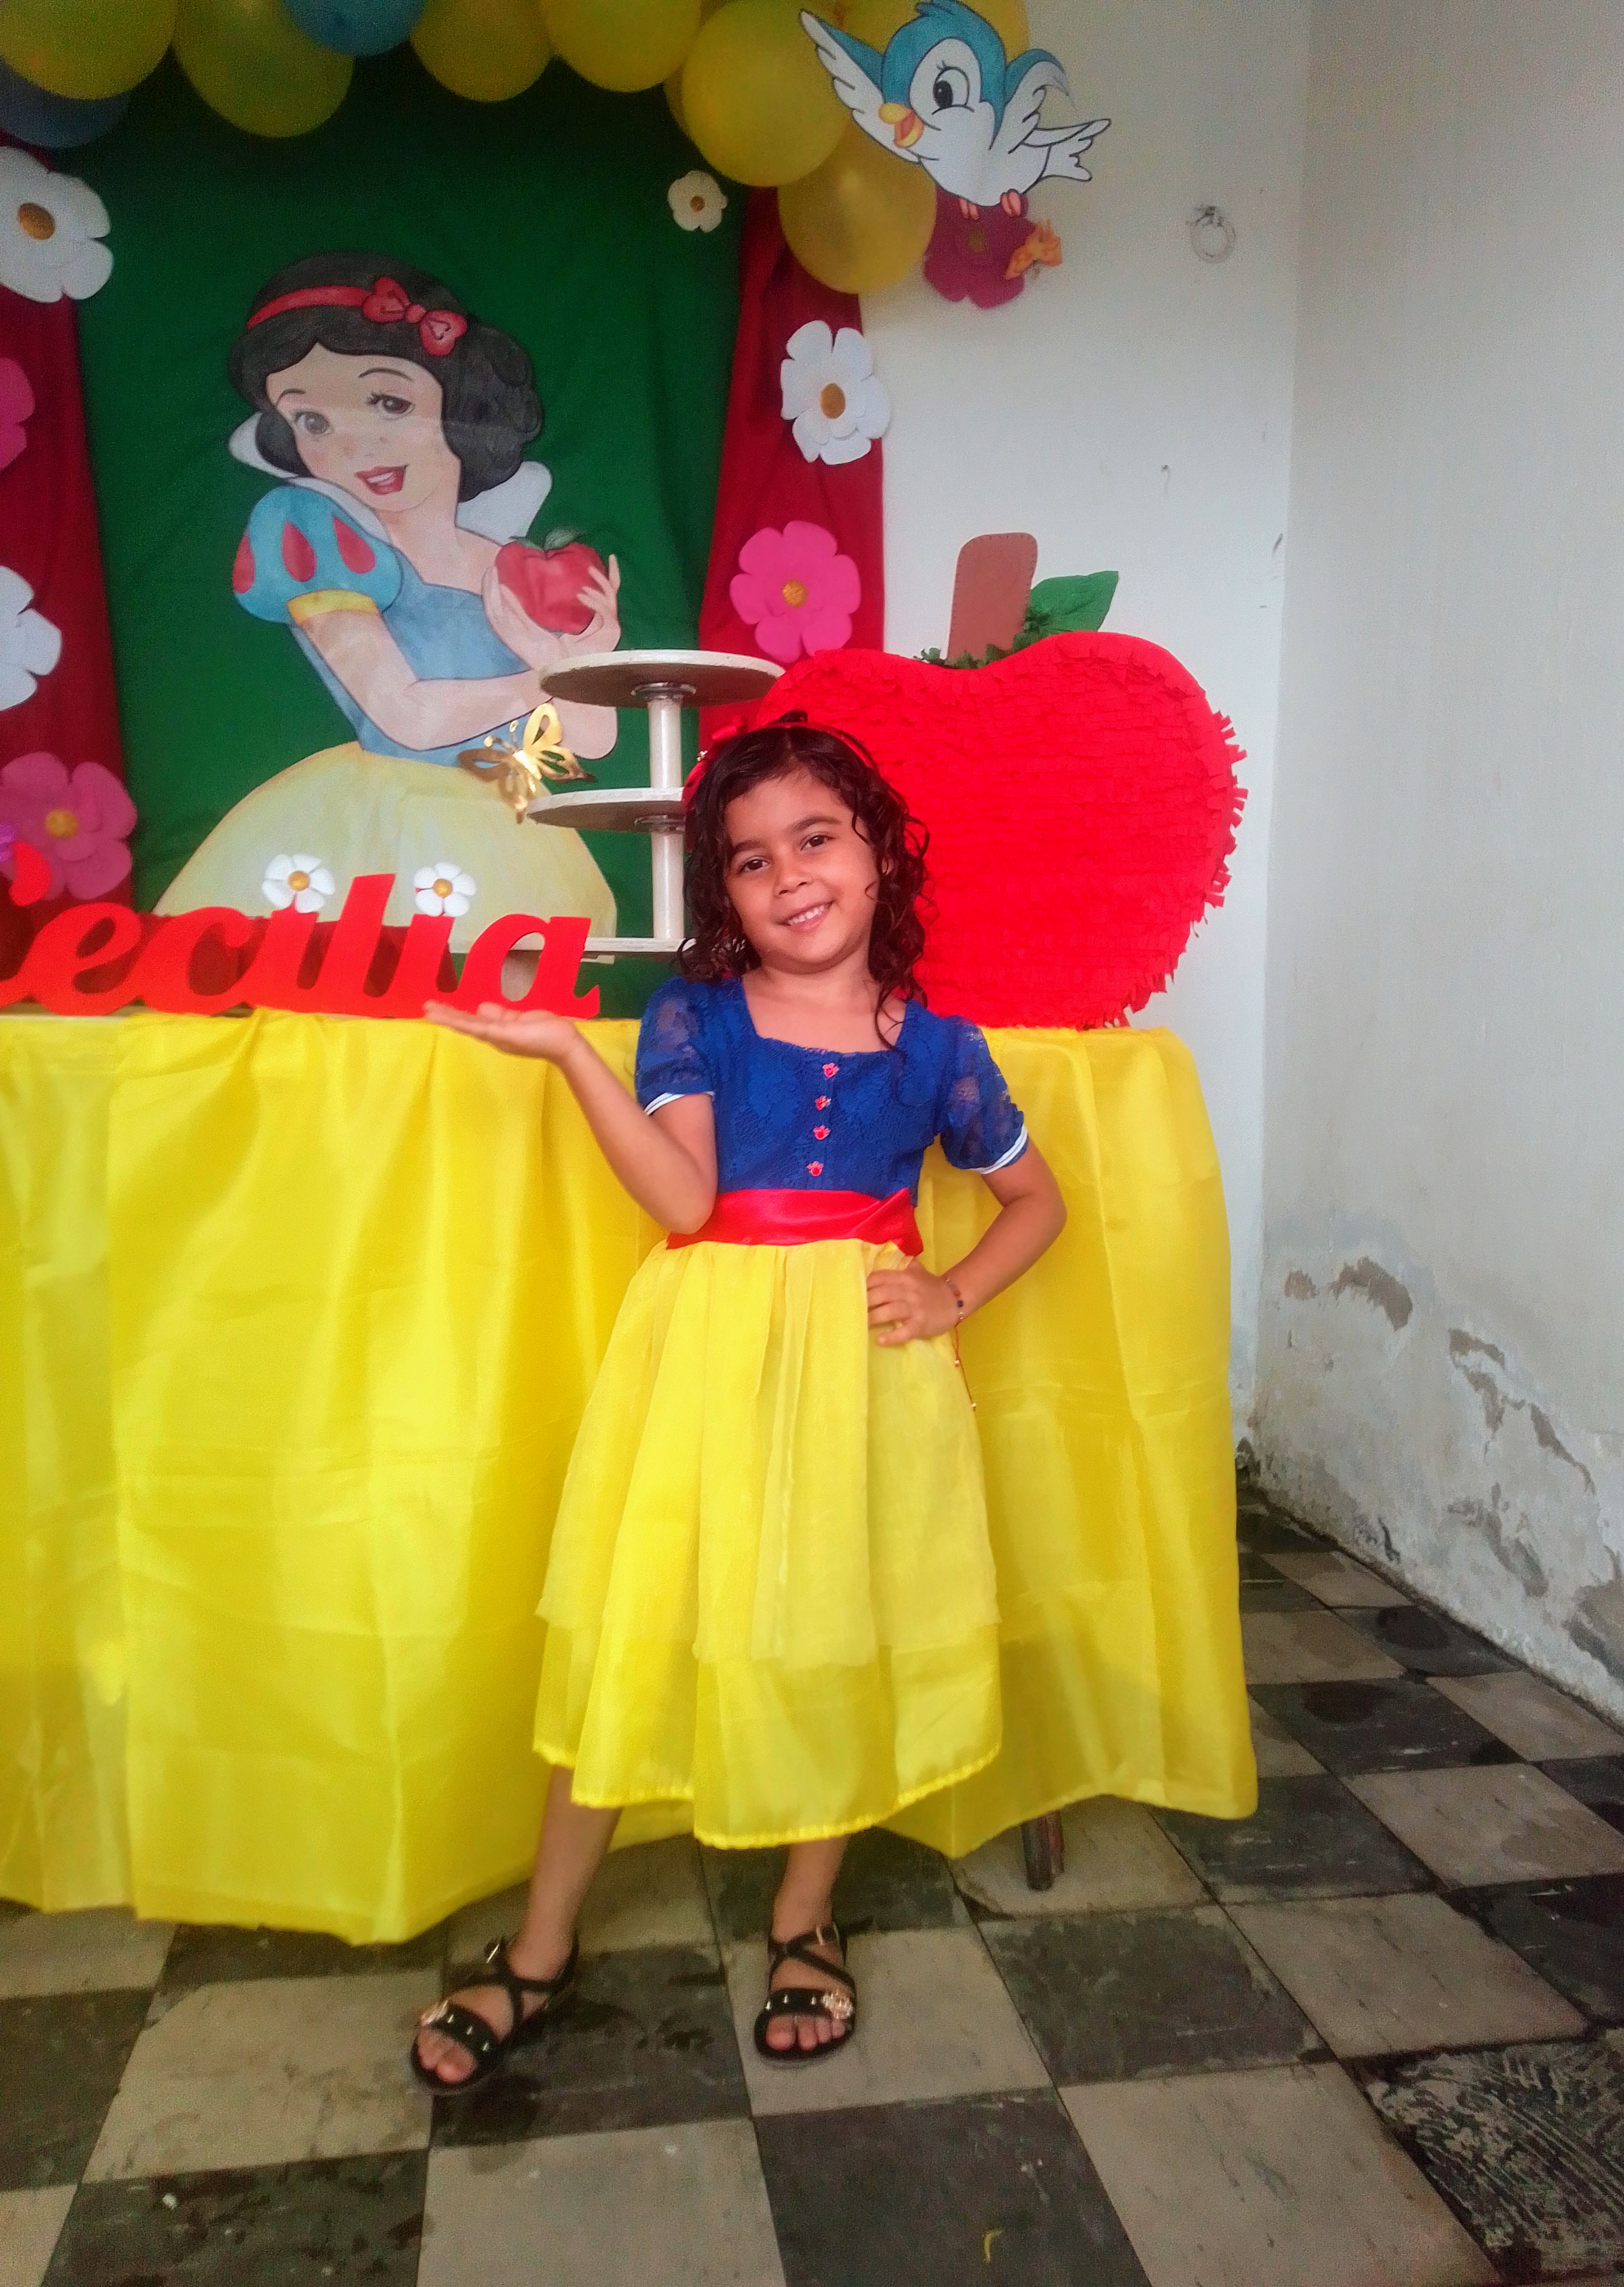
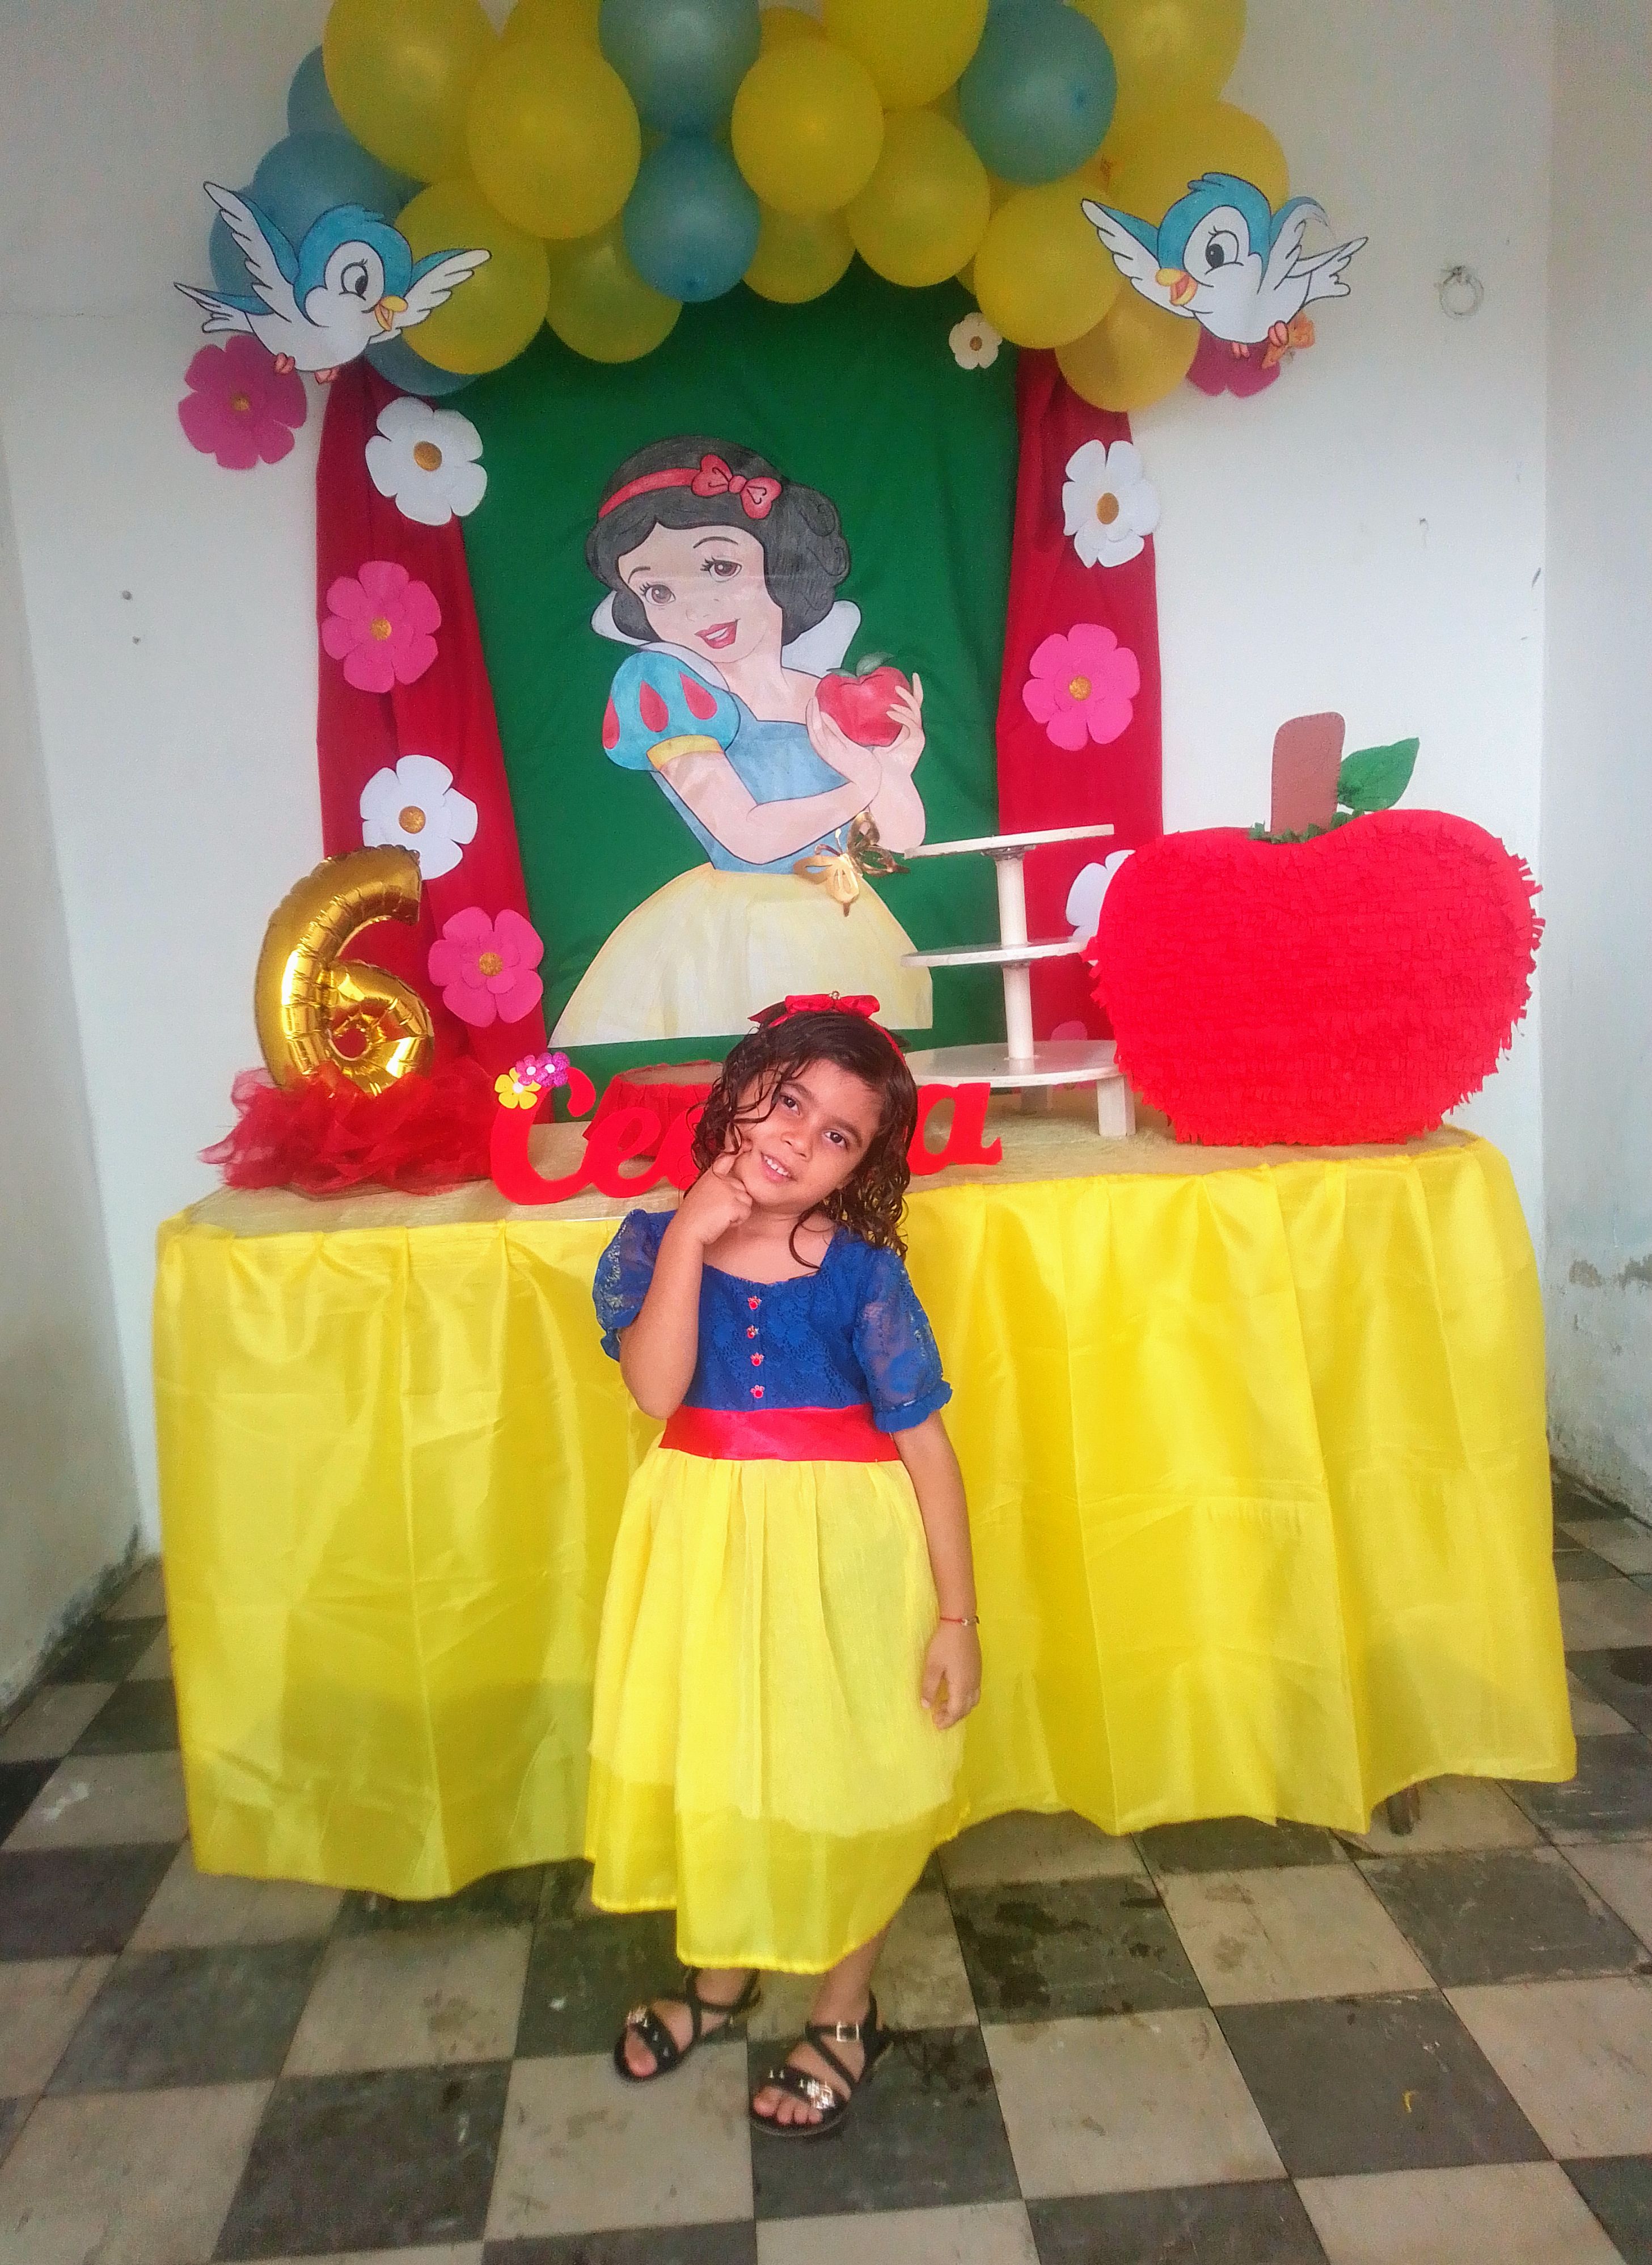
***Resultado!***
***Result!***
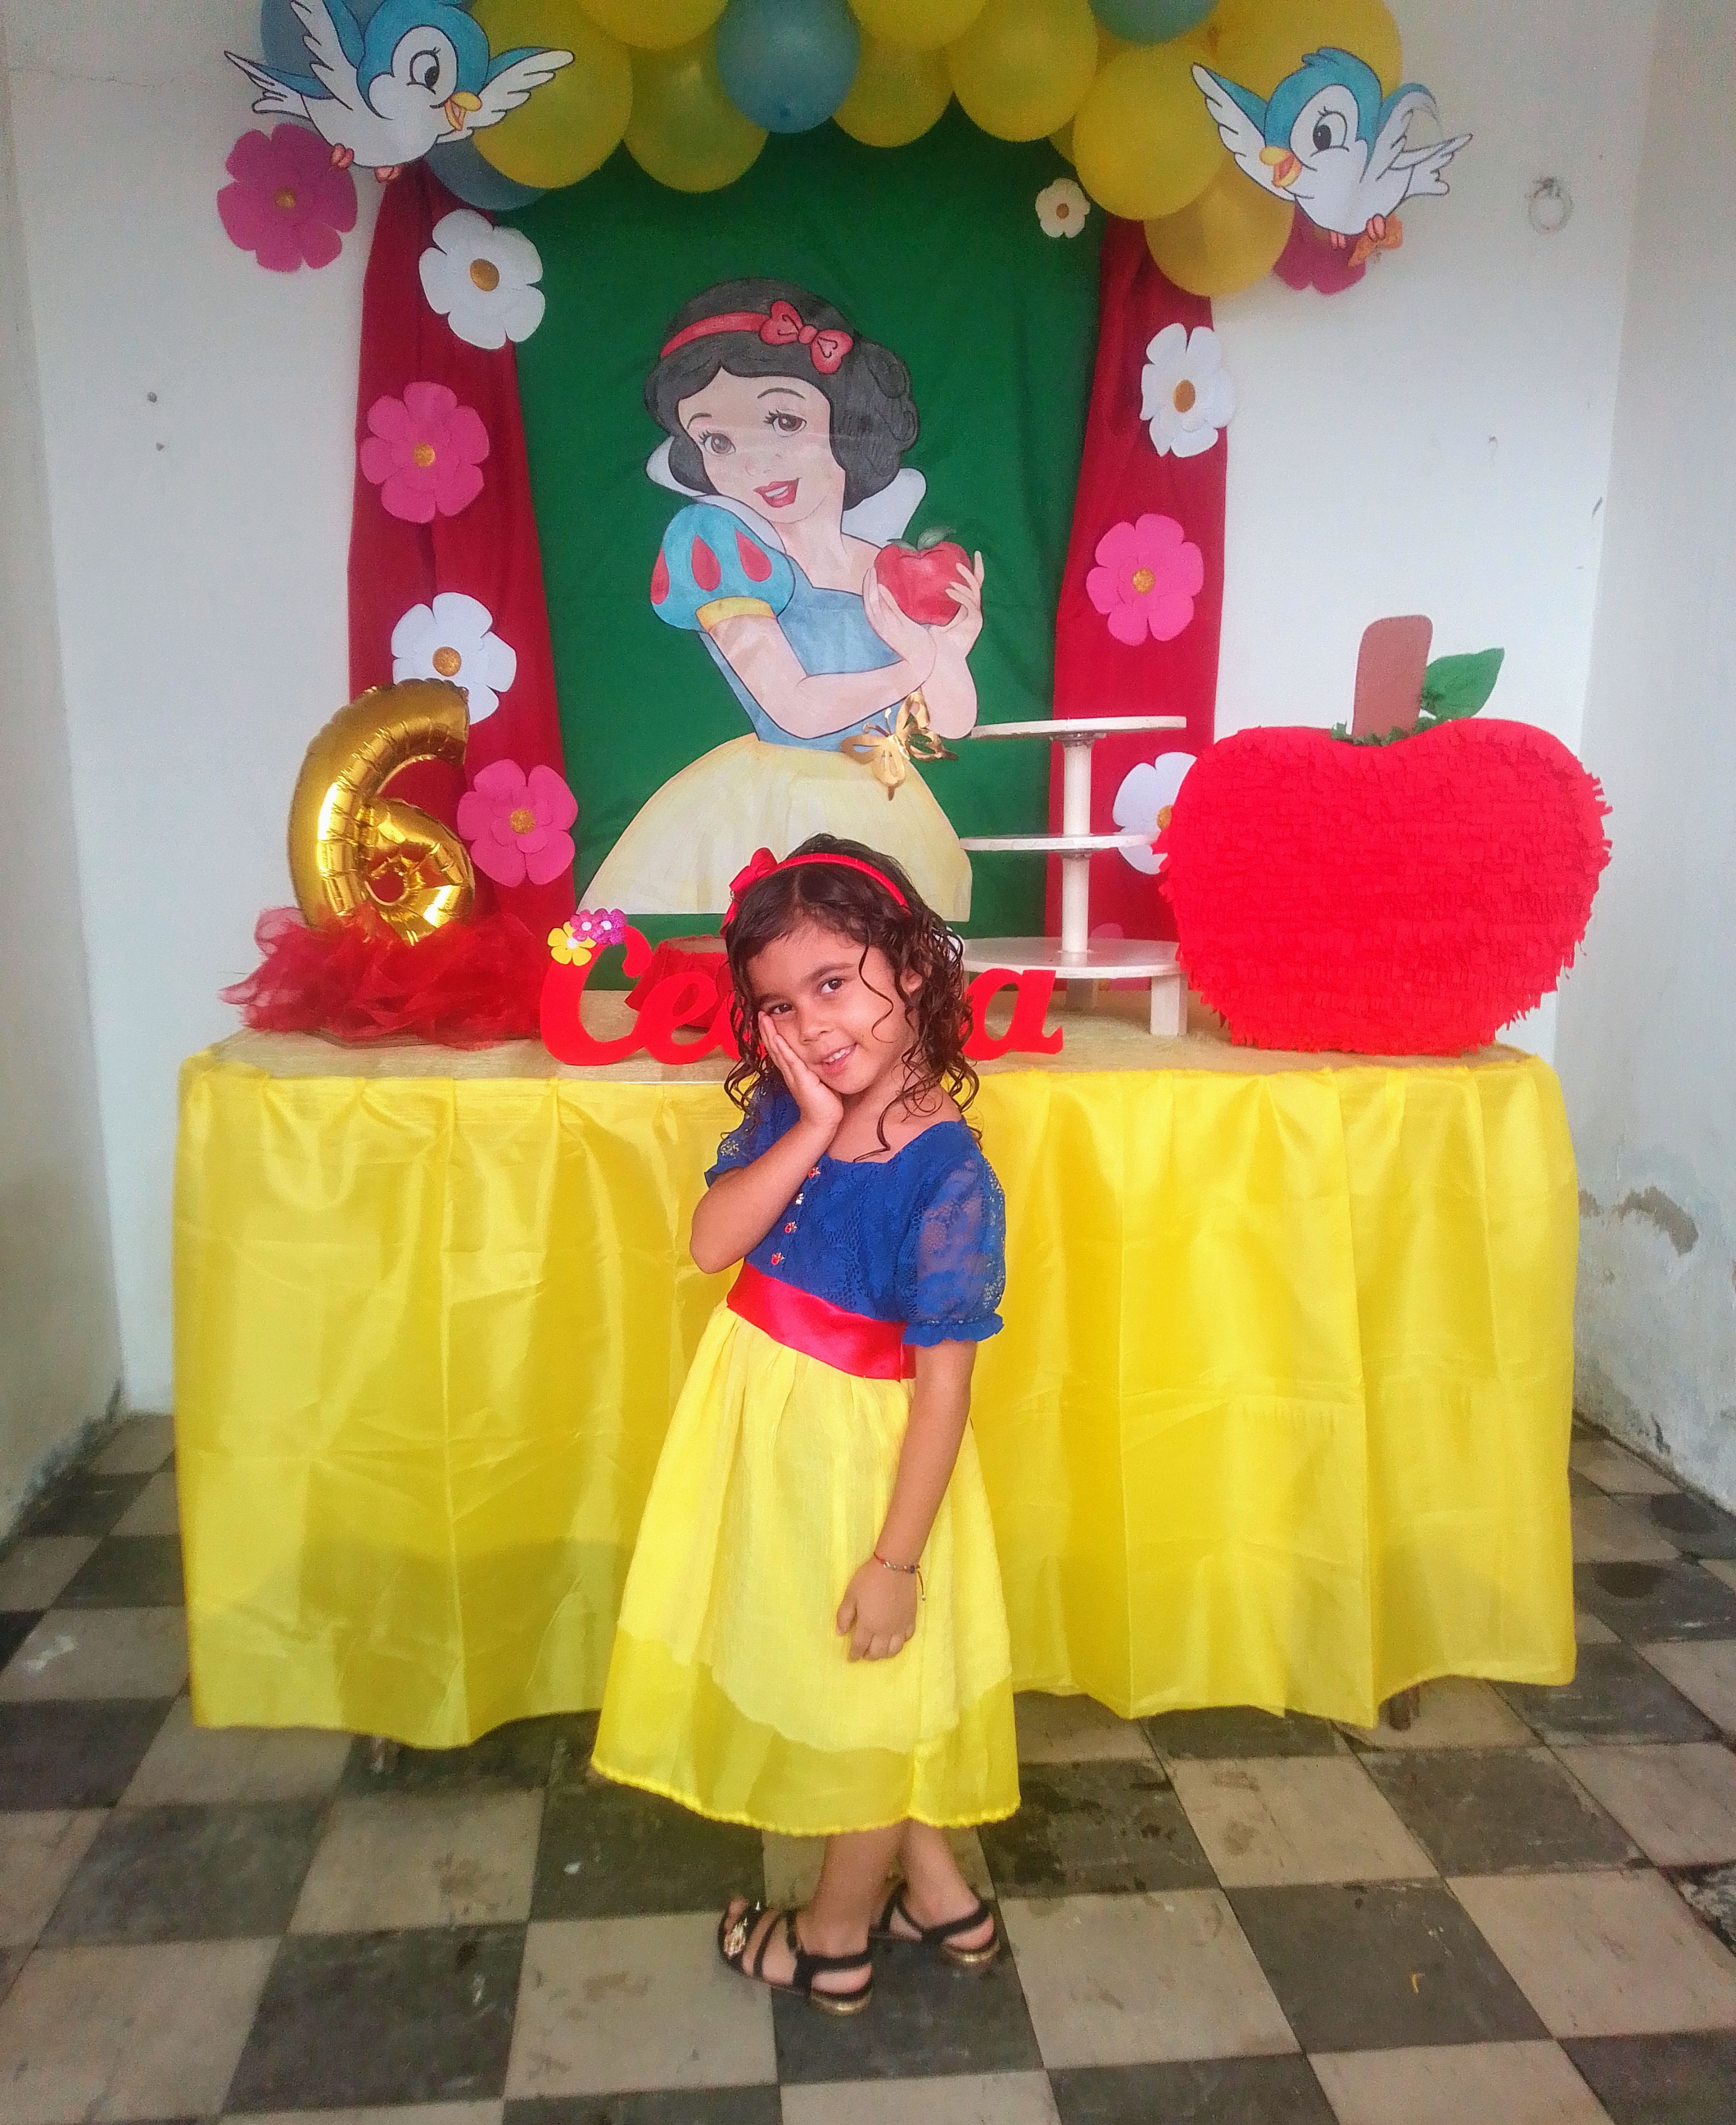
Este es el resultado de esta linda confección de hoy, mi niña toda feliz y luciendo como su su princesa soñada en su cumpleaños..
This is the result of today's lovely creation, my little girl is all happy and looking like her dream princess on her birthday.
Es tan sencillo proponerse algo, cuando se trata de complacer y hacer feliz a tu persona favorita. Espero le haya gustado, cuéntenme que les pareció, nos vemos pronto.
It's so easy to set a goal when it comes to pleasing and making your favorite person happy. I hope you like it. Tell me what you think. See you soon.
🙋🏻Todas las imágenes de esta publicación son de mi autoria capturadas de mi dispositivo Smooth 6.5, primera imagen editada en PicsArt | Texto original traducido en el traductor de Google.
All images in this post are my own, captured from my Smooth 6.5 device, first image edited in PicsArt | Original text translated in Google translator.
