

Linda noche tenga toda la comunidad de jewelry, espero hayan pasado un cálido día!! Hoy me encuentro muy contenta de darle la bienvenida a un nuevo tutorial donde les en enseñaré a ser muy creativos para tener unos lindos aretes de helados...
Lo más bonito de crear nuestros propios accesorios es la imaginación que muchas veces podemos tener, idealizar lo que queremos hacer y de una vez pensar en el resultado que queremos tener, causa mucho entusiasmo, en particular soy amante de crear accesorios muy poco comunes debido a que llaman mucho la atención de las personas y este para de aretes es uno de ellos..¿Aretes de helados?, especialmente barquillas o conos, en definitiva son accesorios que cualquiera quedaría impresionado y hoy te enseño como crearlos en sencillos pasos.. Acompáñame hasta el final.
Have a nice evening, all the jewelry community! I hope you had a wonderful day! Today I'm very happy to welcome you to a new tutorial where I'll teach you how to be very creative and create some cute ice cream earrings...The most beautiful thing about creating our own accessories is the imagination we often have. Idealizing what we want to do and then immediately thinking about the result we want to achieve is very exciting. I'm particularly fond of creating unusual accessories because they really catch people's attention, and this pair of earrings is one of them... Ice cream earrings? Especially cones or waffles. They're definitely accessories that would impress anyone, and today I'll show you how to create them in simple steps. Join me until the end.
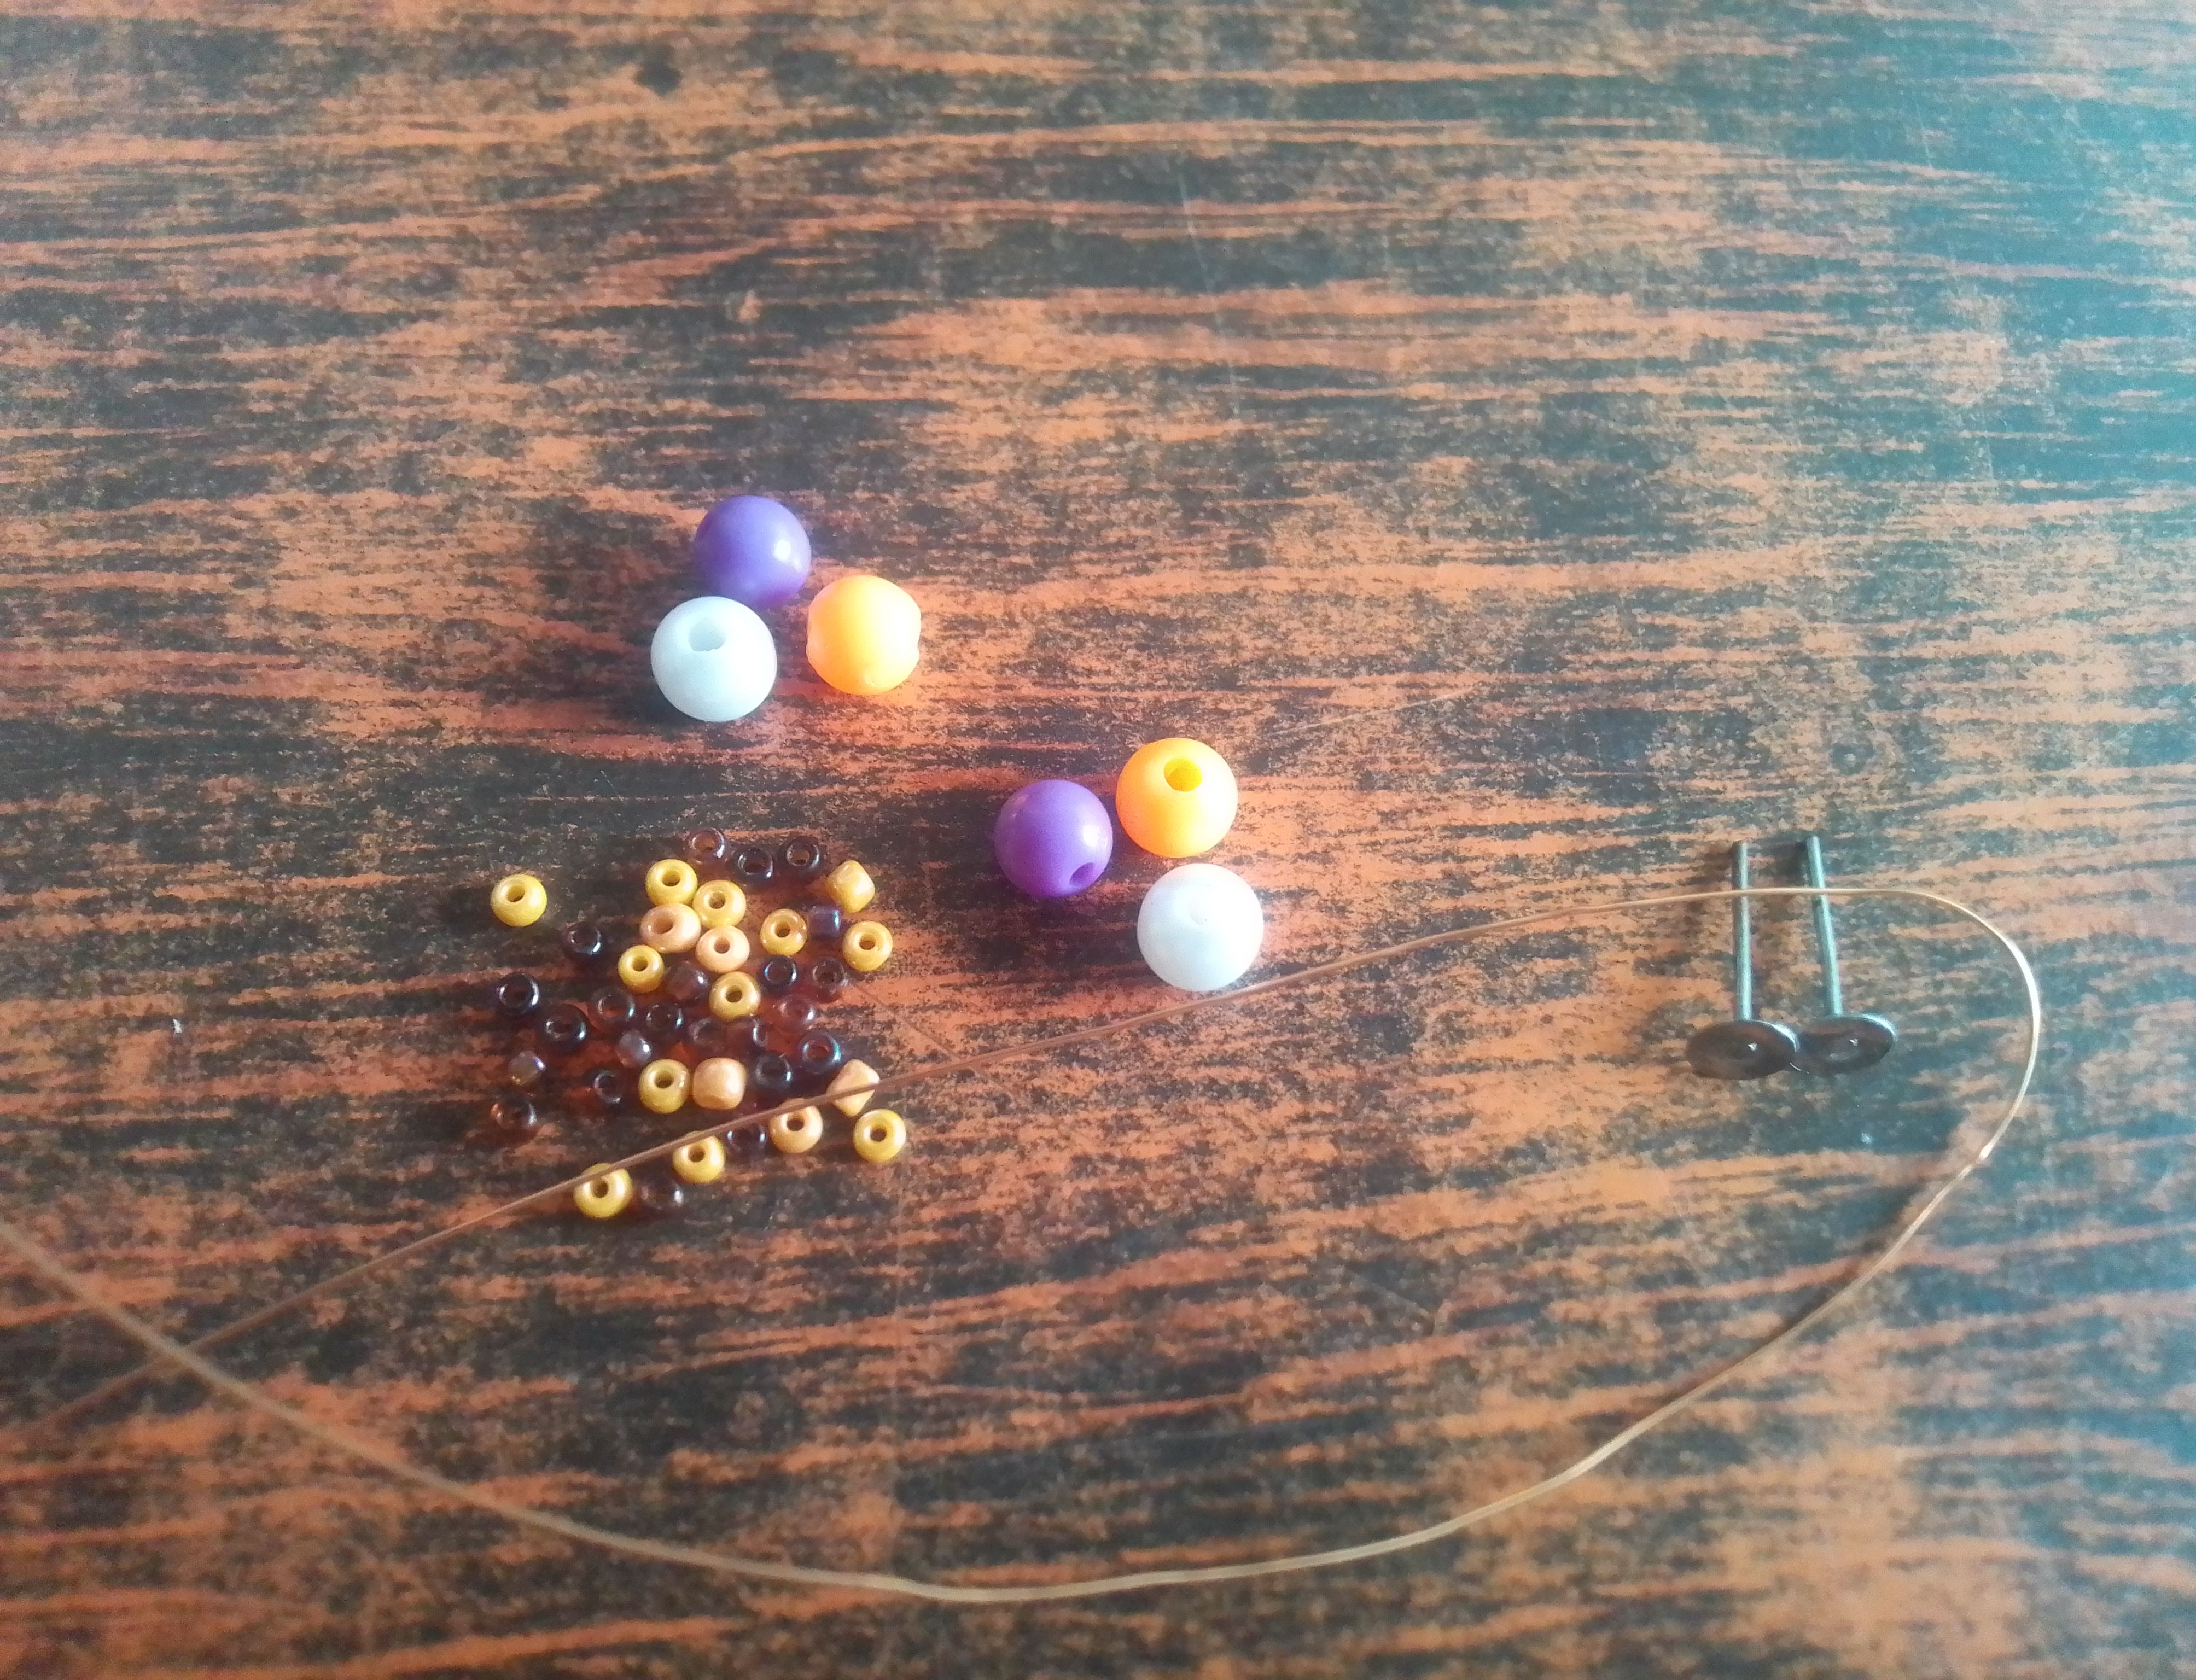
***Materiales que necesitas:***
***Materials you need:***
- Mostacillas marrones.
- Perlas medianas de colores.
- Alambre de bisutería.
- Ganchos.
- Pinza.
***PROCEDIMIENTO***
Procedure
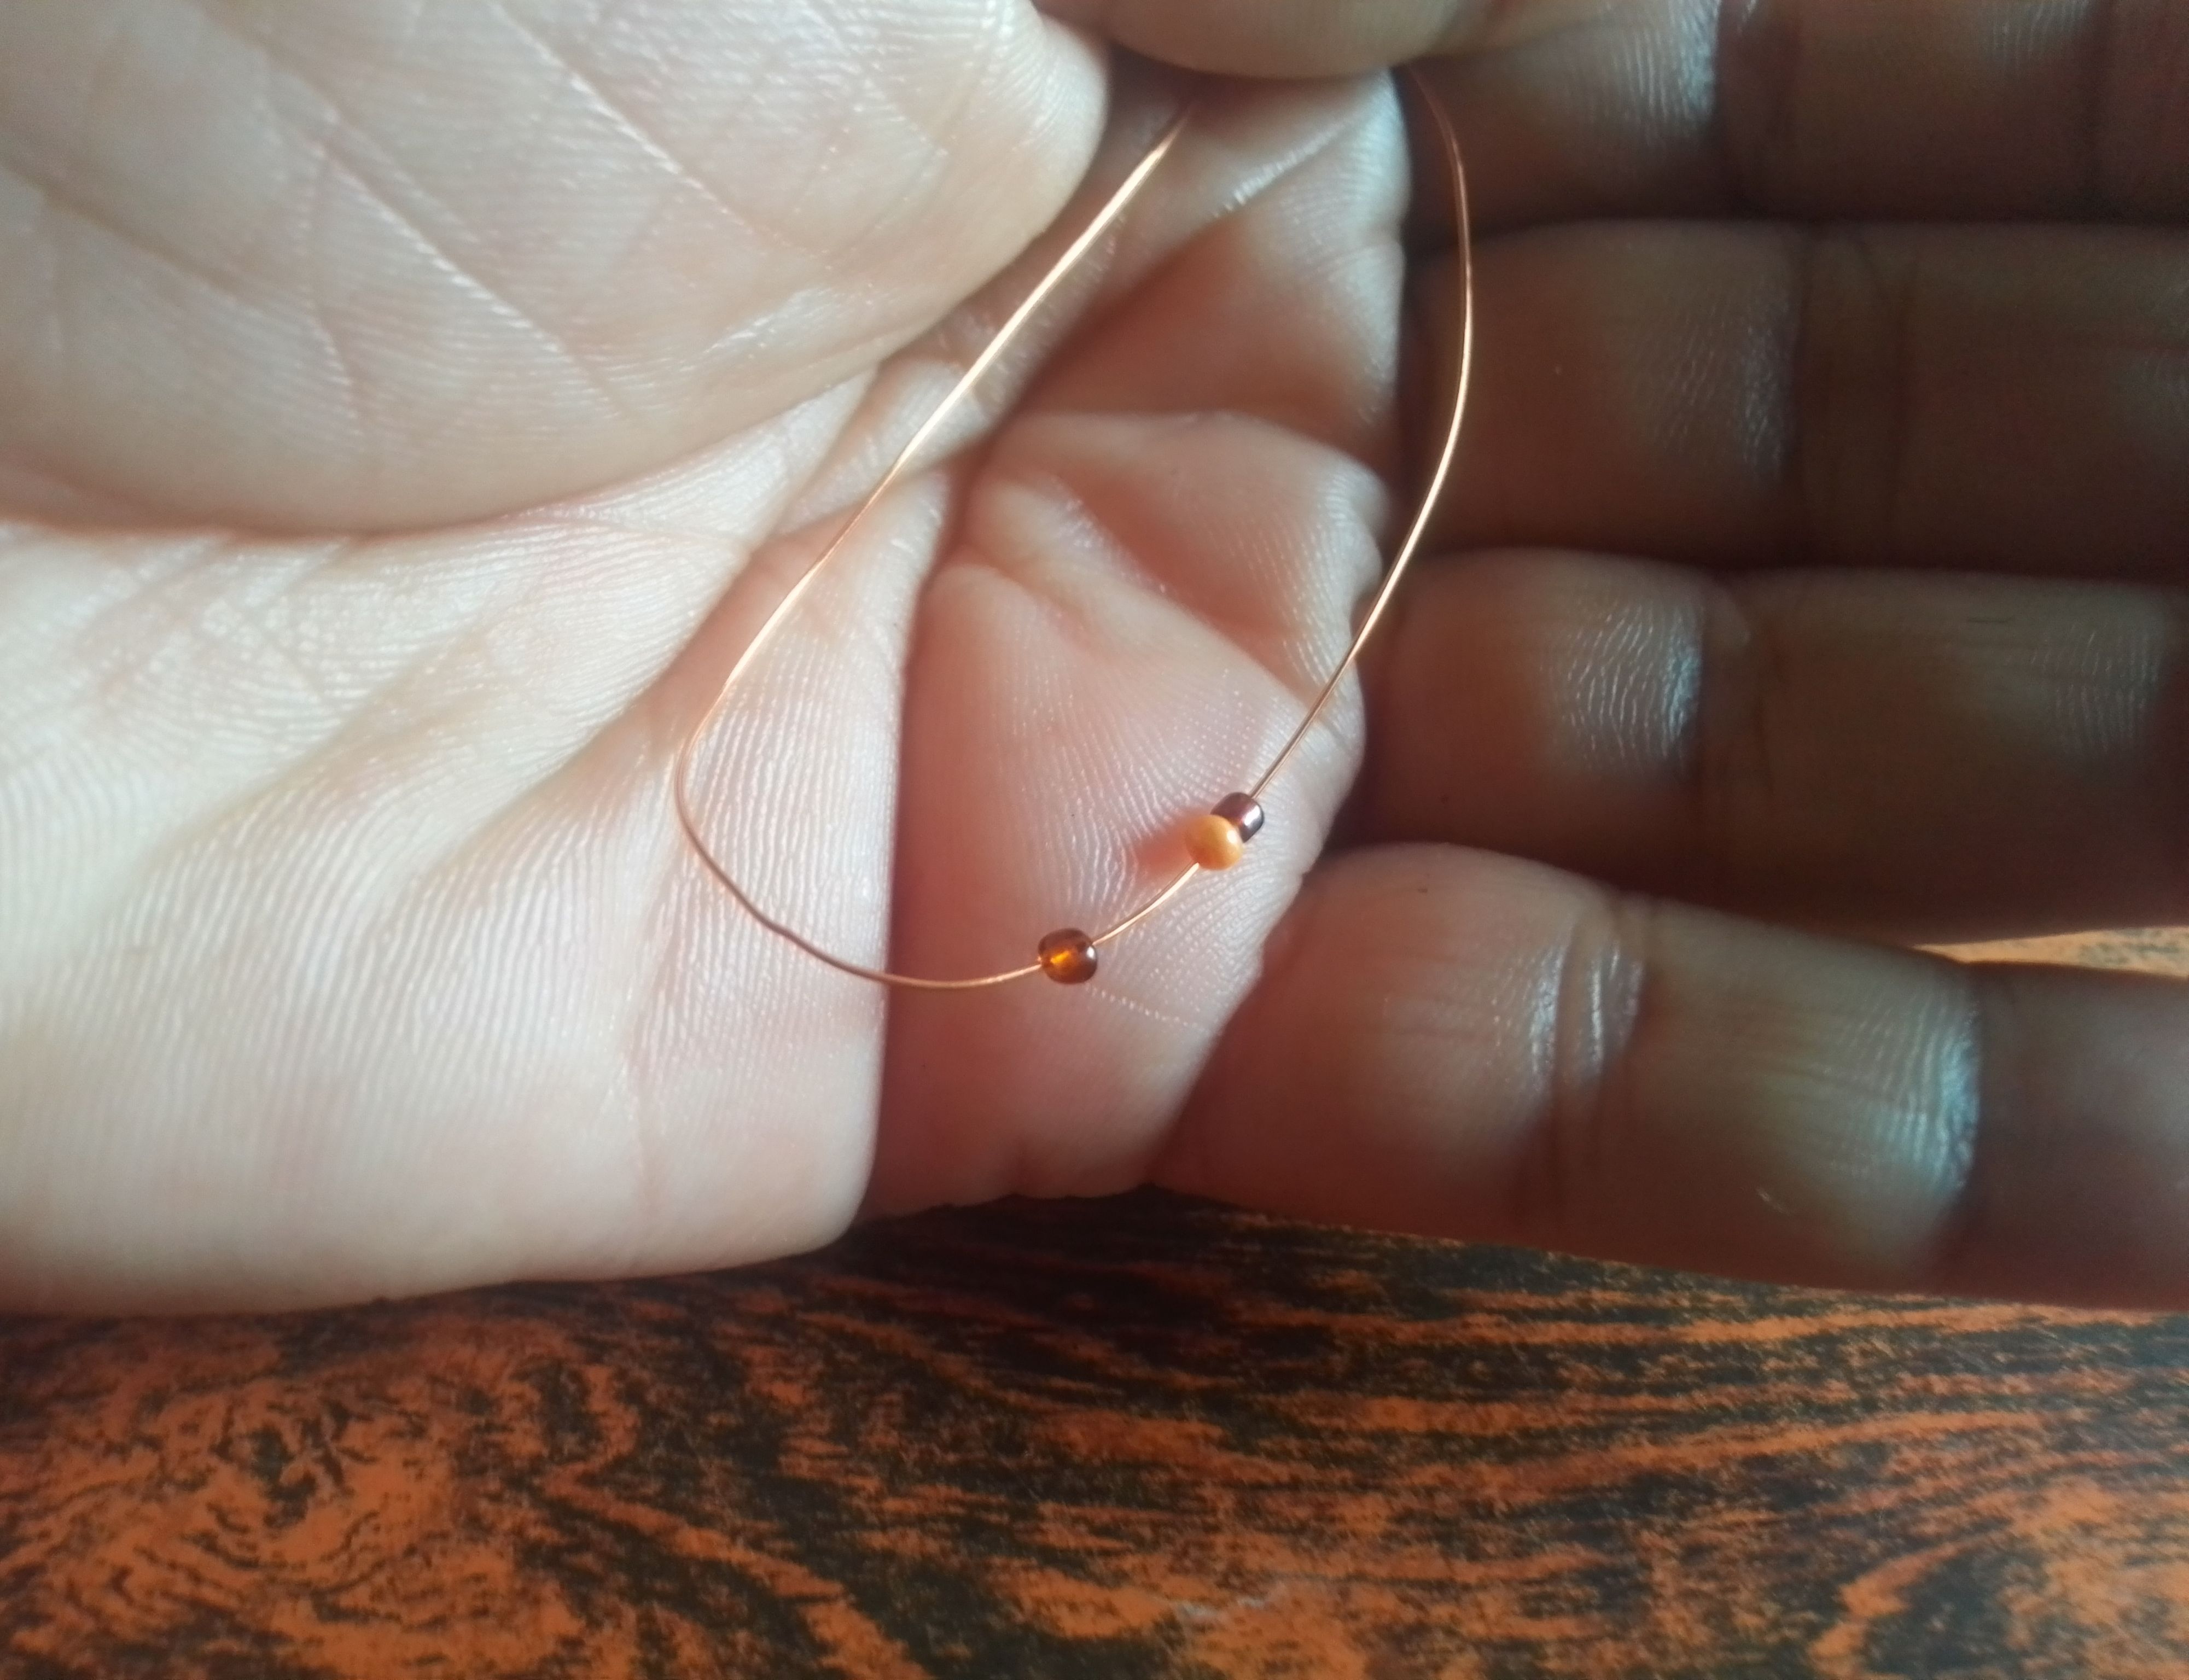
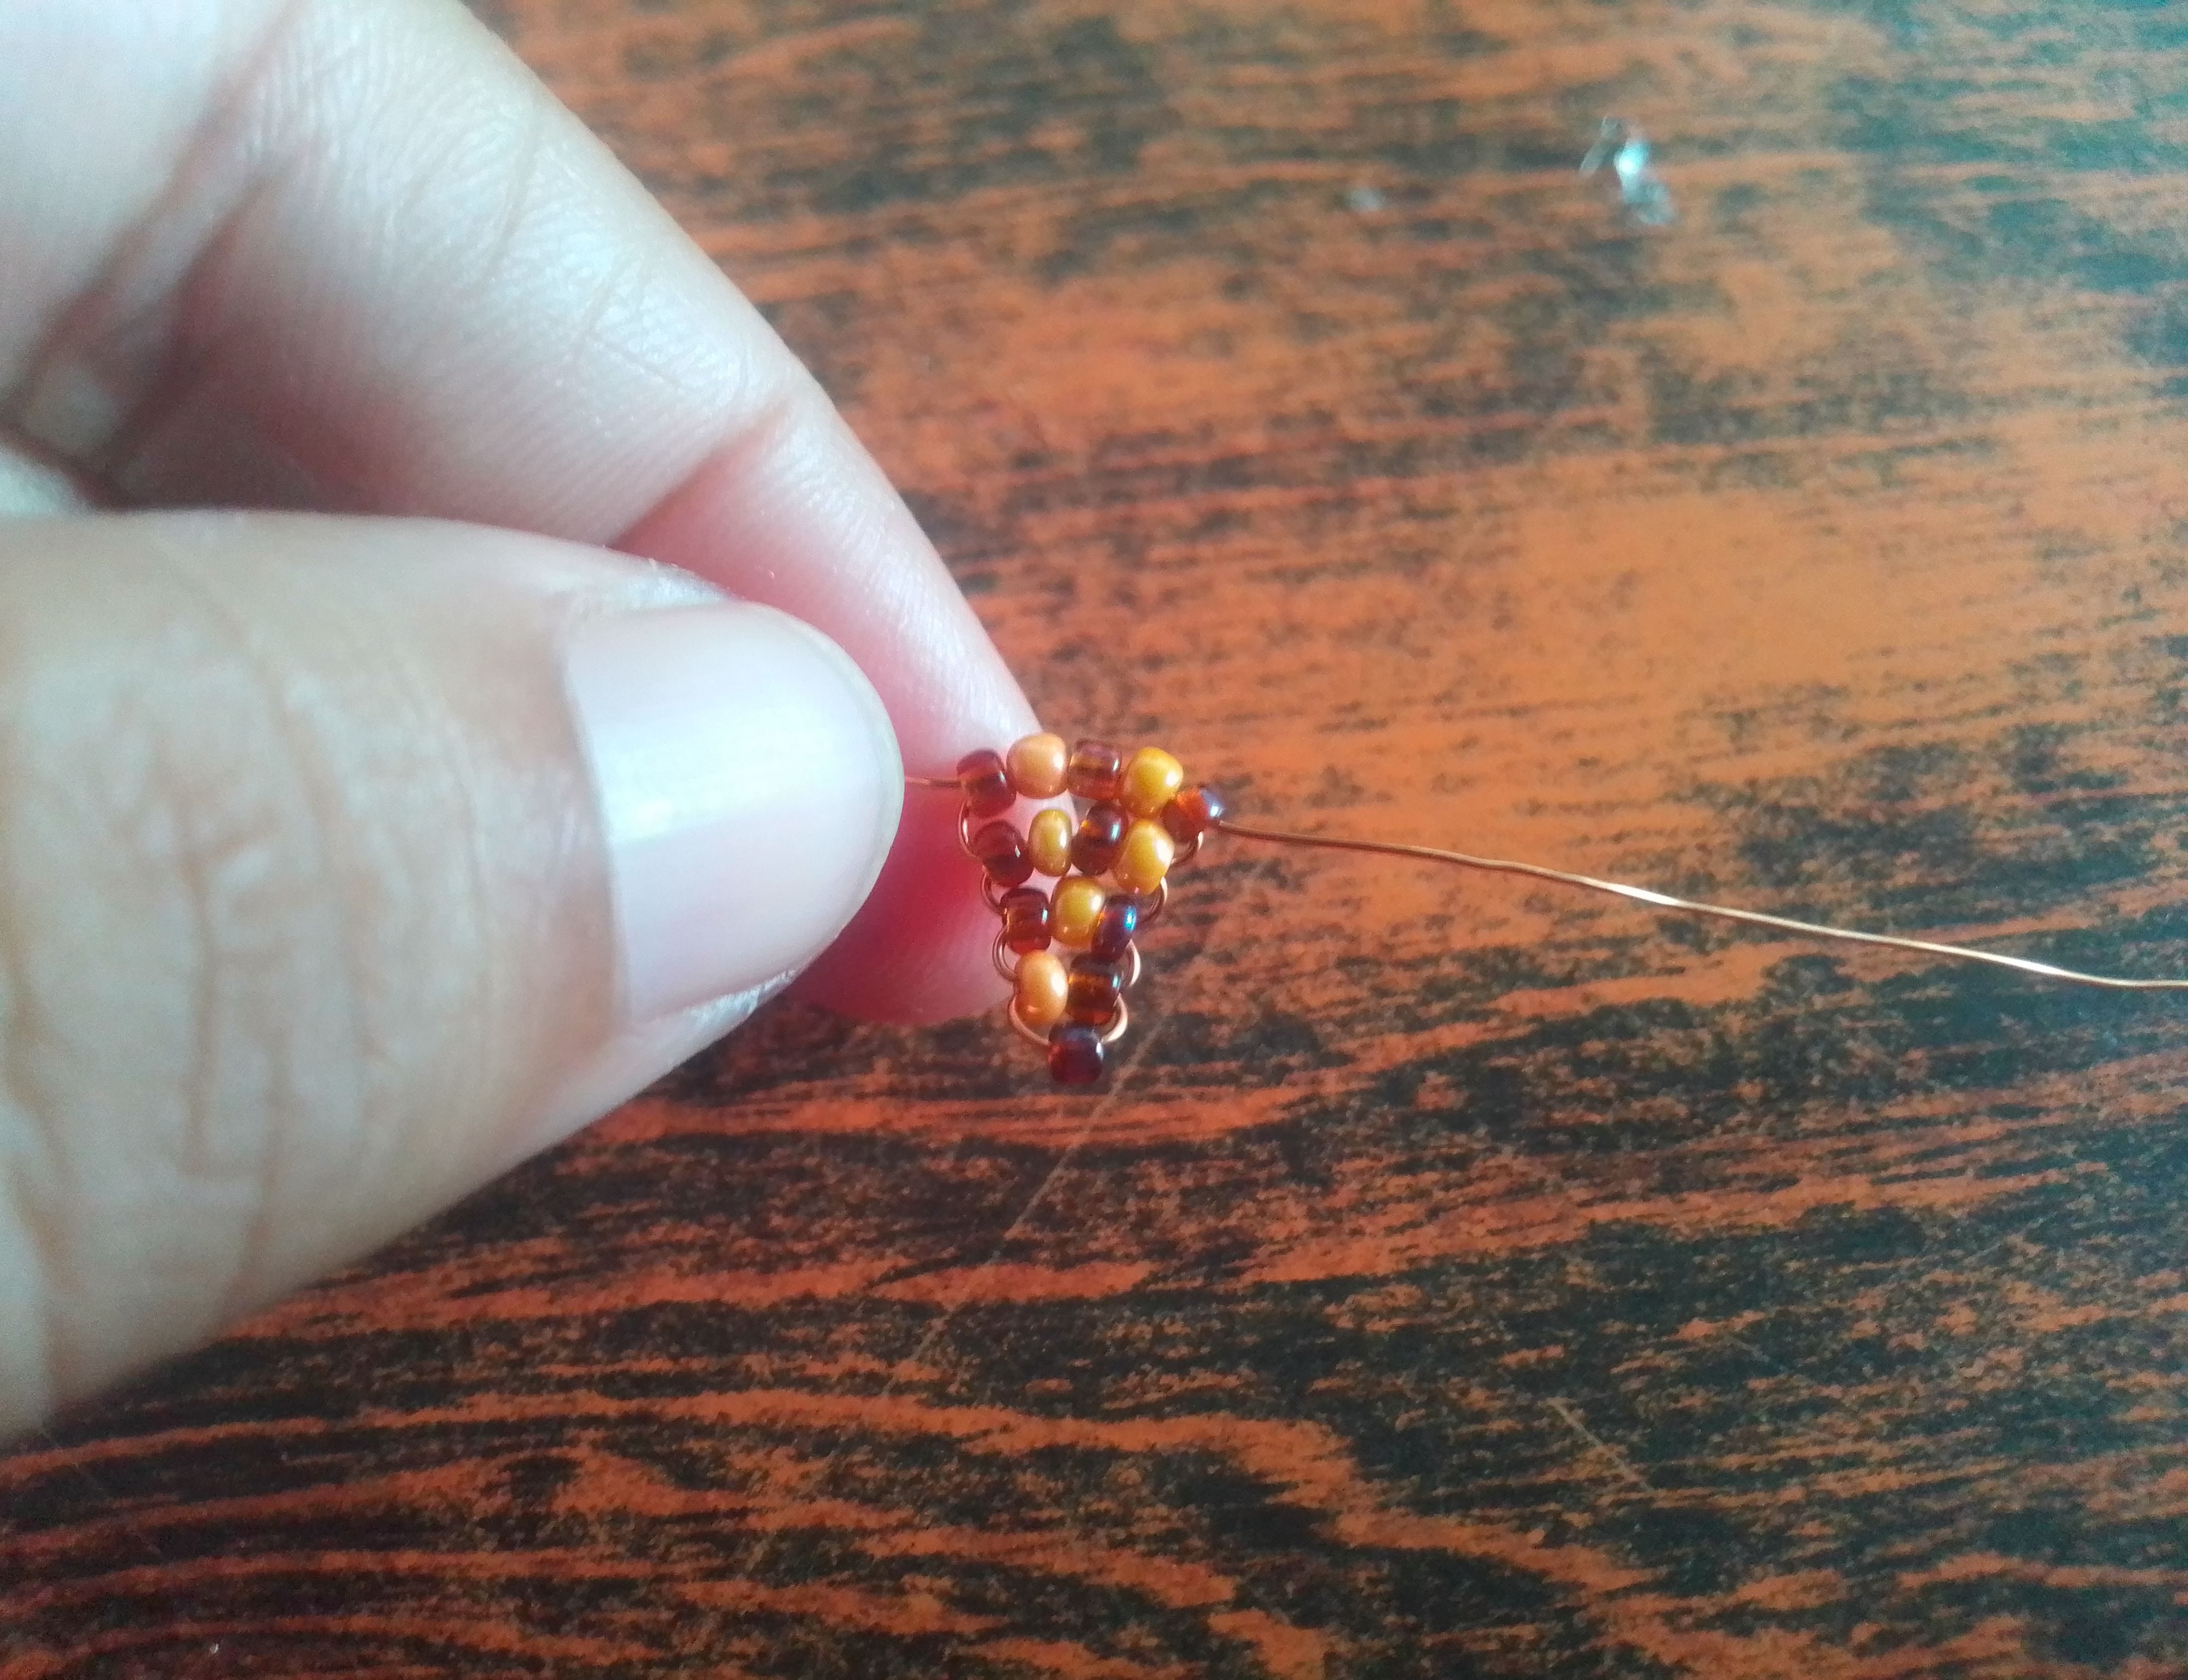
🌟Paso 01
El primer paso que daremos, será cortar 20cm de alambre en que introduciremos tres mostacillas color intercalada con el color amarillo y cruzamos el alambre por solo dos de ellas. Con estos pasos comenzará a formarse el cono.
🌟Step 01
The first step we will take is to cut 20cm of wire into which we will insert three colored beads interspersed with the yellow color and cross the wire through only two of them.
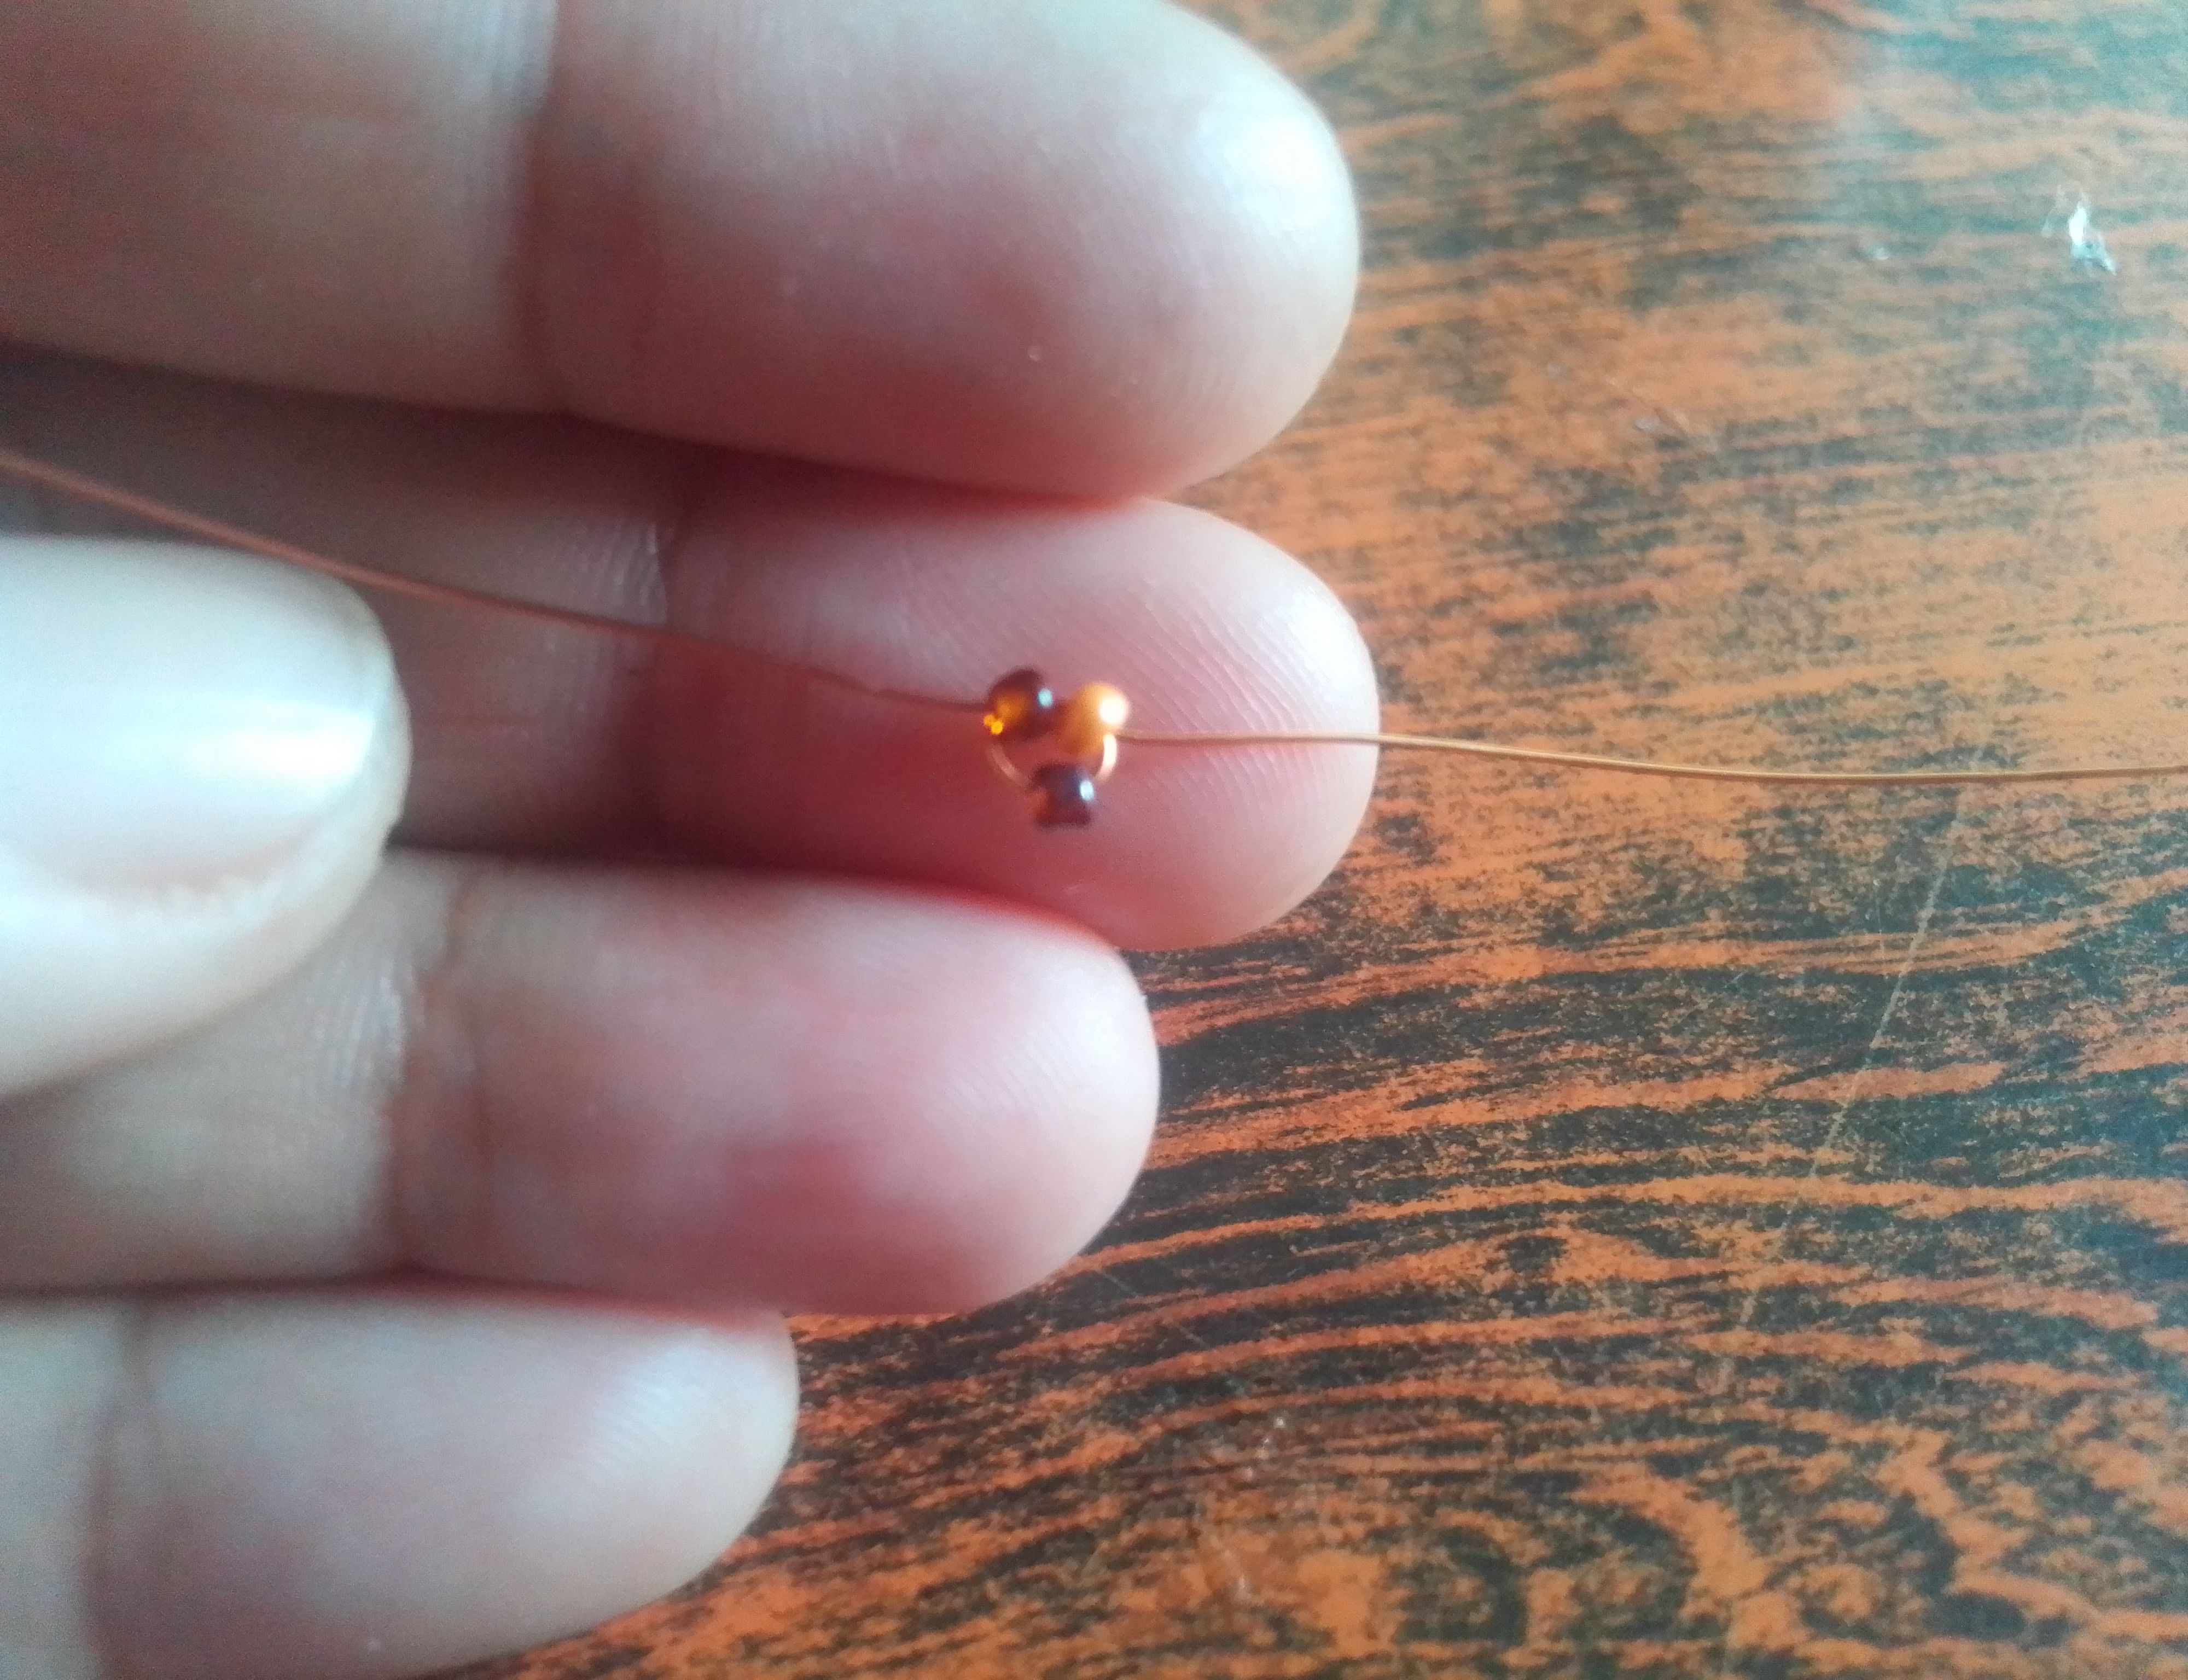
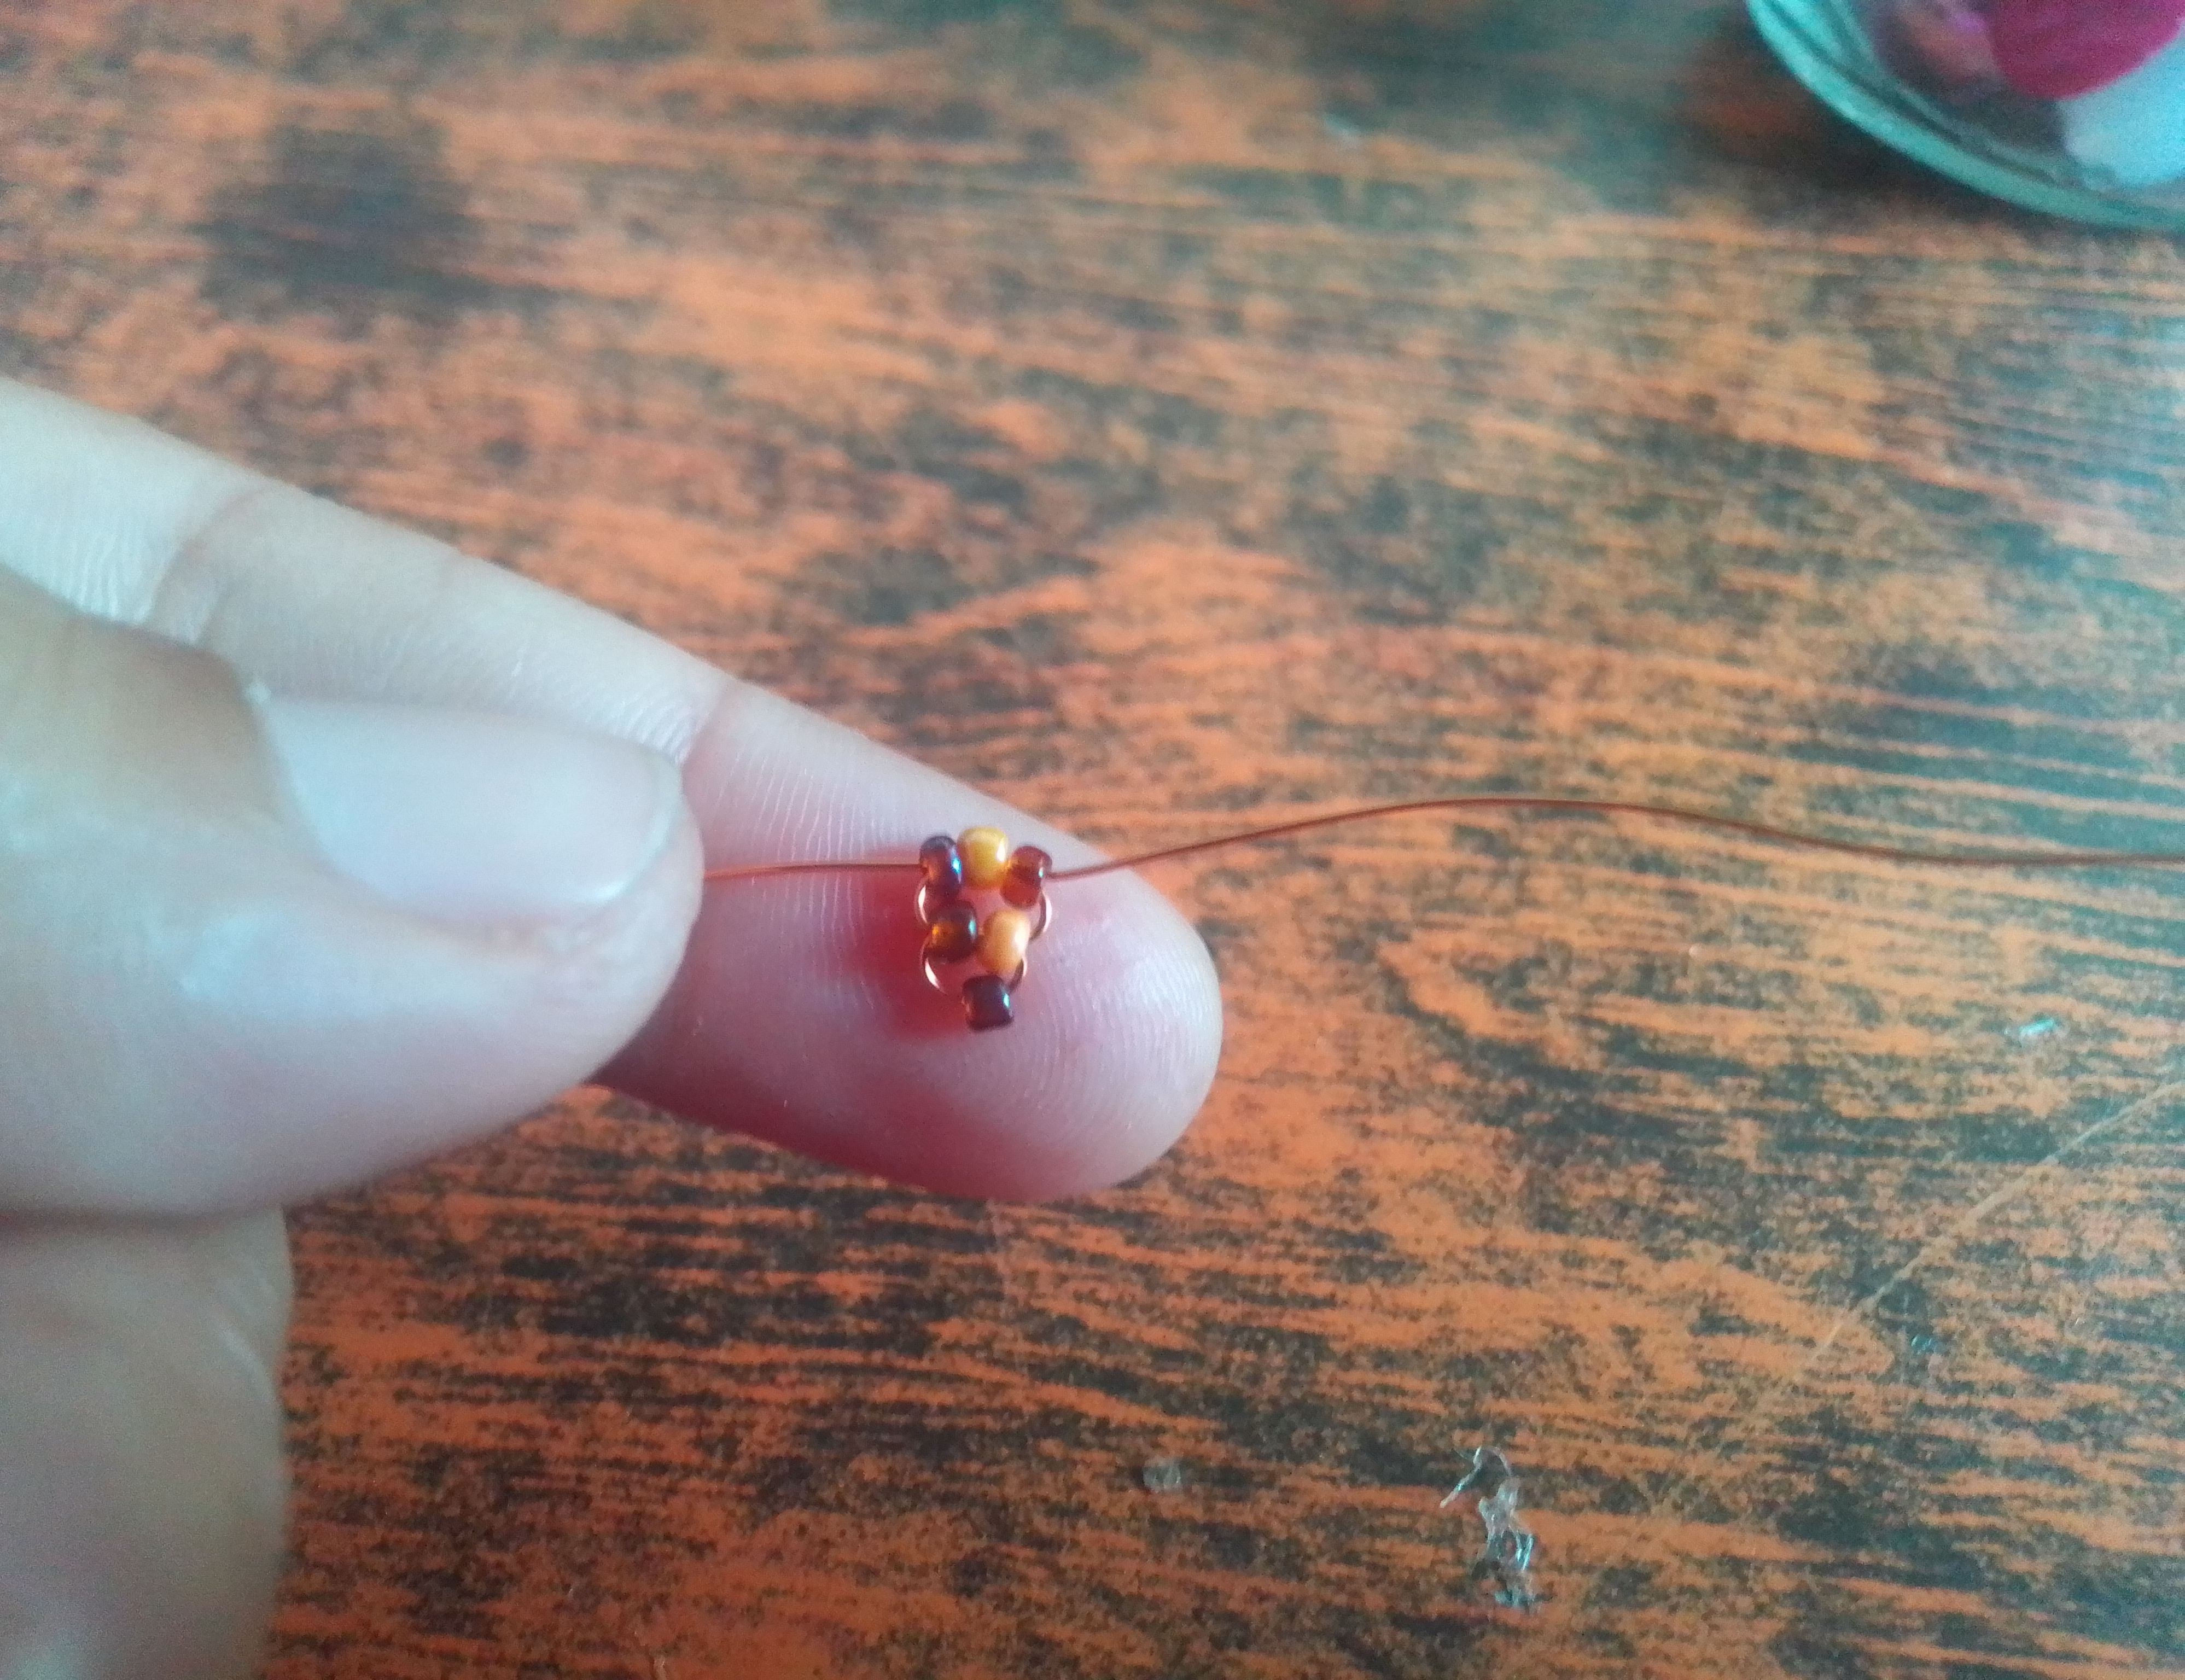
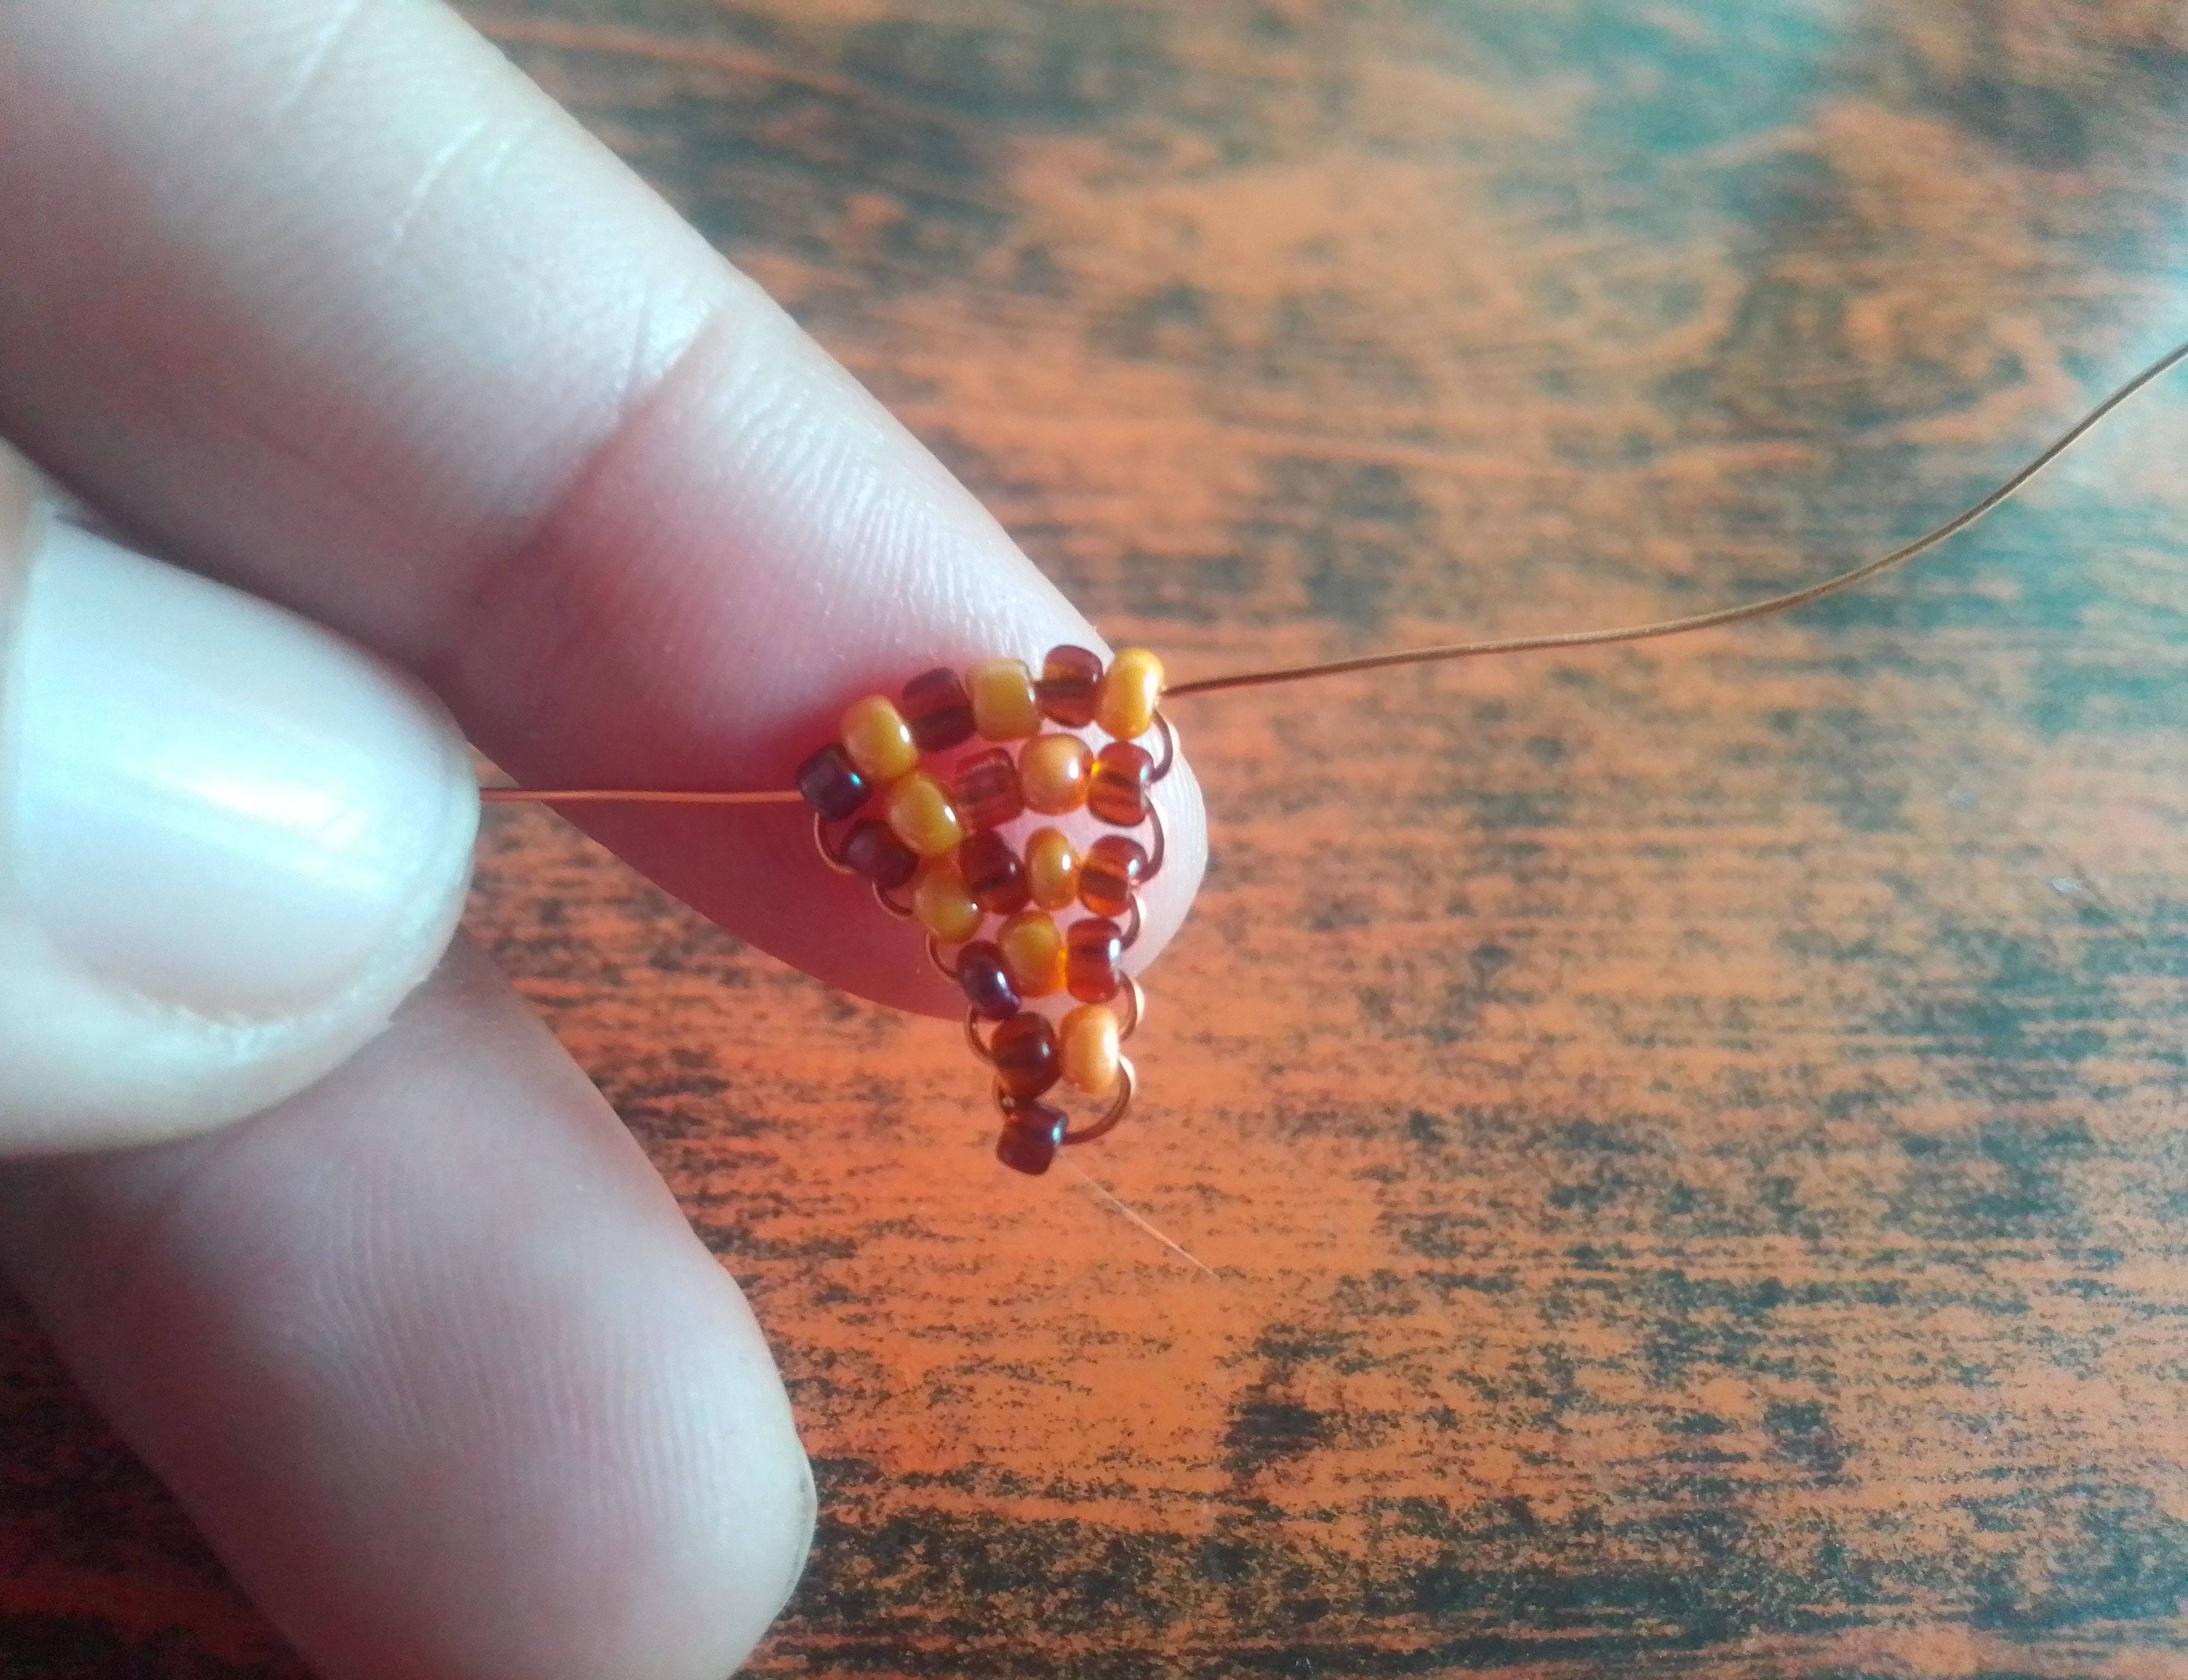
🌟Paso 02
Luego voy a seguro una secuencia de, tres , cuatro, cinco y seis mostacillas cruzadas de la misma manera. Introduzco de un extremo del alambre las mostacillas y cruzo.
🌟Step 02
Then I'll secure a sequence of three, four, five, and six crossed beads in the same way. I insert the beads from one end of the wire and cross them.
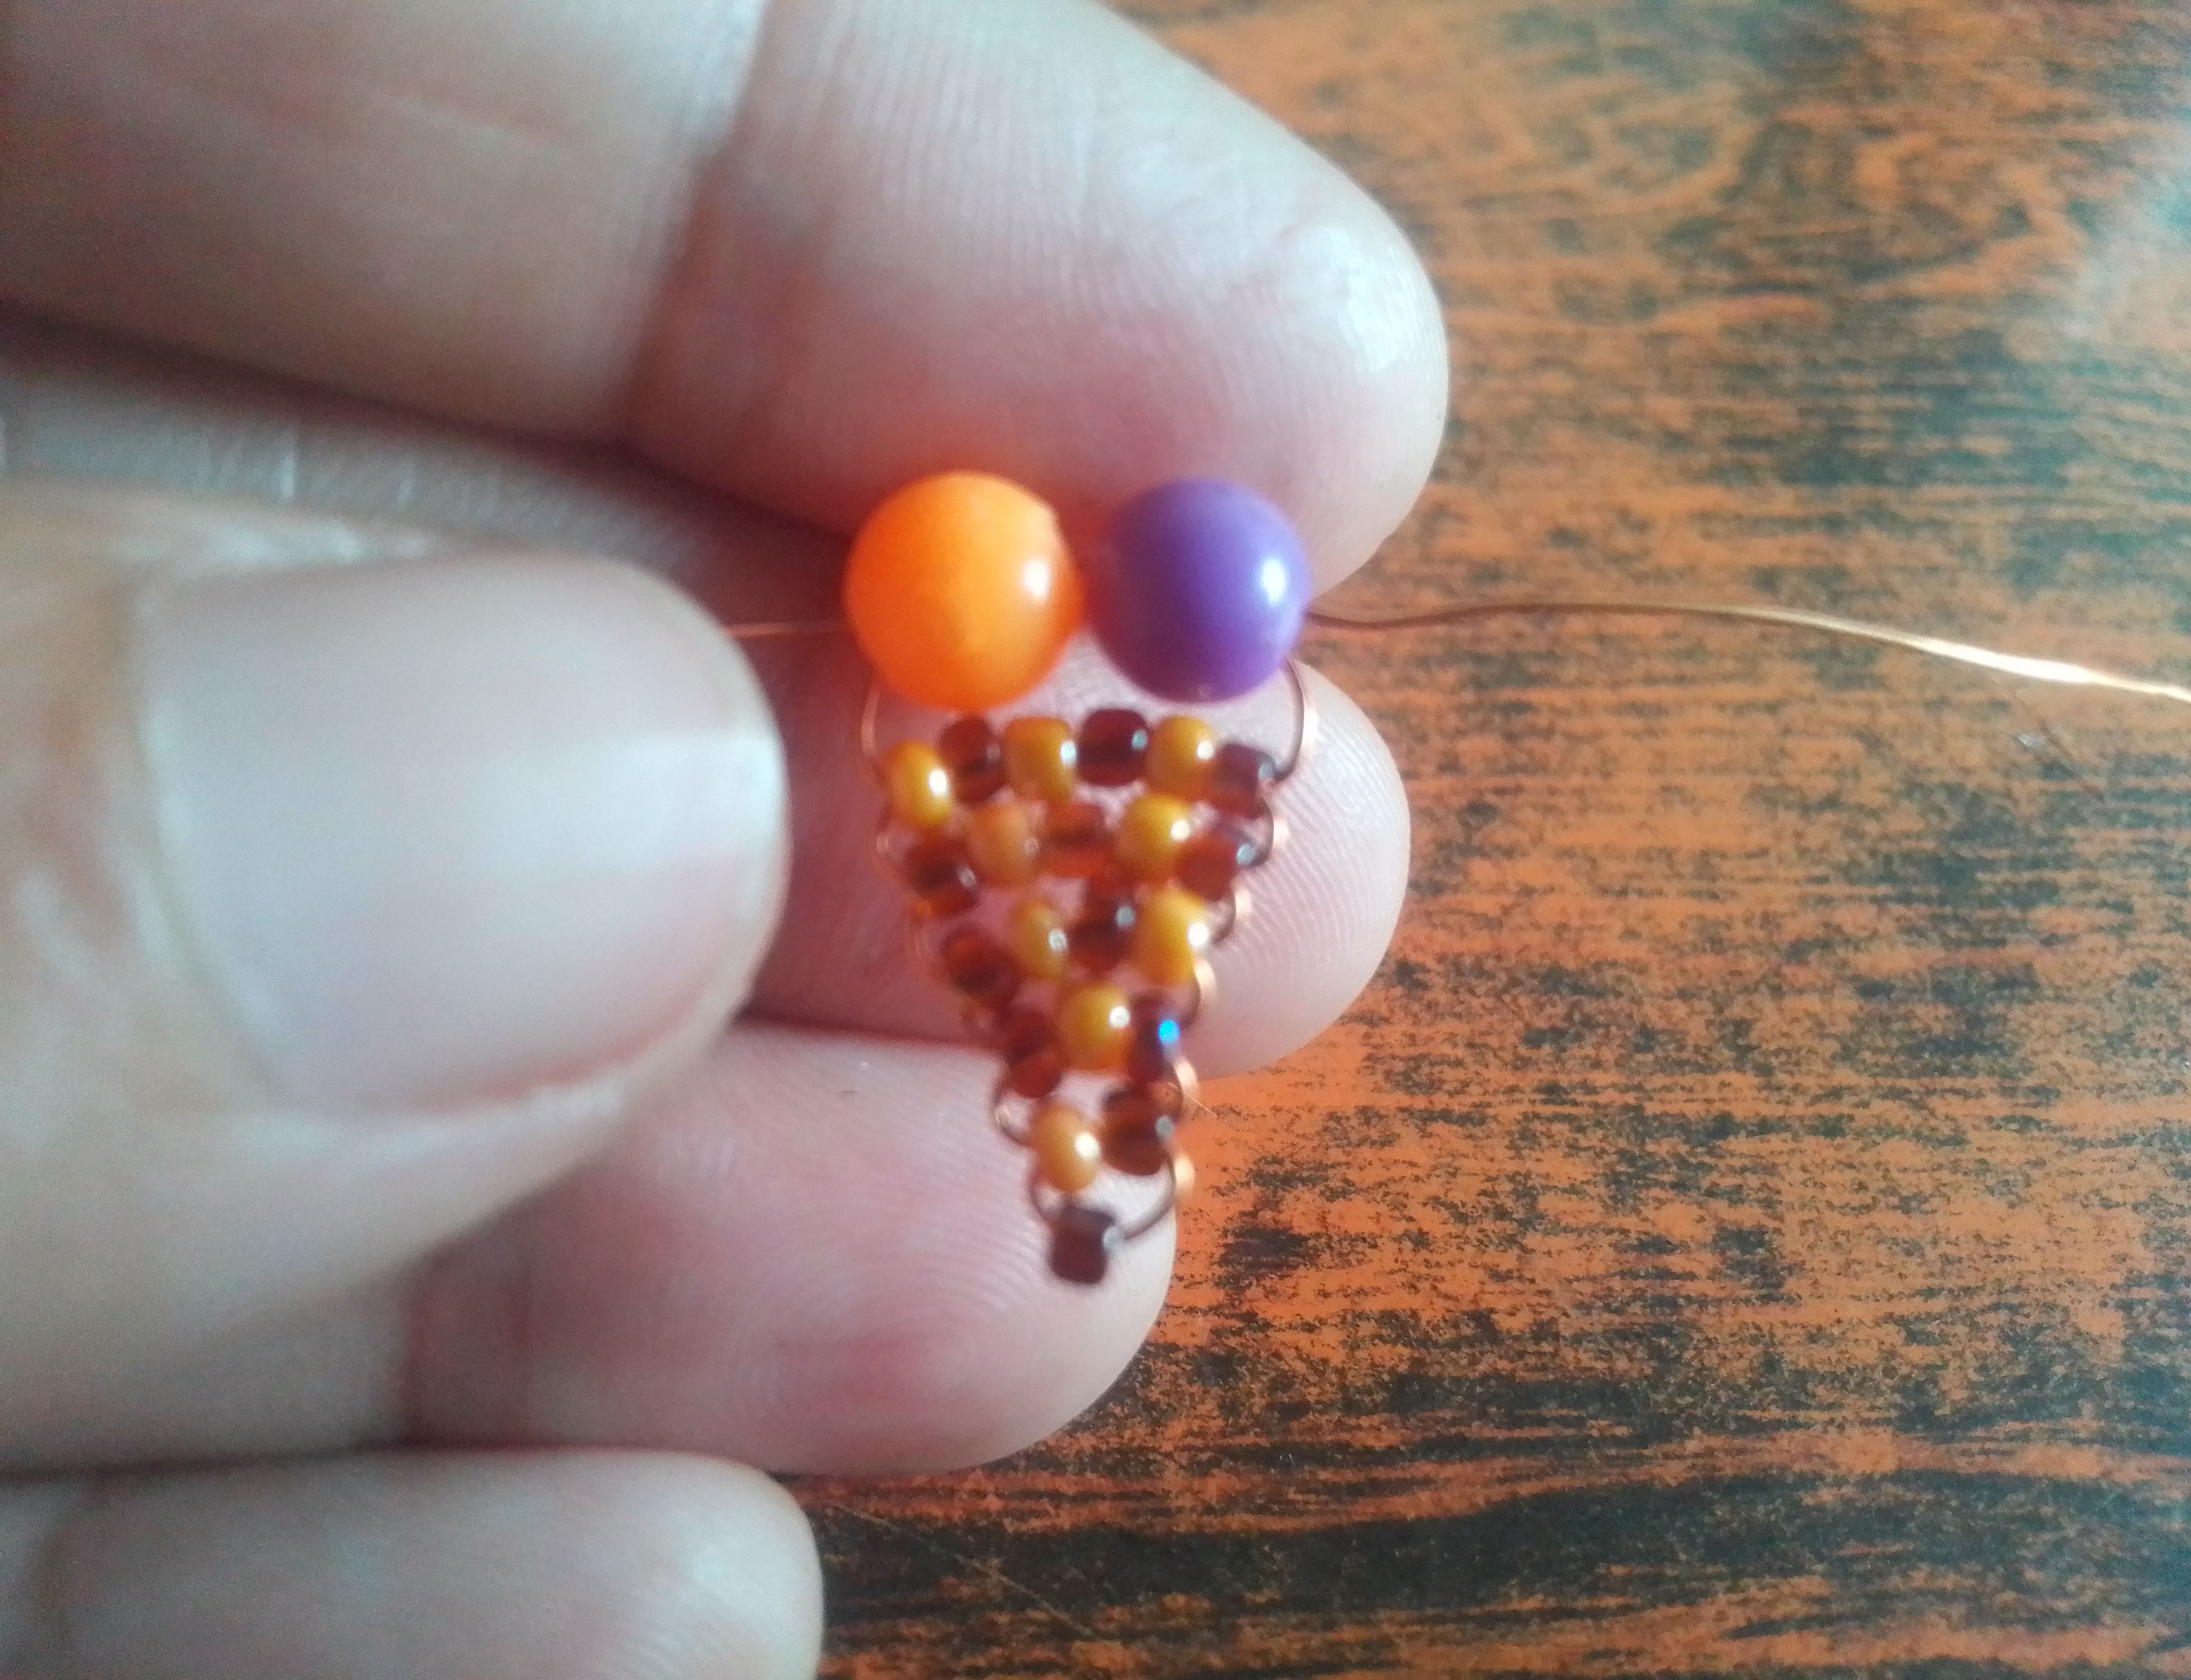
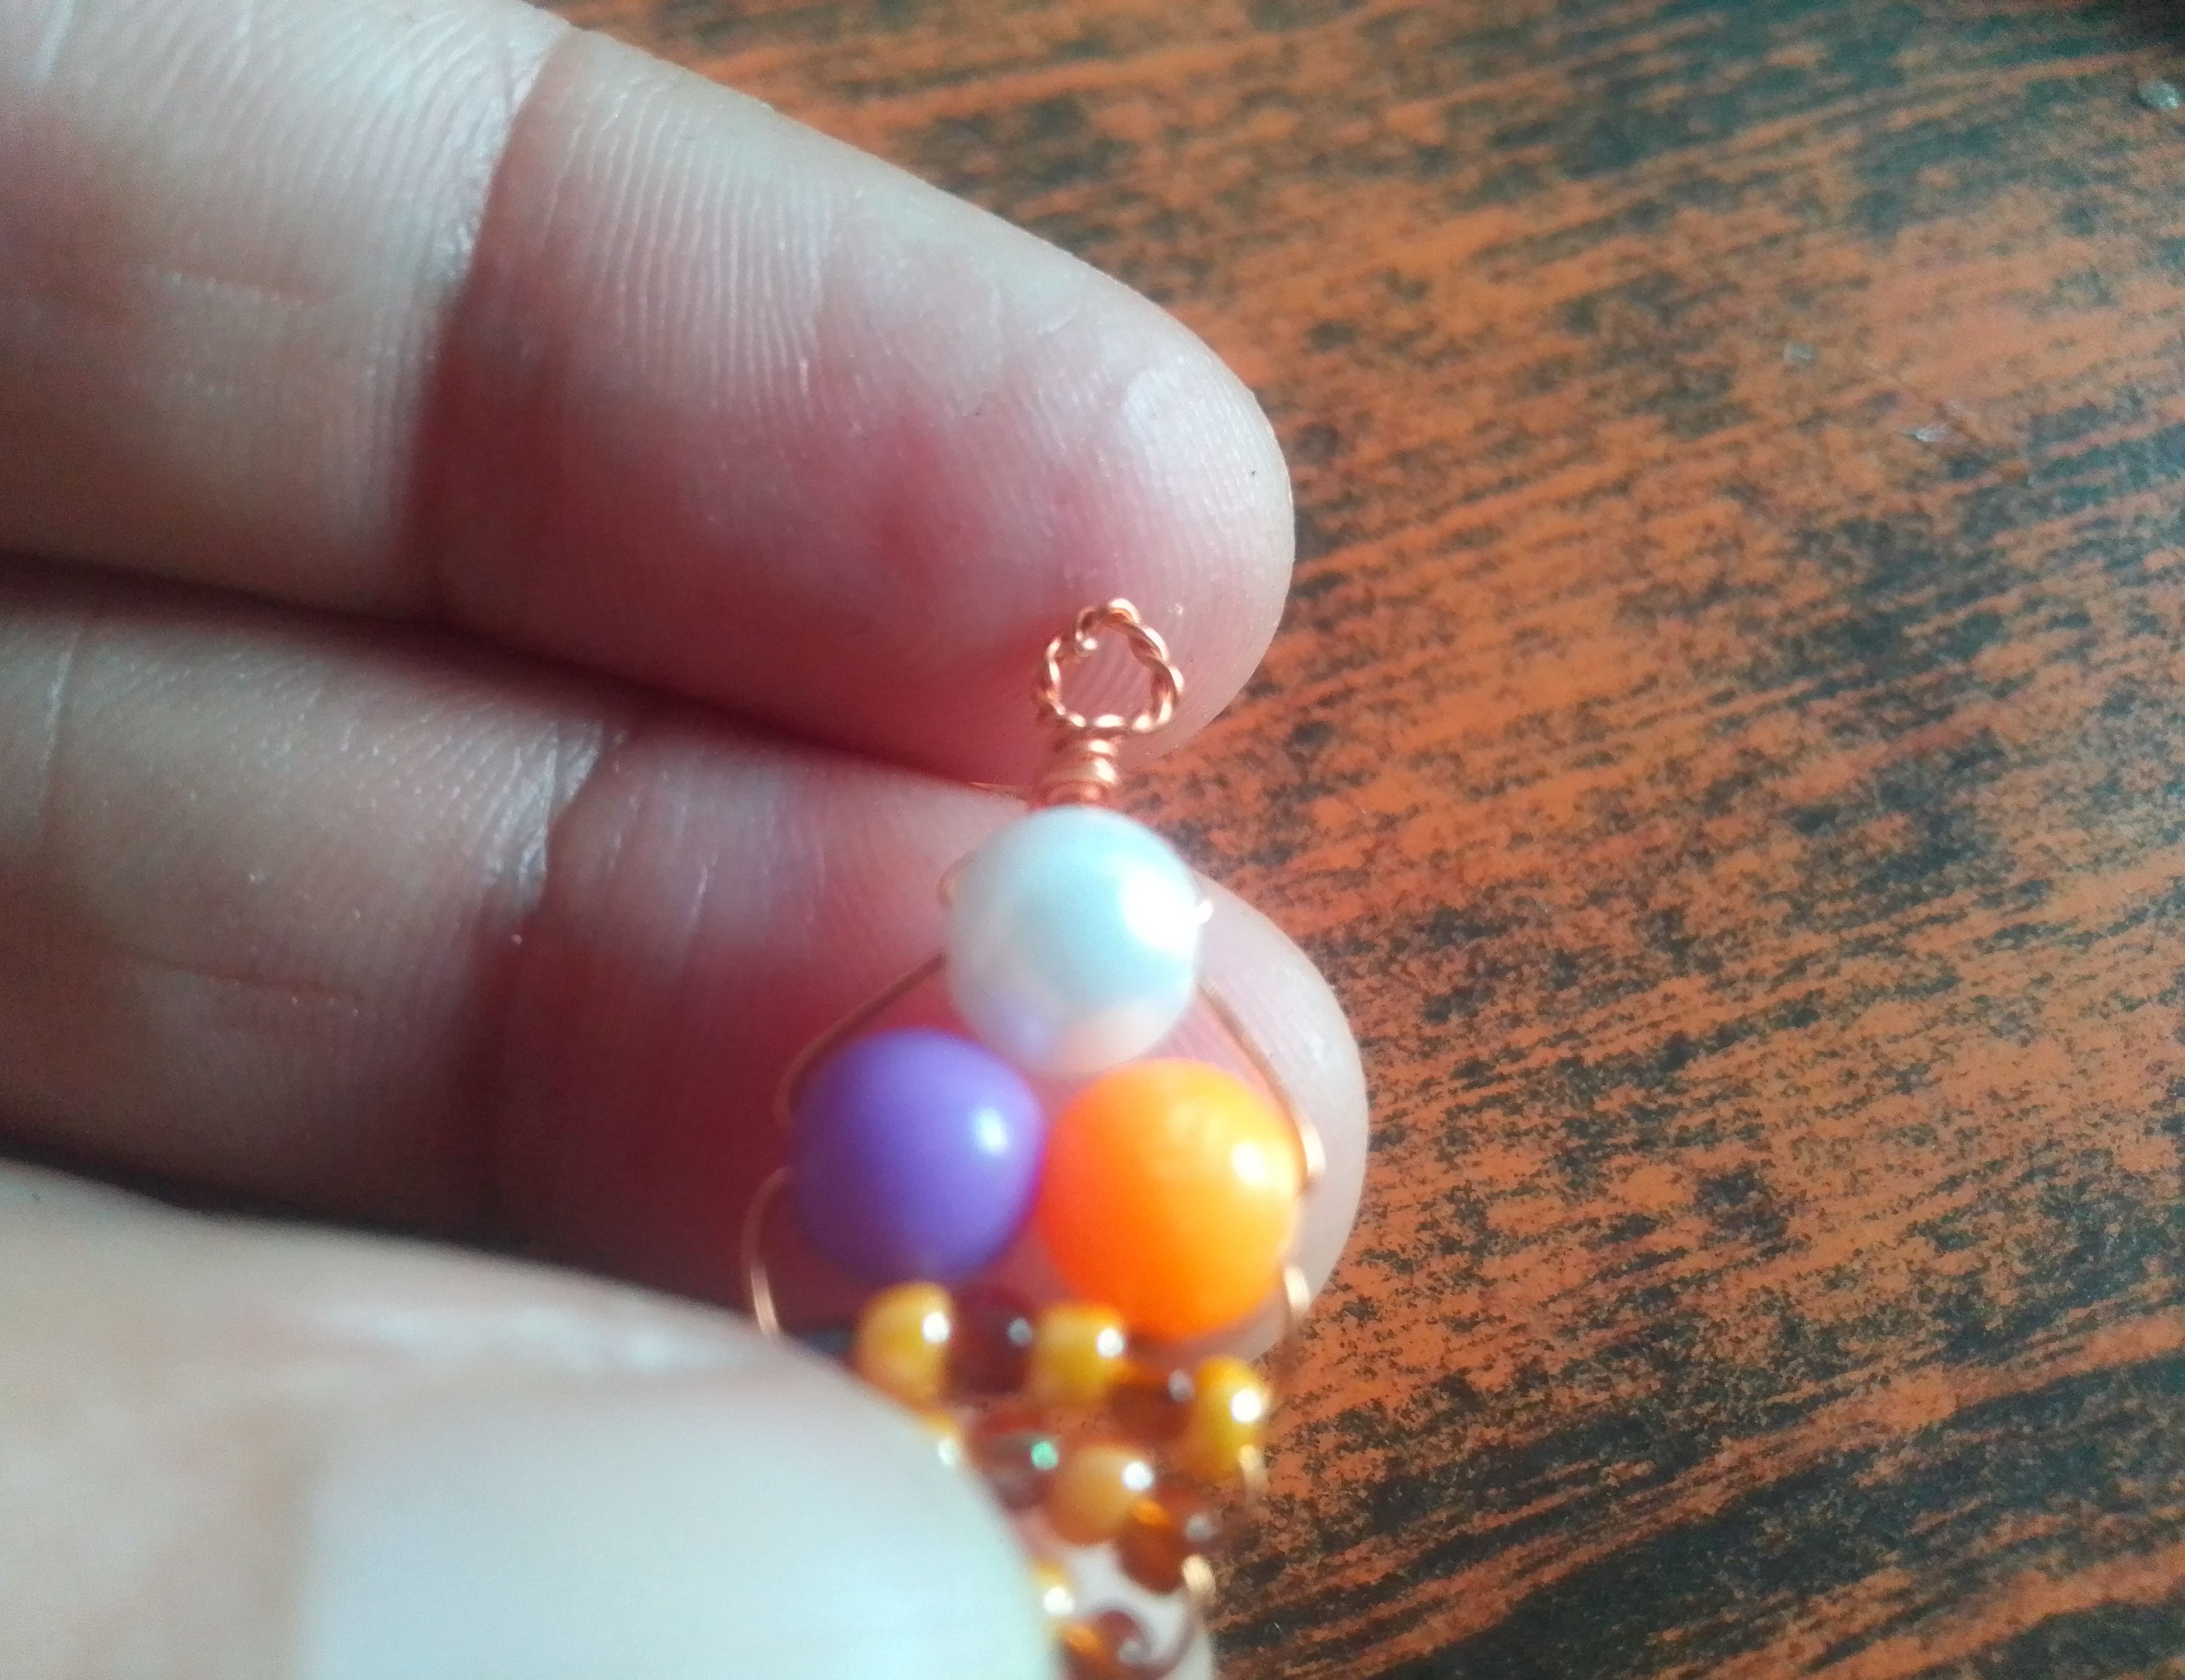
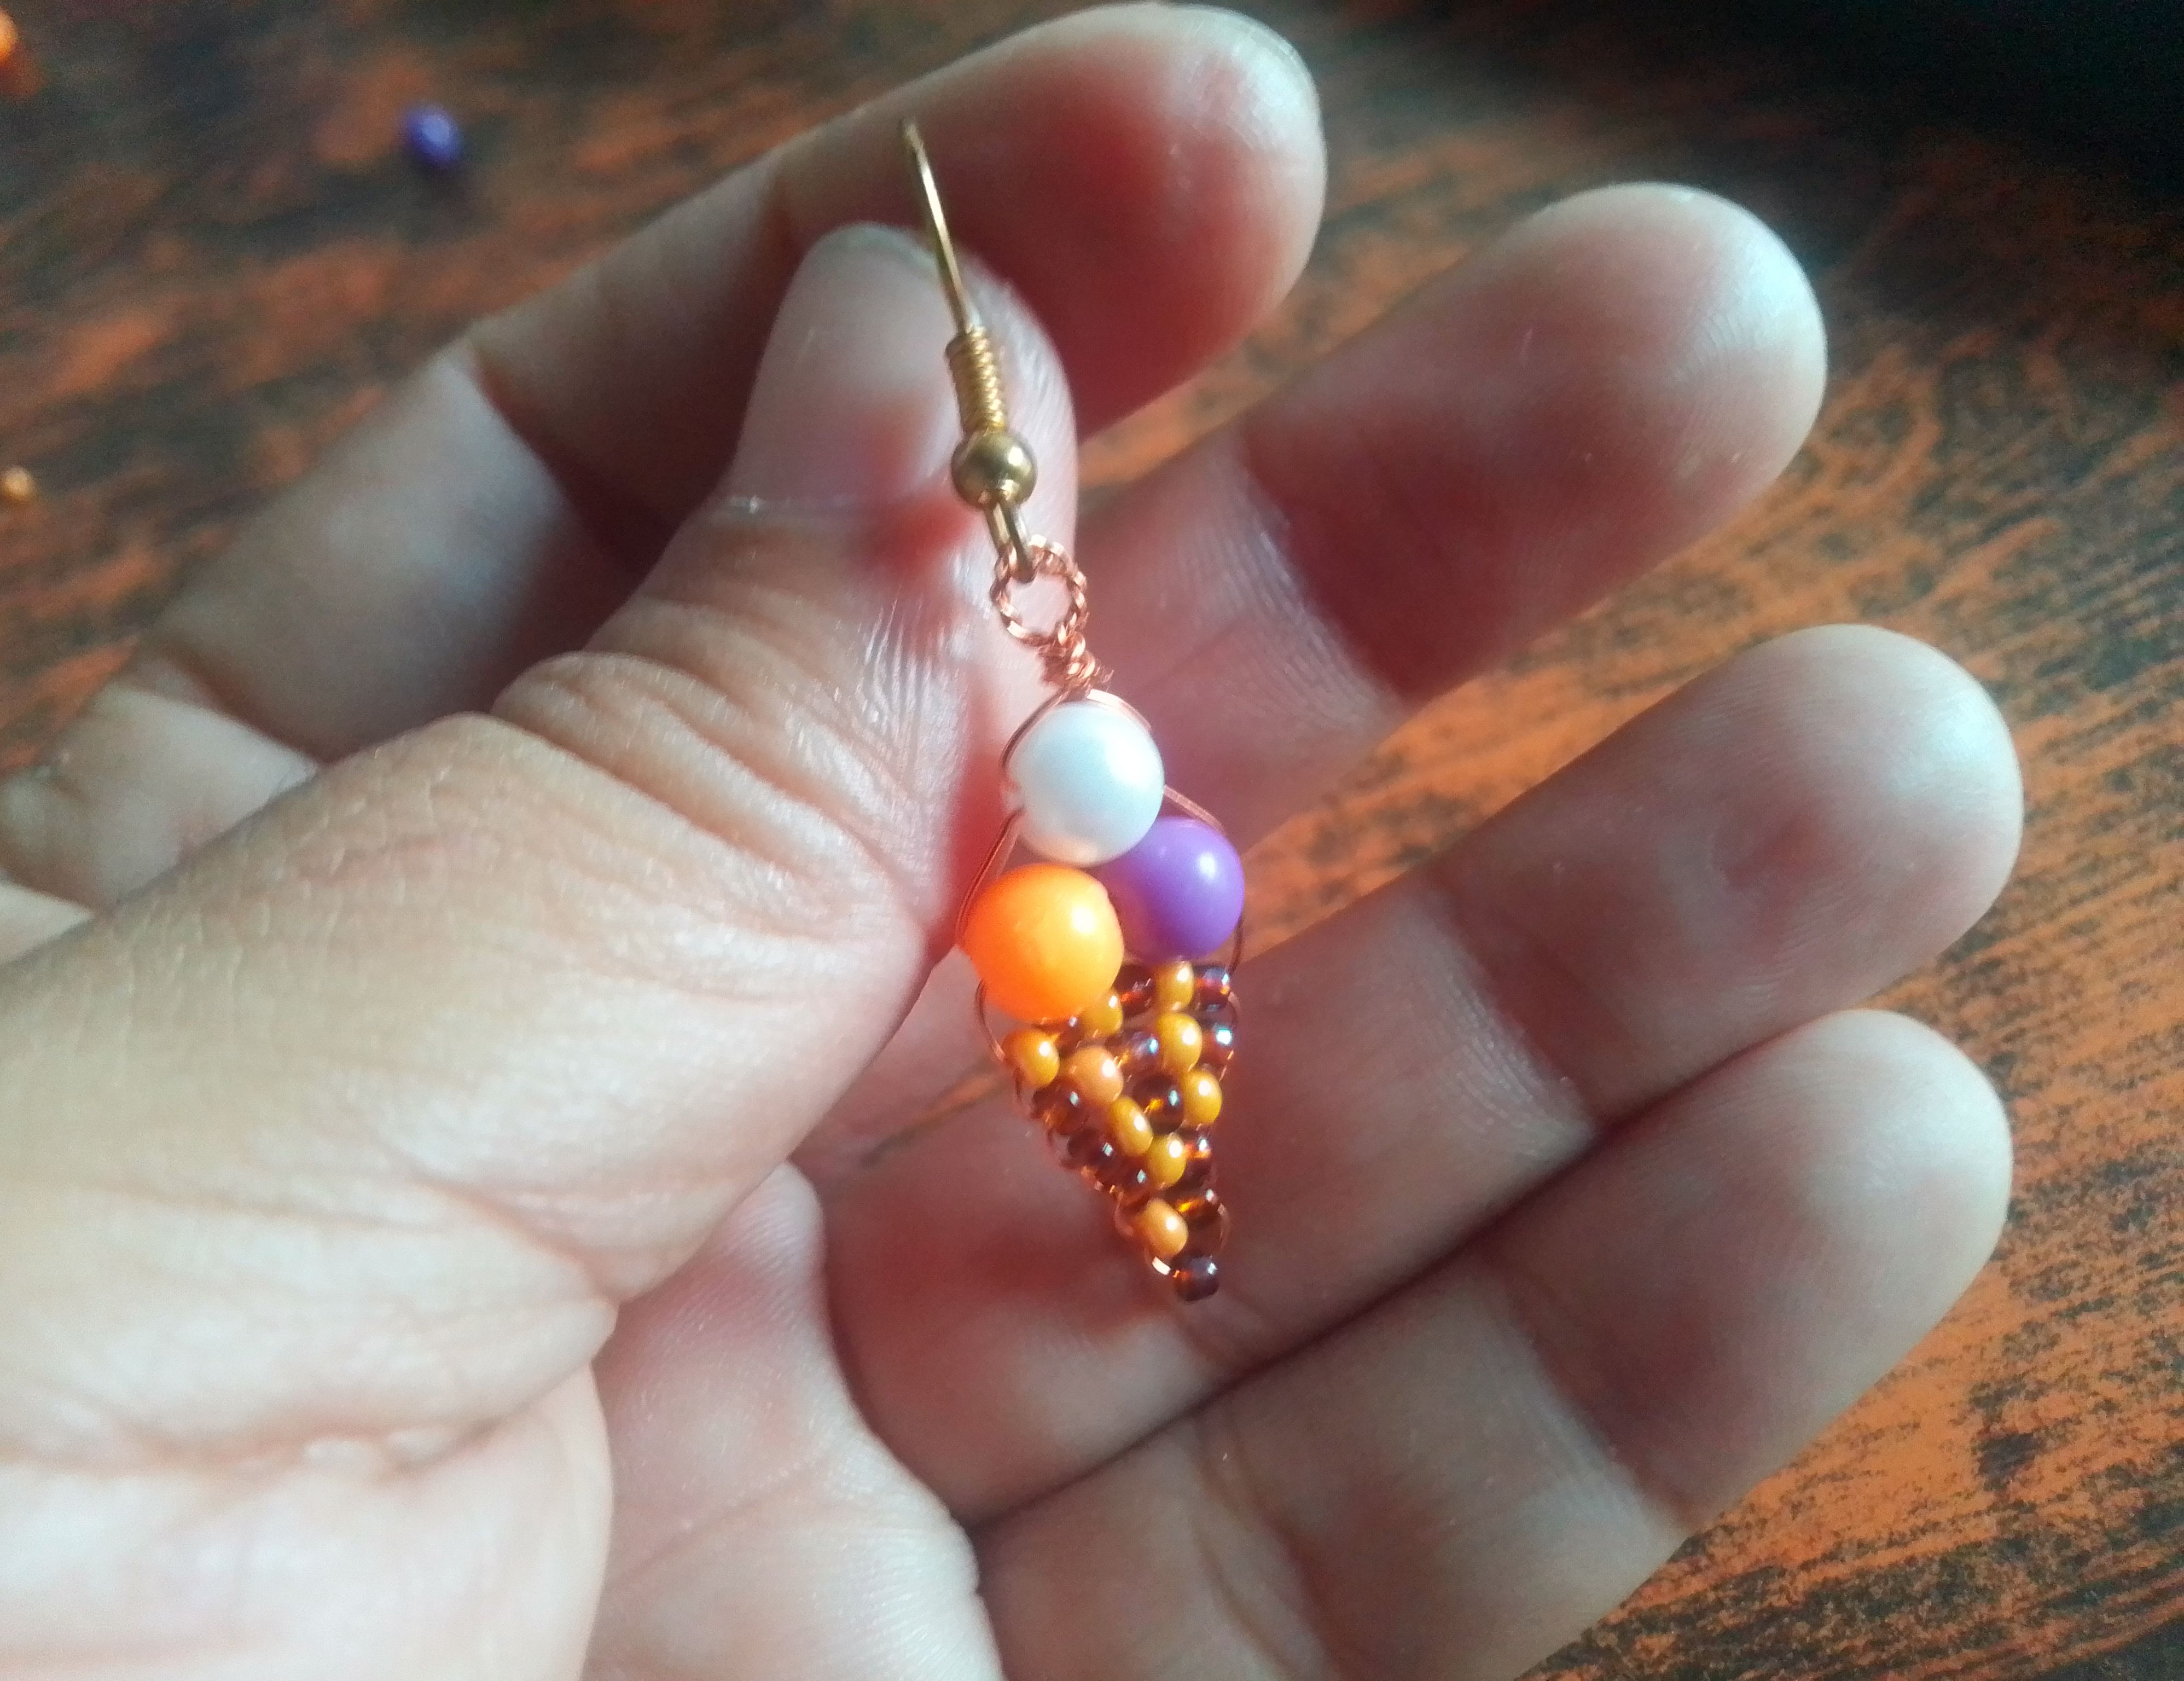
🌟Paso 03
Al llegar al cruce de las seis mostacillas, voy a insertar dos perlas de colores y también las voy a cruzar. Luego introduzco un perla blanca o del color de tu preferencia y enroscamos los extremos delambre que quedan. Doblamos con la pieza para hacer un arito y por este introducir la argolla del colgante.
🌟Step 03
When I reach the intersection of the six beads, I'll insert two colored pearls and cross them as well. Then I'll insert a white pearl or the color of your choice and twist the remaining wire ends together. I'll fold the piece together to make a loop, and I'll insert the pendant's ring through it.
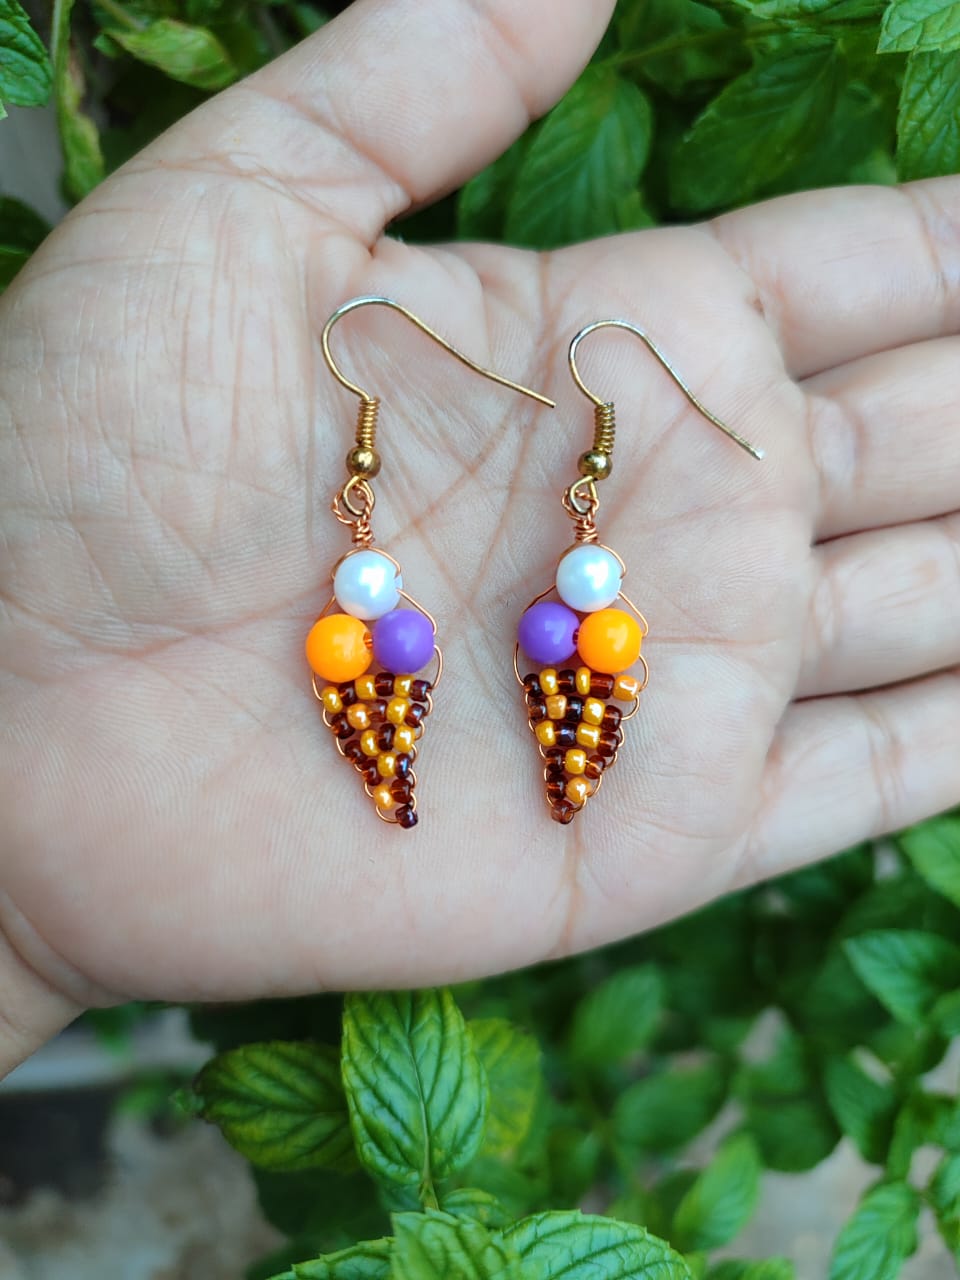
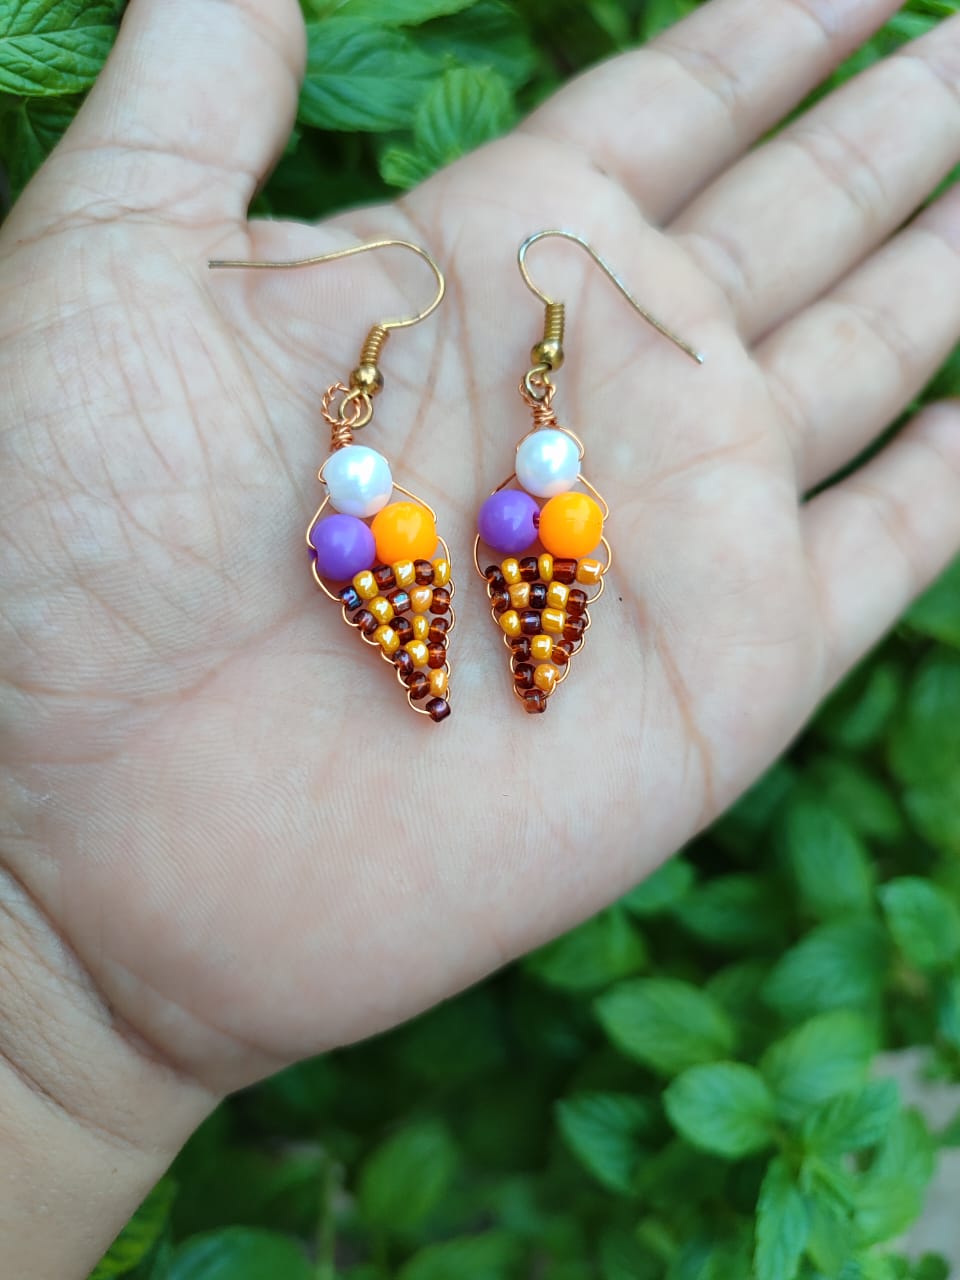
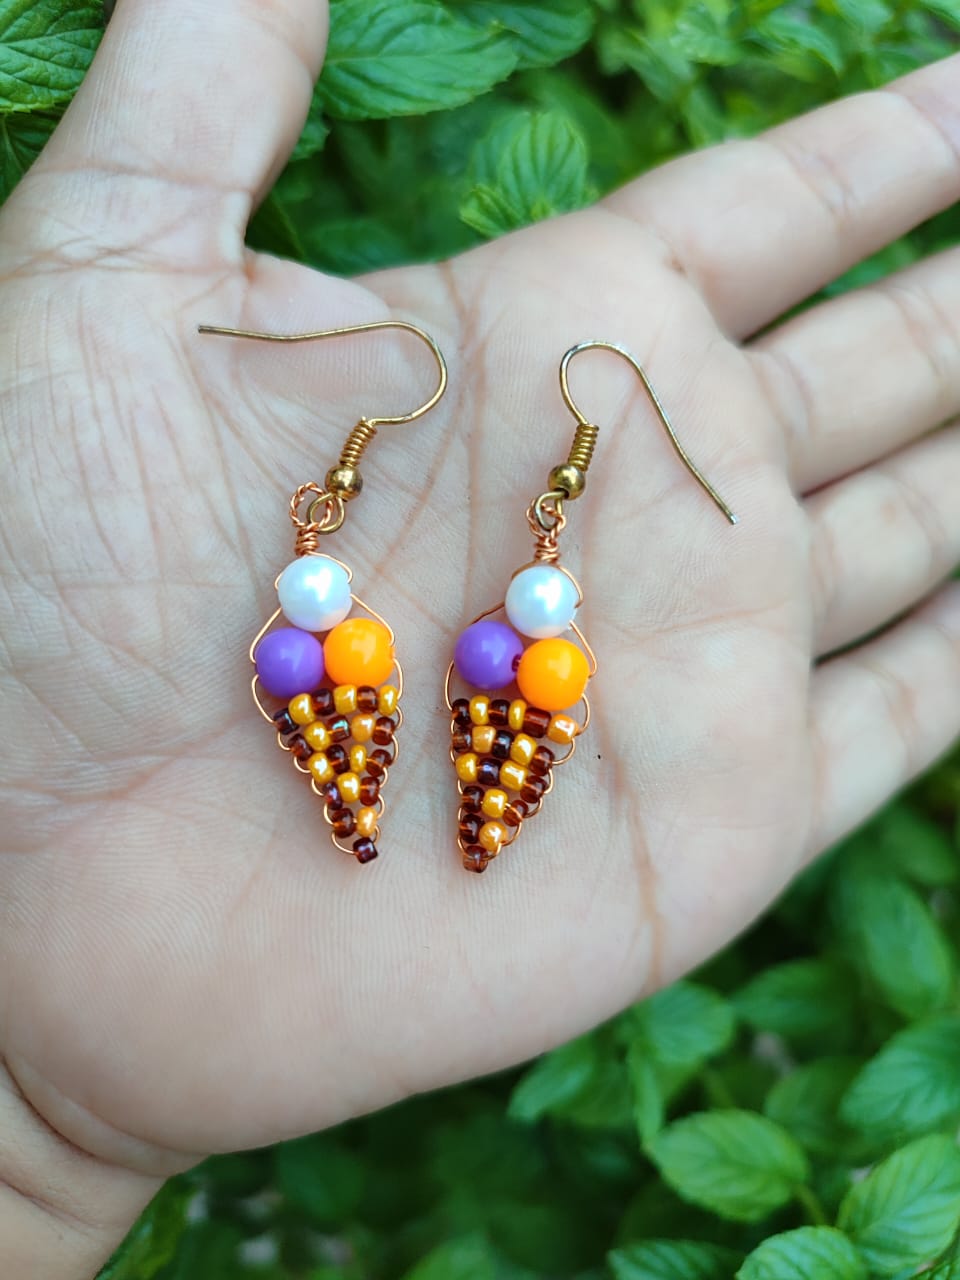
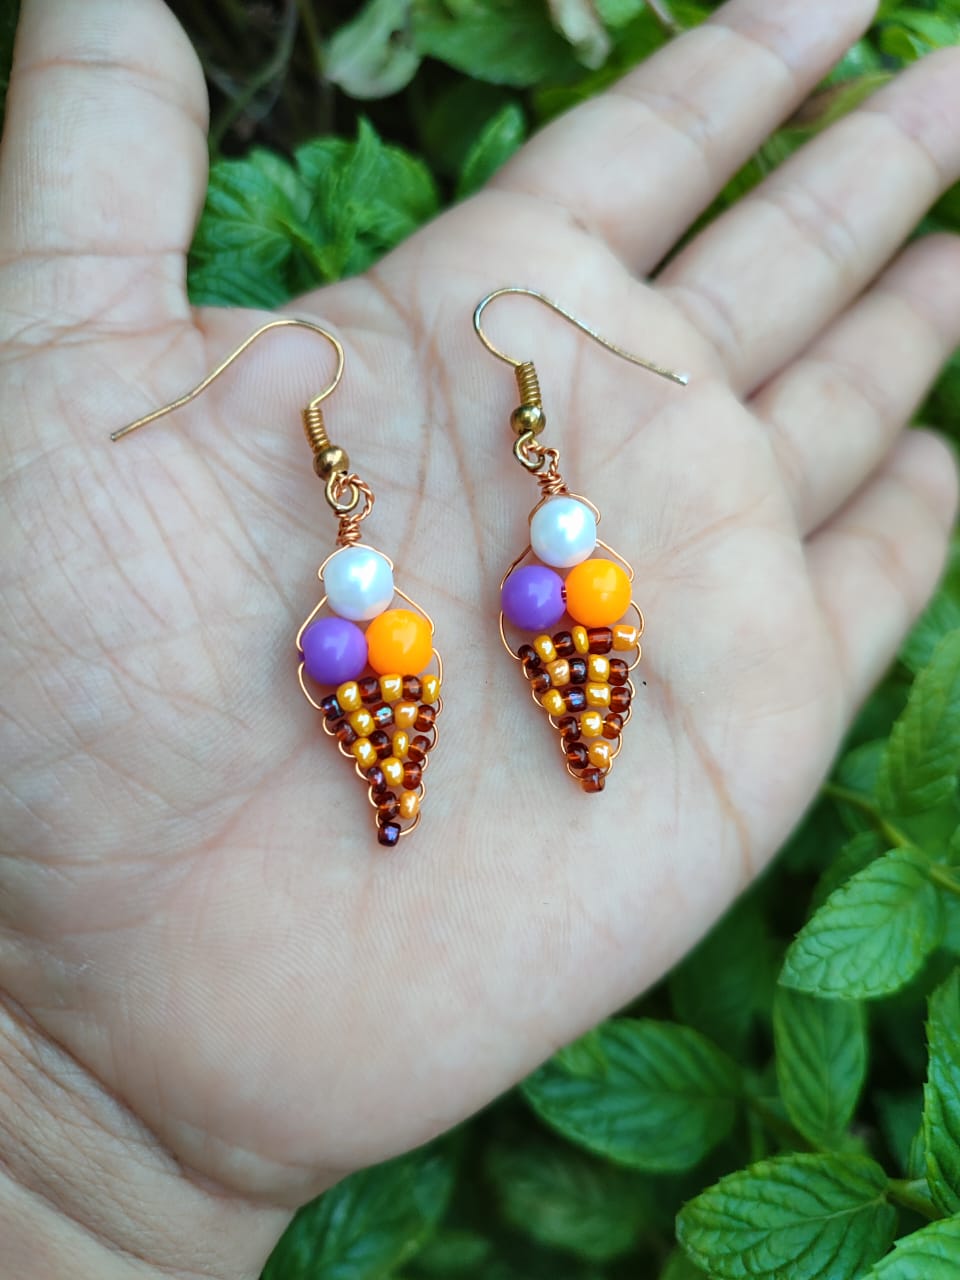
***Resultado!***
***Result!***
Así nos queda este lindo trabajo de hoy. Muy bonito, muy creativos, muy atractivos y sobre todo muy fáciles de hacer.
This is how today's lovely project turns out. Very pretty, very creative, very attractive, and above all, very easy to do.

Este proyecto lo hice con mucho cariño, esperando que sea de agrado.. Agradezco el tiempo que te has tomado de mirar y apoyar, cuéntame que te pareció en los comentarios.. Hasta una próxima idea!
I made this project with a lot of love, hoping you like it. I appreciate the time you've taken to look and support, tell me what you think in the comments. Until next time!
🙋🏻Todas las imágenes de esta publicación son de mi autoria capturadas de mi dispositivo Smooth 6.5, primera imagen editada en PicsArt | Texto original traducido en el traductor de Google.
All images in this post are my own, captured from my Smooth 6.5 device, first image edited in PicsArt | Original text translated in Google translator.
