👋 ¡Saludos, amigas y amigos de Hive!
Soy Roberto Antonio y hoy quiero compartirles unas fotos que tomé con la cámara de mi teléfono, mostrando unos pasos propios, de mi estilo, forma y talento, sobre cómo hice un dibujo a lápiz de una de mis tías que me quiere y me ama tanto.
Se llama Iris y quiero contarles que me sentí feliz, contento, emocionado y tranquilo cuando hice este dibujo.
Les mostraré cómo es mi tía Iris en una foto real y cómo quedó el dibujo.
Espero que les guste mucho y que con paciencia, calma, paz, tranquilidad y tiempo puedan apoyarme con muchos votos. 🙏✨
📝 Paso a Paso: Cómo hice mi dibujo 🎨
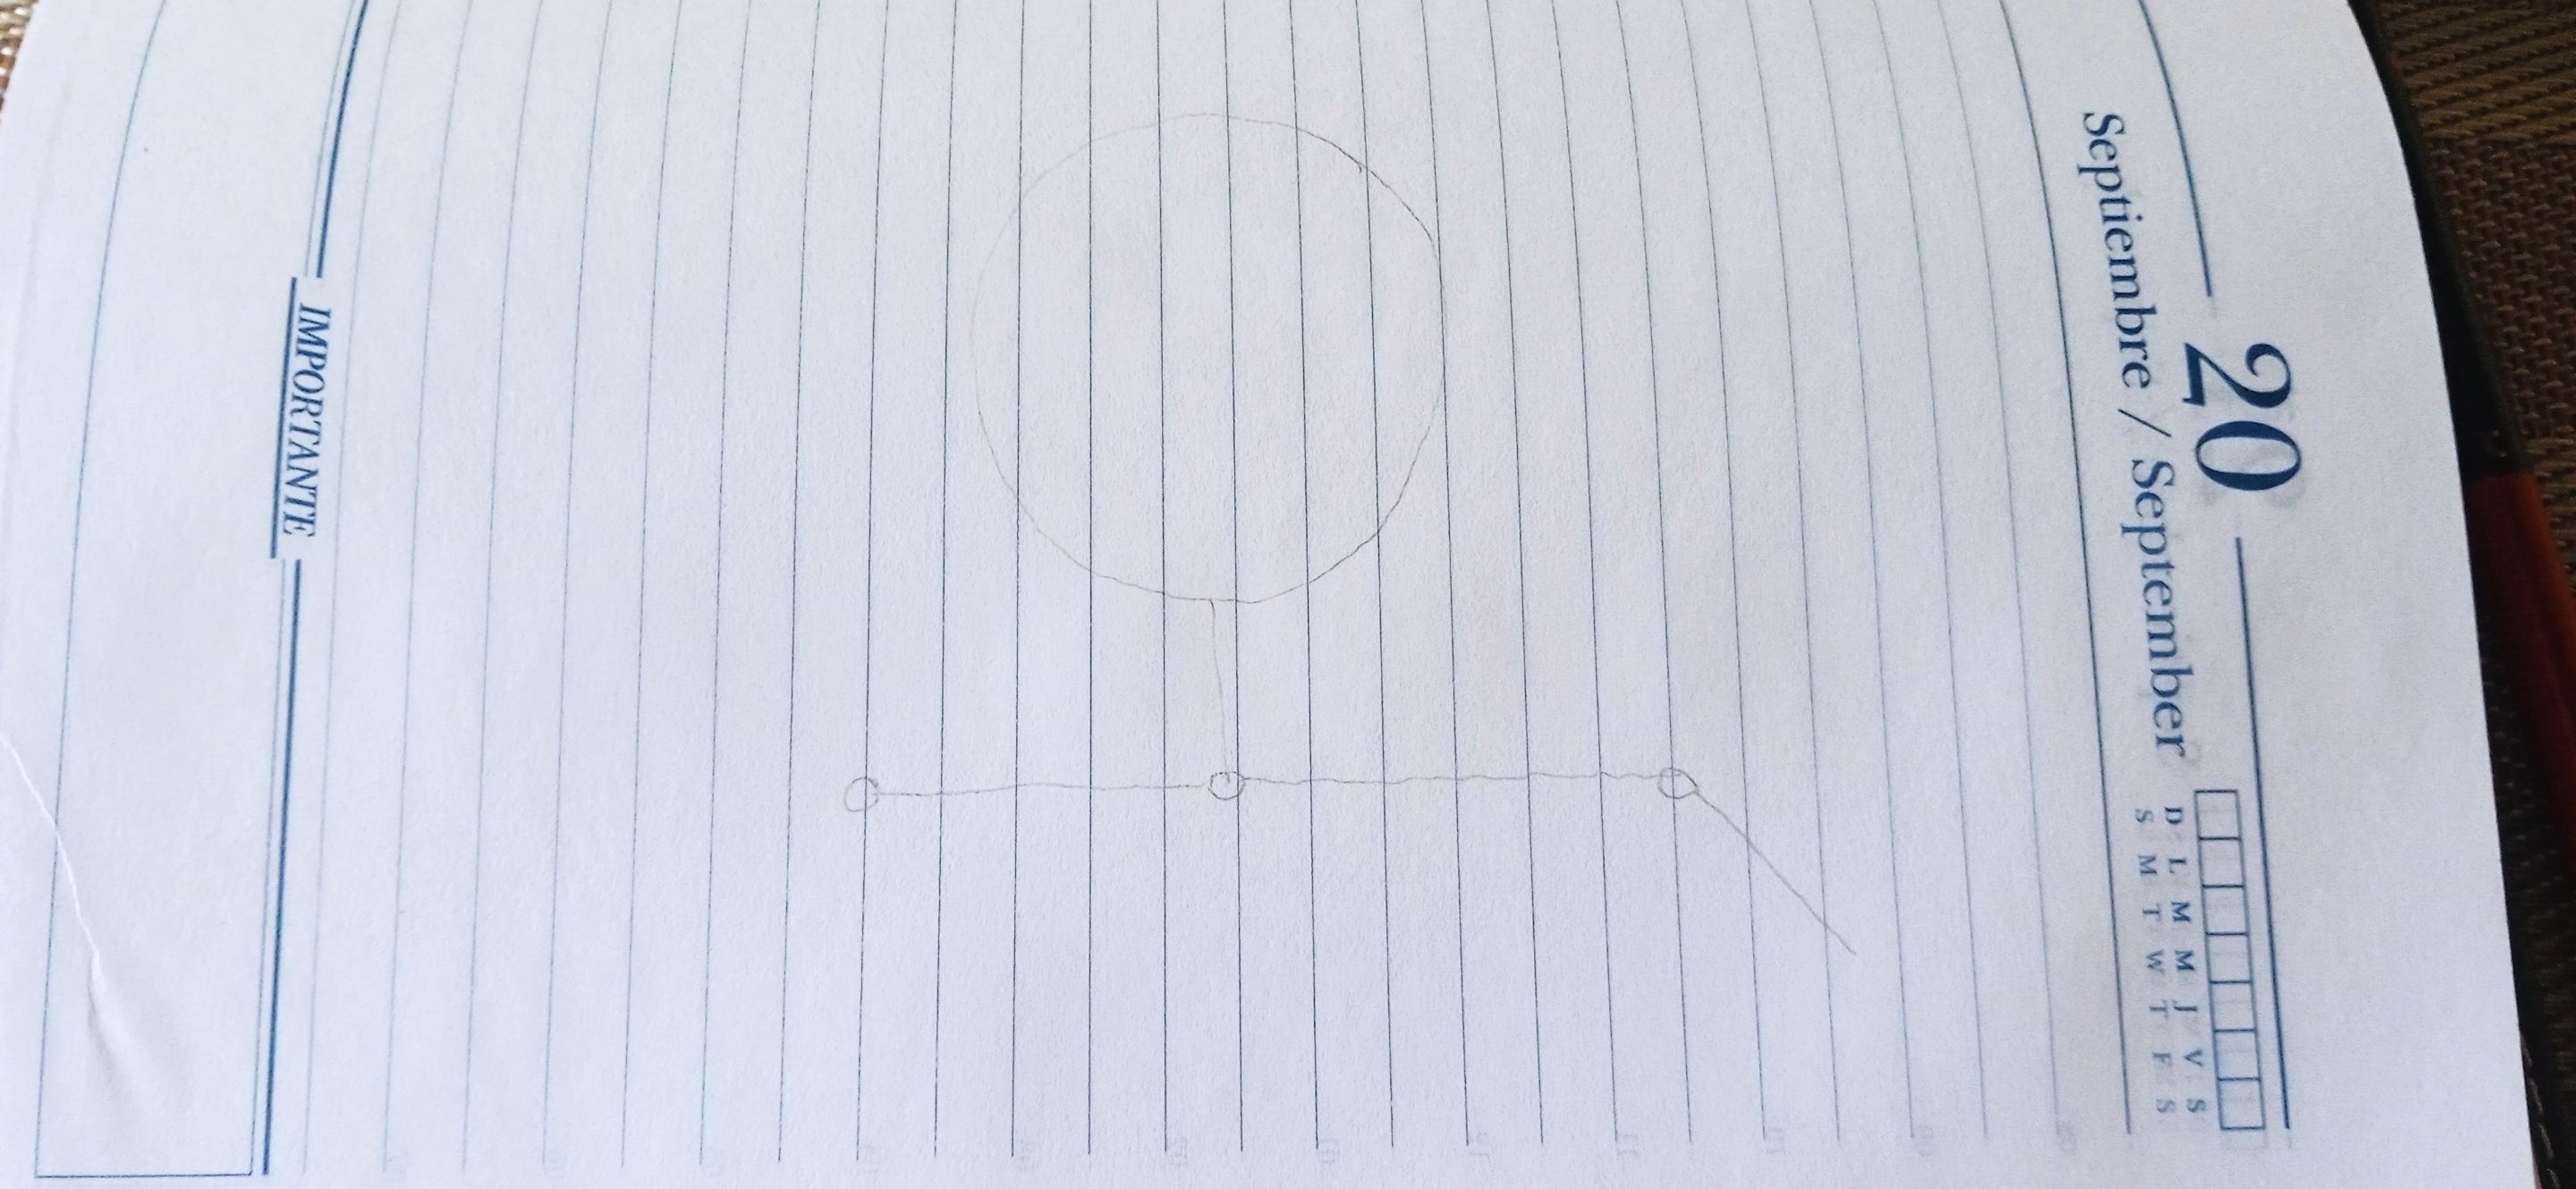
Paso 1. ✏️
Usa un lápiz, puede ser de dibujo o de escribir, para hacer un círculo para el rostro y unas líneas con pequeños círculos para guiarte.
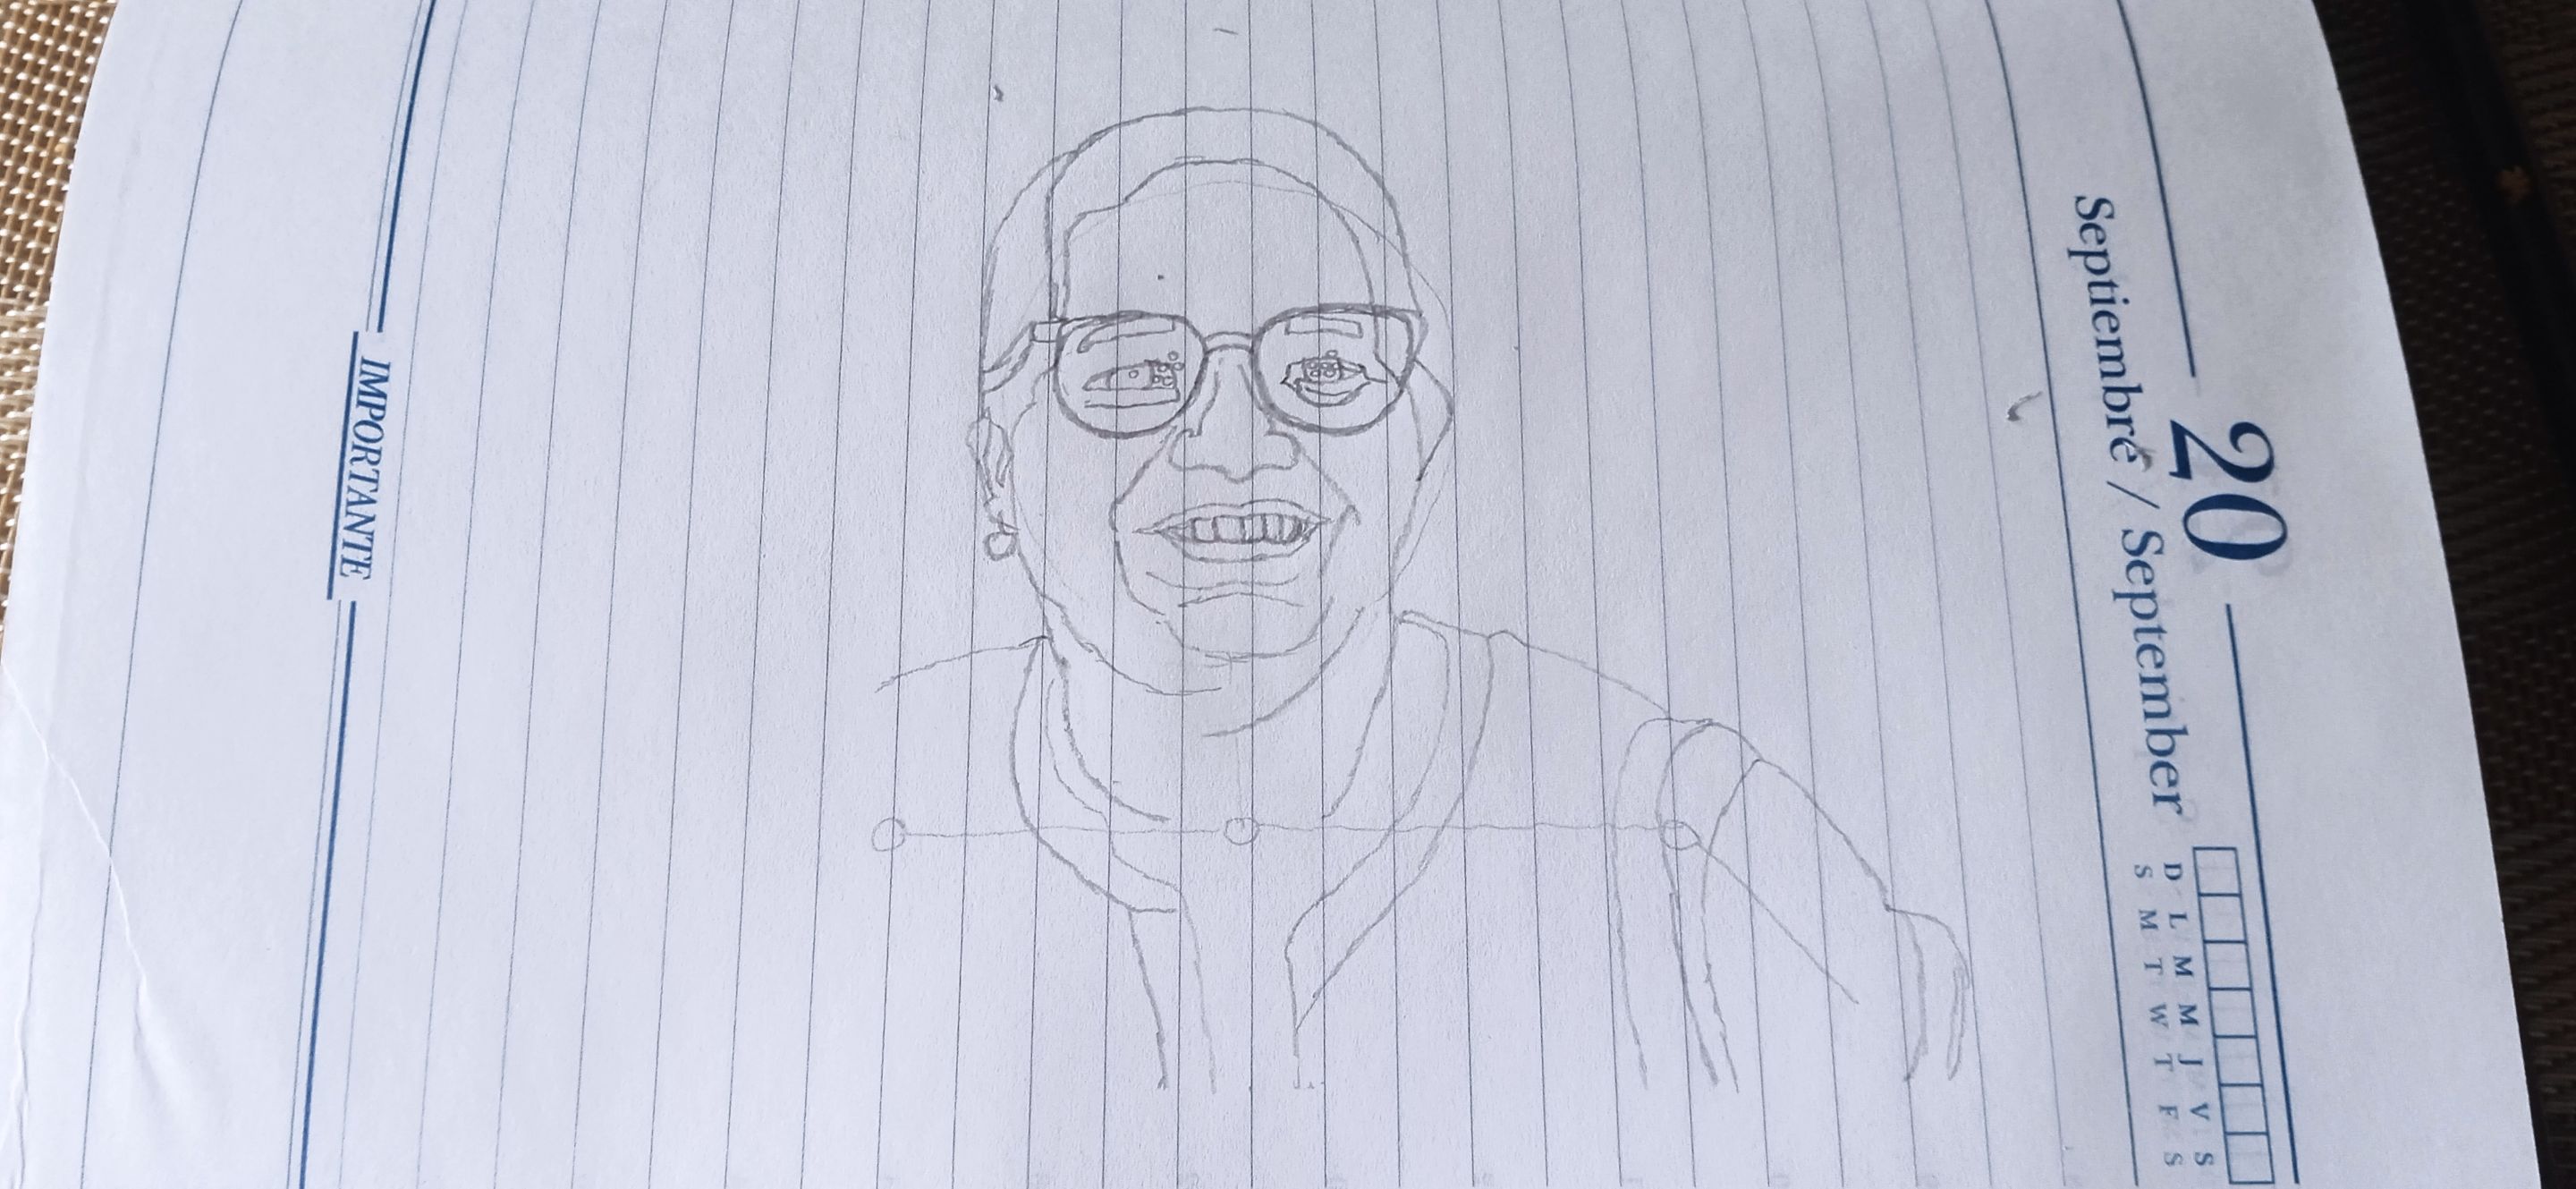
Paso 2. ✏️
Observa el tamaño de los hombros, ropa, cuello, rostro, cabello, oído, lentes y nariz.
Luego, haz la forma de los hombros, la ropa, el cuello, el rostro, el cabello, el oído, los lentes, la nariz y las líneas cerca de la nariz.

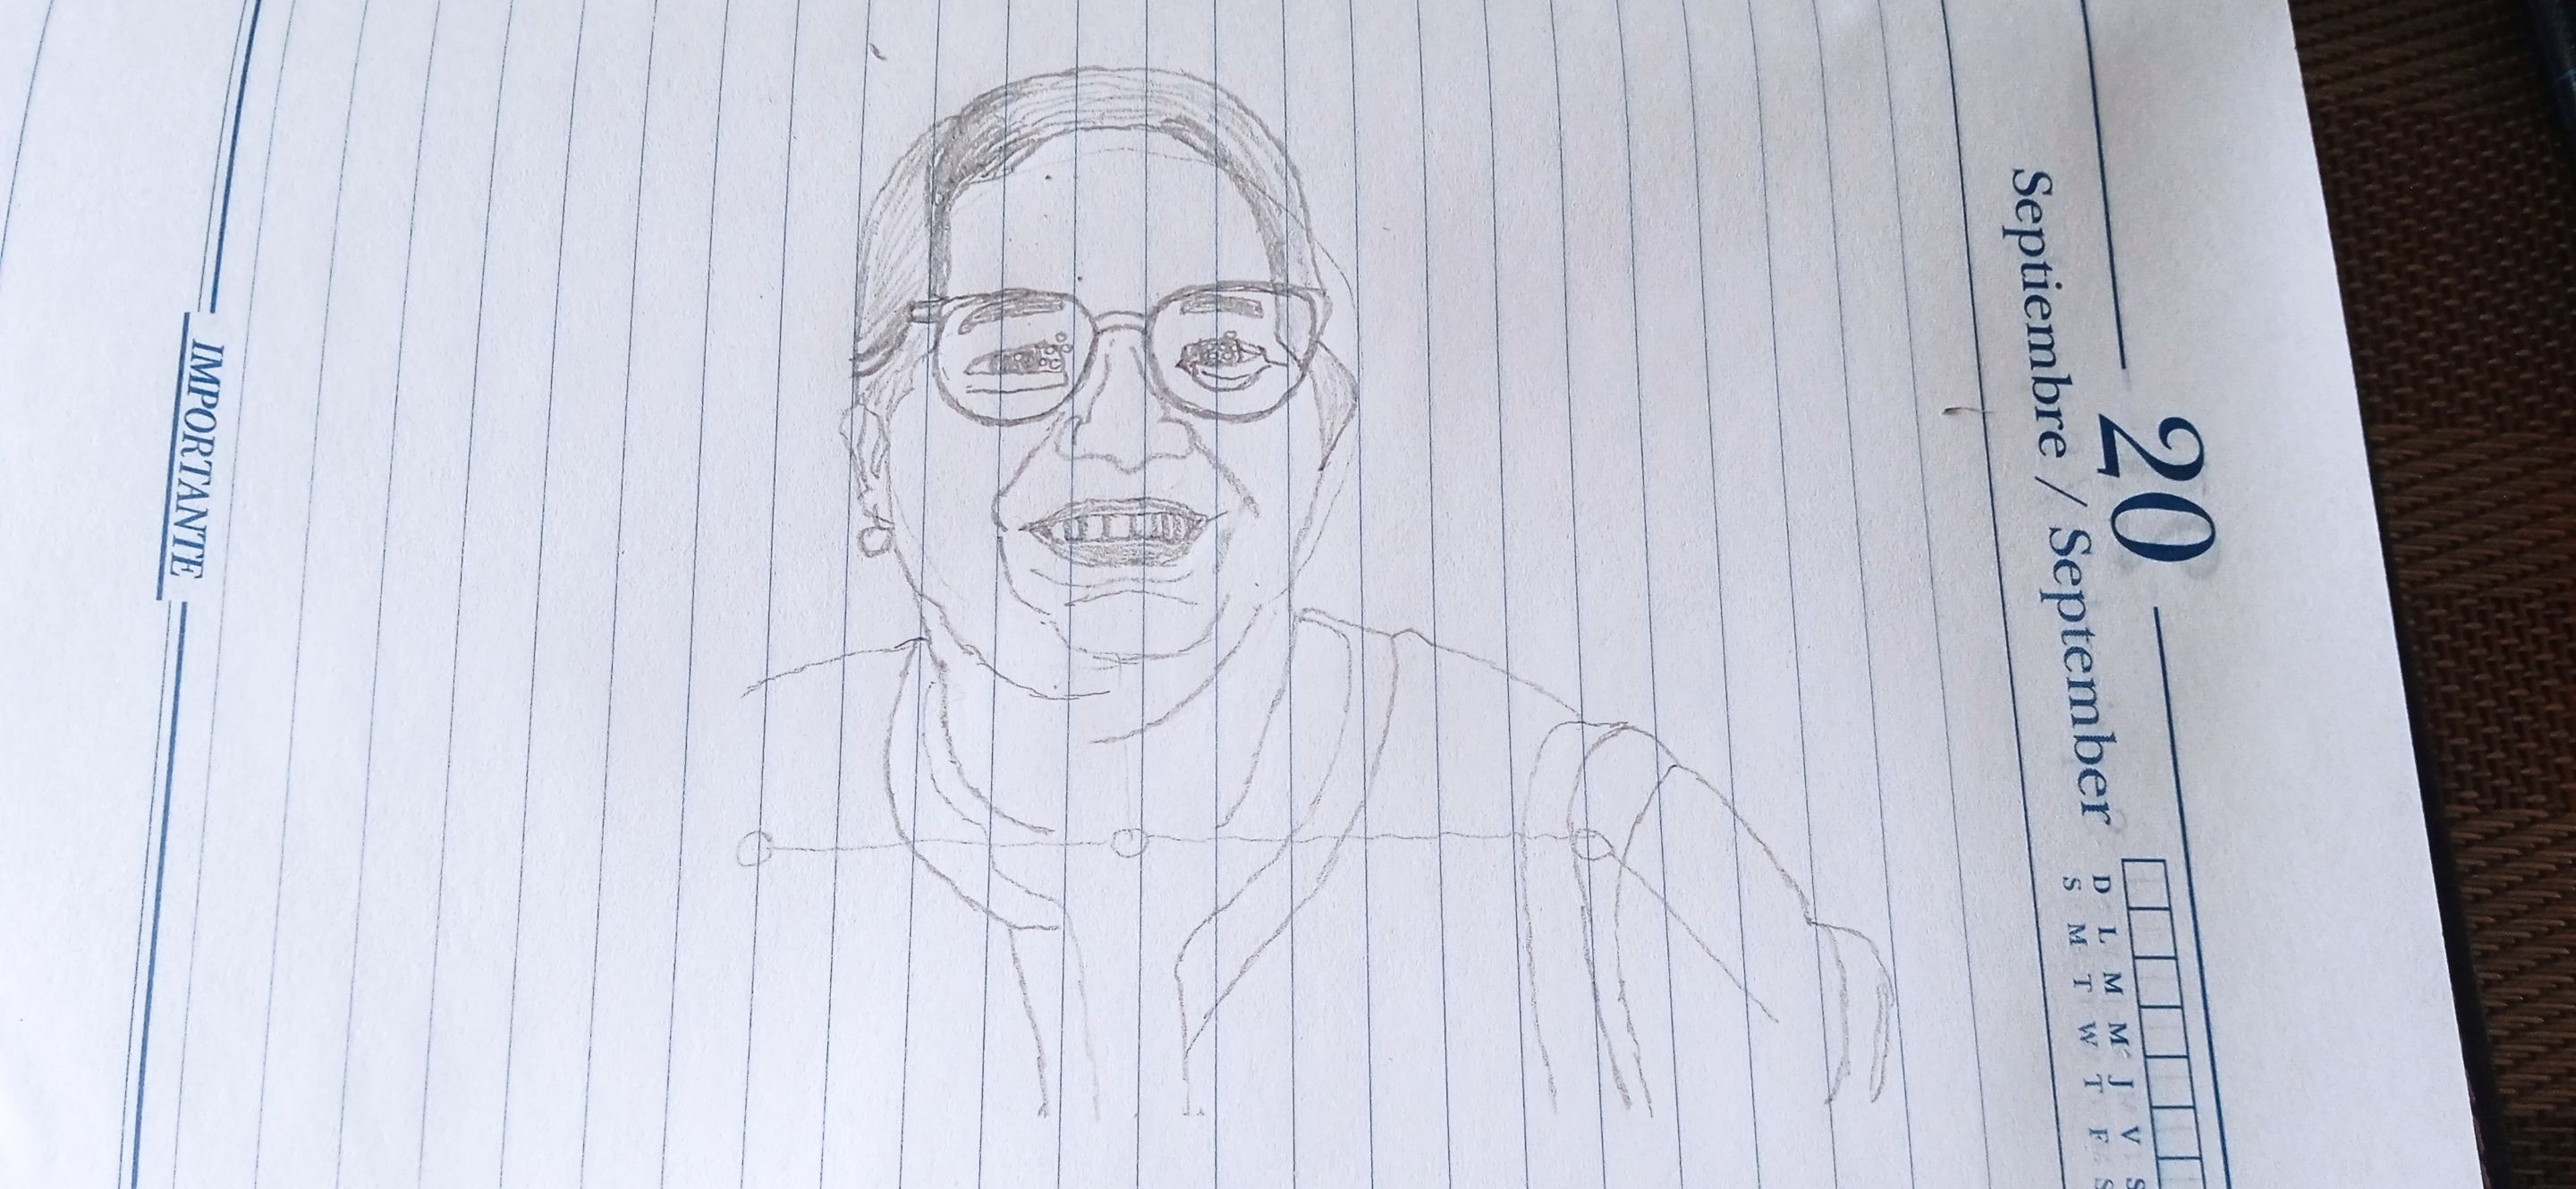
Paso 3. ✏️
Fíjate en el tamaño de las cejas, ojos, boca, dientes y las líneas debajo de la boca.
Después dibuja las cejas, los ojos, la boca, los dientes y las líneas que van debajo de la boca.
Paso 4. ✏️
Observa los toques claros, oscuros, medio claros y medio oscuros que tiene la imagen y ve pintando con el lápiz según corresponda.
Paso 5. 👕
Haz los detalles en la ropa, tal como se muestra en la imagen, fijándote bien.
Paso 6. 🖊️
Por último, firma tu dibujo con el lápiz.
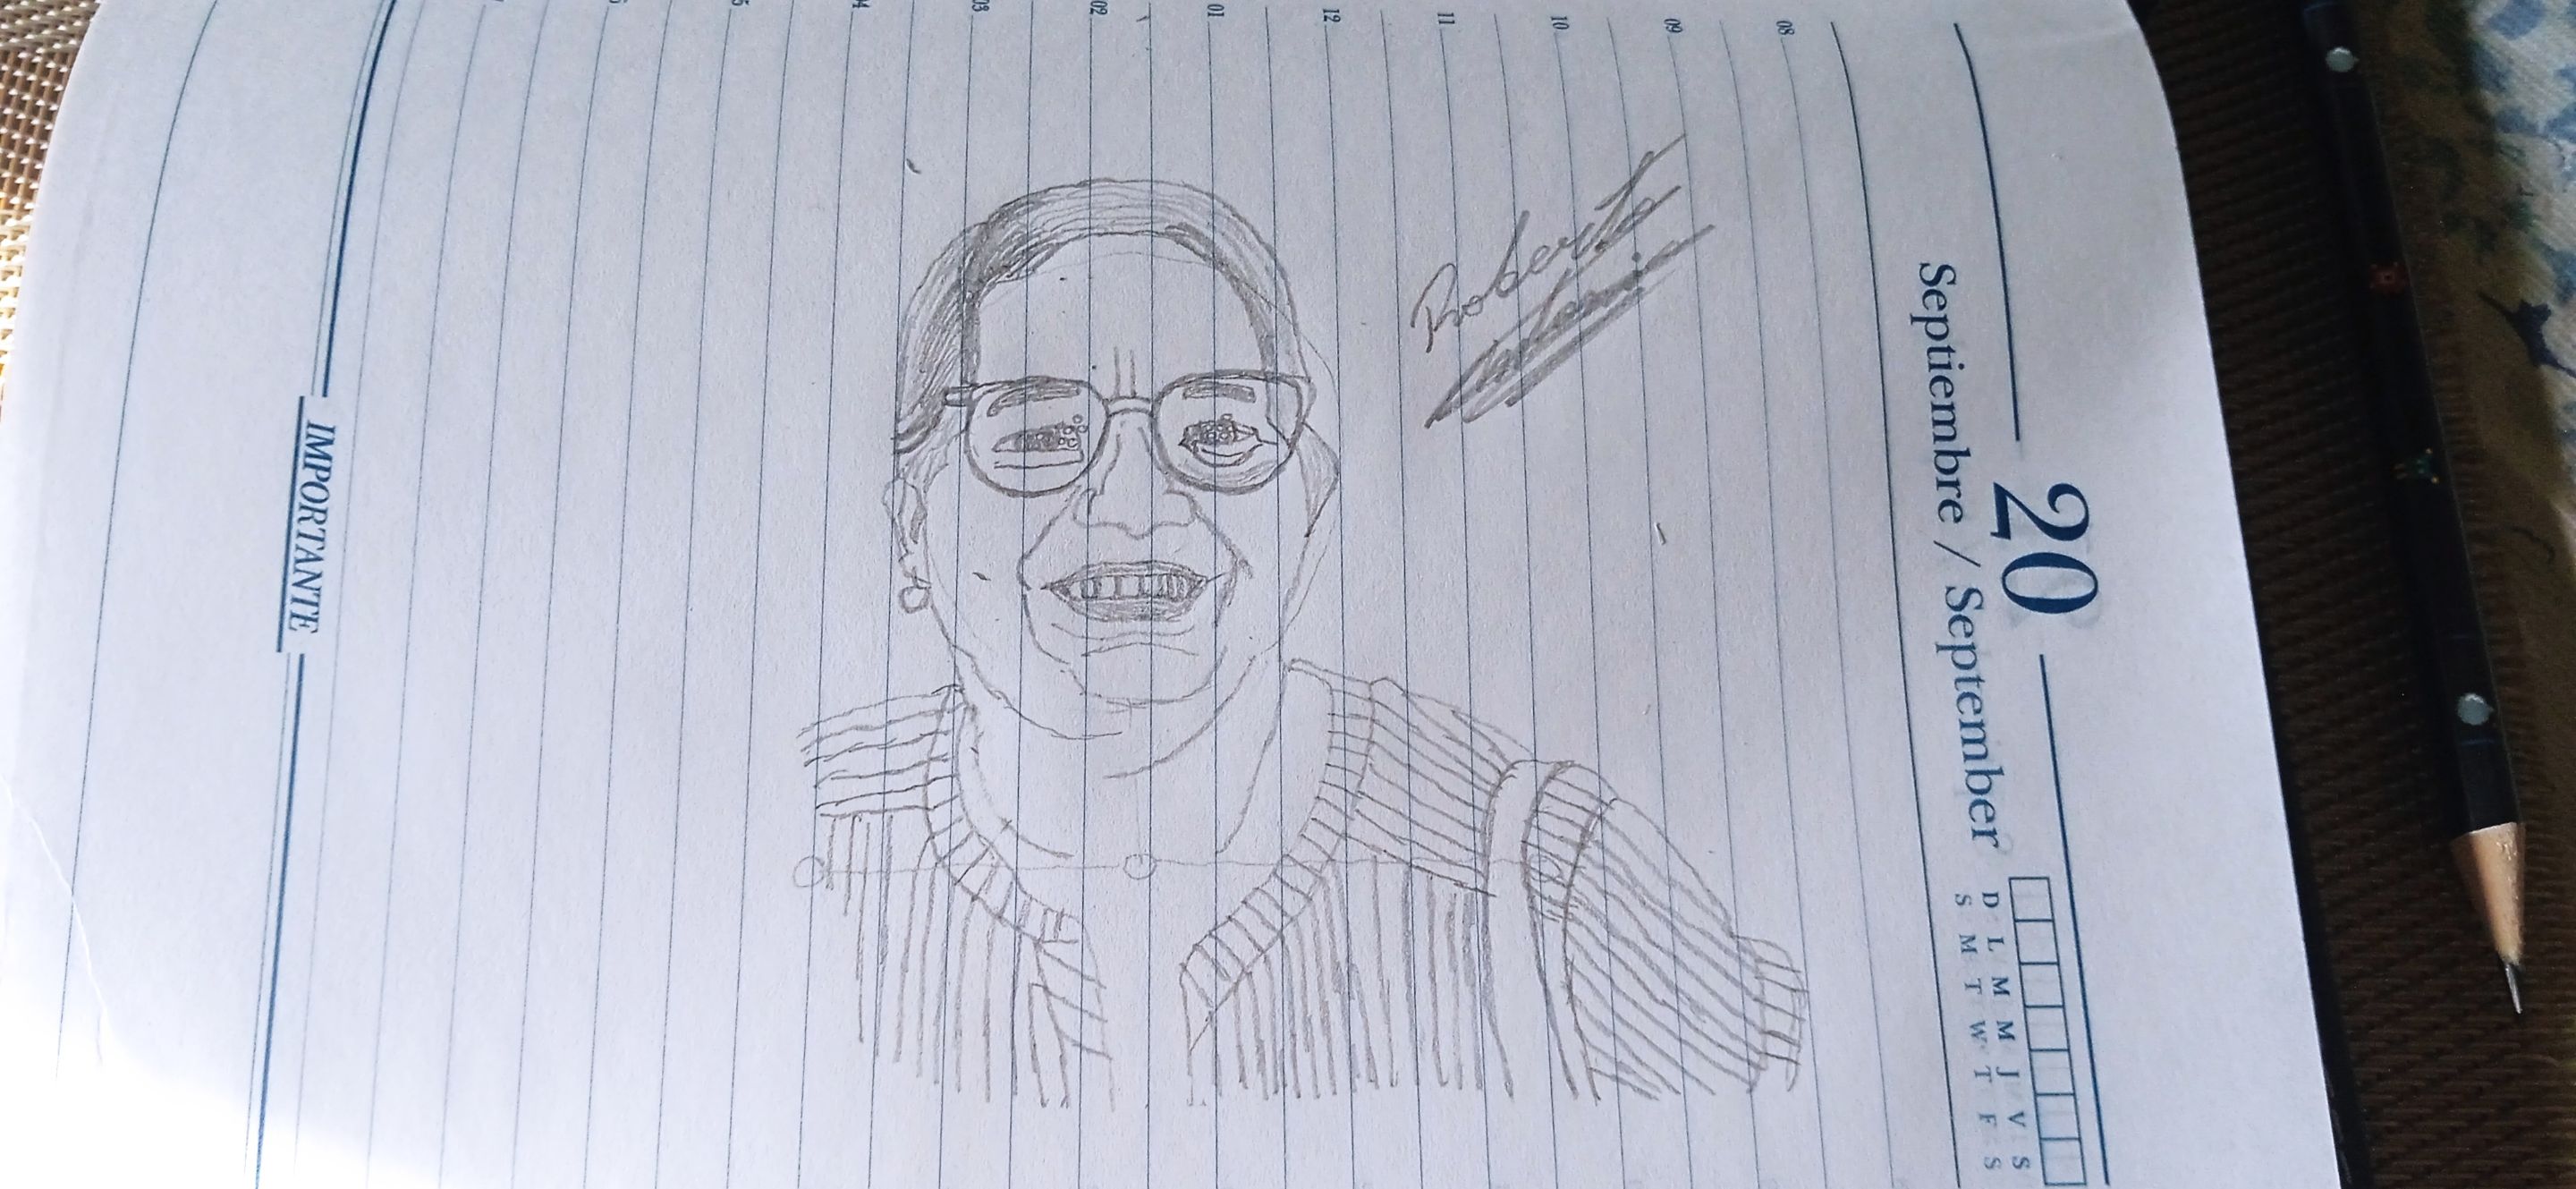
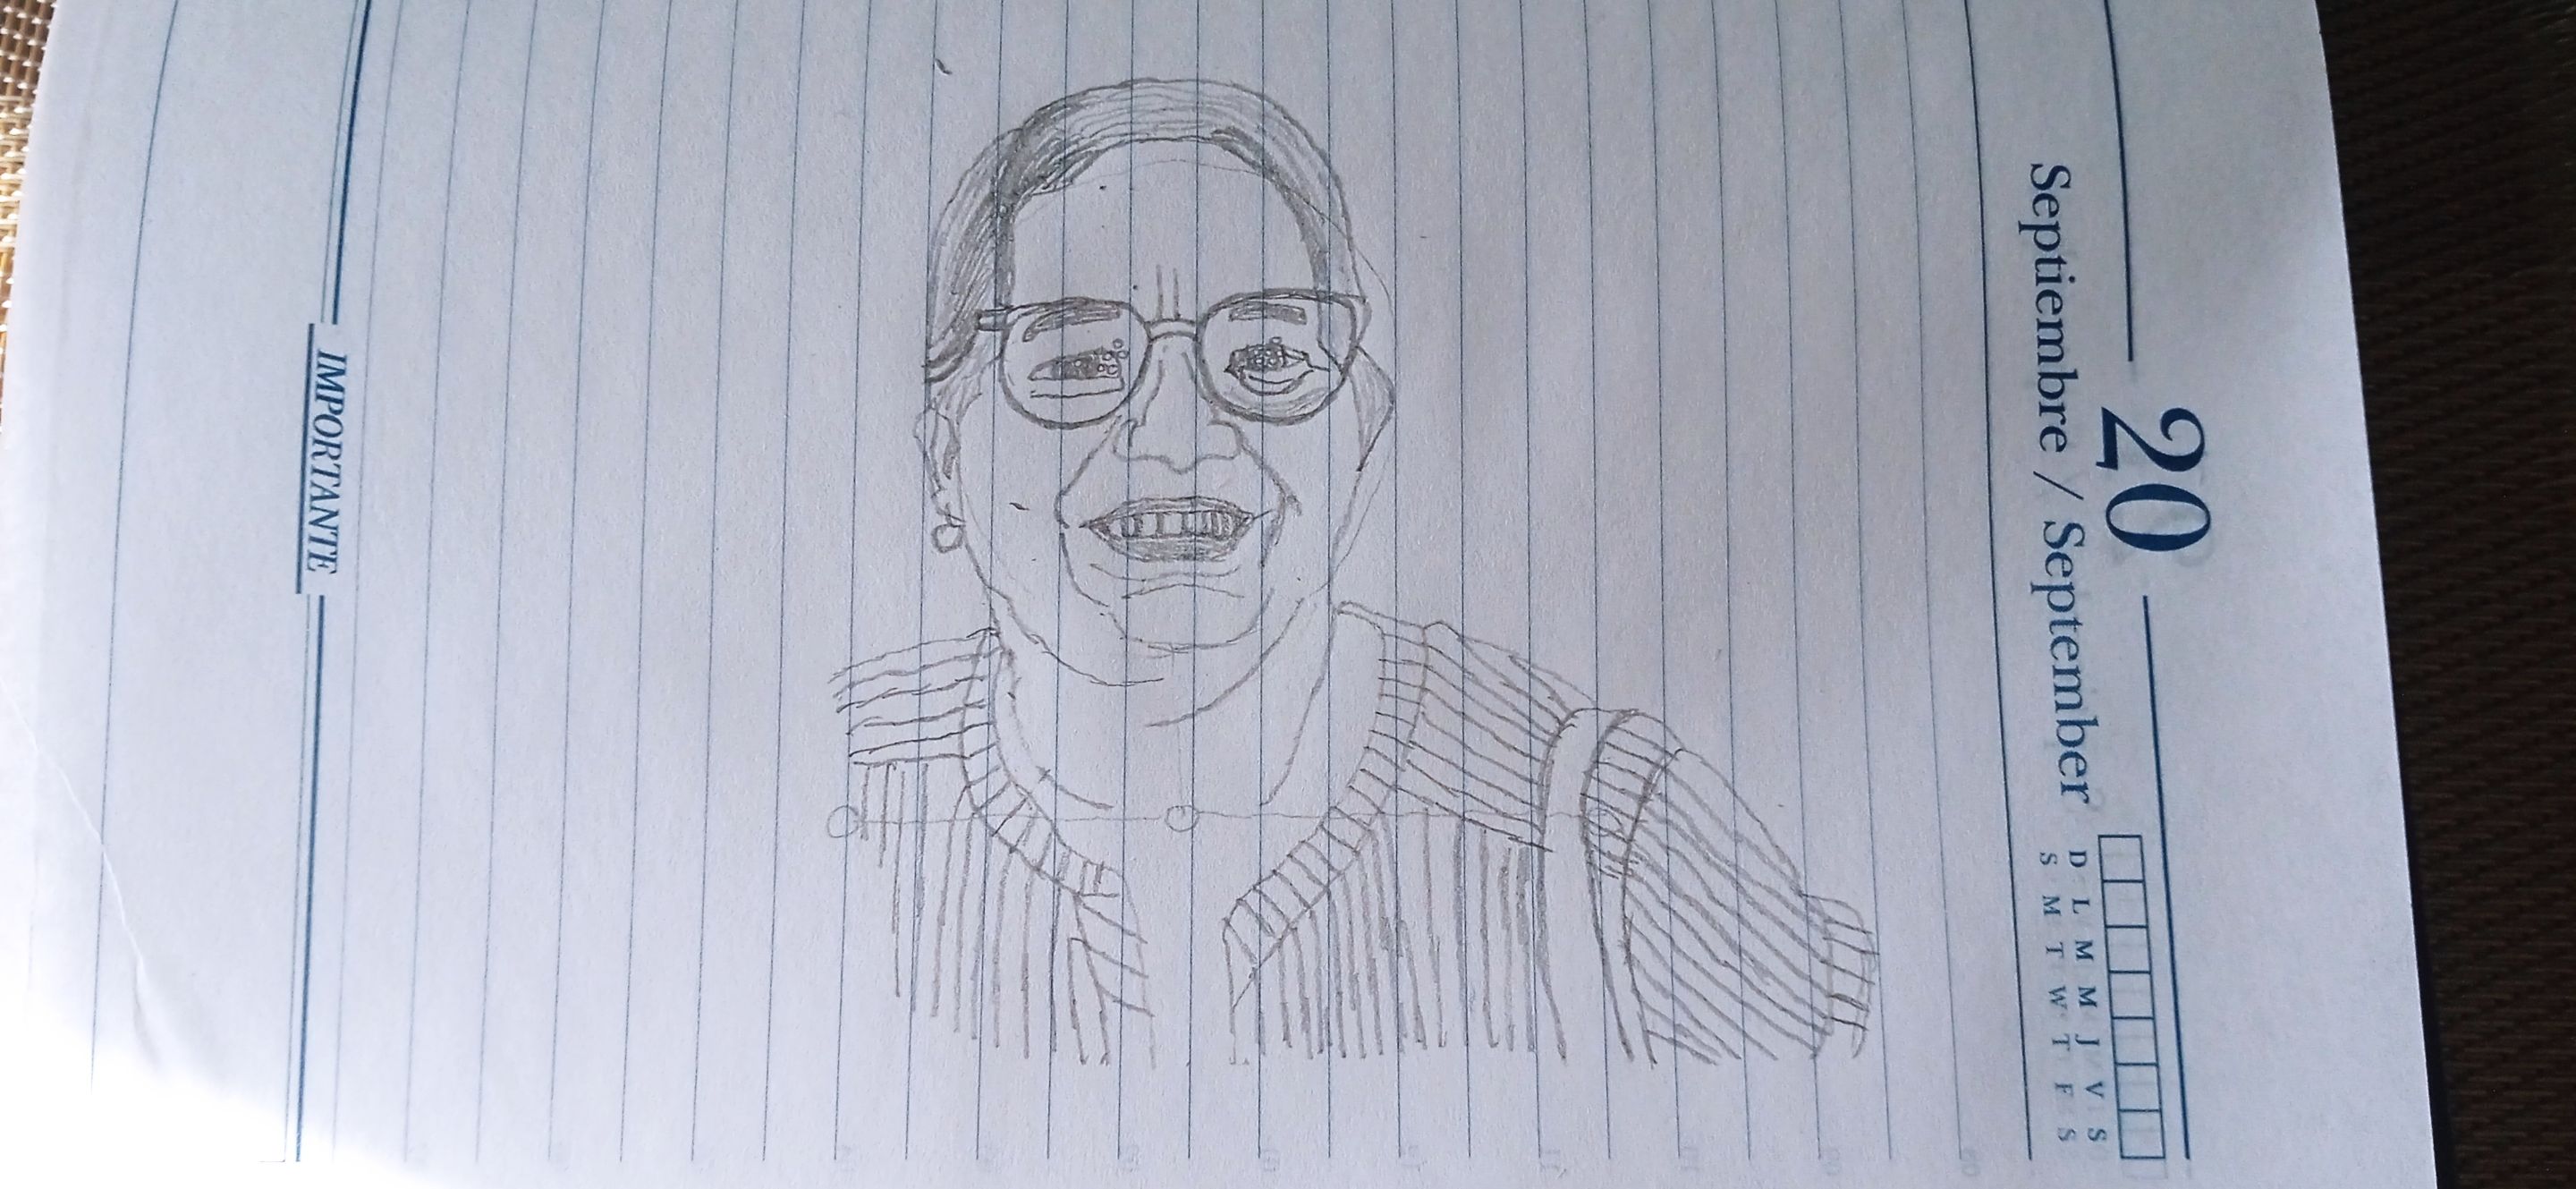
✅ ¡Y LISTO!
Así es como quedó mi dibujo de mi querida tía Iris. 🖼️
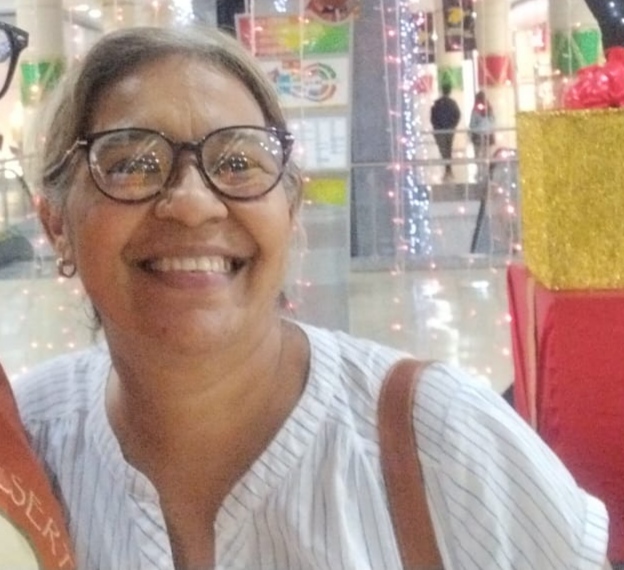
📸 La Fotografía de Referencia
Esta es la fotografía que dibujé.
📌 Reflexión Final ✨
Lo que he aprendido es que hay que observar bien los tamaños y los toques de cada parte de la fotografía o imagen que queremos dibujar.
Luego, practicar y tratar de copiar esos tamaños y toques, pero lo más importante es no rendirse.
Un verdadero dibujante nunca se rinde.
Hay que tener paciencia, calma, paz, tranquilidad y tiempo para lograr que algo nos quede parecido.
🙏 ¡Gracias por leer!
Eso es todo.
Espero que les haya gustado mi post y con paciencia, calma, paz, tranquilidad y tiempo estaré esperando sus votaciones y sus comentarios o respuestas. 📝✨
🎨📝 How to Make a Pencil Drawing of My Aunt Iris' Face ✏️✨
👋 Greetings, friends from Hive!
I'm Roberto Antonio and today I want to share with you some photos I took with my phone camera, showing my own steps, style, and talent on how I made a pencil drawing of one of my aunts who loves and cares for me very much.
Her name is Iris, and I want to tell you that I felt happy, joyful, excited, and calm while making this drawing.
I'll show you what my aunt Iris looks like in a real photo and how my drawing turned out.
I hope you like it very much and that with patience, calmness, peace, tranquility, and time, you can support me with many votes. 🙏✨
📝 Step by Step: How I Made My Drawing 🎨
Step 1. ✏️
Use a pencil, it can be a drawing pencil or a regular one, to draw a circle for the face and some guiding lines with small circles.
Step 2. ✏️
Look at the size of the shoulders, clothes, neck, face, hair, ear, glasses, and nose.
Then, draw the shape of the shoulders, clothes, neck, face, hair, ear, glasses, nose, and the lines near the nose.
Step 3. ✏️
Pay attention to the size of the eyebrows, eyes, mouth, teeth, and the lines below the mouth.
Then, draw the eyebrows, eyes, mouth, teeth, and the lines below the mouth.
Step 4. ✏️
Observe the light, dark, medium light, and medium dark touches in the image and shade them with the pencil accordingly.
Step 5. 👕
Add the details in the clothing, as shown in the image, paying close attention.
Step 6. 🖊️
Finally, sign your drawing with your pencil.
✅ And That’s It!
That’s how my pencil drawing of my dear aunt Iris turned out.
📸 The Reference Photo
This is the photograph I drew.
📌 Final Thoughts ✨
What I’ve learned is that you have to carefully observe the sizes and shading of each part of the photo or image you want to draw.
Then, practice and try to match those sizes and touches, but the most important thing is to never give up.
A true artist never quits.
You need patience, calmness, peace, tranquility, and time to achieve something that looks similar.
🙏 Thank You for Reading!
That’s it.
I hope you liked my post and with patience, calmness, peace, tranquility, and time, I’ll be waiting for your votes and comments. 📝✨