Welcome/ Bienvenidos
Paso No.1
comenzamos realizando una cadena de 8 puntos y la cerramos con un punto deslizado.
Step No.1 We start by making a chain of 8 stitches and close it with a slip stitch.
(https://files.peakd.com/file/peakd-hive/rosalbaced/23vhsZ7EPFWjrmMrwEjwDSQGKJ2NQuXMjm1Y9SzUw44wn5WGrym1jvpRCti46nuVUsvBo.jpg)
Paso No.2
dejemos alrededor del aro una puerta de medio punto y al finalizar se cierra con un punto deslizado punto Y continuamos con la tercera vuelta haciendo una cadena de 8 puntos y se cierra en el tercer.seguimos Tejiendo 8 puntos y volvemos a cerrar con punto deslizado dejando un punto en el medio del aro,seguimos así hasta culminar la vuelta que cerramos con un punto deslizado.
Step No.2 We leave around the hoop a half stitch door and at the end we close it with a slip stitch. And we continue with the third row making a chain of 8 stitches and we close it in the third stitch. And we continue knitting 8 stitches and we close again with a slip stitch leaving a stitch in the middle of the ring, and we continue in this way until the end of the row that we close with a slip stitch.
(https://files.peakd.com/file/peakd-hive/rosalbaced/AJpiqRnxyMJx6tRuSGsxc3wyycoJbZmaYbKTouKJkbFcT4nsfcUQsQLdxRFwnm6.jpg
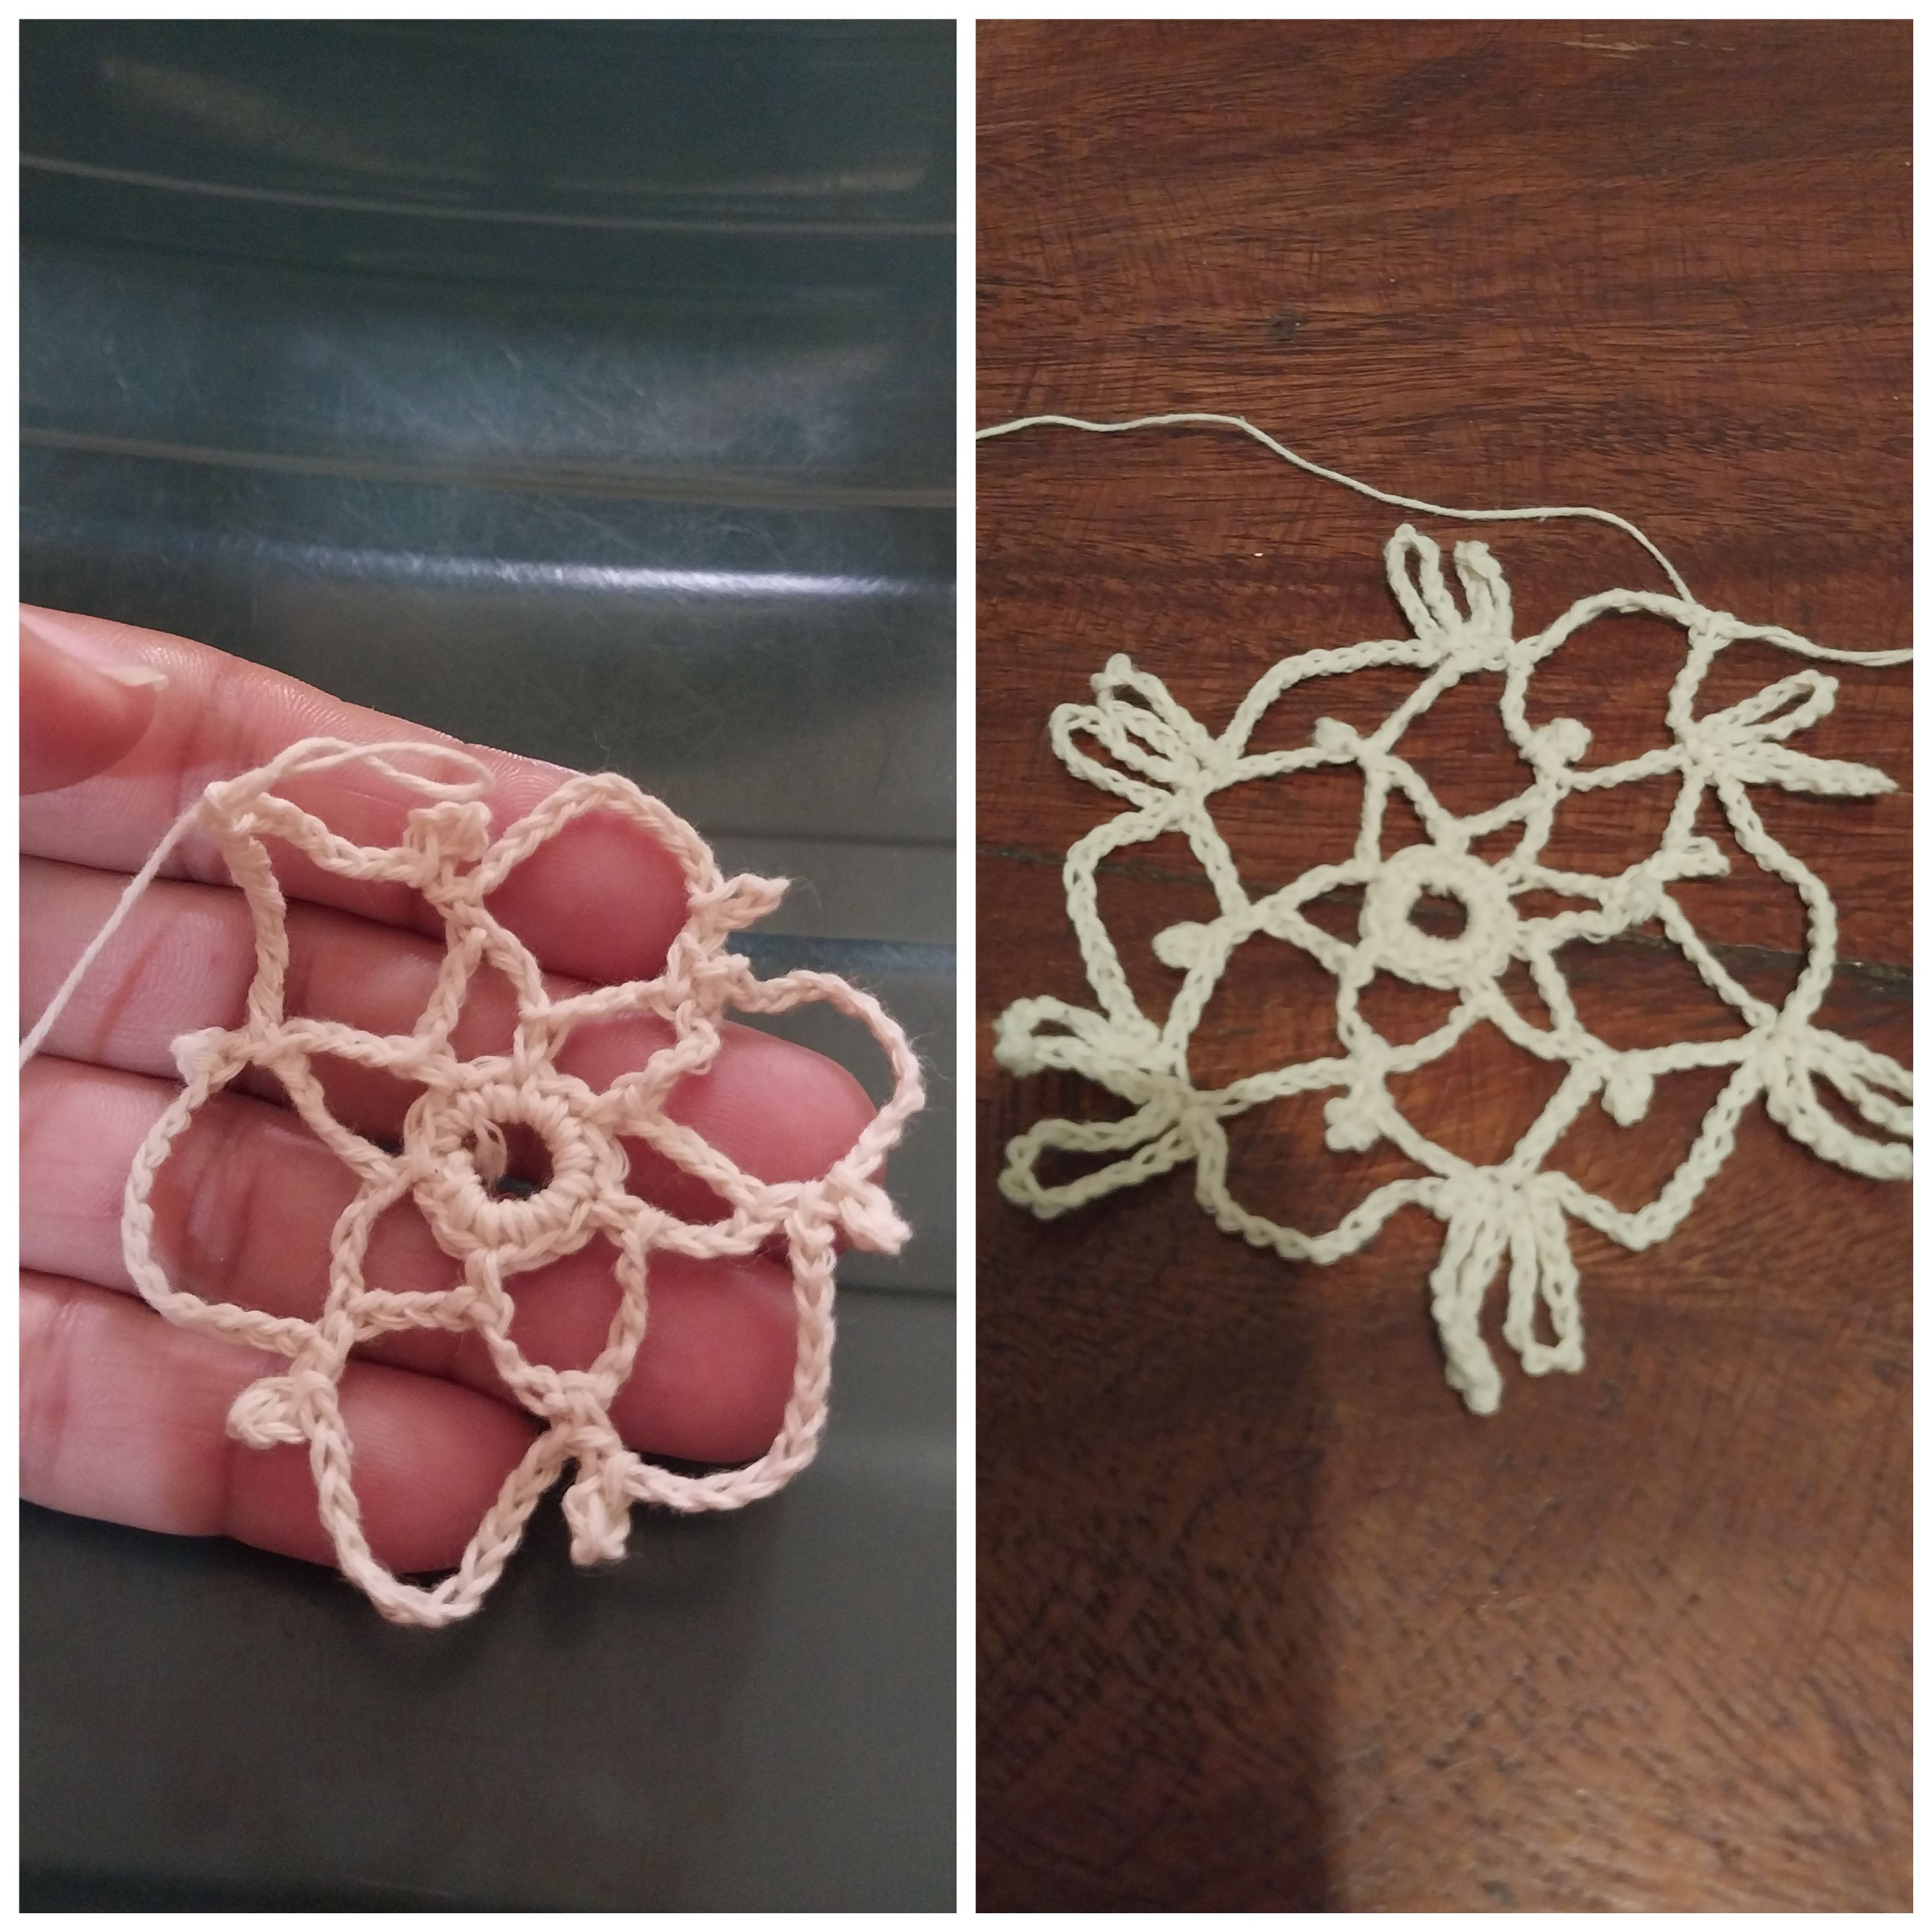
Paso No.3
comenzamos Tejiendo doce puntos y se cierra con un medio punto en el medio del aro de la vuelta anterior, tejemos tres puntos y lo cerramos en el primer punto de los tres con un medio punto, Y seguimos Tejiendo los doce puntos se vuelven a colocar en el centro del aro anterior con un medio punto Y así seguimos Tejiendo hasta terminar la vuelta.
Step No.3 We start knitting twelve stitches and close with a half stitch in the middle of the ring of the previous row, we knit three stitches and close it in the first stitch of the three with a half stitch, and we continue knitting the twelve stitches are placed again in the center of the previous ring with a half stitch and so we continue knitting until the end of the row.
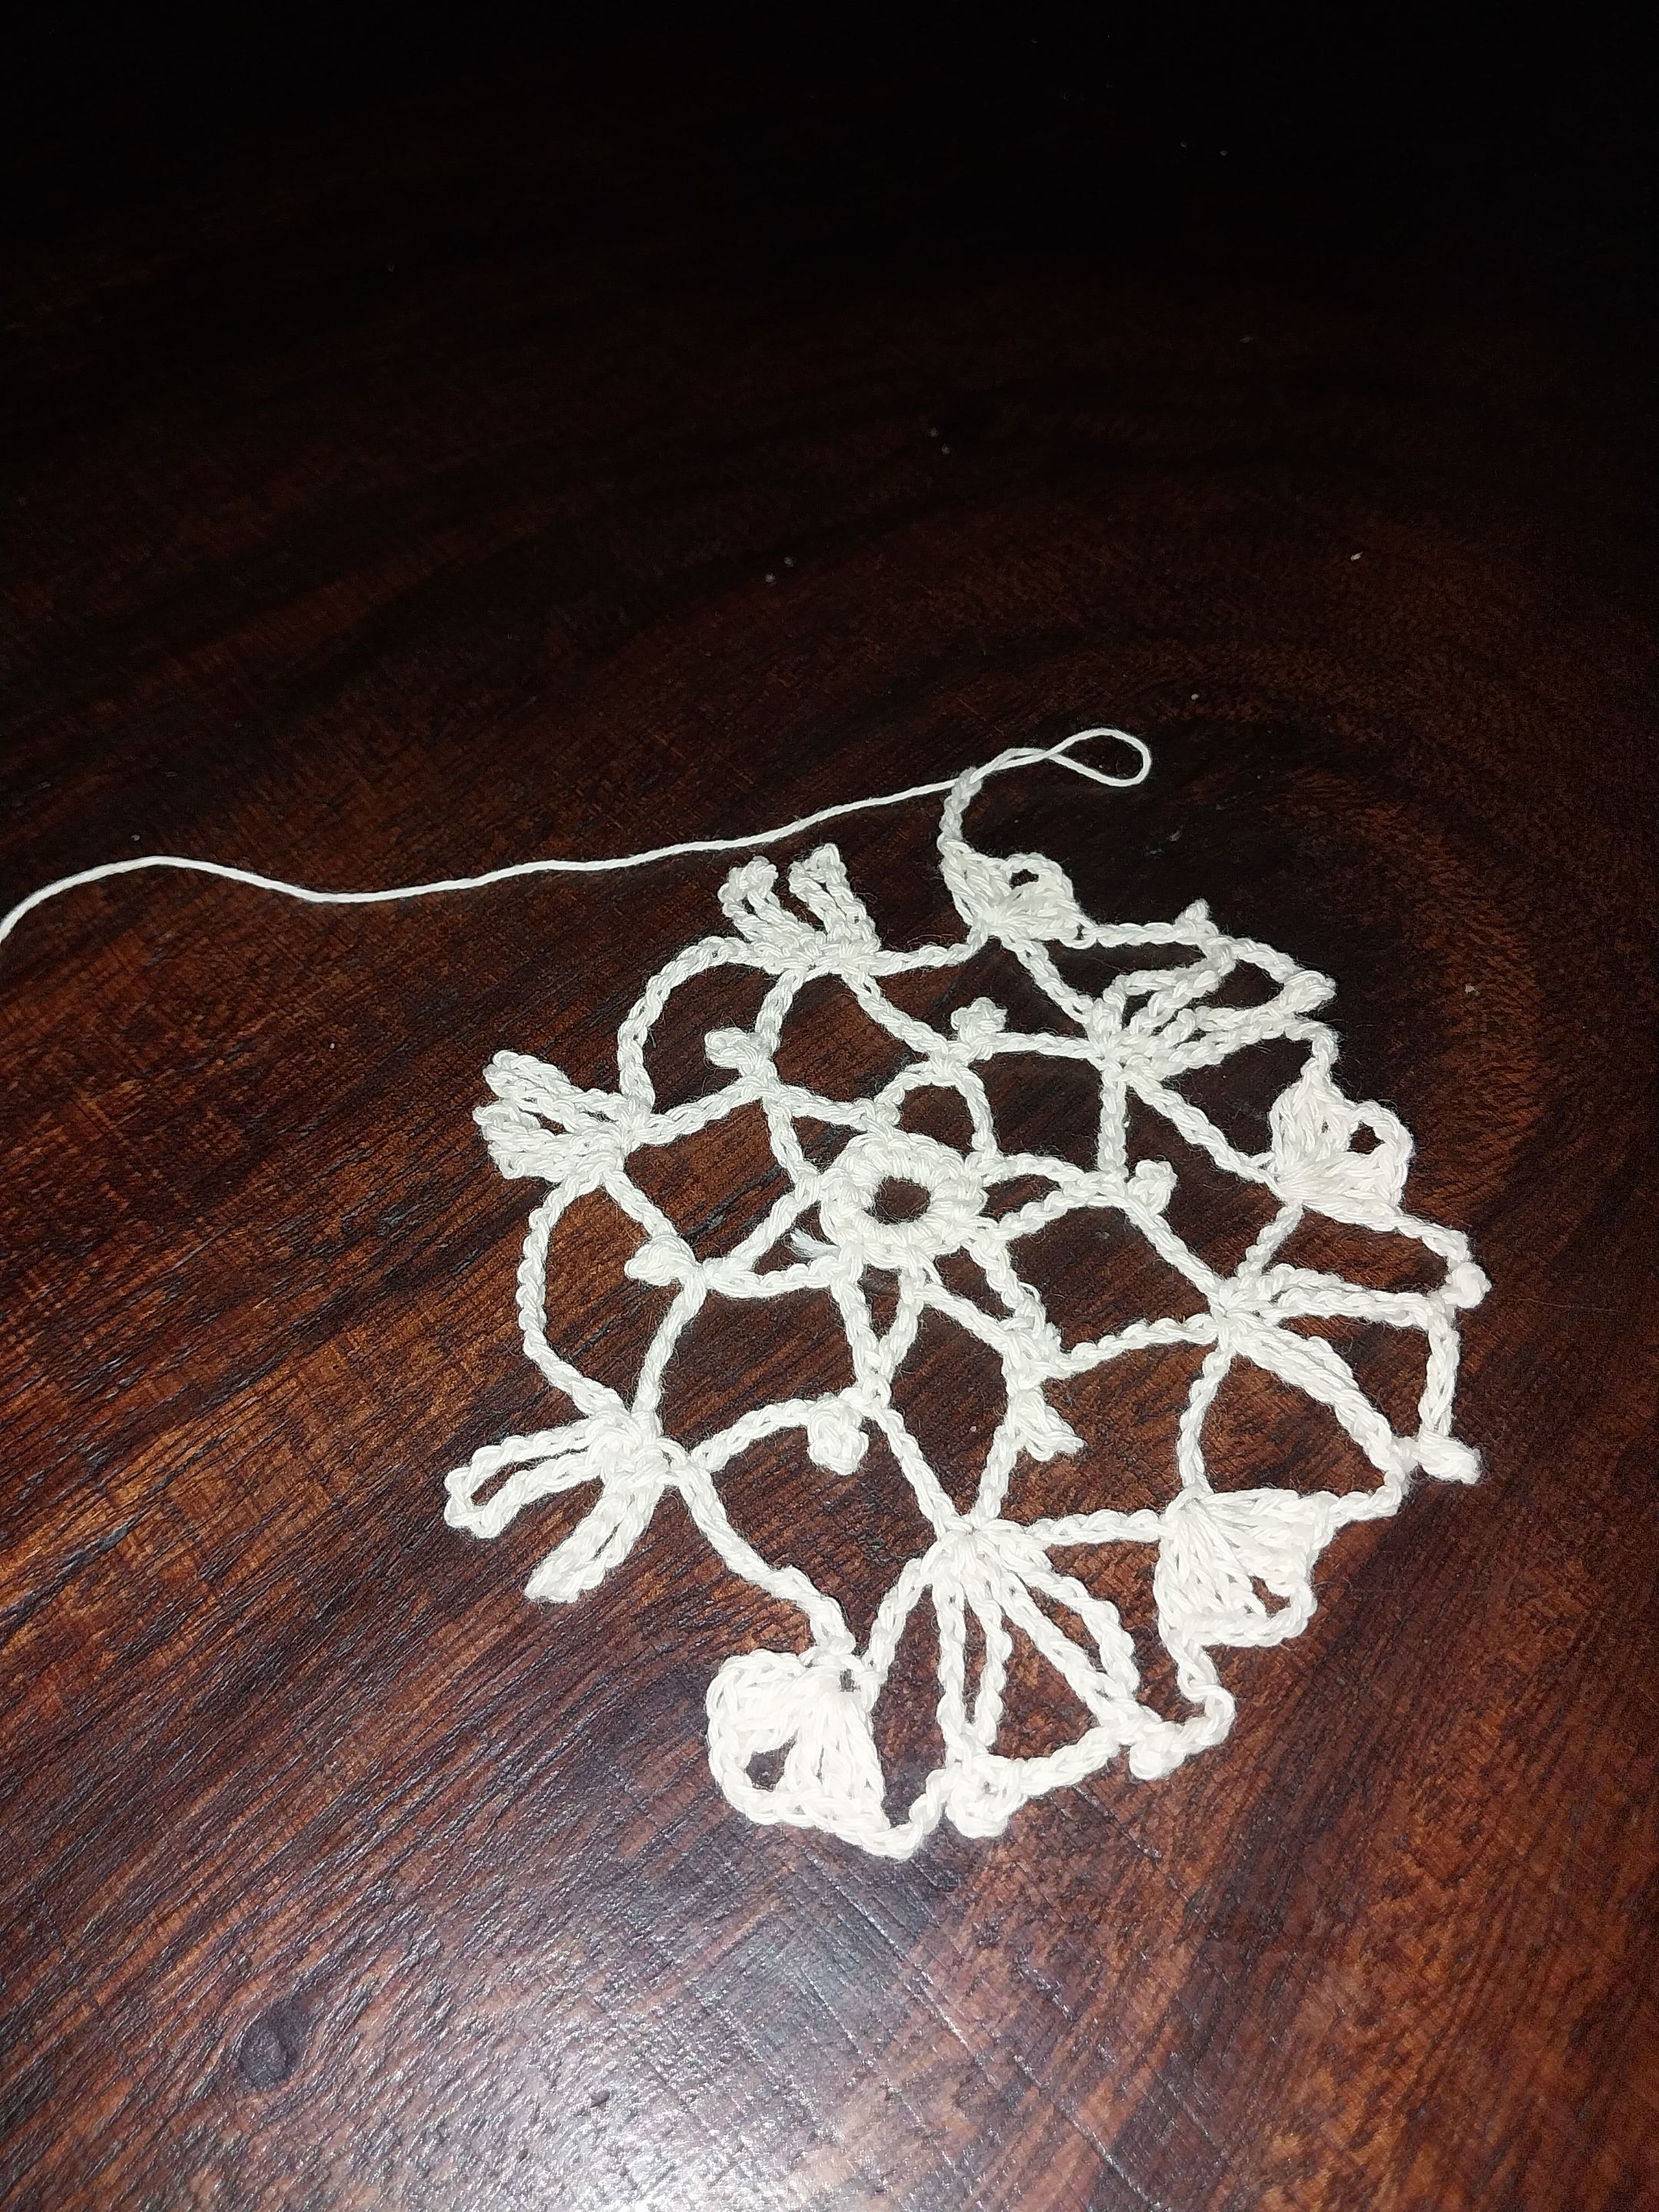
Paso No.4
seguimos Tejiendo la siguiente vuelta Tejiendo doce cadenas y con un medio punto la colocamos en el punto del lado y volvimos a tejer doce cadenas y se vuelve a cerrar con un medio punto en la siguiente cadena, se tejen doce cadenas más y se le coloca con un medio punto en el medio de la cadena de la vuelta anterior y así seguimos Tejiendo la vuelta hasta finalizarla.
Step No.4 We continue knitting the next row knitting twelve chains and with a half stitch we place it in the side stitch and we knit twelve chains again and we close it again with a half stitch in the next chain, we knit twelve more chains and we place it with a half stitch in the middle of the chain of the previous row and so we continue knitting the row until the end of the row.
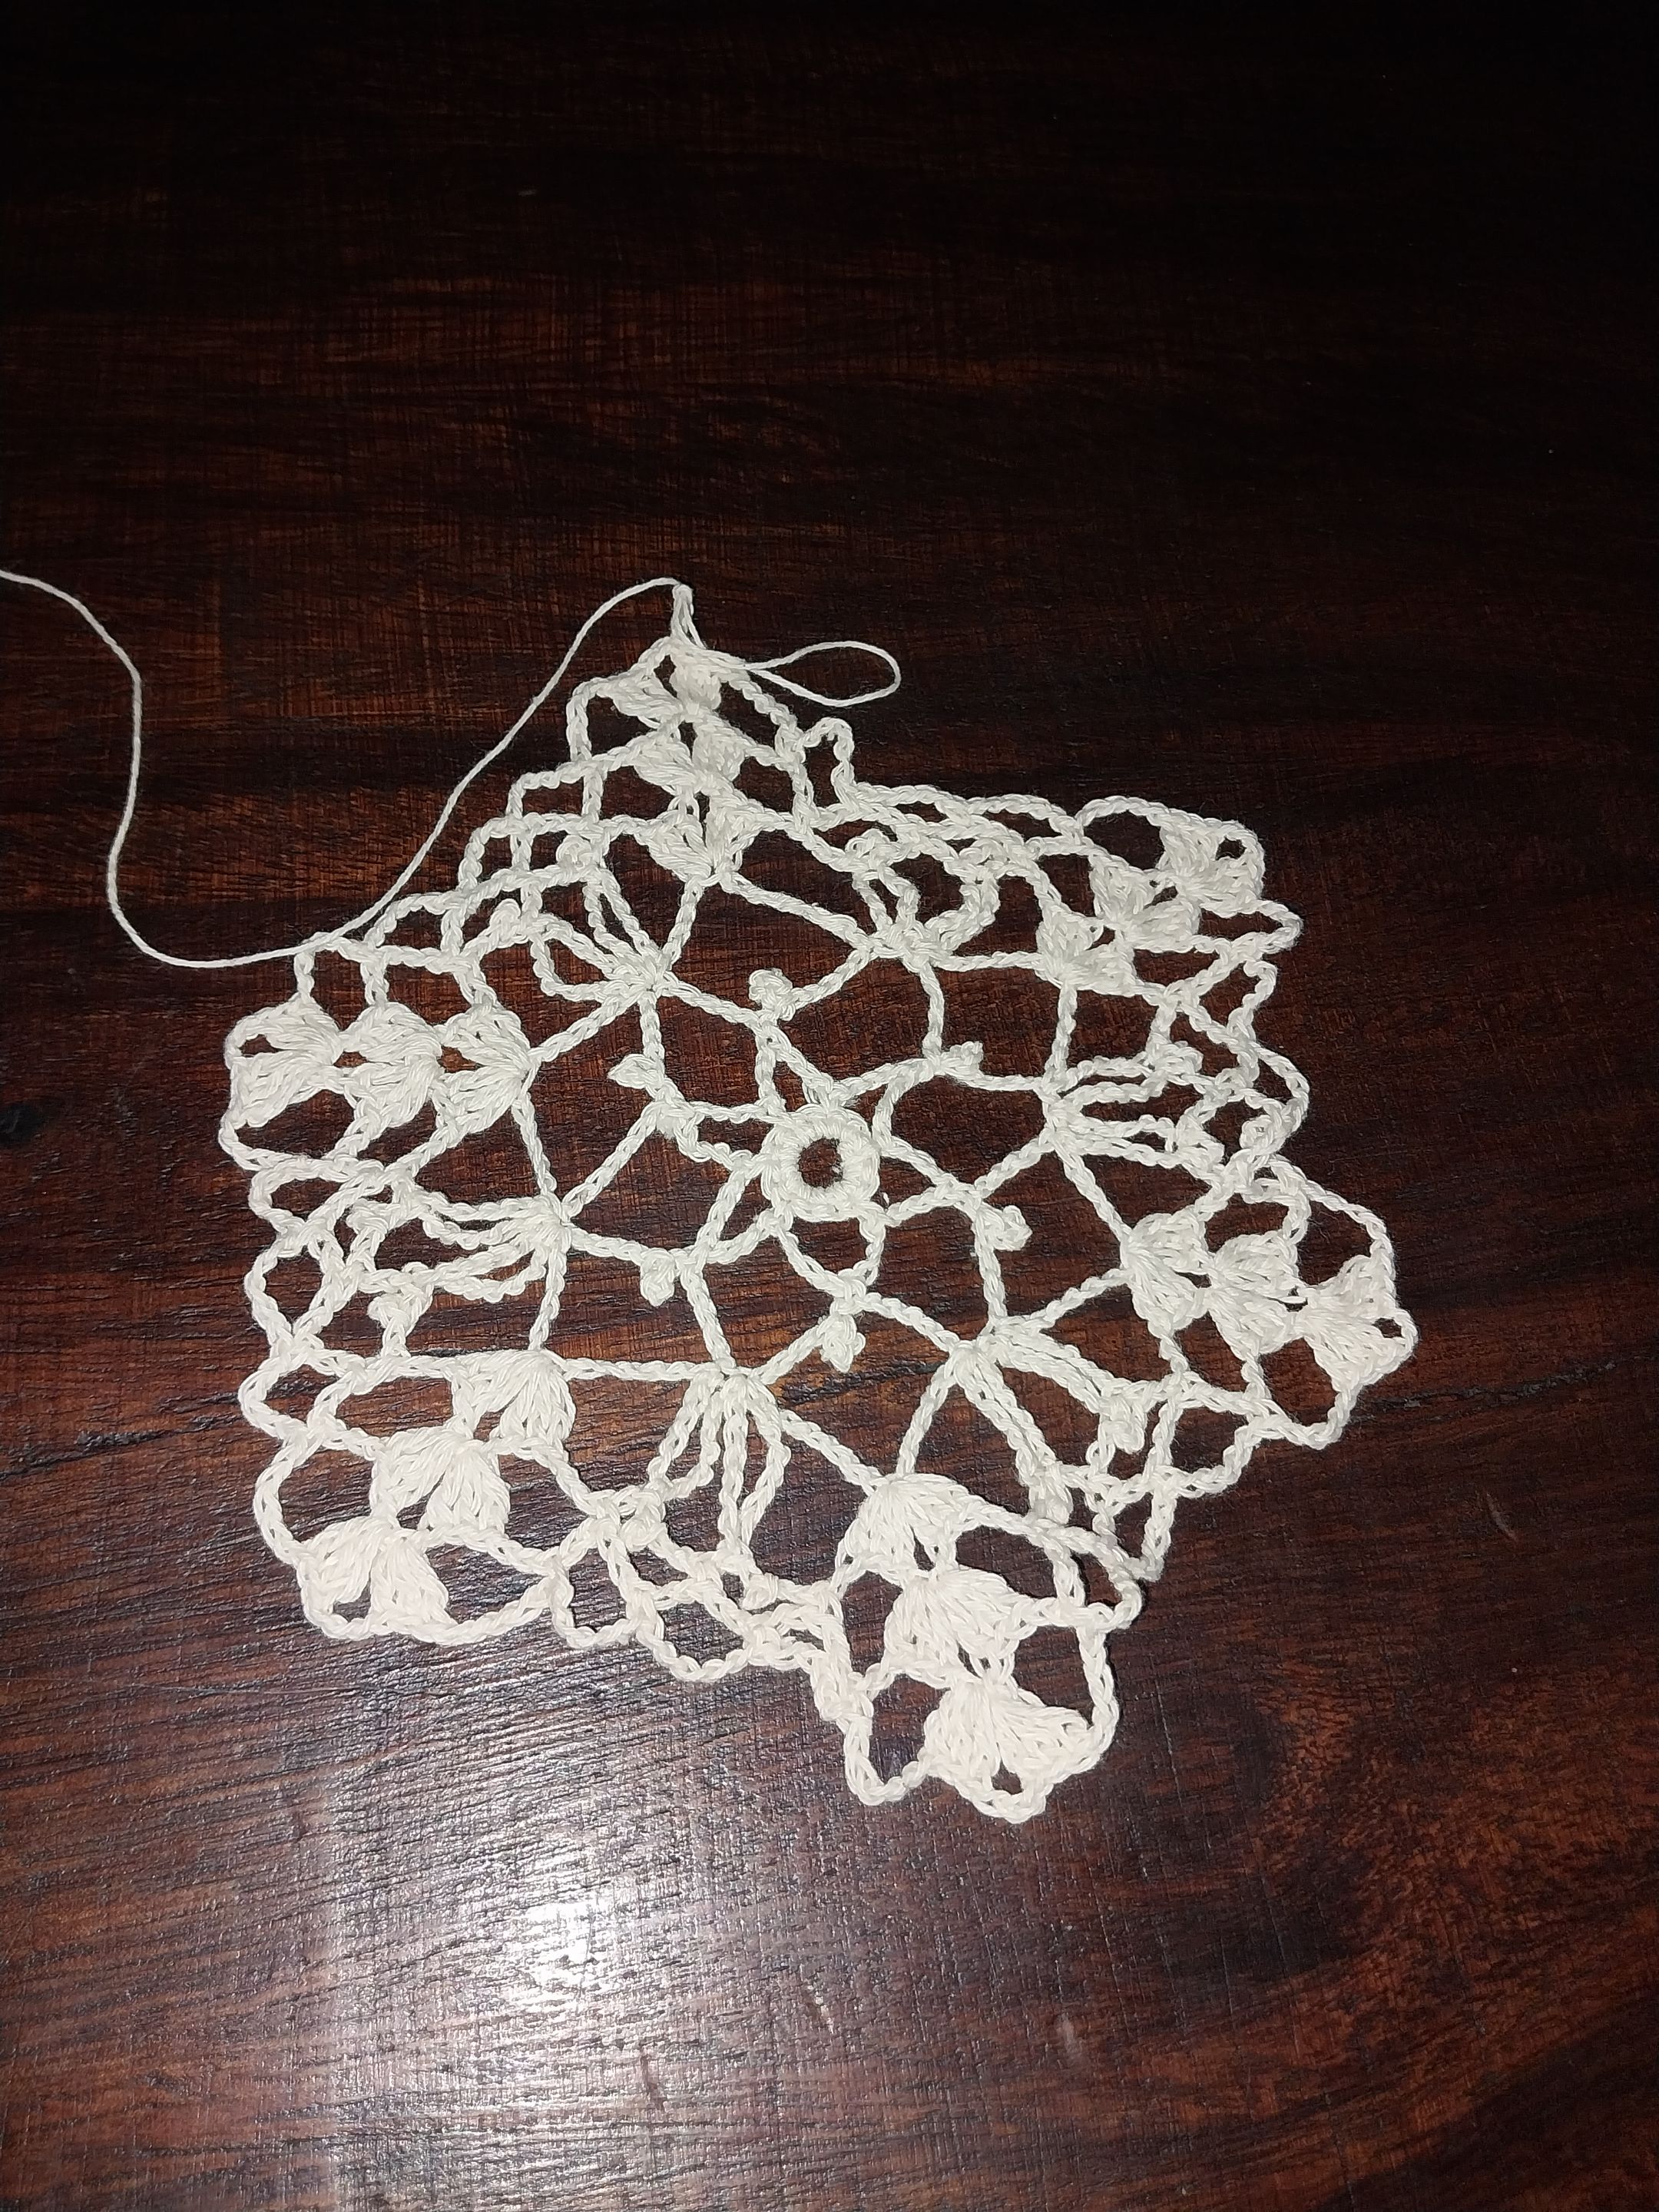
Paso No.5
comenzamos la siguiente vuelta con tres puntos altos y tejemos dos tachones luego tres cadenas y seguimos con tres puntos altos, luego tenemos tres cadenas y con un medio punto Lo colocamos en una de las cadenas de la vuelta anterior y se tejen tres cadenas más y se cierra con un medio punto en el otro aro y así seguimos hasta finalizar la vuelta y luego repetimos tres vueltas iguales.
Step No.5 We start the next row with three double crochet stitches and we knit two strips, then three chains and continue with three double crochets, then we have three chains and with a half stitch we place it in one of the chains of the previous row and we knit three more chains and close with a half stitch in the other ring and so we continue until the end of the row and then we repeat three equal rows.
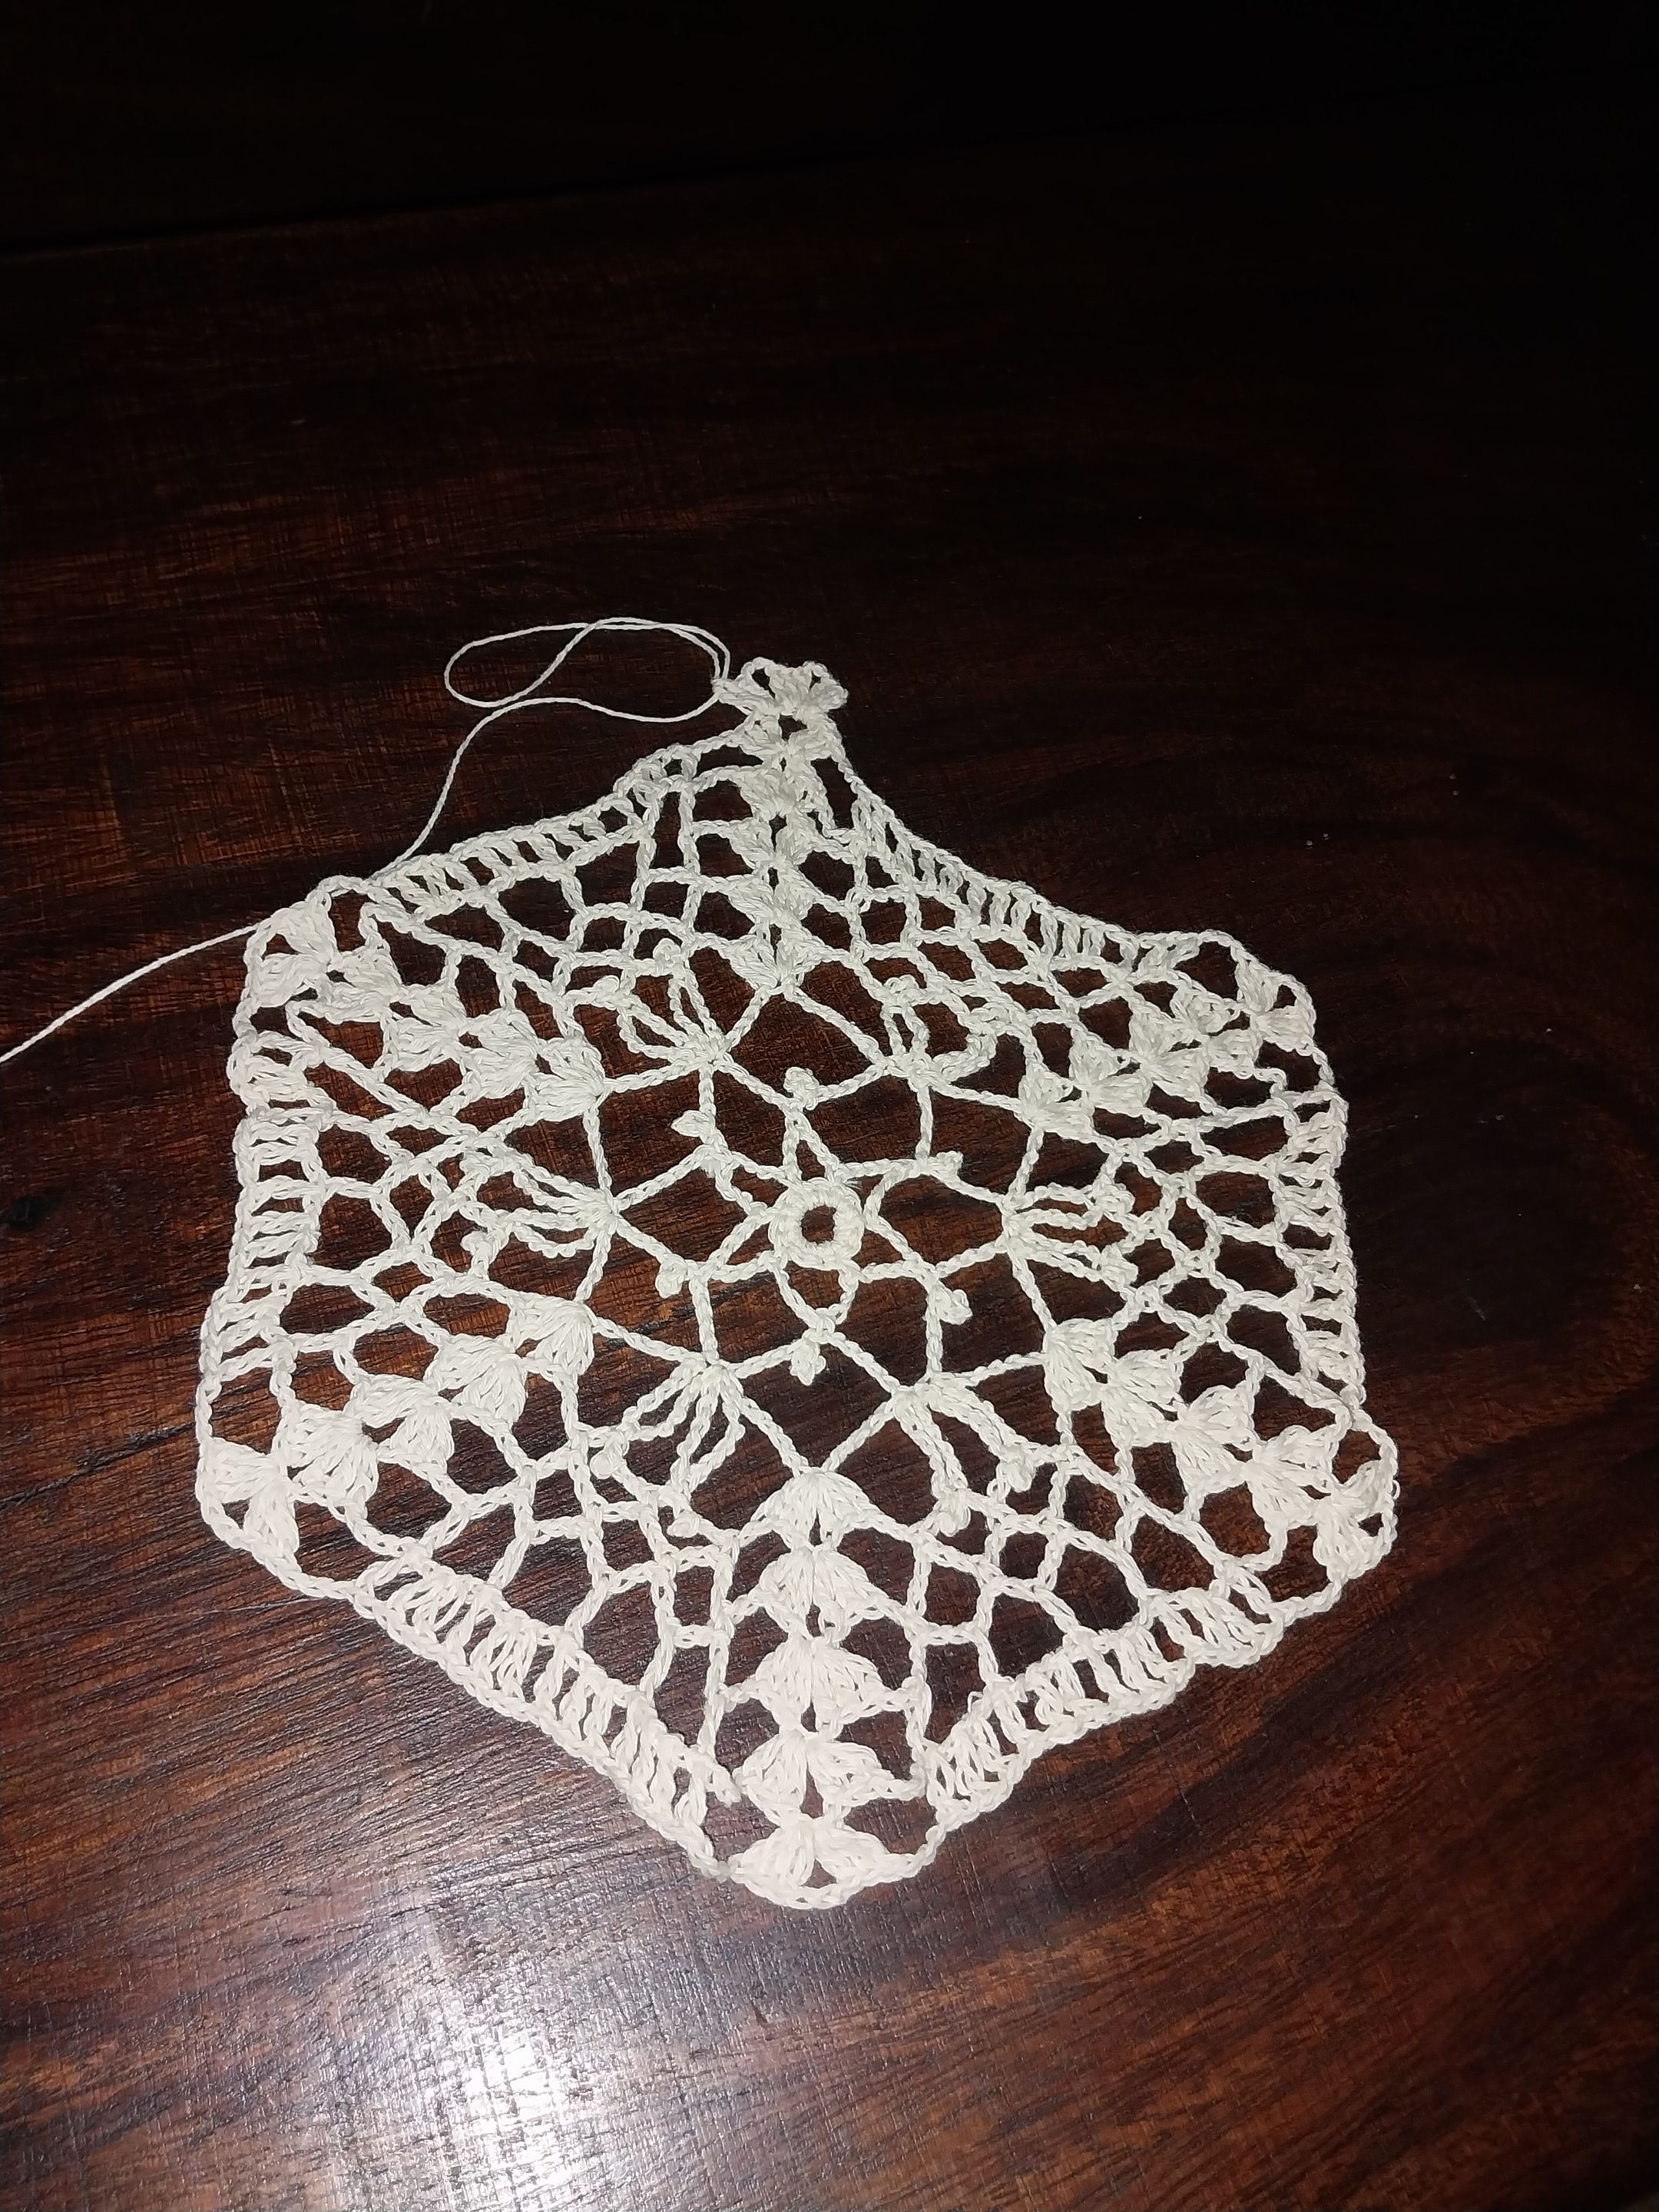
Paso No.6
tejemos la siguiente vuelta con tres puntos altos para hacer un tachón y se tejen dos tachones más, luego tres cadenas y seguimos con tres tachones, se tejen cuatro cadenas y un tachón en el medio de la vuelta anterior y así seguimos Tejiendo cuatro cadenas un tachón hasta tejer cinco cadenas, luego volvemos sobre el abanico a tejer tres tachones, tres cadenas y tres tachones más, y se vuelve a repetir hasta finalizar la vuelta que la cerramos con un punto deslizado. Y luego realizamos otra vuelta igual a la anterior, siempre cerrando la vuelta con un punto deslizado.
Step No.6 We knit the next row with three double crochet stitches to make a stud and knit two more studs, then three chains and continue with three studs, knit four chains and a stud in the middle of the previous row and so we continue knitting four chains and a stud until we knit five chains, then we return on the fan to knit three studs, three chains and three more studs, and repeat again until the end of the row that we close it with a slip stitch. And then we make another round the same as the previous one, always closing the round with a slip stitch.
Paso No.7
seguimos Tejiendo subiendo con tres puntos altos para realizar un abanico y se teje dos cadenas para hacer otro abanico en el siguiente de la vuelta anterior, se tejen tres cadenas y seguimos Tejiendo un Tachón una cadena sobre cada cadena de la vuelta anterior y así continuamos Tejiendo la vuelta hasta terminarla y la cerramos con un punto deslizado.
Step No.7 We continue knitting up with three high stitches to make a fan and we knit two chains to make another fan in the next chain of the previous row, we knit three chains and continue knitting one chain over each chain of the previous row and so we continue knitting the row until we finish it and we close it with a slip stitch.
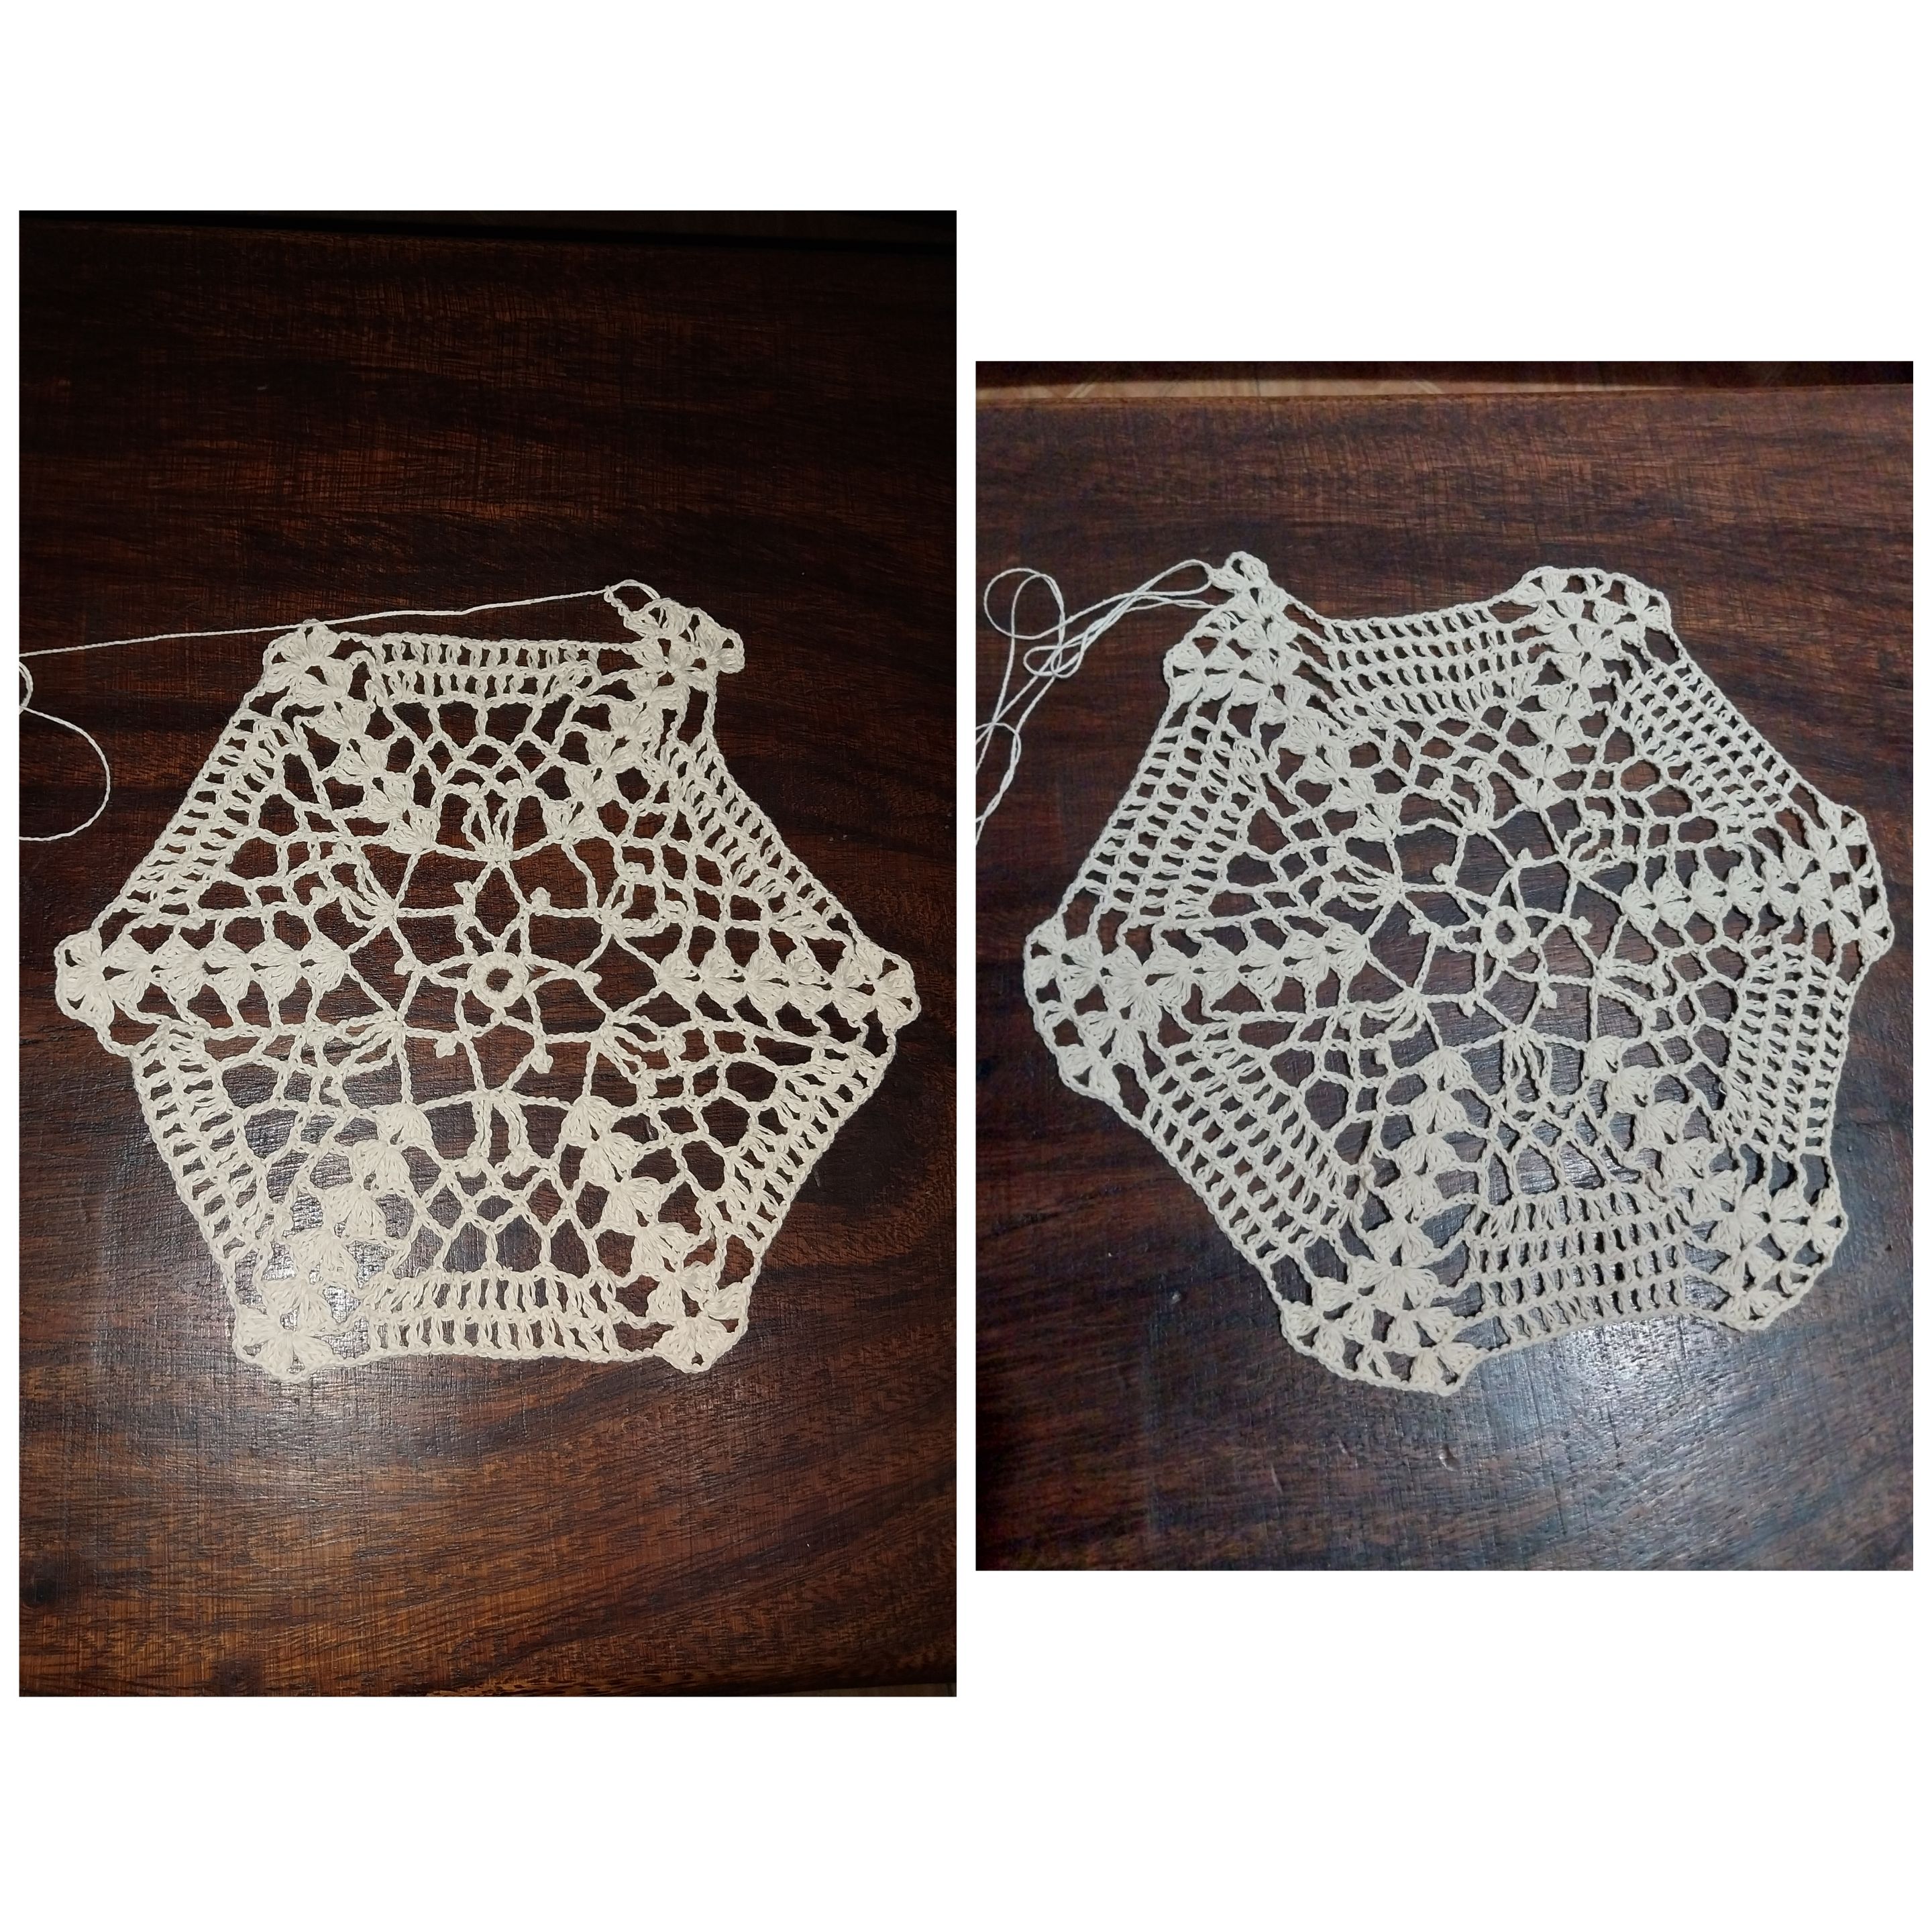
Paso No.8
continuamos con la siguiente vuelta corrimos con tres medio puntos hasta llegar al centro del abanico para subir con tres cadenas y luego seguimos con dos tachones tres cadenas y otros tres tachones más para hacer un abanico, luego dos cadenas y en el centro de dos cadenas que están entre los dos abanicos aquí colocamos un tachón dos cadenas un tachón y lo colocamos en la misma cadena del tachón anterior y así seguimos Tejiendo el otro abanico sobre el de la vuelta anterior y continuamos hasta terminar la vuelta que la cerramos con un punto deslizado, y así le repetimos dos vueltas hacia arriba.
Step No.8 we continue with the next round we run with three half stitches until we reach the center of the fan to go up with three chains and then we continue with two studs three chains and another three more studs to make a fan, then two chains and in the center of two chains that are between the two fans here we place one stud two chains one stud and we place it in the same chain of the previous stud and so we continue knitting the other fan over the one of the previous row and we continue until we finish the row that we close it with a slipped stitch, and so we repeat two rows up.
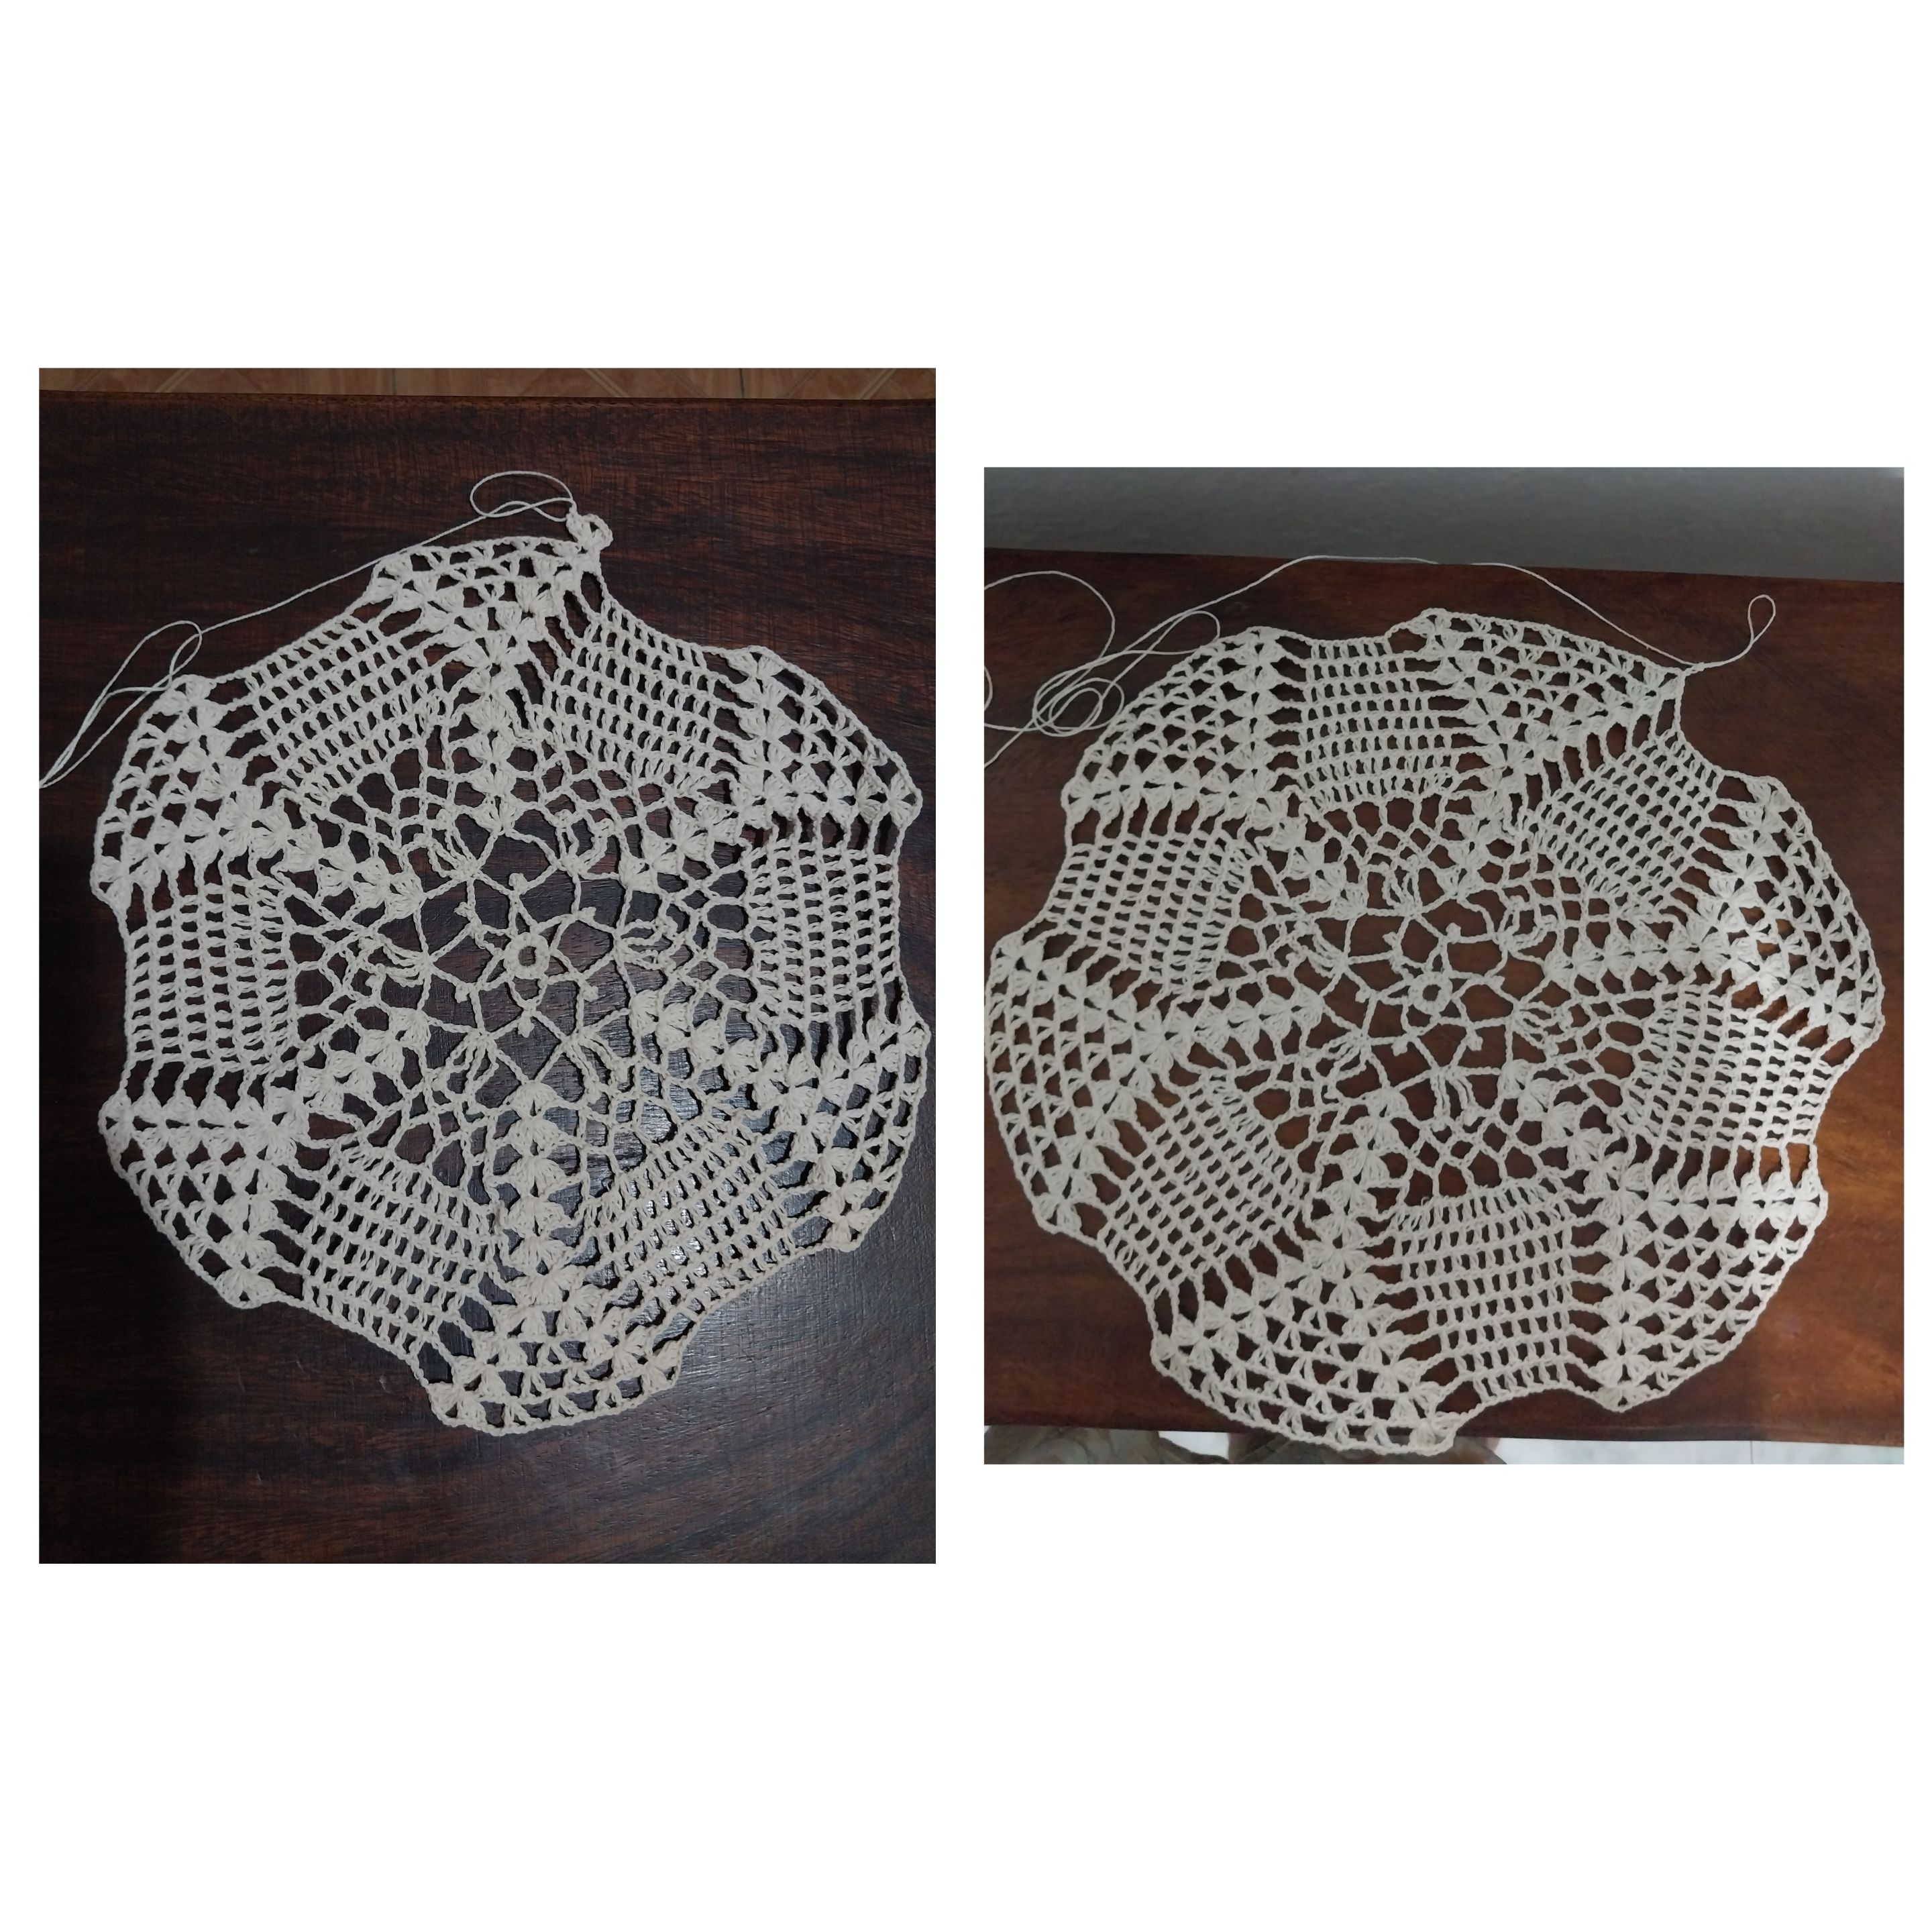
Paso No.9
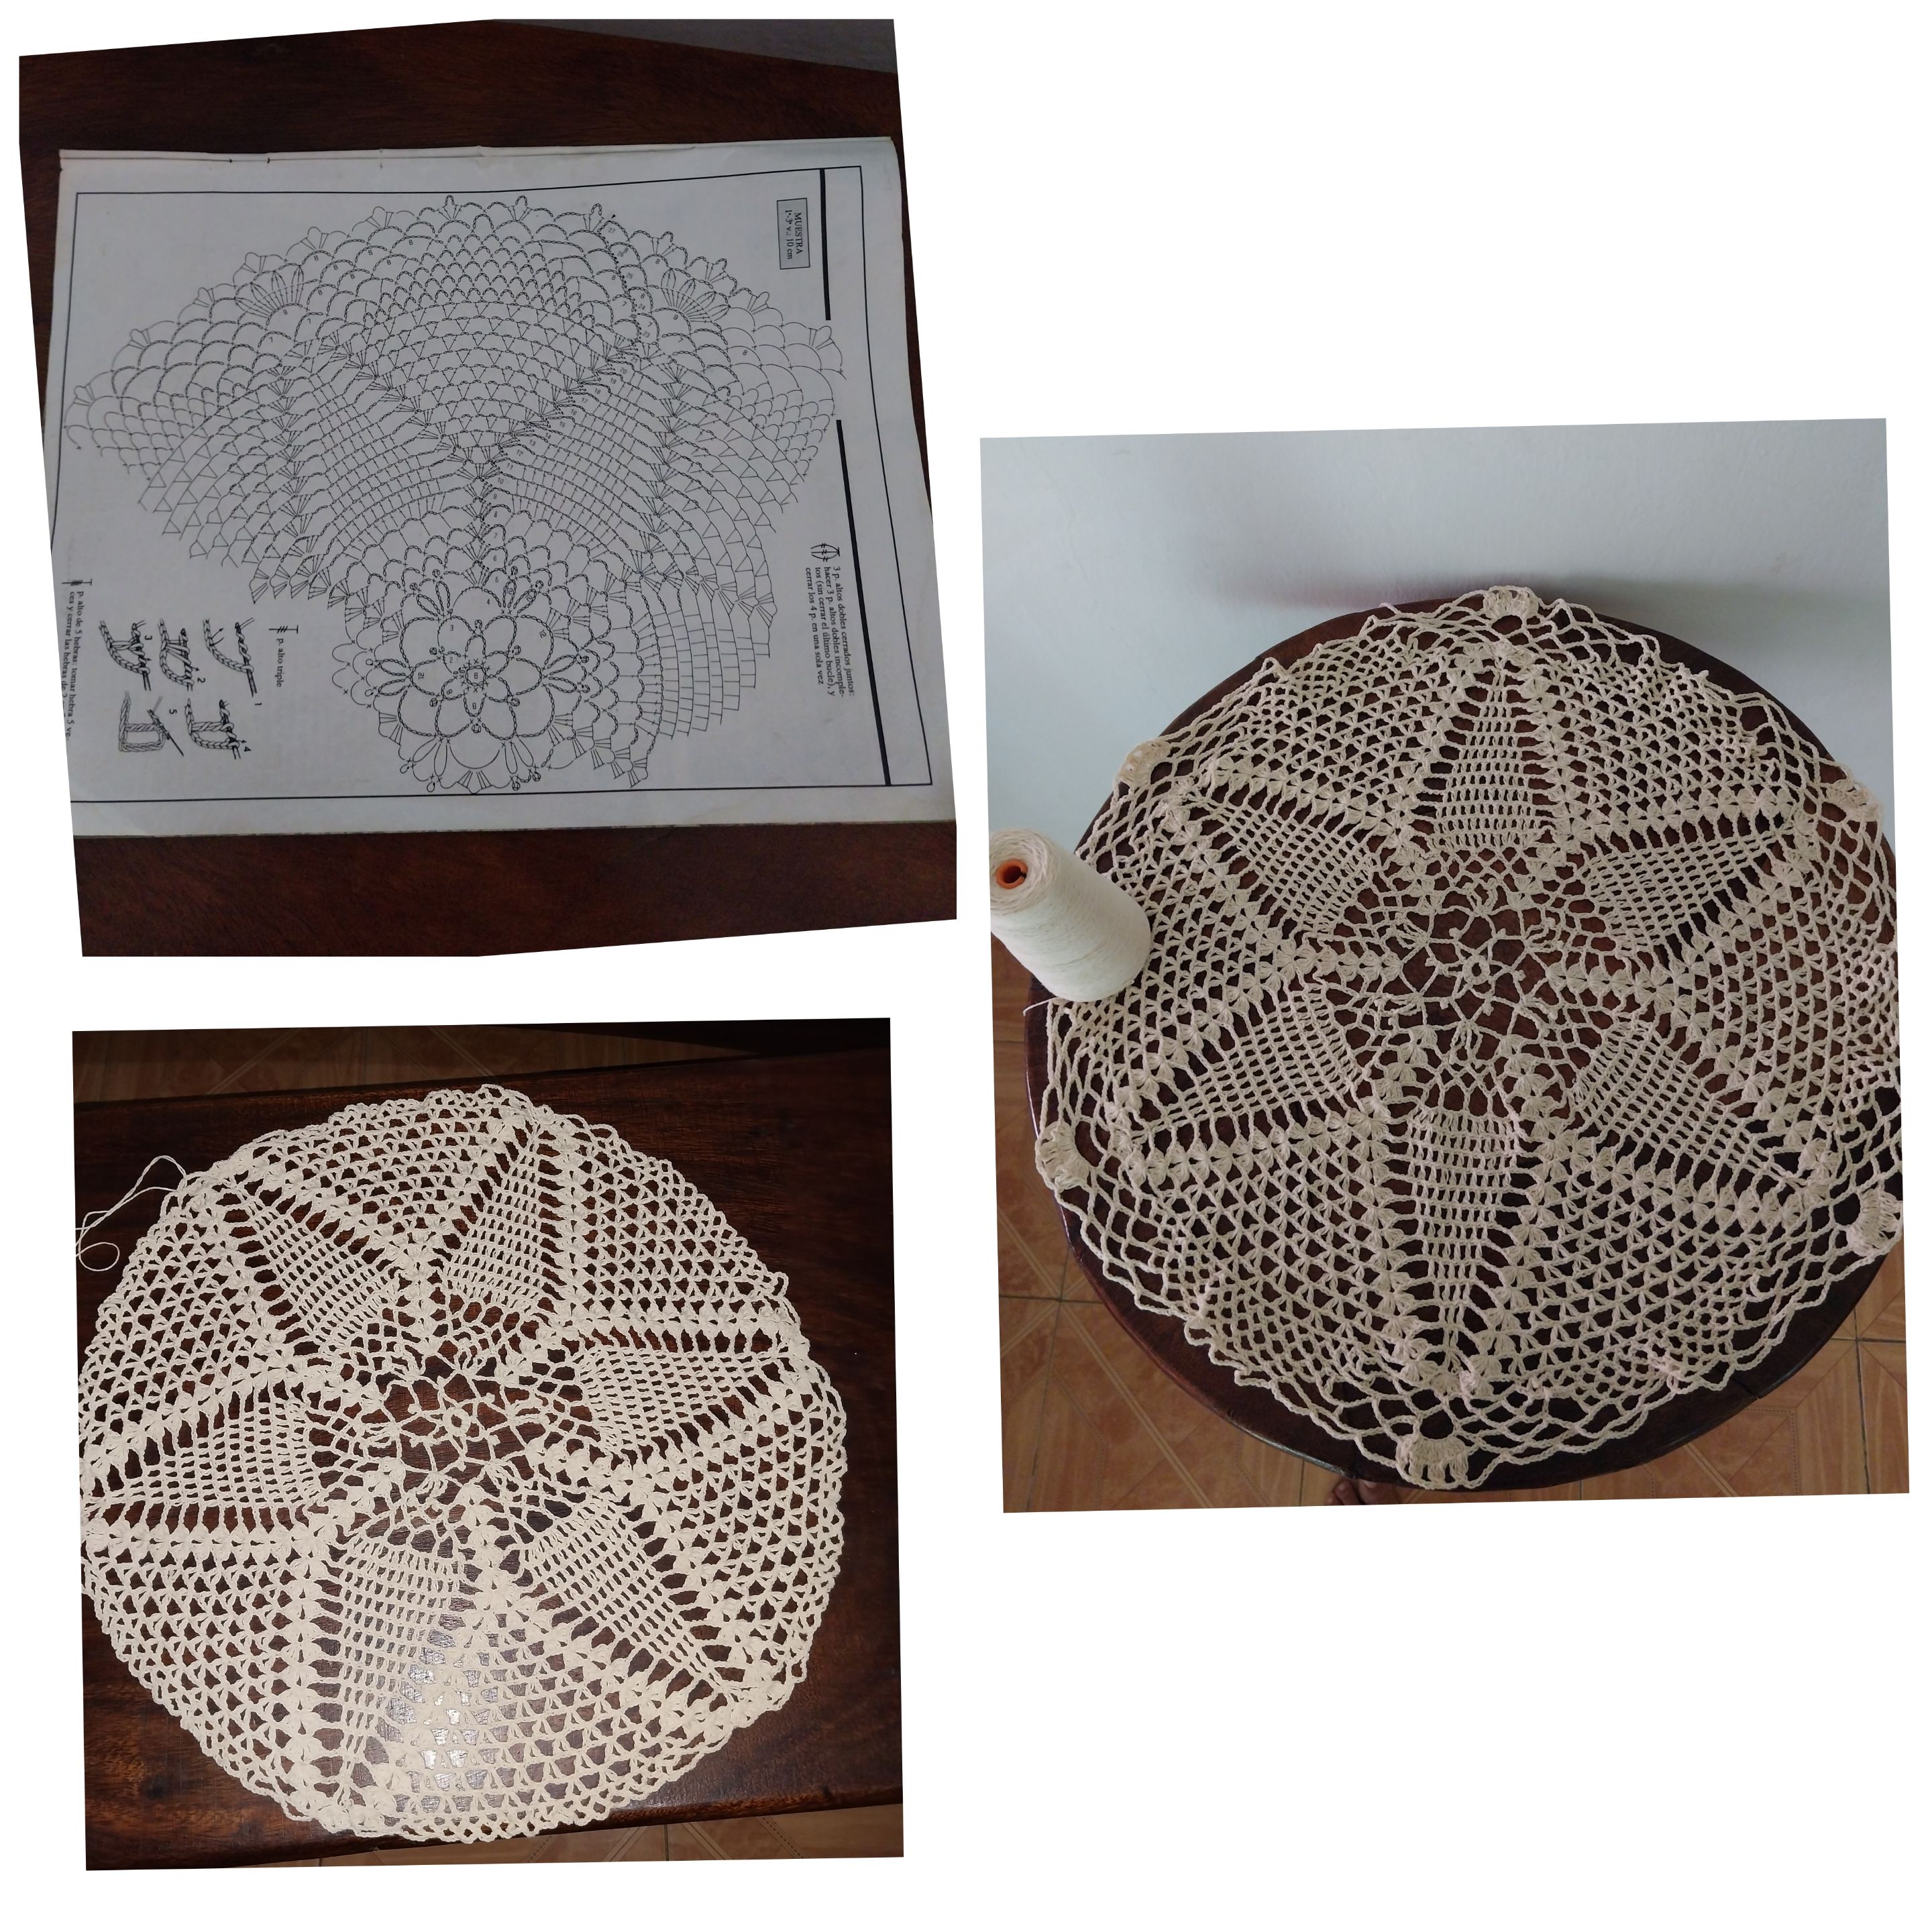
así continuamos tejiendo con la ayuda de patrones gráficos, hasta culminar con el tapete o pañito tejido.
Step No.9 We continue weaving with the help of graphic patterns, until we end up with the woven mat or handkerchief.