🎉 Hey Hive Rockstars! 🥳
Ready to level up your tech game, save money, and have some laughs? Grab your favorite beverage, because today we're going on an EPIC ADVENTURE to self-host a MongoDB server—powered by Cloudflare Tunnel! All with pictures, guides, and plenty of emojis! 😁✨
🚦 Prerequisites (a.k.a. What you'll need before liftoff!)
- 🚀 A domain (Mine:
sagarkothari88.one) - ☁️ Cloudflare account
- 🤓 Basic knowledge of Cloudflare Tunnels
Setup MongoDB Server

Okay. Let's get started. You are in for a treat for saving your costs of mongodb by self-hosting it.
🏗️ Step 1: Access Your System
- SSH or use Chrome Remote Desktop (I love Chrome Remote Desktop for all my systems!)
- Once you're in, you're golden! 🍀
🐳 Step 2: Install Docker
Pro-tip: Docker is like giving your MongoDB its personal luxury apartment.
- For Ubuntu users — just like me! — here's the cheat code:
- You can follow the official Docker docs:
https://docs.docker.com/engine/install/ubuntu/ - Feeling lucky? Use my ready-to-copy commands below!
🎯 Docker-install-step-1: Remove any old baggage
for pkg in docker.io docker-doc docker-compose docker-compose-v2 podman-docker containerd runc; do sudo apt-get remove $pkg; done
🎯 Docker-install-step-2: Add Docker’s home to your address book
sudo apt-get update
sudo apt-get install ca-certificates curl
sudo install -m 0755 -d /etc/apt/keyrings
sudo curl -fsSL https://download.docker.com/linux/ubuntu/gpg -o /etc/apt/keyrings/docker.asc
sudo chmod a+r /etc/apt/keyrings/docker.asc
echo
“deb arch=$(dpkg –print-architecture) signed-by=/etc/apt/keyrings/docker.asc https://download.docker.com/linux/ubuntu
$(. /etc/os-release && echo “${UBUNTU_CODENAME:-$VERSION_CODENAME}”) stable” |
sudo tee /etc/apt/sources.list.d/docker.list > /dev/null
sudo apt-get update
🎯 Docker-install-step-3: Give Docker the keys!
sudo apt-get install docker-ce docker-ce-cli containerd.io docker-buildx-plugin docker-compose-plugin
🍃 Step 3: Spin Up MongoDB in Docker!
Ready? Set. GO! Swap out the username & password, then run:
sudo docker run -d \
  --name mongodb_custom \
  -p 27017:27017 \
  -e MONGO_INITDB_ROOT_USERNAME="your-mongo-db-super-admin-username-here" \
  -e MONGO_INITDB_ROOT_PASSWORD="your-mongo-db-super-admin-password-here" \
  mongo:latest
Congratulations! 🥳 Your private MongoDB server is now live.
🌩️ Setting up Cloudflare Tunnel (where security meets cool tech)

Wanna access your MongoDB from ANYWHERE but keep it ultra-secure? You need a Cloudflare Tunnel! 🚇🦸♂️
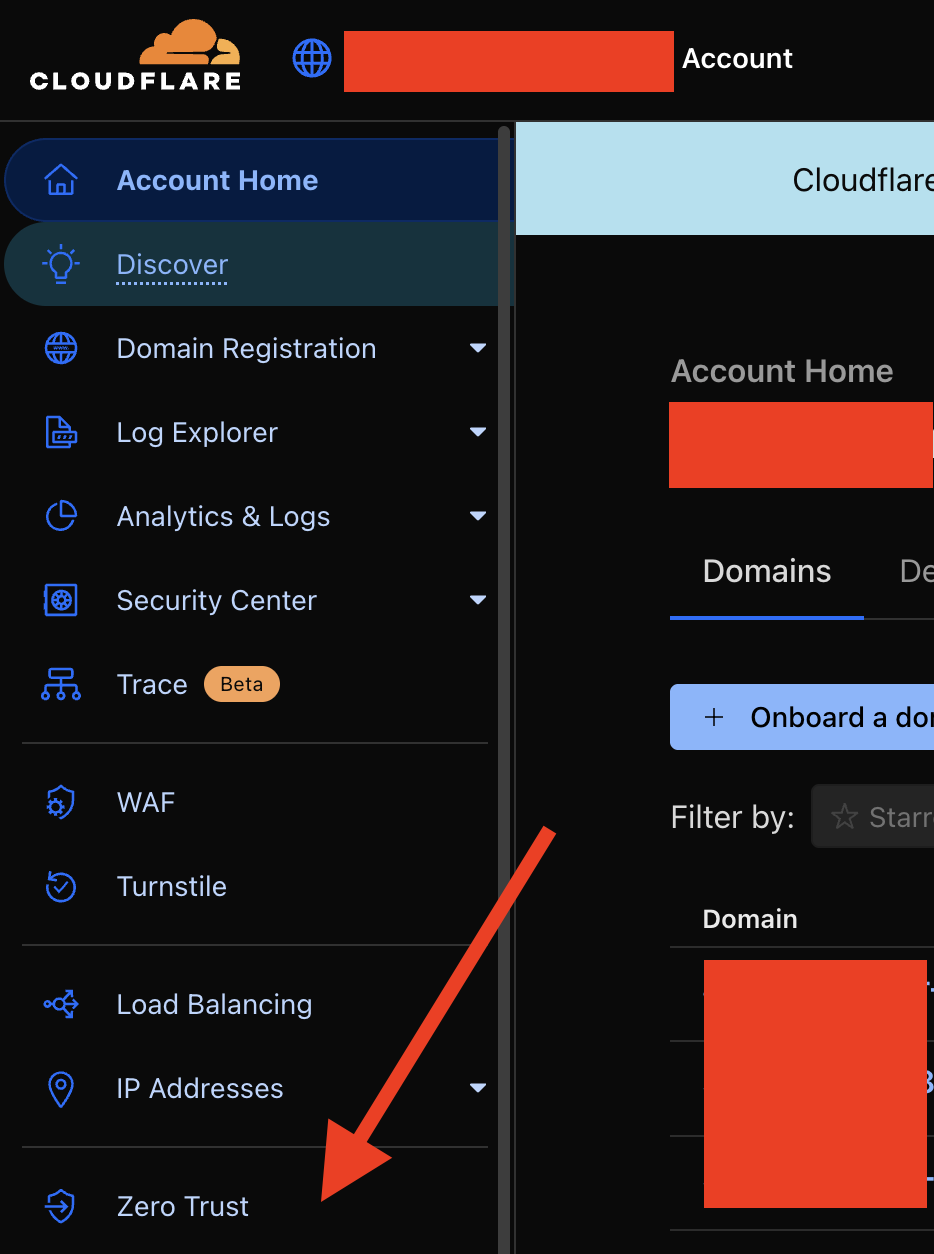
Zero Trust Magic
- Open Cloudflare dashboard
- Click Zero Trust (trust me, click it!)
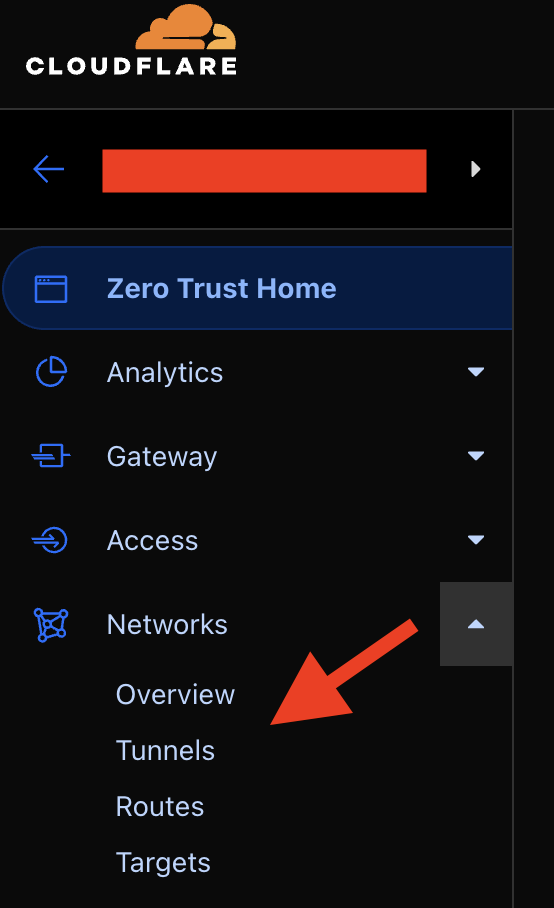
Tunnels Time!
- Go to Network > Tunnels
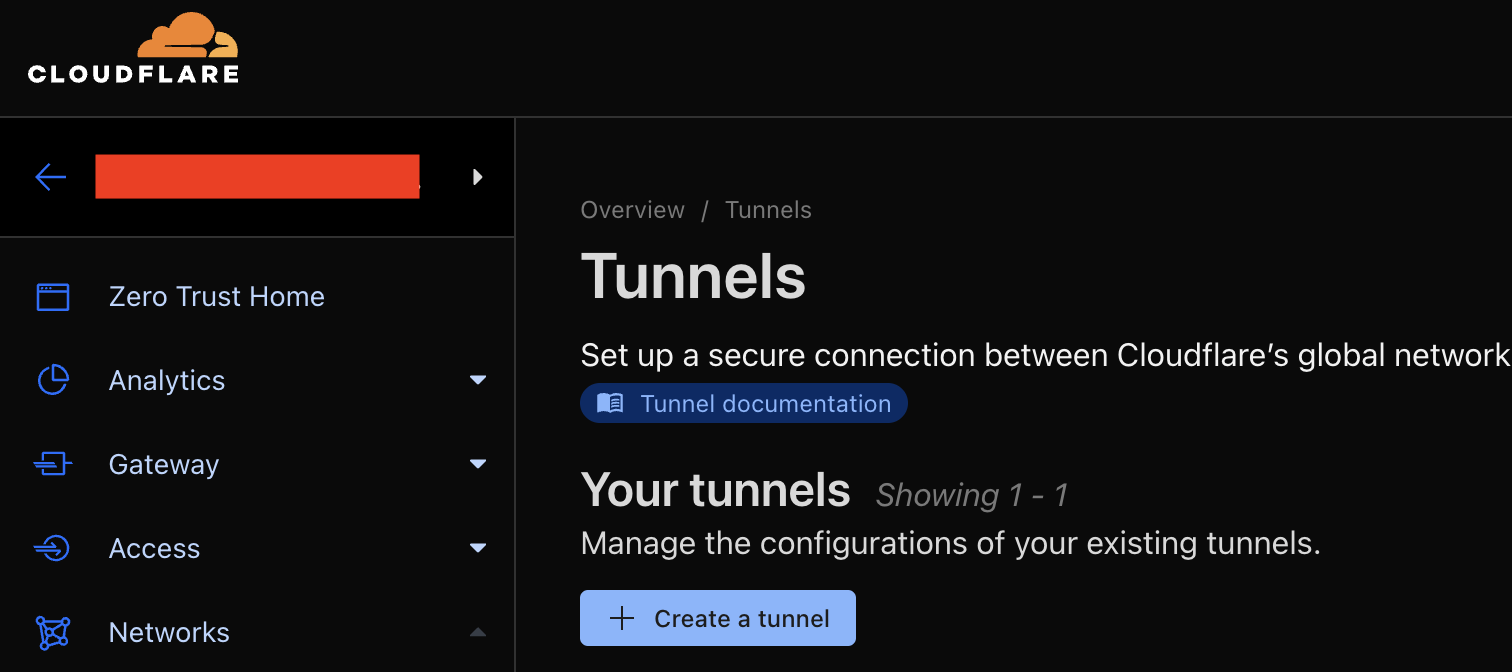
Create a Tunnel—just like creating a secret passage!
Give your Tunnel a cool name (I called mine "mongodb")
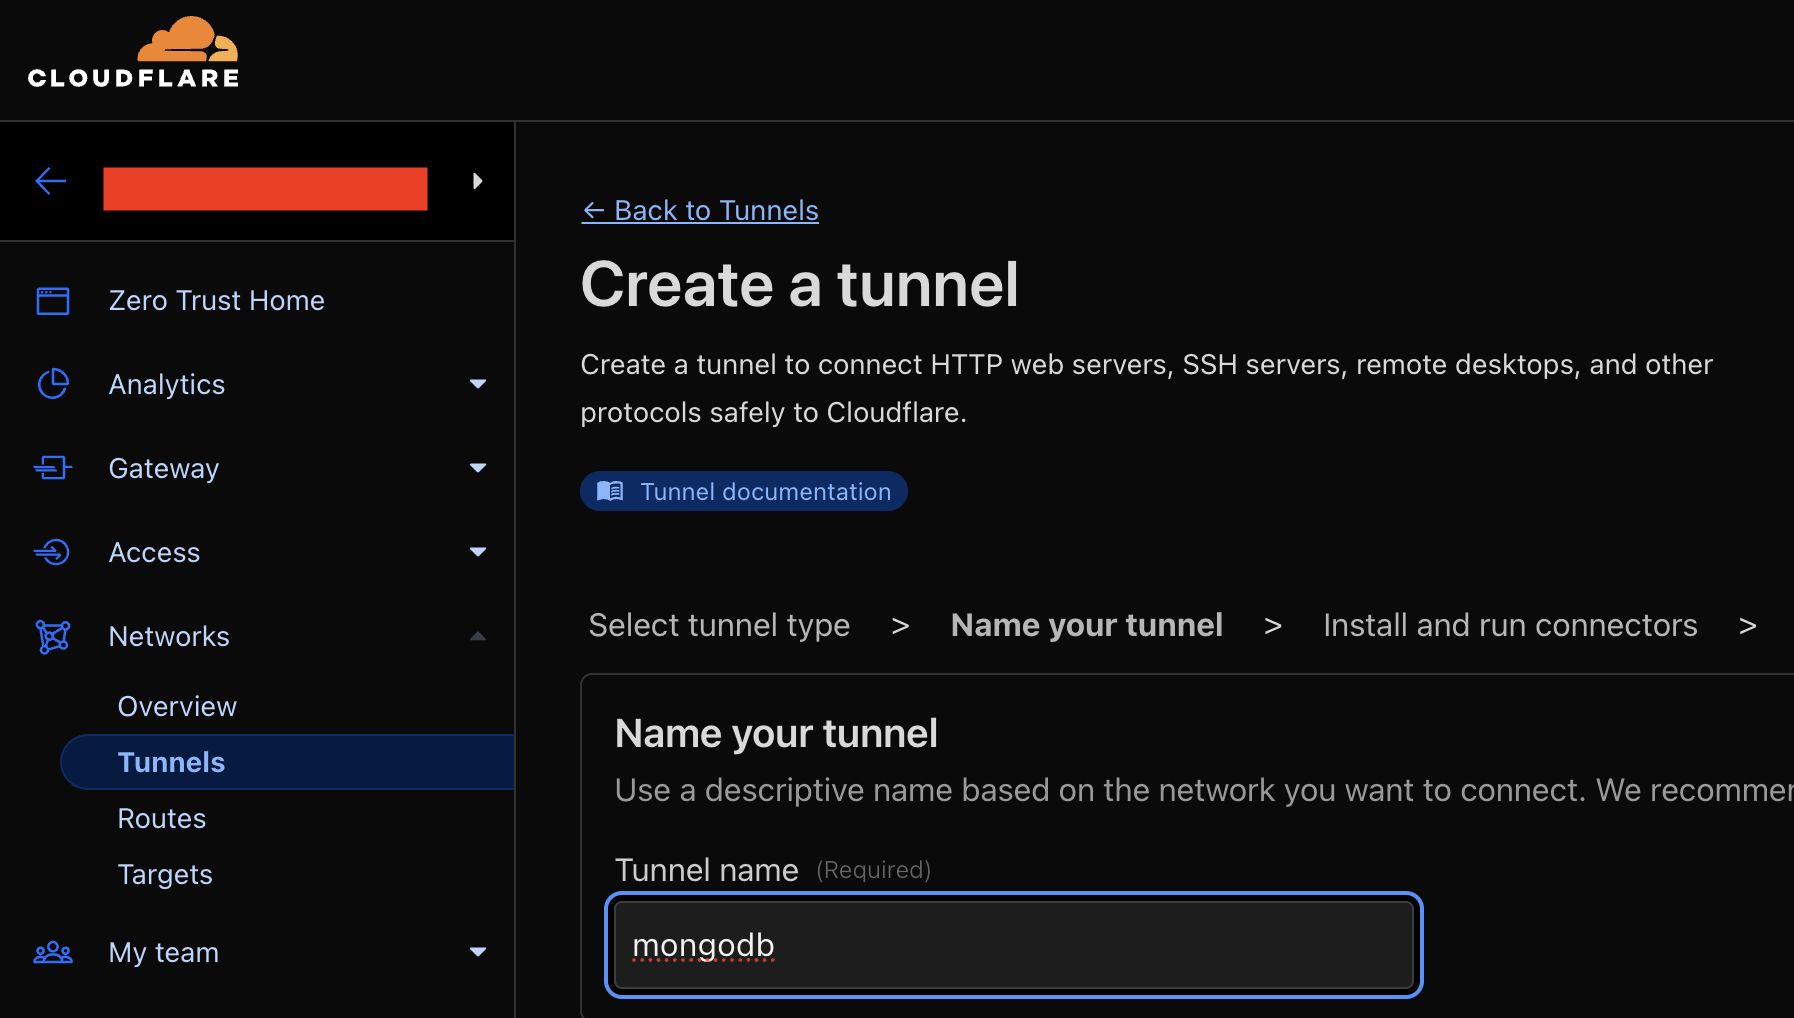
Follow setup instructions for Ubuntu
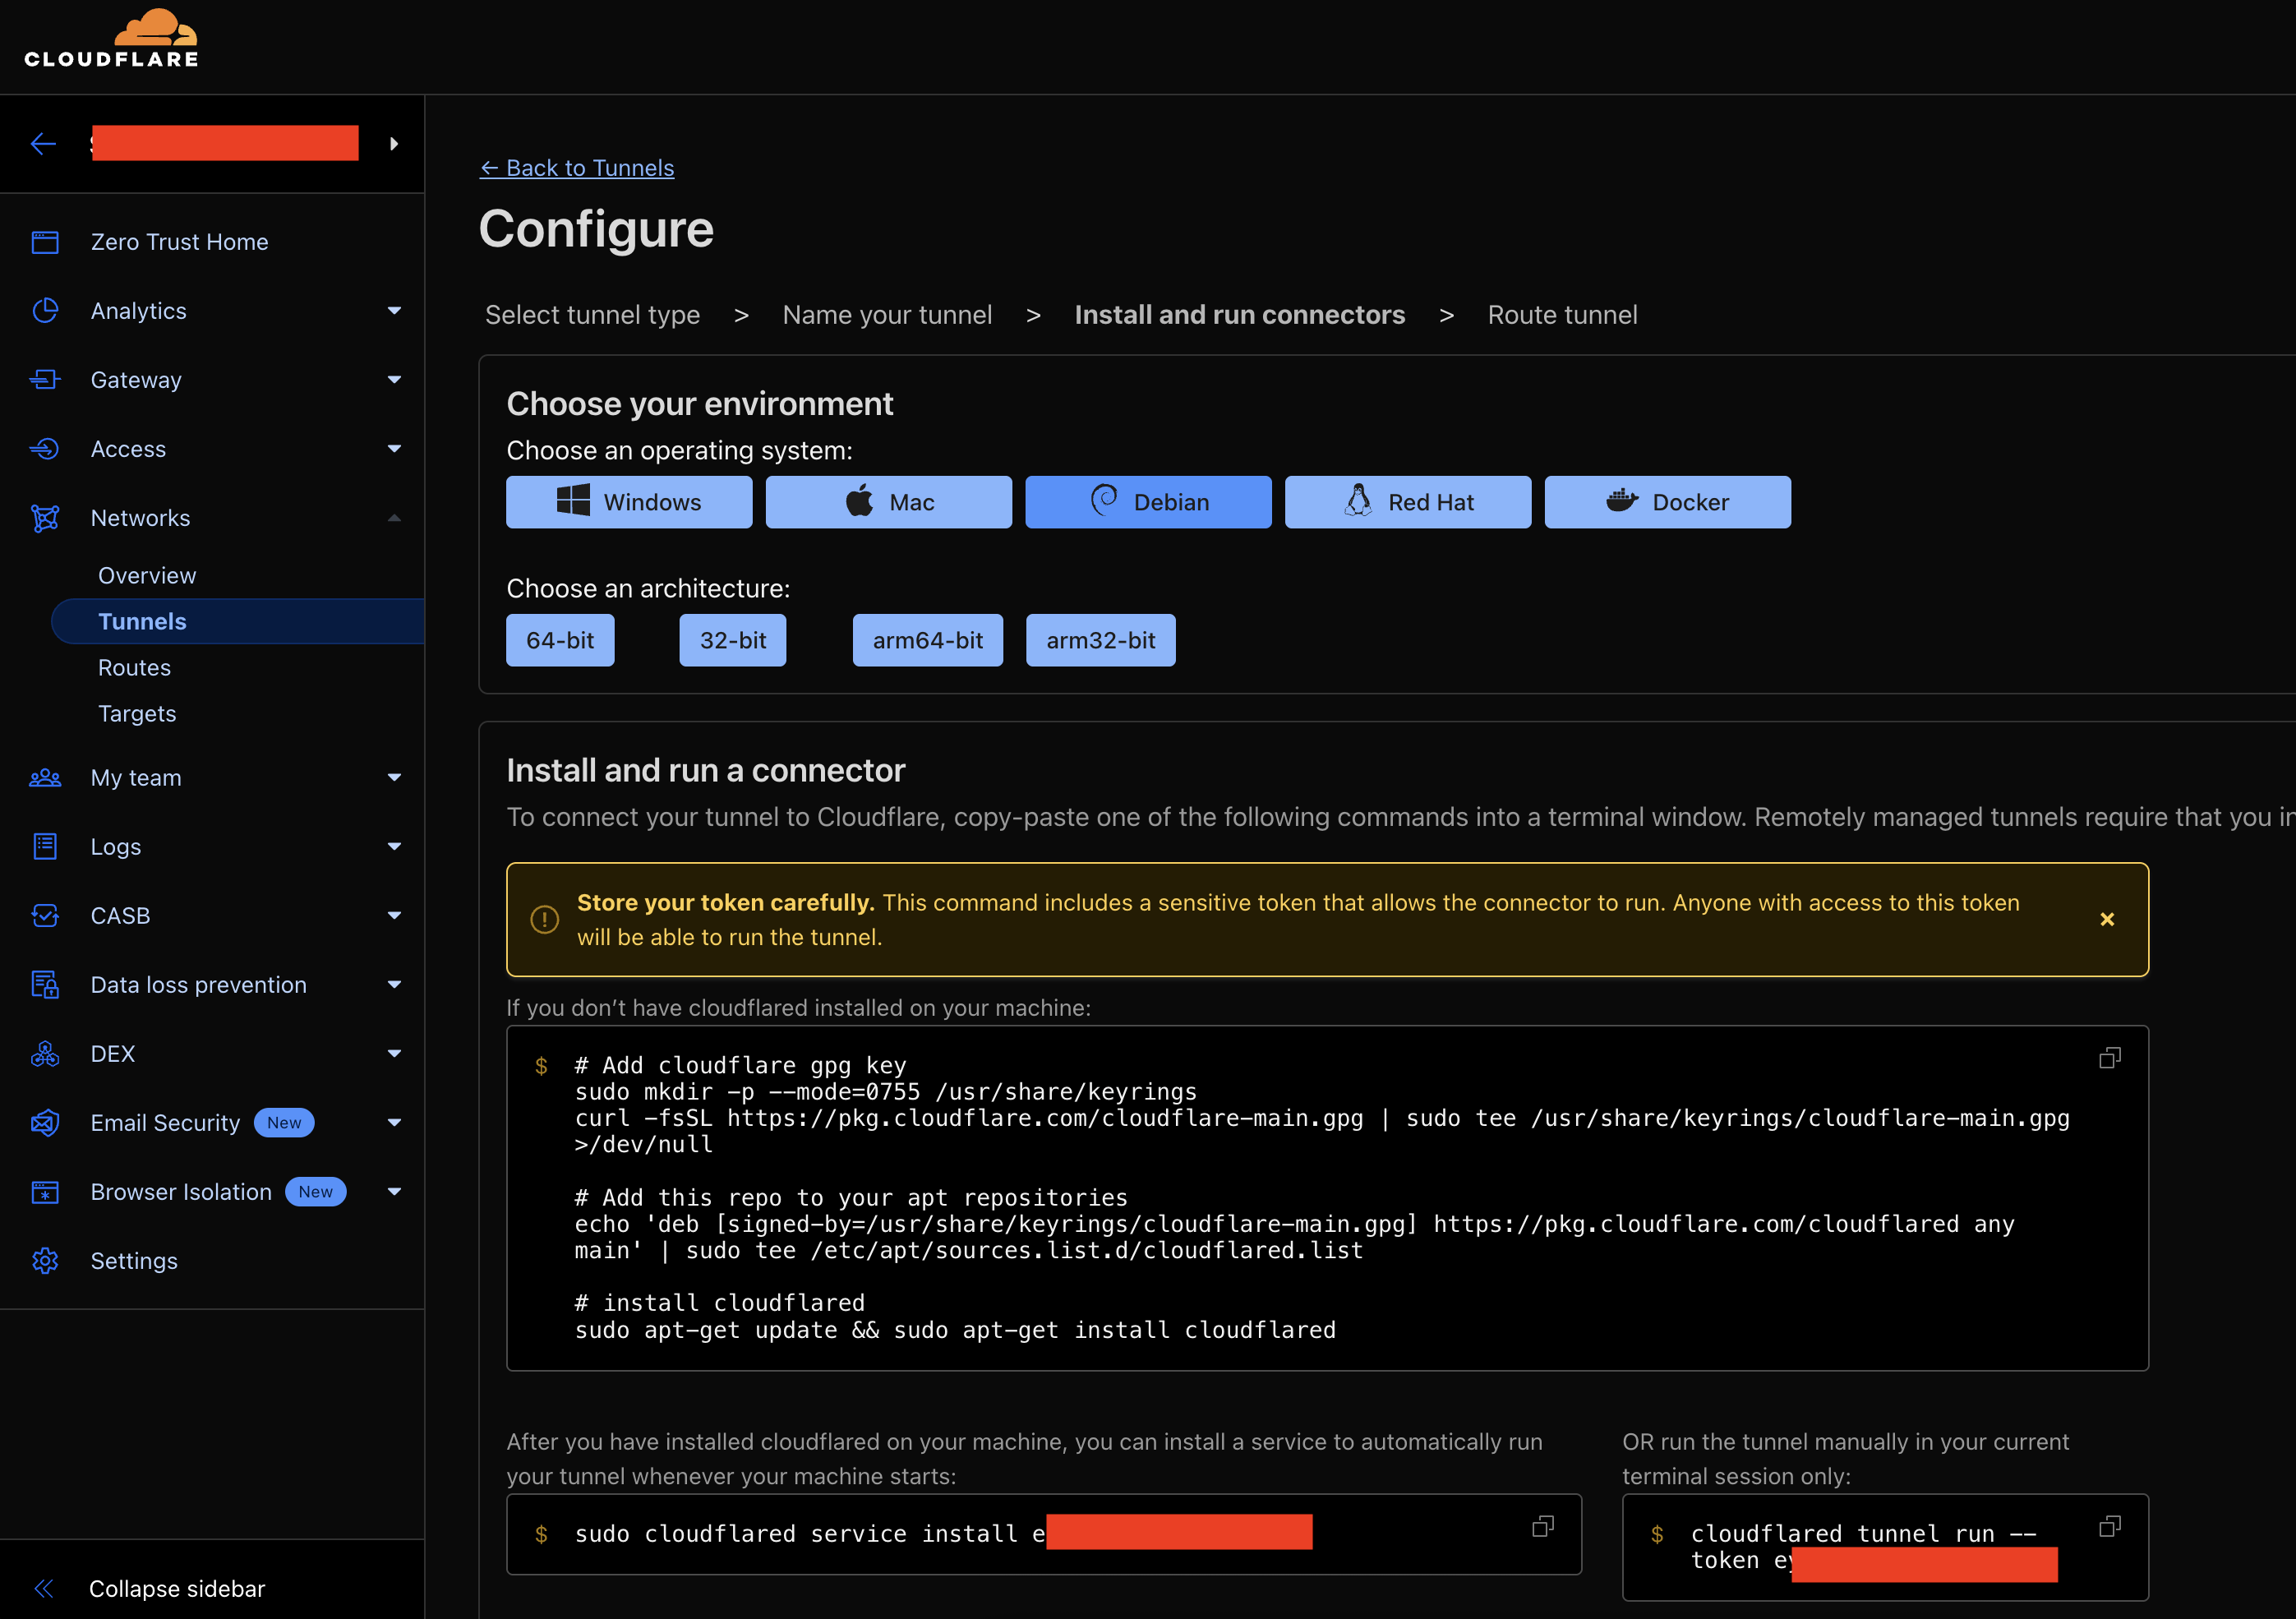
Once you see:
2025-08-03T12:32:03Z INF Using Systemd
2025-08-03T12:32:05Z INF Linux service for cloudflared installed successfully
celebrate! Your tunnel is ready 🥳
Final Step: Bind your tunnel like a pro
- Bind to
tcp://localhost:27017(VERY IMPORTANT!) - Click ‘Complete setup’
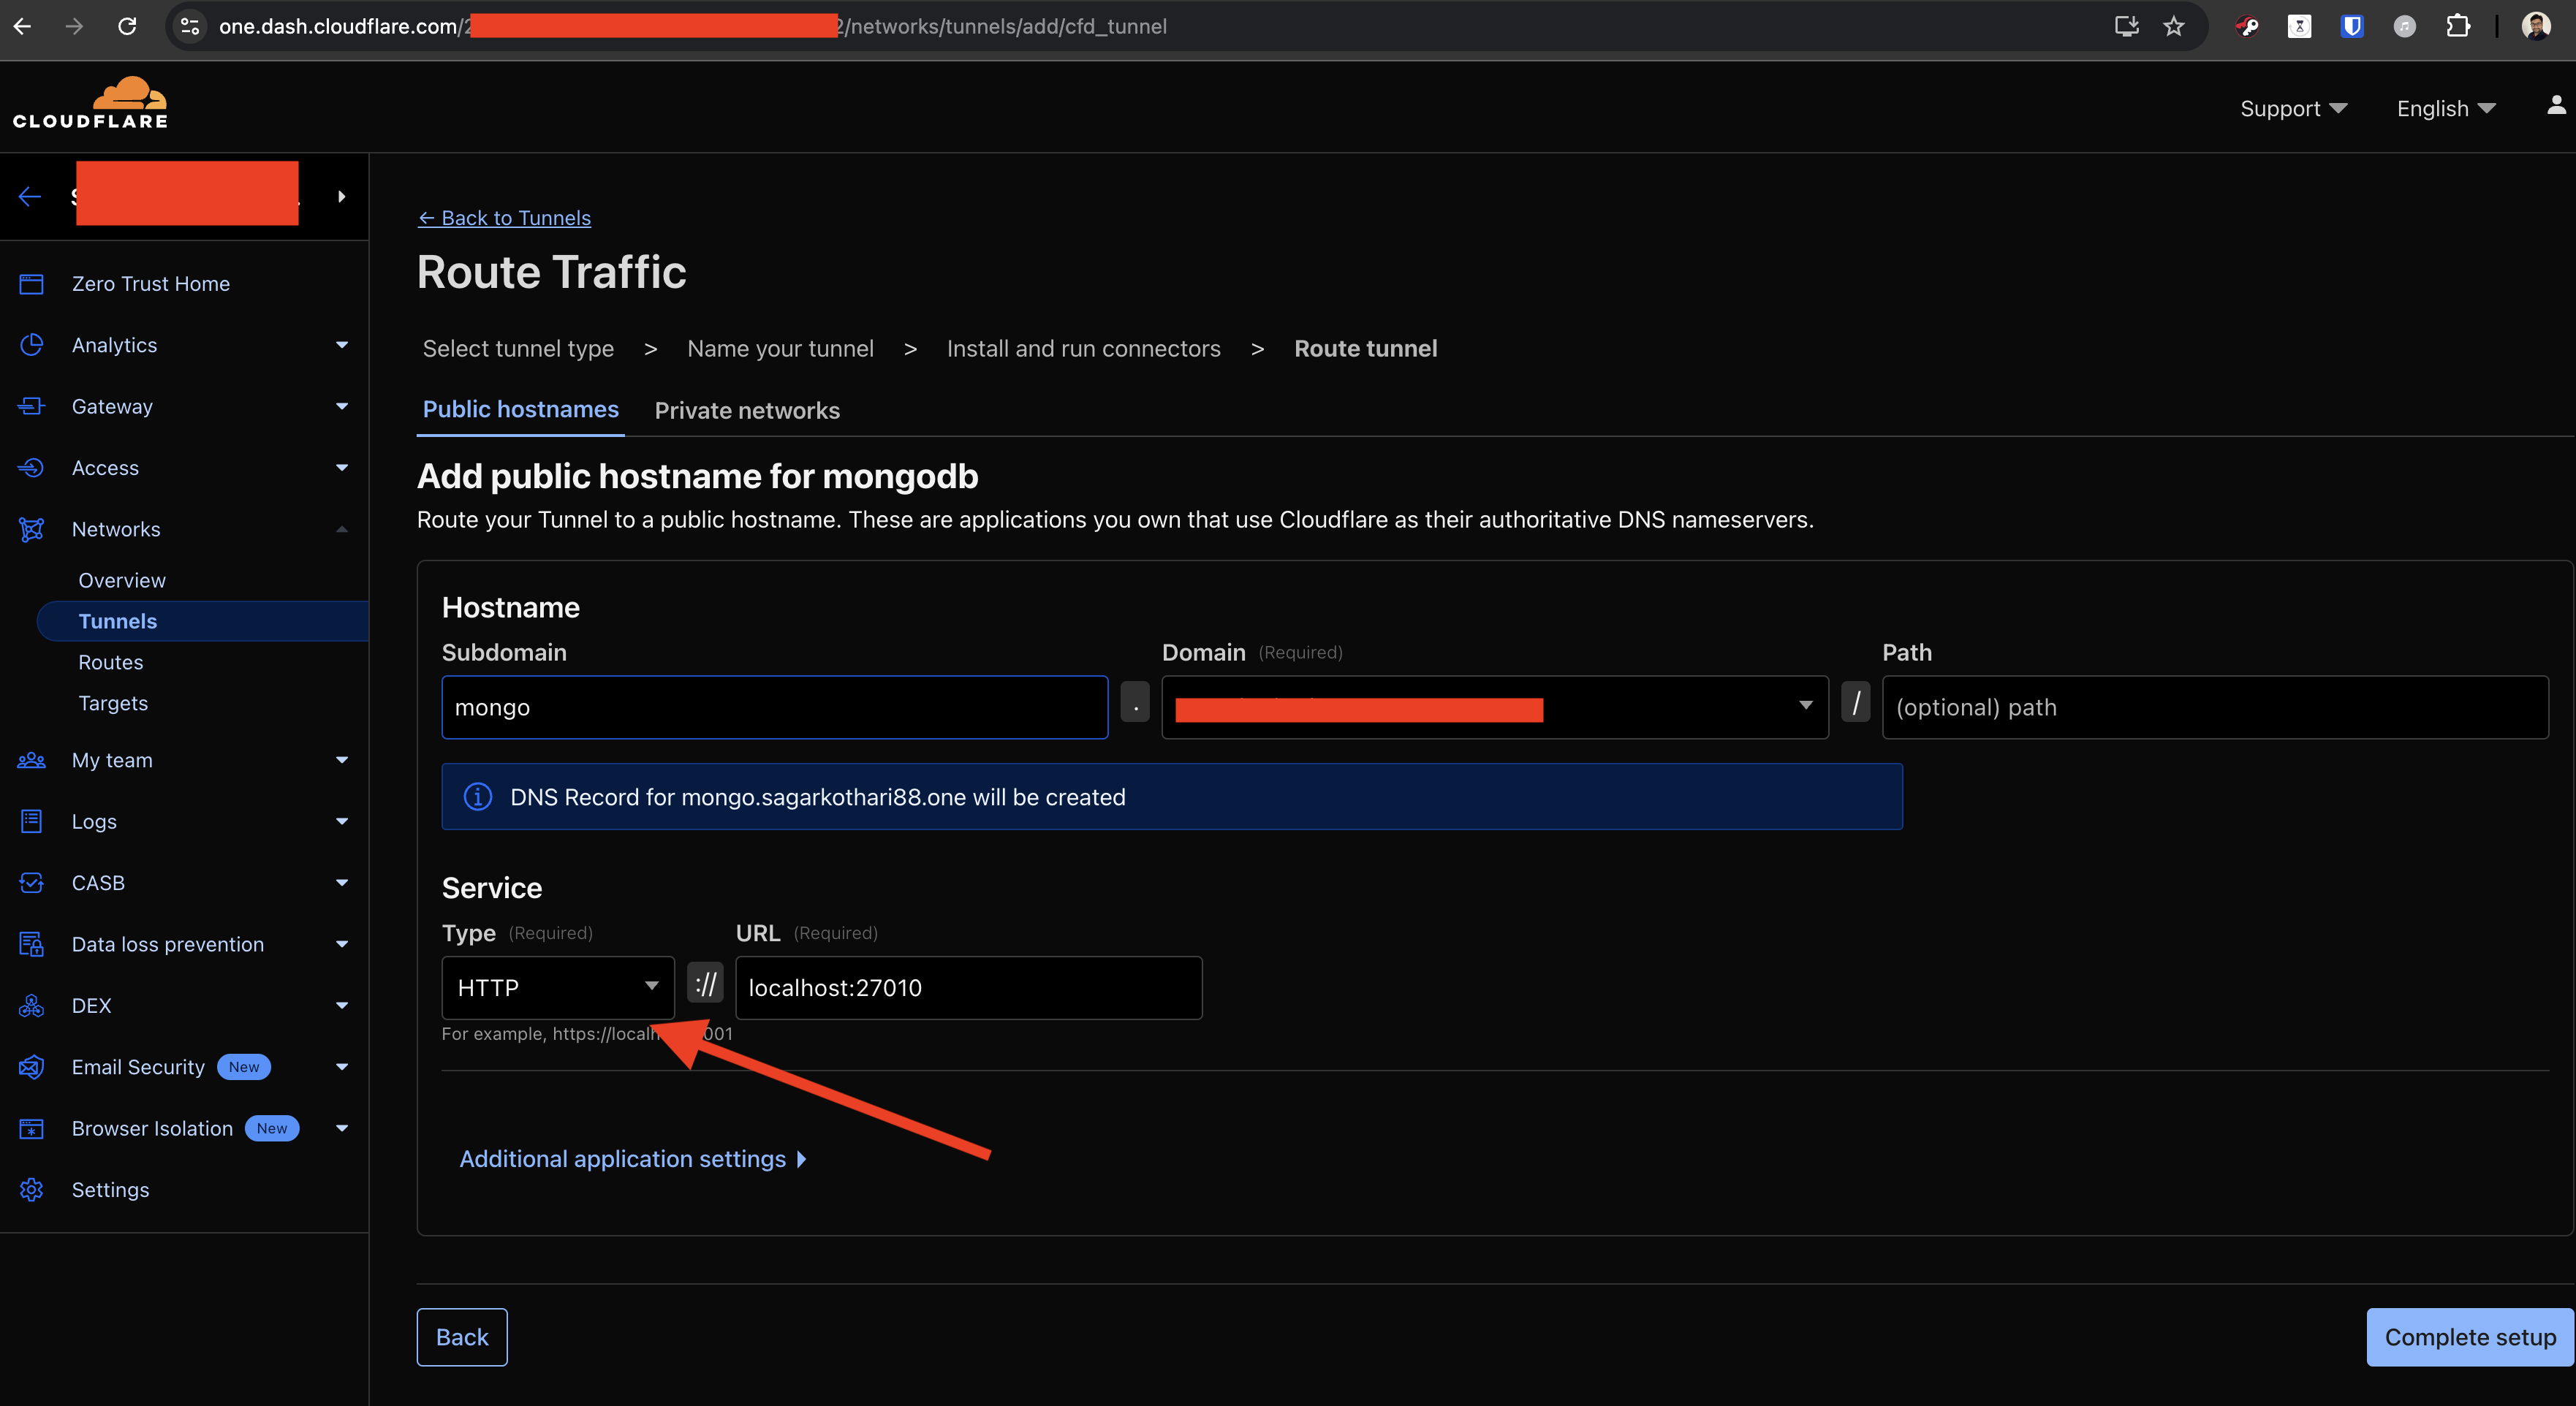
Voilà! Your MongoDB server is world-ready, but only accessible to your secure, trusted peers. (Intruders = Bye Felicia! 👋🚫)
📨 Connecting with MongoDB Client (the fun continues!)
Time to connect to your shiny new MongoDB from another system (“mongodb-client” aka party guest system).
🔧 Install Cloudflared on the Client
For macOS users
brew install cloudflared
or you can use macPorts
sudo port install cloudflared
For Ubuntu adventurers
Add GPG & Repo:
sudo apt install curl lsb-release
curl -L https://pkg.cloudflare.com/cloudflare-main.gpg | sudo tee /usr/share/keyrings/cloudflare-archive-keyring.gpg >/dev/null
echo "deb [signed-by=/usr/share/keyrings/cloudflare-archive-keyring.gpg] https://pkg.cloudflare.com/cloudflared $(lsb_release -cs) main" | sudo tee /etc/apt/sources.list.d/cloudflared.list
Install:
sudo apt update
sudo apt install cloudflared
🛡️ Login Cloudflared
cloudflared tunnel login
- This opens a browser 👨💻
- Log into Cloudflare & authorize your domain. (Mine:
sagarkothari88.one)
🌉 Start Bridge!
cloudflared access tcp --hostname mongodb.sagarkothari88.one --url localhost:27017
- Bridge created! Your remote server is now accessible safely as localhost.
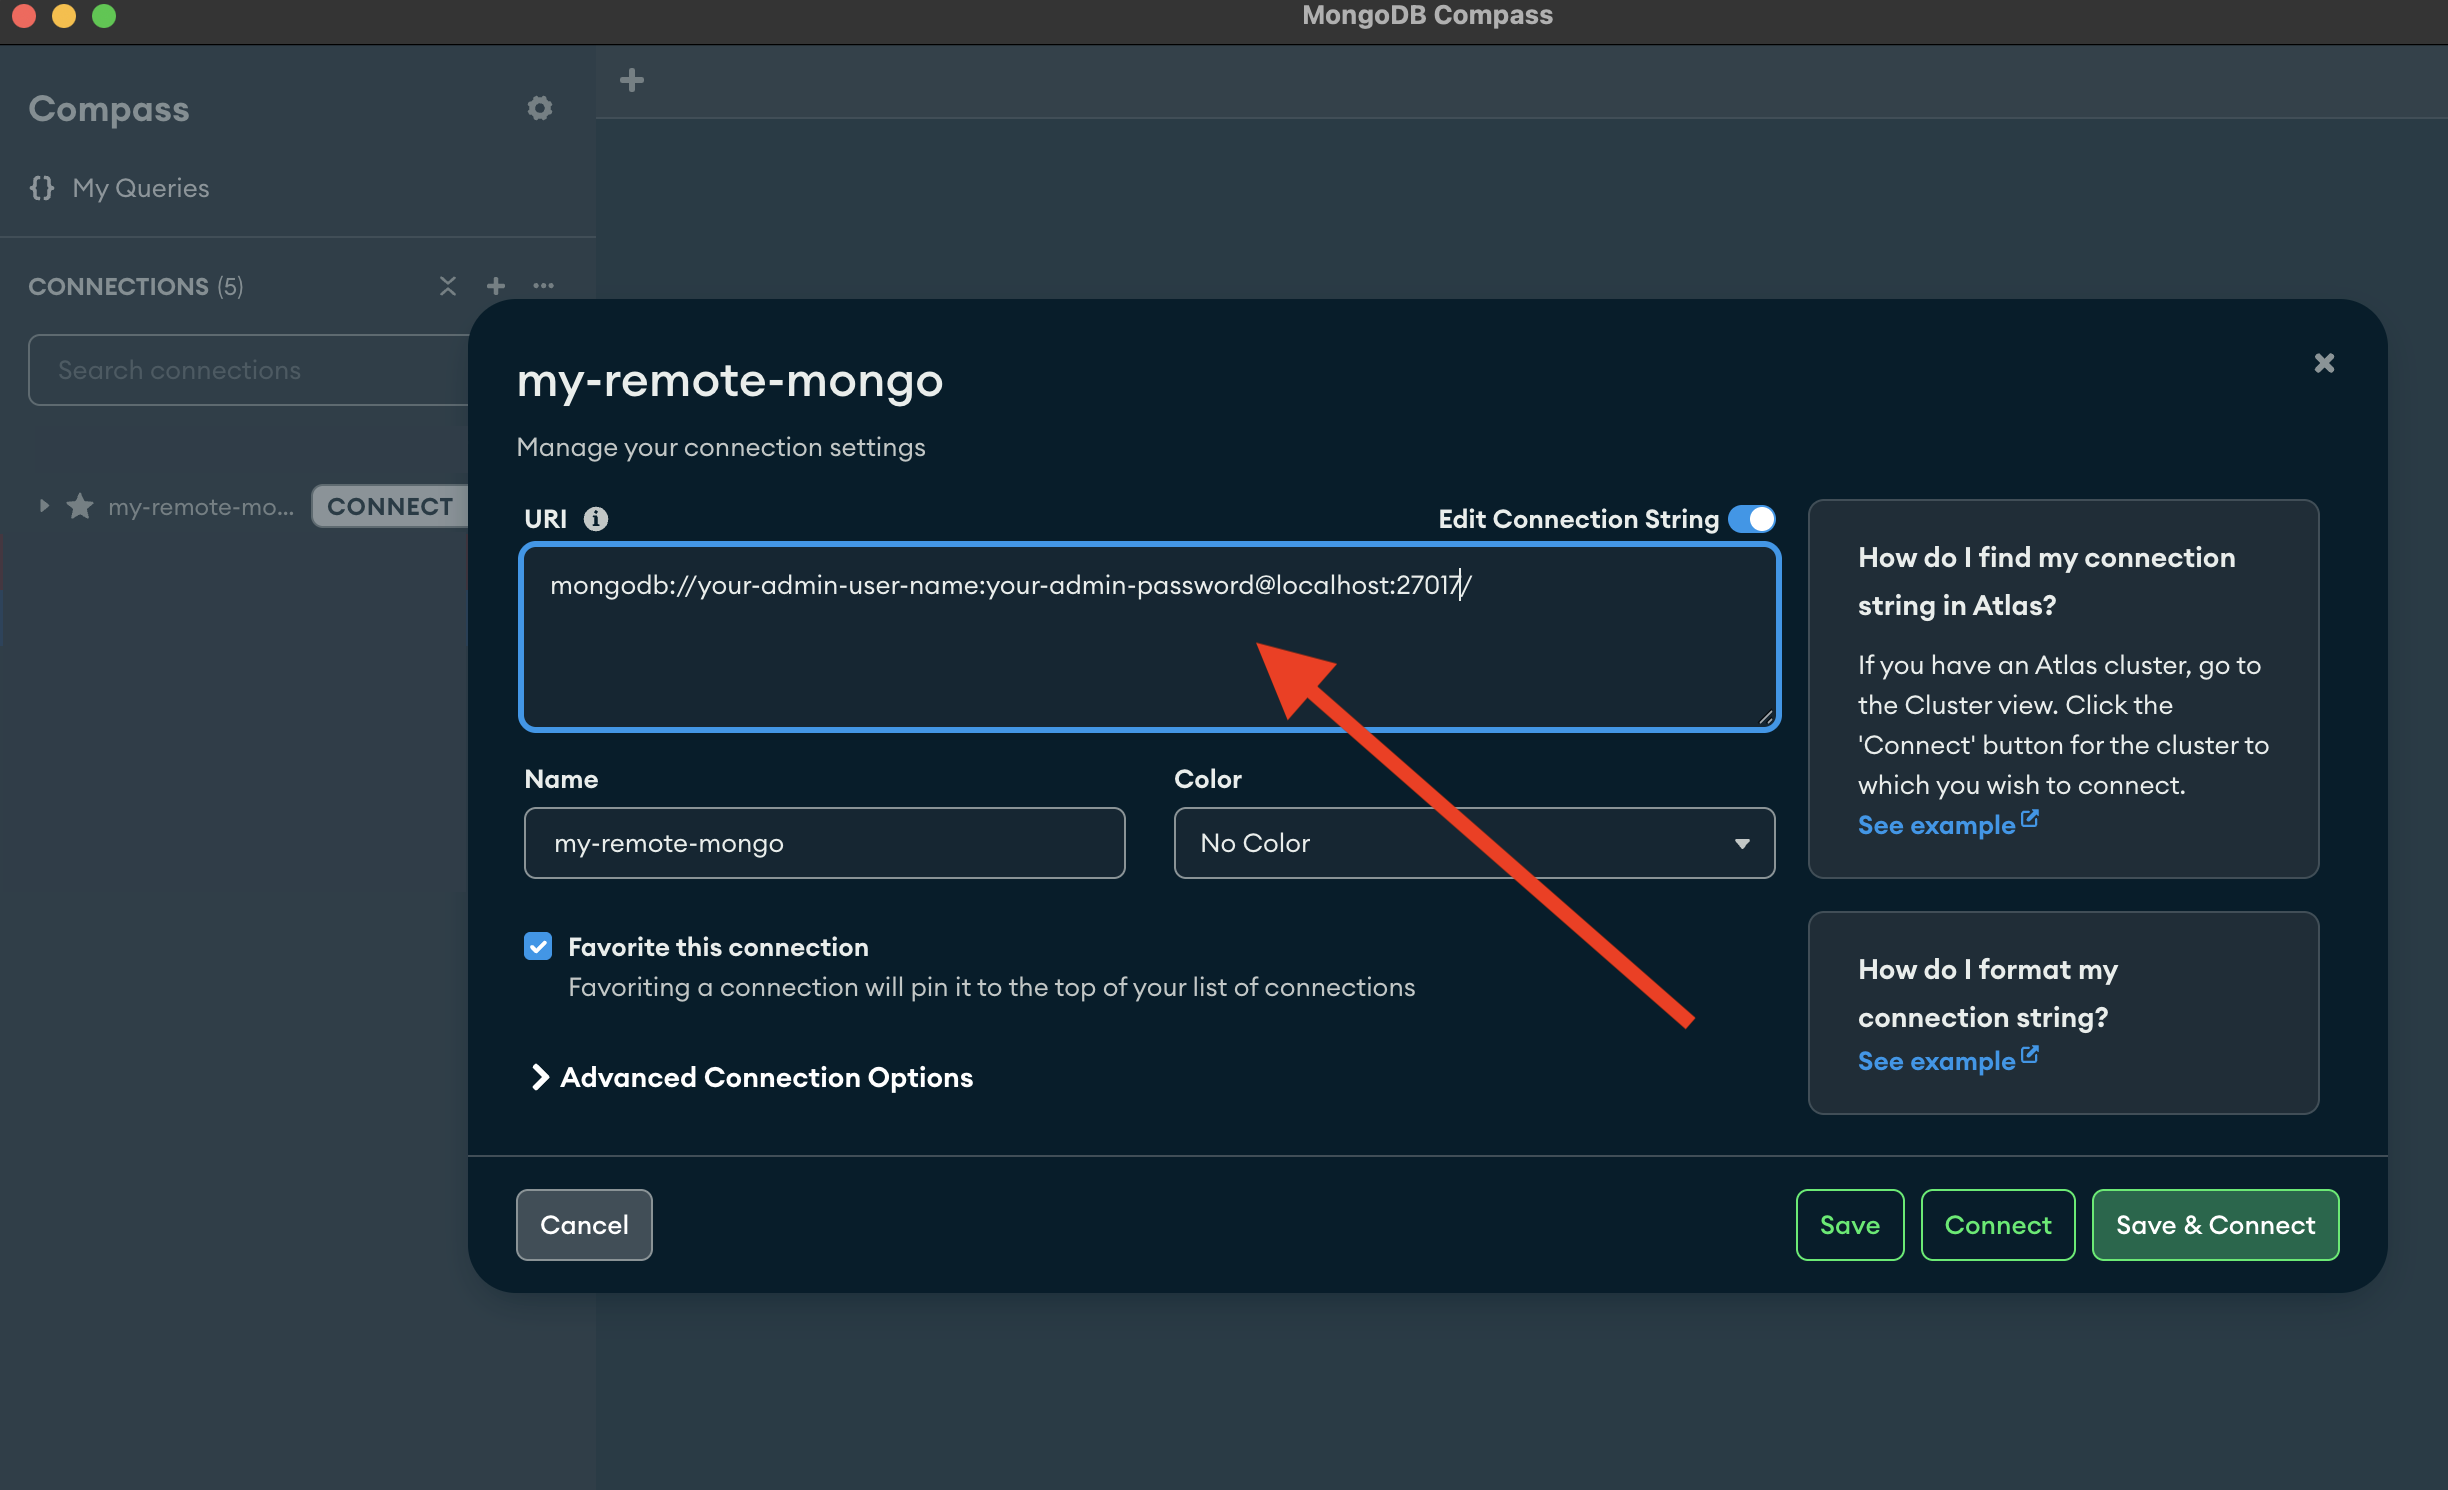
🥞 Connect with MongoDB!
- For NodeJS:
mongodb://admin-user:admin-password@localhost:27017/ - To test: use MongoDB Compass, start the bridge FIRST, then connect.
Whoa! You did it! 🎊 Your own self-hosted MongoDB — secure, portable, AND budget-friendly.
💬 Wrapping Up
Thanks for joining this fun ride 💙
More power to the Hive Blockchain 🐝
More power to all our community members 🙌
Until next time, Happy Coding! 💻✨
📝 Final Note
- I asked Perplexity/AI to help optimize this post to make it more readable and viewer-friendly.
- Here is the link where you can find both original content & improvements made by AI
- https://www.perplexity.ai/search/52724abd-0395-4f79-a8b5-84448b83b5a4
🚀 My Contributions to ♦️ Hive Ecosystem
| Contribution | To | Hive | Ecosystem |
|---|---|---|---|
| Hive Witness Node | Hive API Node (in progress) | 3Speak Video Encoder Node Operator (highest number of nodes) | 3Speak Mobile App Developer |
| 3Speak Podcast App Developer | 3Speak Shorts App Developer | 3Speak Support & Maintenance Team | Distriator Developer |
| CheckinWithXYZ | Hive Inbox | HiFind | Hive Donate App |
| Contributed to HiveAuth Mobile App | Ecency ↔ 3Speak Integration | Ecency ↔ InLeo Integration | Ecency ↔ Actifit Integration |
| Hive Stats App | Vote for Witness App | HiveFlutterKit | New 3Speak App |
🙌 Support Back
❤️ Appreciate my work? Consider supporting @threespeak & @sagarkothari88! ❤️
| Vote | For | Witness |
|---|---|---|
| sagarkothari88 | @sagarkothari88 | |
| threespeak | @threespeak |