
[日本語]
This time's theme is reevaluating underrated or overlooked cards. How about BARON FYATT? He's surprisingly powerful yet rarely seen in play.
As a multi-element magic attacker with the Halving ability, he excels in any situation. While not suited for tanking in combat, he's an exceptionally versatile unit that performs well whether placed in the center or rear.

First, checking the status reveals it has the Halving and Scattershot abilities. However, at level 1, its magic attack power is only 1, which is a bit of a problem.
With a magic attack power of 1, you can't feel secure because you might get completely shut down by Void. While Scattershot means you won't be completely unable to deal damage even if someone puts a Void user at the front, it's still concerning.
To begin with, an attack power of 1 simply isn't enough. While it can reliably spread Halving, it falls short as an attacker.
Ideally, I'd like to use this unit at level 2 or higher. That means the Summoner level must be at least 3. Level 4 would be preferable.
Why level 4? Because many rare units gain additional abilities starting at level 4.
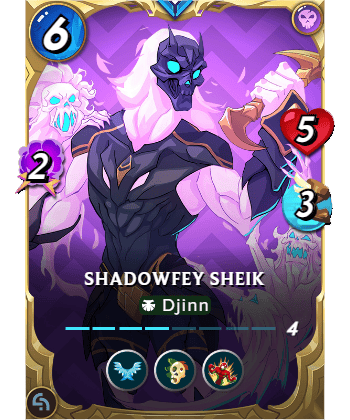
Your favorite SHADOWFEY SHEIK also gains the Painforge ability at level 4, increasing its strength.

BARON FYATT's Halving ability shines in this battle too. We've built a durable team composition with a high-health tank at the front, allowing ARACHNE WAVER to heal. As time passes, it steadily reduces the enemy attackers' damage output, making the tank's durability far superior.
This time Silence is also included. If magic attack power is reduced to 1, THRAGHA's Void will deal 0 damage, so you can rest assured. Demoralize also lowers melee attack power. A truly foolproof setup.
It has extremely high durability. I thought it would be an easy job, but once it actually started, there were three units with ranged attacks and an attack power of 3. The difference wasn't as big as I thought.

As expected, THRAGHA is already down at the start of ROUND 2. Her health isn't that high, and she doesn't have any armor, after all.
On the other hand, since none of the enemy units have fallen yet, I'm at a disadvantage. However, since the four units behind me are magic attackers, I think things could still work out if I can just take down the front enemy, THRAGHA.

Even after advancing to the start of ROUND 3, the enemy THRAGHA remains. Void is incredibly strong. But I think we can finally take it down this turn. The problem is that my UJURAK BRAVE is likely to fall this round.
But SHADOWFEY's Health is still high, so it should be able to hold out for now.

Oh, my UJURAK BRAVE is still standing! It's holding up surprisingly well! And look! The attack power of the enemy's ranged attackers, MERIPUT SLINGER and DAIGENDARK HUNTER, is down to 1. This is where BARON truly shines. 😘
Halving ability reduces enemy attackers' attack power. Lowering enemy attackers' attack power extends the time before tank units fall. Then, use the extended time for a Halving Attack! to further reduce attack power.
This attack power reduction cycle strategy is effective. Since luck inevitably plays a role, if you get incredibly unlucky, Scattershot might keep missing enemy attackers, which can be a real pain.

By ROUND 5, victory is practically assured. With the enemy's attack power reduced, my UJURAK BRAVE has survived. At this point, it's just a matter of finishing them off. Advancing to ROUND 7 seals the win.
This kind of team composition, which lowers the attacker's damage output while maintaining durability, is extremely effective. The essential card is ARACHNE WAVER. Without him, healing won't keep up.
Tanks are pretty much anything goes, but Ulundin Overseer is also a good choice. Its high HP is really nice.

Even at Level 1, it's 70%, so it restores 8 Health. That's awesome! Speaking of which, the newly implemented DAR ‘Gottem’ GEARNUT is pretty good too, right!?
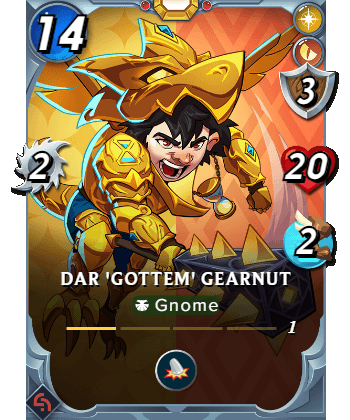
Health 20 is off the charts! 70% means 14 points of recovery, right? I want it, but the price is a bit steep.
If we keep him as the tank, he won't get broken through that easily. Gottem takes the hits up front while BARON lands the Halving magic attack from the rear! I think that setup is really strong—what do you think?
The images below include the BATTLE URL with a referral link. If you are thinking of getting started, take a look at the BATTLE before you sign up.


[日本語]
今回のテーマは過少評価されている、もしくは見落とされているカードを再評価という事ですね。とっても強いのに意外と使われているところを見ないカードという事で BARON FYATT はいかがでしょうか?
マルチエレメントで Halving アビリティを持っている魔法攻撃アタッカーという事でどんな時にでも活躍できます。戦闘でタンクをするには向かないけど、真ん中においても最後尾においても活躍できる取っても優秀なユニットですよ。
まず、ステータスを確認してみると、 Halving と Scattershot アビリティを持っています。しかし、レベル1だと魔法攻撃力は1しかないのでちょっと困ります。
魔法攻撃力が1だと Void で完封されることがあるので安心できないんですよね。Scattershot があるので先頭に Void 持ちを置かれてもダメージをまったく与える事が出来なくなるわけではないけれども。
そもそも攻撃力が1点だとパワーが足りない。必中で Halving をばらまく役目は出来ますが、アタッカーとしては力不足になってしまいますからね。
可能であればレベル2以上で使いたいユニットです。ということで、必然的にサモナーレベルは3以上が必要ですね。できればレベル4が欲しい。
なぜレベル4かというと、レアのユニットはレベル4からアビリティが増えるカードが多いですからね。
お気に入りの SHADOWFEY SHEIK なんかもレベル4で Painforge アビリティが増えるので全然強さが変わってきますです。
このバトルでも BARON FYATT の Halving が活躍します。 高いHealthのタンクを先頭に置いて ARACHNE WAVER が回復する耐久の編成を組んでいるんですが、時間が経過するにしたがって相手のアタッカーの攻撃力をどんどん下げてくれるのでタンクの耐久力が段違いになってくれますよ。
今回は Silence も入っています。魔法攻撃力が1に下がっていれば THRAGHA のVoidで0ダメージになるので安心ですね。Demoralize で近接攻撃力も下げています。さらに万全の体制。
耐久力マシマシで余裕アリアリです。なんて、そんな簡単なお仕事だと思ってたんですけど、ふたを開けてみれば遠距離攻撃かつ攻撃力が3のユニットが3体も入っていてちょっと残念な感じ。
ROUND 2 の開始時点で案の定 THRAGHA が倒されています。Healthはあんまり高くないし、アーマーもないからね、彼女。
一方、相手はまだ1体も倒れていないので私が不利な状況です。私の後ろ4体が魔法アタッカーなので先頭の敵 THRAGHA さえ倒す事が出来ればまだ何とかなると思いますけどね。
ROUND 3 の開始まで進めても敵 THRAGHA が残っています。 Void が強い強い。でも、流石にこのターンで倒せるとは思うけどね。 問題はこのラウンドで私の UJURAK BRAVE が倒れると思われることですね。
でも、SHADOWFEY がHealth を上げて行ってるからまだ耐えれるはず。
お、うちの UJURAK BRAVE が残ってるじゃん!意外と頑張ってくれてる!そして注目!相手の遠距離攻撃アタッカー、MERIPUT SLINGER と DAIGENDARK HUNTER の攻撃力が1になっています。これが BARON の本領発揮です。 😘
Halving アビリティで敵アタッカーの攻撃力を下げる。敵アタッカーの攻撃力が下がるとタンクユニットが落ちるまでの時間が延びる。さらに延びた時間で Halving アタック!攻撃力を下げる。
この攻撃力ダウンサイクル戦略が有効です。どうしても運が絡むので、めちゃくちゃ運が悪いと Scattershot が敵アタッカーを避け続けて困ることもありますけどね。
ROUND 5 までくるともうほぼ勝ち確定ですね。敵の攻撃力が下がっているので私の UJURAK BRAVE が生き残っています。こうなるとあとは倒すだけ。ROUND 7 まで進めて勝利確定です。
このようにアタッカーの攻撃力を下げつつ、耐久する編成が非常に有効です。必須のカードは ARACHNE WAVER です。彼がいないと回復が間に合わなくなるからね。
タンクは割と何でもいいんですけど Ulundin Overseer もいいですね。HPの高さがとても素敵。
レベル1でも 70%だからHealthが8も回復します。凄いね! そういえば、実装されたばかりの DAR 'Gottem' GEARNUT もいいんじゃない!?
Health 20は突き抜けてるね! 70%という事は14回復かな?欲しいけどちょっとお値段が。
彼をタンクにしておけばそうそう突破されることはないでしょう。先頭で Gottem が攻撃を耐えて、後ろから BARON が Halving 魔法アタックを決める!そんな編成はとても強いと思うんだけど、どう思う?
以下の画像をは紹介リンク付きBATTLE URLを含みます。 これから始めようと思っているなら、バトルを見てから登録してみてね。