**
ESPAÑOL
**
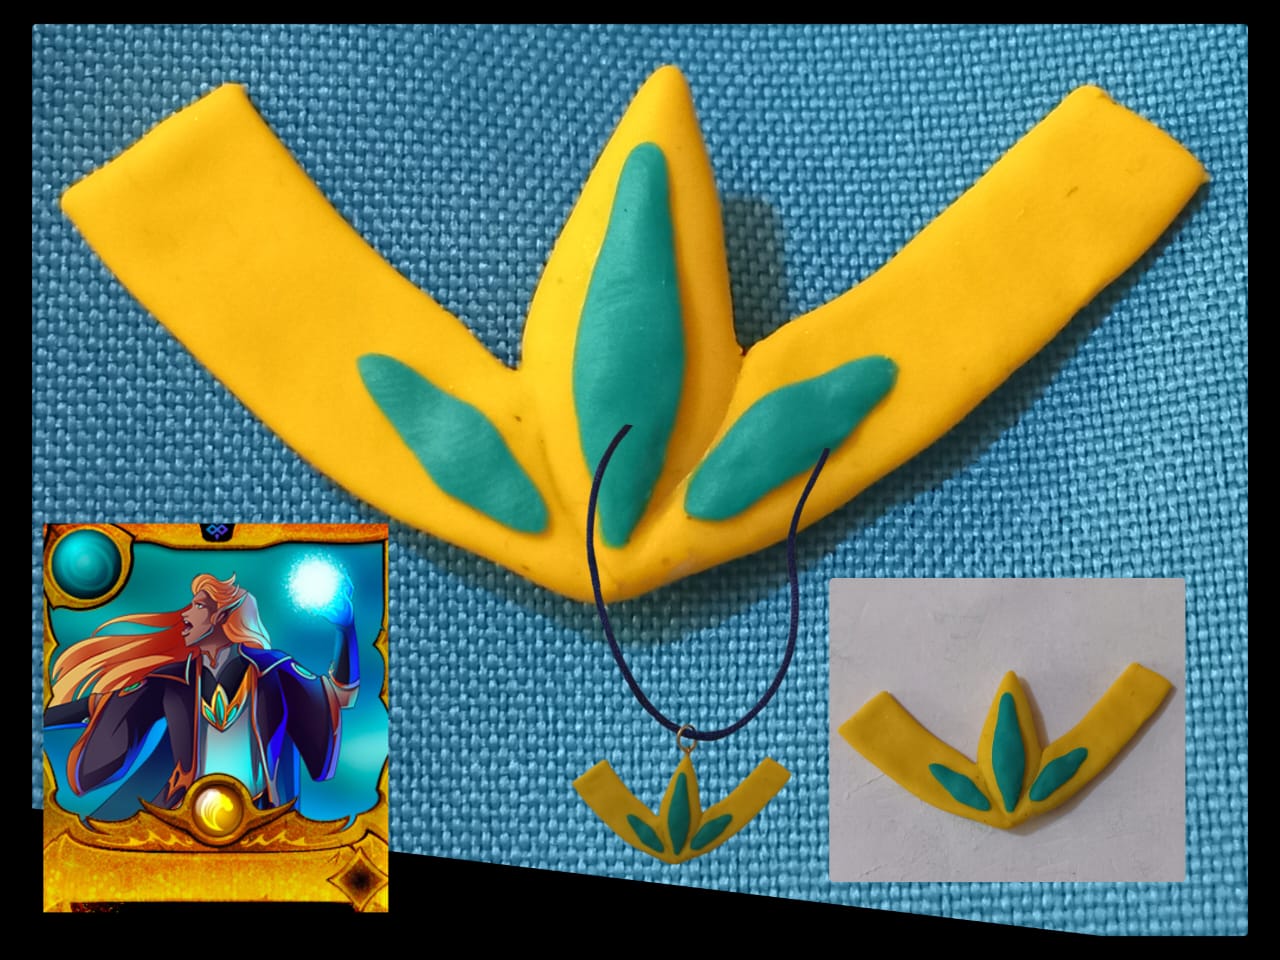
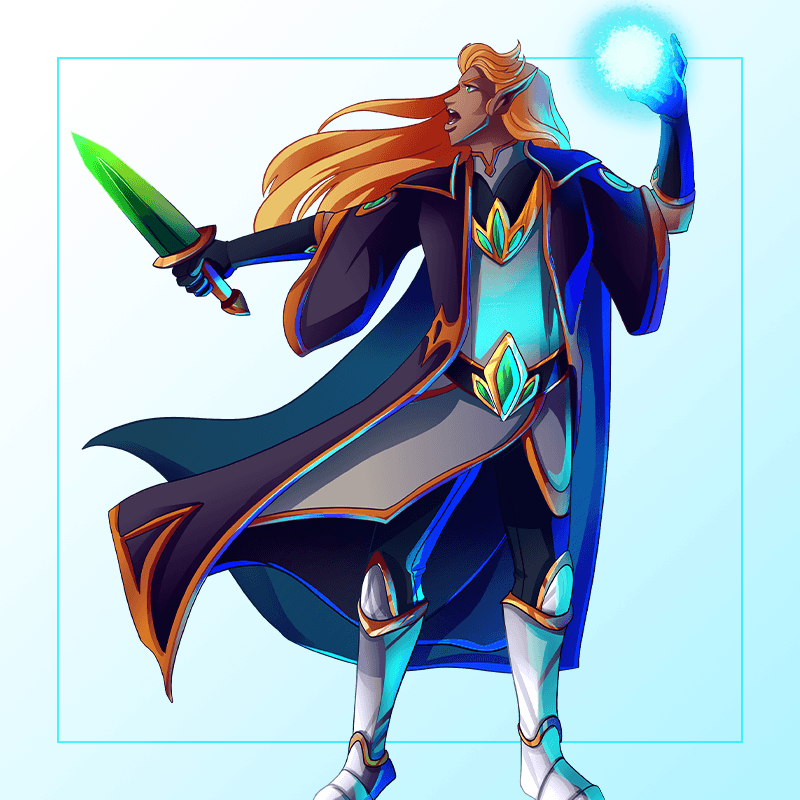
Saludos comunidad @diyhub , les deseo una excelente semana en unión familiar, me siento feliz de compartir un nuevo proyecto creativo tomando como referencia las cartas de Spliterlands, en esta ocasión se trata de un dije o hebilla que lleva el personaje [River Hellondale](https://www.splintercards.com/chaos_core_river-hellondale), en la camisa y correa, es de color dorado y verde y forma triangular en el centro.
Al igual que otros proyectos de moldeado, este también lo hice con masa flexible, un material versátil y sencillo de moldear, que se ha convertido en uno de mis favoritos; durante varios meses, lo estuve buscando en diferentes tiendas, hasta que en una salida con mi mamá, lo conseguimos en la tienda que jamás imaginé, estoy haciendo varios proyectos y tratando de aprovechar al máximo la masa, me gusta moldear, es una actividad relajante y creativa.
**
ENGLISH
**
Greetings @diyhub community, I wish you a wonderful week of family togetherness. I'm happy to share a new creative project inspired by the Spliterlands cards. This time, it's a pendant or buckle worn by the character [River Hellondale](https://www.splintercards.com/chaos_core_river-hellondale) on his shirt and belt. It's gold and green in color and has a triangular shape in the center.
Like other molding projects, I also made this one with flexible clay, a versatile and easy-to-mold material that has become one of my favorites. For several months, I searched for it in different stores until, on an outing with my mom, we found it in the store I never imagined. I'm working on several projects and trying to make the most of the clay. I like molding; it's a relaxing and creative activity.


---
**
MATERIALES
**
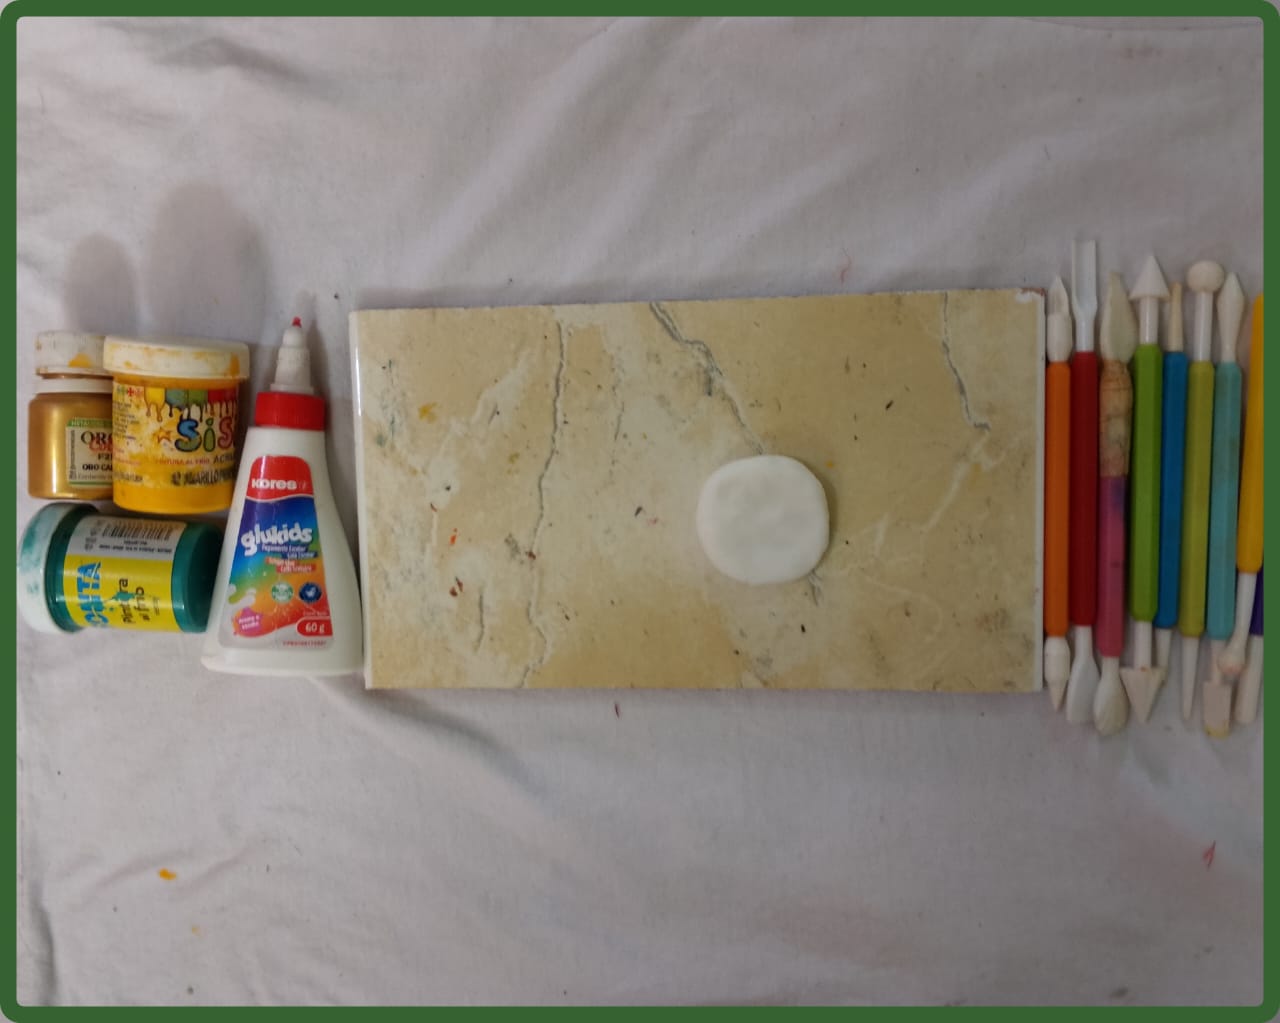
Pintura al frío
Estecas
Aro de joyería
Cordón
Crema para moldear
Pegamento
Masa flexible
Superficie plana para moldear
Pin de joyería
**
MATERIALS
**
Cold-pressed paint
Stacks
Jewelry ring
Cord
Modeling cream
Glue
Flexible compound
Flat surface for molding
Jewelry pin

---
**
PROCEDIMIENTO
**
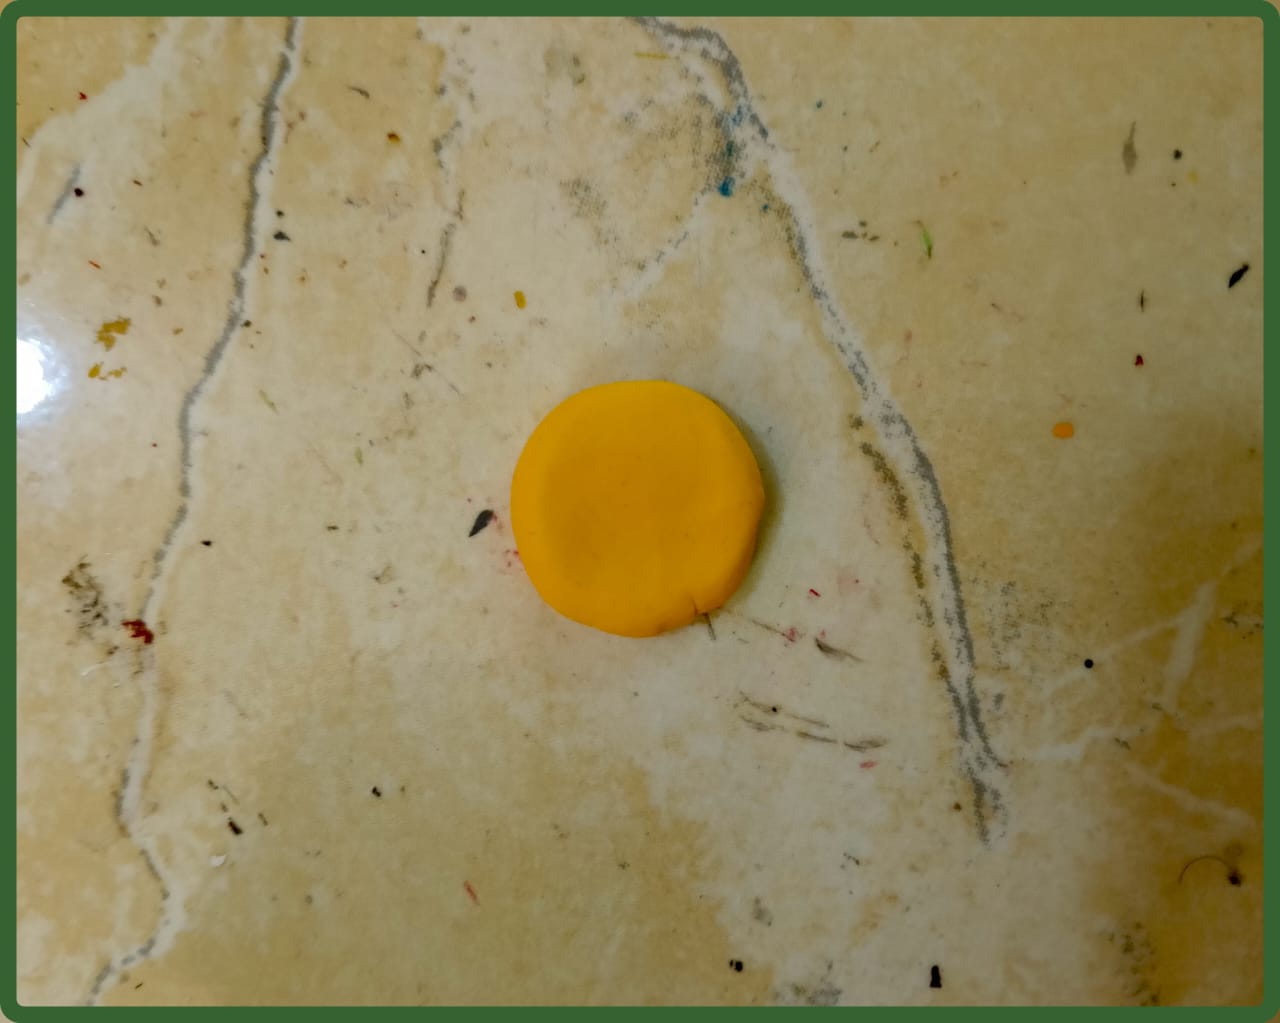
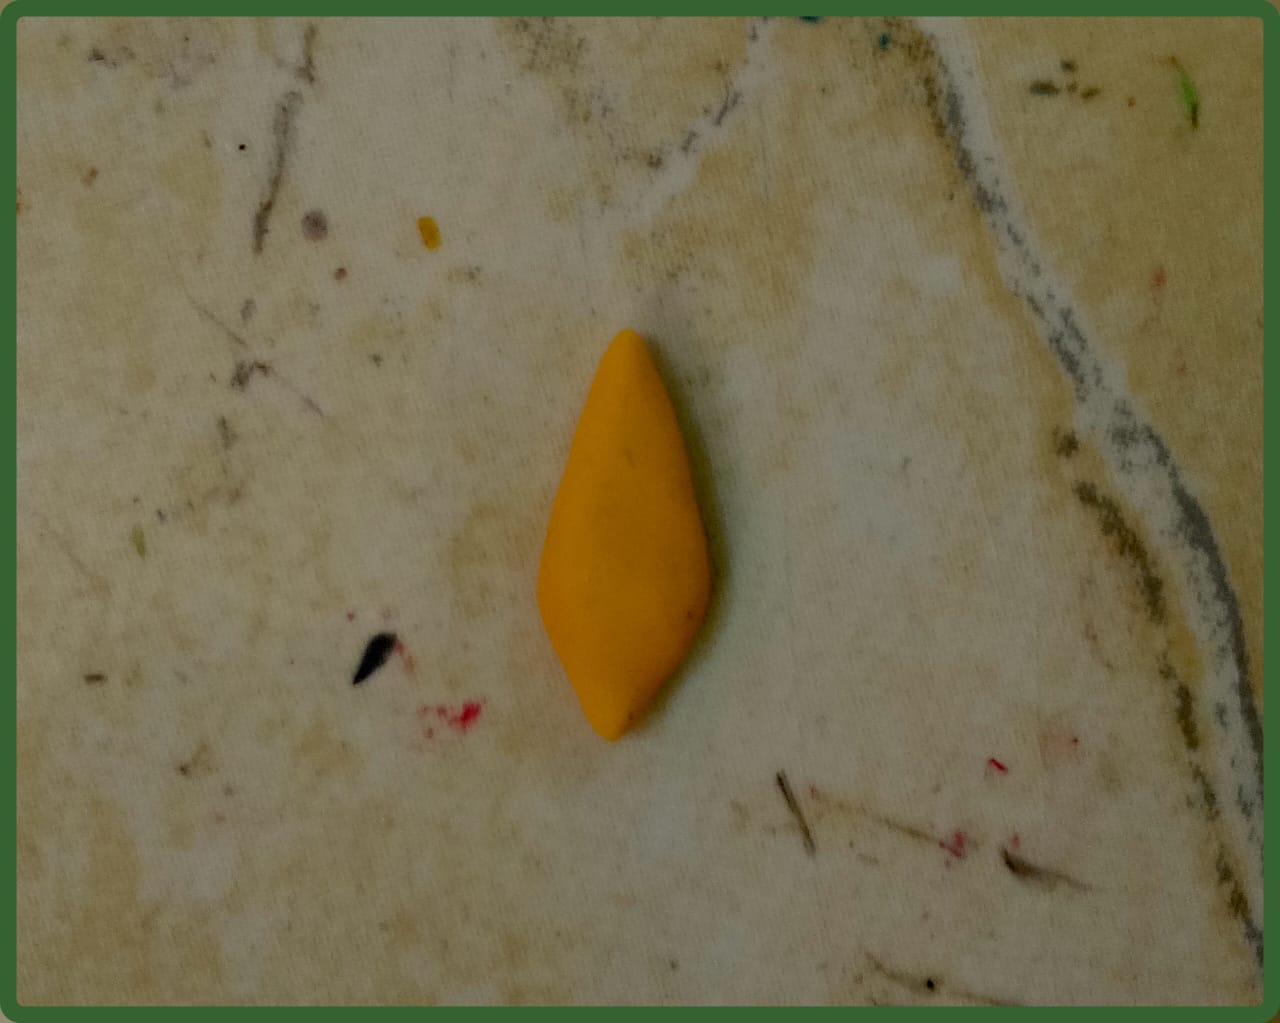
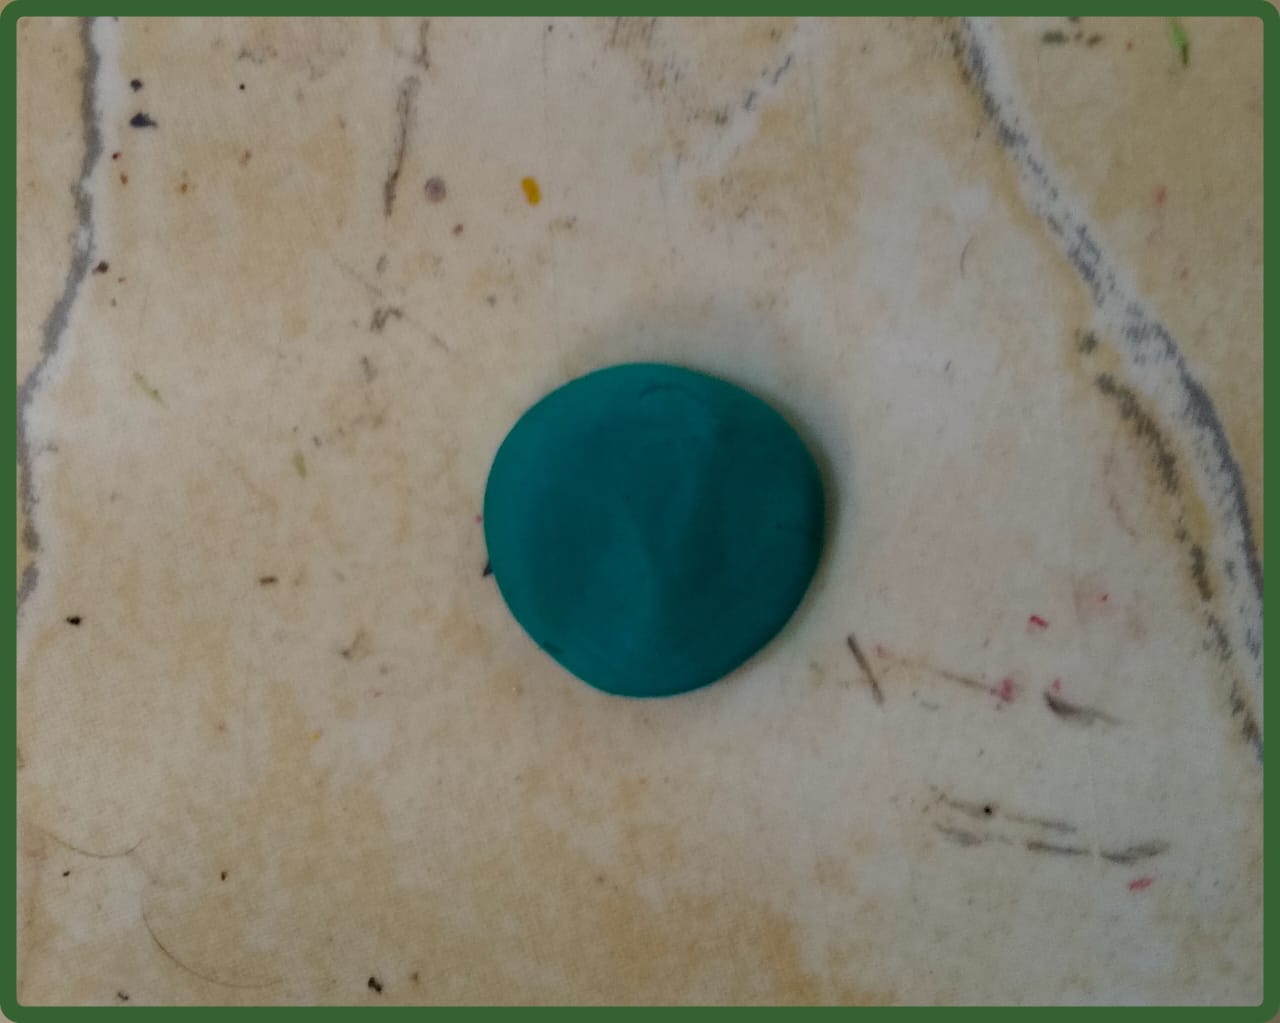
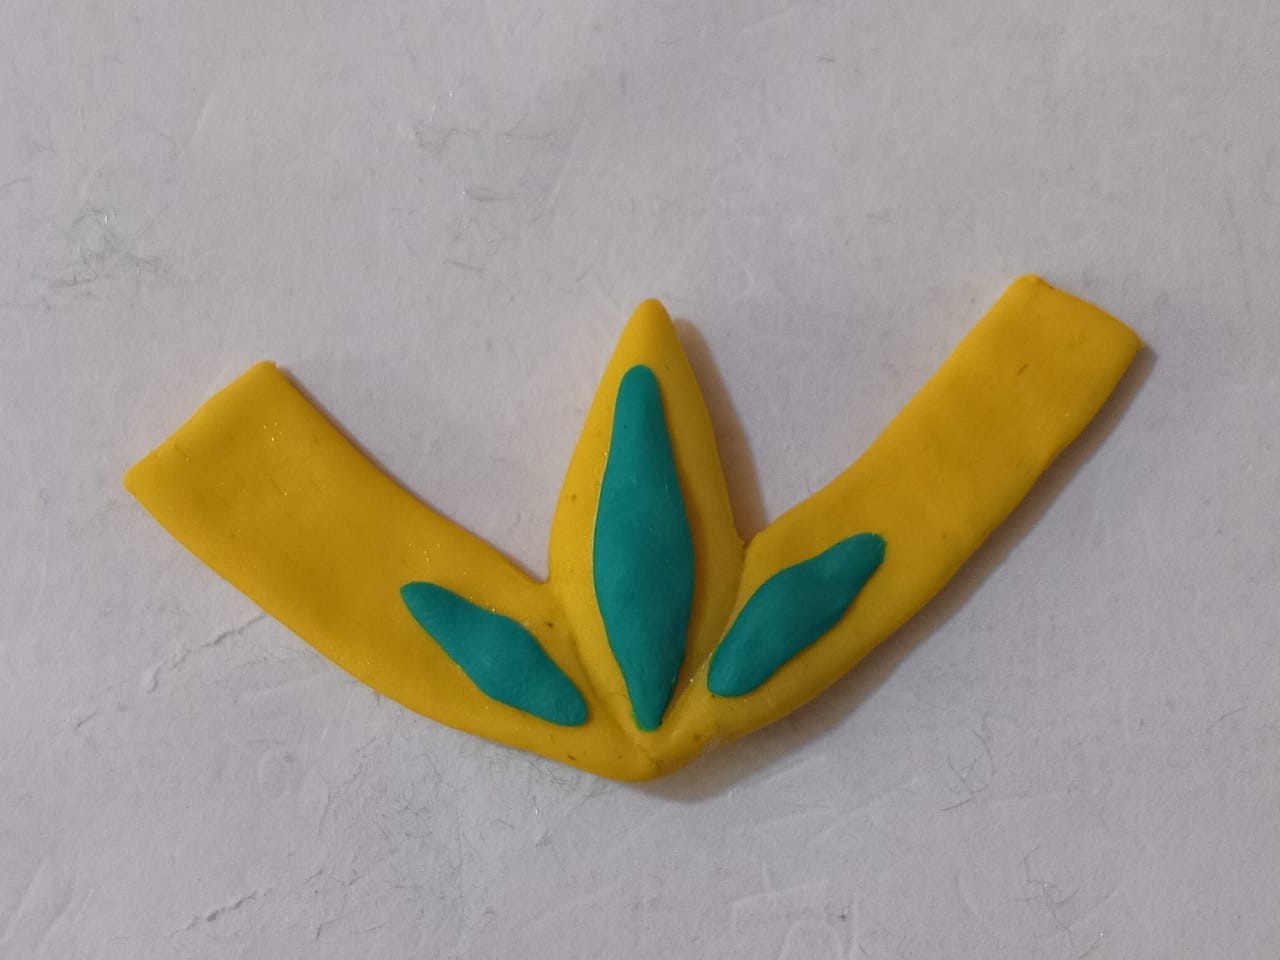
Iniciamos dividiendo la masa en pequeñas porciones, para este proyecto necesitaremos dos colores; dorado y verde, añadimos pintura a cada porción de masa y mezclamos hasta obtener el color deseado, luego formamos bolas, una de cada color, las aplanamos y a partir de allí hacemos la parte central del dije, damos forma con las estecas y moldeamos un rombo alargado hacia arriba y costados redondeados.
**
PROCEDURE
**
We start by dividing the dough into small portions. For this project, we'll need two colors: gold and green. We add paint to each portion of dough and mix until we get the desired color. Then, we form balls, one of each color. We flatten them, and from there, we make the central part of the pendant. We shape it with the stakes and mold a rhombus that is elongated upwards and has rounded sides.
---
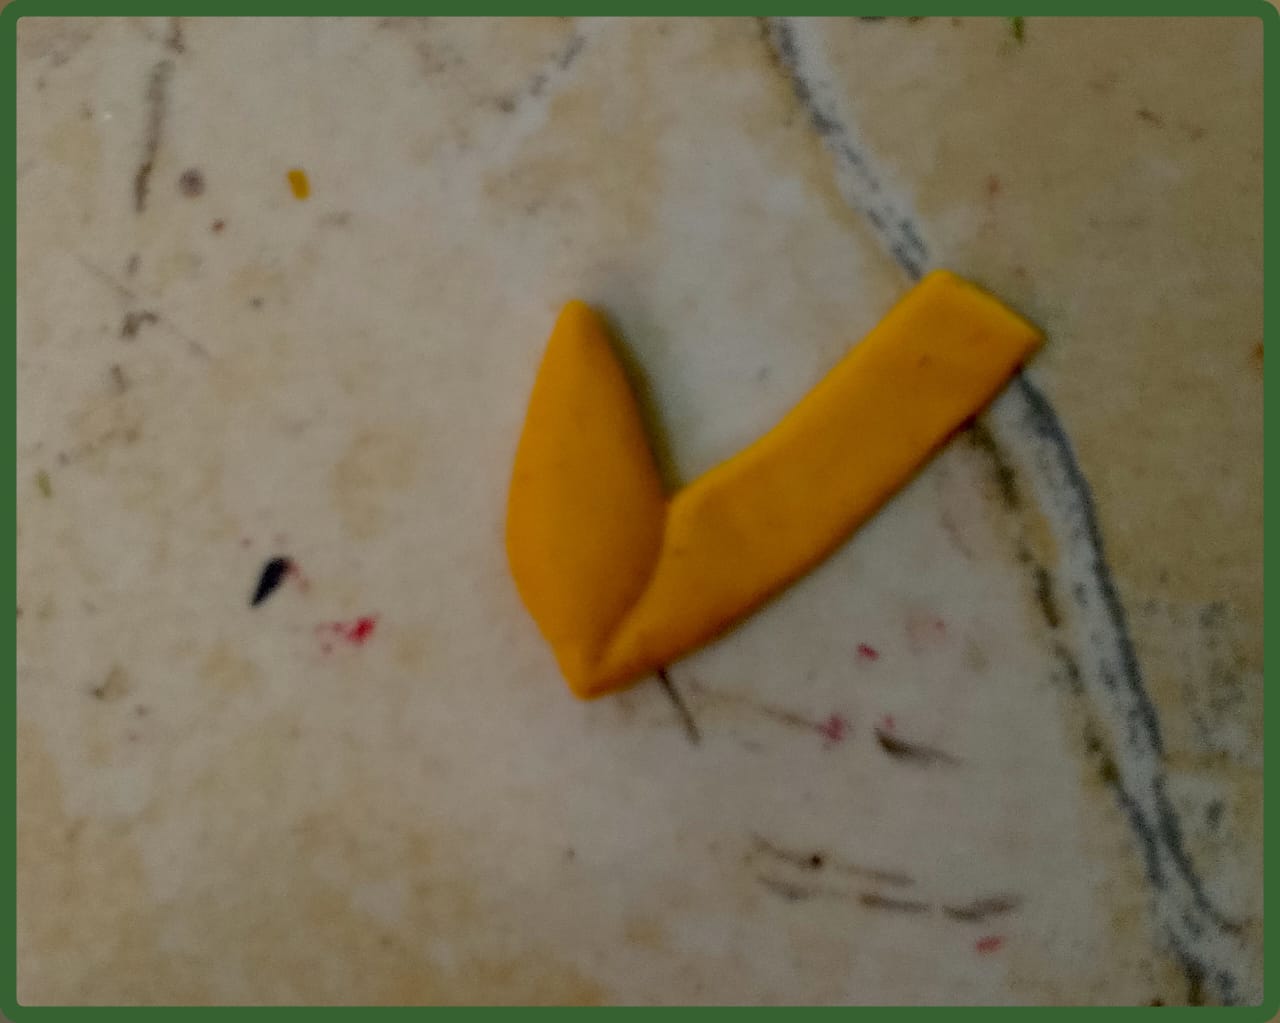
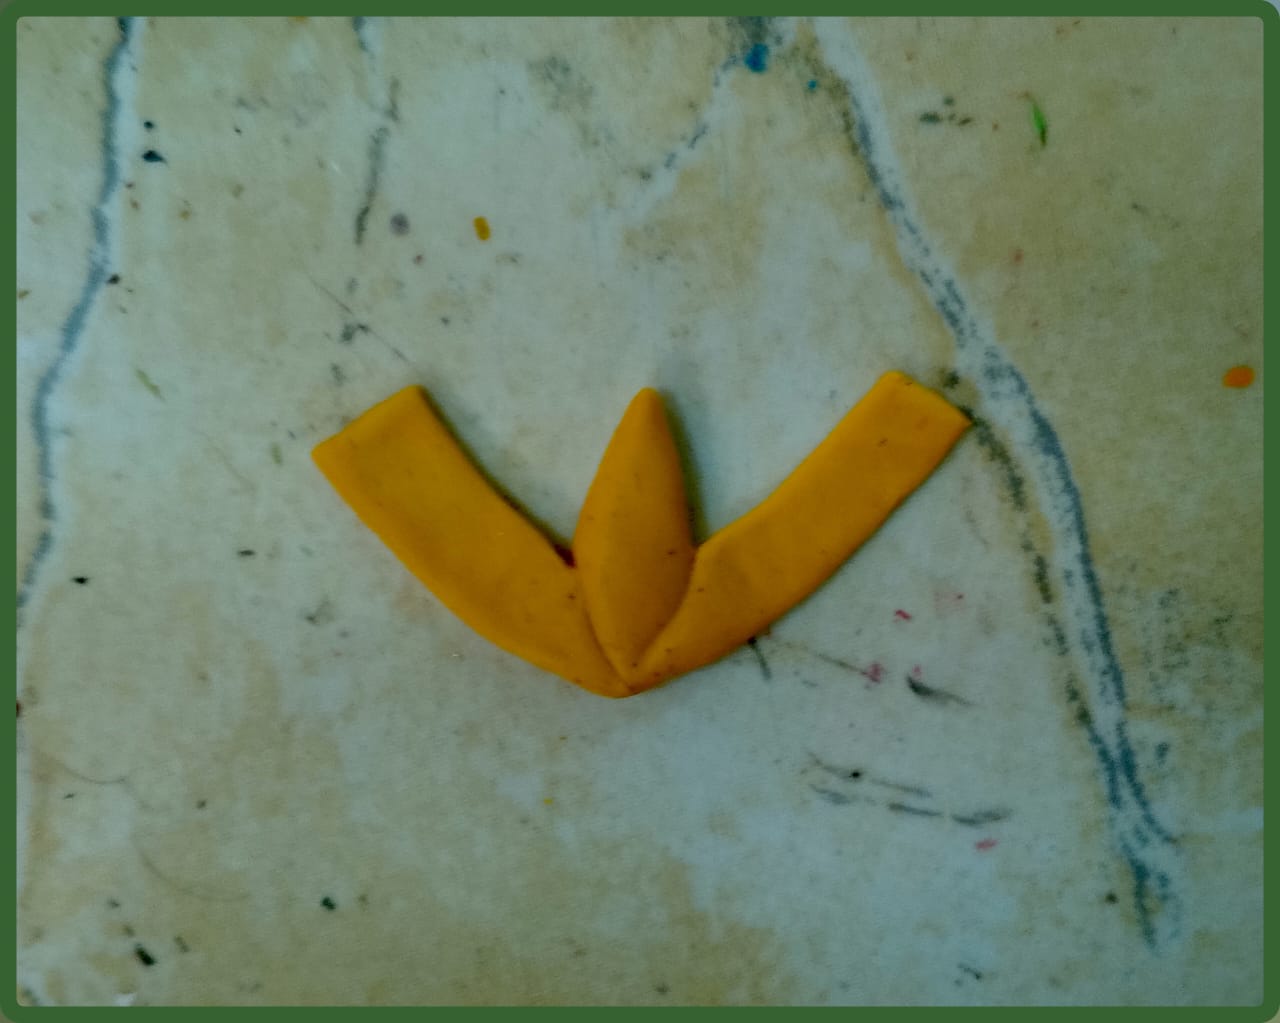
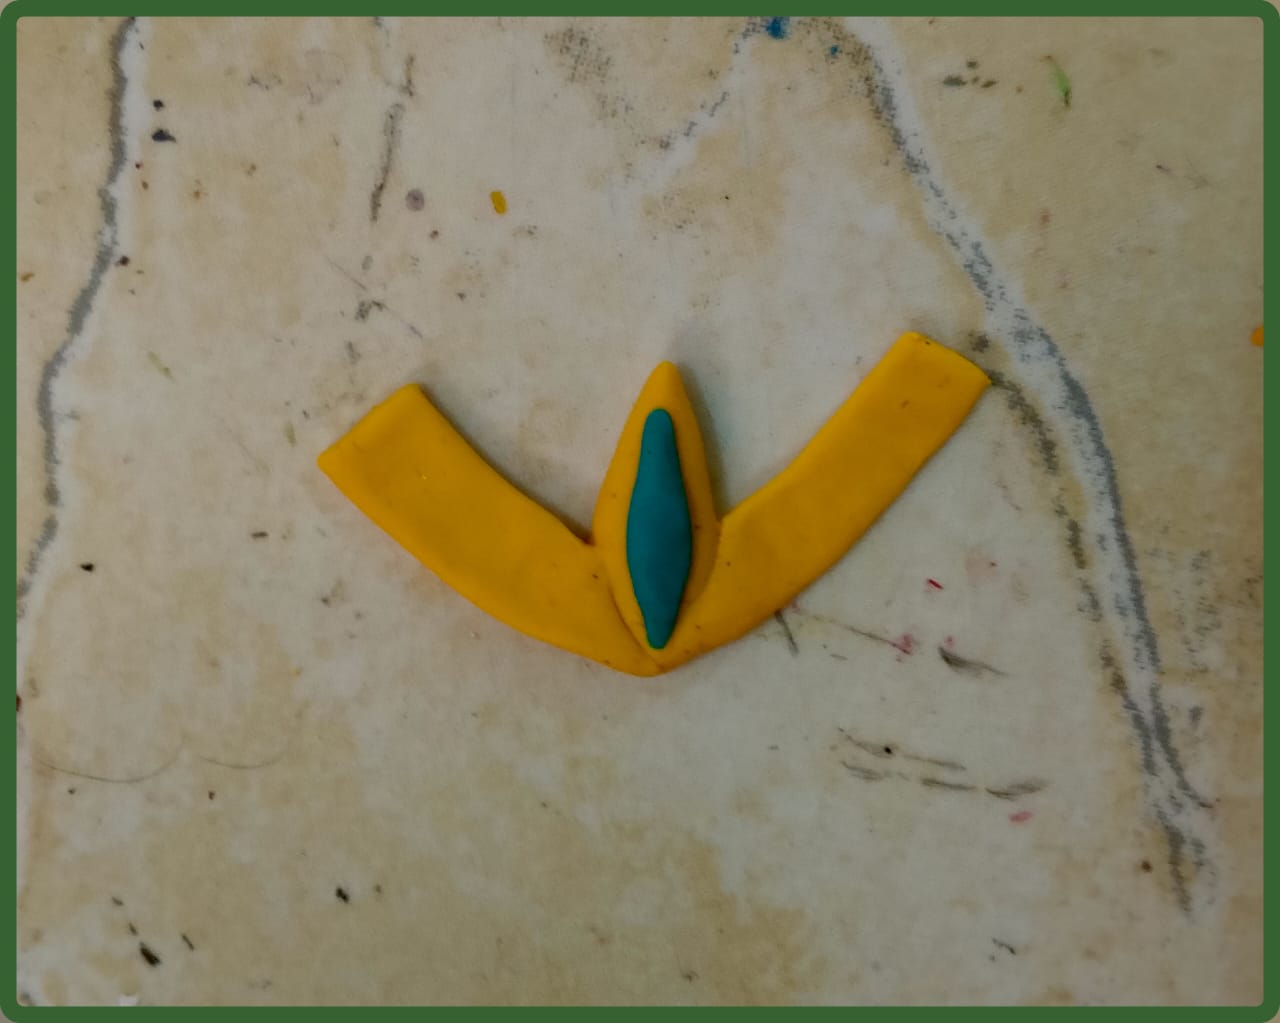
Continuamos utilizando la masa dorada y aplanamos una tira de aproximadamente 6 centímetros de largo, estiramos y hacemos una forma triangular en la base, cortando con la esteca, moldeamos también línea recta en la parte de arriba, colocamos pegamento en el rombo y la cinta y unimos, para el otro lado del dije sacamos una cinta parecida a la anterior solo que esta es más ancha y más corta, unimos con pegamento al otro lado del rombo y dejamos secar.
We continue using the golden dough and flatten a strip of approximately 6 centimeters long, stretch it and make a triangular shape at the base, cutting with the tool, we also mold a straight line at the top, put glue on the rhombus and the ribbon and join it, for the other side of the charm we take a ribbon similar to the previous one only this one is wider and shorter, join it with glue to the other side of the rhombus and let it dry.

---
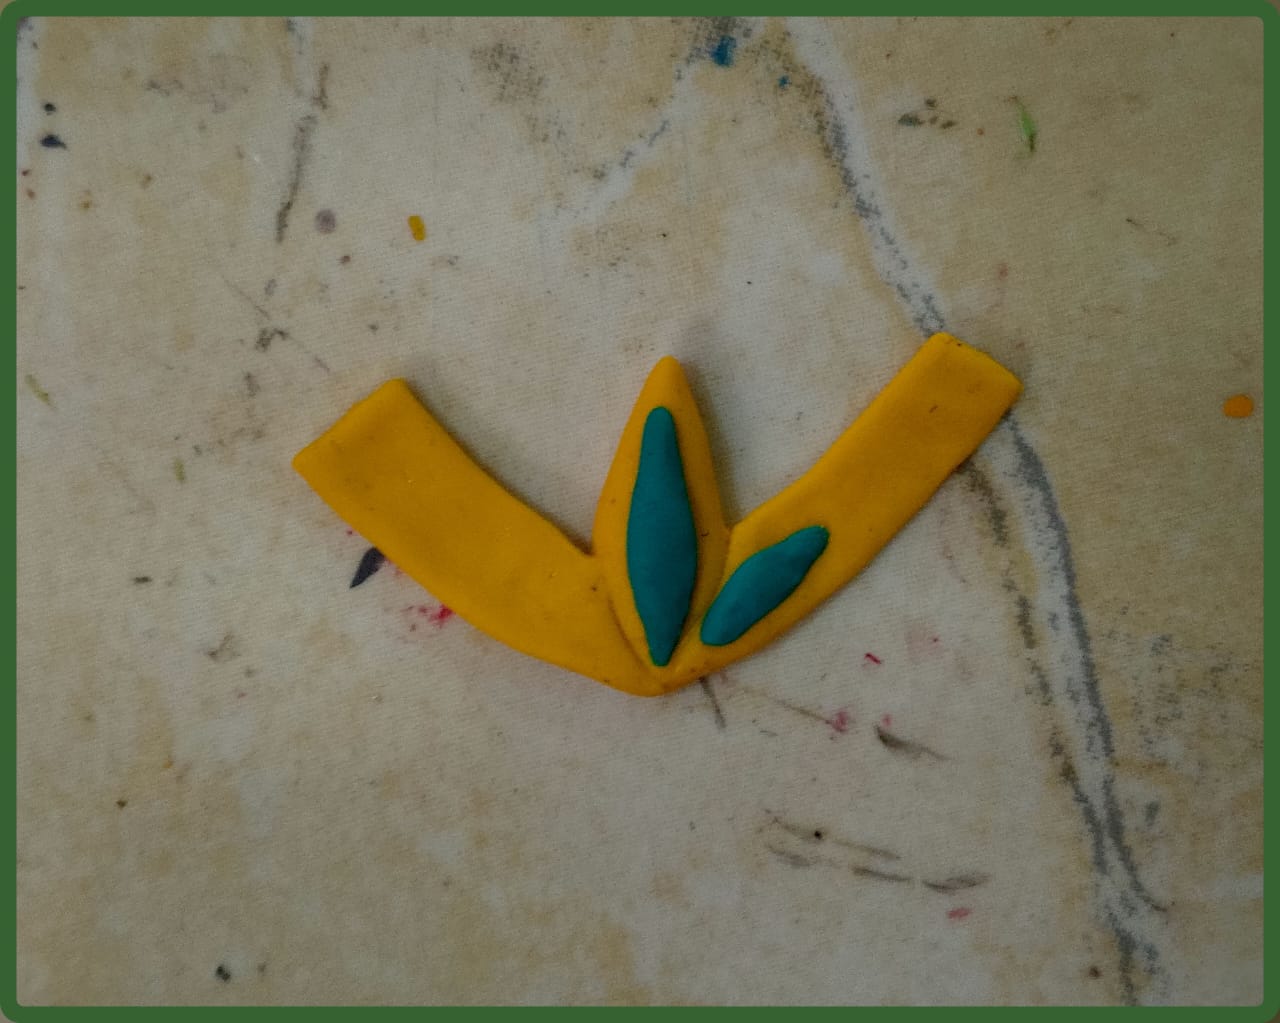
Con la masa de color verde, moldeamos pequeños rombos, pero estos son más alargados que el rombo central y sus puntas son redondeadas, agregamos pegamento, unimos el primer rombo al rombo central y dejamos secar.
Para obtener el color verde y que sea lo más parecido posible al del personaje, agregamos siete gotas de pintura amarilla y mezclamos con la masa, al terminar de mezclar no me gustó el color y añadí nuevamente un poco de pintura verde, también dos gotas de pintura dorada, mezclé durante varios minutos hasta integrar completamente, el color resultante se veía mucho mejor y similar al del personaje, así inicié a moldear los rombos, separando la masa en pequeñas porciones y formando una bola con cada una, a partir del círculo aplanamos y vamos dando forma al rombo, con las estecas hacemos los cortes en las puntas y redondeamos con las manos y la superficie plana.
With the green dough we mold small rhombuses, but these are longer than the central rhombus and their tips are rounded. We add glue, join the first rhombus to the central rhombus and let it dry.
To obtain the green color and make it as similar as possible to that of the character, we add seven drops of yellow paint and mix it with the dough, when I finished mixing I did not like the color and added a little green paint again, also two drops of gold paint, I mixed for several minutes until completely integrated, the resulting color looked much better and similar to that of the character, so I began to mold the rhombuses, separating the dough into small portions and forming a ball with each one, starting from the circle we flatten and we give shape to the rhombus, with the stakes we make the cuts at the tips and round them with our hands and the flat surface.

---
Luego moldeamos dos rombos más pequeños y los pegamos en las cintas laterales del dije, colocamos suficiente pegamento para que para que queden muy bien y dejamos secar.
Then we molded two smaller rhombuses and glued them to the side ribbons of the charm, we put enough glue so that they fit very well and let them dry.

---
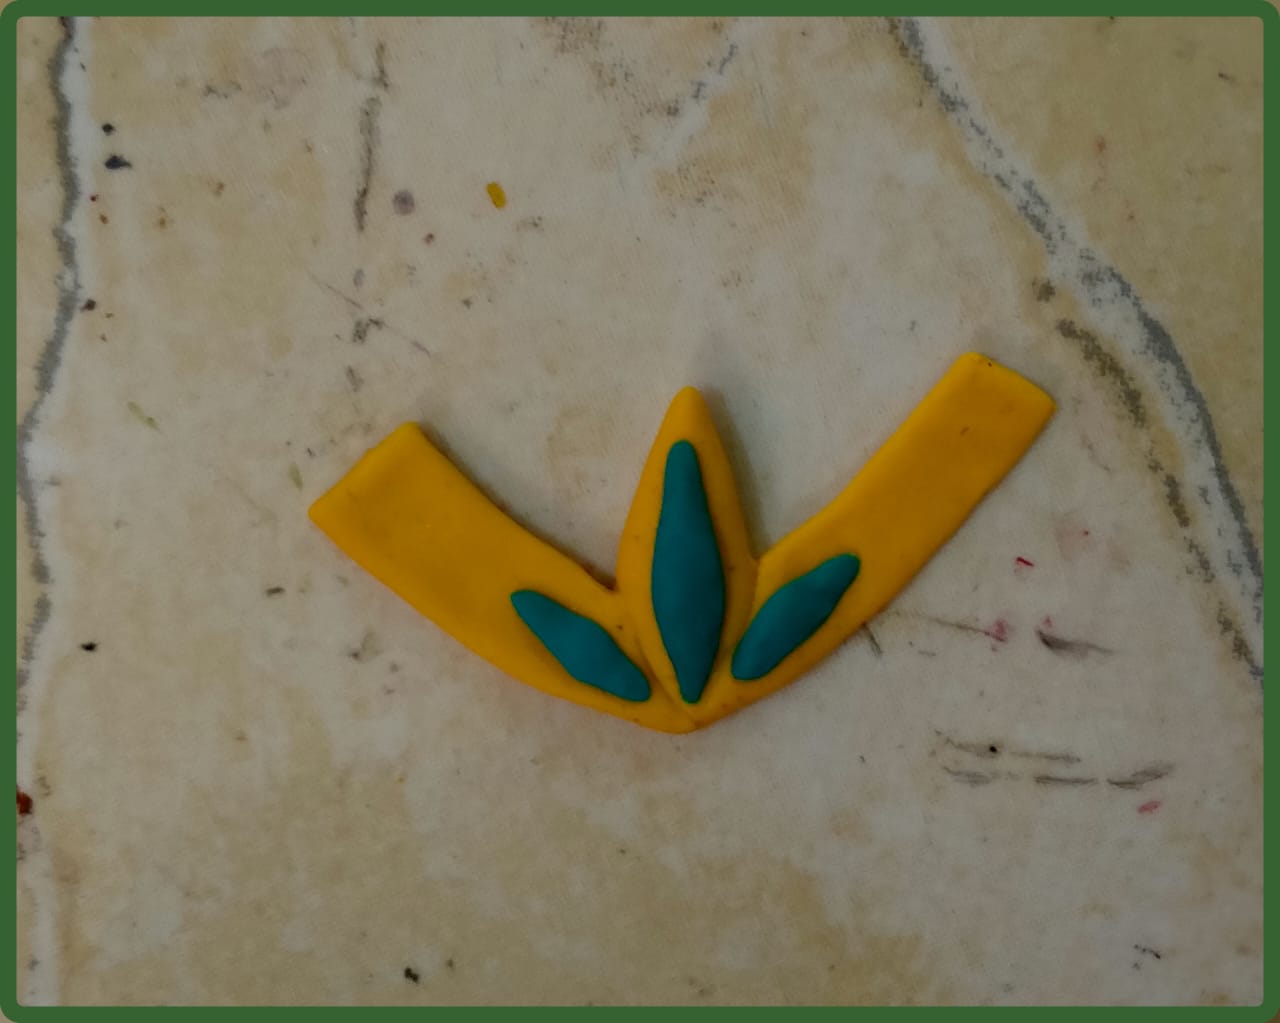
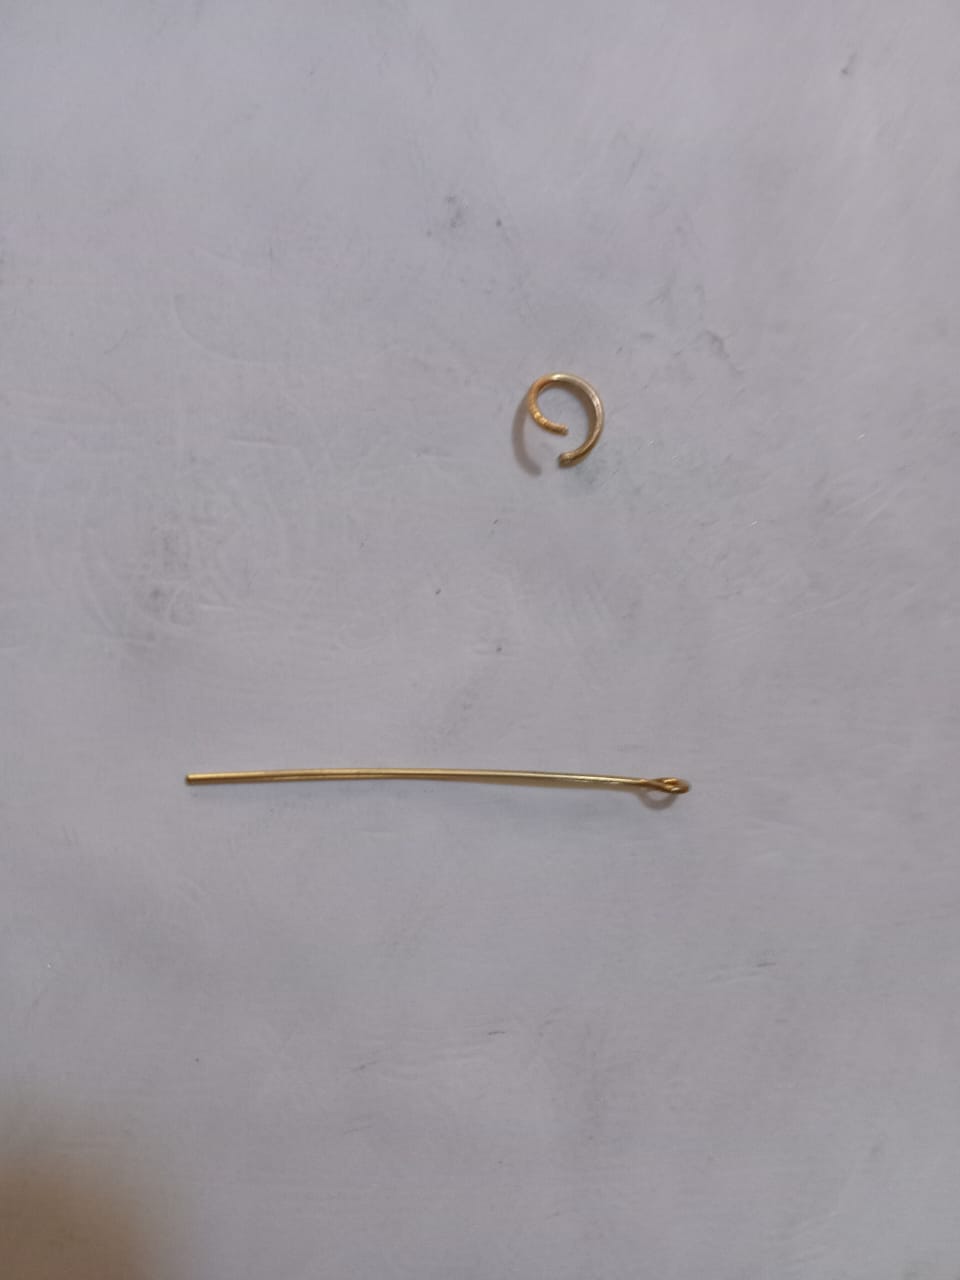
Para finalizar colocamos el pin y aro de joyería en la parte trasera del dije, con ayuda de una aguja o una esteca afilada abrimos un orificio agregamos pegamento y colocamos el pin, en la parte de arriba del pin agregamos el aro de joyería y allí colocaremos el cordón, el cordón es de color azul tomando como referencia el vestuario del personaje, hacemos un nudo en los extremos y dejamos secar para que el pin fije en el dije, así está terminado un hermoso dije inspirado en Splinterlands.
To finish we place the pin and jewelry ring on the back of the pendant, with the help of a needle or a sharp stake we open a hole, add glue and place the pin, on top of the pin we add the jewelry ring and there we will place the cord, the cord is blue taking the character's costume as a reference, we make a knot at the ends and let it dry so that the pin fixes on the pendant, thus a beautiful Splinterlands inspired pendant is finished.

---
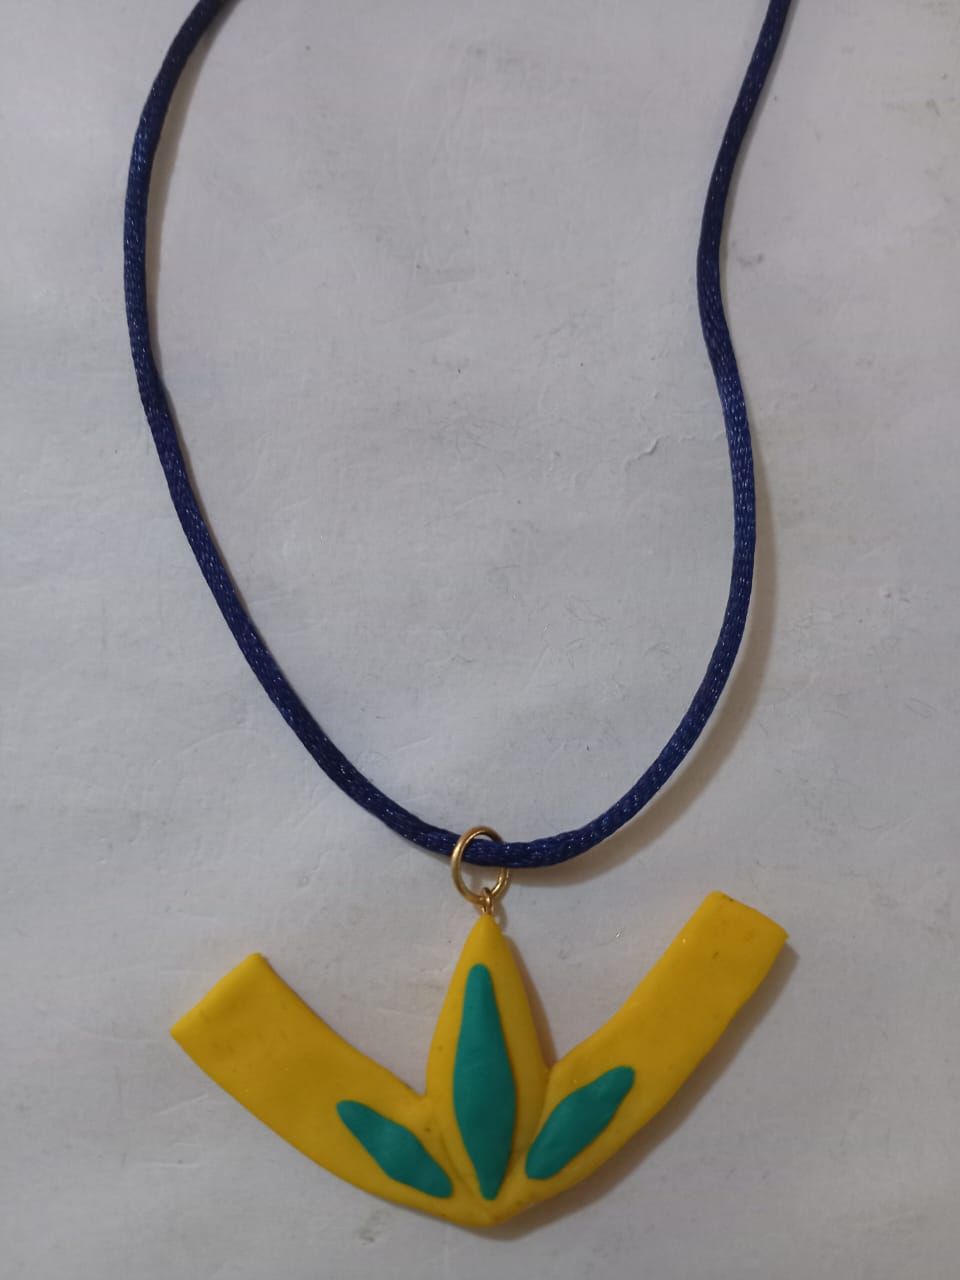
Les muestro el resultado
I show you the result


---
**Gracias por Leer.**
**Thank you for reading.**
---
**Hasta Luego!**
**See you later!**
---
---
Translated with https://www.deepl.com/translator
All images are of my authorship captured with an Alcatel phone.
Todas las imágenes son de mi autoría capturadas con un teléfono Alcatel.
---
#diy
#splinterlands
#spanish
#neoxian
#fanart
#creative
#handmade
#artwork
#crafting
#manualidades
Payout: 9.654 HBD
Votes: 85
More interactions (upvote, reblog, reply) coming soon.