**
ESPAÑOL
**
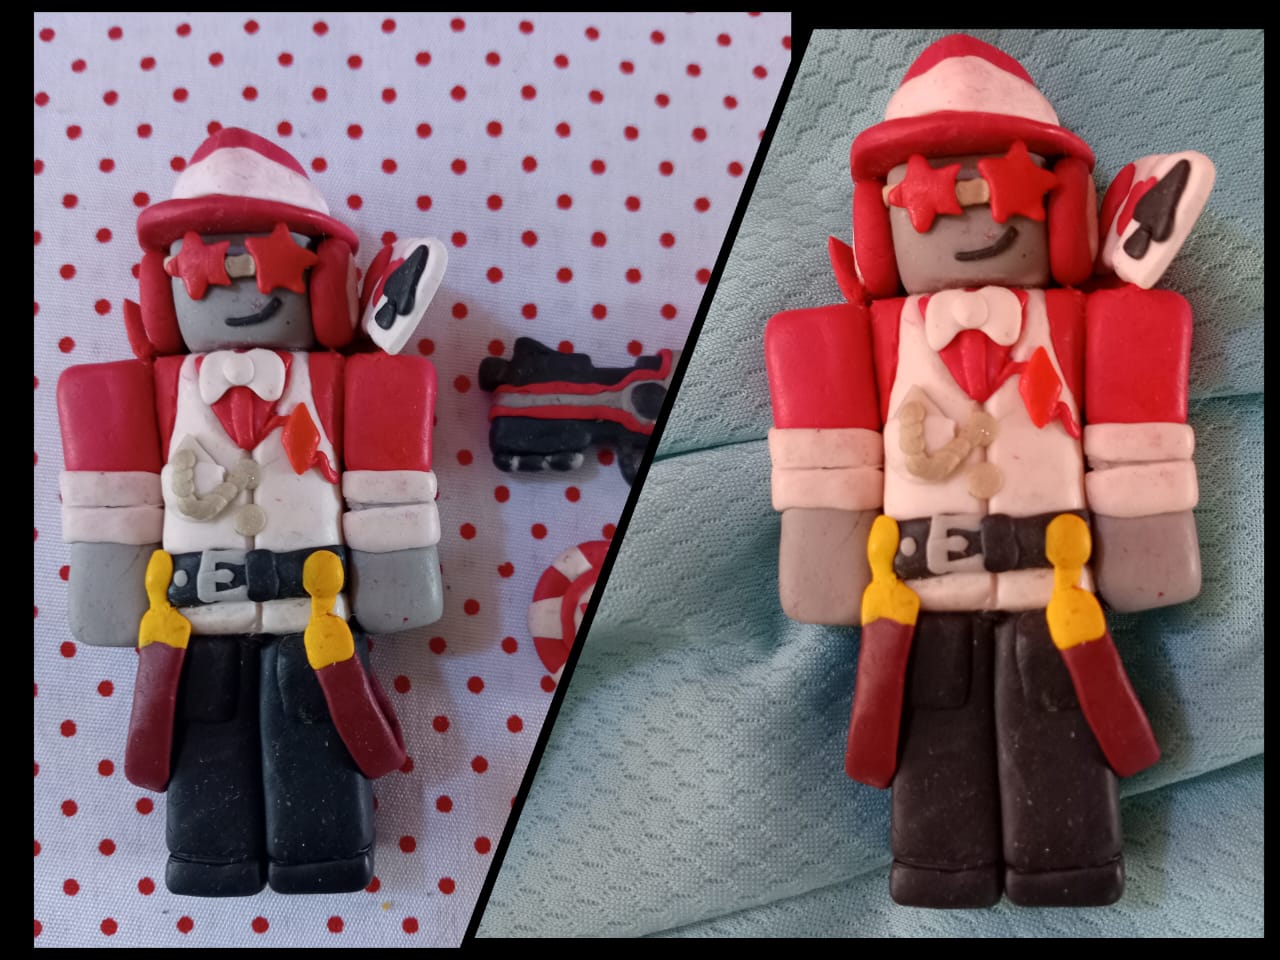
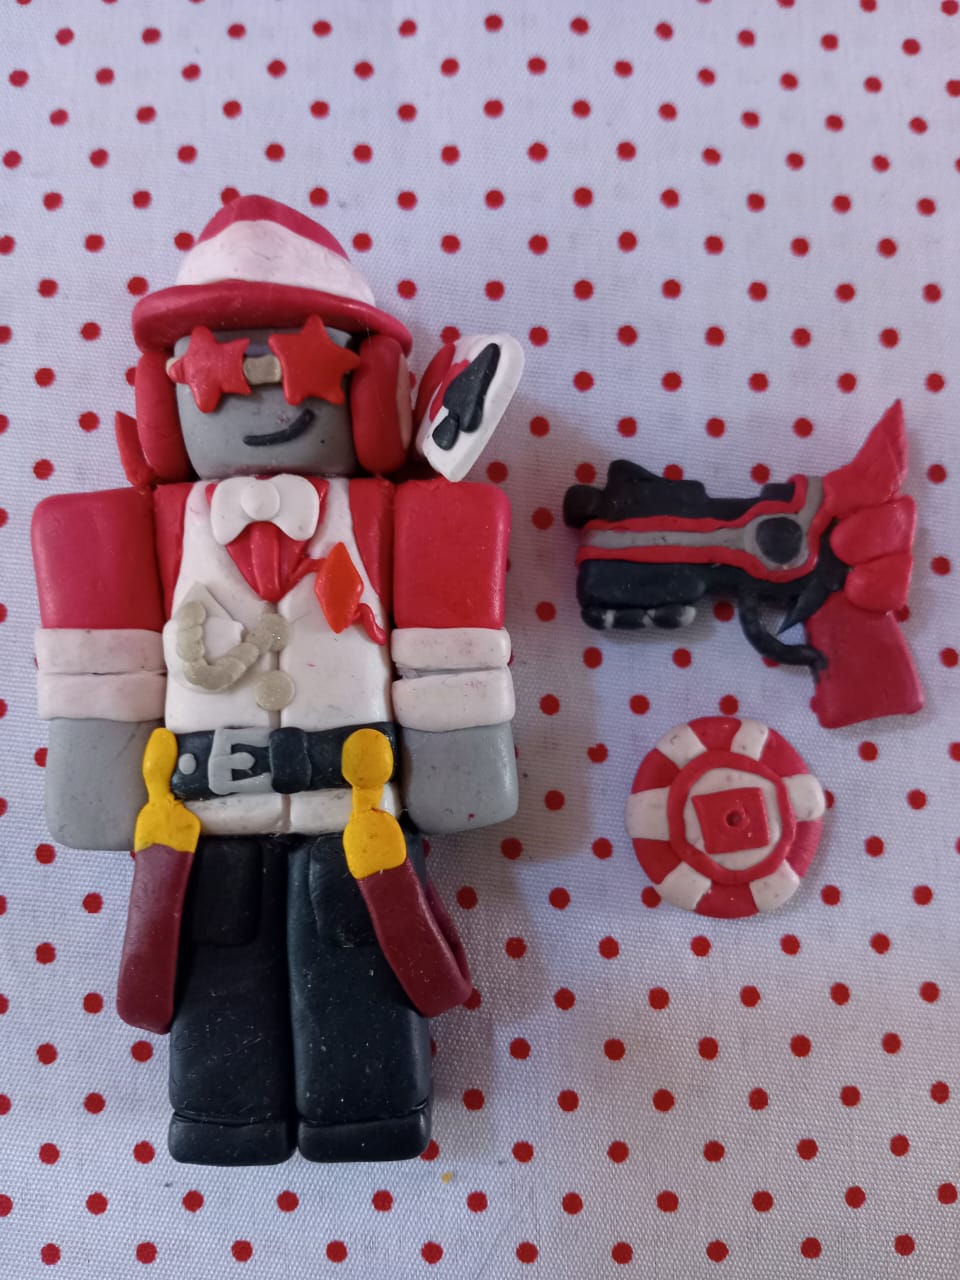
Saludos comunidad @hivediy, les deseo un feliz día en unión familiar, me siento feliz de compartir nuevamente un proyecto creativo, usando mi material favorito; la masa flexible, en esta ocasión les muestro el proceso de moldeado de [Chance Milestone IV](https://forsaken2024.fandom.com/wiki/Chance/Skins#Milestone_IV), un apostador del juego Forsaken, que solía frecuentar el casino de sus padres, en esta versión está usando el atuendo final que obtiene al llegar al nivel 100.
**
ENGLISH
**
Greetings @hivediy community, I wish you a happy day together as a family. I'm happy to share another creative project using my favorite material: flexible clay. This time, I'm showing you the molding process for[Chance Milestone IV](https://forsaken2024.fandom.com/wiki/Chance/Skins#Milestone_IV), a gambler in the game Forsaken who used to frequent his parents' casino. In this version, he's wearing the final outfit he obtains upon reaching level 100.

---
**
MATERIALES
**
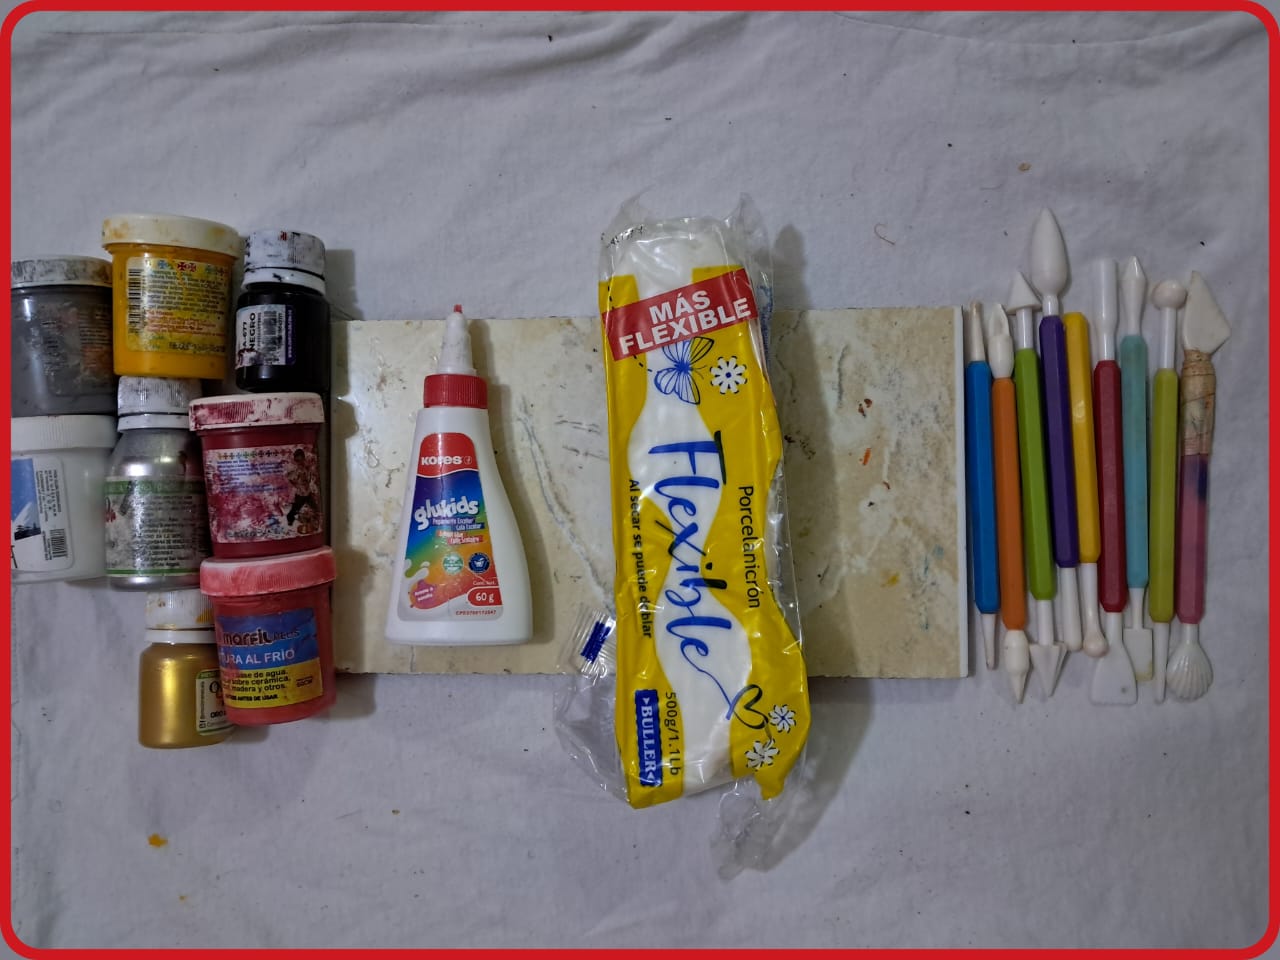
Masa flexible
Pintura al frío
Estecas
Crema para moldear
Pegamento
Superficie plana
(cerámica)
**
MATERIALS
**
Flexible clay
Cold paint
Cutting paste
Modeling cream
Glue
Flat surface
(ceramic)

---
**
PROCEDIMIENTO
**
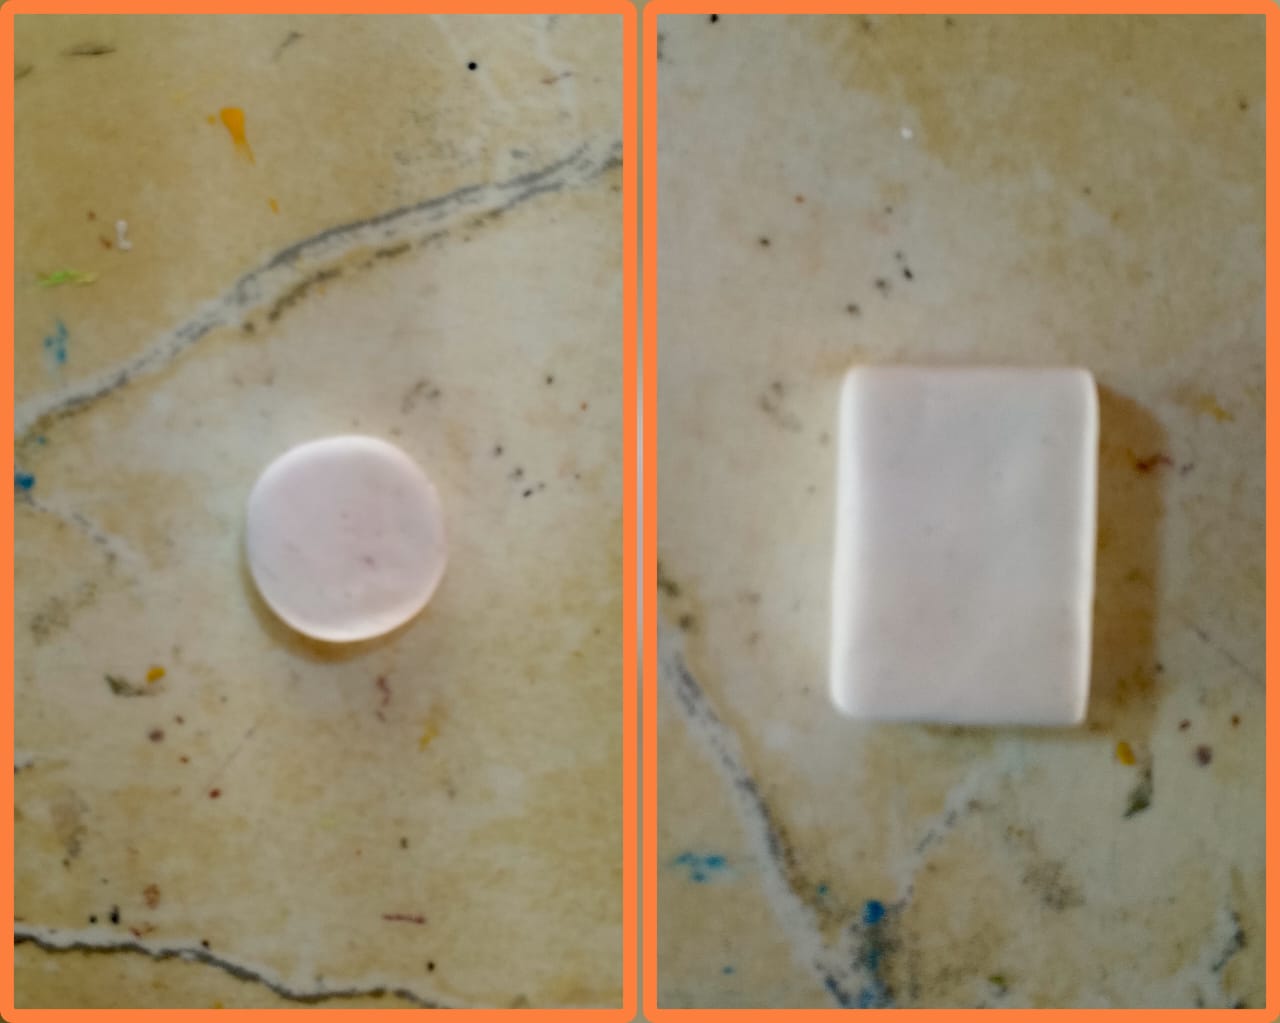
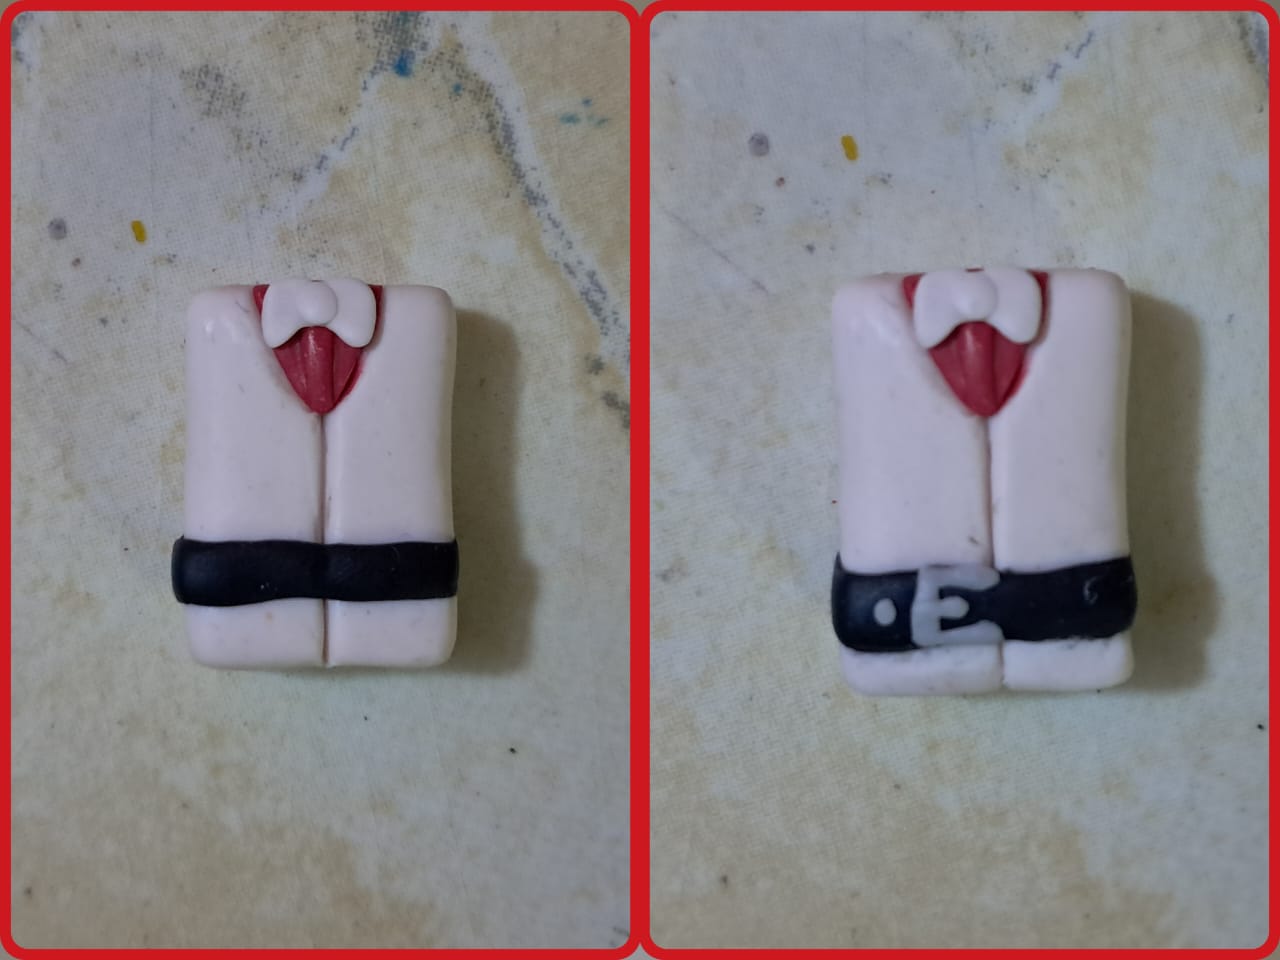
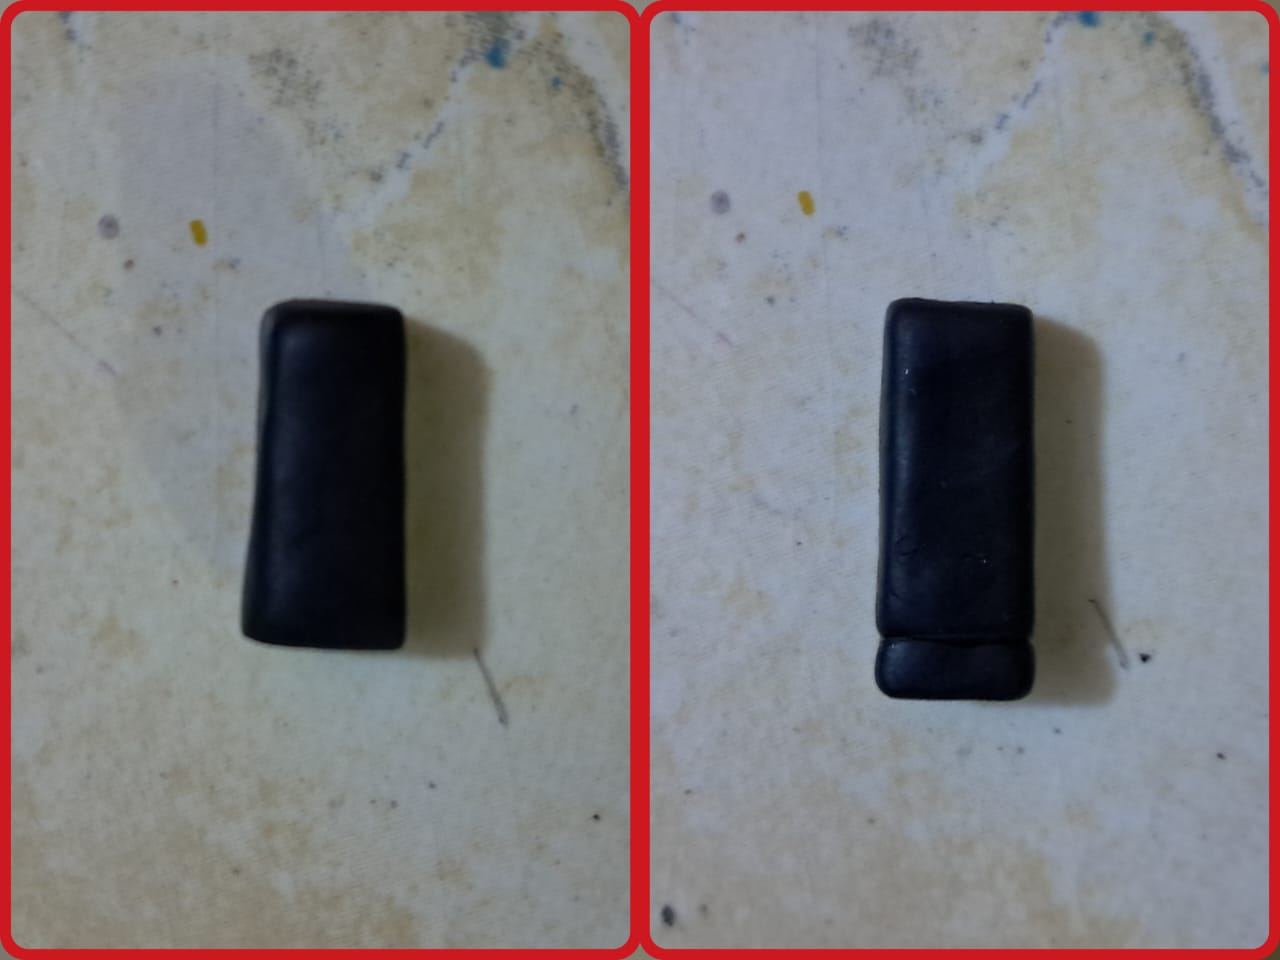
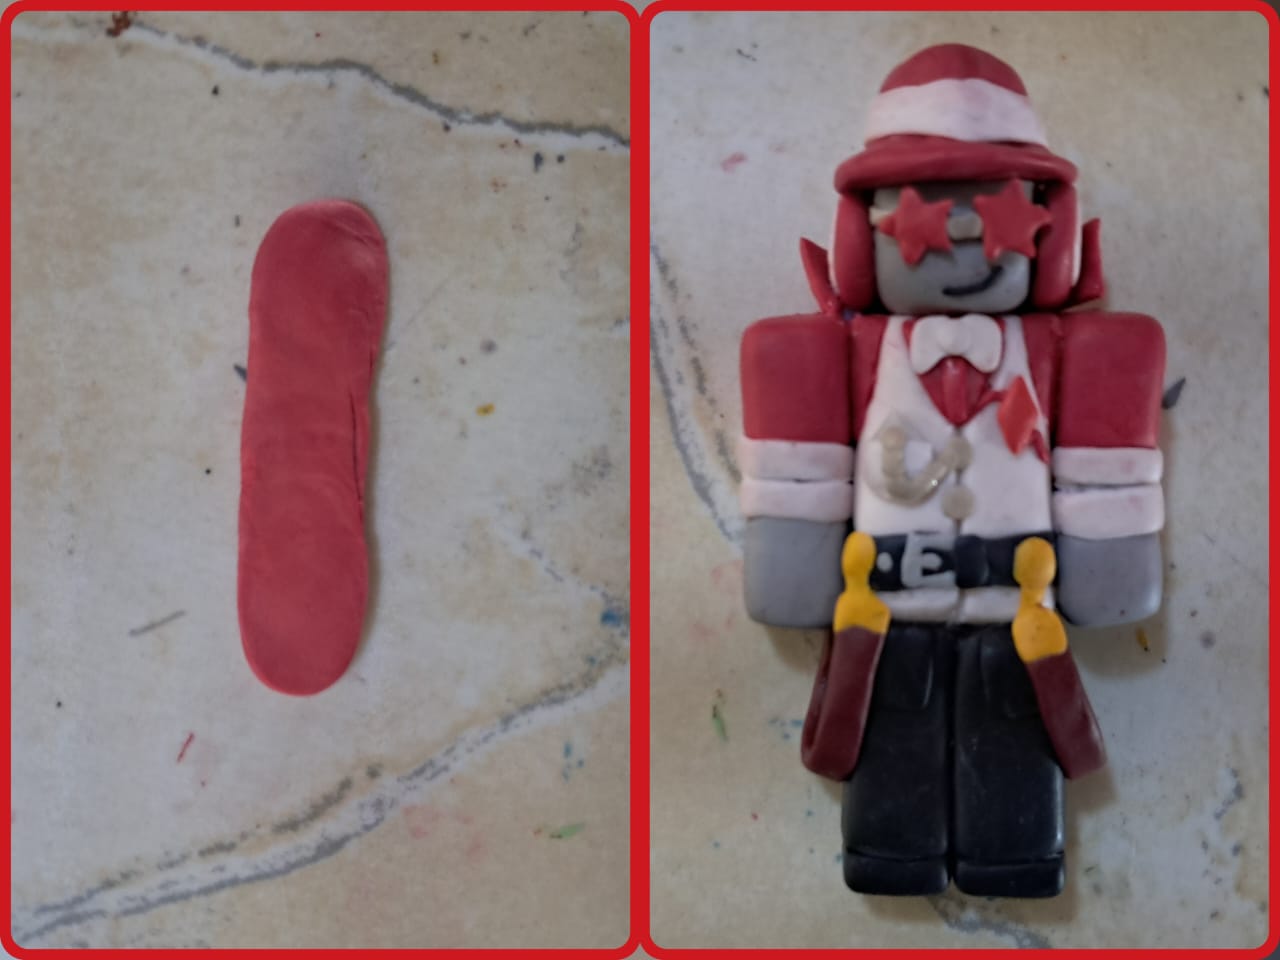
Para moldear iniciamos dividiendo la masa en pequeñas porciones, luego agregamos pintura y mezclamos hasta obtener el color deseado, aunque la masa es blanca me gusta agrgarle pintura blanca para un color uniforme, luego hacemos una bola, aplanamos y formamos un rectángulo.
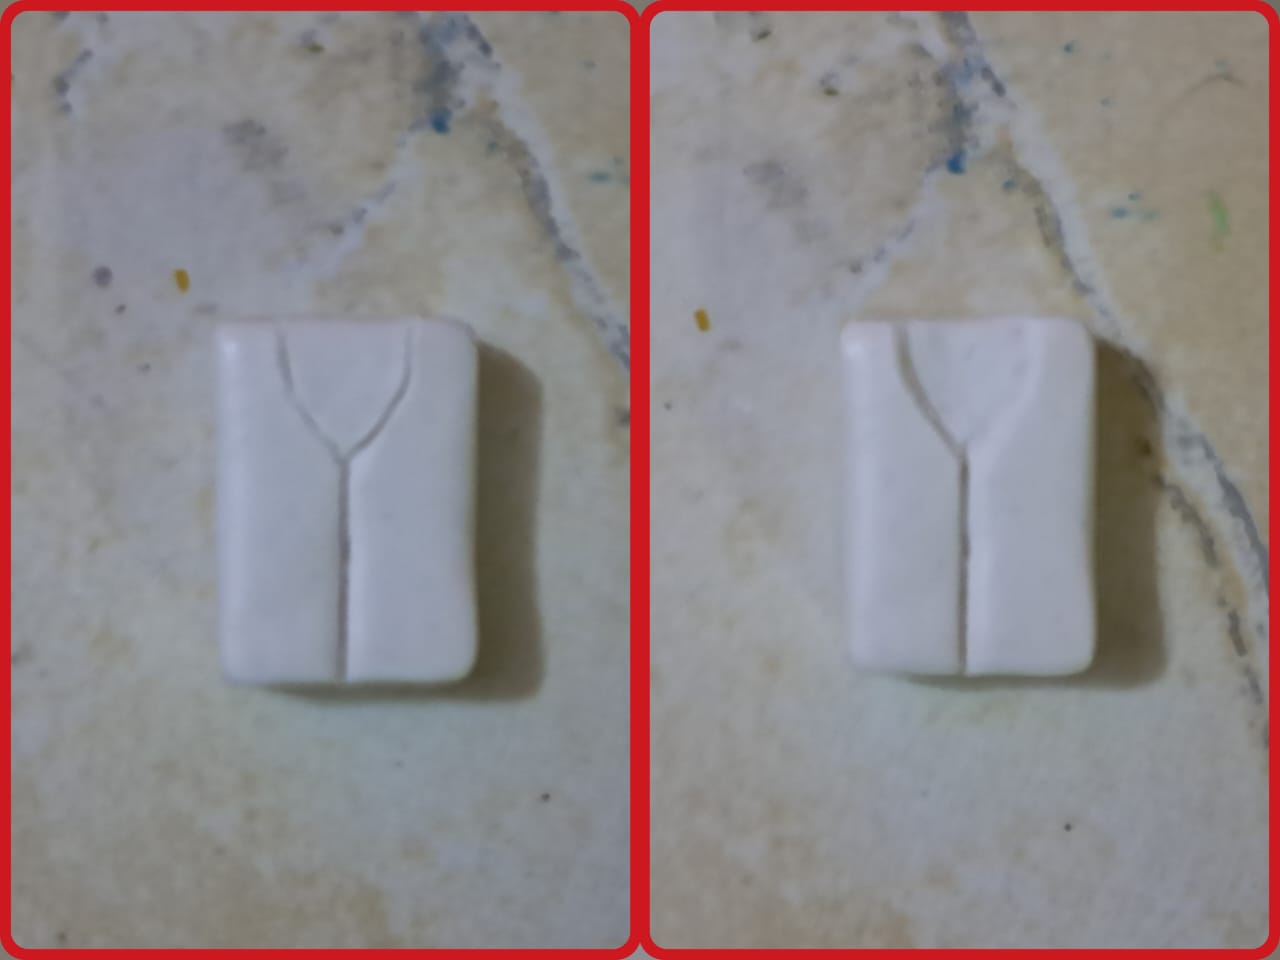
Con ayuda de las estecas marcamos y hacemos un corte en V, en la parte superior del rectángulo y una línea recta en el centro para hacer la camisa.
**
PROCEDURE
**
To mold, we start by dividing the dough into small portions, then add paint and mix until the desired color is achieved. Although the dough is white, I like to add white paint for a uniform color. Then, we form a ball, flatten it, and shape it into a rectangle.
Using the stakes, we mark and make a V-shaped cut at the top of the rectangle and a straight line down the center to make the shirt.

---
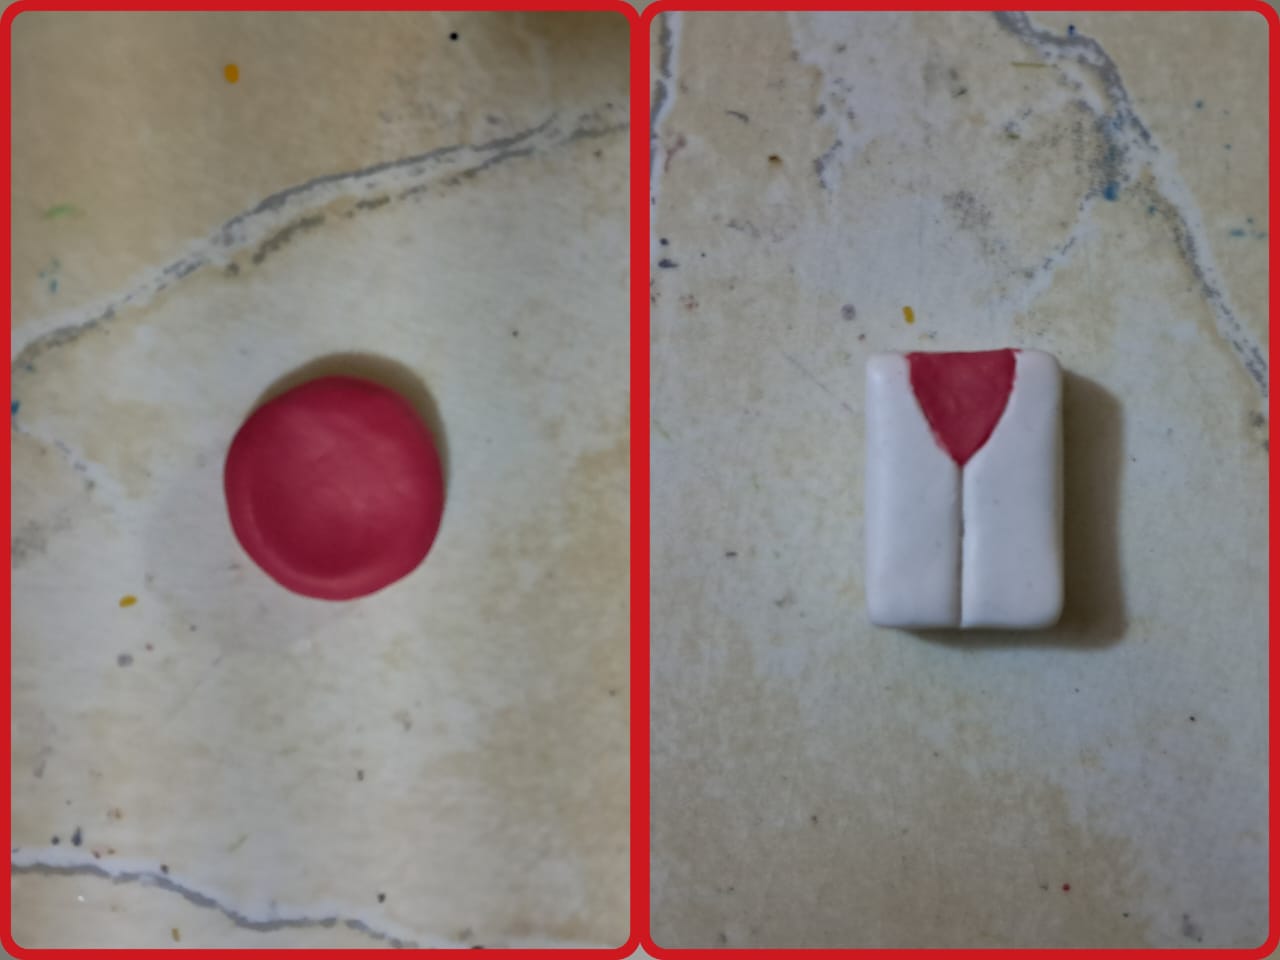
Luego con una porción de masa roja rellenamos el triángulo de la camisa, tomamos una pequeña porción de masa blanca hacemos un moño y el corbatín y lo colocamos encima de la pieza roja, añadimos pegamento y dejamos secar, agregamos pintura negra a otra porción de masa con la cual añadiremos otros detalles a la camisa.
Then, with a portion of red dough, we fill the triangle of the shirt. Take a small portion of white dough and make a bow and tie, then place it on top of the red piece. Add glue and let it dry. Add black paint to another portion of dough, which we'll use to add other details to the shirt.
---
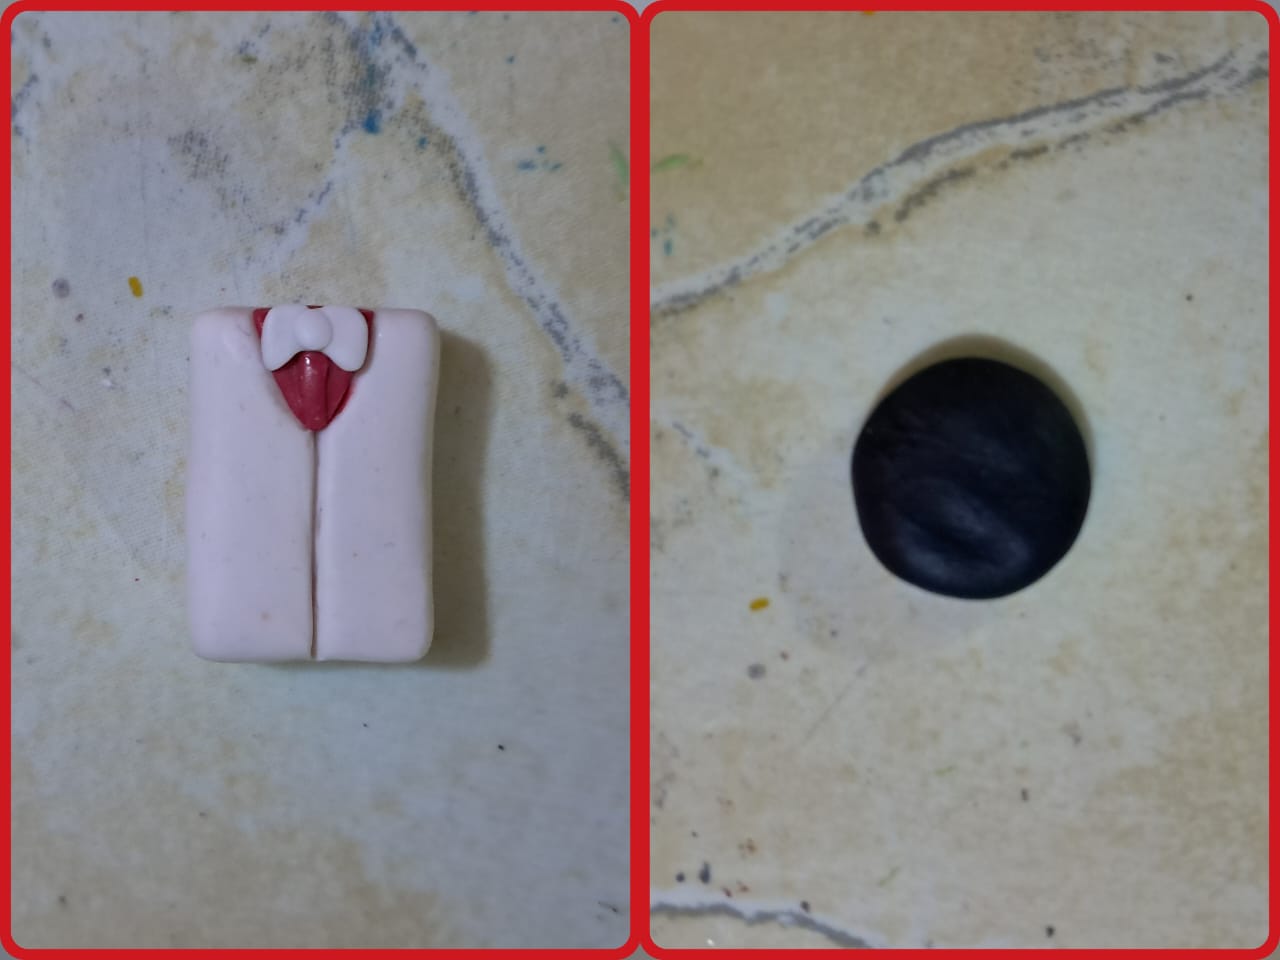
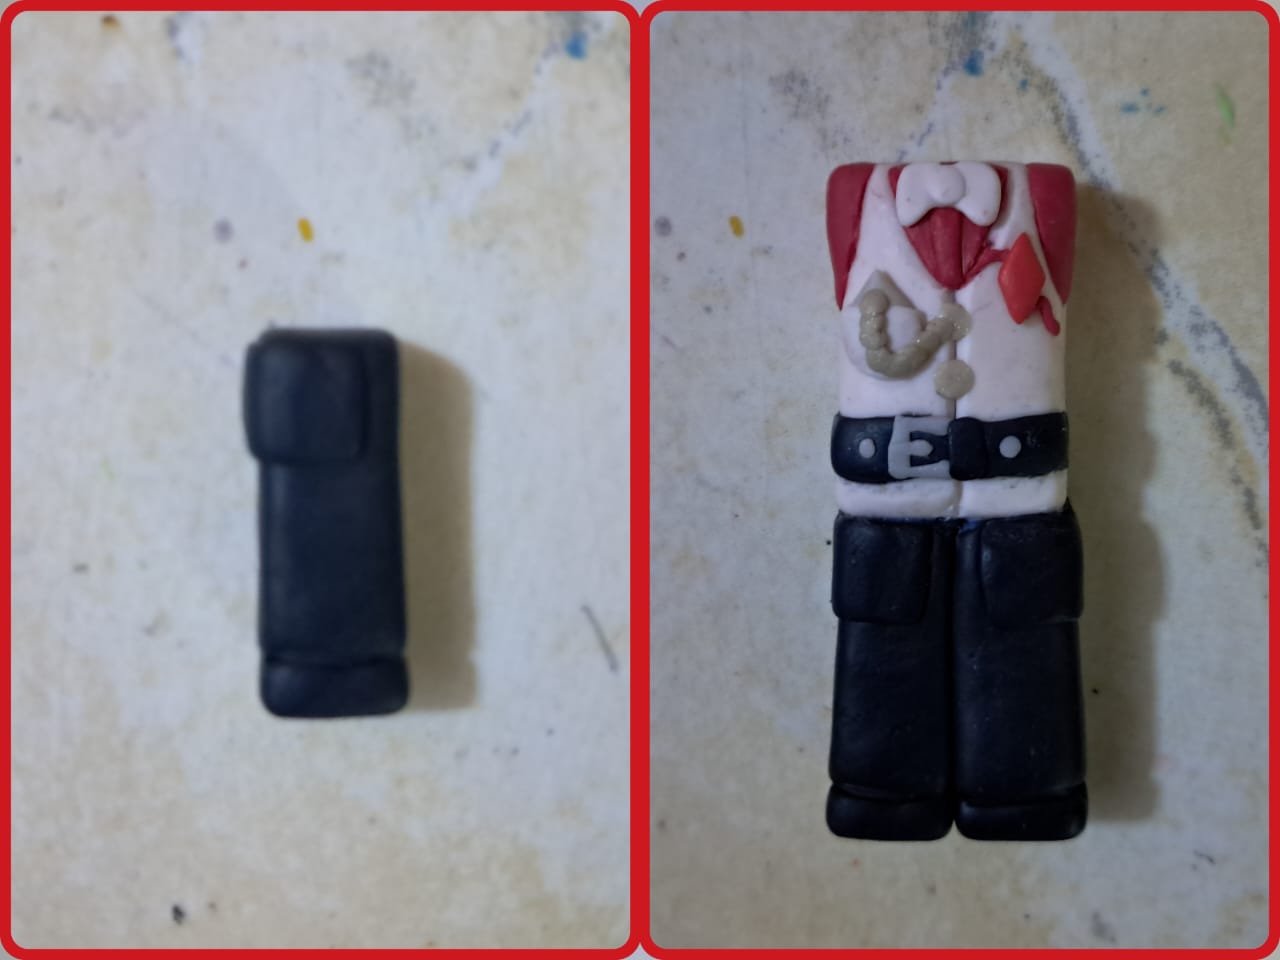
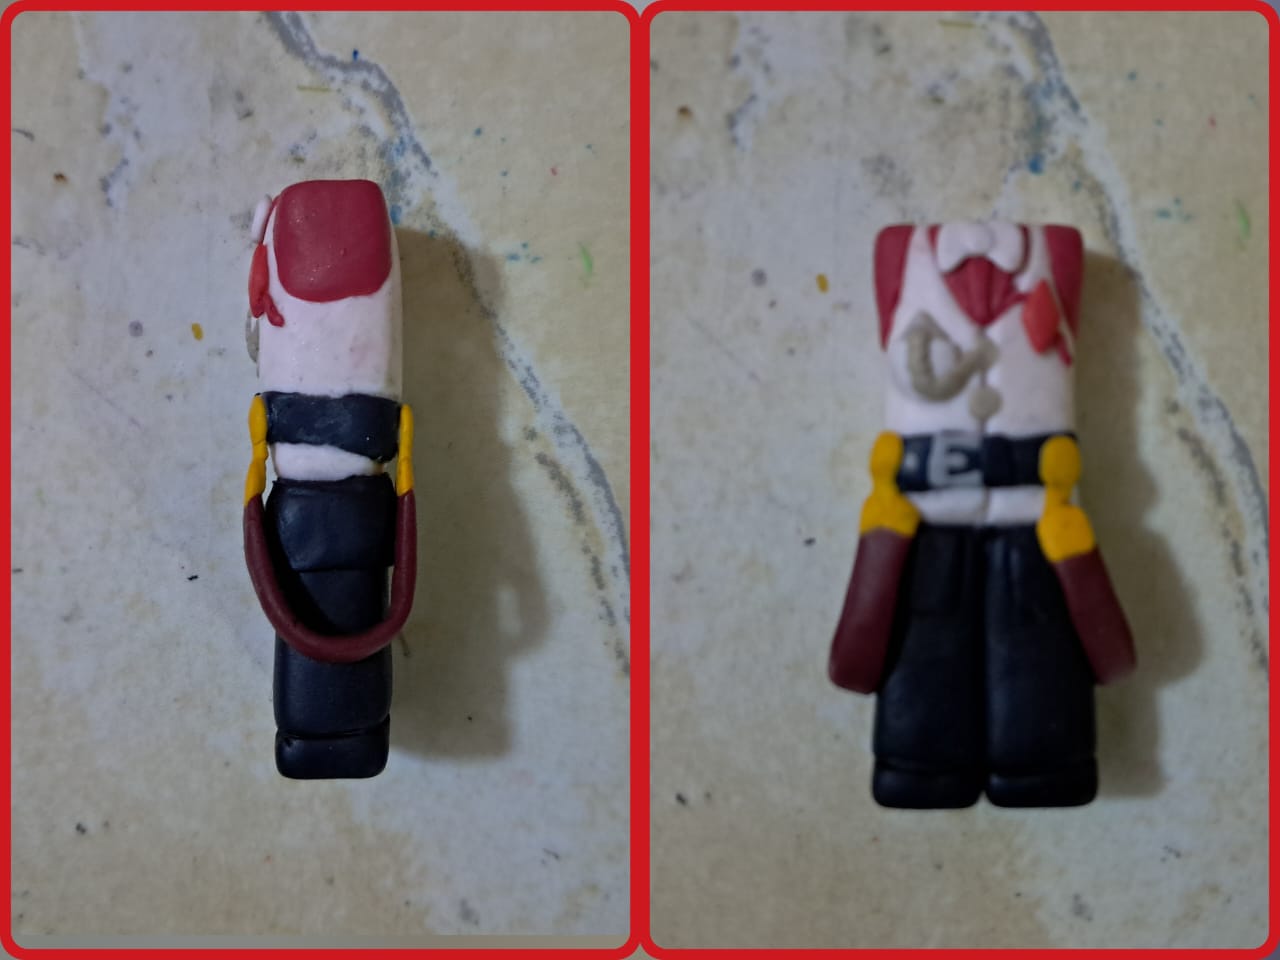
Con la masa negra moldeamos la correa la correa y con masa de color gris hacemos la letra E y círculos plateados, también colocamos los botones añadimos pegamento y nuevamente dejamos secar.
Using the black dough, we mold the strap, and with gray dough, we make the letter E and silver circles. We also place the buttons, add glue, and let it dry again.

---
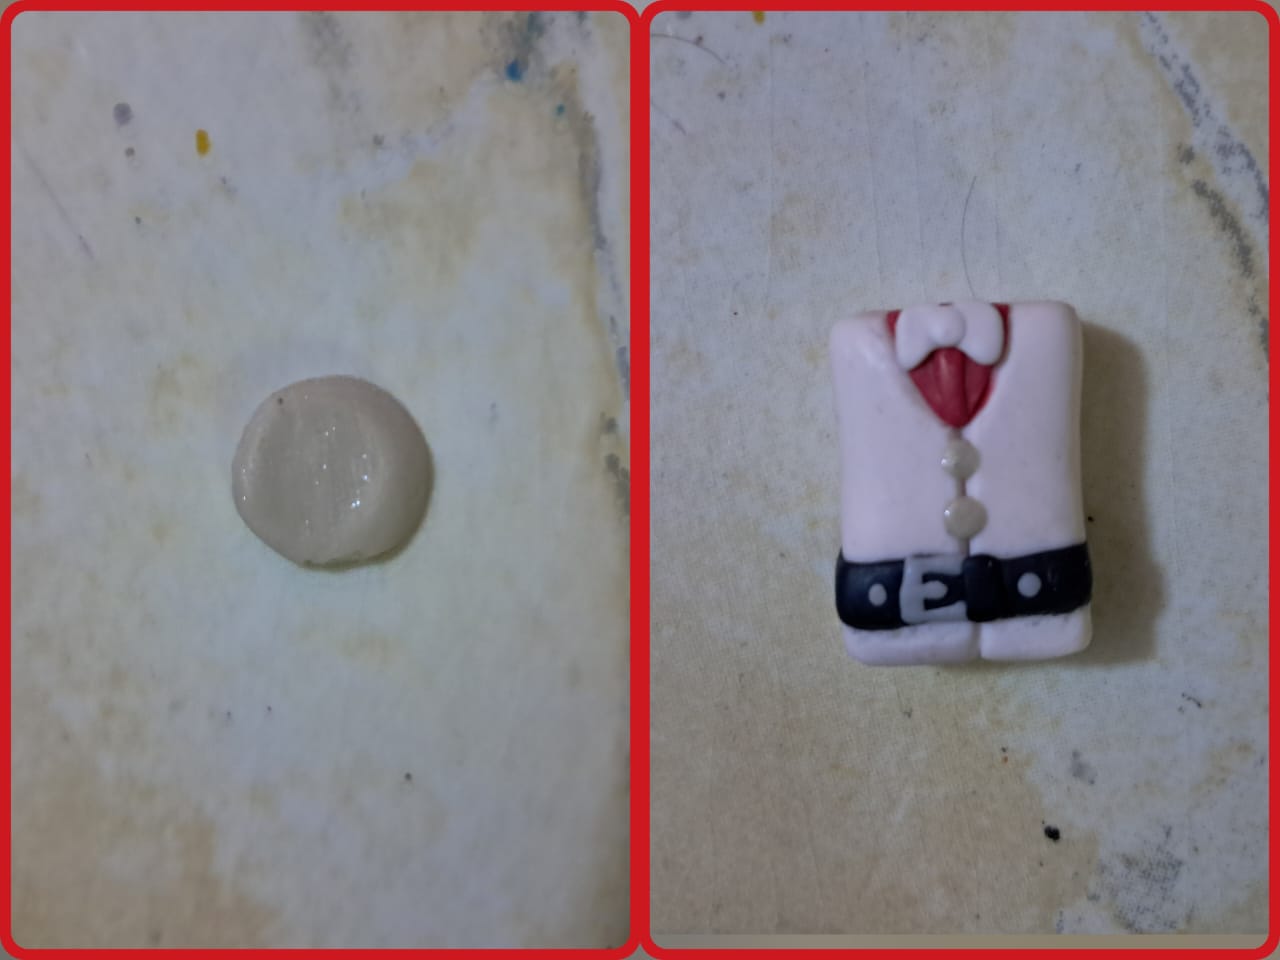
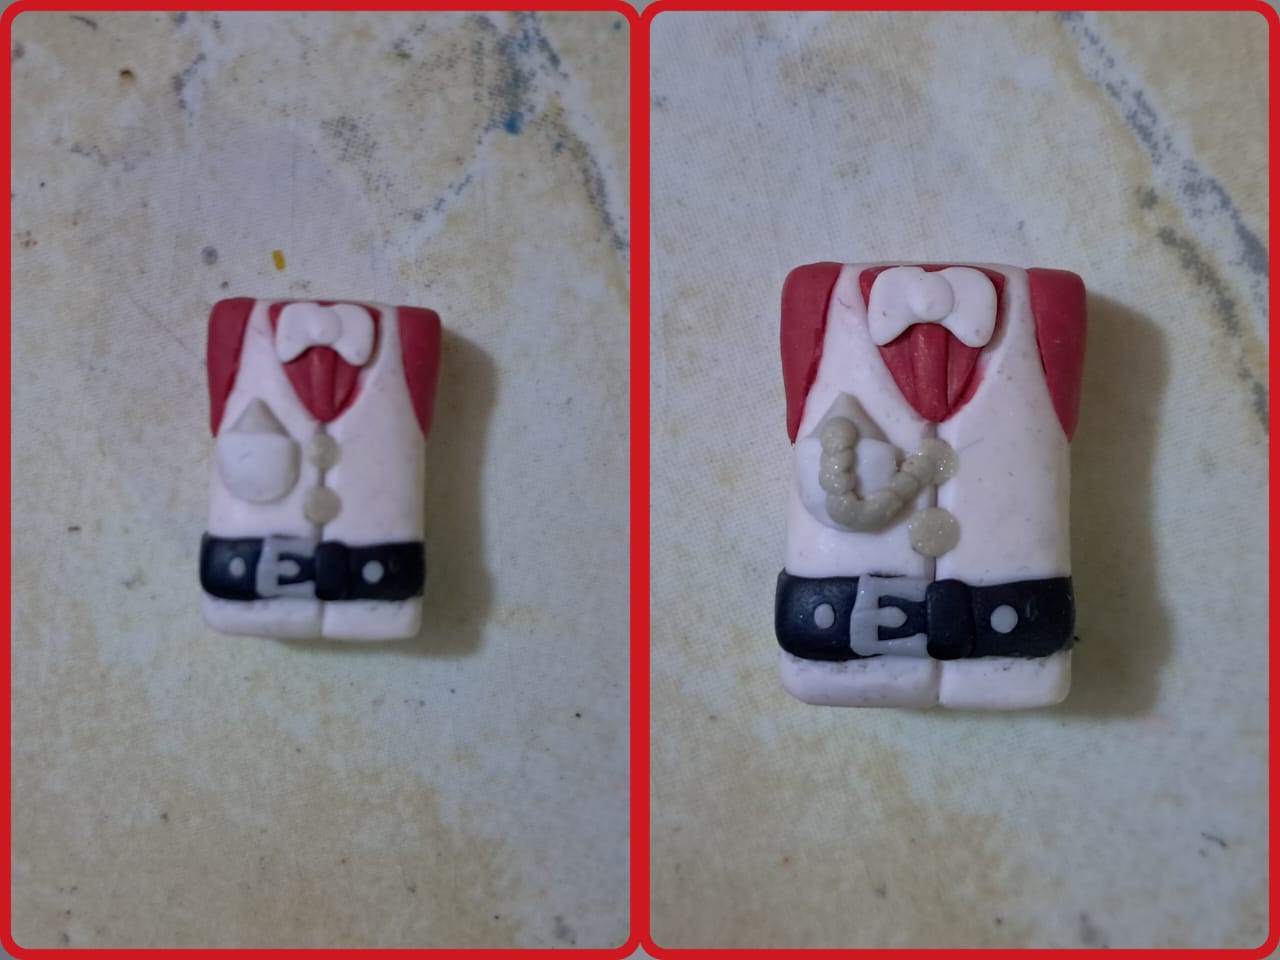
Con la esteca hacemos un corte triangular en la parte en los lados de arriba del rectángulo y rellenamos con masa roja, estos serán la base en la cual haremos los brazos, continuamos agregando los detalles en la camisa pegamos el bolsillo y una cadena que va desde este a los botones.
Using the tool, we make a triangular cut in the top sides of the rectangle and fill it with red dough. These will be the base for the arms. We continue adding the details to the shirt, gluing the pocket and a chain that runs from it to the buttons.

---
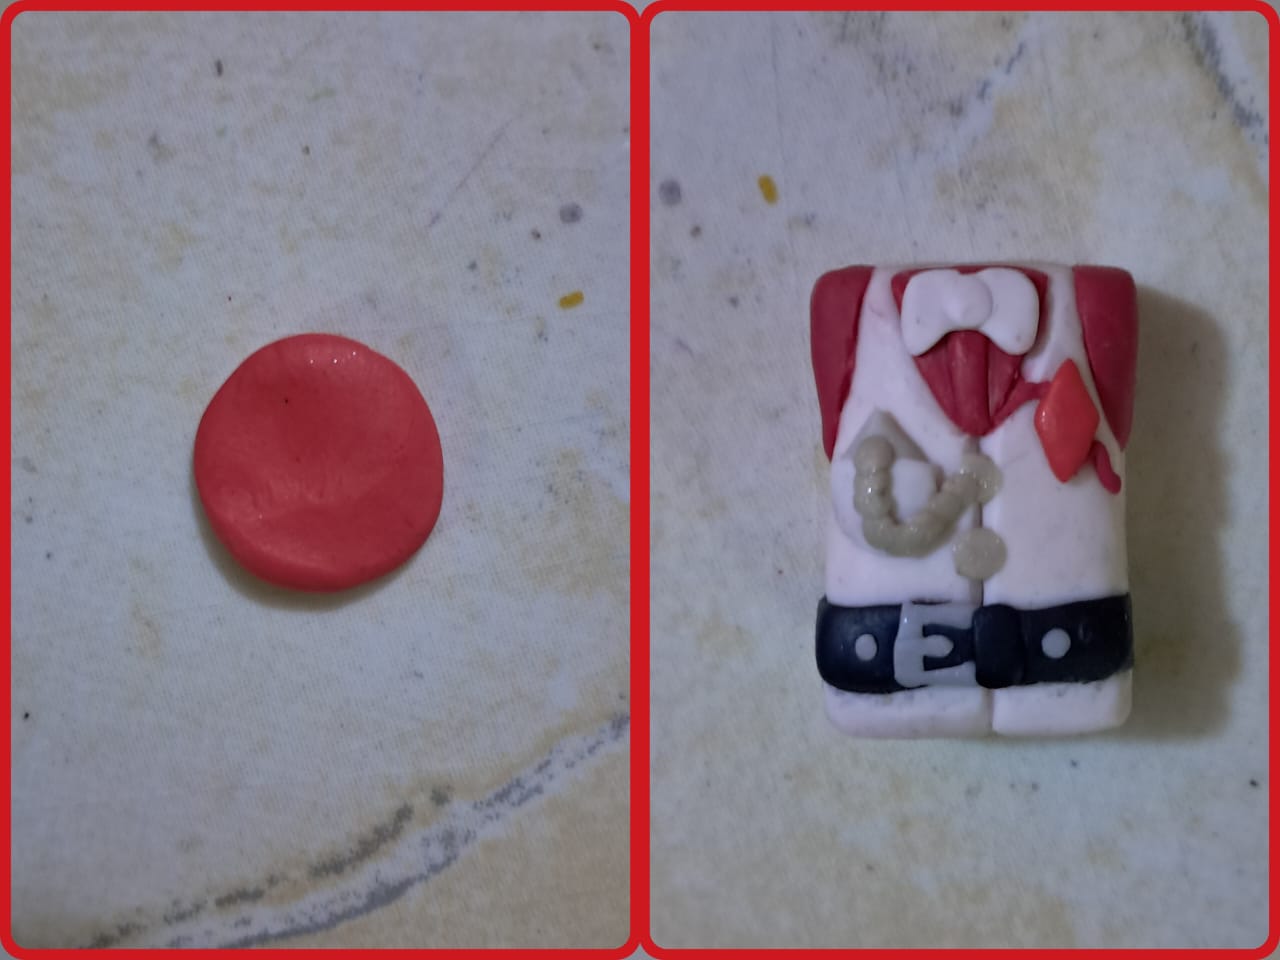
Con la masa roja, agregamos también un diamante en la camisa, el cual lleva una cinta que lo une a la corbata.
With the red dough we also added a diamond to the shirt which has a ribbon that connects it to the tie.

---
Para hacer las piernas, moldeamos dos rectángulos y en la parte inferior agregamos un cuadrado más ancho en la parte delantera, este es el zapato, agregamos pegamento y dejamos secar, también pegamos los bolsillos, dos cuadrados negros, luego unimos las piernas al cuerpo con suficiente pegamento y dejamos secar.
To make the legs, we molded two rectangles and at the bottom we added a wider square in the front, this is the shoe, we added glue and let it dry, we also glued the pockets, two black squares, then we joined the legs to the body with enough glue and let it dry.
---
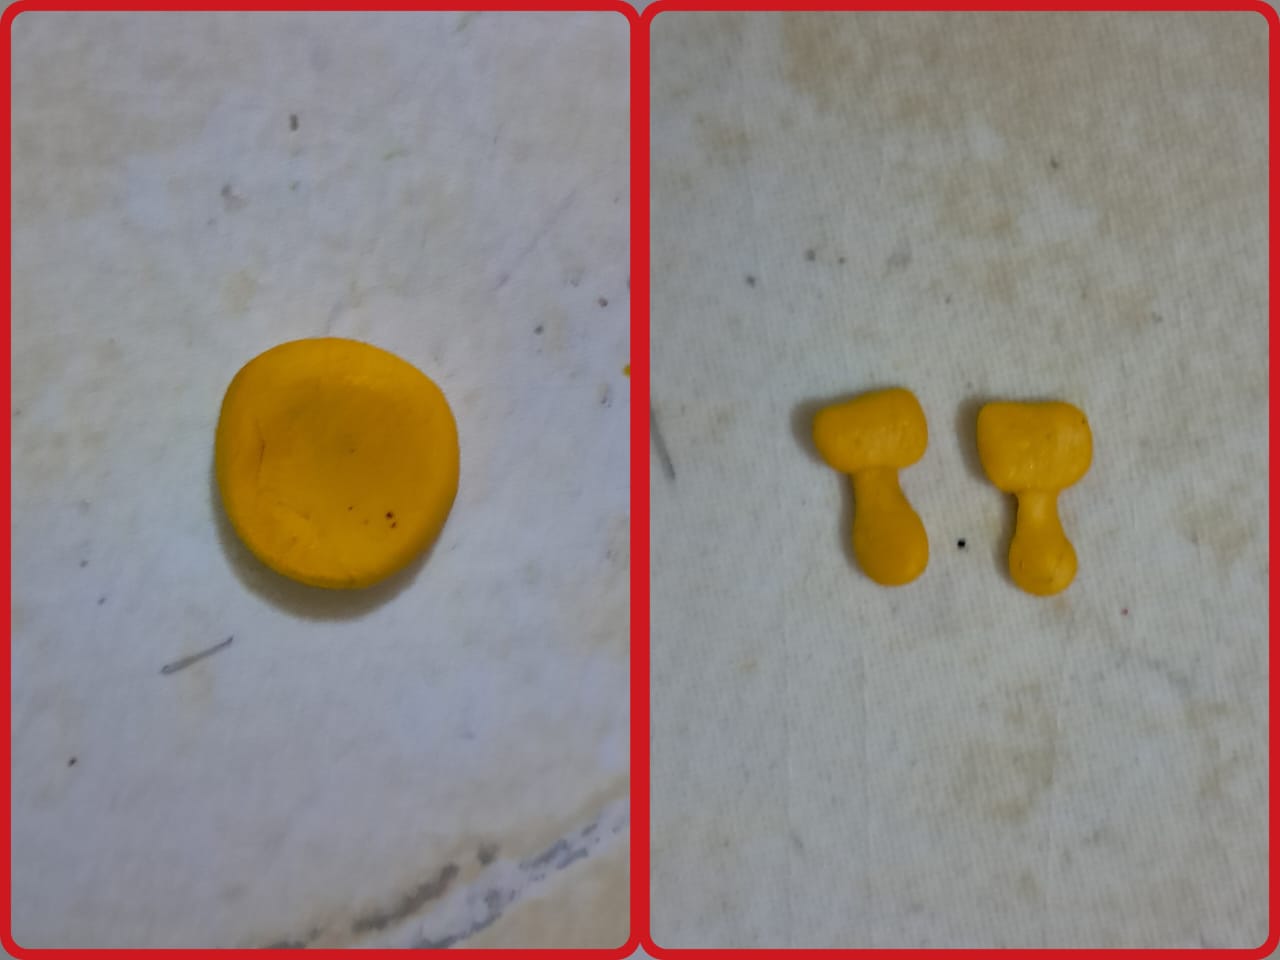
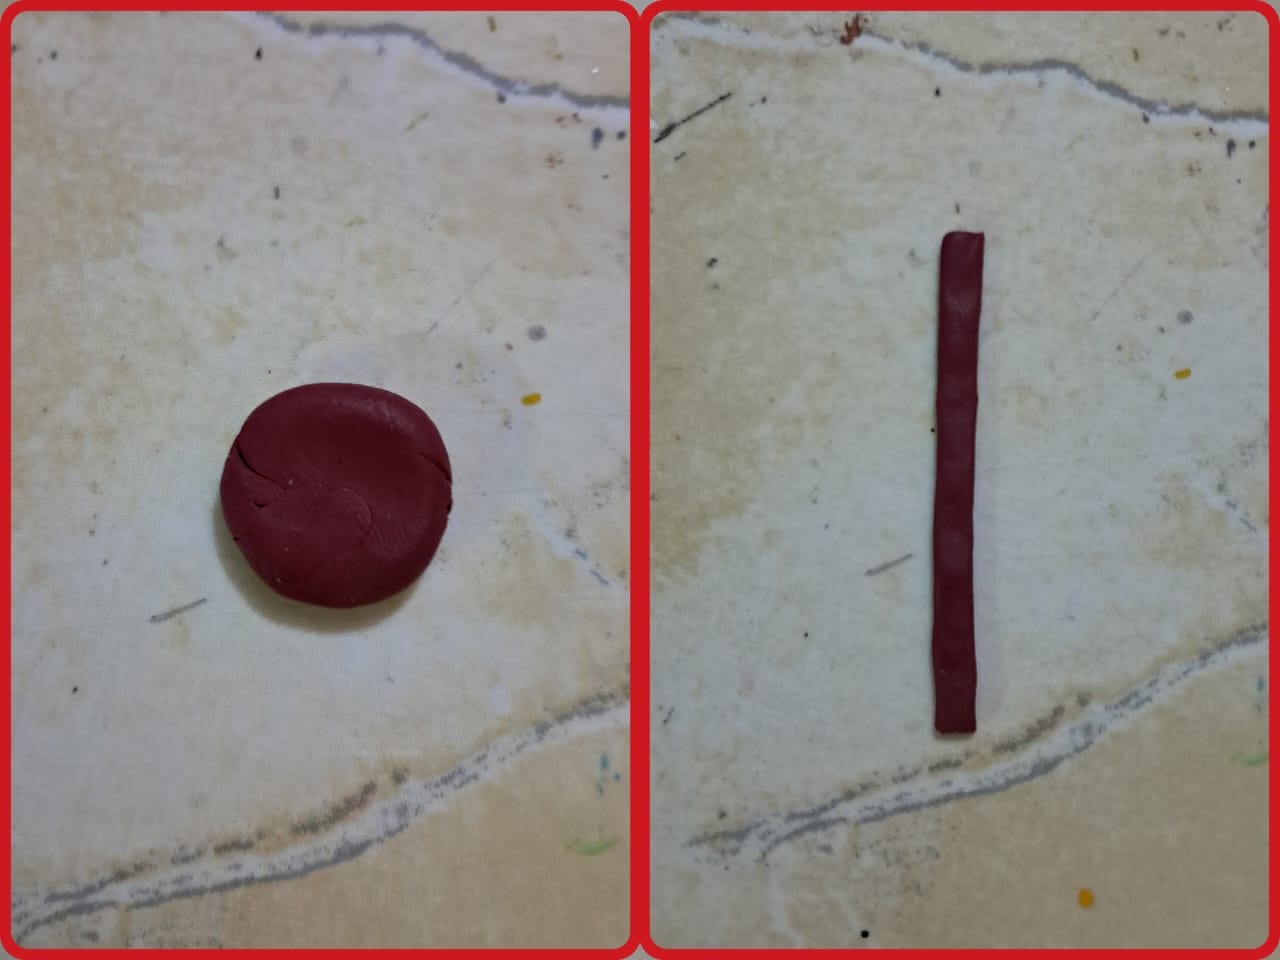
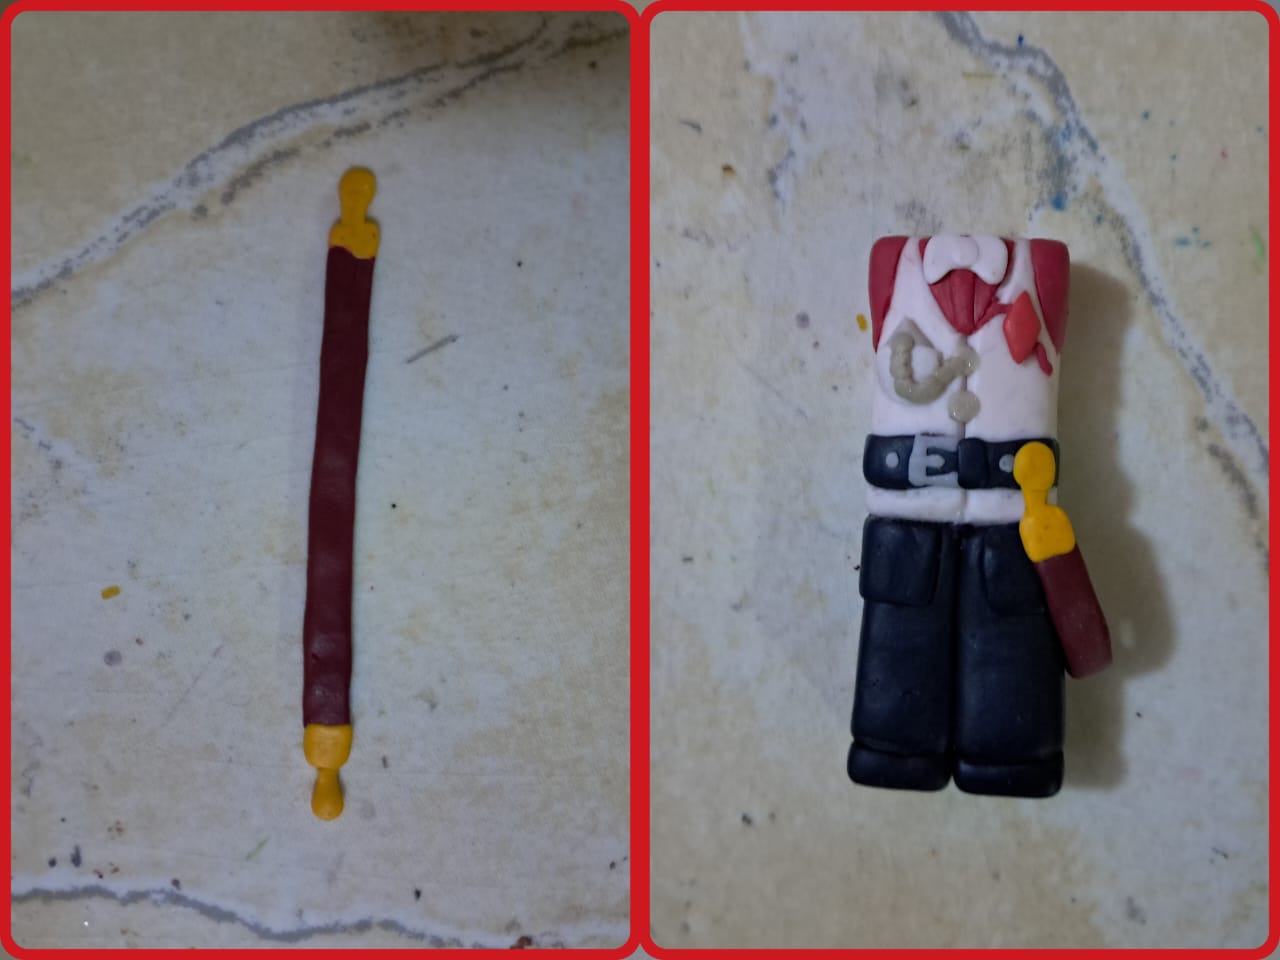
Con la masa dorada haremos los broches partiendo de un rectángulo luego una figura en forma de gota y la unimos al rectángulo; con masa vinotinto haremos los tirantes, a partir de una bola aplanamos estiramos y cortamos dos tiras con las estecas, estas tienen un largo aproximado de 7 centímetros.
Using the gold dough, we'll make the clasps, starting with a rectangle, then forming a teardrop shape and attaching it to the rectangle. Using burgundy dough, we'll make the straps. From a ball, we flatten, stretch, and cut two strips with the stakes. These are approximately 7 centimeters long.

---
Con pegamento unimos los broches a las tiras y luego estás a la correa de Chance una a cada lado de la correa, colocamos pegamento y dejamos secar.
Using glue, we attach the clasps to the strips, then attach them to the Chance strap, one on each side of the strap. We apply glue and let it dry.
---
Para hacer los brazos moldeamos cuatro rectángulos, dos vinotinto y dos gris, agregamos pegamento unimos y dejamos secar, con masa blanca sacamos dos tiras planas y delgadas y las pegamos en la unión de los brazos, luego unimos los brazos al cuerpo.
To make the arms, we molded four rectangles, two burgundy and two gray, added glue, joined them, and let them dry. With white dough, we took two flat, thin strips and glued them to the joints of the arms, then we joined the arms to the body.

---
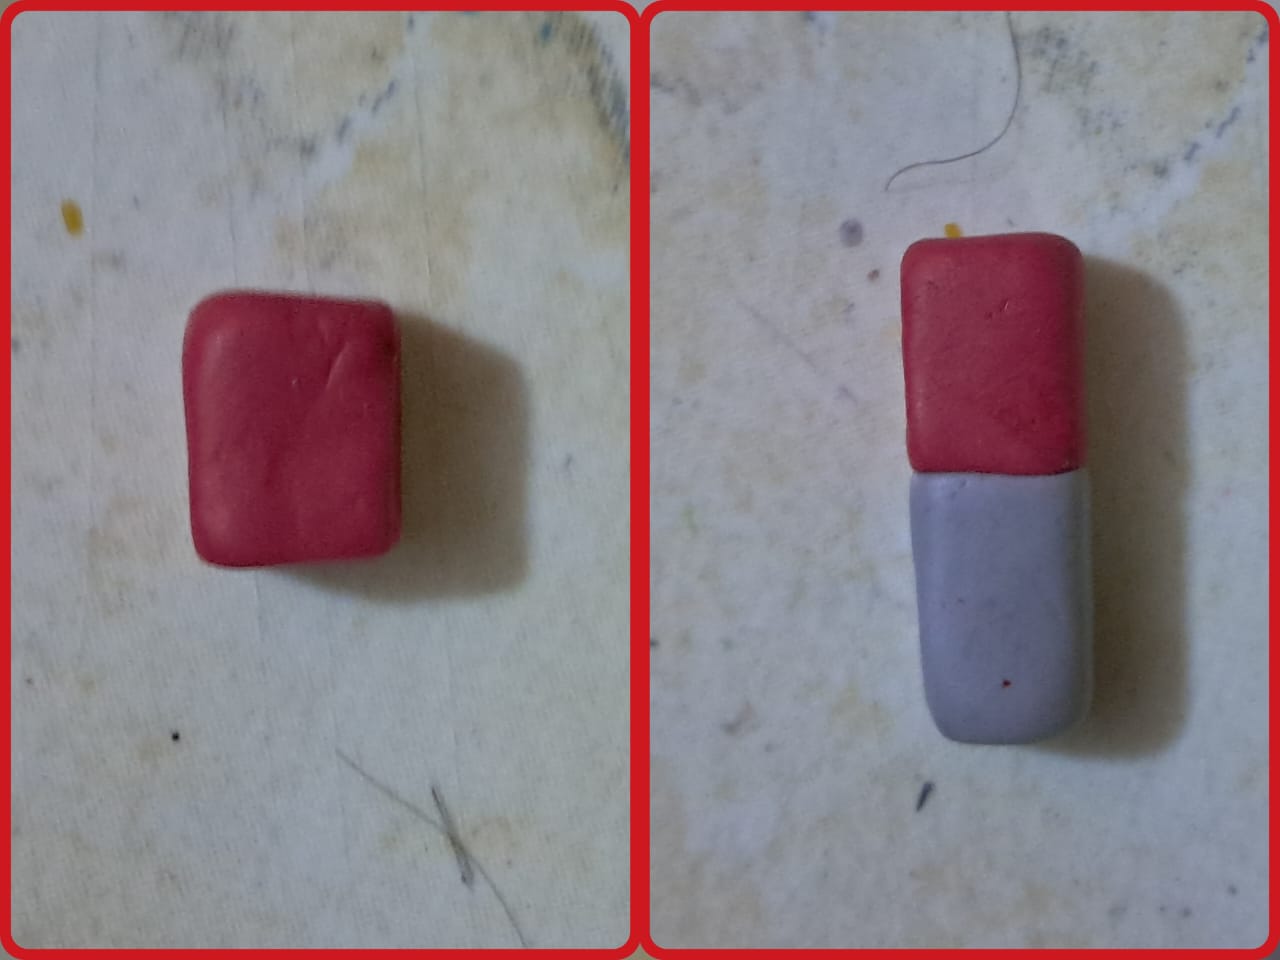
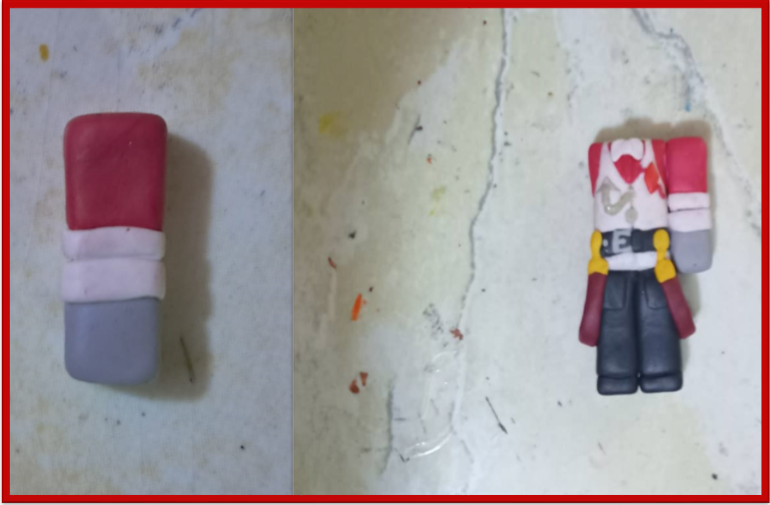
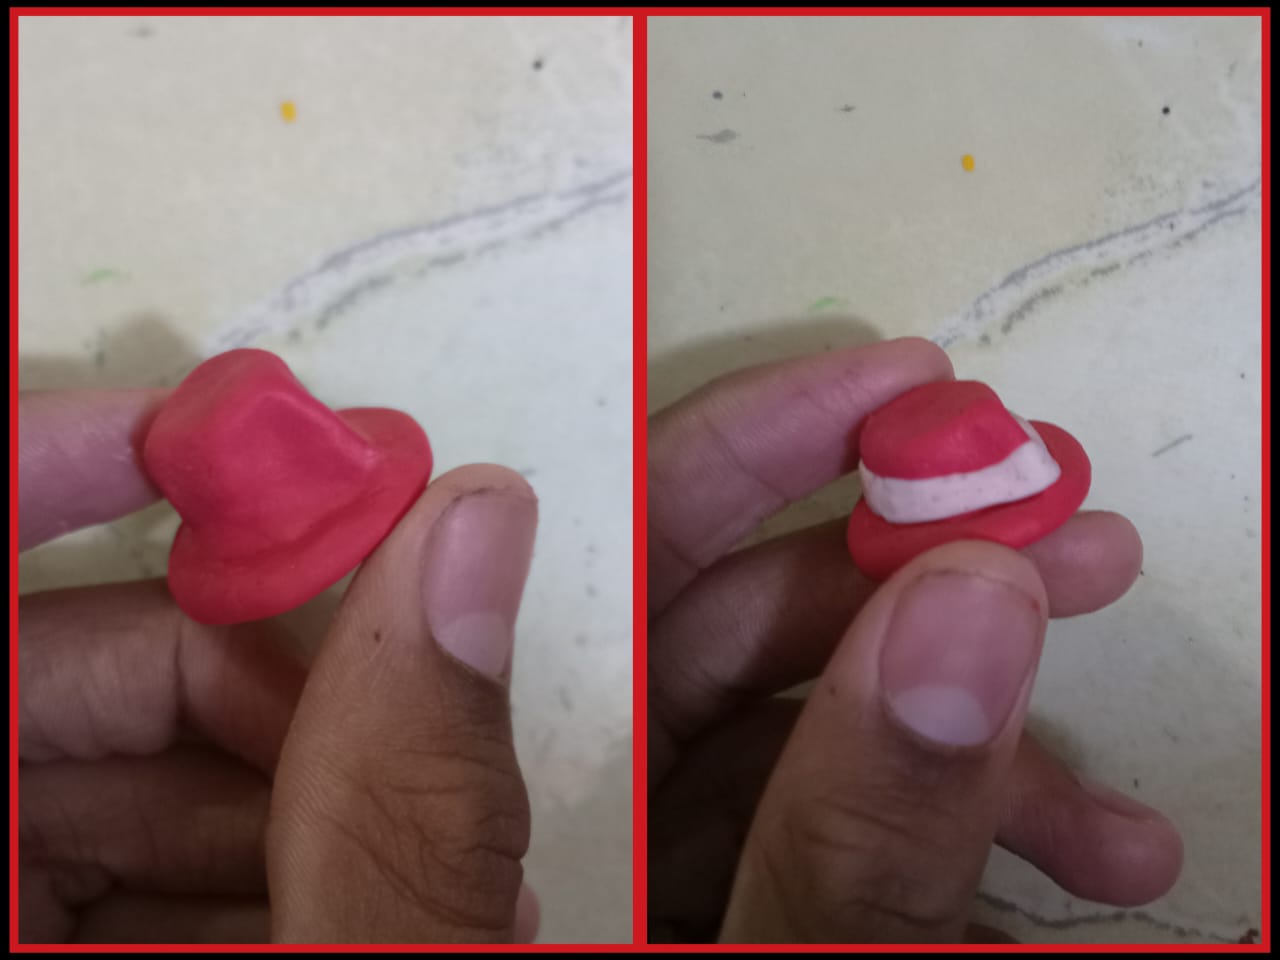
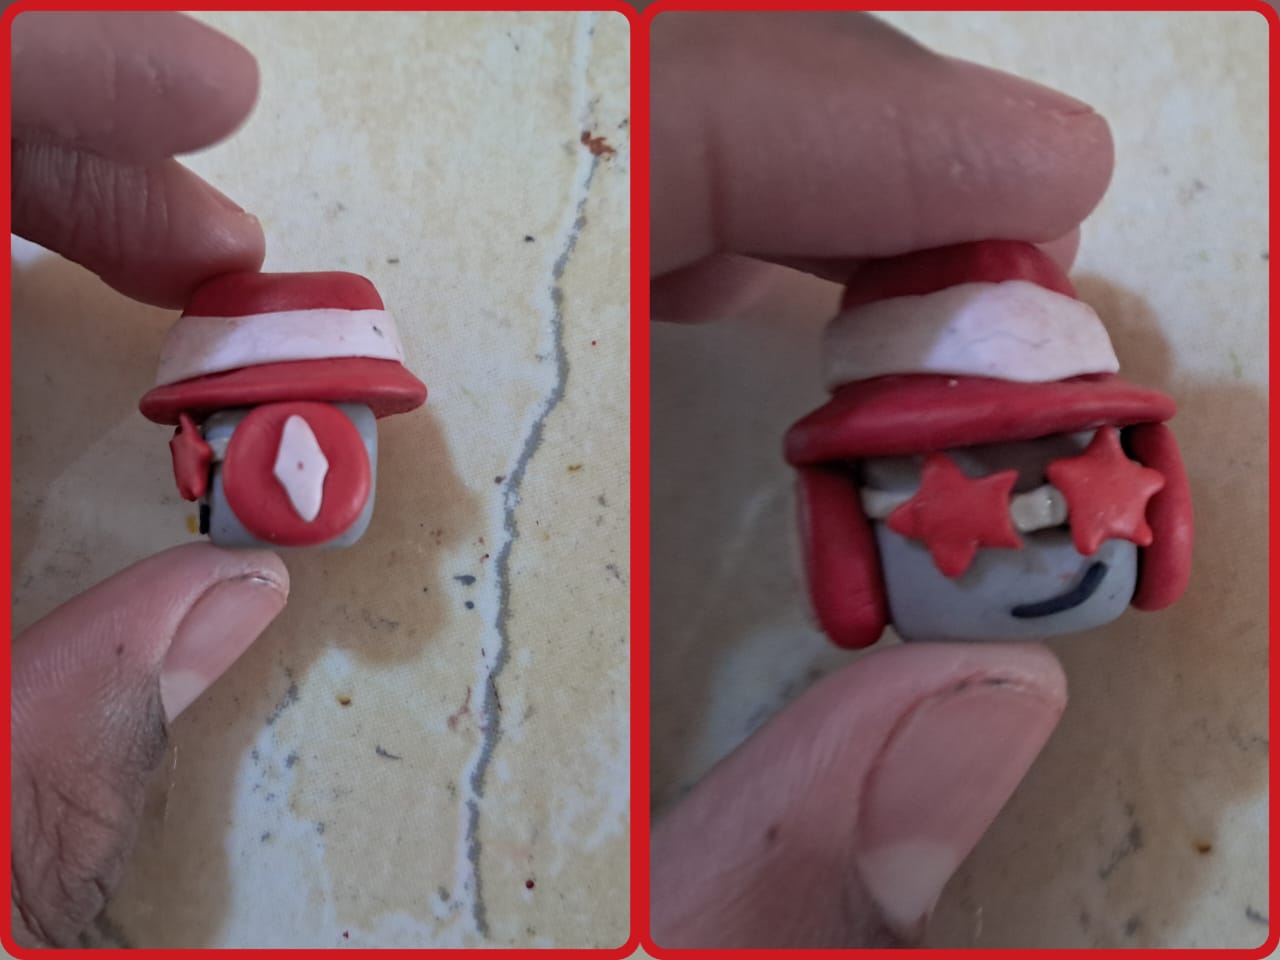
Para hacer el sombrero moldeamos un círculo y encima de este colocamos un cuadrado, vamos dando forma hasta obtener una especie de triángulo en la parte delantera, con masa blanca moldeamos una cinta delgada y la pegamos entre el círculo y el cuadrado, así tendremos listo el sombrero.
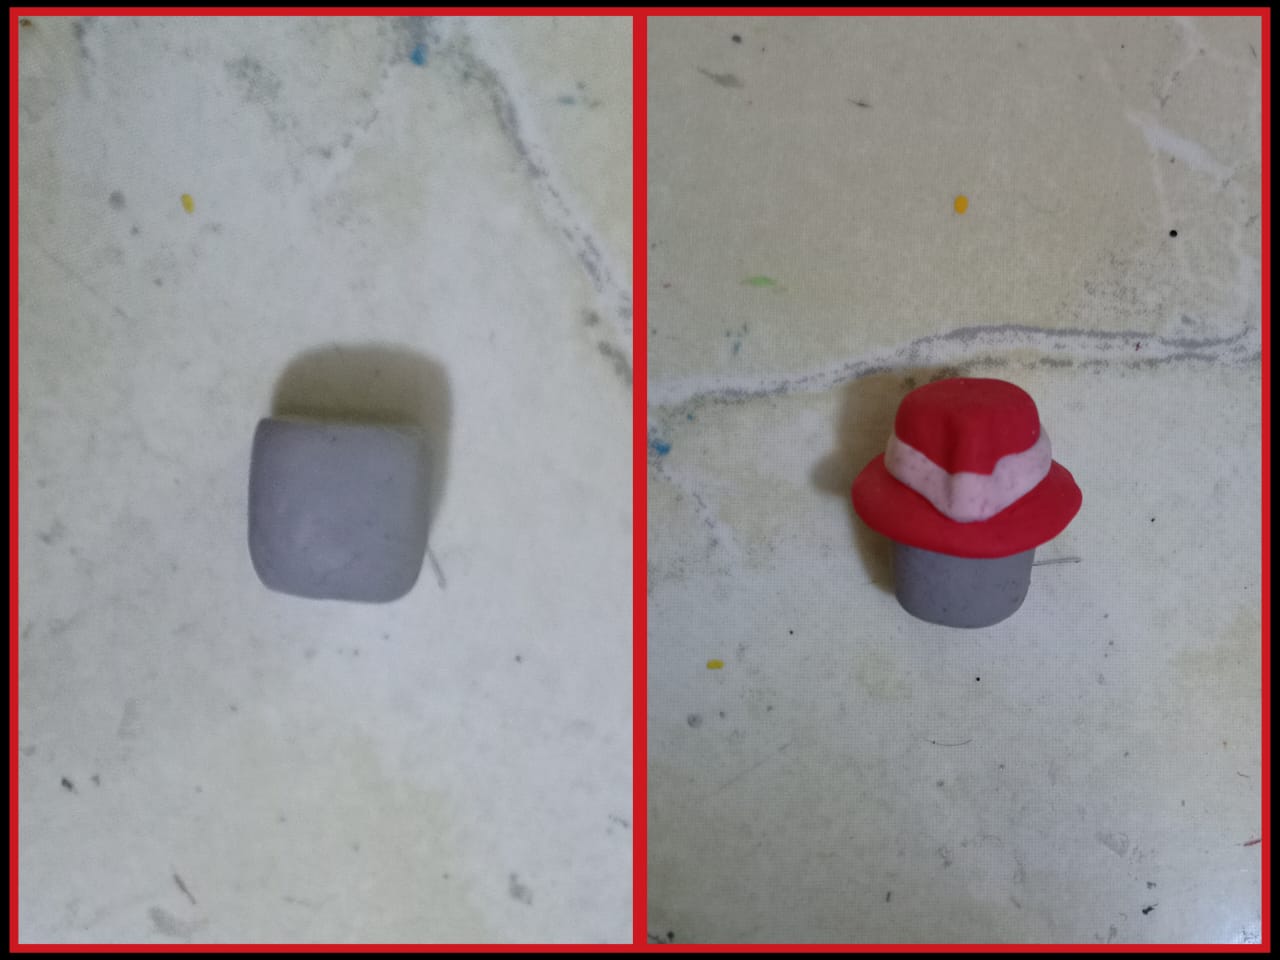
Para hacer la cara tomamos masa de color gris aplanamos y hacemos un cuadrado, con las manos y las estecas vamos dando forma para que nos quede circular en la parte de abajo y recto en la parte de arriba, colocamos pegamento y lo unimos al sombrero, al igual que los pasos anteriores dejamos secar.
To make the hat, we mold a circle and place a square on top of it. We continue shaping it until we have a sort of triangle in the front. Using white dough, we mold a thin strip and glue it between the circle and the square. This will give us the hat.
To make the face, we take some gray dough, flatten it, and make a square. Using our hands and the stakes, we shape it so that it is circular at the bottom and straight at the top. We apply glue and attach it to the hat, just like the previous steps, and let it dry.
---
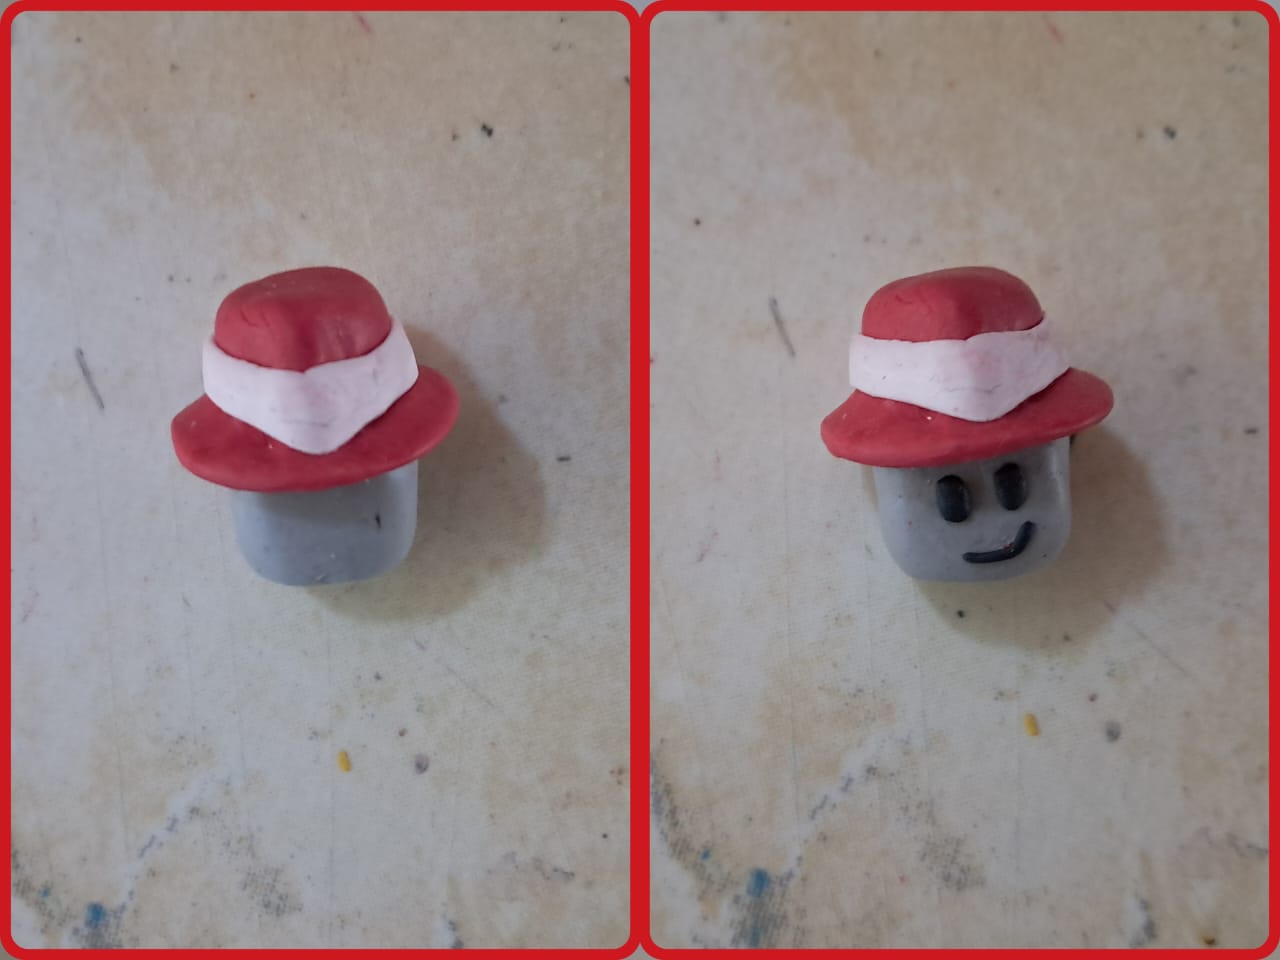
Avanzamos con los ojos y tomamos masa de color negro, moldeamos dos óvalos y con mucho cuidado los pegamos en la cara, agregamos pegamento con la esteca en los ojos y la pieza gris, para hacer la boca moldeamos una tira delgada y agregamos pegamento igualmente con la esteca y lo unimos a la cara, continuamos moldeando y hacemos los lentes, con masa roja sacamos dos estrellas, hacer estas estrellas me tomó bastante tiempo porque son pequeñas y debo pegarlas con mucho cuidado, también moldeamos una cinta blanca y pegamos los lentes; a los lados agregamos círculos rojos que serán las orejeras.
We move on to the eyes and take some black dough, mold two ovals and very carefully stick them to the face, add glue with the tool to the eyes and the gray piece, to make the mouth we mold a thin strip and add glue equally with the tool and join it to the face, we continue molding and make the glasses, with red dough we take out two stars, making these stars took me quite a while because they are small and I have to glue them very carefully, we also mold a white ribbon and glue the glasses; on the sides we add red circles that will be the earmuffs.

---
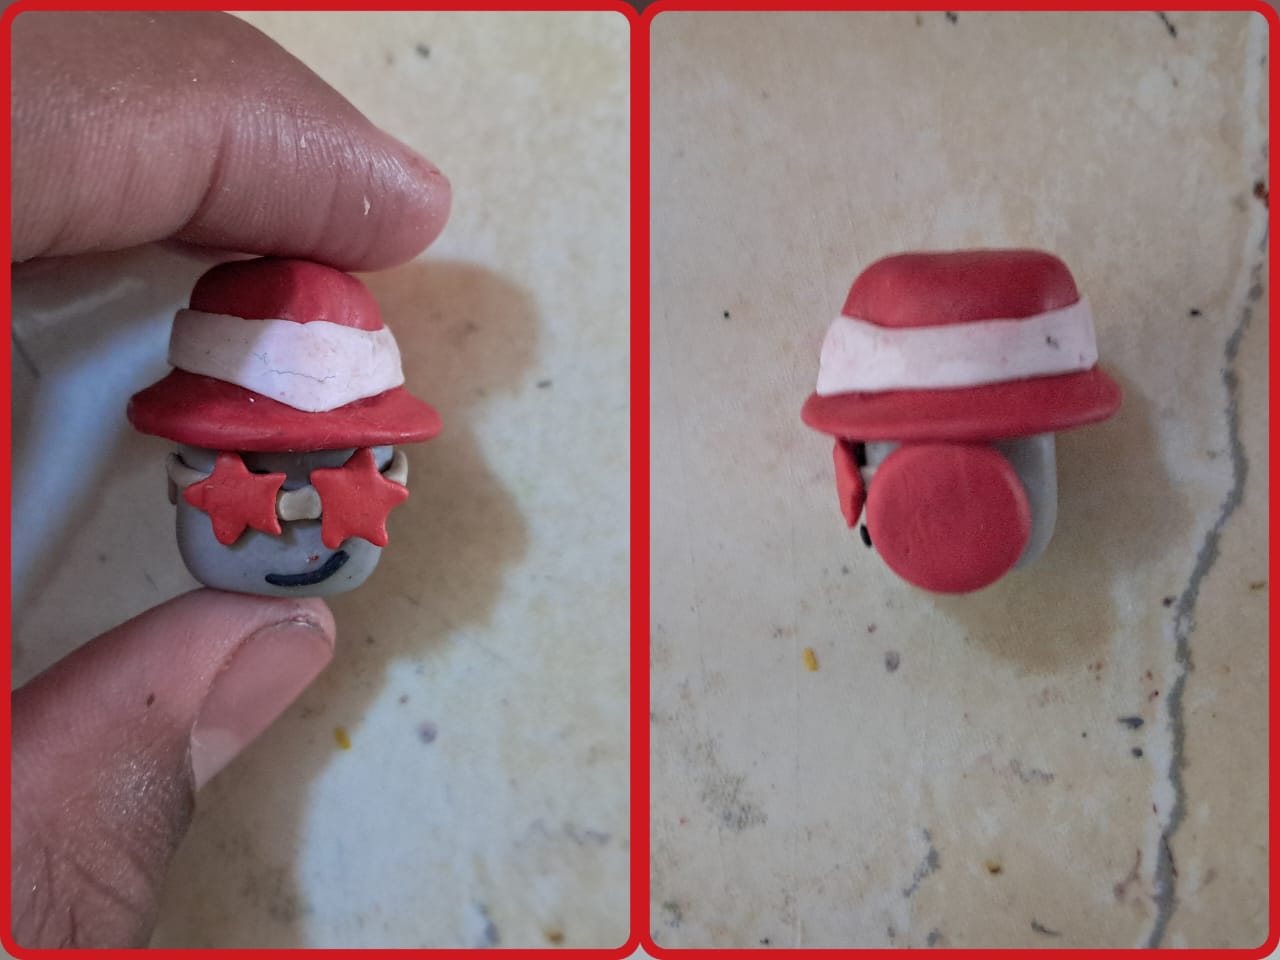
Finalmente agregamos un rombo de color blanco en cada orejera,
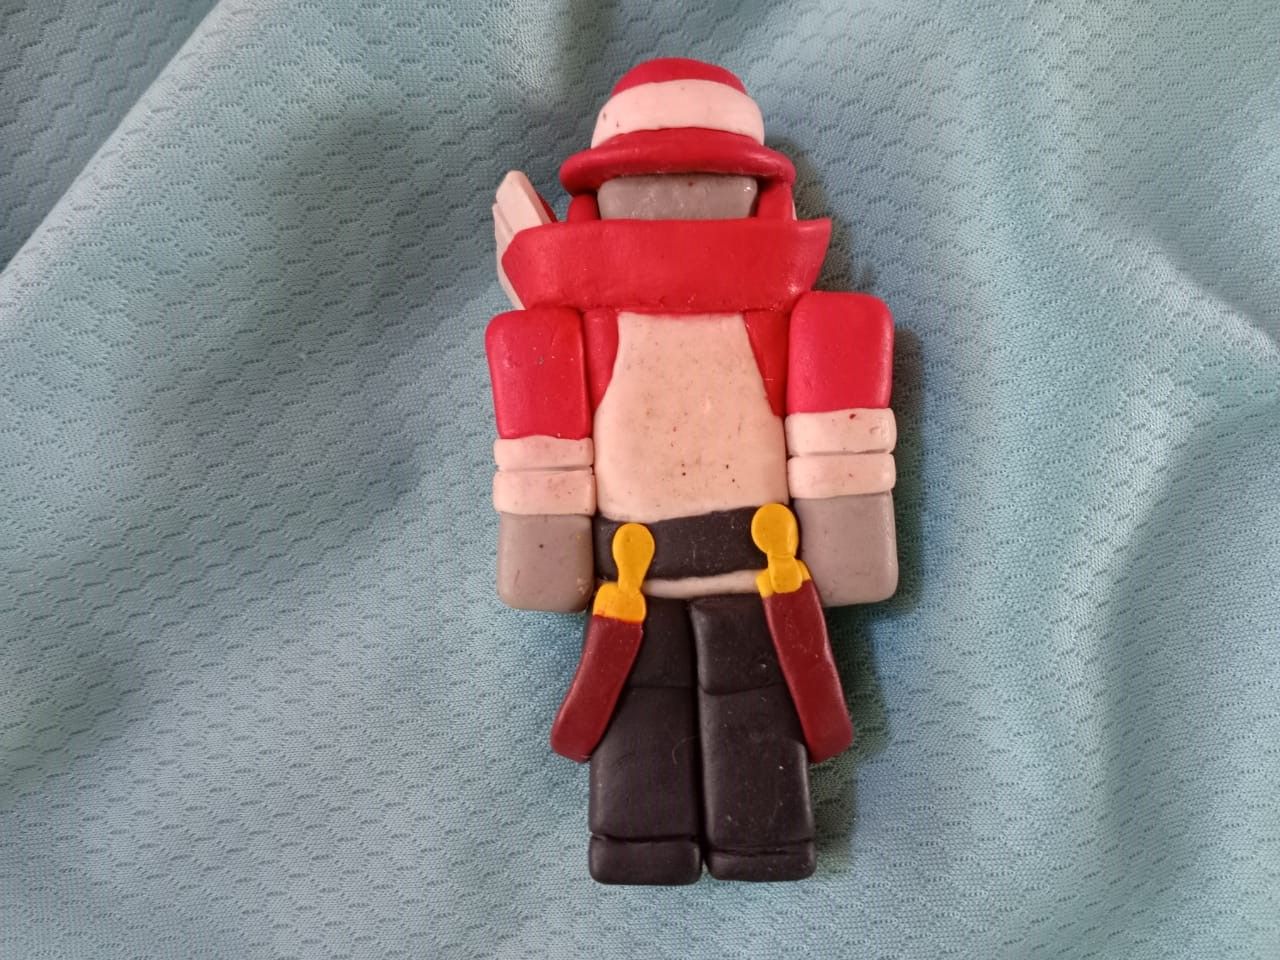
con la masa roja hacemos el cuello de la camisa, estiramos una masa que nos quede delgada y vamos pegando debajo de las orejeras agregamos pegamento dejamos secar, también agregamos las cartas de que lleva en la camisa y así está terminada la escultura de Chance Milestone IV, hacer este personaje me tomó aproximadamente tres días, las piezas son son gruesas y el proceso de secado requiere tiempo también, las piezas pequeñas como los lentes, el diamante, la cadena y las cartas hay que hacerlas con mucho cuidado y paciencia, las estrellas tuve que rehacerlas varias veces hasta que logré el tamaño adecuado.
Finally, we added a white diamond to each earmuff.
We made the collar of the shirt with the red dough. We rolled out the dough until it was thin and glued it underneath the earmuffs. We added glue and let it dry. We also added the cards he wears on his shirt, and that's how the sculpture of Chance Milestone IV was finished. This character took me approximately three days to make. The pieces are thick, and the drying process also takes time. The small pieces, like the glasses, the diamond, the chain, and the cards, have to be made with great care and patience. I had to remake the stars several times until I got the right size.

---
Gracias por Leer.
Thank you for reading.
---
Hasta Luego!
See you later!
---
---
Translated with https://www.deepl.com/translator
All images are of my authorship captured with an Alcatel phone.
Todas las imágenes son de mi autoría capturadas con un teléfono Alcatel.
---
#diy
#spanish
#manualidades
#handmade
#neoxian
#creativecoin
#hivediy
#tutorial
#craft
#sculpture
Payout: 7.476 HBD
Votes: 285
More interactions (upvote, reblog, reply) coming soon.